Sunroof rail/gate disassembly & replacement

E28 technical advice asked and given! Troubleshooting, modifications and more.
Post Reply
Nebraska_e28
Beamter
Beamter
Posts: 9064
Joined: Apr 13, 2006 11:18 PM
Location: Council Bluffs, IA
Contact:

Sunroof rail/gate disassembly & replacement

Post by Nebraska_e28 »

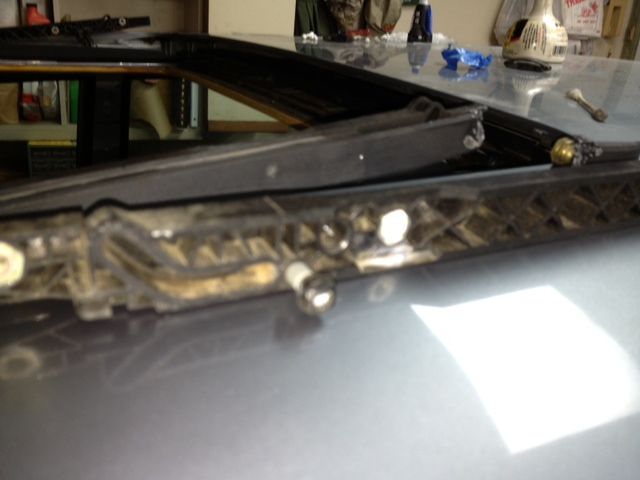
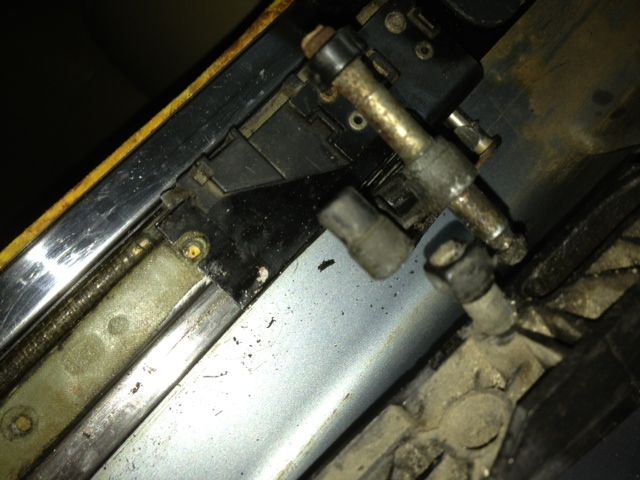
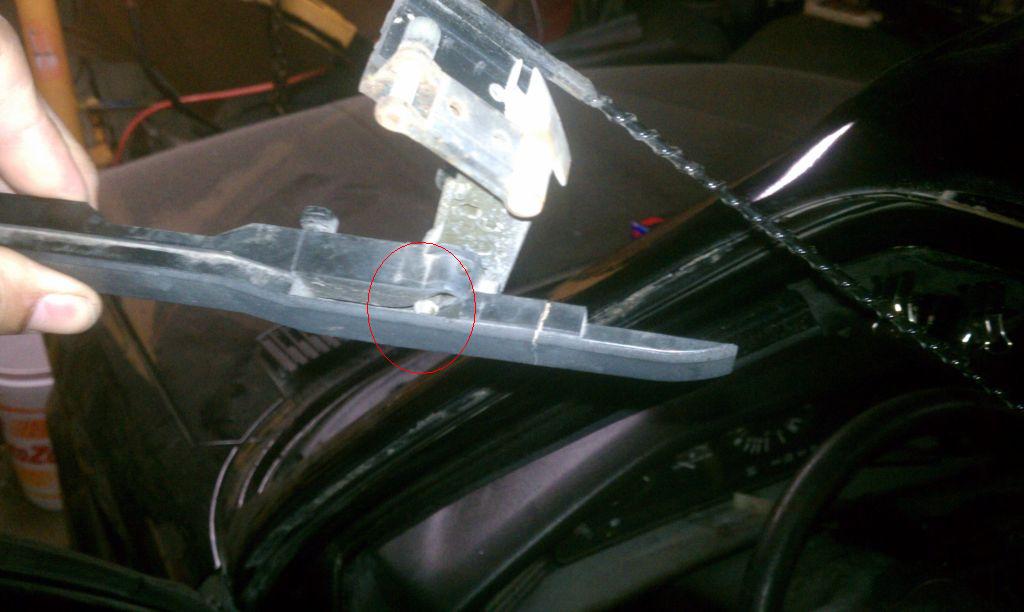
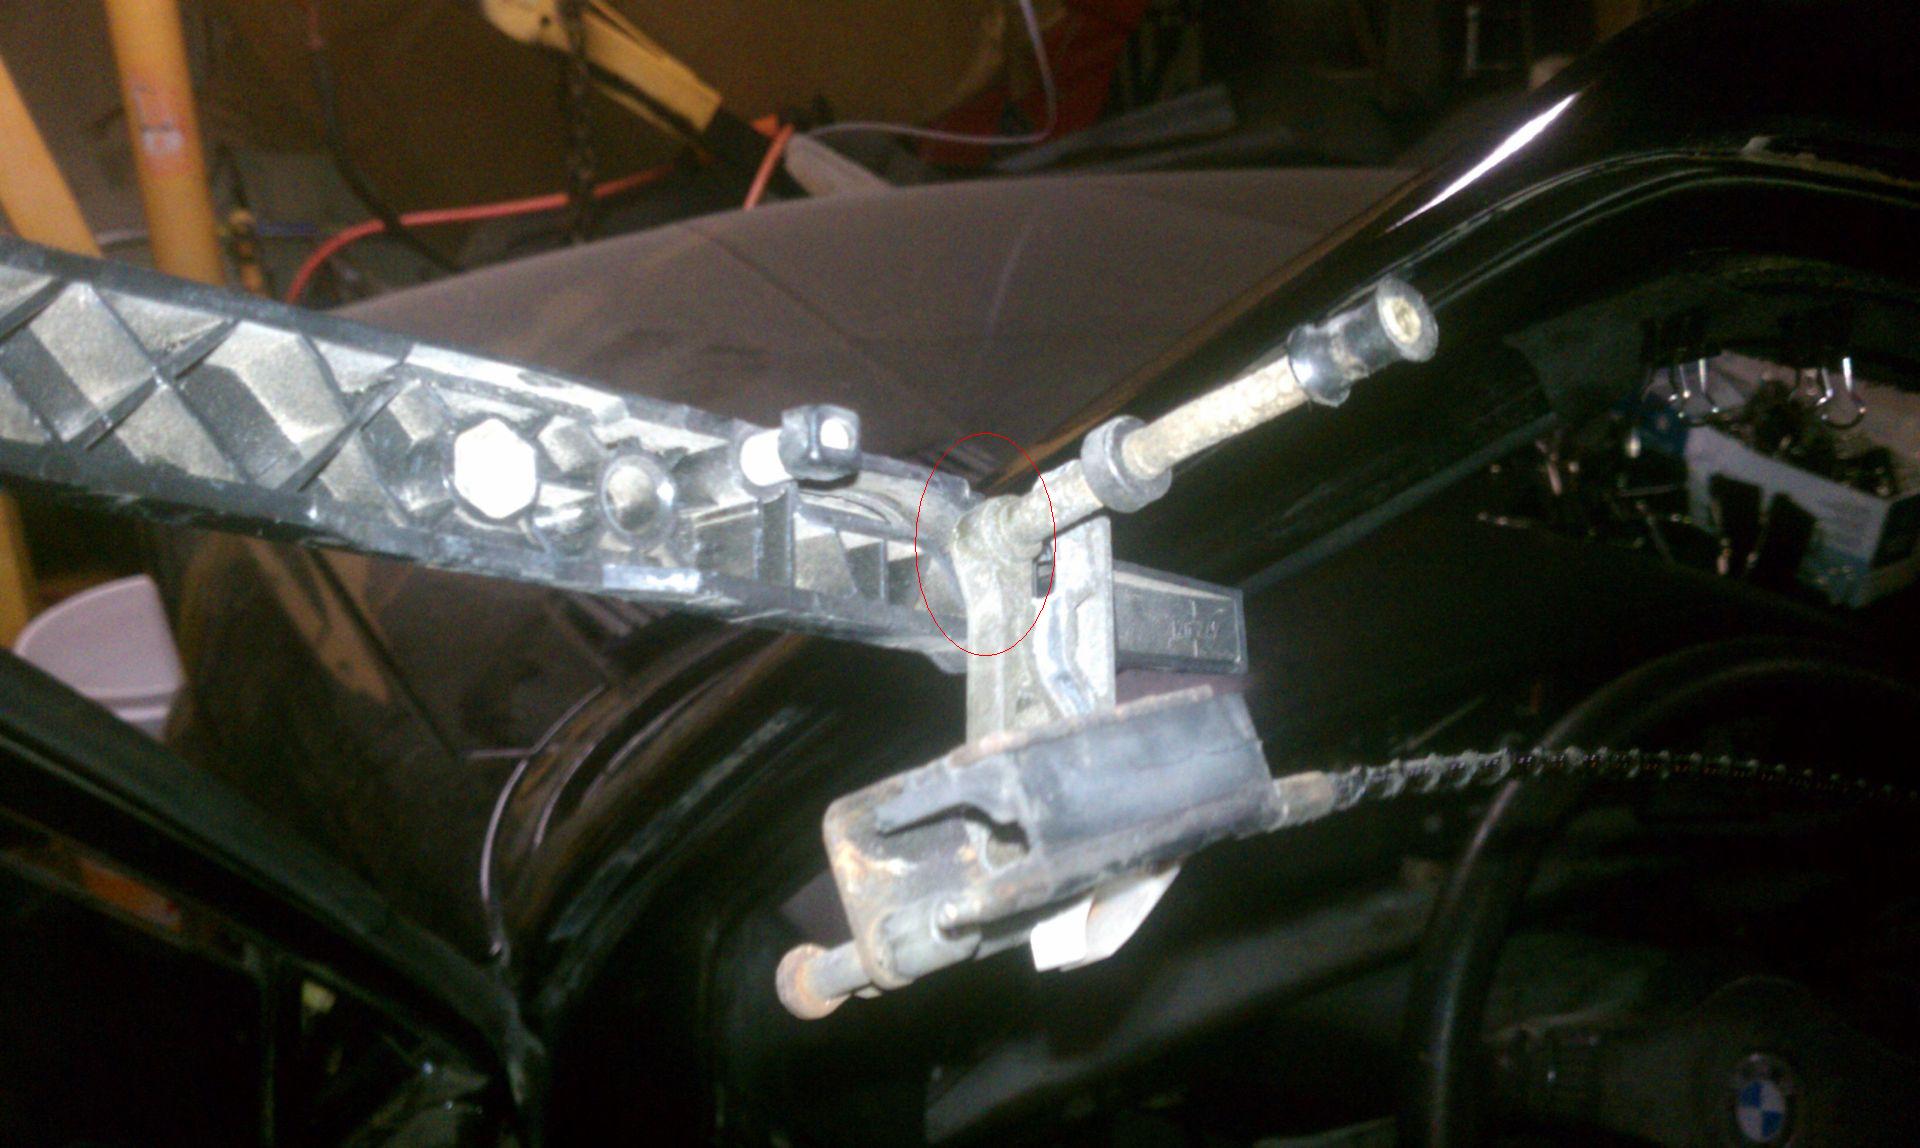
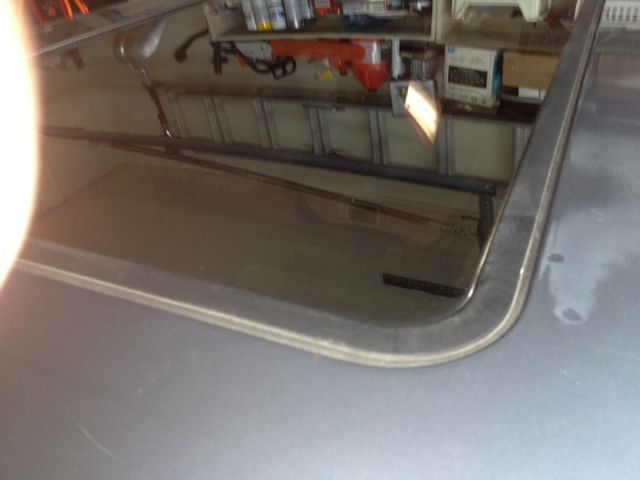
I noticed the plastic around the nuts on sunroof mounting rails is cracked & needs to be replaced.

1. How does the metal pin get removed/installed without cracking the plastic it goes into? (see crappy camera phone pics below) I could grab some gates from the salvage yard, but how do they come apart? This would be optimal so I dont have to distrub the position of sunroof cables on my project car, which otherwise would require re-alignment.

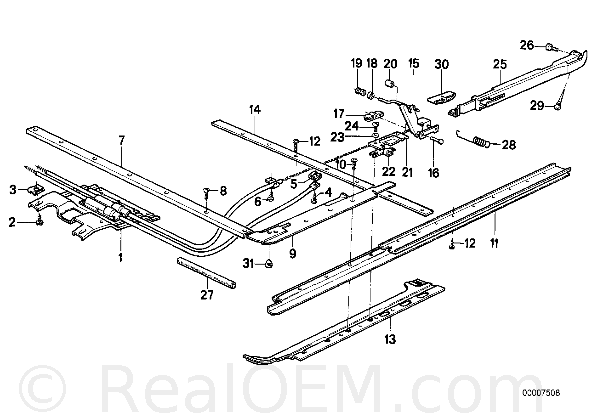
2. Also should I be safe replacing these rails with used uncracked ones? Realoem shows part # 54121941321 & 54121941322 which is item 25 in the diagram below:
Image

3. Do the sunroof cables ever wear out? Mine working fine prior to disassembly.


Image


Image
Nebraska_e28
Beamter
Beamter
Posts: 9064
Joined: Apr 13, 2006 11:18 PM
Location: Council Bluffs, IA
Contact:

Post by Nebraska_e28 »

Bump for a question not for the faint at heart.
shagrath
Posts: 14980
Joined: Jun 15, 2009 12:21 PM
Location: pLace

Post by shagrath »

Sunroofs are such a pita. I would say try to get as many parts as you can out as one unit. Try to keep things together as much as possible.

I hate dealing with these. I just keep mine well lubed so I can delay things breaking a bit. MPL is my sunroof's friend.
Mike W.
Posts: 27231
Joined: Feb 12, 2006 12:00 PM
Location: California Whine Country

Post by Mike W. »

I'm reaching a little bit here trying to remember, but I think I've got it. If the part in question is what I think it is, I've had to do a couple. IIRC they break where the kept nut is? Seems like they used them on lots of different models from the era. I think they're something of a weak point, but not horribly so. I've always used used and no further problems.

As far as cables wearing out, I think if they're working well they stay fine, it's when things get sideways and keep getting used they fail. I had some in an old E24 I had that were a problem, but I forget the details now, it was back in the late '90s when I was working on it. :laugh:
Nebraska_e28
Beamter
Beamter
Posts: 9064
Joined: Apr 13, 2006 11:18 PM
Location: Council Bluffs, IA
Contact:

Post by Nebraska_e28 »

Mike W. wrote:I'm reaching a little bit here trying to remember, but I think I've got it. If the part in question is what I think it is, I've had to do a couple. IIRC they break where the kept nut is?
As far as cables wearing out, I think if they're working well they stay fine, it's when things get sideways and keep getting used they fail. I had some in an old E24 I had that were a problem, but I forget the details now, it was back in the late '90s when I was working on it. :laugh:
Correct, mine is cracked where the keep nut is. I'll be hitting the yard tomorrow to find a replacement.

I also have a separate thread looking for advice on how to clean the cable housings if might be able to comment on that.
Mike W.
Posts: 27231
Joined: Feb 12, 2006 12:00 PM
Location: California Whine Country

Post by Mike W. »

Nebraska_e28 wrote:
Mike W. wrote:I'm reaching a little bit here trying to remember, but I think I've got it. If the part in question is what I think it is, I've had to do a couple. IIRC they break where the kept nut is?
As far as cables wearing out, I think if they're working well they stay fine, it's when things get sideways and keep getting used they fail. I had some in an old E24 I had that were a problem, but I forget the details now, it was back in the late '90s when I was working on it. :laugh:
Correct, mine is cracked where the keep nut is. I'll be hitting the yard tomorrow to find a replacement.

I also have a separate thread looking for advice on how to clean the cable housings if might be able to comment on that.
Nope, never did that part. The cleaning that is.
Nebraska_e28
Beamter
Beamter
Posts: 9064
Joined: Apr 13, 2006 11:18 PM
Location: Council Bluffs, IA
Contact:

Post by Nebraska_e28 »

Mike W. wrote:
Nope, never did that part. The cleaning that is.
In that case I'm definitely going where no man has gone before. (or at least very few)
\waiting for others to chime in with experience
tn535i
Posts: 5590
Joined: Jul 14, 2006 1:30 PM
Location: Middle Tennessee

Post by tn535i »

If you intend to clean the cable housings I'm not sure there is any other way than removing the whole business from the car. Then use solvent or something to flush the old lube out. I wouldn't bother though because I think more problems arise from the cable track that the short tube that leads to the motor or crank.

If you start peeling back the layers of the cable track you will run into the goop used to seal the screws etc. I would replace the sliders that run in the track as they can also break and when they do it can jamb. In order to take the whole track out you remove all those screws lift and slide forward since it hooks in at the back where you can't reach. Clean the tracks well, replace the slider (54121933550), when you fix the cracked part and it should work well for a long time.

Also, beware if you fully extend and remove the cables. Getting them back in evenly and timed to the stops on the clutch can be a real hassle with much trial and error until you find the right spot. It needs to be right on or it tends to stop itself in the wrong spot. One side also engages just ahead of the other.

I learned all this when we transferred a moonroof with motor from one e30 to another with manual roof. E28/24/30 are all basically the same though.
Nebraska_e28
Beamter
Beamter
Posts: 9064
Joined: Apr 13, 2006 11:18 PM
Location: Council Bluffs, IA
Contact:

Post by Nebraska_e28 »

Thanks for the advice guys! I got things up back together after several hours of studying. And I had the timing & alignment dead on! :banana:
Mab1957
Posts: 2252
Joined: May 14, 2010 1:33 PM
Location: Northern Virginia, USA

Post by Mab1957 »

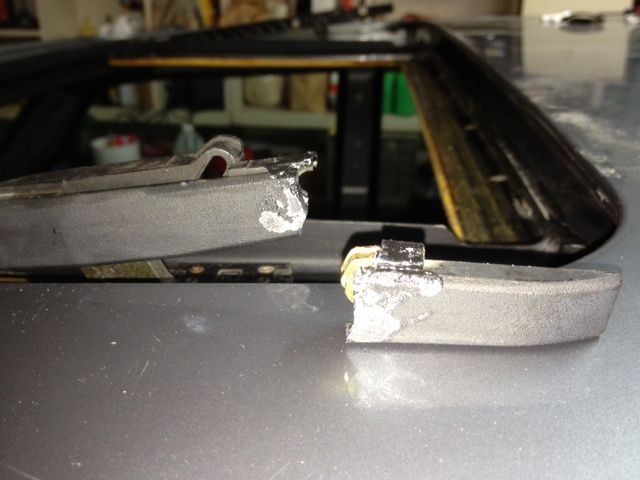
I had to replace the plastic rails on my sunroof. Thought I'd record it here in answer to your question should anyone else run into this issue. They were cracked at the rear and front nut receivers same as yours. I was going to just ride with it until I bumped the rear one putting the glass in and it broke off :oops:
Image
Image
So I had to replace that one with a plastic rail from another set. I removed the cable housing cover and loosened the keeper plate (front screw is out, rear is loose) to let the cover out and rail rise/fall. I bumped the switch aft and removed the keeper plate then let the rail rise so I could work with it. At this point I've been in here a dozen times so it goes pretty quickly with experience.
To answer your other question I dropped the check panel cover and motor housing then slid the whole cable/rail assemblies out and replaced them with the ones that came with the moonroof. I thoroughly cleaned the rails, cables with mineral spirits brush/rags and the housings with spray sovent WD40. Some solvent stays in the cable housing because there's a low point in the tubes ahead of the motor. I greased the business end of the cables then slid them in, preset them to the roof and reinstalled the motor. In a few years maybe I'll be able to say if there's a problem with that approach, but it works for now. The aft end of the cables were caked with gooey dirt and old lubricant so getting them clean was important. I left all of those dry - no graphite or anything else. I will say that I swapped over the smaller early model forward glides to the rails I kept in the car, they seemed to work better than the larger late model guides that came on the moonroof. I had to modify the cable covers as noted in jbort's write up.
Back to the plastic rail swap: Image
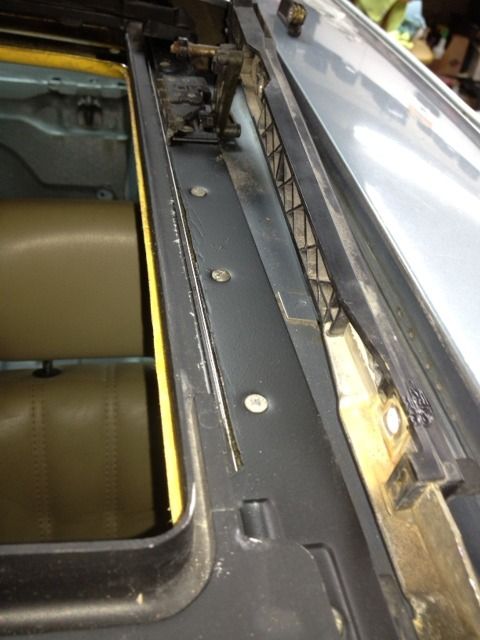
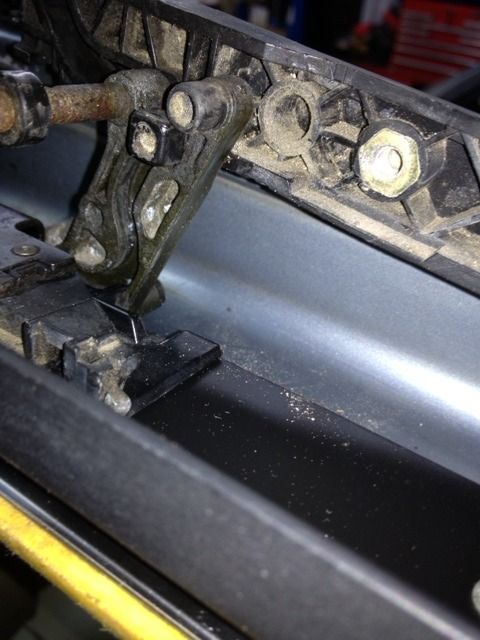
I found that the guide pin in the plastic rail has a mushroom tip on it and will come out of the rail using a fork-handle staple or clip remover. You can slide a pick through the small hole through the rail at the foreend of that guide to give it a start. A drop of 3 in One oil didn't hurt. Clean the new rail prior to install. These also had small cracks in them at the same place so I applied crazy glue to fill those. I think that's why we aren't supposed to overtighten them and the BMW techs use some thread locker on them. Maybe once it is time to secure the moonroof after the headliner install I'll back them out one at a time and apply thread locker. Again, this rail was already in place so I just bumped the position until it would clear the opening where I loosened keeper plate (it will work for one that's fully installed), inserted pick through the rail to give it a push then pried it loose with the staple remover, it unsnapped simply. Position the new one at the same foreend of the rail guide and pressed it in with large locking-jaw pliers. I repositioned it, secured the keeper plate and modified cable cover.
Image
Image
That is better. Now, DO NOT LEAN ON IT!
Image
With the rail replaced and cover plates reinstalled, I was able to reposition the moonroof and install the trim (it worked this time after modifying the cable covers :alright: Time to test drive.
Hupa
Posts: 34
Joined: Jul 14, 2021 2:57 AM
Location: Finland

Re: Sunroof rail/gate disassembly & replacement

Post by Hupa »

Sunroof sealing installation in progress. Managed to remove the roof without much hassle. Can I run the sunroof mechanism back and forth without the roof piece, or will it mess something up with the two sides’ alignment or smthg? Would be easier to clean and lubricate if the mechanism can be run without messing smthg up. 🤔
Mab1957
Posts: 2252
Joined: May 14, 2010 1:33 PM
Location: Northern Virginia, USA

Re: Sunroof rail/gate disassembly & replacement

Post by Mab1957 »

Are the sunroof rails (#25) 3D printed or files available?
Post Reply