http://www.mye28.com/viewtopic.php?t=120000Nebraska_e28 wrote:Will the filter adapter be available to the public?
GOD'S VENGEANCE - Complete Drivetrain Redux
-
mooseheadm5
- Beamter

- Posts: 23035
- Joined: Apr 08, 2009 10:30 PM
- Location: Charlottesville, VA
- Contact:
-
Murfinator
- Posts: 1482
- Joined: Sep 07, 2007 1:39 AM
- Location: ZION - 84032
The only modification to the OE oil filter head is to remove/unscrew the threaded insert the bolt at the bottom of the canister threads into. The new plate, o-ring and threaded hollow bolt attach to where threaded insert was. I Loctited the hollow bolt and used a spanner wrench to ensure everything was tight and wouldn't loosen when the filter is replaced.DMS wrote:Fist of all: top quality build! You're really taking the time to think everything through.
What makes it worth the efford to modify the oil filter housing? Is the XG8A filter so much better then a regular filter? On what do you base this?
(I've never looked into this so please enlighten me)
The Mann and Mahle filters have proven to work well with these motors as designed for 600k+ miles. However, this motor is not as designed and the lubricants will be different that those tested for use with those filters. The XG8 is designed for use with synthetic oils and contains a high quality metal mesh to hold the three layers of filtering material in place for over 15k miles. As I indicated earlier, I will continue to use Blackstone Laboratories to monitor deposits in the oil at various intervals.
Also, I never liked the canister, especially this particular model with the long bolt extending up through the bottom of the canister. The inverted E34 and especially the E46 canister are much easier to deal with since you can access the filter so much more easily while standing at the front of the car.
-
Murfinator
- Posts: 1482
- Joined: Sep 07, 2007 1:39 AM
- Location: ZION - 84032
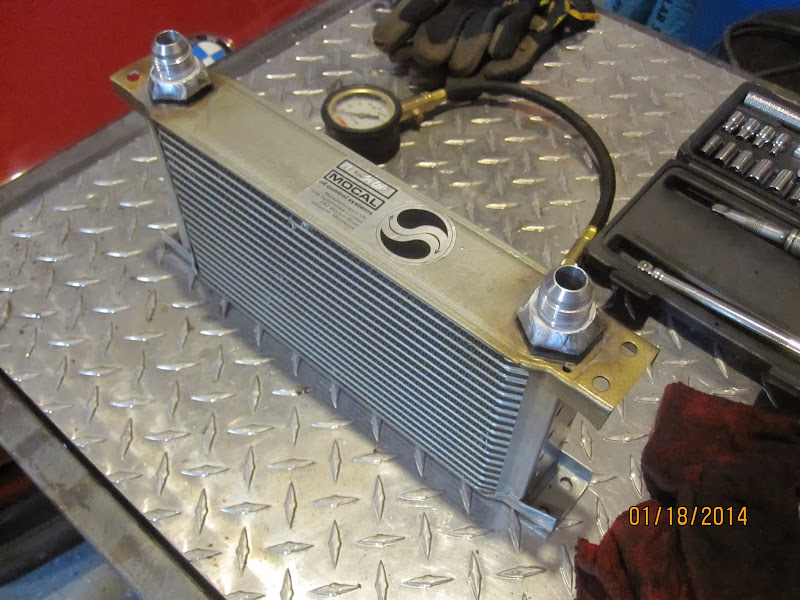
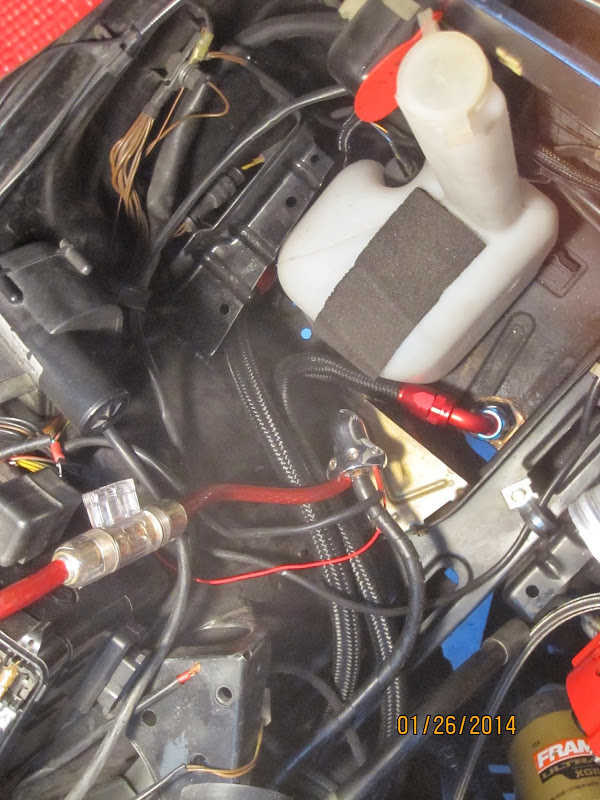
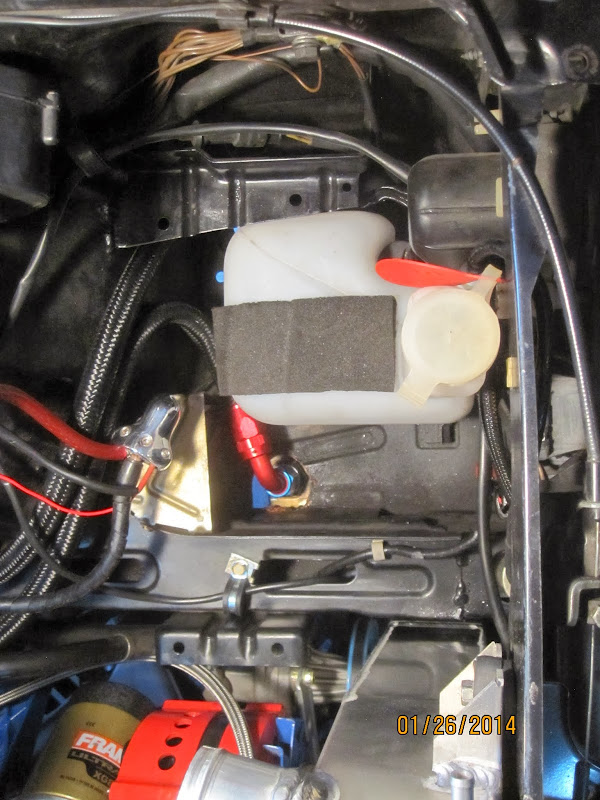
The original power steering cooling pipe was removed to make room for the charge piping. Because I didn't want to install a heat exchanger in front of the radiator or intercooler I looked for a more suitable location that wouldn't block air flow to other components or take up room under the hood. The solution was to locate a Mocal 19-row oil cooler. The 5/8 BSP fittings were cut off and replaced with -10AN. The hoses were run through holes cut in the floor of the battery box. Space was available there because I'm running a 524TD washer reservoir and battery tray with a smaller Braille battery.
An OE duct was trimmed to provide some baffling; pulling air through the brake cooling ports on the driver's side of the Hartge airdam. The baffling could be better but most likely the cooling capacity is more than adequate.
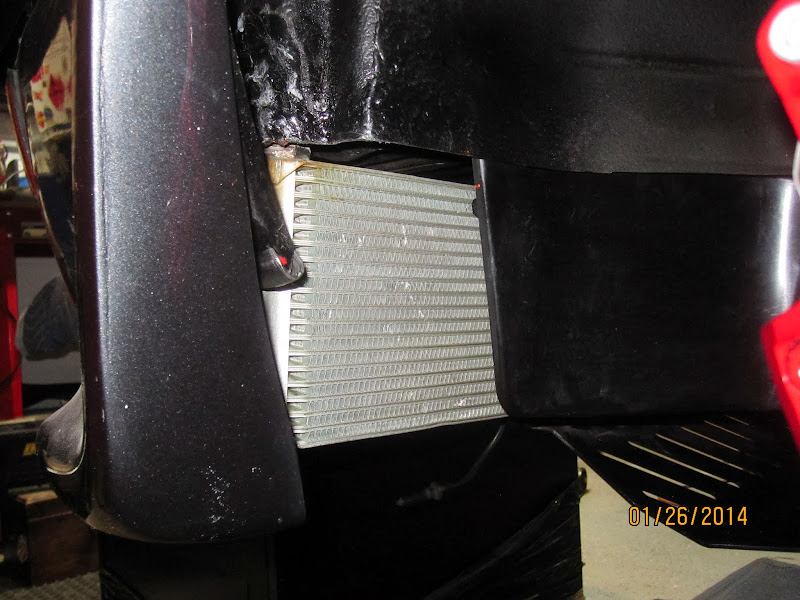
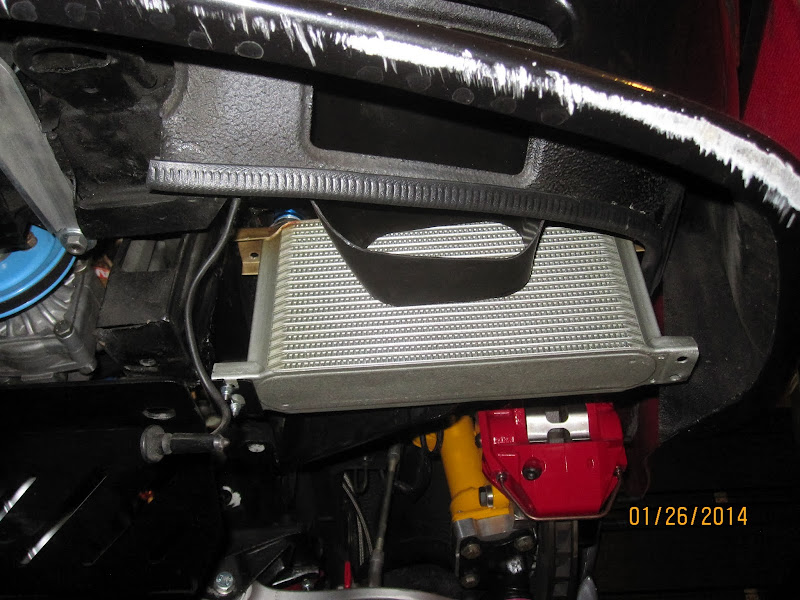
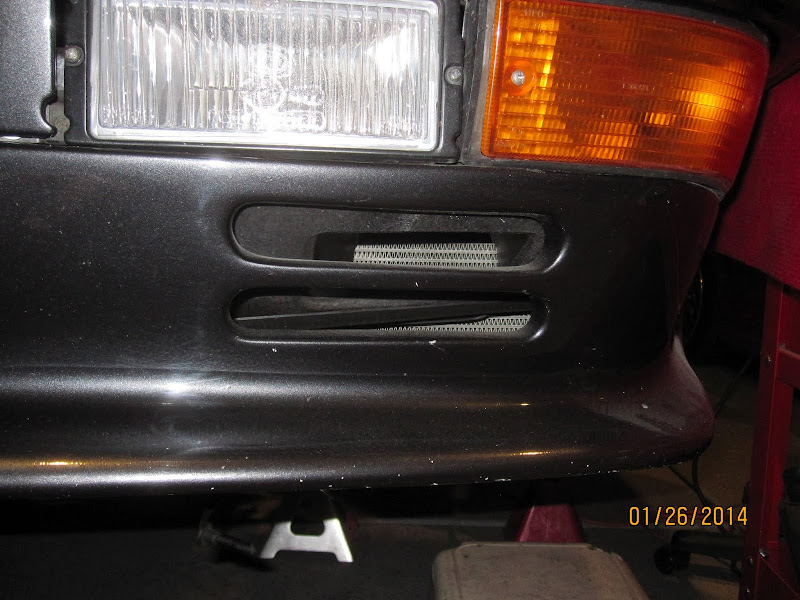
An OE duct was trimmed to provide some baffling; pulling air through the brake cooling ports on the driver's side of the Hartge airdam. The baffling could be better but most likely the cooling capacity is more than adequate.
-
Murfinator
- Posts: 1482
- Joined: Sep 07, 2007 1:39 AM
- Location: ZION - 84032
Duke: Thank you for posting your pics and links to your E28 build. That was a very innovative approach to mounting Todd's W>A kit. As you may recall, at one time early in this build I owned and planned to install the same kit before deciding to go with a custom A>A system.
Made some cosmetic changes:
Never liked the way the arm rests turned out after being re-dyed several years ago. Decided to recover them completely.
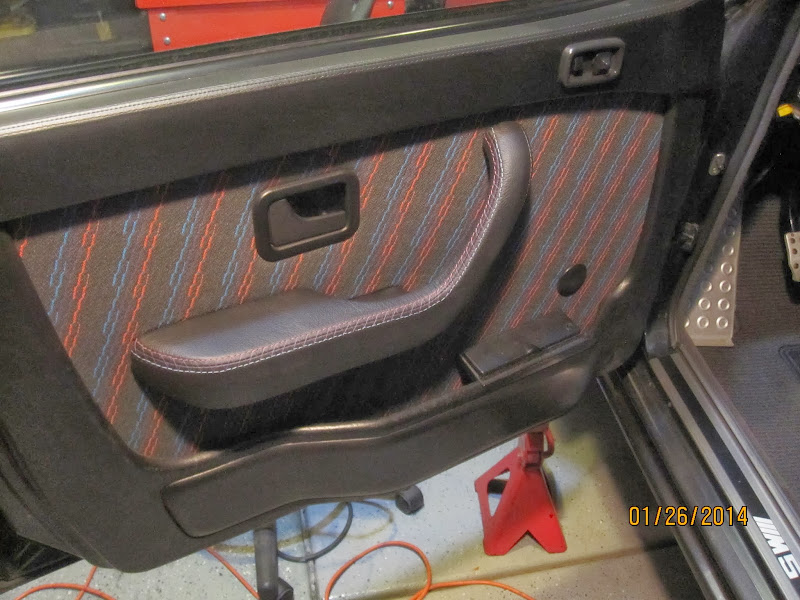
Made some cosmetic changes:
Never liked the way the arm rests turned out after being re-dyed several years ago. Decided to recover them completely.
-
Murfinator
- Posts: 1482
- Joined: Sep 07, 2007 1:39 AM
- Location: ZION - 84032
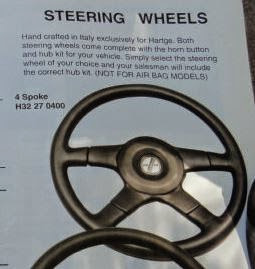
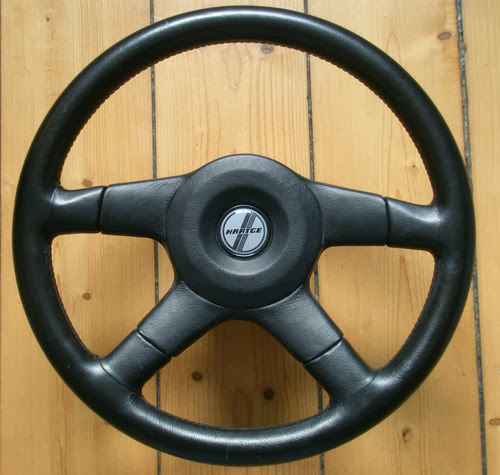
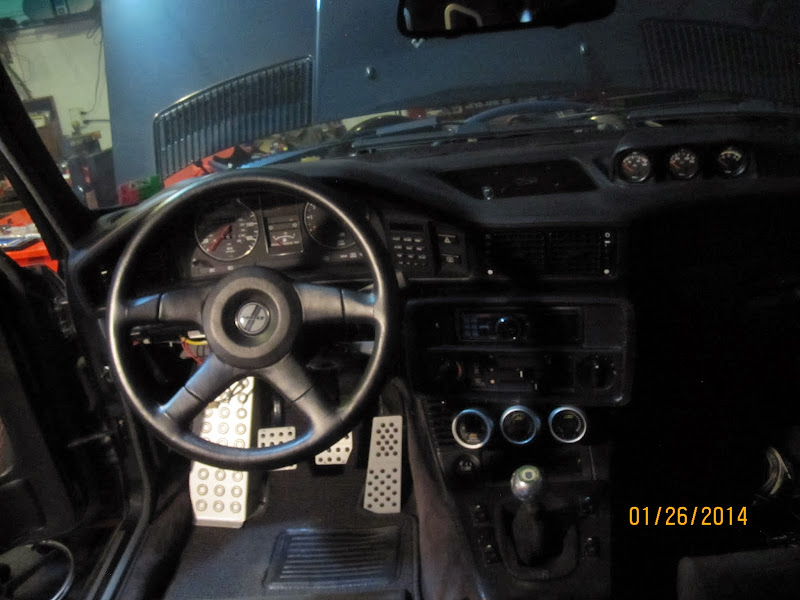
A few months back while browsing the web I came across an interesting steering wheel. Although the Alcantara-wrapped M-Tech II was nice and matched the interior I was never entirely satisfied with it and continued looking for something a little more interesting.
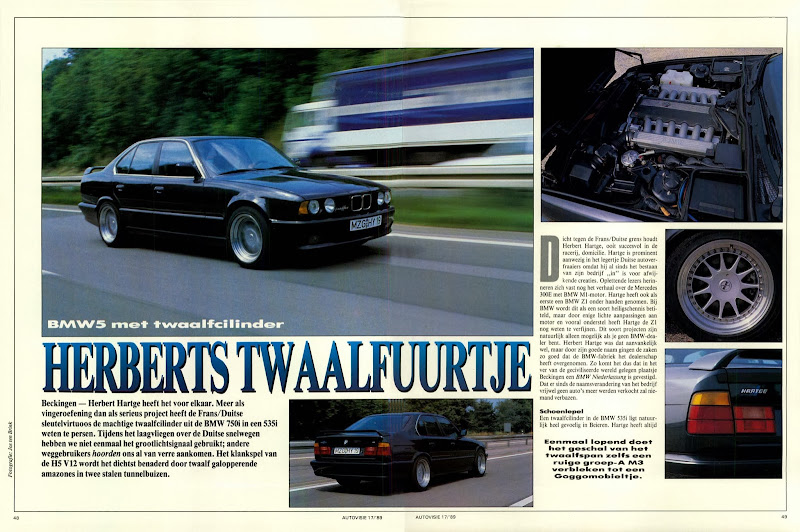
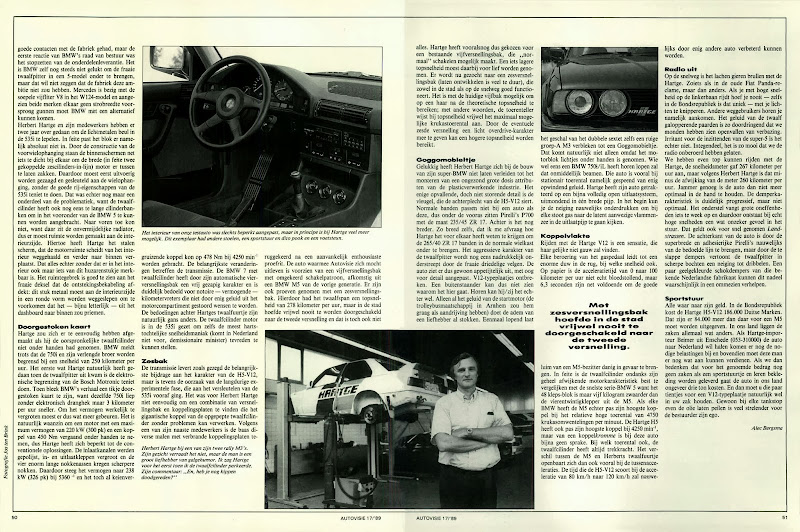
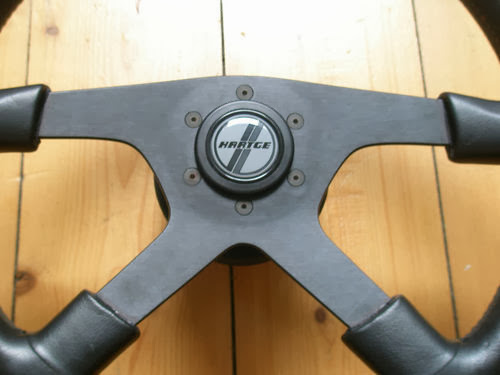
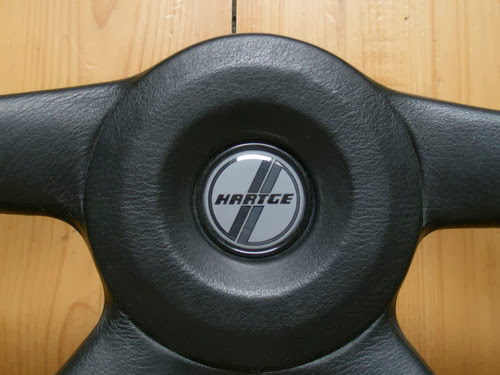
The new wheel arrived from Germany and I believe is a much better match to the overall build. It was manufactured by Momo for Hartge and was included in their E34 H5 V12 model. Below are pages from an article from 1989 featuring the car along with a nice interior shot of the steering wheel.
The wheel itself is in excellent condition with only a couple light scratches through the surface dye which will be easily addressed. A nice bonus was the logo on the horn button matches those on the Hartge center caps providing a nice touch.


Last edited by Murfinator on Oct 06, 2014 8:06 PM, edited 2 times in total.
-
Murfinator
- Posts: 1482
- Joined: Sep 07, 2007 1:39 AM
- Location: ZION - 84032
It's been a couple months since I've posted an update. I've been sidetracked with two other vehicle overhauls: motor rebuild in Jeep and 100k maintenance in E46 M3. Both are complete. Now I can get back to this project.
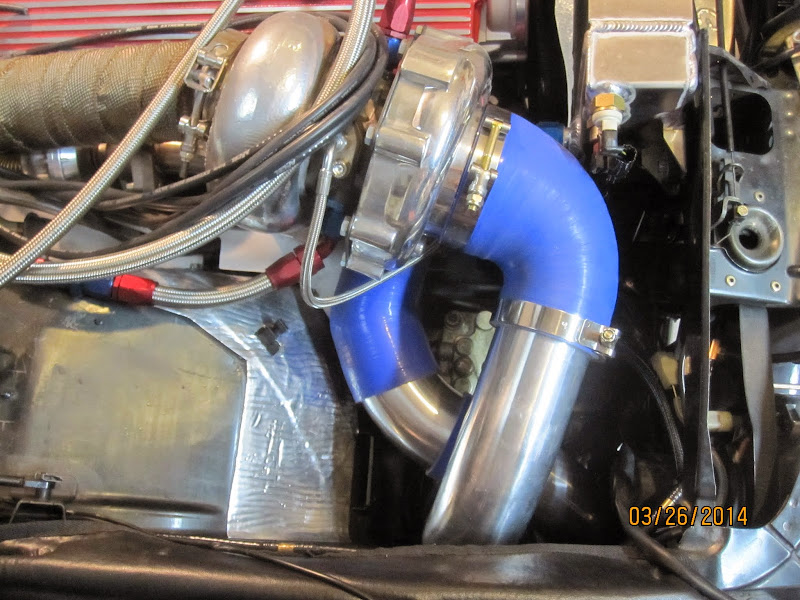
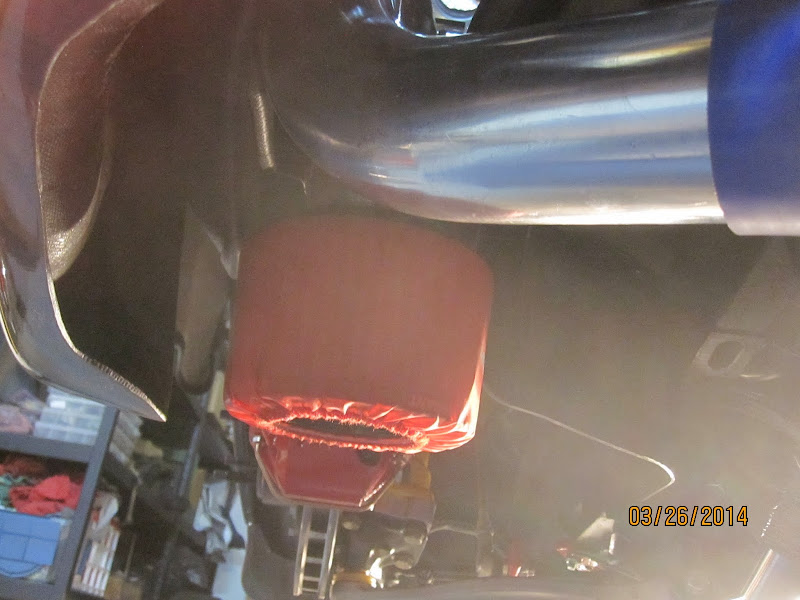
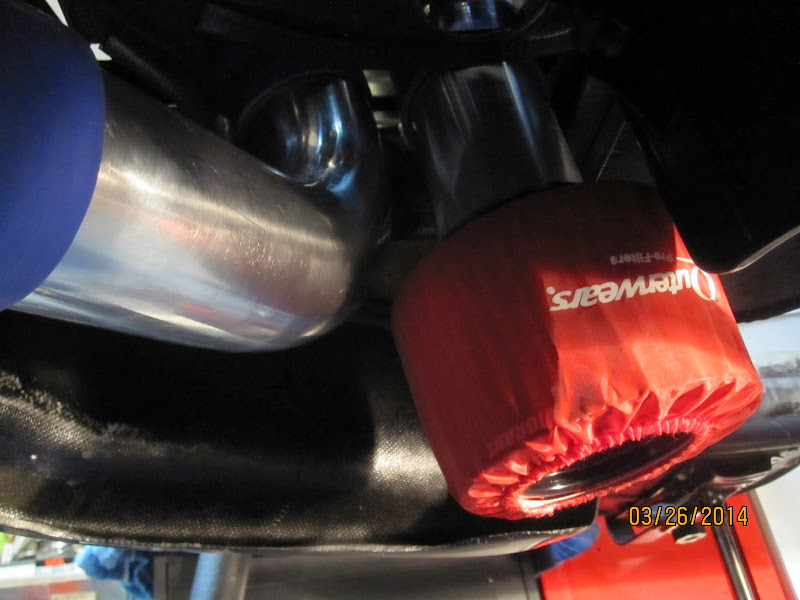
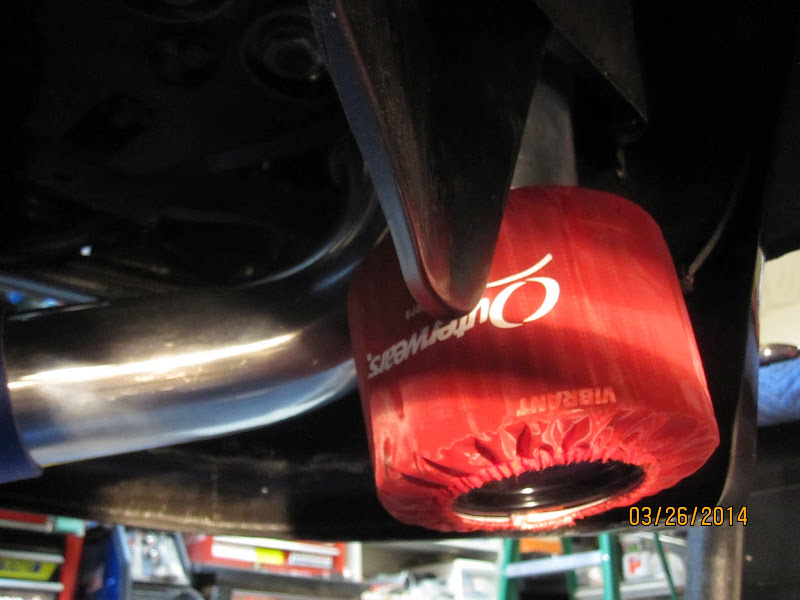
Took a few pics showing the current status. Intake and charge pipes have been fitted. Intake is pulling from beneath the original location of the charcoal canister forward of the passenger wheel well. A waterproof liner protects the filter but a splashguard needs to be fabbed to shield it from tire spray in its backside. No hot air intake system here.
Since I don't own a spool gun to weld the aluminum I'll be taking them to a local shop and using their's and rolling the ends.
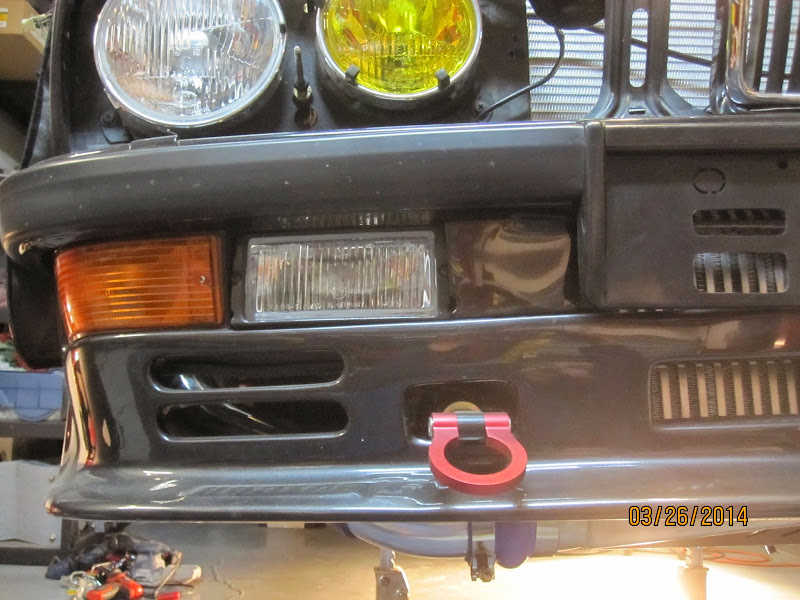
Added cut-outs in the euro plate bracket to improve air flow.
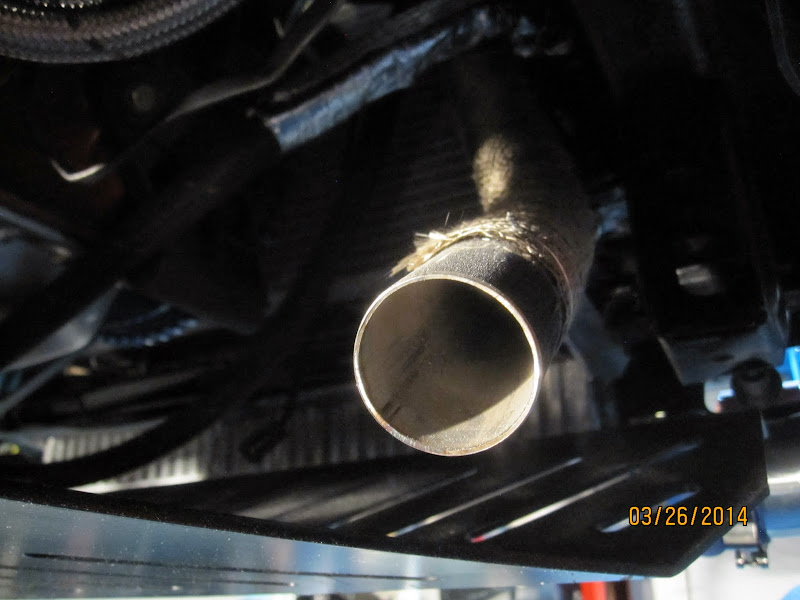
Forward wastegate dump pipe:
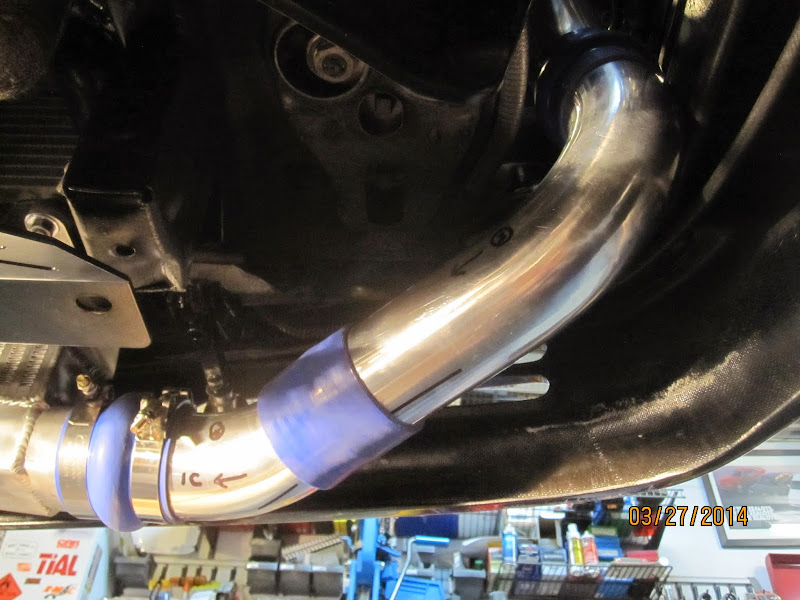
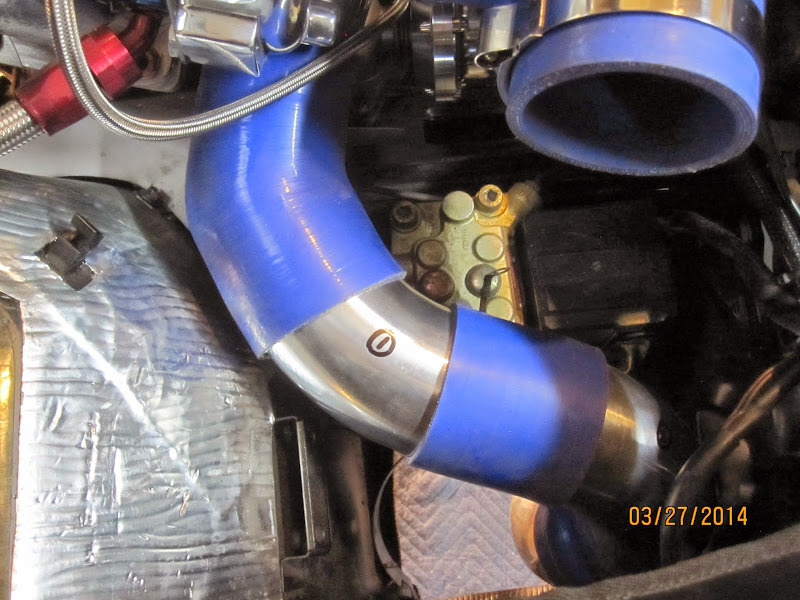
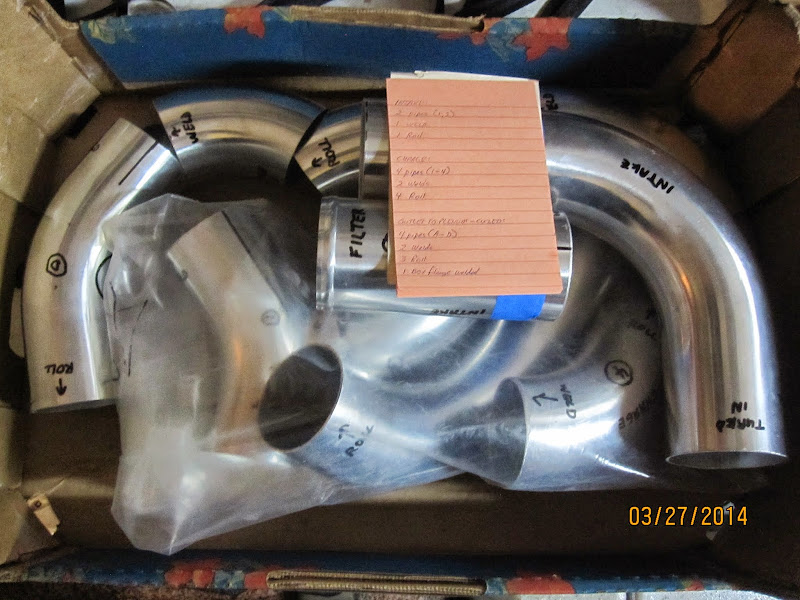
Still debating my options for an overflow tank. I definitely won't be using the OE plastic one. VAC offers one they designed for the E30 M3 which retains the OE level sensor fitting. I mocked up a foam piece to ensure its dimensions will fit. Had to modify the bracket and will need to move the tank's mounting tabs. The tolerances are tight but it should work.
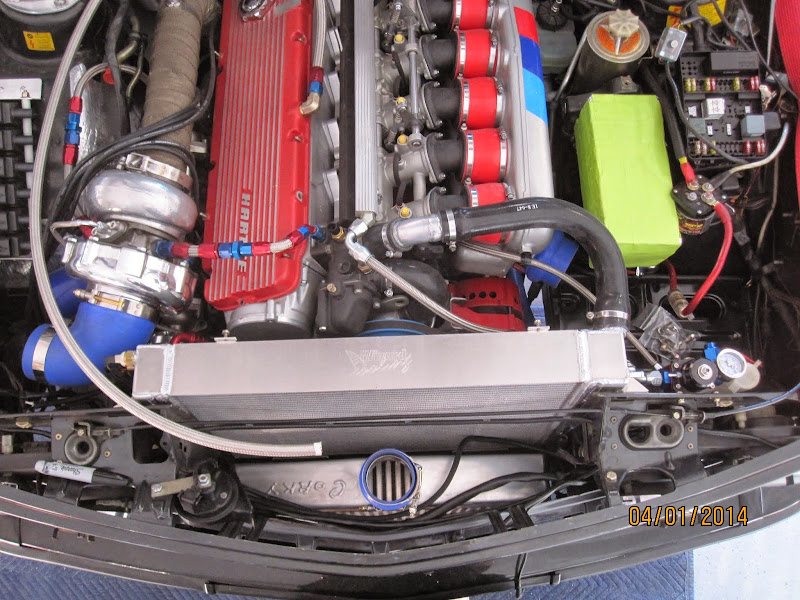
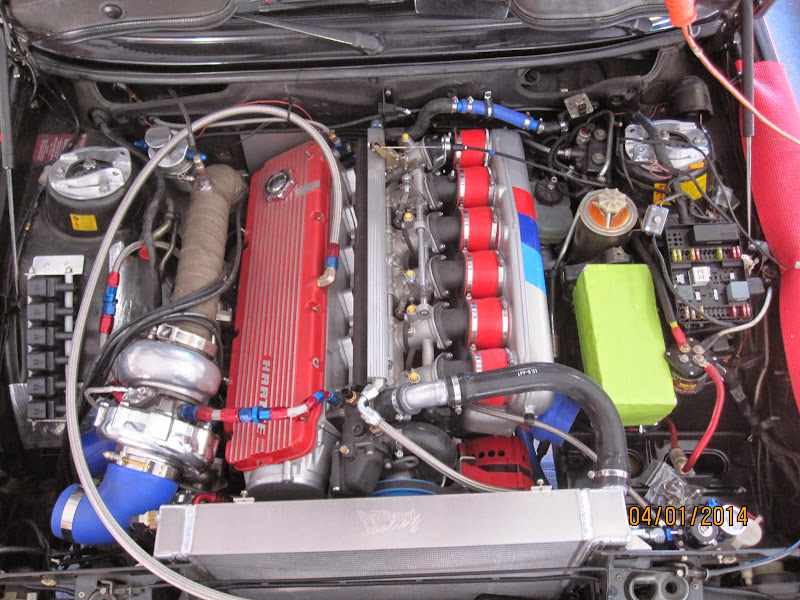
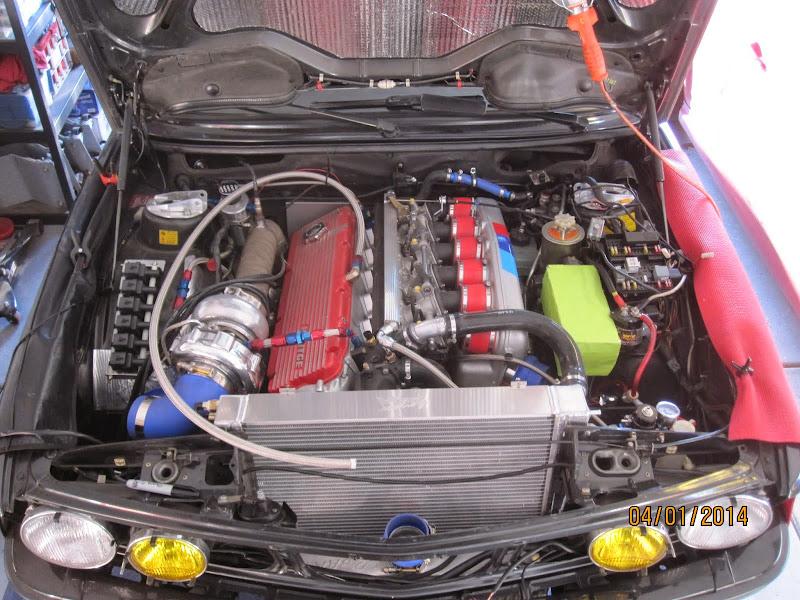
The intercooler to plenum piping takes a 120 degree turn and makes its way into the engine compartment near the inside bottom corner of the drivers high beam. Trimming and reinforcement of the metal in these areas and the light bracket was required and was part of the reason for removal of the OE power steering cooler and pipes and use of a smaller battery.
The TiAL BOV will be located just prior to the plenum intake port, clocked toward the alternator.
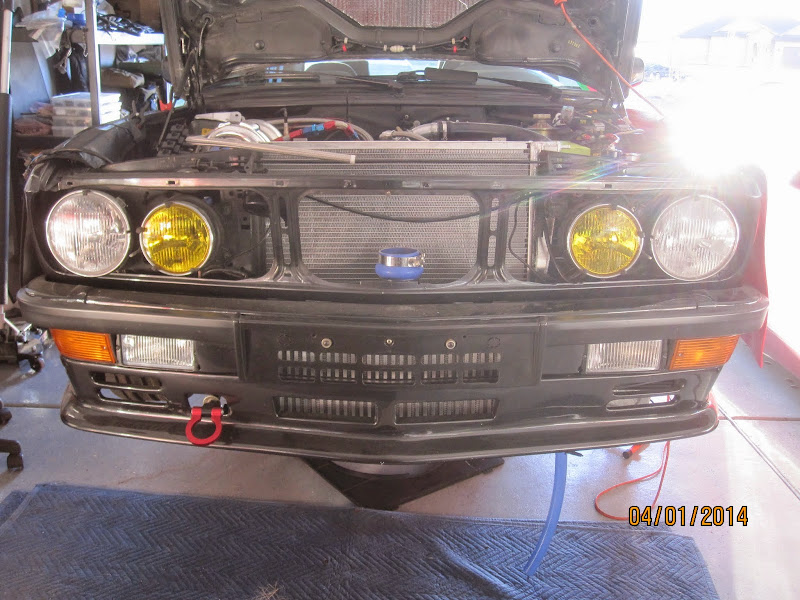
The LS1 coil packs are mounted on aluminum shock mounts on the passenger wheel well where the OE washer tank was, thus the need for the TD washer tank. Didn't want to cover the Golden Monkey Hartge valve cover.
Took a few pics showing the current status. Intake and charge pipes have been fitted. Intake is pulling from beneath the original location of the charcoal canister forward of the passenger wheel well. A waterproof liner protects the filter but a splashguard needs to be fabbed to shield it from tire spray in its backside. No hot air intake system here.
Since I don't own a spool gun to weld the aluminum I'll be taking them to a local shop and using their's and rolling the ends.
Added cut-outs in the euro plate bracket to improve air flow.
Forward wastegate dump pipe:
Still debating my options for an overflow tank. I definitely won't be using the OE plastic one. VAC offers one they designed for the E30 M3 which retains the OE level sensor fitting. I mocked up a foam piece to ensure its dimensions will fit. Had to modify the bracket and will need to move the tank's mounting tabs. The tolerances are tight but it should work.
The intercooler to plenum piping takes a 120 degree turn and makes its way into the engine compartment near the inside bottom corner of the drivers high beam. Trimming and reinforcement of the metal in these areas and the light bracket was required and was part of the reason for removal of the OE power steering cooler and pipes and use of a smaller battery.
The TiAL BOV will be located just prior to the plenum intake port, clocked toward the alternator.
The LS1 coil packs are mounted on aluminum shock mounts on the passenger wheel well where the OE washer tank was, thus the need for the TD washer tank. Didn't want to cover the Golden Monkey Hartge valve cover.
-
mooseheadm5
- Beamter

- Posts: 23035
- Joined: Apr 08, 2009 10:30 PM
- Location: Charlottesville, VA
- Contact:
-
Murfinator
- Posts: 1482
- Joined: Sep 07, 2007 1:39 AM
- Location: ZION - 84032
Thanks for the observation and I've taken this phenomena into consideration. Doesn't rain much here in Utah, but if it does not to worry:mooseheadm5 wrote:It'll never see rain, correct?
http://www.outerwearsracing.com/proddet ... rod=734077
I ran the same product on the Ta-Hoe and I still run them on the Jeep. Both have cut-out wheel wells and were exposed to tire spray, rain, snow and mud. They work as advertised.Technology and Benefits of Outerwears Products
Outerwears Pre-filters are designed to enhance the efficiency of any performance or exposed air filter. The Pre-filter is constructed with a proprietary polyester mesh with uniform micron openings, treated with an optional hydrophobic water-repellent process. The mesh is UV resistant, filters debris down to .005”, is shatter proof in freezing temperatures, and resistant to heat up to 450 degrees. The material is puncture resistant and has elasticity characteristics allowing the threads to return to the original position in the event the threads have been impacted or shifted. The manufacturing process incorporates a welded seam for strength, or reinforced industrial grade thread to fill needle holes and to reduce potential failure points in the material. The top seam utilizes specialized thread and cording (ON LARGER PIECES W/TOPS) to reinforce durability of the top. Six stock colors are available in either regular or the water-repellent variety. Special colors are available with appropriate volume. Pre-filters are designed to deflect the damaging debris, which clogs air filters, compromising peak air-flow and horsepower. The Pre-filter also extends the time between servicing intervals reducing costs and increasing convenience for the consumer.
-
Murfinator
- Posts: 1482
- Joined: Sep 07, 2007 1:39 AM
- Location: ZION - 84032
-
Murfinator
- Posts: 1482
- Joined: Sep 07, 2007 1:39 AM
- Location: ZION - 84032
Re: GOD'S VENGEANCE - Complete Drivetrain Redux
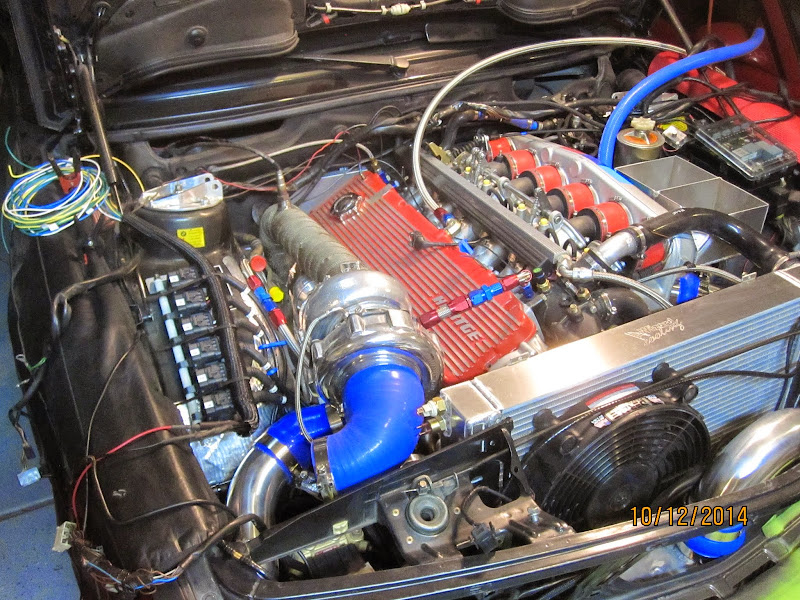
It's been a while since I've posted an update. Other hobbies have taken up my time. The build continues to progress.
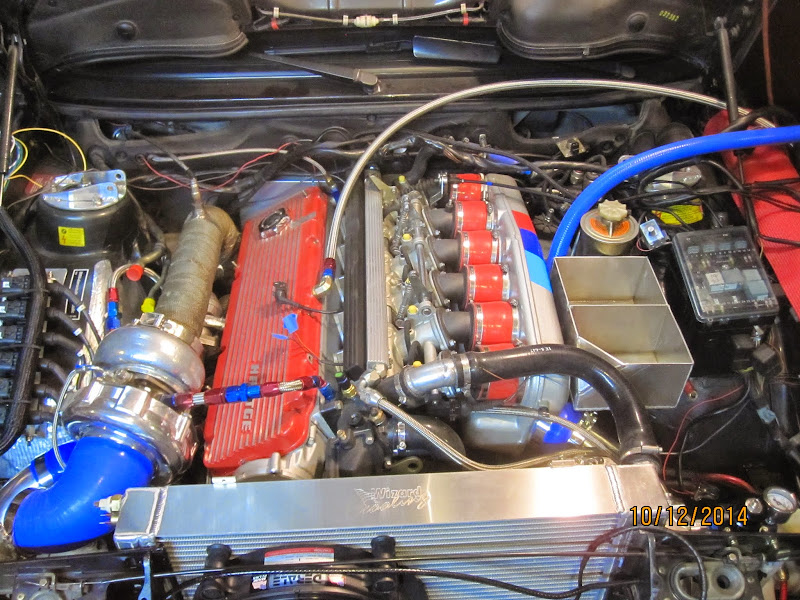
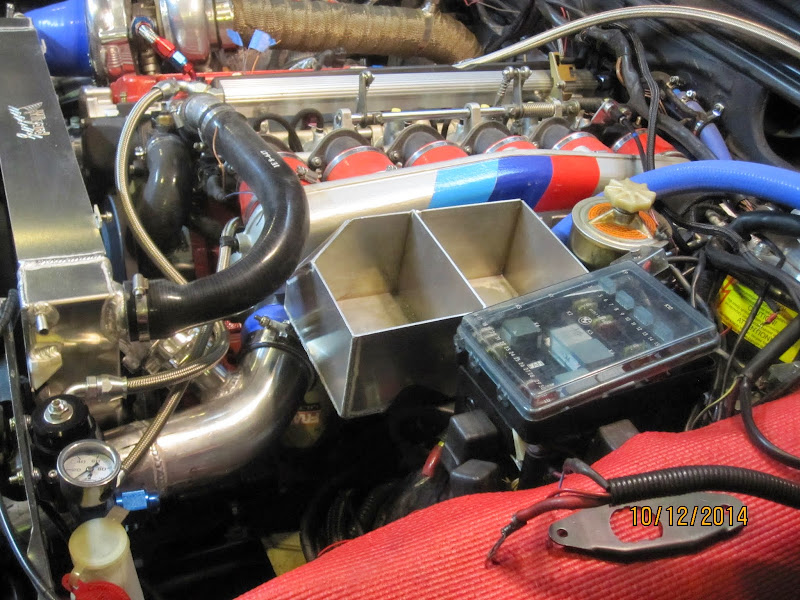
Re: GOD'S VENGEANCE - Complete Drivetrain Redux
There's a lot going on under there. What is the box between the plenum and the fusebox?
-
Nebraska_e28
- Beamter

- Posts: 9064
- Joined: Apr 13, 2006 11:18 PM
- Location: Council Bluffs, IA
- Contact:
Re: GOD'S VENGEANCE - Complete Drivetrain Redux
I'm guessing an a>w incorporation or a big shot of meth.wkohler wrote:There's a lot going on under there. What is the box between the plenum and the fusebox?
-
Murfinator
- Posts: 1482
- Joined: Sep 07, 2007 1:39 AM
- Location: ZION - 84032
Re: GOD'S VENGEANCE - Complete Drivetrain Redux
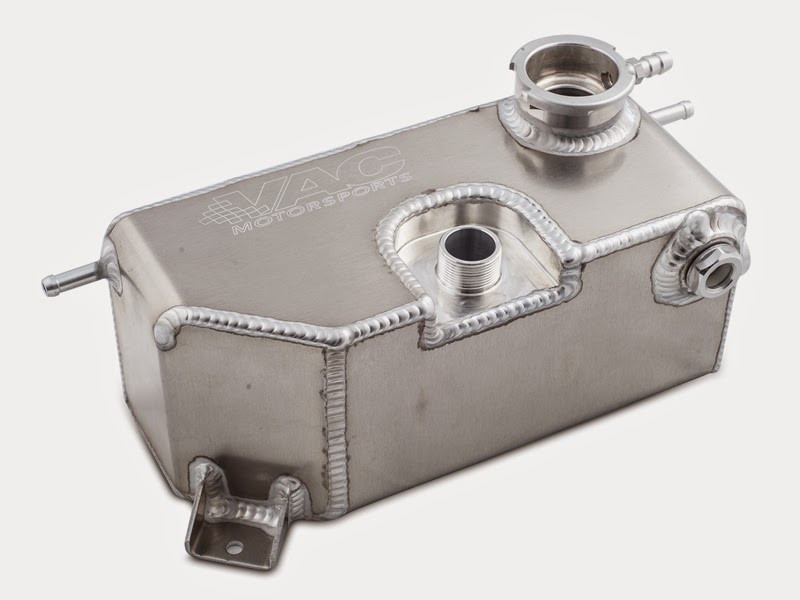
I've never liked the OE coolant overflow tank. Not only is it plastic and prone to seep but after a year or so under the hood the plastic begins to turn brown and dingy like worn leather. Please understand I know many others have not experienced seepage from OE tanks and don't care whether they discolor. That's all good and well but given that I've already upgraded to a larger aluminum radiator it makes little sense to retain the plastic overflow tank given its propensity to fail when taken beyond its intended function.
I have mentioned in prior posts the aluminum overflow tank VAC Motorsports offer for the E30 M3. This tank retains the OE level sensor/idiot light and is a direct bolt in. The green foam piece in my prior post reflects the exact dimensions of the VAC tank shown above which is available for $339. While this is a nice piece, the amount of modification to make it work in an E28 I've determined to be not worth the trouble.
Next, when it came time to mount a catch can as part of the crankcase and cylinder head evac system which pulls 3 inches of vacuum via a scavenger in the downpipe, there were no good mounting options. Packaging and wire/hose routing has become a challenge. To answer Chris' question the box between the plenum and fuse box will serve as both an overflow for the cooling system and a catch can. With the top unfinished it can be seen the box is internally divided. I measured the volume of the OE overflow tank and added 0.5 liters to account for the higher volume of the new radiator. The large blue silicone hose will connect to the bottom of the forward portion of the tank. A nipple at the front of the tank will connect it with the radiator and a cap will be welded to the top. Like the VAC tank the OE level sensor will be retained. The -10AN braided hose will connect the crankcase and cylinder head to the rear half of the tank via 90 degree fittings. The OE overflow mount was modified and reinforced to allow for as large an internal volume as the space allows.
-
carnutdallas
- Posts: 1915
- Joined: Apr 13, 2008 3:22 PM
- Location: Frisco, TX
- Contact:
Re: GOD'S VENGEANCE - Complete Drivetrain Redux
I am so glad I am subscribed to this epic thread! Your work is spectacular. Looking forward to the completion, in due time of course 
Re: GOD'S VENGEANCE - Complete Drivetrain Redux
understatement. makes my eyes cross a little.wkohler wrote:There's a lot going on under there...
-
M. Holtmeier
- Posts: 3031
- Joined: Mar 11, 2007 3:06 AM
- Location: Dallas, Texas
Re: GOD'S VENGEANCE - Complete Drivetrain Redux
This thread is still nuts, after all these years. When is the cage going in! 
-
Murfinator
- Posts: 1482
- Joined: Sep 07, 2007 1:39 AM
- Location: ZION - 84032
Re: GOD'S VENGEANCE - Complete Drivetrain Redux
I'm still considering running in the Silver State Classic Challenge http://www.silverstateclassic.com/event ... ption.aspxM. Holtmeier wrote:When is the cage going in!
As a rookie I'd have to run in the Touring class (max speed 124 mph). With a cage I could potentially run in the Grand Sport class (max speed 165).
I haven't heard of any E28's competing in the Silver State Classic Challenge since Rug Cunningham ran in 1989 with a stock M5. His top speed was 165 and a 144 mph average. http://youtu.be/e-PFfwxR3SQ?t=39m18s
-
Murfinator
- Posts: 1482
- Joined: Sep 07, 2007 1:39 AM
- Location: ZION - 84032
Re: GOD'S VENGEANCE - Complete Drivetrain Redux
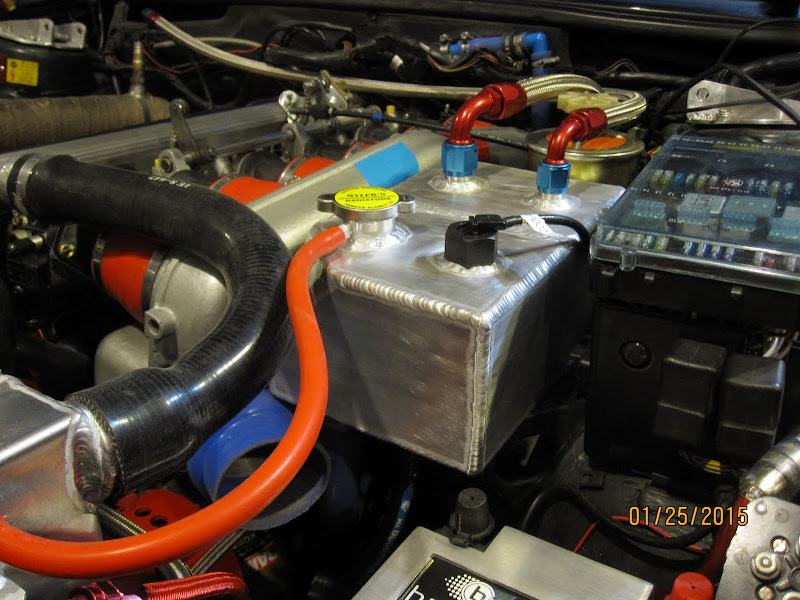
The first version of the overflow/catch-can was of too thin a gauge aluminum. When the AN bungs were being welded into the top of the tank there was not enough heat in the thicker bung and too much in the catch-can. The result was a worthless molten blob. I had a thicker gauge aluminum laser cut to the proper dimensions and with holes cut for the sensor, bungs and cap. I'm pleased with the result though it took several months to pull everything together. The canister rests on the modified bracket for the original overflow tank. This canister has 1.5x the capacity of the original and uses the OE level sensor, plus it includes the integrated catch-can that I couldn't find room for anywhere under the hood. It attaches underneath with 5/16 nut plates. Overall it cost ~$150 in materials and cutting fees.
-
Murfinator
- Posts: 1482
- Joined: Sep 07, 2007 1:39 AM
- Location: ZION - 84032
Re: GOD'S VENGEANCE - Complete Drivetrain Redux
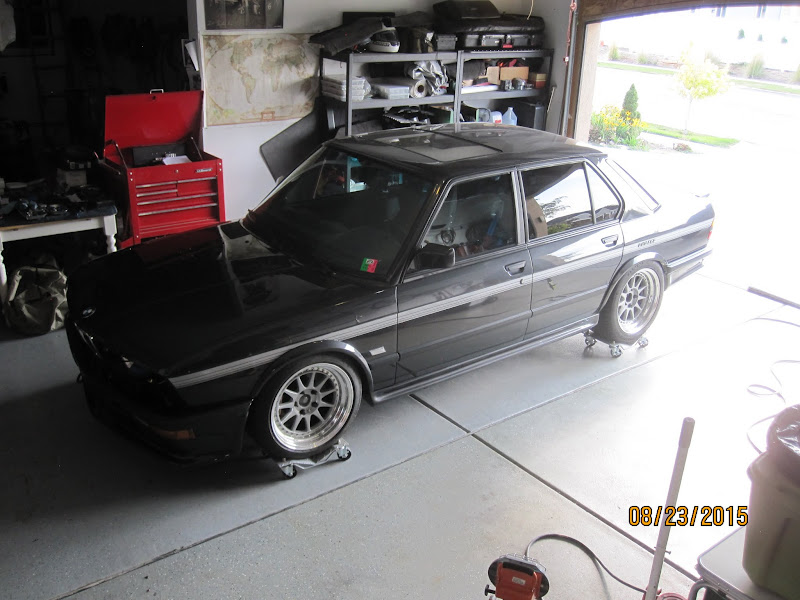
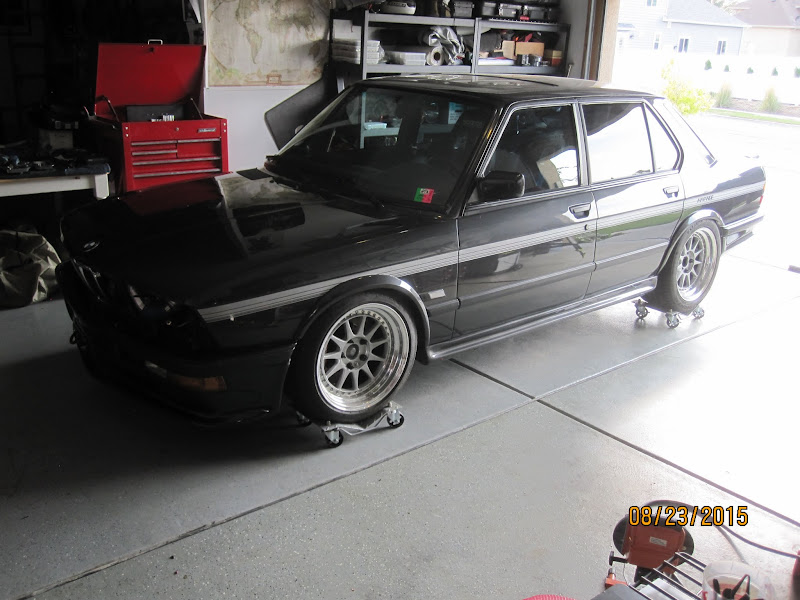
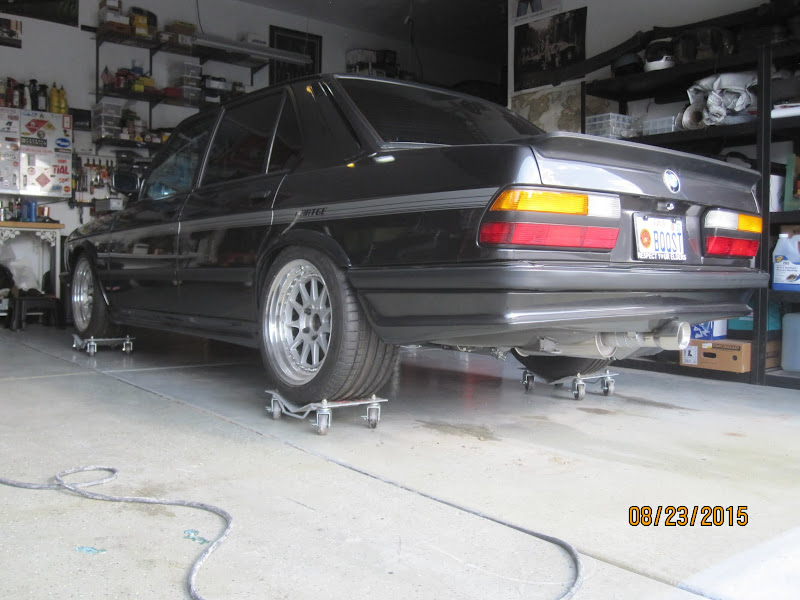
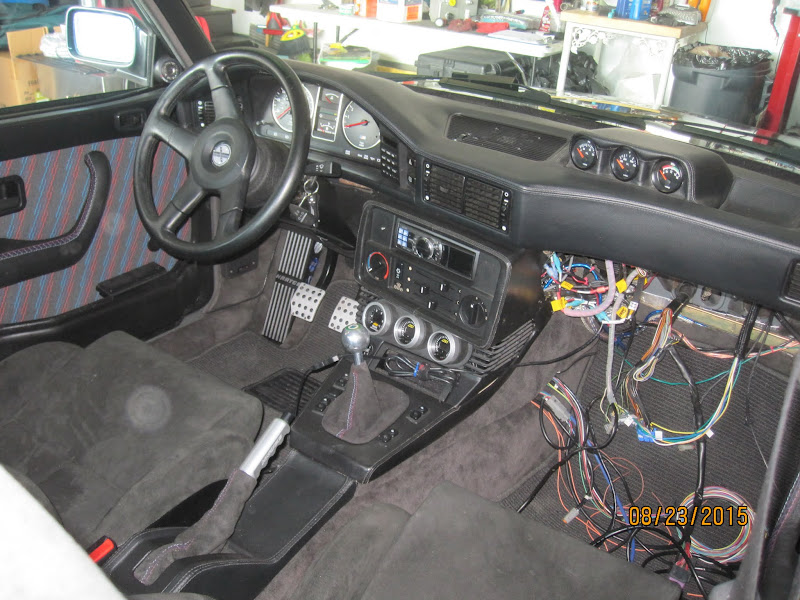
After nearly 5 years the car is off jack stands. Finally figured out where and how to mount a brake fluid reservoir. Used one from a '95 540i Touring from Iceland. The OE reservoir didn't fit due to the throttle body spacers pushing the intake plenum ~1" toward the drivers side of the engine bay. More pics later under the hood. Still more wiring and plumbing to finish.
Re: GOD'S VENGEANCE - Complete Drivetrain Redux
Congrats!!!
Re: GOD'S VENGEANCE - Complete Drivetrain Redux
Congratulations, Mike! The car looks stellar! Looking forward to more under-hood photos. I have to say it's almost crying for the Hartge rear wing though.
When I heard they were closing Miller Motorsports Park, the first thing I thought of was that you weren't going to get to use your car there. I guess the Chinese bought it and plan to keep it open, so I guess disaster averted?
When I heard they were closing Miller Motorsports Park, the first thing I thought of was that you weren't going to get to use your car there. I guess the Chinese bought it and plan to keep it open, so I guess disaster averted?
-
Murfinator
- Posts: 1482
- Joined: Sep 07, 2007 1:39 AM
- Location: ZION - 84032
Re: GOD'S VENGEANCE - Complete Drivetrain Redux
Chris, you're right. I've considered the wing. Had an opportunity to pick one up from Paul L but decided to pass. He calls it the "love-hate". I still prefer the more subdued M-Tech spoiler.
Without the motorsports park I would have been left to the remote highways. Glad someone bought the park since I'll need to learn to drive this car again. My DD is the opposite of what I'm hoping this car will be performance wise.
The brake reservoir idea came from an E30 v12 swap project from Iceland I believe. I saw a build post somewhere, it was several years ago, and noted the BMW reservoir didn't sit directly above the master cylinder. The owner had used an E32/E34 set up that had plastic 90 degree fittings and hoses that allowed the reservoir to be mounted several feet away. The reservoir is NLA so it took a while to source one. Oddly enough the one I found was in Iceland also.
Found the link to the build thread for the M70: http://www.e30tech.com/forum/showthread.php?t=119616
Re: GOD'S VENGEANCE - Complete Drivetrain Redux
Good to see more progress on this!!
Re: GOD'S VENGEANCE - Complete Drivetrain Redux
So, how close are you to getting this thing going?
-
Kyle in NO
- Posts: 17638
- Joined: Feb 12, 2006 12:00 PM
- Location: Nasty Orleans------> Batten-Rooehjch------>More Souther LA
Re: GOD'S VENGEANCE - Complete Drivetrain Redux
God must have calmed down a bit...
-
Murfinator
- Posts: 1482
- Joined: Sep 07, 2007 1:39 AM
- Location: ZION - 84032
Re: GOD'S VENGEANCE - Complete Drivetrain Redux
Yes, things have calmed down a bit but are starting to pick back up.
Because of the additional power needs (fuel pump, boost control, electric fan, etc...) I'm adding a supplementary fuse box and relays. The ARC 4000D should do the trick: http://www.summitracing.com/parts/arc-4000d
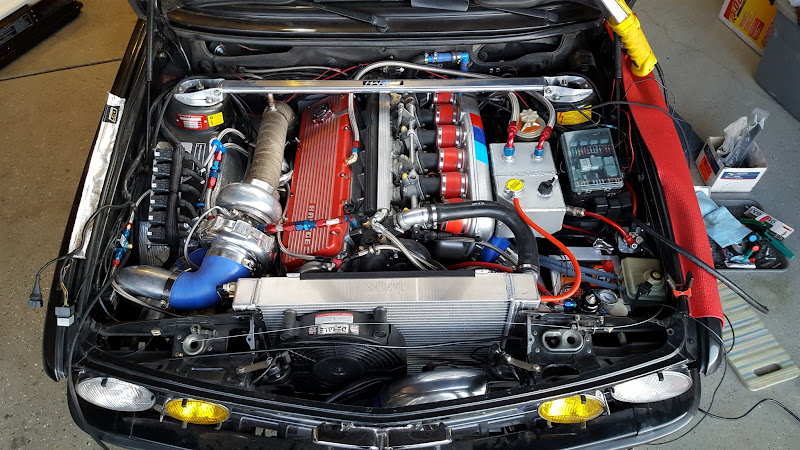
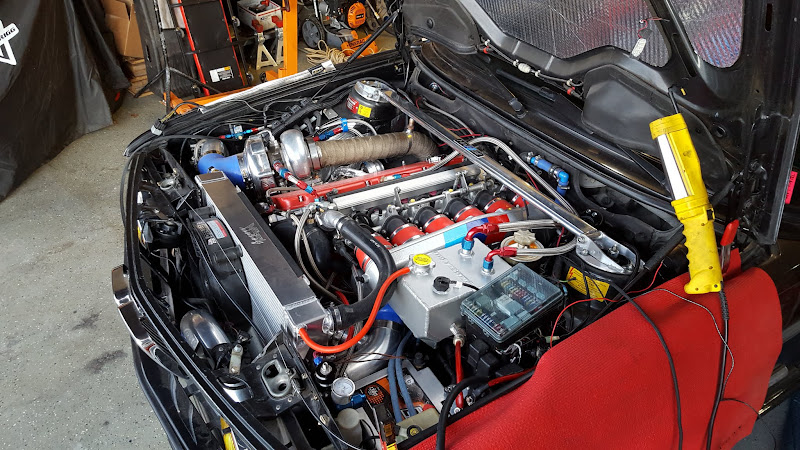
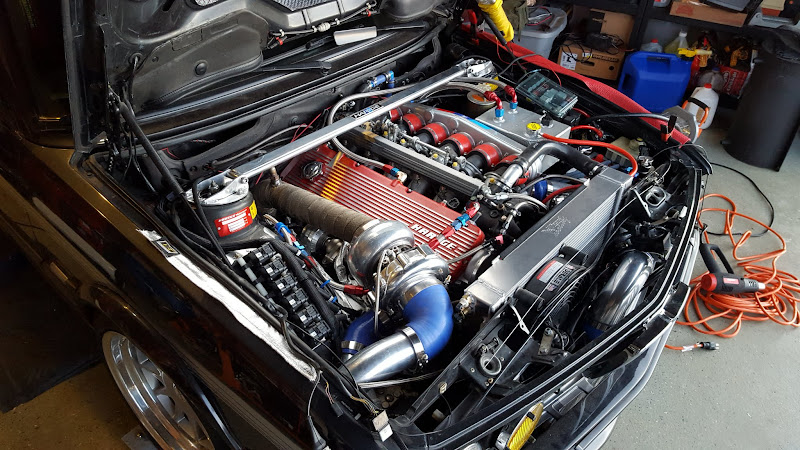
Been working through some wiring issues. Here's how the project stands currently. Everything is pretty well sandwiched in there. Still routing wires/hoses and getting everything sorted. The drivers grill needed a good amount of trimming, as did the drivers headlight mount. Nothing visible from the outside. Broke and ordered a new hood latch assembly. Still waiting on some misc. bits from Pelican.
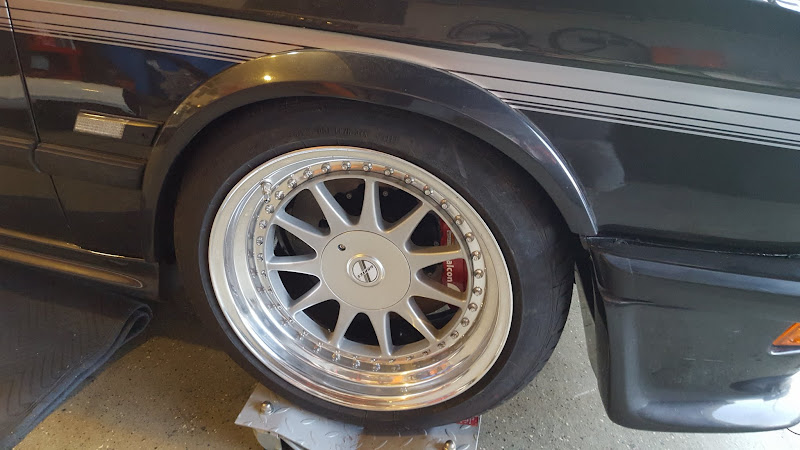
First shot of the wheels mounted with the bolt covers installed. Had to trim the wheel studs a bit. Also had to remove the 10mm rear spacers. Put those up front for a wider track and notched the trailing arms to fit the beefy 275's in the rear. Otherwise I was looking at some serious modification to the rear fenders that are already rolled nearly to the point of cracking the paint and warping the M-Tech flares. It wasn't until I got the car on the dollies that I noticed the rear tires would rub inside the fenders when the springs were compressed. Also had to space out the rear struts 1/4".
Barely noticeable in the shot of the passenger front wheel below is an aluminum baffle protecting the air intake from being doused by the tire when it rains. Don't want to overtax and rely entirely on the filter wrap. The molded aluminum plate is riveted in place just below where the charcoal canister was and gets air channeled in from the brake duct in the Hartge spoiler with some help from an OE M-Tech funnel in the same manner the Mocal power steering cooler gets its air on the drivers side beneath the Braille battery and TD washer tank.
Installed the Racing Dynamics strut tower bar and the custom overflow/vacuum canister. Both the canister and intake plenum were powdercoated after modifying the canister with a notch to keep some distance its front corner and the negative terminal on the battery.
Thanks to ahab and Chris for information on the M5 engine wiring harness I'm making some progress in that arena.


-
e30 Alpina B6 3.5
- Posts: 83
- Joined: Apr 03, 2011 4:43 PM
- Location: California
Re: GOD'S VENGEANCE - Complete Drivetrain Redux
AWESOME Build!!!
I also going to build a Hartge H35 e30 with m30 with itbs and turbo. I will have to read this awesome build especially the m30 build. I love all the Hartge parts on your car. Looks like you might need Hartge shift knob and Hartge mono wiper?
I also going to build a Hartge H35 e30 with m30 with itbs and turbo. I will have to read this awesome build especially the m30 build. I love all the Hartge parts on your car. Looks like you might need Hartge shift knob and Hartge mono wiper?
-
Chimi-Changa
- Posts: 1659
- Joined: Nov 08, 2011 11:02 PM
- Location: Massachusetts
Re: GOD'S VENGEANCE - Complete Drivetrain Redux
Congratulations on this Epic build. So much great, custom work on this car- Thanks for the thread dedication.
Is the brake line heat shield in engine bay pass shock pillar area a Hartge piece?
Is the brake line heat shield in engine bay pass shock pillar area a Hartge piece?

