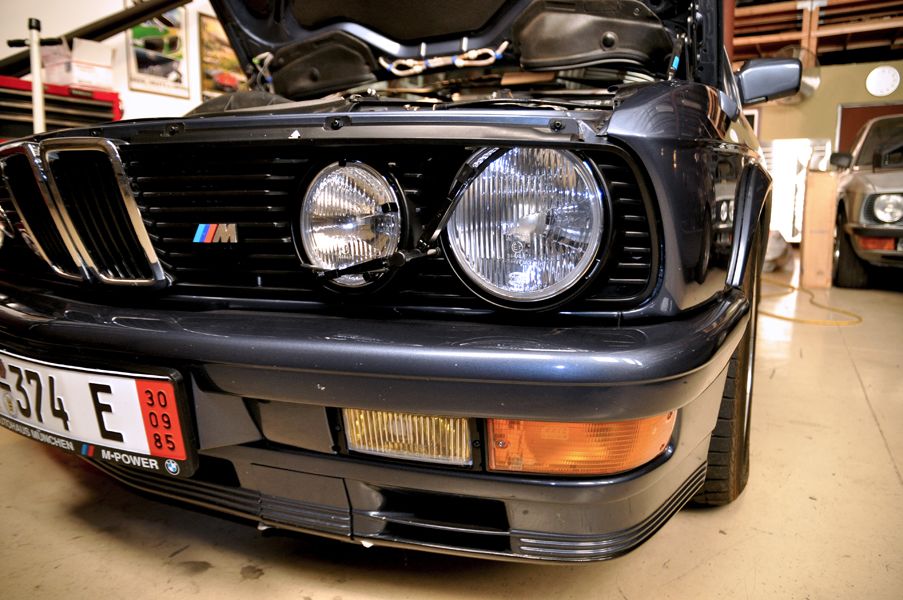
This is the condensed version of what all I have been doing since December right up this past weekend. I embarked on what I have titled the Front End Overhaul phase of my ownership for my 1985 M535i. This is actually the second phase of an overall renovation since I bought this car in 2010 (the first part was the Rear End of the car and Fuel System done over two years from 2012 & 2013). The Engine Bay and Front End were the last big areas of the car to tackle in terms of repairs, cleaning, upgrades, and beautification. The car was/is already pretty clean and a show winner (Concours and Popular), but I knew the engine bay was holding this car back from moving up to the next level. Living here in SoCal and the west among some truly fanatical collectors/restorers not to mention some pretty stiff competition in Concours circles is a double-edged sword. It is all at once inspiring, humbling and a bit discouraging. Luckily I count all these folks as friends and many of whom are incredibly supportive so the competition is mostly friendly. Since this year is the 100 Centennial of BMW and Car Week & OctoberFest in Monterery, California will be the high-point of the celebration (at least west of the Mississippi) I was convinced to attend this year (my first time bringing a BMW). As such I decided this was the time to embark on this project. However let me be clear: I am doing this project because I want to, because I have always wanted to do this to a car and not because I'm trying to keep up with Mr.Jones. I am at a point in my life where I actually have a car worthy of this effort.
First off, this is the synopsized scope of work:
-Engine Resealing (Gaskets, etc.)
-Transmission Resealing (Gaskets, etc.)
-New Rebuilt Driveshaft & Mounts
-New Shifter & Bushings (Z3 1.9 Shifter, E28 Linkage)
-New Cooling System, complete
-New Front Suspension & Steering Components (all except original Dinan & Bilstein equipment)
-New Oil System (Filter, Head, Cooler, Lines)
-Overhaul Hydraulic System (New components, Lines, Hoses)
-New Electrical System (Alternator, Fuse Box, Harness Re-taping)
-Re-do Headlight Washer & Wiper System
-Re-do Front Lighting (Repair Lens Hardware, New Turn Signals, New Wiring, New Low Beam Lens)
-Re-do Front Brakes (New Rotors, Rebuild E32 750i Calipers, New Backplates, New Pads)
-Re-do Front Struts (New Wheel Bearings, New Sensors, New Spring Pads & Mounts)
-New Rear Brakes (Replacement Rebuilt E34 540i Rear Calipers, New Pads)
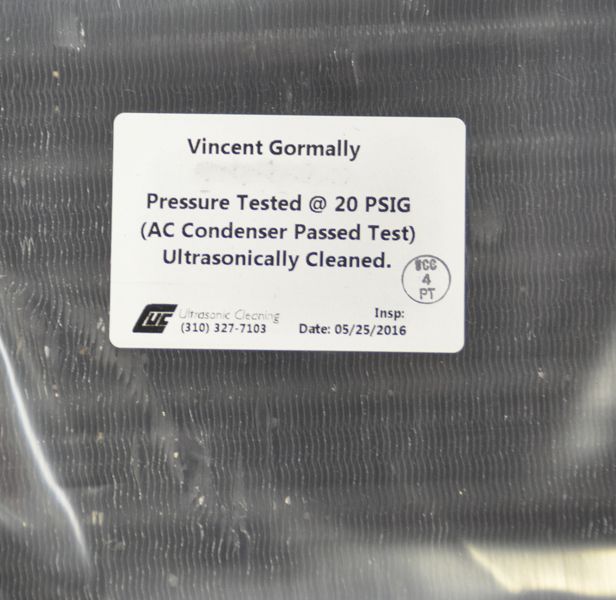
-Re-do Air Condition System (New Hoses & Lines, New/Re-furbish Condenser, New Drier)
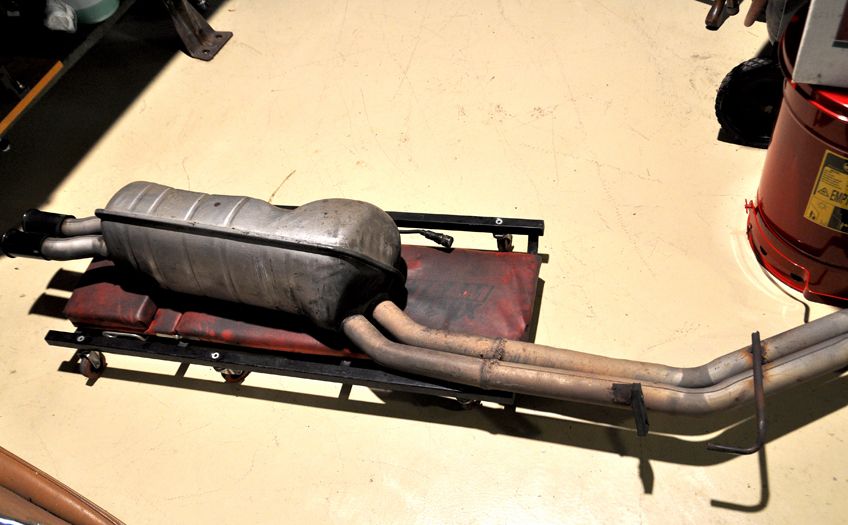
-New Exhaust System, complete
-Refinish Parts: Cleaning, Plating, Powder-coating, Tumbling (Oil Pan, Timing Covers, Intake & Exhaust Manifolds, Valve Covers, etc.)
In short pretty much everything forward of the Firewall gets addressed one way or another (with new Rear Brakes thrown in which is a continuation/completion of the Rear End Refurb from a few years back).
I started this over the holidays this past December 2015; it was a bit of a late start as I had planned on starting this back in November right after the SoCal Vintage BMW Meet. But life, the house, work and the holidays put the Kibosh on that so I couldn’t carve out any solid productive time until after Christmas. I lifted the car and started demo & tear-down on Tuesday 12/29. The Monday before I drove the car down from the hangar and had the A/C system discharged and drained. The drive back turned into a fun spirited one as I wanted to enjoy the M one last time and bank some of that goodness before tearing the whole thing apart and having it off the road for the next 7 months. After doing that, I promptly closed the hangar and left the whole thing for the entire month of January so I could finish this (the final 1% of which we are still trying to complete):
But that is for another thread.
PART I: PREPARATION & DISMANTLING
Since I had a long list of small mini-projects of sorts to handle in the engine bay, I decided to remove the engine and transmission entirely so as to get access to everything expediently and efficiently. I have never done this before so this was a going to have some challenges full of learning curves.
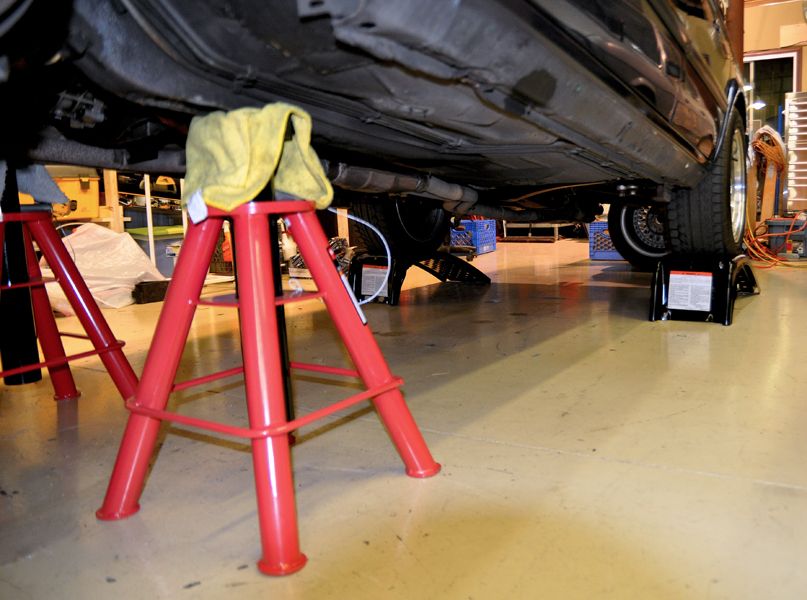
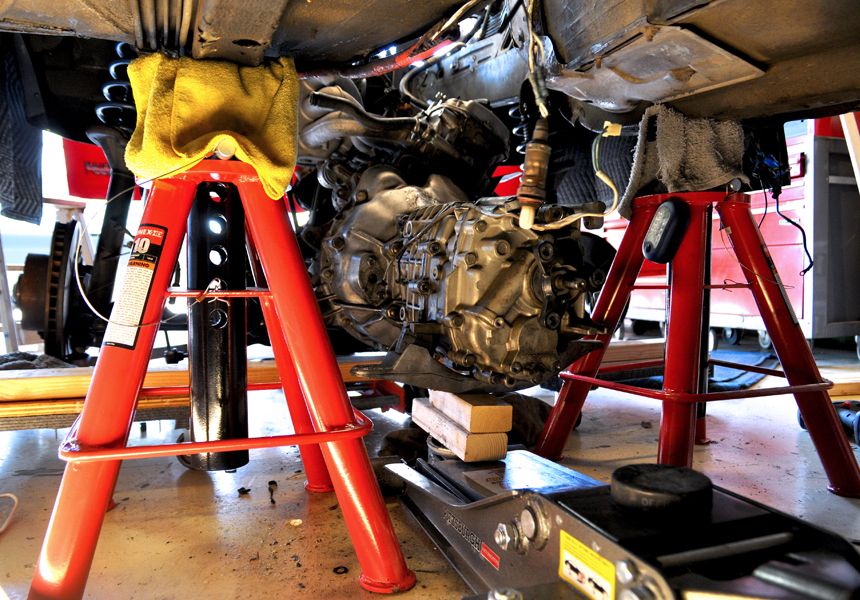
I raised the car up on a set of rear wheel ramps and the front up on a set of large 10 ton tall truck jack stands. These are from Sunex and start at 18.5” extending up to 31” and have a 21” footprint; these are really heavy duty and have proven to be worth the investment. Without access to a real lift, this setup was the next best thing.
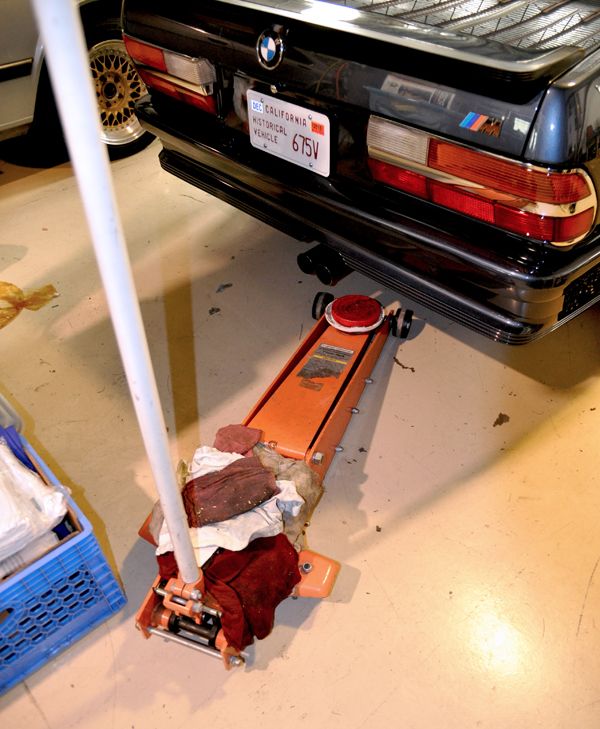
Of course I couldn’t do this without this invaluable tool: a Long Frame High Reach Floor Jack. This one was a Craigslist find Central Hydraulics (aka Harbor Freight):
First up was a collective weekend of photo documenting everything and researching. I have been taking extensive photos and even a video or two since I started (the amount has officially crossed into “Crap-ton” designation). However I know that of the many photos I took, I am going to be missing a critical one (or ten); it’s inevitable.
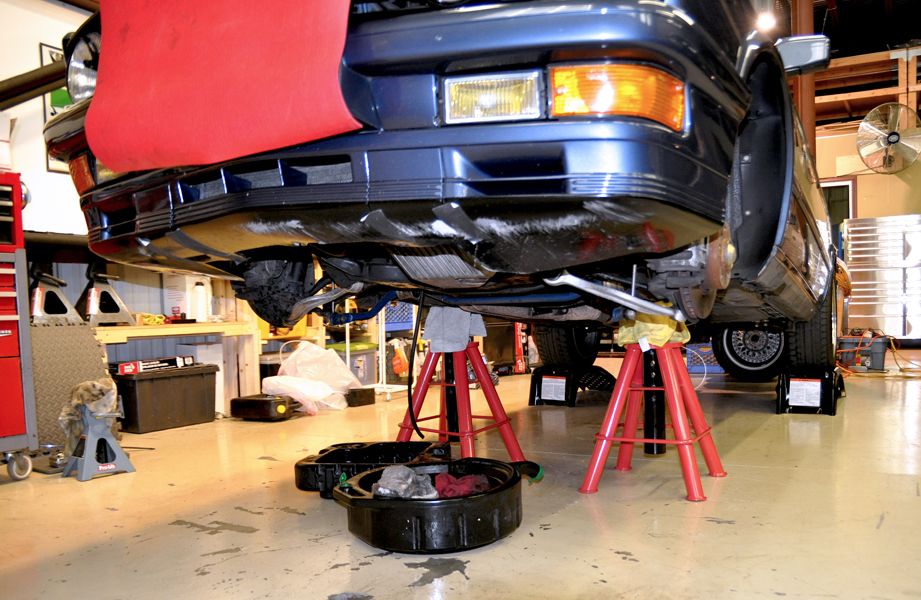
Next up was the better part of a day draining every system: Cooling, Hydraulic, Steering, Brakes, Transmission, and Oil:


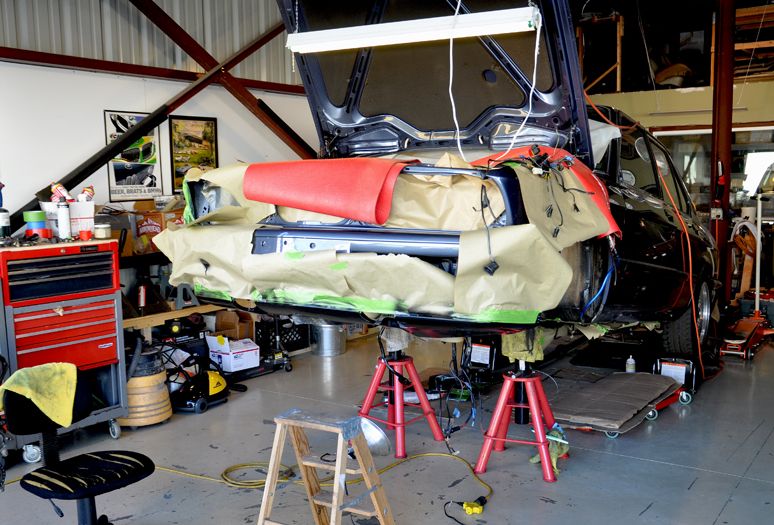
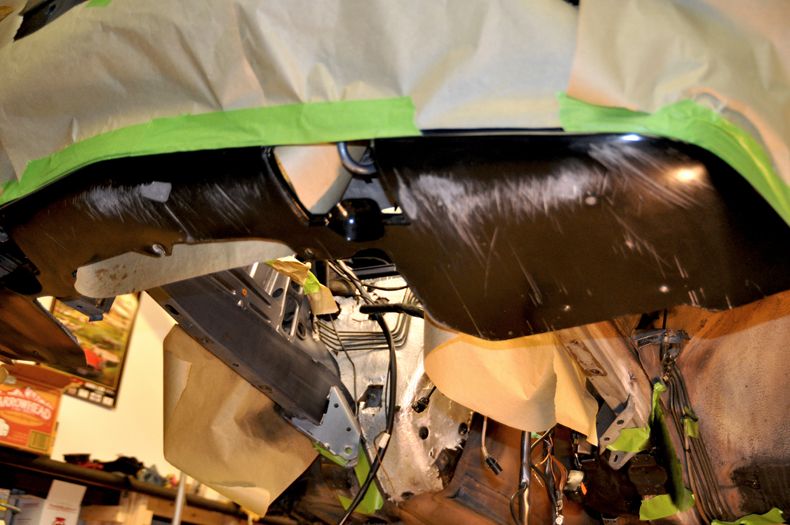
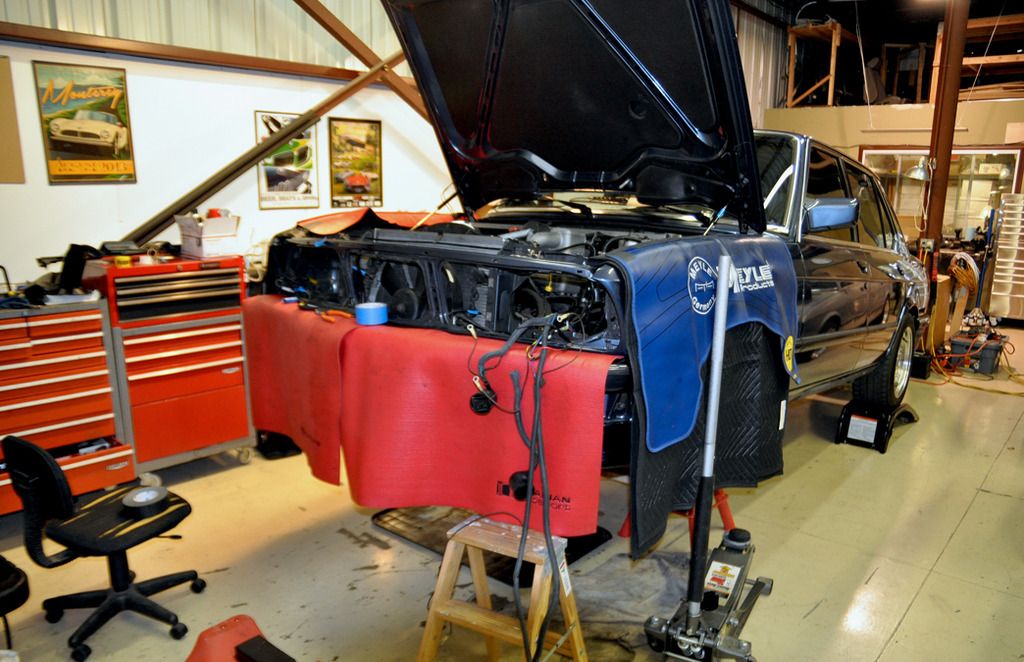
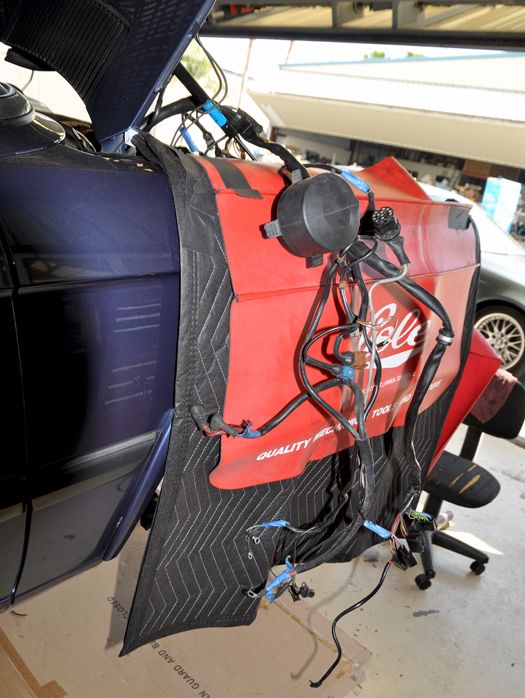
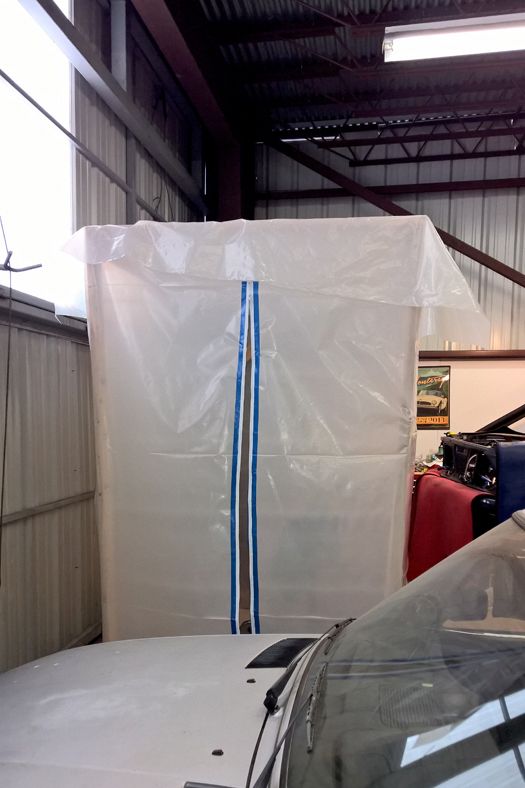
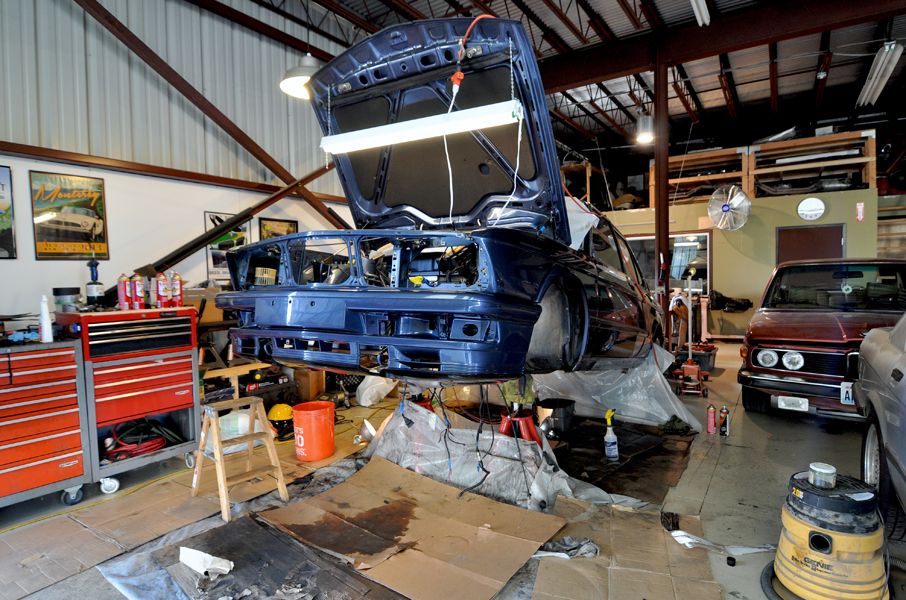
After all of that, the body protection went on to secure it for the long haul during the rest of demolition so it ended up looking like this for the last 5 months:
I have folders of photos of the dismantlement all the various systems and parts that took place over the last 5 months; too many, but here are a few:

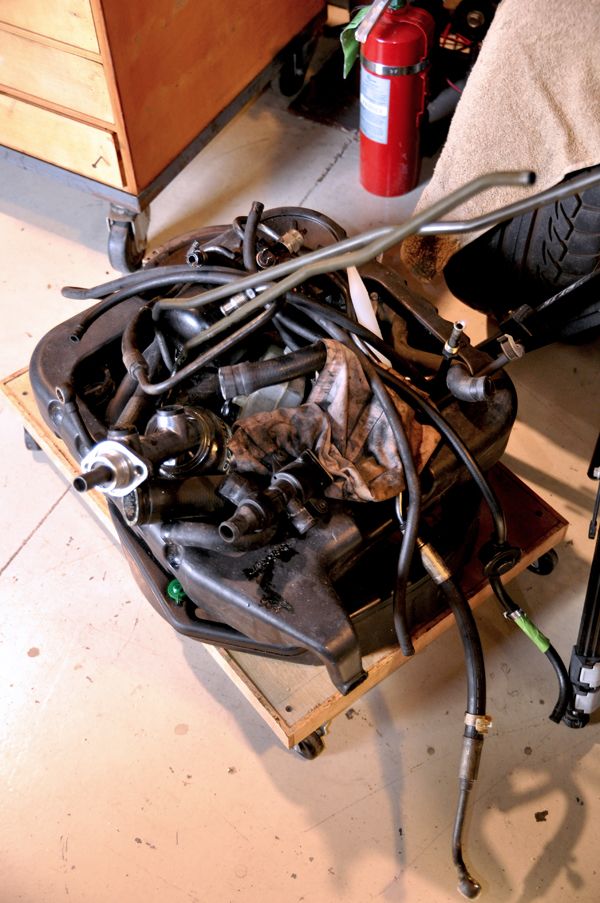
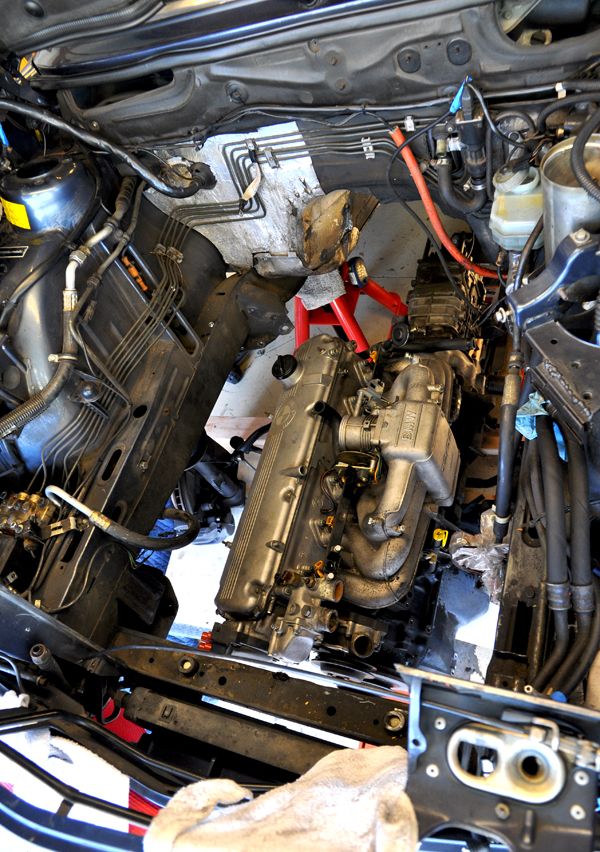
Eventually I ended up here, with the engine & transmission ready to come out:
PART II: ENGINE & TRANSMISSION REMOVAL
There was some debate amongst the “crew” (i.e. Ralph and Phil, my steadfast assistants in this next phase) and a few minds here on the best way to get these out of the car. Due to the fact that I had loosened the front struts already and the car was in the air as high as it was, I decided to do the only sensible thing: drop the Whole Kit-n-Kaboodle out the bottom (you can almost envision the whole assembly: engine, trans, subframe, struts - dropping down below like some 500lb bomb out of the bomb bay of a B-17 in that picture above). Of course it wasn’t that simple in reality.
First I had to raise the front end even higher to be able for the Intake to clear the M-Tech front valance once it landed on the rolling cart I set up below. This meant raising the jack stands up another peg or two and chocking the hell out of the rear wheels on the wheel stands.
The Engine Cart: a couple of furniture dollies, some 2x4’s and ¾’ plywood:
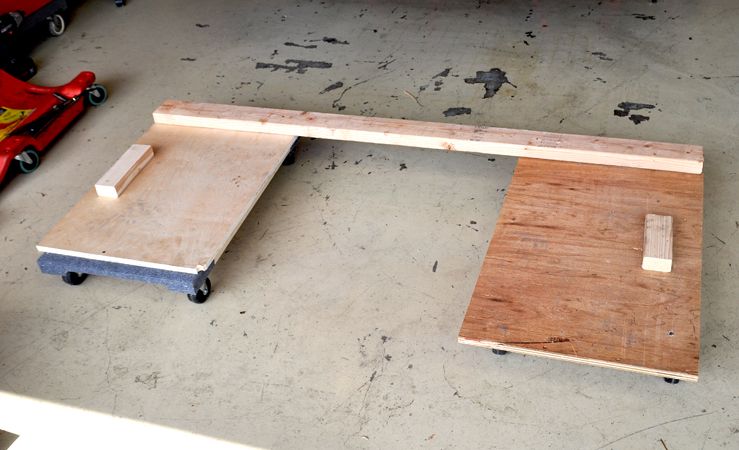
Other than a slight miscalculation with the width of the cart and trying to fix it on the fly, lowering it was surprisingly easy with the aid of the trusty big orange HF floor jack and some safety support from an engine hoist above.
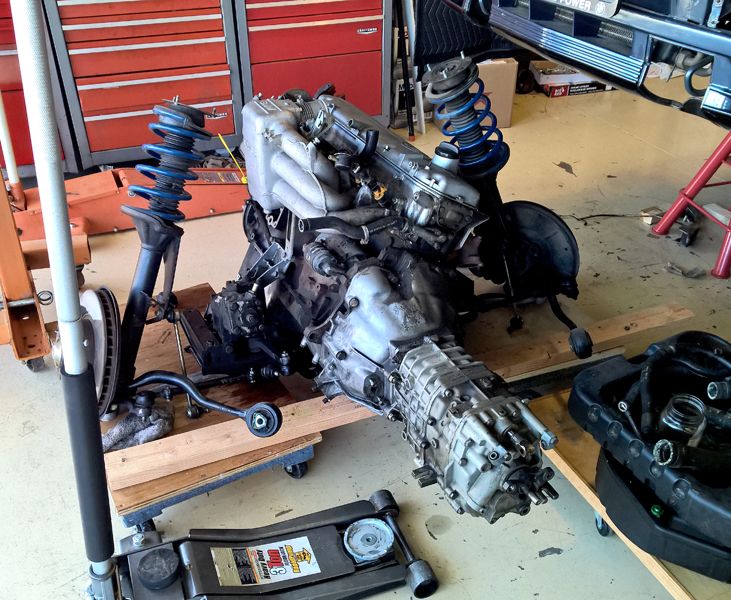
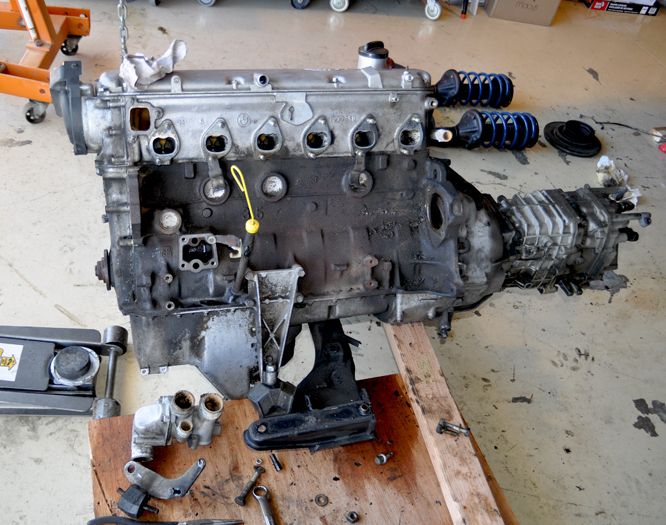
From here it was time to break down the engine and transmission for their overhaul.
PART III: ENGINE & TRANSMISSION
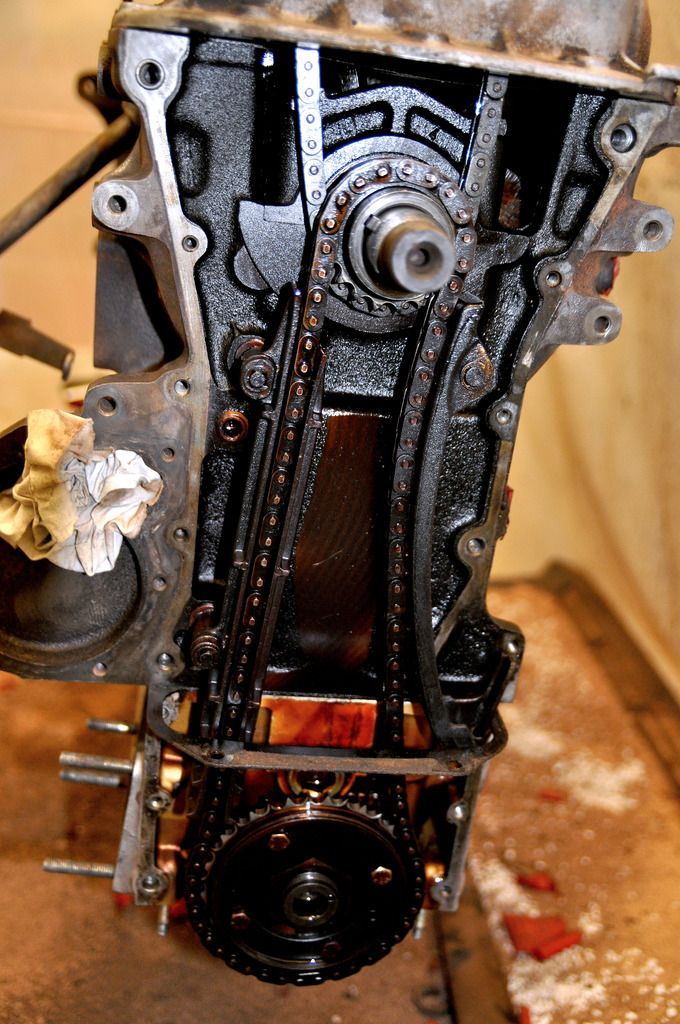
The goals with the engine and transmission were nothing too grand: replace gaskets, remove & refinish some parts and/or replace with new parts, inspect the Timing Chain Guides, and clean everything thoroughly.
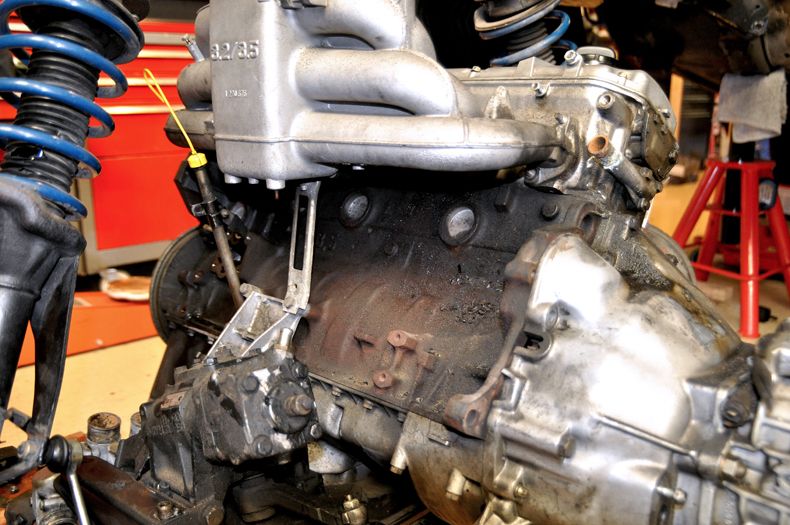
First was the breakdown of the rest to the parts on the block: Intake & Exhaust Manifolds:

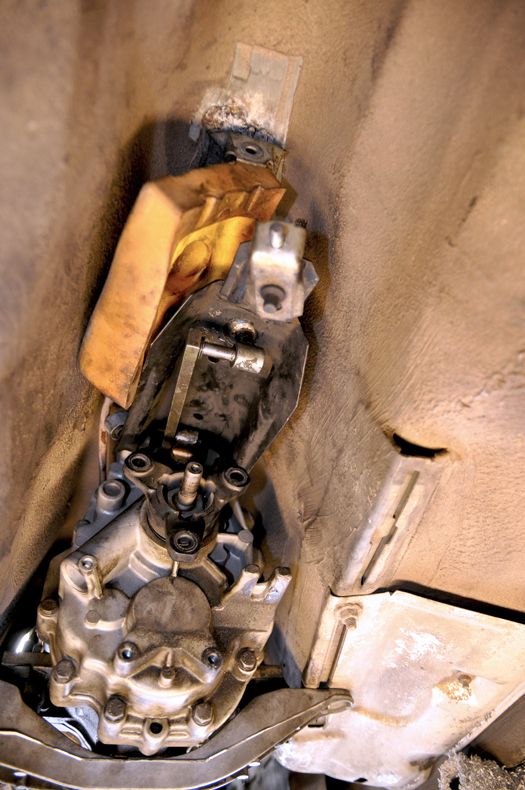
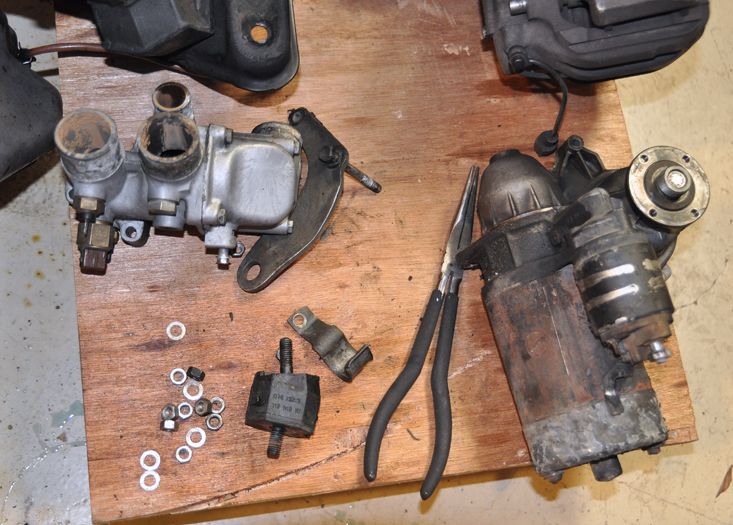
Starter, et al:
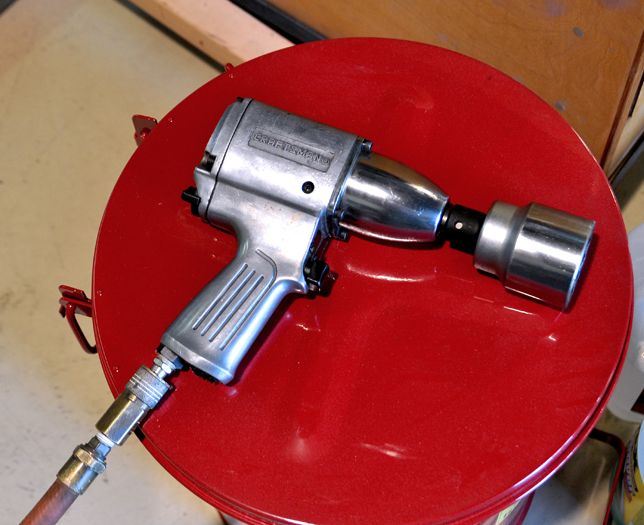
After all that was removed (including the Front Struts), it was time to tackle the famed Front Crank Hub Nut, or “Jesus Nut”. In hindsight I should have loosened this first prior to even raising the car, but oh well. I figured with enough mass of the block and transmission along with it being bolted down to the cart, we would have enough dissipated mass to counter-act the overturning momentum. That was optimistic. First we tried Ralph’s homemade Crank Hub Holder Tool seen here:
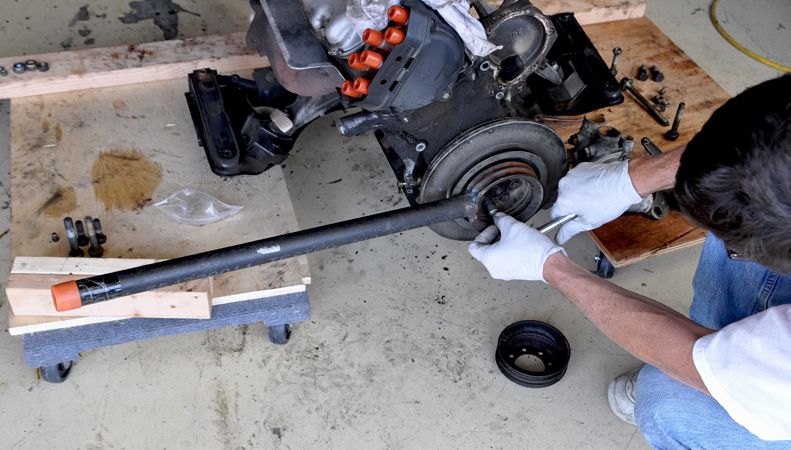
When we applied the counter-force with the 4x Torque Multiplier and 48” breaker bar, his tool squealed like a pig and promptly sheared at the threads of the iron pipe just above his weld (in retrospect he shouldn’t have made the weld at the threaded end; he knows that now).
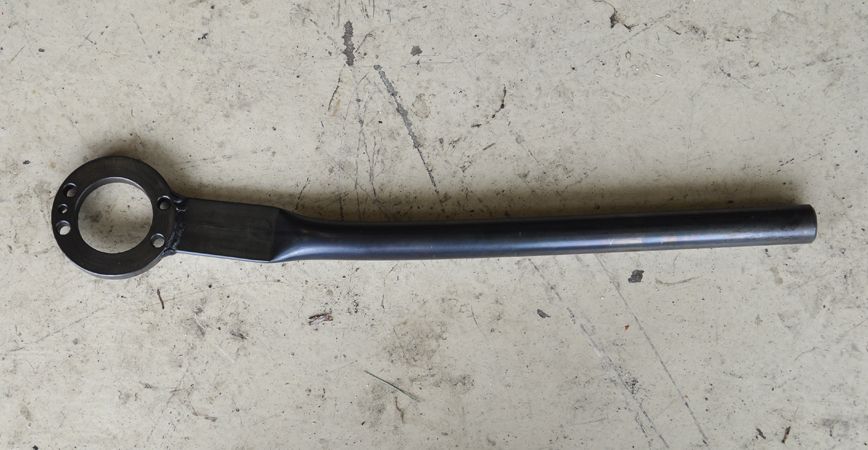
Next up was to locate the proper tool: SIR Tool’s BMW 3043 for the M30. A few days later it arrived and we were back at it the next weekend. Well, while the SIR Tool held (once we added and extension which braced it to the floor), we couldn’t get the leverage we needed and not have the block over-turn the cart (no matter how many of our fat buts were sitting on it). We switched up to pneumatic force after that:
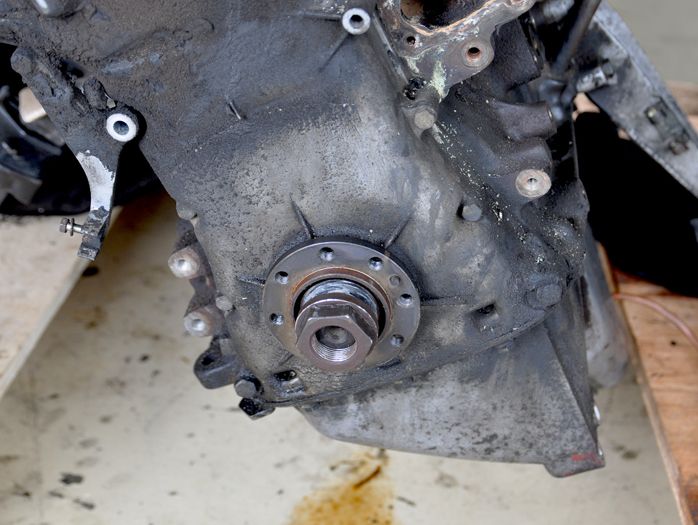
Voila, it worked. But victory came at a cost: the SIR Tool suffered an irreparable blow and ended up looking like this:
SIR Tool and the seller (HandsOnTools.com) stepped up and replaced the tool free of charge, so it worked out. And of course, that nut was off so we off to the races.
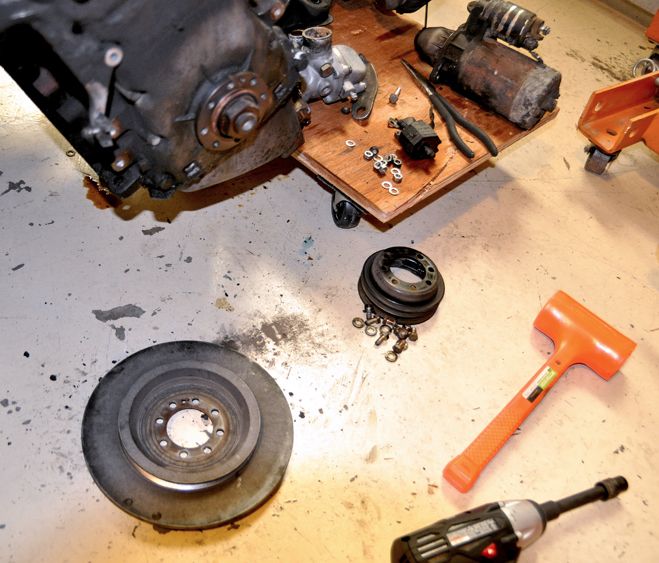
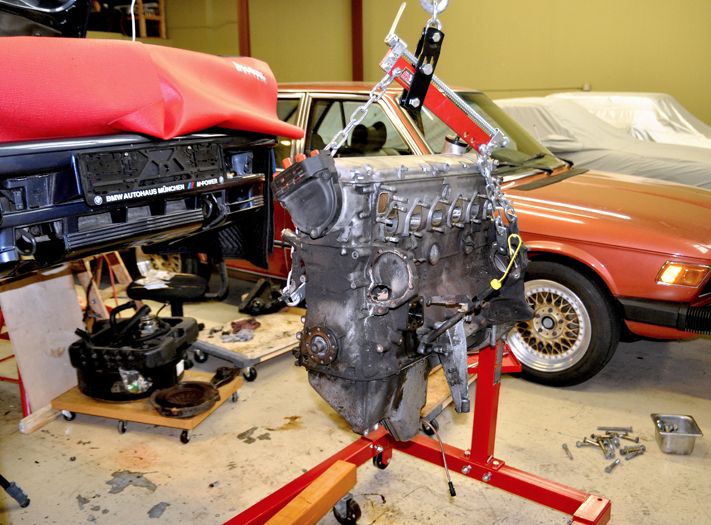
I removed the Transmission and Bell Housing , removed the nuts holding the Motor Mounts to the Subframe and prepped the engine hoist and stand.
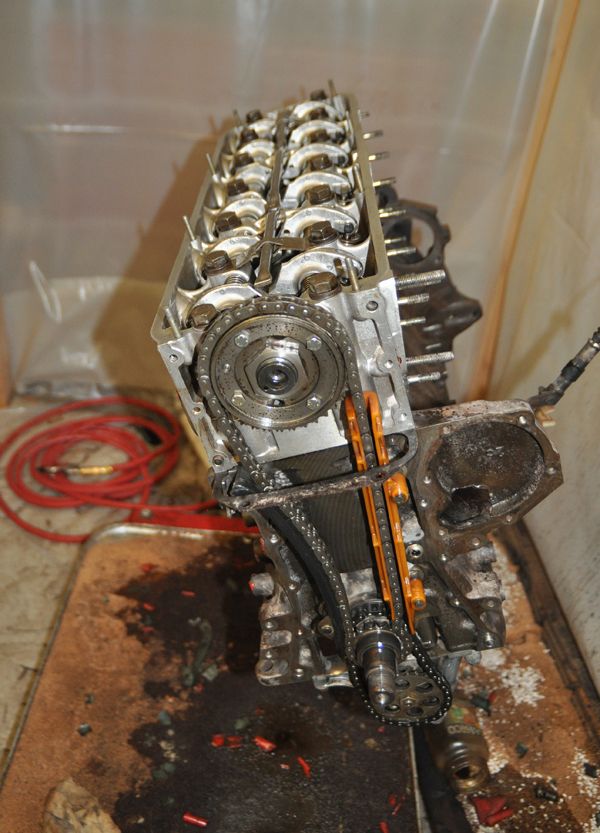
Then get the block on the engine stand for the remainder of work:
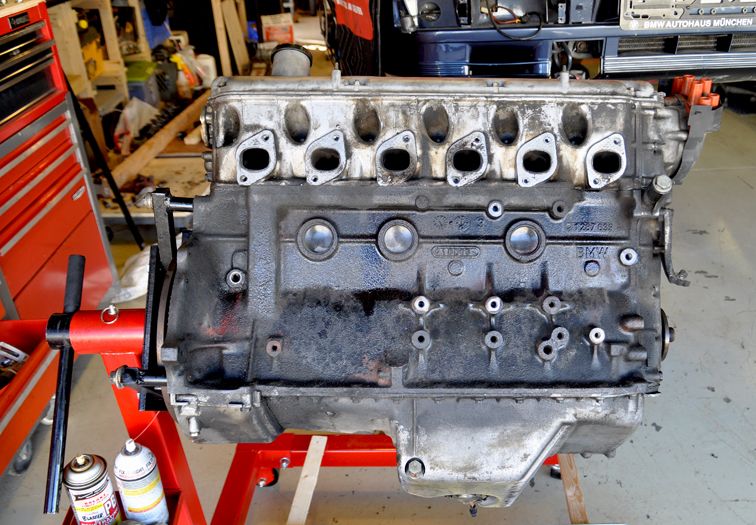
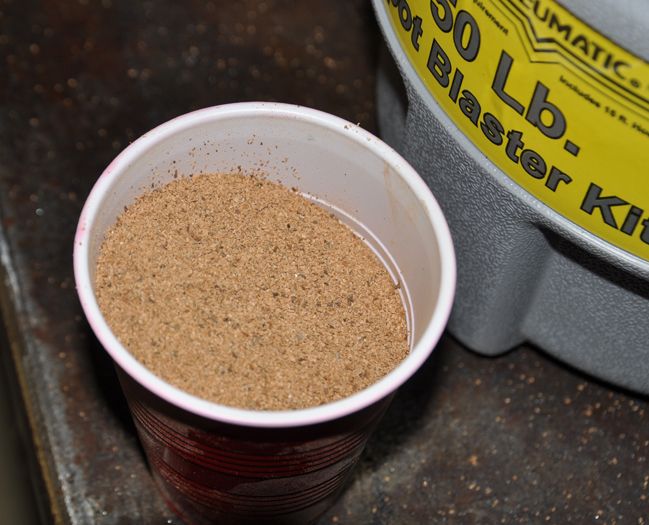
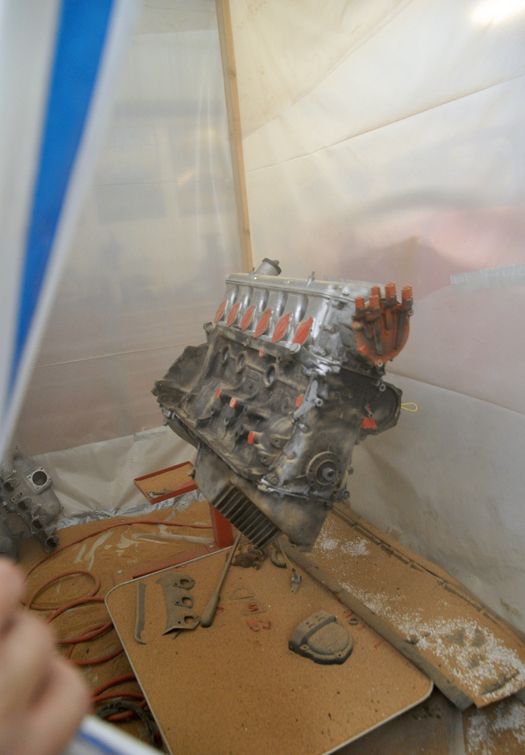
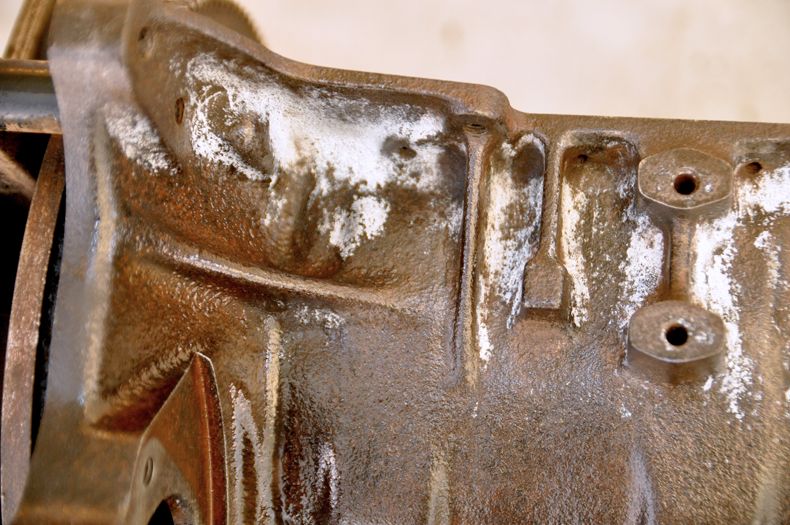
I decided to try using a light blast media to clean off the grime prior to going at it with degreaser. I used this setup: Walnut shell in a light duty small spot blaster:
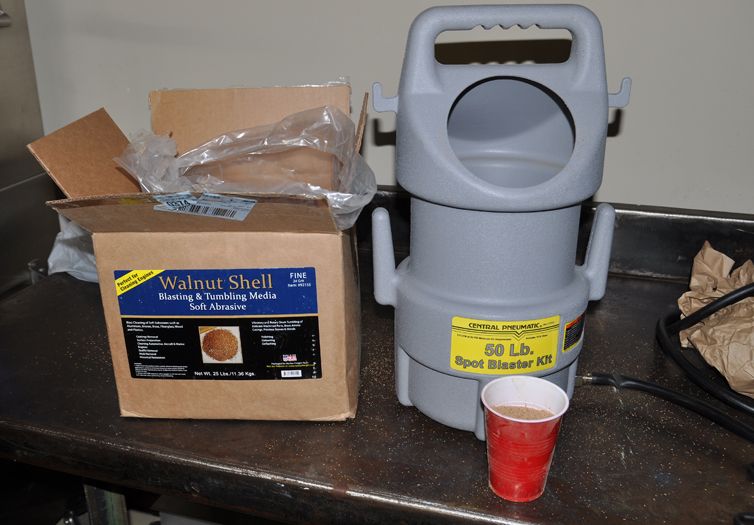
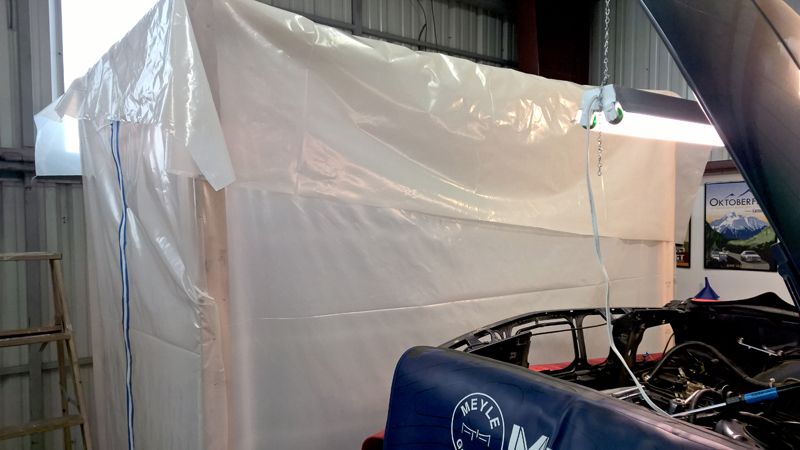
This little setup works just okay and really could benefit from a more powerful compressor behind it (we have yet to get our 5hp Sanborn up and running). But for a light general cleaning it does the trick once you get used to the eccentricities of this blaster. The blasting was done to cut my degreasing and scouring down to a minimum. For that purpose, it worked rather well. In order to pull this off without sending media all over the hangar and my hangar-mates’ cars, I constructed a Dexter-style clean room to contain everything:
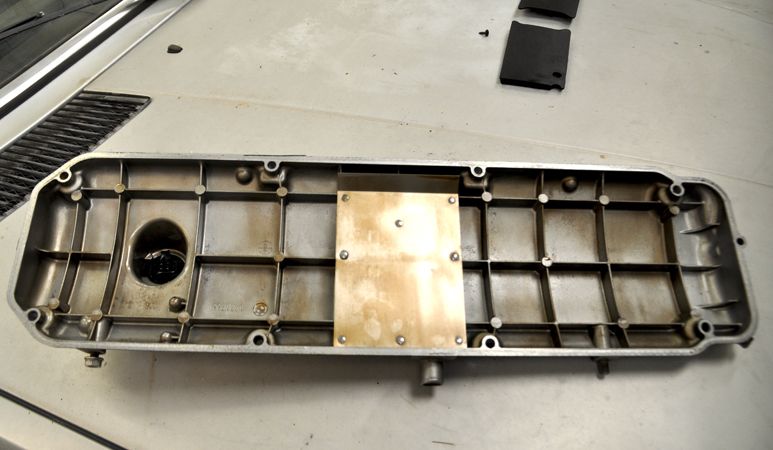
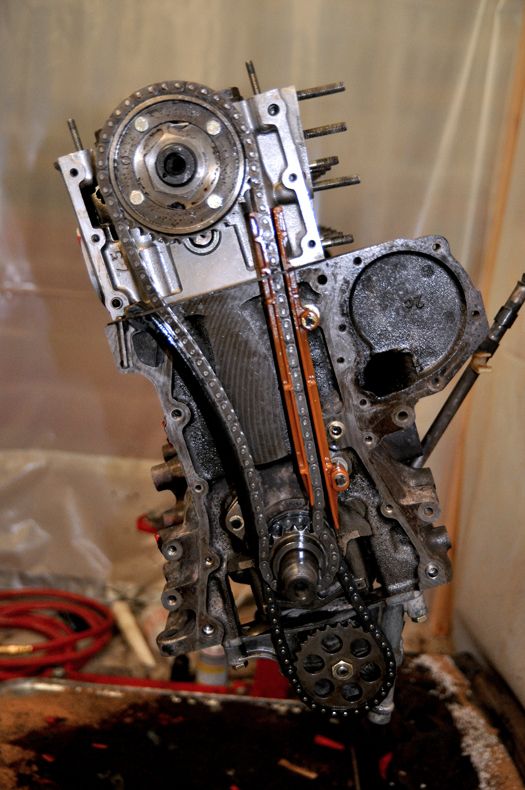
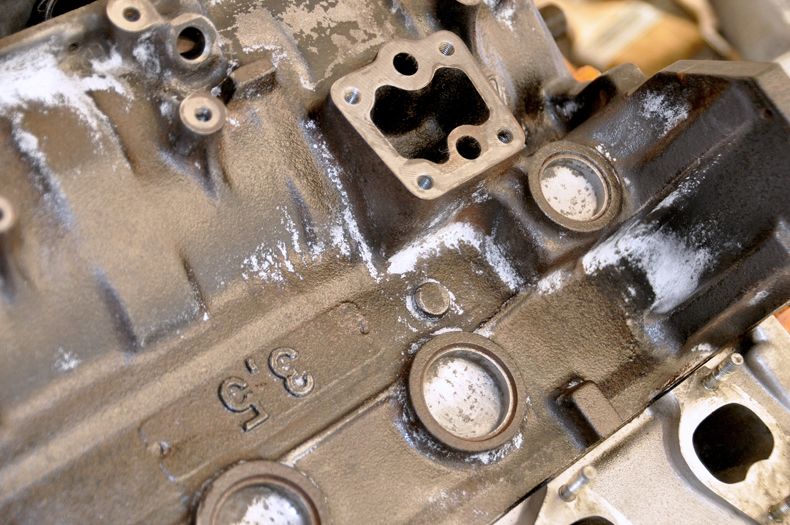
After the blasting, I removed the covers: Valve, Oil Pan, Timing:
Surprised to find the Valve Cover this clean underneath. Clean living I suppose:
The rest of it was as I was suspecting:
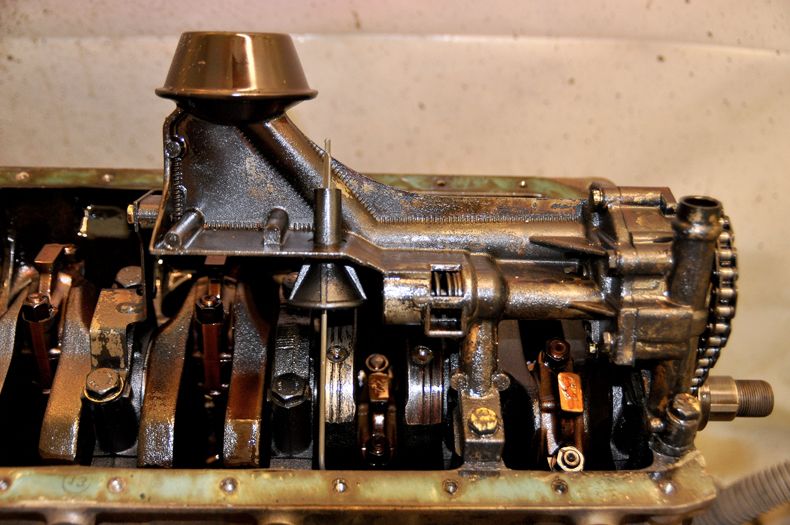

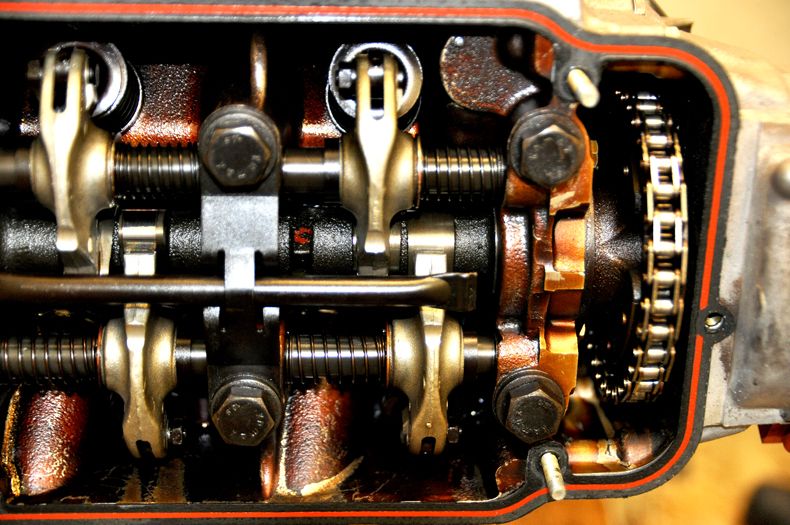
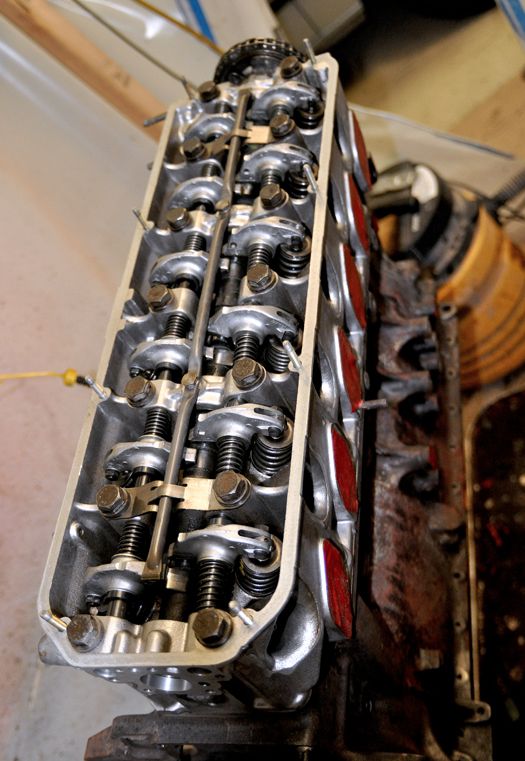
The head was rebuilt back in 1989 at just 57,620 miles with a new Camshaft, Rockers and Lifters. Don’t really know why (suspect overheating), there were no notes on the service invoice. But the Lifters all have an ’88 date stamp on them so it checks out. The rest of engine and car are now just at over 196,000 miles.
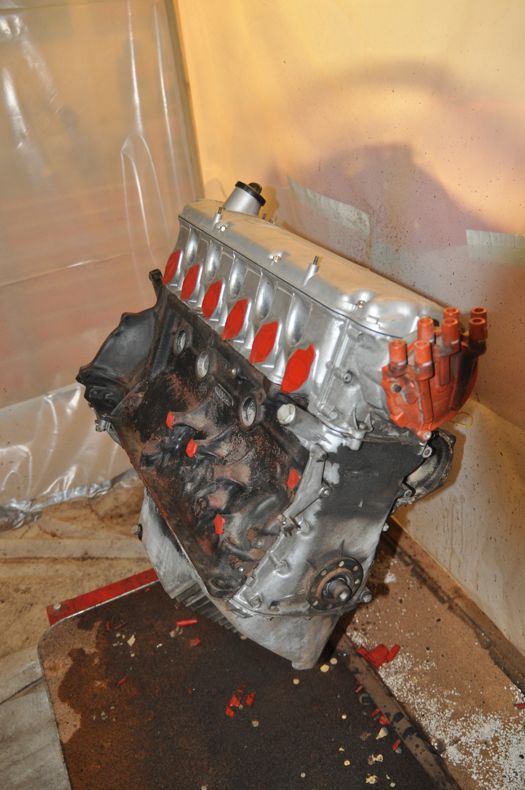
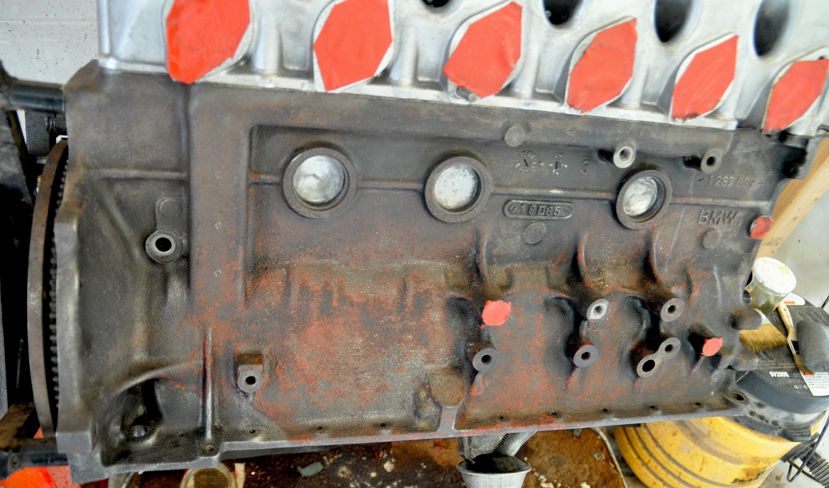
This booth and walnut shell worked well for the degreasing that followed also:
And block painting: Gloss Black from Bill Hirsch Automotive Coatings:
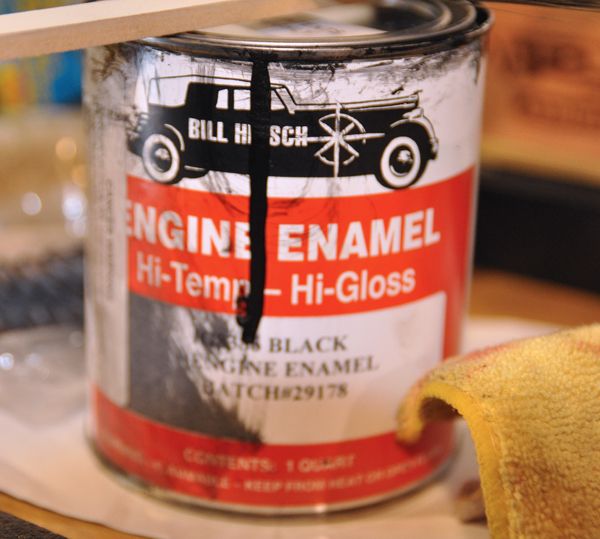
I’m pretty impressed with this stuff: it went on smooth and flowed really well (brushed). It has the reputation of being like iron when it cures. I had prepped the block beforehand after the blasting (degreased, wire brushed, sanded) then treated it with their Metal Prep spray. This attacked the rusted areas and converted it to a zinc surface which then could be painted directly.
The results stand for themselves:
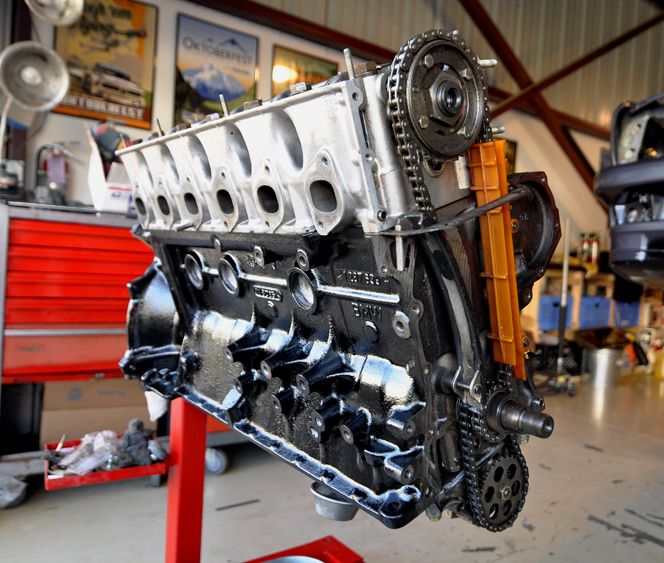
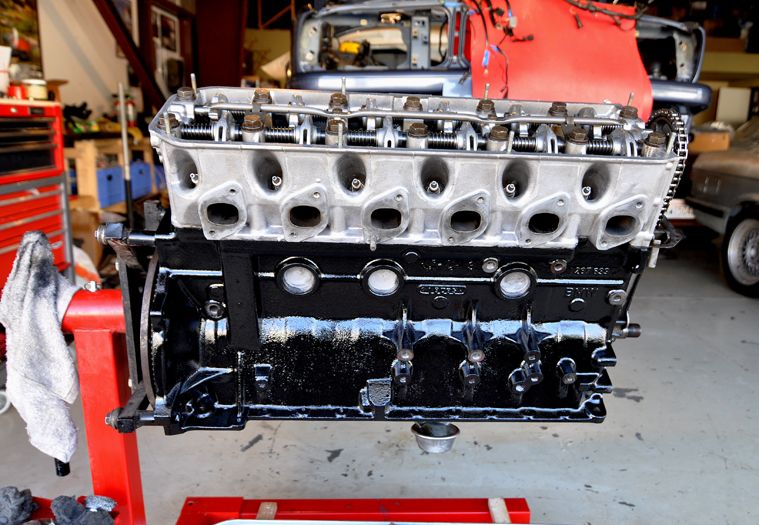
Ready to put it all back together.
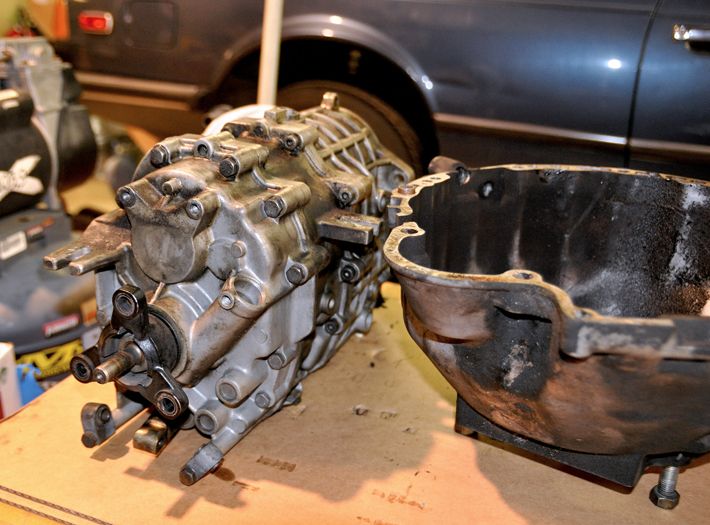
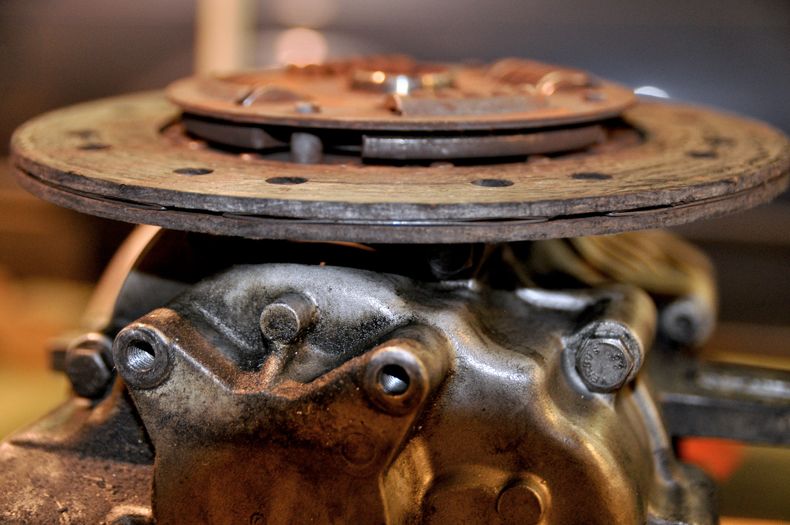
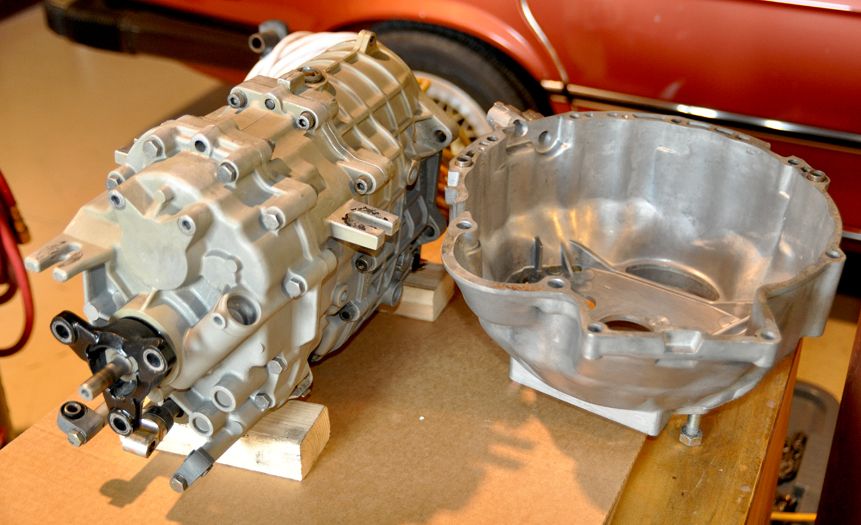
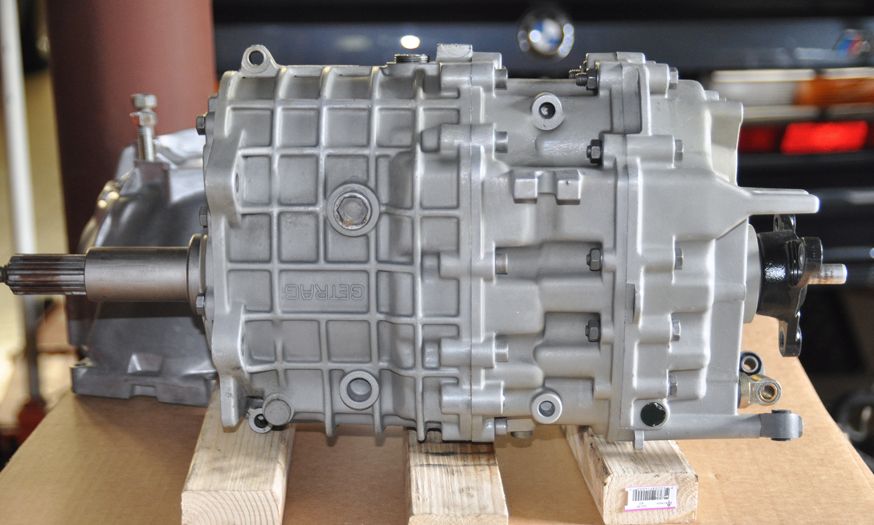
In the meantime, time to pull the transmission and clutch apart to see what’s what and cleaning:
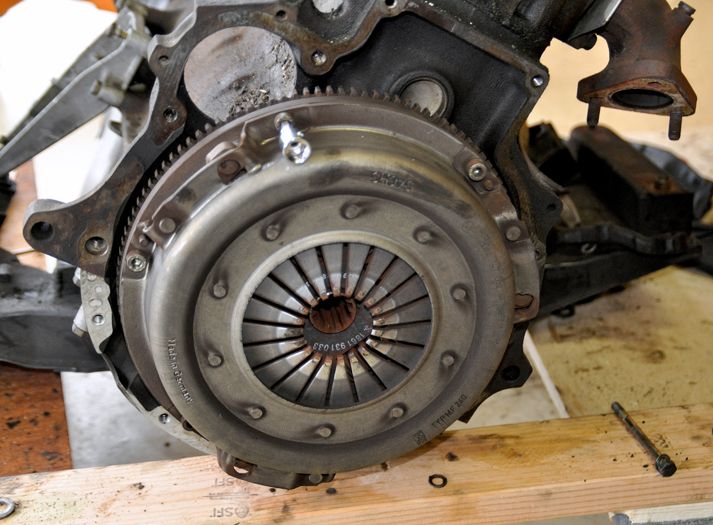
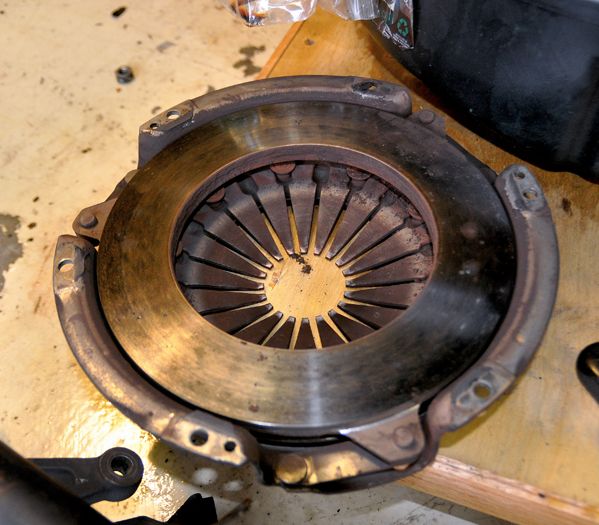

Clutch still looks pretty good with a lot of disc still left:
I will replace the Clutch Fork, Spring and Ball Pin while I’m in there. Cleaned the case and Bellhousing up and ready to go back together. I’m probably going to powder coat the Bellhousing (since everything else down underneath is powder coated):
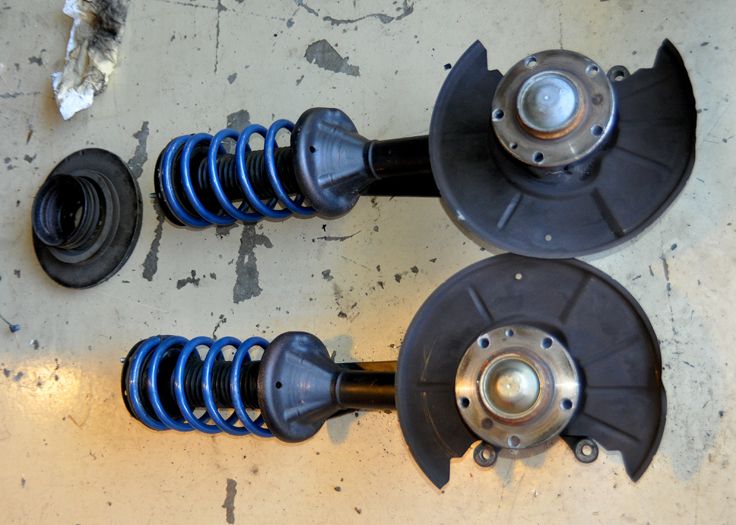
PART IV: FRONT STRUTS
While all that with the block was going on, I was multitasking by working on the Front Struts. After dismantling them from the Subframe, it was time to tear them down. The existing Dinan Stage 3 Suspension will remain so the Springs and Bilstein Sports will go back in with new mounts and hardware.
The goal was to get them apart to achieve the following:
-New Spring Plates & Pads
-New Upper Strut Mounts
-New Wheel Bearings (even though the old ones still seem to be pretty smooth)
-New Brake Back Plates
-Clean and Powder Coat Strut
Tear down:

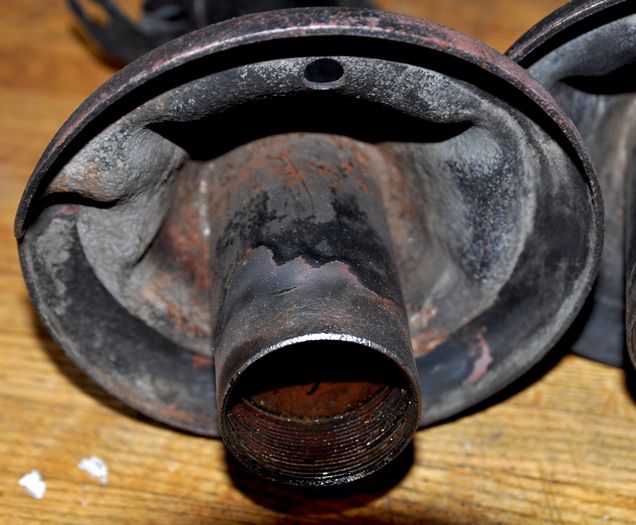
Time to get the Axle Hub Nut off:
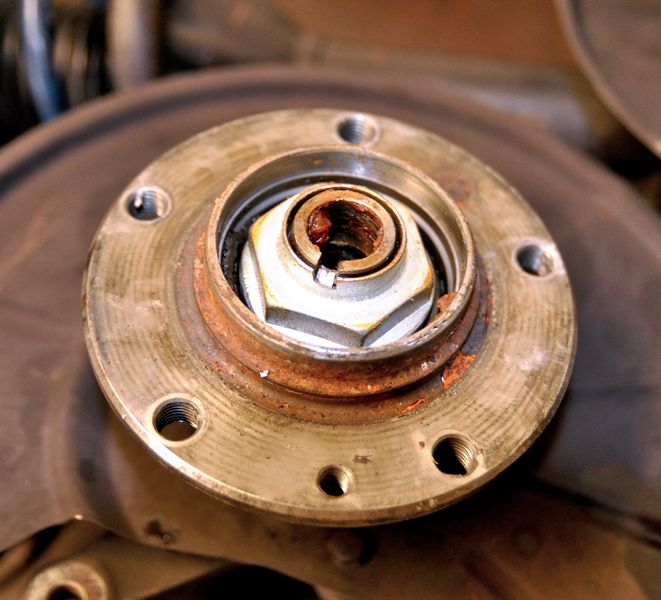
I had to scramble a bit to find someone that had a 46mm socket on a shelf so I could work that coming weekend. I wasn’t looking ahead and didn’t plan to pick this up earlier; luckily my local O’Reilly’s ordered it from their regional warehouse and I had it the next afternoon. Time for a little pneumatic persuasion:
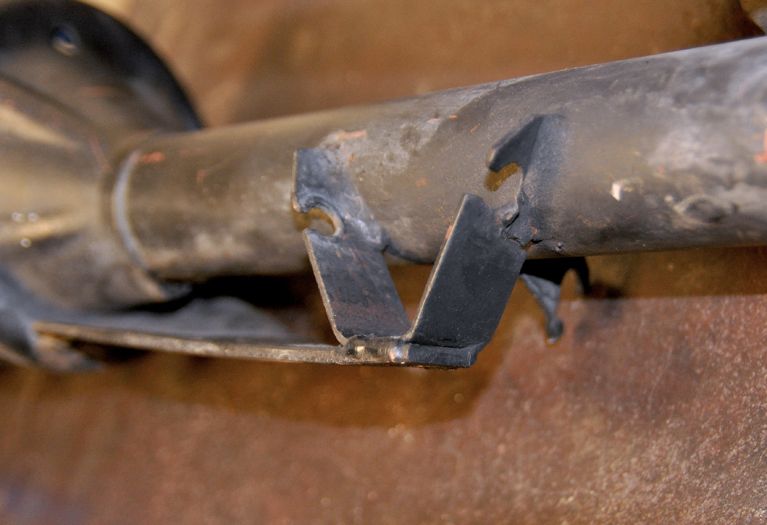
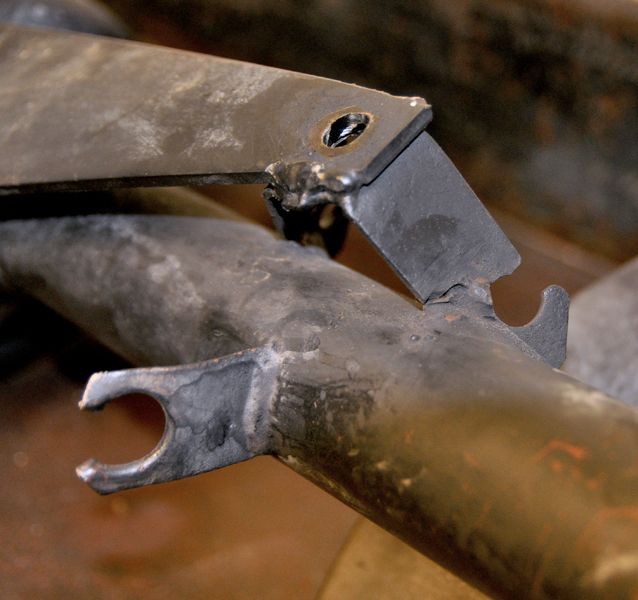
Once I got the struts apart, it was clear they needed some attention. The reinforced driver’s side Sway Bar Mount was cracked at the rather sloppy weld. That was sent off to Aero Welding for a quick fix along with the M5 Subframe that needed the Steering Box Mount reinforced.
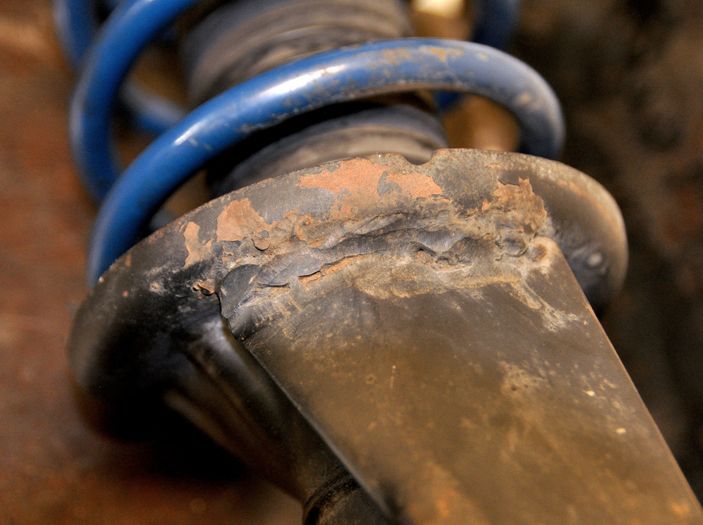
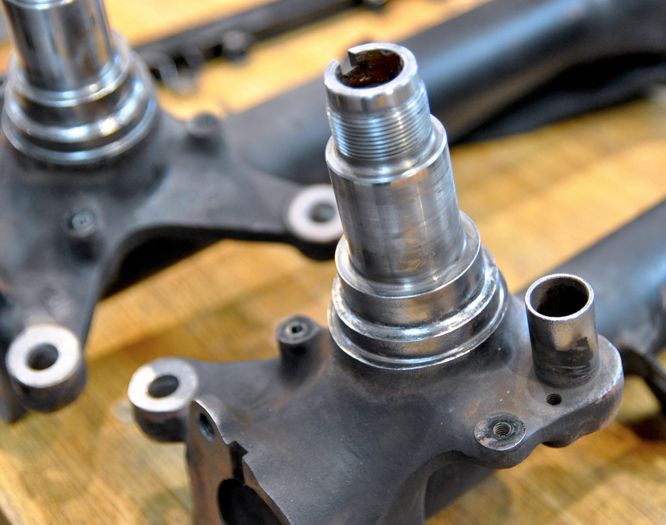
The bottom of the spring cup was starting to show ugliness also (both struts showed this):
Spent some time cleaning up the bottom of the spindles :
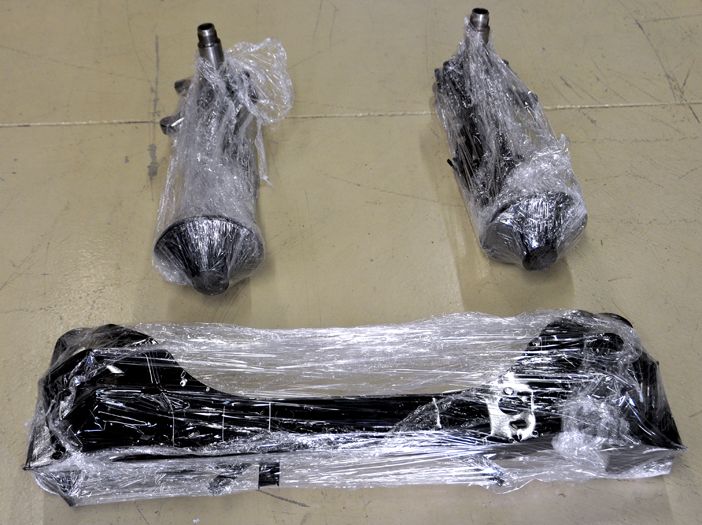
Struts are back from Powder Coater and the Brake Back Plates have just arrived from Silver Springs so it’s time to start re-assembly.
PART V: BRAKES
This car has a Stage V Big Brake Upgrade (E32 750/E34 540) which I contemplating changing up to E34 M5 Front Brakes, but opted to stay with the existing brake setup. I will also be replacing the existing older style E32 Rear Calipers this go around with newer E34 Calipers. Included is a new E32 Master Cylinder also. New UUC Stainless Steel lines were put in when I did the Rear End Overhaul.
(I realized I didn’t take any photos of this step since I had them apart in about 15 minutes and my hands were full at the time). I just got them back from being Yellow Zinc plated, so time to rebuild them and get them back in; replacing the rears will probably be one of the last things I do.
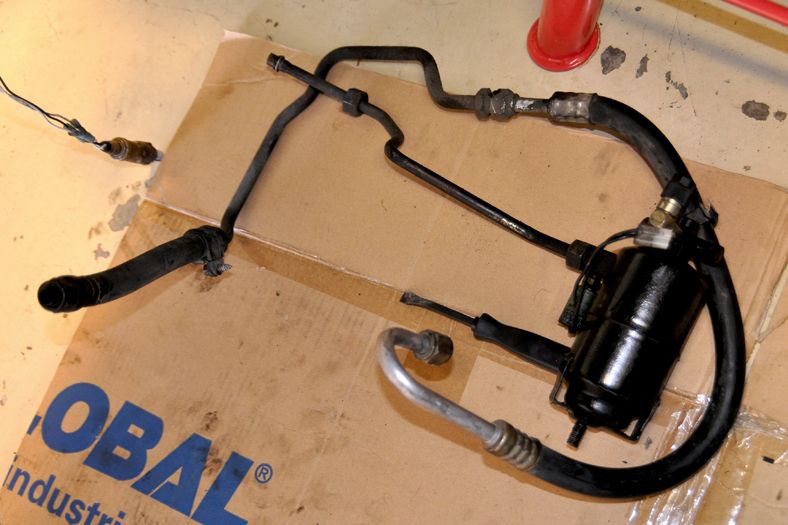
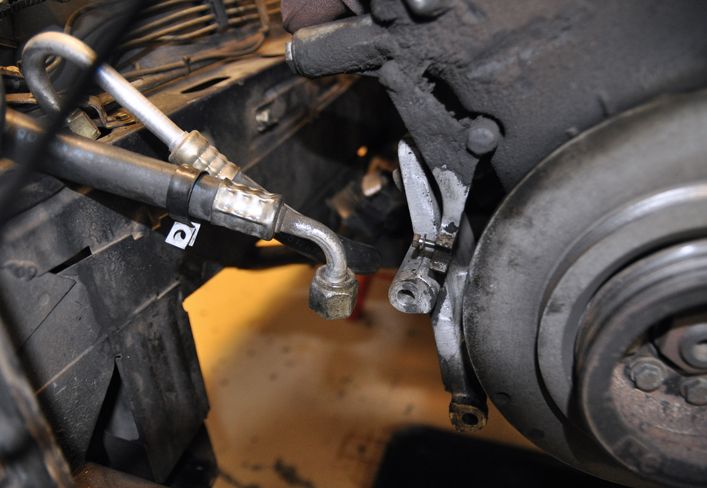
PART VI: HYDRAULIC SYSTEM
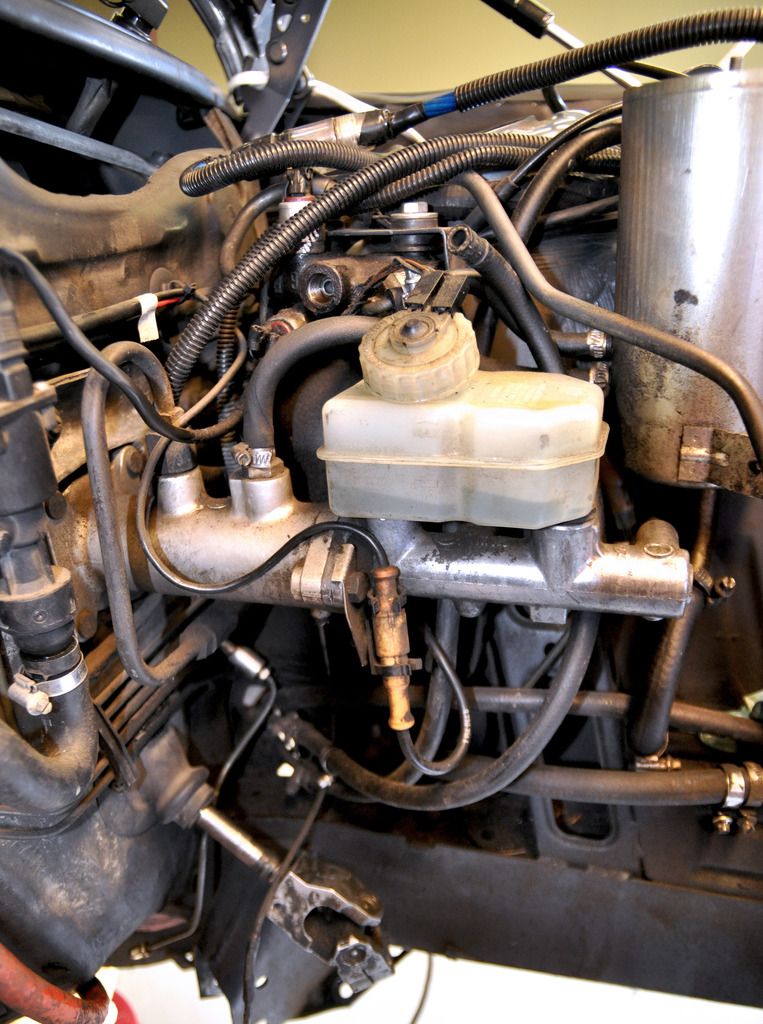
One of the primary goals of this exercise was to be able to replace the 32 year old, leaking Hydraulic System (okay I admit that it was really to clean up after a 32 year old, leaking Hydraulic System, but that’s my OCD side talking). With the engine out and the car raised this is a significantly easier task, but still a messy prospect.
Tear Down:
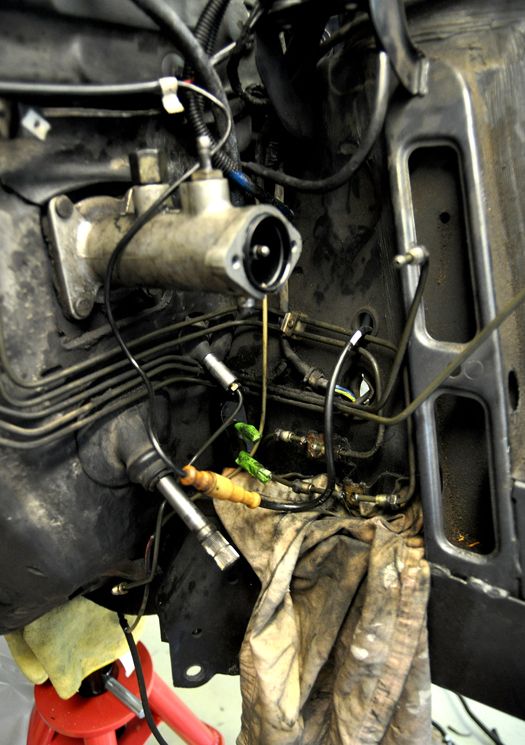
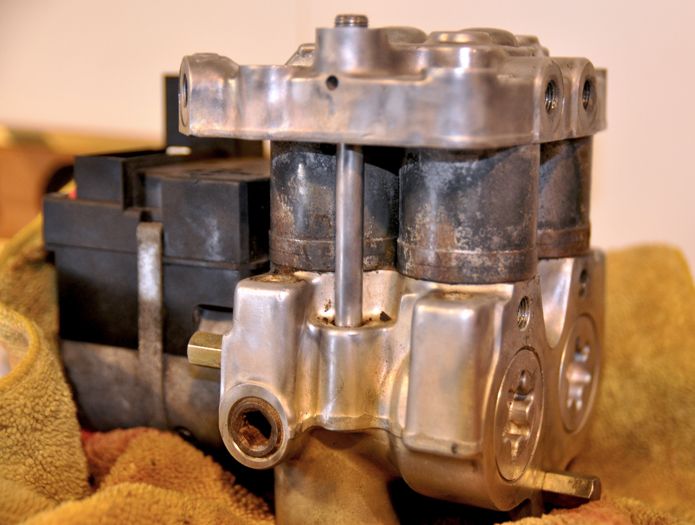
Including the ABS Pump (which was a complete mess):
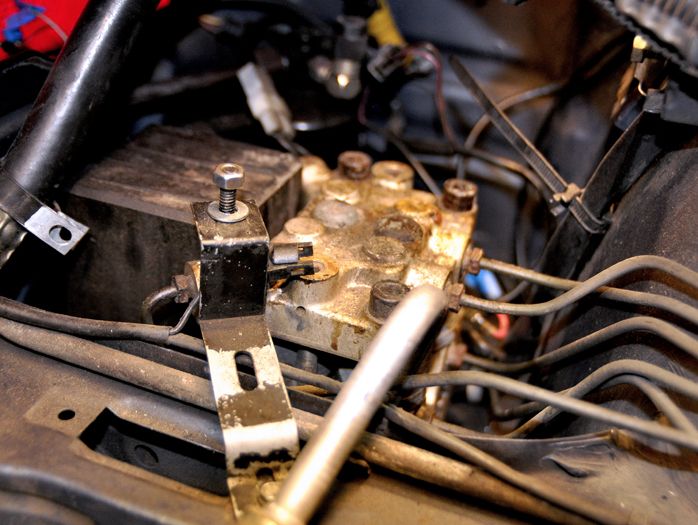
I’m still debating whether or not to complete taking the pump apart and cleaning out the insides (as per this:http://www.mye28.com/viewtopic.php?f=3& ... h#p1339558) Since I’m likely to refinish and repaint the pump along with re-plate the case screws, taking apart the last few elements on the pump is only a few more steps. The pump does appear to be weeping, so that may settle my own debate right there.
As to rest of the system I began with disconnecting the hydraulic lines from the ABS Pump to the Master Cylinder & Booster, removing the connecting hardware, and removing Distribution T’s for replacement. Cleaned all the connection fittings as well on the hard lines (they were pretty gunked up and corroded at the ABS Pump):
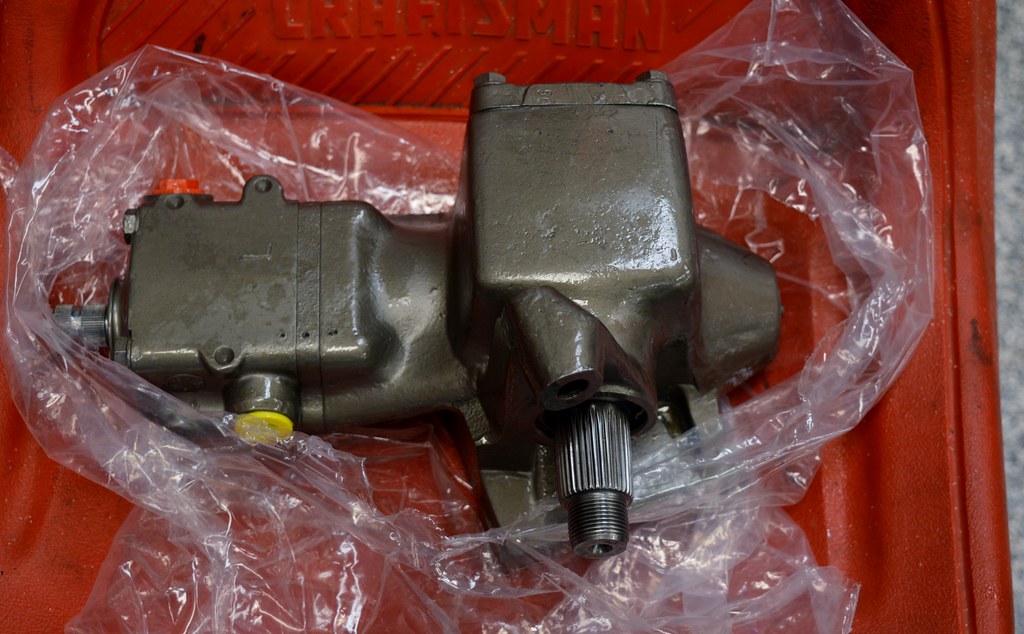
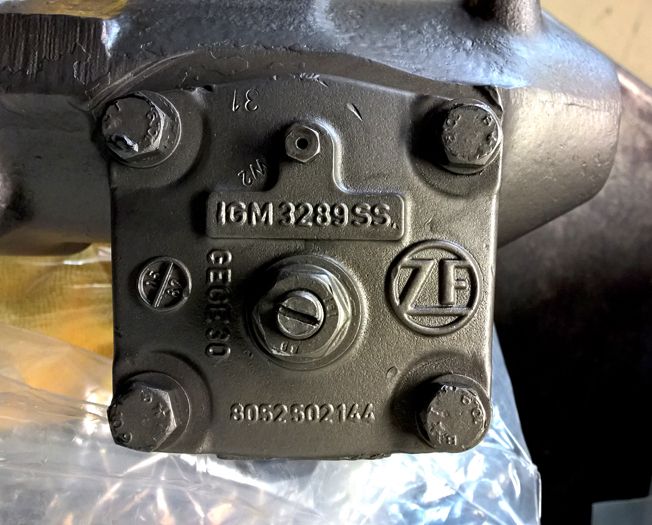
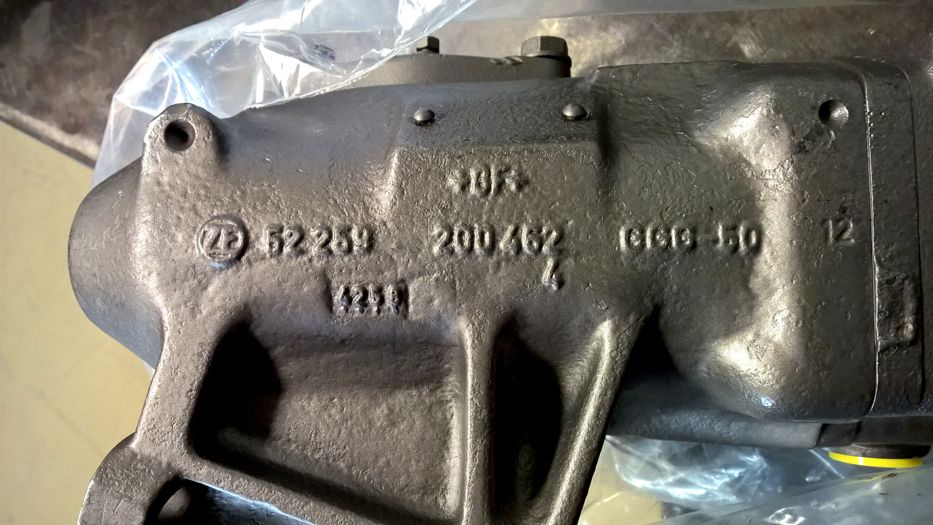
I have a rebuilt M5 Steering Gear/Box (well it’s supposed to be one at least); it’s ready to go in:
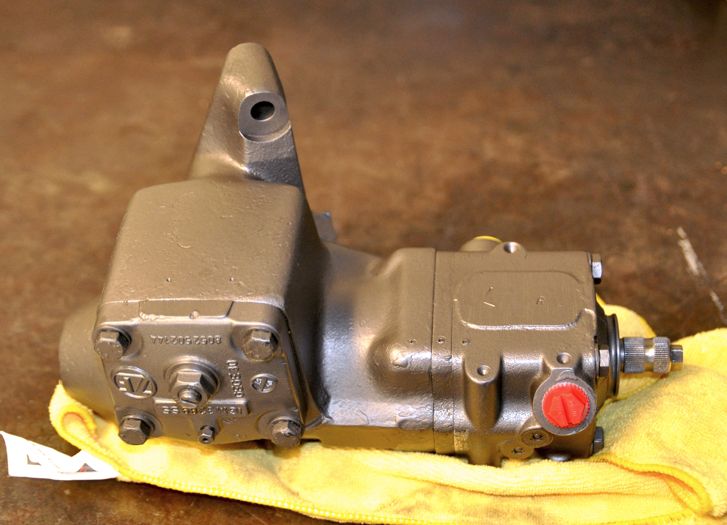
Without the ID plate, all I have to go on are the markings on the outer case:
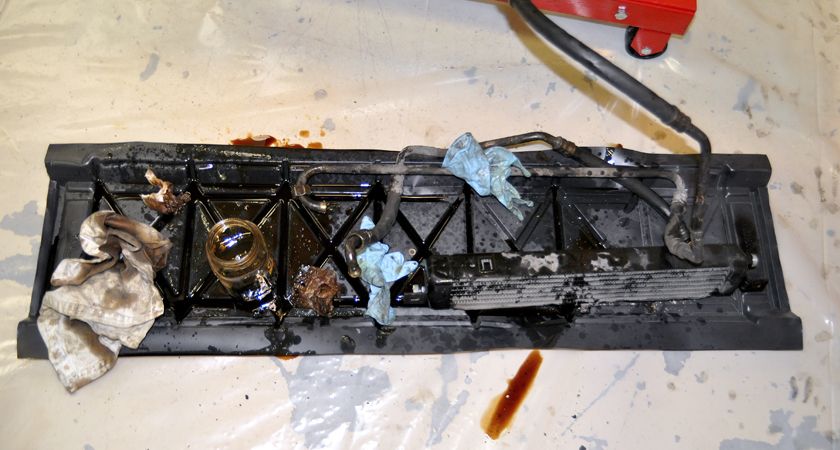
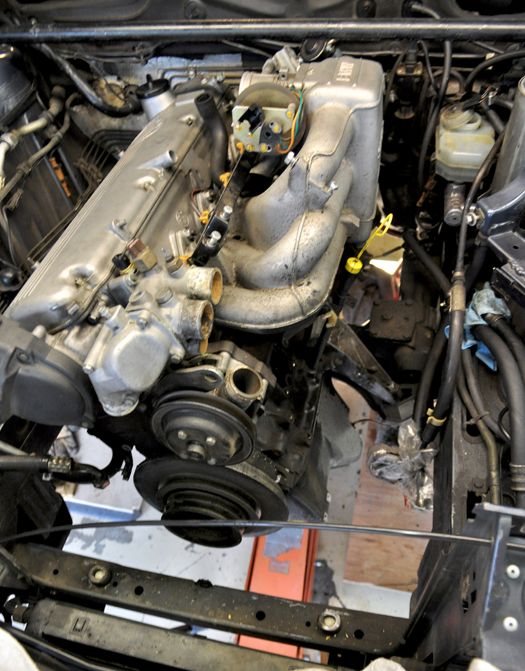
PART VII: CLEANING ENGINE BAY & UNDERCARRIAGE
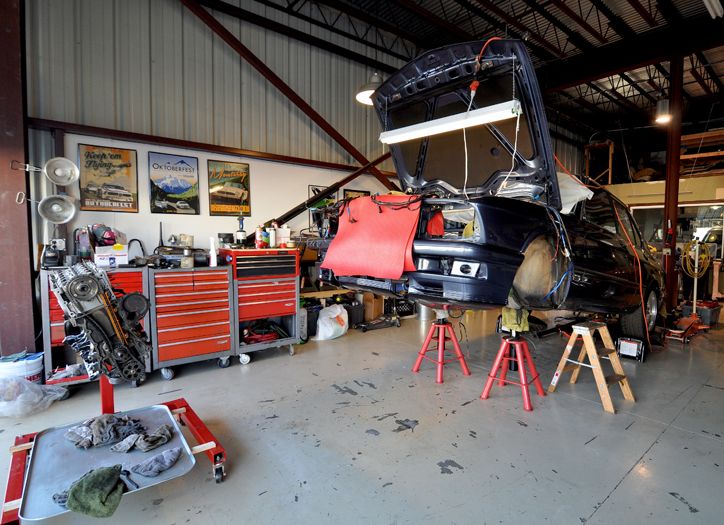
This brings us up to last weekend; while you all were enjoying your days off, visiting with family & friends, taking some time to remember the fallen, I was neck-deep in grime and cleaning solvents. Since one of the main goals of this exercise was to get this car to Concours level, it meant getting dirty; very dirty. And wet. This is what the hangar looked like all weekend:
First it was the wheel wells:
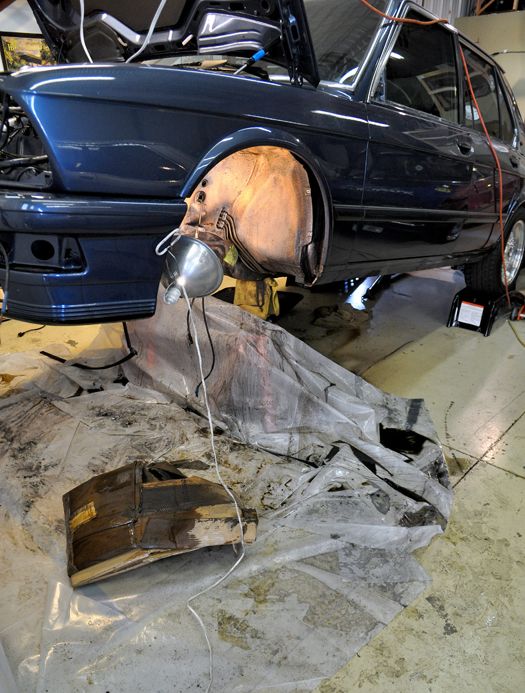
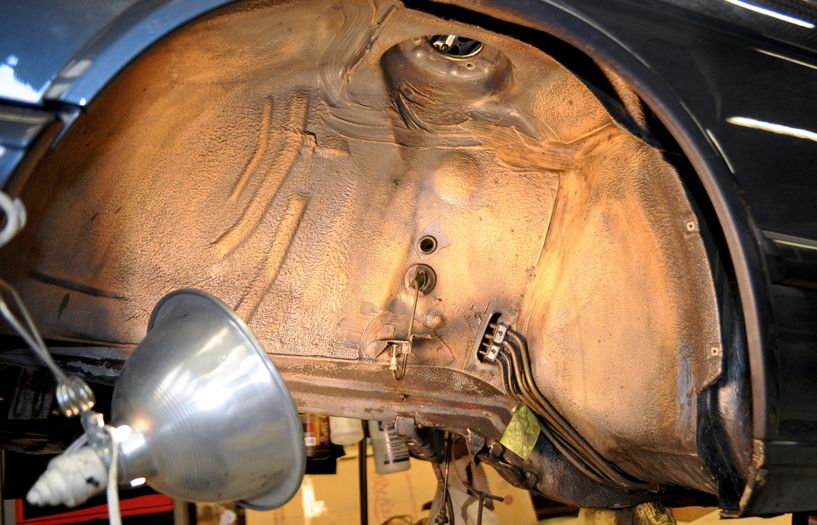
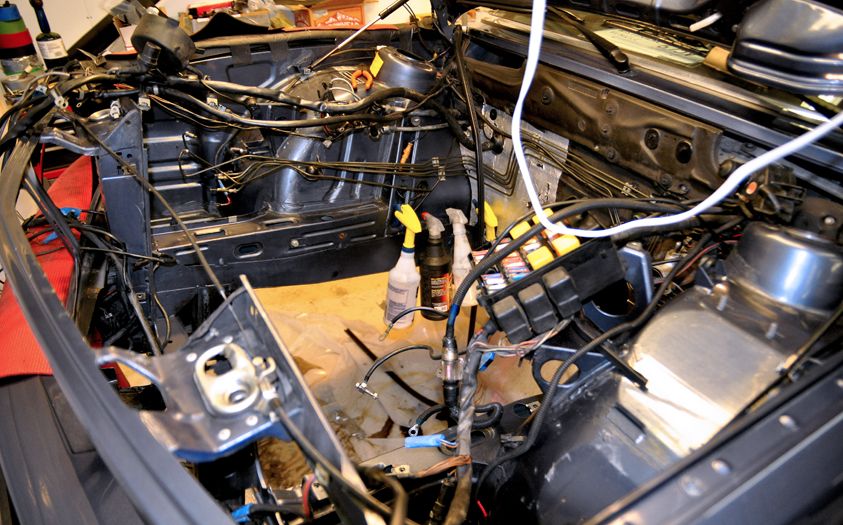
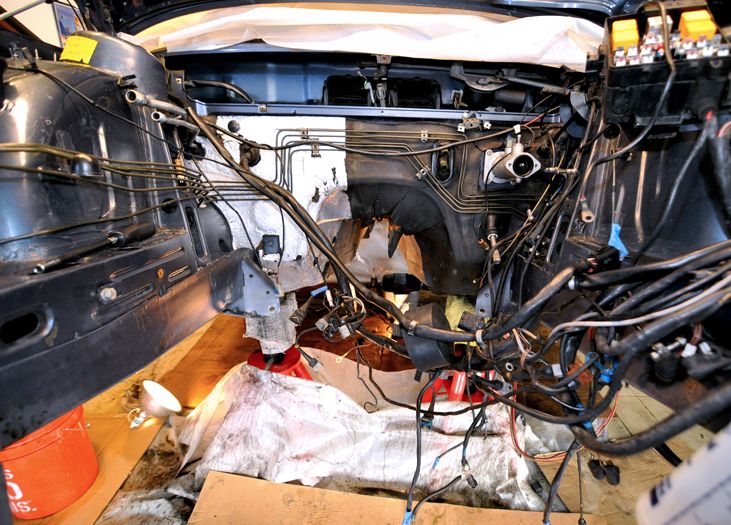
Then it was the engine bay:
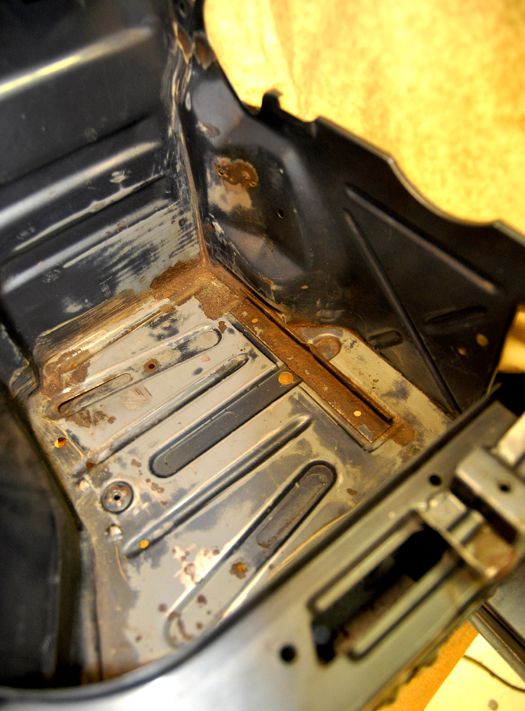
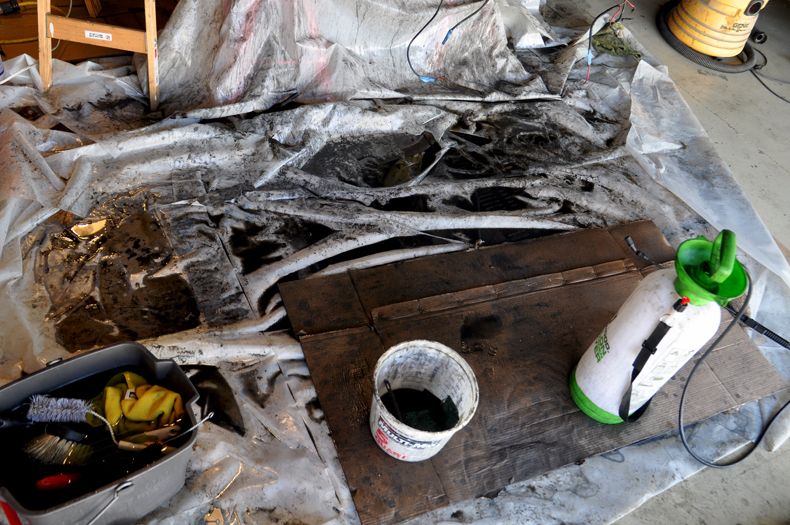
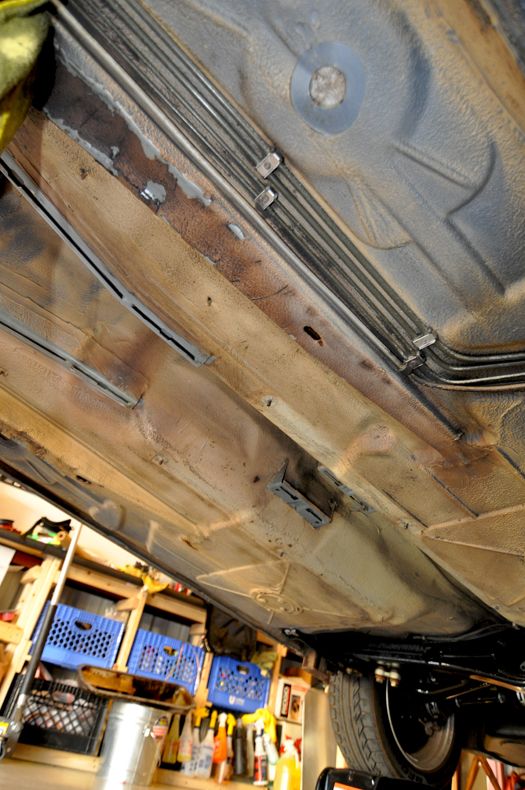
Then it was time to get really messy and get under the car. This was the hardest car cleaning task I have ever taken on. I was a sight: Tyvek suit, full face respirator, and industrial chemical full sleeved gloves; wish I took a selfie. But it was necessary to do this: first what 32 years of grime looks like:
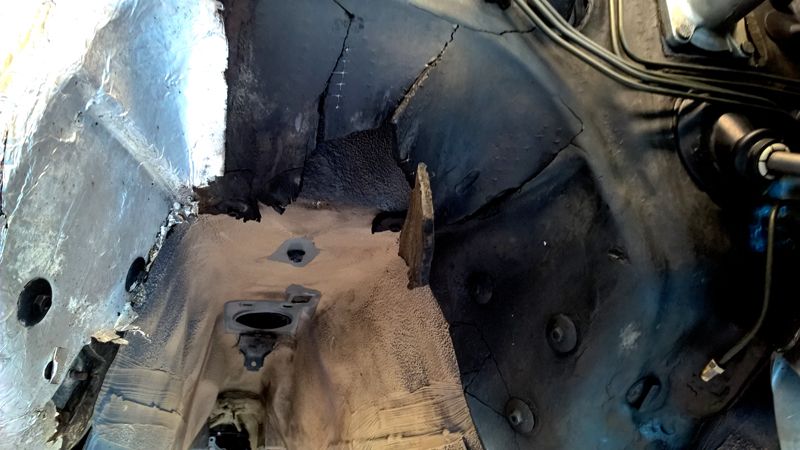
What progress looked like as you work down through the layers:
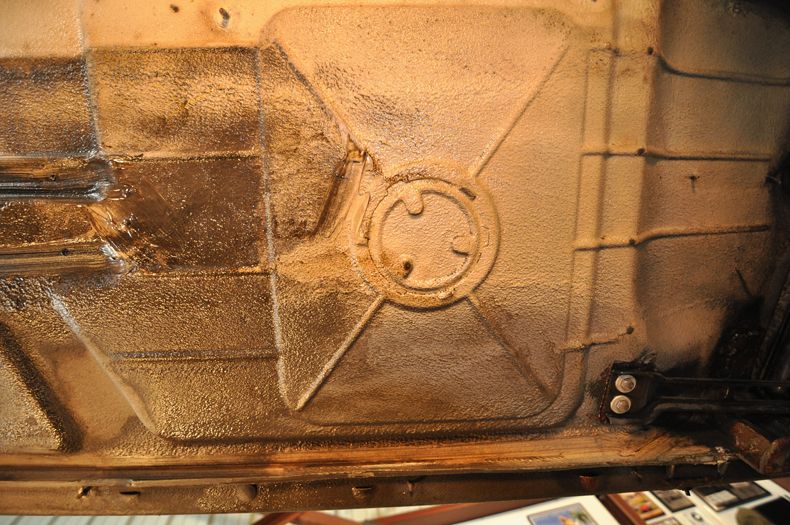
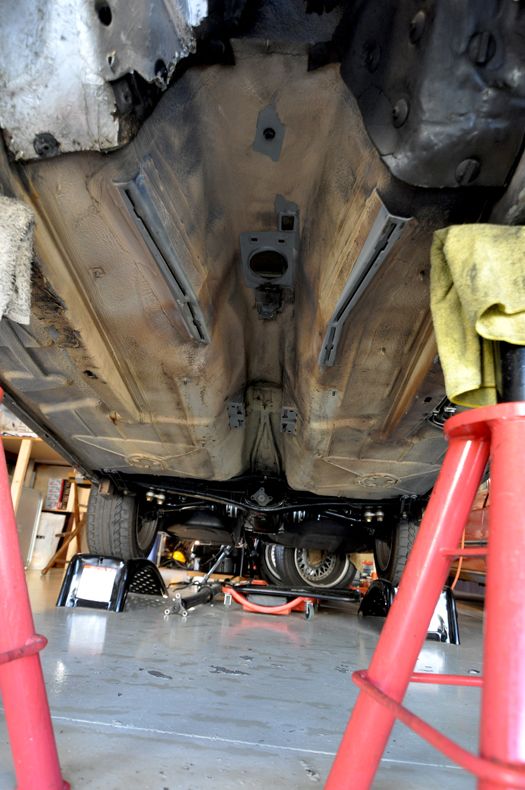
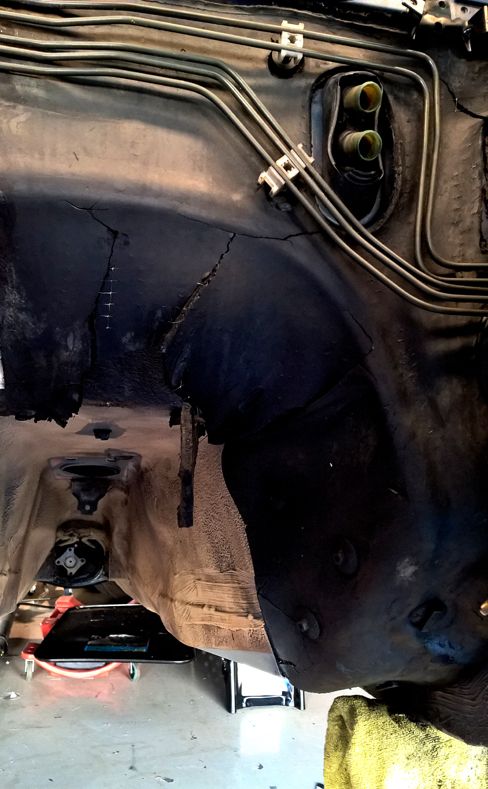
Then more or less completion:
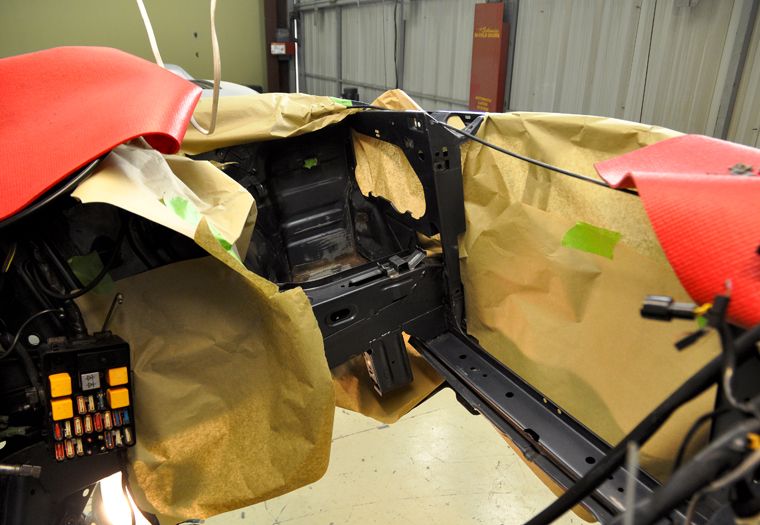
After cleaning the engine bay and specifically the firewall I have to make a decision how to deal with the crumbling rubber sound & heat proofing. After this many years it’s kind of giving up the ghost:
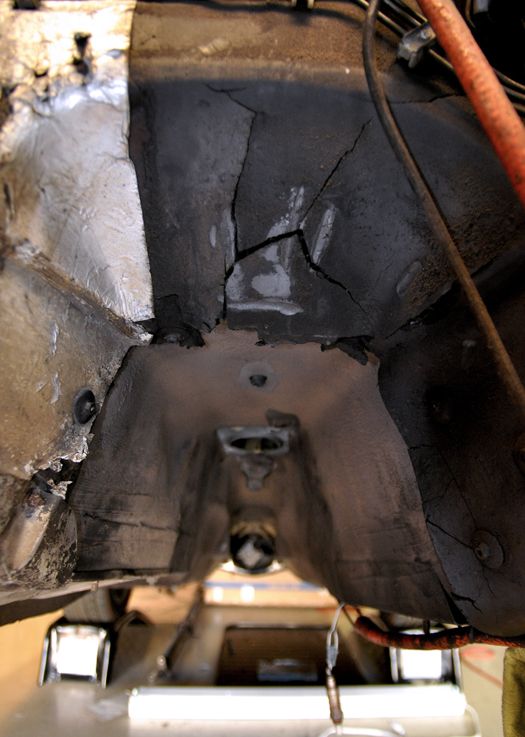

I wasn’t planning on removing all the stuff on the firewall to be able to replace it all, so I may just trim off the lower section of the rubber parts and clean it up as best I can. I may look into some other rubber matting of sorts that I can but on the lower section into the transmission tunnel.
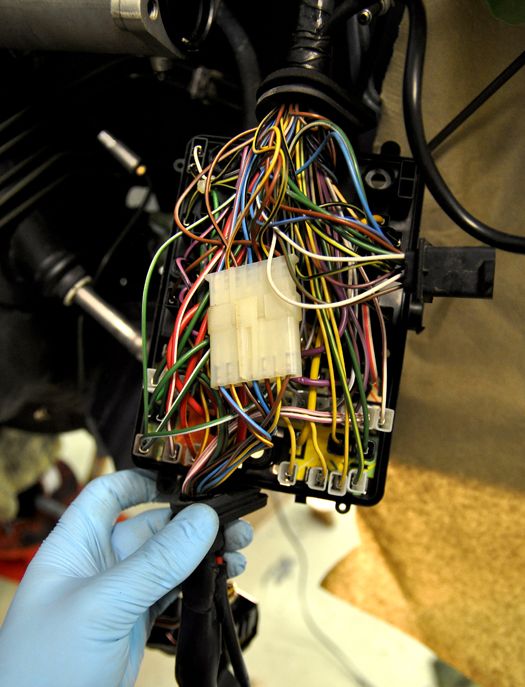
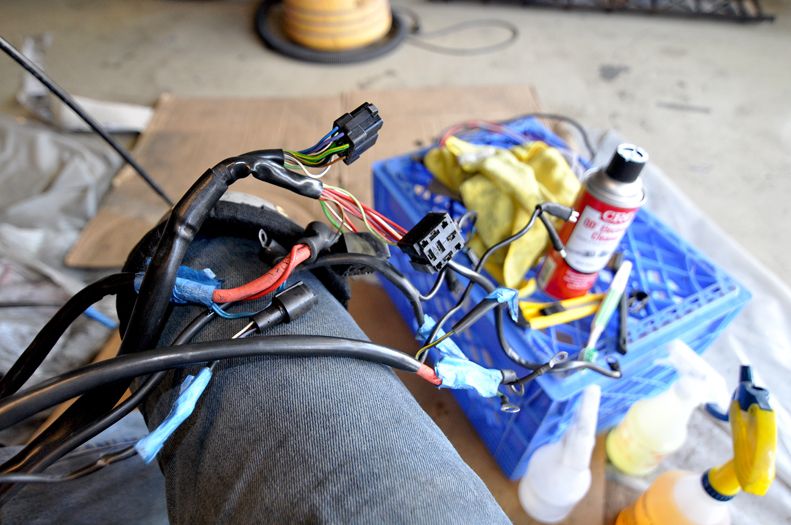
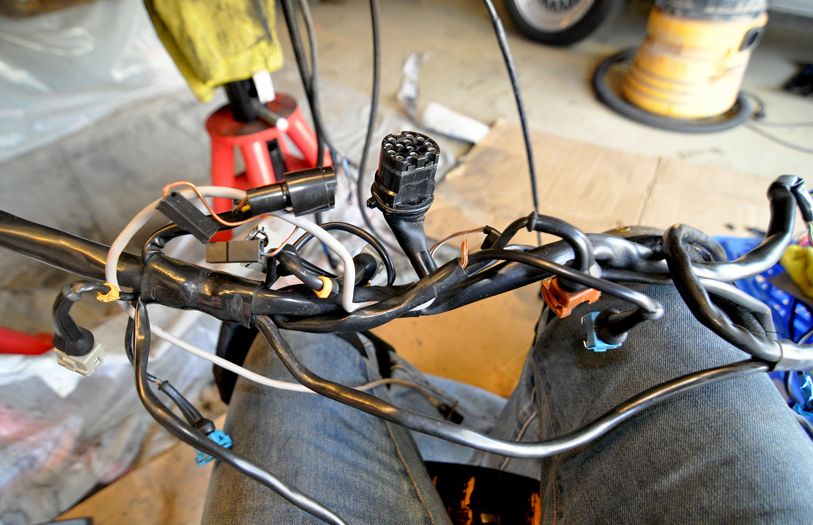
Monday saw me cleaning all the wire harnesses; at least I got to sit down in a chair for most of this:

So that leaves me up to this week. After cleaning up after the weekend (2 hours of mopping and the Hazmat Unit arriving), it looks ready for the re-assembly phase:
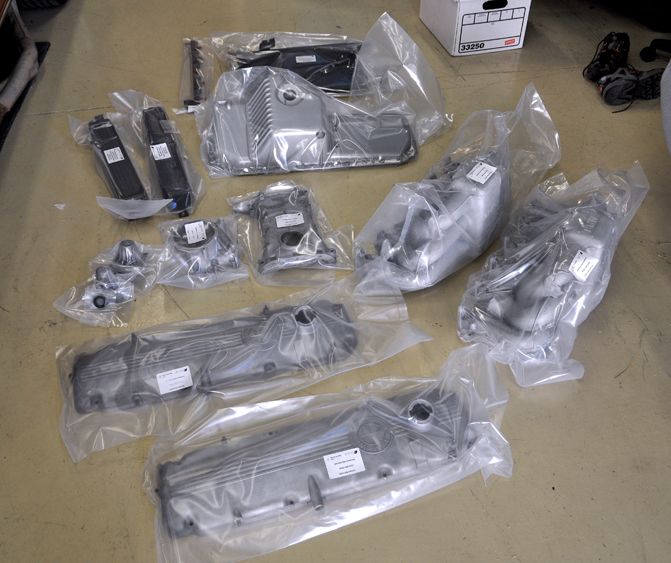
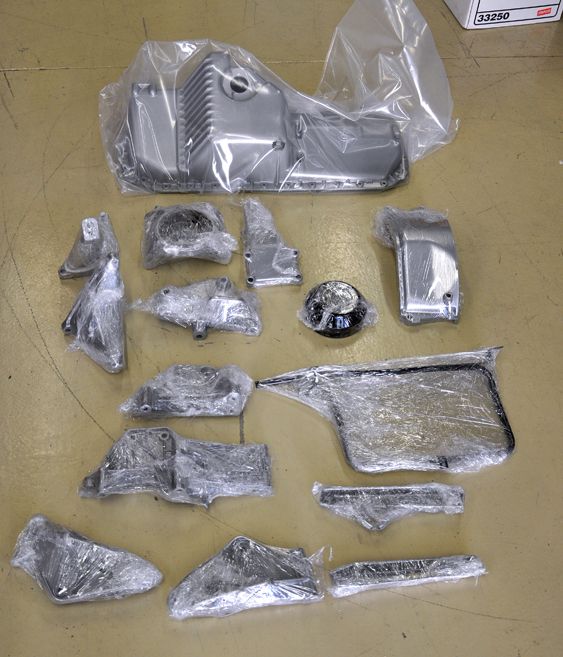
I got a lot of parts back the both Ultrasonic cleaning as well as the powder coaters. I just picked up the Yellow Zinc plating yesterday:
Up for this weekend is some engine bay paint touch-up and rust remediation (battery compartment), make a decision on the ABS Pump and start reviewing for the Fuse Box replacement.