Re: 1985 Arktisblau M535i Renovation - Progression
Re: 1985 Arktisblau M535i Renovation - New Year's Update
I never knew shift rod joint failure was a problem.
-
maybeillbuyit
- Posts: 535
- Joined: Feb 01, 2014 12:00 PM
- Location: Vancouver BC
Re: 1985 Arktisblau M535i Renovation - New Year's Update
If you shift like Ralph, maybe its a problem!! 
Re: 1985 Arktisblau M535i Renovation - New Year's Update
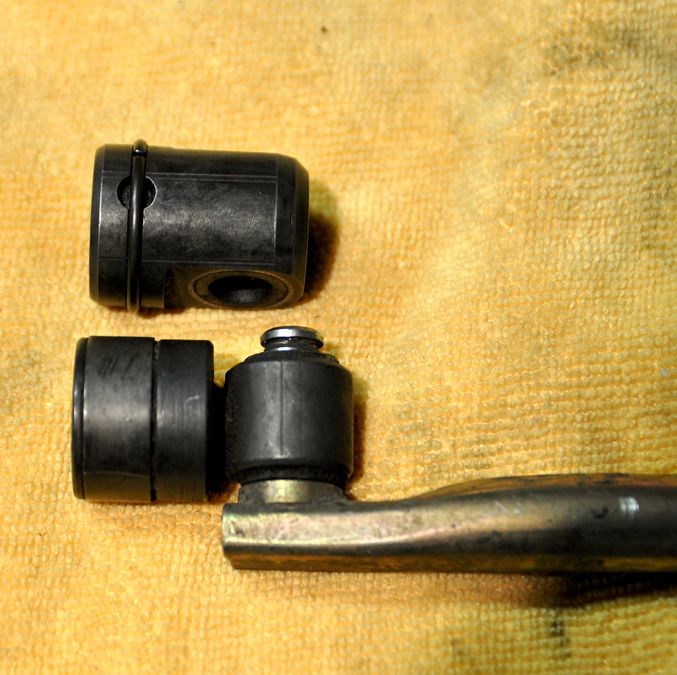
Ralph,Ralph in SoCal wrote:I'll actually be investigating this further with Vince's car as his shifter in neutral position is a little forward for my taste. He's OK with it as it is functional but hopefully there's an easy solution. I think he still has the SSK Shift Rod Joint in place and that could be the reason why. Because of this scenario I've got plans for an adjustable shift rod so that neutral location can be dialed in easily.maybeillbuyit wrote:vinceg101 wrote: Ralph said I should mention that one critical upgrade everyone should do regarding Gear Shifters is to replace the stock older E28 Linkage (Gearshift Rod Joint in BMW parlance) with a newer E46 version. Someone had done this more recently in the cars’ past before I got it since this Transmission and Shift Kit went in around 1994 (unless this is an E36 unit?): Here are some examples for illustration:
The newer unit has a solid body instead of the weaker smaller shaft style of the older one; the old ones were prone to shear off at the junction. Good upgrade.
This looks like a great upgrade, much beefier.I notice the e46 unit looks shorter than the original. Any issue with that or is the selector rod a longer one?
Anyway, hoping for an update from Mr. G himself as this is progressing and I'm sure there's a few folks waiting for anything tangible.
Ralph
Why not copy the Rogue DSSR design with clevis ends, but use a threaded center portion with jamb nuts at either end...
Re: 1985 Arktisblau M535i Renovation - New Year's Update
^^^
I know Ralph was going to crawl up under there earlier this week and/or tomorrow when we are all back there. We will discuss the options.
Update coming. Lot's has been happening these last few weeks; I've been working faster than I can keep up the documentation for it.
I know Ralph was going to crawl up under there earlier this week and/or tomorrow when we are all back there. We will discuss the options.
Update coming. Lot's has been happening these last few weeks; I've been working faster than I can keep up the documentation for it.
Re: 1985 Arktisblau M535i Renovation - New Year's Update
Vince... Where are your priorities?vinceg101 wrote:^^^
I know Ralph was going to crawl up under there earlier this week and/or tomorrow when we are all back there. We will discuss the options.
Update coming. Lot's has been happening these last few weeks; I've been working faster than I can keep up the documentation for it.
Re: 1985 Arktisblau M535i Renovation - Unveiling
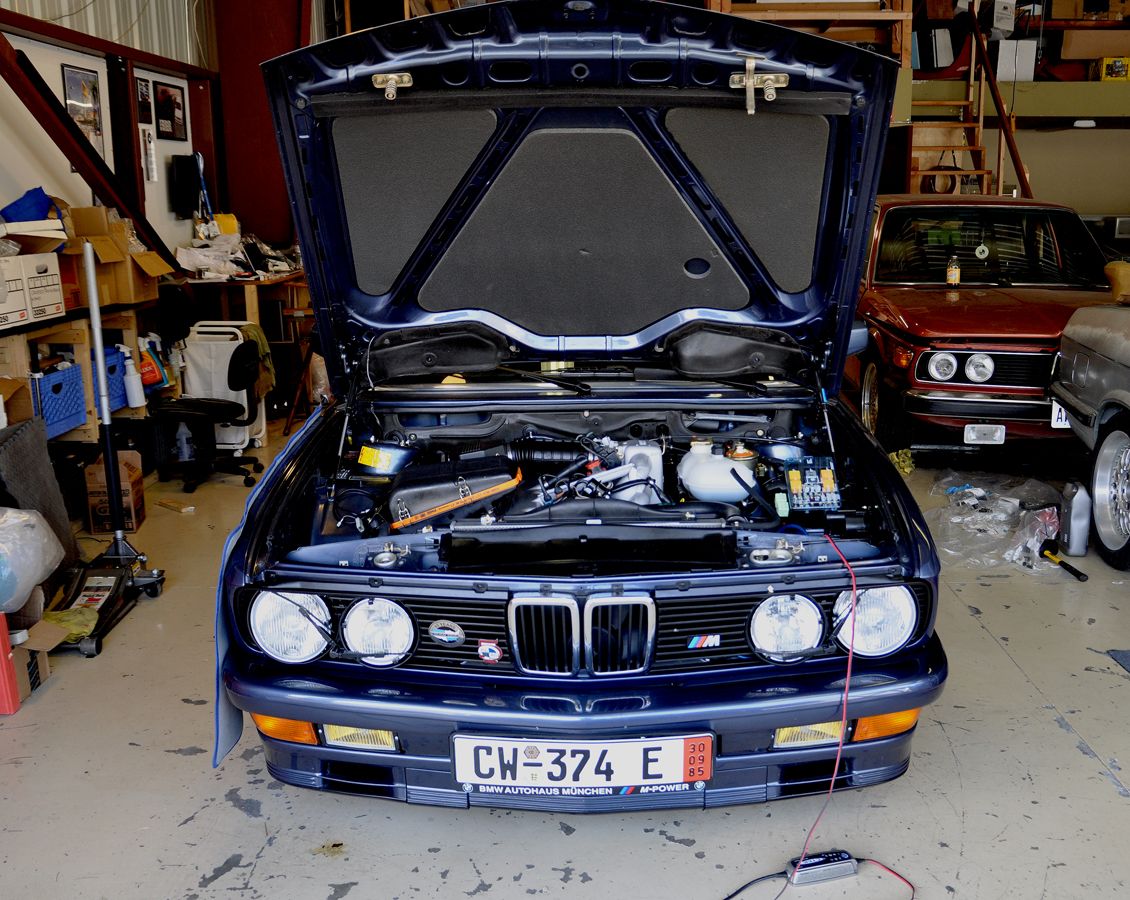
Guten Tag! Mich erinnern?
Anyone want to dance?
Re: 1985 Arktisblau M535i Renovation - Unveiling
I bet that feels good. Congrats.
Re: 1985 Arktisblau M535i Renovation - Unveiling
I know, there was a LOT in between those last two updates.
I owe you all a ton more photos and about a thousand procedures along the way, but it's all been about getting her ready for this weekend in San Diego. So I obviously skipped ahead a bit.
Honestly though, it has been a bumpy week, and it's only Tuesday. As of Saturday night, the car wasn't even running as we were trying everything and asking everyone for possible solutions; so I woke up Sunday not entirely sure this car was going to make it for this Friday. [Turns out it was a reversed pin-out on the ECU Harness Connector (12 & 13) when they Federalized the car for SMOG and installed the Johnson Box. Thank heavens for the ETM and Ralph's anal patience and persistence.] Then it was finishing all the Glass and Door re-assembly, a ruptured FPR O-ring in my driveway, re-scheduling maintenance, and completing the body work installation.
Suffice it to say, she is road-worthy and at about 98%; however this drive will definitely be her true shake-down test. I still have a long night Thursday ahead of me to do the final punch-list stuff and pack; I am going to meet Jay3 at the Hangar sometime around midnight so Ralph and I will be hard at work before then. There are one or two still nagging items we need to address (A/C and a squealing Power Steering Pump) and about a half dozen other small things that are less critical that I would love to get to, but time is an evil mistress.
So for all those on their way to San Diego, you will get to meet her in person.
Last edited by vinceg101 on Mar 15, 2017 4:47 PM, edited 2 times in total.
Re: 1985 Arktisblau M535i Renovation - Unveiling
I'm more tired than anything at the moment. And sore.wkohler wrote:I bet that feels good. Congrats.
But yes, it's starting to feel good.
Re: 1985 Arktisblau M535i Renovation - Unveiling
Very awesome! I would love to see all of these super shiny e28s some day. For some reason, reassembly always takes me longer than expected. I think it is in correcting misgivings in a car's past life.
Re: 1985 Arktisblau M535i Renovation - Unveiling
Can't wait to see it...soooonnnnnnnnnn...
Nothing like a beautifully renovated car to make mine feel like a dirtball
This will be a cool drive from LA to SD.
Nothing like a beautifully renovated car to make mine feel like a dirtball
This will be a cool drive from LA to SD.
Re: 1985 Arktisblau M535i Renovation - Unveiling
Don't I know that; it will be included as one of my many Pearls of Wisdom I plan an including at the end of this thread in a wrap-up. Re-assembly took me, on average, at least 3-4 times longer than disassembly. One needs to budget and schedule their time accordingly. One of the reasons for this was that I adopted the policy that if I touch a part/assembly, I did one of three things:dsmith wrote:Very awesome! I would love to see all of these super shiny e28s some day. For some reason, reassembly always takes me longer than expected. I think it is in correcting misgivings in a car's past life.
1. Replace it with a new part (within reason and budget of course)
2. Refinish/Rebuild it. This could be a new used part or the original
3. Clean it at the very least
All this added a lot of time whether it was searching and purchasing the part, rebuilding & refinishing, or just the labor to thoroughly clean something. Sometimes the first two items added weeks to the whole process in shipping, plating, powder-coating, shuttling parts, etc.
I chose to be anal about all this not just because I like shiny pretty things, but mostly so I don't have to do this again to this car. I knew the cleaner and more finished I made everything, the easier it would be maintain it and keep it clean from this point forward and therefore less time and effort I would need to expend in the future.
But yes, I do agree that maybe this is some sort of penance I am serving for ignoring cars in the past and my other current cars.
-
harrypalmer
- Posts: 669
- Joined: Jul 25, 2012 12:10 AM
- Location: Denver, Colorado
Re: 1985 Arktisblau M535i Renovation - Unveiling
vinceg101 wrote:Don't I know that; it will be included as one of my many Pearls of Wisdom I plan an including at the end of this thread in a wrap-up. Re-assembly took me, on average, at least 3-4 times longer than disassembly. One needs to budget and schedule their time accordingly. One of the reasons for this was that I adopted the policy that if I touch a part/assembly, I did one of three things:dsmith wrote:Very awesome! I would love to see all of these super shiny e28s some day. For some reason, reassembly always takes me longer than expected. I think it is in correcting misgivings in a car's past life.
1. Replace it with a new part (within reason and budget of course)
2. Refinish/Rebuild it. This could be a new used part or the original
3. Clean it at the very least
All this added a lot of time whether it was searching and purchasing the part, rebuilding & refinishing, or just the labor to thoroughly clean something. Sometimes the first two items added weeks to the whole process in shipping, plating, powder-coating, shuttling parts, etc.
I chose to be anal about all this not just because I like shiny pretty things, but mostly so I don't have to do this again to this car. I knew the cleaner and more finished I made everything, the easier it would be maintain it and keep it clean from this point forward and therefore less time and effort I would need to expend in the future.
But yes, I do agree that maybe this is some sort of penance I am serving for ignoring cars in the past and my other current cars.
Very beautiful effort on your part!
Re: 1985 Arktisblau M535i Renovation - Unveiling
THIS is why I like you.vinceg101 wrote: I did one of three things:
1. Replace it with a new part (within reason and budget of course)
2. Refinish/Rebuild it. This could be a new used part or the original
3. Clean it at the very least
All this added a lot of time whether it was searching and purchasing the part, rebuilding & refinishing, or just the labor to thoroughly clean something. Sometimes the first two items added weeks to the whole process in shipping, plating, powder-coating, shuttling parts, etc.
I chose to be anal about all this not just because I like shiny pretty things, but mostly so I don't have to do this again to this car. I knew the cleaner and more finished I made everything, the easier it would be maintain it and keep it clean from this point forward and therefore less time and effort I would need to expend in the future.
-
Tammer in Philly
- Posts: 10719
- Joined: Feb 12, 2006 12:00 PM
- Location: CHI, IL
Re: 1985 Arktisblau M535i Renovation - Unveiling
Damn, now you made it too nice to drive! 
Re: 1985 Arktisblau M535i Renovation - Unveiling
Wish I could join the gang in San Diego to see the unveiling, but it is not in the cards for me this year. Hope to see it in person at some point.
Congrats on a spectacular project!
Jim
Congrats on a spectacular project!
Jim
Re: 1985 Arktisblau M535i Renovation - Unveiling
And here I thought it was my roguish good looks.cek wrote:THIS is why I like you.
Re: 1985 Arktisblau M535i Renovation - Unveiling
Oh boy...vinceg101 wrote:And here I thought it was my roguish good looks.cek wrote:THIS is why I like you.
-
Ralph in SoCal
- Posts: 113
- Joined: Feb 02, 2010 1:03 AM
- Location: High Desert of SoCal
Re: 1985 Arktisblau M535i Renovation - Unveiling
One of these days Mr. G will provide the necessary update. Probably combing through the extremely large number of photos he's taken. I just hope he doesn't delve too much into the 2 steps forward 1 step back dance that we unenthusisatically weaved through. I'm just happy to have had the opportunity to assist Vince with his project and then to have it come out so nice.
This whole process was a complete 180 degree turnaround from my usual routine. I told Vince from the start when he asked me to help that I was expert in disassembly and severely lacking in a near complete assembly as he had embarked on. I usually wear gloves to protect my hands but in this instance I wore gloves to protect the parts and the car. Lastly, I have plenty of 12V experience and troubleshooting skills but zero experience with electronics. I'm good at R&R of components by plugging them in!! I'm sure it's nothing for many here but the work on removing the Johnson Box and the modification to the TPS was a challenge for me. Vince had all the tools to get the jobs done well.
It was very nice to see the car at the St. Paddys meet. It was also very nice for a couple of very knowleadgeable folks to acknowledge my contribution to the project. I want to acknowledge these same fine folks were there on the phone providng guidance when we were running into issues and were lost in which direction to follow. And of course, Vince did a great job with it.
Ralph
Re: 1985 Arktisblau M535i Renovation - Next Chapter
Howdy, been a while.
I was terribly remiss in never officially thanking all the people that helped me complete this project; to all of you a most gracious "thank you", it was truly a humbling experience and one that I feel extremely fortunate to have been a part of with all your collected knowledge. I simply could not have accomplished a fraction of what I did without you. Hell, I even had my long-suffering wife helping out towards the end (that is her installing the door vapor barrier in the photos below. She also VOLUNTEERED no less to help hang the exhaust system and re-install the MTech side skirts. She's a keeper.)
Most of all, one person stepped up and saved me more often than not: Ralph Bulaong. Even his modest proclamations in the previous post can not hide his innate talent with automobiles and his knowledge of this generation of BMW's. I am also fortunate to call him a friend, one of the few I have as an adult.
Even though I have been working on the M535i continually the last four years (yikes, has it really been that long?), I took some time off from documenting anything on the M535i. I realized I never came back here to finish documenting the Front End project; there was a lot of work that got crammed in at the 11th hour in order finish the car for the then 2017 St.Paddy’s Day Meet. Frankly between doing all that work and the time & energy it took, I was kind of burnt out so on the shelf the thread went. As with most of car projects, they rarely end when you reach your deadline; it seems I’ve been in perpetual troubleshoot mode for the last four years. So, what better way to excise one big, massive, all-consuming project than to start another big, massive, all-consuming project.
But before we start this, I should at least honor the last project (at least that last push) with this little montage:
-Door Window Glass:
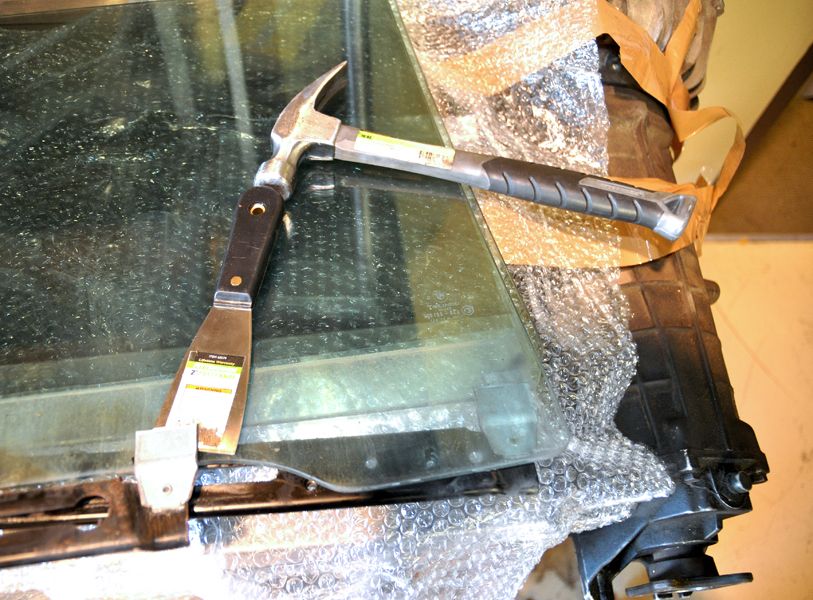
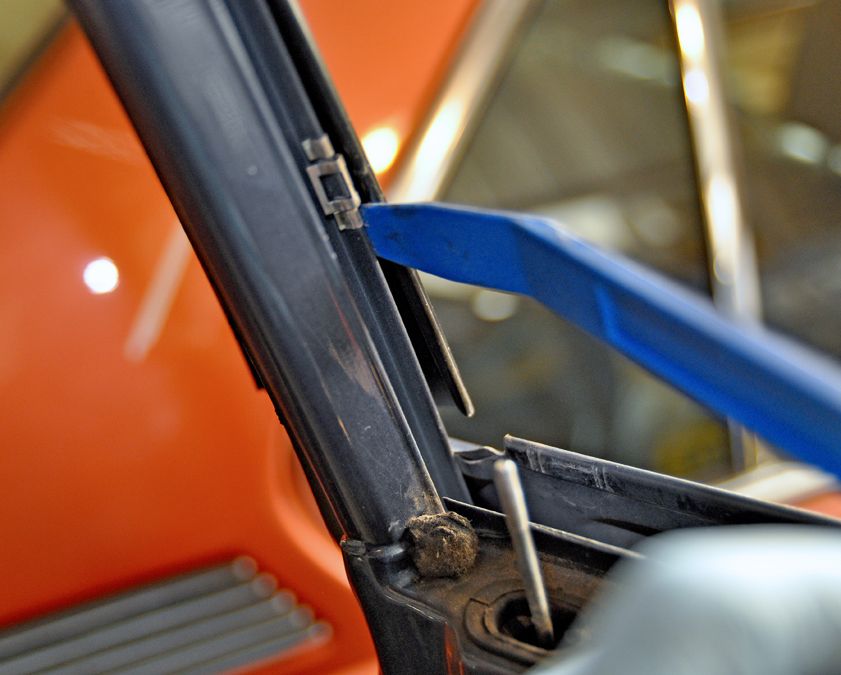
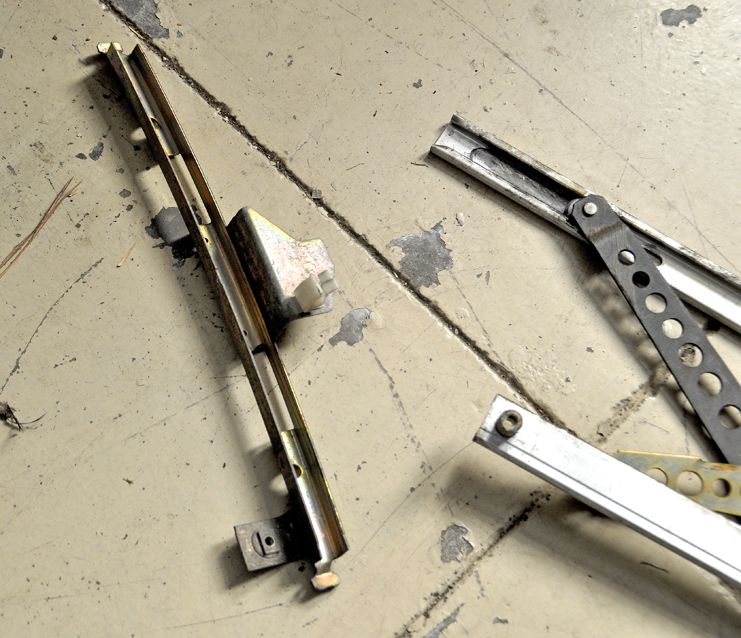
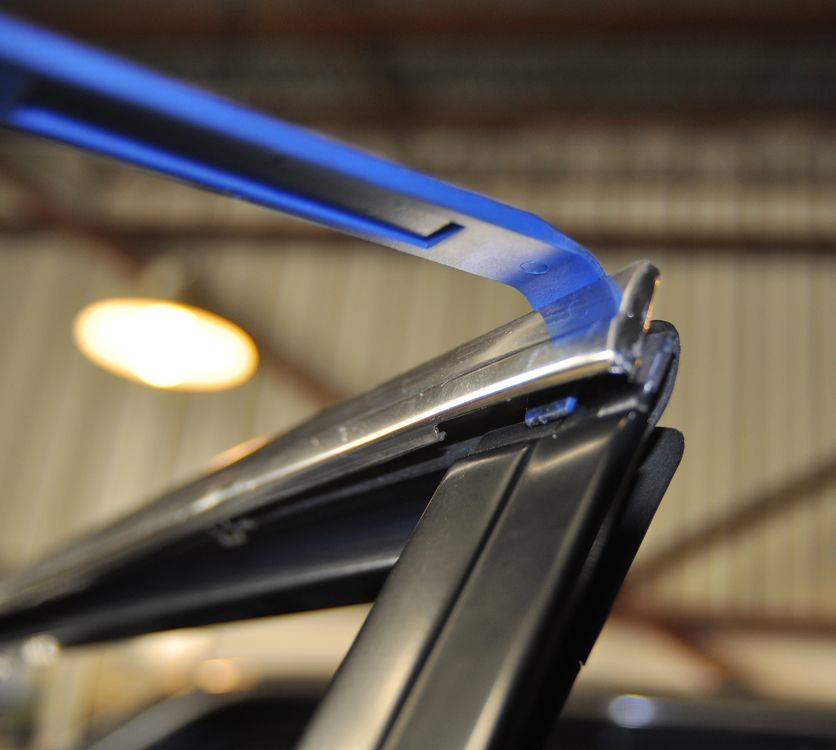
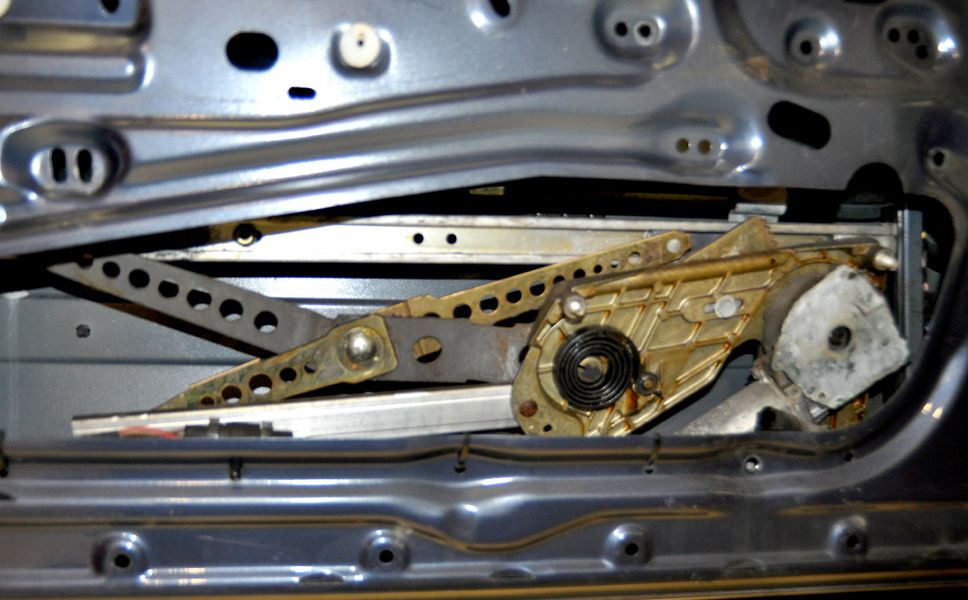
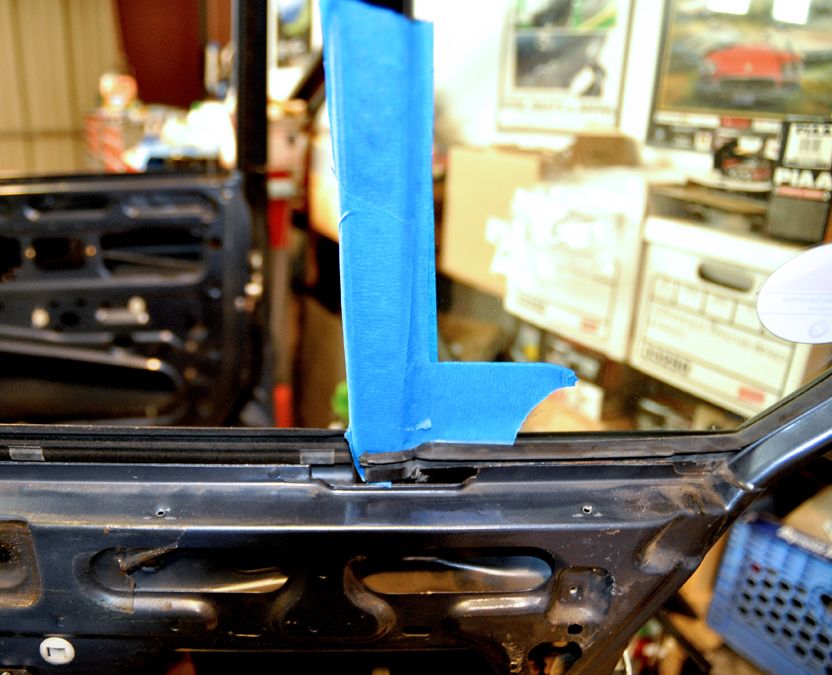
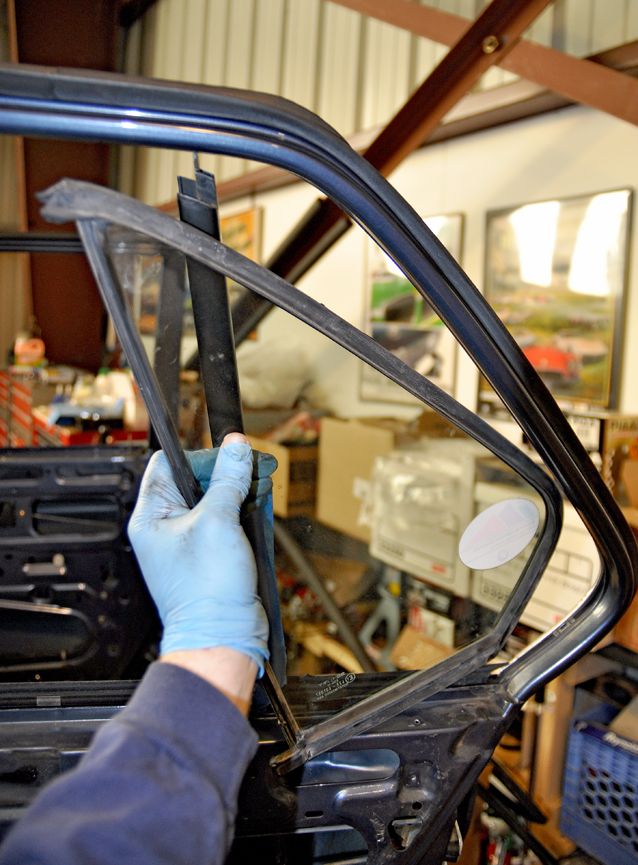
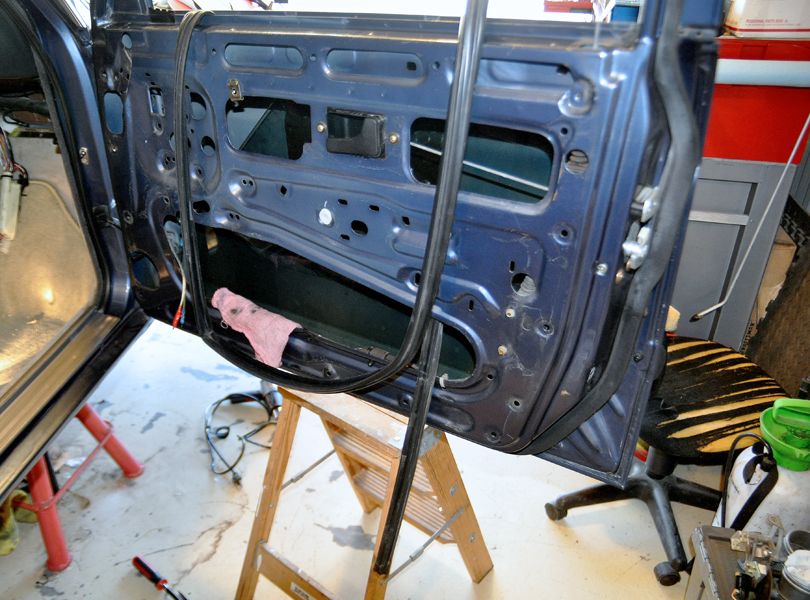
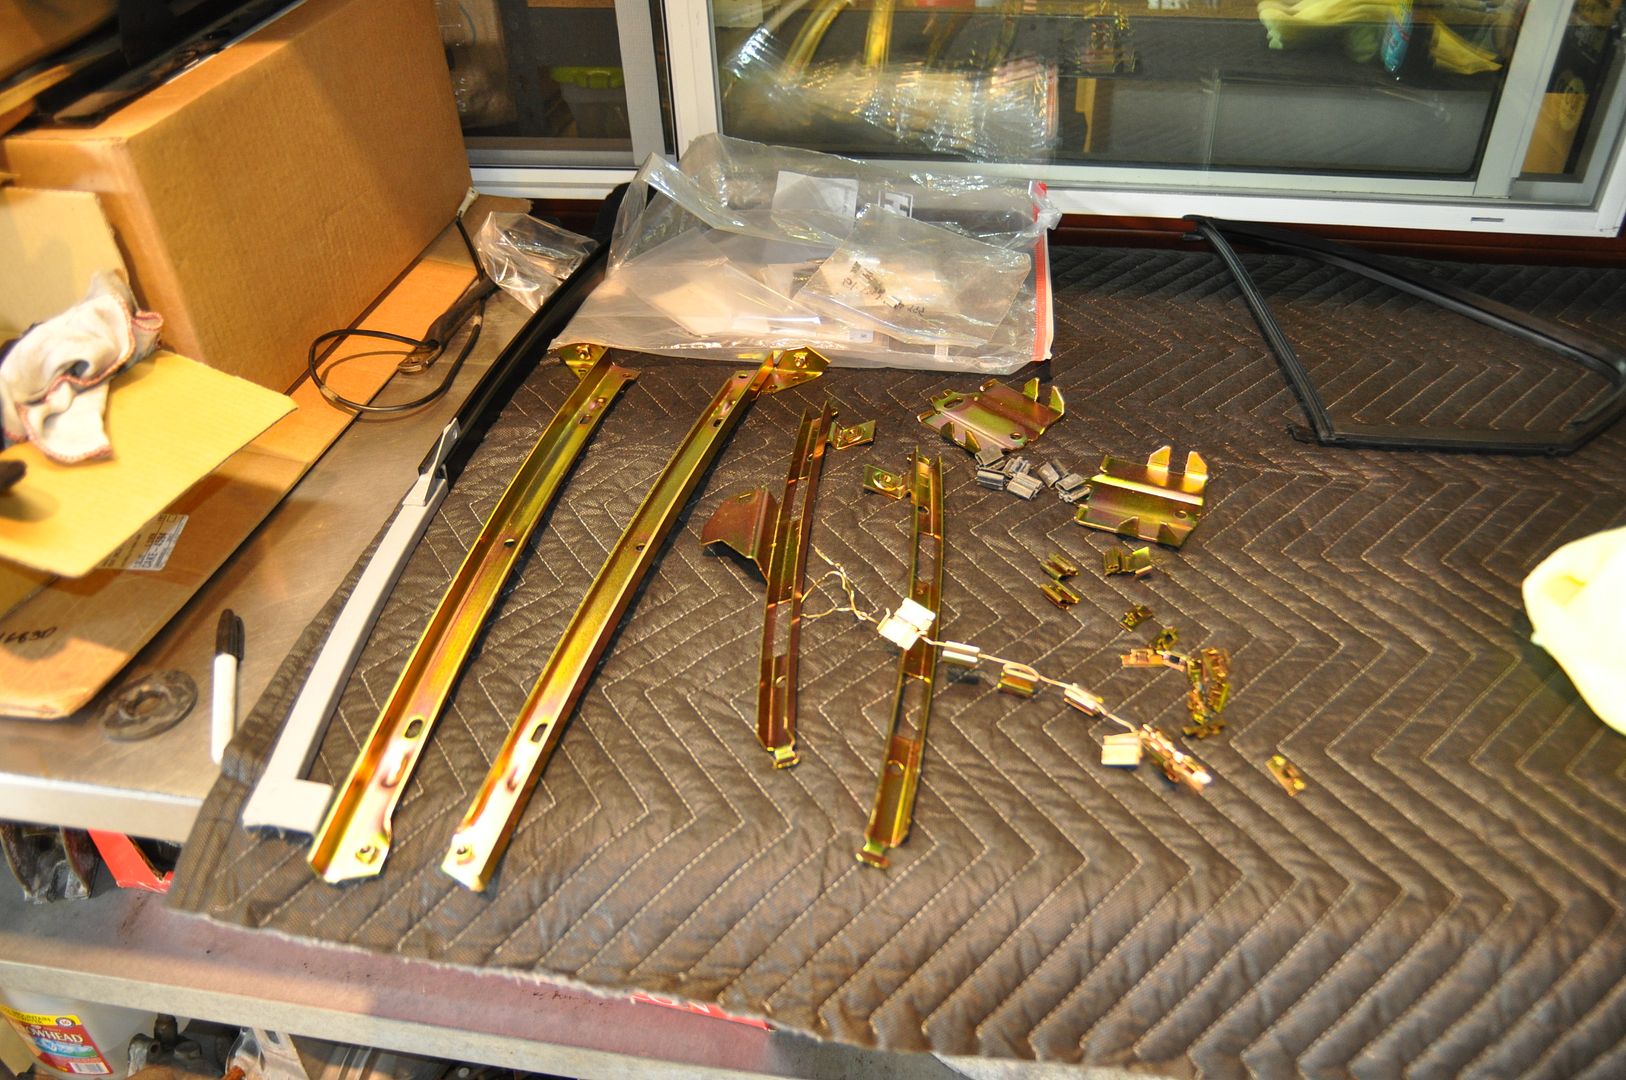
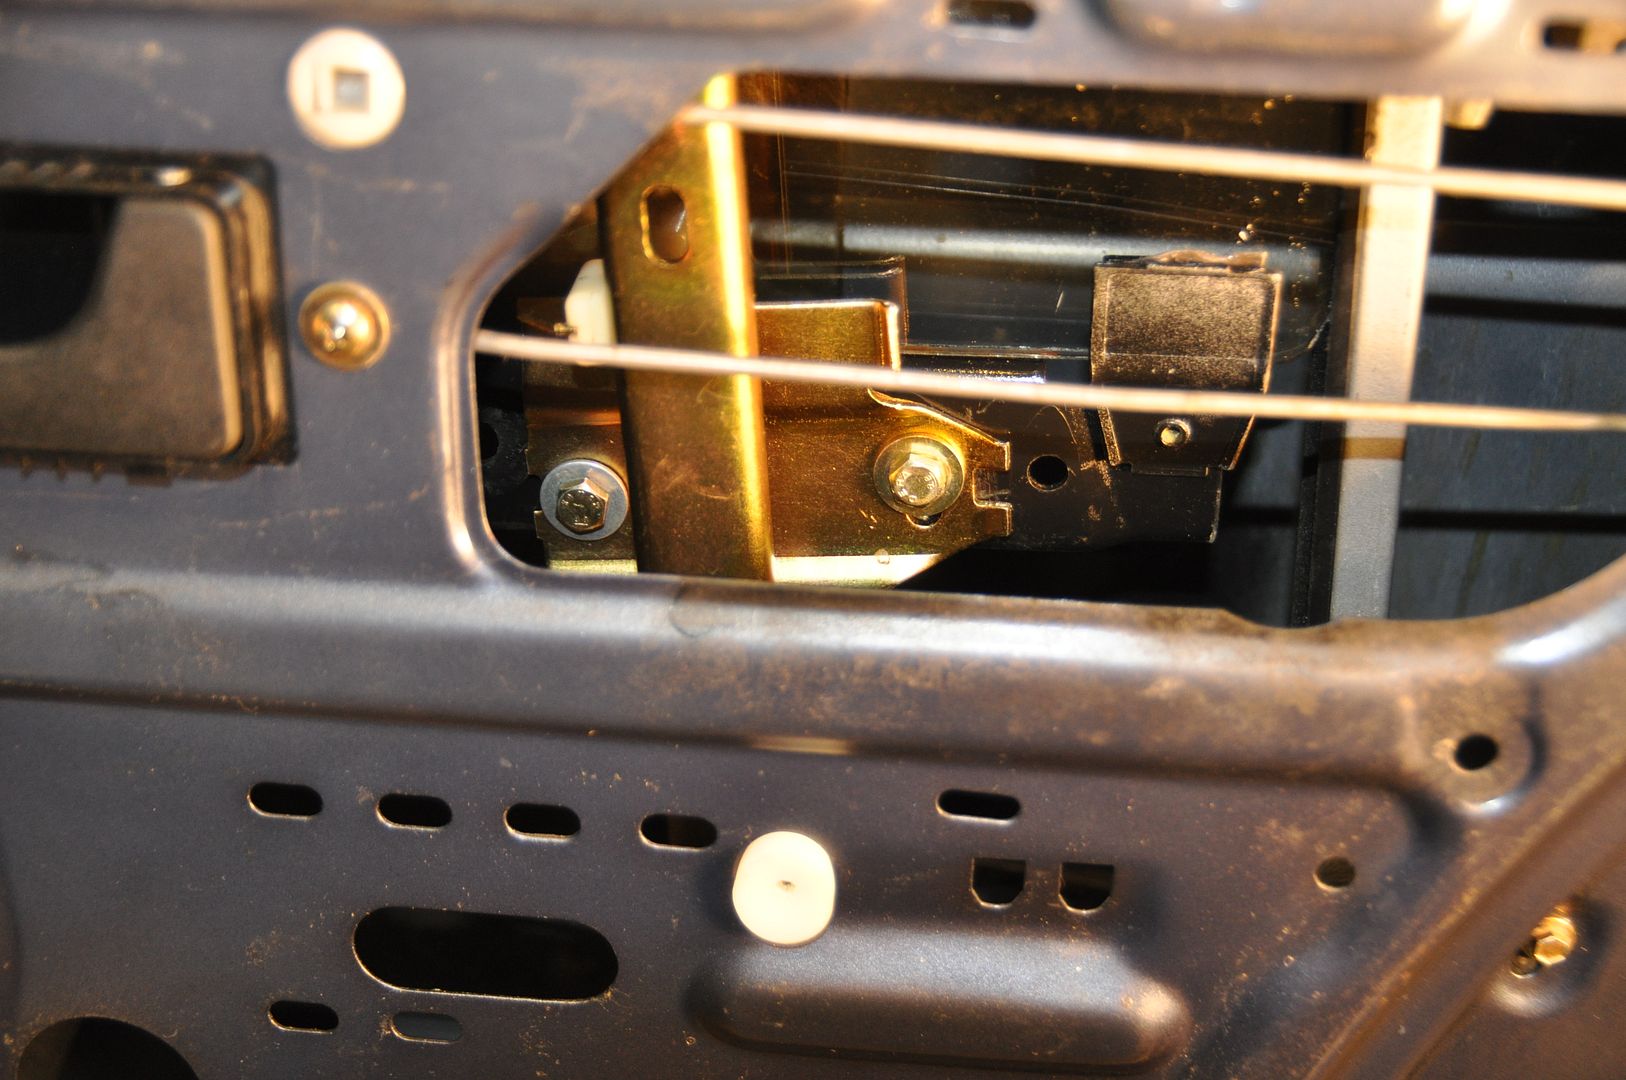
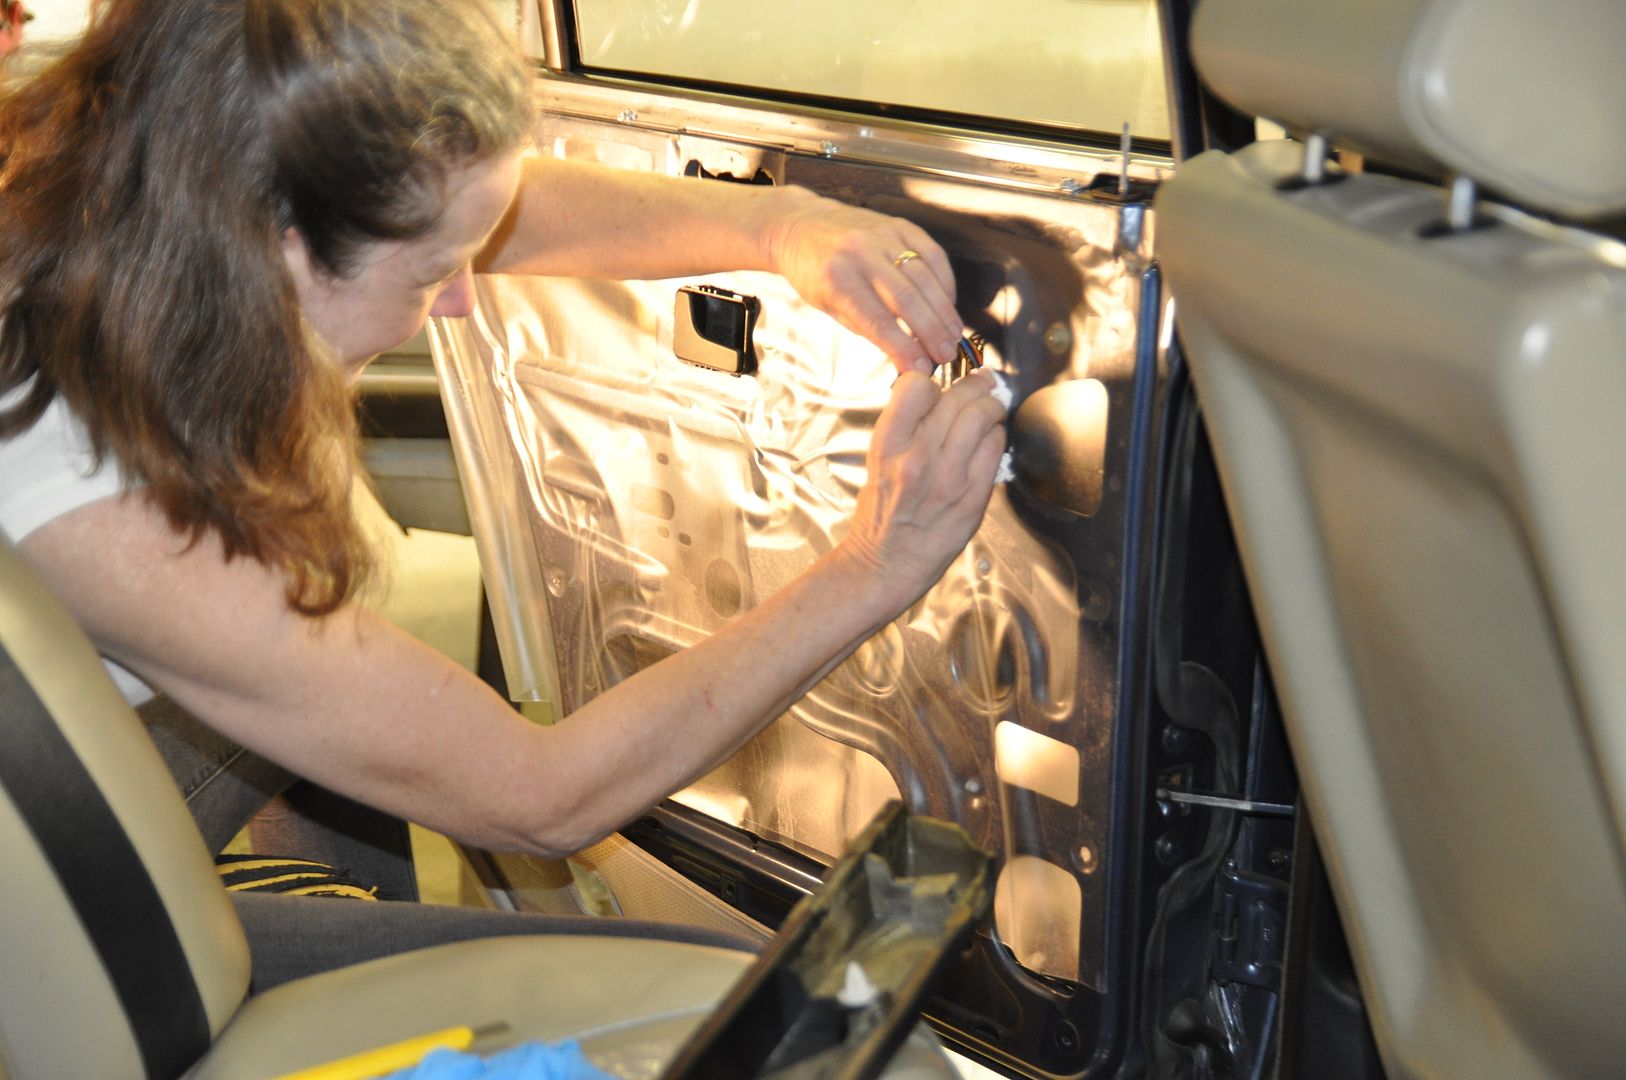
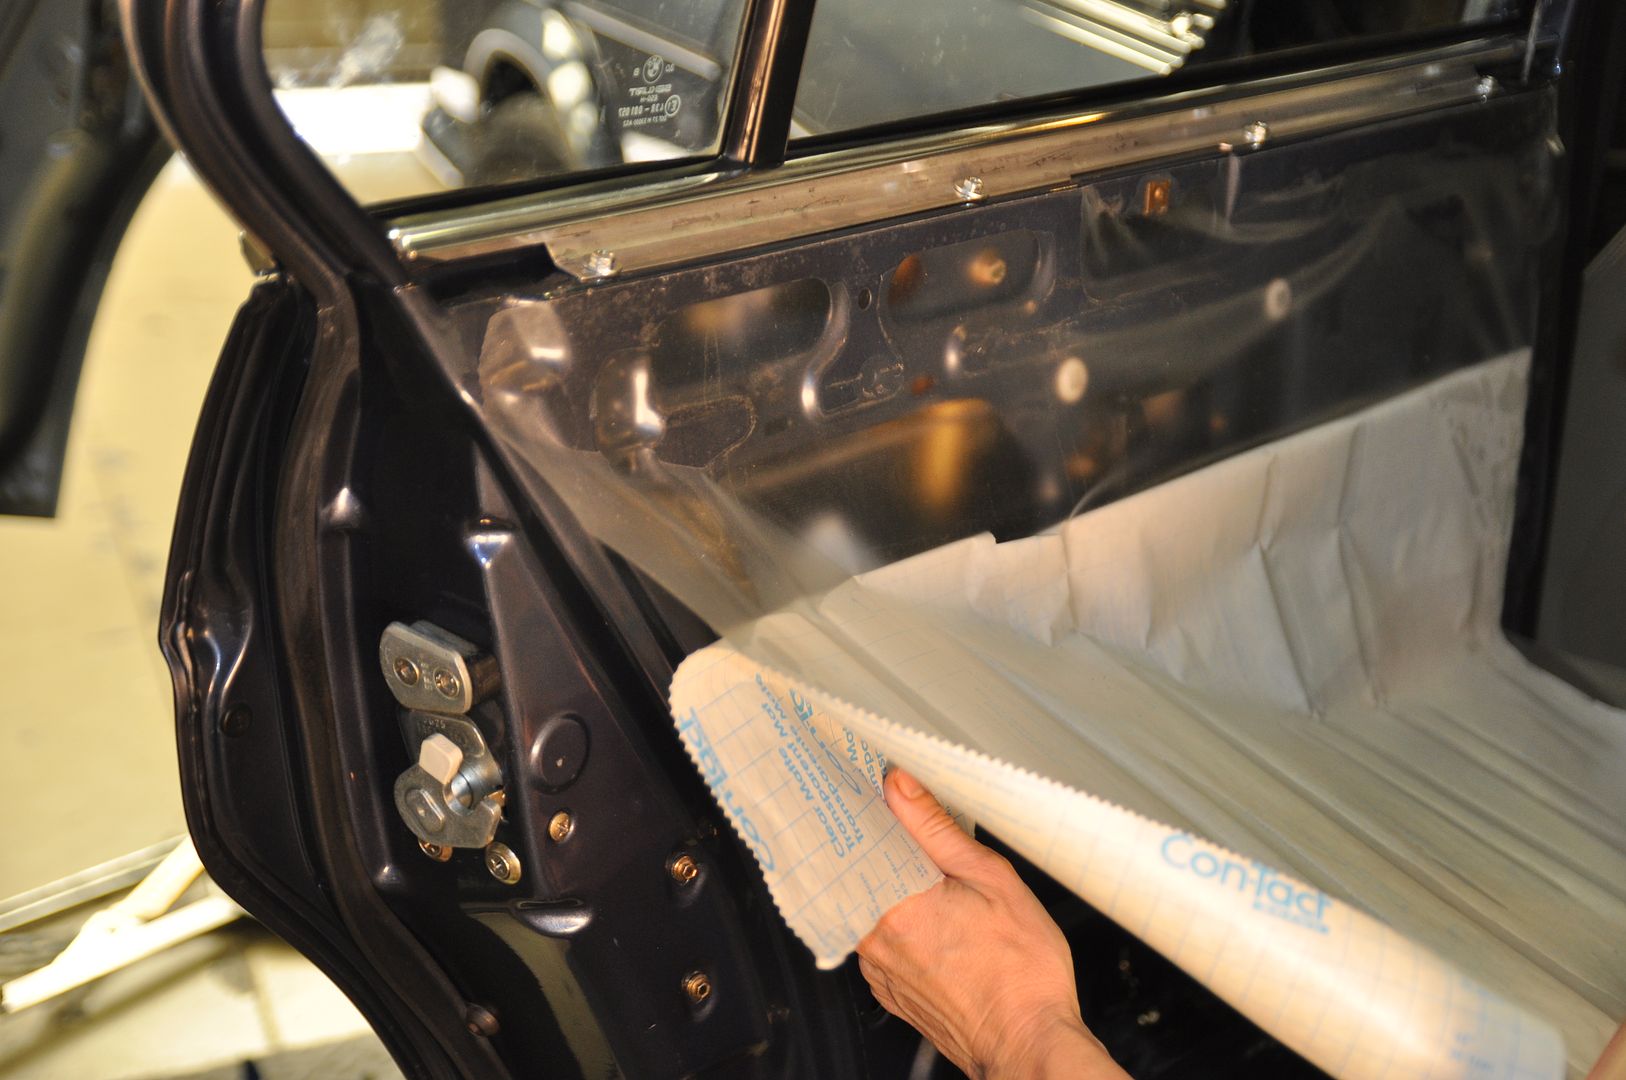
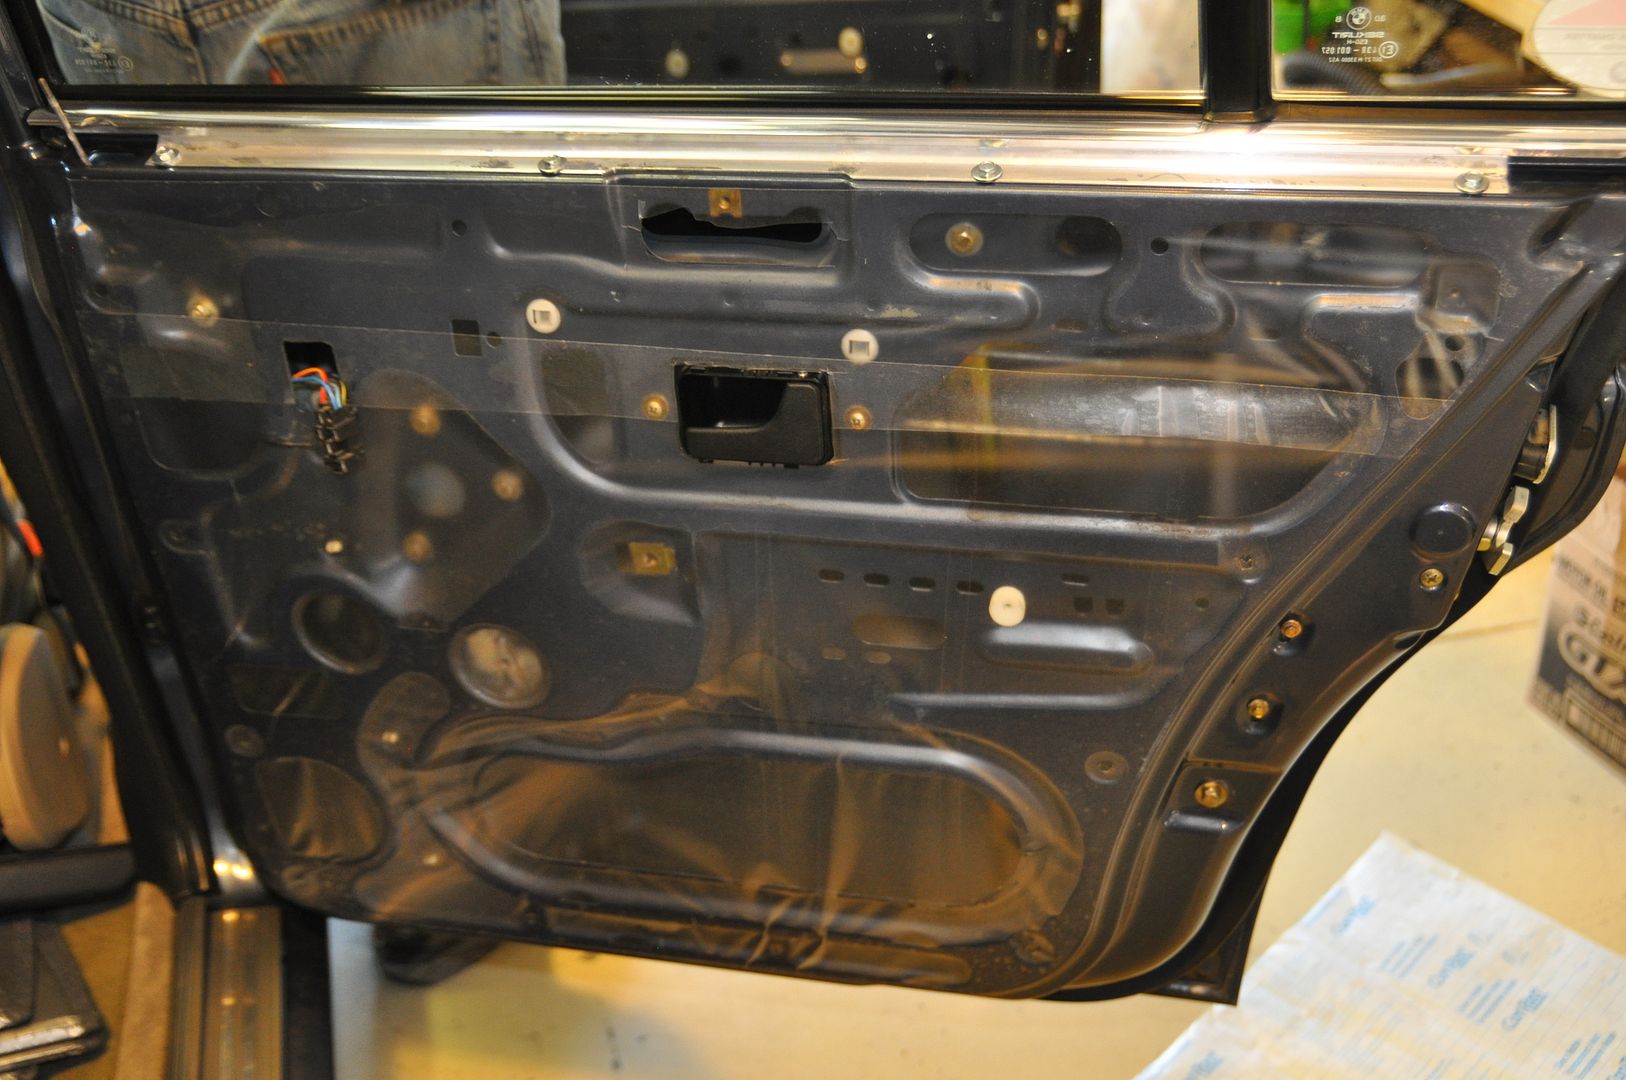
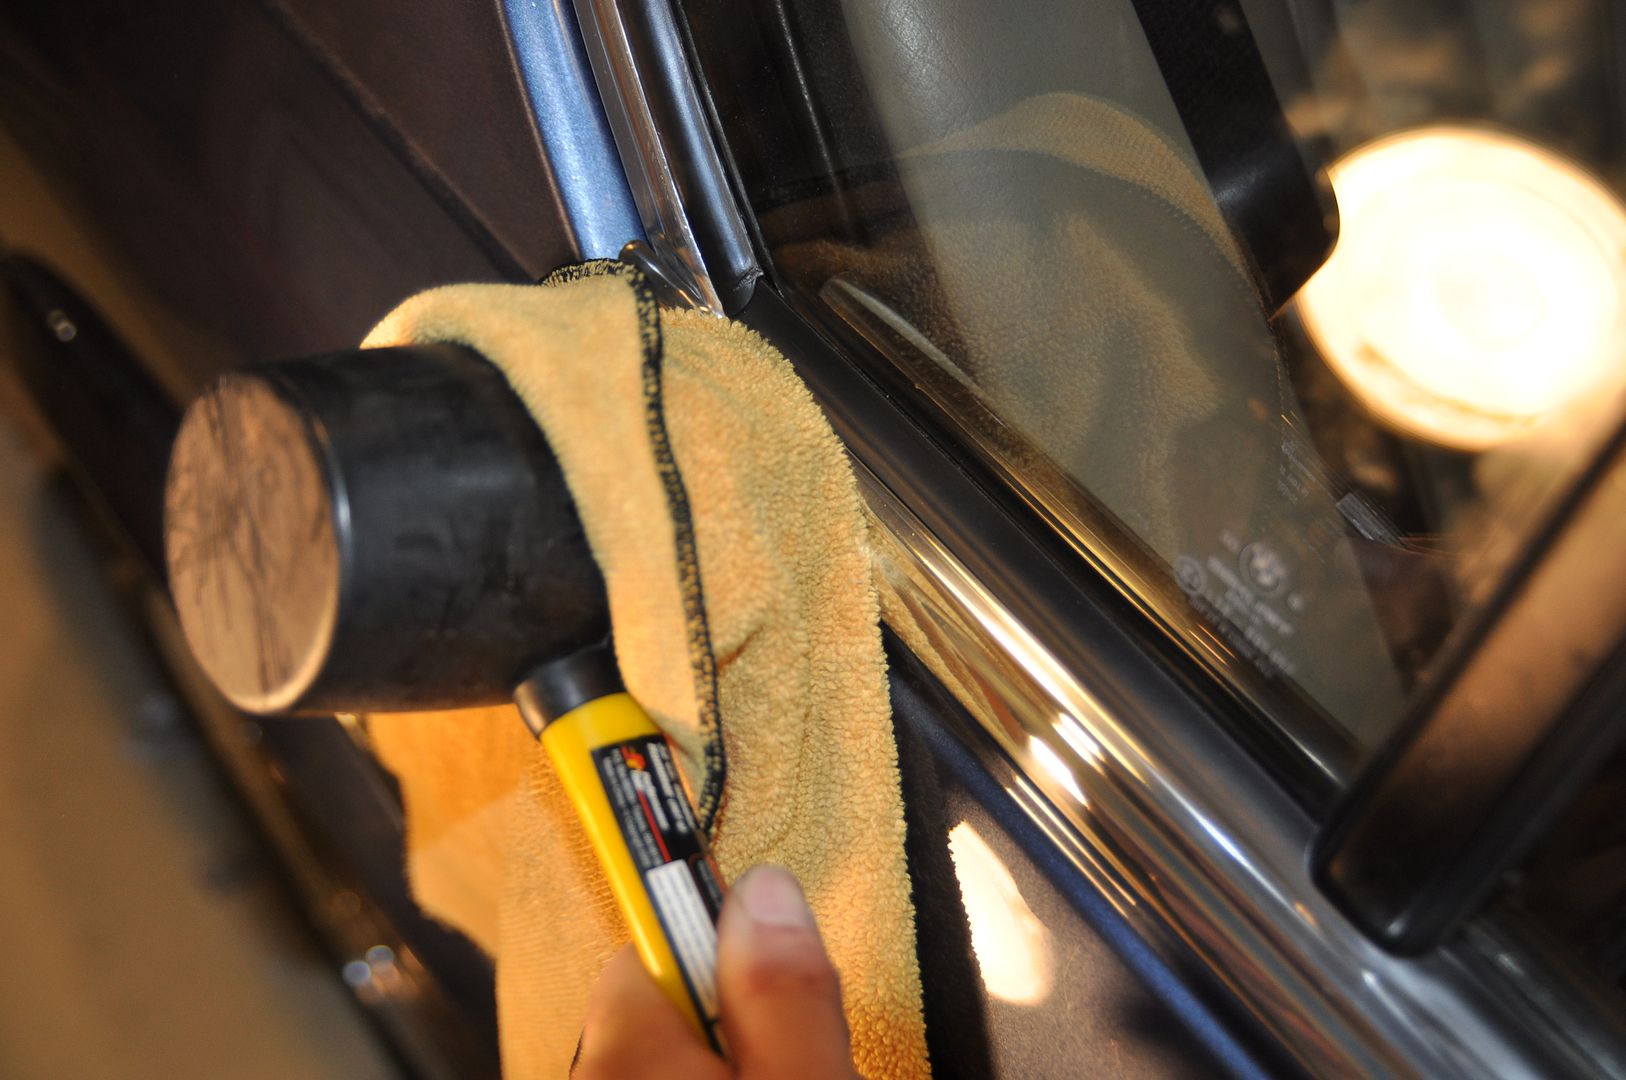
(There is a whole narrative that goes with the glass removal and re-installation, but I may do that separately since a few of you have been asking about that).
-Transmission & Shifter:
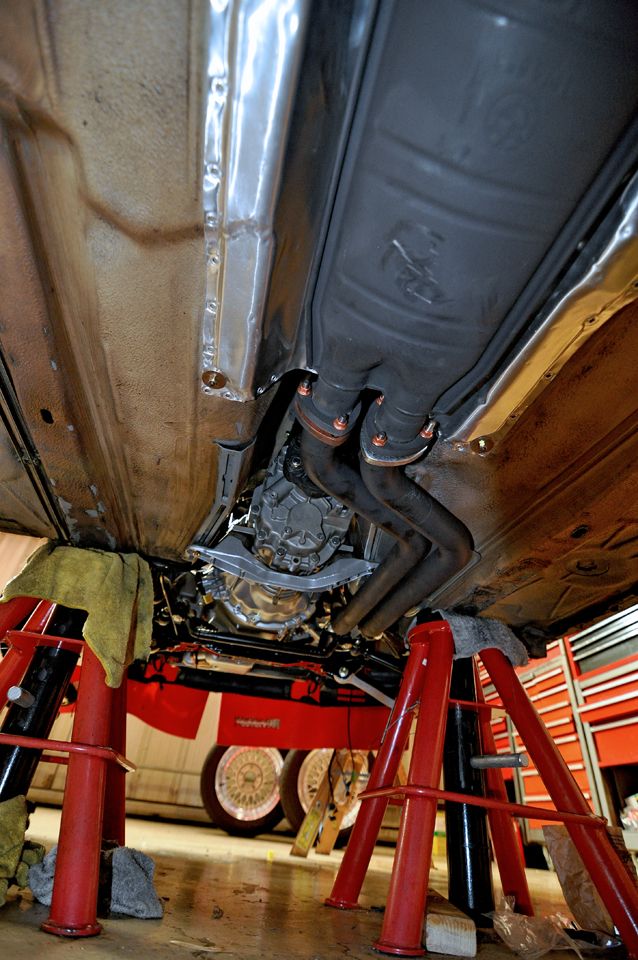
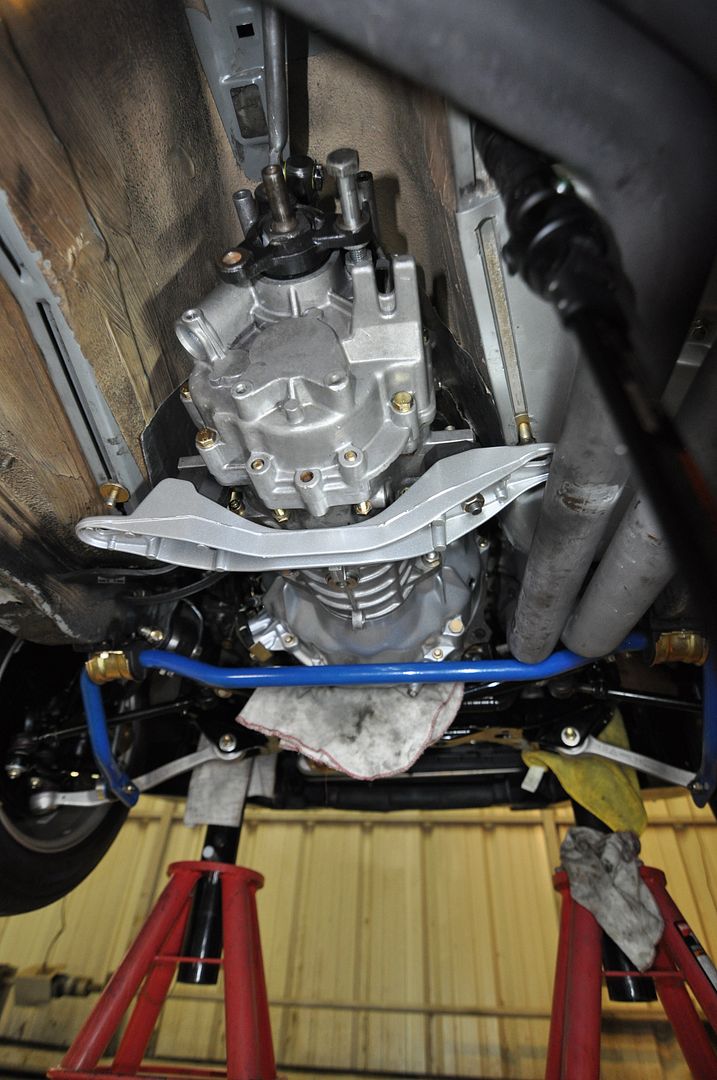
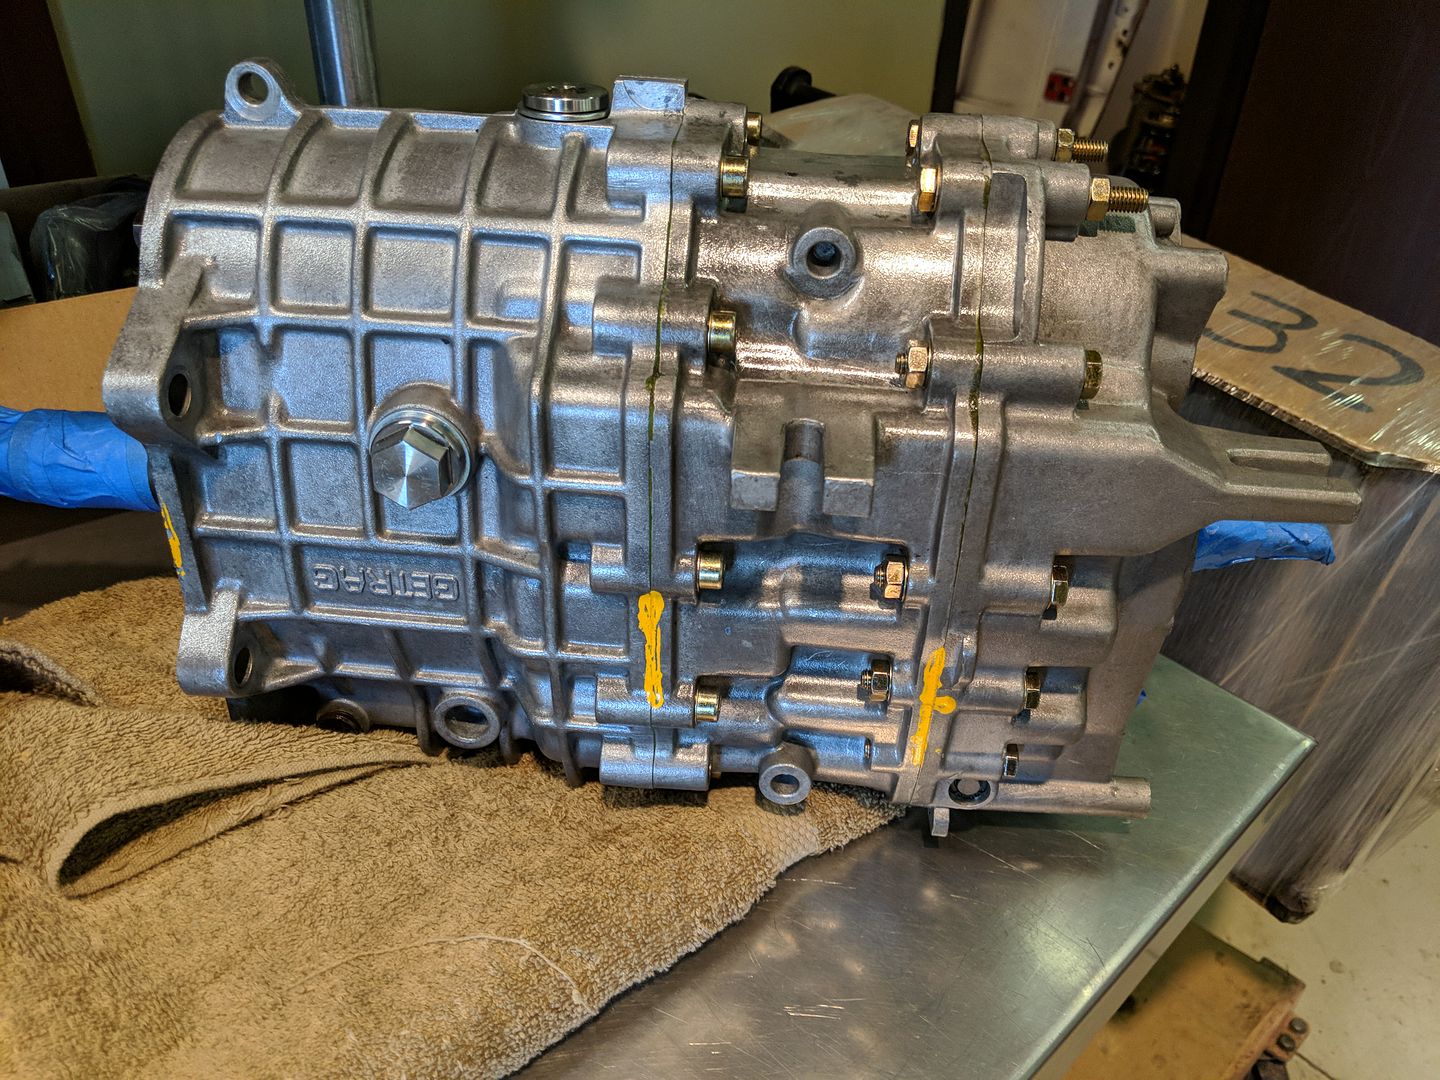
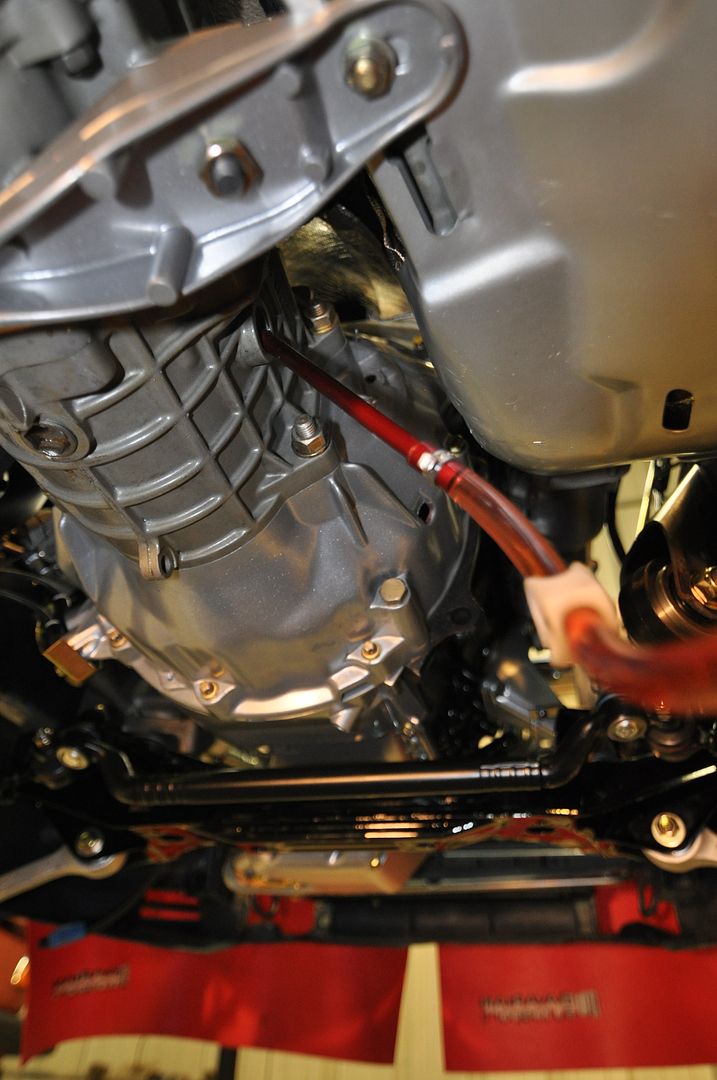
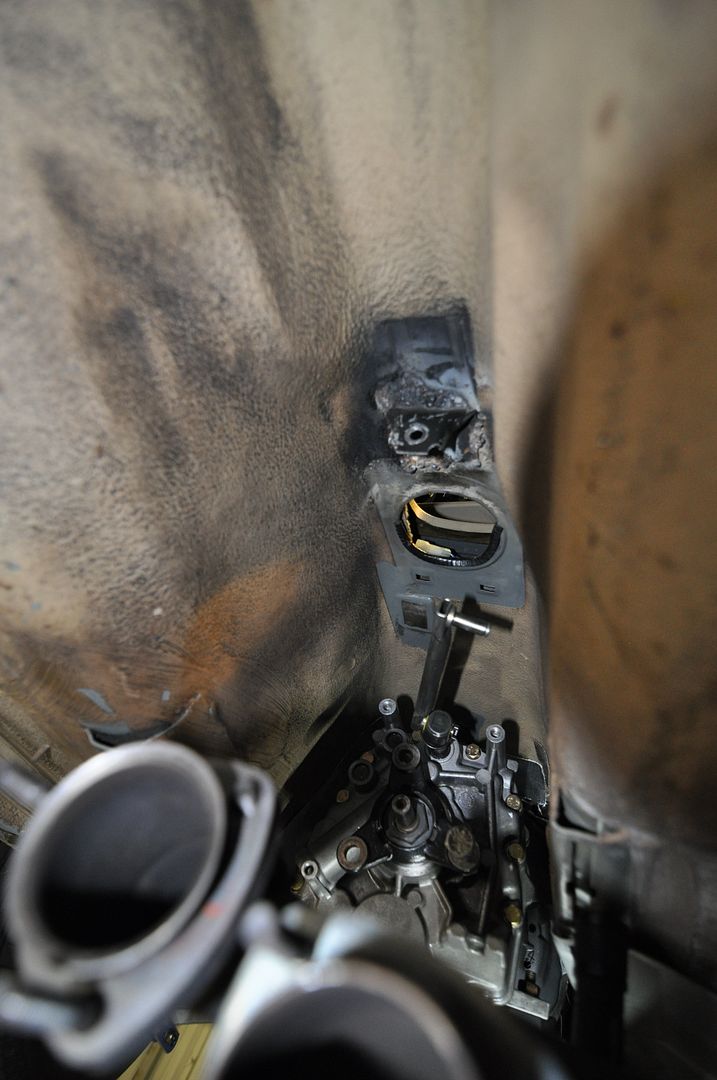
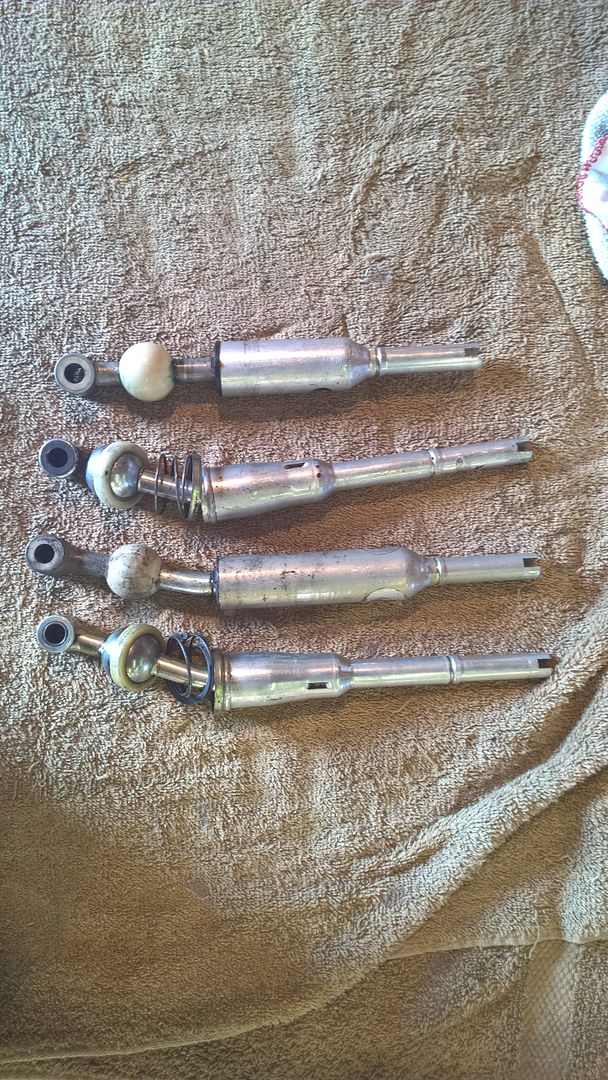
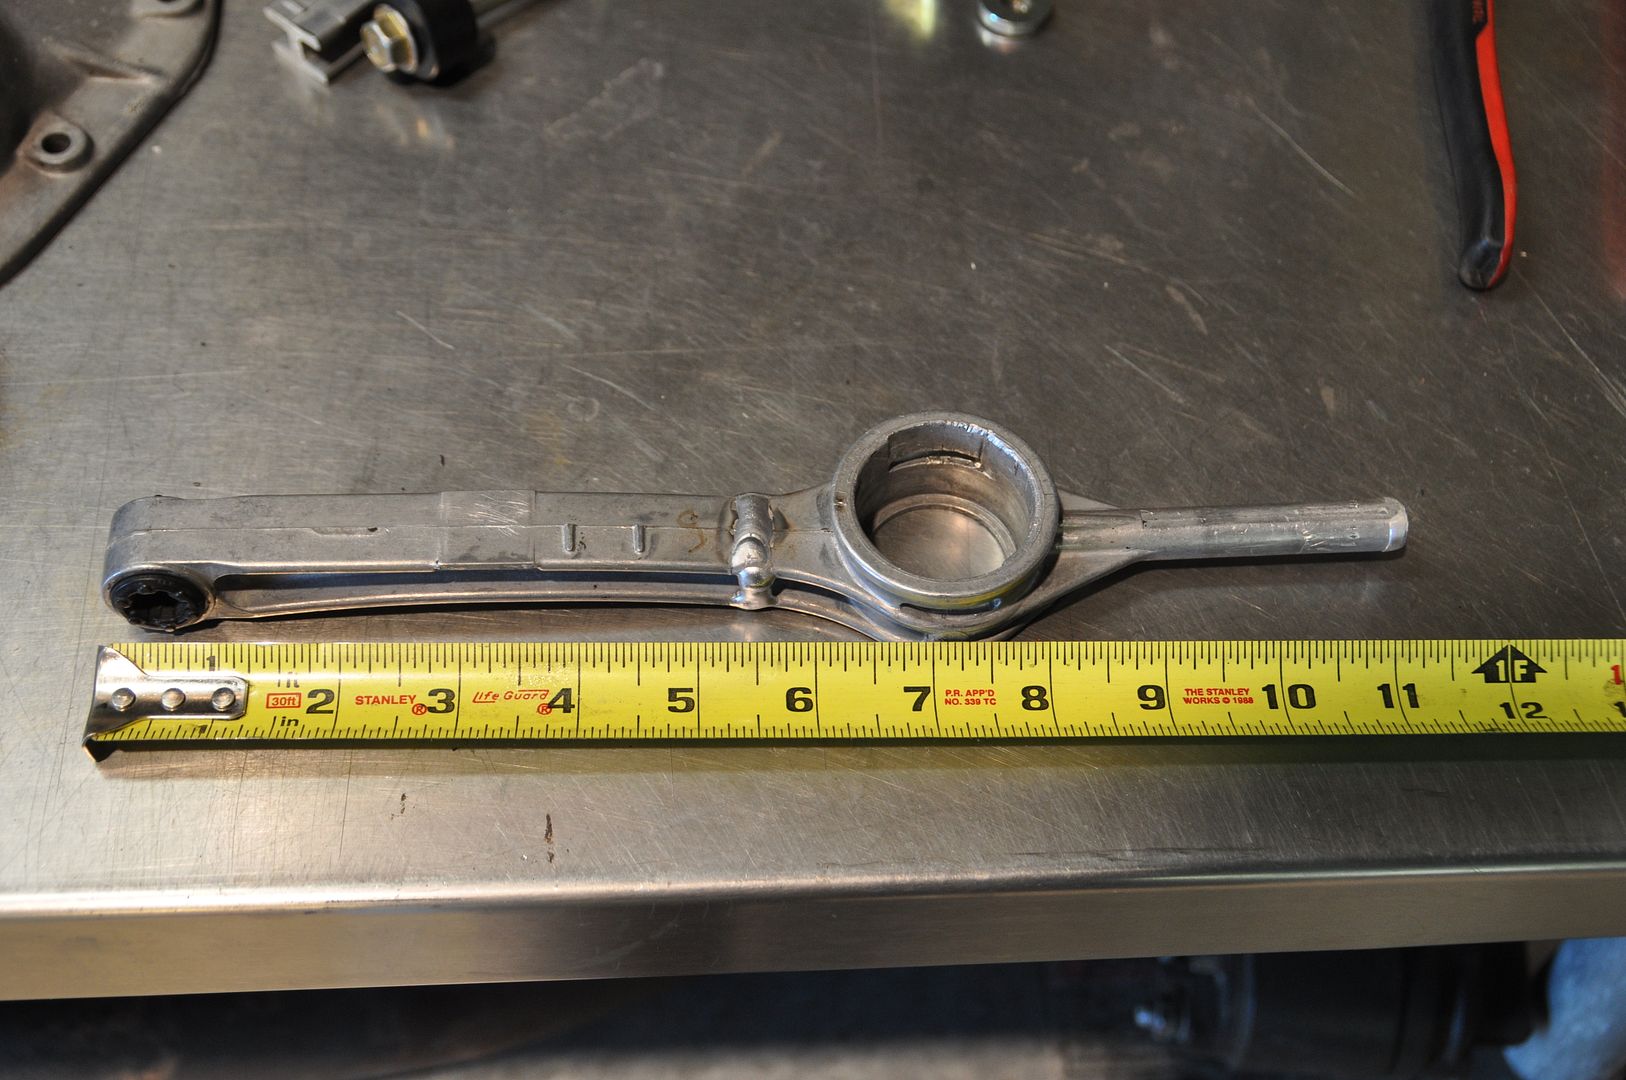
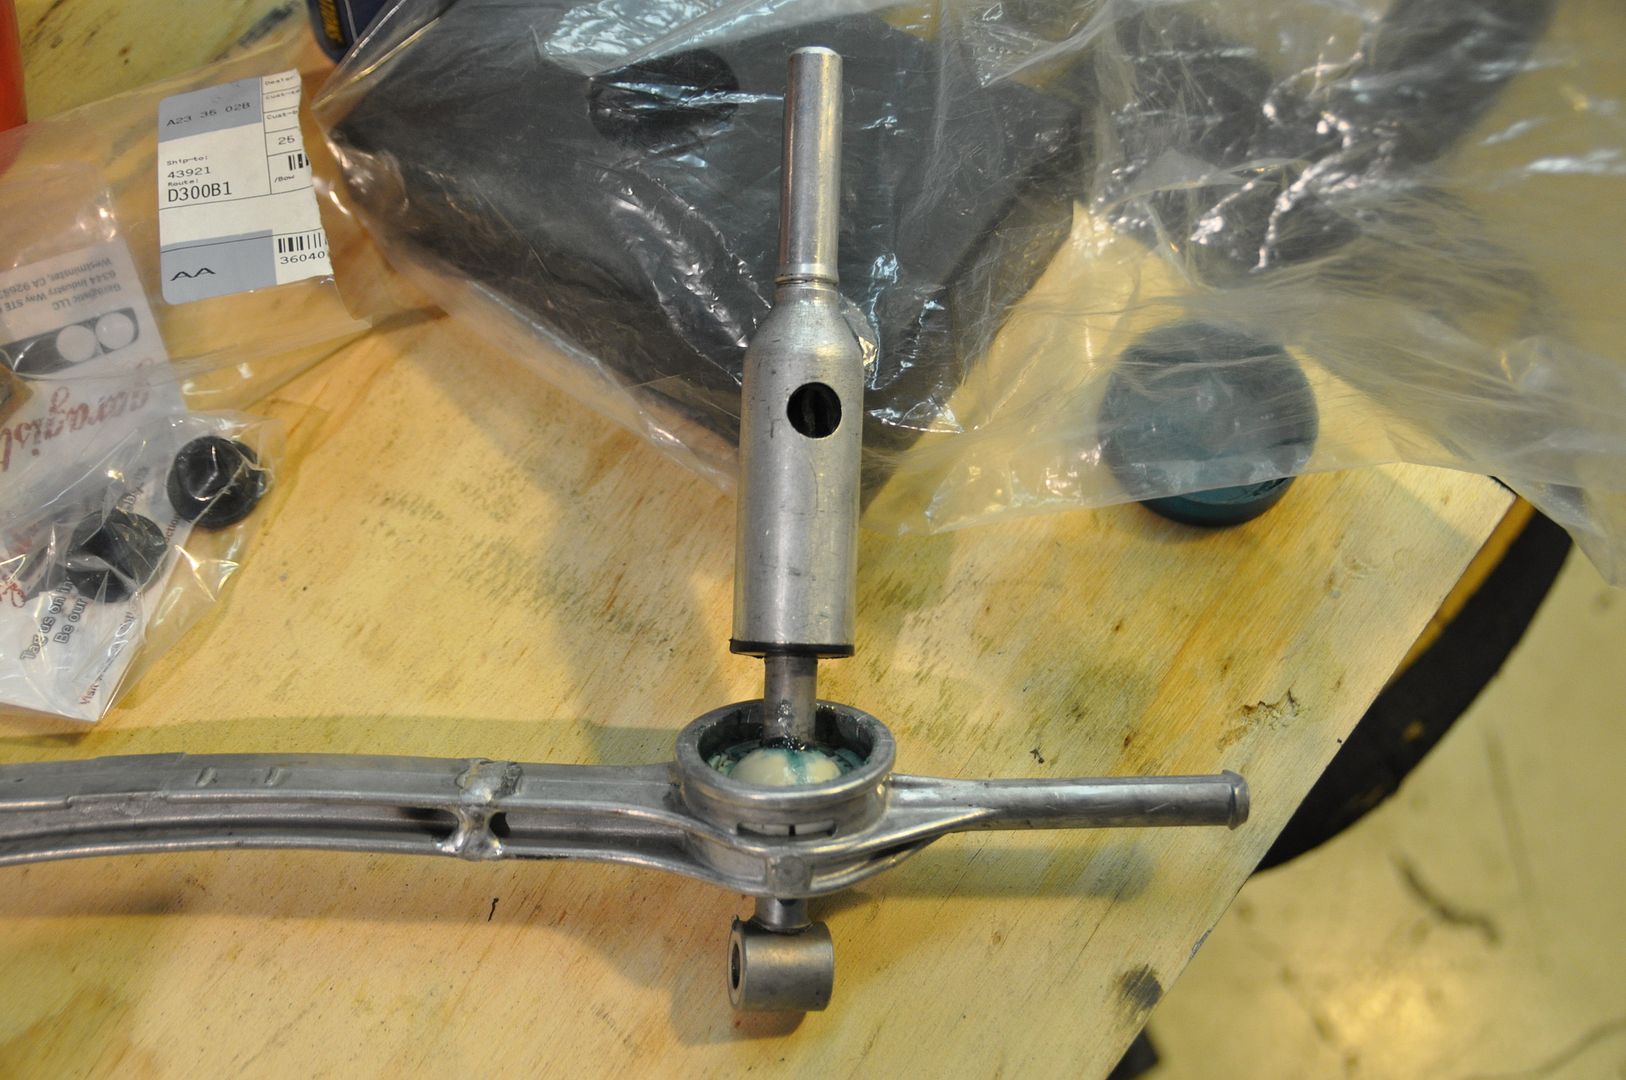
This has been an ongoing sub-project sort of like the house guest that never leaves. I started with trying to install a Z3 1.9 shifter for my existing G265/6 and that was failure (turns out they are incompatible with the stock E28 parts). I replaced that 265 with another one since the internal shift linkage was unbearable to me and it was giving the "Death Rattle". I sourced and put in another G265/6 and in the meantime, Ralph figured out how to make the Z3 shifter work. Turns out a Z3 shifter really is only setup to work with G260 and requires an later version shifting arm (25111220900) and corresponding mounting plates/brackets. This is fine except a 265 is a different length (shorter) than a 260, so this required shortening the whole shifting arm to fit. Then we discovered that the shorter and straighter version of the shifter for the 1.9 is not conducive with the E28 console (it puts your knuckles into the HVAC fins and also has a hard time staying in reverse). So we then tried the 2.3 version which is a tad longer and bent slightly; bingo, that seems to work just fine and gives me just the right amount of short-shifting feel I was looking for.
Since then, after I drove that transmission to Portland and back (+2,000 miles) and then it developed the "Death Rattle". So out it came and the car is presently running on a loaner G265/6 which appears to be fine(?). But this has put a whole rebuild and sourcing new bearings front and center which is in the works.
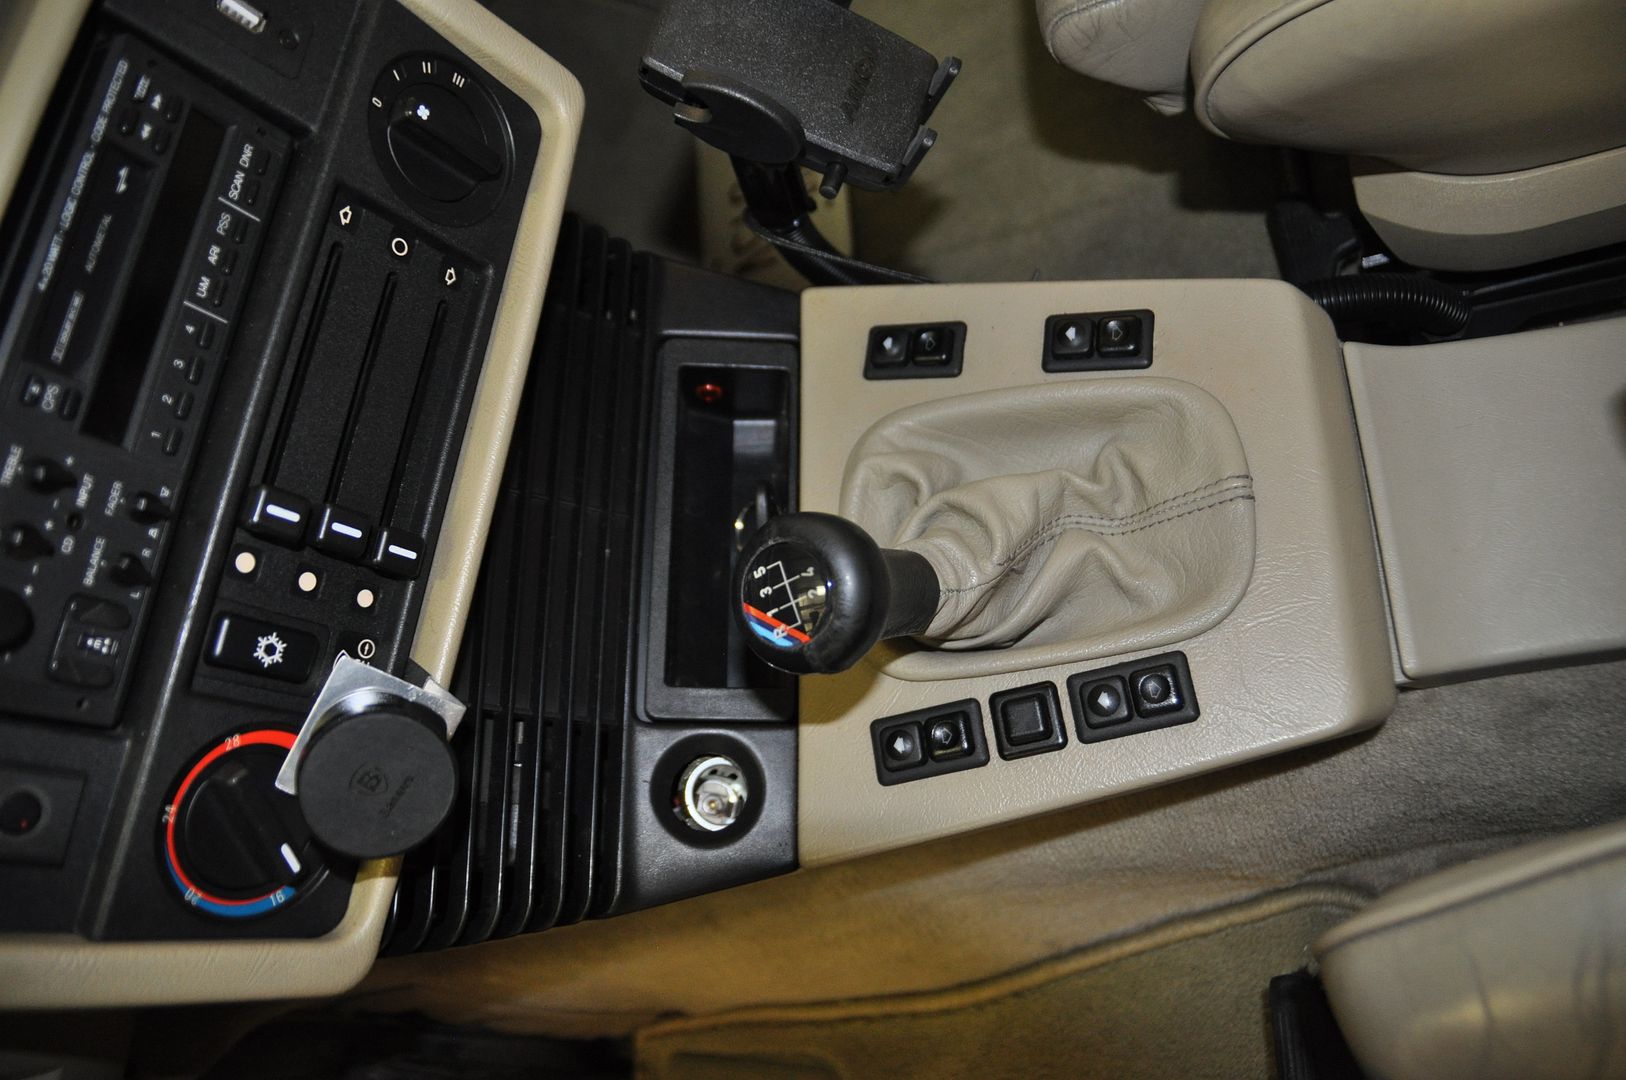
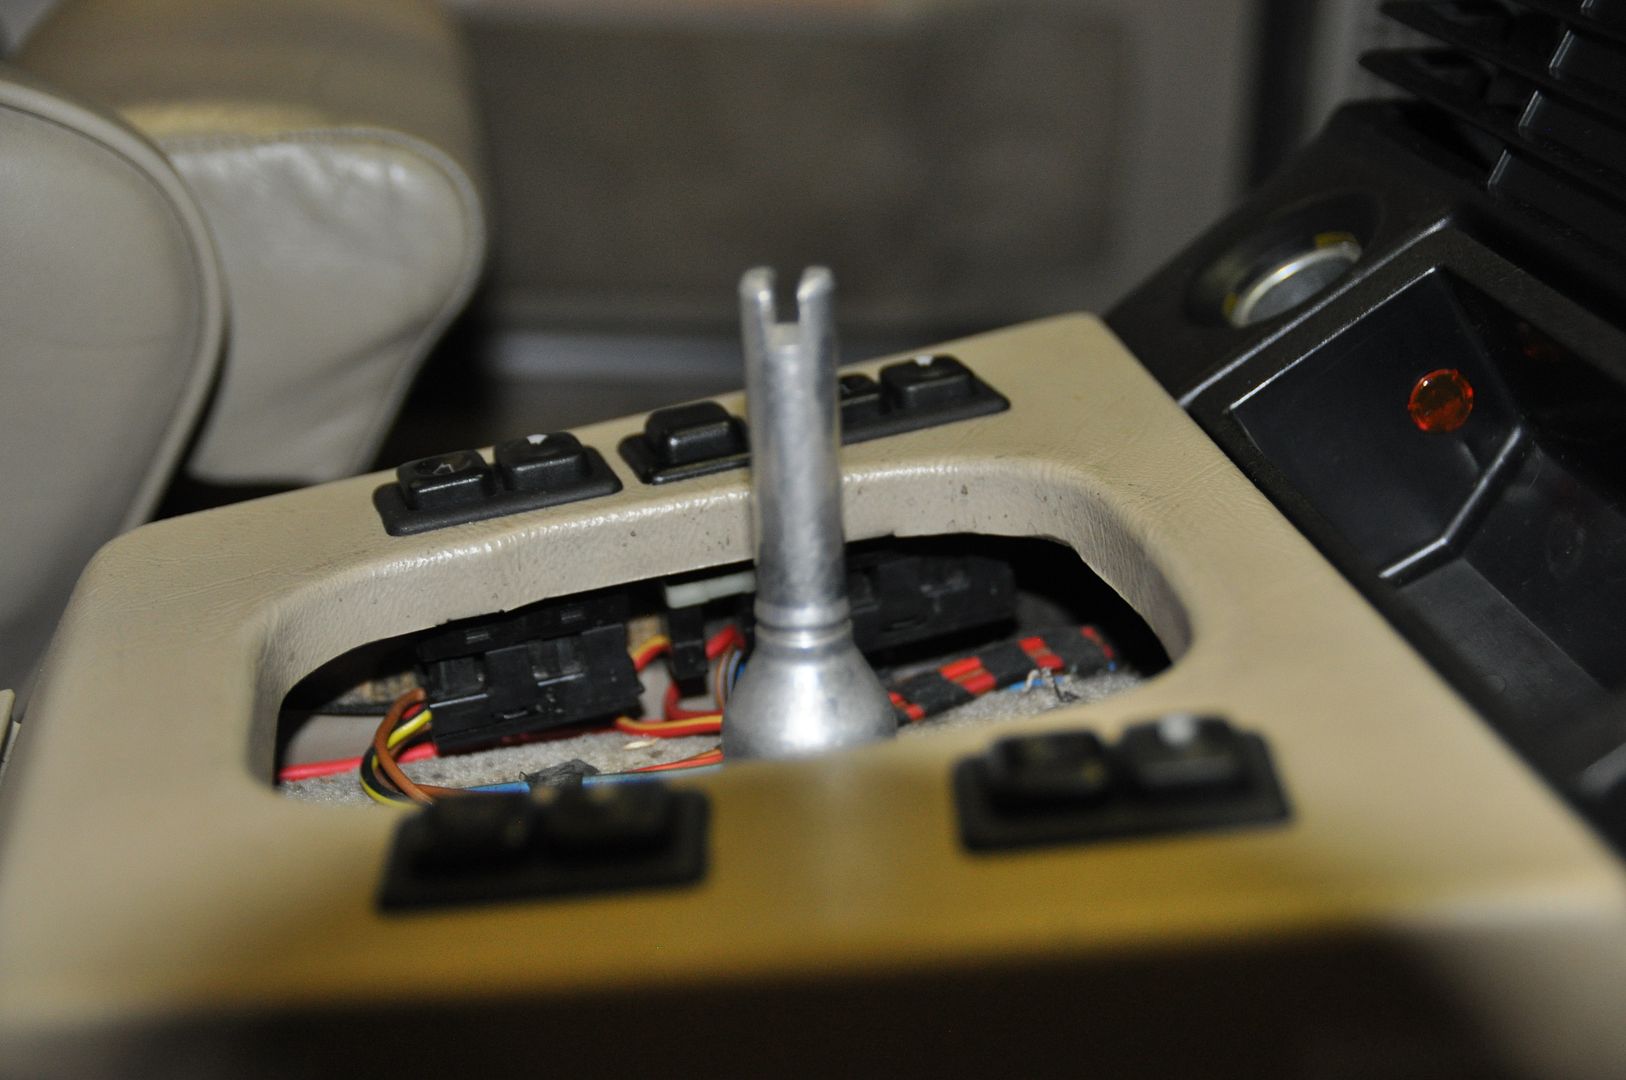
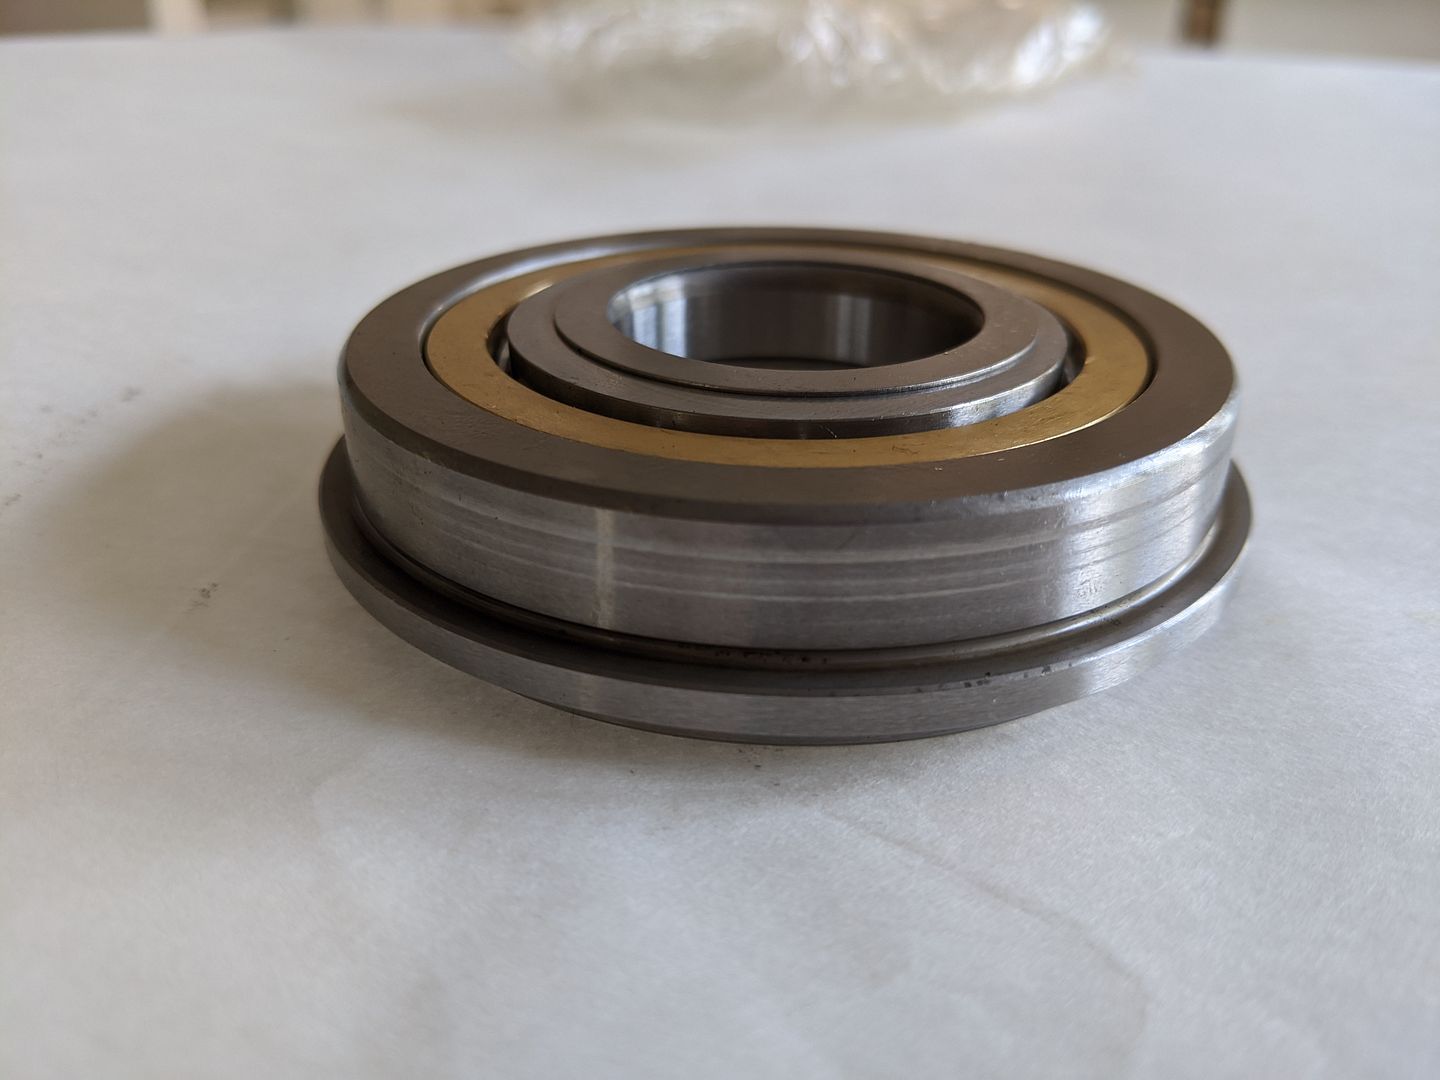
-Misc., Body and Finishing and Everything Else:
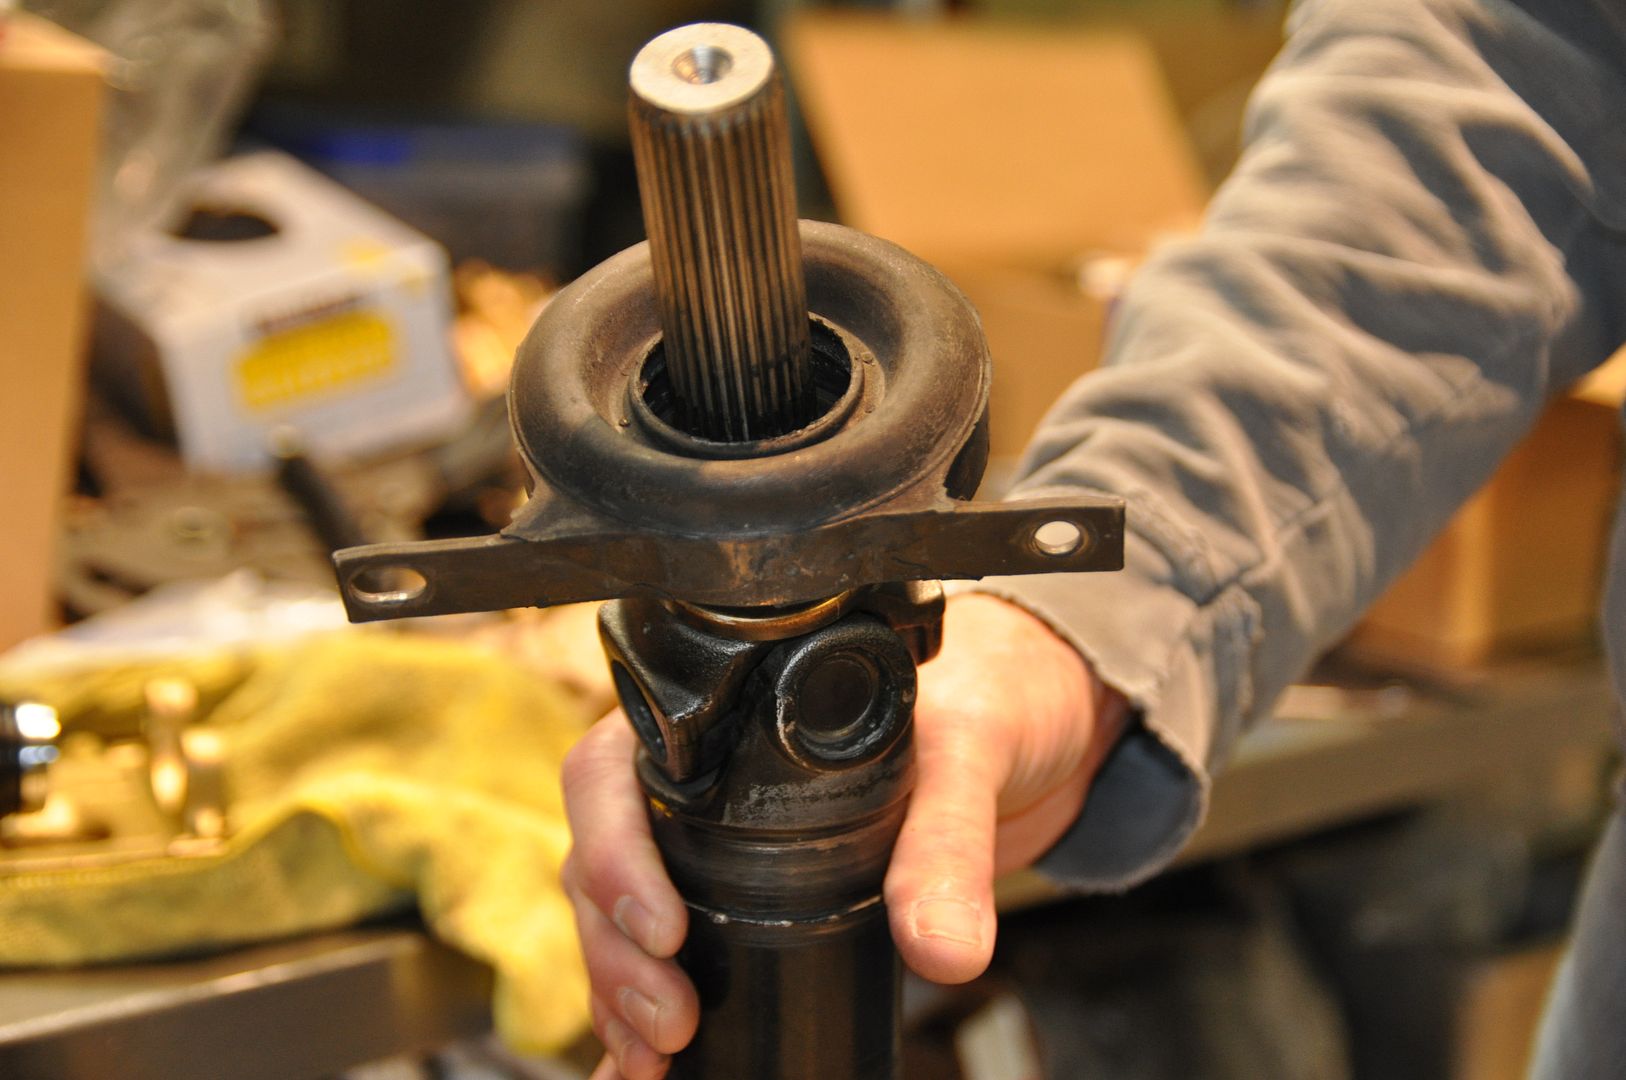
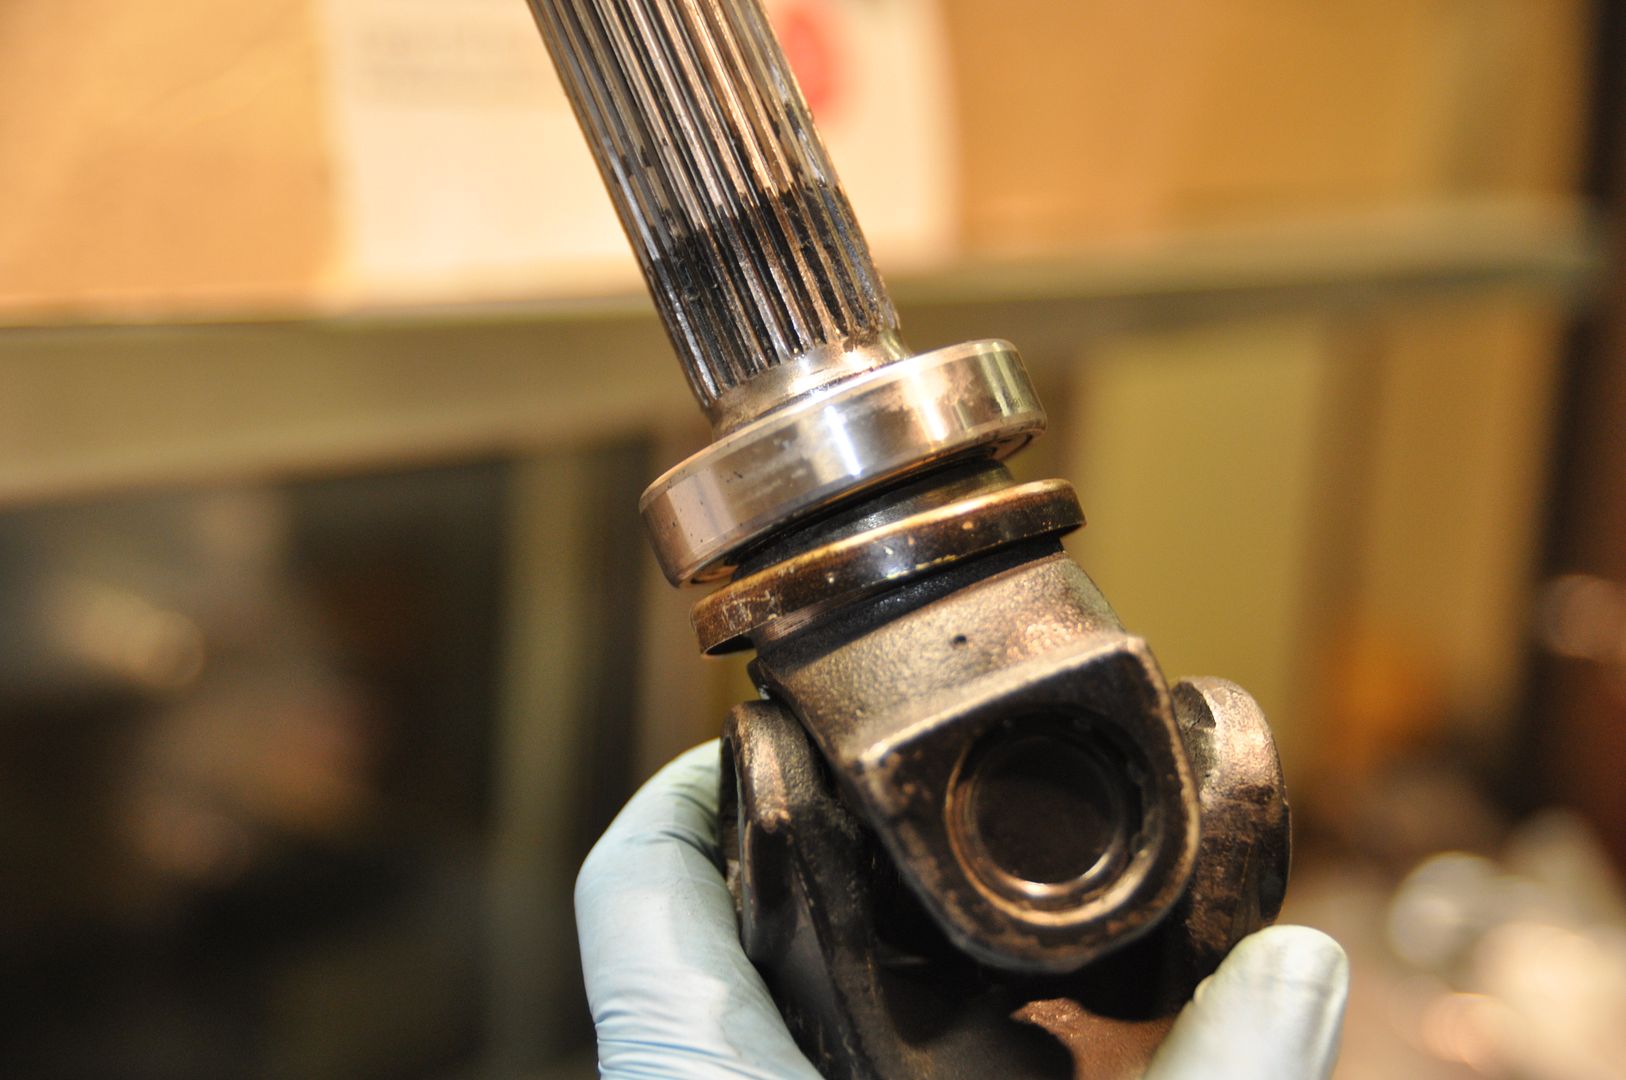
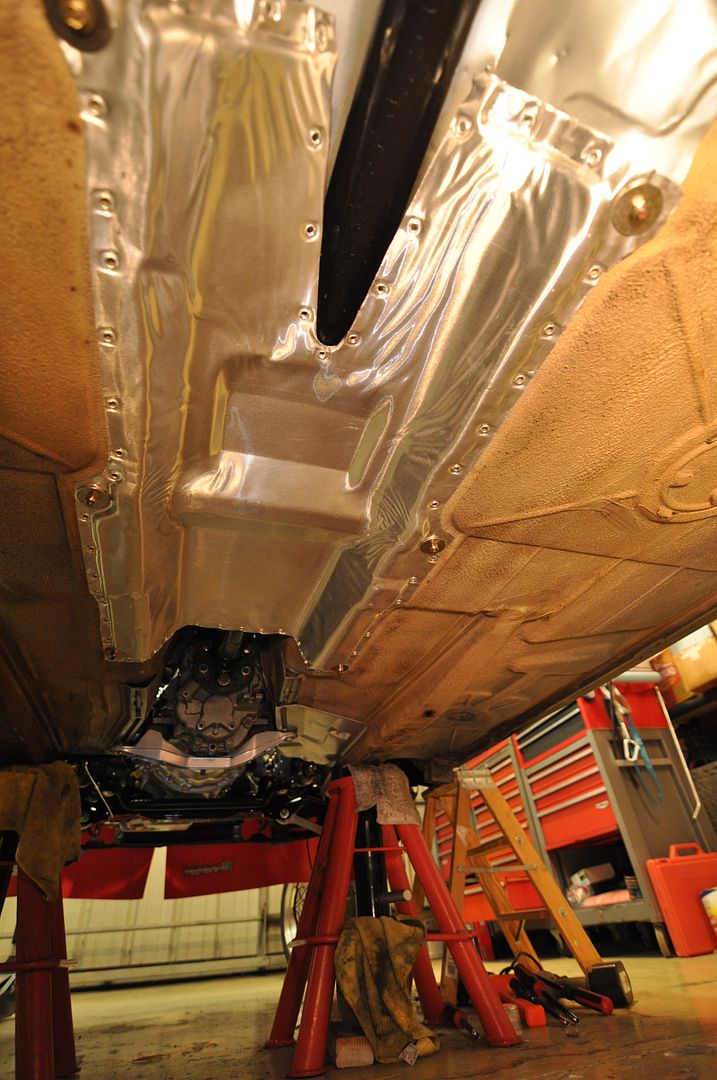
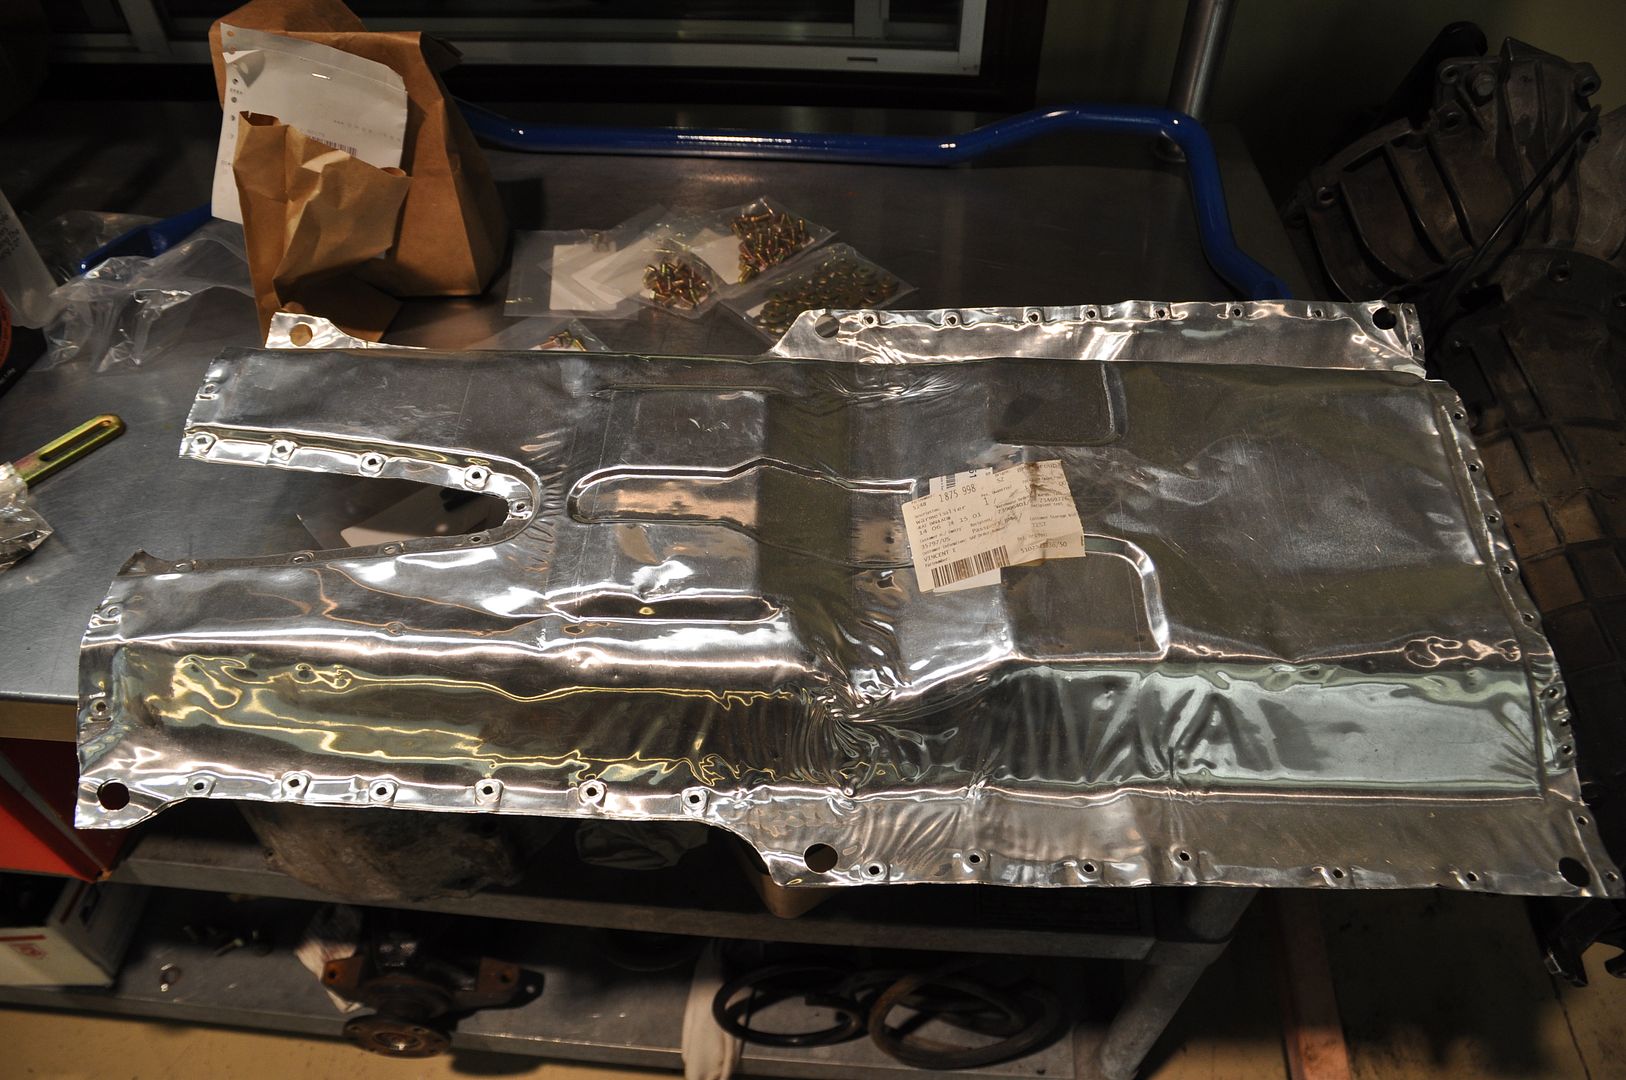
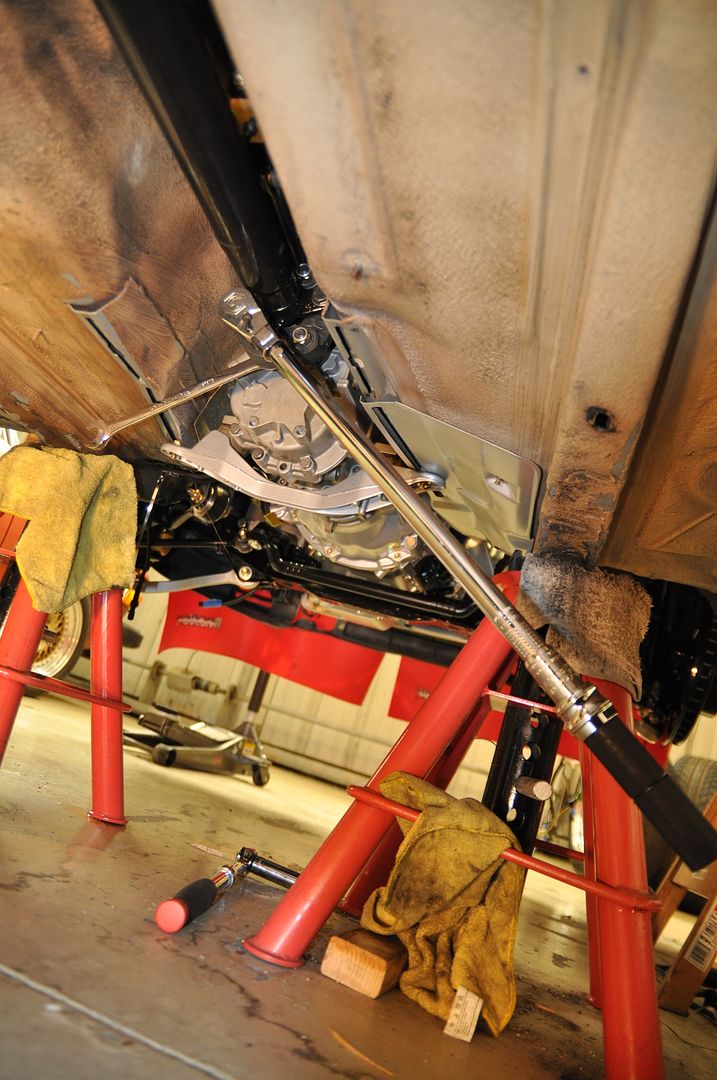
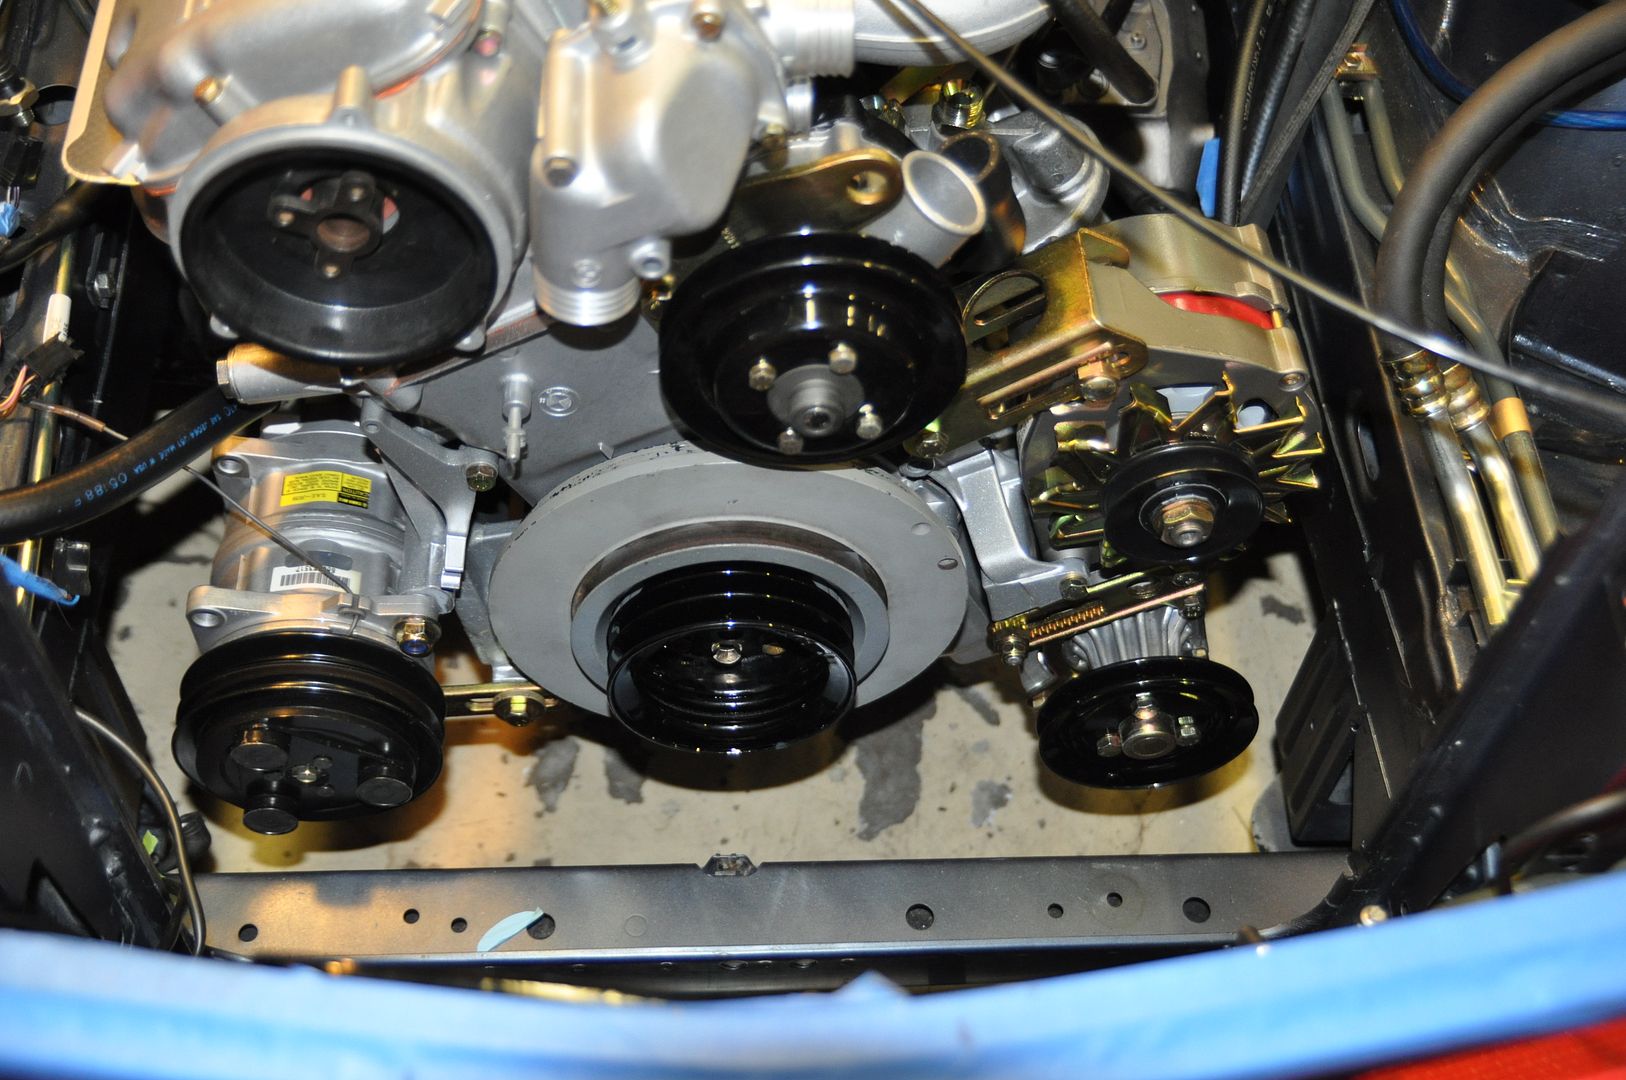
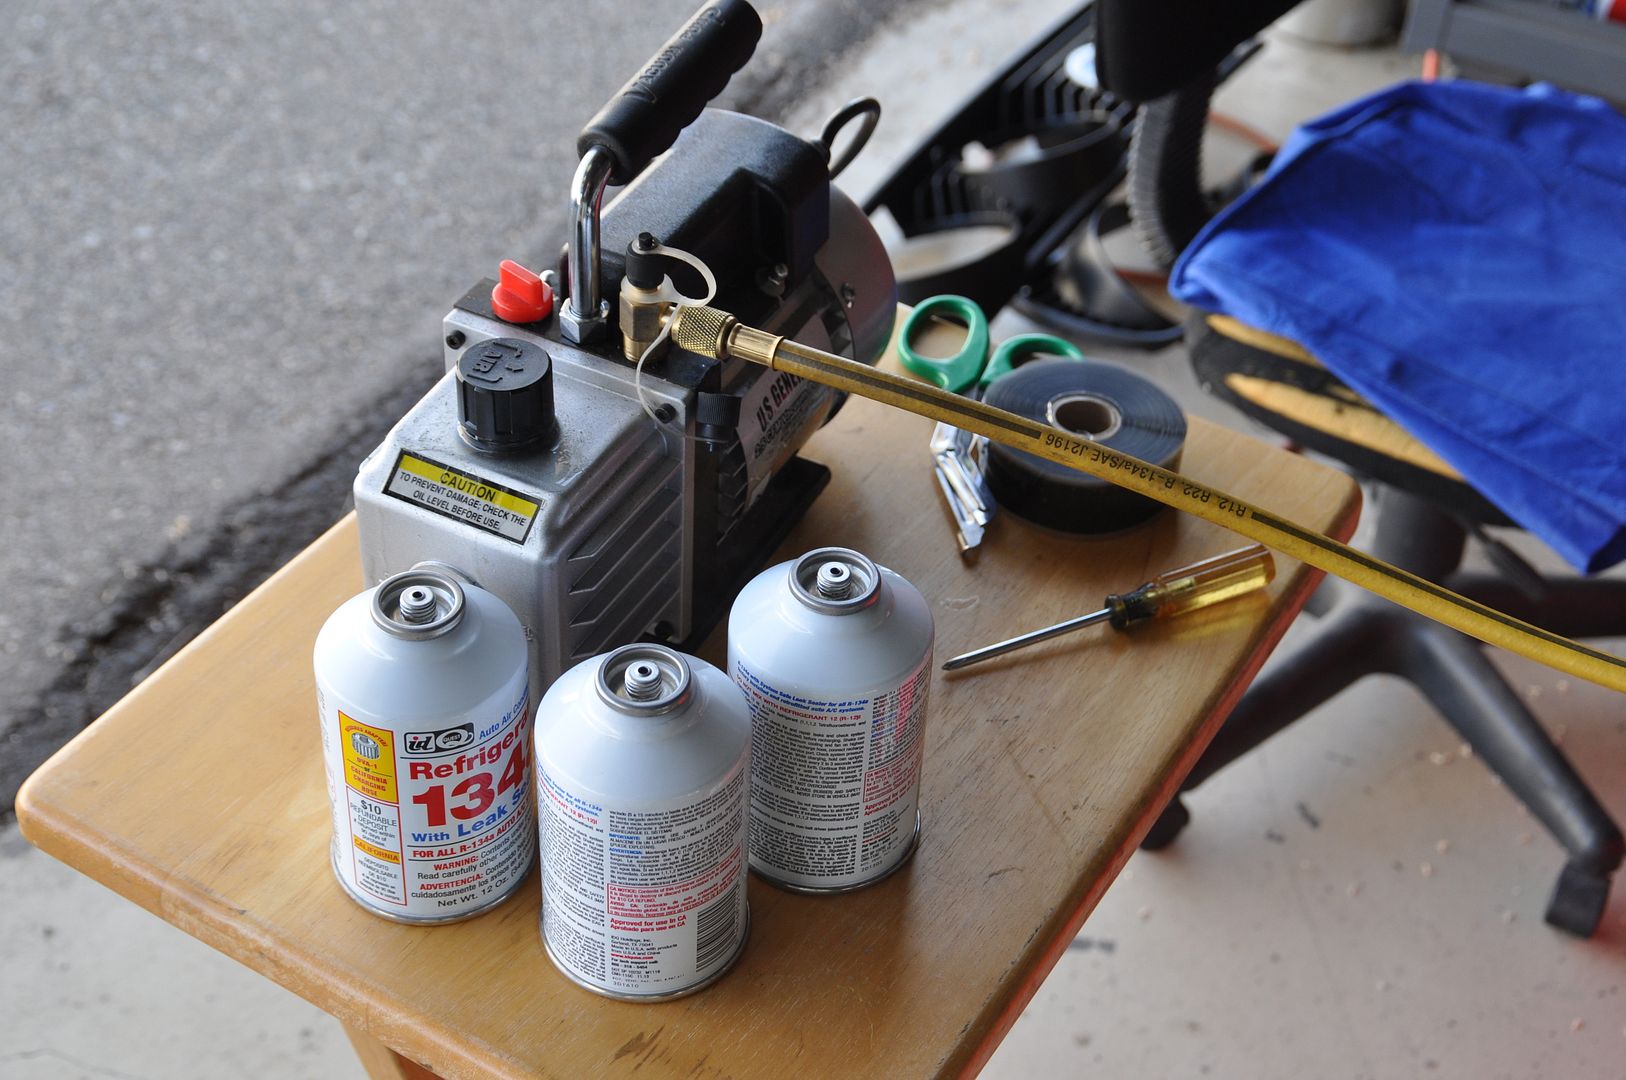
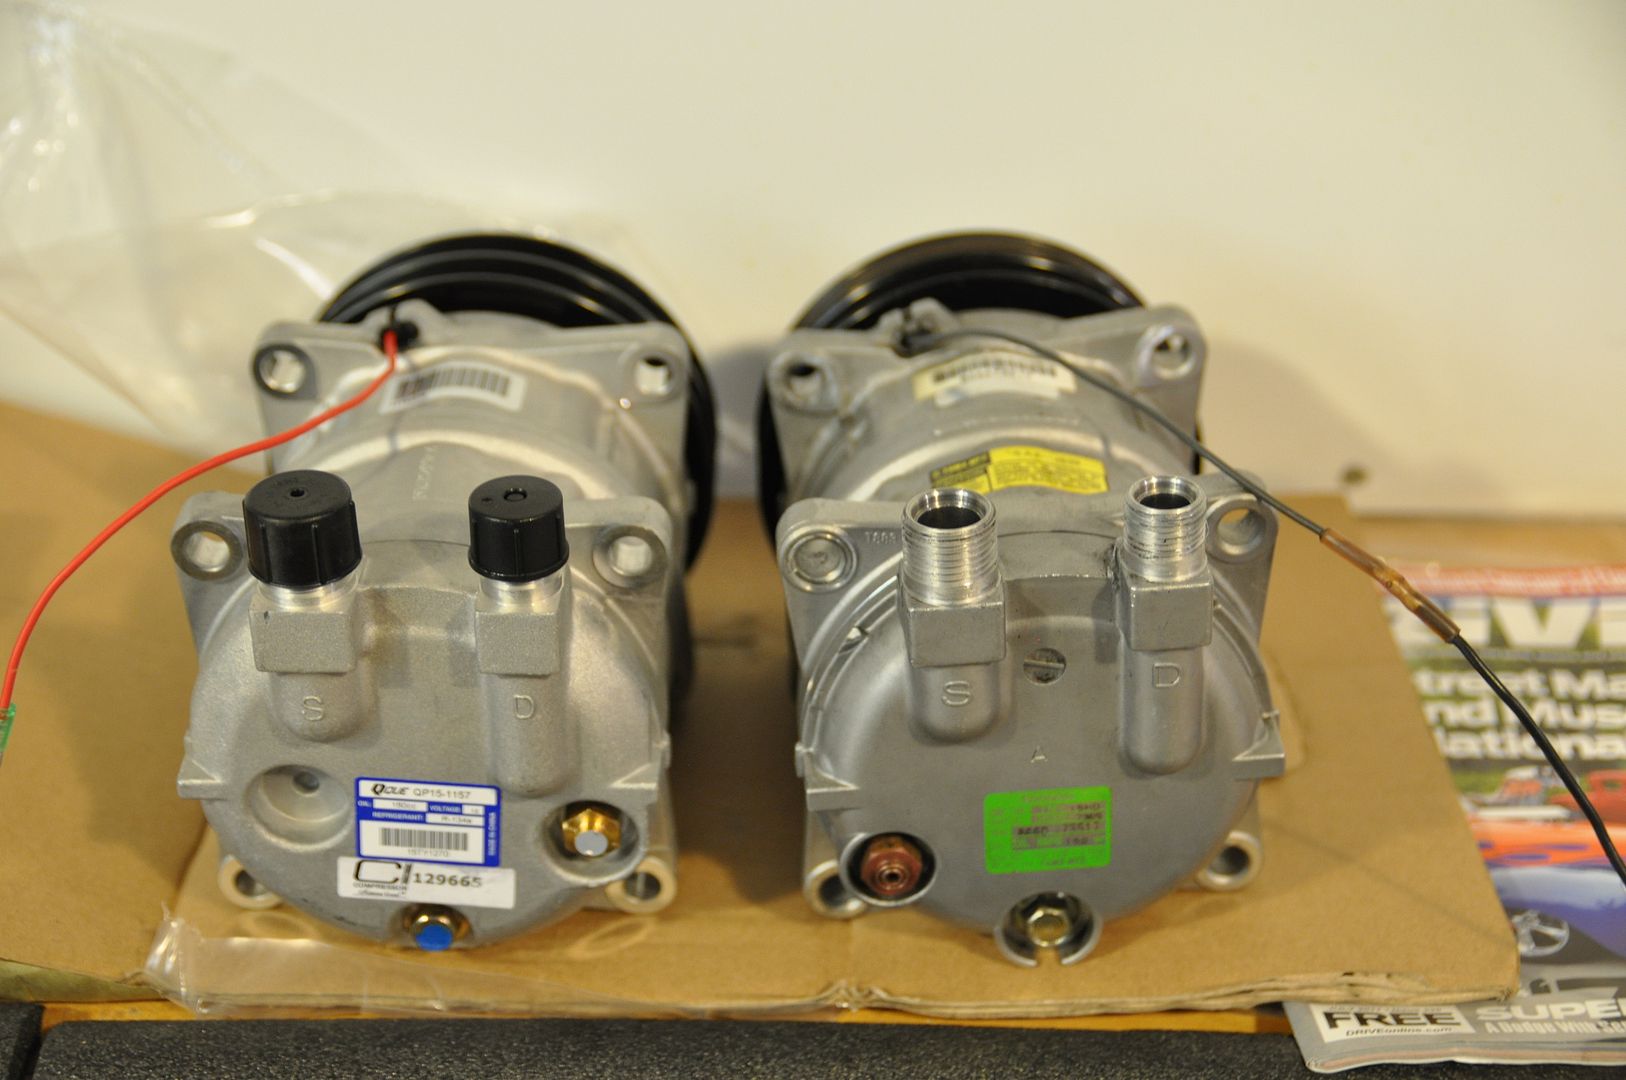
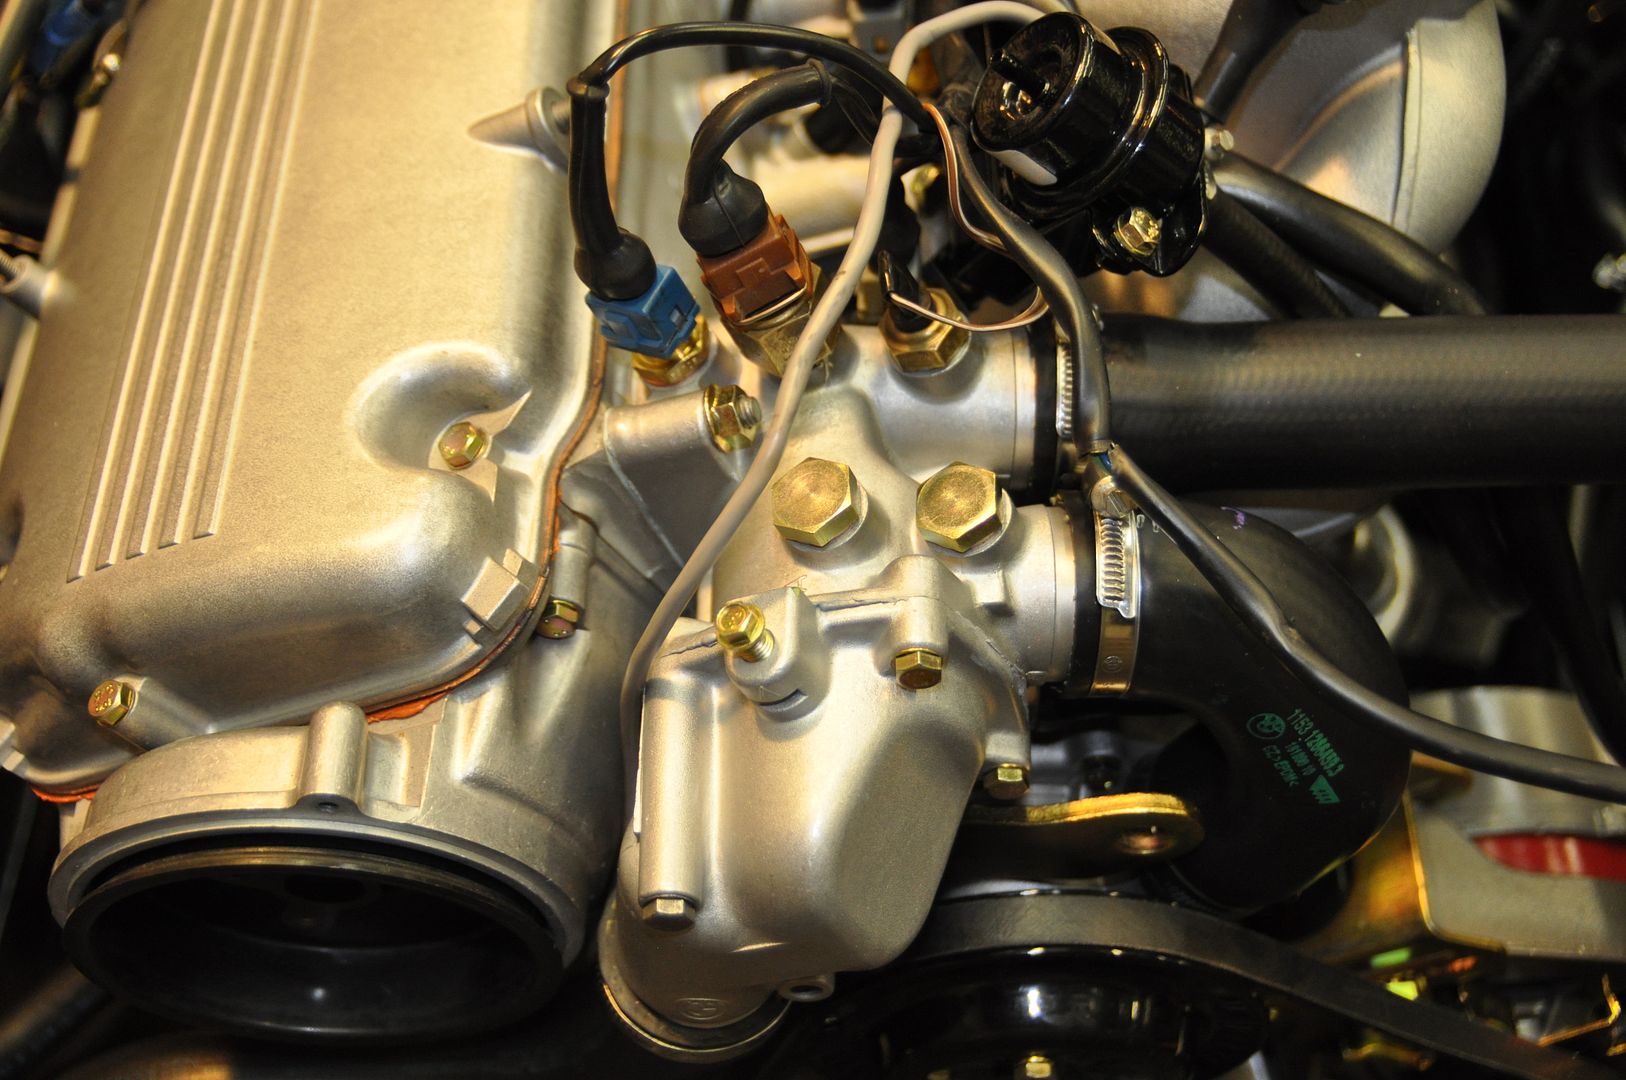
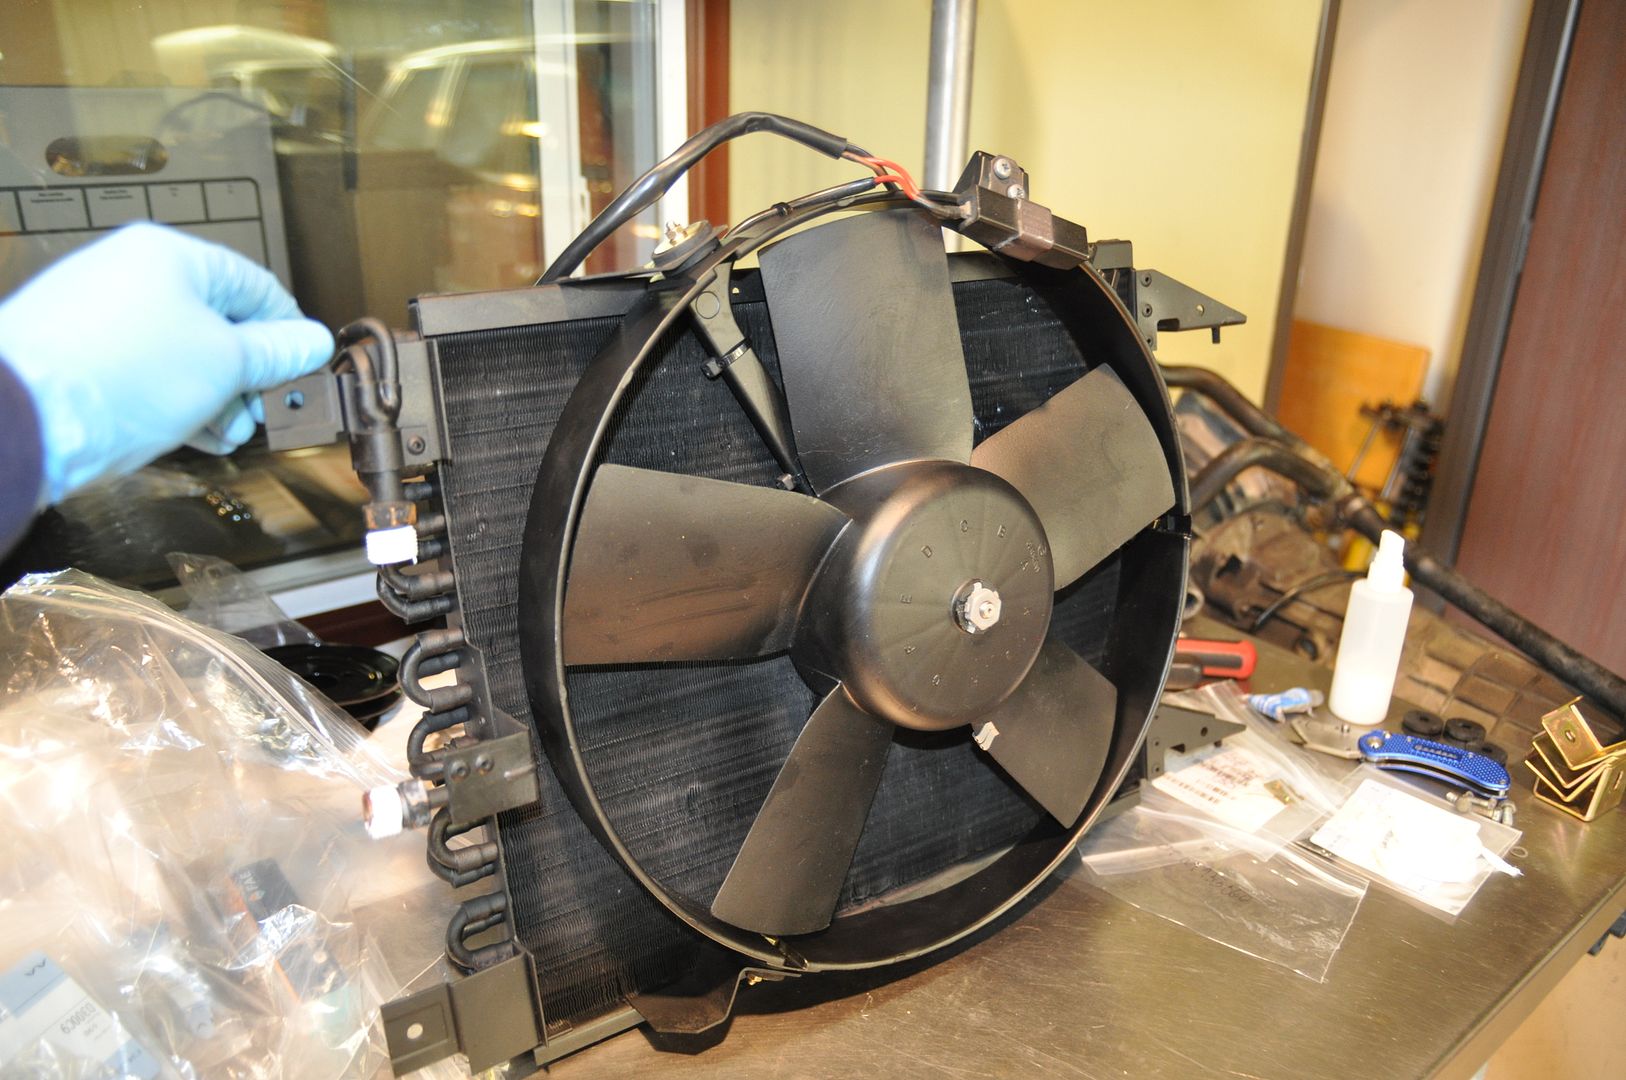
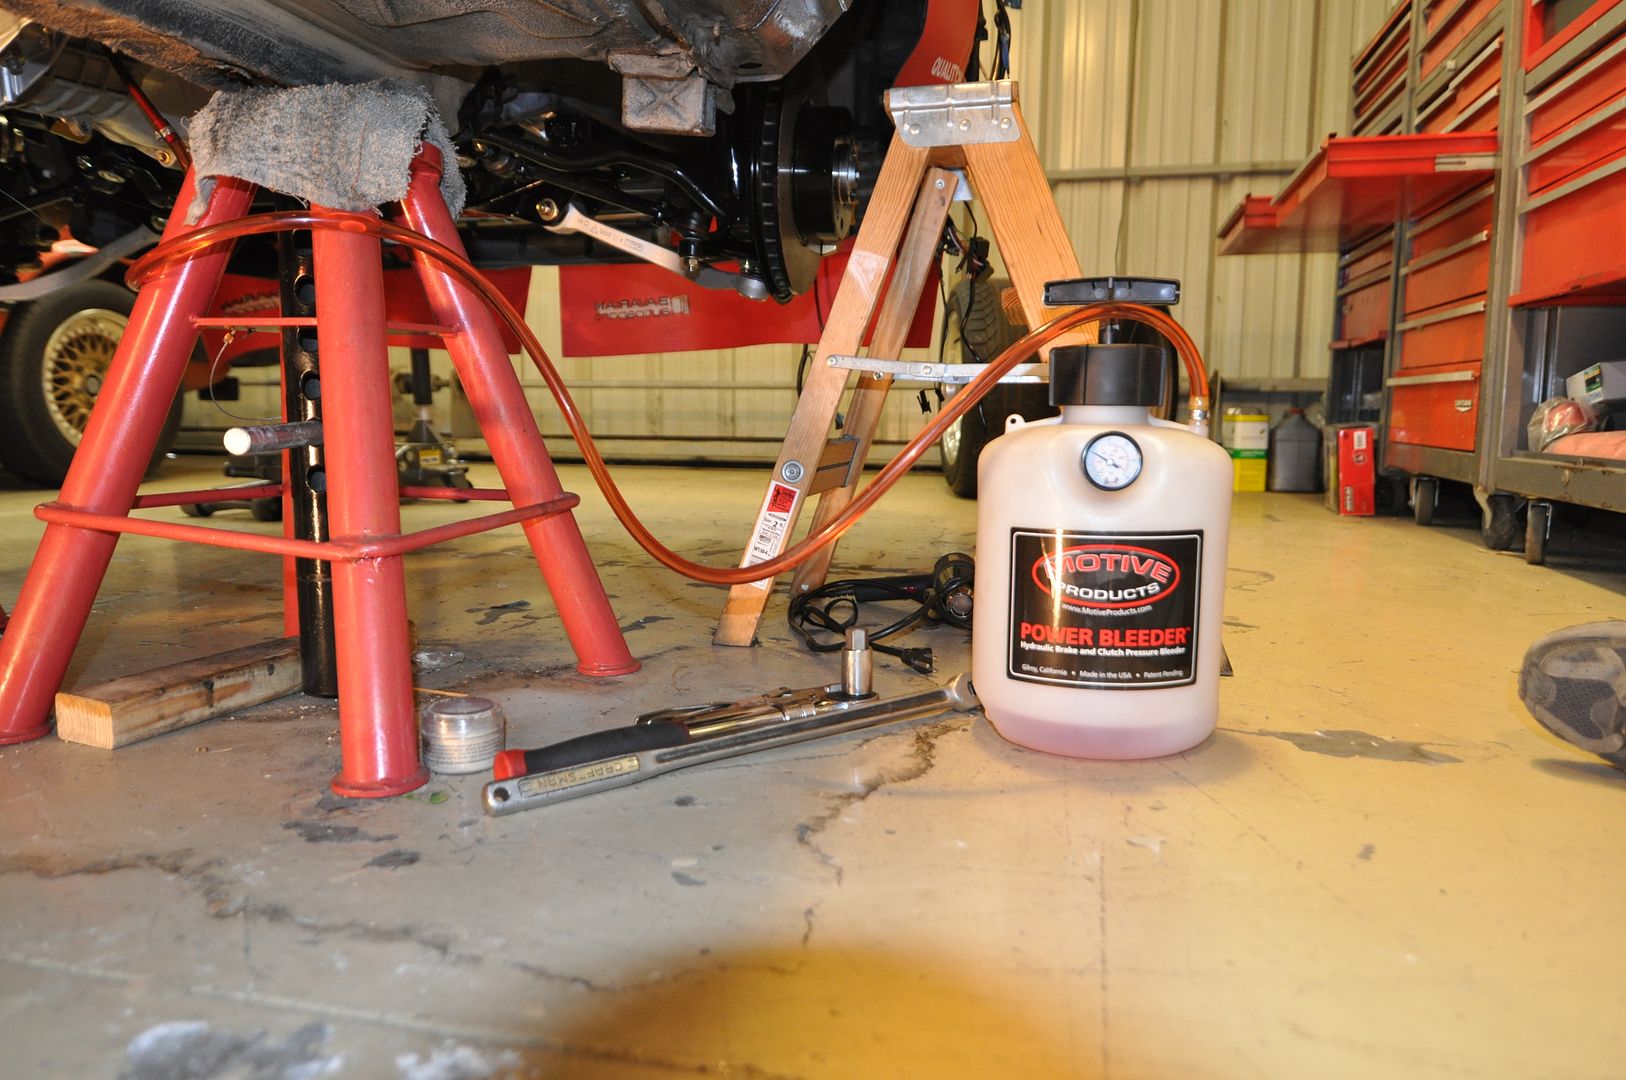
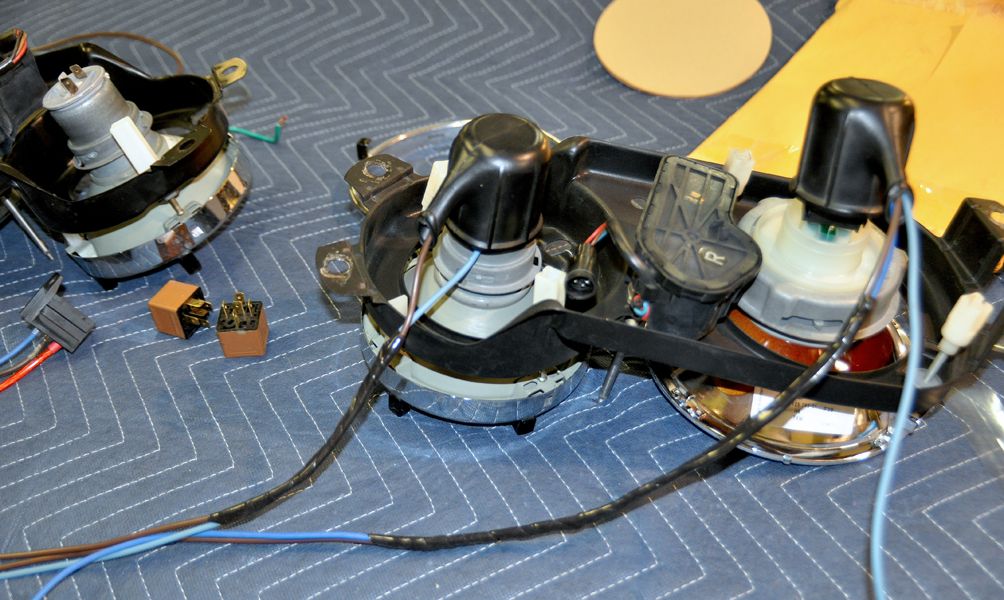
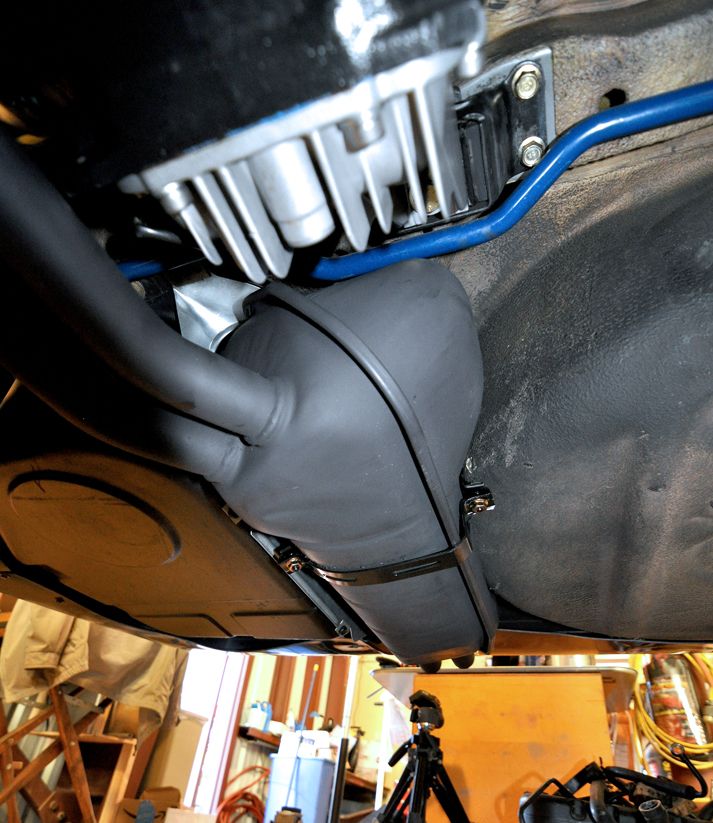
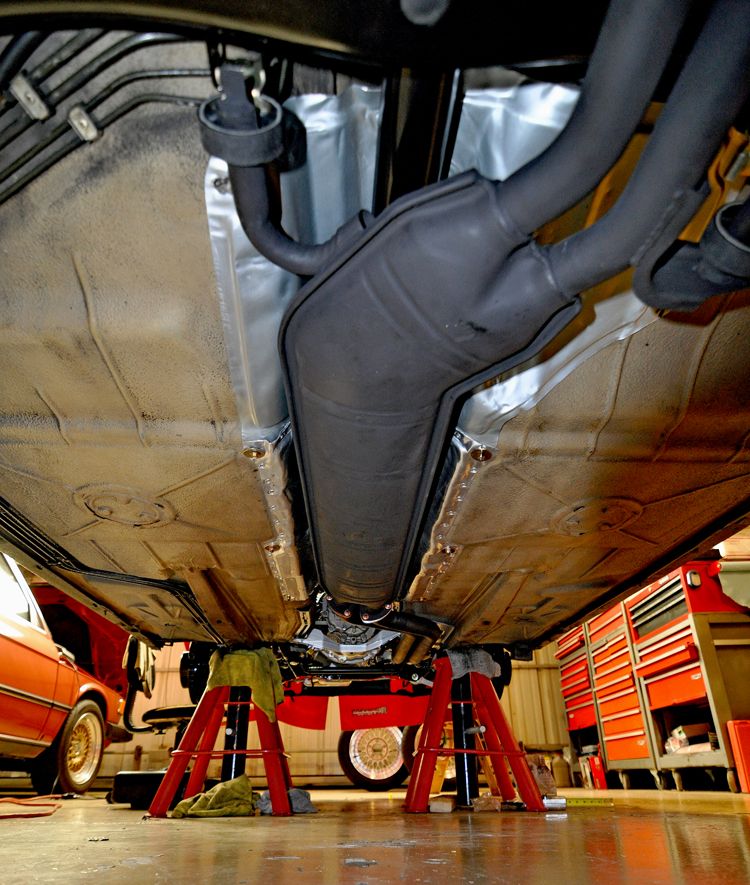
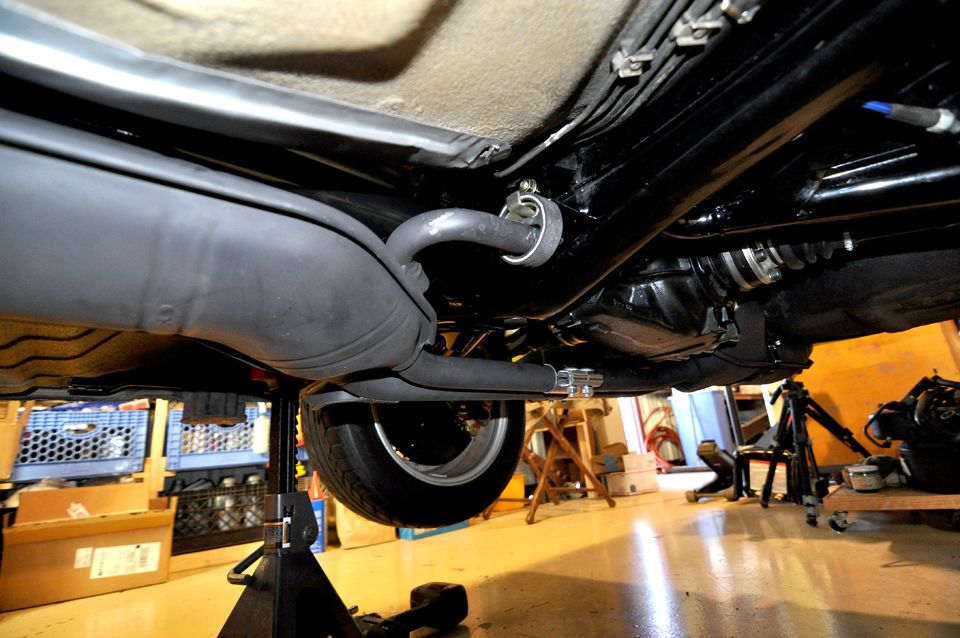
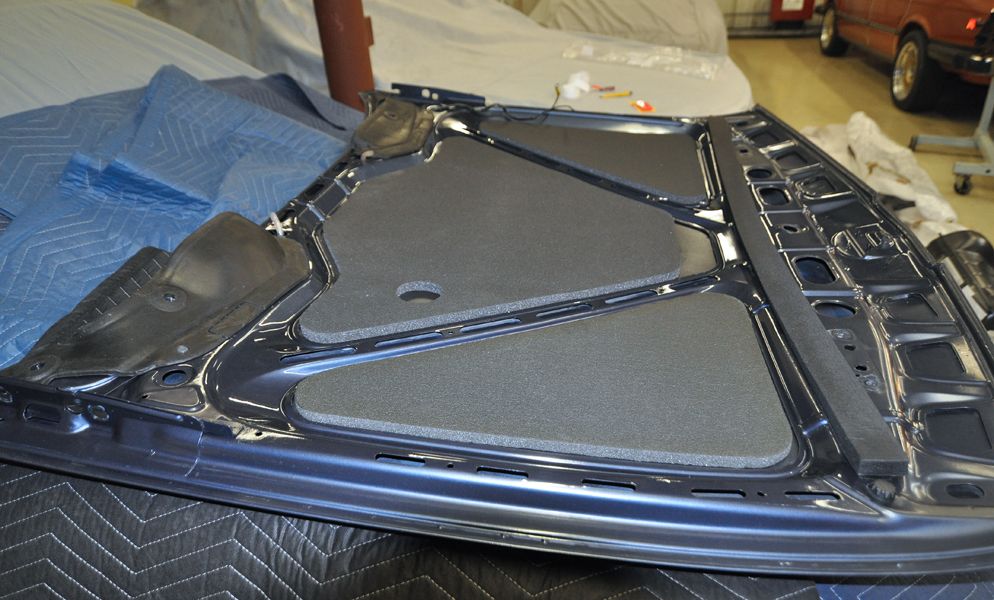
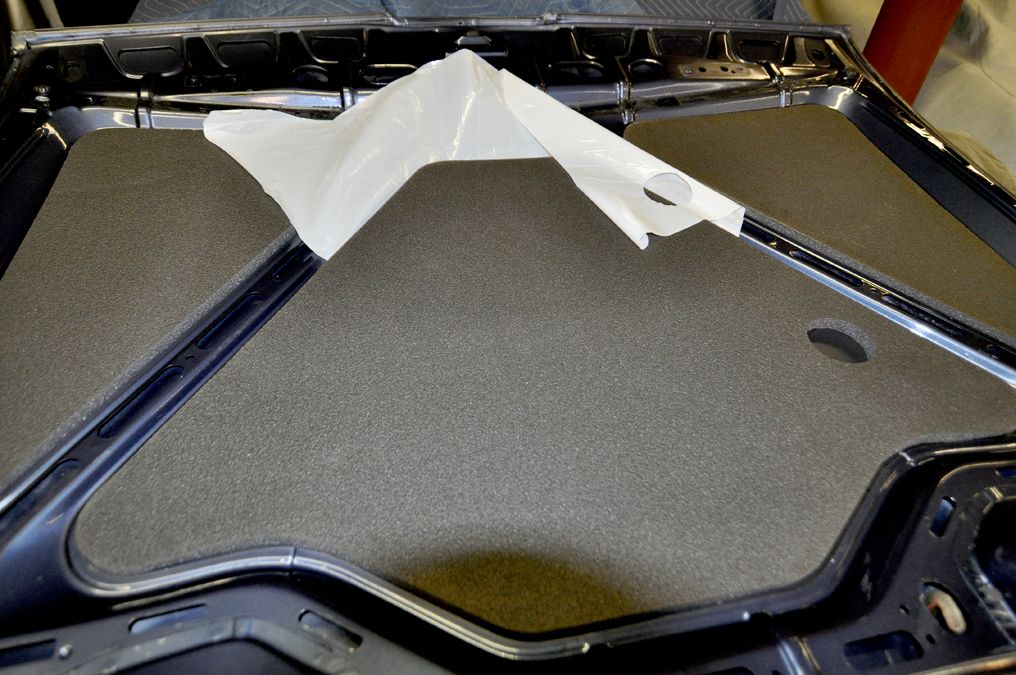
Some of those components and sub-projects are on my forever troubleshoot list, namely the rear windows and trim which actually involves re-doing the entire procedure, so plenty of time to go back a document it all (lucky you).
So, onto the NEW Big Project: Interior Remodel
Confession: I have never really liked the interior of this car. Sure, it was in excellent original condition; who doesn’t like a perfect example of a well-kept M-Tech leather interior? Only…it’s Pearl Beige. It was sort of the trade off when I bought it, a reasonable compromise considering what I was getting. And even though this car has won multiple awards with this interior, it was time to make a change.
Before I bought this car, I looked at another M535i which also happened to be Arktisblau but with an interior I have always coveted: Taurusrot leather. However, that car was kind of a rolling disaster. It also suffered terribly at the hands of its’ last owner, but that’s a whole other saga (and well documented on this forum).
For those of you unfamiliar with Taurusrot, it seems it wasn’t a terribly popular color offered mainly in early E28’s and E24’s (I’m sure they showed up in other models, but not often). It’s a bit of an odd color in their Red family and best falls into the “Dark Red” category. The easiest way to describe it is start with Cardinalrot and add black to make it darker (that’s an over-simplification but you get the idea). As I have been discovering trying to source a modern equivalent, it’s a lot harder to match than it looks since the color often leans towards the brown side of the spectrum. In fact in a lot of light, it is easy to see how people can mistake this for a brown rather than red (even if you’re not amongst the large segment of the male population who is red color blind). Most modern leather and other auto manufacturers’ “dark reds” tend to be closer to Burgundy which is more purple. In my mind Taurus represented one of the deepest and richest colors of leather BMW had to offer; there was something very elegant about a deep, dark red offset with the black and Anthracit trim & carpet that just screams sumptuousness. Paired with a great exterior color like the Arktisblau, I am looking for a total transformation of this car.
So, I started planning, buying various parts, and generally waiting for the right moment to pull the trigger. Looking back at all that as I was putting together one of my epic spreadsheets, I realized I have been gathering stuff since before the last project (2015). The biggest piece of the puzzle fell into place a few years ago: an almost intact M-Tech Taurus E28 interior; complete rear seats, and all four door panels with armrests being sold by a board member. The only thing missing were the front M-Tech Sport Seats (the seller had them, but they were thrashed power seats). I was hoping to find a whole interior to just transplant without any re-upholstery, but I discovered that finding good, intact manual M-Tech Sport Seats is quite the task. Finding them in Taurus was nearly impossible, they were truly Unicorns. So, I was in for re-upholstering at least my manual M-Tech Sport Seats, hoping to match the existing Taurus leather. More on this later.
As with most of my projects, I really tend to throw everything and the kitchen sink into it. This project was an opportunity to address several outstanding issues I have been postponing dealing with. It really is a “While you’re in there” type of project.
Here is the list that constitutes the whole scope of work for this project:
-Taurusrot Leather: Front & Rear seats, Rear headrests, Driver’s Front Armrest (Bavarian Autosport)
-Taurusrot Vinyl: Door Panels, Door Armrests (with Anthracit trim and carpet insets)
-Anthracit Carpet: Replace the existing Pearl Beige
-Anthracit Trim: Replace existing Pearl Beige Lower Dash, Center Console and Lower Seat pieces
-Anthracit Headliner: Replace the existing woven Pearl Beige (with decaying foam backer)
-Anthracit Rear Parcel Tray & Sunblind: Dye existing Pearl Beige (another Unicorn item)
-Steering Wheel, Shift Knob & Shift Boot: Re-Covering existing M-Tech I wheel, New Black Shift Boot, Re-Covering and/or New Shift Knob
-Seat Repairs: Welding & Repairing Driver’s M-Tech Sport Seat, New Parts
-Body Repairs: Weld in Graft Replacements to both Front Floor Board outer corners (Body rust & holes leftover from the cars’ former life in the NE); Weld in Graft patch to the Rear Bulkhead (giant ugly hole from a PO for a trunk sub-woofer); Weld in Graft Replacements to Lower Rockers at the Rear Jack points (again more fallout from the NE).
-HVAC Repairs/Preventative Maintenance: Replace both the Heater Core and the AC Condenser, repair/replace/upgrade misc. parts and what-not
-Audio System Upgrades: Mostly just the infrastructure with new signal wiring from the Head Unit to the Amps in the trunk, but since I have to completely dismantle the current system (cabin wiring and trunk), I may be trying out a new Head Unit. Also, I will be fabricating and installing a cooling fan system for the Amp Board (it was overheating my last long road trip).
-Thermal & Acoustic Abatement: This is a big item I am working which involves addressing the following items: Roof, Doors, Rear Bulkhead, and Floor.
Well, I guess that’s enough to classify this as a big, massive, all-consuming project doesn’t it?
Of course, while all this is happening, I STILL have a short list of leftover troubleshooting items from the previous project as well as on-going issues. Stuff like: Fixing the Wiper Relay wiring in the Fuse Box (my F-Up), tracking down a battery drain somewhere, trying to resolve the bearing replacement for the G265, and trying make sure I didn’t F-Up the Head Gasket a few years ago, etc., etc., etc.
Since there is a lot of coordination between several trades-people and disciplines and their schedules, I have to sequence and overlap that whole scope of work. I’m breaking it down to happen in five major parts:
-Part I: Headliner
-Part II: Leather Upholstery
-Part III: Floor & Carpet (w/Body Repairs)
-Part IV: Interior Trim
-Part V: Equipment and Everything Else
PART I: HEADLINER
First up is the Headliner. I’m doing this first because the brilliant Craftsman that will be doing this and Upholstery doesn’t become available until the end of March and then will take about 6 weeks to do the leatherwork. He’s in high demand and only a One-Man shop so he has projects stacked up; it was a bit of chess match figuring when my schedule becomes free and aligns with his (I was ready to start this project back in November more or less).
Taking advantage of the wait time, there is preparation work to do in advance of me dropping off the car for his work. Few weeks back I started in with tearing out the old headliner (complete removal happens after the front Windshield and rear window are removed down in the shop). Before that was the near complete removal of the interior: Seats, B-Pillars, Rear Parcel Tray and A-Pillars. The remainder will come out when I get the car back after the new Headliner is installed.
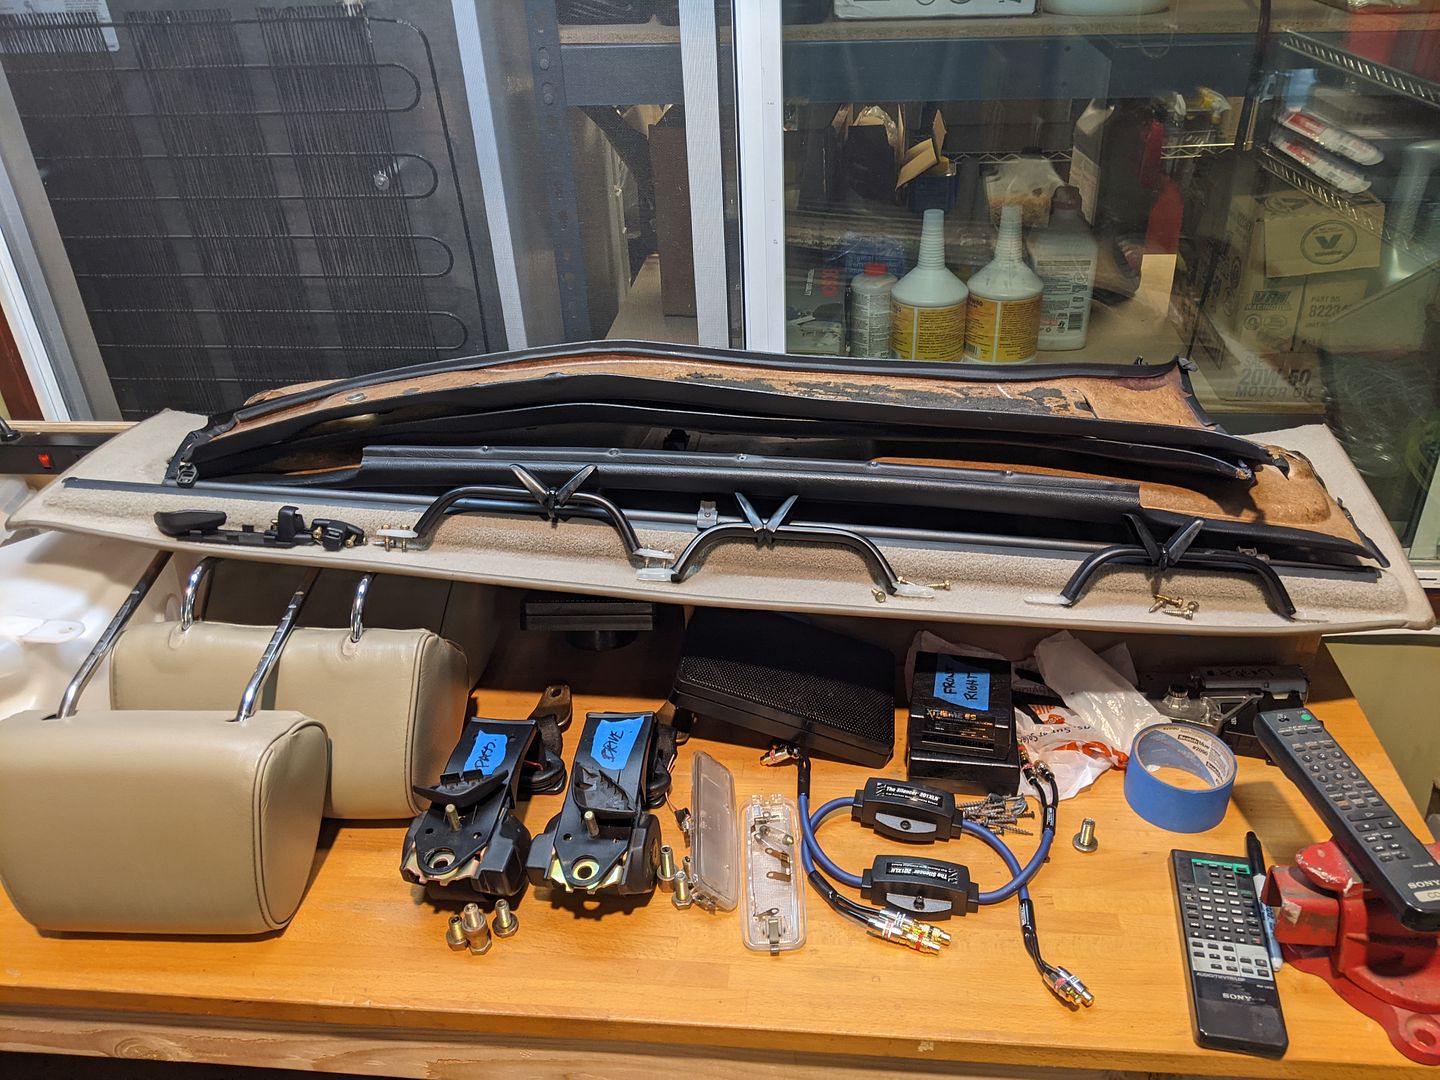
On to the fun stuff:
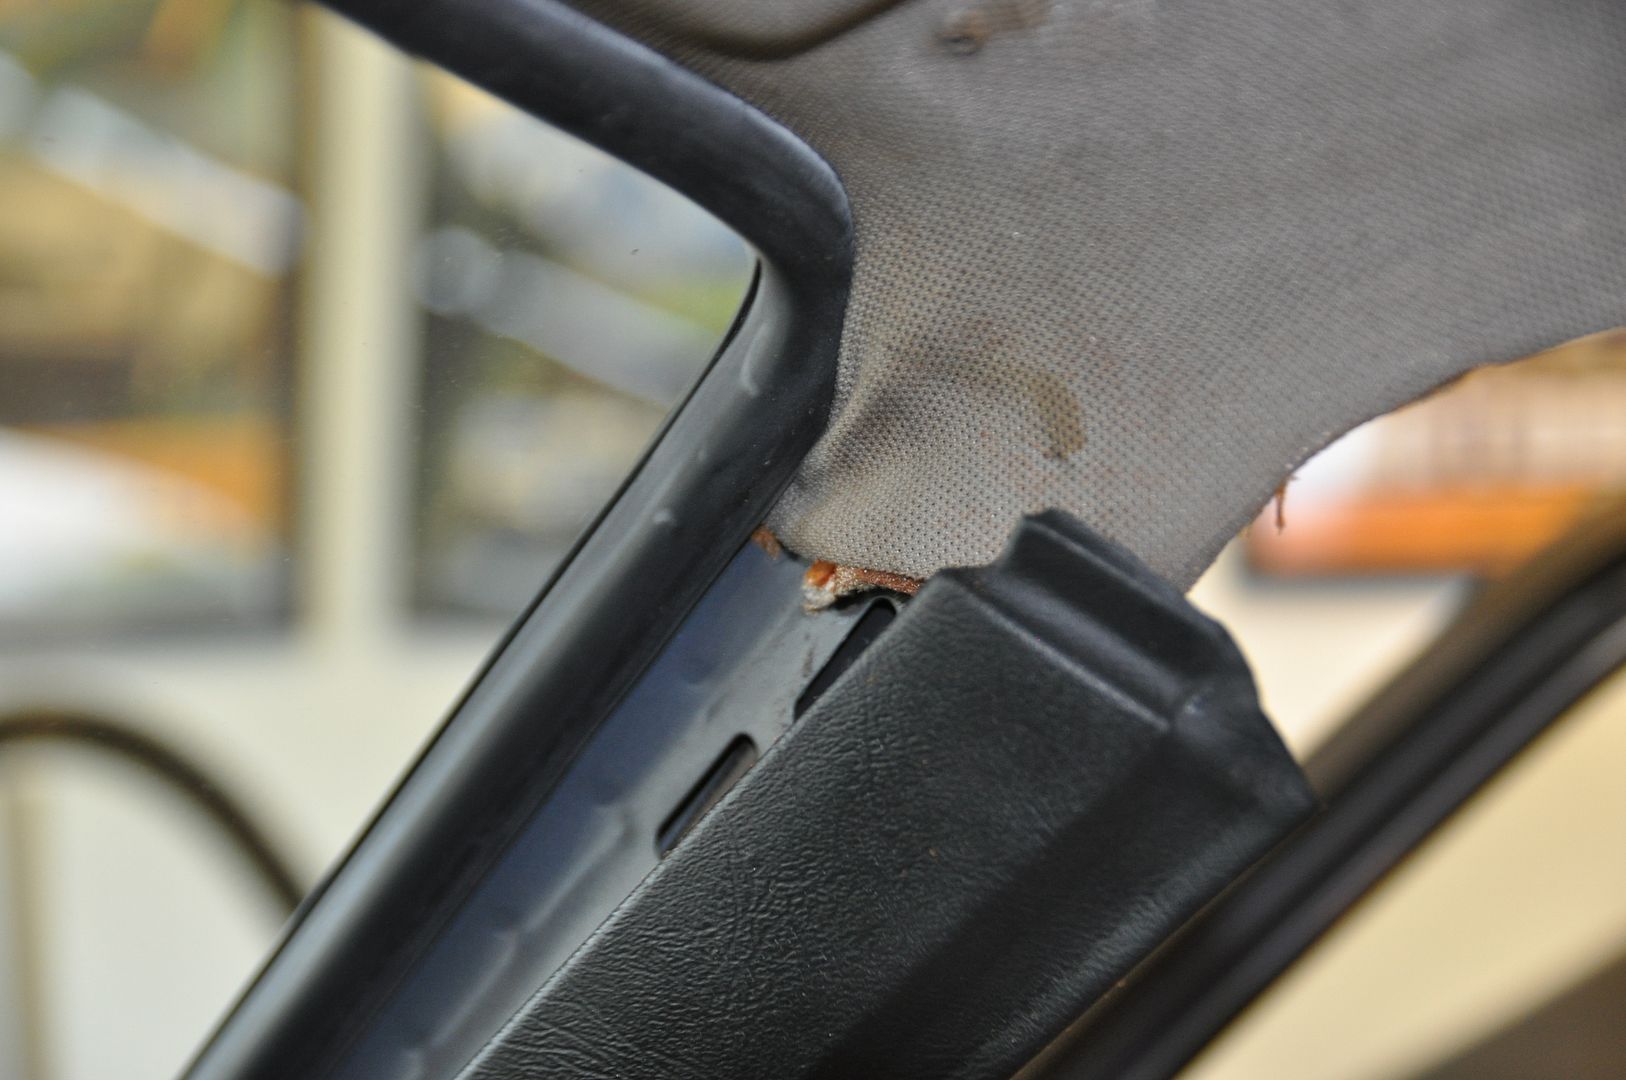
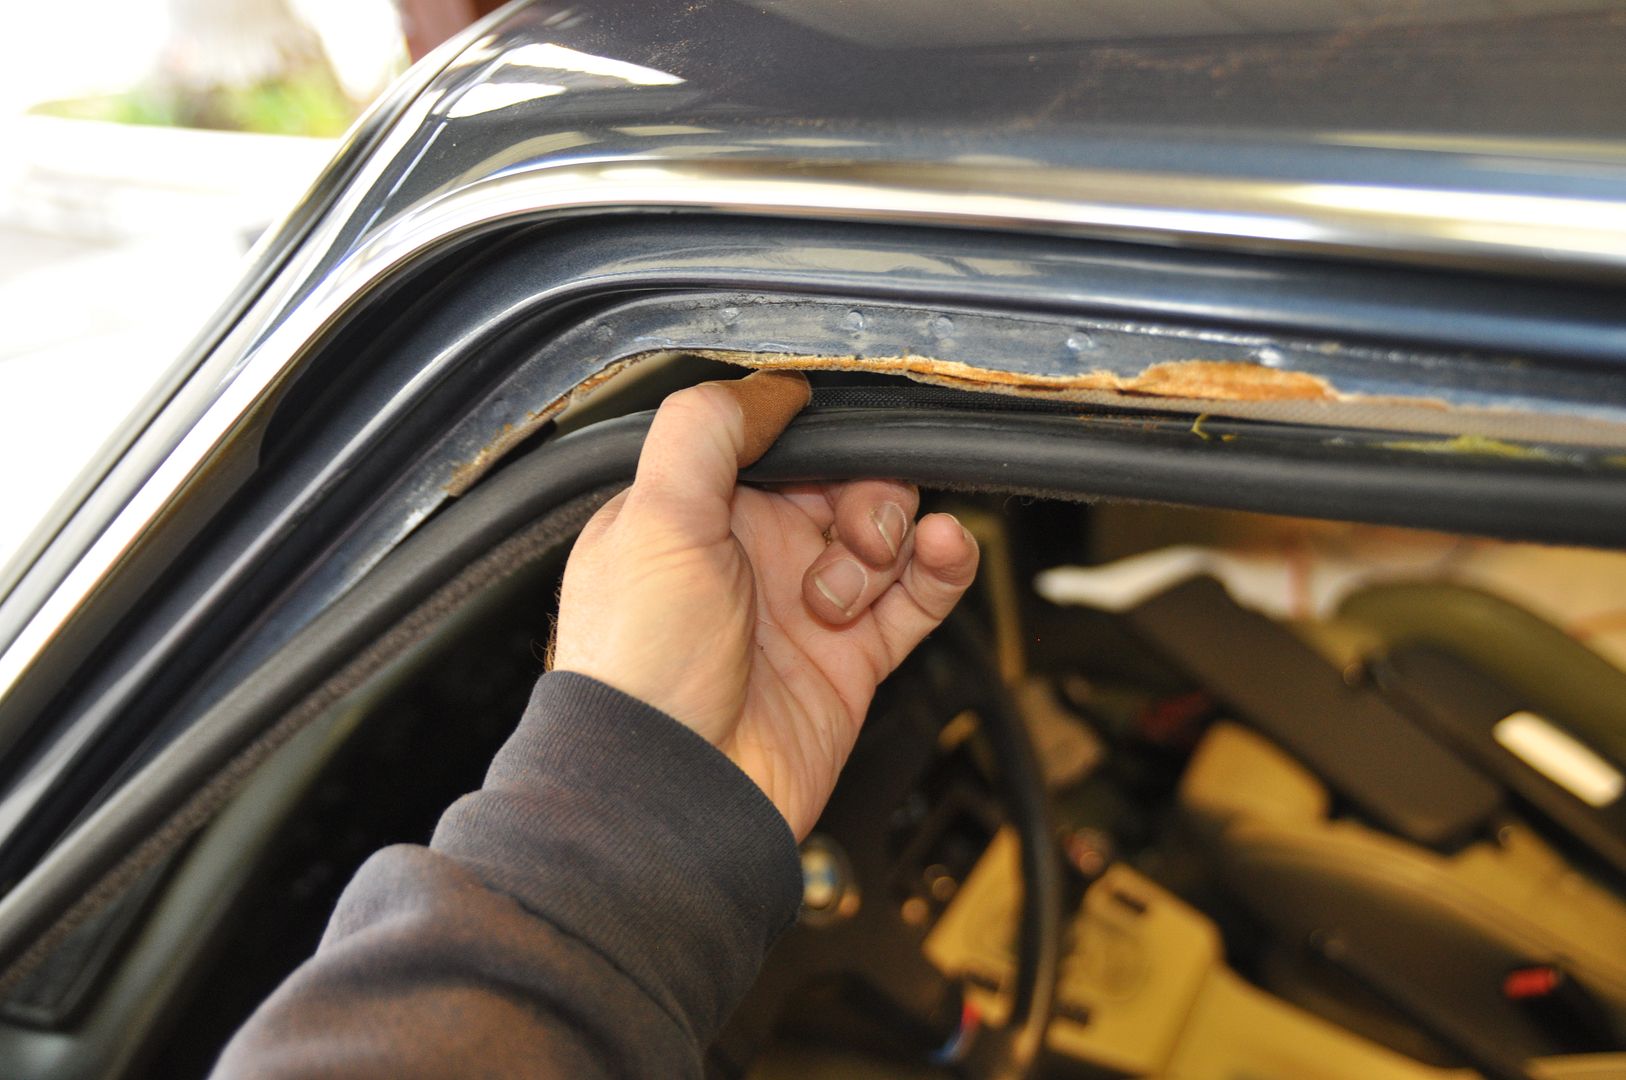
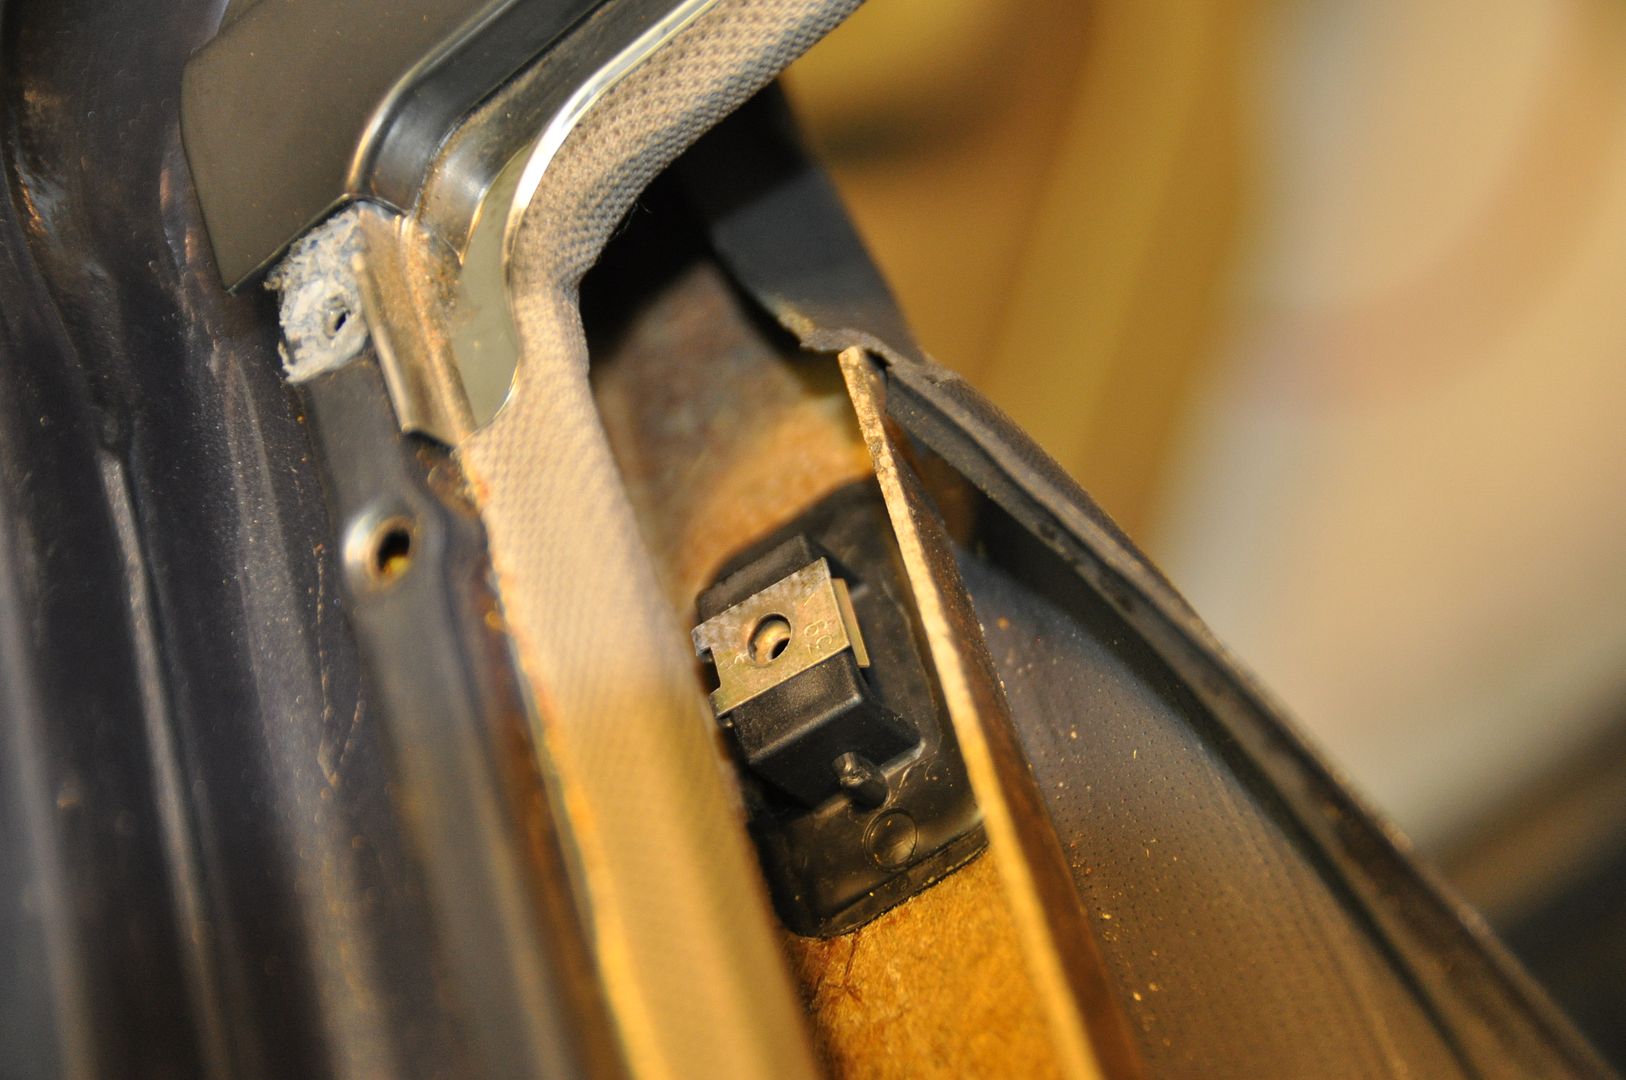
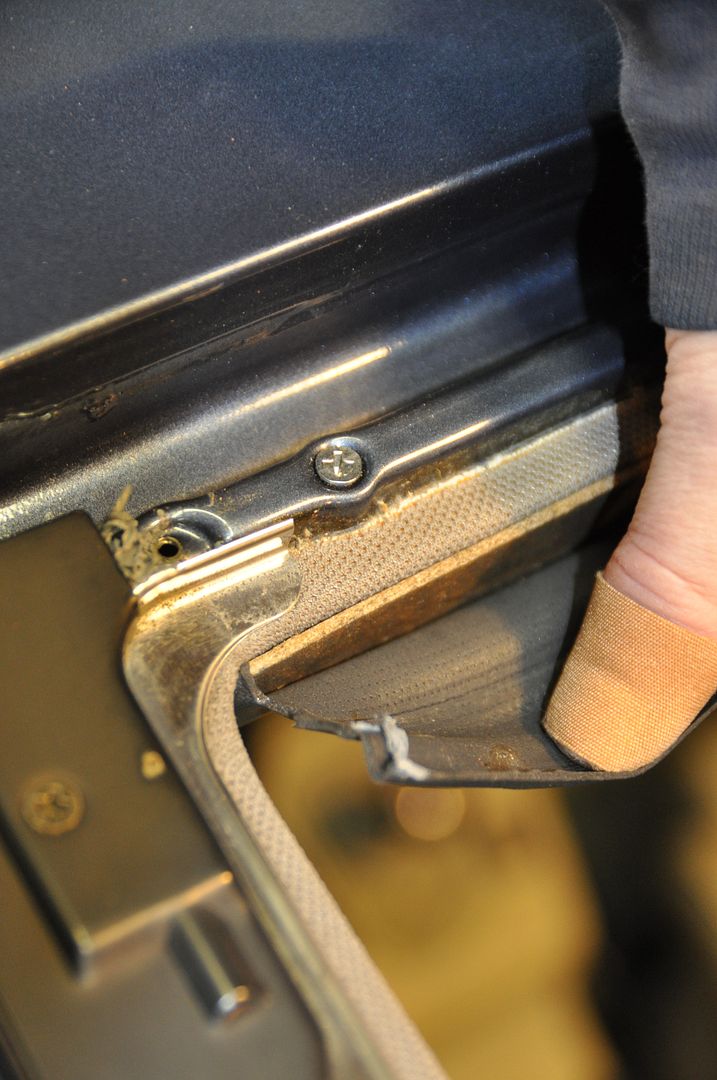
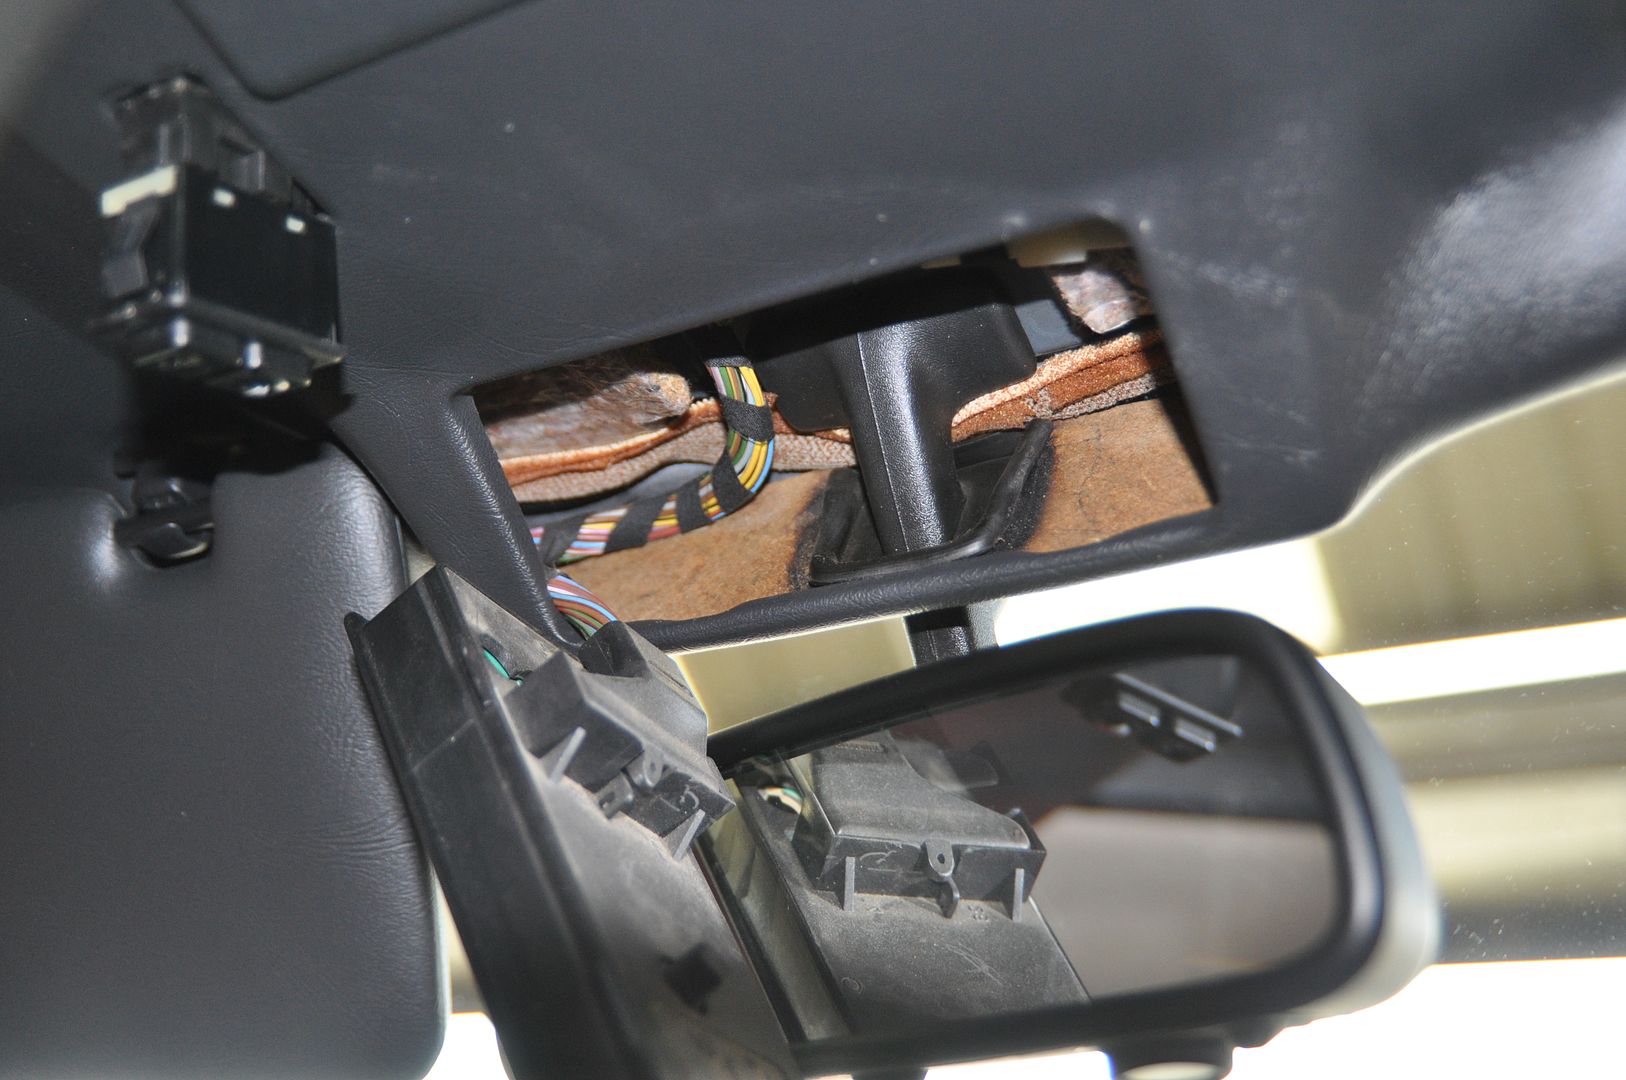
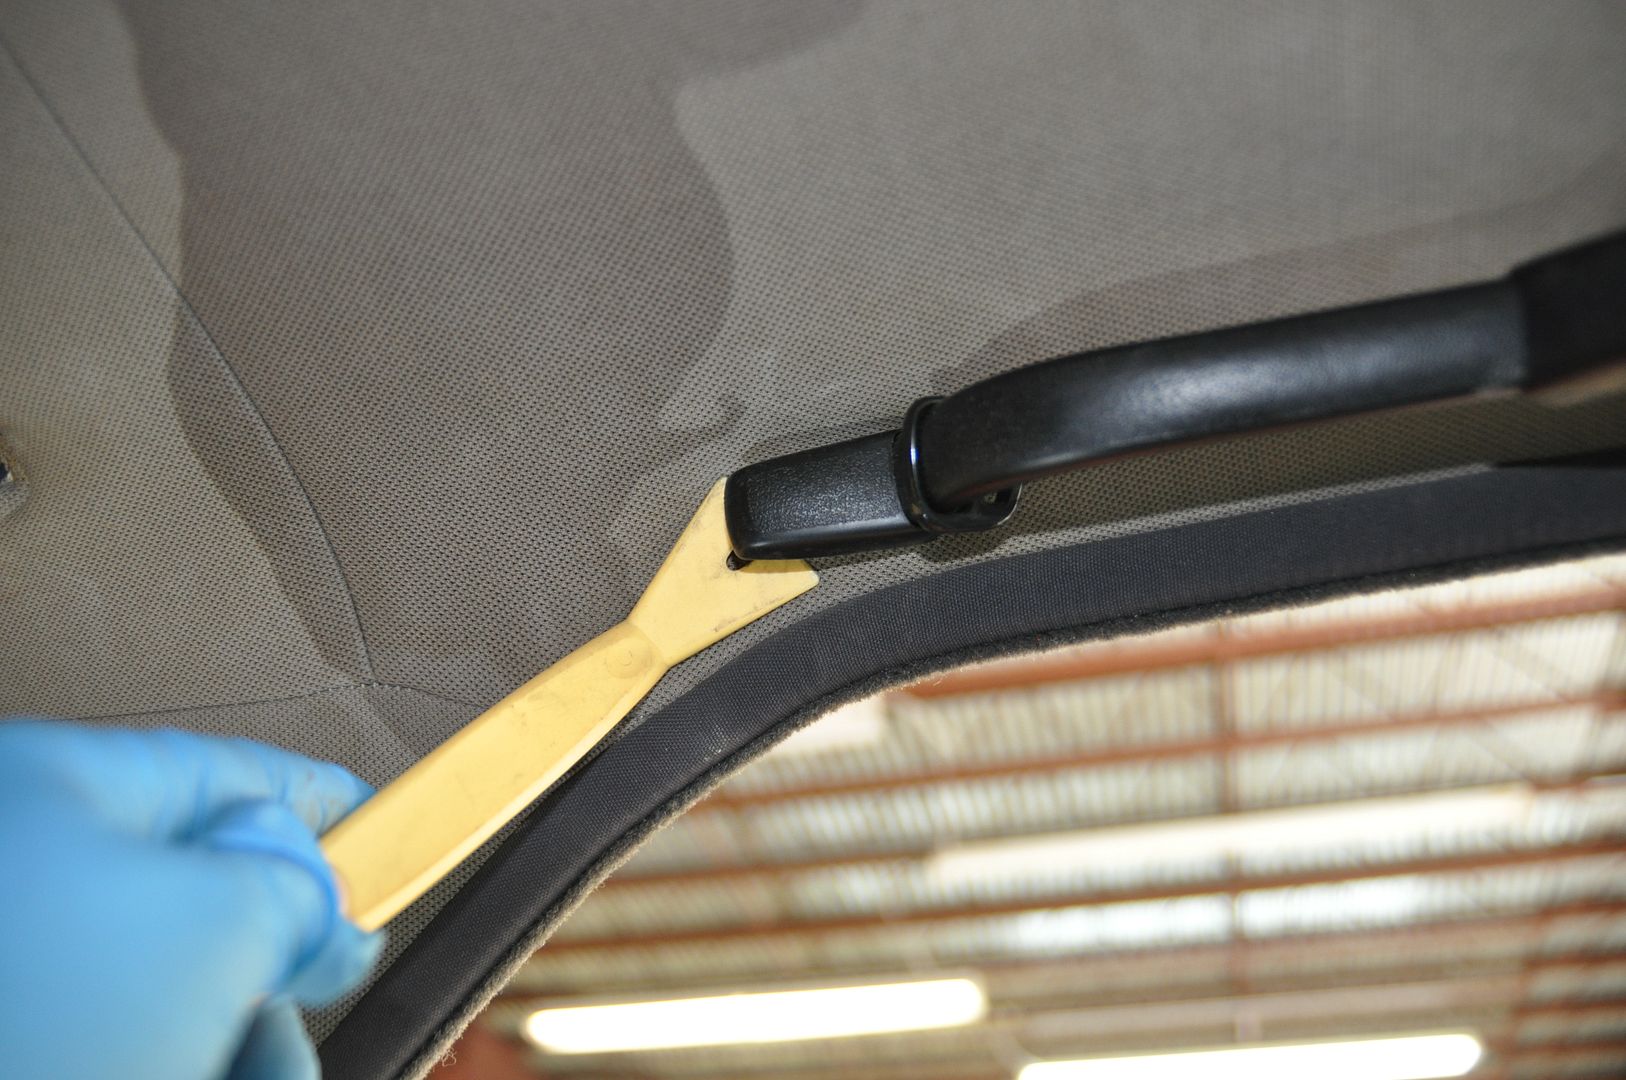
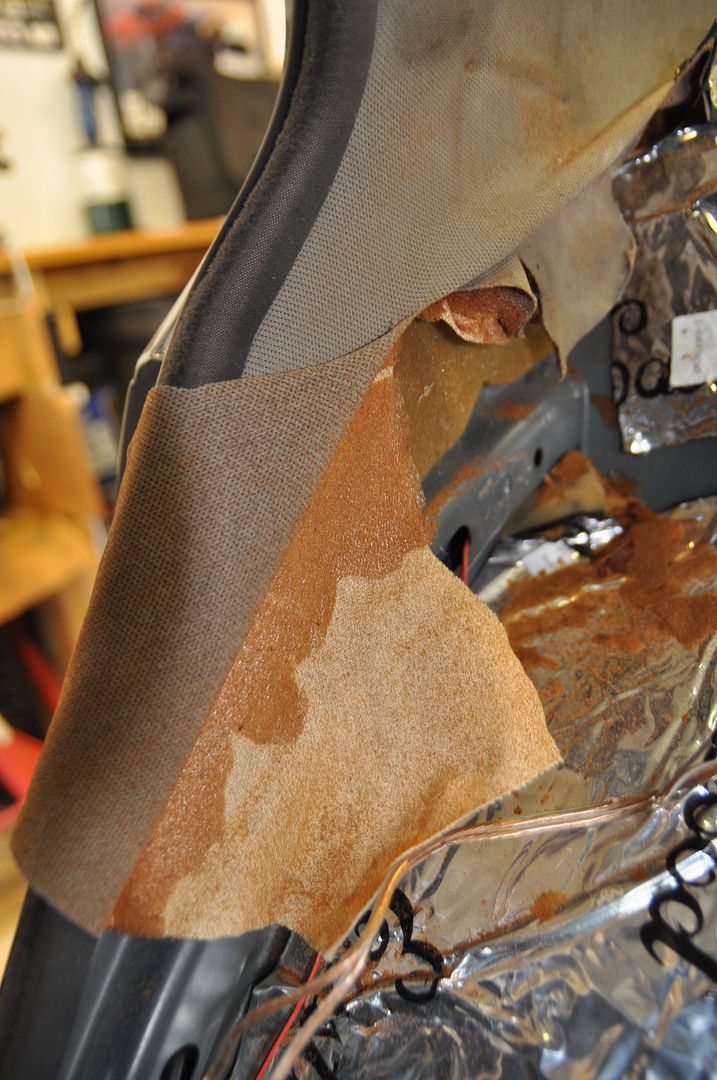
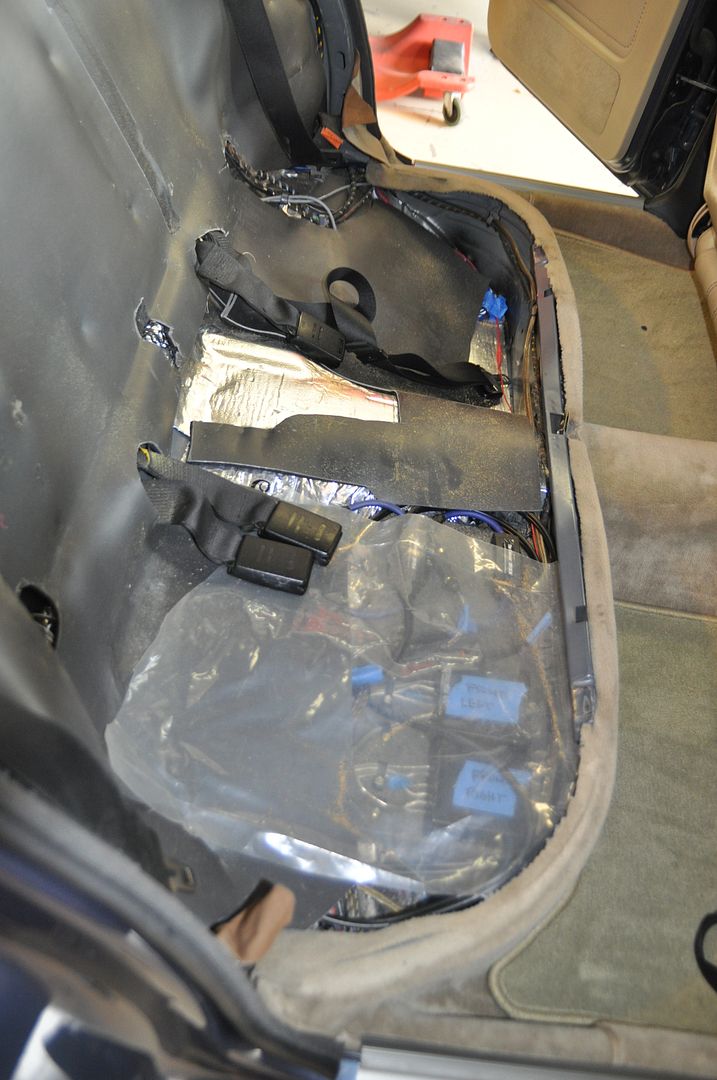
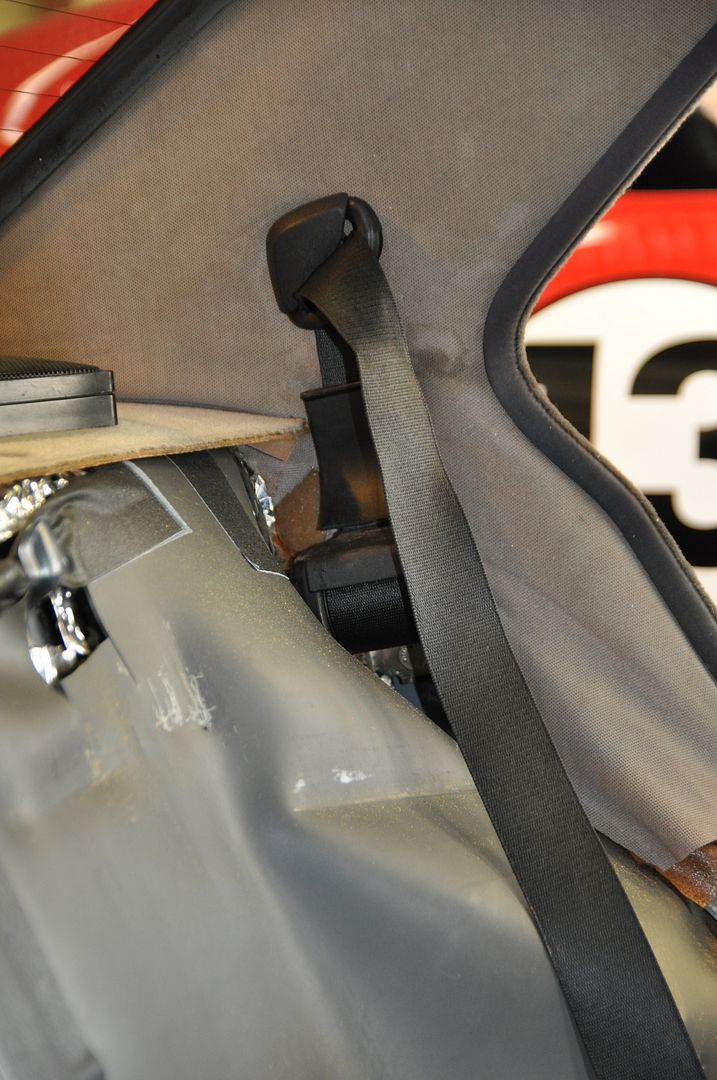
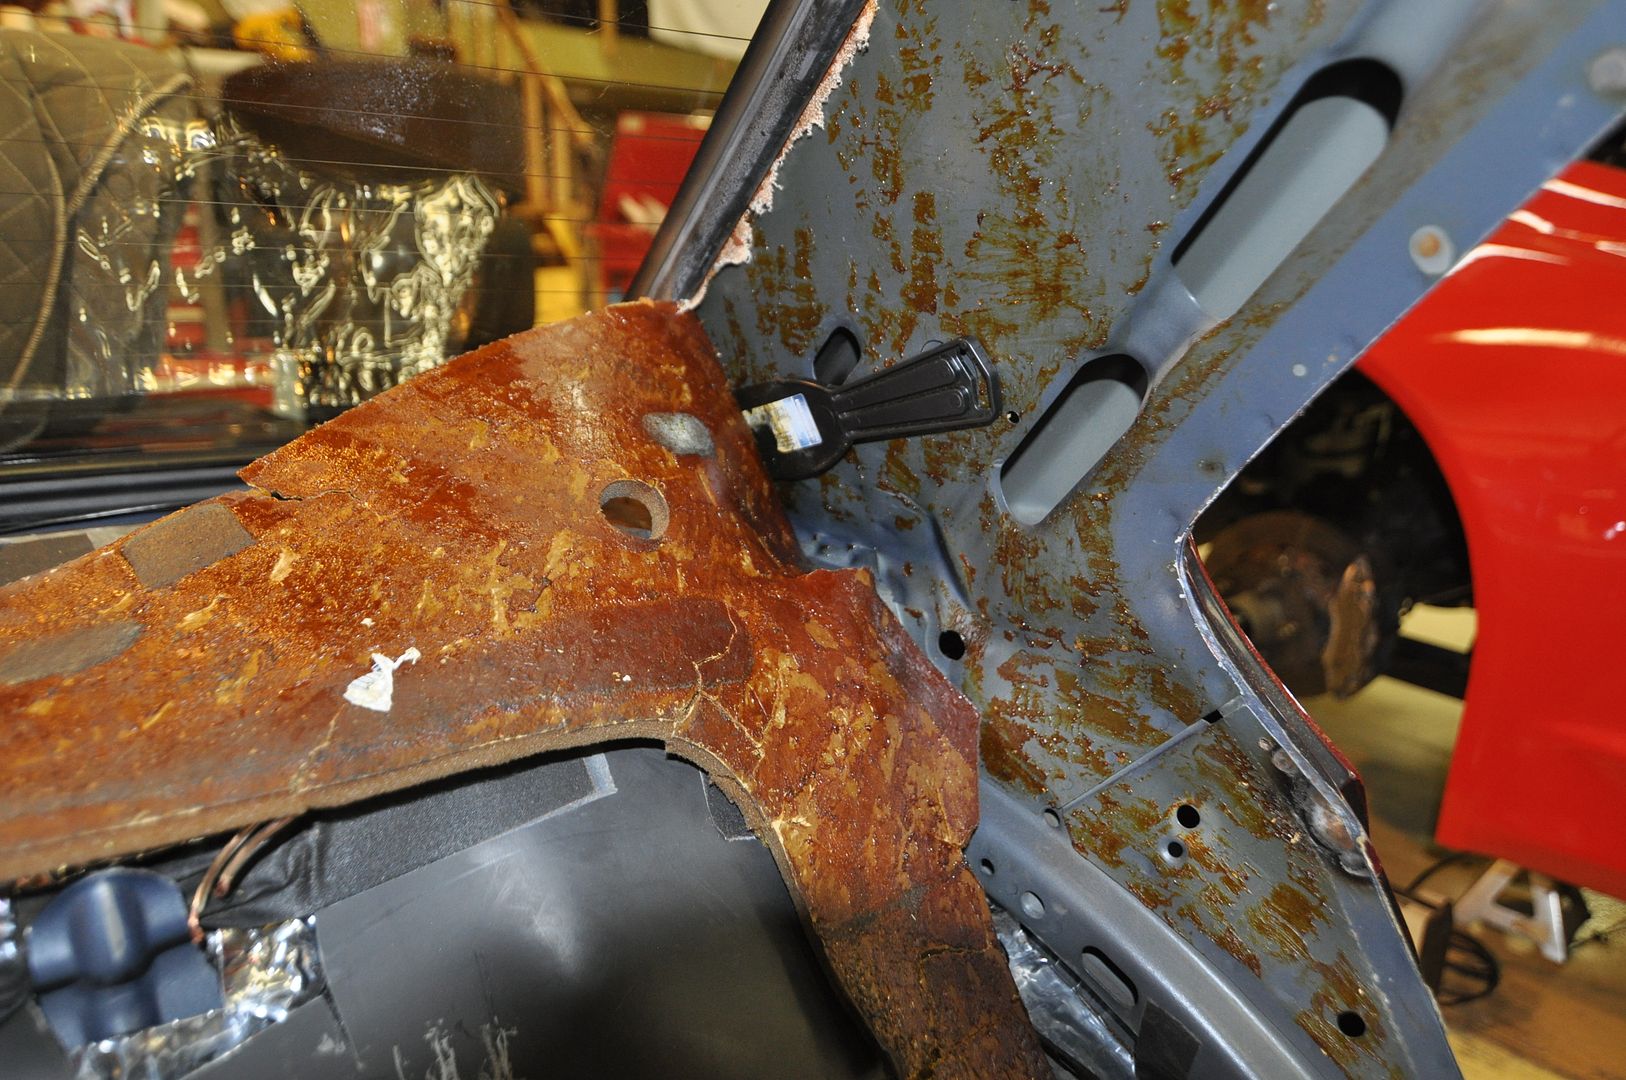
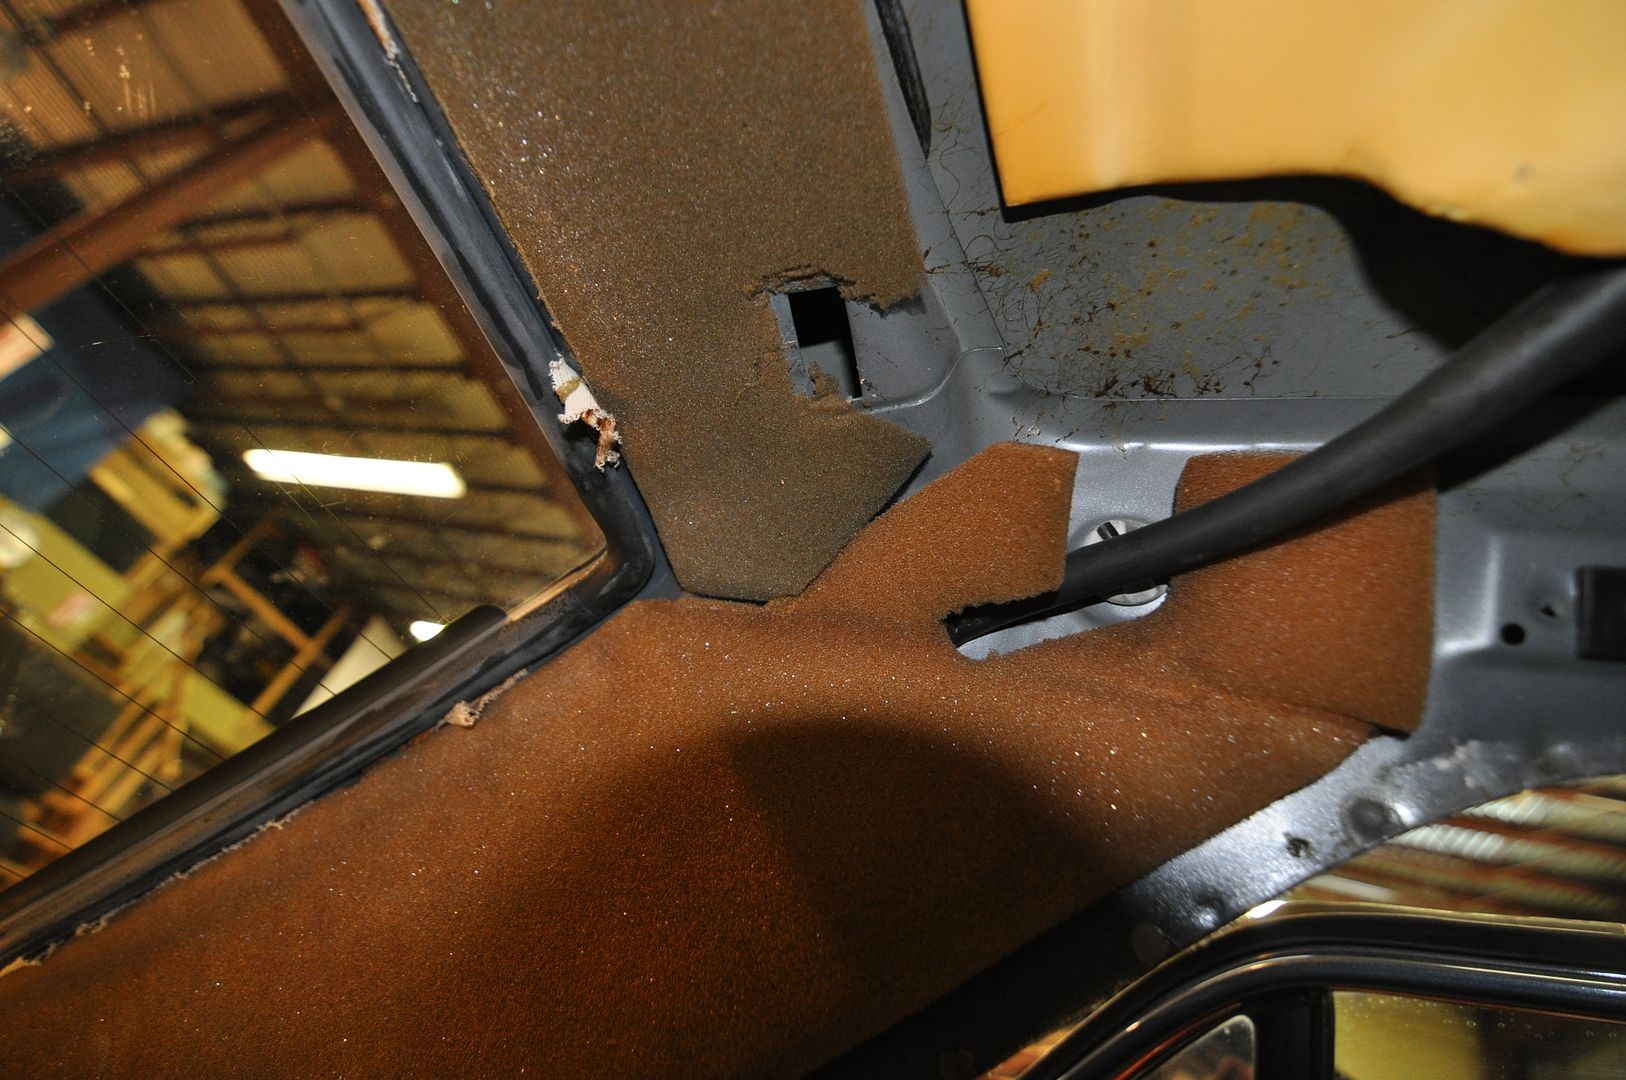
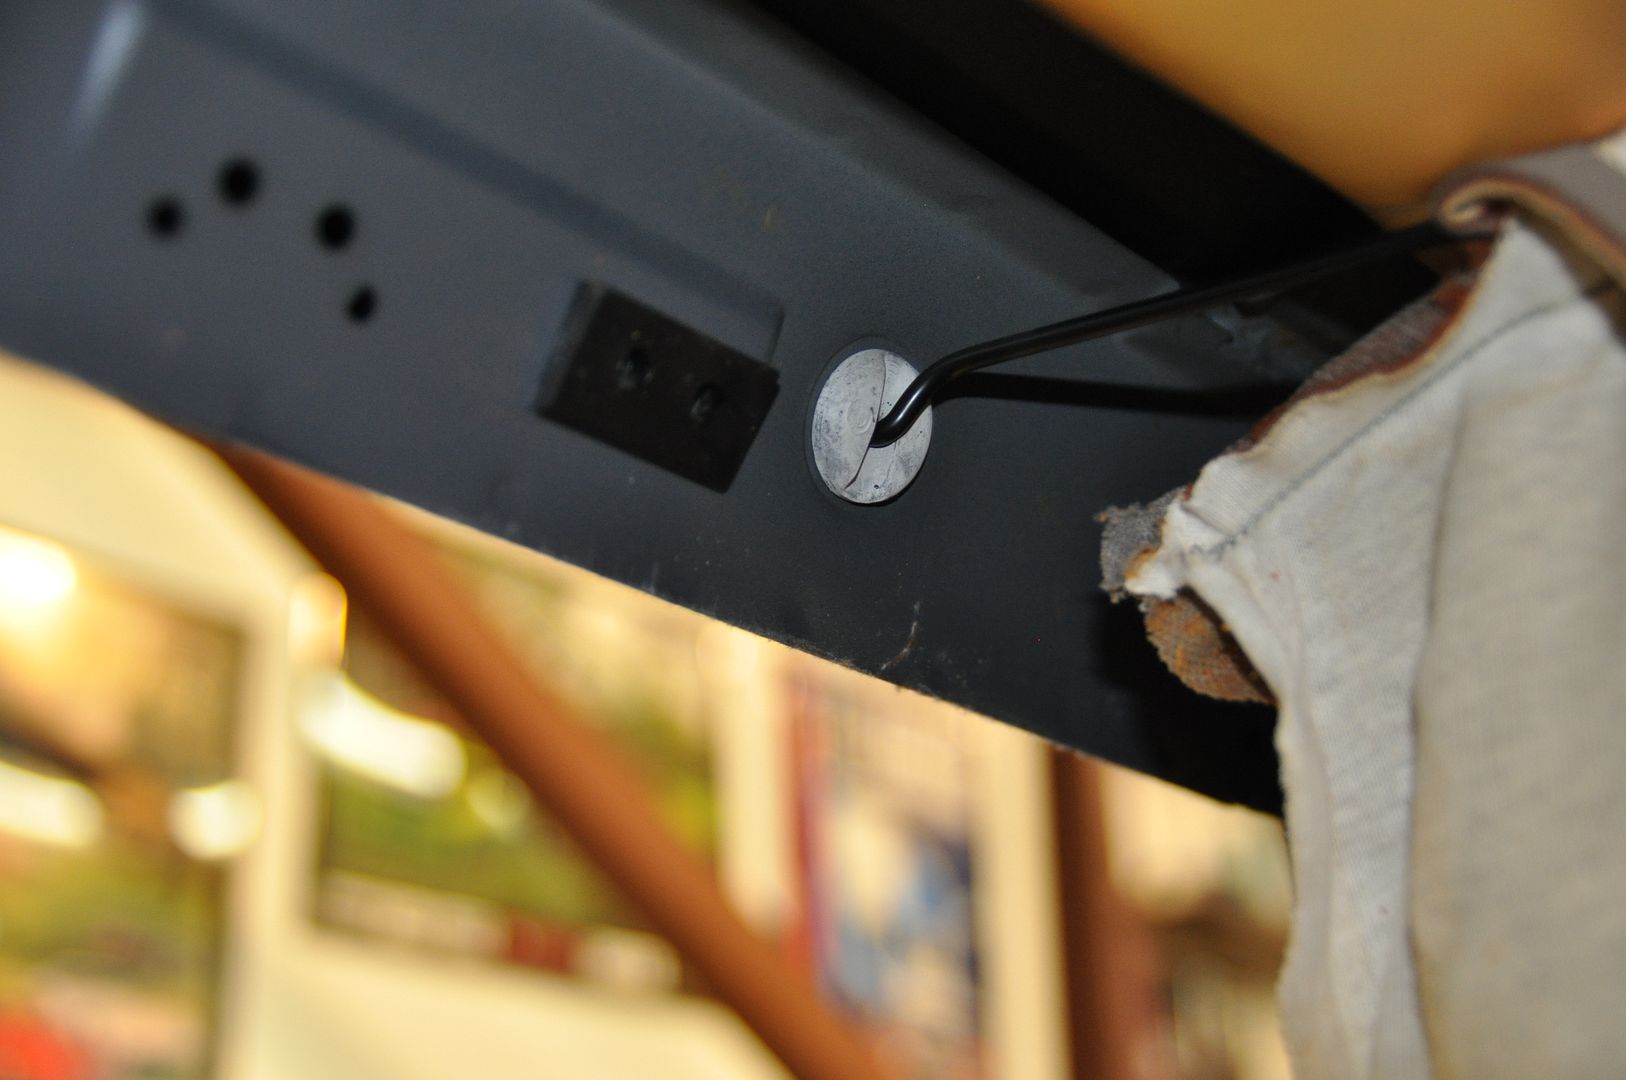
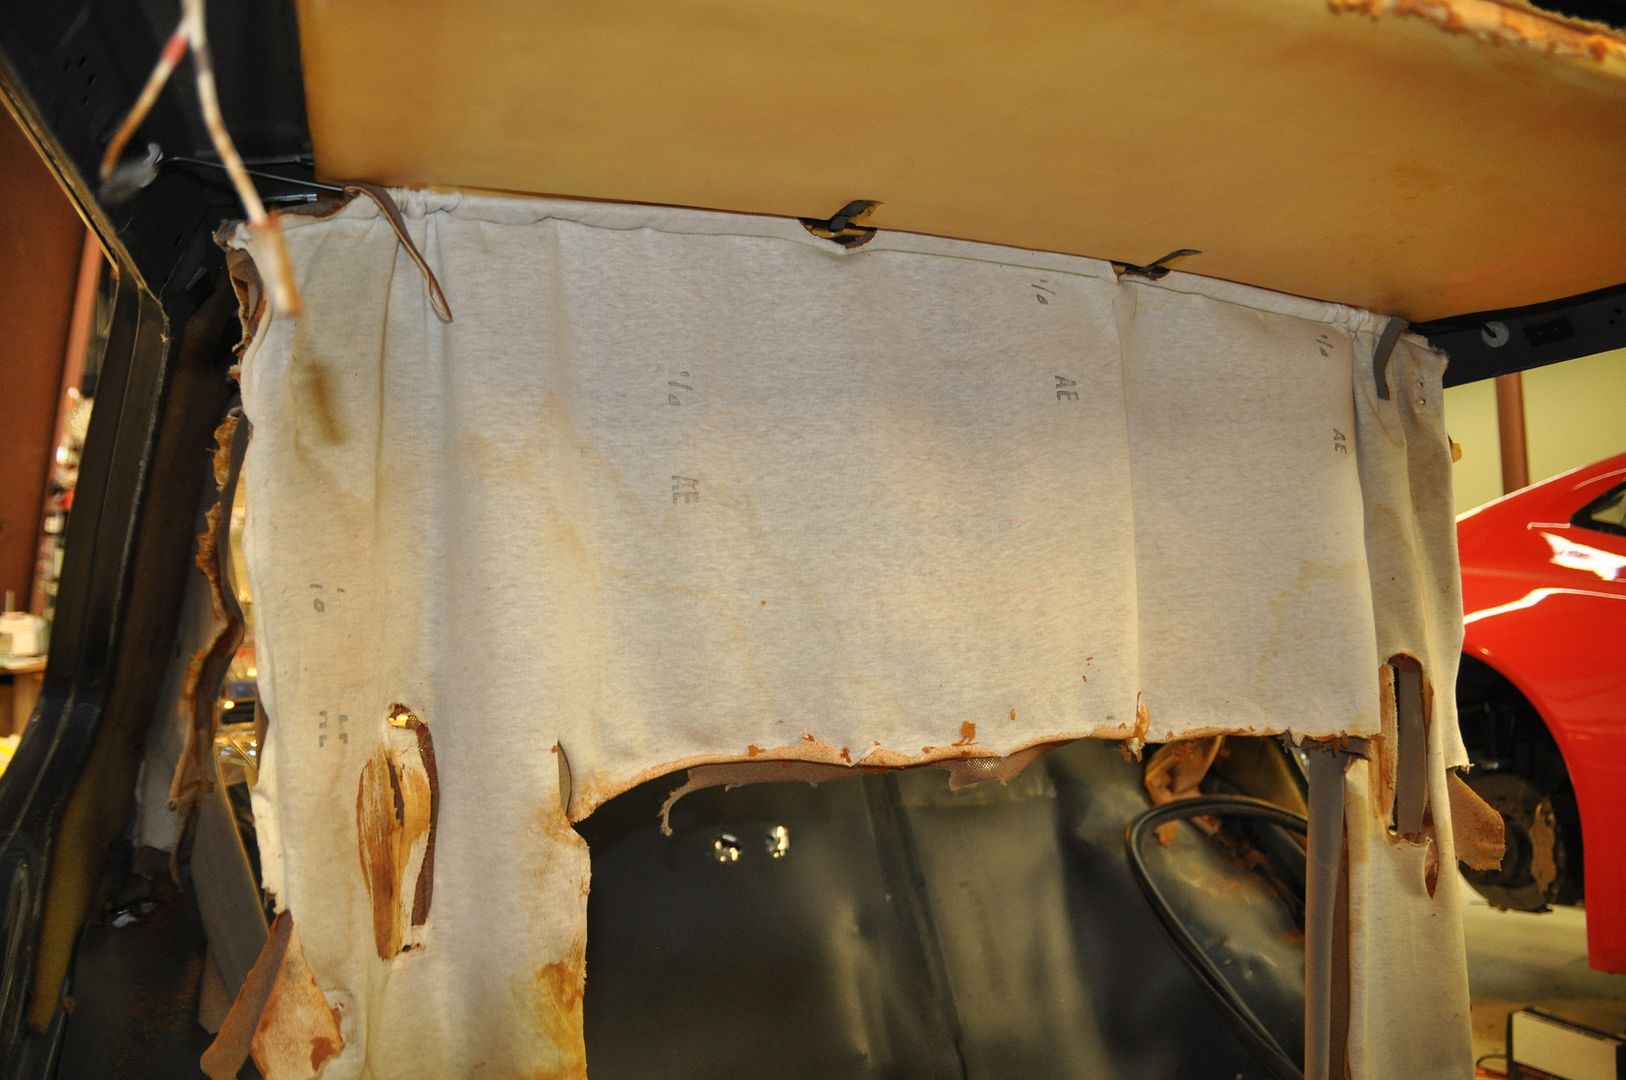
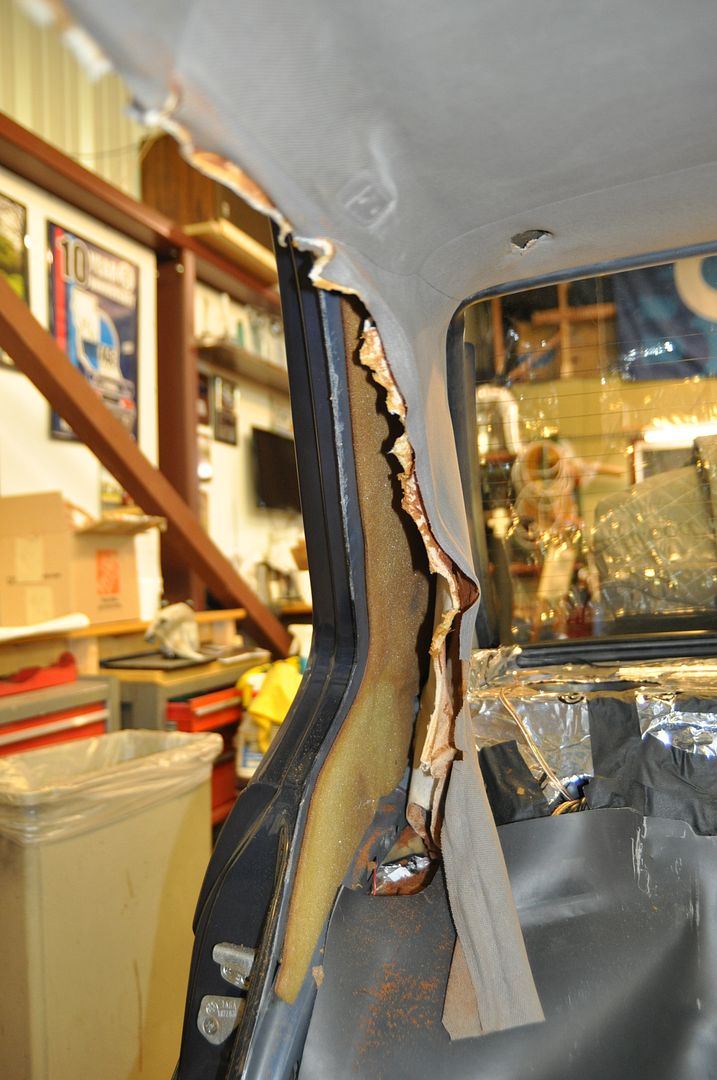
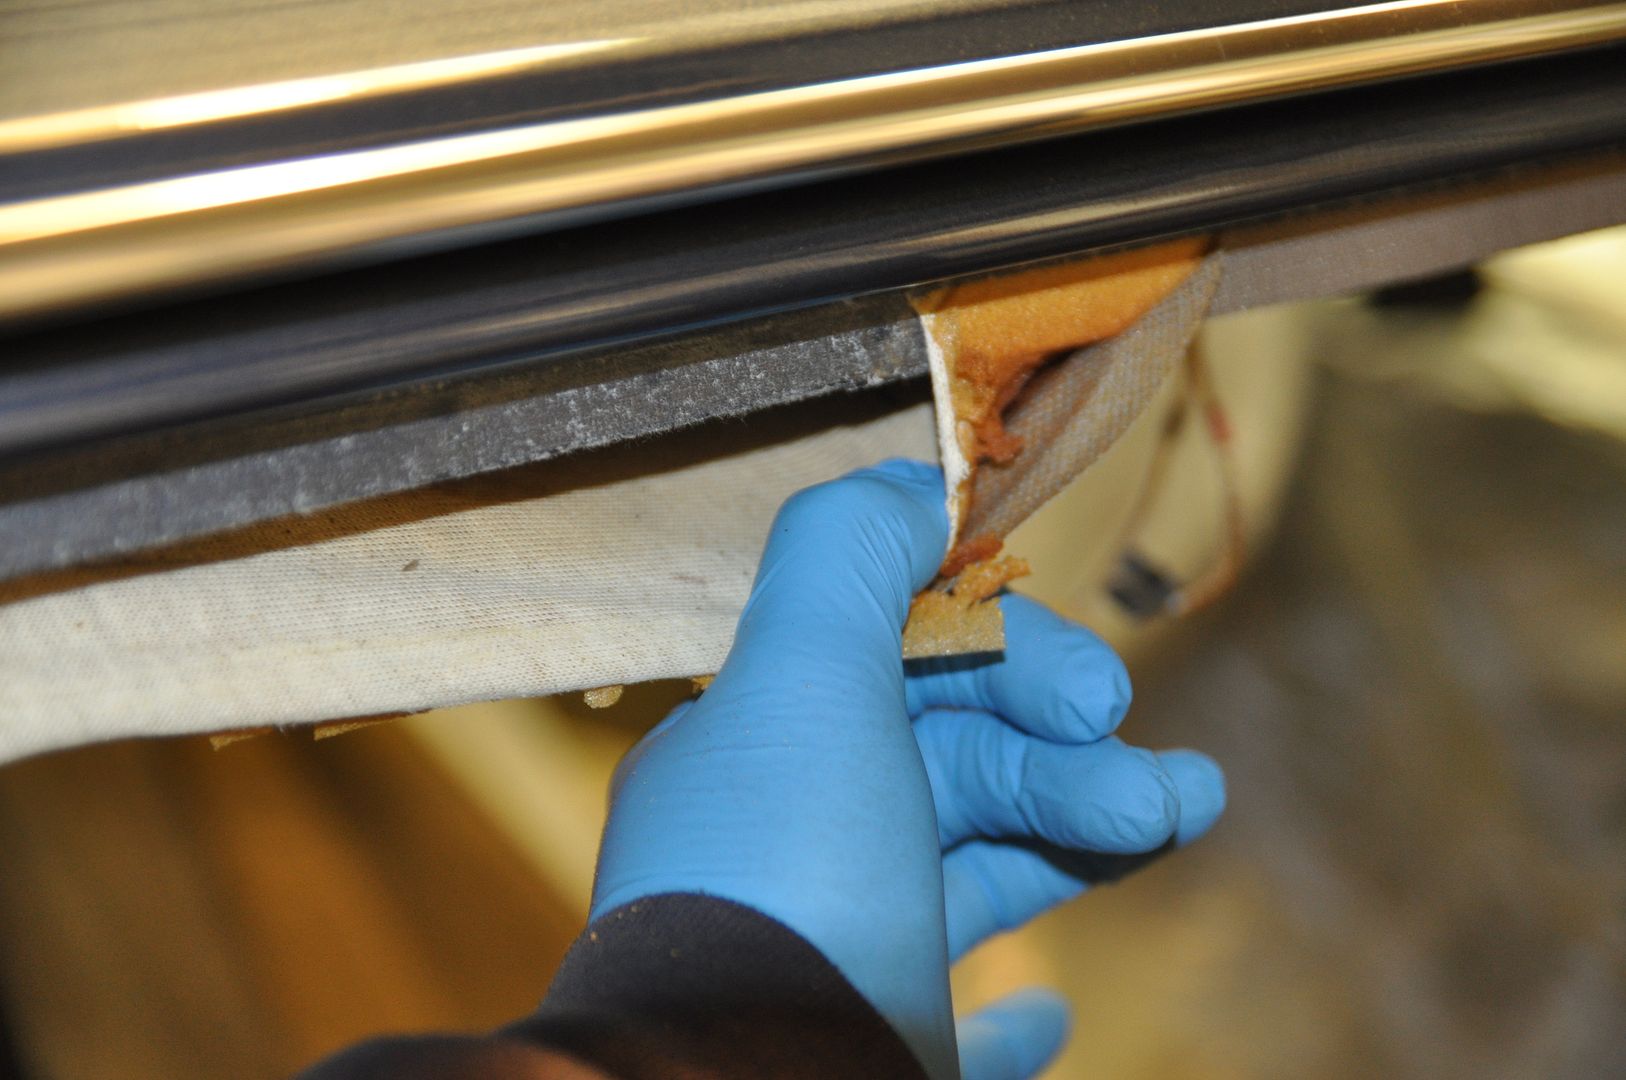
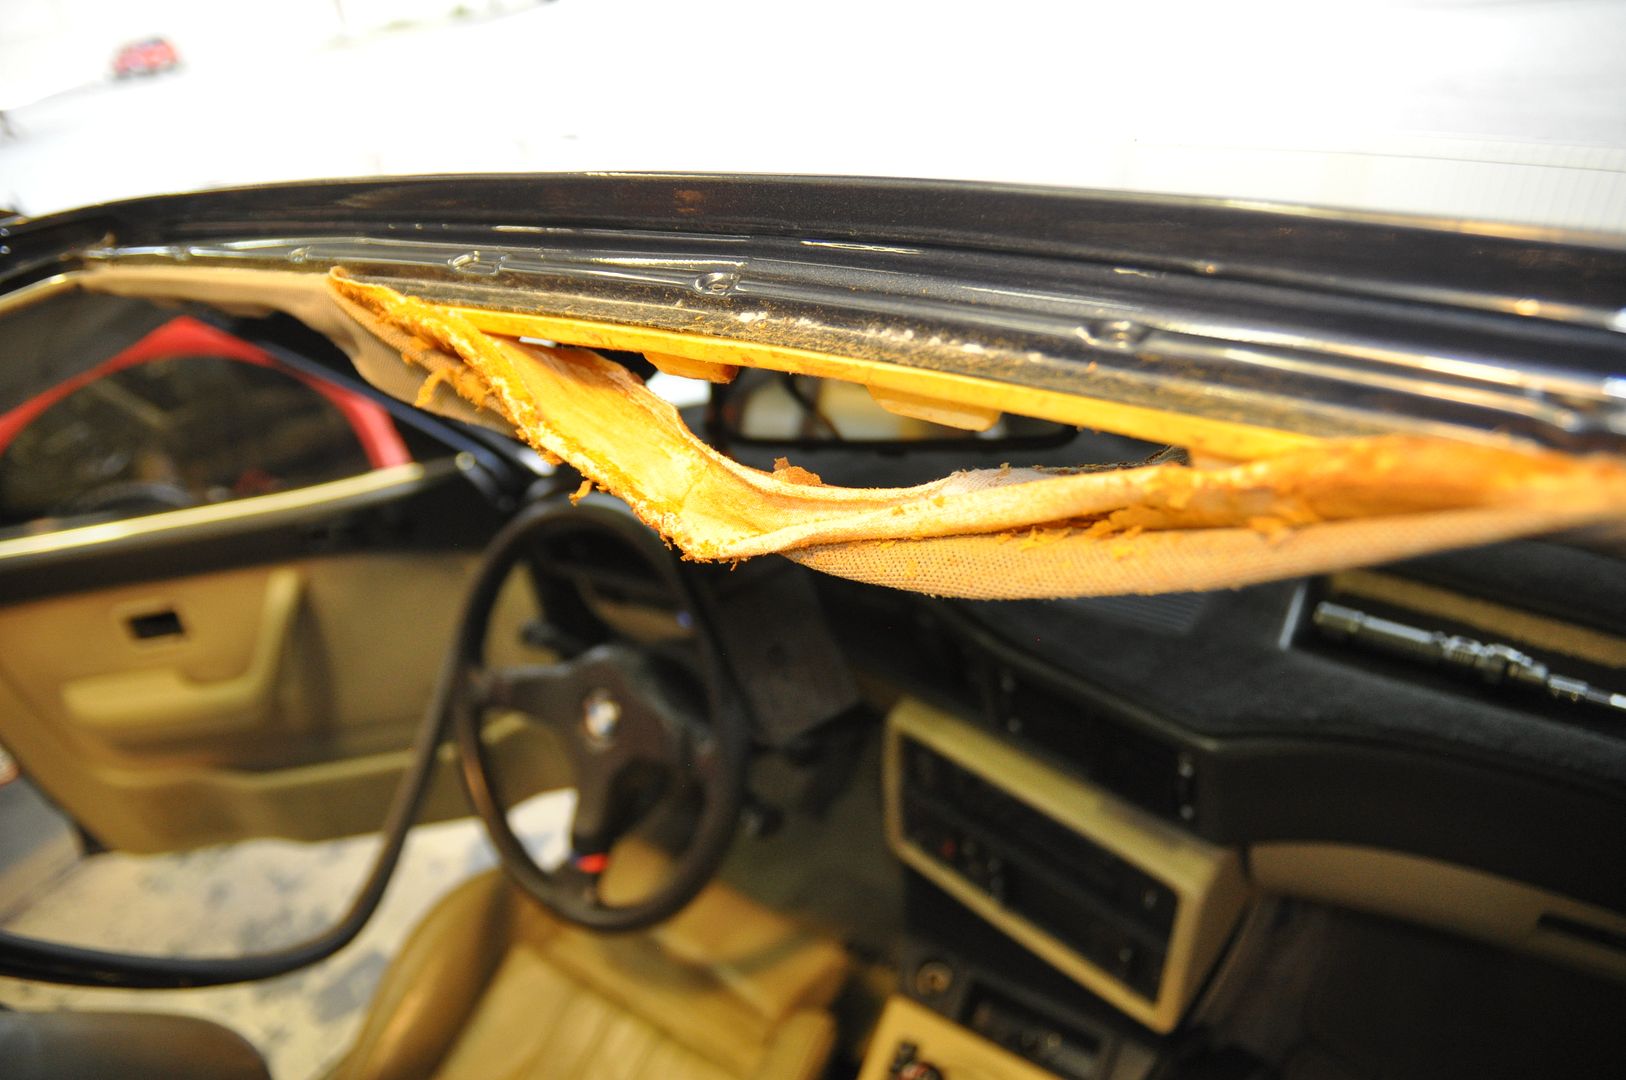
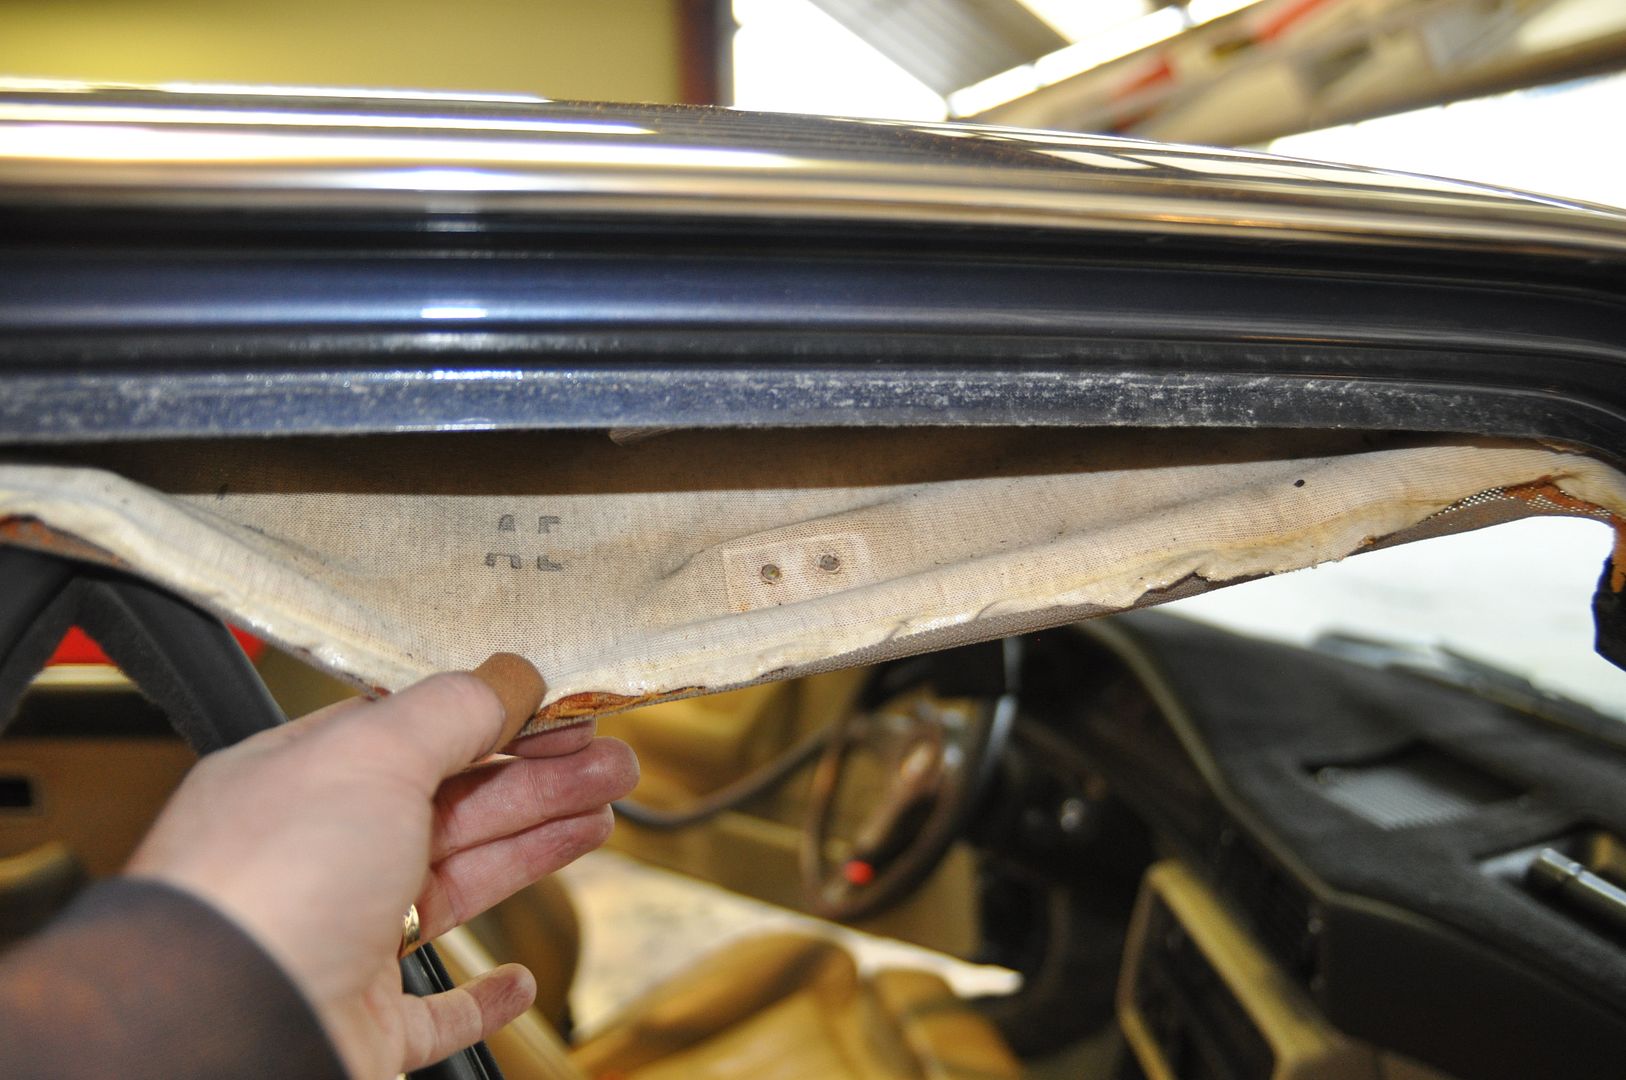
Yum:
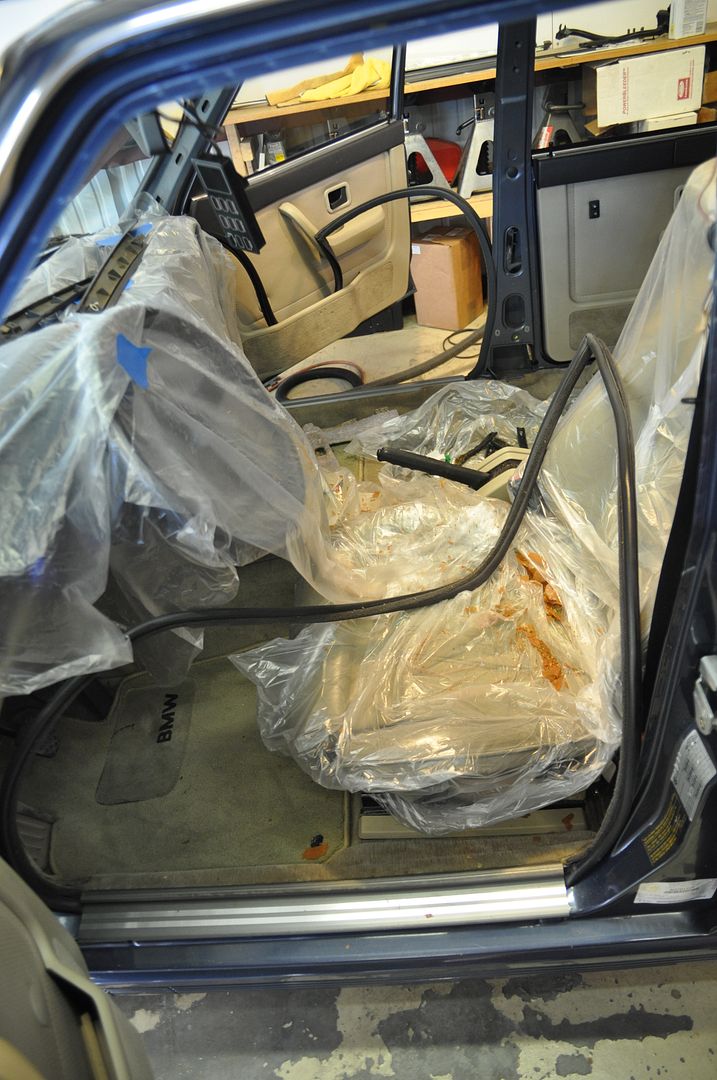
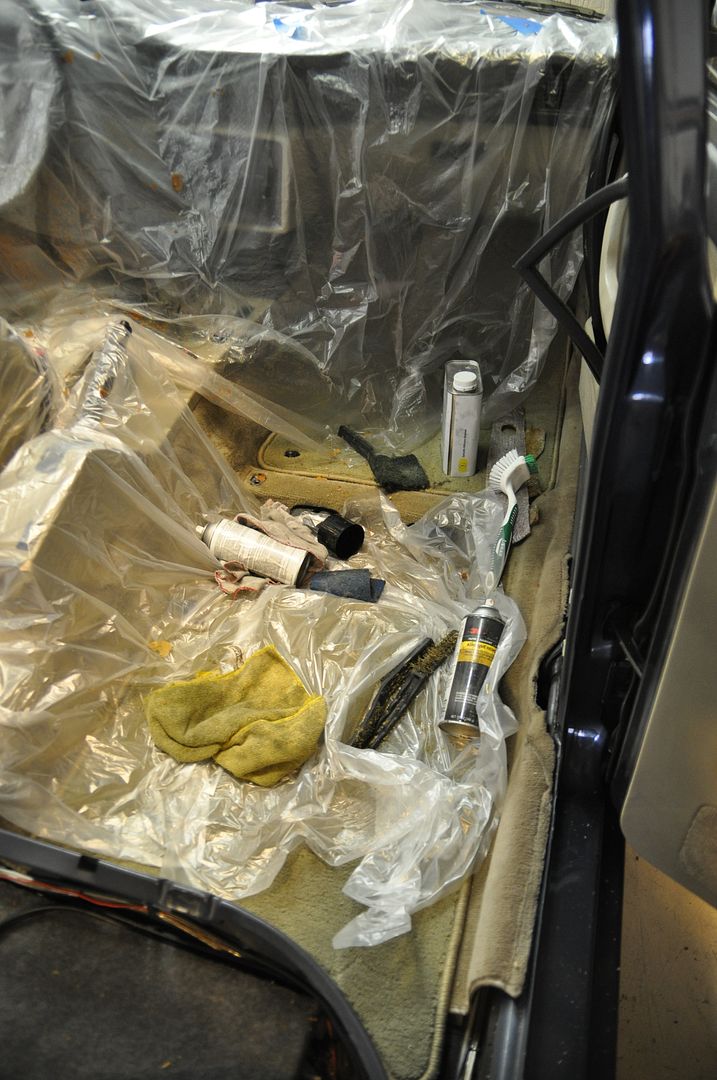
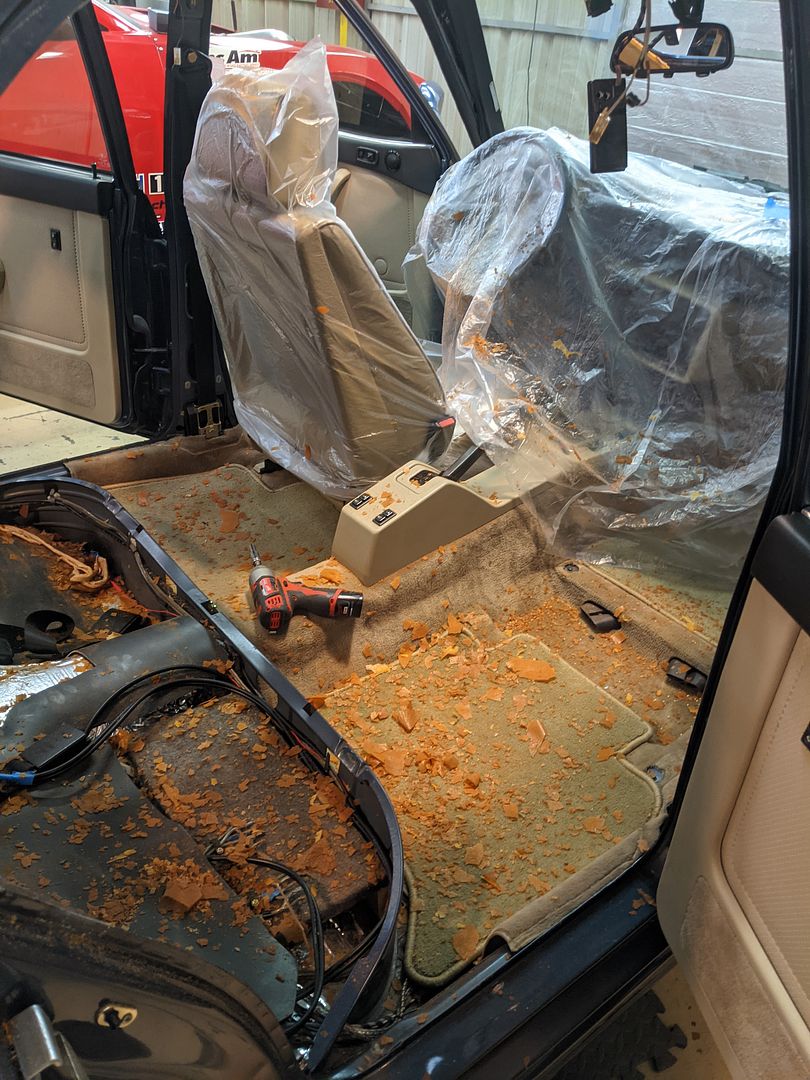
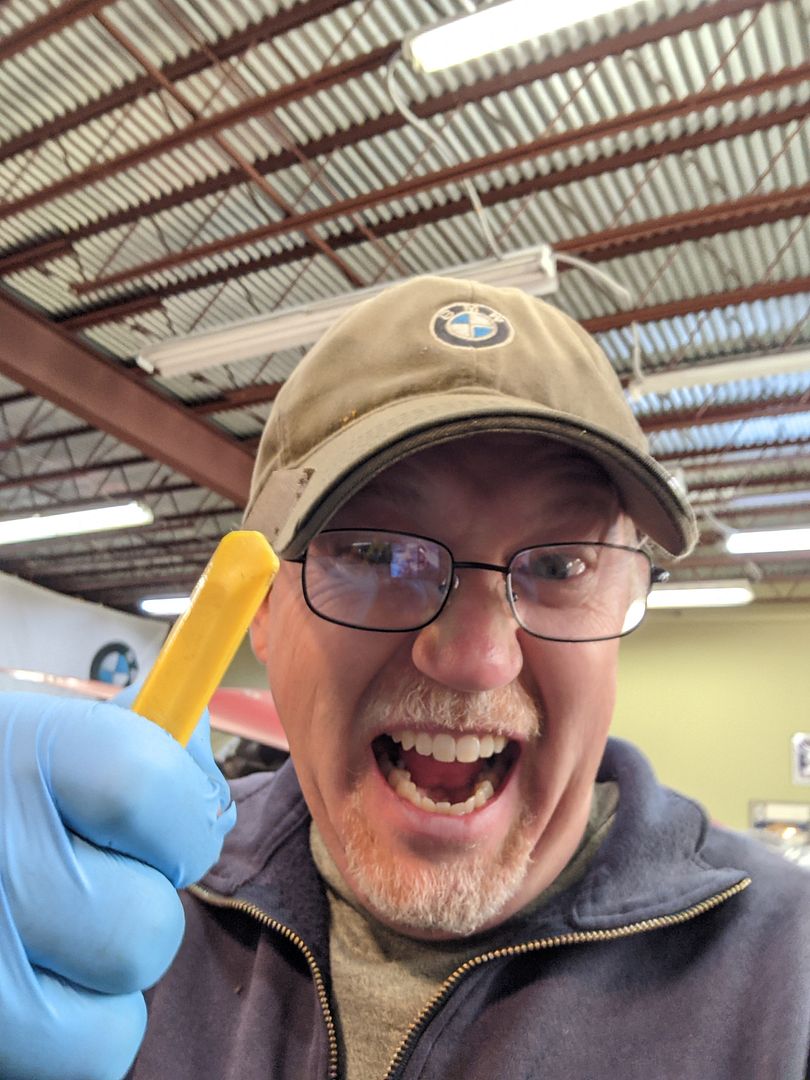
Look out:
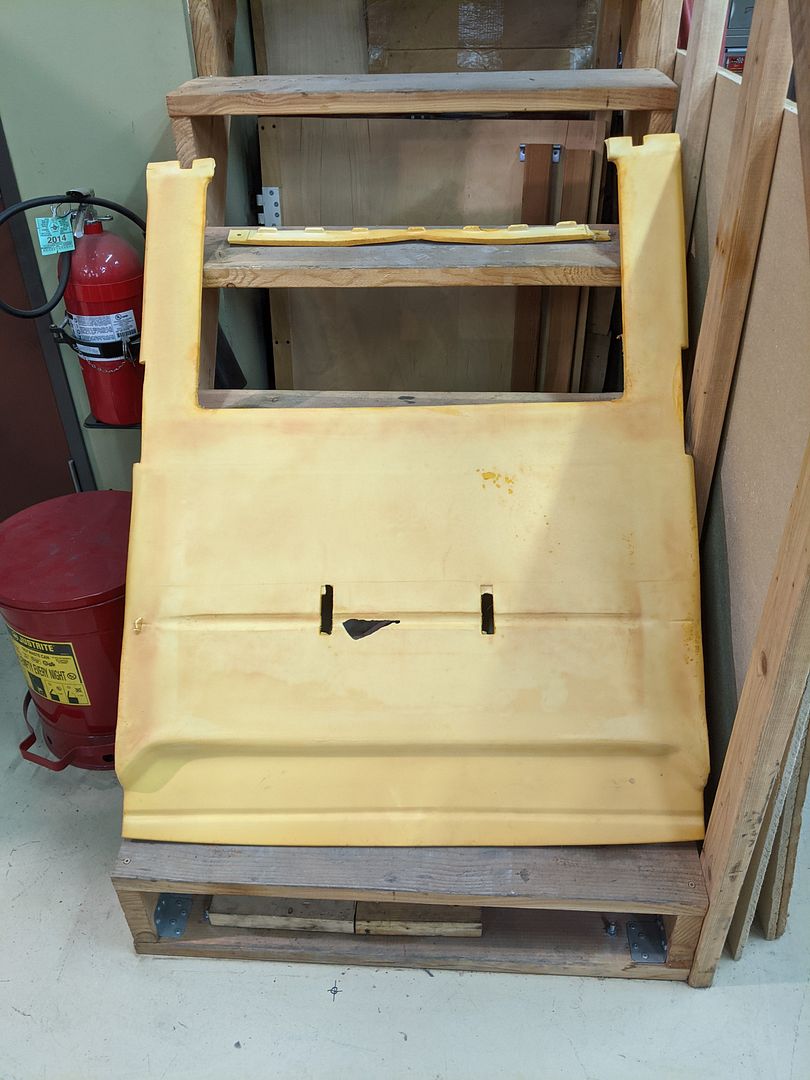
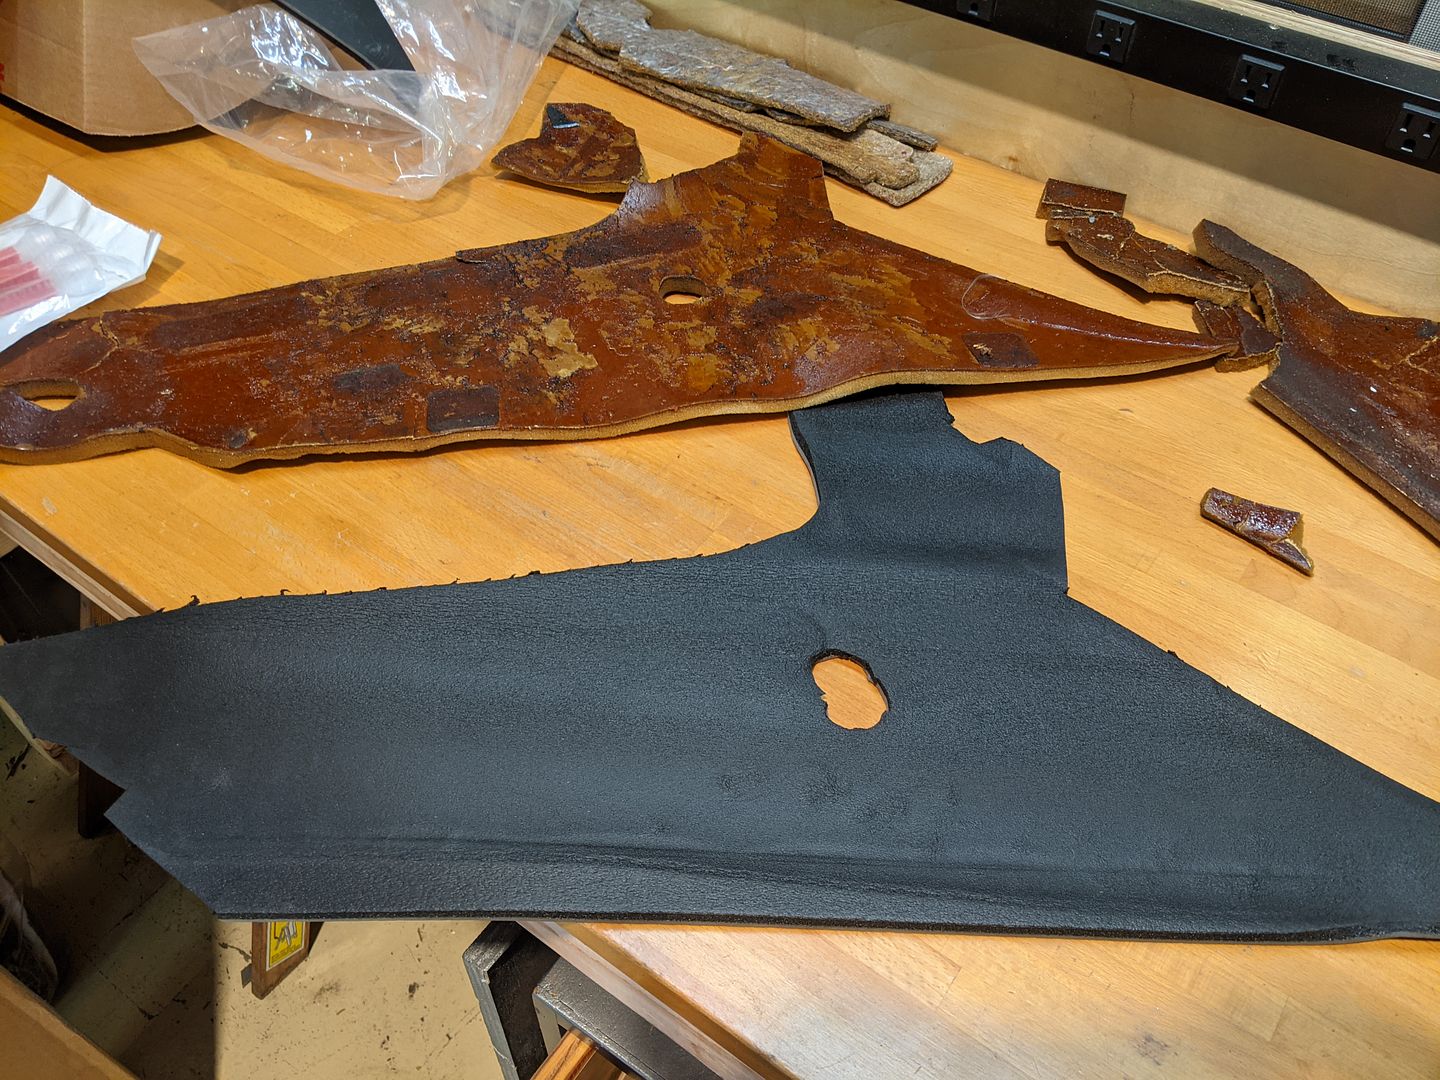
I managed to get this hard foam panel off mostly intact. I know I need to keep the front part as it provides the smooth form for the Headliner to roll into the Sunroof. I’m not sure about the rear half that is over the Sunroof Panel Cassette; I’m pretty sure I can substitute whatever sound and heat abatement it provided with other materials (more on this whole system to come).
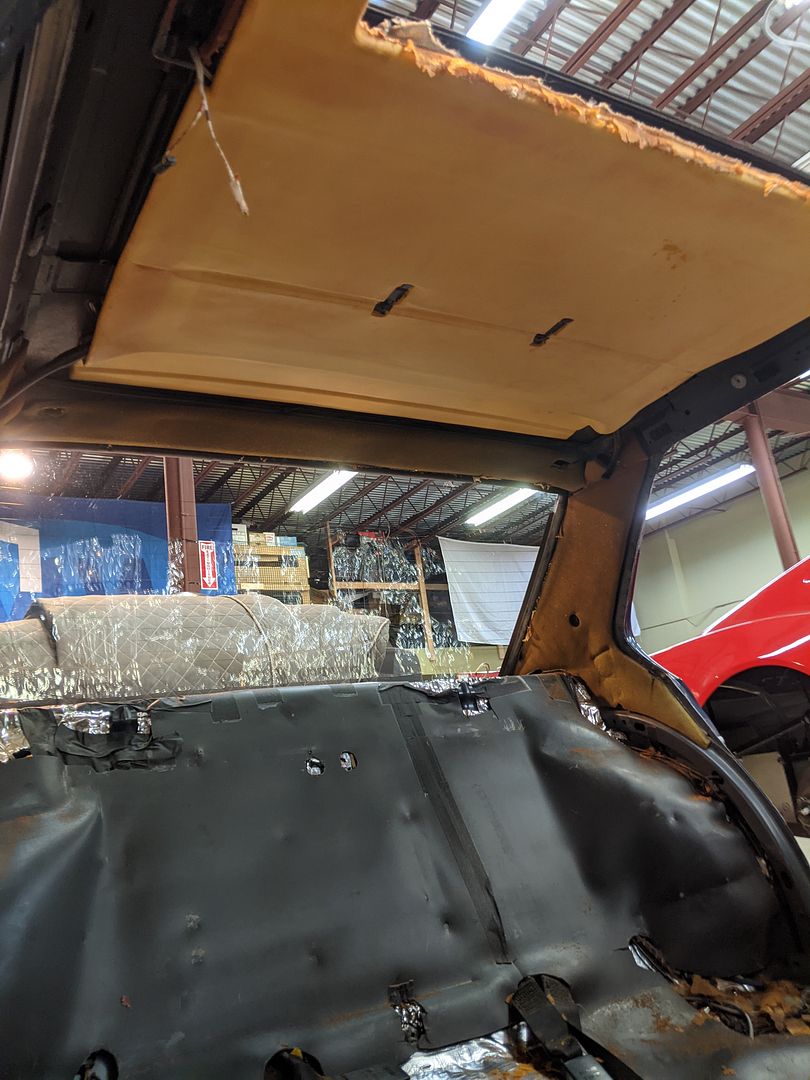
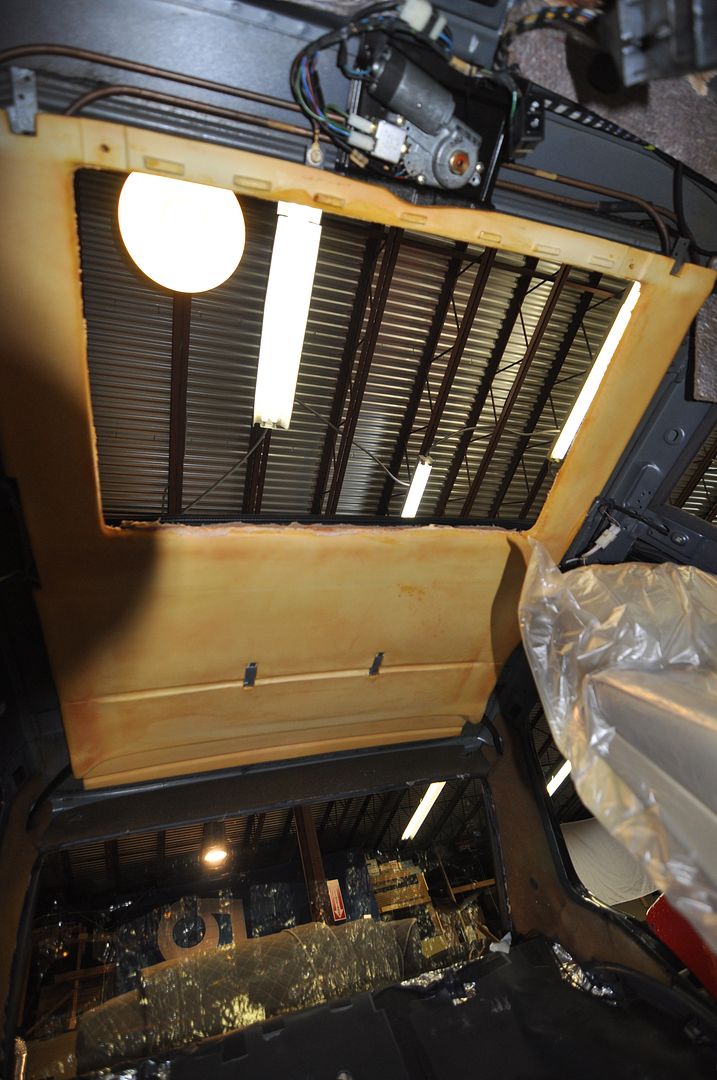
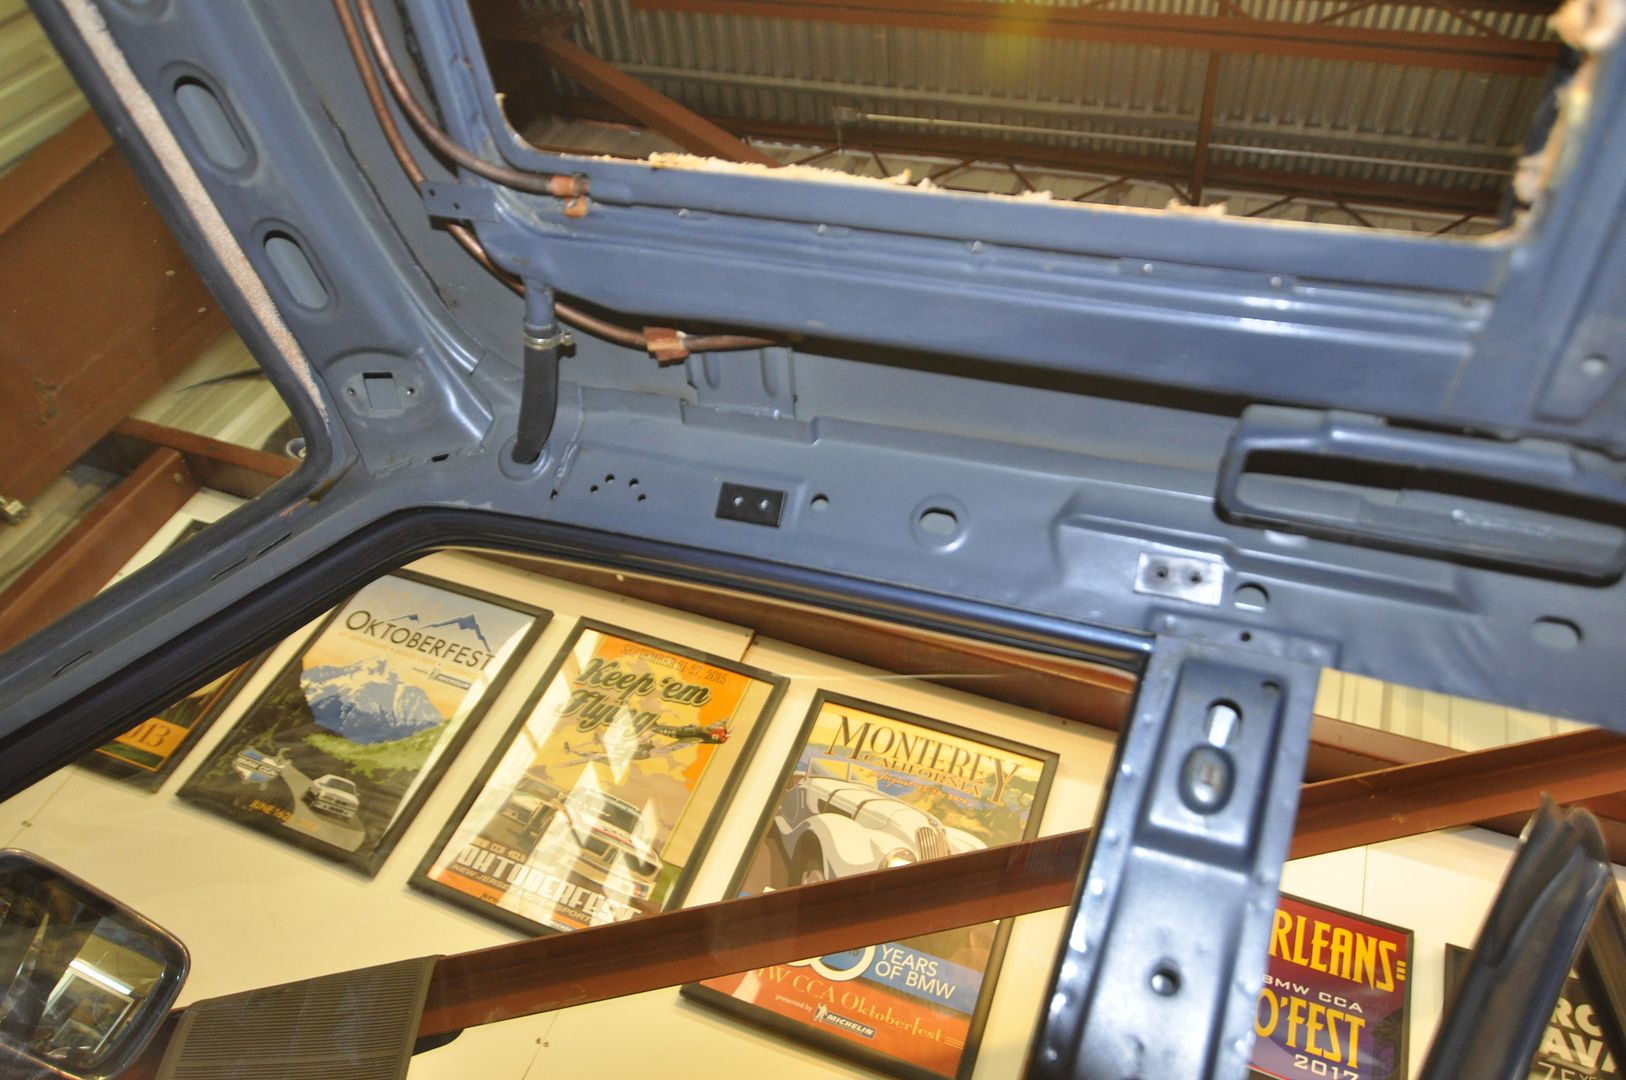
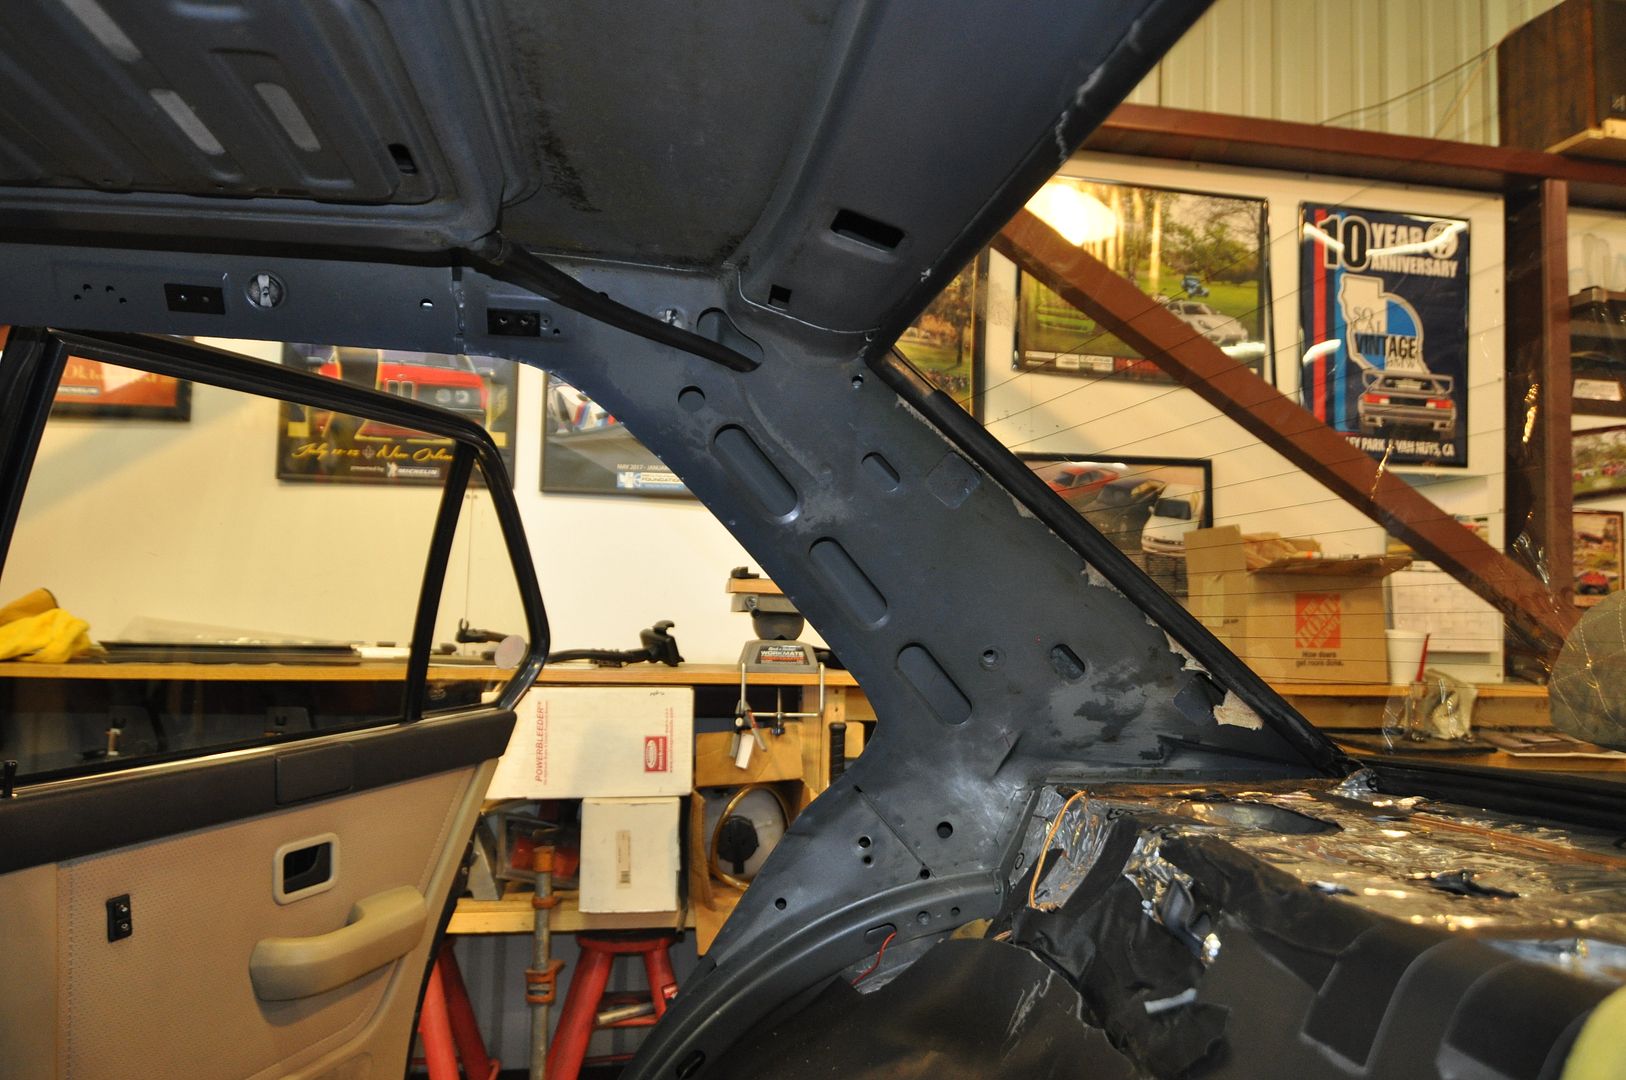
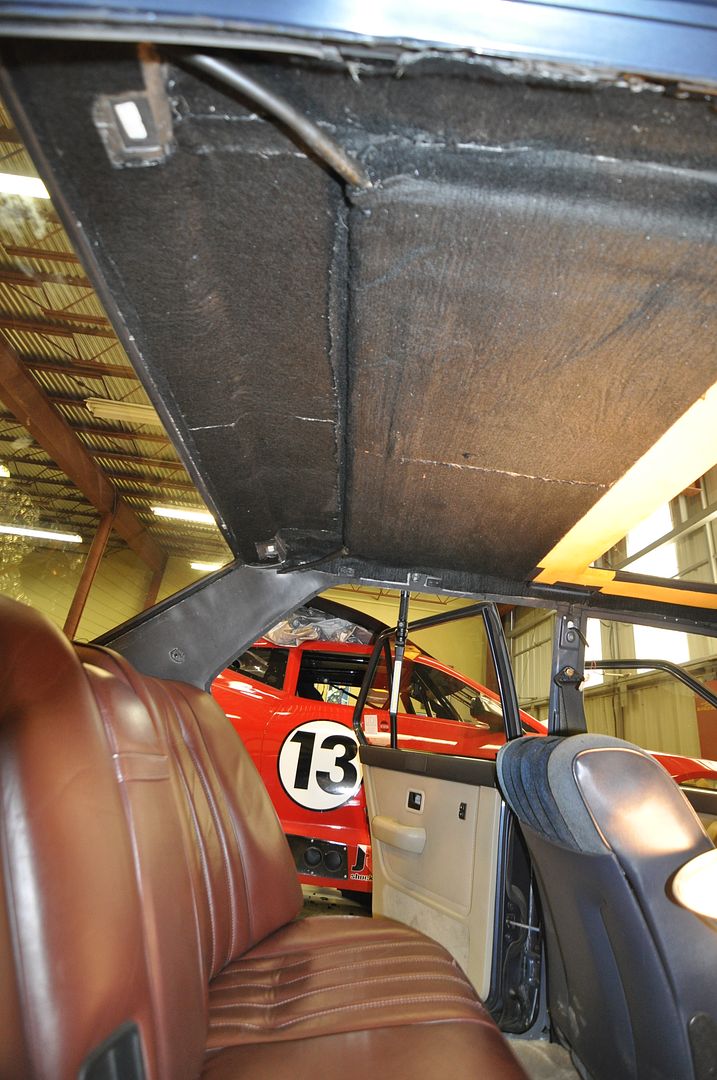
I finally get to see what the raw roof of an E28 looks like:
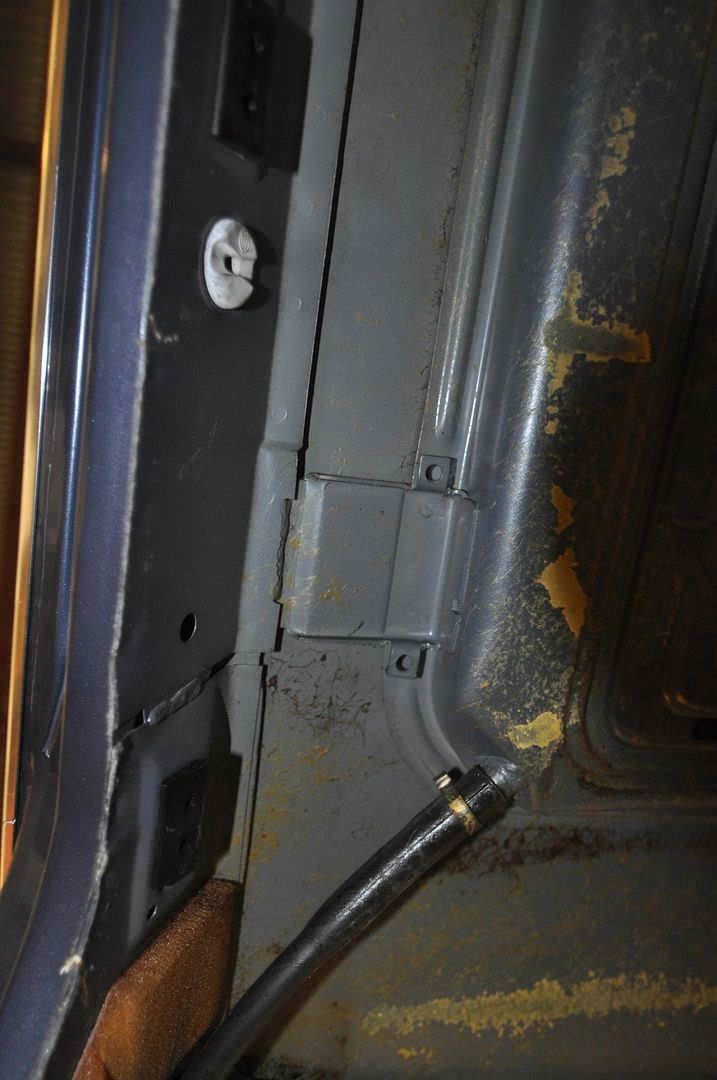
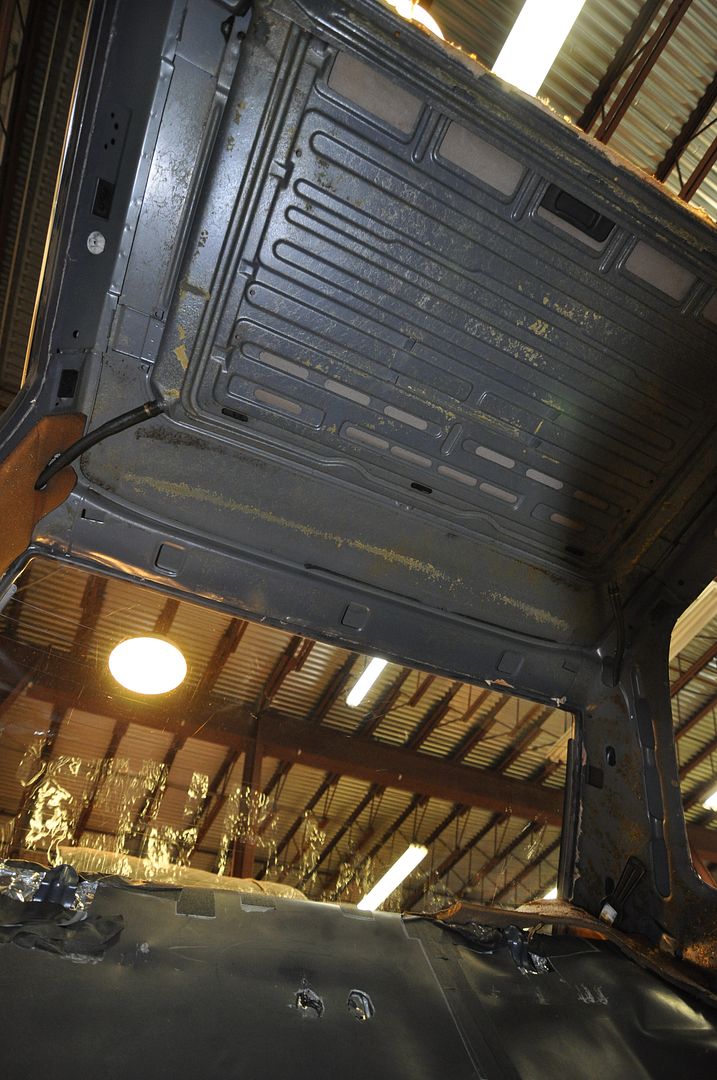
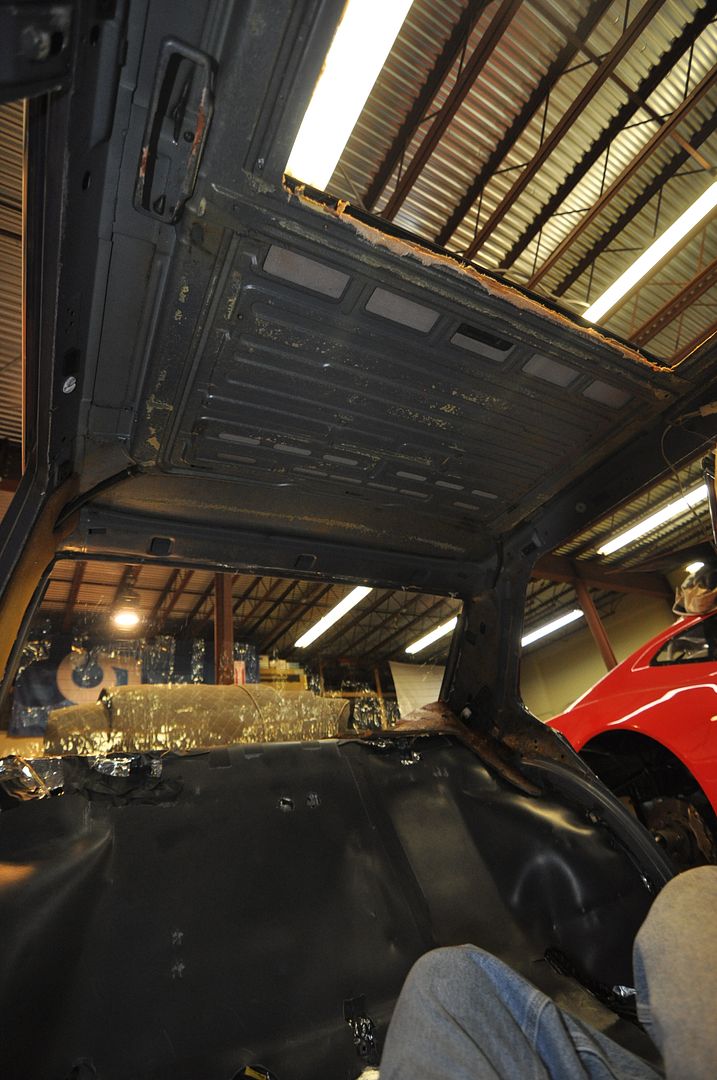
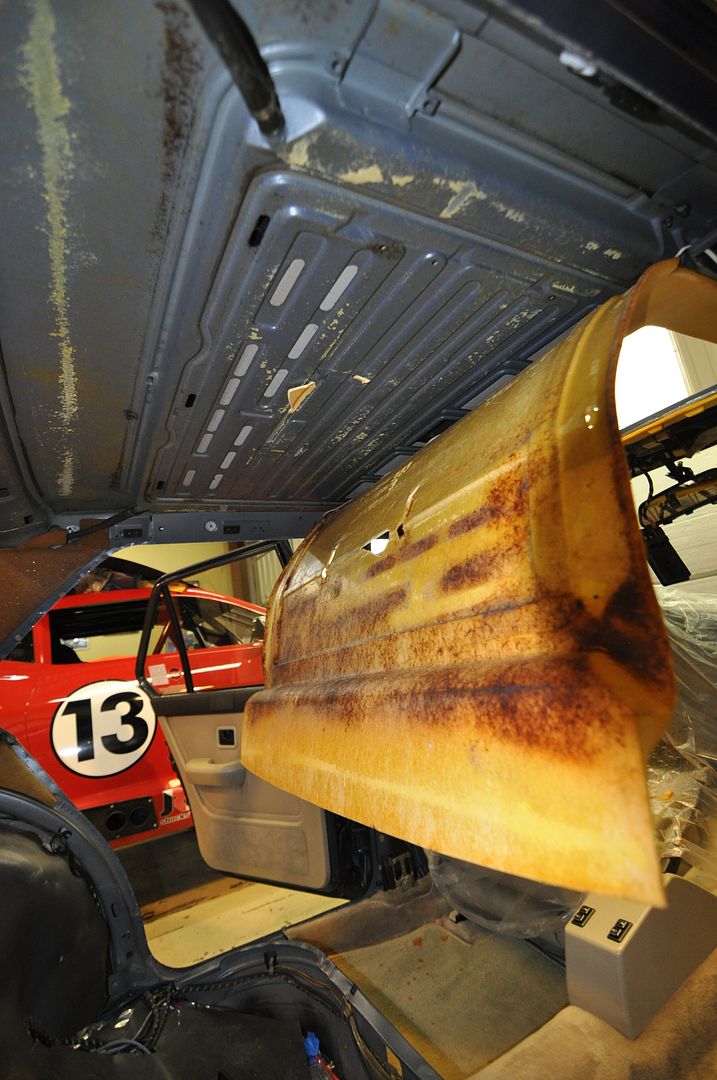
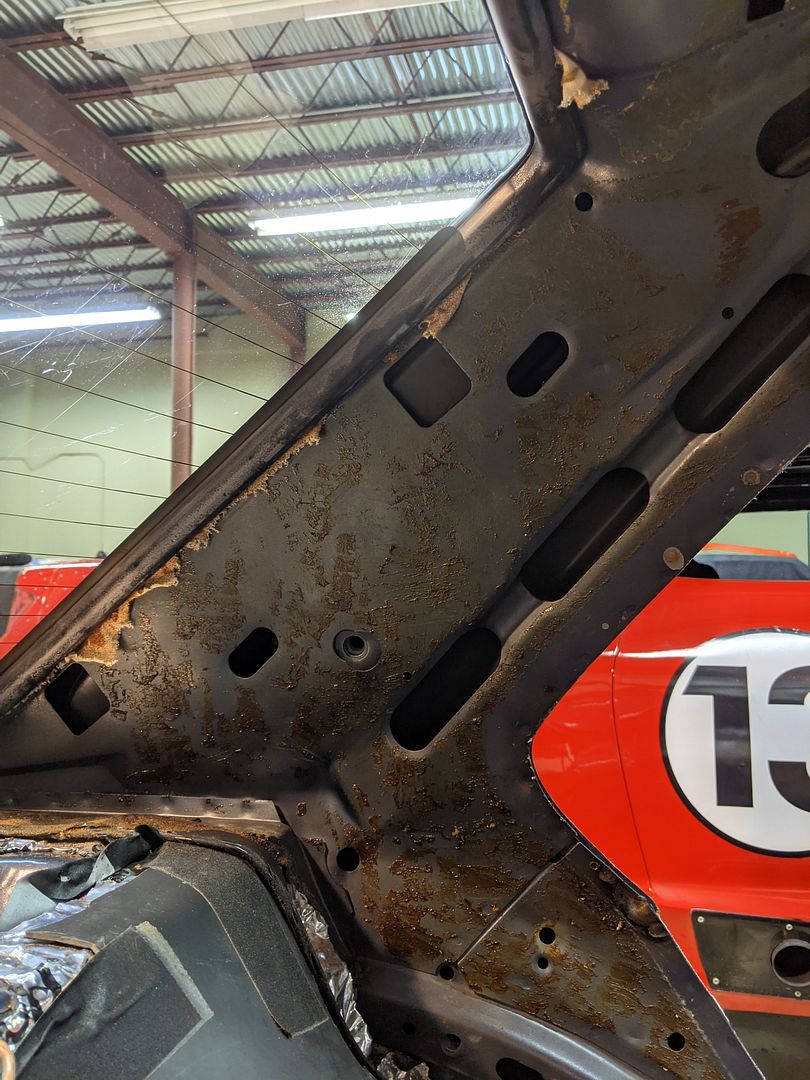
Turns out there’s not a whole up there between the headliner and the roof sheetmetal.
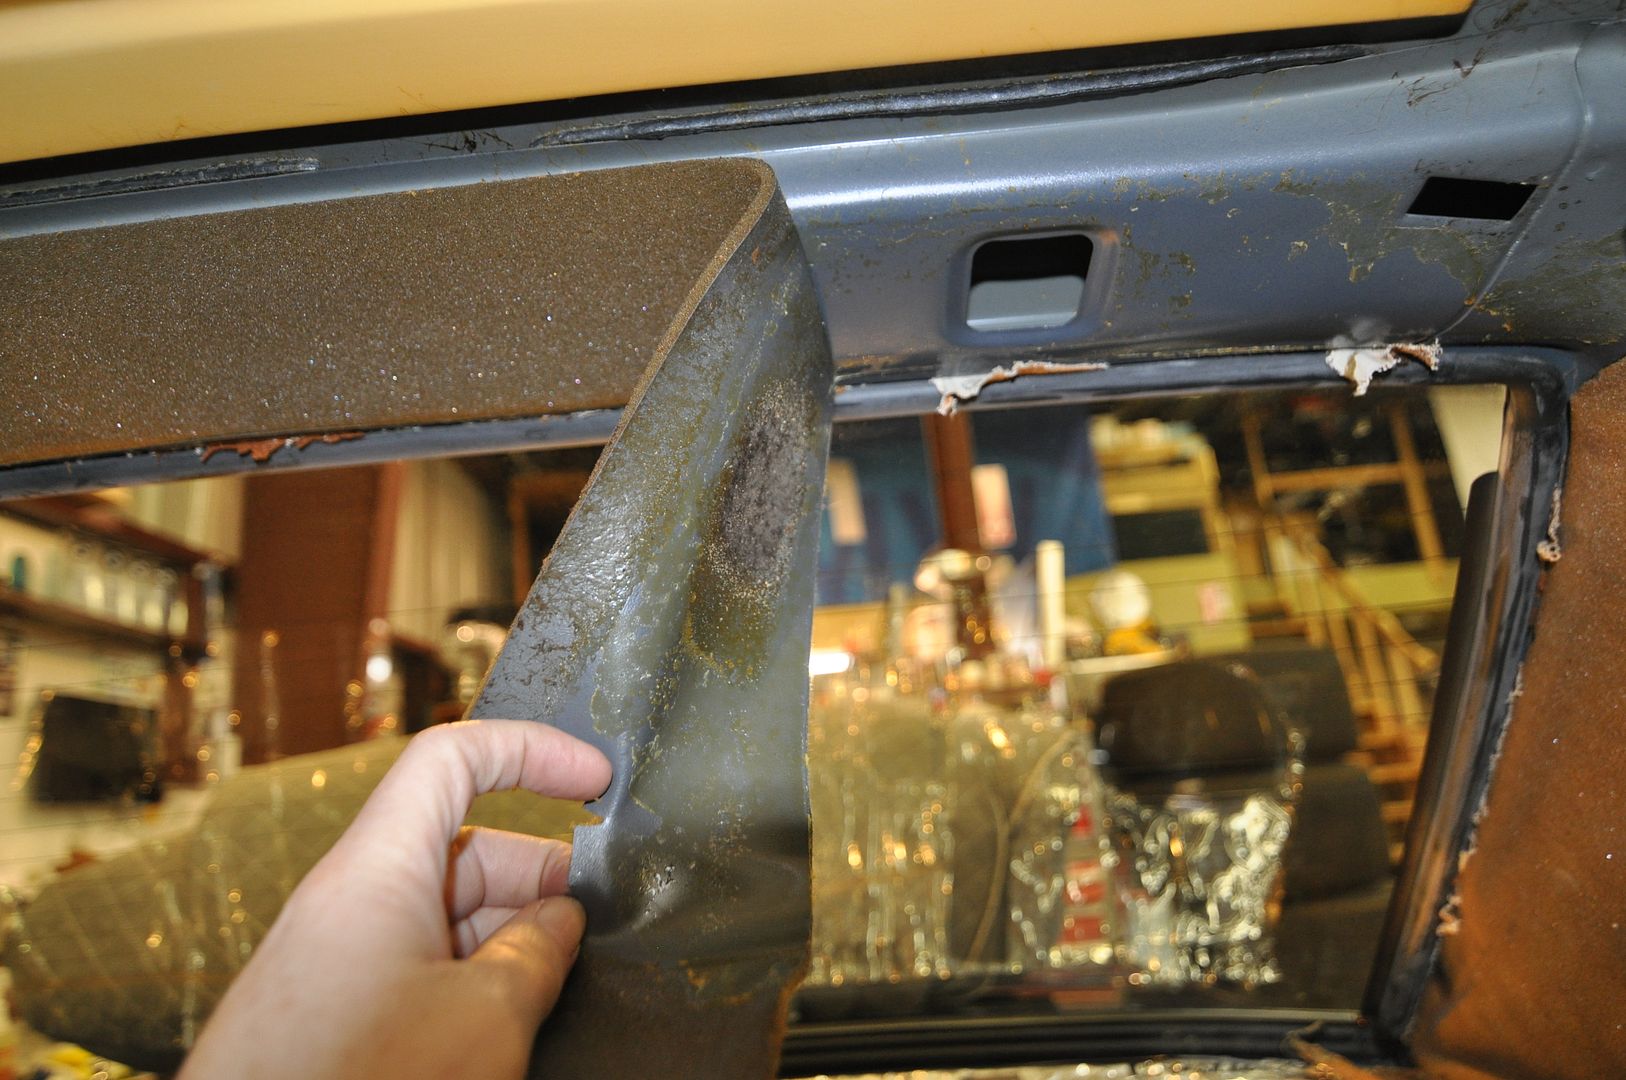
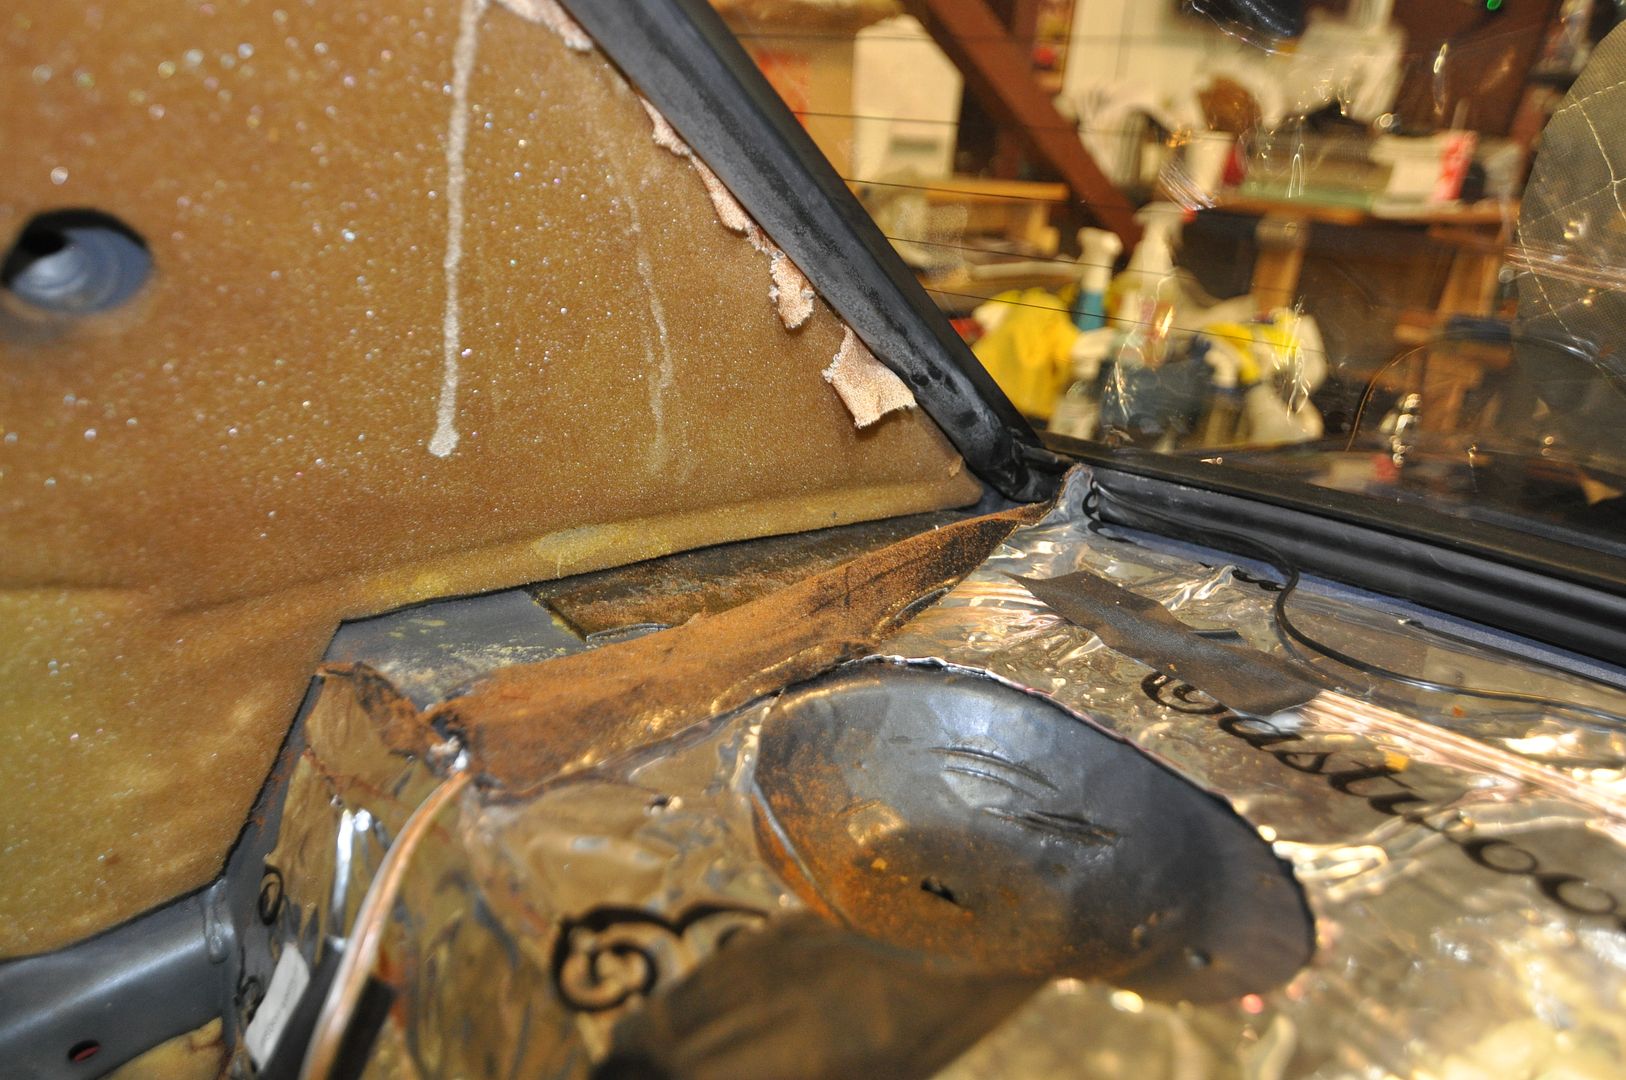
After removing all the nasty, decomposing headliner it was time to remove the various foam padding and strips:

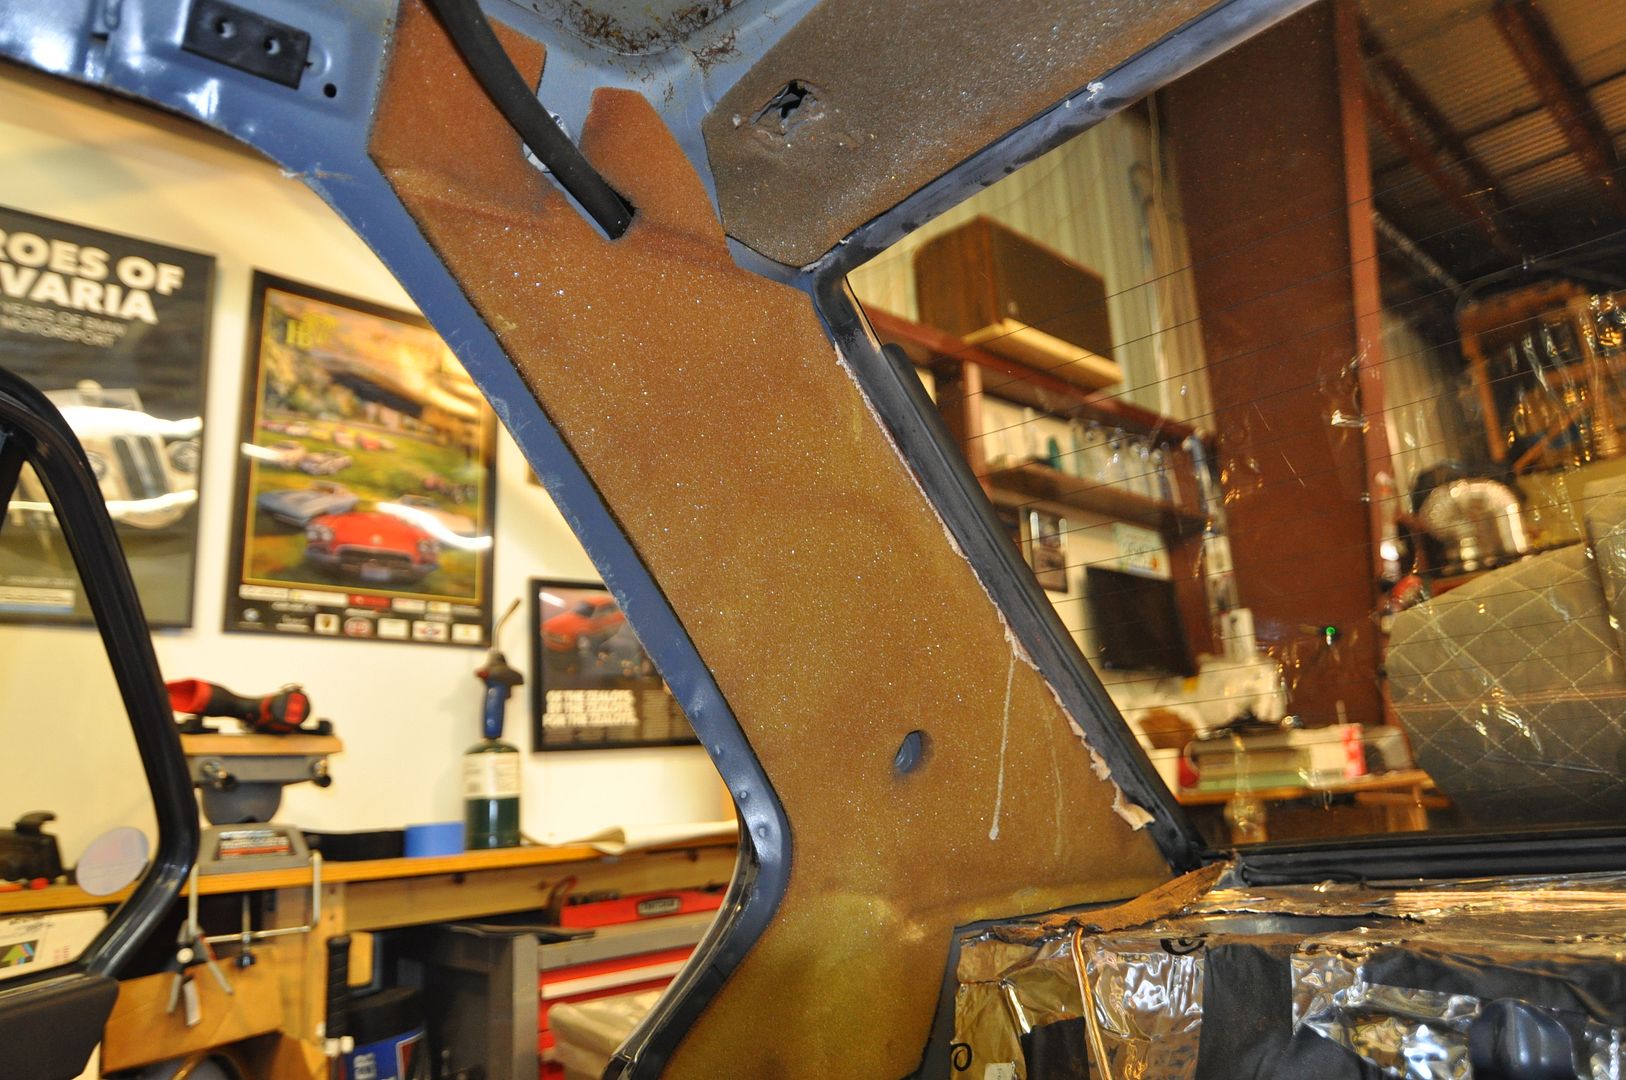
After all that, it was time to clean off all the old adhesive from the roof. You will need strong flat scraper blades, plastic razor blades, adhesive remover and a whole lot of Advil later to get all that stuff off (after working over your head for hours, you will understand the need for the Advil. And the Rum chaser to wash it down).
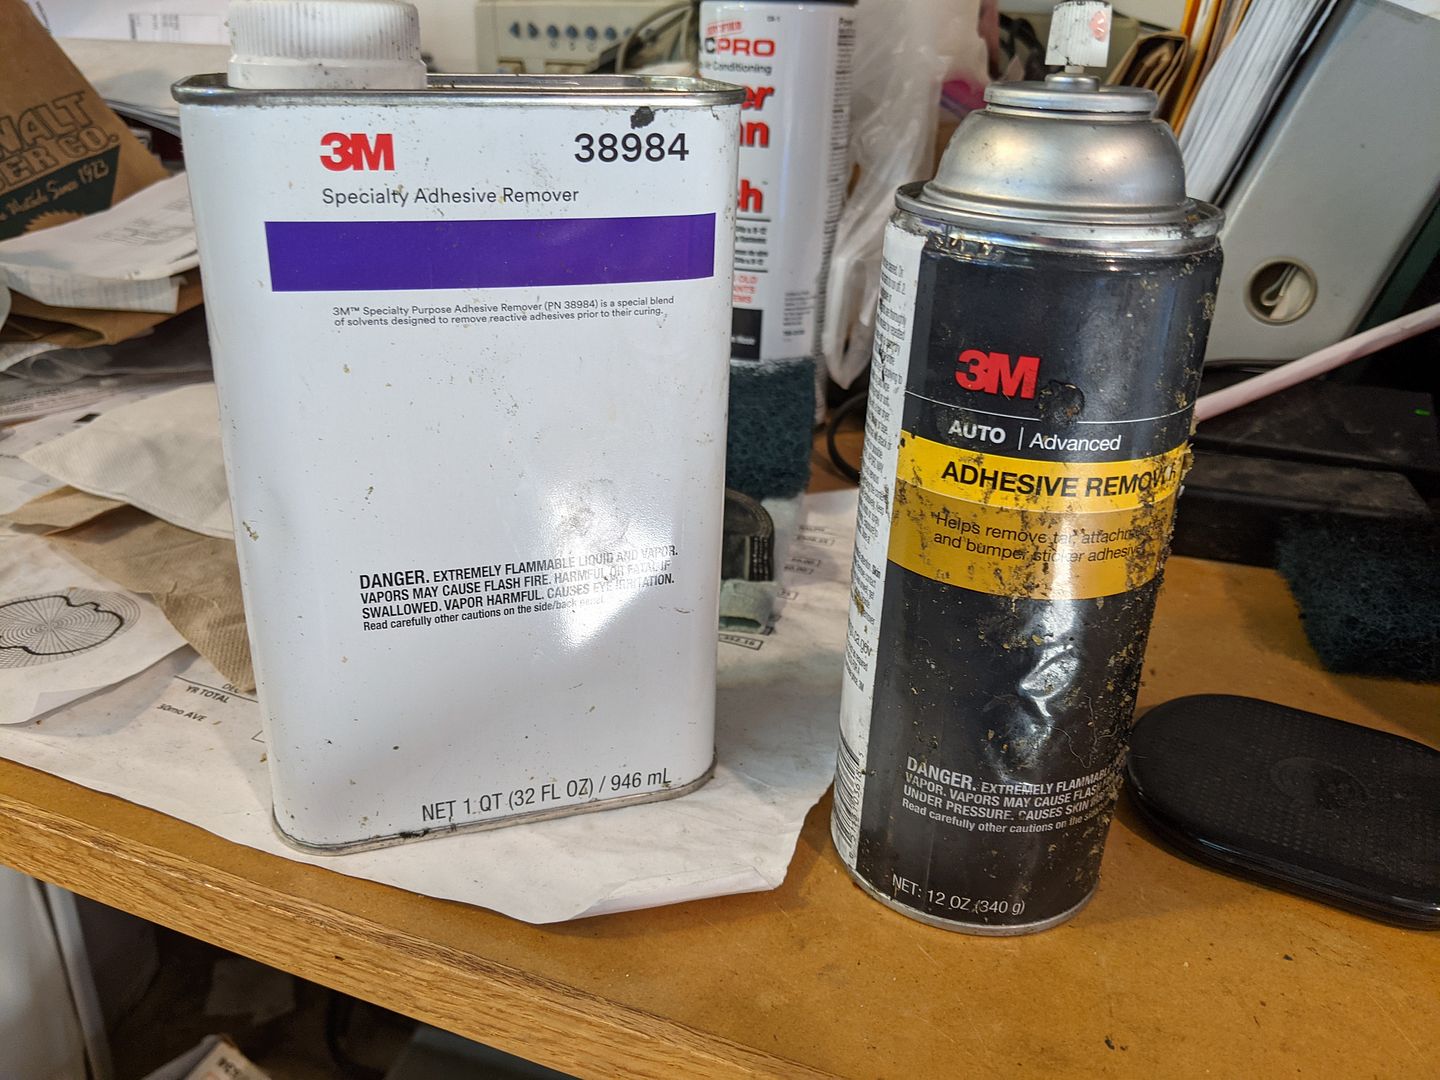
I don’t want to smell this stuff anytime soon:
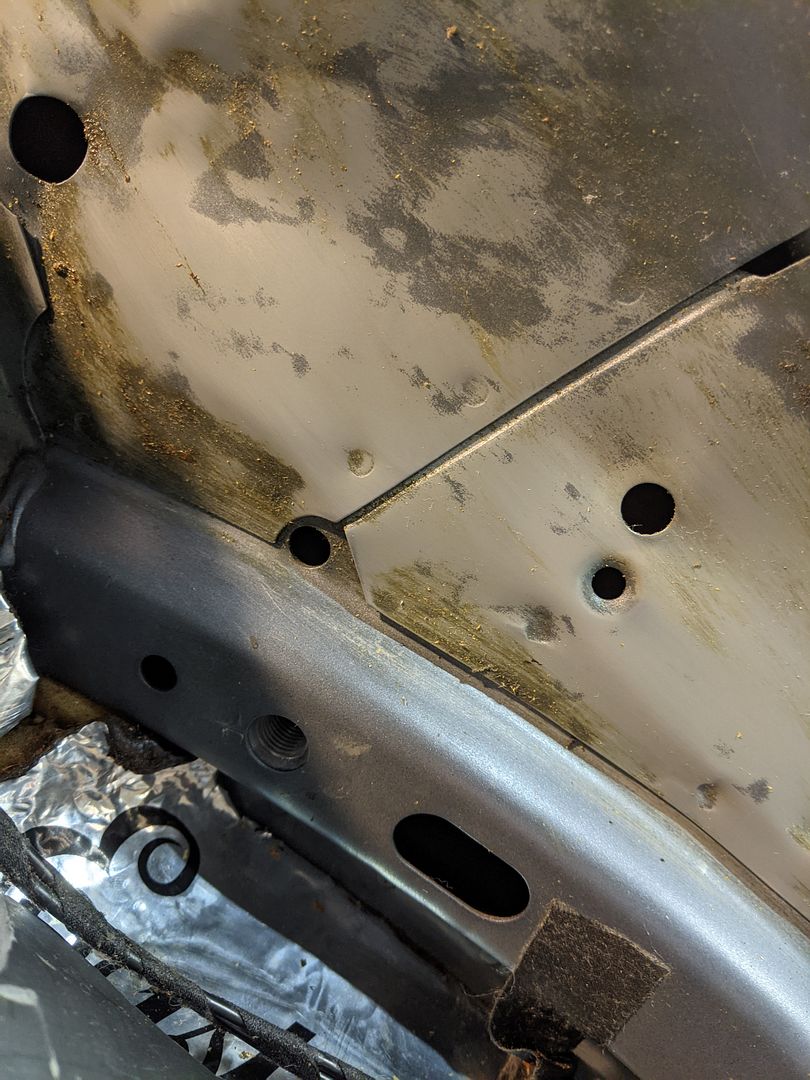
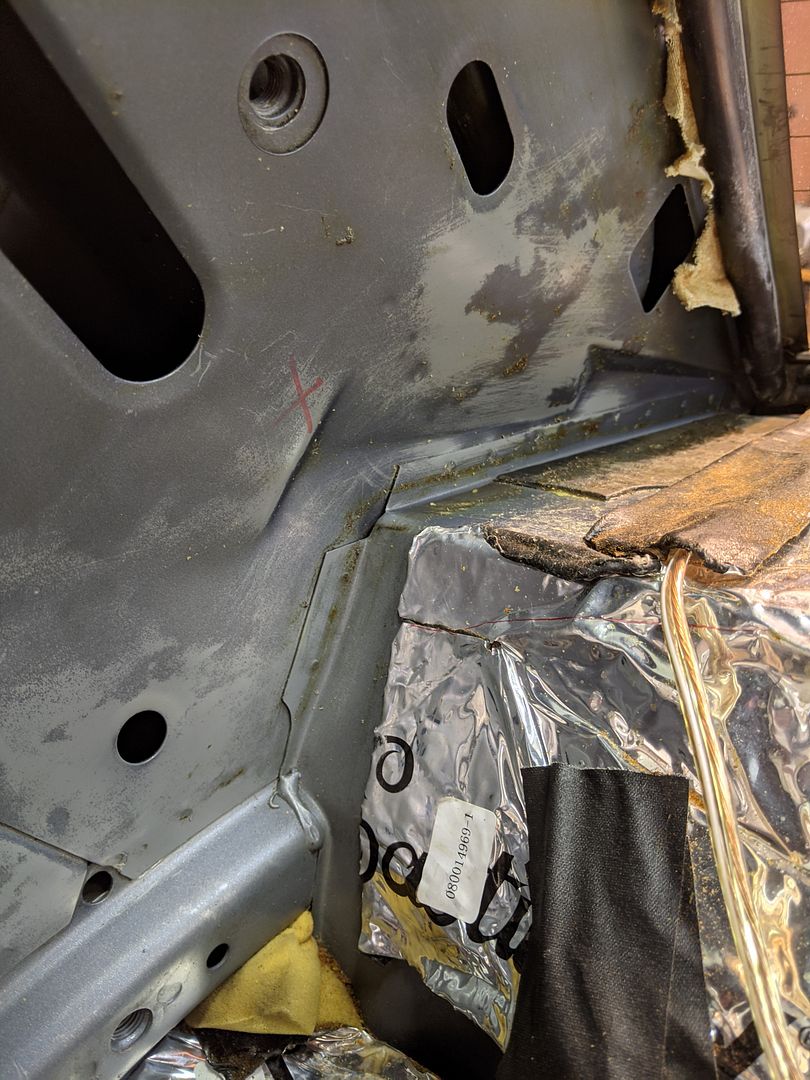
The cleaned product:
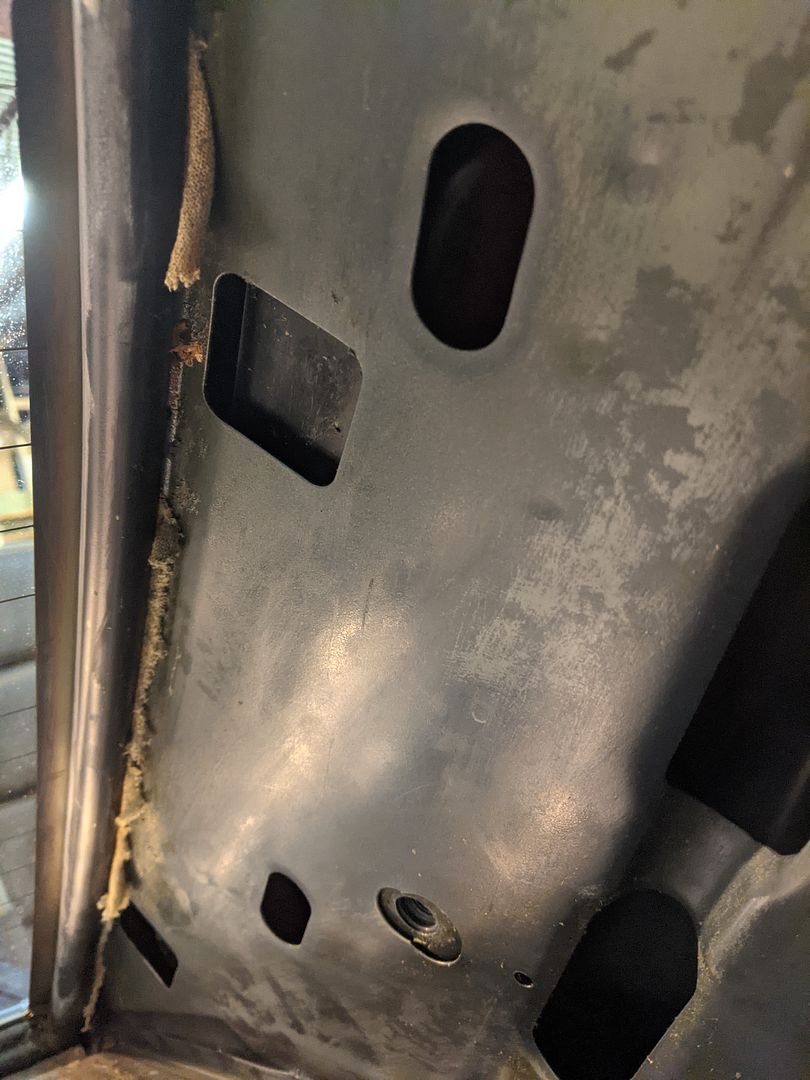
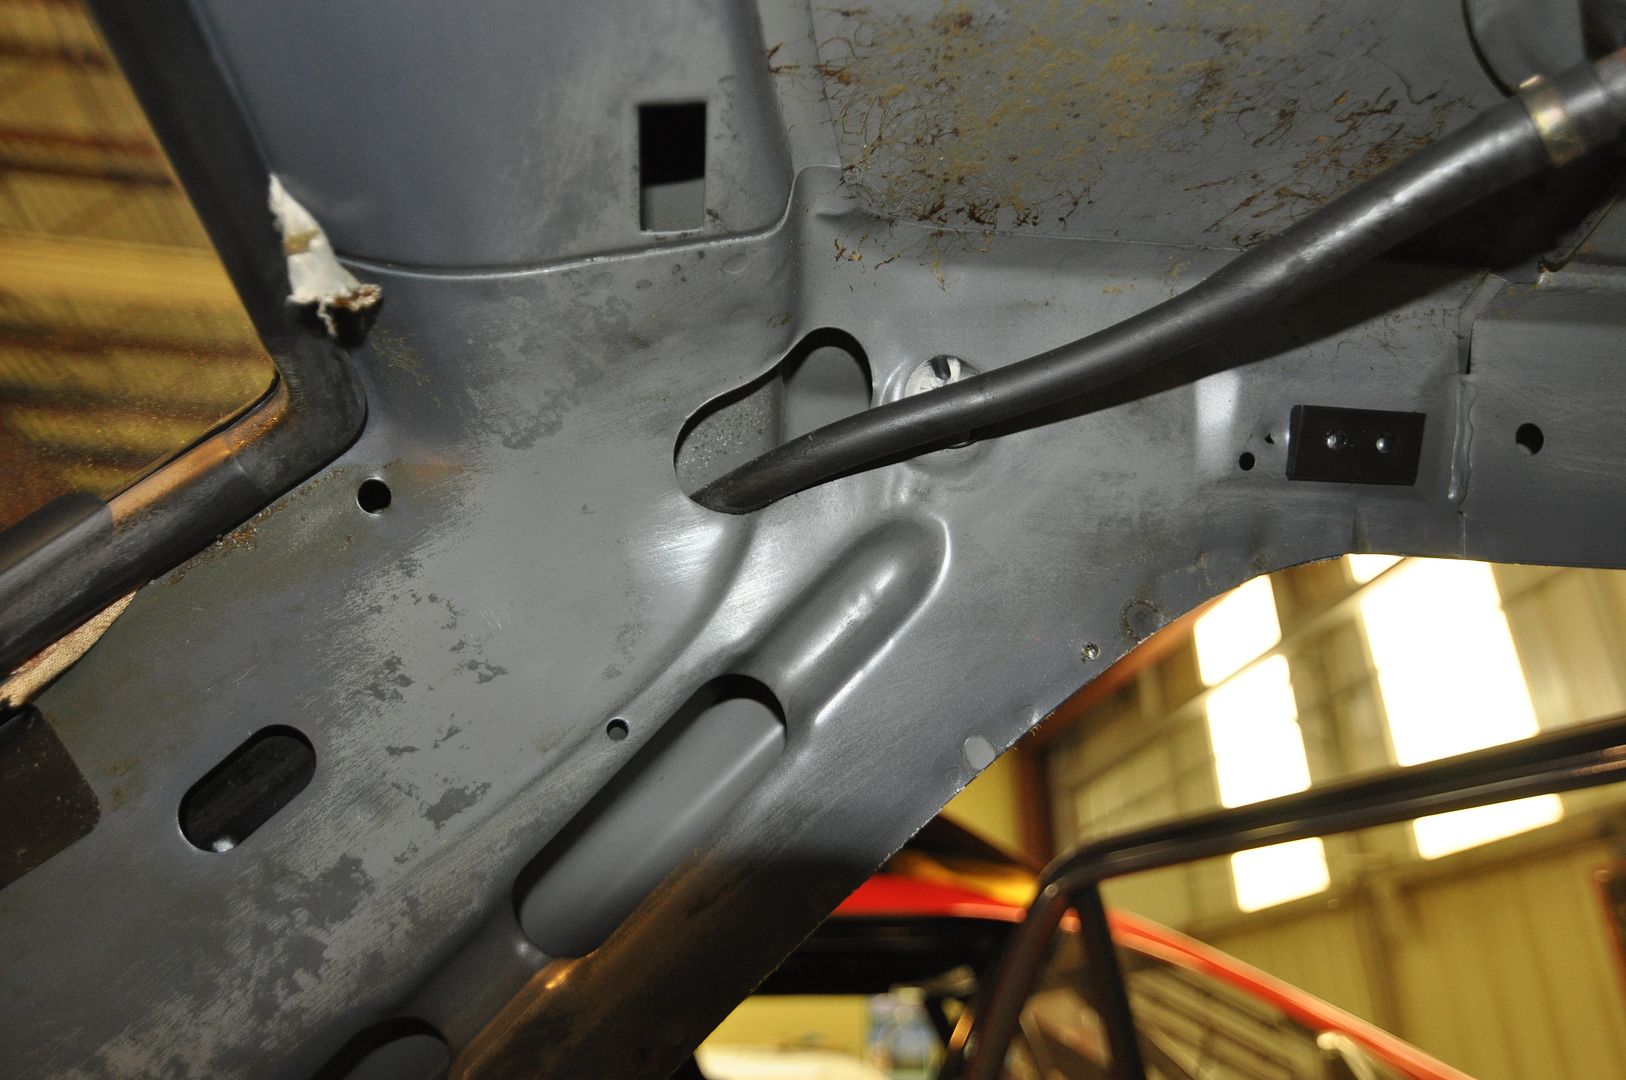
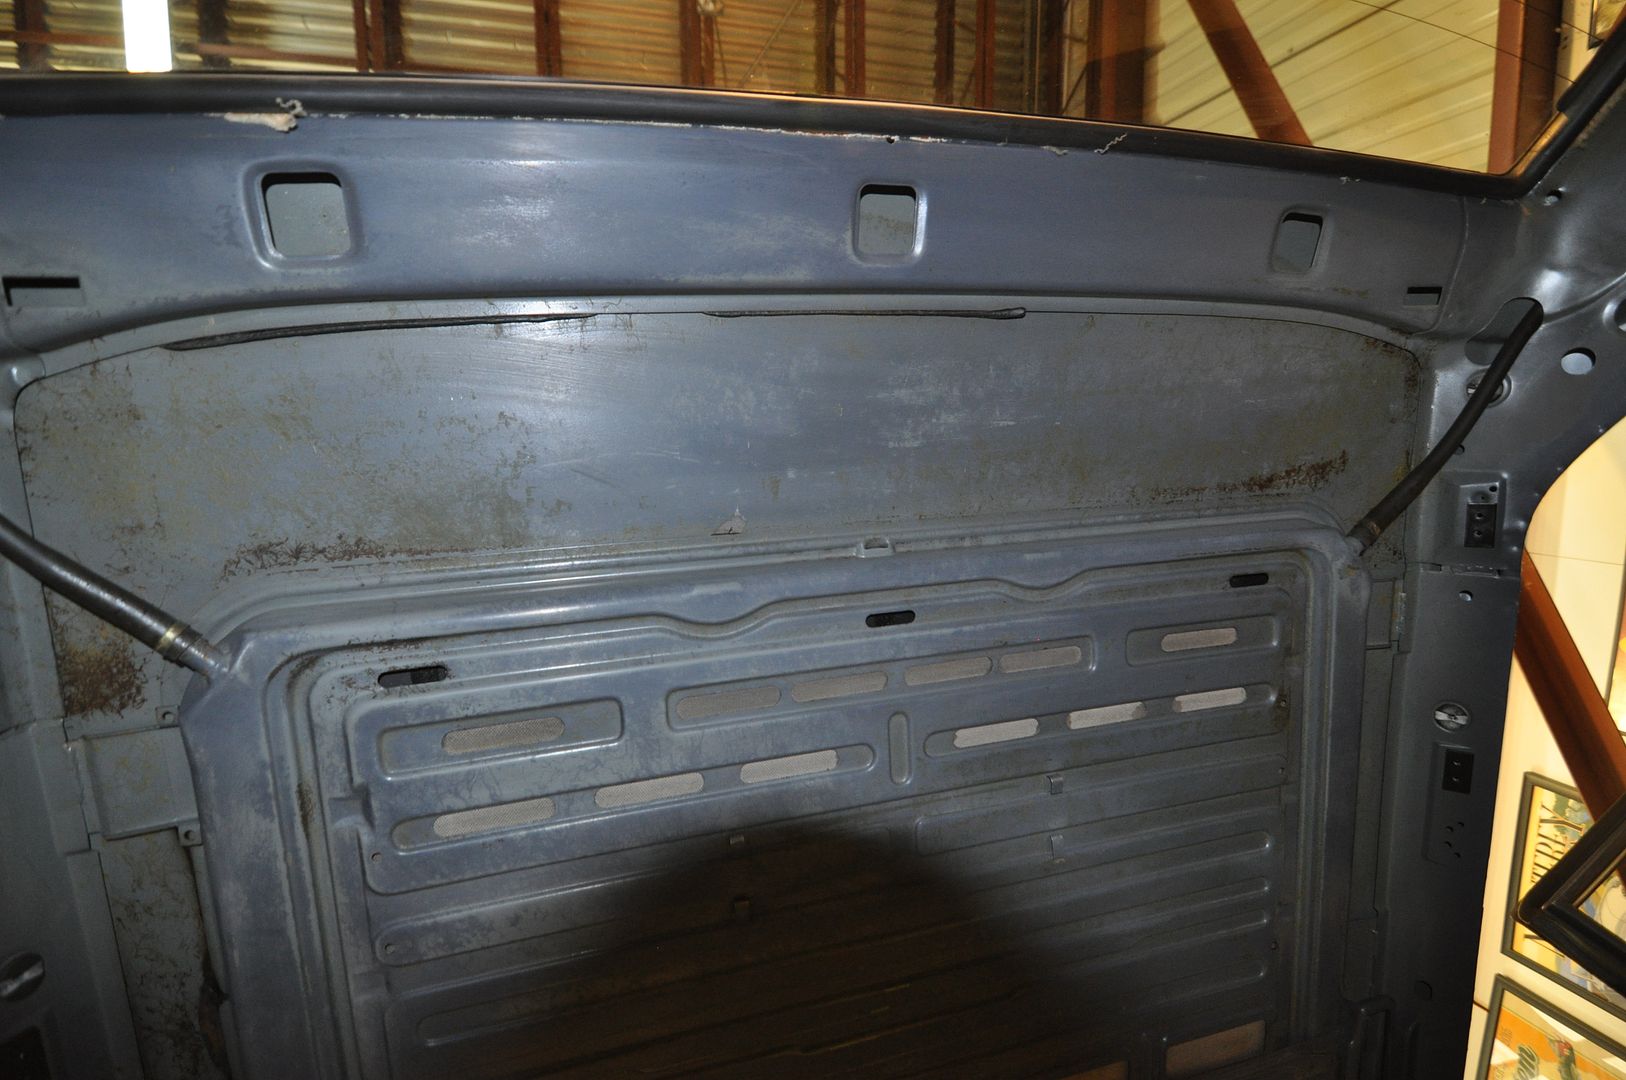
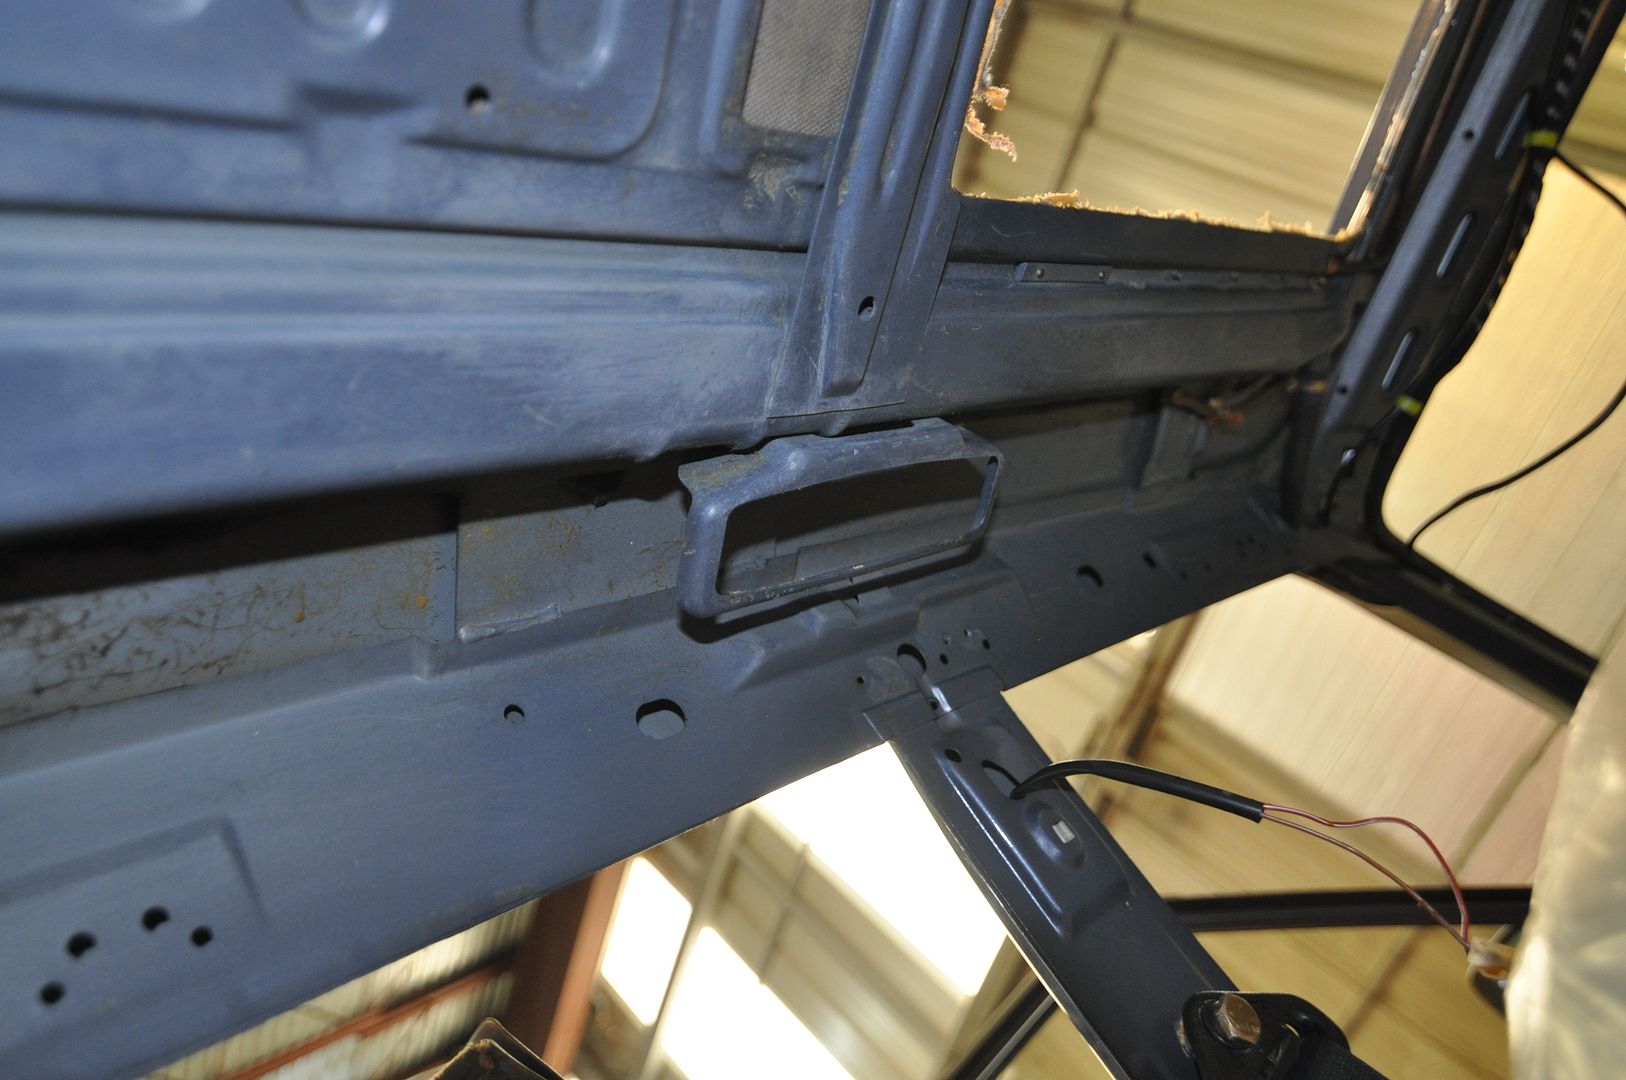
The interior cabin in an E28 is a pretty loud & warm space. One of the primary goals of this project was to increase the levels of both heat and noise abatement inside the cabin. I started this when I did the engine bay overhaul 4 years back with a new Neoprene & Thermal firewall barrier. I even wrapped the thermal barrier down through the front part of the transmission tunnel. I understand that I am fighting a deficiency of design in terms of door & window seals not to mention the amount of glass inherent with the E28, but I was certainly going to address as much of the other areas I could. My simple goal was to make this car’s interior half as quite as BMW did with the E39; if I could achieve that then I would be happy. After a great deal of research and some experience, I chose many products by HeatShield Products to employ with the task of reducing both heat and noise intrusion.
For the roof, I am doing the following:
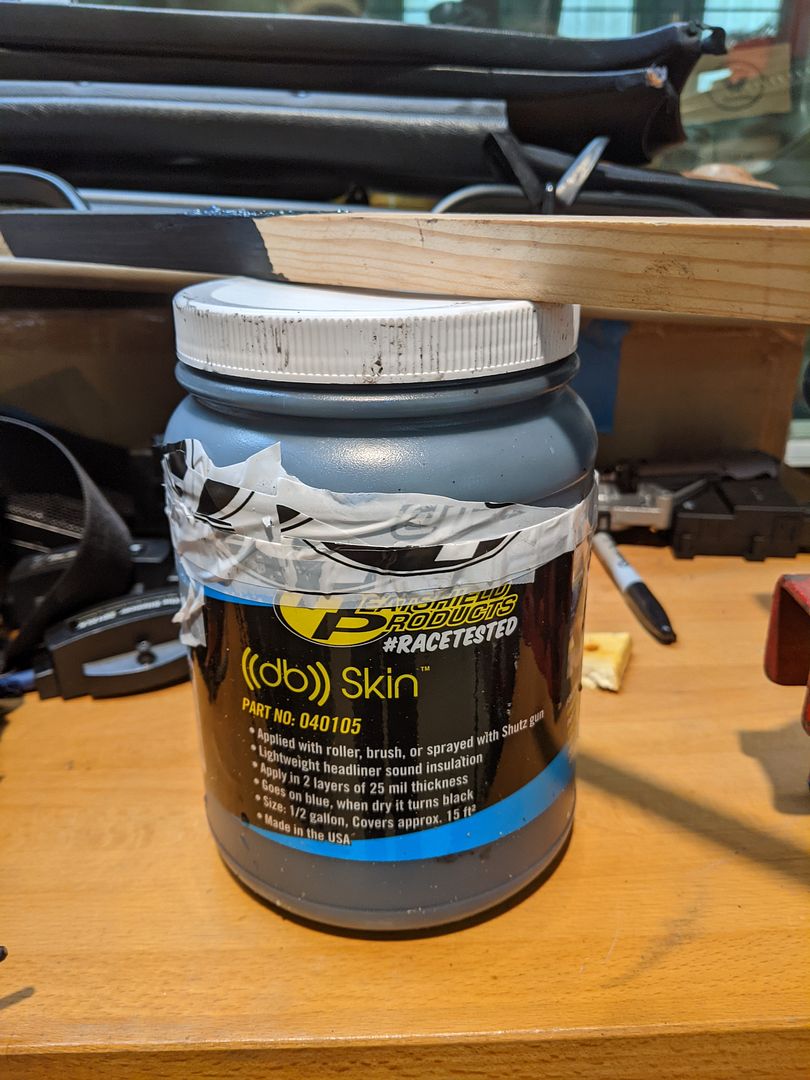
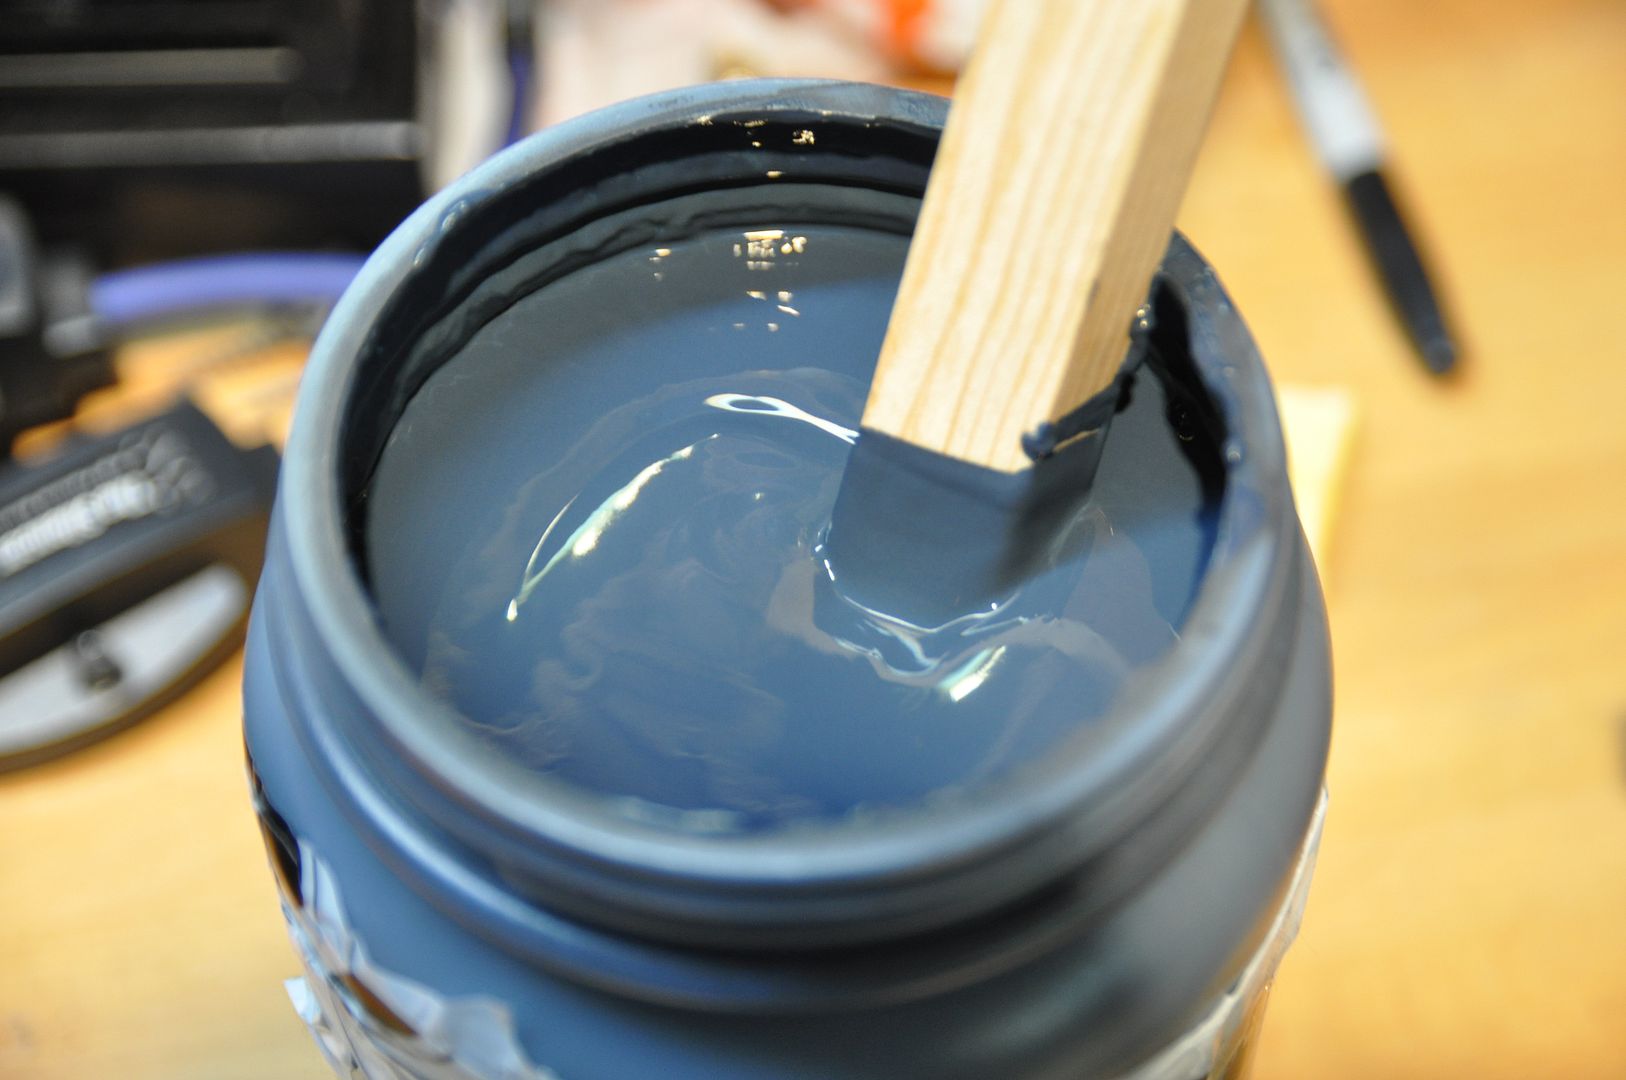
-HeatShield Products Headliner Kit: db Skin Liquid Membrane with db Stealth fabric barrier. The db Skin is to deaden the resonance of the sheet metal panels, goes on in a couple coats to reach about 50 mil. The db Stealth is a double layer polyester & fiberglass fabric for heat abatement; this goes on as the last layer under the finish headliner after all the rest of the stuff following below.
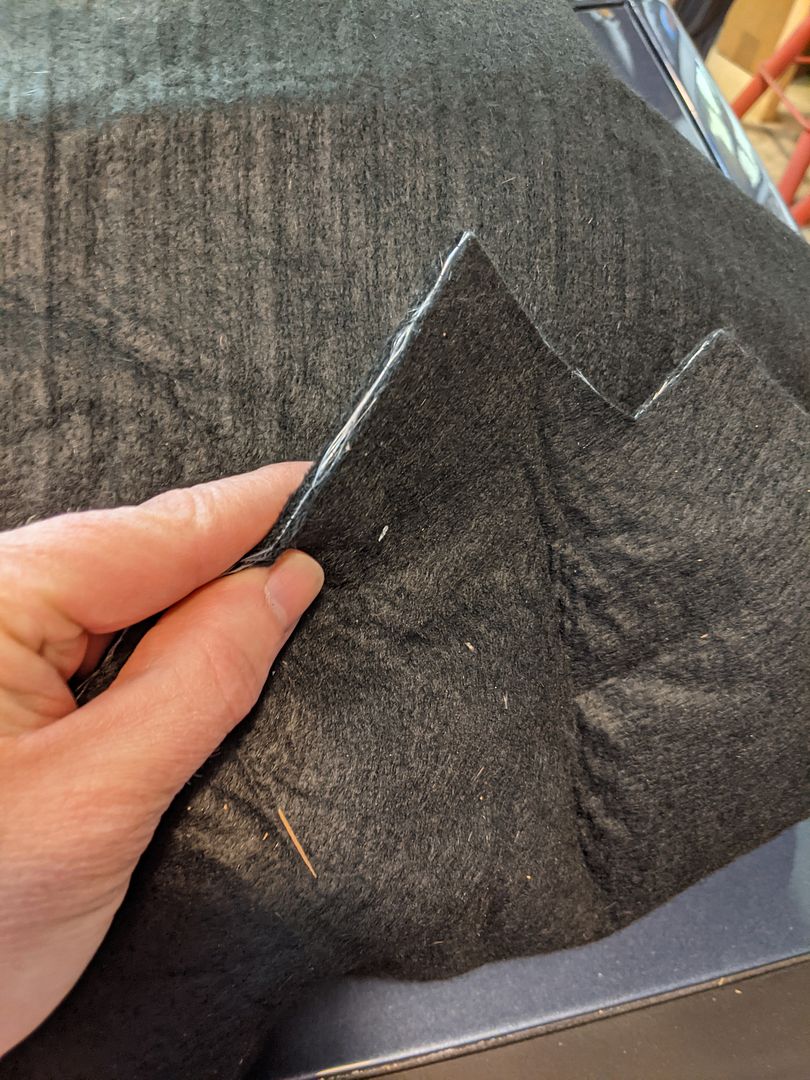
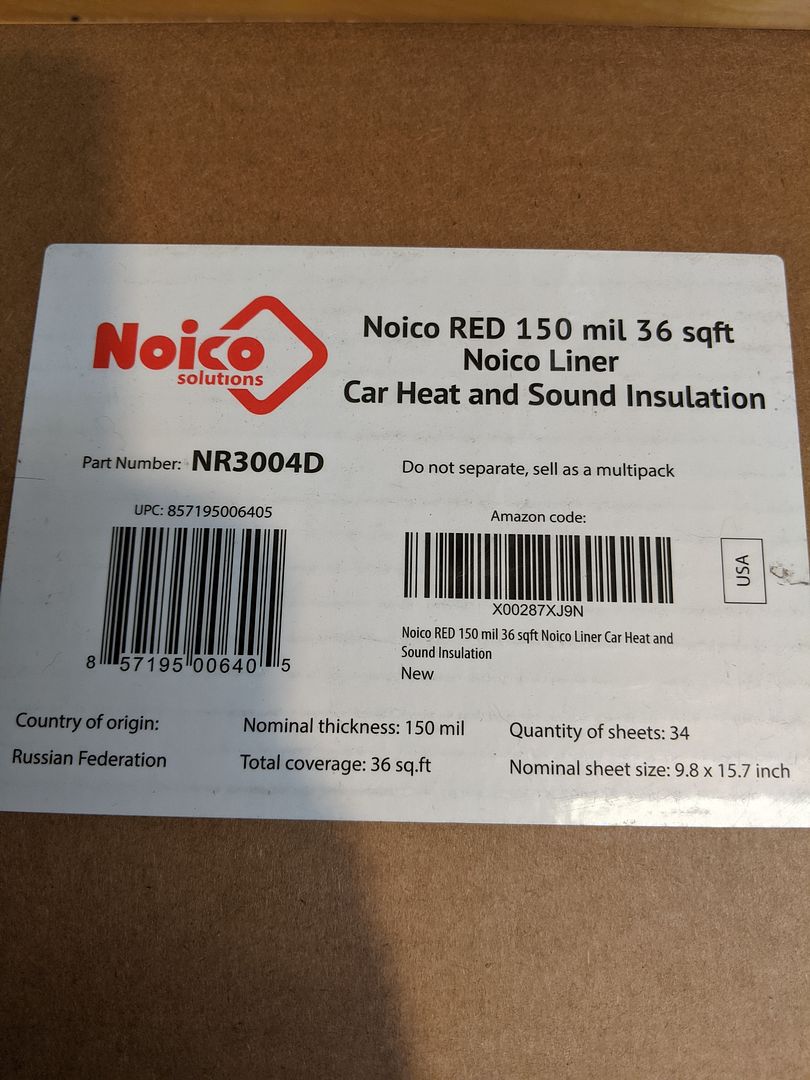
-Noico Red 150 mil Acoustic Foam: Self-Adhered, high performance closed cell foam padding. Further deadens the steel and vibrations. (The db Stealth fabric is glued over the top of the Noico).
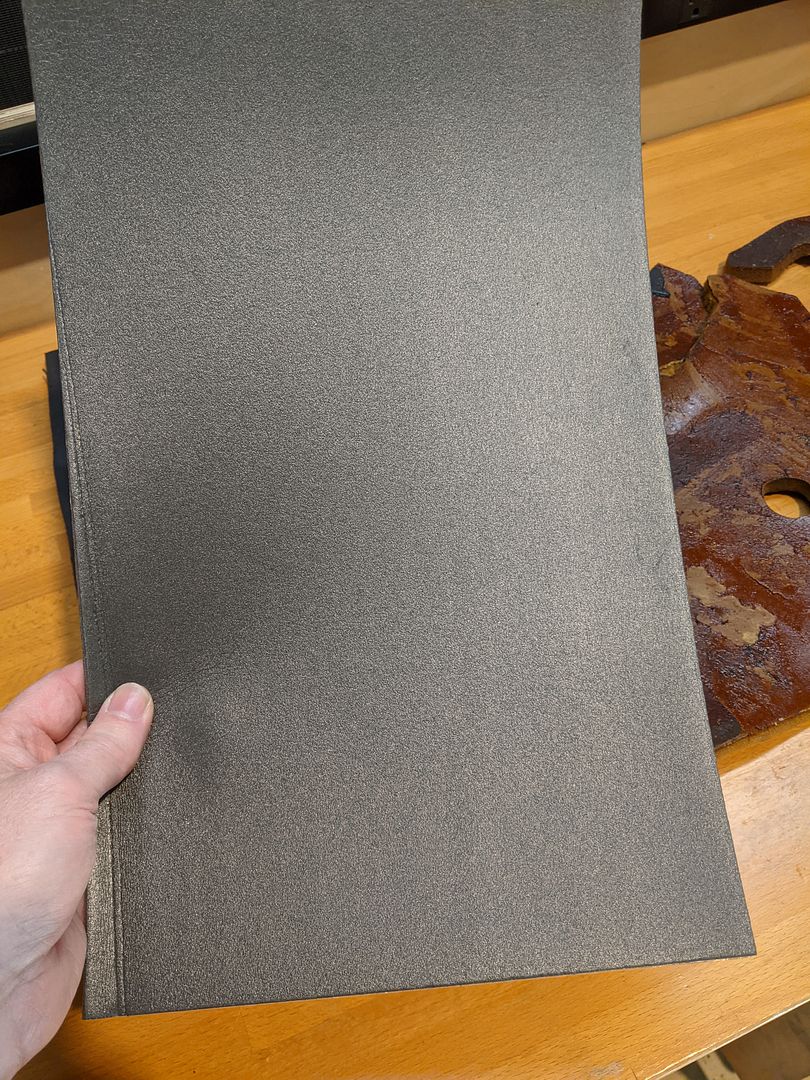
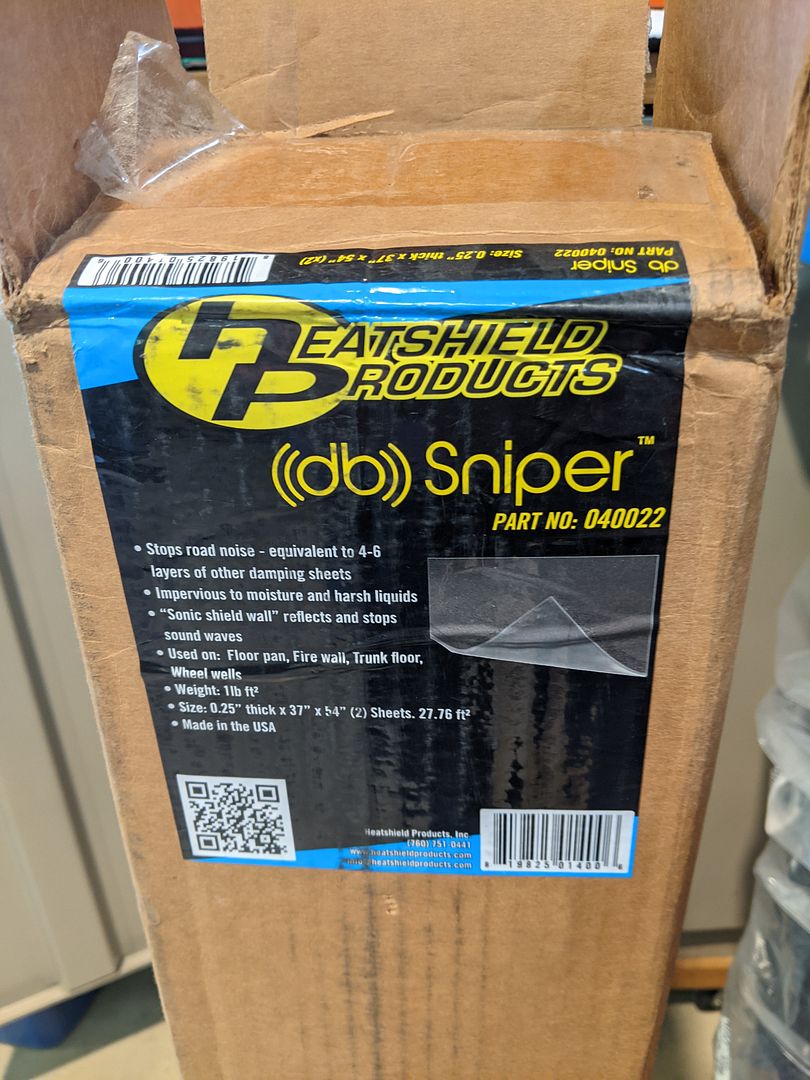
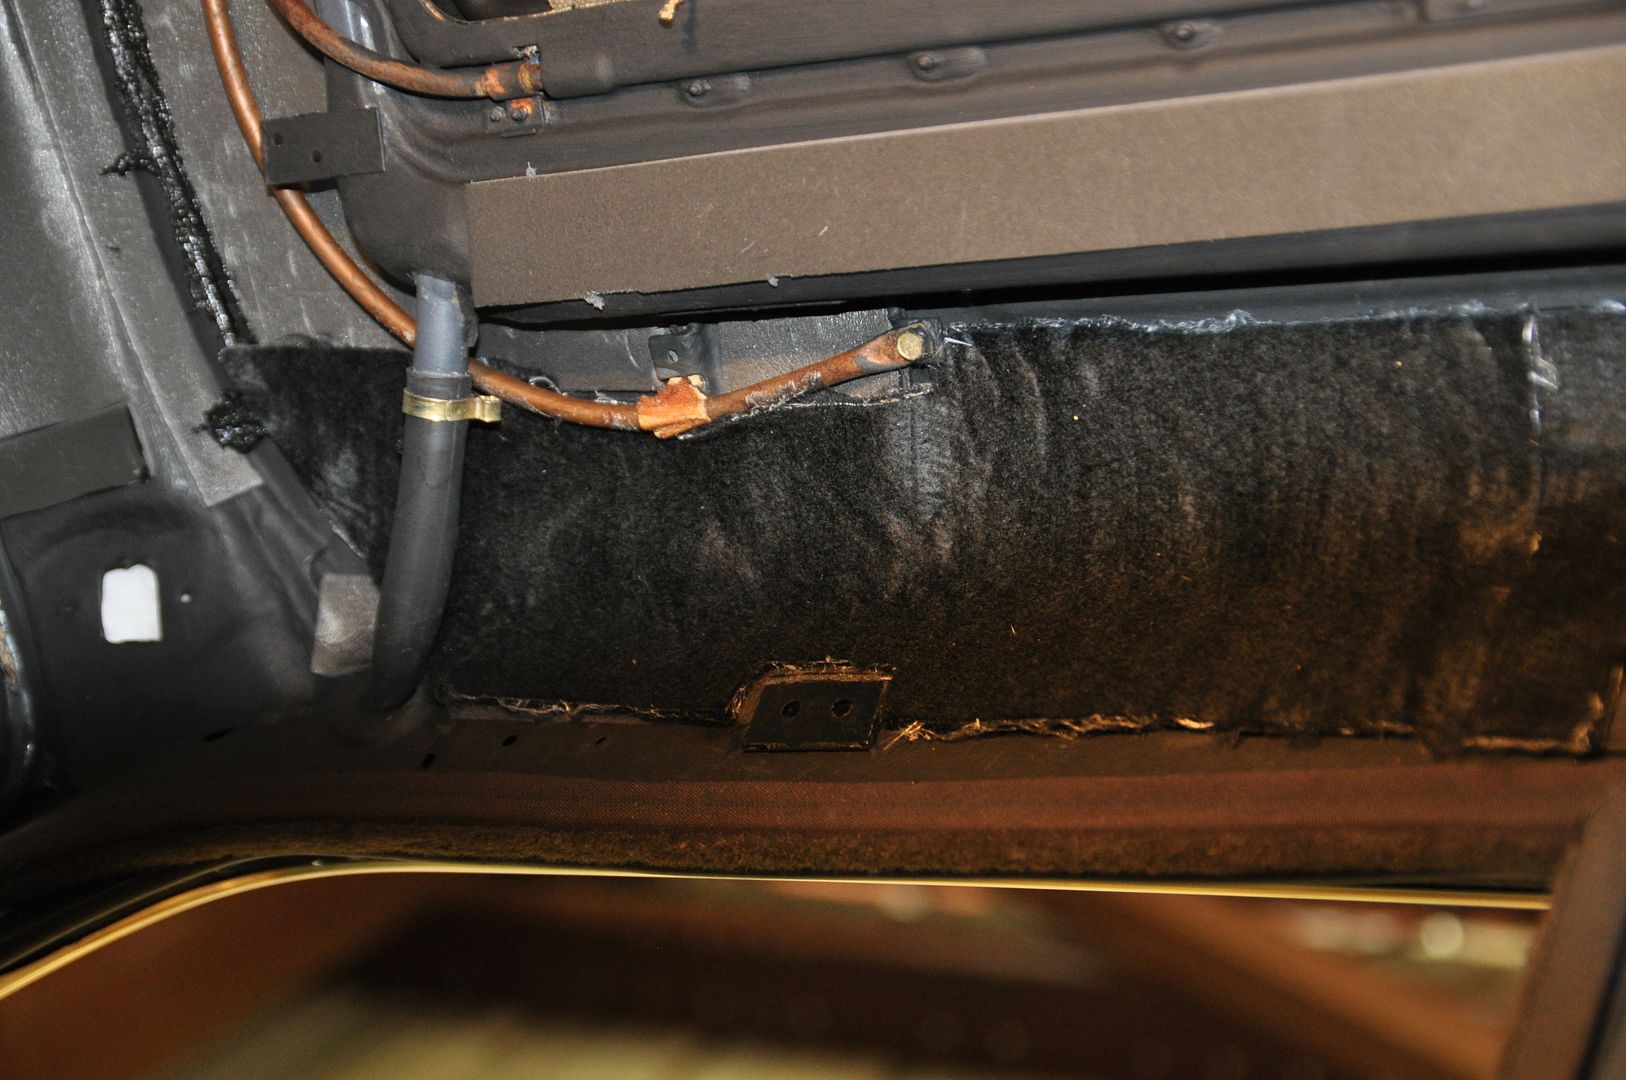
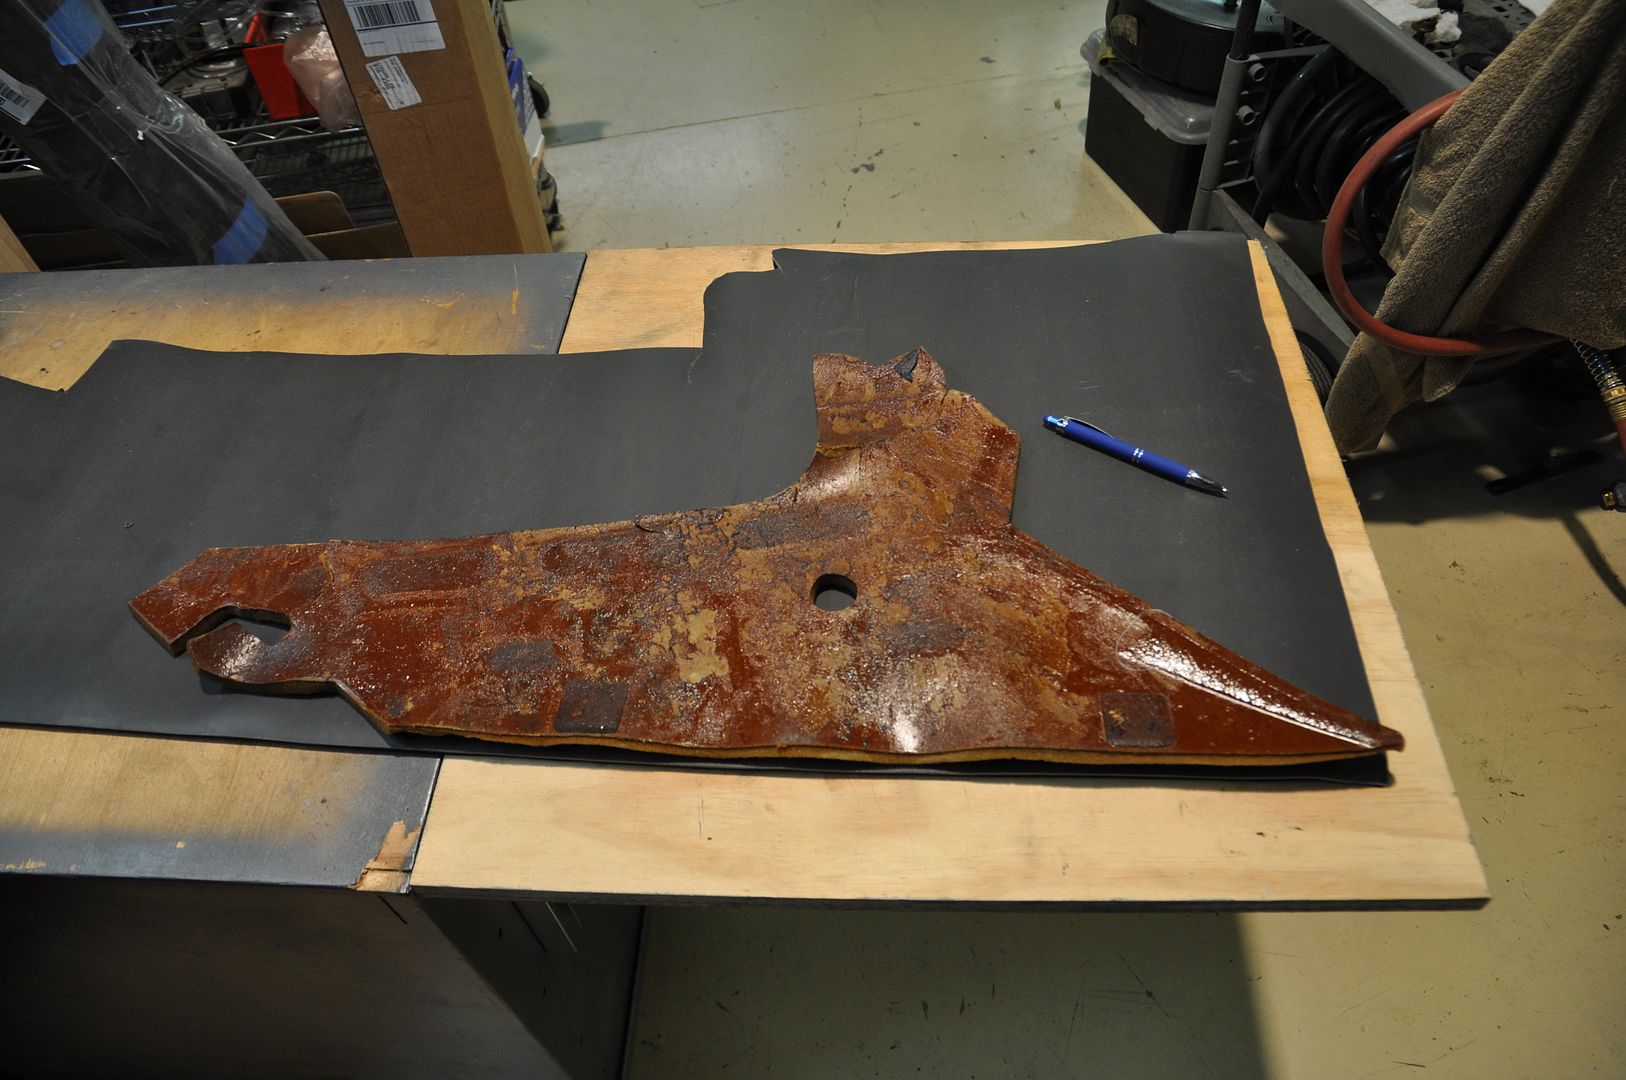
-HeatShield db Sniper Acoustic Mat: High performance Neoprene closed cell foam with a dense high-mass rubber vinyl backer mat. I have used this in the Rear Seat well and Bulkhead but here I’m using it on the C-Pillars to replace BMW’s open cell & vinyl mat they used. (In order to get the assembly thickness to equal the OEM, I added two layers of thin black cotton batting glued to the Sniper).
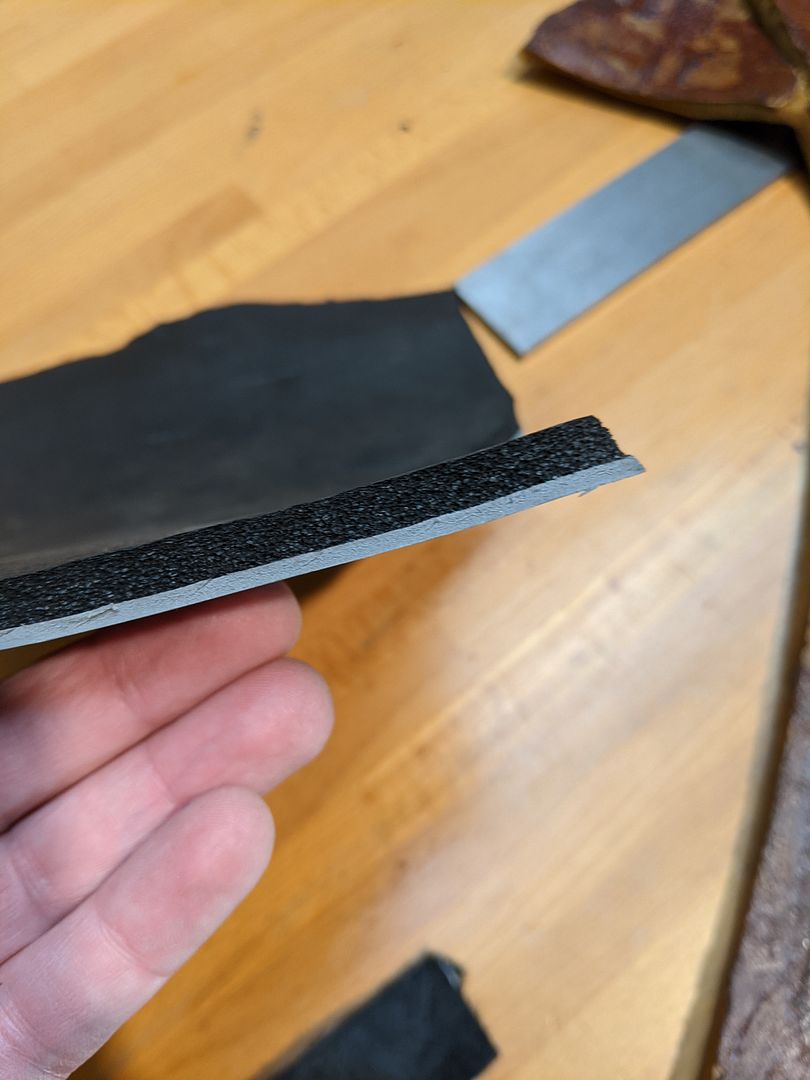
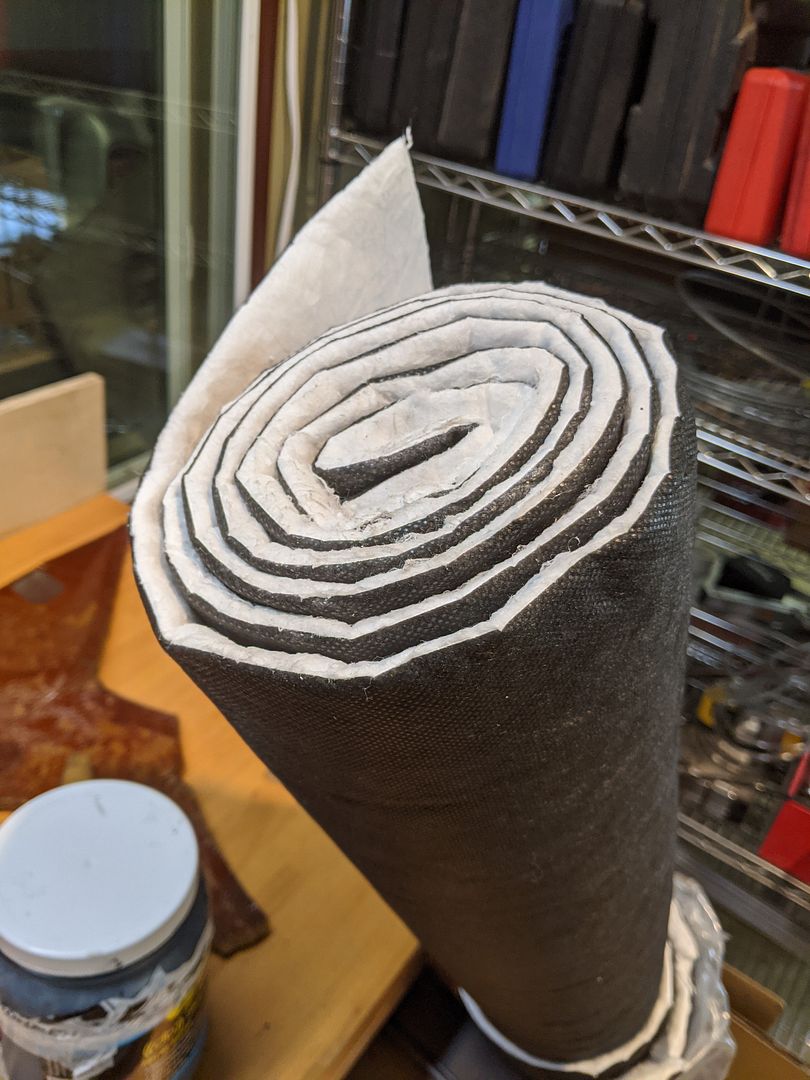
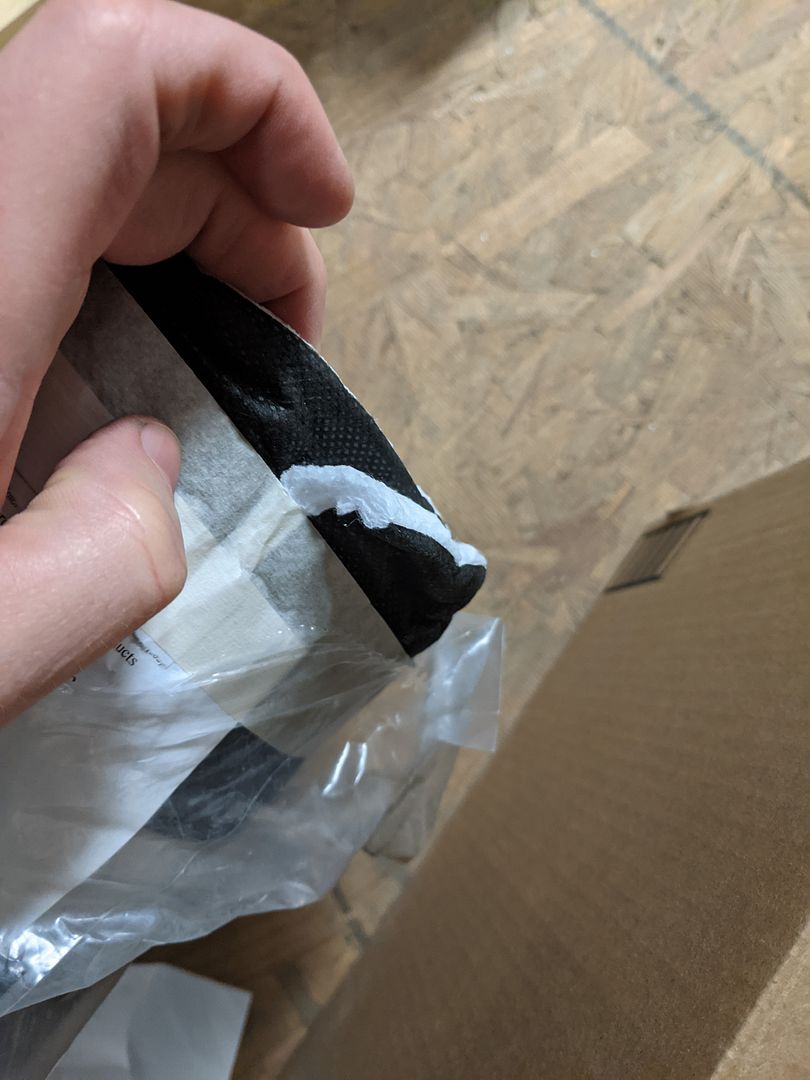
-3M Thinsulate Acoustic Batt Insulation: +/-3/4” thick, one side backed (comes in a 60”x10’ roll). This gets cut up and crammed into all the open cavities and holes; there is a surprising amount of them between the roof, C-Pillars and B-Pillars).
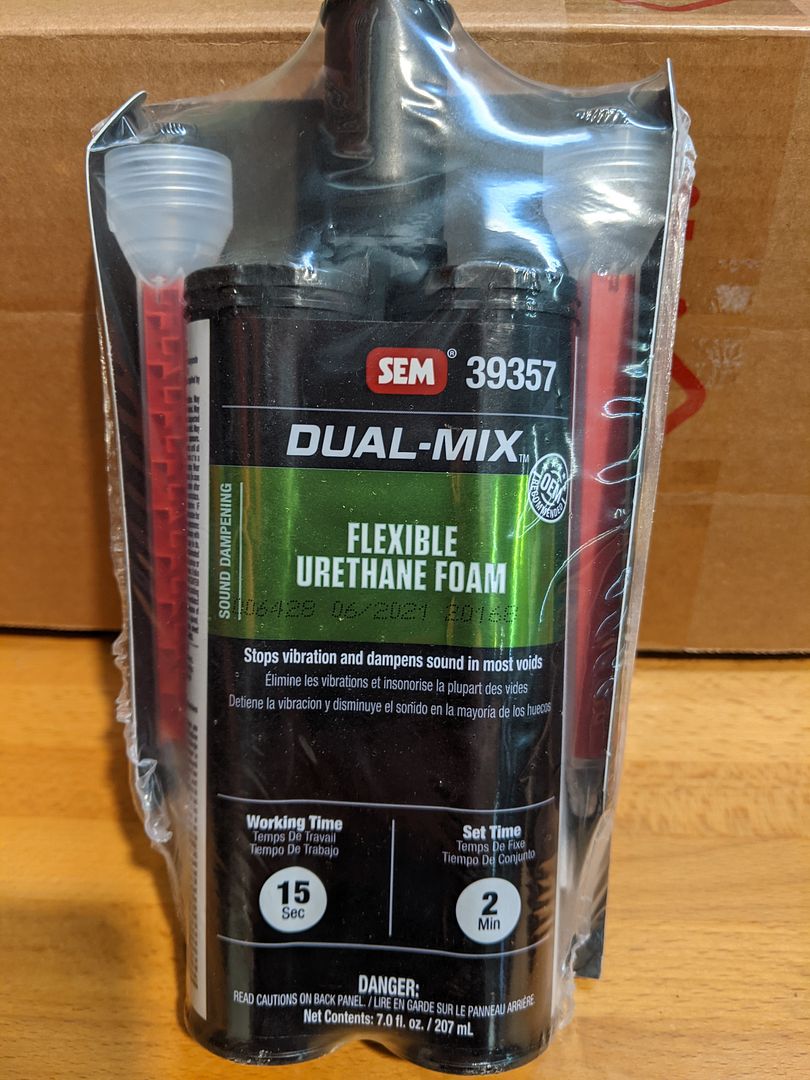
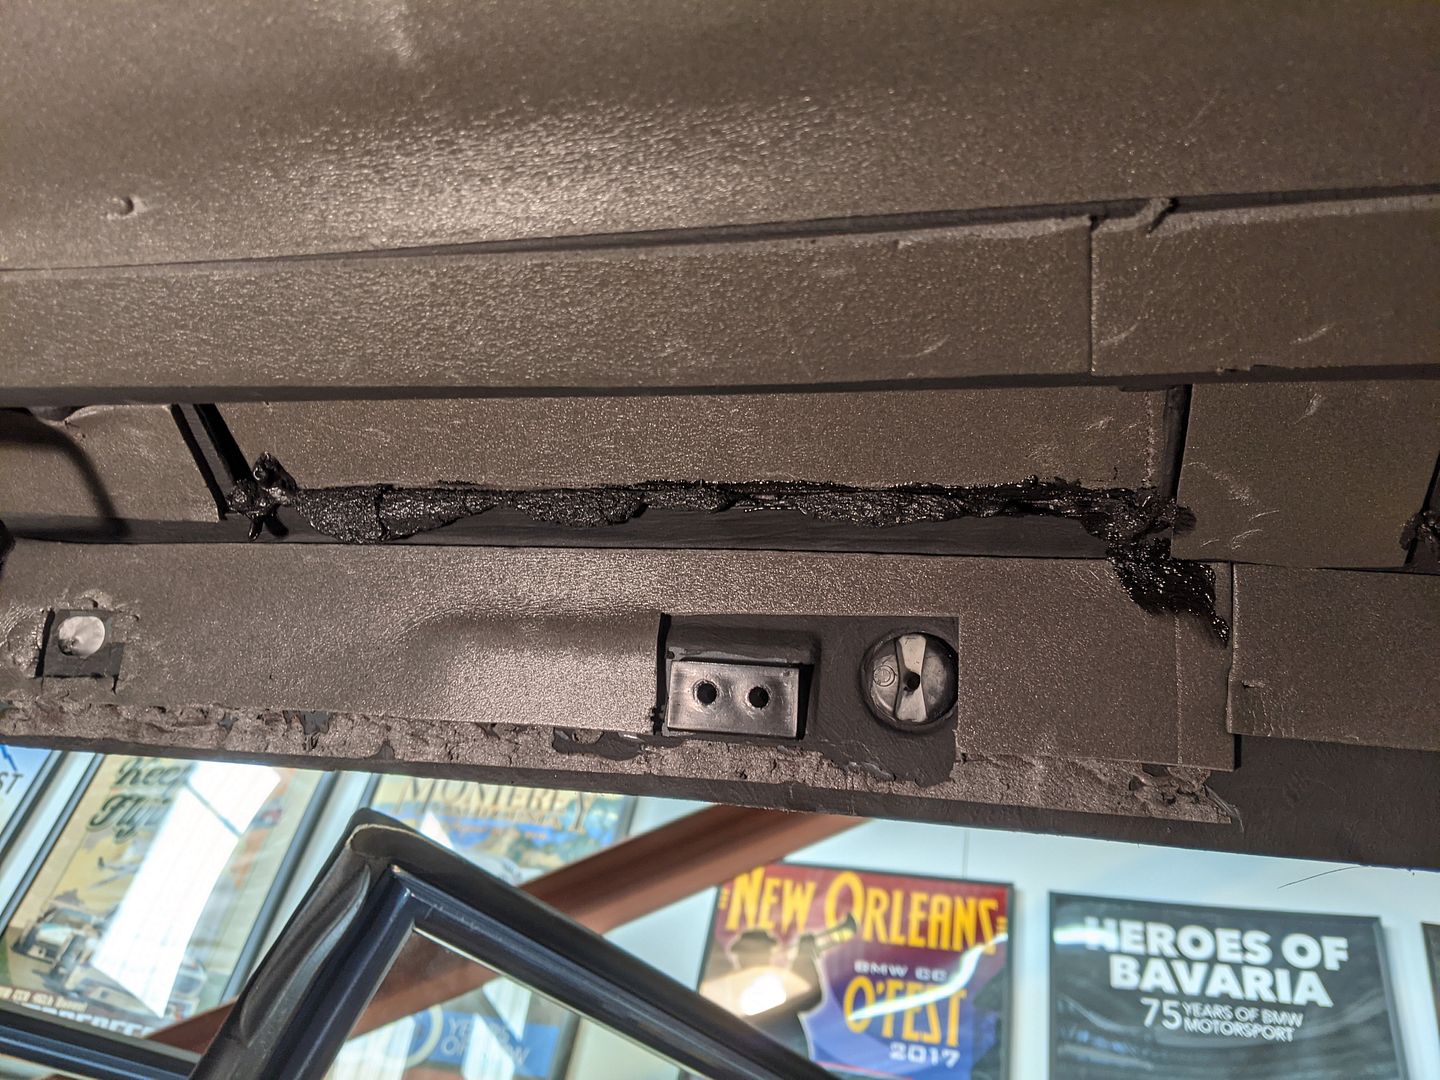
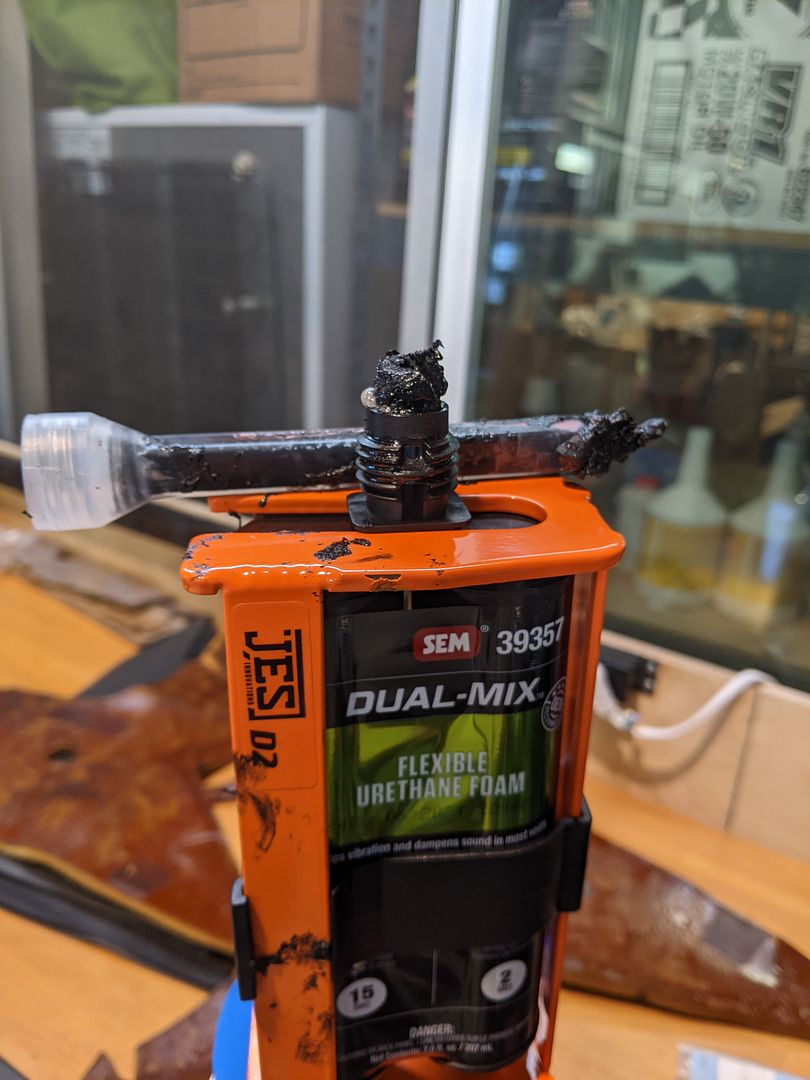
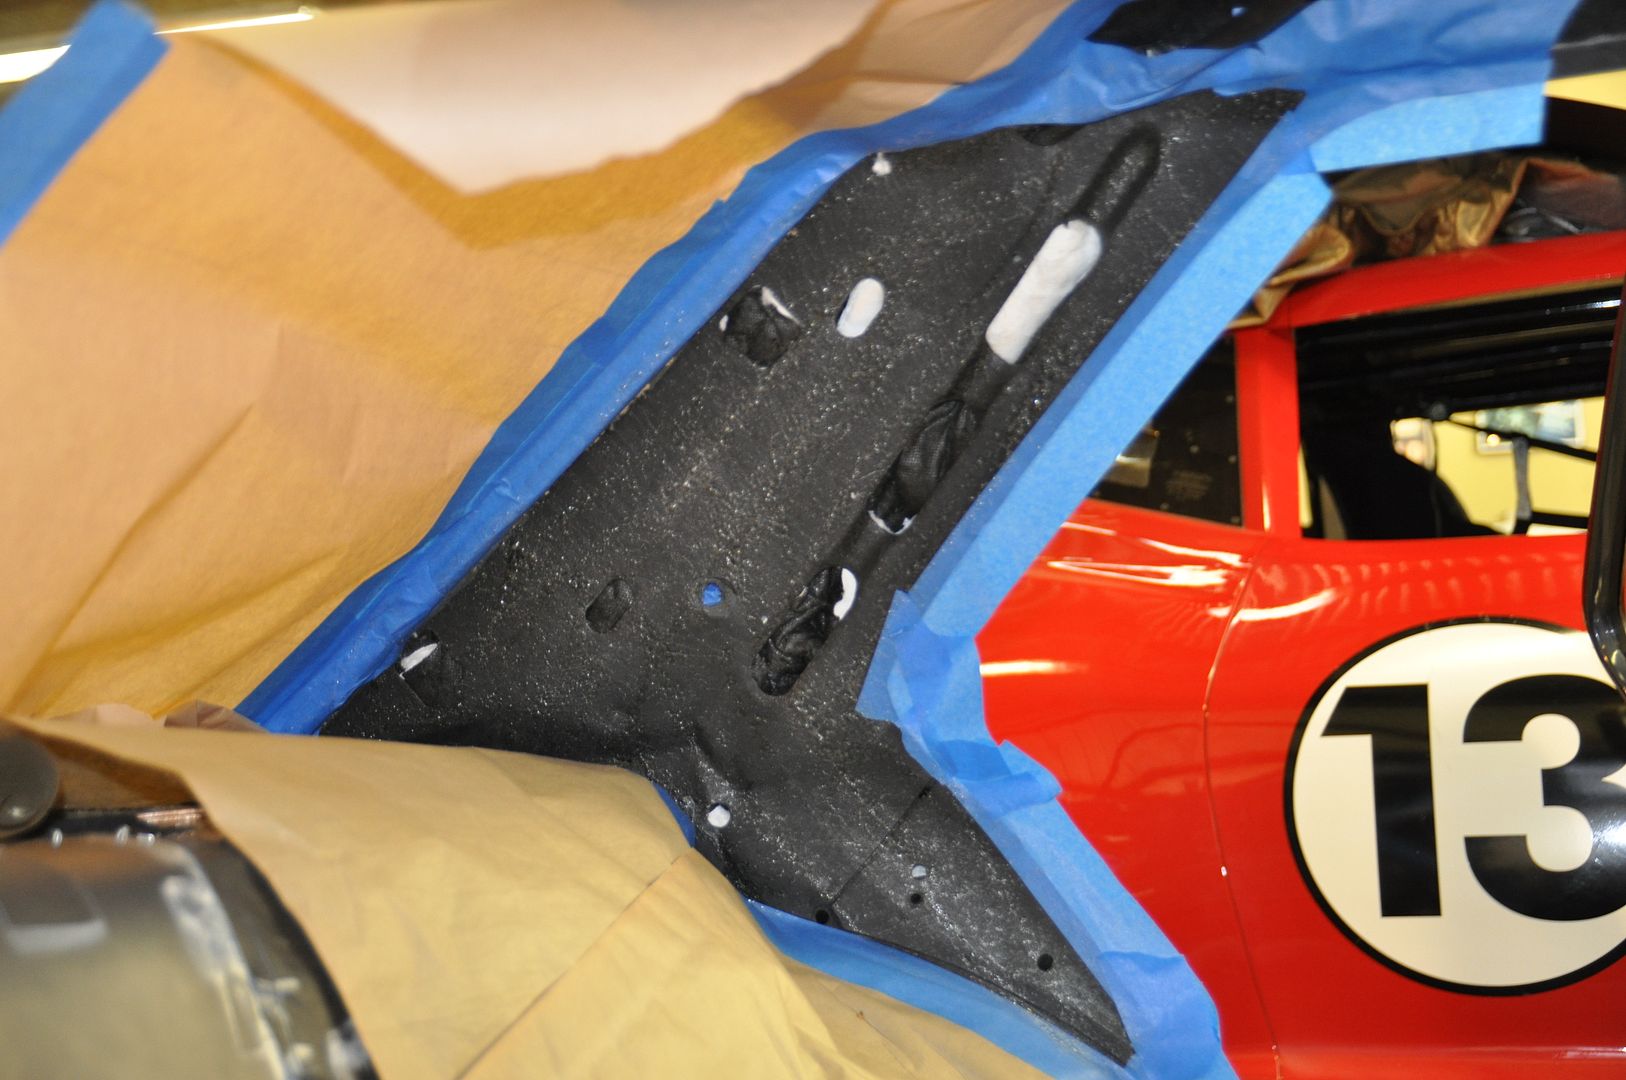
-SEM 39357 Dual-Mix Flexible Urethane Foam: This is injected into any open holes (too small for the batt insulation) and closing the many joints and panel seams. This is to seal off vibration and any heat intrusion.
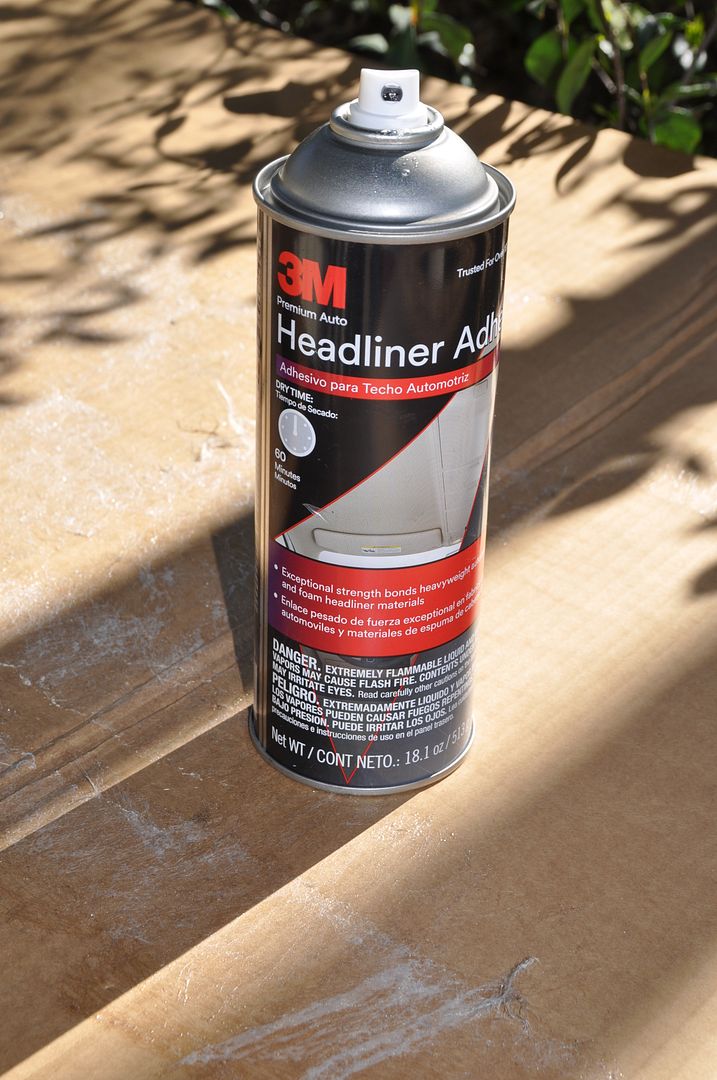
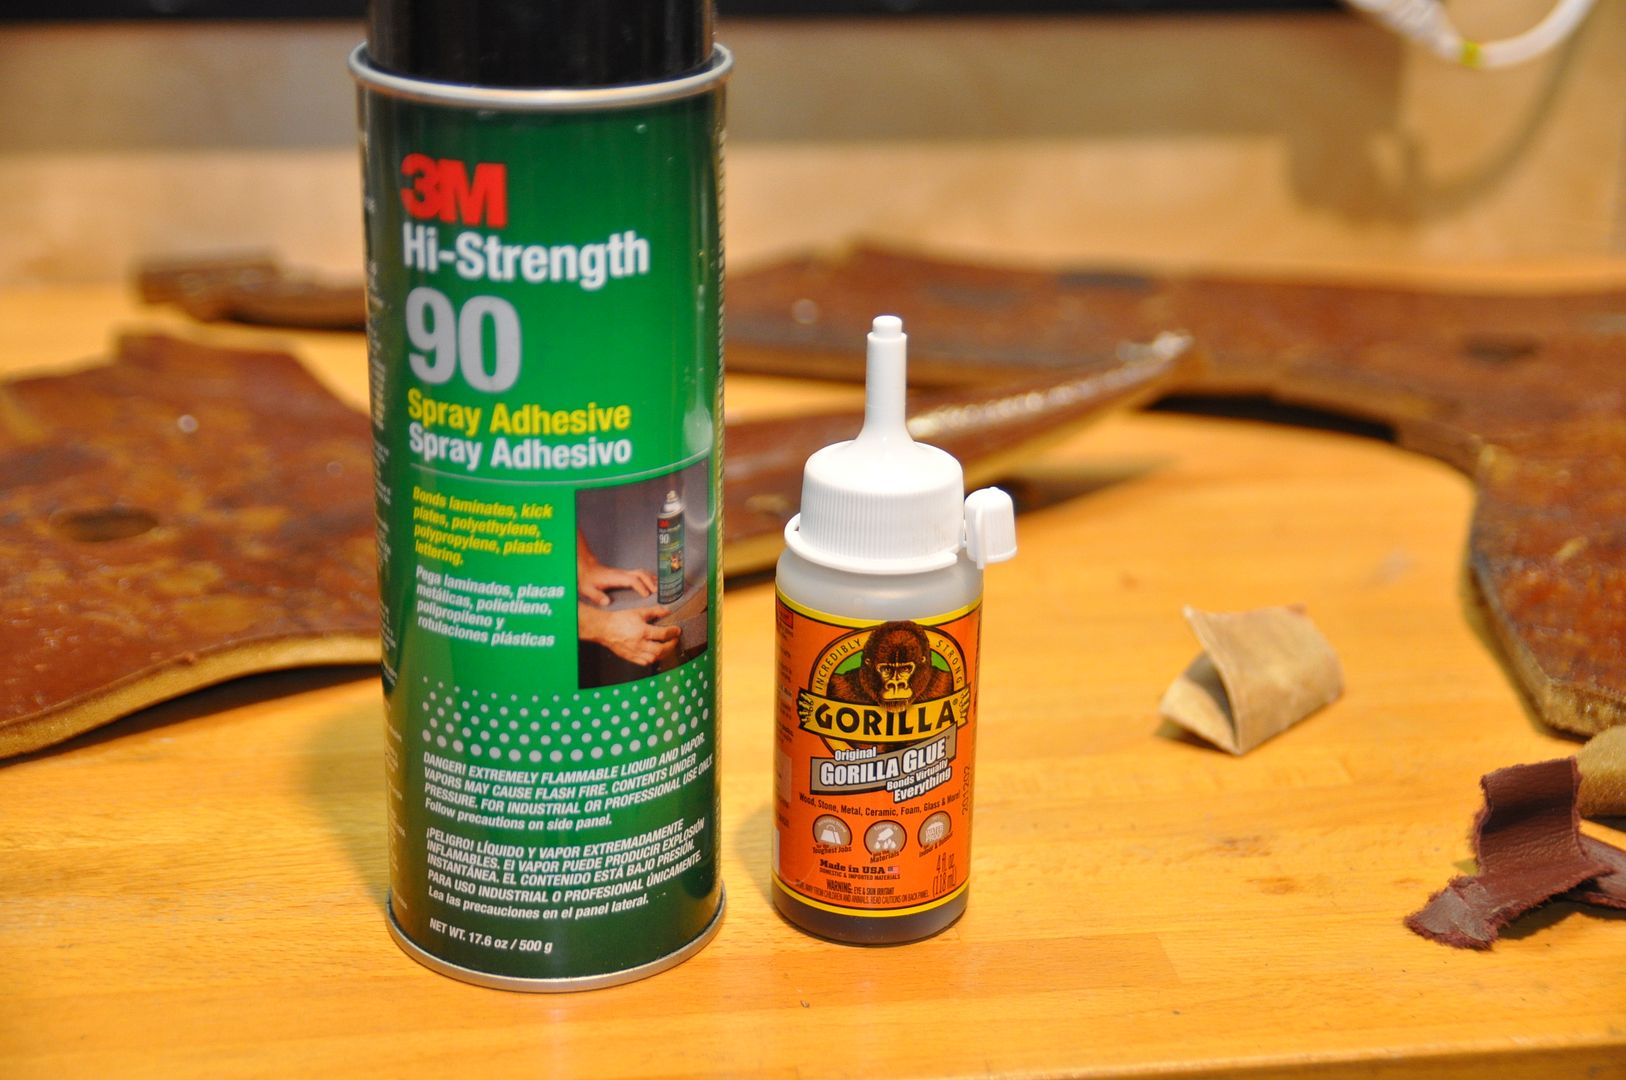
All this stuff was installed with the help of a myriad of adhesives:
3M Spray Headliner Adhesive:
3M Hi-Strength Spray 90 Adhesive:
Gorilla Glue:
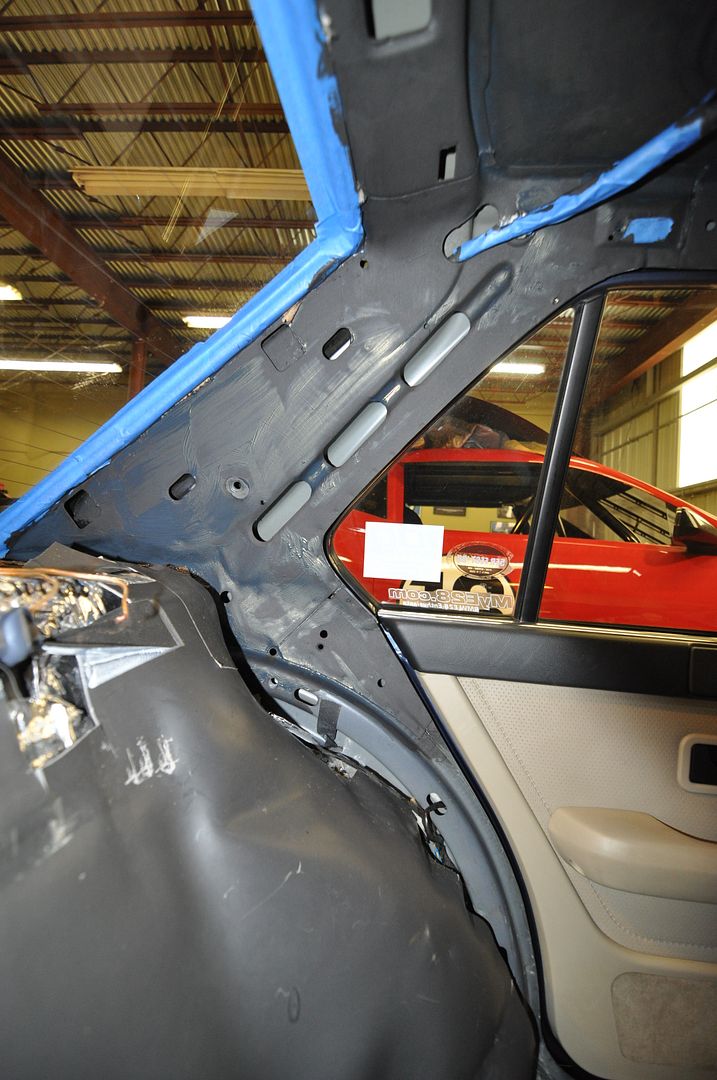
Here it all is going on it their respective layers:
HeatShield db Skin:
Thick liquid, can be applied by roller, brush or gun. For this roof, small brushes worked best. I ended up putting on three layers only because the first layer went on thin (they should be two 25mil layers which is pretty thick). I might use this on the floor as well since I have a lot leftover.
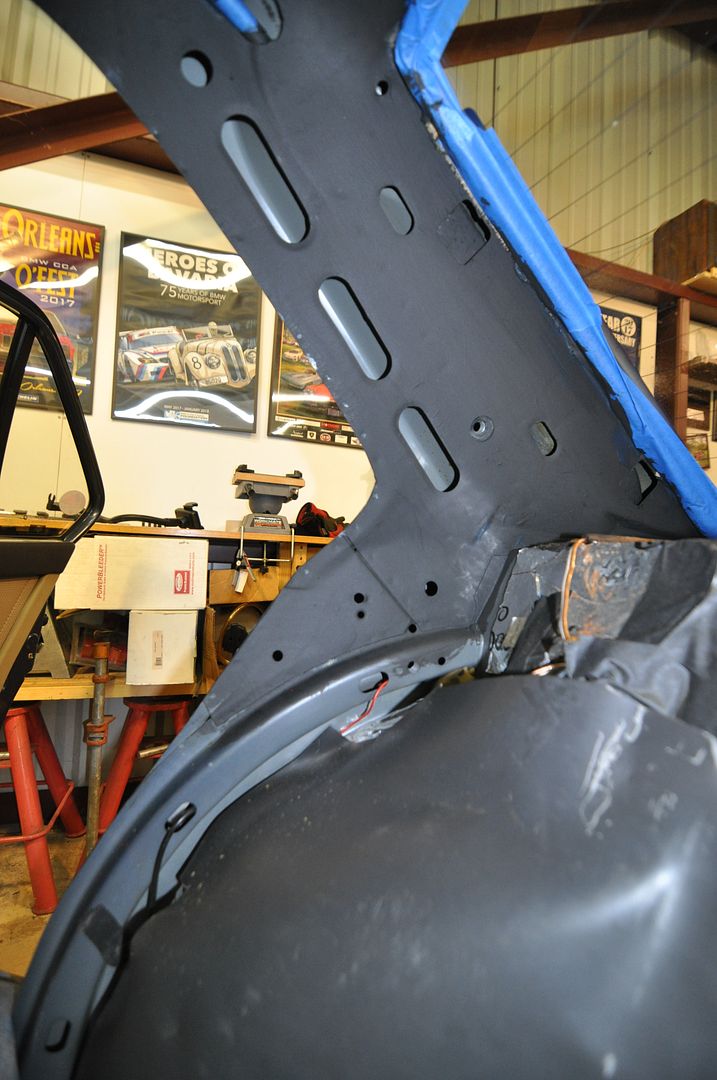
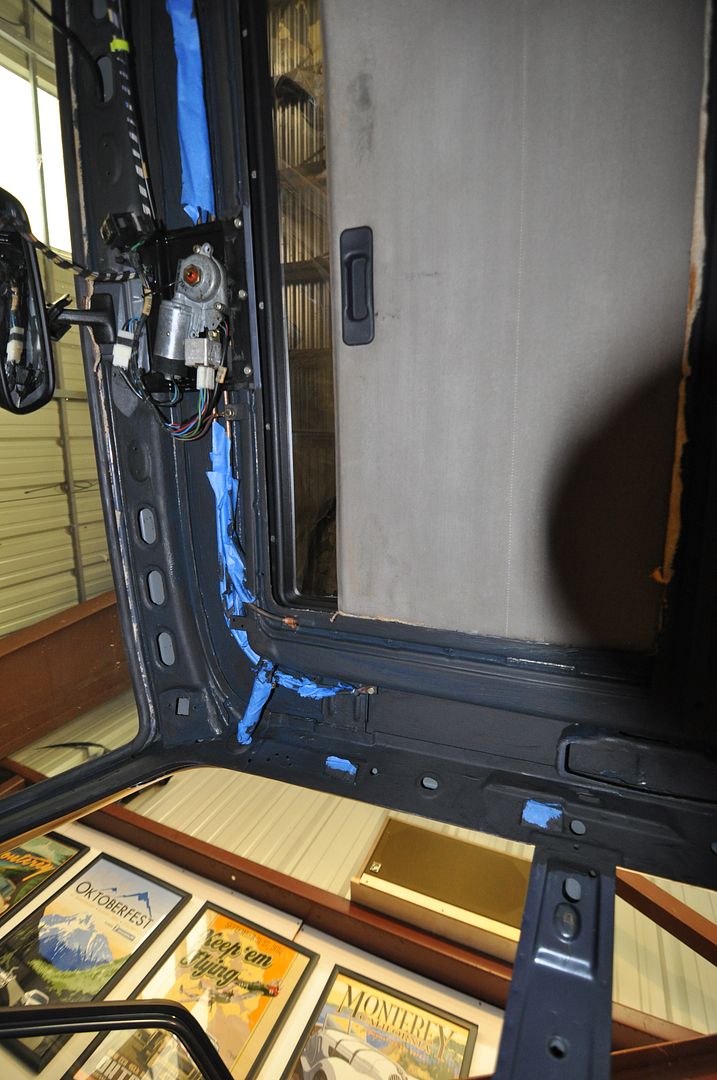
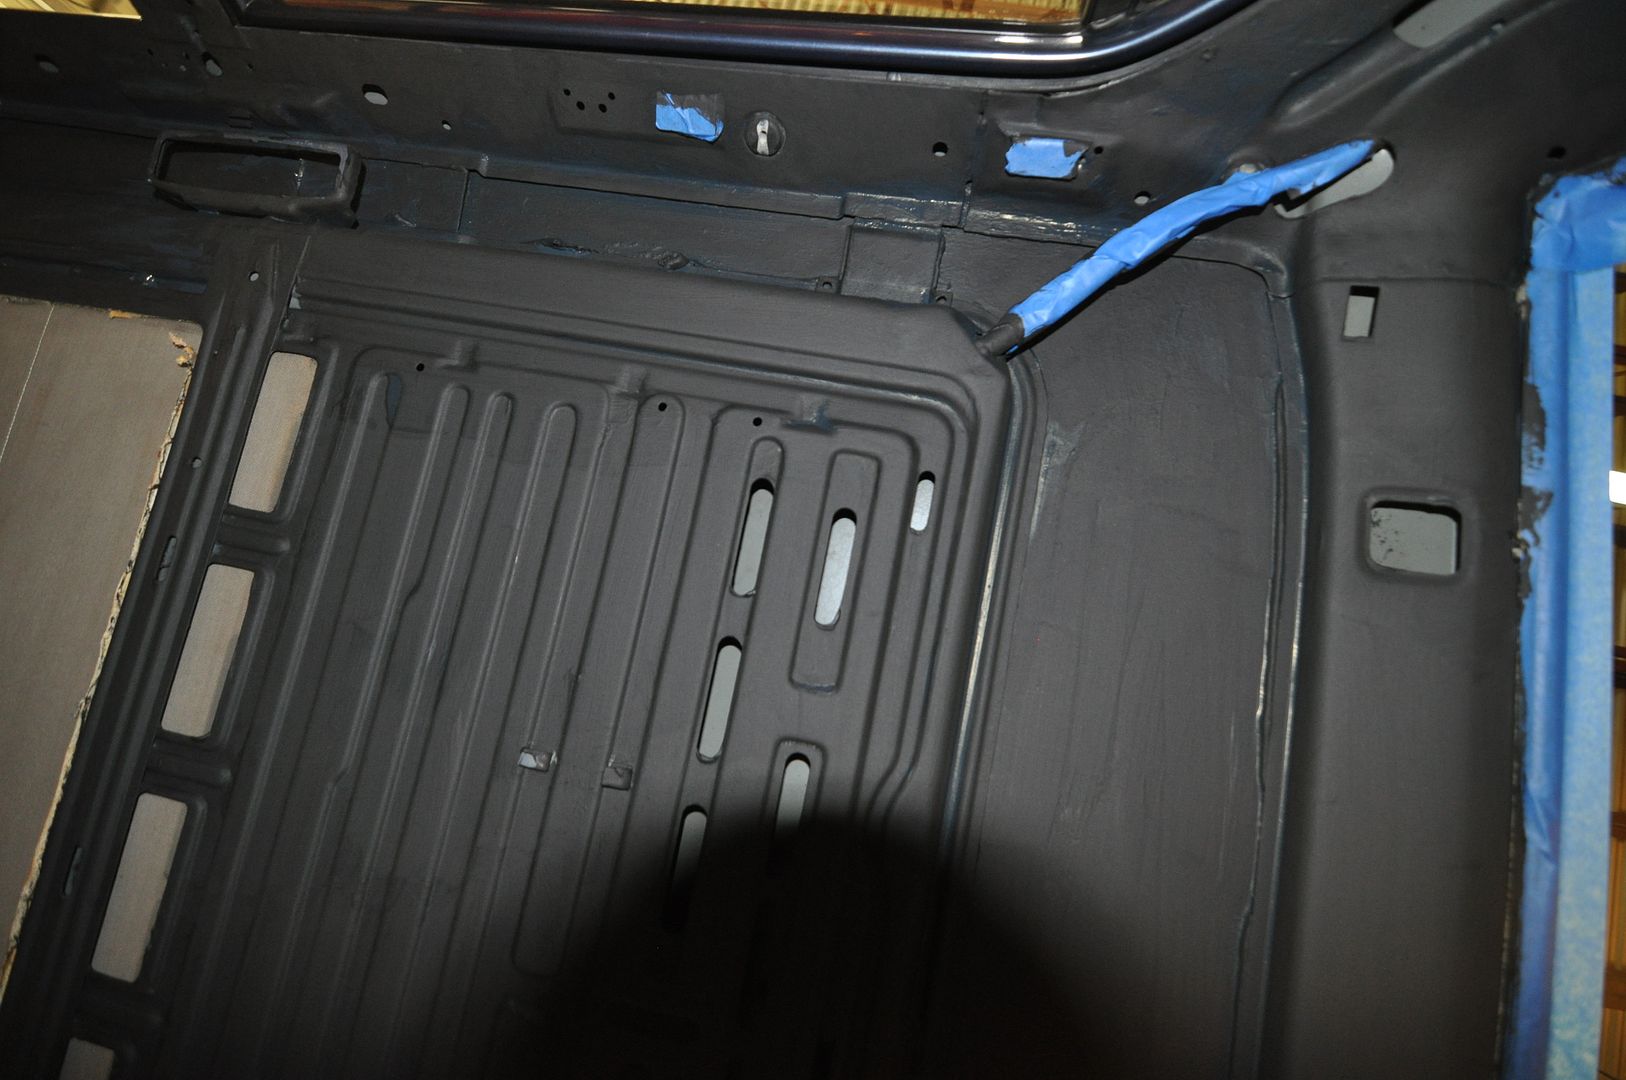
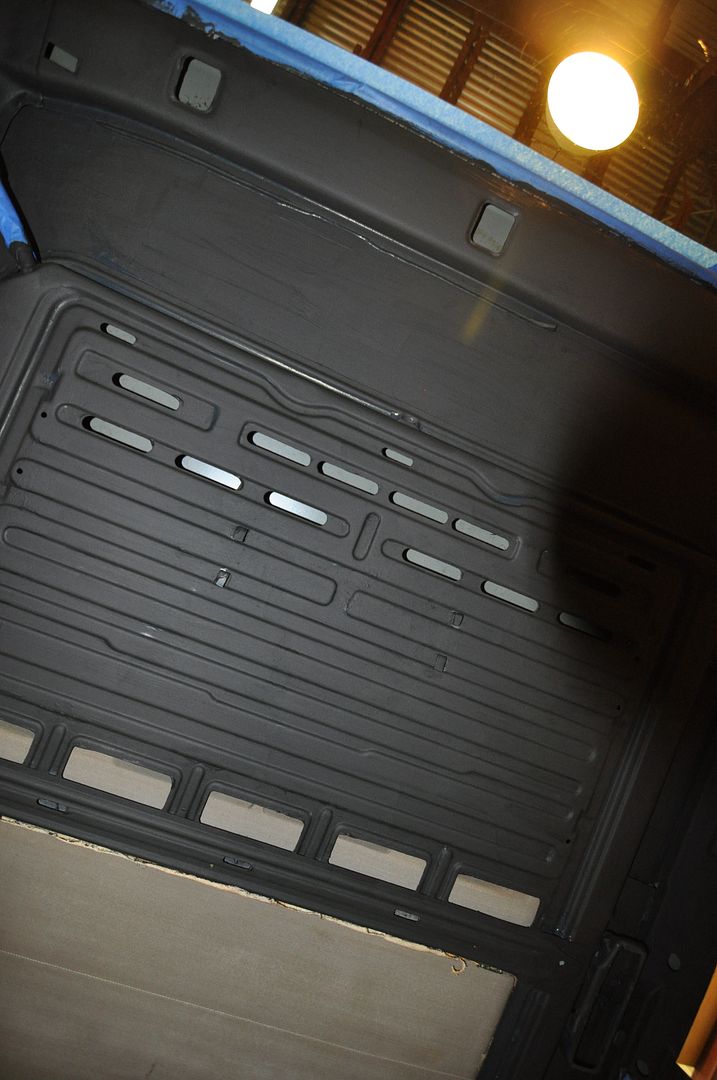
Noico Red Foam:
This is the 150mil version with the super adhesive sticky side and boy does it stick. Once you put it down, don't even think of trying to move it or work it. This stuff alone almost negates the need for the db Skin liquid as it does a much better job of deadening the panels.
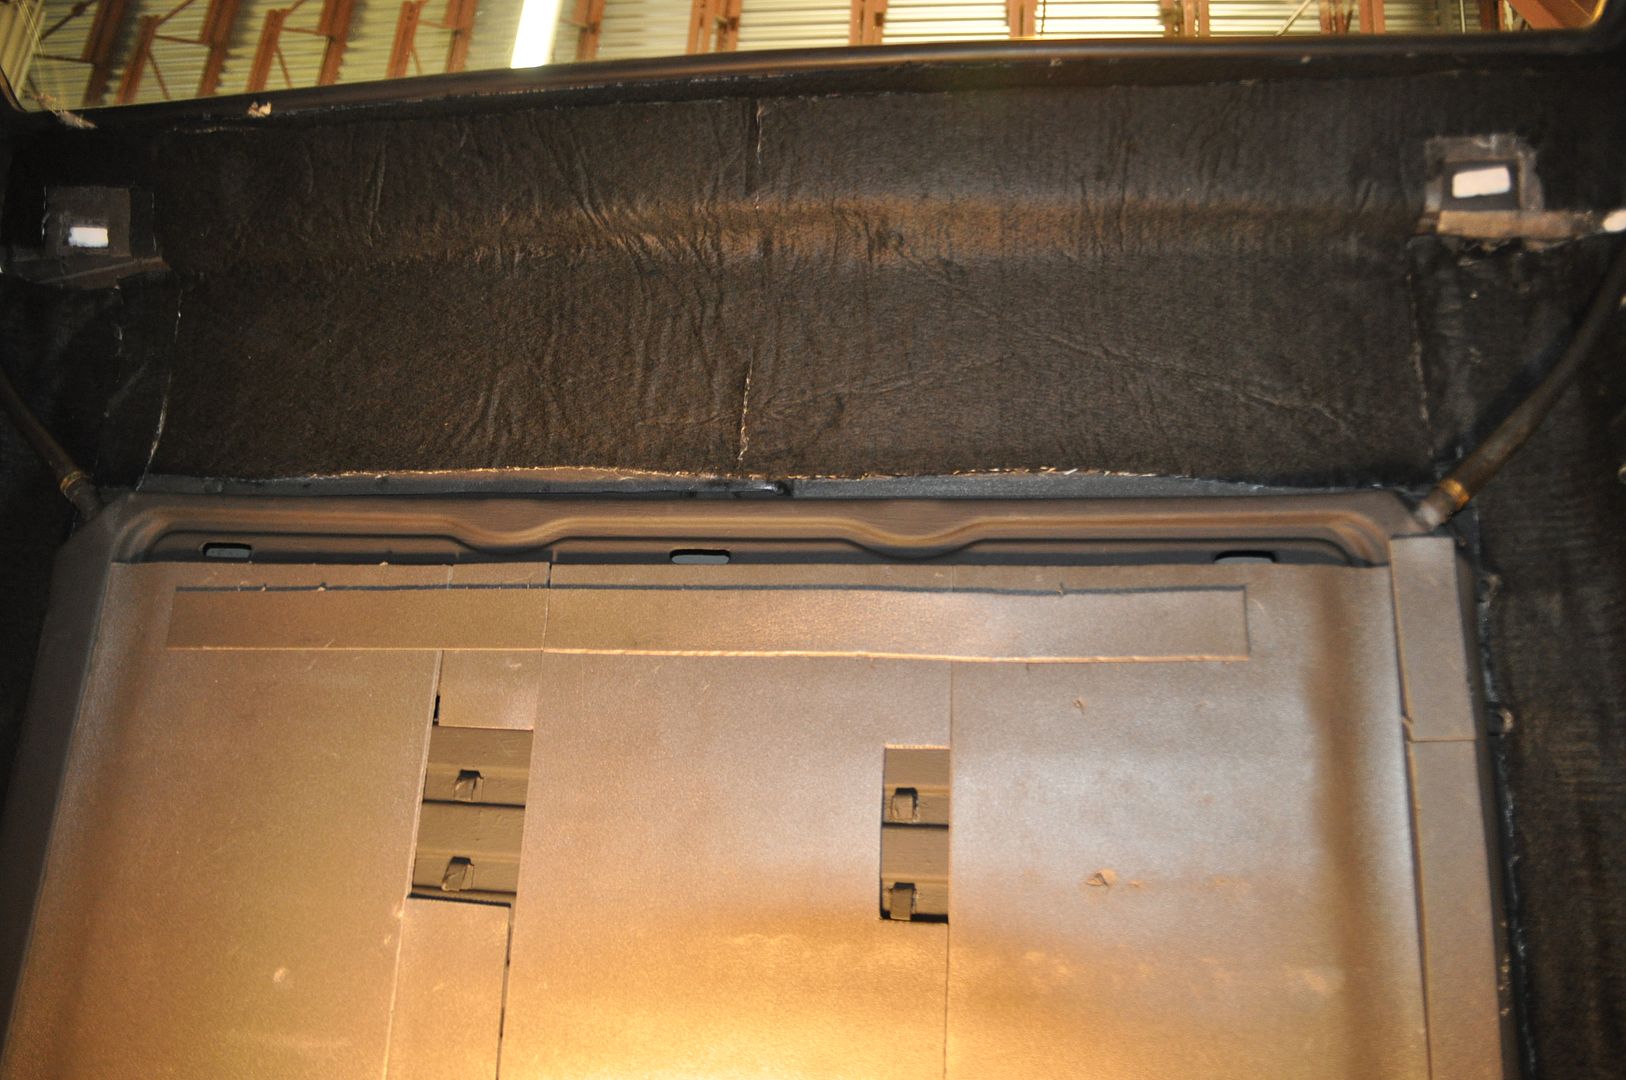
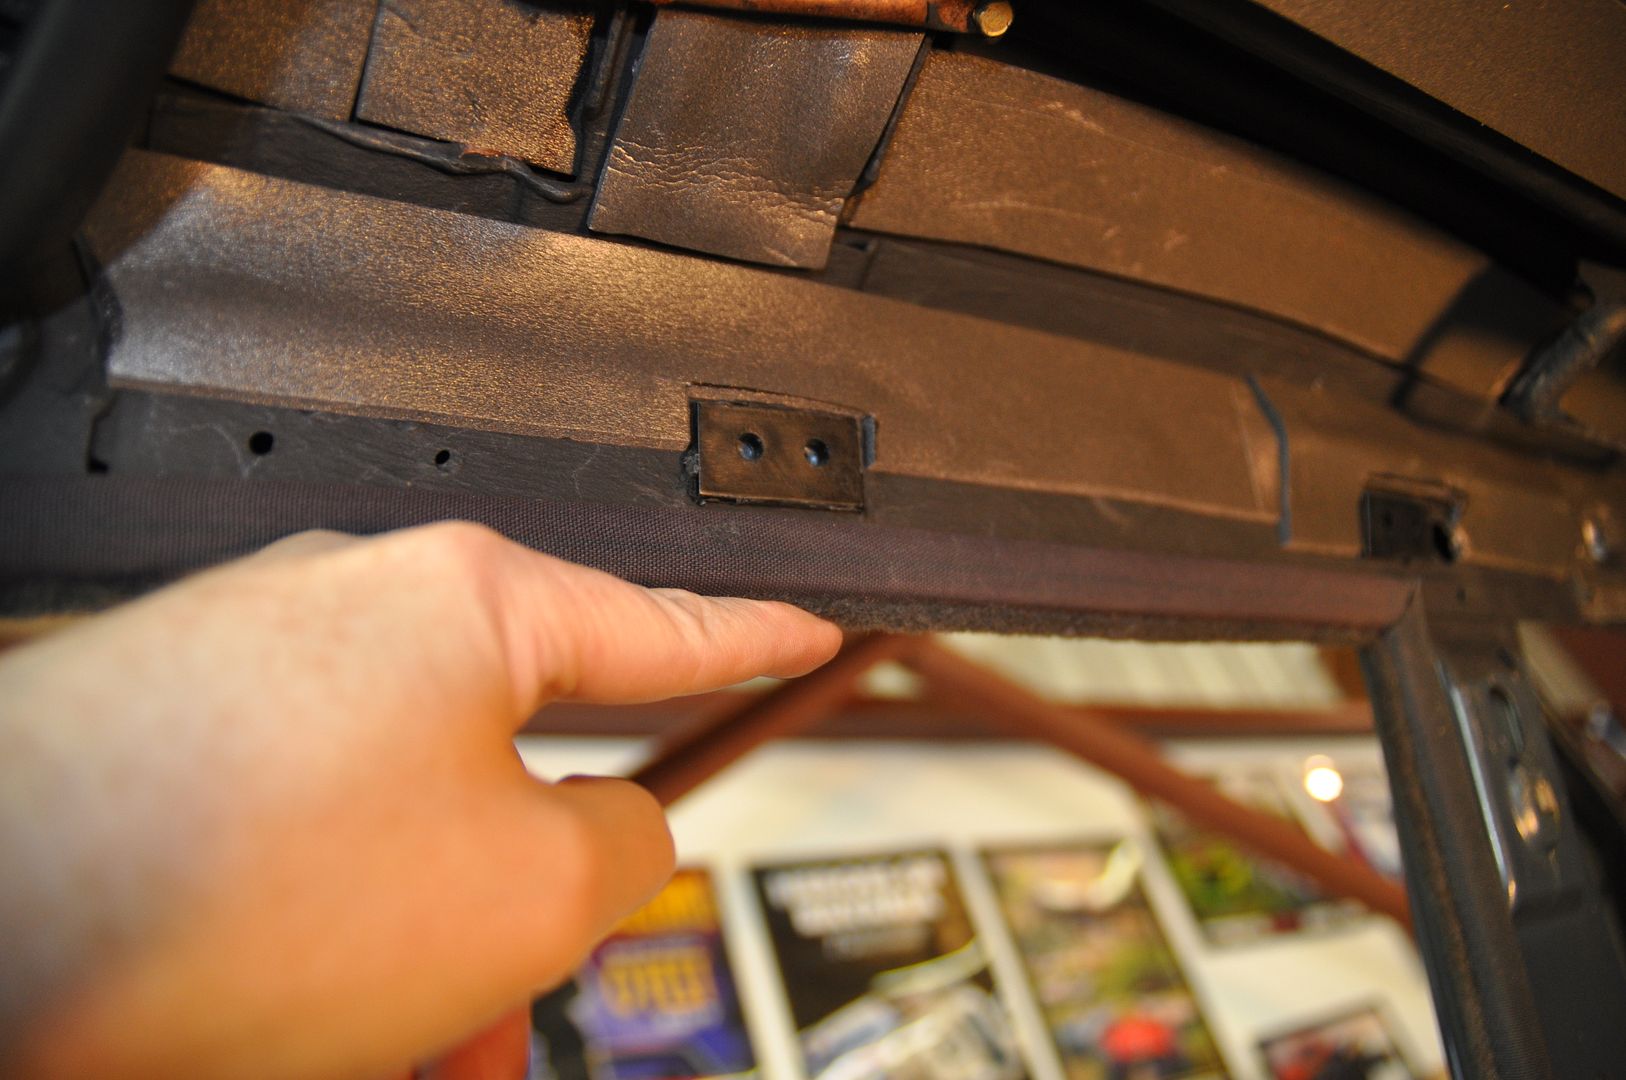
3M Thinsulate:
So much insulation. You will be surprised at both how many hollow cavities there are and how much they eat this insulation. Use a dulled coat hangar and small cut strips to get the best results.
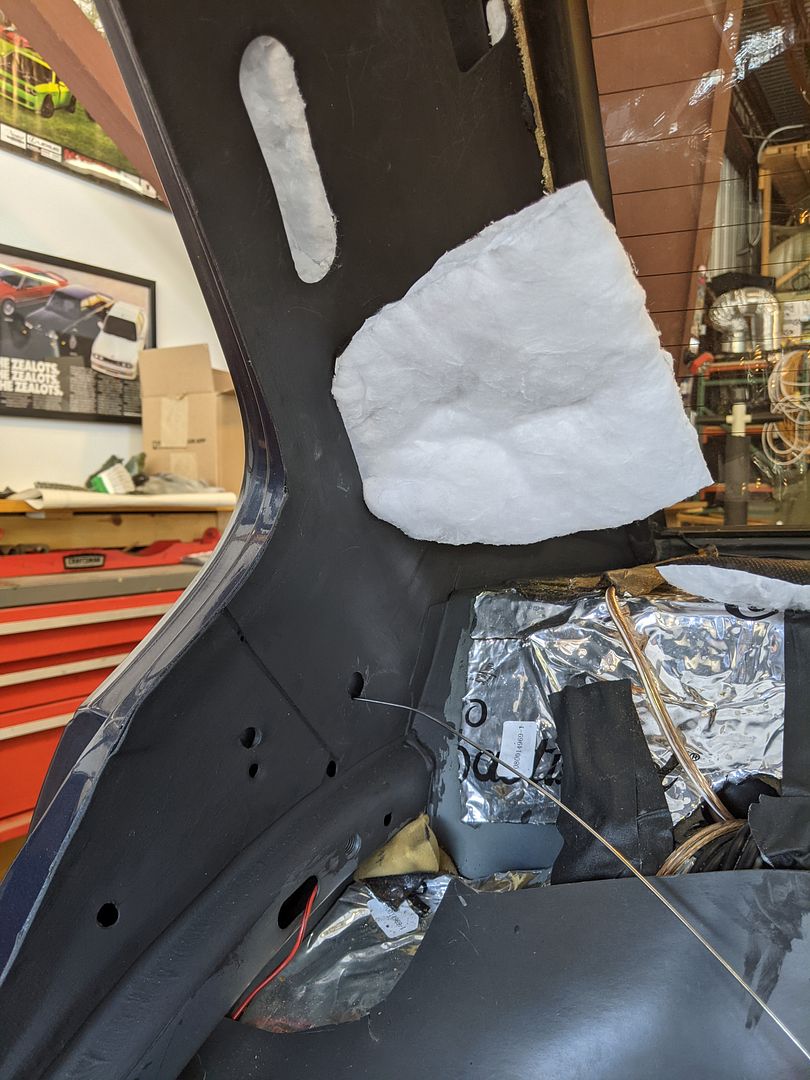
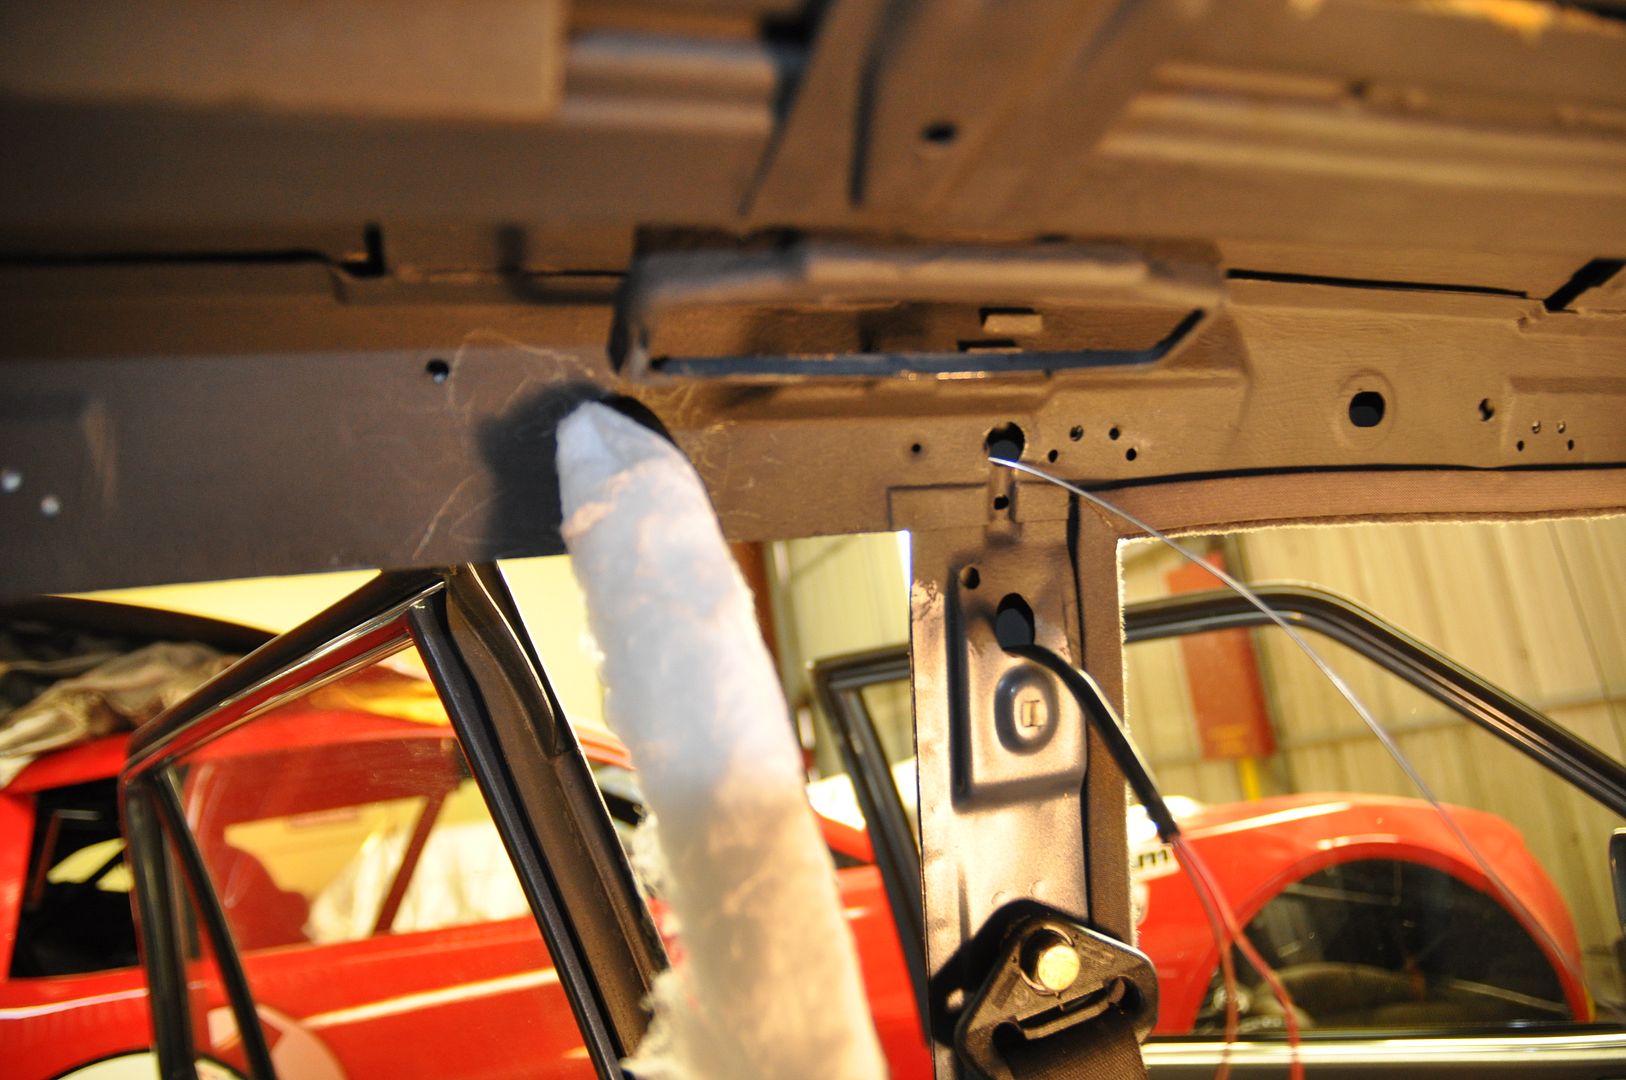
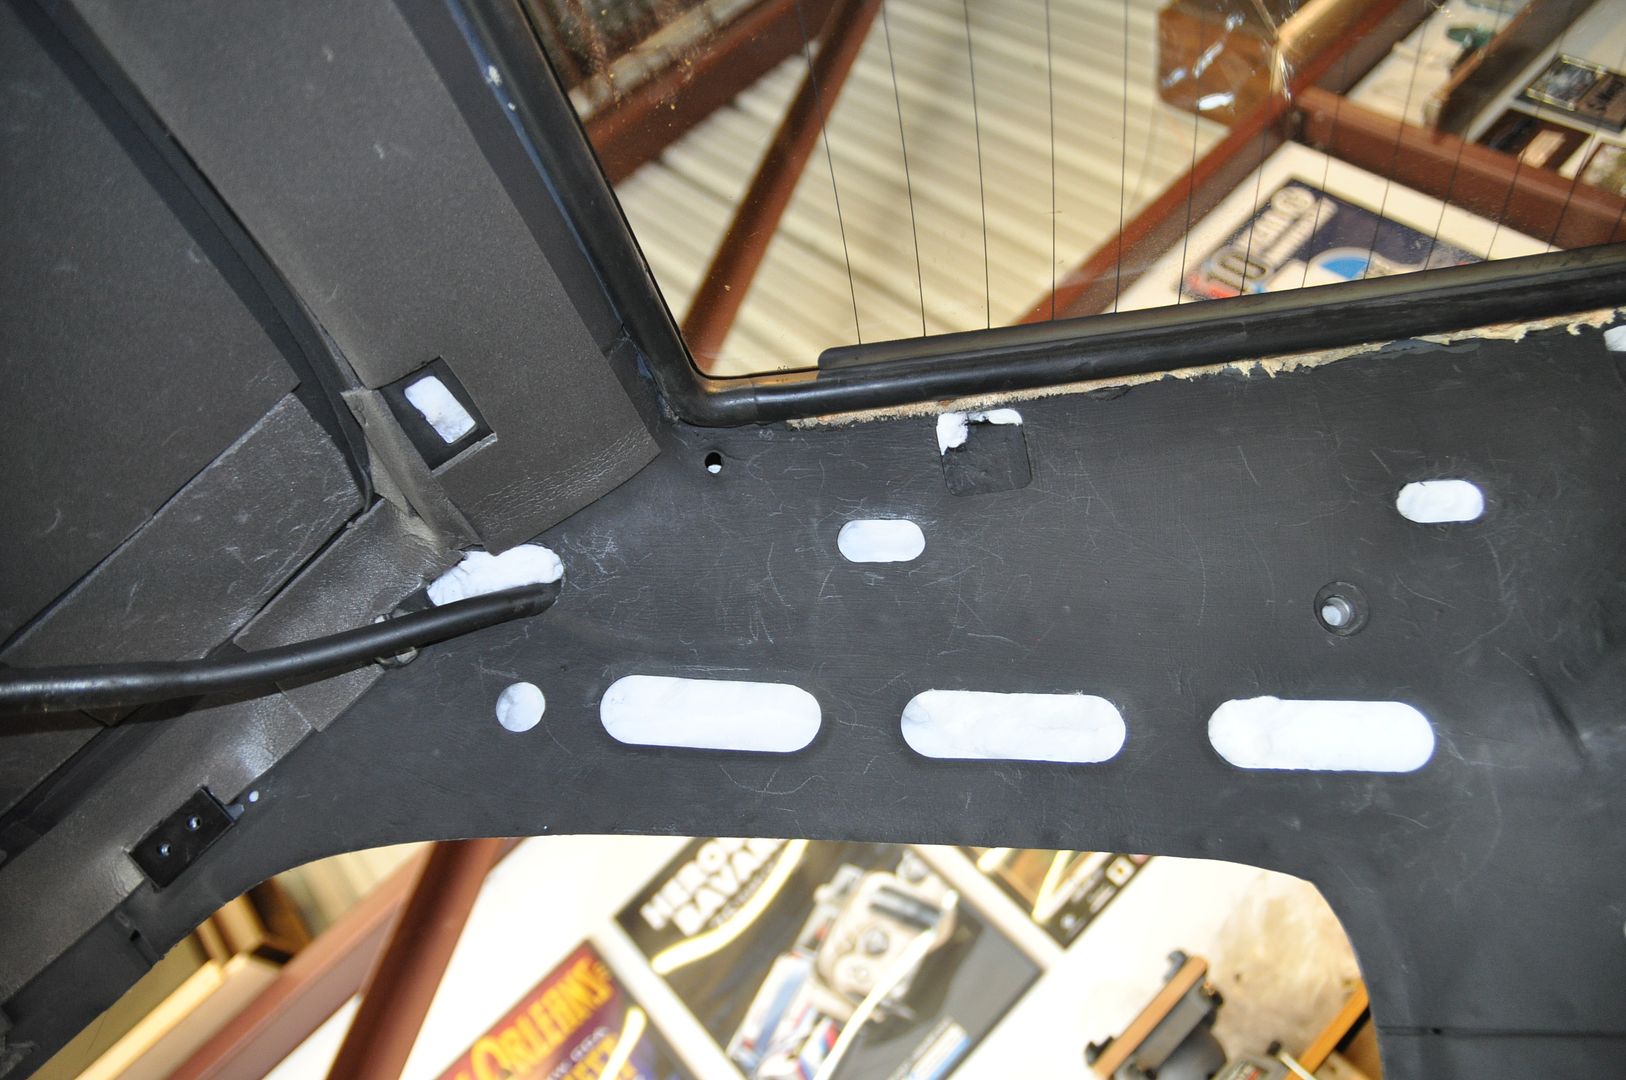
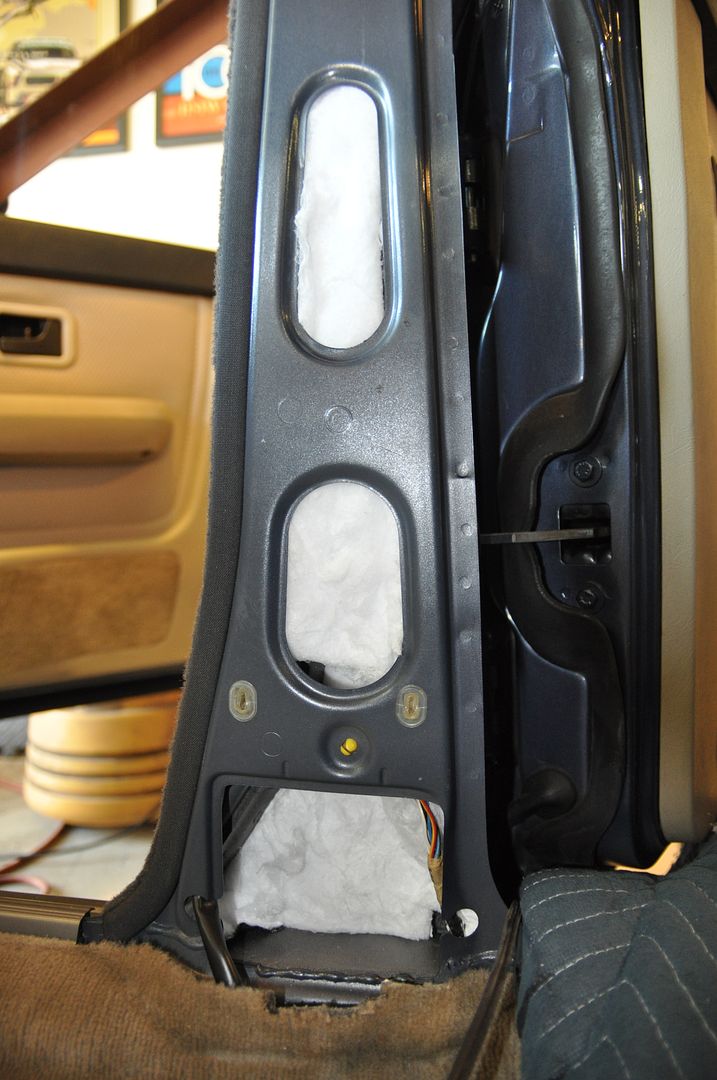
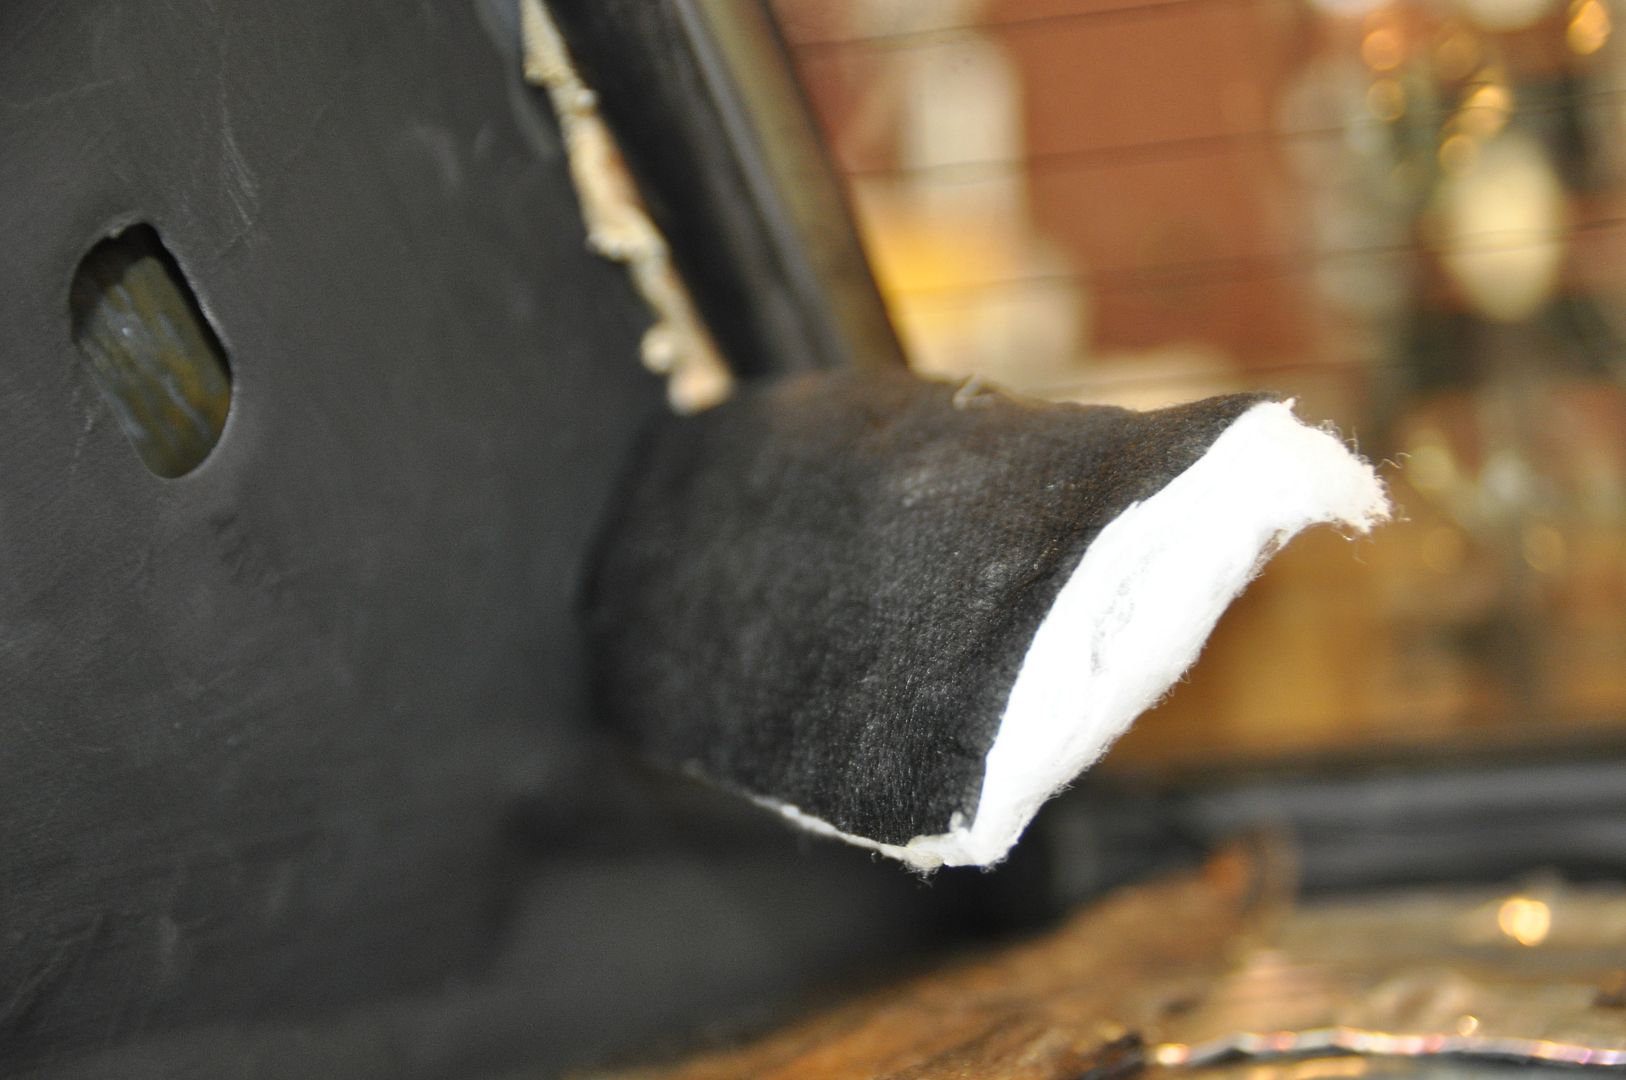
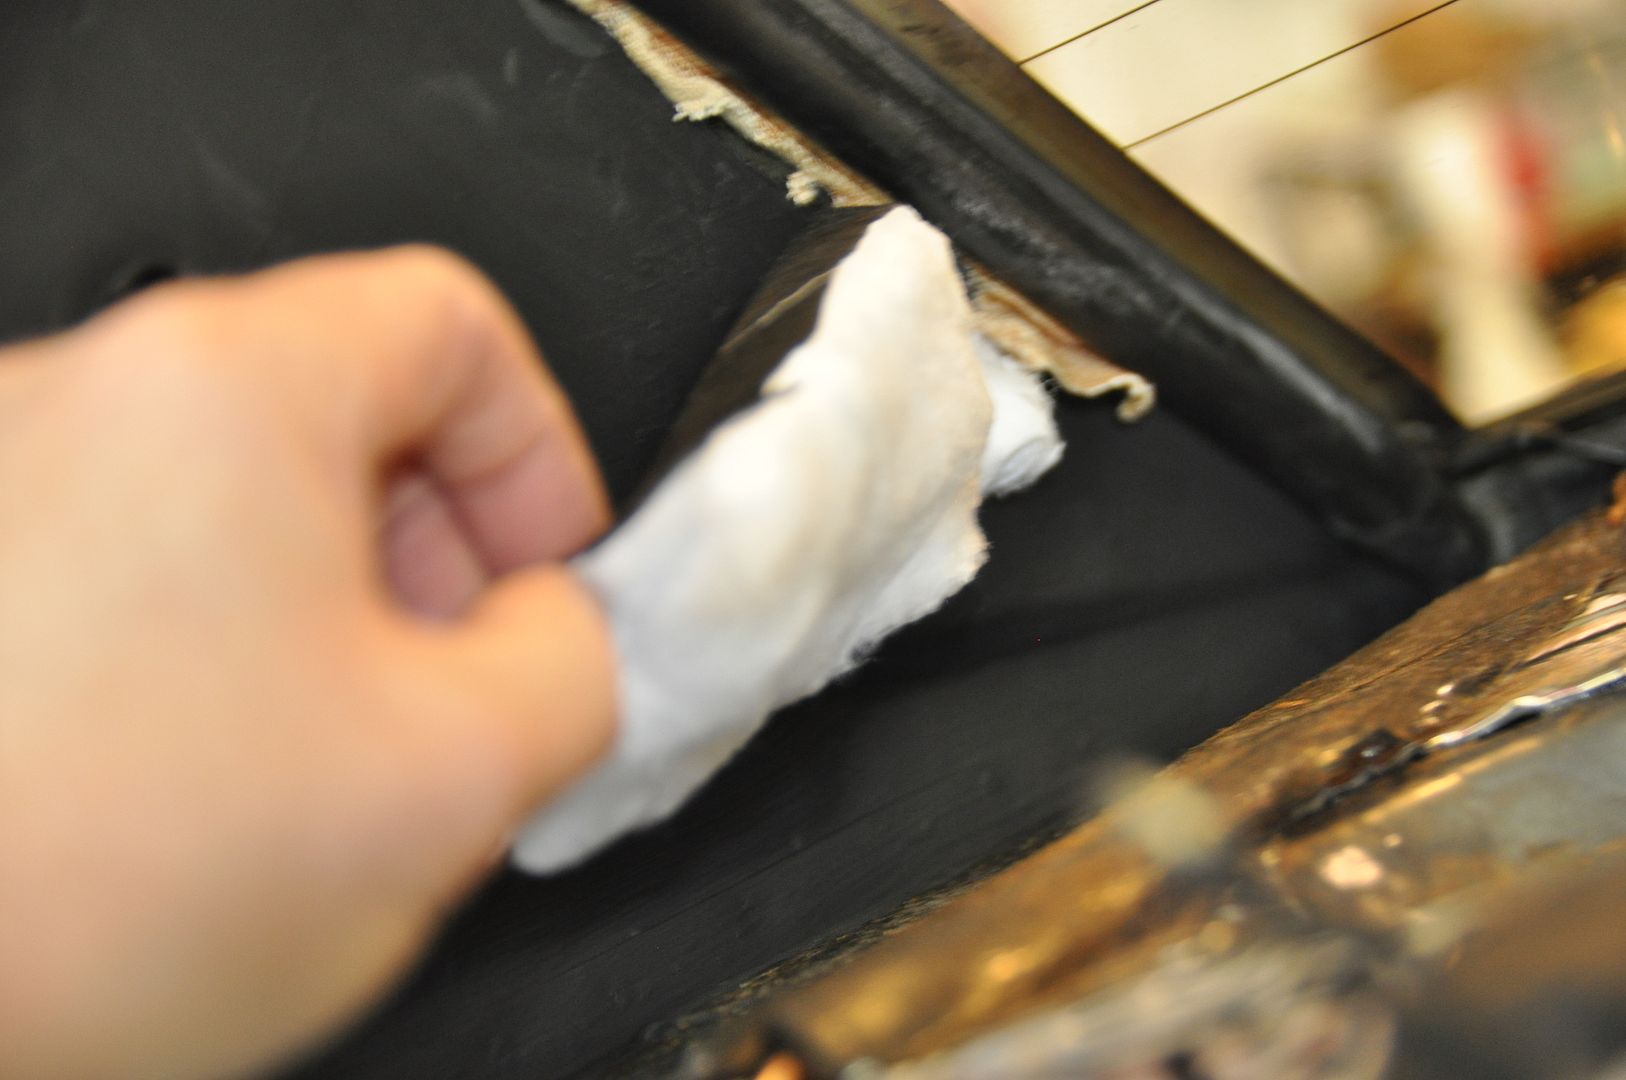
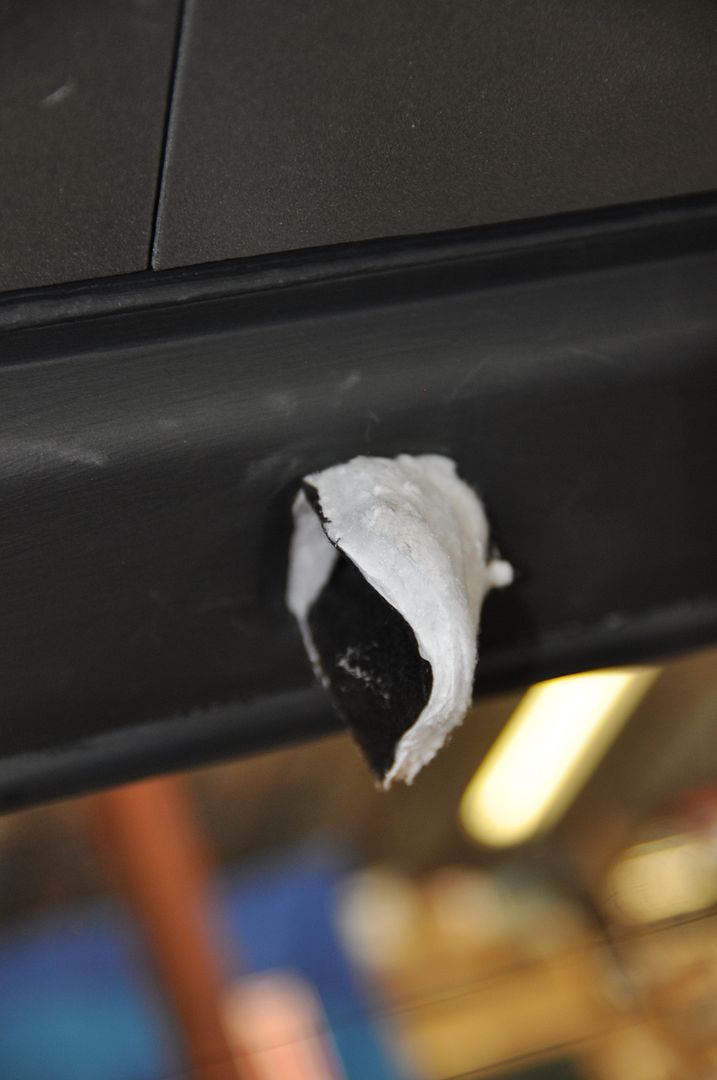
SEM 39357:
This stuff was not easy to work with: first it wants to go everywhere (most times not where you need it to go), and it sets up in less than 30 seconds so you have act fast as soon as you press the trigger. I will likely use more of this for the floor and bulkheads than I did for the roof.
HeatShield db Sniper:
Spray 90 both surfaces and pray you get it set right the first time because you don't get a second chance.
Heatshield db Stealth:
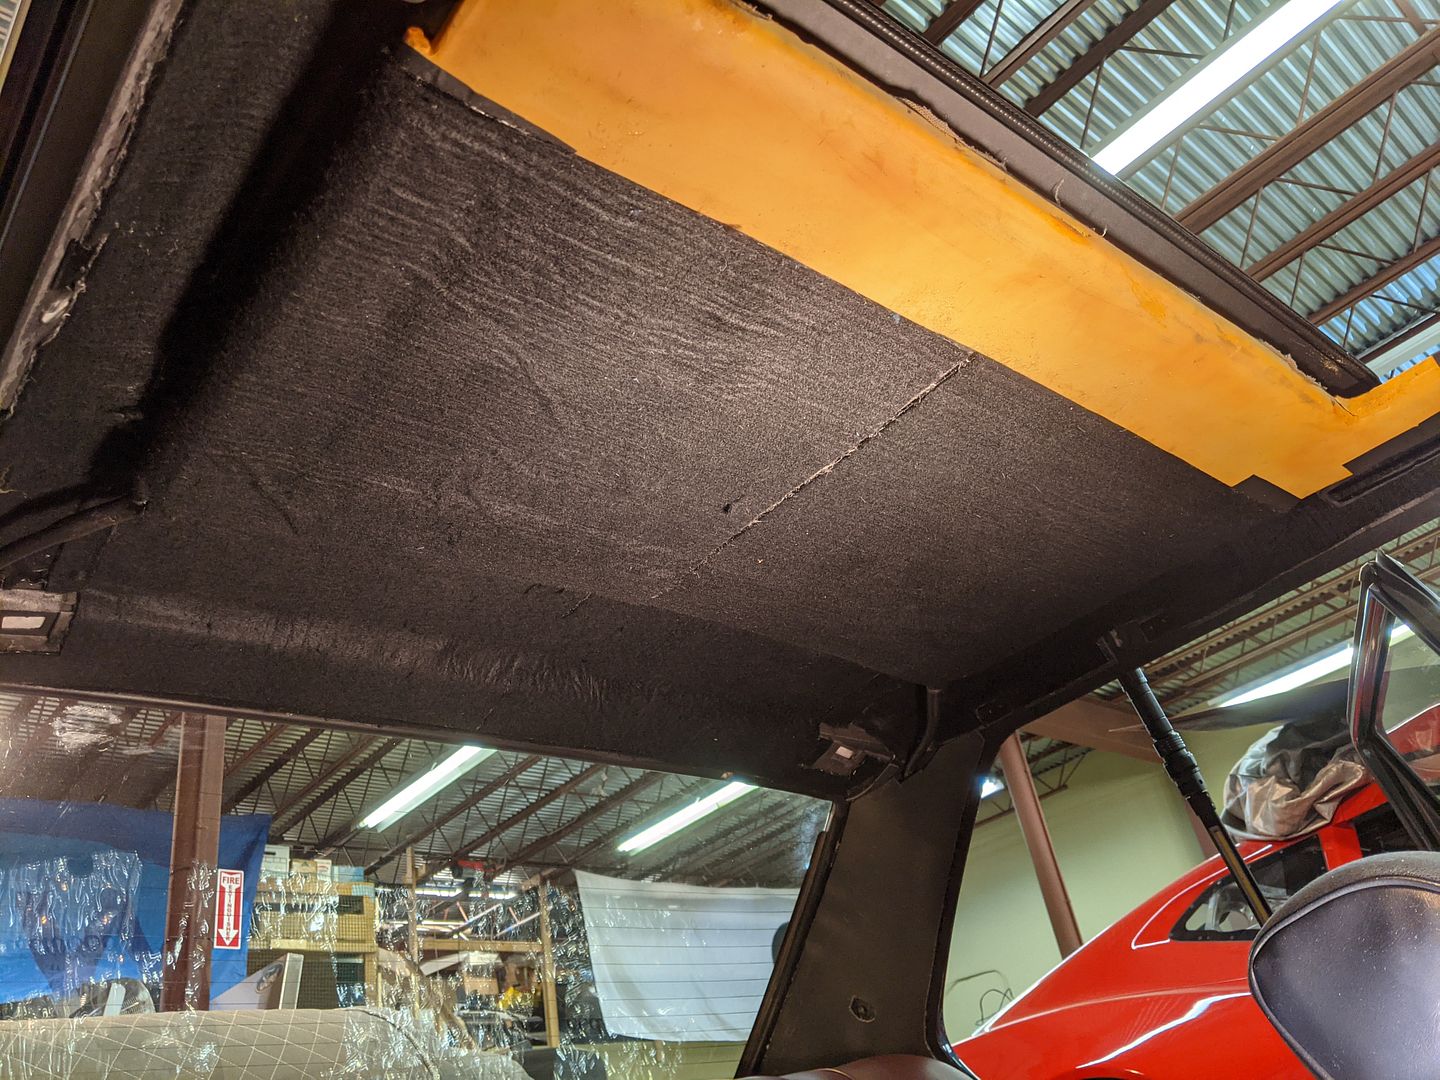
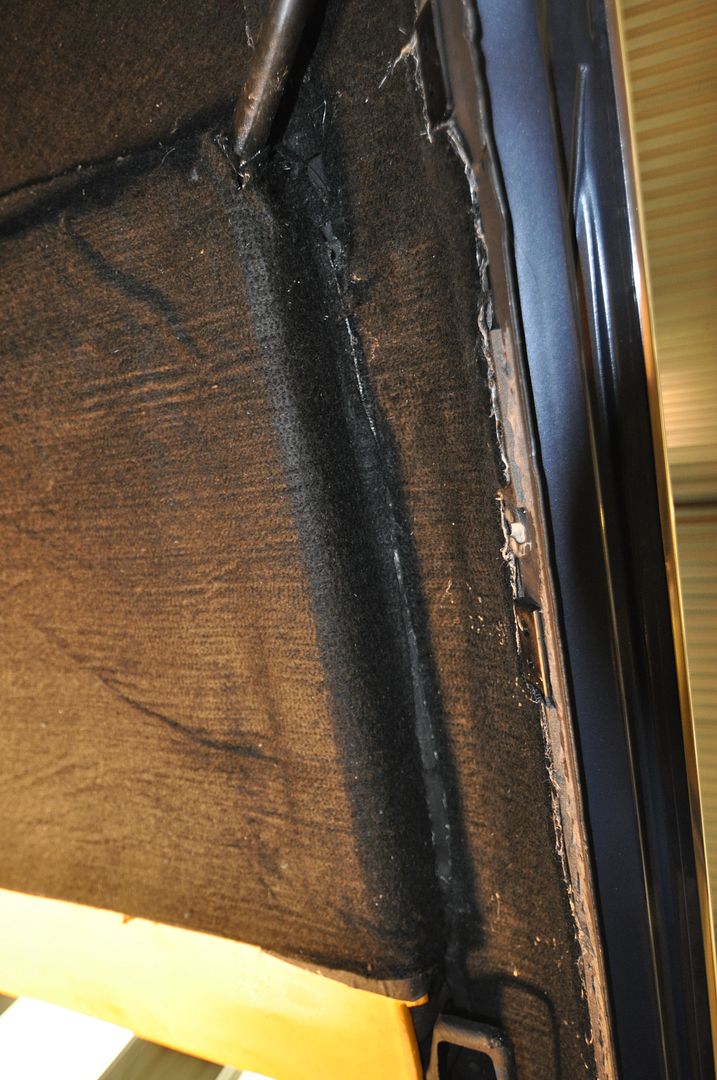
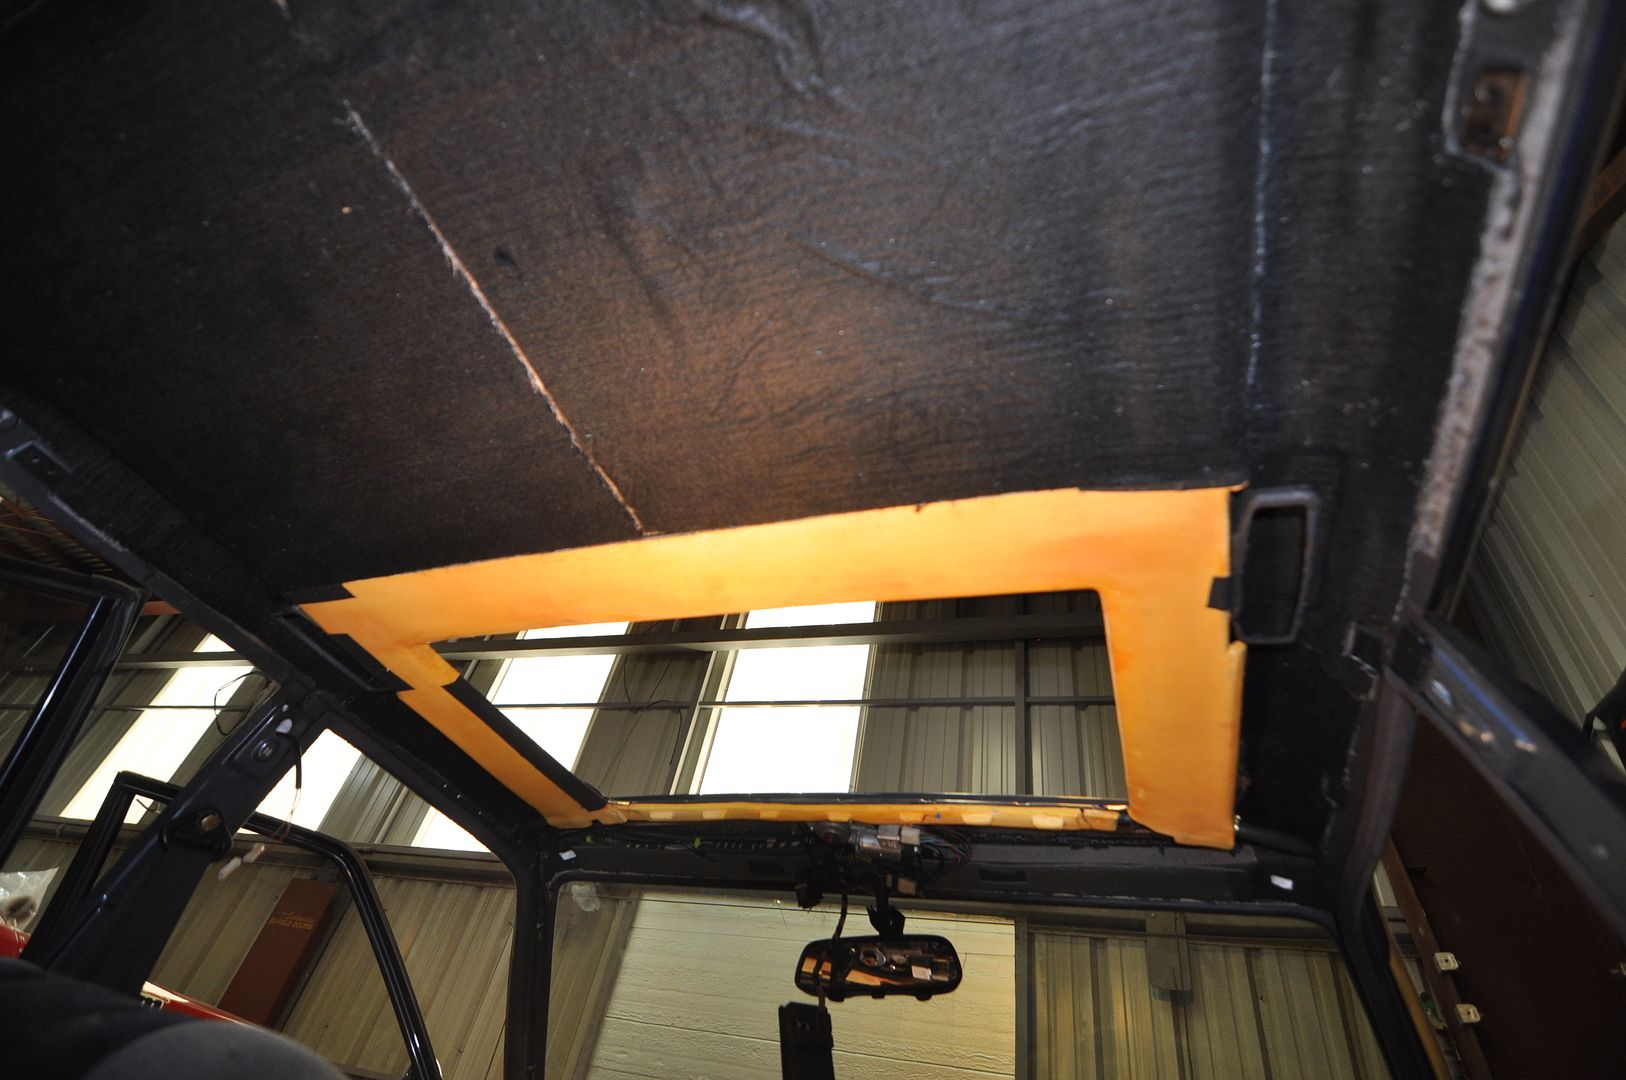
With all those layers finally on it was time to add the OEM formed foam panel but just the front section since all those layers replaced this foam for the rear section of the cabin roof which was only covering the Sunroof cartridge. All my added layers were outperforming that foam panel and since the headliner in this section isn’t dependent on it for forming, it was obsolete. As mentioned, the front section as it rolls into the Sunroof opening was and is necessary as the headliner is adhered to it.
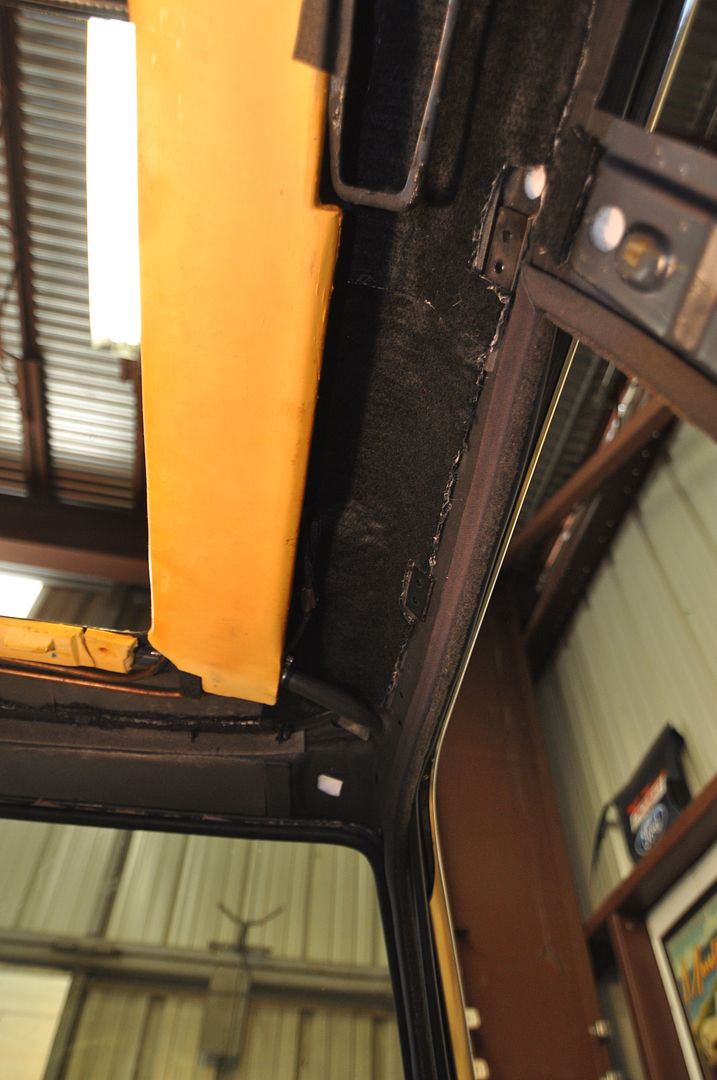
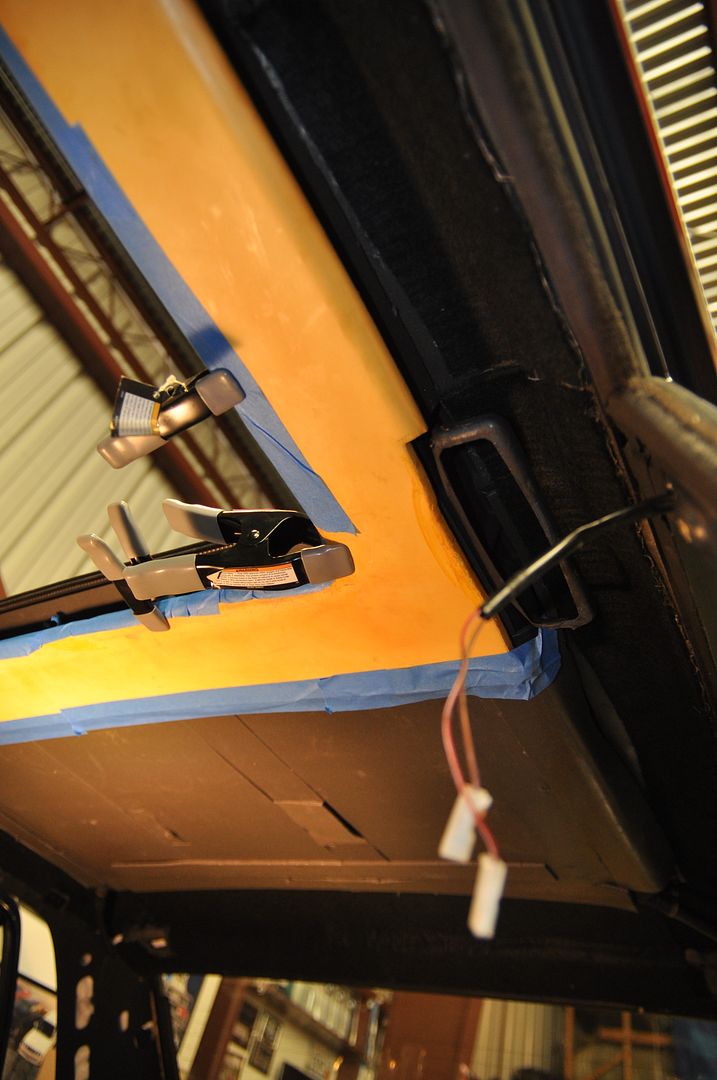
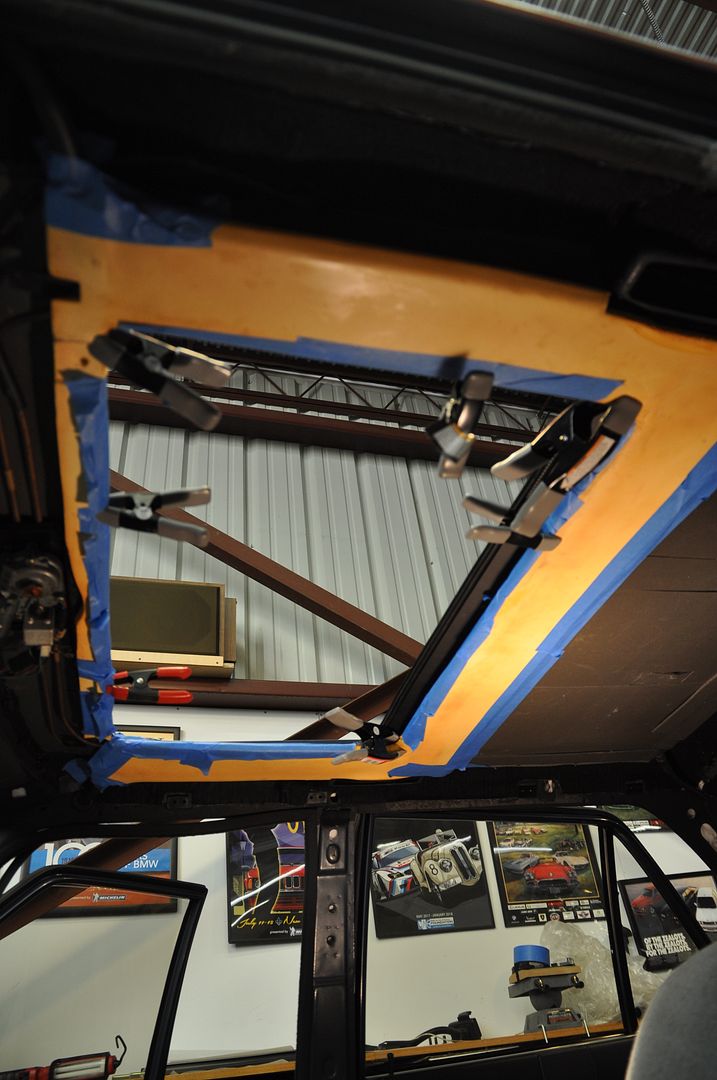
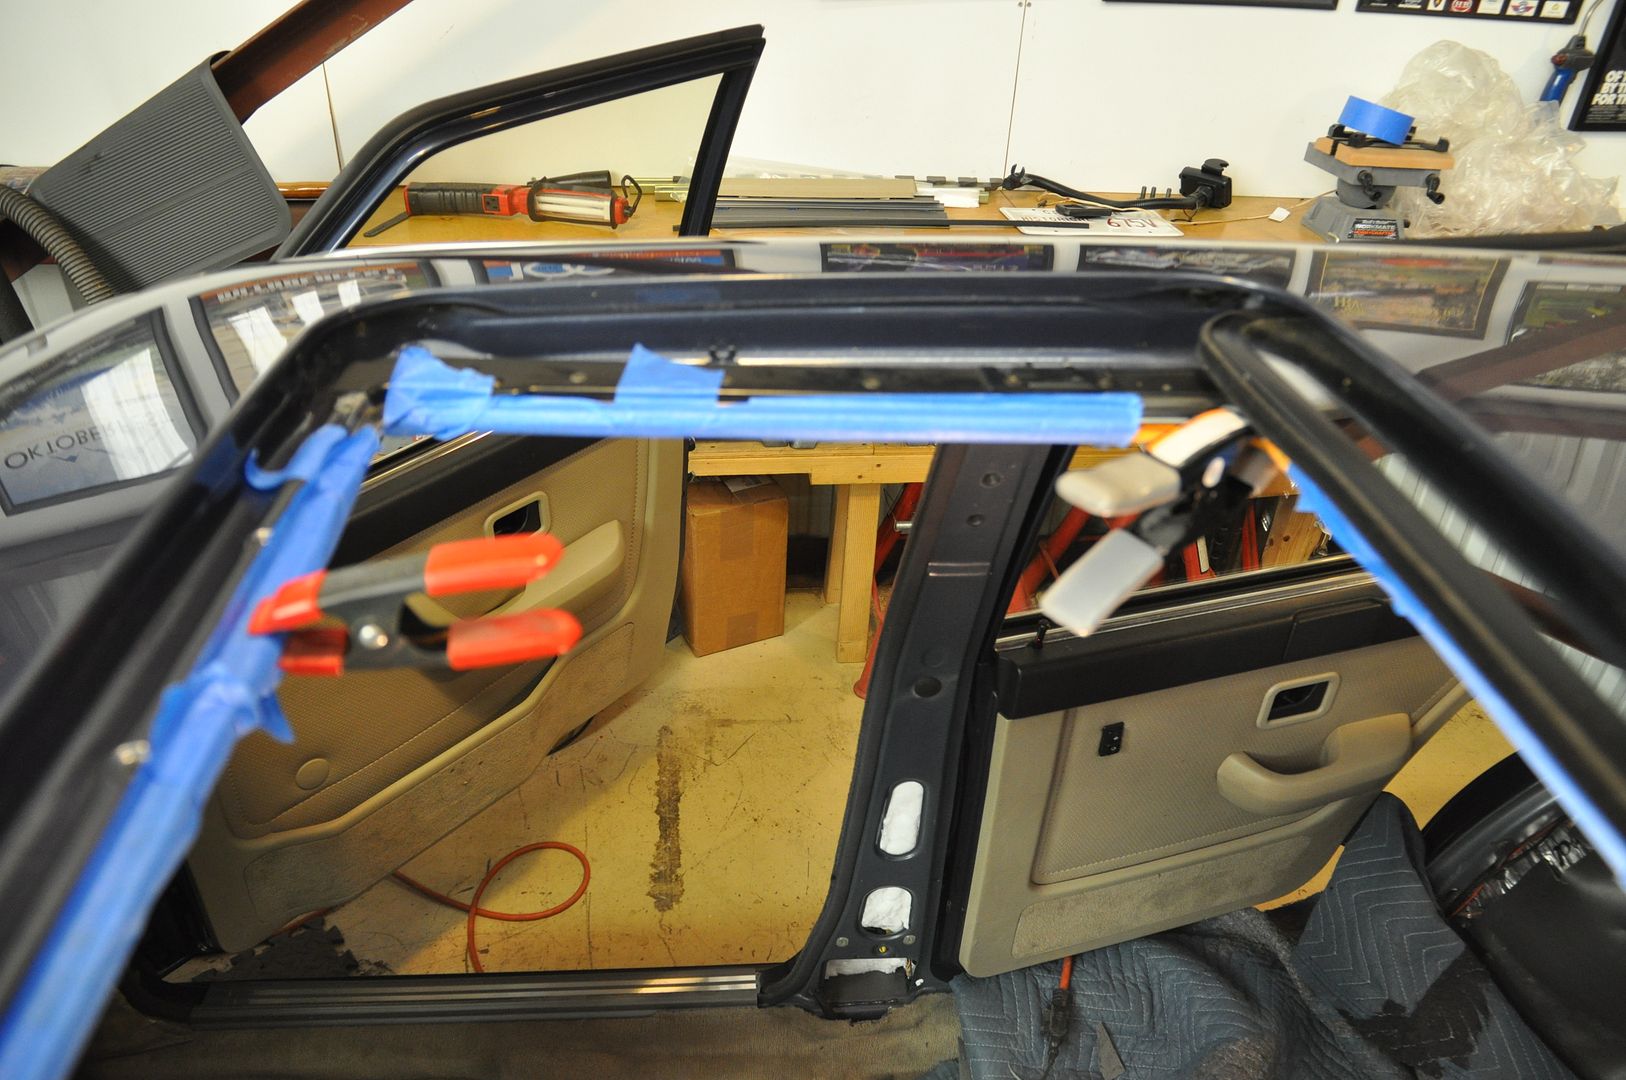
The roof Courtesy Light wire harness was repaired and re-installed and thus completed the prep work for the new Headliner which is due to be installed starting April 5th.
I am still researching a suitable material for the black or Anthracit Headliner. I have been making almost weekly trips to both Veteran Company (automotive finish materials) in downtown LA and to the upholsterer in Costa Mesa to get samples and review them with Juan. I am confident that this week’s trip will be the last.
Next up will be starting in on rebuilding the interior Door Panels and getting the car ready for Headliner.
I was terribly remiss in never officially thanking all the people that helped me complete this project; to all of you a most gracious "thank you", it was truly a humbling experience and one that I feel extremely fortunate to have been a part of with all your collected knowledge. I simply could not have accomplished a fraction of what I did without you. Hell, I even had my long-suffering wife helping out towards the end (that is her installing the door vapor barrier in the photos below. She also VOLUNTEERED no less to help hang the exhaust system and re-install the MTech side skirts. She's a keeper.)
Most of all, one person stepped up and saved me more often than not: Ralph Bulaong. Even his modest proclamations in the previous post can not hide his innate talent with automobiles and his knowledge of this generation of BMW's. I am also fortunate to call him a friend, one of the few I have as an adult.
Even though I have been working on the M535i continually the last four years (yikes, has it really been that long?), I took some time off from documenting anything on the M535i. I realized I never came back here to finish documenting the Front End project; there was a lot of work that got crammed in at the 11th hour in order finish the car for the then 2017 St.Paddy’s Day Meet. Frankly between doing all that work and the time & energy it took, I was kind of burnt out so on the shelf the thread went. As with most of car projects, they rarely end when you reach your deadline; it seems I’ve been in perpetual troubleshoot mode for the last four years. So, what better way to excise one big, massive, all-consuming project than to start another big, massive, all-consuming project.
But before we start this, I should at least honor the last project (at least that last push) with this little montage:
-Door Window Glass:


(There is a whole narrative that goes with the glass removal and re-installation, but I may do that separately since a few of you have been asking about that).
-Transmission & Shifter:
This has been an ongoing sub-project sort of like the house guest that never leaves. I started with trying to install a Z3 1.9 shifter for my existing G265/6 and that was failure (turns out they are incompatible with the stock E28 parts). I replaced that 265 with another one since the internal shift linkage was unbearable to me and it was giving the "Death Rattle". I sourced and put in another G265/6 and in the meantime, Ralph figured out how to make the Z3 shifter work. Turns out a Z3 shifter really is only setup to work with G260 and requires an later version shifting arm (25111220900) and corresponding mounting plates/brackets. This is fine except a 265 is a different length (shorter) than a 260, so this required shortening the whole shifting arm to fit. Then we discovered that the shorter and straighter version of the shifter for the 1.9 is not conducive with the E28 console (it puts your knuckles into the HVAC fins and also has a hard time staying in reverse). So we then tried the 2.3 version which is a tad longer and bent slightly; bingo, that seems to work just fine and gives me just the right amount of short-shifting feel I was looking for.
Since then, after I drove that transmission to Portland and back (+2,000 miles) and then it developed the "Death Rattle". So out it came and the car is presently running on a loaner G265/6 which appears to be fine(?). But this has put a whole rebuild and sourcing new bearings front and center which is in the works.


-Misc., Body and Finishing and Everything Else:


Some of those components and sub-projects are on my forever troubleshoot list, namely the rear windows and trim which actually involves re-doing the entire procedure, so plenty of time to go back a document it all (lucky you).
So, onto the NEW Big Project: Interior Remodel
Confession: I have never really liked the interior of this car. Sure, it was in excellent original condition; who doesn’t like a perfect example of a well-kept M-Tech leather interior? Only…it’s Pearl Beige. It was sort of the trade off when I bought it, a reasonable compromise considering what I was getting. And even though this car has won multiple awards with this interior, it was time to make a change.
Before I bought this car, I looked at another M535i which also happened to be Arktisblau but with an interior I have always coveted: Taurusrot leather. However, that car was kind of a rolling disaster. It also suffered terribly at the hands of its’ last owner, but that’s a whole other saga (and well documented on this forum).
For those of you unfamiliar with Taurusrot, it seems it wasn’t a terribly popular color offered mainly in early E28’s and E24’s (I’m sure they showed up in other models, but not often). It’s a bit of an odd color in their Red family and best falls into the “Dark Red” category. The easiest way to describe it is start with Cardinalrot and add black to make it darker (that’s an over-simplification but you get the idea). As I have been discovering trying to source a modern equivalent, it’s a lot harder to match than it looks since the color often leans towards the brown side of the spectrum. In fact in a lot of light, it is easy to see how people can mistake this for a brown rather than red (even if you’re not amongst the large segment of the male population who is red color blind). Most modern leather and other auto manufacturers’ “dark reds” tend to be closer to Burgundy which is more purple. In my mind Taurus represented one of the deepest and richest colors of leather BMW had to offer; there was something very elegant about a deep, dark red offset with the black and Anthracit trim & carpet that just screams sumptuousness. Paired with a great exterior color like the Arktisblau, I am looking for a total transformation of this car.
So, I started planning, buying various parts, and generally waiting for the right moment to pull the trigger. Looking back at all that as I was putting together one of my epic spreadsheets, I realized I have been gathering stuff since before the last project (2015). The biggest piece of the puzzle fell into place a few years ago: an almost intact M-Tech Taurus E28 interior; complete rear seats, and all four door panels with armrests being sold by a board member. The only thing missing were the front M-Tech Sport Seats (the seller had them, but they were thrashed power seats). I was hoping to find a whole interior to just transplant without any re-upholstery, but I discovered that finding good, intact manual M-Tech Sport Seats is quite the task. Finding them in Taurus was nearly impossible, they were truly Unicorns. So, I was in for re-upholstering at least my manual M-Tech Sport Seats, hoping to match the existing Taurus leather. More on this later.
As with most of my projects, I really tend to throw everything and the kitchen sink into it. This project was an opportunity to address several outstanding issues I have been postponing dealing with. It really is a “While you’re in there” type of project.
Here is the list that constitutes the whole scope of work for this project:
-Taurusrot Leather: Front & Rear seats, Rear headrests, Driver’s Front Armrest (Bavarian Autosport)
-Taurusrot Vinyl: Door Panels, Door Armrests (with Anthracit trim and carpet insets)
-Anthracit Carpet: Replace the existing Pearl Beige
-Anthracit Trim: Replace existing Pearl Beige Lower Dash, Center Console and Lower Seat pieces
-Anthracit Headliner: Replace the existing woven Pearl Beige (with decaying foam backer)
-Anthracit Rear Parcel Tray & Sunblind: Dye existing Pearl Beige (another Unicorn item)
-Steering Wheel, Shift Knob & Shift Boot: Re-Covering existing M-Tech I wheel, New Black Shift Boot, Re-Covering and/or New Shift Knob
-Seat Repairs: Welding & Repairing Driver’s M-Tech Sport Seat, New Parts
-Body Repairs: Weld in Graft Replacements to both Front Floor Board outer corners (Body rust & holes leftover from the cars’ former life in the NE); Weld in Graft patch to the Rear Bulkhead (giant ugly hole from a PO for a trunk sub-woofer); Weld in Graft Replacements to Lower Rockers at the Rear Jack points (again more fallout from the NE).
-HVAC Repairs/Preventative Maintenance: Replace both the Heater Core and the AC Condenser, repair/replace/upgrade misc. parts and what-not
-Audio System Upgrades: Mostly just the infrastructure with new signal wiring from the Head Unit to the Amps in the trunk, but since I have to completely dismantle the current system (cabin wiring and trunk), I may be trying out a new Head Unit. Also, I will be fabricating and installing a cooling fan system for the Amp Board (it was overheating my last long road trip).
-Thermal & Acoustic Abatement: This is a big item I am working which involves addressing the following items: Roof, Doors, Rear Bulkhead, and Floor.
Well, I guess that’s enough to classify this as a big, massive, all-consuming project doesn’t it?
Of course, while all this is happening, I STILL have a short list of leftover troubleshooting items from the previous project as well as on-going issues. Stuff like: Fixing the Wiper Relay wiring in the Fuse Box (my F-Up), tracking down a battery drain somewhere, trying to resolve the bearing replacement for the G265, and trying make sure I didn’t F-Up the Head Gasket a few years ago, etc., etc., etc.
Since there is a lot of coordination between several trades-people and disciplines and their schedules, I have to sequence and overlap that whole scope of work. I’m breaking it down to happen in five major parts:
-Part I: Headliner
-Part II: Leather Upholstery
-Part III: Floor & Carpet (w/Body Repairs)
-Part IV: Interior Trim
-Part V: Equipment and Everything Else
PART I: HEADLINER
First up is the Headliner. I’m doing this first because the brilliant Craftsman that will be doing this and Upholstery doesn’t become available until the end of March and then will take about 6 weeks to do the leatherwork. He’s in high demand and only a One-Man shop so he has projects stacked up; it was a bit of chess match figuring when my schedule becomes free and aligns with his (I was ready to start this project back in November more or less).
Taking advantage of the wait time, there is preparation work to do in advance of me dropping off the car for his work. Few weeks back I started in with tearing out the old headliner (complete removal happens after the front Windshield and rear window are removed down in the shop). Before that was the near complete removal of the interior: Seats, B-Pillars, Rear Parcel Tray and A-Pillars. The remainder will come out when I get the car back after the new Headliner is installed.

On to the fun stuff:
Yum:

Look out:

I managed to get this hard foam panel off mostly intact. I know I need to keep the front part as it provides the smooth form for the Headliner to roll into the Sunroof. I’m not sure about the rear half that is over the Sunroof Panel Cassette; I’m pretty sure I can substitute whatever sound and heat abatement it provided with other materials (more on this whole system to come).


I finally get to see what the raw roof of an E28 looks like:

Turns out there’s not a whole up there between the headliner and the roof sheetmetal.
After removing all the nasty, decomposing headliner it was time to remove the various foam padding and strips:
After all that, it was time to clean off all the old adhesive from the roof. You will need strong flat scraper blades, plastic razor blades, adhesive remover and a whole lot of Advil later to get all that stuff off (after working over your head for hours, you will understand the need for the Advil. And the Rum chaser to wash it down).
I don’t want to smell this stuff anytime soon:

The cleaned product:


The interior cabin in an E28 is a pretty loud & warm space. One of the primary goals of this project was to increase the levels of both heat and noise abatement inside the cabin. I started this when I did the engine bay overhaul 4 years back with a new Neoprene & Thermal firewall barrier. I even wrapped the thermal barrier down through the front part of the transmission tunnel. I understand that I am fighting a deficiency of design in terms of door & window seals not to mention the amount of glass inherent with the E28, but I was certainly going to address as much of the other areas I could. My simple goal was to make this car’s interior half as quite as BMW did with the E39; if I could achieve that then I would be happy. After a great deal of research and some experience, I chose many products by HeatShield Products to employ with the task of reducing both heat and noise intrusion.
For the roof, I am doing the following:
-HeatShield Products Headliner Kit: db Skin Liquid Membrane with db Stealth fabric barrier. The db Skin is to deaden the resonance of the sheet metal panels, goes on in a couple coats to reach about 50 mil. The db Stealth is a double layer polyester & fiberglass fabric for heat abatement; this goes on as the last layer under the finish headliner after all the rest of the stuff following below.


-Noico Red 150 mil Acoustic Foam: Self-Adhered, high performance closed cell foam padding. Further deadens the steel and vibrations. (The db Stealth fabric is glued over the top of the Noico).


-HeatShield db Sniper Acoustic Mat: High performance Neoprene closed cell foam with a dense high-mass rubber vinyl backer mat. I have used this in the Rear Seat well and Bulkhead but here I’m using it on the C-Pillars to replace BMW’s open cell & vinyl mat they used. (In order to get the assembly thickness to equal the OEM, I added two layers of thin black cotton batting glued to the Sniper).


-3M Thinsulate Acoustic Batt Insulation: +/-3/4” thick, one side backed (comes in a 60”x10’ roll). This gets cut up and crammed into all the open cavities and holes; there is a surprising amount of them between the roof, C-Pillars and B-Pillars).


-SEM 39357 Dual-Mix Flexible Urethane Foam: This is injected into any open holes (too small for the batt insulation) and closing the many joints and panel seams. This is to seal off vibration and any heat intrusion.

All this stuff was installed with the help of a myriad of adhesives:
3M Spray Headliner Adhesive:
3M Hi-Strength Spray 90 Adhesive:
Gorilla Glue:
Here it all is going on it their respective layers:
HeatShield db Skin:
Thick liquid, can be applied by roller, brush or gun. For this roof, small brushes worked best. I ended up putting on three layers only because the first layer went on thin (they should be two 25mil layers which is pretty thick). I might use this on the floor as well since I have a lot leftover.
Noico Red Foam:
This is the 150mil version with the super adhesive sticky side and boy does it stick. Once you put it down, don't even think of trying to move it or work it. This stuff alone almost negates the need for the db Skin liquid as it does a much better job of deadening the panels.
3M Thinsulate:
So much insulation. You will be surprised at both how many hollow cavities there are and how much they eat this insulation. Use a dulled coat hangar and small cut strips to get the best results.


SEM 39357:
This stuff was not easy to work with: first it wants to go everywhere (most times not where you need it to go), and it sets up in less than 30 seconds so you have act fast as soon as you press the trigger. I will likely use more of this for the floor and bulkheads than I did for the roof.


HeatShield db Sniper:
Spray 90 both surfaces and pray you get it set right the first time because you don't get a second chance.

Heatshield db Stealth:

With all those layers finally on it was time to add the OEM formed foam panel but just the front section since all those layers replaced this foam for the rear section of the cabin roof which was only covering the Sunroof cartridge. All my added layers were outperforming that foam panel and since the headliner in this section isn’t dependent on it for forming, it was obsolete. As mentioned, the front section as it rolls into the Sunroof opening was and is necessary as the headliner is adhered to it.
The roof Courtesy Light wire harness was repaired and re-installed and thus completed the prep work for the new Headliner which is due to be installed starting April 5th.
I am still researching a suitable material for the black or Anthracit Headliner. I have been making almost weekly trips to both Veteran Company (automotive finish materials) in downtown LA and to the upholsterer in Costa Mesa to get samples and review them with Juan. I am confident that this week’s trip will be the last.
Next up will be starting in on rebuilding the interior Door Panels and getting the car ready for Headliner.
Last edited by vinceg101 on Mar 17, 2021 3:26 AM, edited 4 times in total.
Re: 1985 Arktisblau M535i Renovation - Next Chapter
Enjoyed the great pics.
Mentioning glue choice...
3m 90 etc won't hold up in my experience.
Dap weldwood landau top and trim.
Only glue to buy to make shit stick and last.
Please use it. It is the true professional glue. Industrial strength easy to brush or spray.
Just have to mention this professional product. Always superb results.
5 gallons 100 to 130.
I don't know of a better glue for permanent no failure work.
Re: 1985 Arktisblau M535i Renovation - Next Chapter
I'll look into it. Thanks.Spen wrote: Mar 12, 2021 5:39 AM Enjoyed the great pics.
Mentioning glue choice...
3m 90 etc won't hold up in my experience.
Dap weldwood landau top and trim.
Only glue to buy to make shit stick and last.
Please use it. It is the true professional glue. Industrial strength easy to brush or spray.
Just have to mention this professional product. Always superb results.
5 gallons 100 to 130.
I don't know of a better glue for permanent no failure work.
Re: 1985 Arktisblau M535i Renovation - Next Chapter
So glad you shared all this Vince! You are doing awesome work! I can't wait to see this car (and you) again!
Re: 1985 Arktisblau M535i Renovation - Next Chapter
Taking advantage of some down-time waiting for the Headliner, I moved onto addressing some Interior parts:
PART IV: INTERIOR TRIM: DOOR PANELS I
I set out to improve the existing Taurusrot Door Panels (aka Interior Door Cards). The set I received with the rest of the Taurus interior had some blemishes on the Anthracit frames and the cardboard backer panels had seen better days (suffering for 30+ years inside a door, etc.). Aside from the cosmetics, the improvements I wanted to make were again regarding heat and sound abatement in the whole door assembly; these panels would be the final layer of that overall improvement.
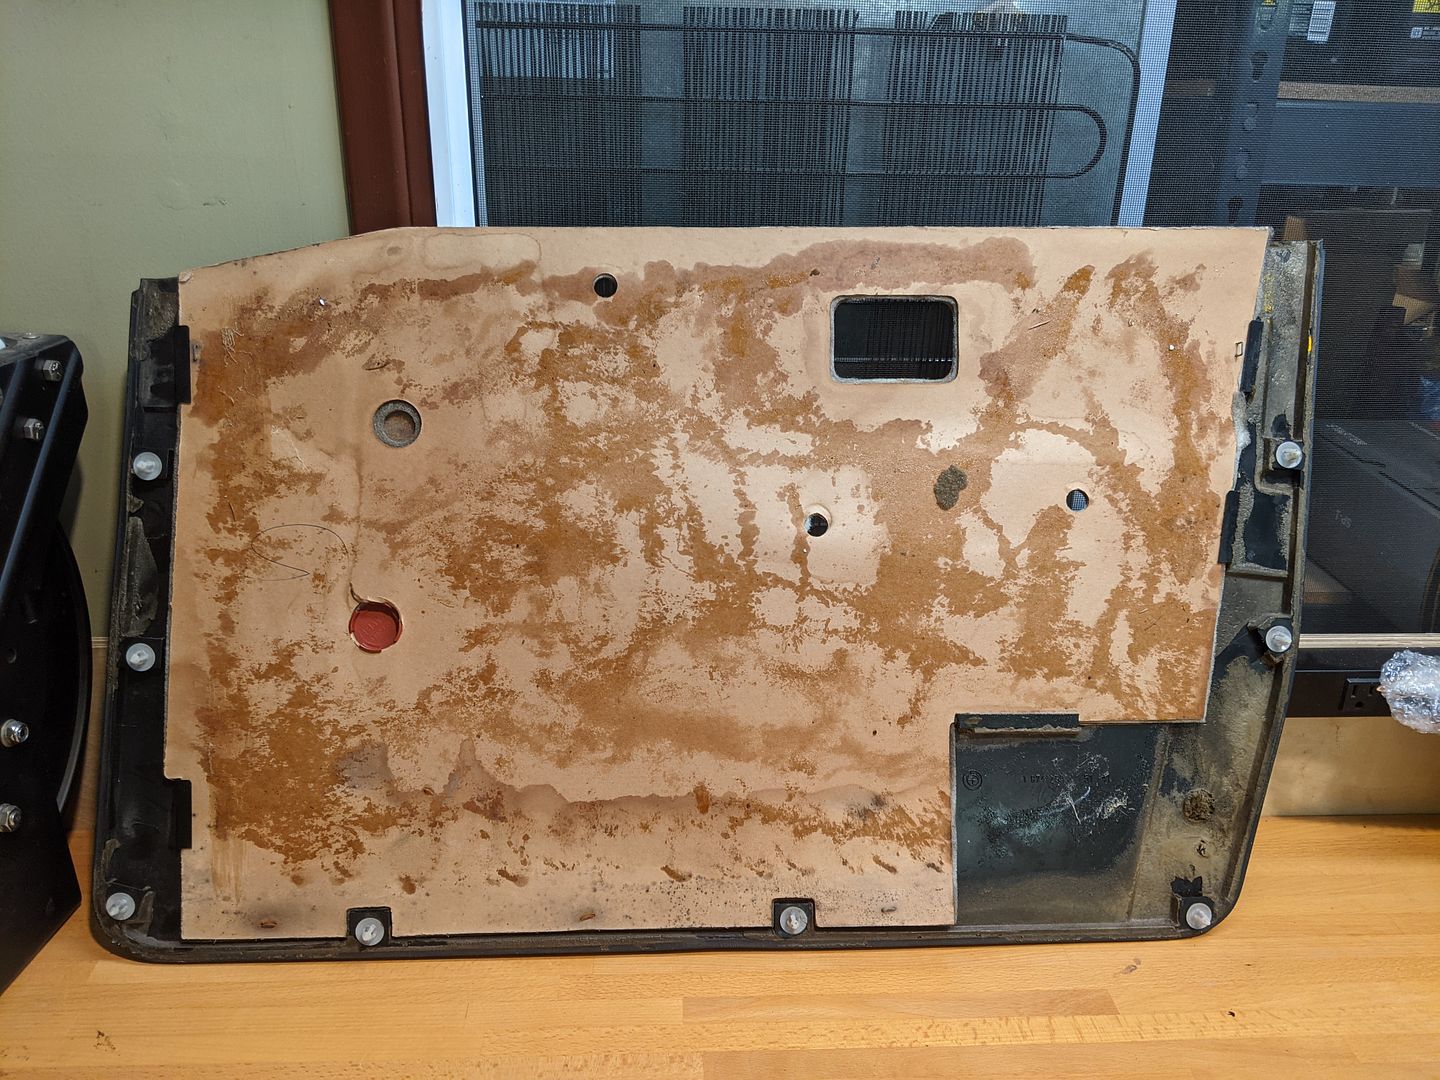
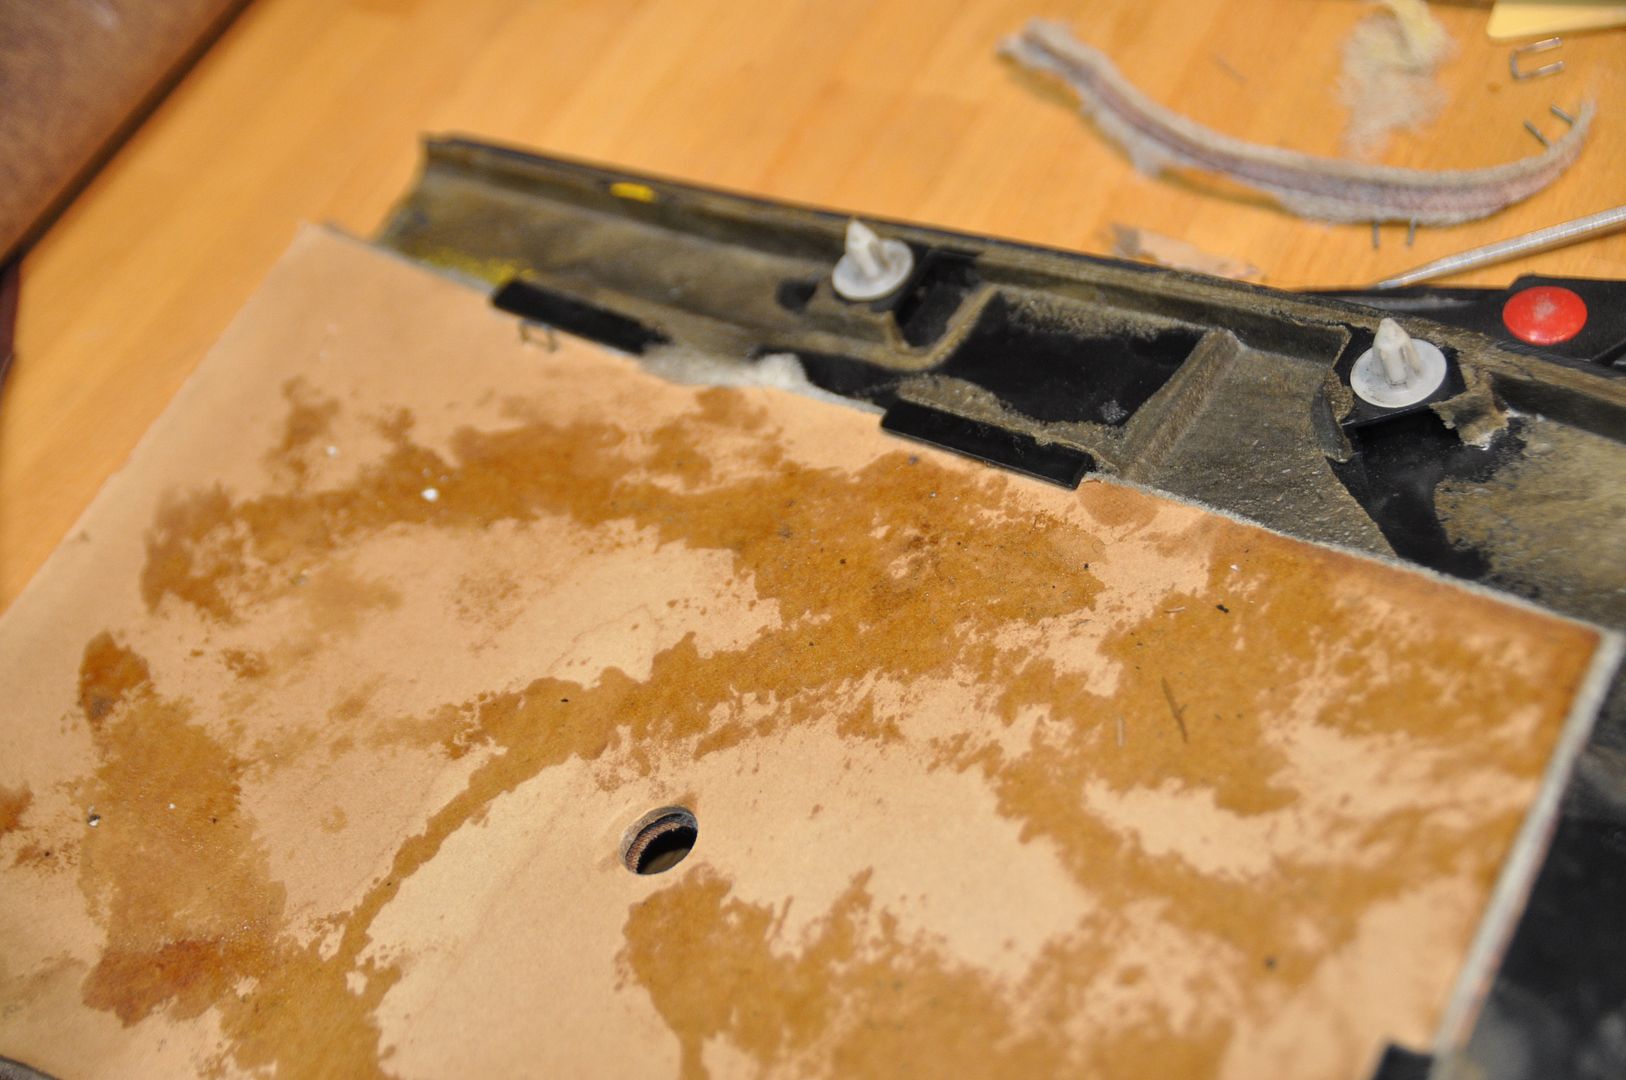
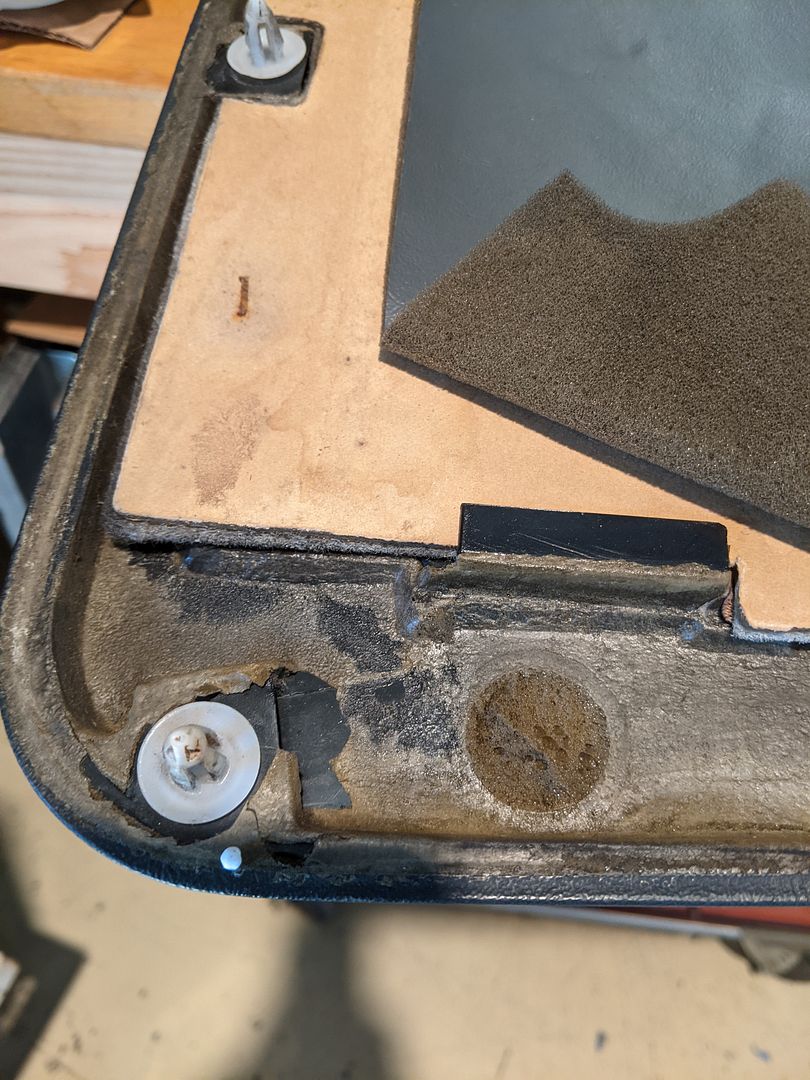
To review, the Door Panels are made up of 1) Plastic & Vinyl Frame (in my case here it is the Anthracit contrasting color scheme shared with the Cardinalrot & Black interiors, otherwise it may be Pearl Beige, Llama, Natur, Pacific Blue, Nutria, Moca, etc.) and 2) Vinyl “Covering” panel (comprised of a +/-3mm or 1/8” hard cardboard core with a poly foam batting layer then the finished vinyl glued/heat pressed together), this is then slipped into slots on the frame then it is stapled through the back into the frame. On that of course are all the hardware, armrests and handles in the same color as the vinyl covering. This whole assembly is attached to the door via a series of plastic trim clips with the handles and armrests bolted through into the door itself. On each door is a plastic door cap at the top of the panel below each window; these are attached directly to the door itself as the Door Panels slip in underneath them when clipped to the doors.
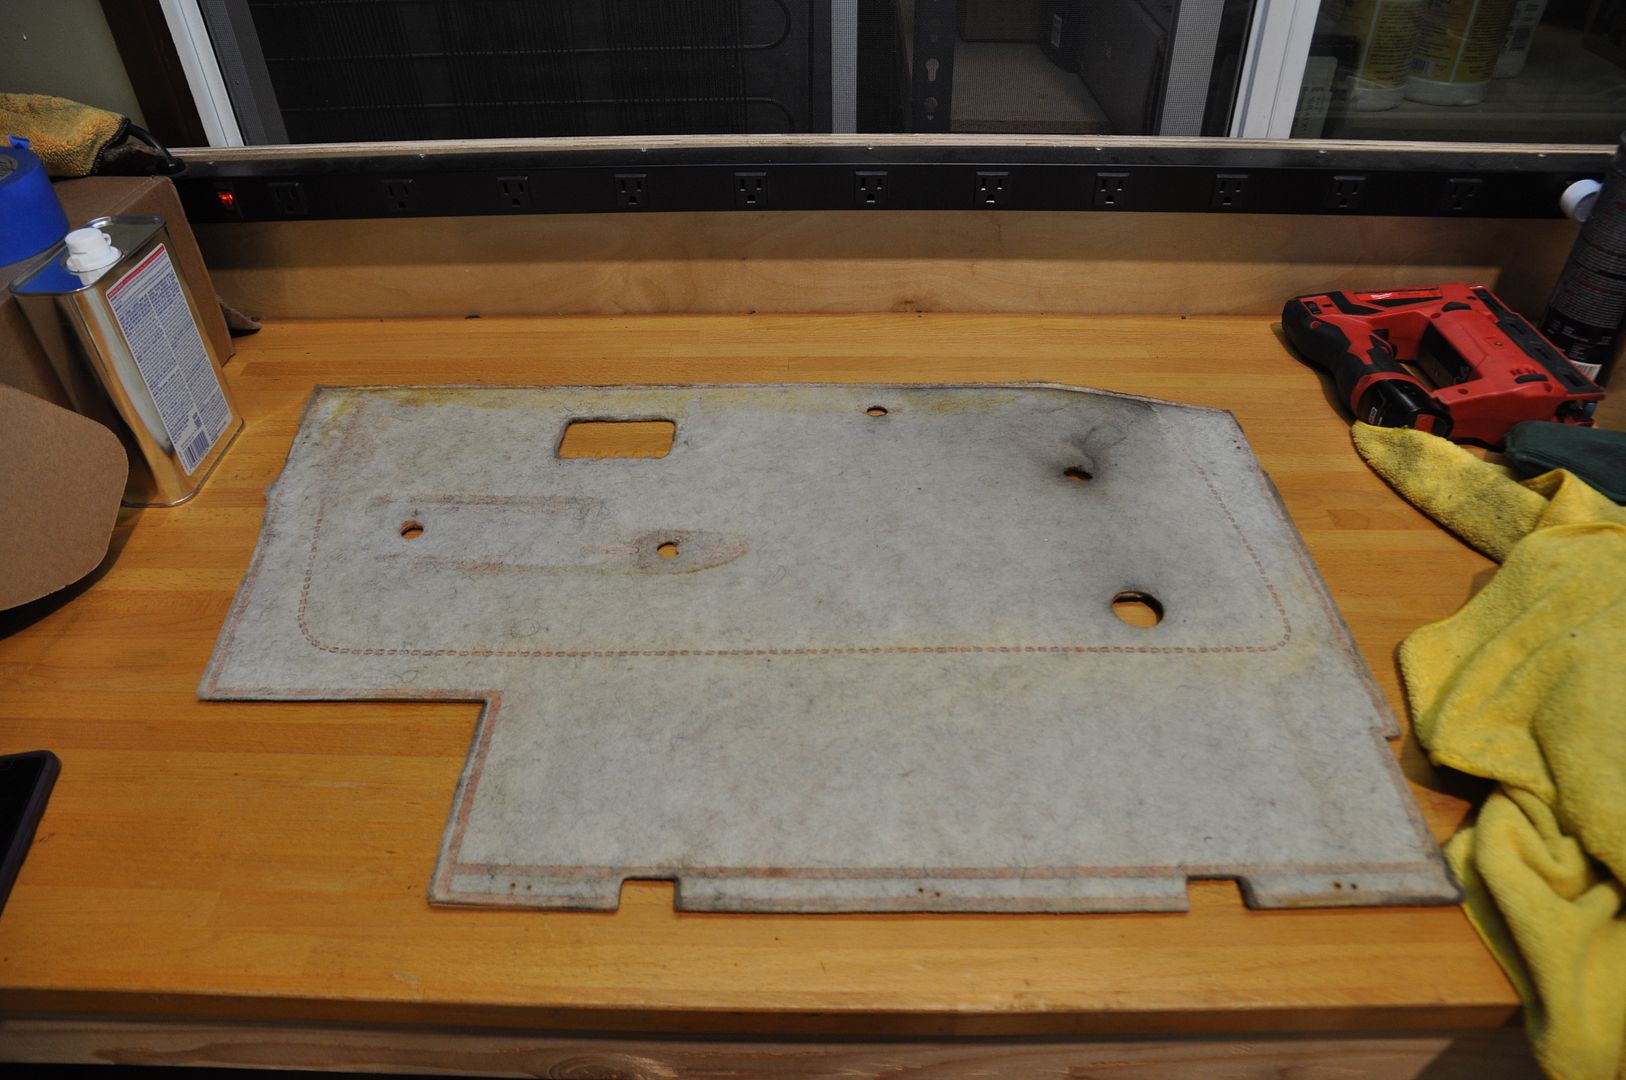
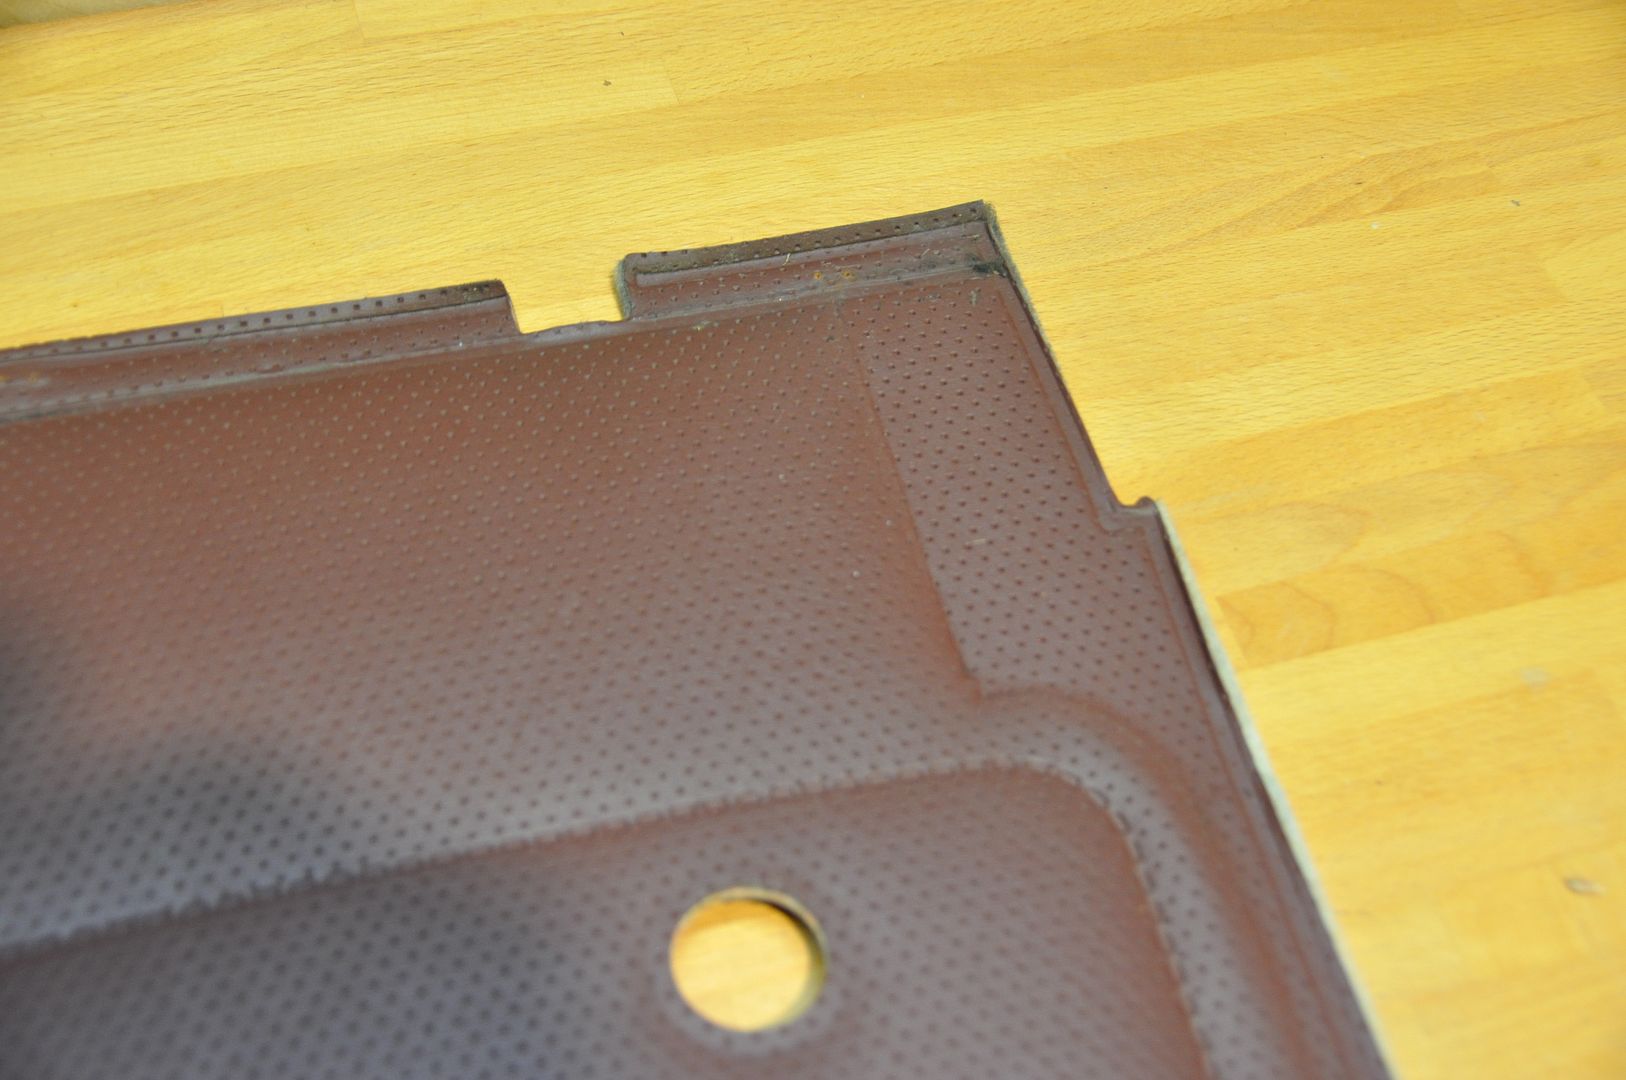
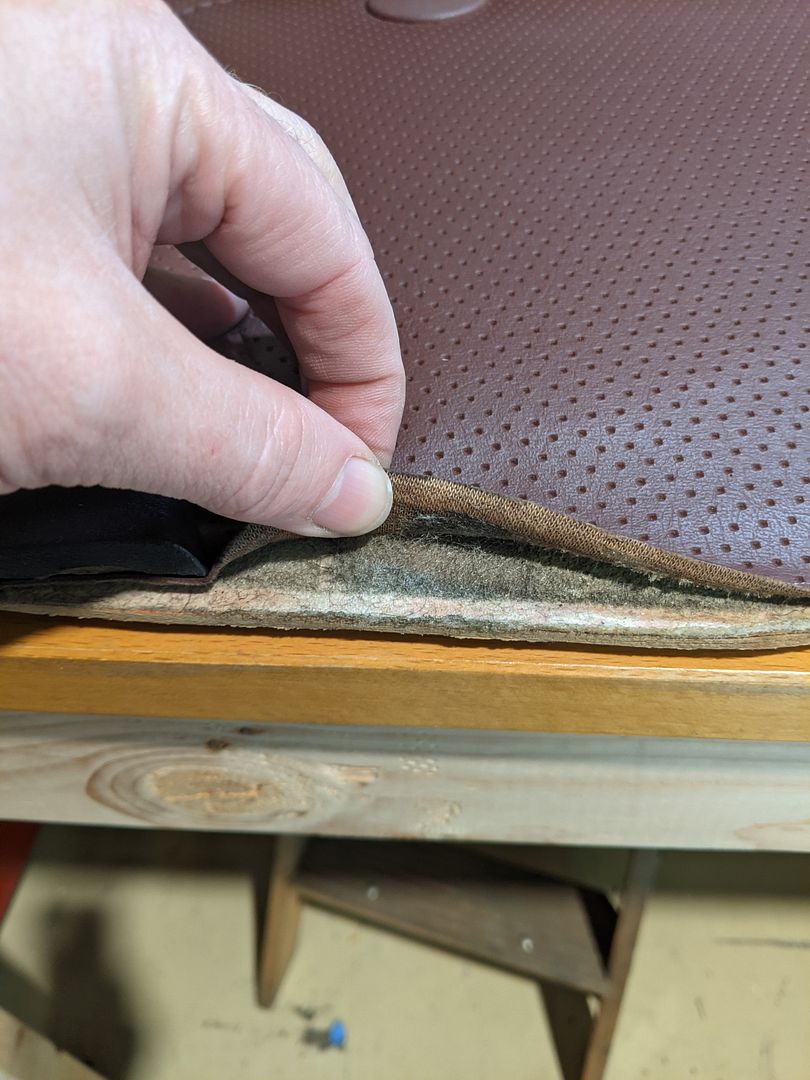
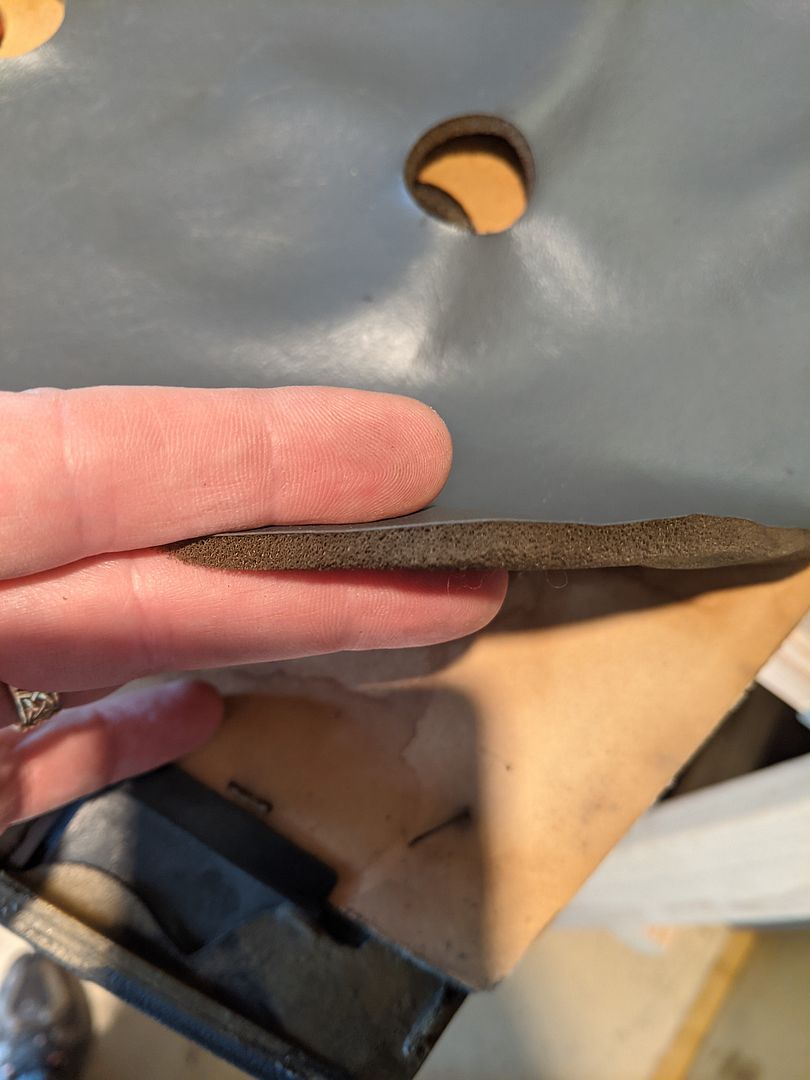
Dismantling & Cleaning:
In a pursuit to get four excellent Door Panels, I sourced another Black/Anthracit set of panels and proceeded to take them all apart to mix & match the best assemblies.
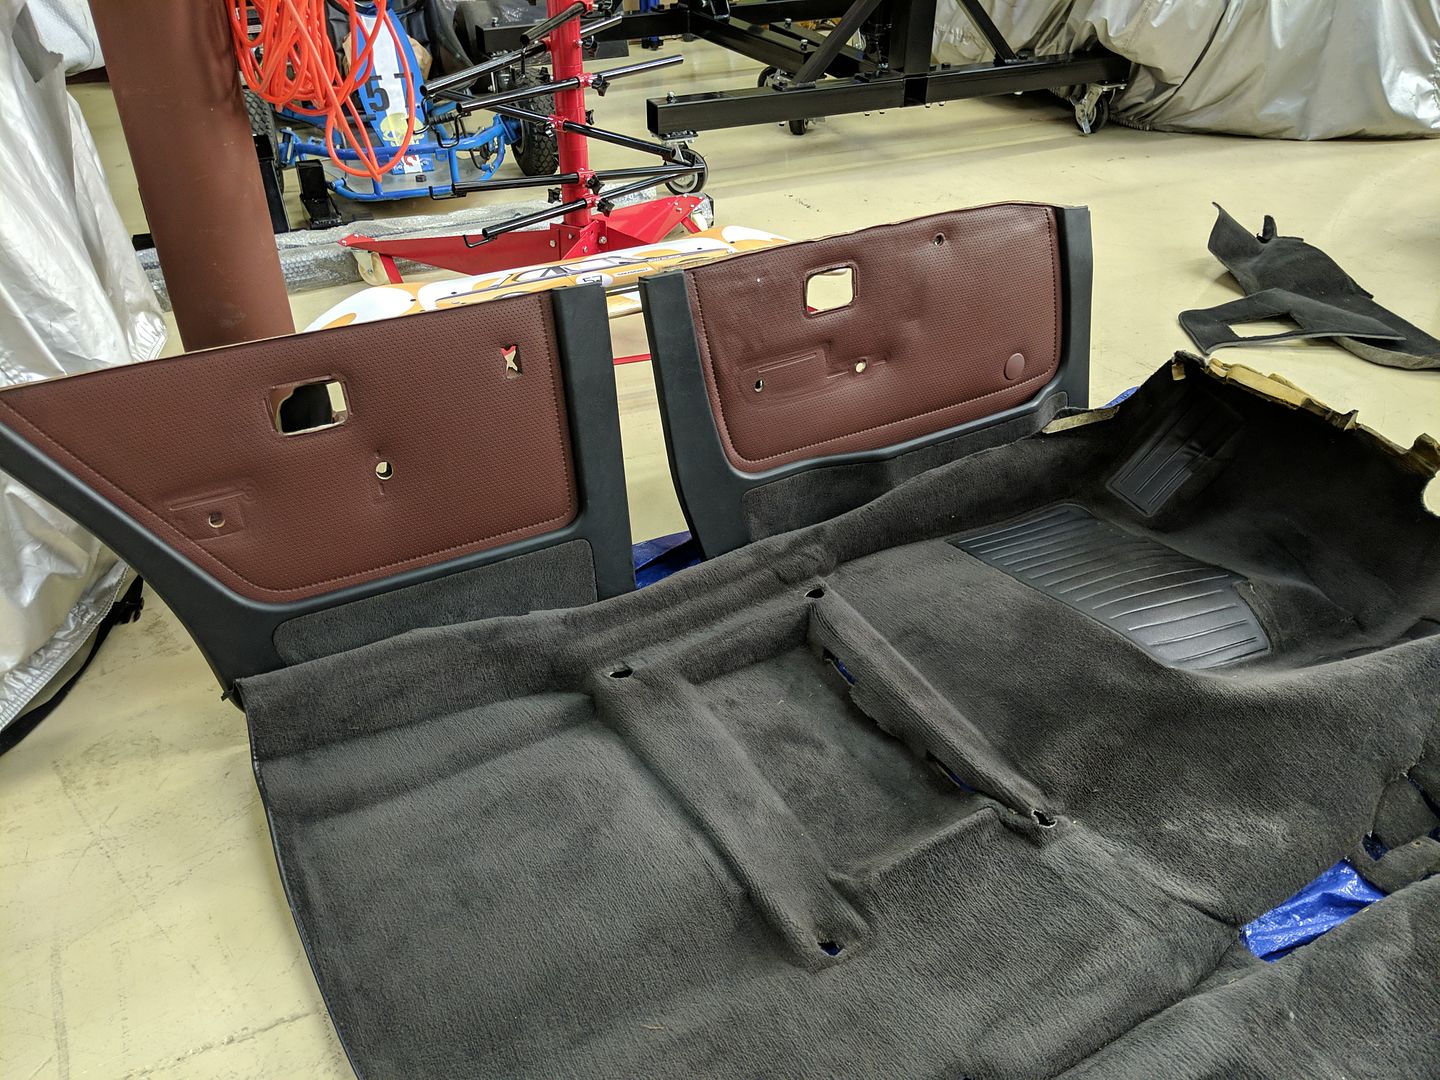
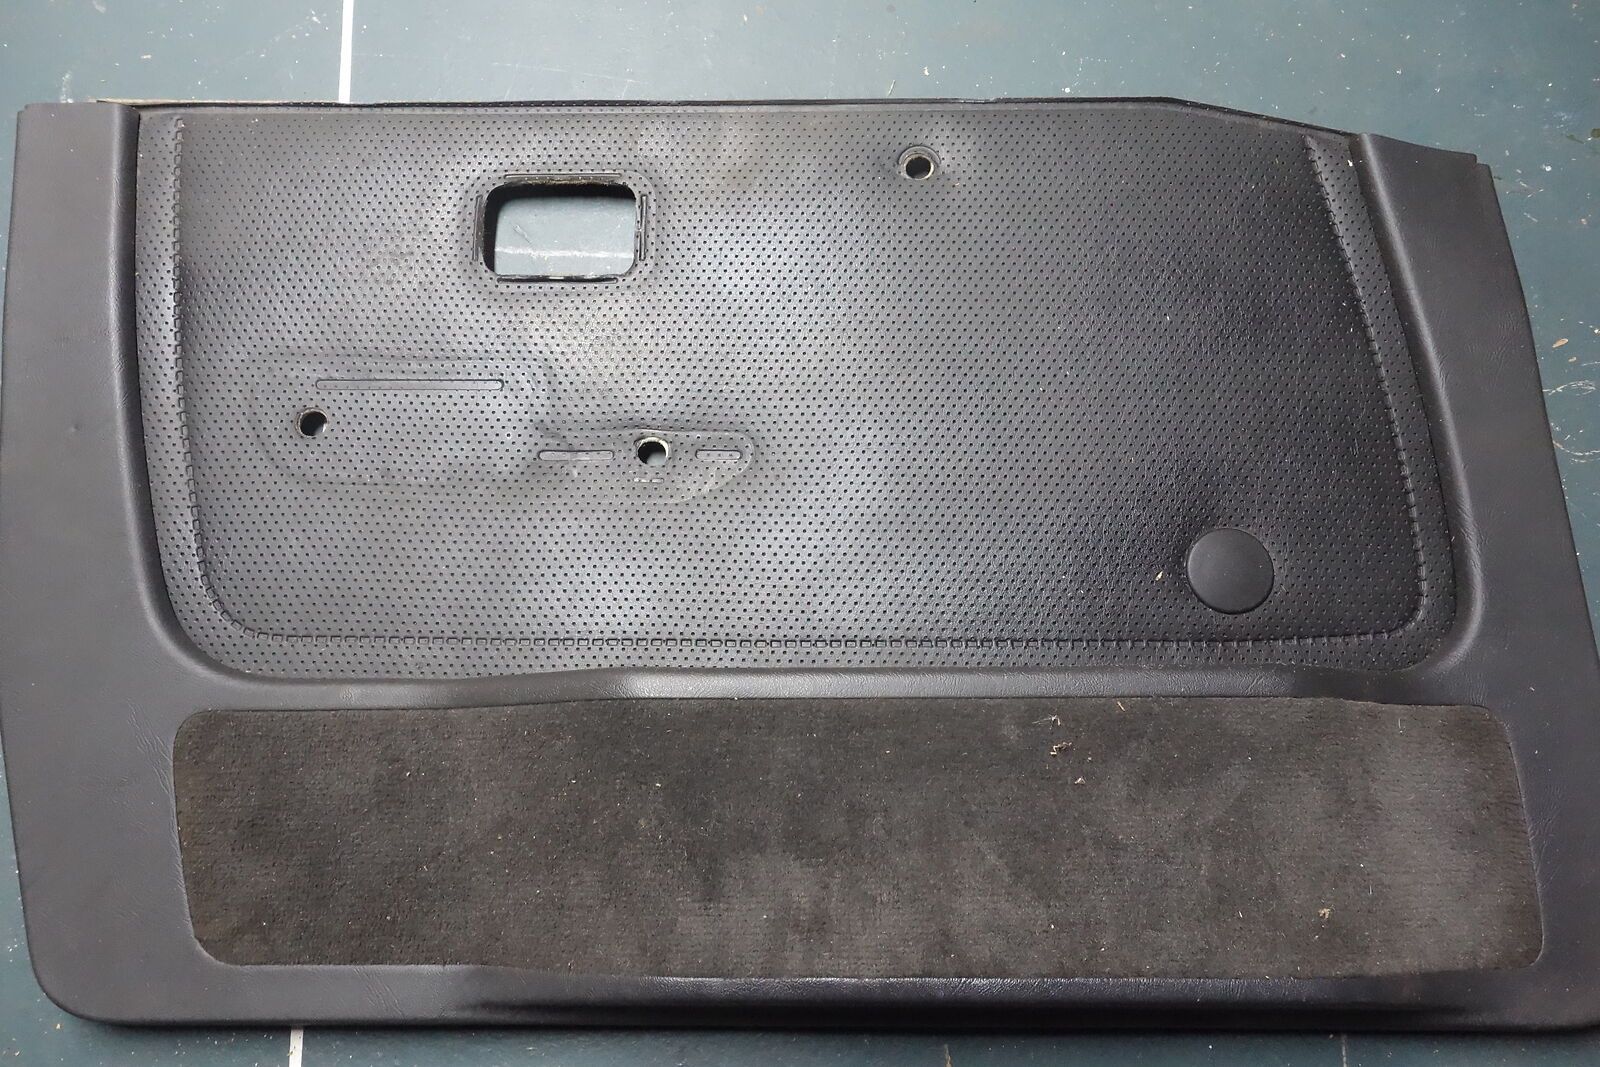
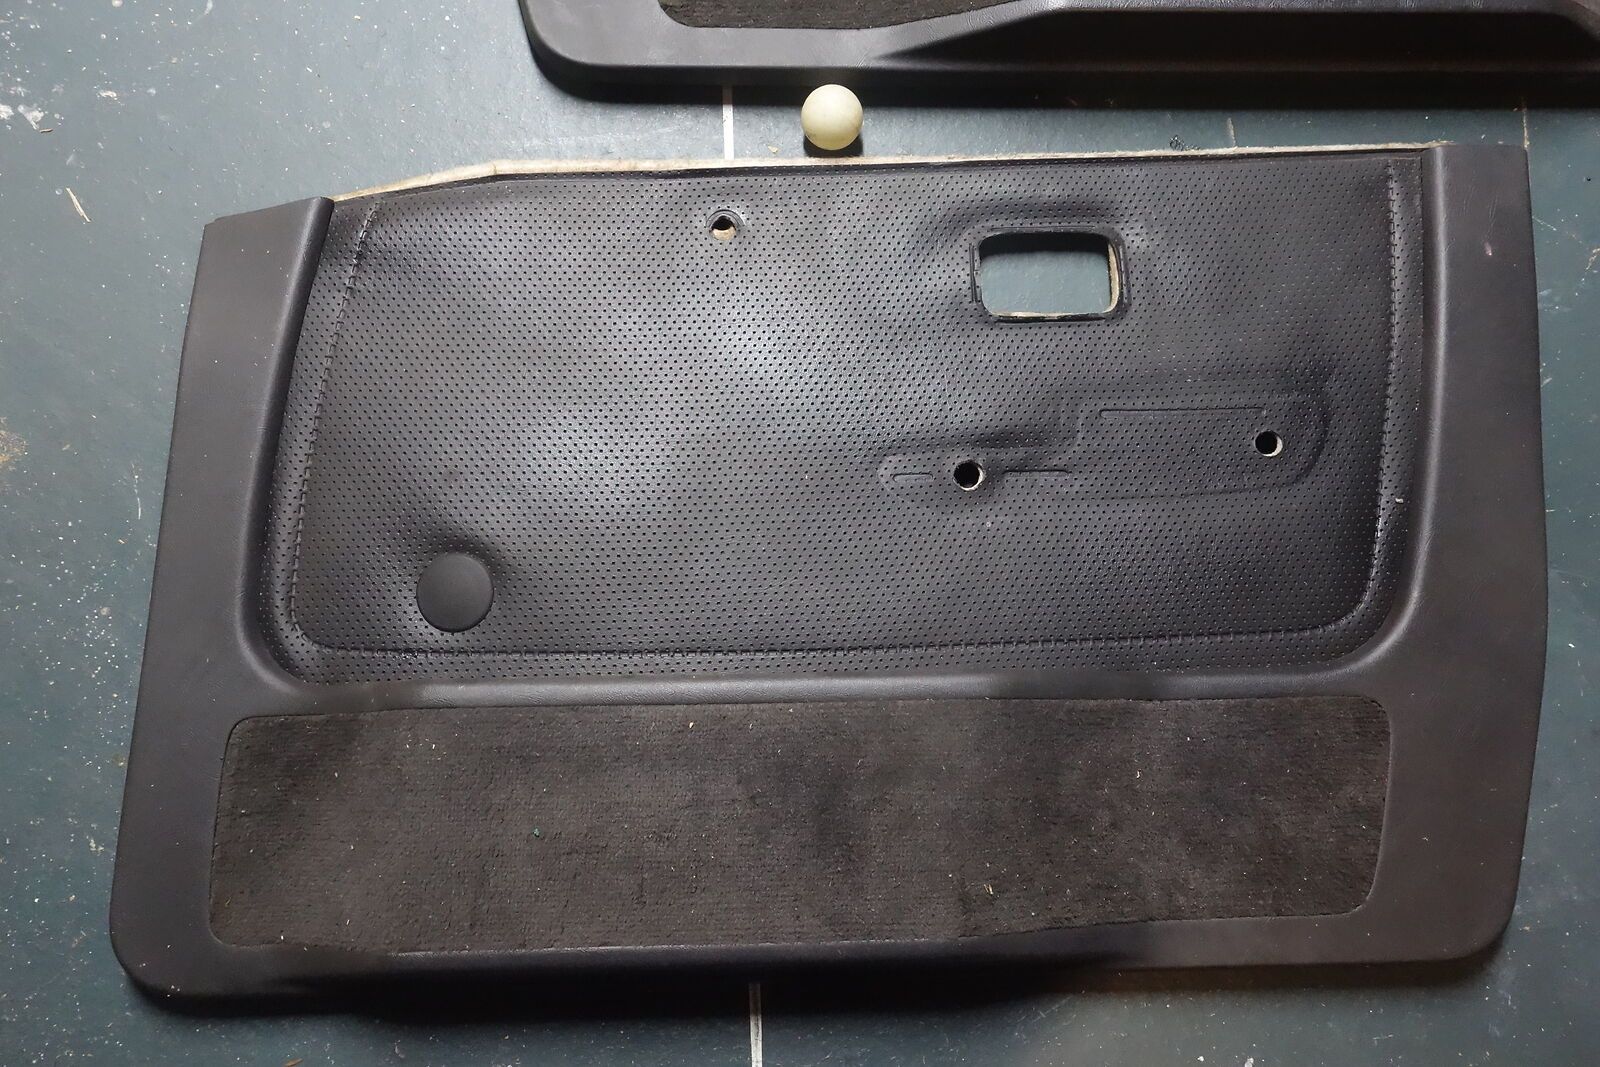
Taking the frames apart:
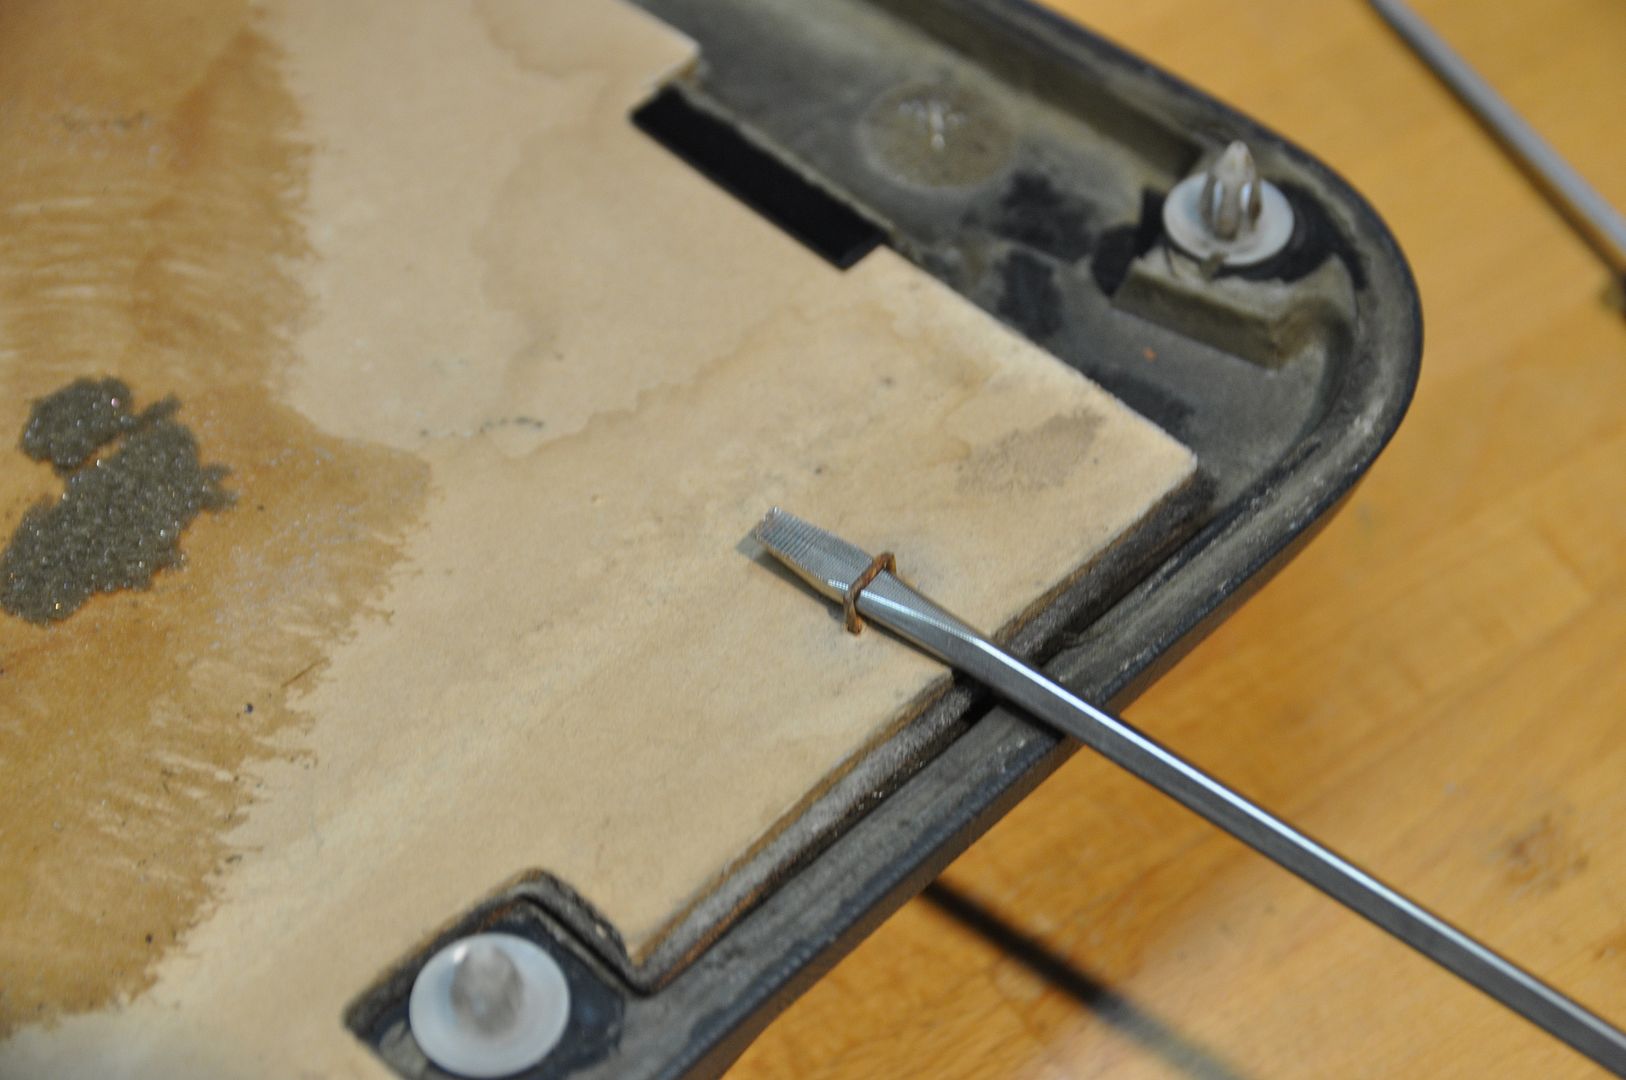
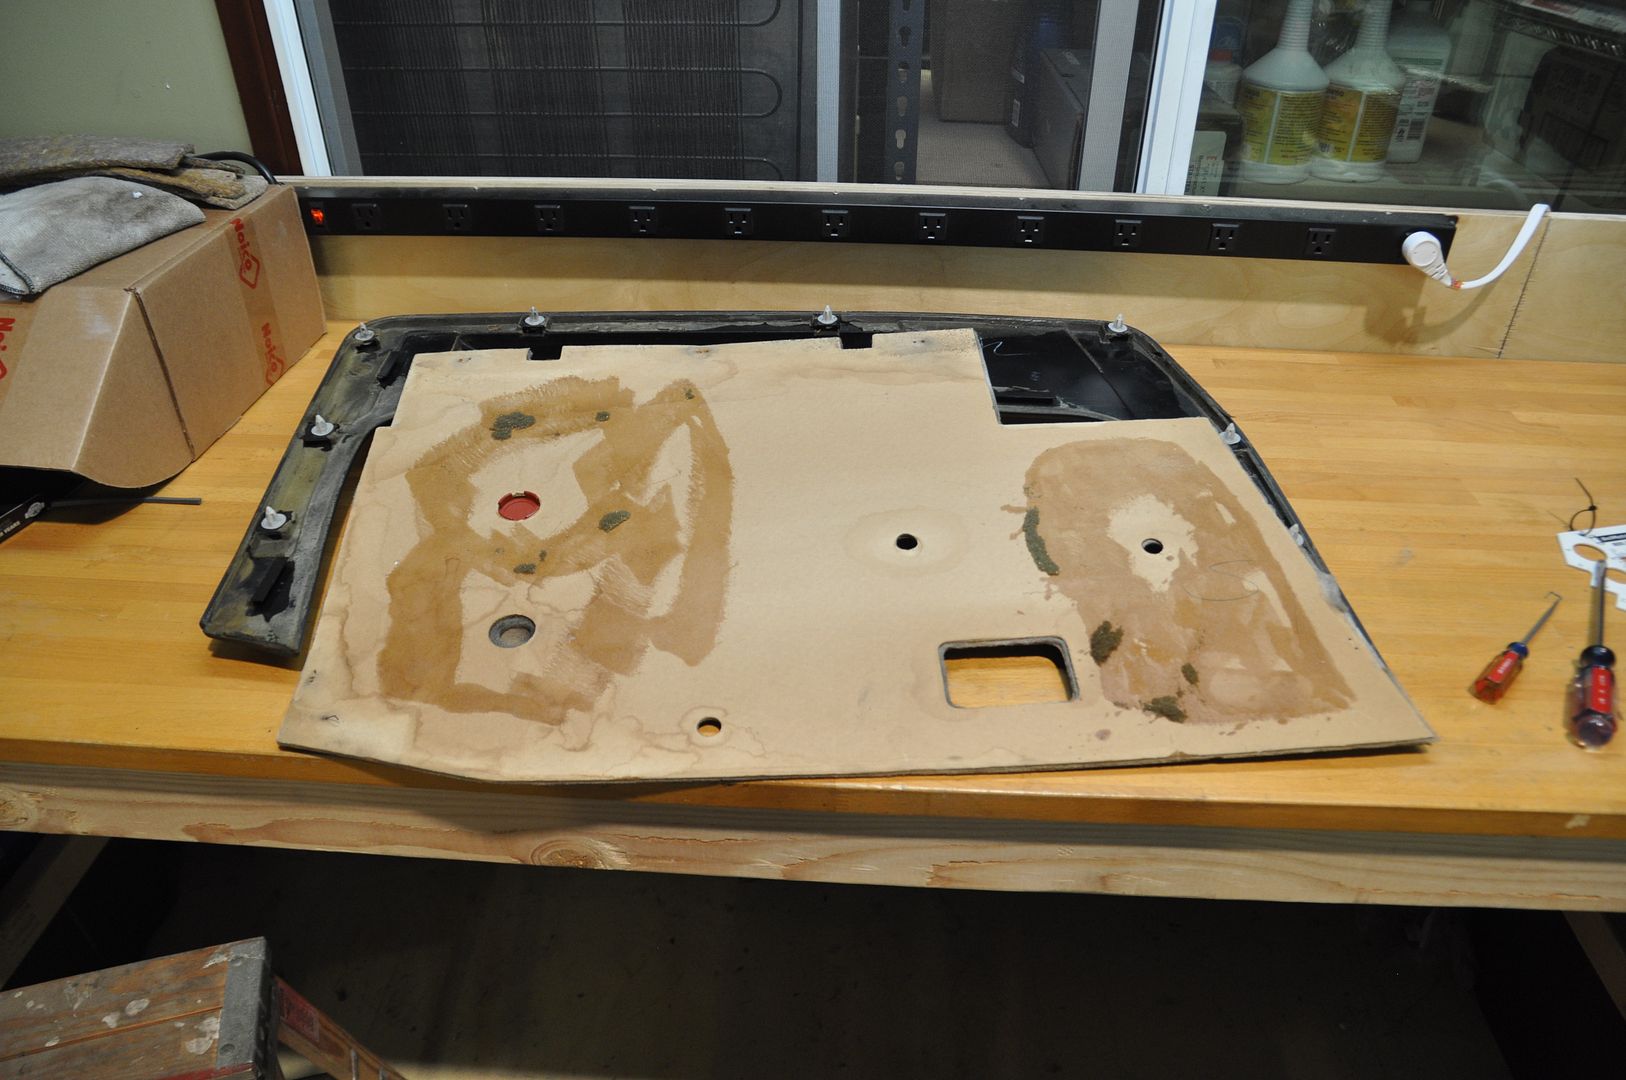
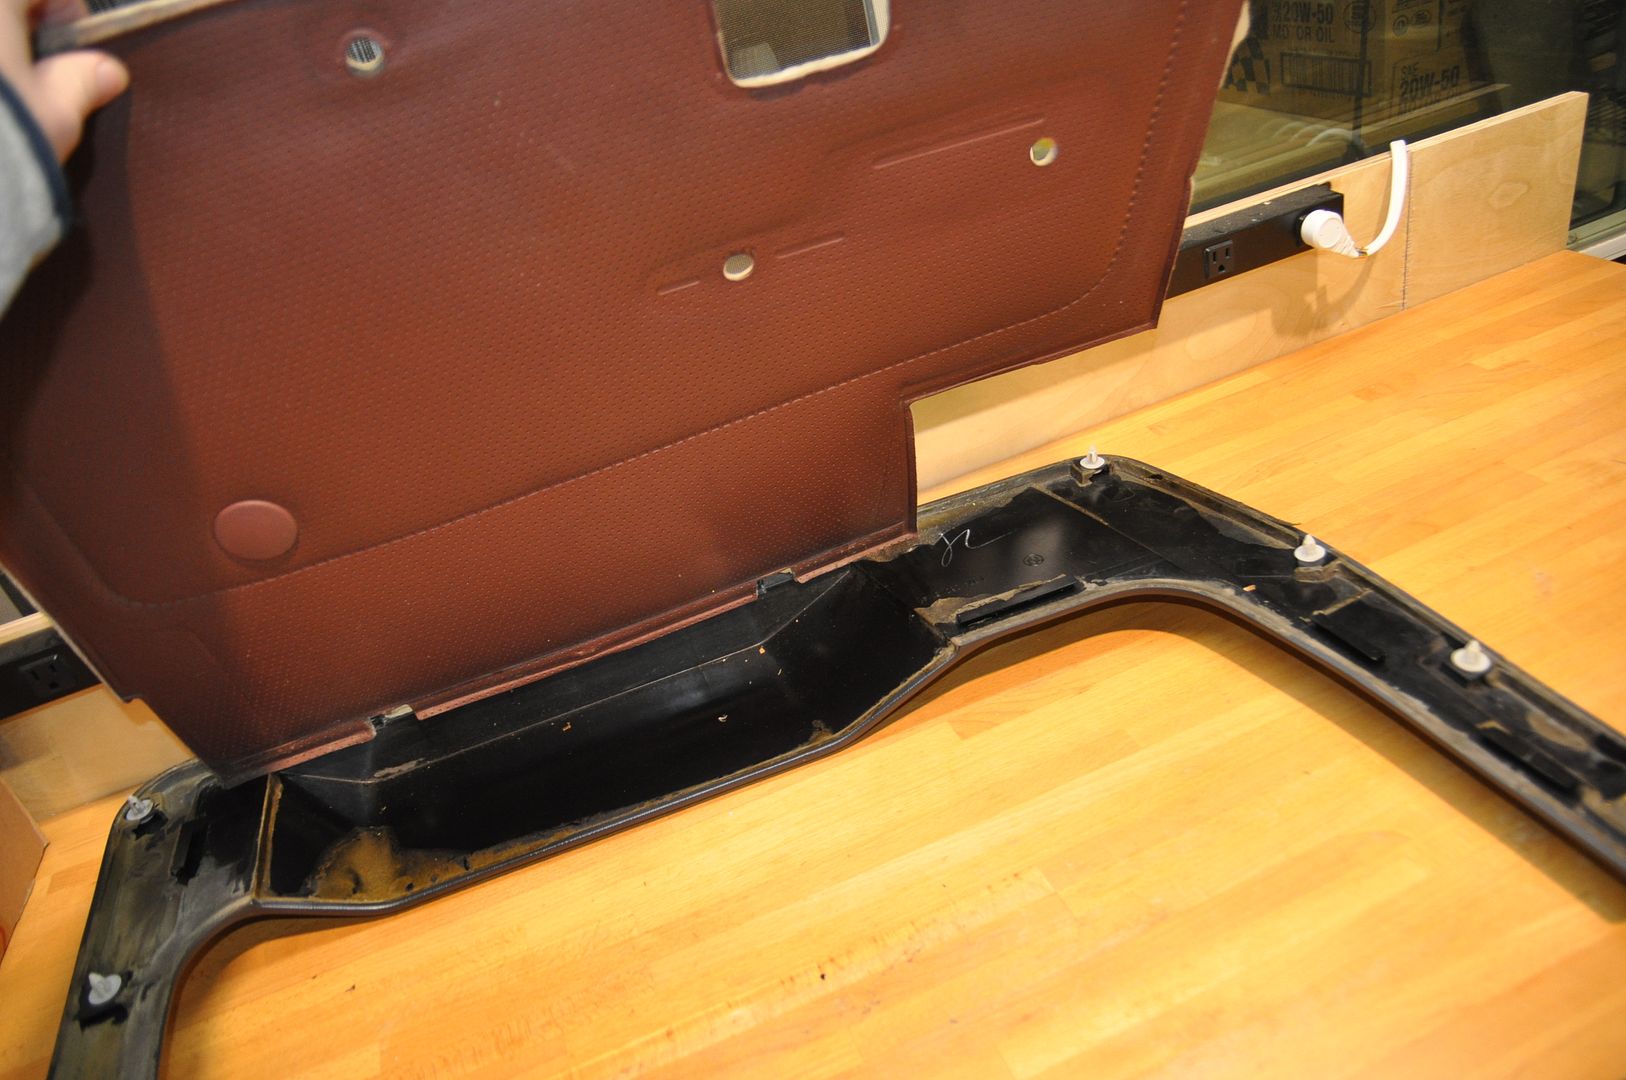
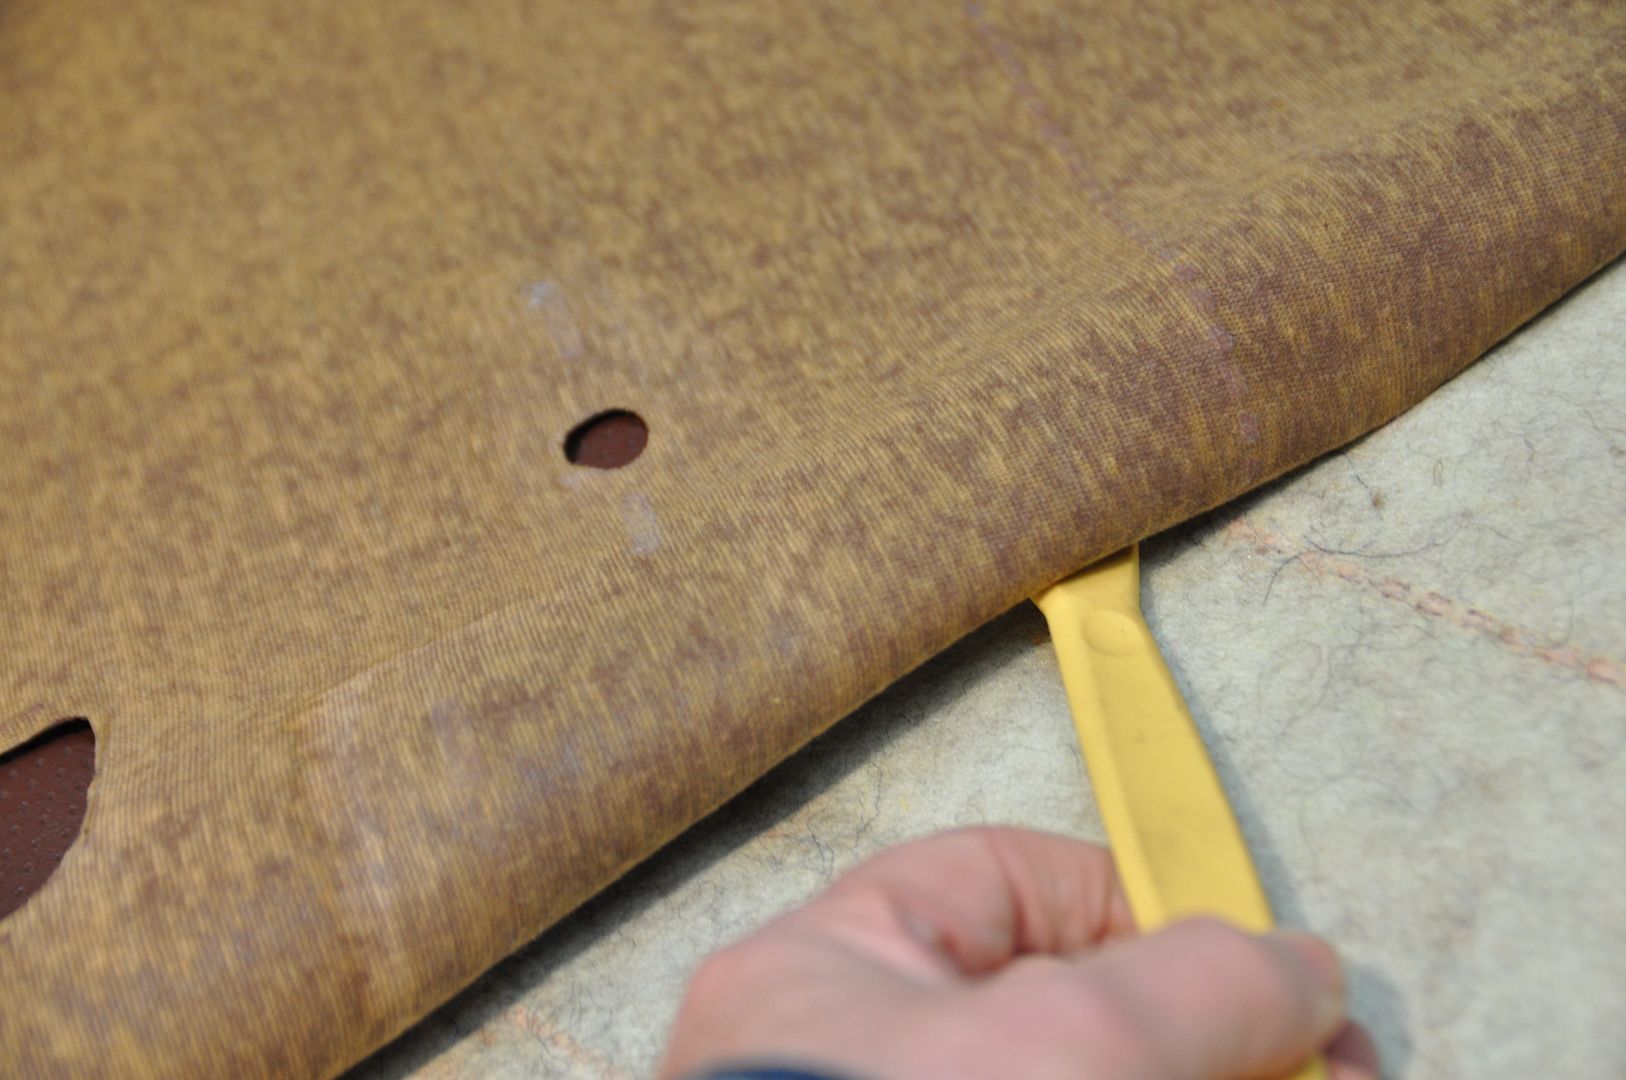
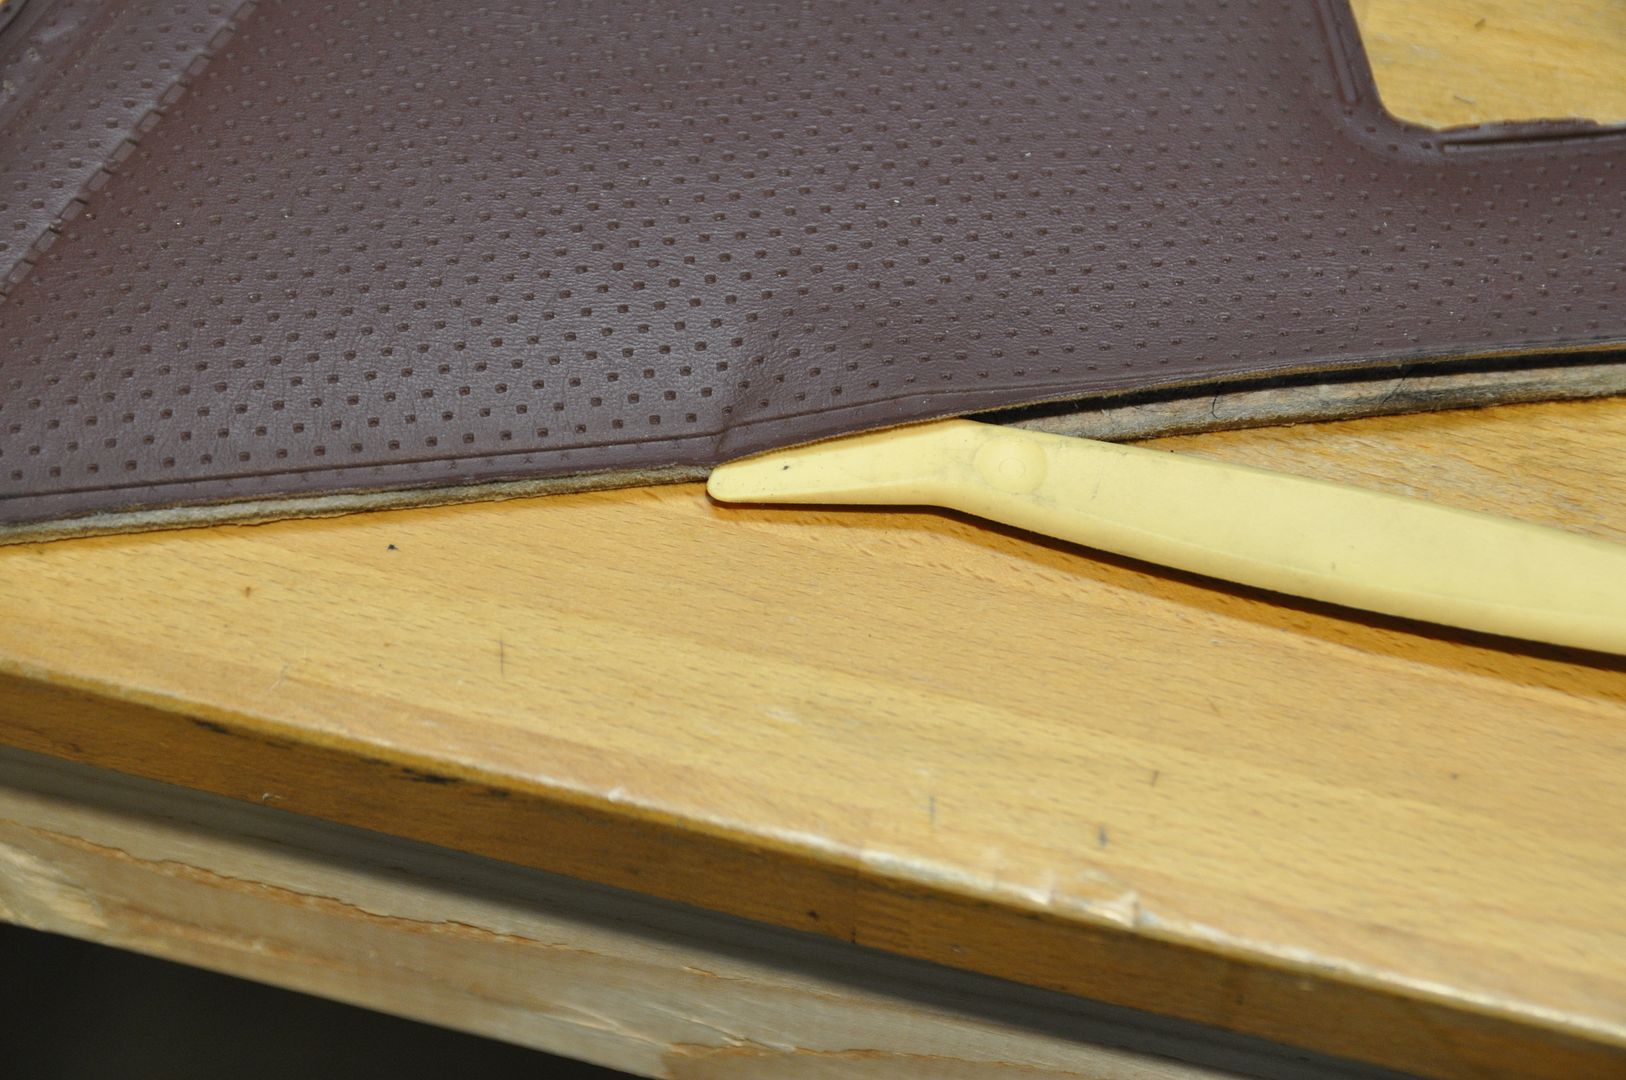
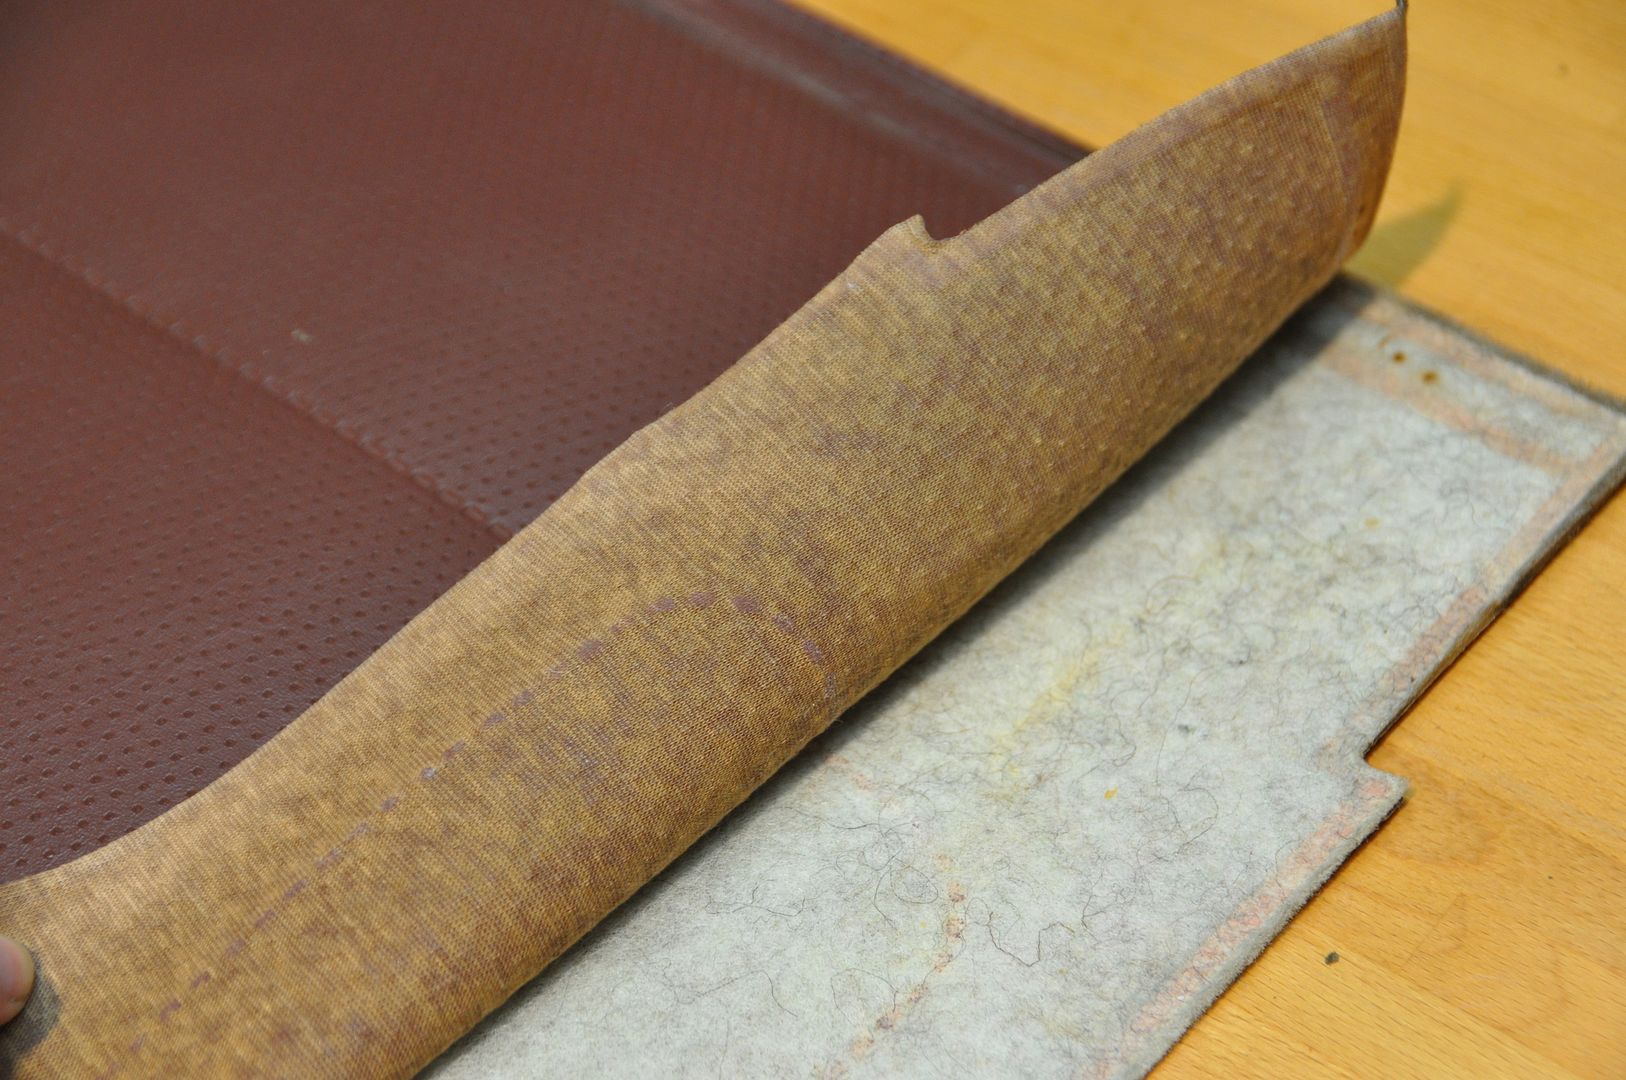
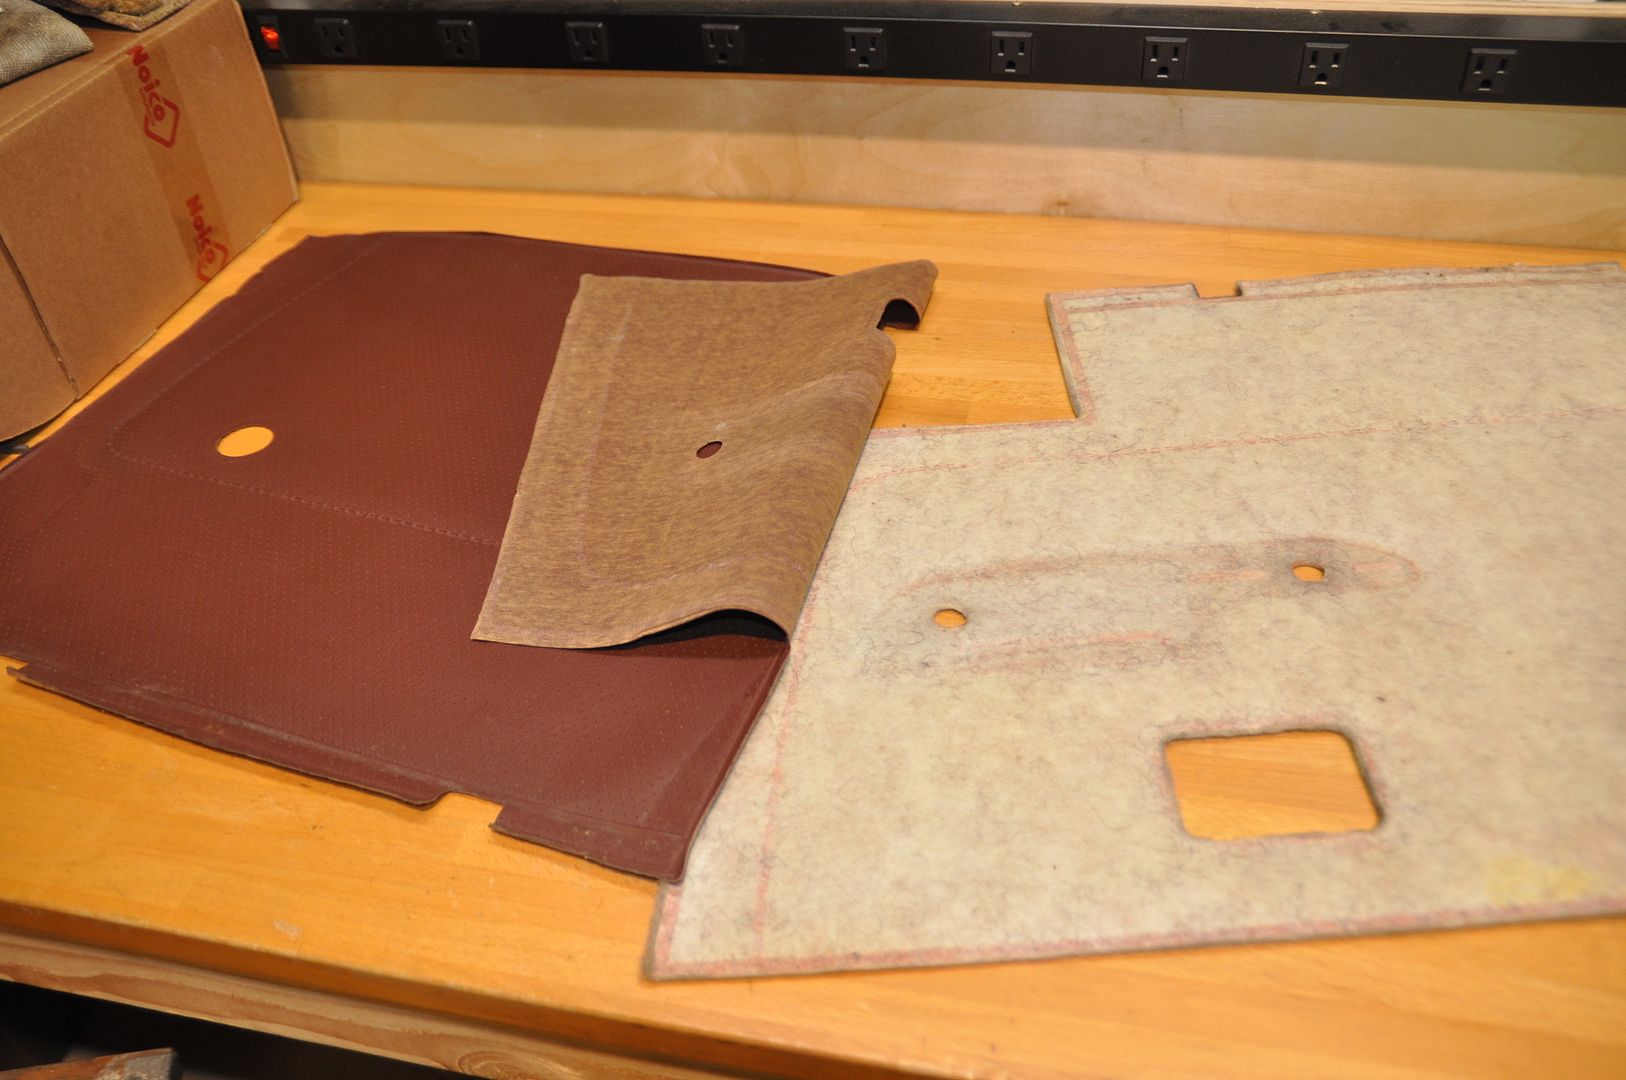
I then removed the Tarusrot vinyl covering from the Door Panels, carefully lifting and separating them from the foam and cardboard. The plastic trim tools work best, not that the 35 year old glue was putting up much resistance:
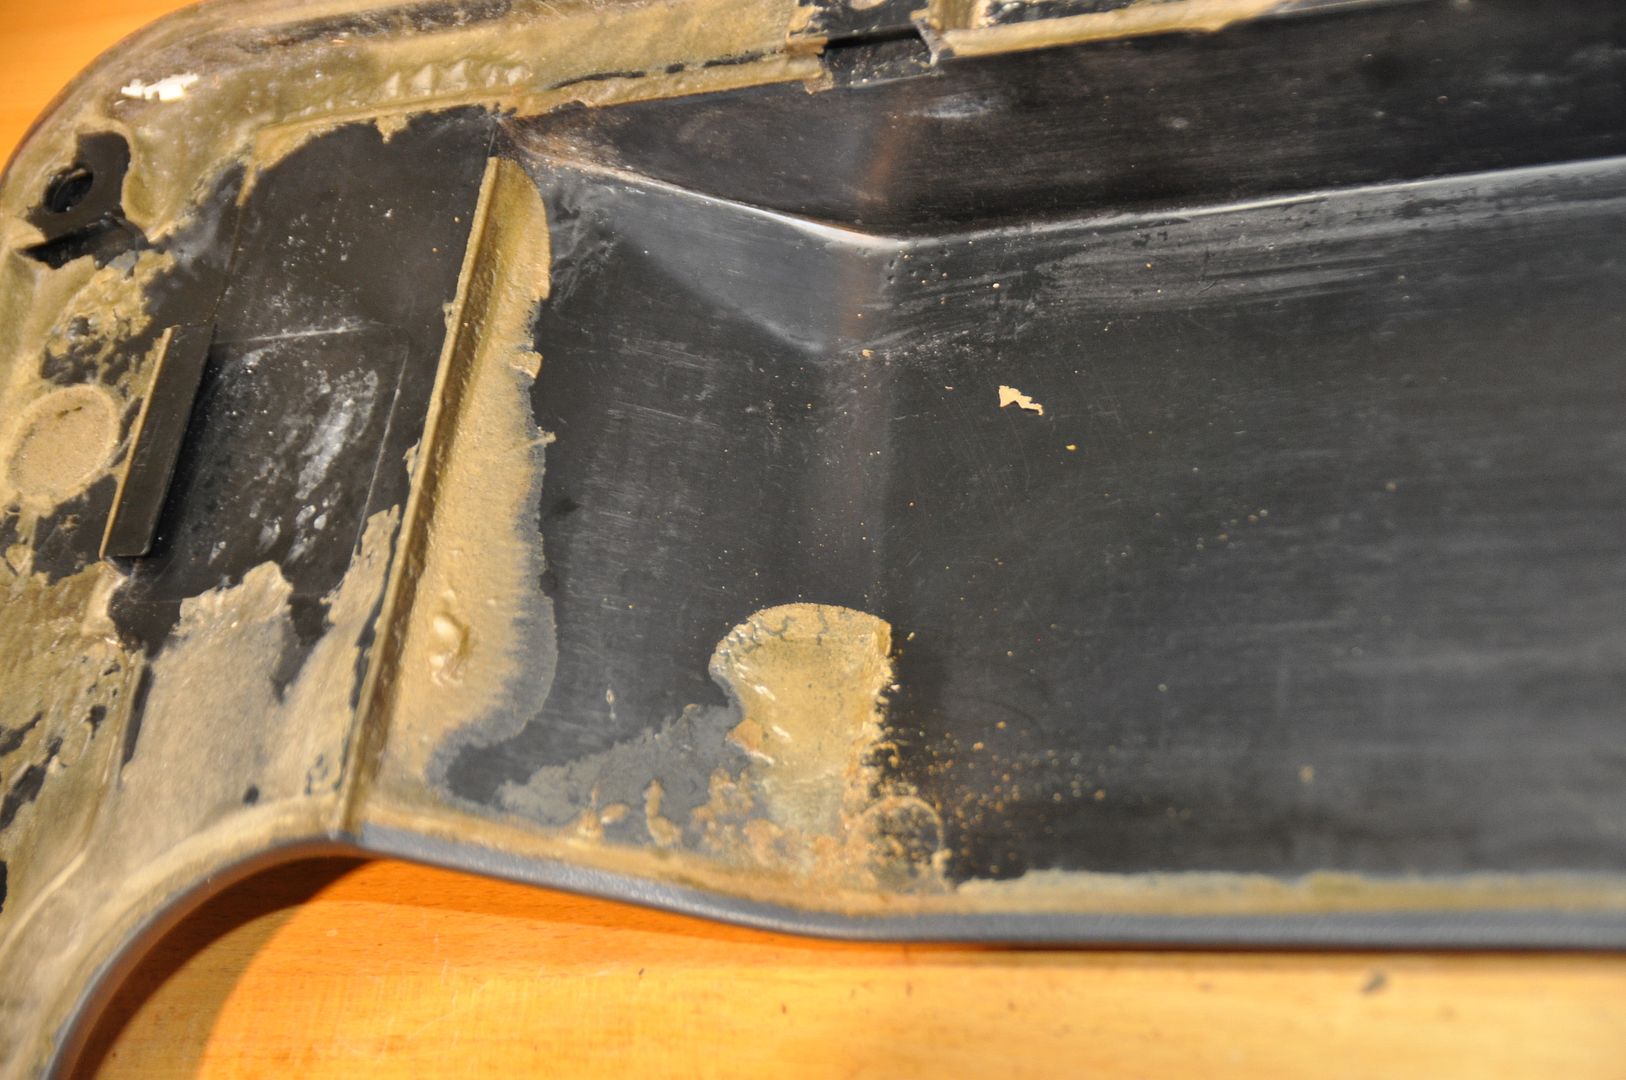
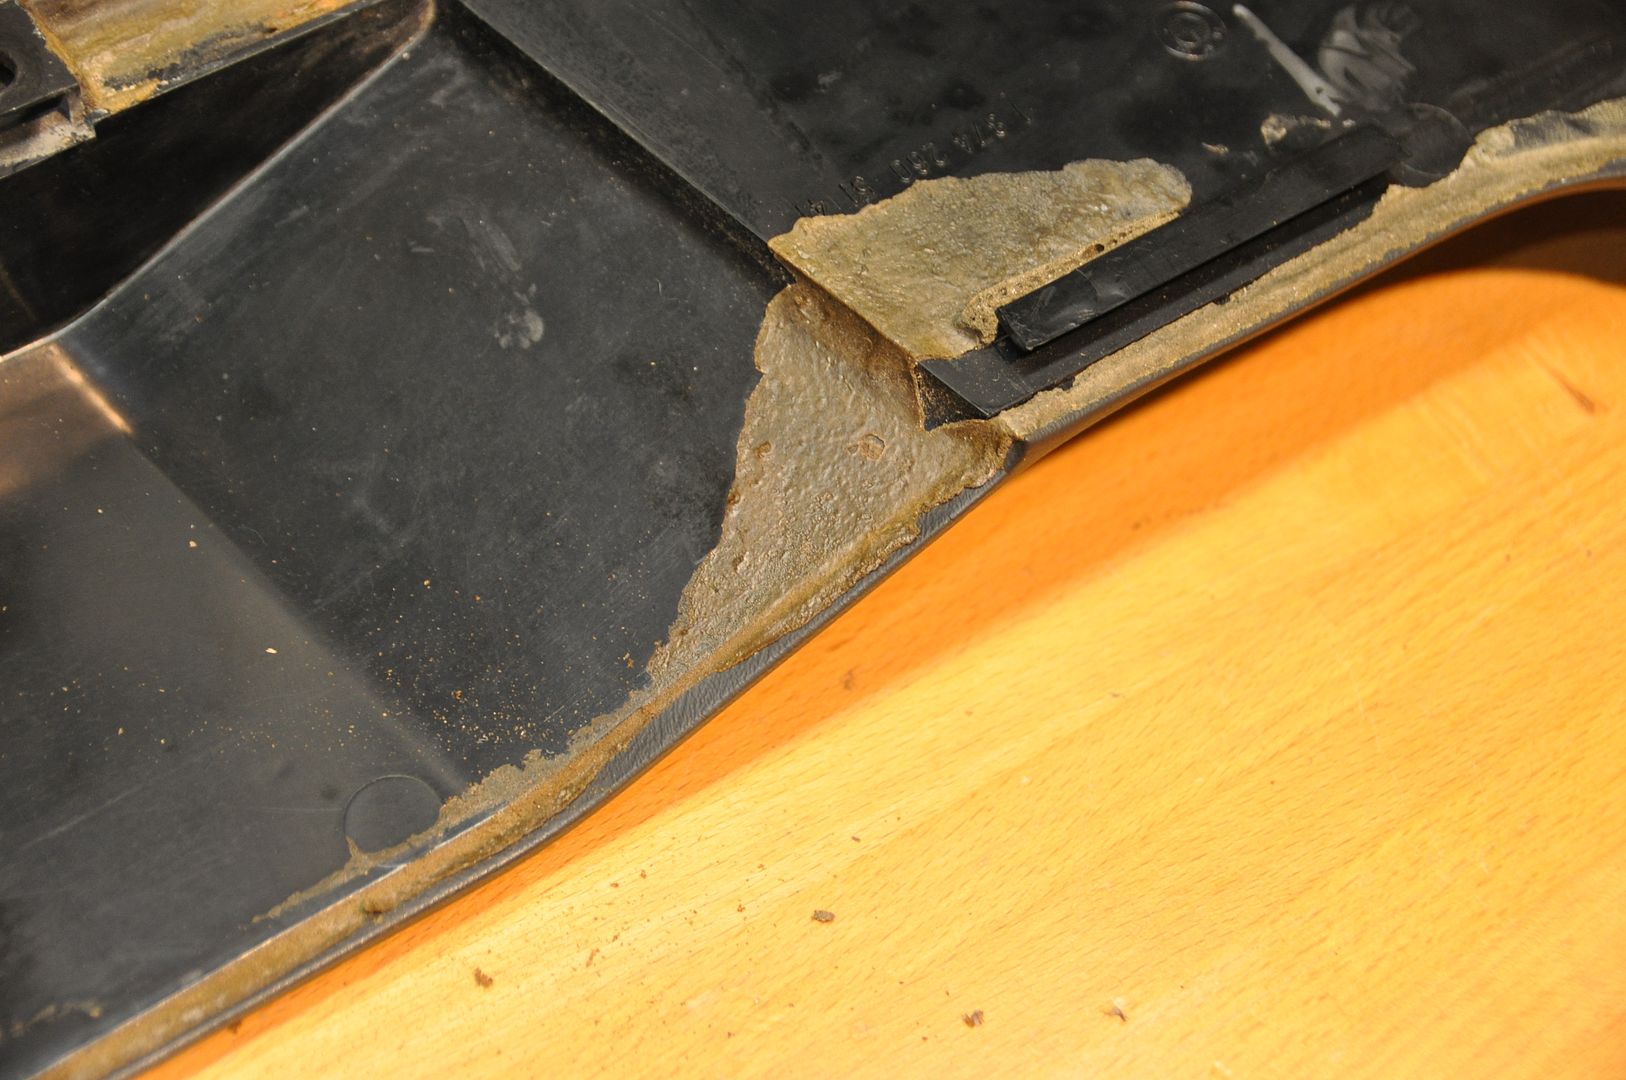
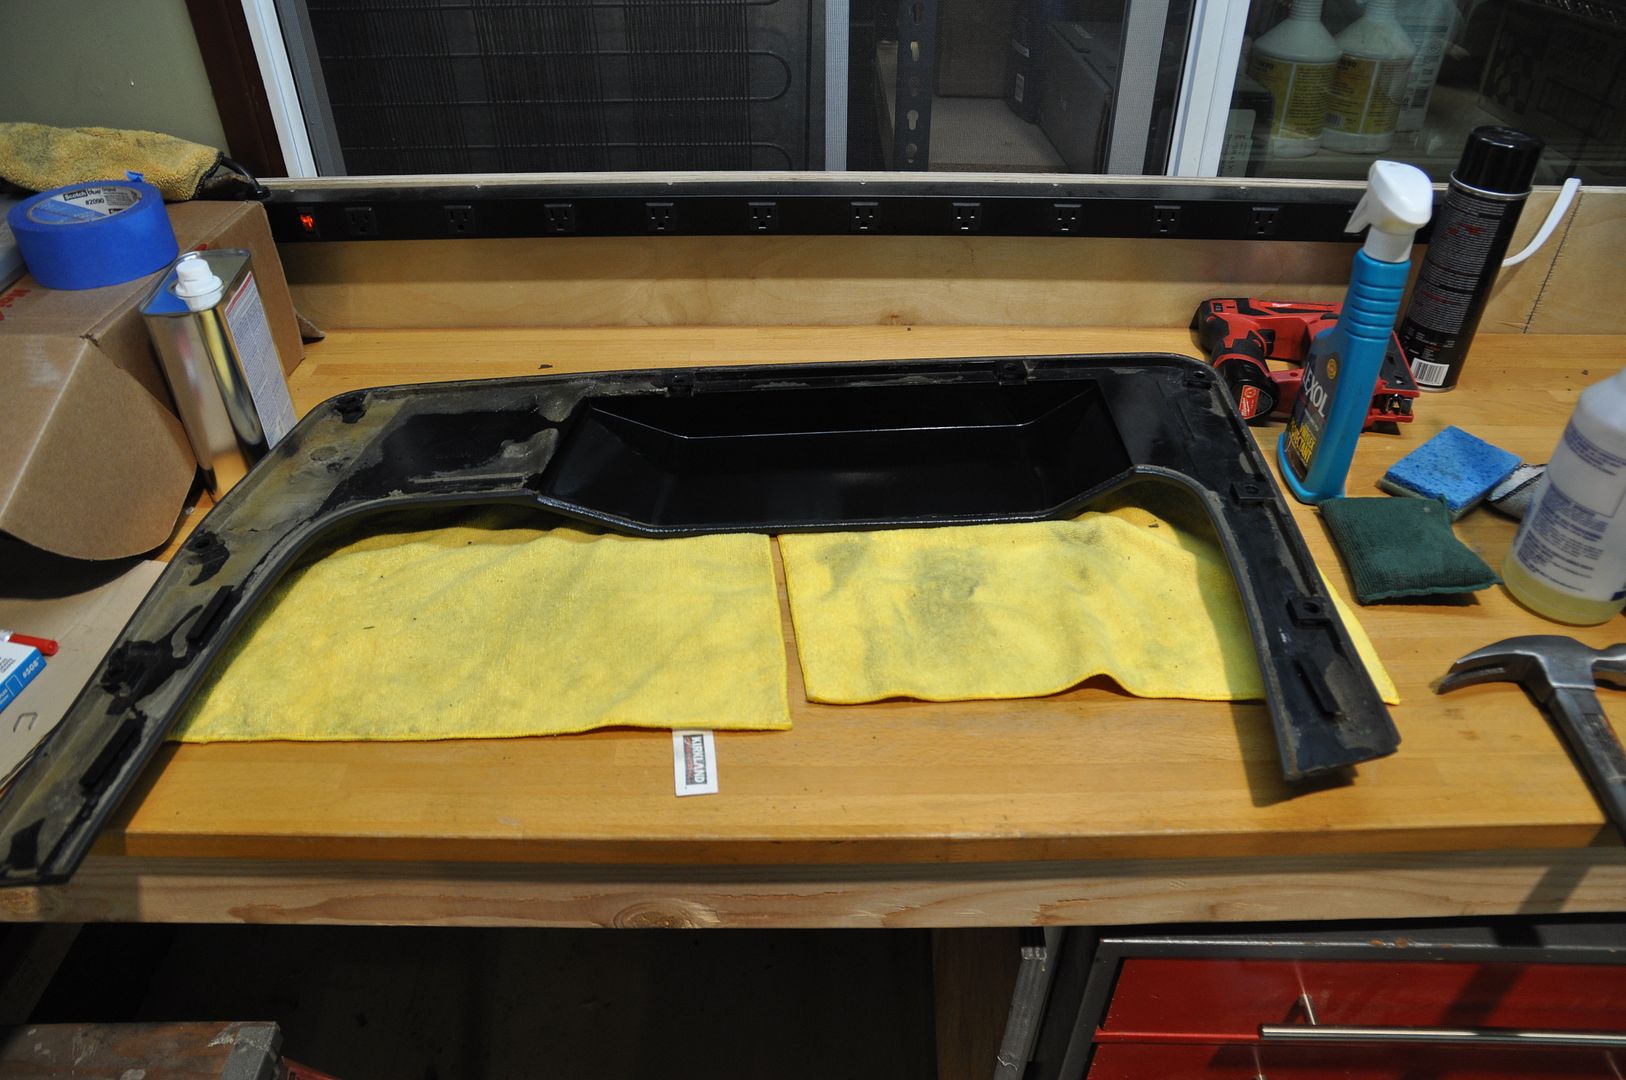
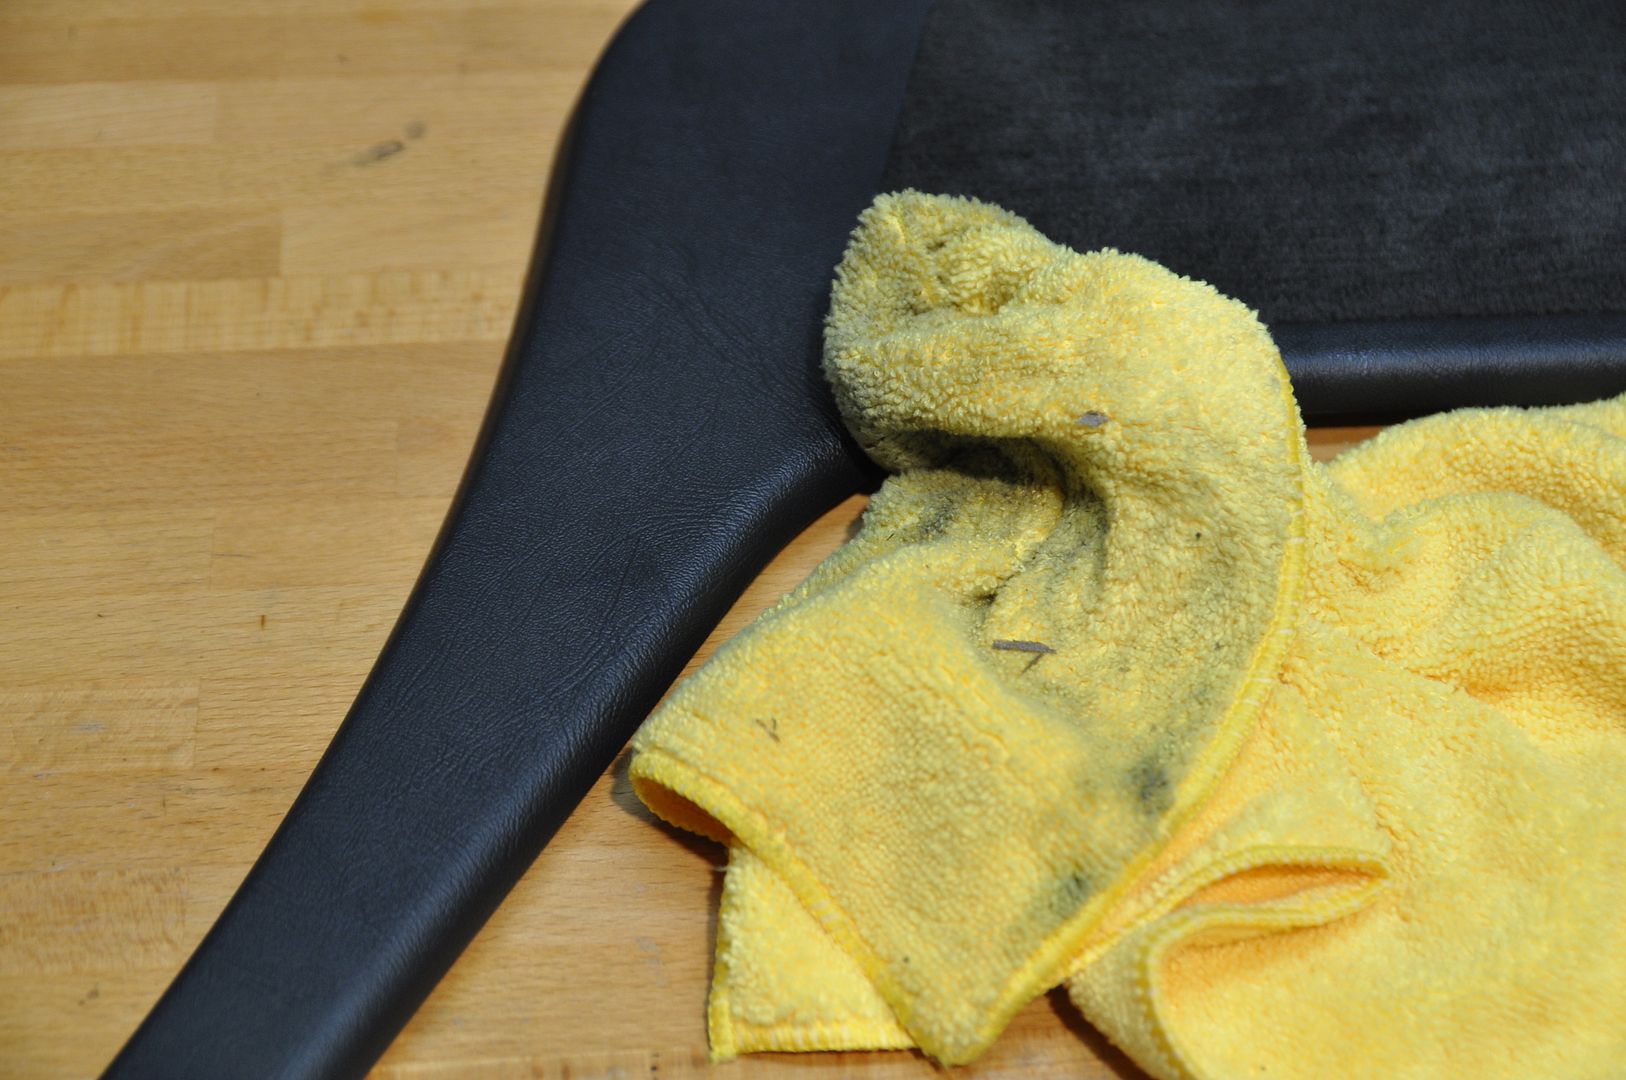
Then onto cleaning up the plastic frames. I swear these were assembled on either Monday for Friday afternoon; the amount of over-glue and general sloppiness was astounding:
Re-Assembly:
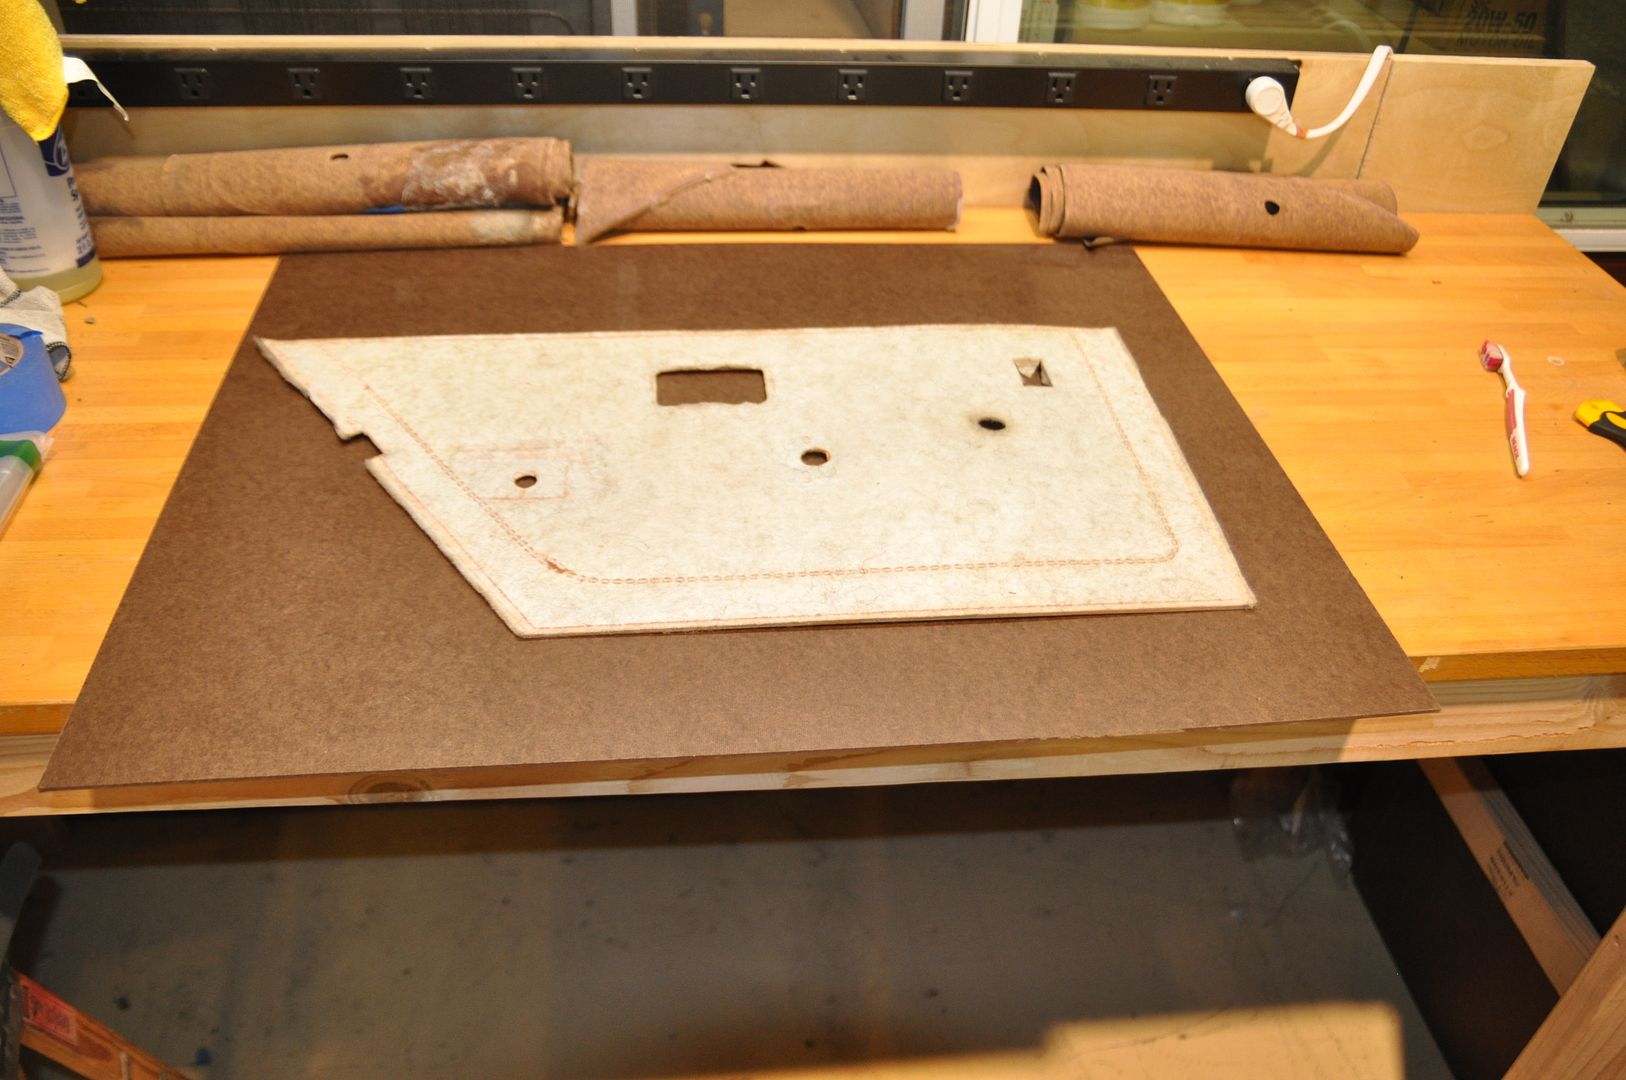
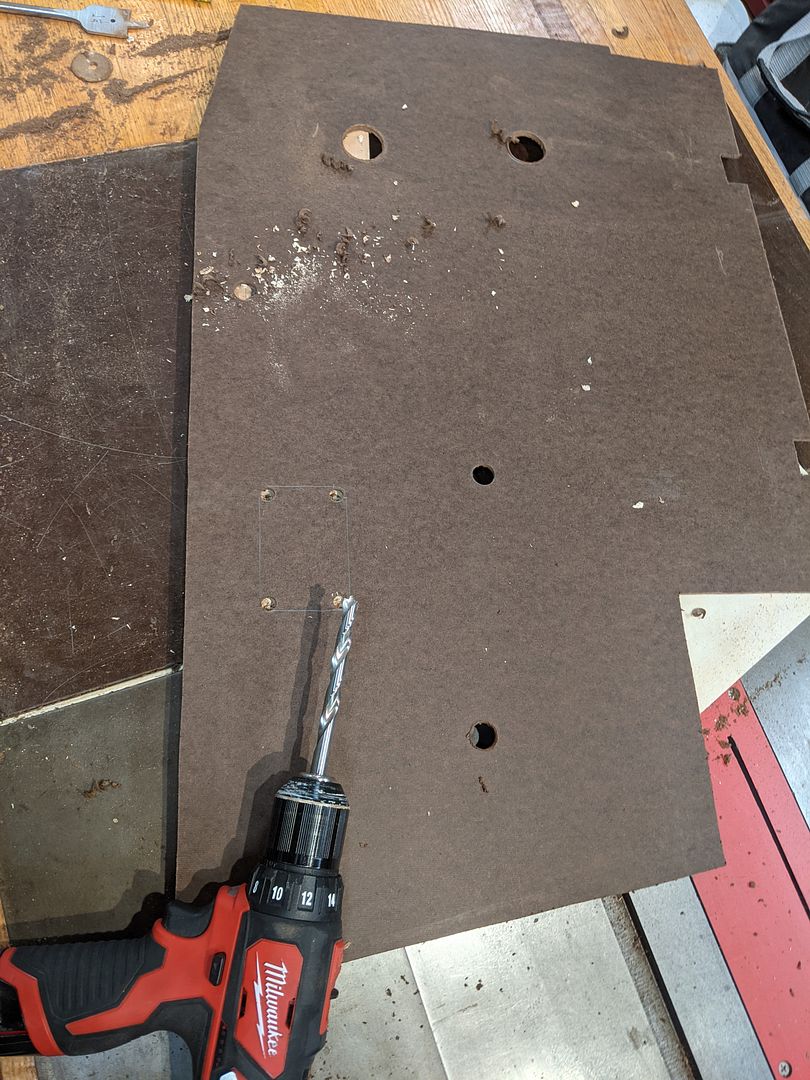
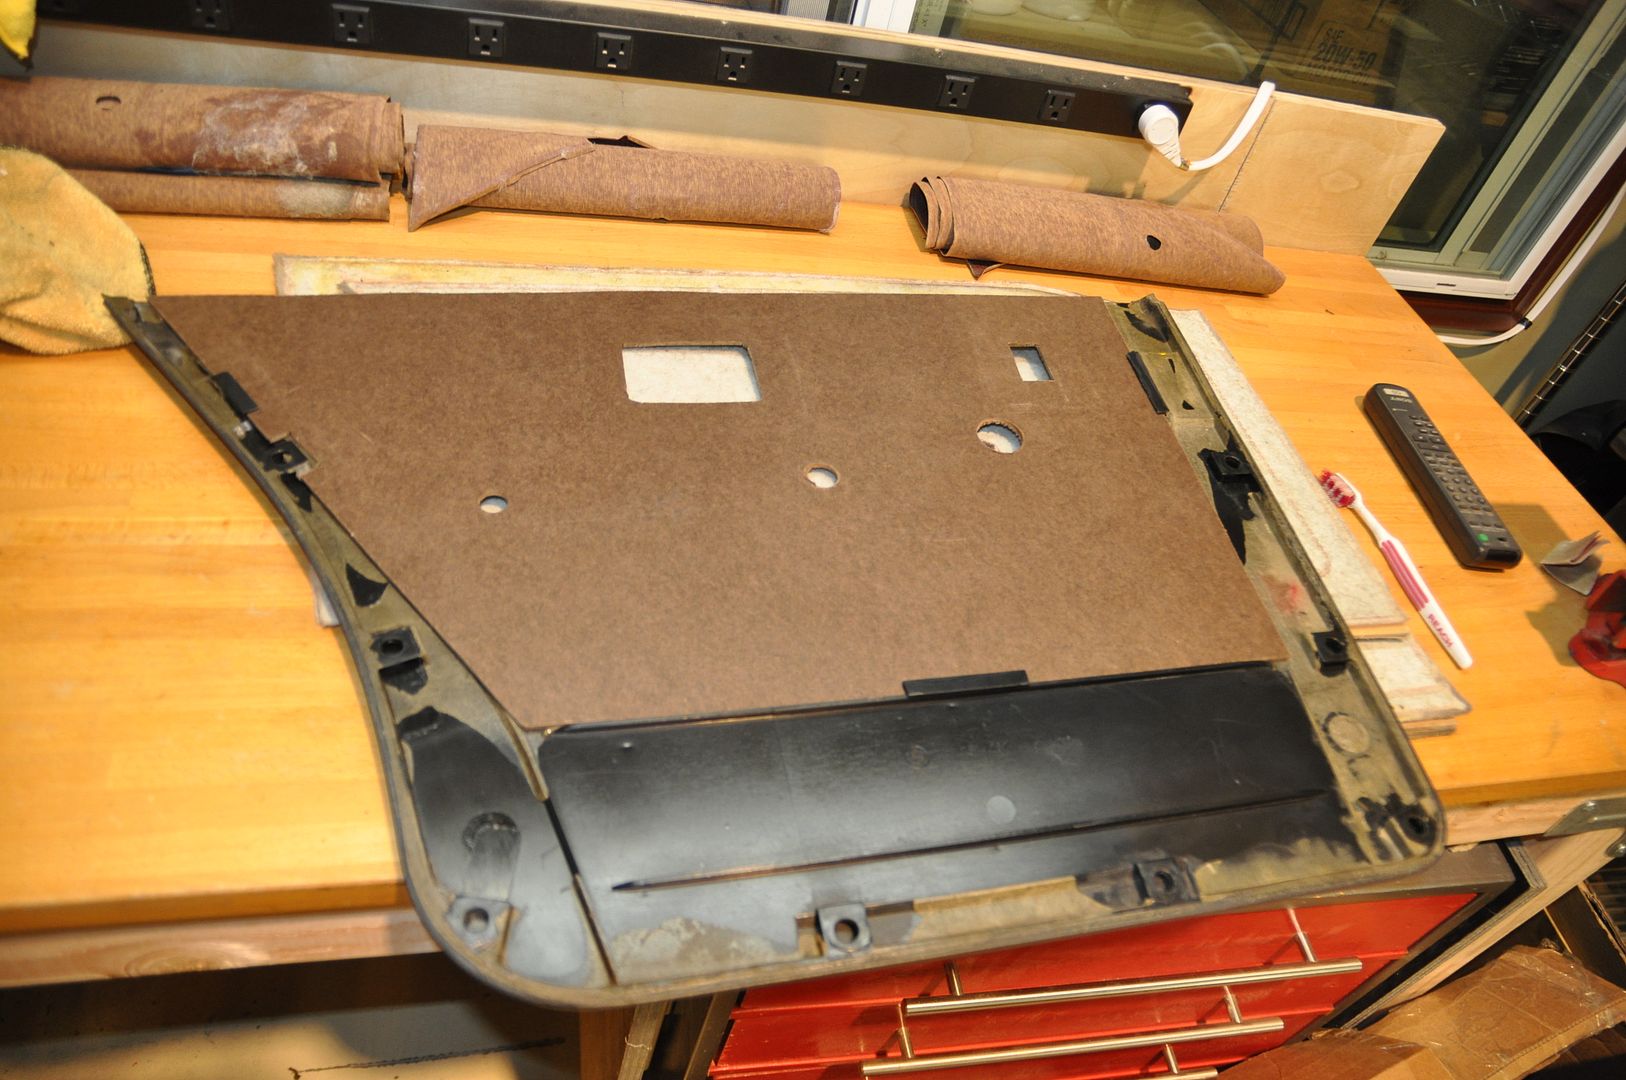
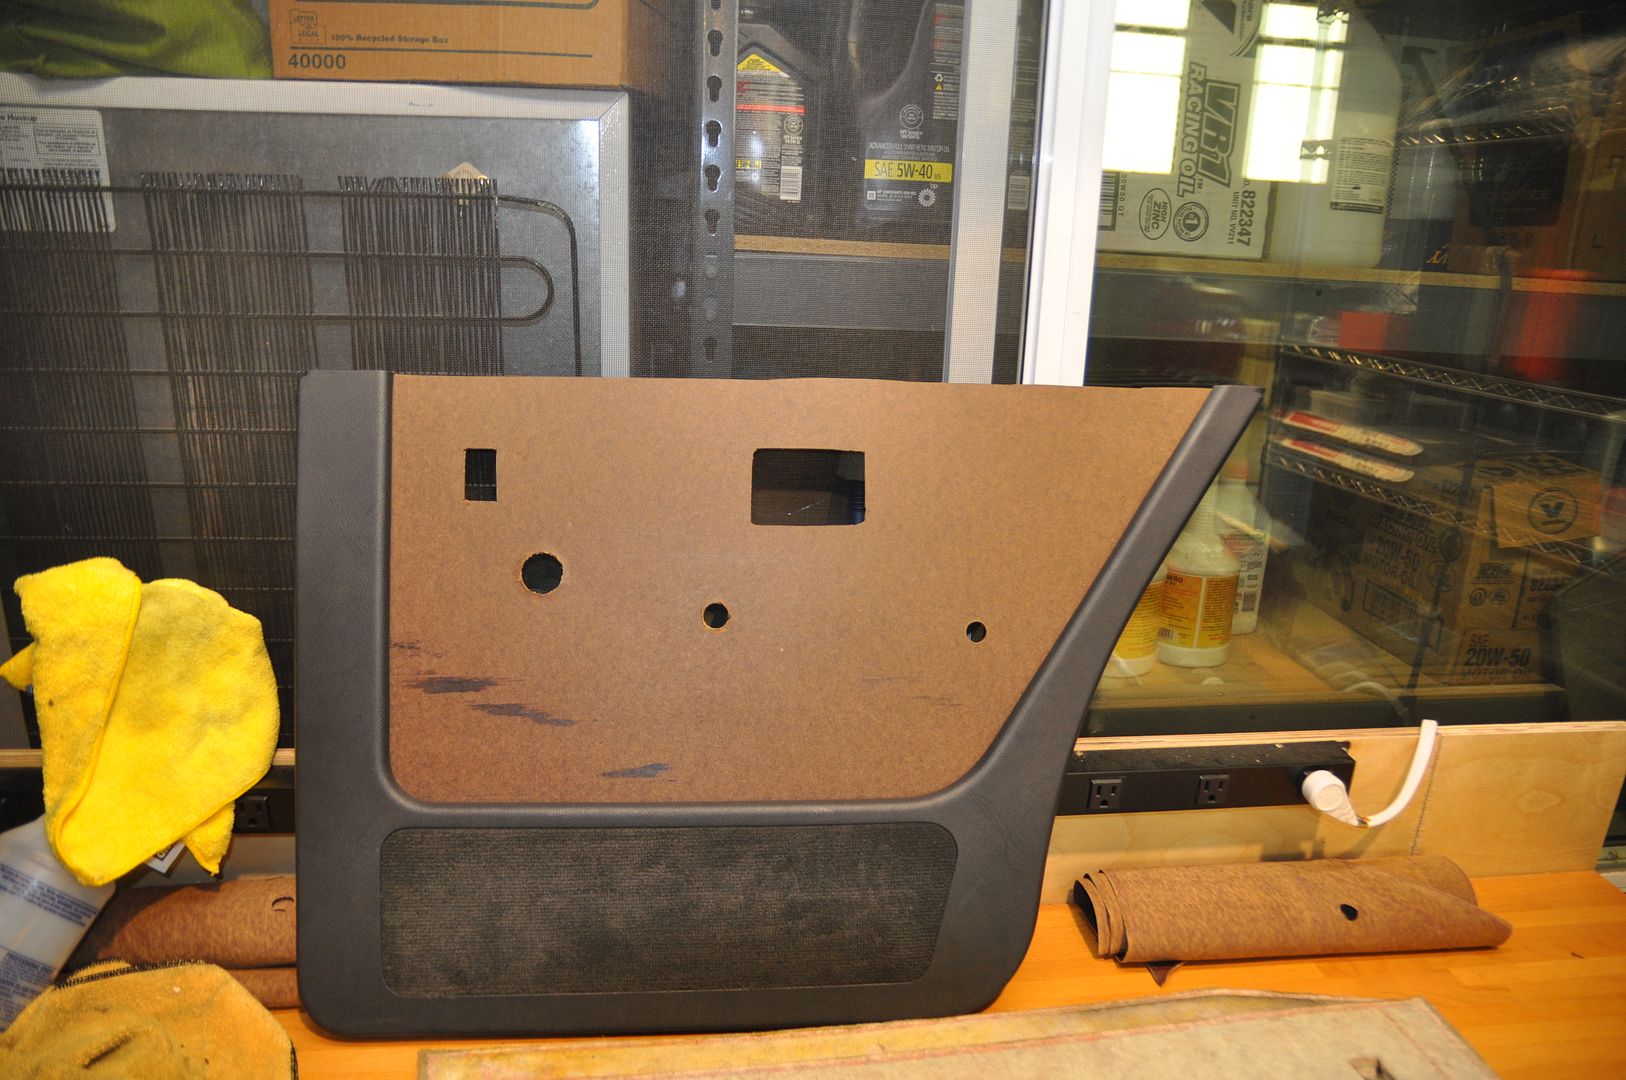
The first step was to fabricate new backer panels. I decided quickly on 1/8” Tempered Hardboard (or Masonite). The density, hardness and dimensional stability were deciding factors in its’ selection. We have used this stuff in acoustic wall assemblies for houses and studios, so I took advantage of its’ density to hopefully improve the cabin environment. I also considered 1/8” Birch Bender Board but wanted the rigidity and density the Hardboard offered instead. On top of that, the Tempered is impregnated with a moisture resistant treatment which was an added bonus considering where these go and their potential to get wet. Templated and cut easily with a jigsaw and whole drilled out:
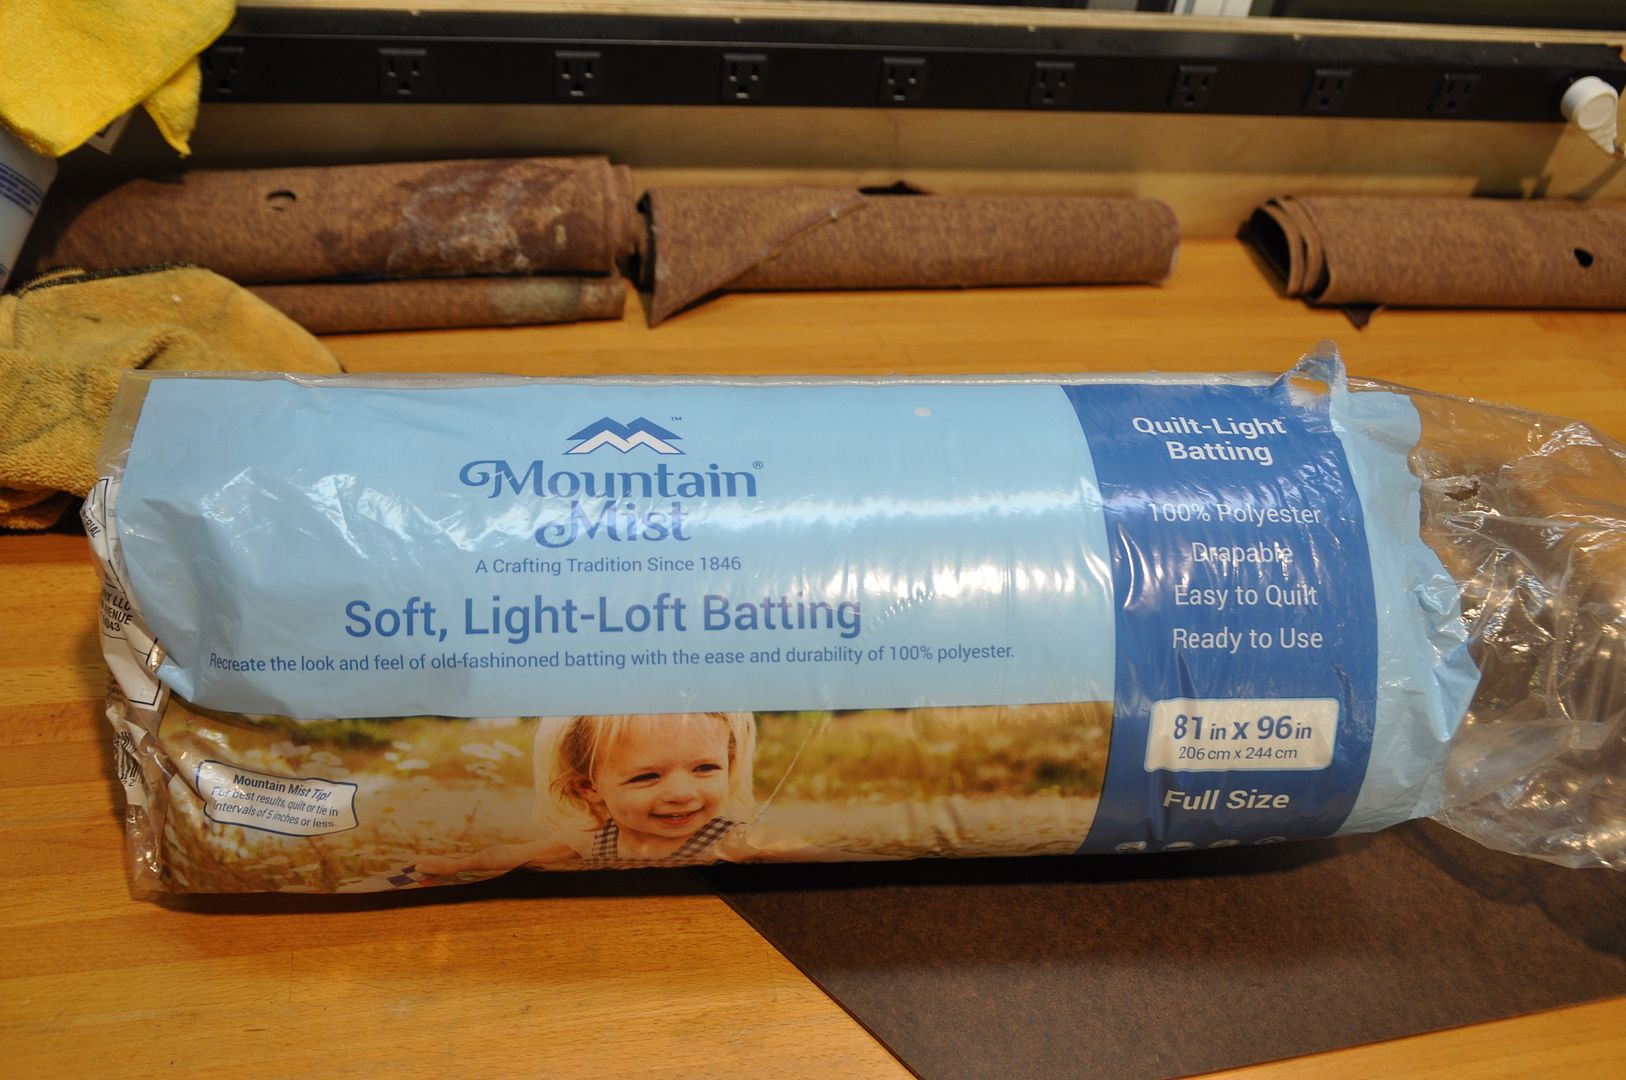
The existing poly-foam batting was only about another +/-3mm or 1/8” and only there to provide a bit of “loft” or softness behind the vinyl. I found a suitable replacement in this stuff used by quilters:
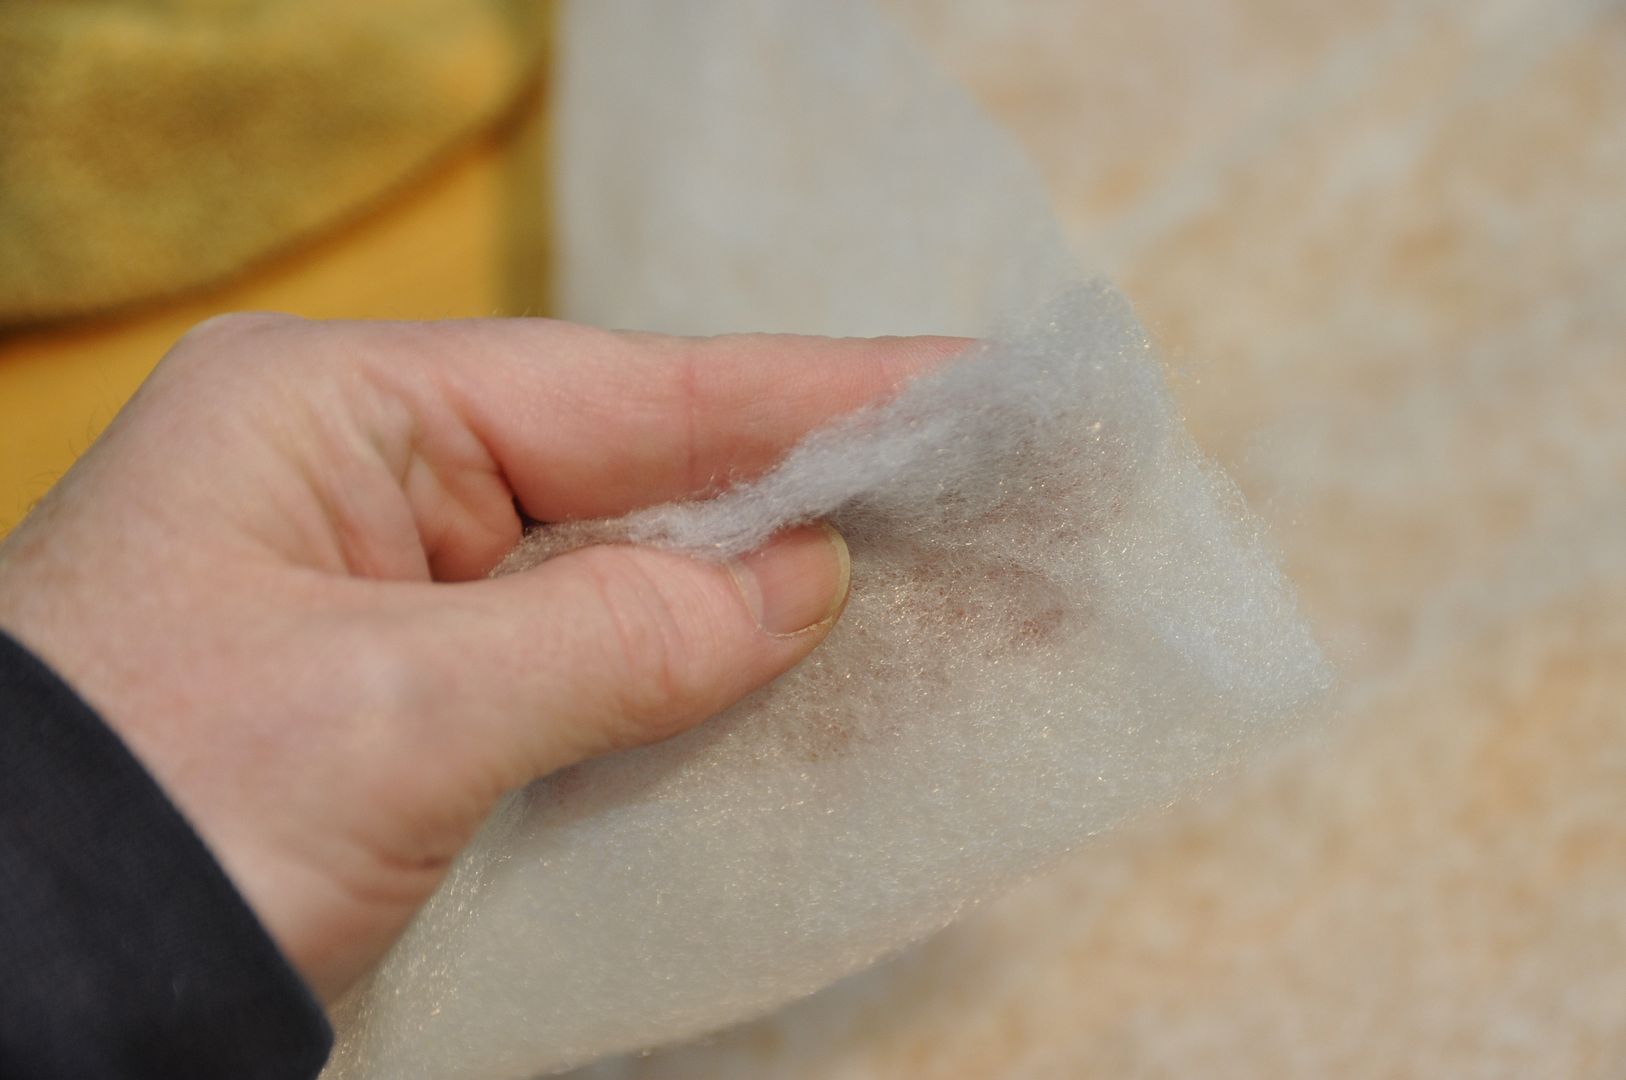
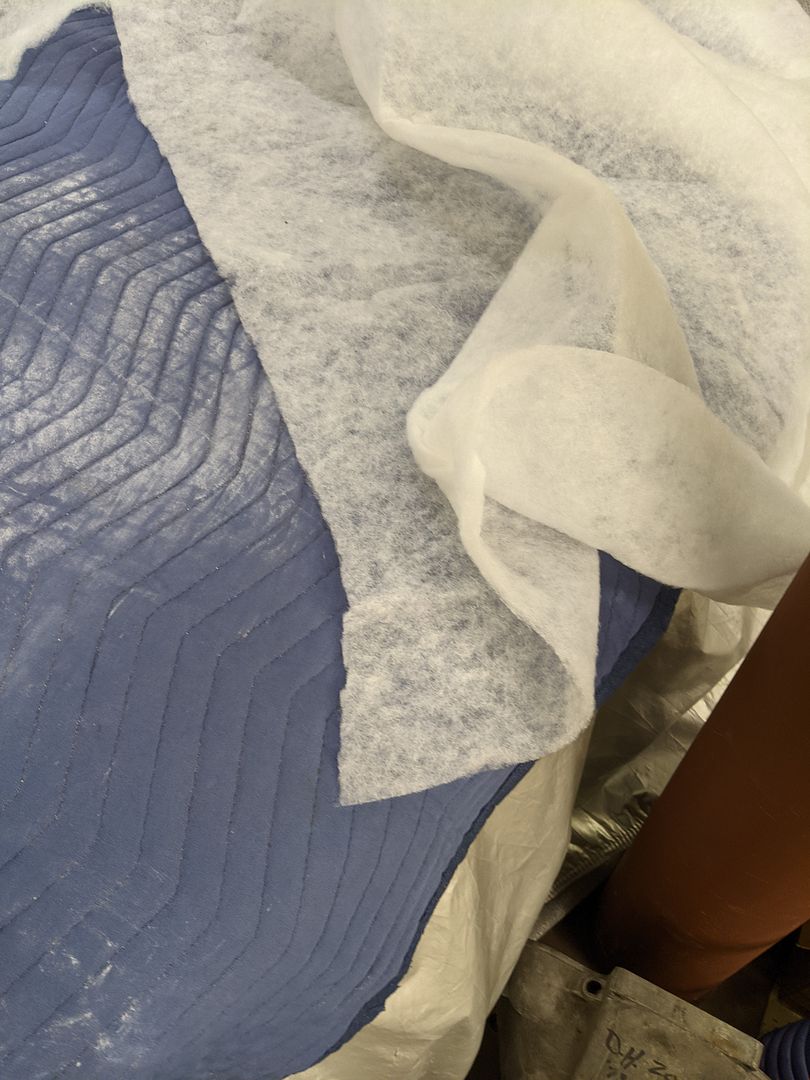
Templated and cut easily with scissors then spray adhered to the backer panels:
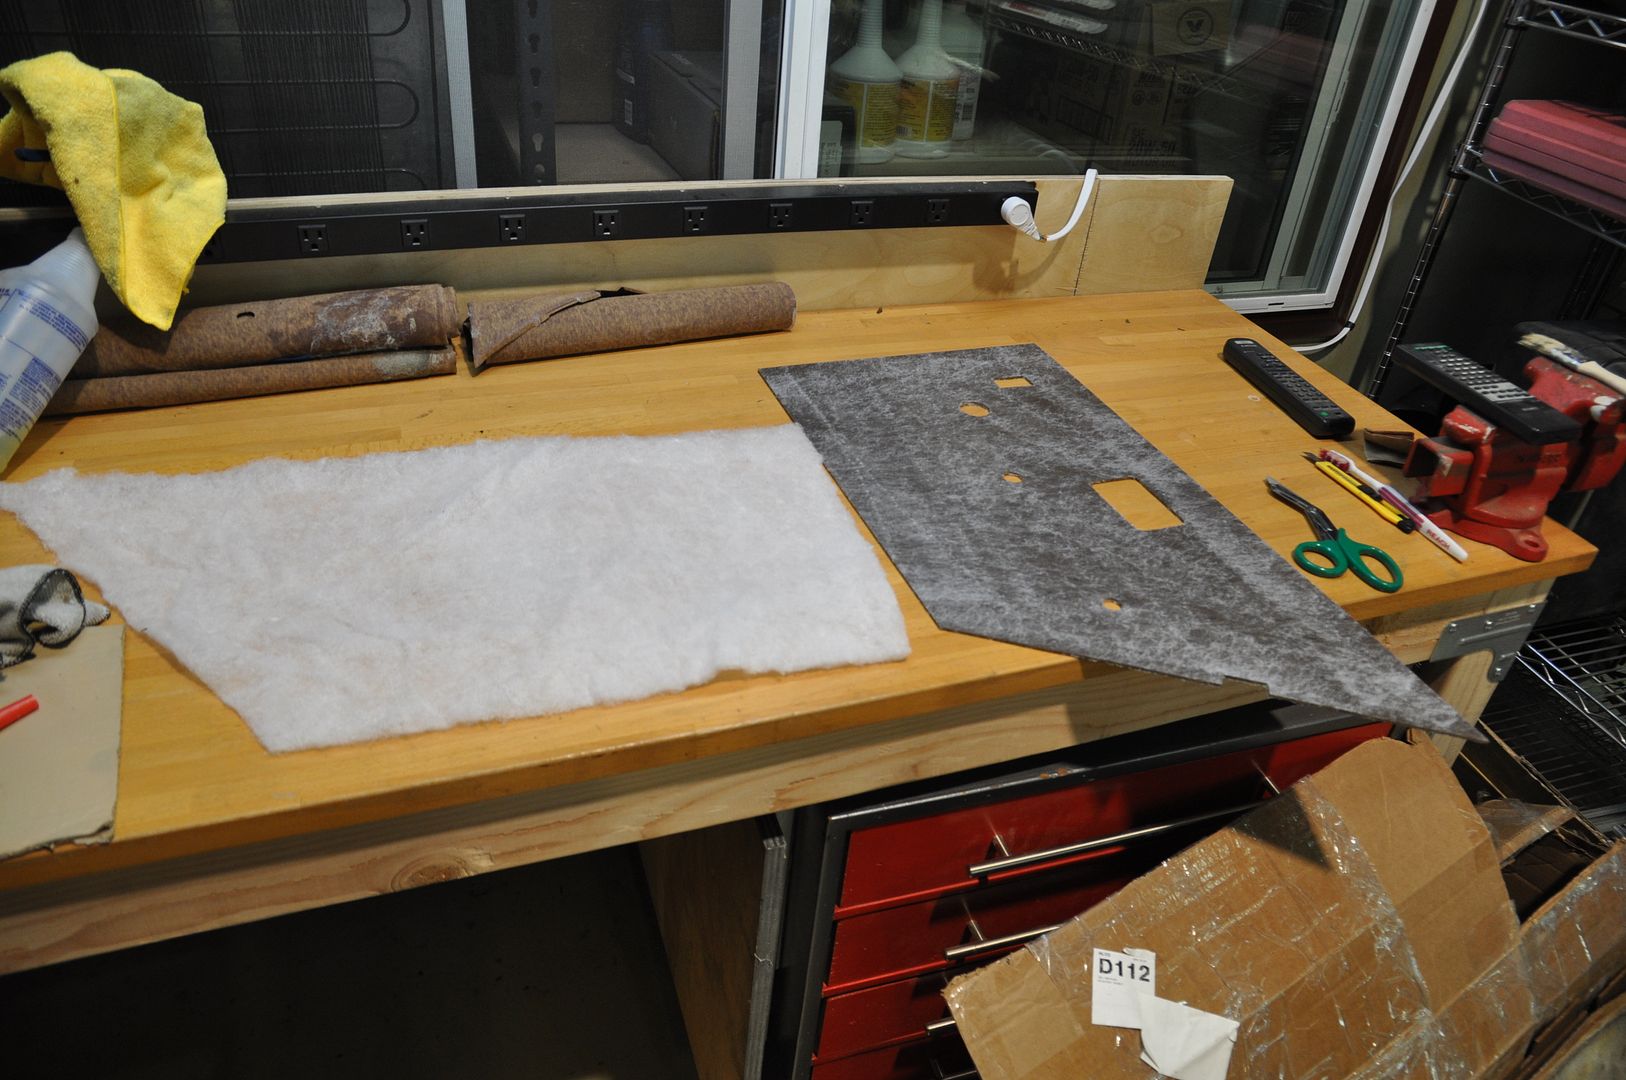
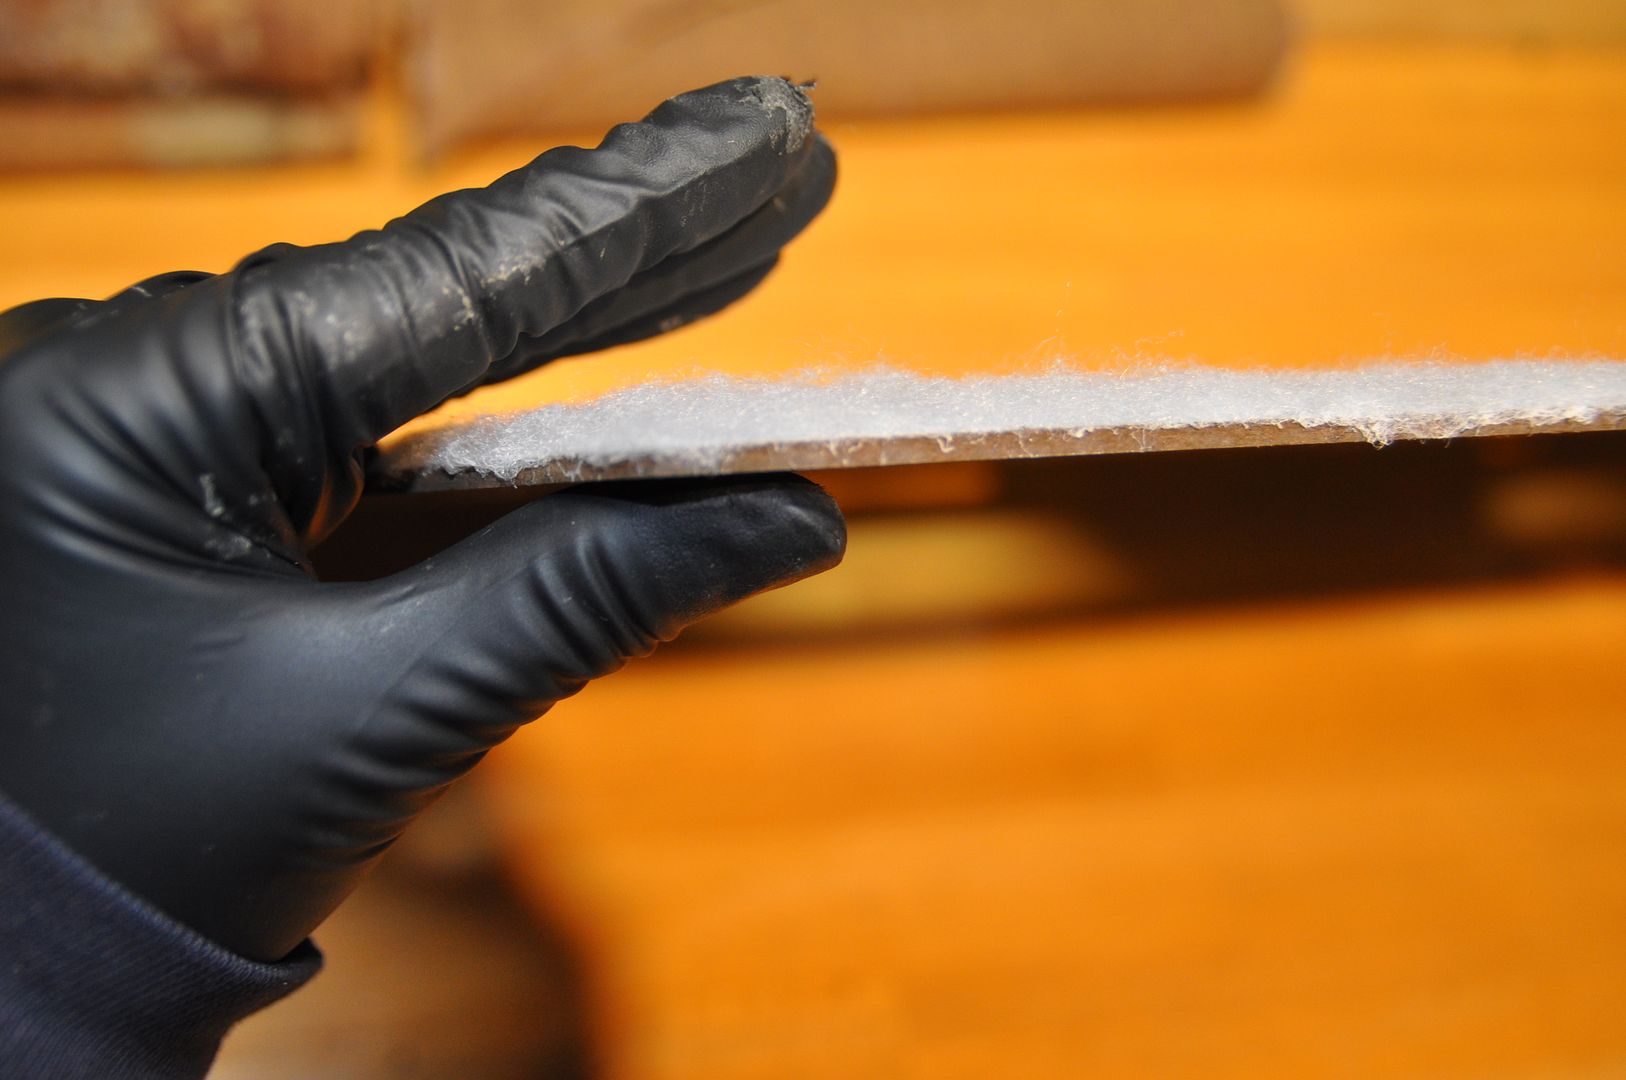
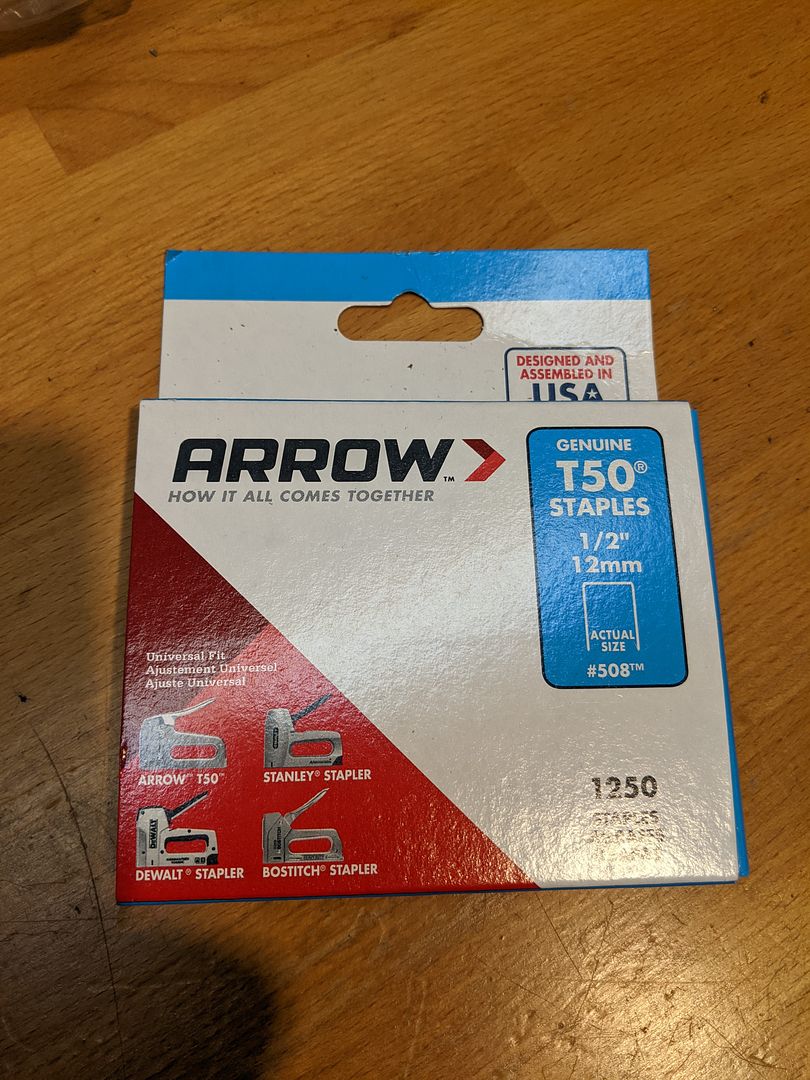
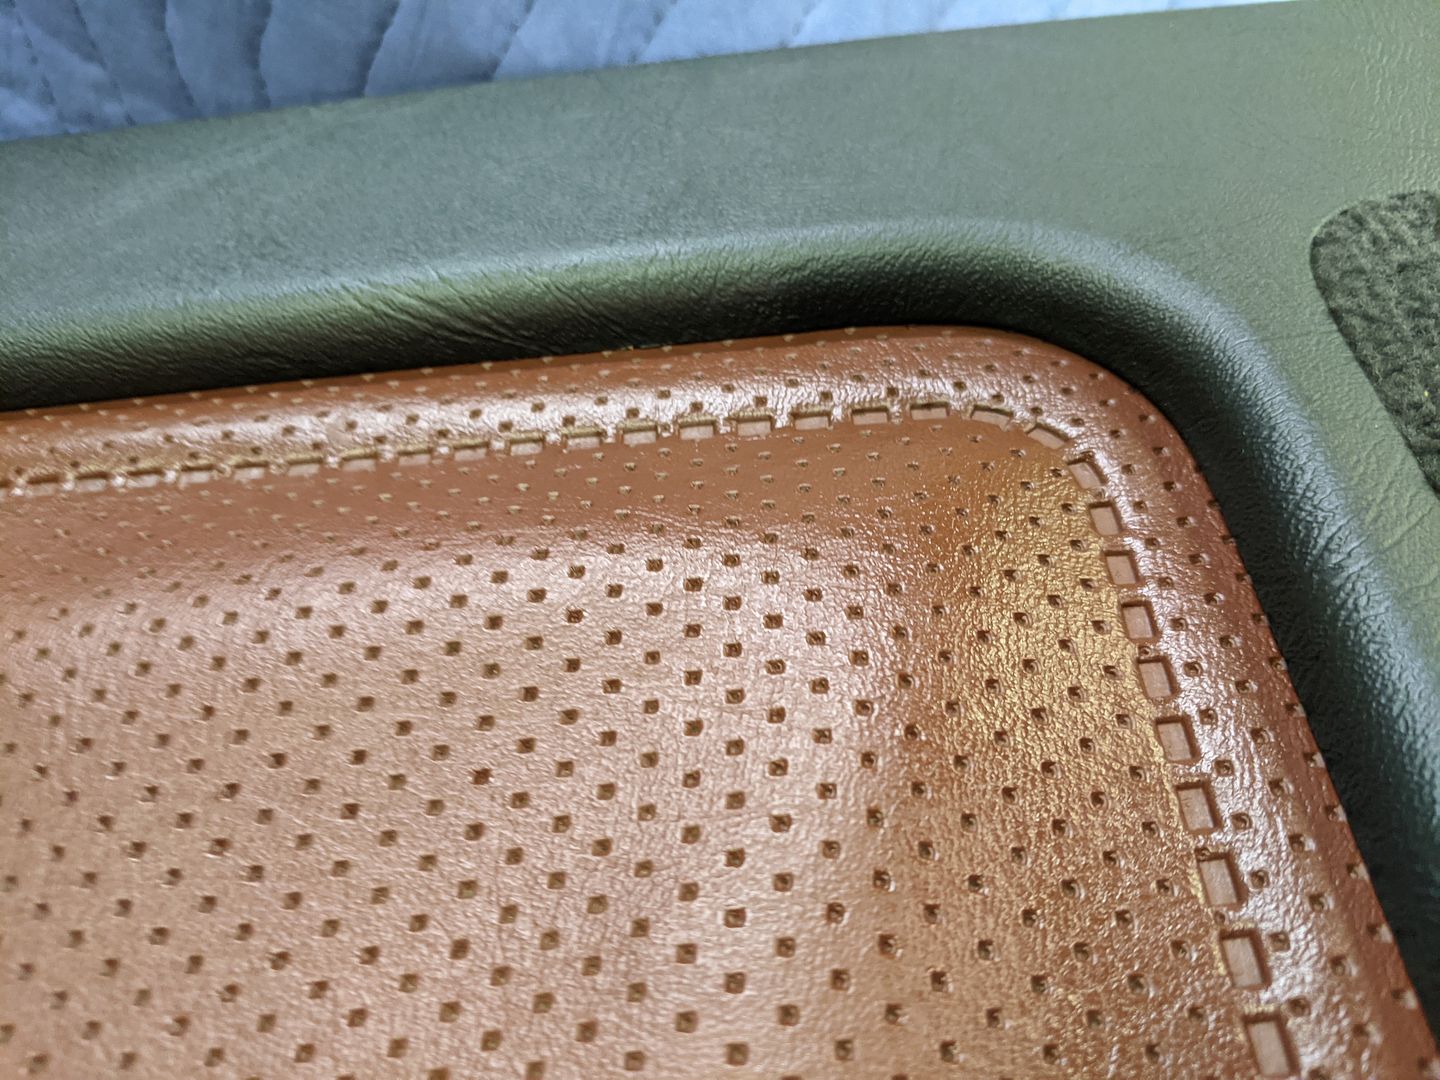
Now the trickier part: gluing the Taurus vinyl down to the backer panels. It seems that BMW used some kind of heat/vacuum press to bond all this together since the parts of the vinyl that are adhered to the actual cardboard backer panels are the edges and the “stitched”-looking seams running through the covering. The rest of the vinyl is spray glued to the foam batting. This creates the quilted look of the panels. Since I don’t have a heat press, I opted to use super glue along these edges and seams to recreate this effect. This was where choosing the poly foam batting came in since its’ light construction allowed the super glue to pass through it to the Hardboard (this mostly worked). Otherwise I would have chosen a more dense open or closed cell foam that would have smoothed out the whole vinyl covering (not to mention it would have been one more acoustic abatement layer). But I stuck with recreating the OEM look (especially one 35 years old). Assembly was pretty easy and went fast especially with the power stapler.
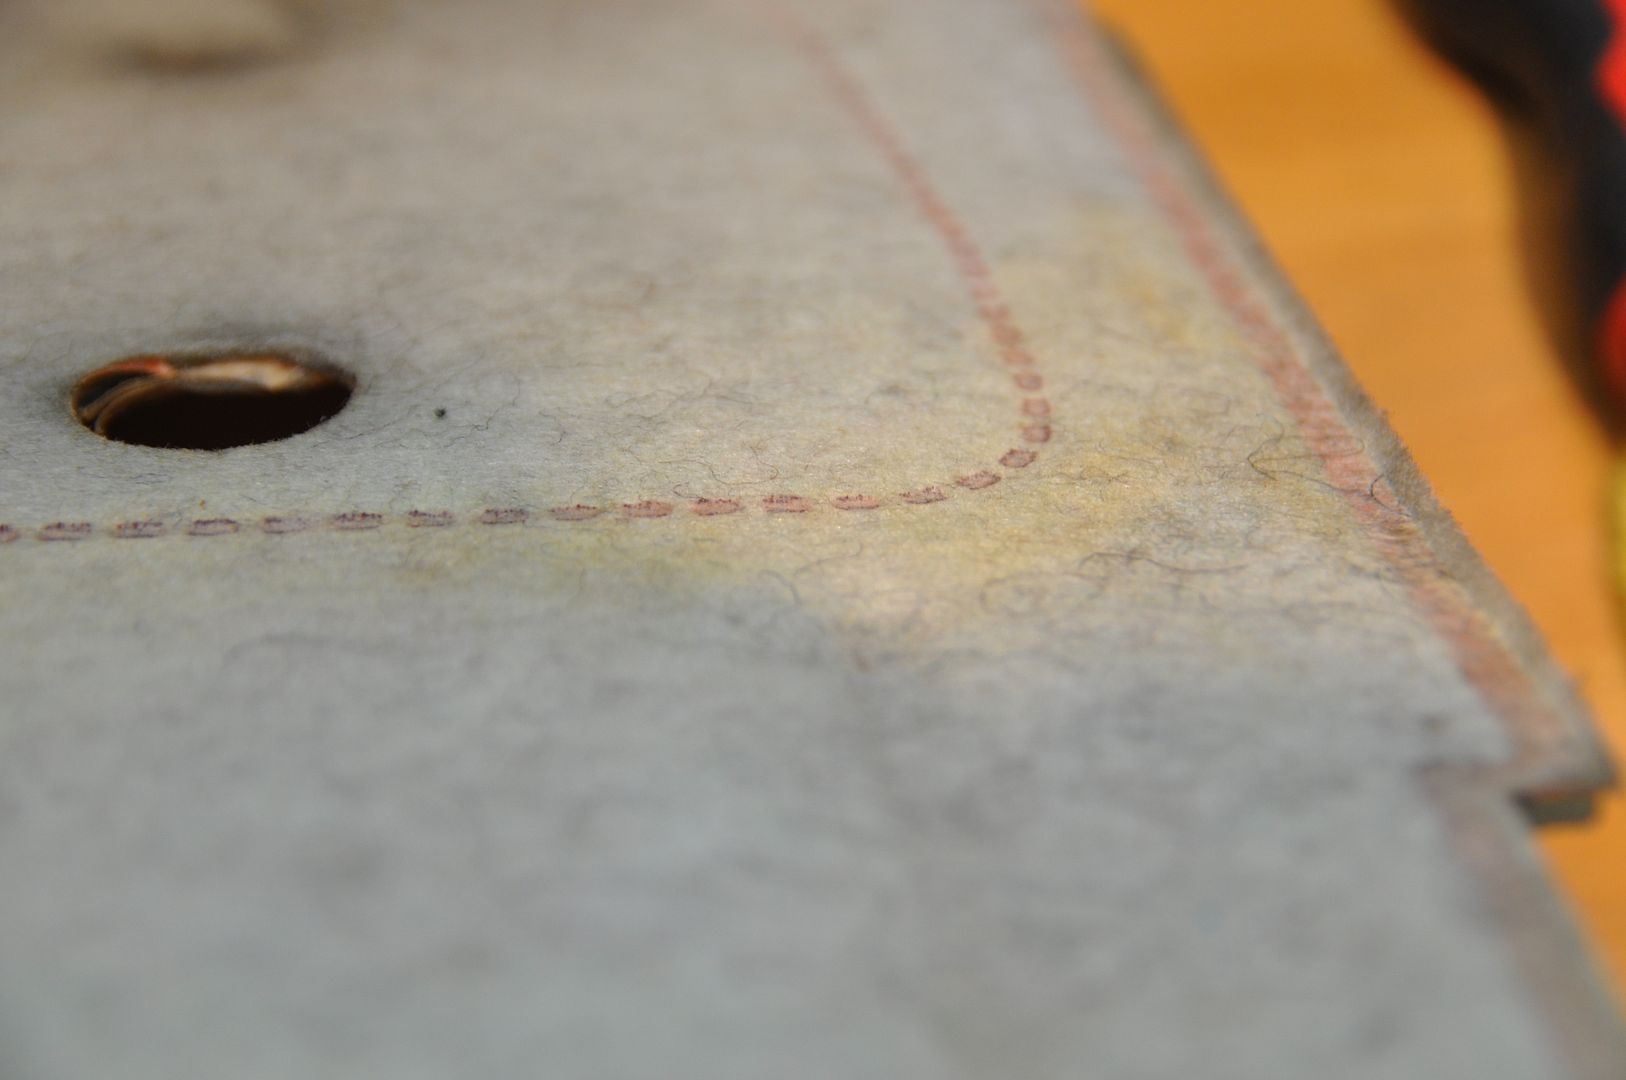
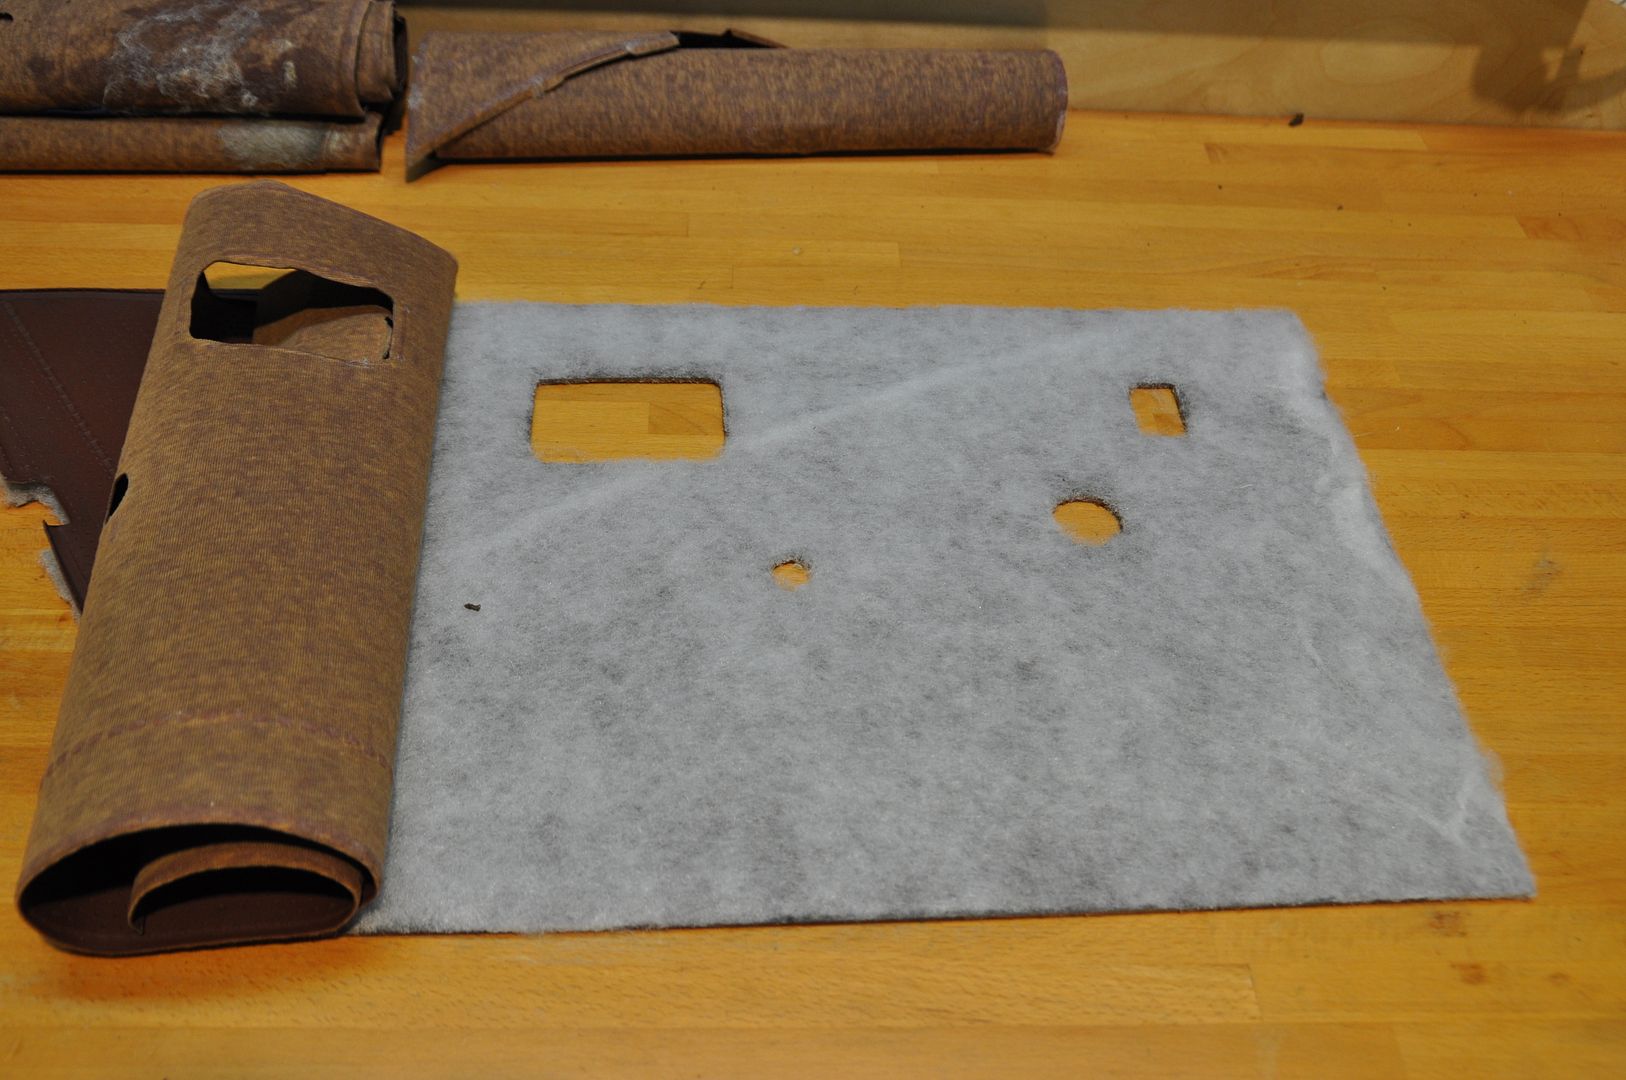
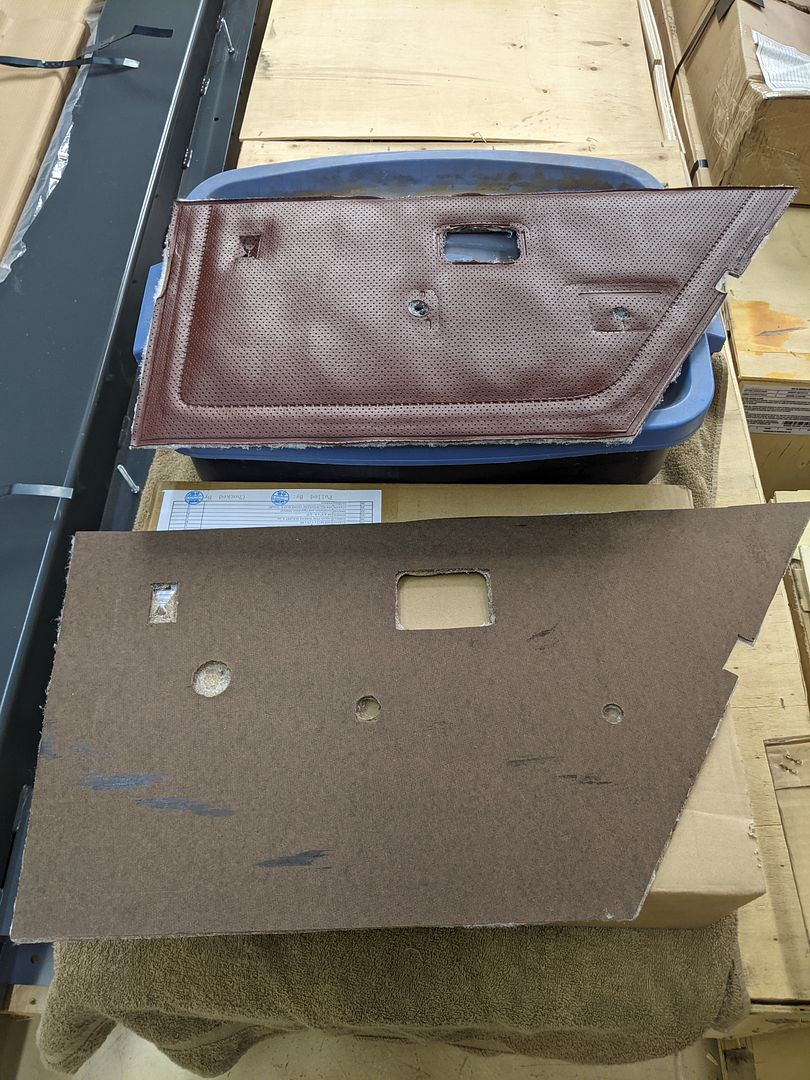
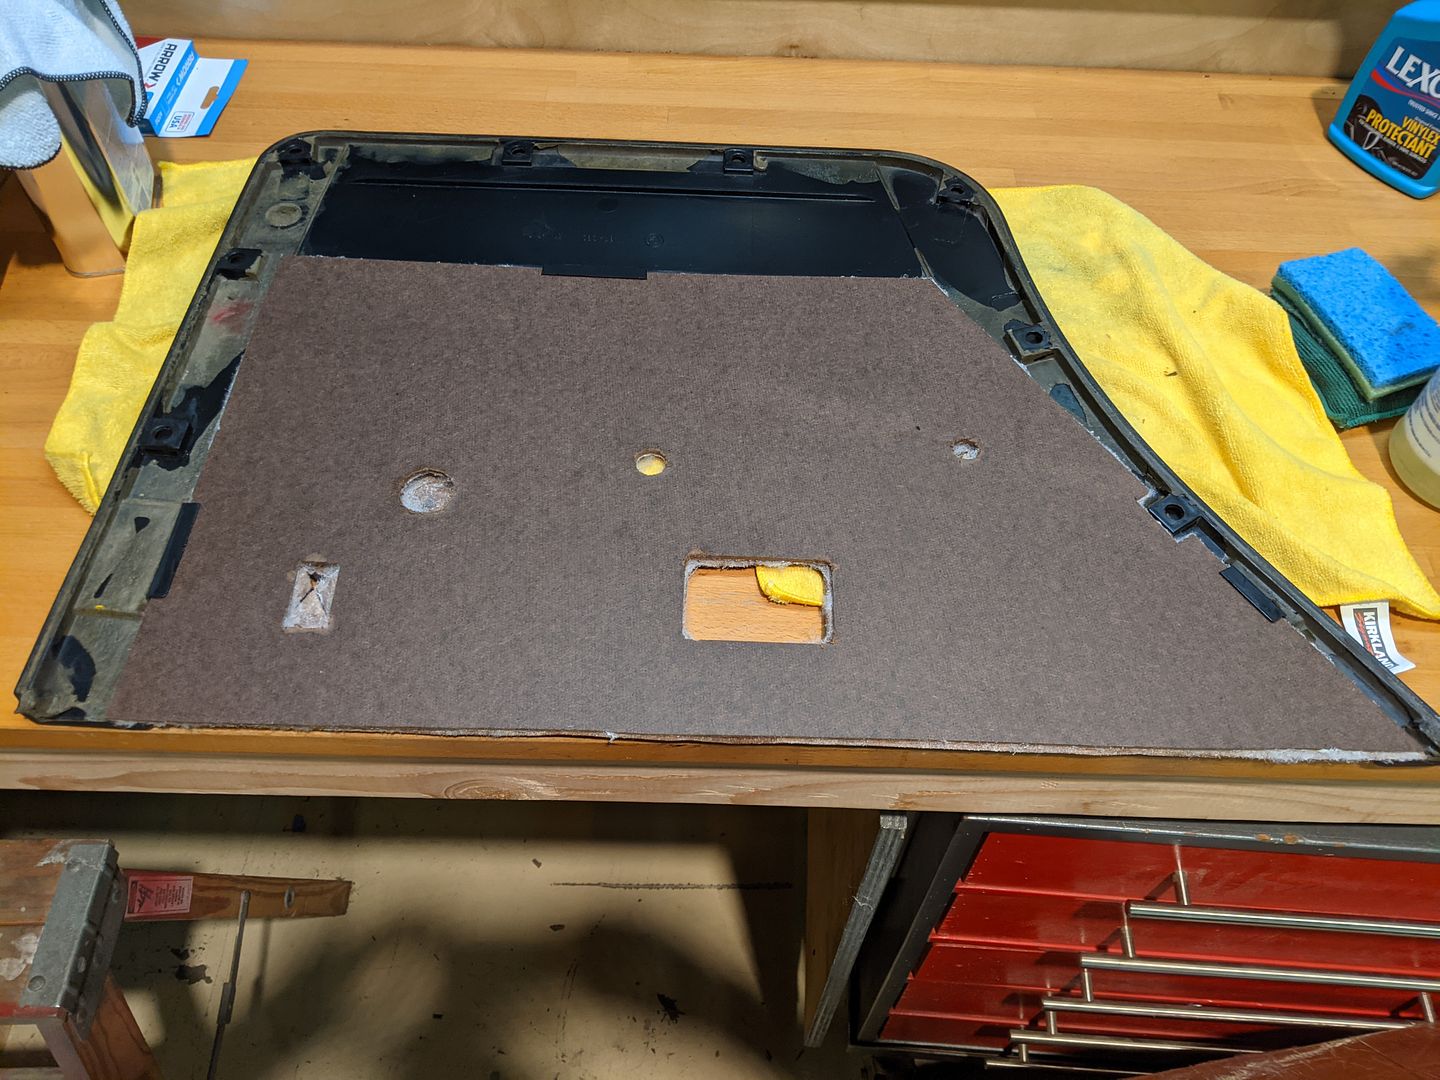
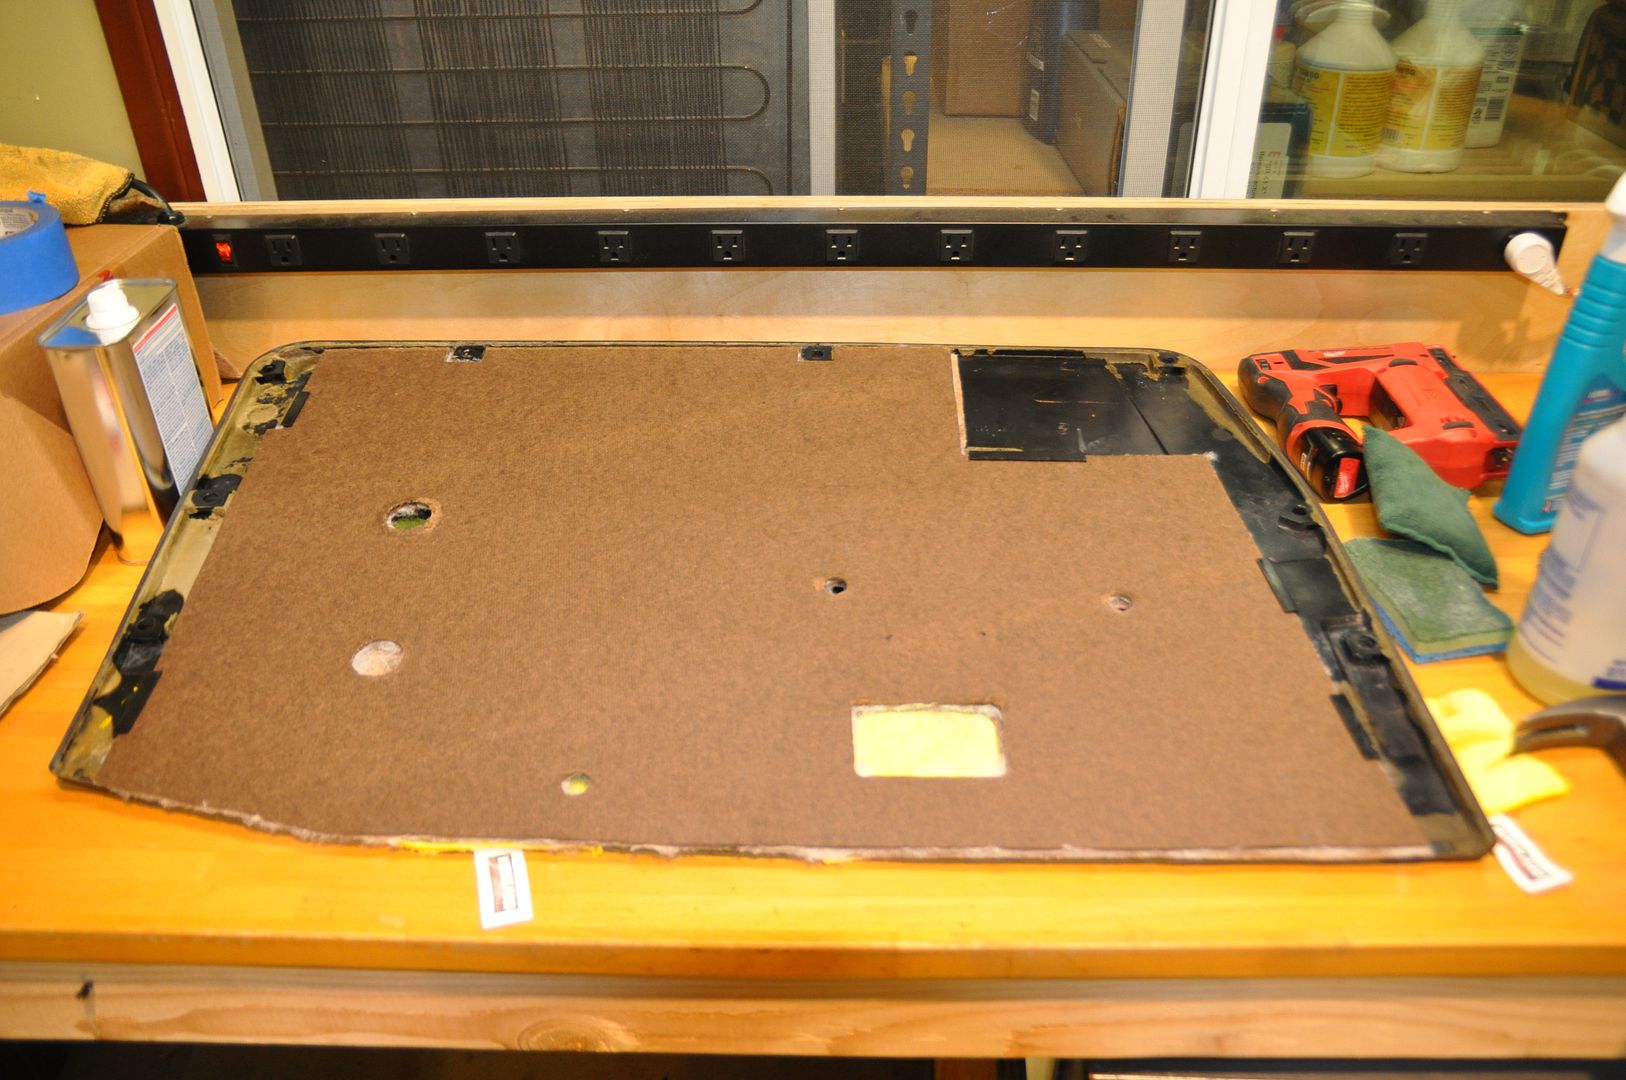
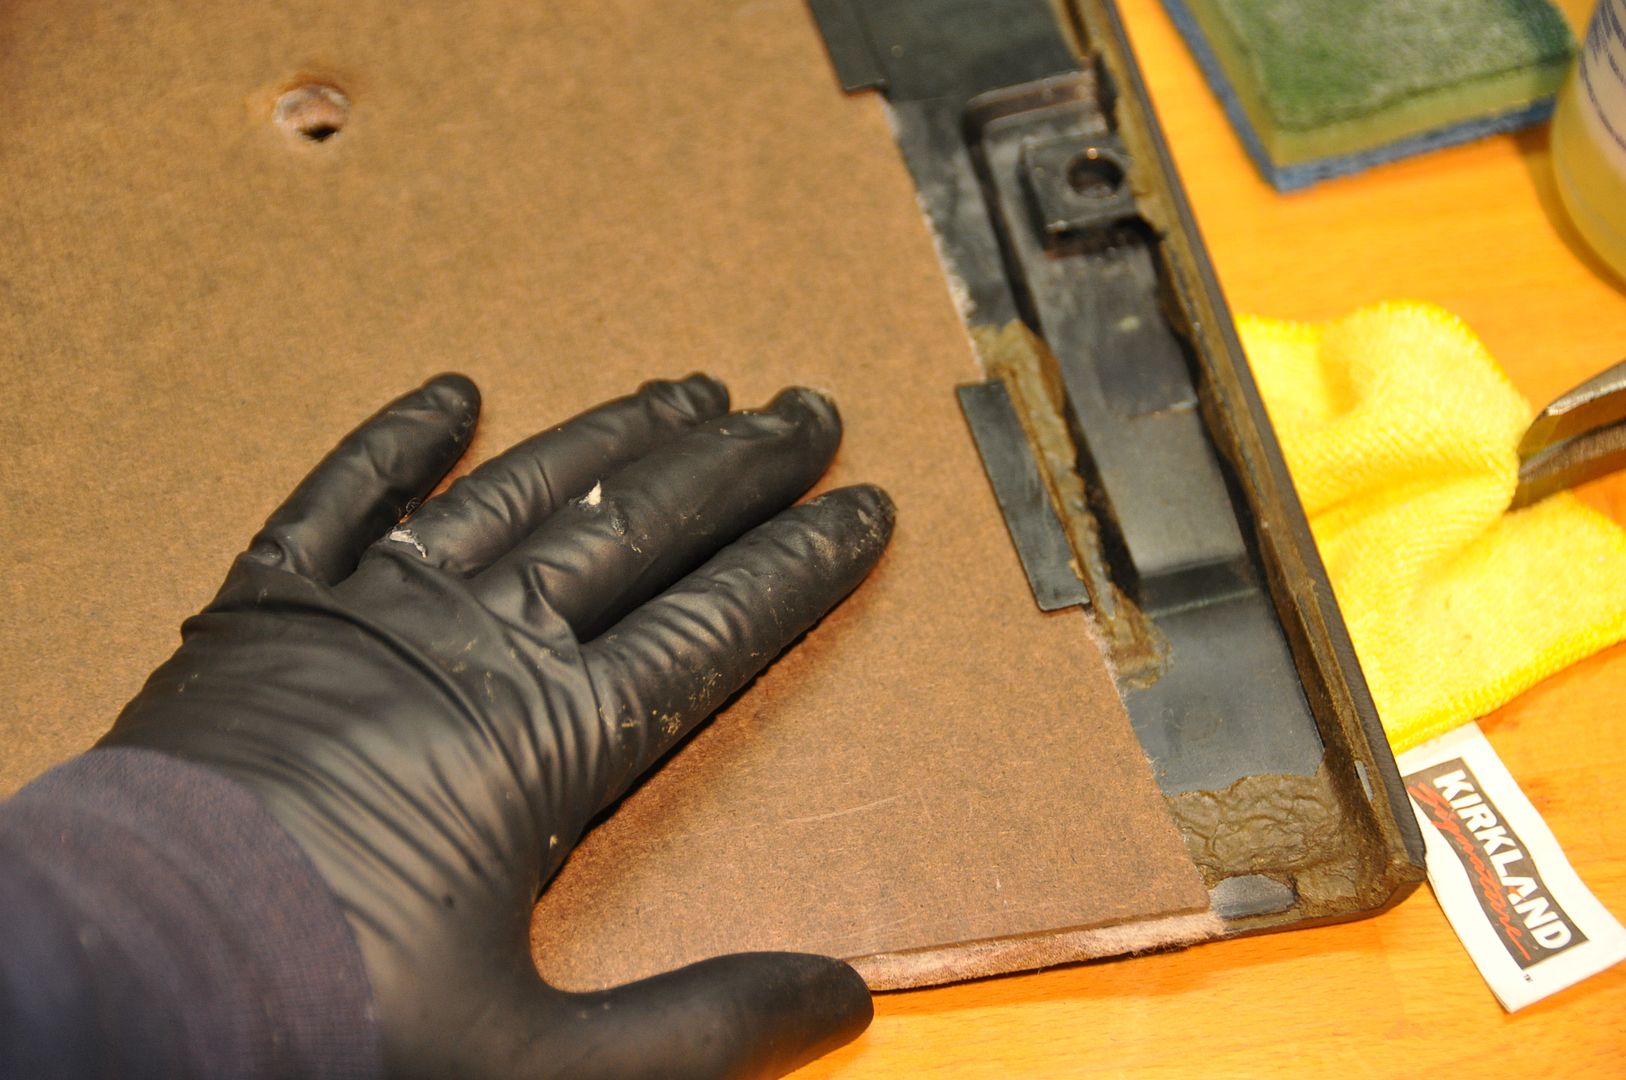
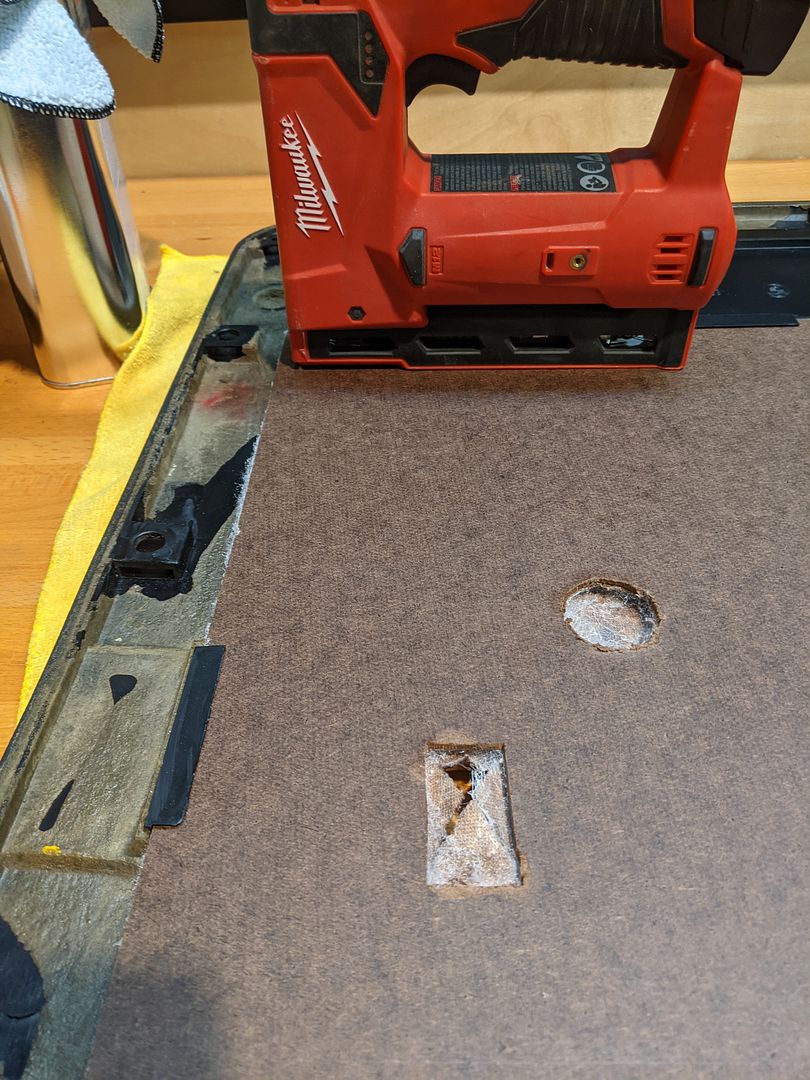
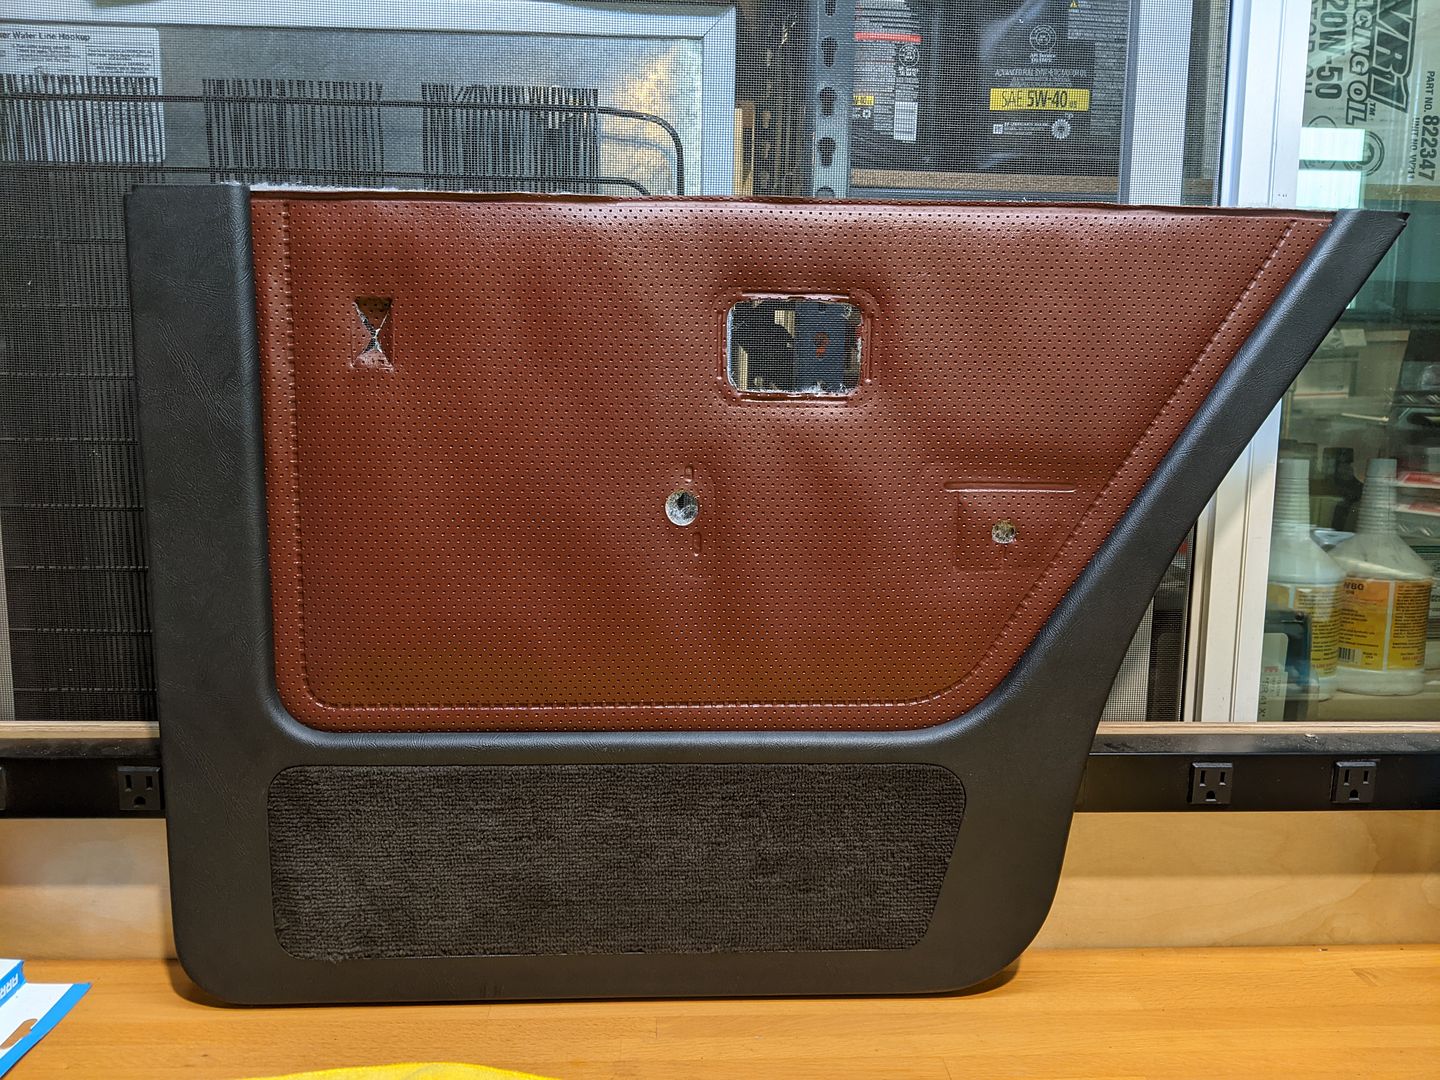
Finish product came out well:
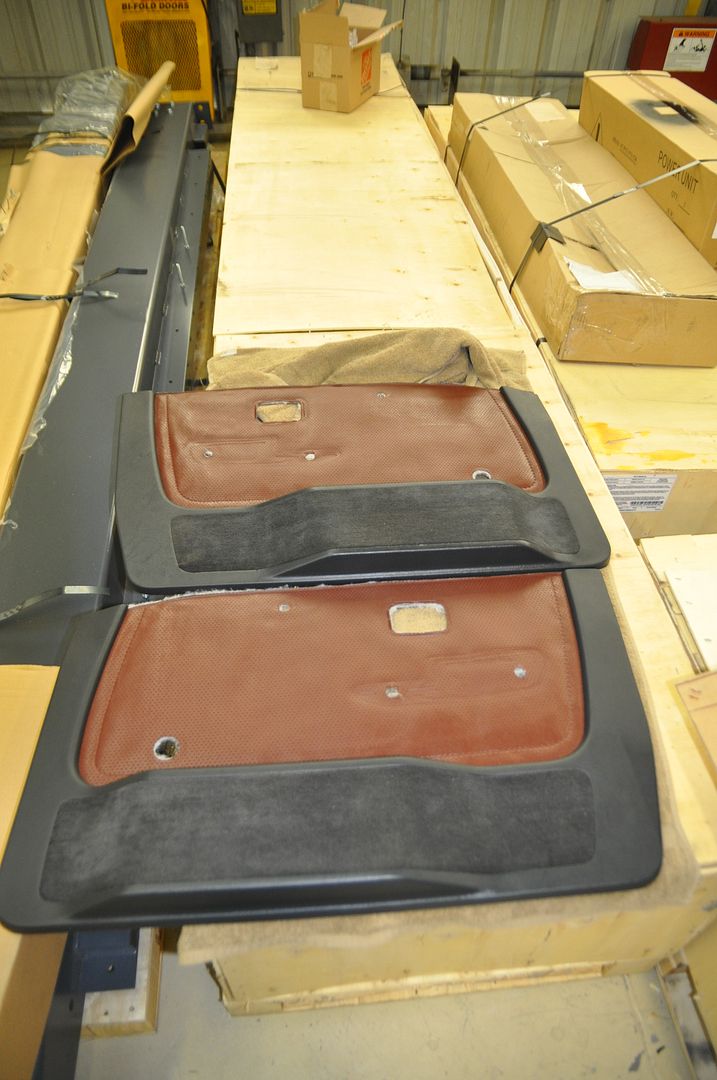
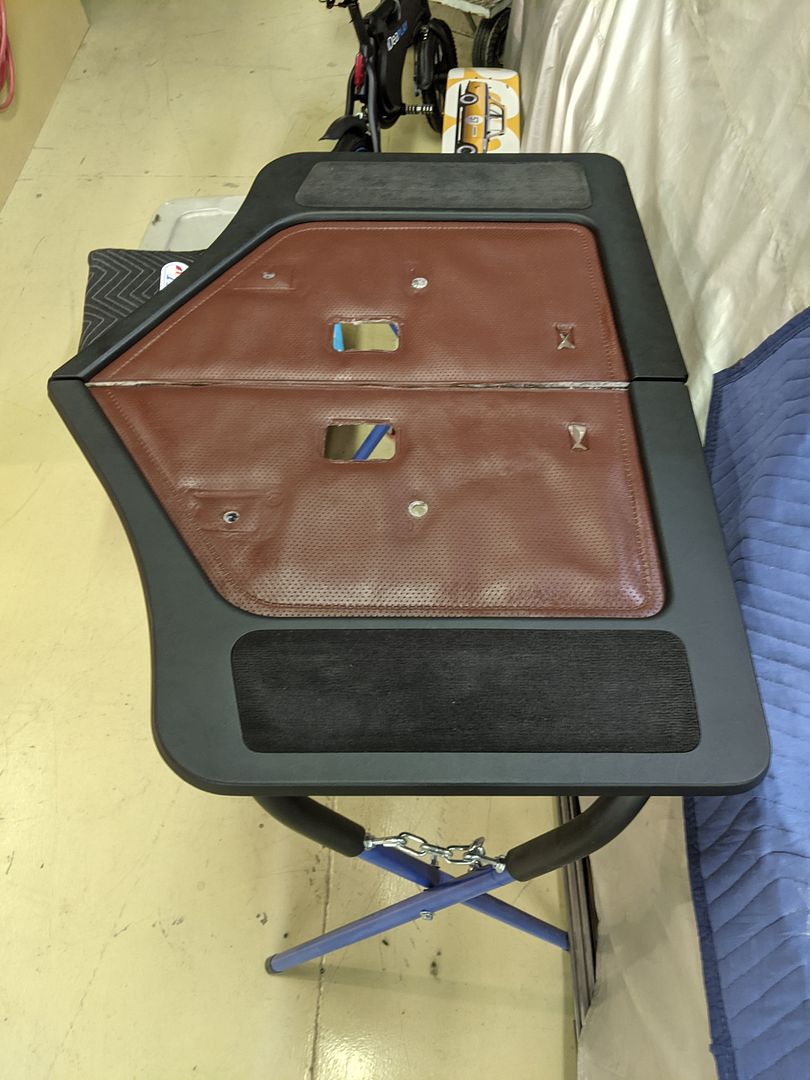
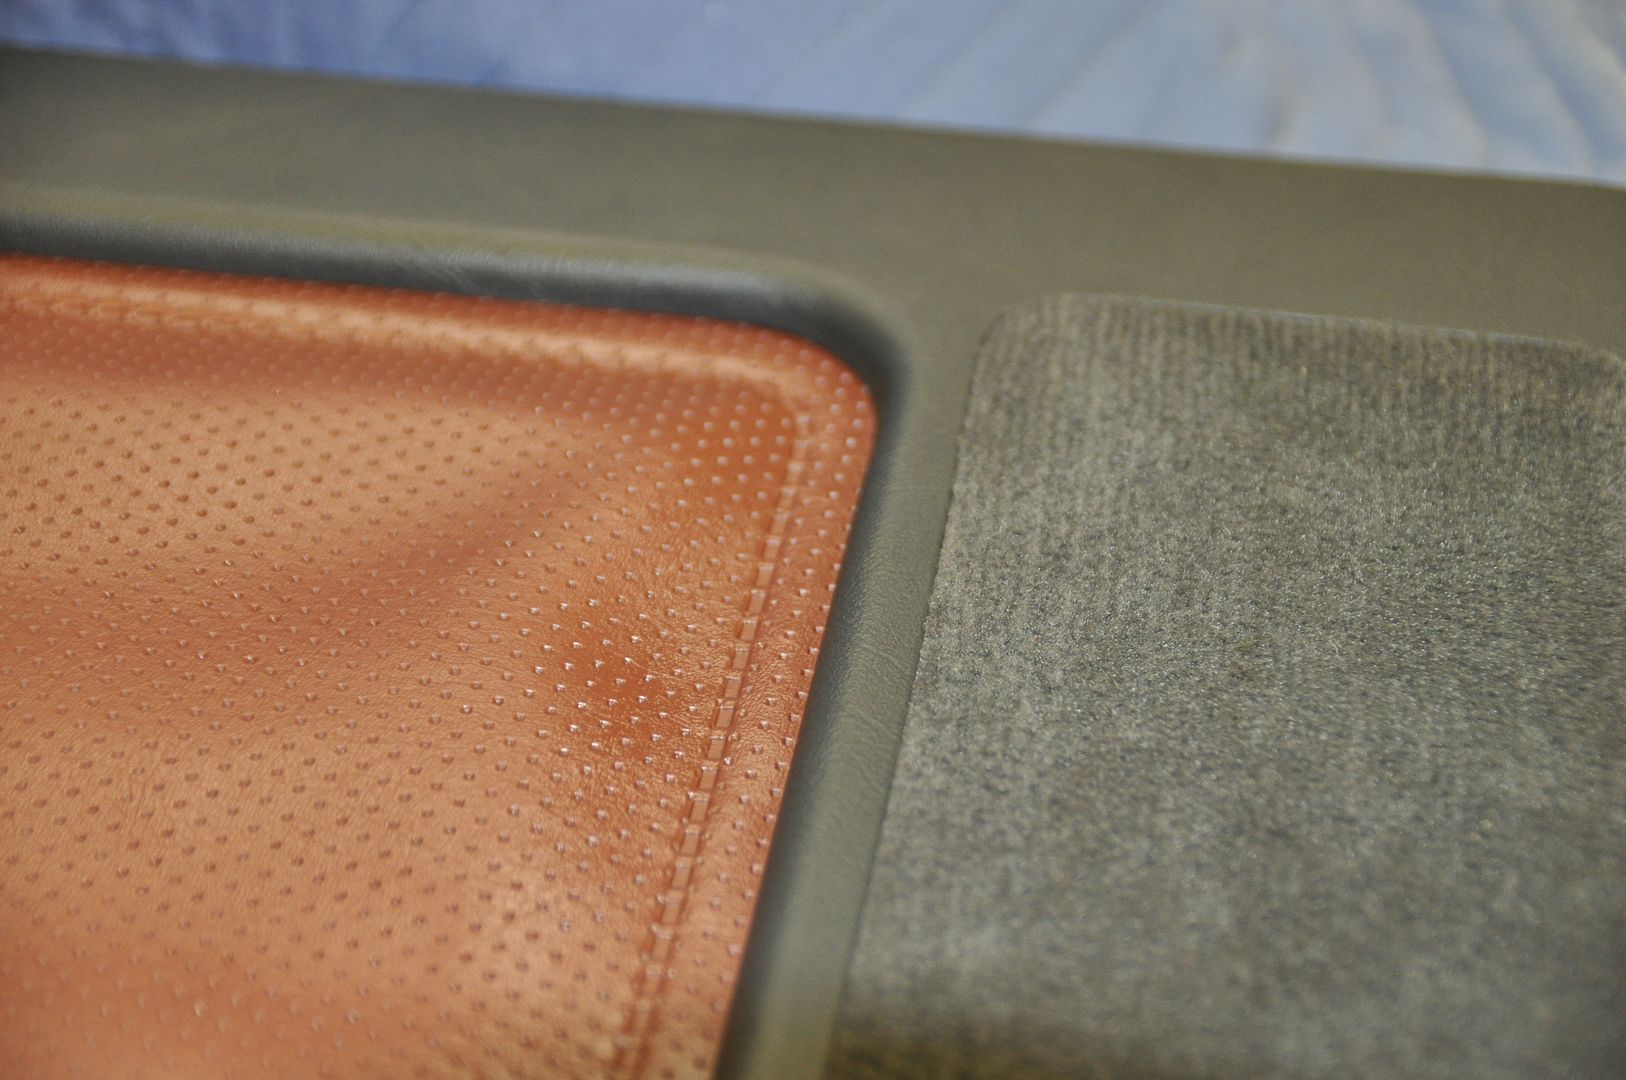
Last up is to add a line of glue/trim adhesive and foam sealant around the back of the Hardboard panel and frame to seal up the whole assembly. This is not really necessary as the whole assembly is pretty solid especially since I used a lot more staples than BMW did originally, but I’m into overkill for this project so that’s on next Saturday’s agenda. I might even add a vapor barrier across the whole back to really seal this whole thing. There is another layer to these that I left out: BMW used a +/-3mm/1/8” open cell foam with vinyl backer layer glued to the backside of the Door Panel; this is sandwiched against the poly vapor barrier stretched across the door separating it from the elements. I opted to leave this out since I am going to install another HeatShield product on the door in lieu of that poly vapor barrier which will likely out-perform both the foam and vapor barrier (more on this later).
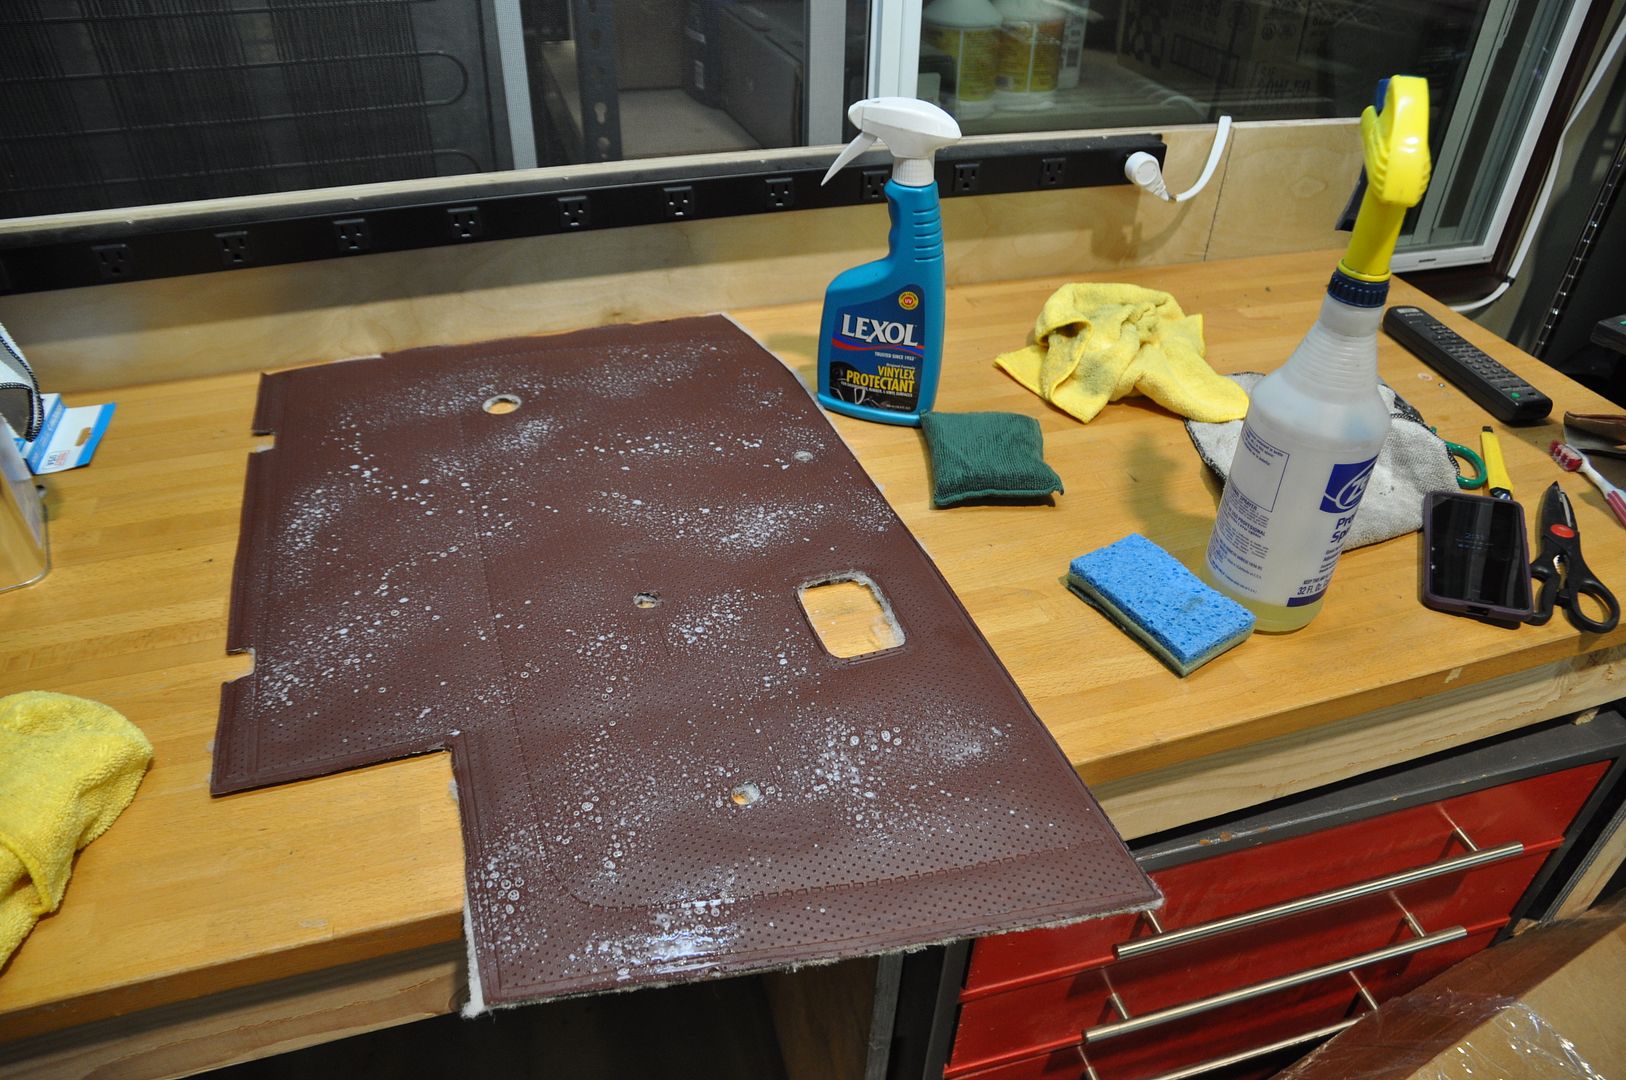
These Door Panels were treated with a healthy layer of Vinylex and put aside to await their new attachment clips and final assembly later.
PART IV: INTERIOR TRIM: DOOR PANELS I
I set out to improve the existing Taurusrot Door Panels (aka Interior Door Cards). The set I received with the rest of the Taurus interior had some blemishes on the Anthracit frames and the cardboard backer panels had seen better days (suffering for 30+ years inside a door, etc.). Aside from the cosmetics, the improvements I wanted to make were again regarding heat and sound abatement in the whole door assembly; these panels would be the final layer of that overall improvement.


To review, the Door Panels are made up of 1) Plastic & Vinyl Frame (in my case here it is the Anthracit contrasting color scheme shared with the Cardinalrot & Black interiors, otherwise it may be Pearl Beige, Llama, Natur, Pacific Blue, Nutria, Moca, etc.) and 2) Vinyl “Covering” panel (comprised of a +/-3mm or 1/8” hard cardboard core with a poly foam batting layer then the finished vinyl glued/heat pressed together), this is then slipped into slots on the frame then it is stapled through the back into the frame. On that of course are all the hardware, armrests and handles in the same color as the vinyl covering. This whole assembly is attached to the door via a series of plastic trim clips with the handles and armrests bolted through into the door itself. On each door is a plastic door cap at the top of the panel below each window; these are attached directly to the door itself as the Door Panels slip in underneath them when clipped to the doors.


Dismantling & Cleaning:
In a pursuit to get four excellent Door Panels, I sourced another Black/Anthracit set of panels and proceeded to take them all apart to mix & match the best assemblies.


Taking the frames apart:
I then removed the Tarusrot vinyl covering from the Door Panels, carefully lifting and separating them from the foam and cardboard. The plastic trim tools work best, not that the 35 year old glue was putting up much resistance:
Then onto cleaning up the plastic frames. I swear these were assembled on either Monday for Friday afternoon; the amount of over-glue and general sloppiness was astounding:
Re-Assembly:
The first step was to fabricate new backer panels. I decided quickly on 1/8” Tempered Hardboard (or Masonite). The density, hardness and dimensional stability were deciding factors in its’ selection. We have used this stuff in acoustic wall assemblies for houses and studios, so I took advantage of its’ density to hopefully improve the cabin environment. I also considered 1/8” Birch Bender Board but wanted the rigidity and density the Hardboard offered instead. On top of that, the Tempered is impregnated with a moisture resistant treatment which was an added bonus considering where these go and their potential to get wet. Templated and cut easily with a jigsaw and whole drilled out:

The existing poly-foam batting was only about another +/-3mm or 1/8” and only there to provide a bit of “loft” or softness behind the vinyl. I found a suitable replacement in this stuff used by quilters:

Templated and cut easily with scissors then spray adhered to the backer panels:
Now the trickier part: gluing the Taurus vinyl down to the backer panels. It seems that BMW used some kind of heat/vacuum press to bond all this together since the parts of the vinyl that are adhered to the actual cardboard backer panels are the edges and the “stitched”-looking seams running through the covering. The rest of the vinyl is spray glued to the foam batting. This creates the quilted look of the panels. Since I don’t have a heat press, I opted to use super glue along these edges and seams to recreate this effect. This was where choosing the poly foam batting came in since its’ light construction allowed the super glue to pass through it to the Hardboard (this mostly worked). Otherwise I would have chosen a more dense open or closed cell foam that would have smoothed out the whole vinyl covering (not to mention it would have been one more acoustic abatement layer). But I stuck with recreating the OEM look (especially one 35 years old). Assembly was pretty easy and went fast especially with the power stapler.


Finish product came out well:


Last up is to add a line of glue/trim adhesive and foam sealant around the back of the Hardboard panel and frame to seal up the whole assembly. This is not really necessary as the whole assembly is pretty solid especially since I used a lot more staples than BMW did originally, but I’m into overkill for this project so that’s on next Saturday’s agenda. I might even add a vapor barrier across the whole back to really seal this whole thing. There is another layer to these that I left out: BMW used a +/-3mm/1/8” open cell foam with vinyl backer layer glued to the backside of the Door Panel; this is sandwiched against the poly vapor barrier stretched across the door separating it from the elements. I opted to leave this out since I am going to install another HeatShield product on the door in lieu of that poly vapor barrier which will likely out-perform both the foam and vapor barrier (more on this later).
These Door Panels were treated with a healthy layer of Vinylex and put aside to await their new attachment clips and final assembly later.
Re: 1985 Arktisblau M535i Renovation - Next Chapter
All this gives me warms.
Well done Vince and thanks for sharing!
Well done Vince and thanks for sharing!
Re: 1985 Arktisblau M535i Renovation - Next Chapter
Stellar build. Moar!
Re: 1985 Arktisblau M535i Renovation - Next Chapter
I just found this thread, how can this be possible?  it is FAN.TASTIC.
Every time I see one of these rebuilds, I ask myself "what does it take". Is it Free Time? Focus? Patience? Knowledge? Skill? Adequate Space? Help? is it A Lack Of Financial Worries? Is it "all of the above"?
What throws me off is, I know I could do a bit of the stuff you showed. But you are doing ALL of it. From wiring to fuses to bodywork to interiors to door cards to crankshaft to valve timing to welding, to painstakingly documenting AND EXPLAINING what you did, in a way that has monumental didactic value.
I am in absolute AWE. Can't wait to read the rest of it.
Re: 1985 Arktisblau M535i Renovation - Next Chapter
I would like to know, too. My bet is the misses does not miss him.
But i could be wrong
But i could be wrong
-
hubble1953
- Posts: 857
- Joined: Dec 25, 2007 1:15 PM
- Location: Boise, Idaho
Re: 1985 Arktisblau M535i Renovation - Next Chapter
Sure hope we have 5erWest in Portland this year! Really want to see this car again...
jm
jm
Re: 1985 Arktisblau M535i Renovation - Next Chapter
Yes. Yes. Definitely Yes. Some, but most of it was blind, dumb luck and some assistance from people smarter than me. See previous. Yes. Hell Yes. More like ignorance. And Definitely Yes.Foonfer wrote: Mar 17, 2021 3:29 PM I just found this thread, how can this be possible?it is FAN.TASTIC.
Every time I see one of these rebuilds, I ask myself "what does it take". Is it Free Time? Focus? Patience? Knowledge? Skill? Adequate Space? Help? is it A Lack Of Financial Worries? Is it "all of the above"?
What throws me off is, I know I could do a bit of the stuff you showed. But you are doing ALL of it. From wiring to fuses to bodywork to interiors to door cards to crankshaft to valve timing to welding, to painstakingly documenting AND EXPLAINING what you did, in a way that has monumental didactic value.
I am in absolute AWE. Can't wait to read the rest of it.
If you look at the dates, the bulk of this thread was done 5 years ago, I only started the interior portion this year. I view this forum and these types of threads as useful and extremely valuable to the entire community here. A lot of people here have given me countless lessons and information, so it was time I gave some back.
You're not entirely wrong. 5 years ago I was putting in up to 30 hours a week in the shop doing all that on top of trying to run a small Architectural firm. Burning from both ends doesn't describe the half of it (it's also useful not to have kids). I am taking a more balanced approach with the interior project only because I don't have nearly the amount of free time I had back then (work is off the hook, helping aging parents, trying to hold an old house together, etc.).leadphut wrote: Mar 17, 2021 8:10 PM I would like to know, too. My bet is the misses does not miss him.
But i could be wrong
You will note that my wife actually pitched in on some of it; but she did get used to not having me around a lot so much so that when I'm not heading out to The Hangar Saturday mornings, her response is "What the hell are you still doing here?" (maybe I should be worried...)
Hope springs eternal but I'm not holding my breath. Besides at this rate and the delays from the upholsterer, it will be down to wire to finish by mid-July. I think the only real road trip this year may be to Eric's (Kenny Blankenship) Sparks, NV get-together in September (if that happens?)hubble1953 wrote: Apr 25, 2021 1:09 PM Sure hope we have 5erWest in Portland this year! Really want to see this car again...
jm
On a related note, I packed up the Honda yesterday to transport all the seats to the upholsterer on Tuesday:
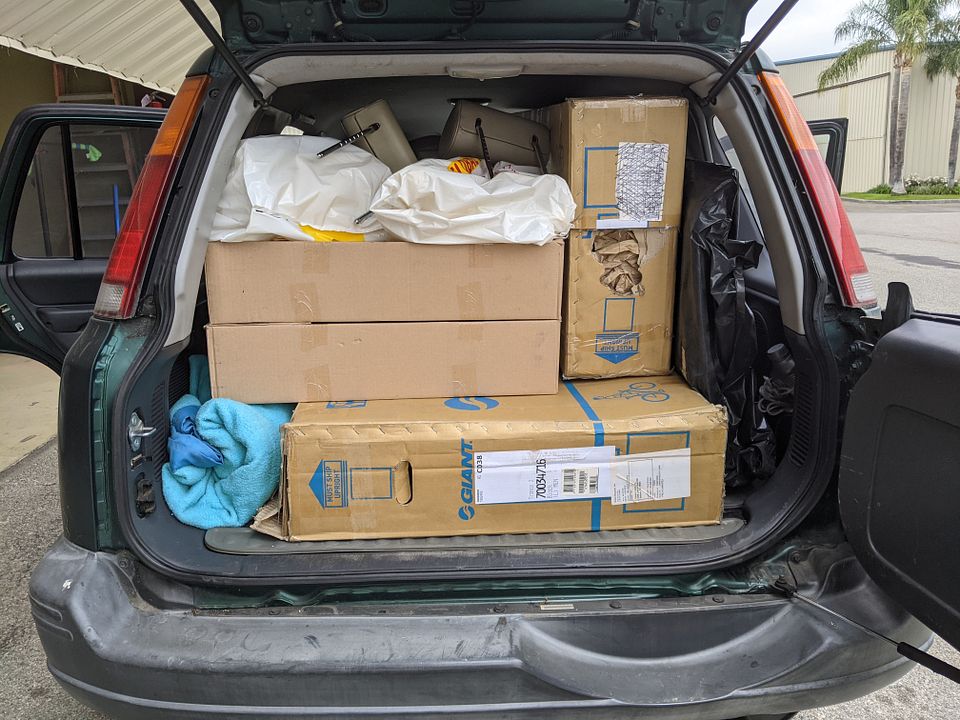
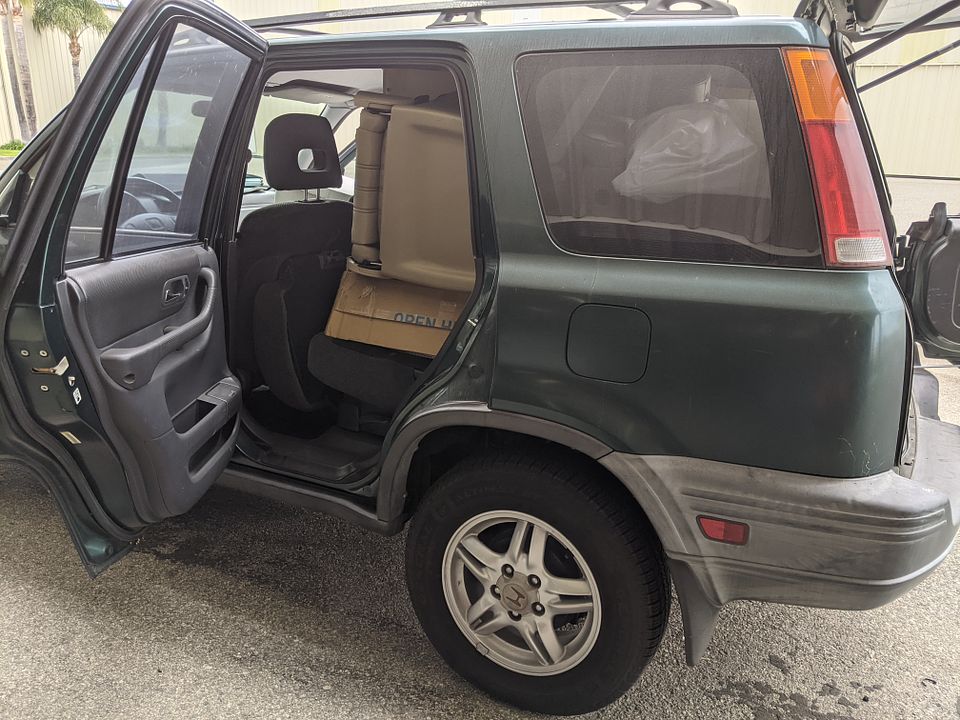
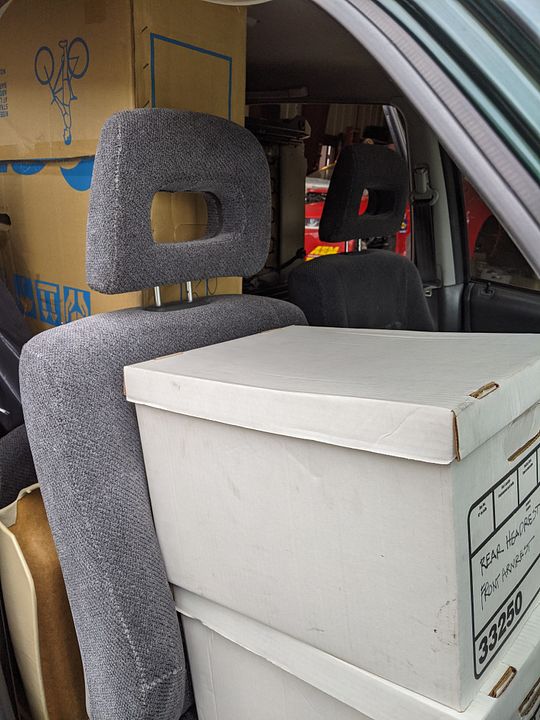
Thank heavens for Honda's decision to make the CR-V (and my wife's decision to buy it).
Along with all that (front and rears seats, new padding, headrests, parts, etc.), three large cows get loaded also (well, the skins off their backs):
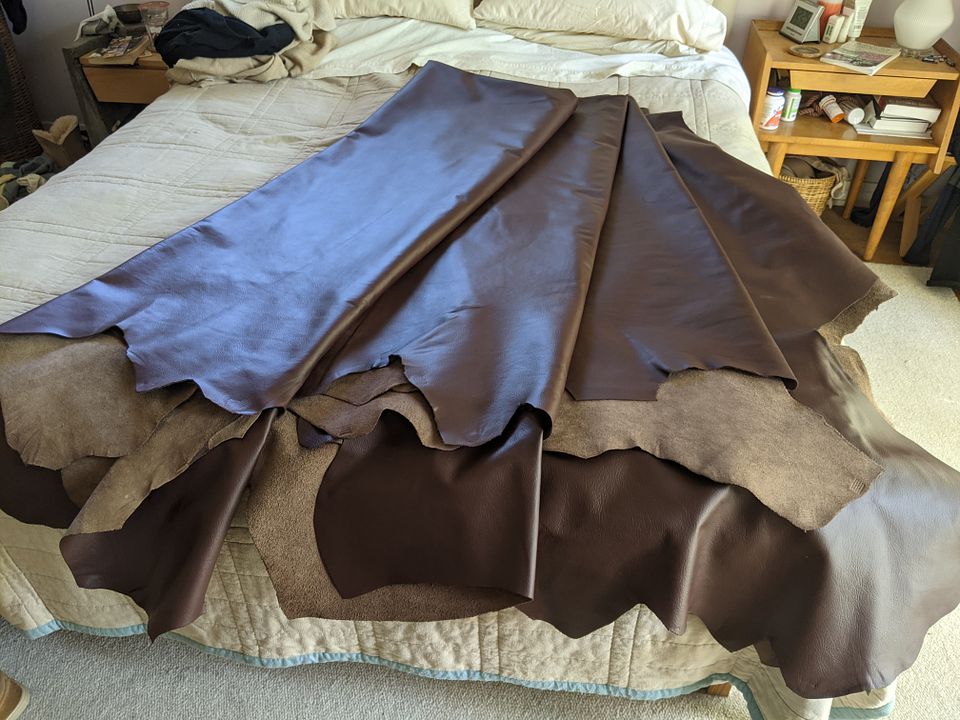
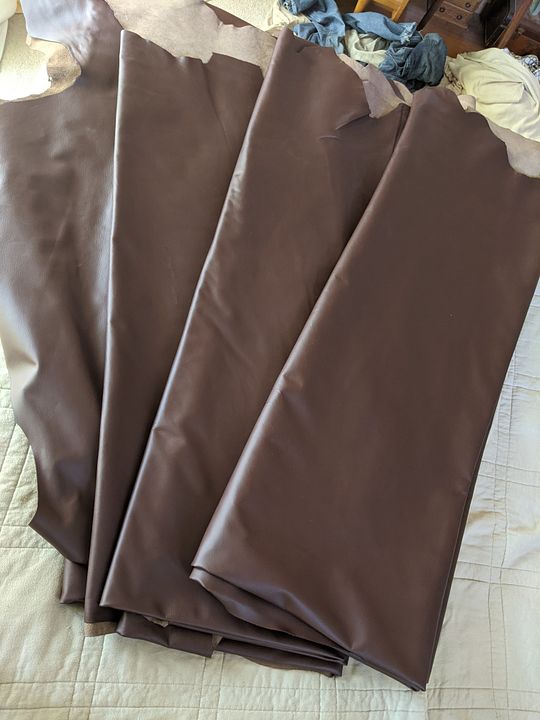
(And before anyone comments, it is not "brown"; that color is actually as close as it will ever get to the original BMW Taurusrot (Oxblood). Blame the lighting and phone camera.)
Besides loading, I also started taking apart the interior starting with the lower dash trim & panels and the center console. Next weekend is removing the HVAC stuff, pulling the carpet out and getting the car ready for the welder.
Last edited by vinceg101 on Apr 26, 2021 2:41 AM, edited 1 time in total.


