Operation Hartge Jr. (Dirty Priest)
-
Kyle in NO
- Posts: 17638
- Joined: Feb 12, 2006 12:00 PM
- Location: Nasty Orleans------> Batten-Rooehjch------>More Souther LA
Re: Operation Hartge Jr. (528i/DRTY/SLK)
Damn! Sucks about the inspection cover. If you also use the B35 oil pan it actually has the "cover" made into the oil pan, which I suppose is why they eliminated the bolt holes.
https://images.google.com/imgres?imgurl ... h%2Fx%2Fim
https://images.google.com/imgres?imgurl ... h%2Fx%2Fim
-
Chimi-Changa
- Posts: 1655
- Joined: Nov 08, 2011 11:02 PM
- Location: Westboro, MA
Re: Operation Hartge Jr. (528i/DRTY/SLK)
Little more progress today. Transmission and headers are in. For now, I red loctited the flywheel cover plate with the 5 bolts holding it and see how she holds.
Also popped in some Turner stainless brake lines compliments of a local friend ( thanks local friend), installed rear calipers- and grabbed front brakes to also paint silver.
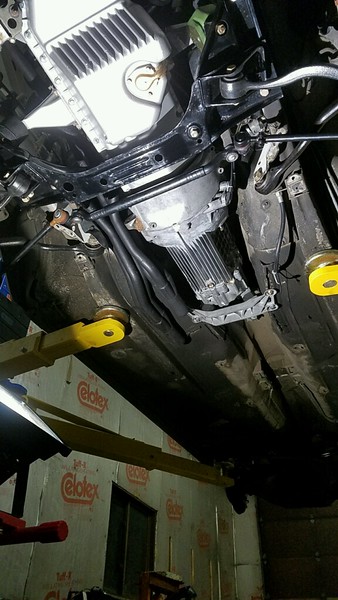
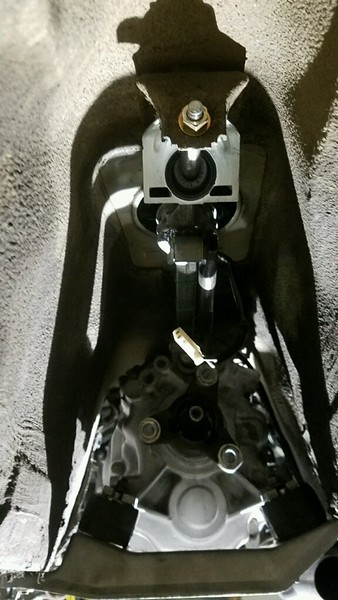
Just need a little touch up before the bake in.
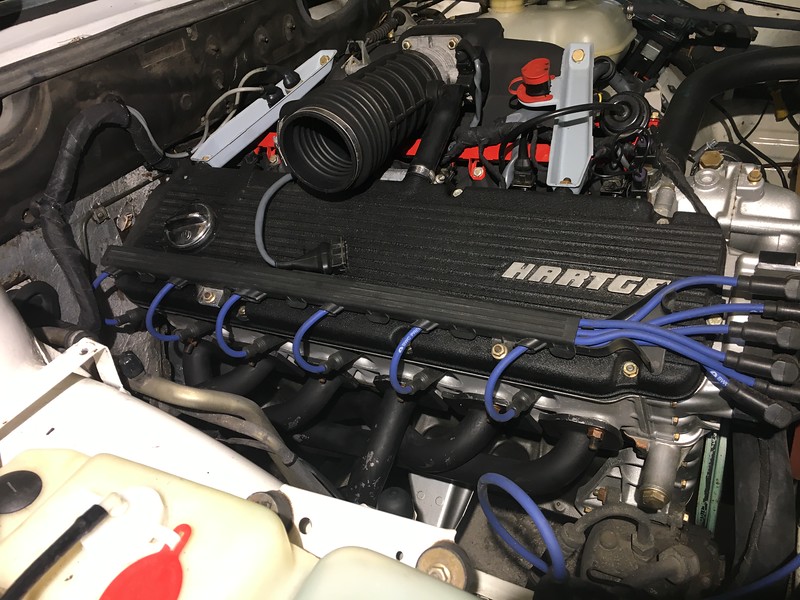
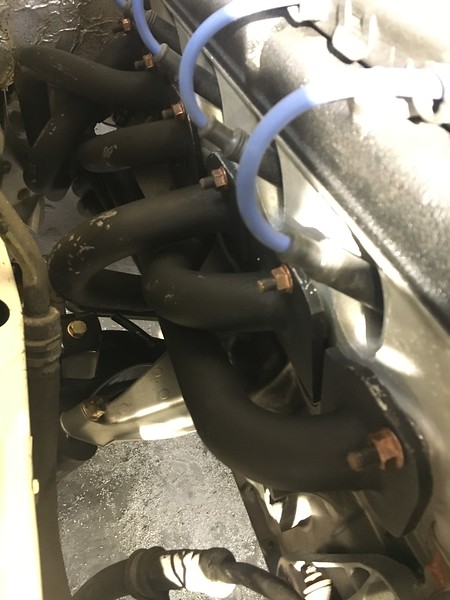
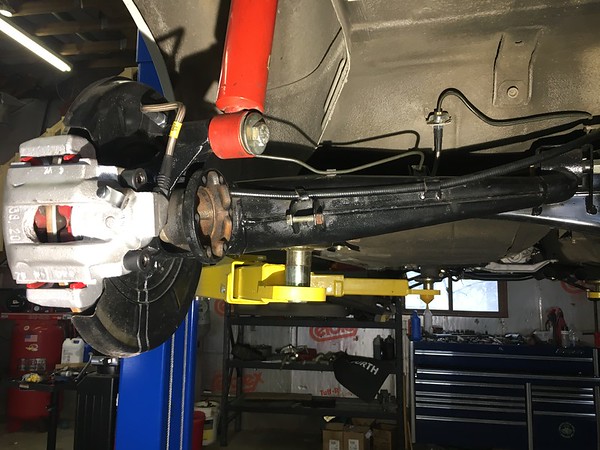
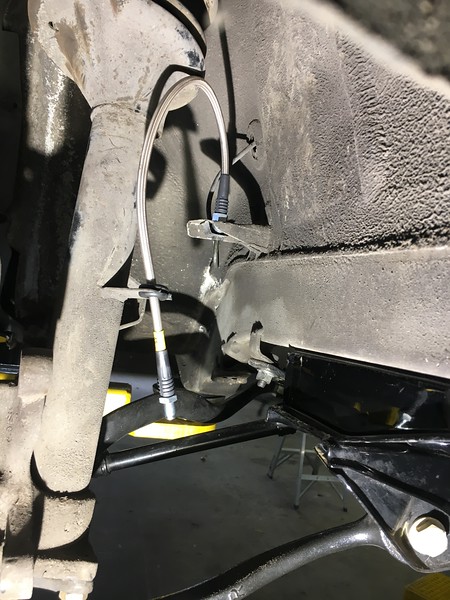
And also thanks to a board member here, was able to purchase this h//5 badge. Good stuff, much appreciated.
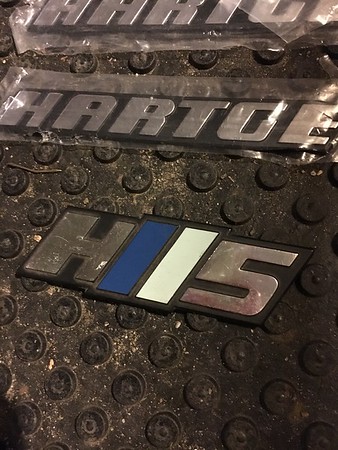
Also popped in some Turner stainless brake lines compliments of a local friend ( thanks local friend), installed rear calipers- and grabbed front brakes to also paint silver.


Just need a little touch up before the bake in.


And also thanks to a board member here, was able to purchase this h//5 badge. Good stuff, much appreciated.

-
Chimi-Changa
- Posts: 1655
- Joined: Nov 08, 2011 11:02 PM
- Location: Westboro, MA
Re: Operation Hartge Jr. (528i/DRTY/SLK)
After quite a bit ( since January), this puppy is finally home. It landed yesterday- and I honestly can't believe its here still. Roy was gracious to offer me a storage spot for the Grey car, and Op H Jr. is now officially on!
I hired this cool as ice driver Julio. Not only did he have it here in a flash, but helped me push it into place. Gracias Amigo. He told me a story about how he knew a super huge African American guy that had one when he was younger- and the guy loved them and only drove them. ( he could not believe he fit in them) Good stuff, and vibes on the euro delivery yah? Anyway- here it is, now, like here. Just in time for me to place a cover over it, and hope for warmer temps to start work... Happy new year and thanks for watching the progress.
Wife actually took this pic, I was out walking the dogs when he showed.
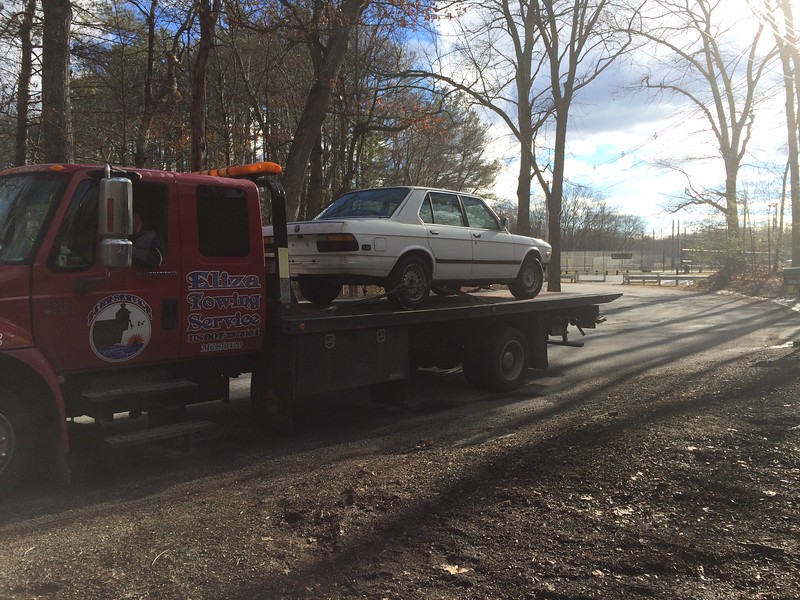
German Dogs seem to like it. Yes, that's the snowblower ready in the background.
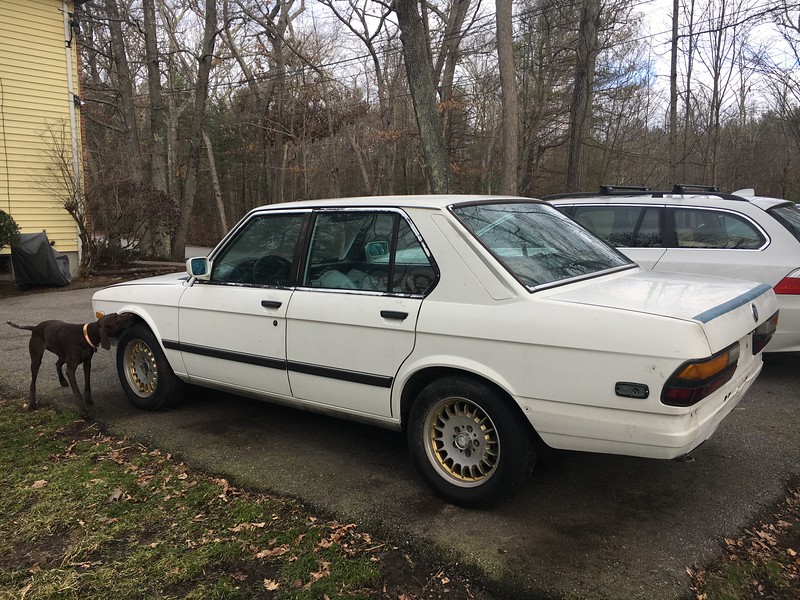
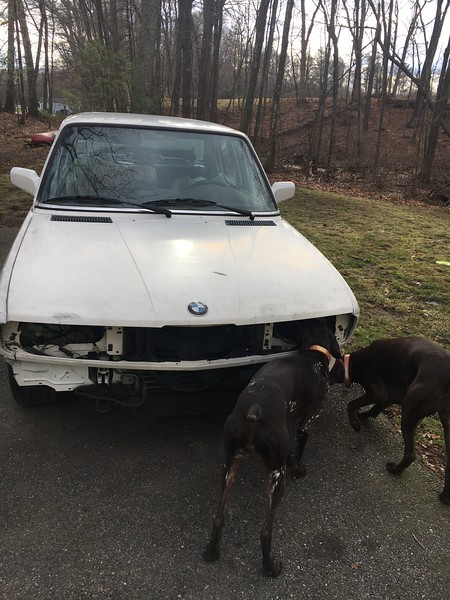
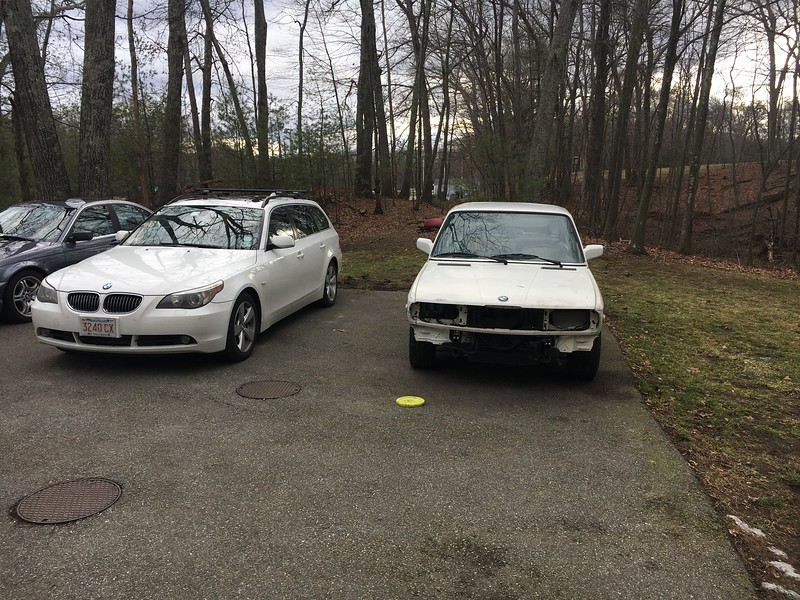
This will be its home for a while, next to Nicoles e61. That's Jims e46 next to that, on loan for a few days. ( Thanks Jim!)
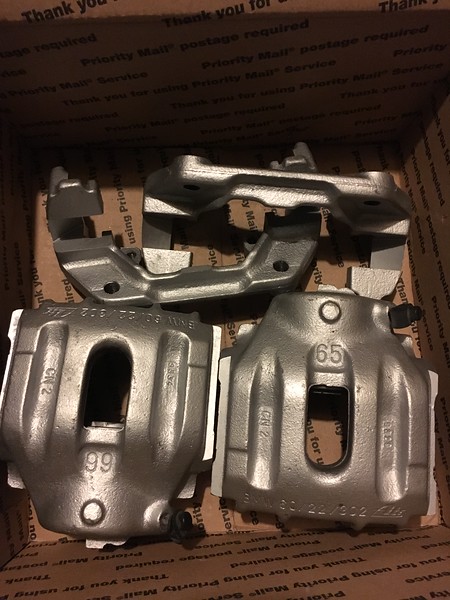
And the cookies weren't the only thing getting baked up over the holiday's... Sheshed up the front brakes too.
I hired this cool as ice driver Julio. Not only did he have it here in a flash, but helped me push it into place. Gracias Amigo. He told me a story about how he knew a super huge African American guy that had one when he was younger- and the guy loved them and only drove them. ( he could not believe he fit in them) Good stuff, and vibes on the euro delivery yah? Anyway- here it is, now, like here. Just in time for me to place a cover over it, and hope for warmer temps to start work... Happy new year and thanks for watching the progress.
Wife actually took this pic, I was out walking the dogs when he showed.

German Dogs seem to like it. Yes, that's the snowblower ready in the background.


This will be its home for a while, next to Nicoles e61. That's Jims e46 next to that, on loan for a few days. ( Thanks Jim!)

And the cookies weren't the only thing getting baked up over the holiday's... Sheshed up the front brakes too.

Re: Operation Hartge Jr. (528i/DRTY/SLK)
not sure how i missed this thread.

Re: Operation Hartge Jr. (528i/DRTY/SLK)
Rubber Duckie, the Eagle has landed.
Re: Operation Hartge Jr. (528i/DRTY/SLK)
Did you call Steve and get your CSB swapped yet?
-
Chimi-Changa
- Posts: 1655
- Joined: Nov 08, 2011 11:02 PM
- Location: Westboro, MA
Re: Operation Hartge Jr. (528i/DRTY/SLK)
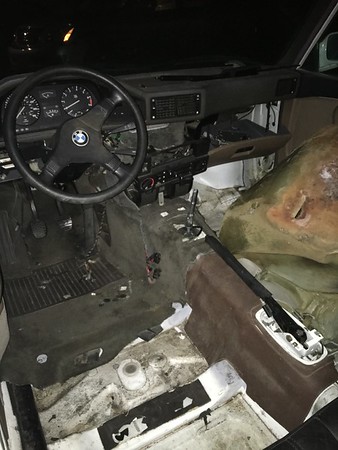
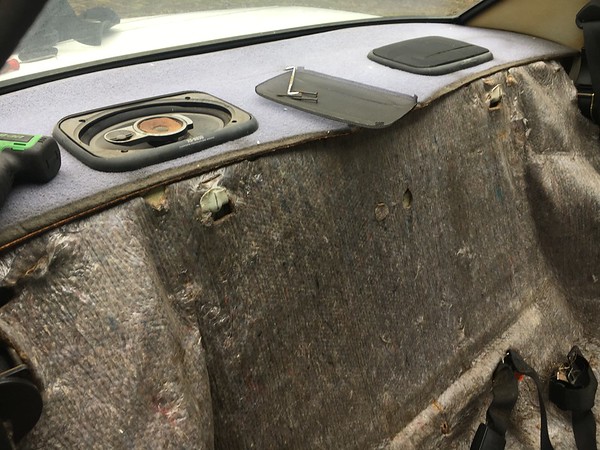
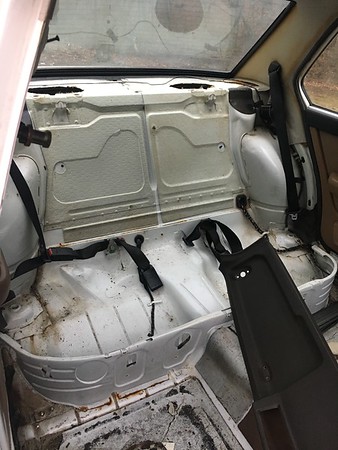
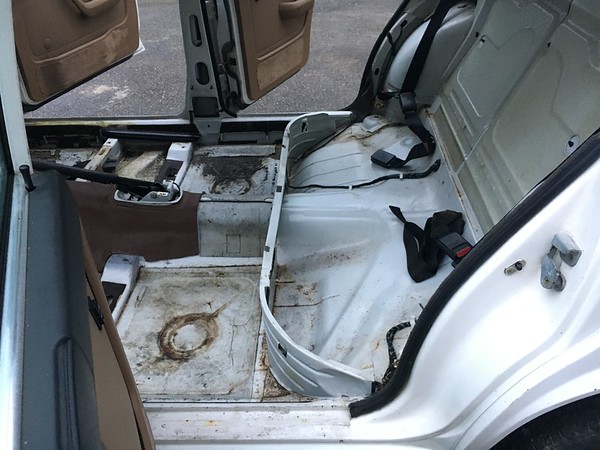
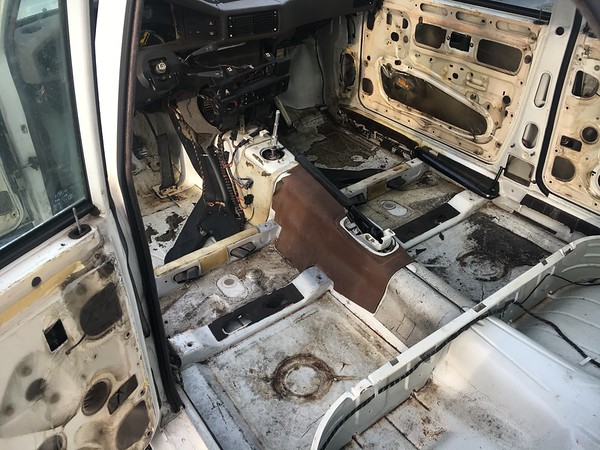
Not to much has been going on due to the weather, but on warmer days have done some stripping and playing around. Pulled all the interior out, and checked out the trunk a lot better for water resistance. Looks like I will end up replacing the trunk seal. The tail lights that were in it did not have any seal at all on them, so I popped in a set with new seals I had ready. Winter basement projects will be freshening up driveshaft with new csb, rear end refresh, and manny sport seat shocks ( drama below), etc.
[
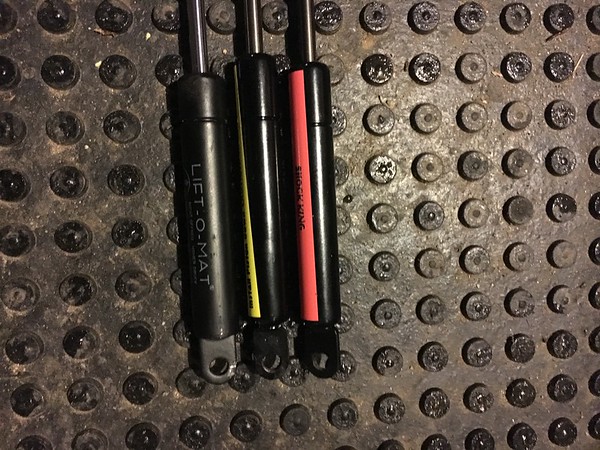
So the seat shocks I bought off the board here are just about too long for them not to be able to be compressed enough to fit. Besides the holes in each end don't fit, but that can be worked out. The length issue cannot.
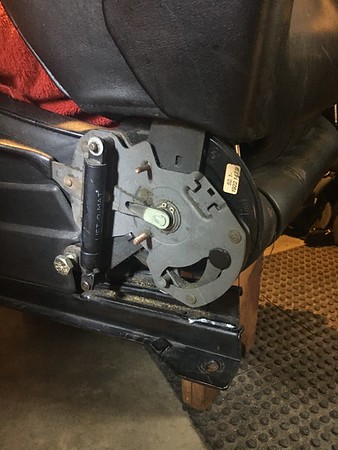
the one in it is on the left:
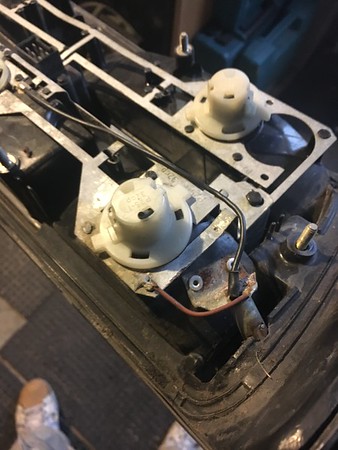
The tail lights in it has this funky side bulb in the end of the housing, not sure what that is?


[

So the seat shocks I bought off the board here are just about too long for them not to be able to be compressed enough to fit. Besides the holes in each end don't fit, but that can be worked out. The length issue cannot.

the one in it is on the left:

The tail lights in it has this funky side bulb in the end of the housing, not sure what that is?

Re: Operation Hartge Jr. (528i/DRTY/SLK)
You should be super thankful the tail lights have that funky side bulb instead of holes drilled in your fenders and quarters. That was their way of putting a side marker in the car. I was lucky with all of my E28s except the '87 M535i, but thankfully those are in the kit, not the sheetmetal. Front turn signals would have had one too before the car had all the M535i stuff swapped onto it, I think.
Bummer on the seat shocks. There are two different styles one for the seat back and one for the base. Are you sure? Guy has sold a lot of them.
Bummer on the seat shocks. There are two different styles one for the seat back and one for the base. Are you sure? Guy has sold a lot of them.
-
Das_Prachtstrasse
- Posts: 5616
- Joined: Sep 10, 2006 7:06 AM
- Location: Melbourne, Doooown Under
Re: Operation Hartge Jr. (528i/DRTY/SLK)
Glad to see progress being made. Interesting about the shocks.. I had no problem with them and used the same ones. I think the only variance in shocks from factory were the way they attached to the pin, one variety had an open end as apposed to a ring.
Check your handbrake sheetmetal for stress fractures while the carpet is out. Much easier to attend to now than later!
Check your handbrake sheetmetal for stress fractures while the carpet is out. Much easier to attend to now than later!
-
Chimi-Changa
- Posts: 1655
- Joined: Nov 08, 2011 11:02 PM
- Location: Westboro, MA
Re: Operation Hartge Jr. (528i/DRTY/SLK)
Finally an update! Busy from new job has kept me from attacking this project with reckless abandon, but I have been able to put some time in here and there. It feels almost overwhelming at times when I think of how much needs to be done. I've left the seat shocks alone for a bit, and will figure those out when I get to the interior.
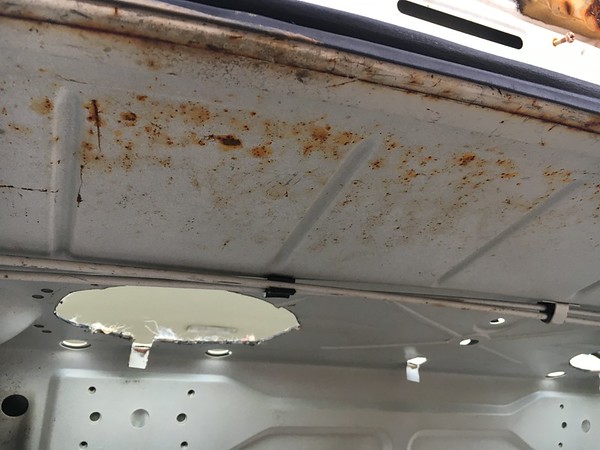
Slowly stripping the interior and exterior getting her ready for paint. Inspecting the trunk further, looks like will need a new seal and some rust spots touched up too. Motronic was kind enough to release some parts for it like a jack, rear deck and shade, heater box and adding a third brake light which for driving around here is a good idea.
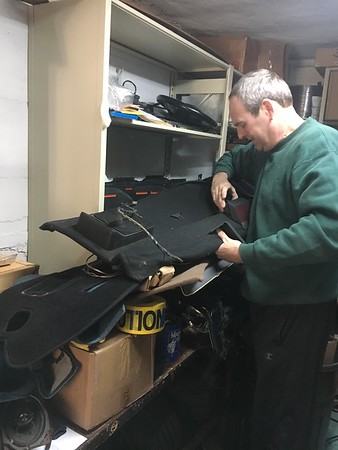
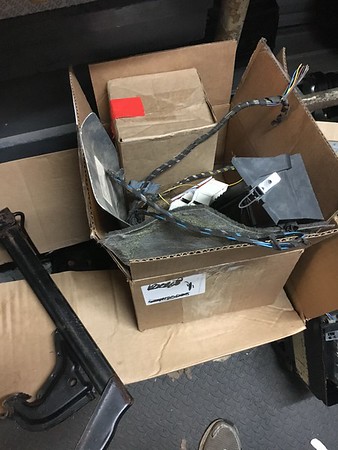
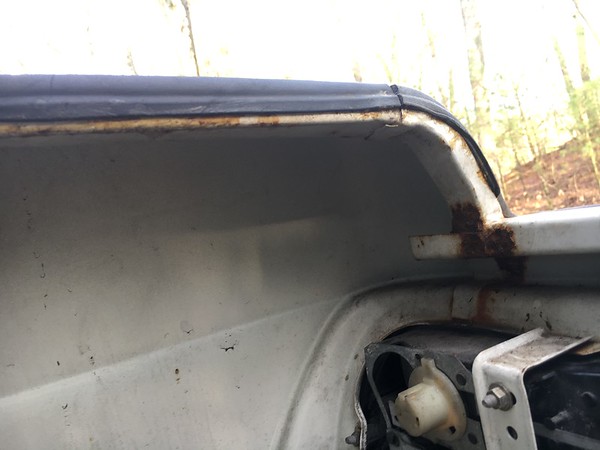
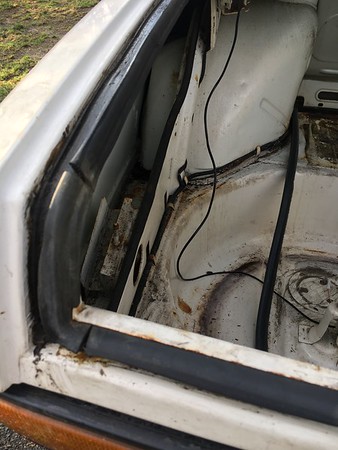
Trunk situation needs a little love. Surprising the plate light area was fine... I will likely have the trunk painted too, even though most will be covered with a M5 trunk kit- i'll leave the small took kit and and show the nice new paint there.
.
So, the motor ran out in California, but finally getting around to installing the headers here and giving a go she just is cranking. Went over the usual stuff ( most ignition is new) replacing main and FP relay's and the main fuel pump and still nada,... At one point if was starting and stalling but now not even. I've swapped ECU's and still the same. The bypass valve and slide valve is brand new, and saw that it was fully closed. I turned the screw until it was half open, figuring to start there but still the same cranking result. Fuel tank was drained and fresh fuel with StarTron was offered- still the same. I might try the in tank pump now. Most everything else is new ( Plugs, wires, coil, injectors, fuel pump, TPS, relays) and have tested voltage most everywhere and seems to be proper. ..
Getting frustrated there- spent some time bleeding the brakes, and clutch and now have working brakes and clutch pedal feels great. ( alot softer than my old car that had a pretty stiff clutch)
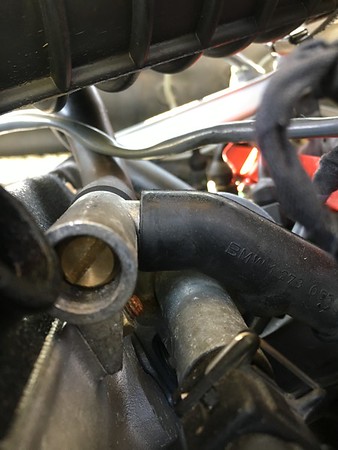
Bypass valve thingy
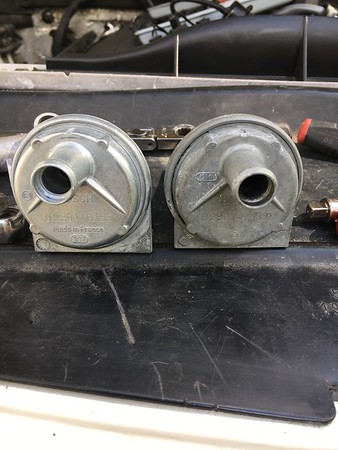
The Slide valve replaced with has different part number on it, and the hole is in slightly different position:
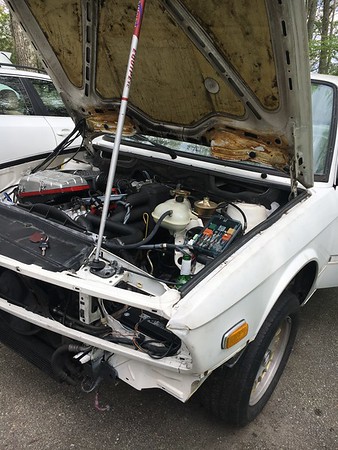
My wife doesnt ski anymore so I was happy to have a nice hood prop
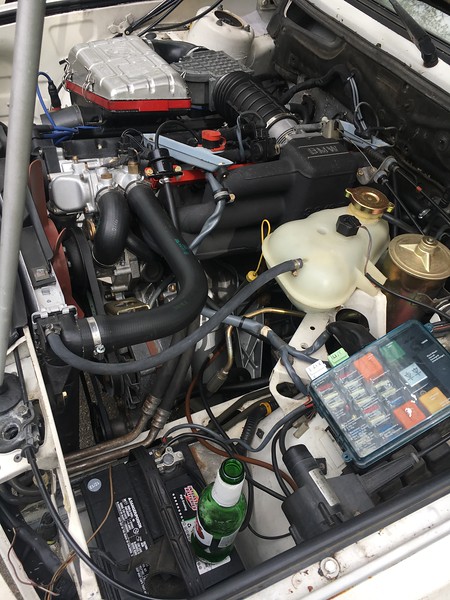
Slowly stripping the interior and exterior getting her ready for paint. Inspecting the trunk further, looks like will need a new seal and some rust spots touched up too. Motronic was kind enough to release some parts for it like a jack, rear deck and shade, heater box and adding a third brake light which for driving around here is a good idea.


Trunk situation needs a little love. Surprising the plate light area was fine... I will likely have the trunk painted too, even though most will be covered with a M5 trunk kit- i'll leave the small took kit and and show the nice new paint there.
.


So, the motor ran out in California, but finally getting around to installing the headers here and giving a go she just is cranking. Went over the usual stuff ( most ignition is new) replacing main and FP relay's and the main fuel pump and still nada,... At one point if was starting and stalling but now not even. I've swapped ECU's and still the same. The bypass valve and slide valve is brand new, and saw that it was fully closed. I turned the screw until it was half open, figuring to start there but still the same cranking result. Fuel tank was drained and fresh fuel with StarTron was offered- still the same. I might try the in tank pump now. Most everything else is new ( Plugs, wires, coil, injectors, fuel pump, TPS, relays) and have tested voltage most everywhere and seems to be proper. ..
Getting frustrated there- spent some time bleeding the brakes, and clutch and now have working brakes and clutch pedal feels great. ( alot softer than my old car that had a pretty stiff clutch)
Bypass valve thingy

The Slide valve replaced with has different part number on it, and the hole is in slightly different position:

My wife doesnt ski anymore so I was happy to have a nice hood prop


Re: Operation Hartge Jr. (528i/DRTY/SLK)
Did you check if you have full fuel pressure at the engine?Chimi-Changa wrote: So, the motor ran out in California, but finally getting around to installing the headers here and giving a go she just is cranking. Went over the usual stuff ( most ignition is new) replacing main and FP relay's and the main fuel pump and still nada,... At one point if was starting and stalling but now not even. I've swapped ECU's and still the same. The bypass valve and slide valve is brand new, and saw that it was fully closed. I turned the screw until it was half open, figuring to start there but still the same cranking result. Fuel tank was drained and fresh fuel with StarTron was offered- still the same. I might try the in tank pump now. Most everything else is new ( Plugs, wires, coil, injectors, fuel pump, TPS, relays) and have tested voltage most everywhere and seems to be proper. ..
-
Chimi-Changa
- Posts: 1655
- Joined: Nov 08, 2011 11:02 PM
- Location: Westboro, MA
Re: Operation Hartge Jr. (528i/DRTY/SLK)
- Thanks
That seems to be the problem... I have not checked pressure yet but looks like I need to. I checked voltage at the injector connectors, and at tps.
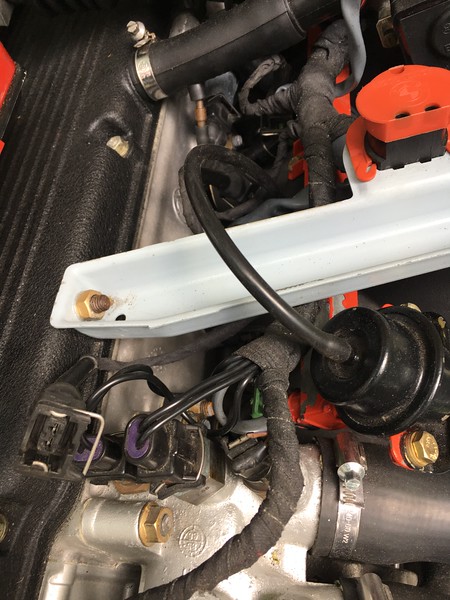
Also want a new coolant temp sensor- not sure how long that one has been in the motor. The main fuel pump is new but the lift pump is original- and this EU car has a screw in pump not bolt in looks like....
The Vintage trip was a blast and met up with some old friends and made some new ones. I was stoked on all the cars, and definitely got all jacked up on the project. DSmith's car was cool to see in person, among others
I swapped the 3.46S with Sammy for a 3.07S- which the euro Hartge H5S's had... and Pavel was cool enough to lug it to the vintage all the way from Tx for me to pickup- Thanks gents
It's now chilling in the basement:
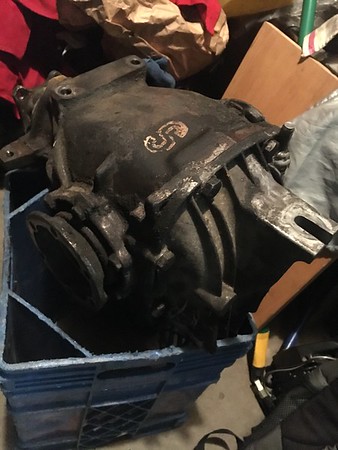
That seems to be the problem... I have not checked pressure yet but looks like I need to. I checked voltage at the injector connectors, and at tps.

Also want a new coolant temp sensor- not sure how long that one has been in the motor. The main fuel pump is new but the lift pump is original- and this EU car has a screw in pump not bolt in looks like....
The Vintage trip was a blast and met up with some old friends and made some new ones. I was stoked on all the cars, and definitely got all jacked up on the project. DSmith's car was cool to see in person, among others
I swapped the 3.46S with Sammy for a 3.07S- which the euro Hartge H5S's had... and Pavel was cool enough to lug it to the vintage all the way from Tx for me to pickup- Thanks gents
It's now chilling in the basement:

-
Chimi-Changa
- Posts: 1655
- Joined: Nov 08, 2011 11:02 PM
- Location: Westboro, MA
Re: Operation Hartge Jr. (528i/DRTY/SLK)
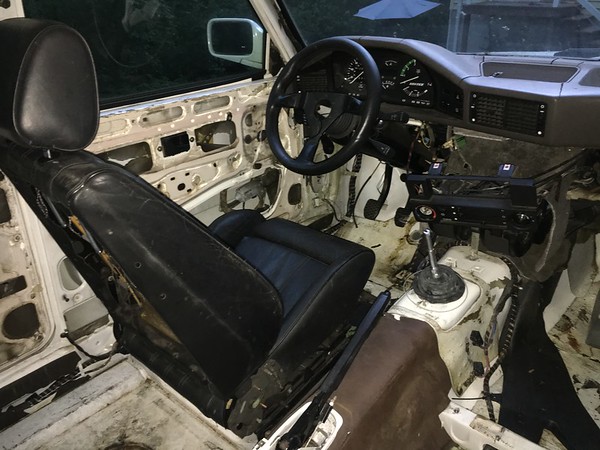
Figured I'd make myself more comfy while cranking her over, placing a seat, cluster, and steering wheel in for the moment.
[/
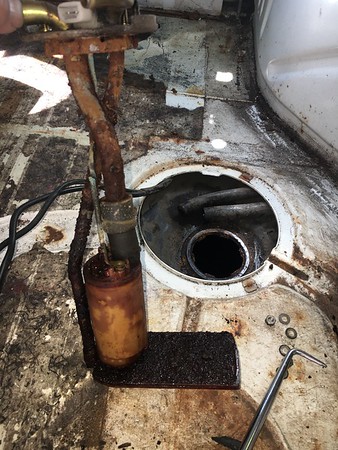
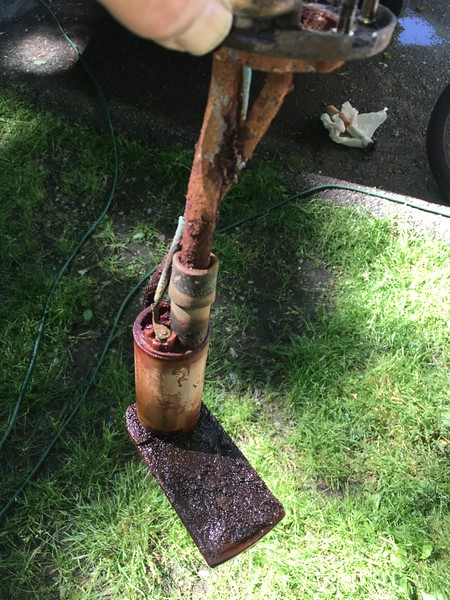
So everything is pointing to fuel supply/pressure - and decided to pull the in tank pump to check it out. Drained the tank again, and pulled the in tank pump- looking like this might be part ( if not all) of my problem. Good news is I have replacement tank, hope the USA and EU tanks are compatible ( besides the in tank pump mounting)
[/

So everything is pointing to fuel supply/pressure - and decided to pull the in tank pump to check it out. Drained the tank again, and pulled the in tank pump- looking like this might be part ( if not all) of my problem. Good news is I have replacement tank, hope the USA and EU tanks are compatible ( besides the in tank pump mounting)


Re: Operation Hartge Jr. (528i/DRTY/SLK)
Re: Operation Hartge Jr. (528i/DRTY/SLK)
I just swapped a north american tank into my 1984 525i that had the same pick-up setup as yours. everything plugged in and worked fine so you shouldn't have any issues with your replacement tank
Adam
Adam
-
Chimi-Changa
- Posts: 1655
- Joined: Nov 08, 2011 11:02 PM
- Location: Westboro, MA
Re: Operation Hartge Jr. (528i/DRTY/SLK)
Thanks Adam-
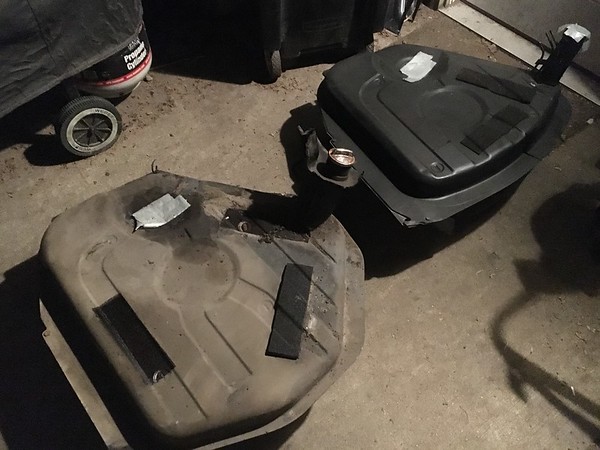
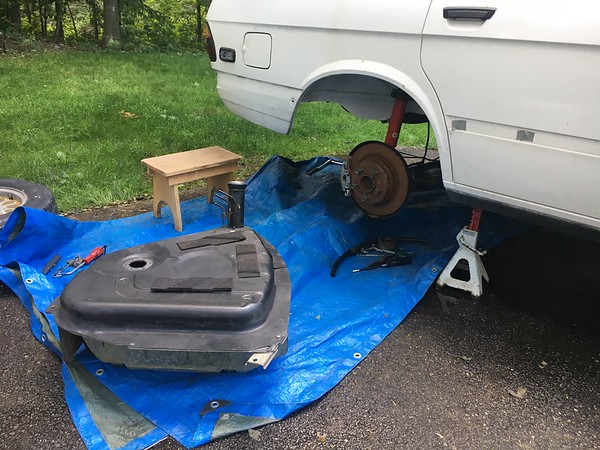
Yes- looks like everything should line up- The USA is about 2 gal smaller than the EU tank, Here is the difference
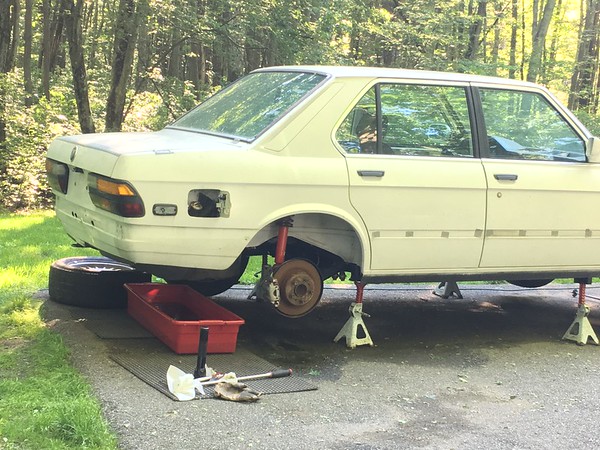
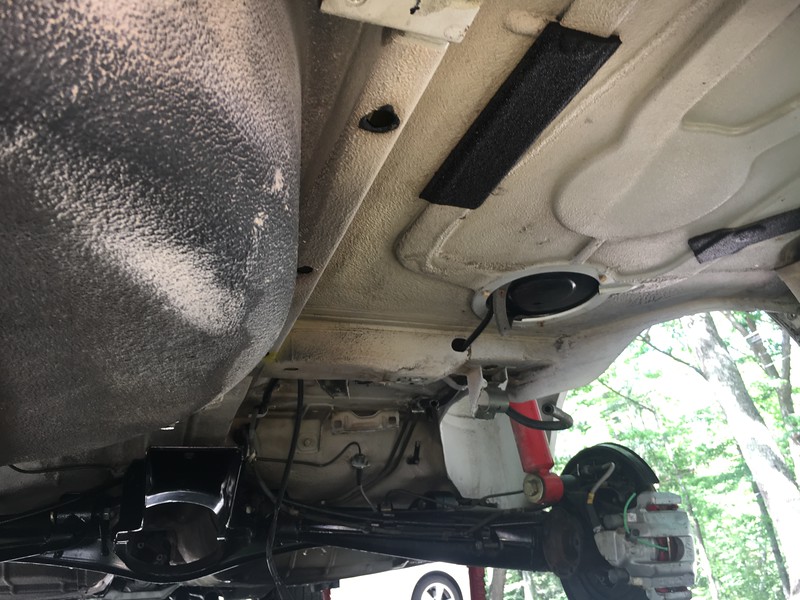
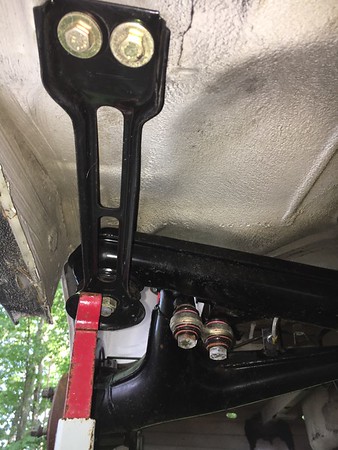
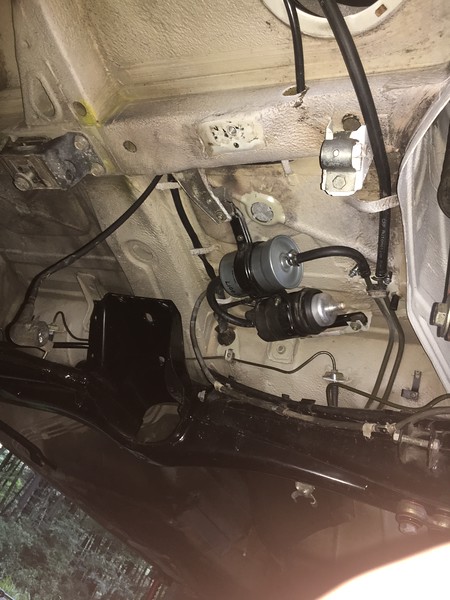
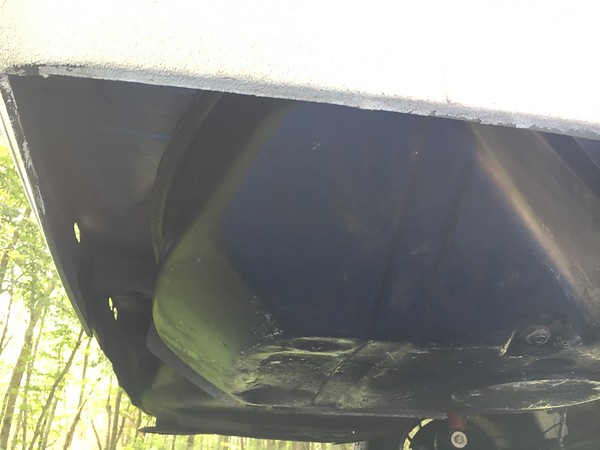
I took the opportunity to do some under carriage cleaning while the tank and pumps are out. Not a fun job in the driveway with just jack stands and a garden hose, but the results were nice.
before:
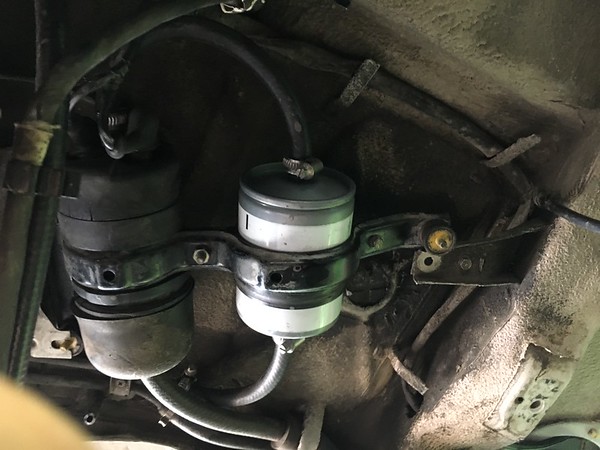
Yes- looks like everything should line up- The USA is about 2 gal smaller than the EU tank, Here is the difference

I took the opportunity to do some under carriage cleaning while the tank and pumps are out. Not a fun job in the driveway with just jack stands and a garden hose, but the results were nice.
before:


-
Chimi-Changa
- Posts: 1655
- Joined: Nov 08, 2011 11:02 PM
- Location: Westboro, MA
Re: Operation Hartge Jr. (528i/DRTY/SLK)
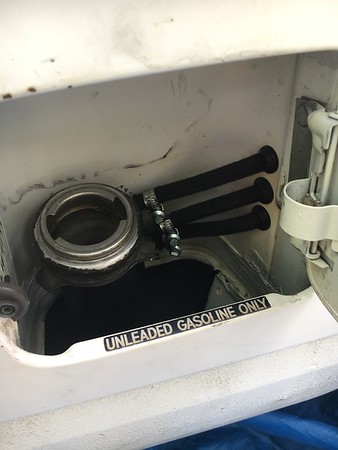
Tank went in pretty smoothly, You can see the gap that is left with the USA tank in there. Ended up with new evap hoses while I was there ( found some nice oem style braided ones at Bel Metric)
Also blew some compressed air through the hard lines to make sure nothing was blocking. Did the fuse 1 and 4 jump to test and not only could I hear the pumps and fuel rail filling, but could here the bladder in the pressure regulator squealing as the pressure built up. Tried the fire party again, and still could hear and feel that CYL 1 was not firing....After checking voltage at the wiring, and impedance of the injector and both were good I decided to replace the injector- Quick delivery of the 24lb injector from Five-O, popped that in yesterday and sure enough- all were firing and warming up. Stoked. Now moving on to the drive line.
evap action:
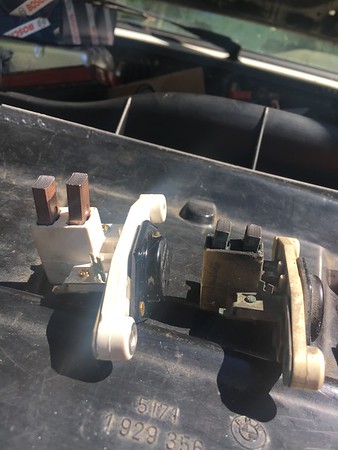
New Voltage regulator also in for good measure.
Also blew some compressed air through the hard lines to make sure nothing was blocking. Did the fuse 1 and 4 jump to test and not only could I hear the pumps and fuel rail filling, but could here the bladder in the pressure regulator squealing as the pressure built up. Tried the fire party again, and still could hear and feel that CYL 1 was not firing....After checking voltage at the wiring, and impedance of the injector and both were good I decided to replace the injector- Quick delivery of the 24lb injector from Five-O, popped that in yesterday and sure enough- all were firing and warming up. Stoked. Now moving on to the drive line.


evap action:

New Voltage regulator also in for good measure.

-
Chimi-Changa
- Posts: 1655
- Joined: Nov 08, 2011 11:02 PM
- Location: Westboro, MA
Re: Operation Hartge Jr. (528i/DRTY/SLK)
Little sound with the story:
https://www.youtube.com/watch?v=IFY6AZCVbuc
Just long tube headers on, and higher flow afe filter...
https://www.youtube.com/watch?v=IFY6AZCVbuc
Just long tube headers on, and higher flow afe filter...
-
Chimi-Changa
- Posts: 1655
- Joined: Nov 08, 2011 11:02 PM
- Location: Westboro, MA
Re: Operation Hartge Jr. (528i/DRTY/SLK)
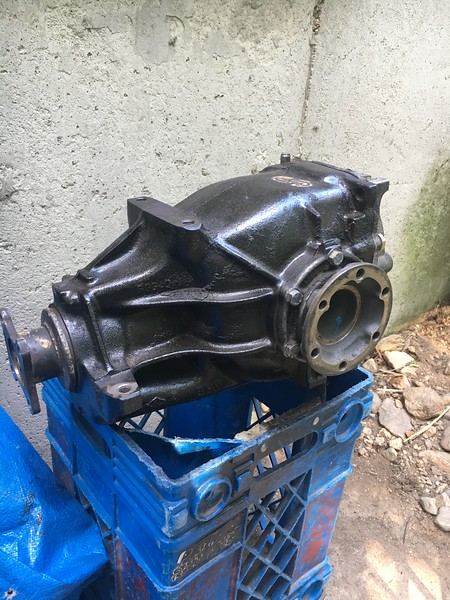
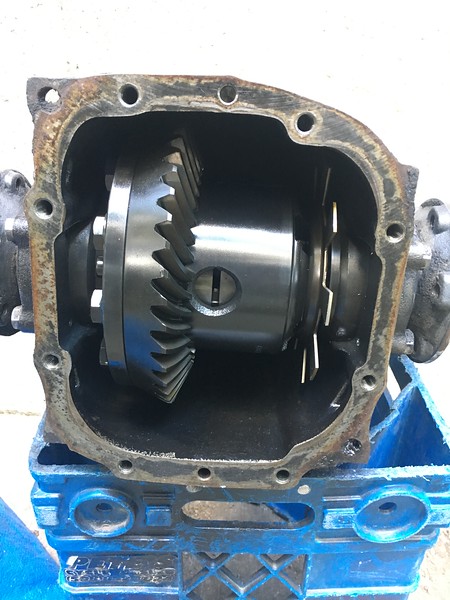
Working on the rear end... I traded the 3.46s to Sammy for a 3.07s that Pavel was nice enough to bring to the Vintage for me. 3.07's are what the Europe Hartge H5S cars came with, in the USA they had 3.25's and some had 3.46's.
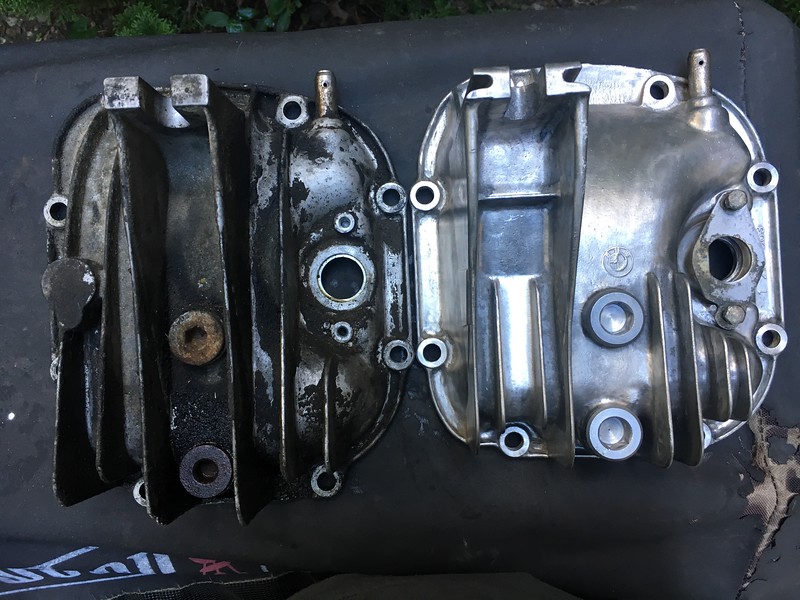
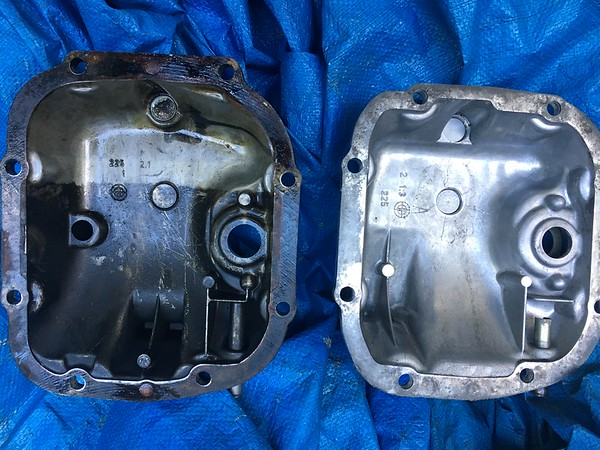
This one sounds like it is also out of an 82 Euro 635CSI- The rear cover has a center mount, not side-and cover like to be an inch or so longer than the one I had, and also extra cover that Jim offered me for it. After a little cleaning and painting, went to line up new cover and it lines up except for the bottom two holes.
So this body is an (early, coarse spline column) 1985 528, anyone know if can use the center mount rear cover that came on it, or is there a larger size, side mount cover that I should look for? Sounds like the standard is a 185 size gear, and the 3.7 sounds like it might be large case or 210 gear size.
Oil covered one is original to the diff:


Last edited by Chimi-Changa on Aug 02, 2017 8:48 PM, edited 1 time in total.
-
Boneyard Dynamics
- Posts: 90
- Joined: Apr 26, 2011 5:46 PM
- Location: Bavaria, not far away from the place the e28s where build
Re: Operation Hartge Jr. (528i/DRTY/SLK)
You had a bit of bad luck. Really early 188 diffs have a bigger case than the later more well known 188 diffs. All type 188 diffs till ~ 9/82 have the older bigger case. From 9/82 the little bit smaller well known type 188 diff case was used.
The bigger 188 diffs were only used in e24 and e28 till ~9/82, as to my knowledge.
The problem is, there is only a cover with a center mount for the older, bigger 188 diff. There was never a left mount cover for the old big 188 case.
e28s till 9/84 used the center mount, from 9/84 the left mount was used.
greetings from bavaria,
Wolfgang
-
Chimi-Changa
- Posts: 1655
- Joined: Nov 08, 2011 11:02 PM
- Location: Westboro, MA
Re: Operation Hartge Jr. (528i/DRTY/SLK)
Very good intel Wolfgang, Thank you for posting.
My production date was July 3, 1985 so I need a side mount. A 3.25s has become available, and likely going that route. I could possibly swap the gears over from the larger med case to the regular med case, but the path of least resistance is calling. Thank you Jim, Ben, Sammy, and Pavel regarding-
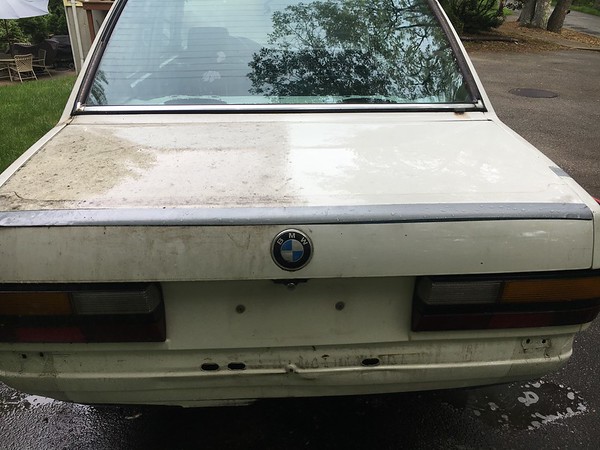
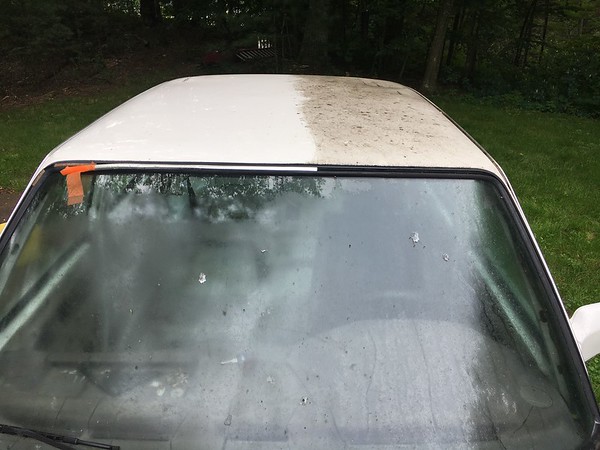
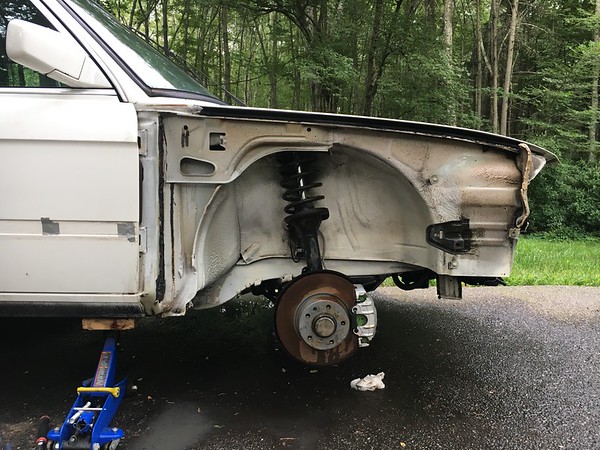
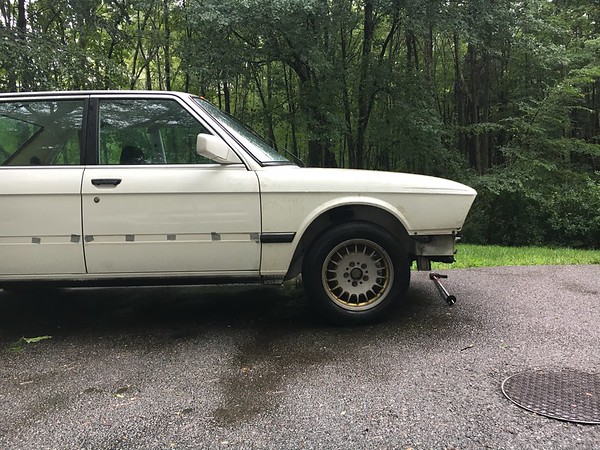
So, even though there is much to do, I felt like giving it a bath for the first time in years- I guess it was looking more off white. I was so excited to see a cleaner car ( still more nooks and cranny cleaning to do) I went ahead and replaced the pass fender- I'm ditching the federalized markers, and that one had two dents plus transport damage- so adios. Also busted out the Lemon Simple Green, brush, and hottest water out of the tap for some wheel well cleaning while it was opened up. New fender line up pretty good for just with two bolts in it. I still want to do some sort of preventative coating on inside of fender while its off.
And to my dogs, and neighbor's with a newborn's joy- I warmed her up a bit, and let the temp build in the motor. Needle went over middle, then lower hose finally got hot and then the needle settled back to middle. Thinking about exhaust options, but happy with the sound of this high comp motor.


Re: Operation Hartge Jr. (528i/DRTY/SLK)
"Drive that Bitch!" 
-
Blue Shadow
- Posts: 10294
- Joined: Feb 12, 2006 12:00 PM
- Location: SE PA
Re: Operation Hartge Jr. (528i/DRTY/SLK)
I'm looking at that LBK and see that the rotors are screaming for a drive to clean them off. You can see that the painted hats are holding up well to the NE weather abuse but the braking surface is supposed to be shiny and that is done with regular buffing with brake pads. Those pads need to be rubbing that rotor so the smooth comes back to replace the rust.
Little steps, coming along and it will be nice. Good work.
Little steps, coming along and it will be nice. Good work.
-
Chimi-Changa
- Posts: 1655
- Joined: Nov 08, 2011 11:02 PM
- Location: Westboro, MA
Re: Operation Hartge Jr. (528i/DRTY/SLK)
Thanks to Motronic, and BenGerman- I secured this 3.25S - did a bunch of cleaning up on it, and Jim let me use this shiny rear cover that he cleaned up- Gracias!
before:
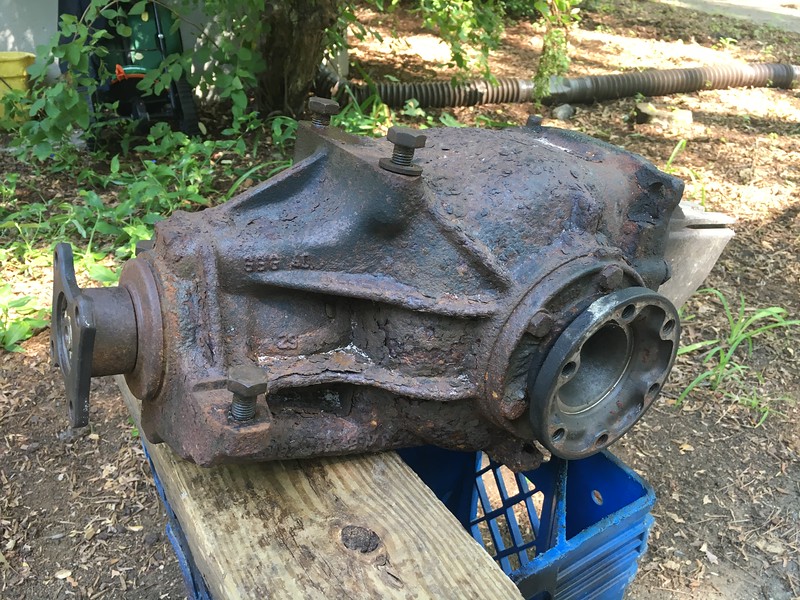
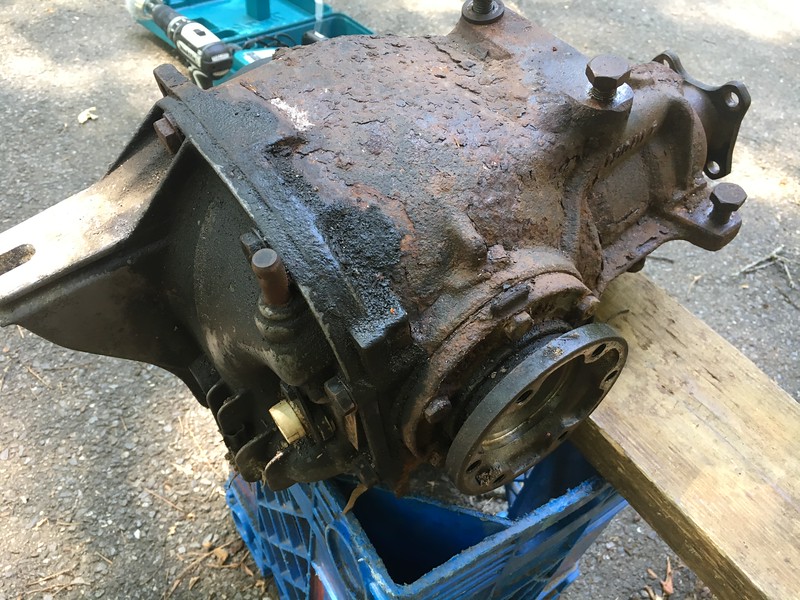
after:
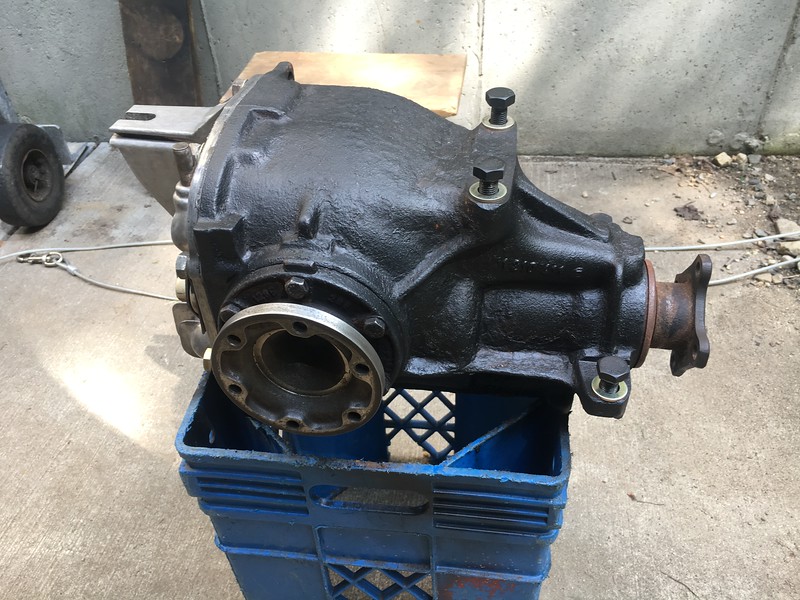
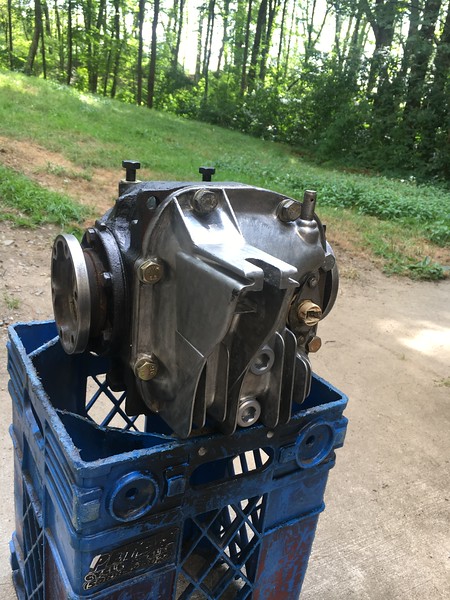
Yesterday was able to install the driveshaft, differential, axles with new hardware- and threw on the Type A wheels. It was pretty cool to fire it up, and actually move it back and forth under its own power.
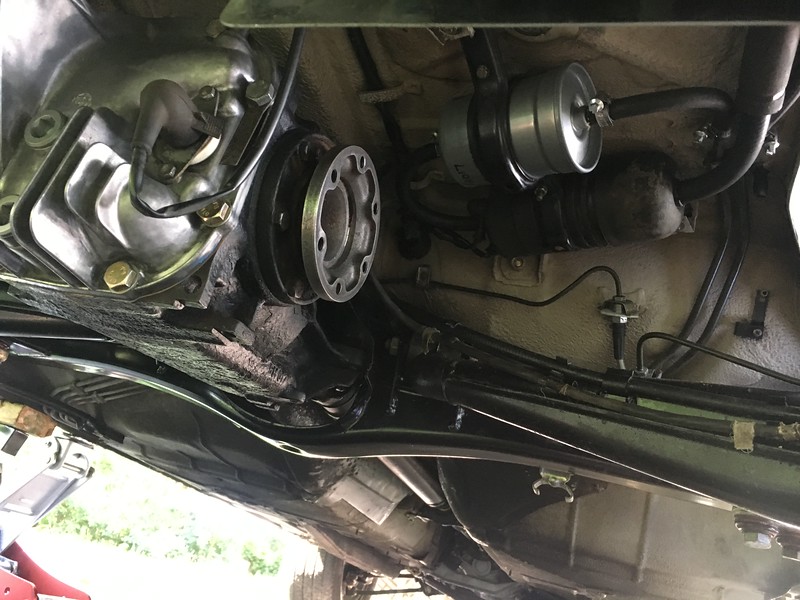

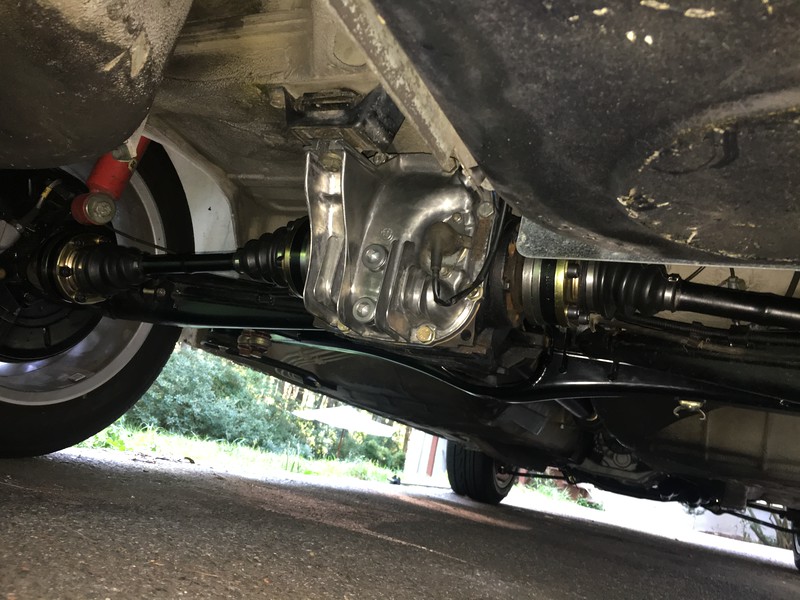
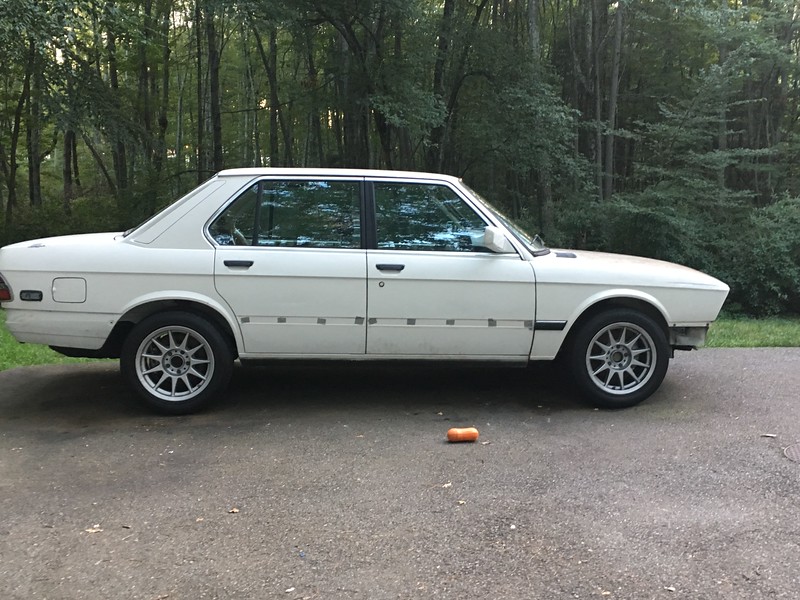
before:


after:


Yesterday was able to install the driveshaft, differential, axles with new hardware- and threw on the Type A wheels. It was pretty cool to fire it up, and actually move it back and forth under its own power.


-
Chimi-Changa
- Posts: 1655
- Joined: Nov 08, 2011 11:02 PM
- Location: Westboro, MA
Re: Operation Hartge Jr. (528i/DRTY/SLK)
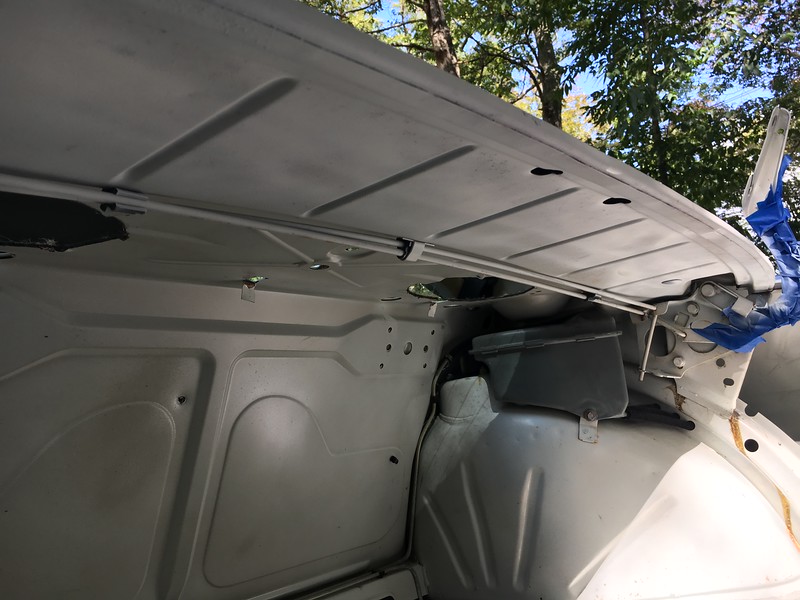
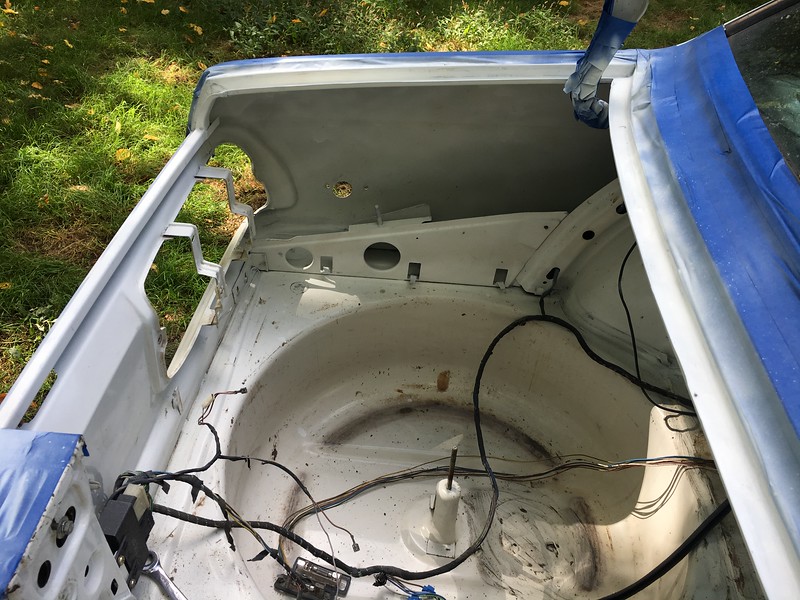
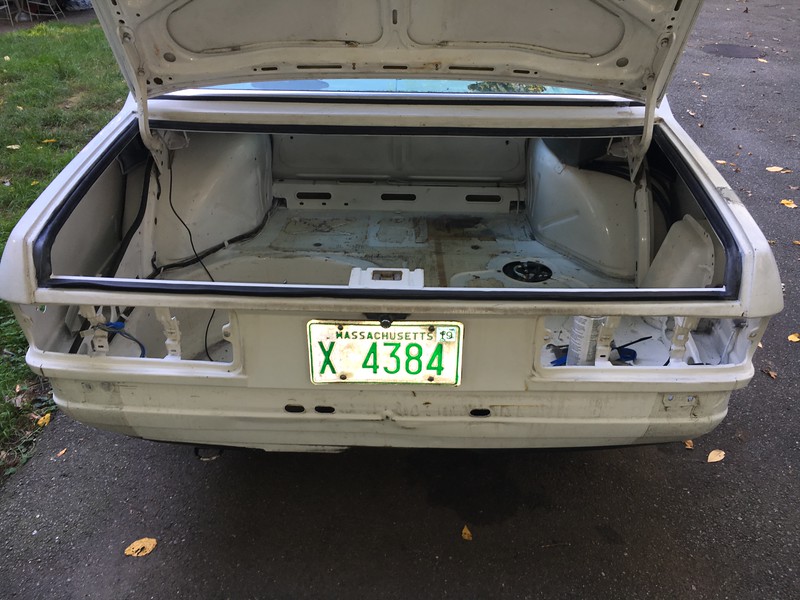
Trunk seal time. This car has a small ( typical) corrosion spot below the rear glass, and a very tired trunk seal. Between that, the hole, and weak light seals- water was getting in the trunk.
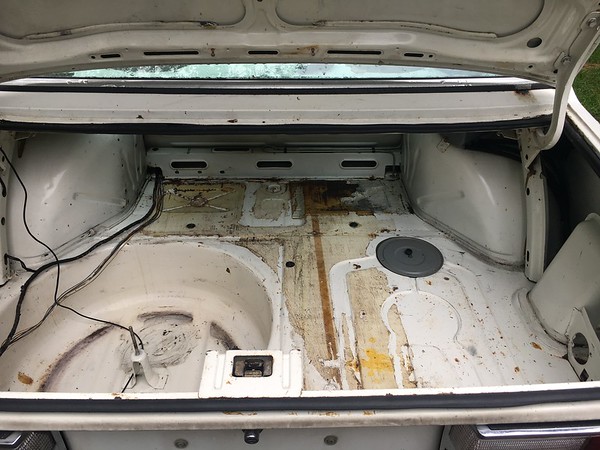
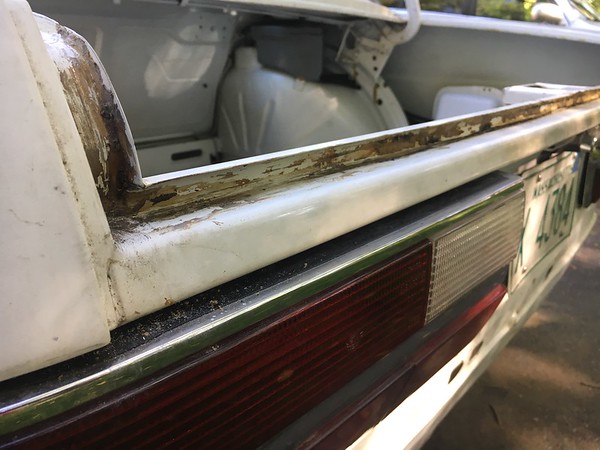
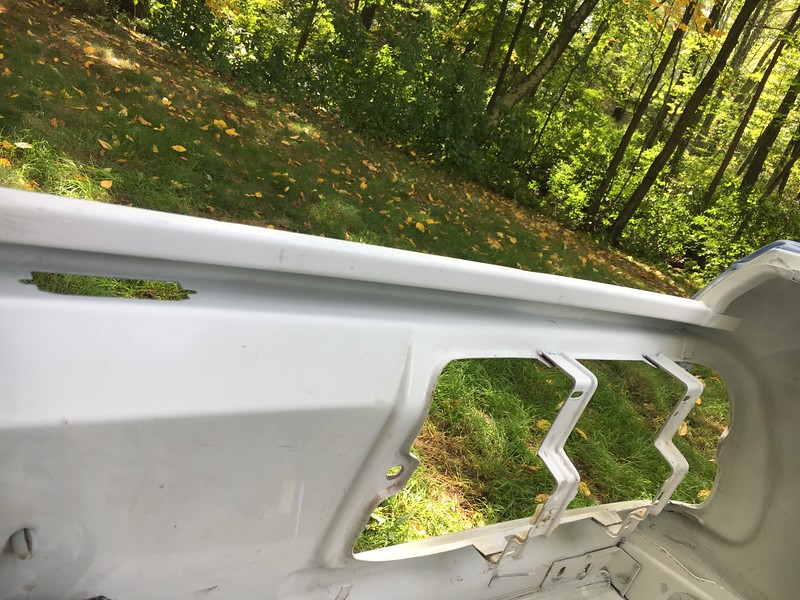
Was able to get the old seal off, and spent alot of time removing what looked like gorilla glue in the seal track. Given this being a weak area on these cars- i am trying to do this once ( for now) and go for as close to frog's behind as possible.
I decided to spray the channel with Eastwood's rust preventative spray too, which comes in White which is nice. Removing the trunk lid sure makes things easier for glue removal and prep:
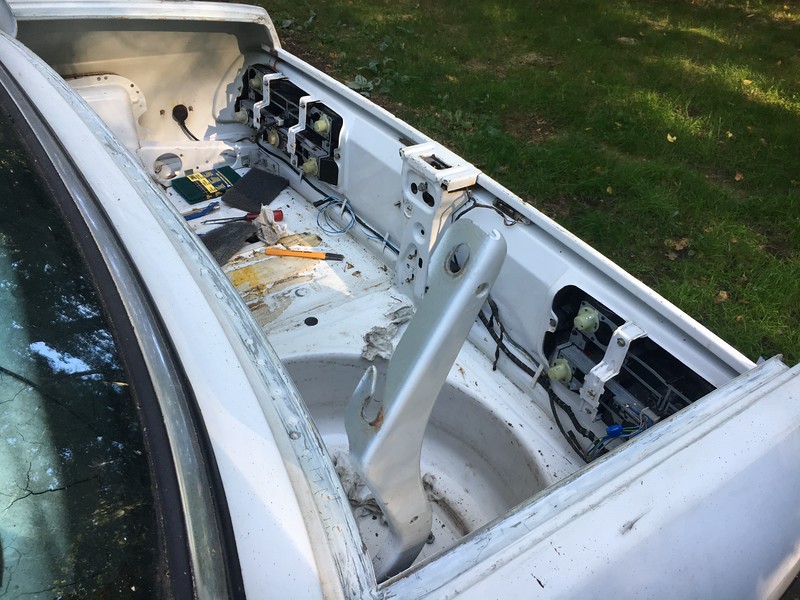
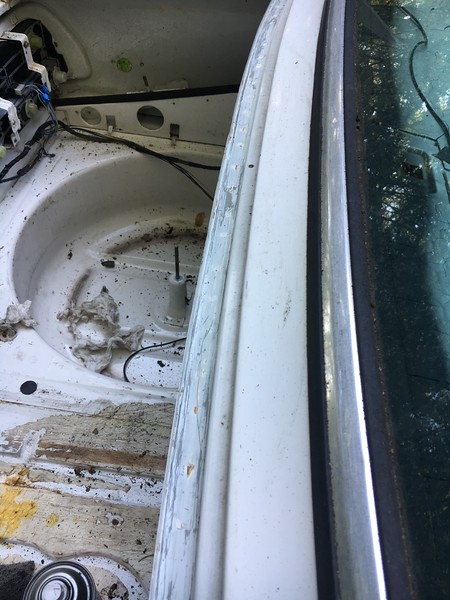
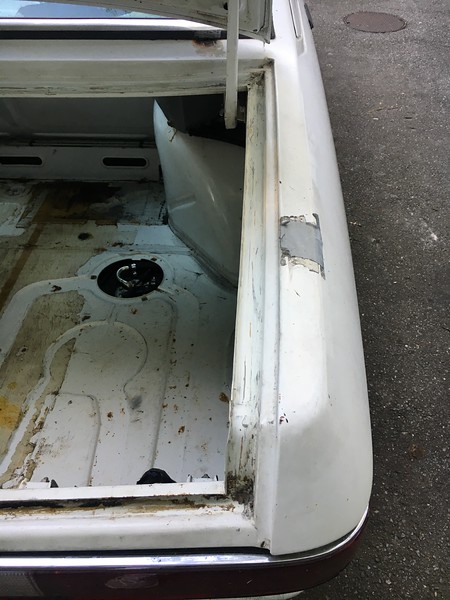
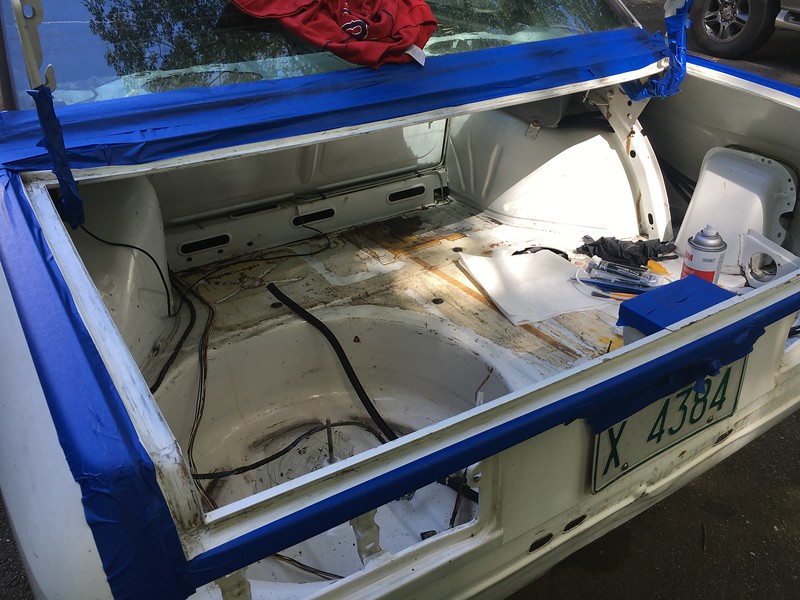
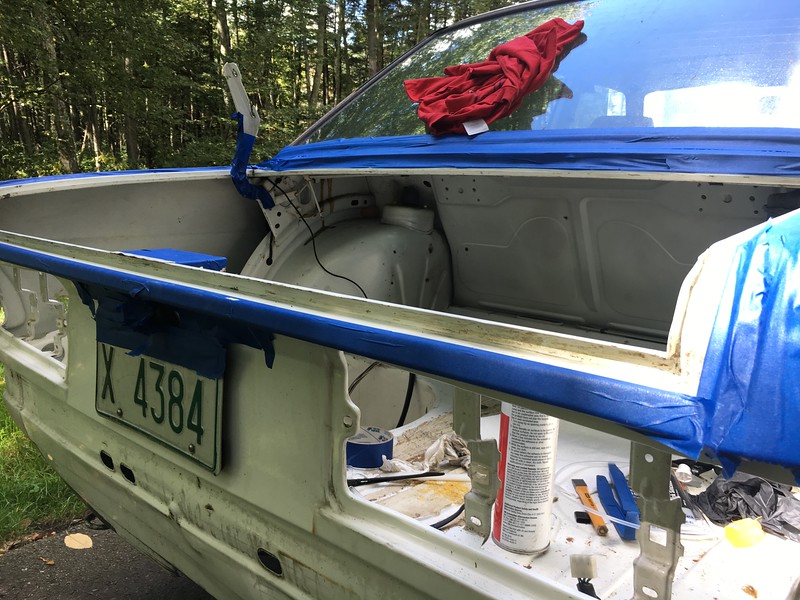
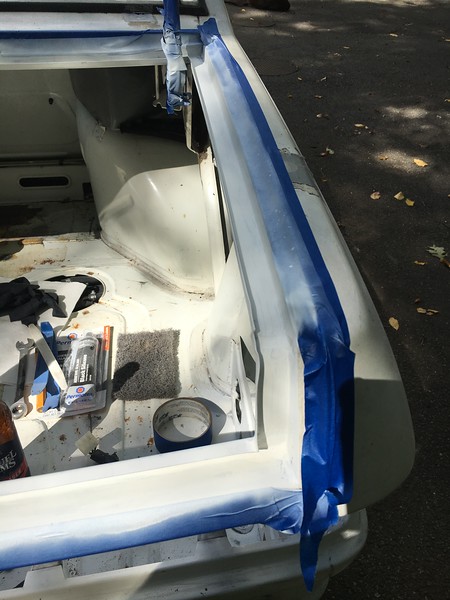
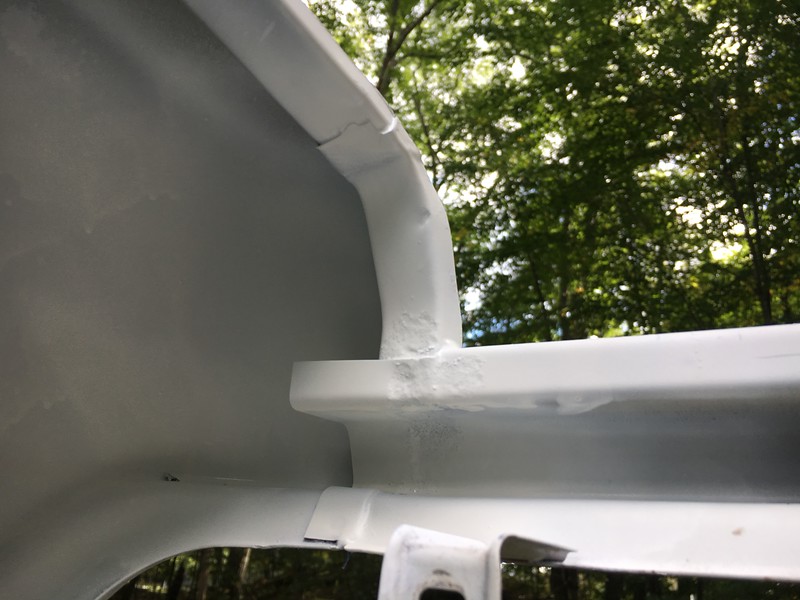
New seal on! Next day, secured rear of seal and corners with Black Silacone:
and besides the new seal- registered and insured this Bish! Transferred my old school (rear only) MA plate to it, and used a e46 plate bracket to attach it to the euro rear mount holes ( thanks Chris K for idea)
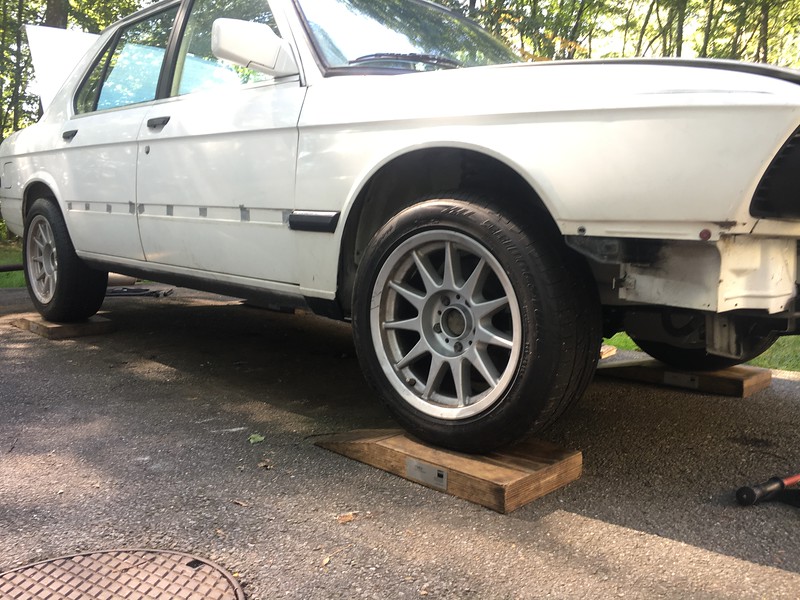
Time to tighten up the suspension and steering, was able to borrow some Carrera GT blocks from work, and bought some 70 pound sand bags from Lowe's to weight the car down:
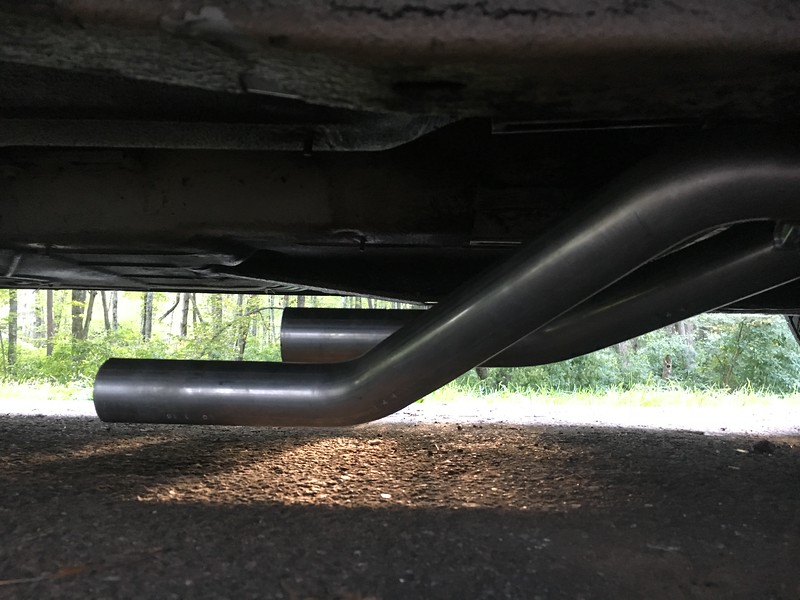
Also started playing with exhaust a little, added the connector pipes to the headers- this shows the different lengths they are- will try to make up the difference with the connecting pipes before the resonator


Was able to get the old seal off, and spent alot of time removing what looked like gorilla glue in the seal track. Given this being a weak area on these cars- i am trying to do this once ( for now) and go for as close to frog's behind as possible.
I decided to spray the channel with Eastwood's rust preventative spray too, which comes in White which is nice. Removing the trunk lid sure makes things easier for glue removal and prep:


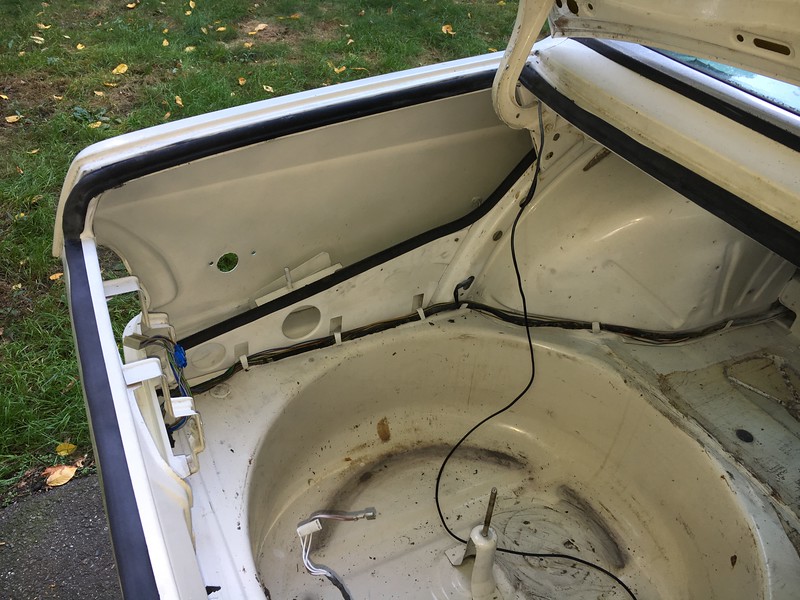
New seal on! Next day, secured rear of seal and corners with Black Silacone:

and besides the new seal- registered and insured this Bish! Transferred my old school (rear only) MA plate to it, and used a e46 plate bracket to attach it to the euro rear mount holes ( thanks Chris K for idea)

Time to tighten up the suspension and steering, was able to borrow some Carrera GT blocks from work, and bought some 70 pound sand bags from Lowe's to weight the car down:

Also started playing with exhaust a little, added the connector pipes to the headers- this shows the different lengths they are- will try to make up the difference with the connecting pipes before the resonator


-
Chimi-Changa
- Posts: 1655
- Joined: Nov 08, 2011 11:02 PM
- Location: Westboro, MA
Re: Operation Hartge Jr. (528i/DRTY/SLK)
Switching over to words and dollar amounts 
Re: Operation Hartge Jr. (528i/DRTY/SLK)
Trunk is in very good condition compared to handful of cars I have seen so far.
-
Chimi-Changa
- Posts: 1655
- Joined: Nov 08, 2011 11:02 PM
- Location: Westboro, MA
Re: Operation Hartge Jr. (528i/DRTY/SLK)
Did some more fender cleaning, replaced the valve cover gasket with the reinz style gasket- these seem to seal the valve cover a little better.
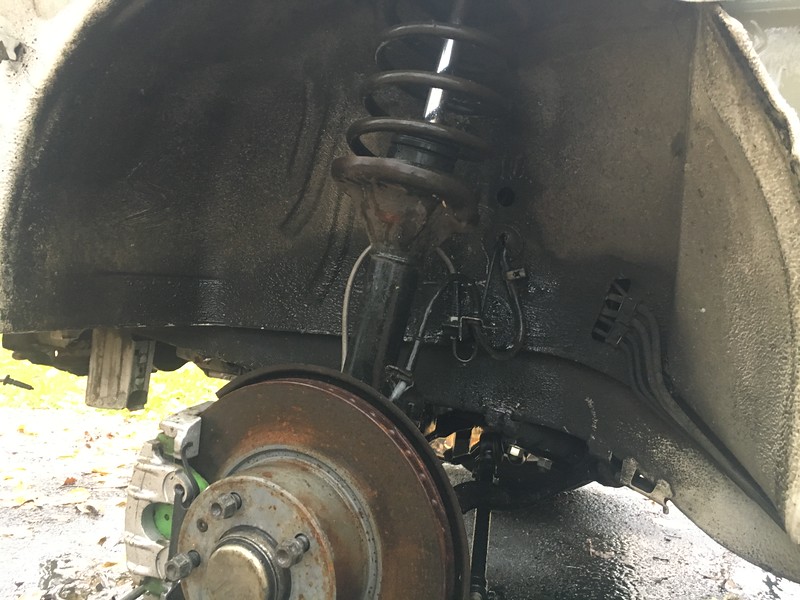
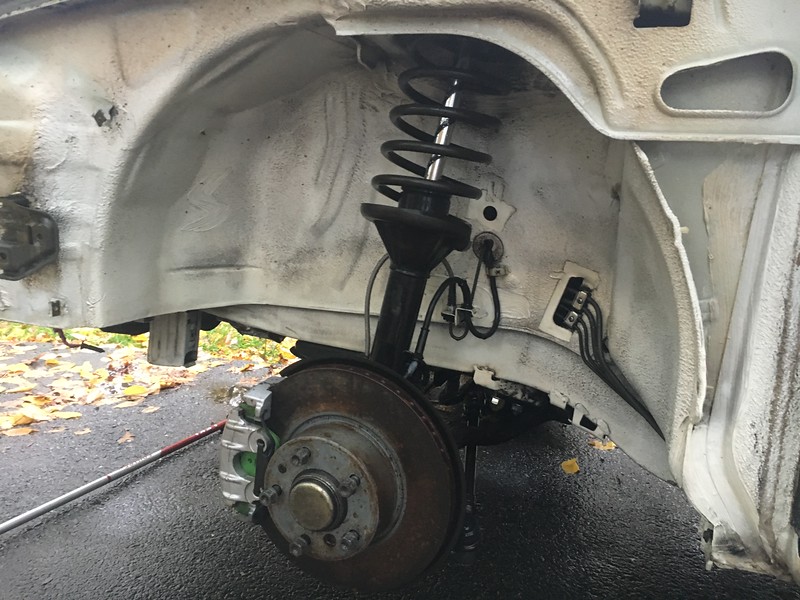
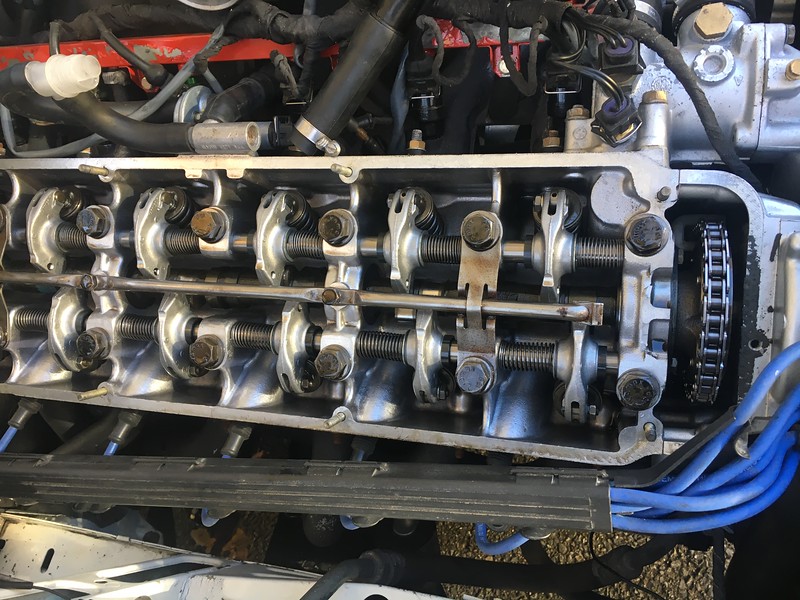
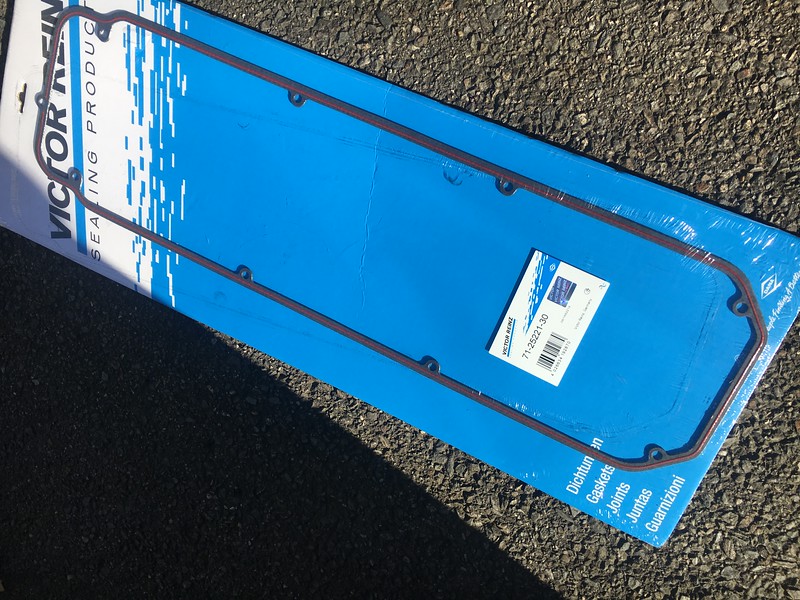
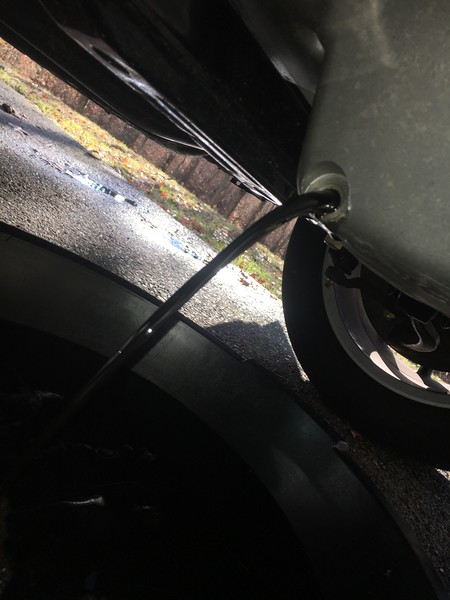
After running the motor a bit, and decided to change the oil to have fresh oil sitting until spring, glad I did. The oil was pretty dark in the motor. i will do it again in the spring and add break-in additives back in...
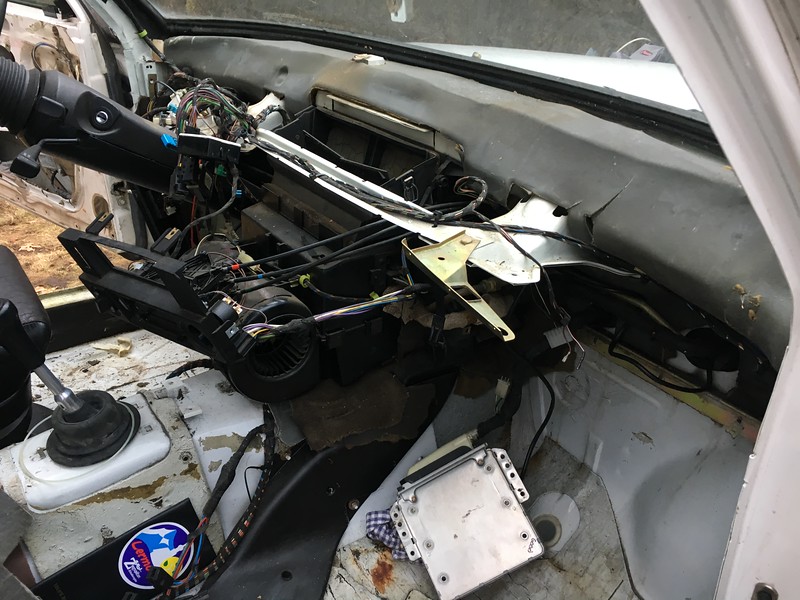
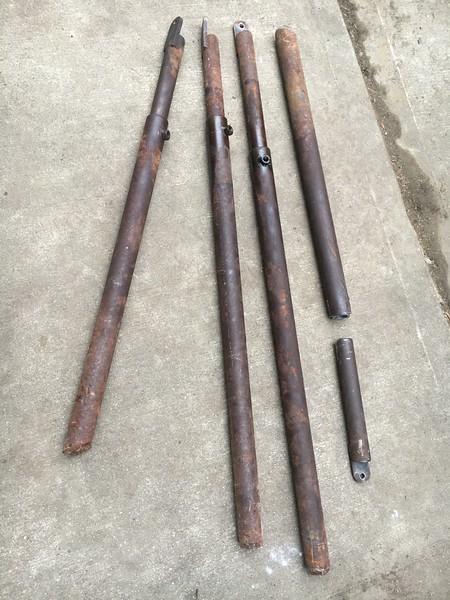
Yesterday was able to pull the dash, and the federalized door beams out:
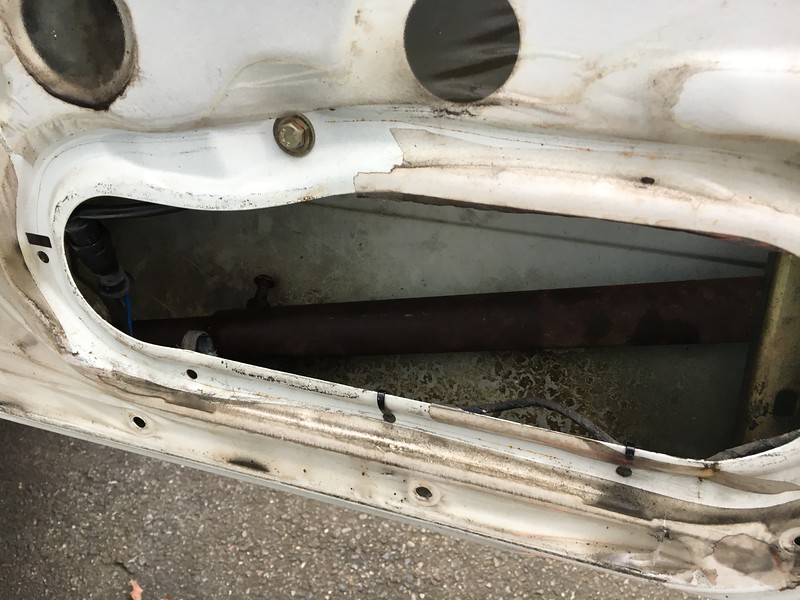
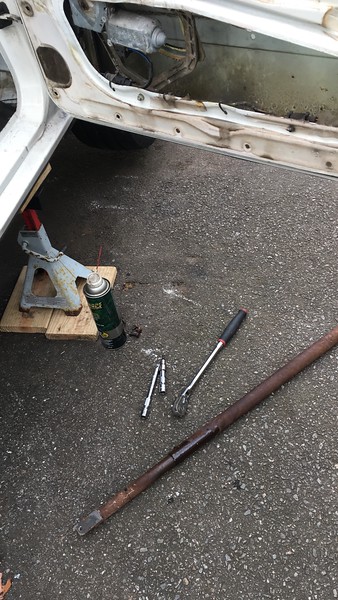
I had no idea these were added, but did notice they seemed like the only things rusting on the car... Thanks Wolf for the heads up! Three came out OK, one had to eventually be cut out. These total 16.8 pounds:
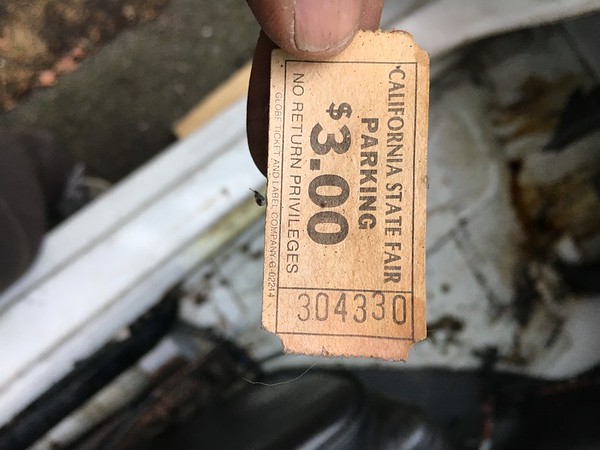
With dash out, found this old fair ticket from one of the previous owners:


After running the motor a bit, and decided to change the oil to have fresh oil sitting until spring, glad I did. The oil was pretty dark in the motor. i will do it again in the spring and add break-in additives back in...

Yesterday was able to pull the dash, and the federalized door beams out:

I had no idea these were added, but did notice they seemed like the only things rusting on the car... Thanks Wolf for the heads up! Three came out OK, one had to eventually be cut out. These total 16.8 pounds:


With dash out, found this old fair ticket from one of the previous owners:

Re: Operation Hartge Jr. (528i/DRTY/SLK)
Nice progress. Thanks for sharing the pictures. What are you using to clean the underbody and wheel wells, in terms of cleaning tools and chemicals?
-
Chimi-Changa
- Posts: 1655
- Joined: Nov 08, 2011 11:02 PM
- Location: Westboro, MA
Re: Operation Hartge Jr. (528i/DRTY/SLK)
Thanks! I am limited to the driveway, and with pets in the yard I was hesitant to use harsh chemicals.
So, I used Simple Green lemon flavor, and the hottest water that would come out of my sink in a wash bucket. Some plastic scrub tools helped out, too.
So, I used Simple Green lemon flavor, and the hottest water that would come out of my sink in a wash bucket. Some plastic scrub tools helped out, too.

