Another restoration - 83' 528i
Another restoration - 83' 528i
Hi all,
My name is Taavi and I'm from Estonia.
I've been reading this forum weekly for a few years now but haven't bothered to write much anything. The know-how lying around on this website is amazing and it is my go-to place for pretty much anything related to these cars.
Now that it finally feels like the project is getting somewhere I though it's time to make an introduction. And what better way to do that than with a proper build thread.
Not sure how I got the bug but I've been longing for a decent E28 for a while. But unfortunately, nice specimens have become quite scarce in this part of the world. Cars are either quite expensive or have extensive rust damage. Or both.
I believe it's worth a mention that I had no experience with bodywork prior to that project. Frankly, I had never even used a welder.
However, being prepared to get myself acquainted with bodywork I started to look for an E28. Hence, the quest for a decent E28 got a secondary objective - to learn a great deal in the process.
It has been a work in progress for a while now but I'll start from the beginning and dedicate each post to a certain period of time. Hopefully, I'll catch up with the progress after a while.
I will stop the introduction post here and leave it for future overviews, progress lists and indices.
Re: Another restoration - 83' 528i
July 2017 - Dec 2017
I have decided to dedicate the first post to the car that didn't get saved.
In July 2017 I found an online advertisement for a 1981 525i.
It had a M30B35 in it which was perfect as I already had intentions to do that swap myself on the car I end up with. The car had some cosmetic rust repairs done and it had a cheap flashy single stage paint on it. This wasn't an issue since the idea was to strip and repaint the car anyway. Furthermore, it had been standing for a while and didn't run too well but managed to make the 100km trip back home without any issues.
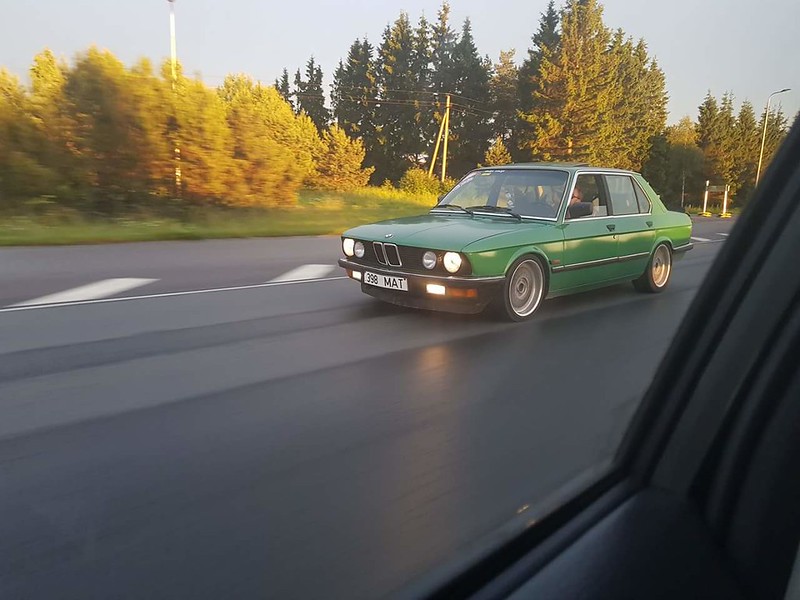
Here's one of the first pictures I have of this car - me driving it home.
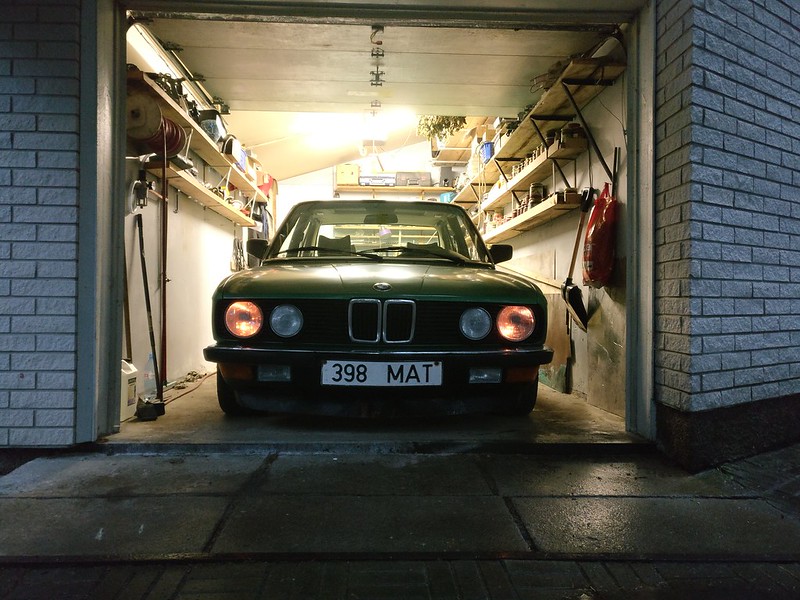
And here's a photo of the car in the tiny garage space at my parents house where I did the initial overhaul to get it roadworthy.
My and a few of my friends were looking for a larger shared workshop at that time and since the car was in more or less running condition I was in no hurry to begin with the extensive repairs. So the idea was to get it tidied up, pass the inspection and just enjoy it for the rest of the summer.
Some notes about the car from the top of my head:
Unfortunately, I do not have many photos from that period.
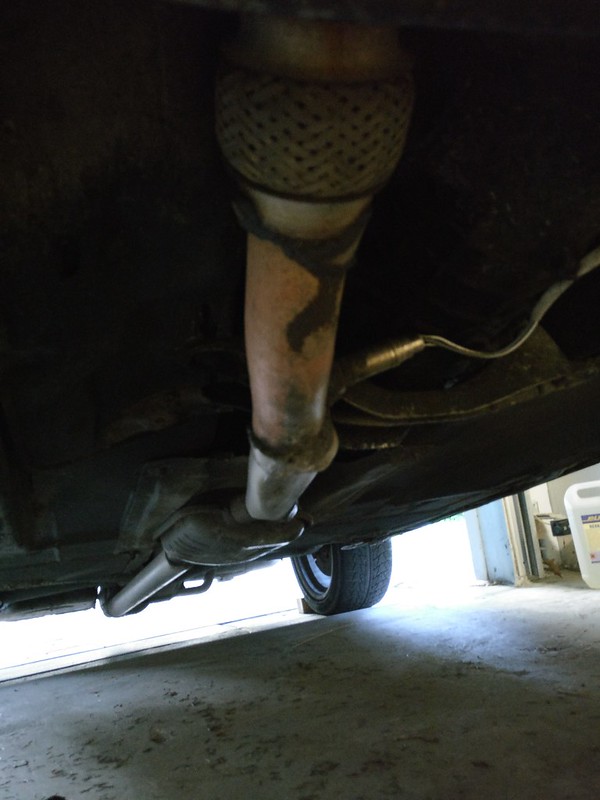
A dodgy exhaust.
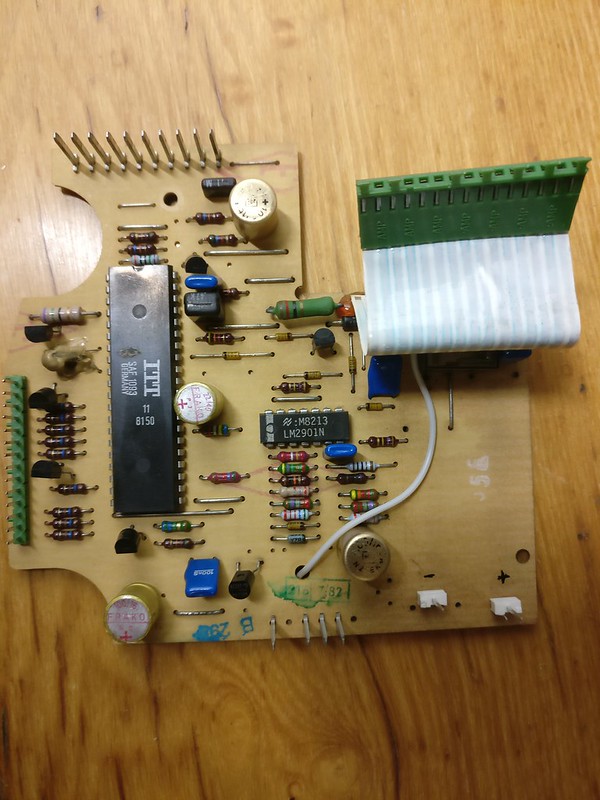
Fixing SI board to get the temp gauge working.
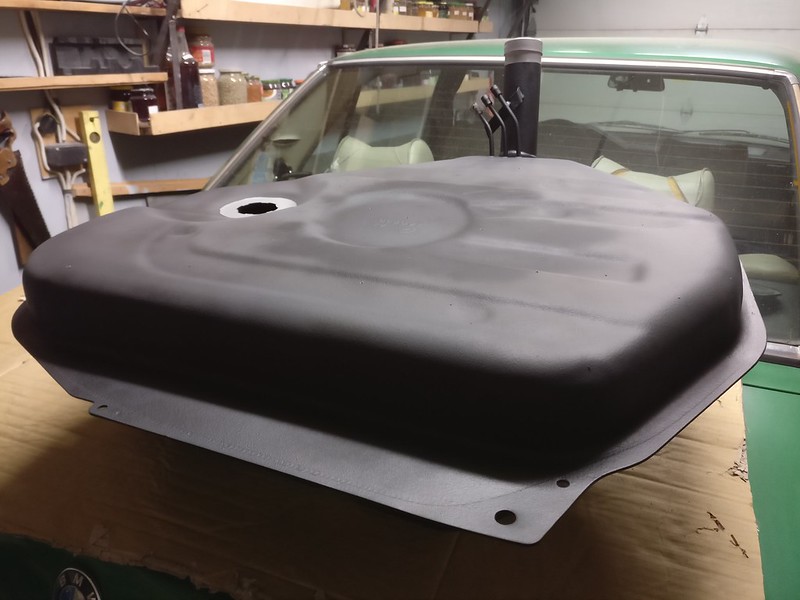
New fuel tank stonechipped and painted, ready to go in.
Next few months I was just driving the car and getting our new workshop ready. In the late october the car made its final ride to the workshop and I began taking everything apart.
A few photos of the car before dismantling everything.
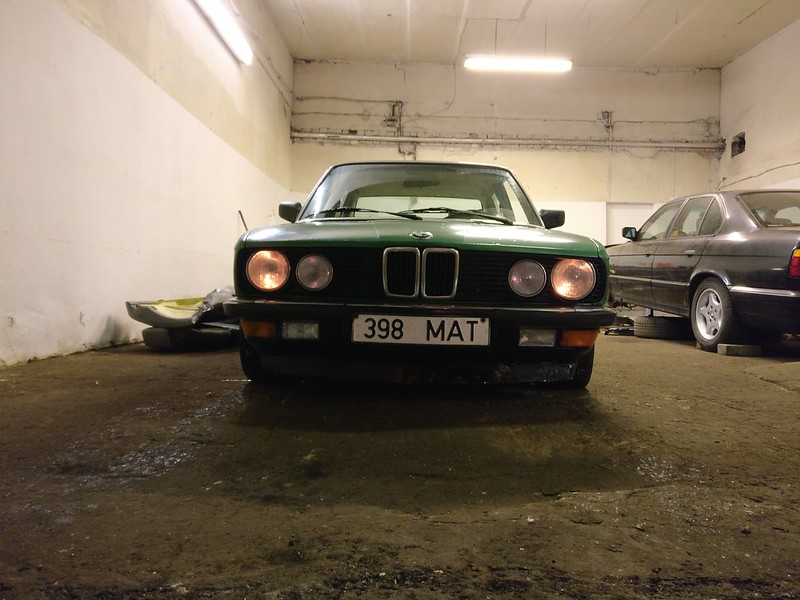
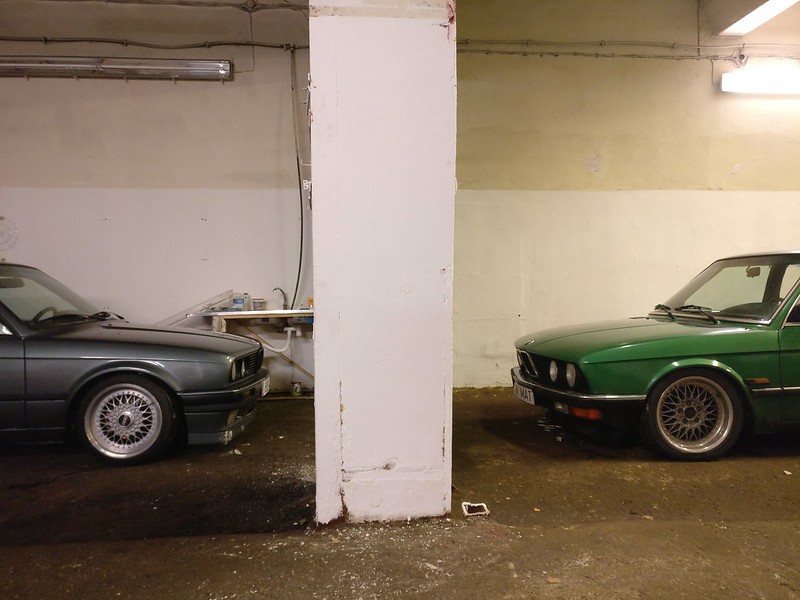
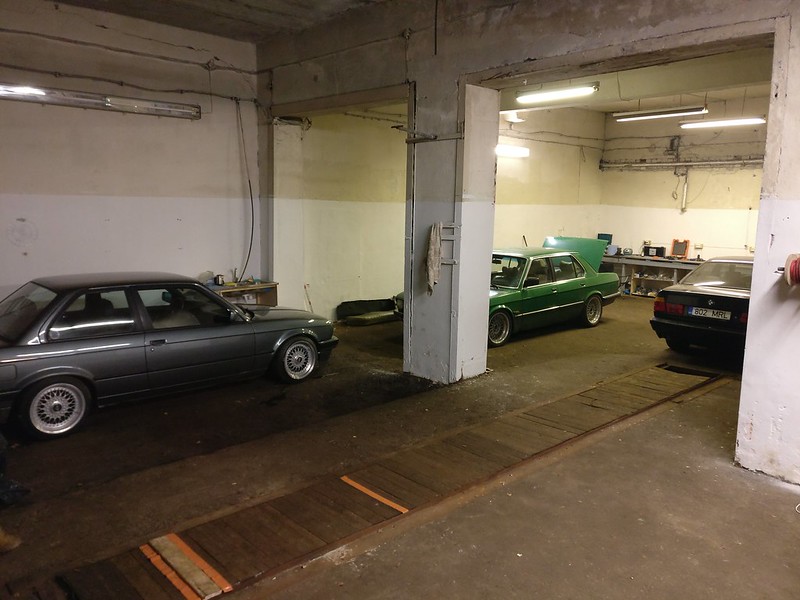
I have hundreds of pictures taken during disassembly. If anyone is in need for a picture of some otherwise hard to see place, hit me up and I might be able to find something. I won't bother anyone else with those photos because there's isn't much to see.
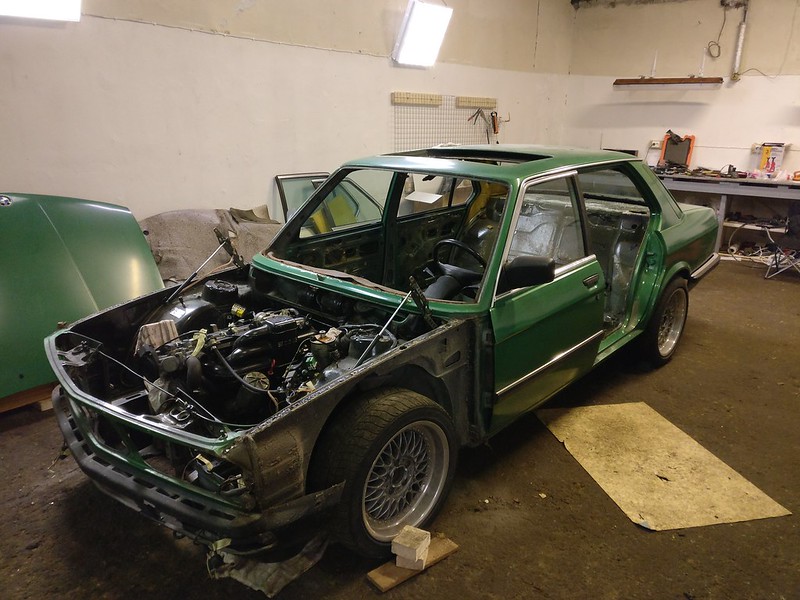
Here's the car with a lot of stuff already removed. Taken in December 2017.
Maybe someone already noticed it on the previous photo but this is one of the main reasons this chassis got discarded.
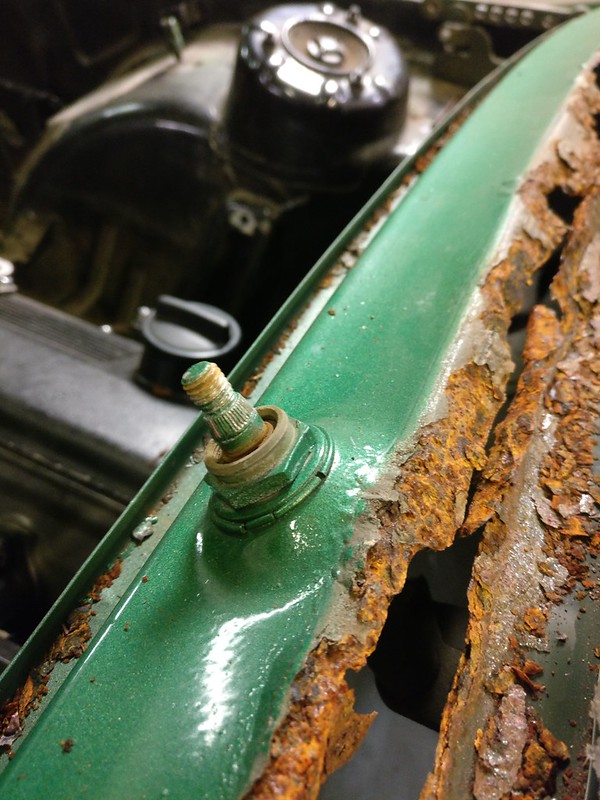
All that rust was well hidden under the new paint and windshield seal and barely visible before removing the windshield.
Meanwhile, I also took some time to thoroughly clean all the interior parts I intended to use. Everything got cleaned, sorted, labelled. Smaller parts ended up in zip-bags, larger parts got wrapped into plastic and sorted into boxes.
Here's a great (great might not be the best word to describe this filth) before and after photo of how dirty most of the interior stuff was. Glove box being already cleaned.
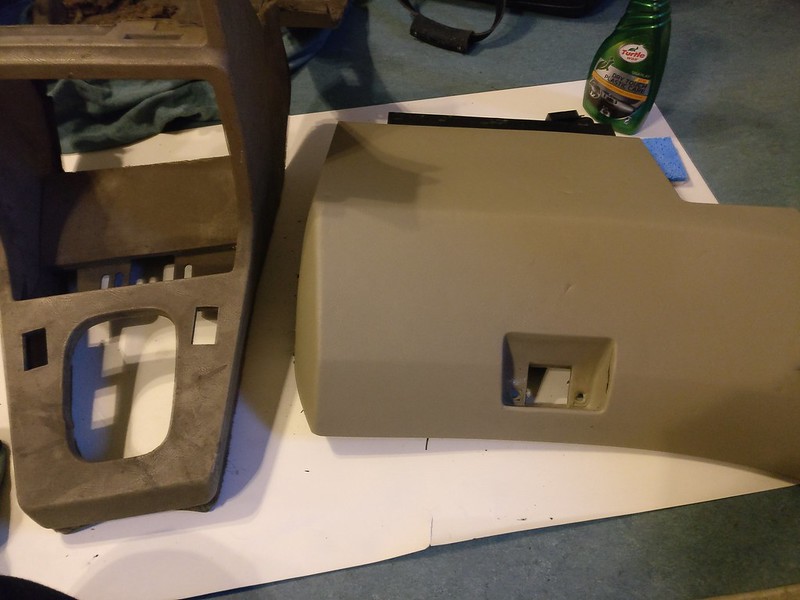
I remember spending hours and hours on bathing car parts, dismantling all the vent grills and scrubbing more than 30 years of road grime out of the vent pipes. I did not take many photos of the cleaning process but I'll try to remember taking some when time comes to put everything back together.
Anyhow, engine had to come out
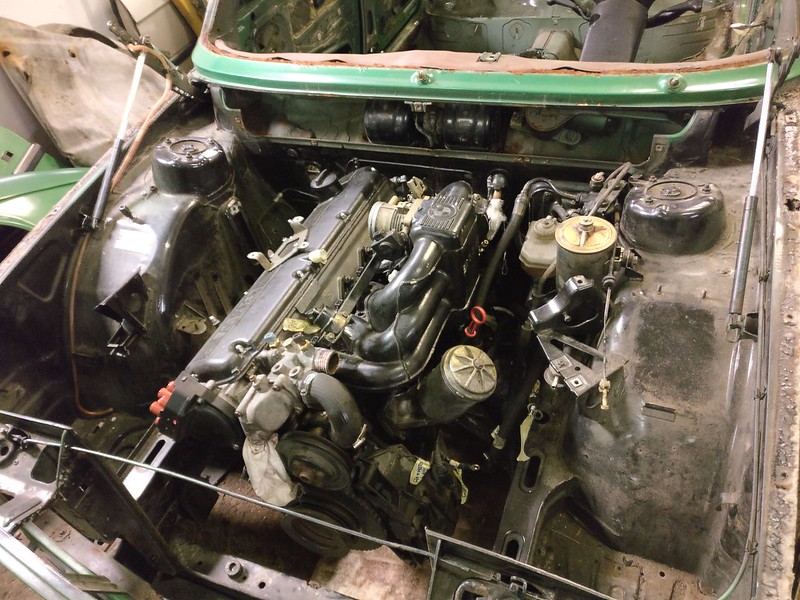
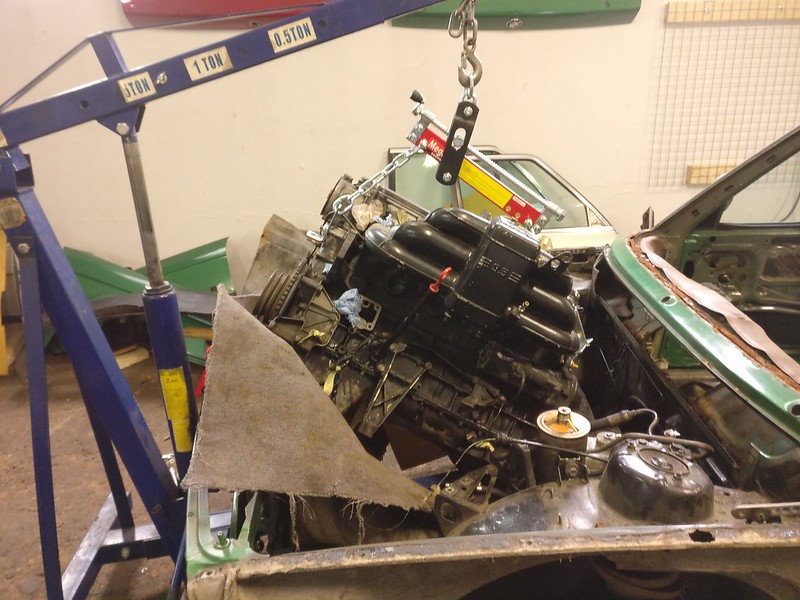
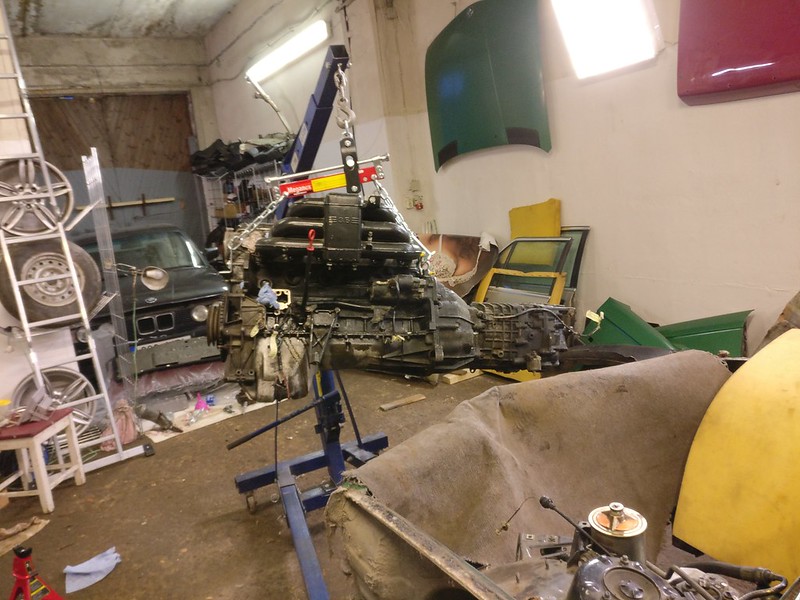
And put on a stand for storage and overhaul
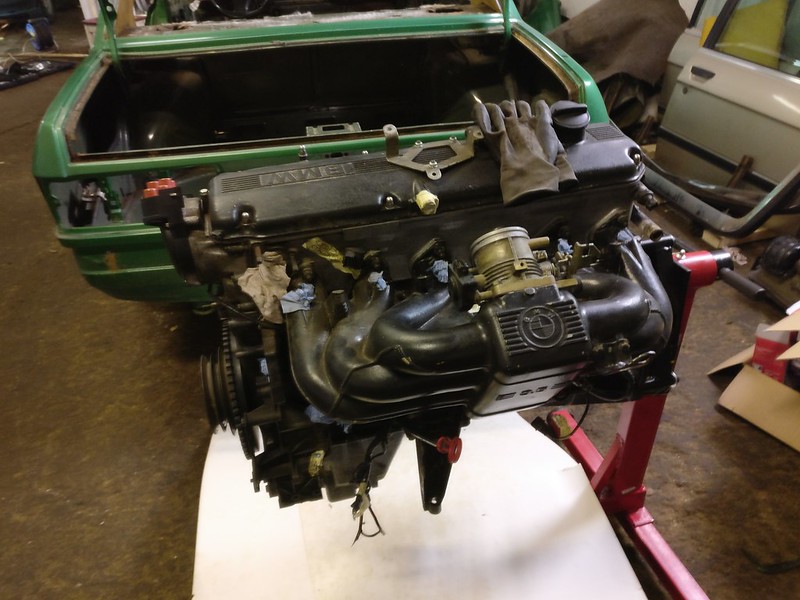
I recall that on the same day the engine got removed I was mumbling around how I should probably find a better chassis for this build. Lucky for me, one of my mates overheard this. He asked around some and was able to find me a (possibly) better chassis the same evening.
This car got fully taken apart and then the chassis was scrapped.
I have decided to dedicate the first post to the car that didn't get saved.
In July 2017 I found an online advertisement for a 1981 525i.
It had a M30B35 in it which was perfect as I already had intentions to do that swap myself on the car I end up with. The car had some cosmetic rust repairs done and it had a cheap flashy single stage paint on it. This wasn't an issue since the idea was to strip and repaint the car anyway. Furthermore, it had been standing for a while and didn't run too well but managed to make the 100km trip back home without any issues.
Here's one of the first pictures I have of this car - me driving it home.

And here's a photo of the car in the tiny garage space at my parents house where I did the initial overhaul to get it roadworthy.

My and a few of my friends were looking for a larger shared workshop at that time and since the car was in more or less running condition I was in no hurry to begin with the extensive repairs. So the idea was to get it tidied up, pass the inspection and just enjoy it for the rest of the summer.
Some notes about the car from the top of my head:
- Pearl beige leather seats and black panels (originally it had green cloth interior)
- A not-nice-at-all and noisy 2.5 inch single pipe exhaust
- Floor boards quite rusted (which I was expecting)
- Some other rust here and there but didn't see anything too troublesome back then (without dismantling anything)
- I did get some spare parts with the car, including a spare getrag 260/6 gearbox and beige interior panels
- Original paint was some darker green, can't recall the exact color at the moment
- A quite nice set of 17 inch style 5 wheels
- An electric fan with manual switch in the cabin instead of the visco
- Replaced many of the intake hoses and boots to eliminate vacuum leaks
- New set of plugs and ignition wires (one or two of the old wires were busted)
- New distributor cap and rotor
- Valve adjustment
- New oil and filters
- Got the injectors cleaned
- Replaced all rubber fuel hoses
- New fuel tank - old tank had large rust holes next to the filler neck
- New UCAs and LCAs
- New tie rods
- New(ish) tires
- Sorted out some minor electrical wiring issues
- Repaired the check panel which had water damage
- Got all the dials working in instrument cluster (didn't bother with SI board then)
- Got some holes in exhaust welded up
- New brake pads and rotors
- Cleaned the interior (it was extremely dirty)
Unfortunately, I do not have many photos from that period.
A dodgy exhaust.

Fixing SI board to get the temp gauge working.

New fuel tank stonechipped and painted, ready to go in.

Next few months I was just driving the car and getting our new workshop ready. In the late october the car made its final ride to the workshop and I began taking everything apart.
A few photos of the car before dismantling everything.


I have hundreds of pictures taken during disassembly. If anyone is in need for a picture of some otherwise hard to see place, hit me up and I might be able to find something. I won't bother anyone else with those photos because there's isn't much to see.
Here's the car with a lot of stuff already removed. Taken in December 2017.

Maybe someone already noticed it on the previous photo but this is one of the main reasons this chassis got discarded.

All that rust was well hidden under the new paint and windshield seal and barely visible before removing the windshield.
Meanwhile, I also took some time to thoroughly clean all the interior parts I intended to use. Everything got cleaned, sorted, labelled. Smaller parts ended up in zip-bags, larger parts got wrapped into plastic and sorted into boxes.
Here's a great (great might not be the best word to describe this filth) before and after photo of how dirty most of the interior stuff was. Glove box being already cleaned.

I remember spending hours and hours on bathing car parts, dismantling all the vent grills and scrubbing more than 30 years of road grime out of the vent pipes. I did not take many photos of the cleaning process but I'll try to remember taking some when time comes to put everything back together.
Anyhow, engine had to come out


And put on a stand for storage and overhaul

I recall that on the same day the engine got removed I was mumbling around how I should probably find a better chassis for this build. Lucky for me, one of my mates overheard this. He asked around some and was able to find me a (possibly) better chassis the same evening.
This car got fully taken apart and then the chassis was scrapped.
Re: Another restoration - 83' 528i

Damn. Surprised the car didn't just break in half!
I'm exited to find out what happened next!
Re: Another restoration - 83' 528i
Jan - Feb 2018
So, on with the replacement chassis that was mentioned before.
It was a rolling chassis - engine and drivetrain missing. The car was originally a Bronzit 528i from 1983. I actually went to check it multiple times before a decision was made.
Here's the car standing in the yard of the previous owner.
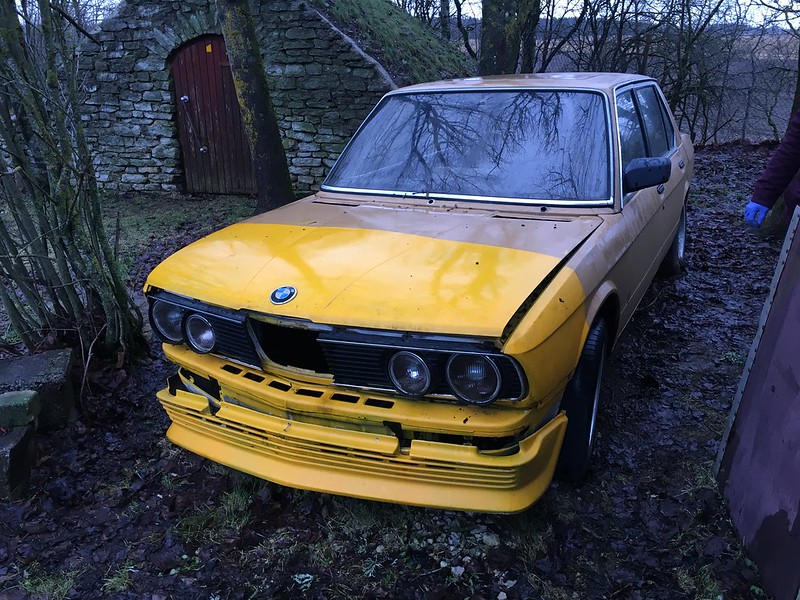
It sure looks by now that all those E28-s with weird paint jobs out there are attracted to me. Or is it the other way around...
Overall, this chassis seemed to be in much better shape than the green one. And it didn't cost much at all. Even if I would have discovered something fatal I could break even selling different bits and pieces. And it had some nice beige interior parts I was missing. So financially it was a no brainer.
Since I was basically choosing between the two, I mostly compared everything to the other car I had.
Pros:
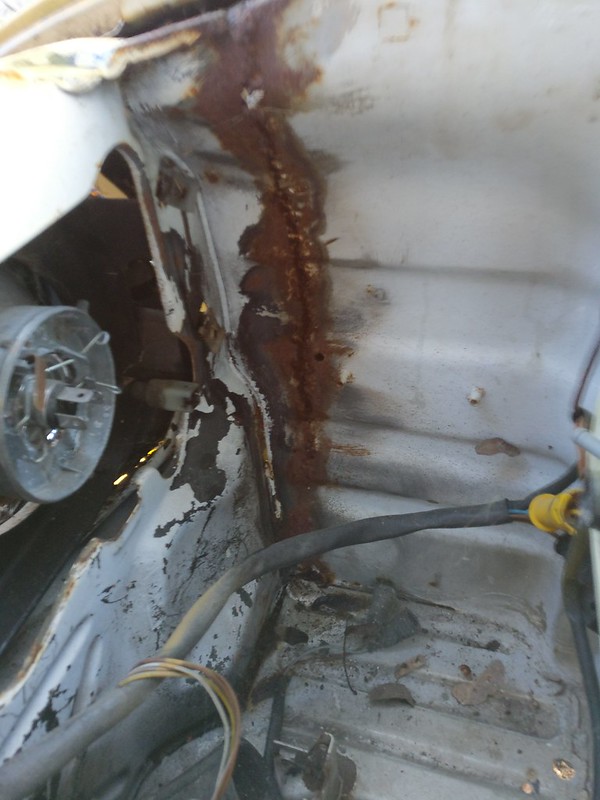
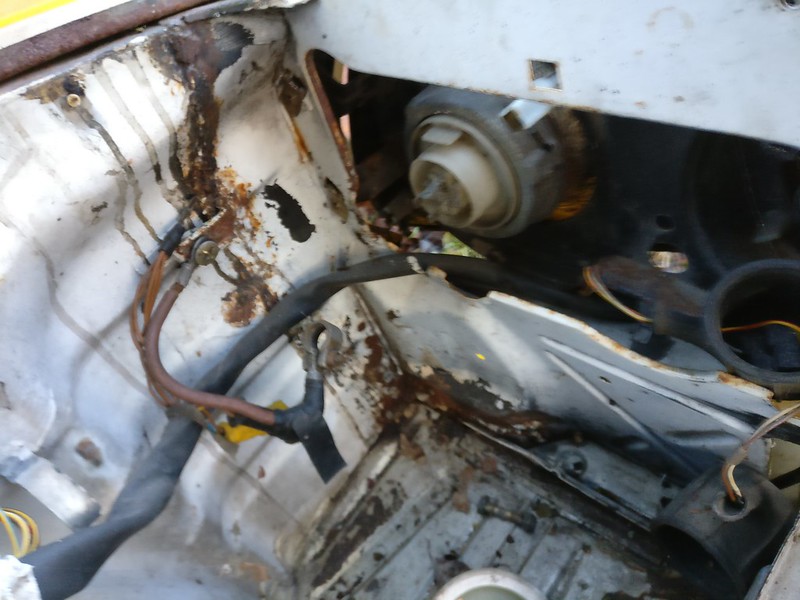
Anyhow, I came to the conclusion that I had nothing to lose and took the deal.
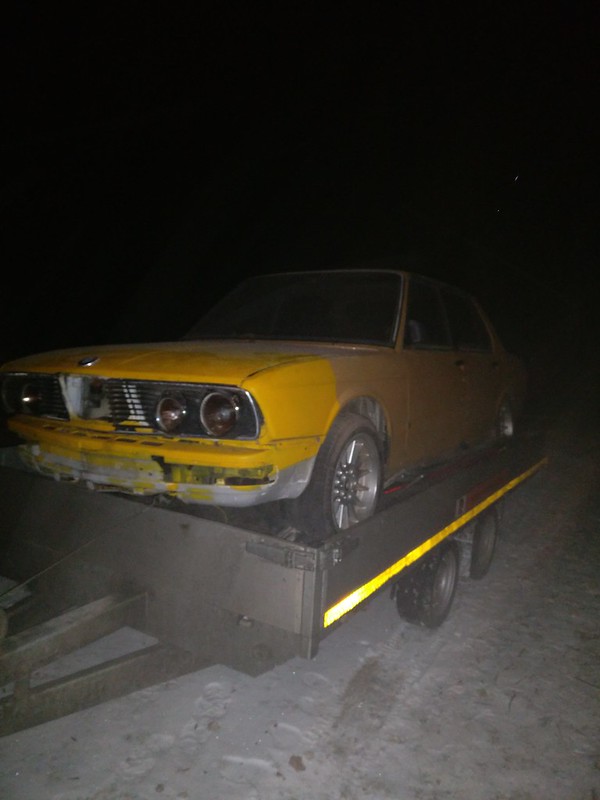
A crappy photo of the car on the trailer
Most of the January and February I was disassembling both cars, bagging and labelling everything and cleaning some interior parts. Taking apart the second car went way faster since I already had all the photos from the first car. Nevertheless, time was scarce as a while back I had decided to take my career to a whole new path and was dividing my schedule between work, school and wrenching. So only a little progress on the evenings and some on the weekends.
Some door handle cleaning in the process
After removing the cover from the rear parcel shelf I found my "favourite" part of the car - ready-made support for a big ass subwoofer.
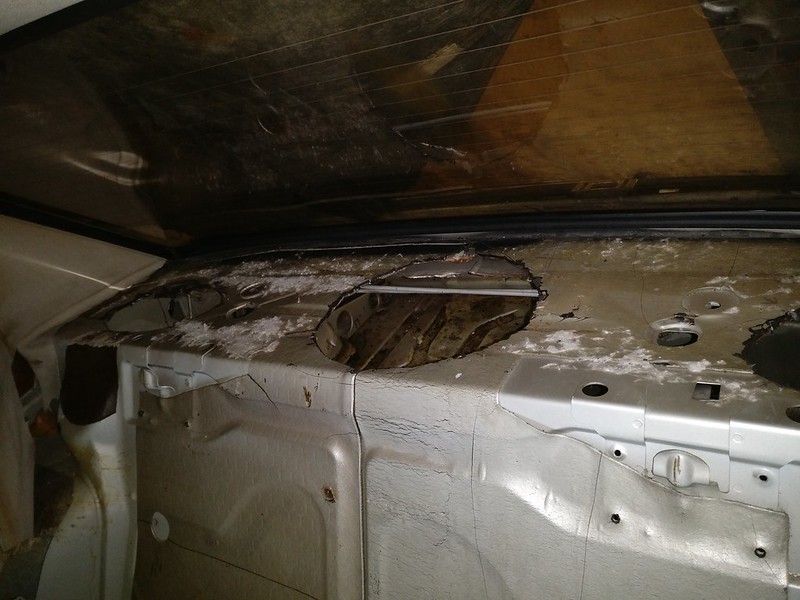
Since I'm not much of a fan of large woofers on the parcel shelf I can cut out the hole and sell it for a nice profit.
Found some dodgy repairs on the front corners of the floorpan that need to be taken care of.
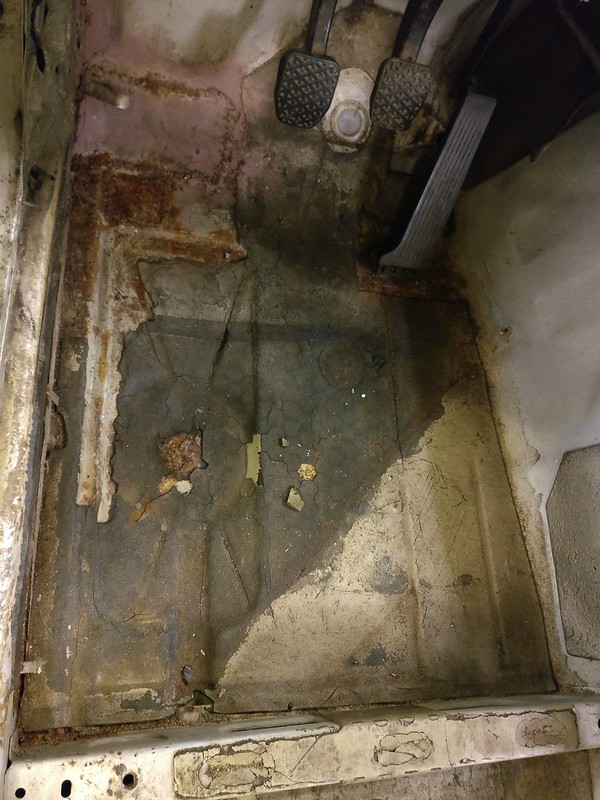
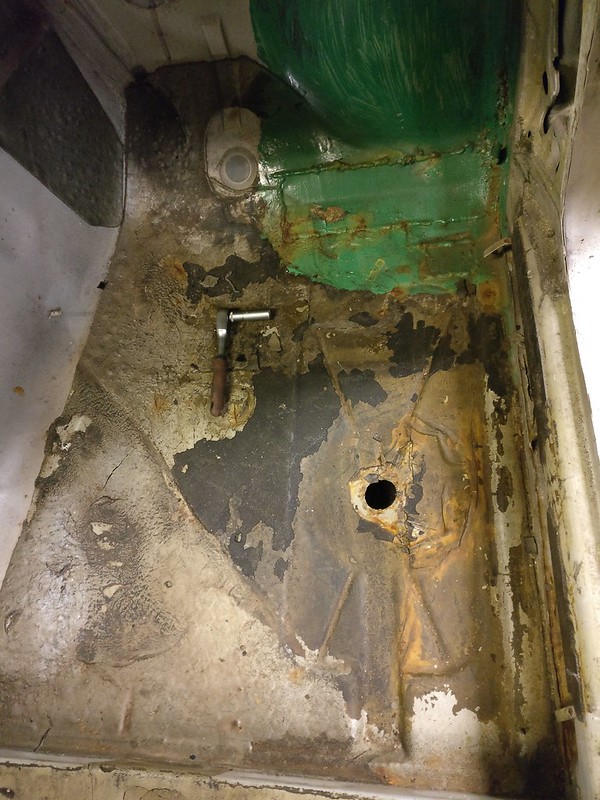
Began with the removal of the old sound insulation. At first, I was using canned cold spray to freeze the insulation and then tap it off gently with a small hammer. A chisel and a scraper came in handy as well.
Due to fair amount of insulation on the floors and other panels I also decided to try the dry ice method.
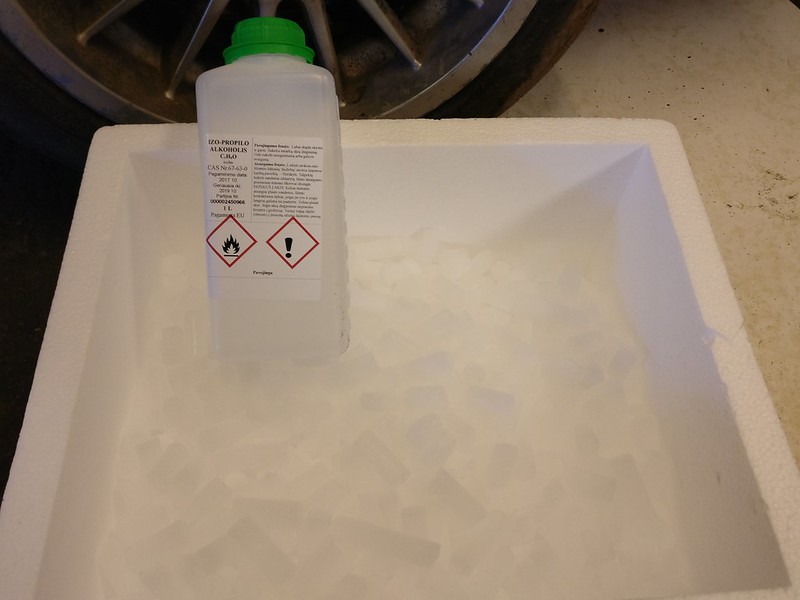
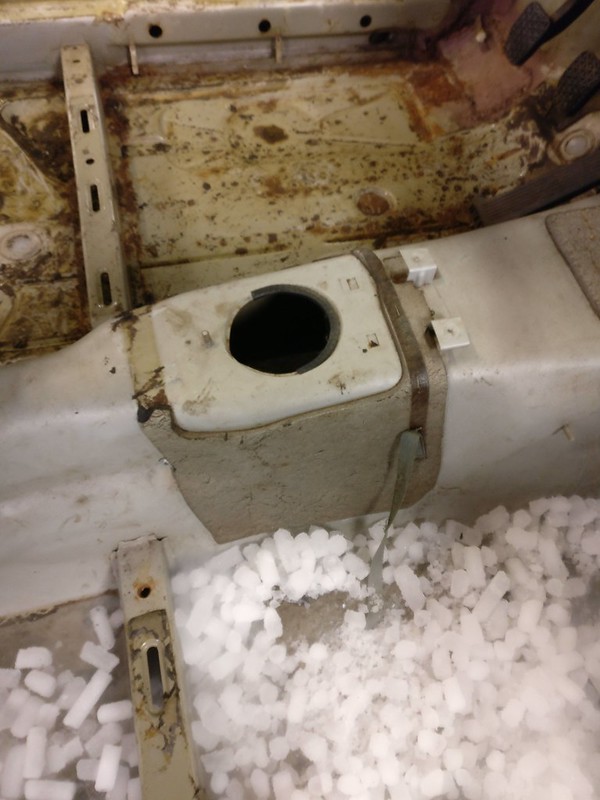
Both approaches worked really well and freezing the insulation would be my go-to method if I ever needed to do it again.
This should sum up most of the progress in January and February 2018.
So, on with the replacement chassis that was mentioned before.
It was a rolling chassis - engine and drivetrain missing. The car was originally a Bronzit 528i from 1983. I actually went to check it multiple times before a decision was made.
Here's the car standing in the yard of the previous owner.

It sure looks by now that all those E28-s with weird paint jobs out there are attracted to me. Or is it the other way around...
Overall, this chassis seemed to be in much better shape than the green one. And it didn't cost much at all. Even if I would have discovered something fatal I could break even selling different bits and pieces. And it had some nice beige interior parts I was missing. So financially it was a no brainer.
Since I was basically choosing between the two, I mostly compared everything to the other car I had.
Pros:
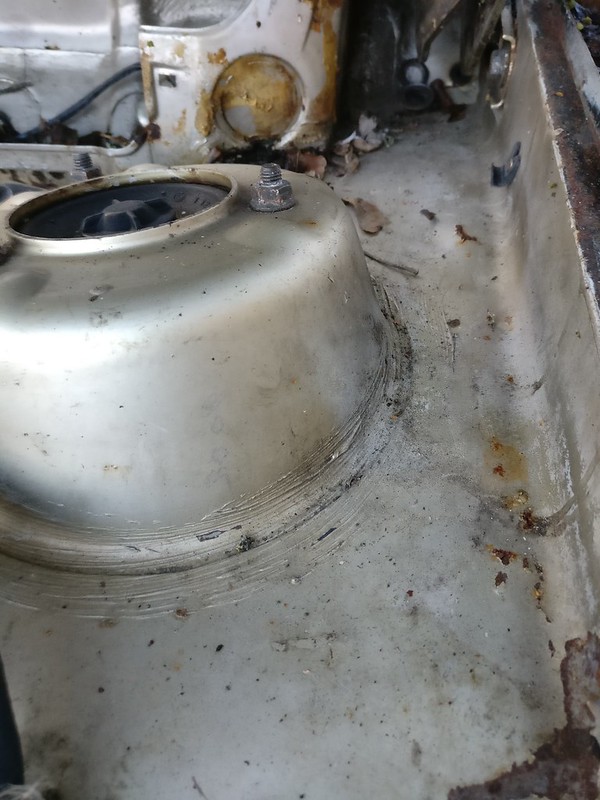
- Floorpans seemed in a lot better state than on the green car.
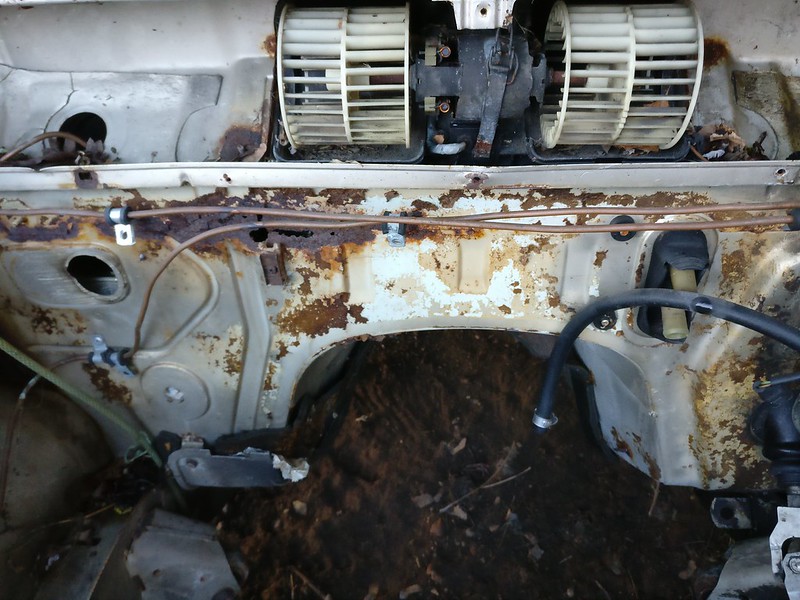
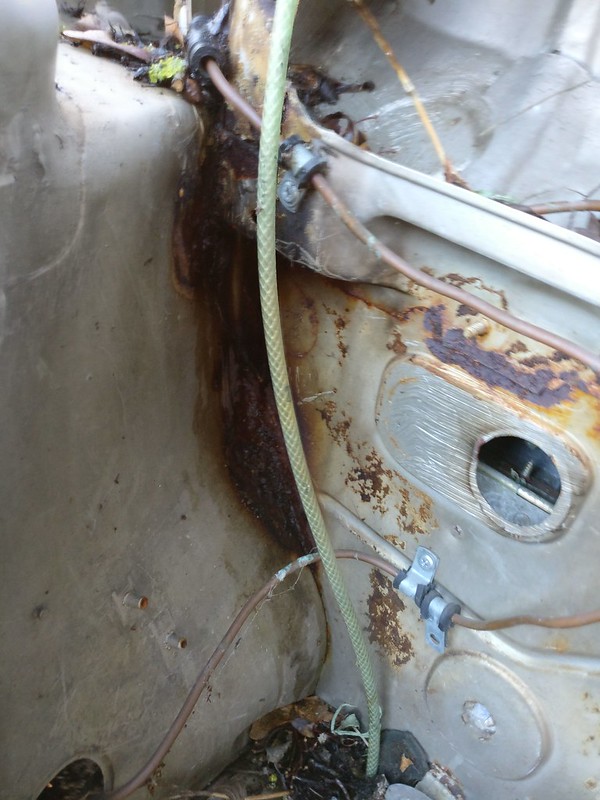
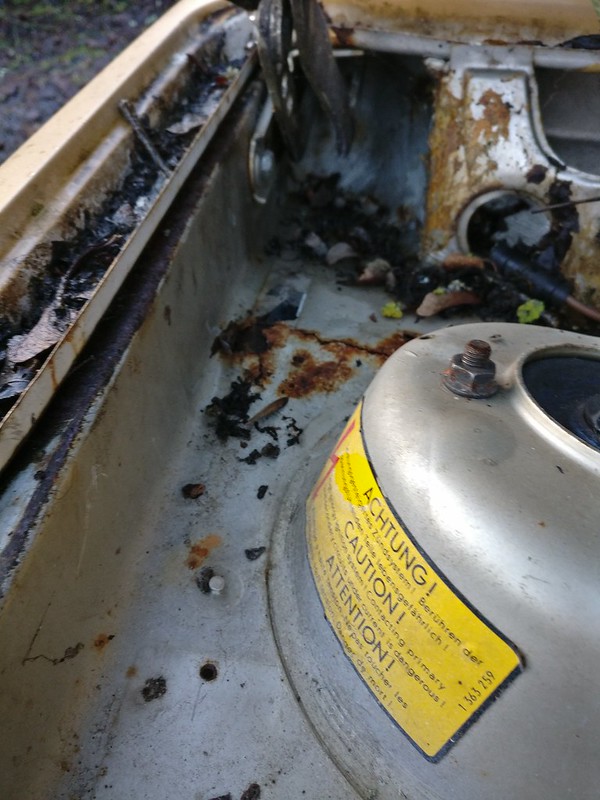
- There was rust creeping out next to the front strut towers. But it was the same with the other car. And the green car already had some patches there!
- No visible rust near front window frame. And it actually turned out to be in pristine condition later.
- Only very minor rust in rear licence plate lights area. Other than the lower section, rear panel was in good condition.
- Rear strut towers were good.
- Firewall had more rust issues than the other car
- Someone had changed out the nose section. The work was done inadequately - the welds were rather poor and in really peculiar locations. But frame rails seemed to be straight and the "new" nose section itself was in a good condition. In comparison - I had to cut off the headlights from the green car due to the rust after multiple failed attempts to loosen the screws.
- Some extremely ugly and substandard welds to fill up some pinholes in the front section.


Anyhow, I came to the conclusion that I had nothing to lose and took the deal.
A crappy photo of the car on the trailer

Most of the January and February I was disassembling both cars, bagging and labelling everything and cleaning some interior parts. Taking apart the second car went way faster since I already had all the photos from the first car. Nevertheless, time was scarce as a while back I had decided to take my career to a whole new path and was dividing my schedule between work, school and wrenching. So only a little progress on the evenings and some on the weekends.
Some door handle cleaning in the process

After removing the cover from the rear parcel shelf I found my "favourite" part of the car - ready-made support for a big ass subwoofer.

Since I'm not much of a fan of large woofers on the parcel shelf I can cut out the hole and sell it for a nice profit.
Found some dodgy repairs on the front corners of the floorpan that need to be taken care of.


Began with the removal of the old sound insulation. At first, I was using canned cold spray to freeze the insulation and then tap it off gently with a small hammer. A chisel and a scraper came in handy as well.
Due to fair amount of insulation on the floors and other panels I also decided to try the dry ice method.


Both approaches worked really well and freezing the insulation would be my go-to method if I ever needed to do it again.
This should sum up most of the progress in January and February 2018.
Re: Another restoration - 83' 528i
Mar 2018
Now that all the body panels and interior bits were removed, engine bay cleared and floorboards cleaned of soundproofing and it was time to move on to the underside of the car.
From the beginning, the plan was to build a rotisserie to provide easy access to the underside for repairs. A while back I had found these free schematics by Red Wing Steel Works for a car rotisserie online - click me to find out.
So I created a BOM for the rotisserie and ordered the metal tubing. Though, I did downscale some parts a bit since the E28 is definitely not a heavy car. I opted getting everything cut by the shop as it did not add much to the final bill. Cutting all those tubes without proper tools is a lot of work. Despite that, I still had to make some 45 degree cuts and some bits for the body mount brackets. And drill a lot of holes for the 22mm bolts I was going to use.
I had sourced a second hand MIG welder in the fall and had some practice on scraps but this was my first real welding project. So, by all means, I was a little nervous whether I can produce welds strong enough. Fortunately, I have a good friend who is a car restaurator by profession (and a good one at that). After he gave me thumbs up on the first welds I was able to proceed with piece of mind.
All in all, it took me about two weeks worth of evenings to build the rotisserie. One week for drilling, cutting and welding and another week for cleaning and painting. I didn't have a spot where to shoot a paint gun so I was brushing down the paint which made it a slow process.
Again, I am really bad at taking pictures of the progress - I tend to get carried away and forget everything else when I am doing something. This is the first picture of the rotisserie I was able to find. End frames and one of the hanging bracket already finished.
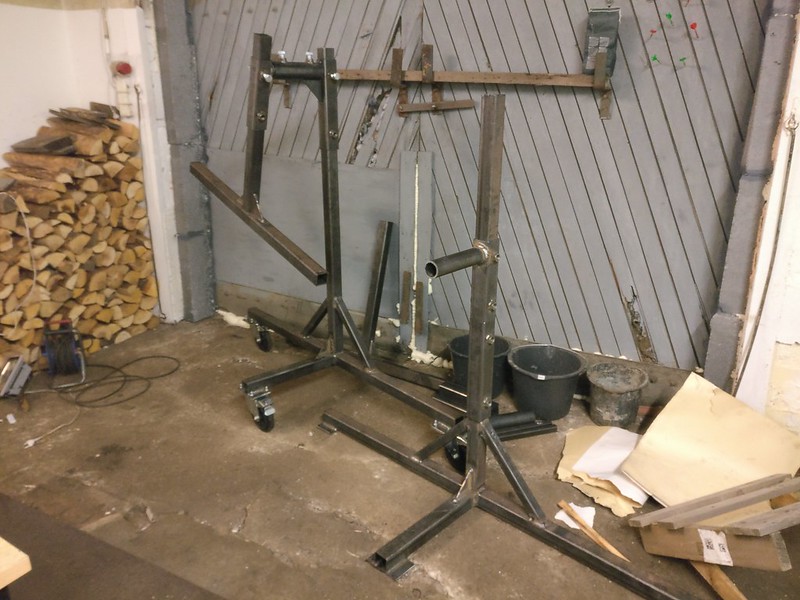
This would be the front frame with body mounts attached.
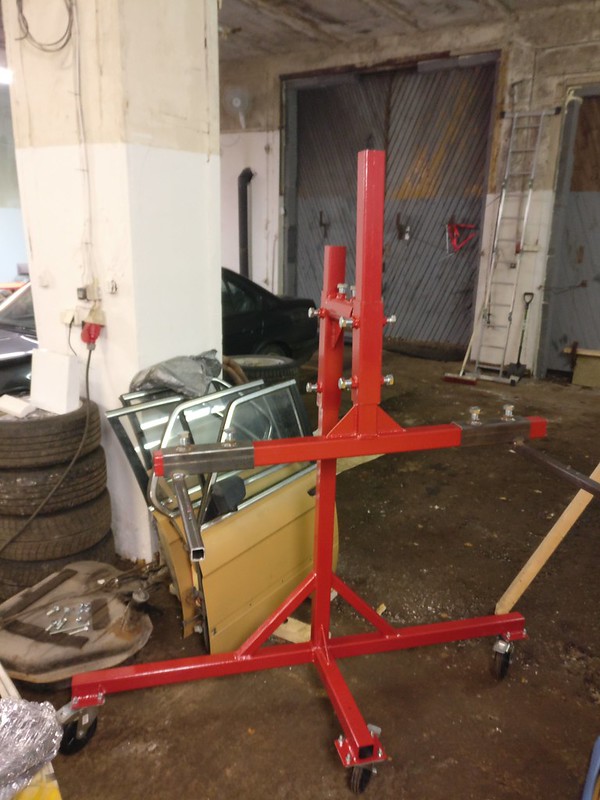
Front body mounts will get bolted into the frame rails, like this:
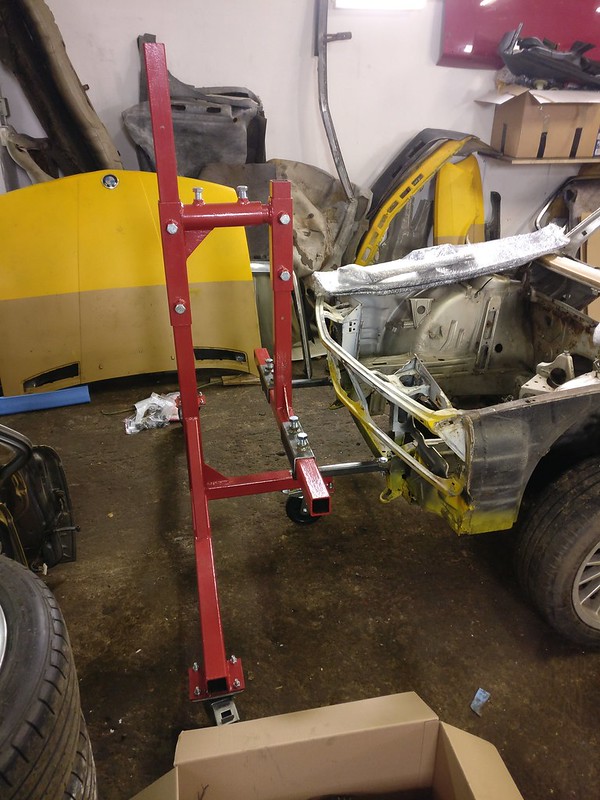
Rear frame will attach to the bumper mounts:
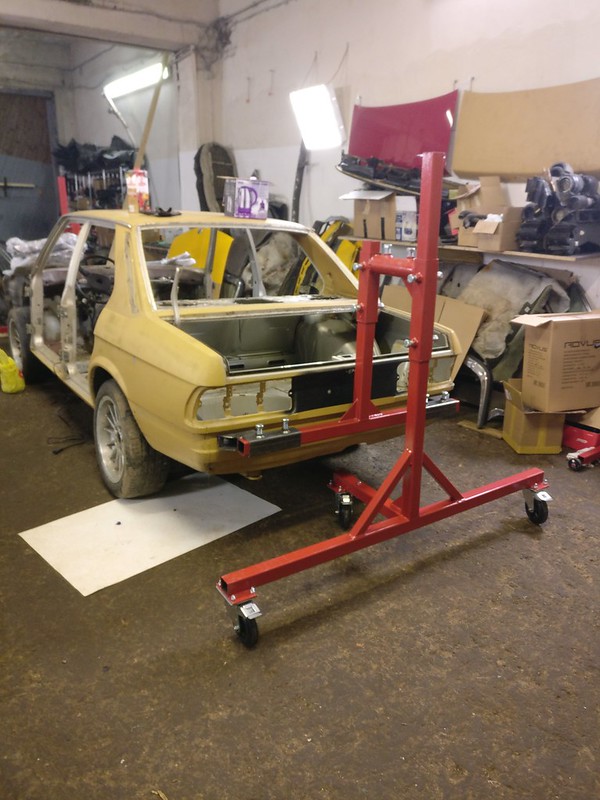
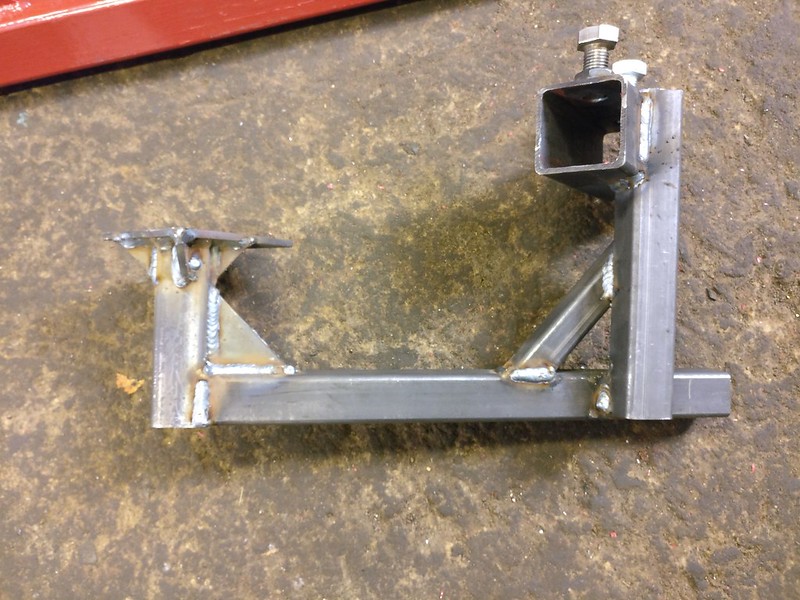
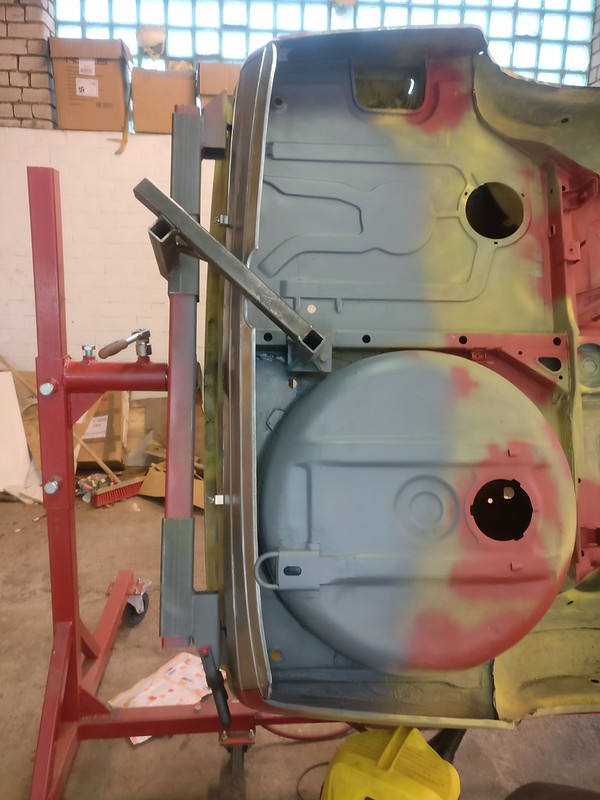
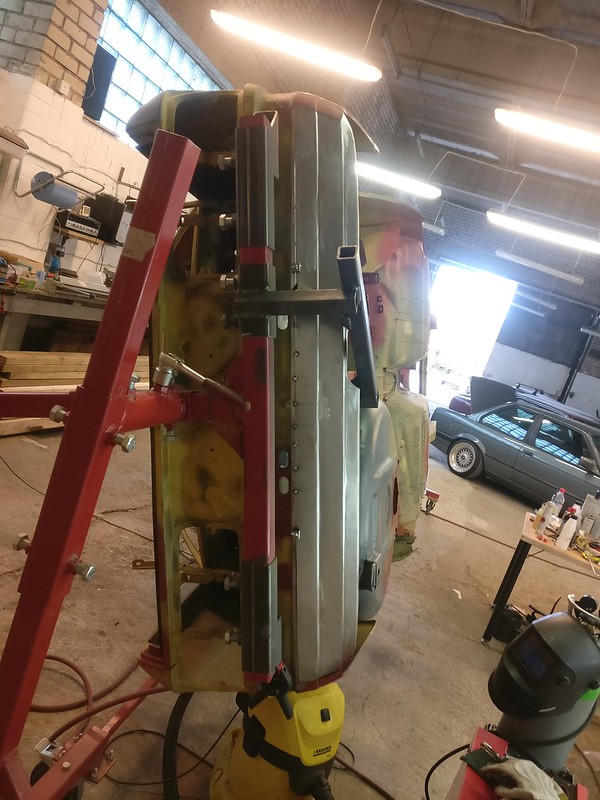
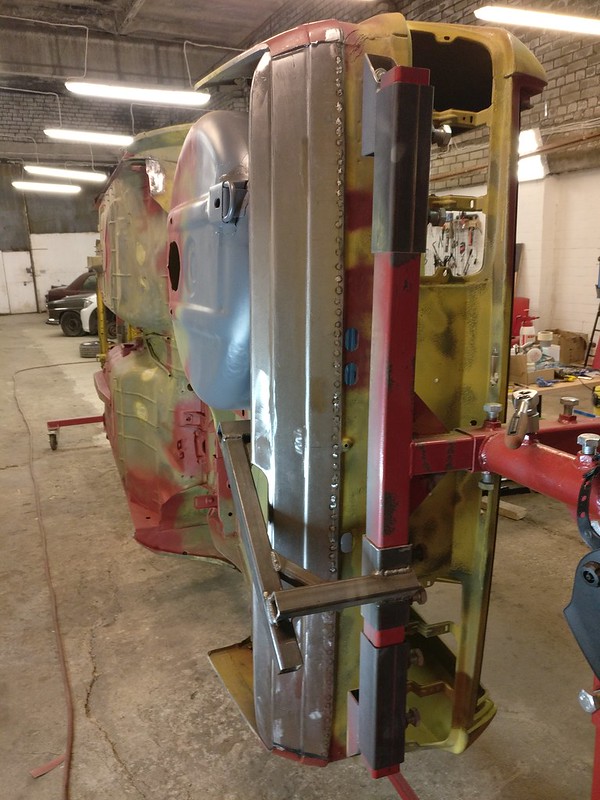
In the rear, I did not like the whole body being held up only by those two bumper mounts which are essentially a layer of sheet metal with a little bit of reinforcement, so I made an additional (seriously overengineered) support that attaches to one of the fuel tank mounts on the longitudinal beam underneath the car.
Since I only needed to raise and lower the car once I skipped out on the stationary bottle jacks. This can be done perfectly well using floor jacks.
If I remember correctly, the wheels I used were 150mm caster wheels that should support more than 150kg of load each.
Therefore, after everything was tried on and adjusted it was time to remove the subframes from the car and get it up in the air.
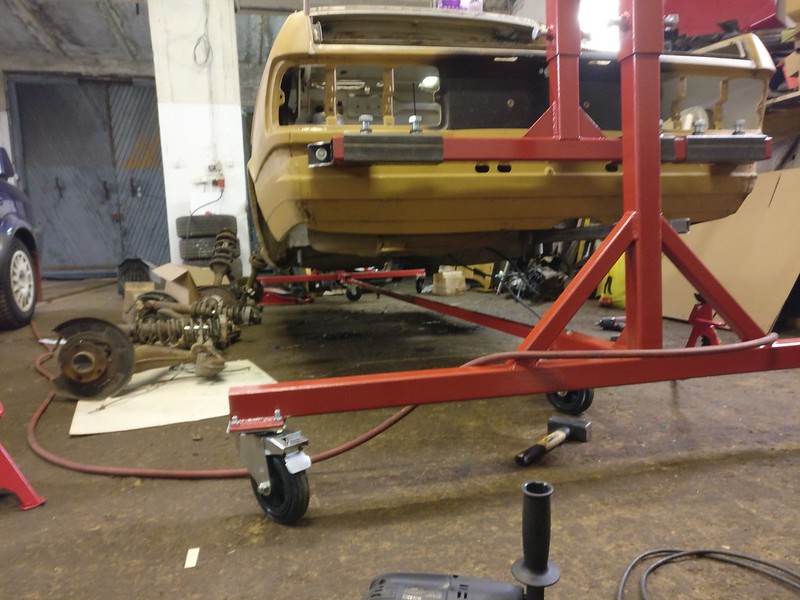
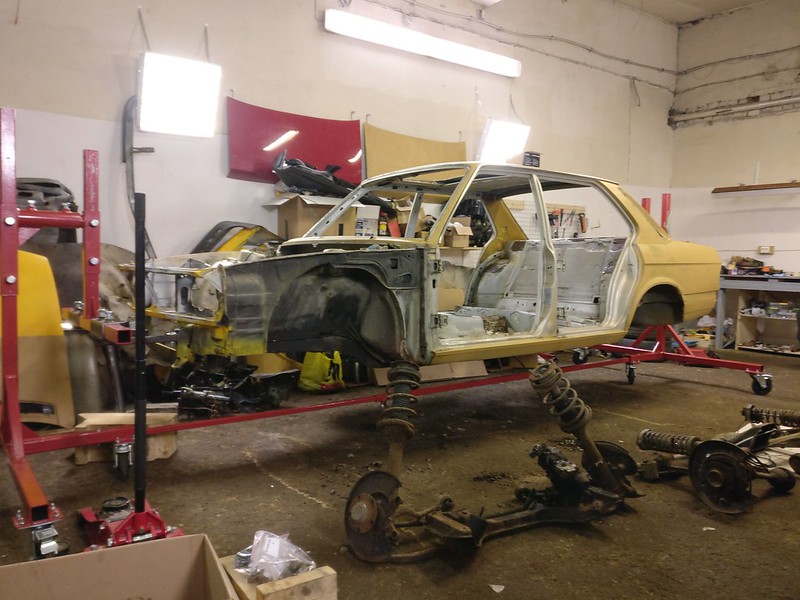
And a proof of concept:
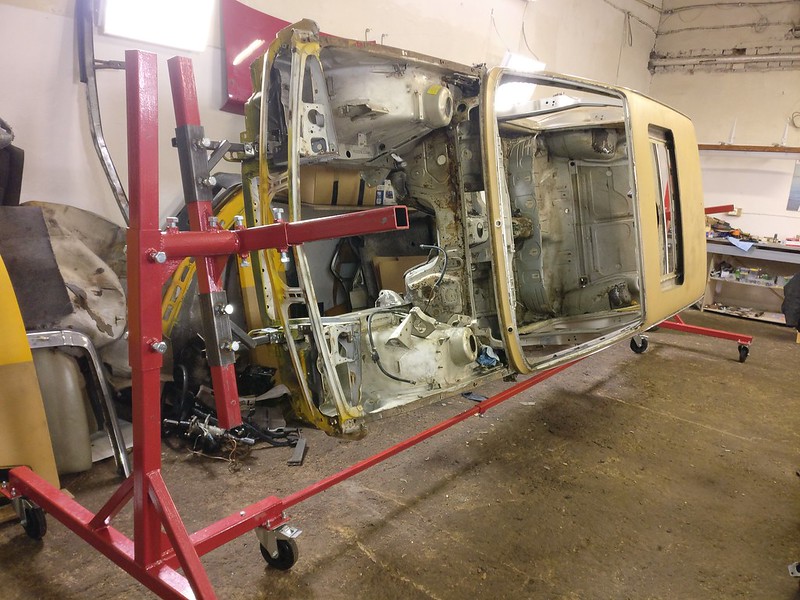
Seeing that this post already is getting reasonably long and thus I won't be covering much else here I think it would be a good place to list out some observations on the rotisserie.
First of all, it is a really solid piece and I wouldn't hesitate to build it again using those plans. But still, I would make a few minor adjustment.
Furthermore, did some digging around and found out that this rotisserie did cost me about about third of the price of the cheapest car rotisserie Eastwood offers. Go find a bunch of scrap steel tubes and you could dial the price down even more.
Now that all the body panels and interior bits were removed, engine bay cleared and floorboards cleaned of soundproofing and it was time to move on to the underside of the car.
From the beginning, the plan was to build a rotisserie to provide easy access to the underside for repairs. A while back I had found these free schematics by Red Wing Steel Works for a car rotisserie online - click me to find out.
So I created a BOM for the rotisserie and ordered the metal tubing. Though, I did downscale some parts a bit since the E28 is definitely not a heavy car. I opted getting everything cut by the shop as it did not add much to the final bill. Cutting all those tubes without proper tools is a lot of work. Despite that, I still had to make some 45 degree cuts and some bits for the body mount brackets. And drill a lot of holes for the 22mm bolts I was going to use.
I had sourced a second hand MIG welder in the fall and had some practice on scraps but this was my first real welding project. So, by all means, I was a little nervous whether I can produce welds strong enough. Fortunately, I have a good friend who is a car restaurator by profession (and a good one at that). After he gave me thumbs up on the first welds I was able to proceed with piece of mind.
All in all, it took me about two weeks worth of evenings to build the rotisserie. One week for drilling, cutting and welding and another week for cleaning and painting. I didn't have a spot where to shoot a paint gun so I was brushing down the paint which made it a slow process.
Again, I am really bad at taking pictures of the progress - I tend to get carried away and forget everything else when I am doing something. This is the first picture of the rotisserie I was able to find. End frames and one of the hanging bracket already finished.

This would be the front frame with body mounts attached.

Front body mounts will get bolted into the frame rails, like this:

Rear frame will attach to the bumper mounts:

In the rear, I did not like the whole body being held up only by those two bumper mounts which are essentially a layer of sheet metal with a little bit of reinforcement, so I made an additional (seriously overengineered) support that attaches to one of the fuel tank mounts on the longitudinal beam underneath the car.

Since I only needed to raise and lower the car once I skipped out on the stationary bottle jacks. This can be done perfectly well using floor jacks.
If I remember correctly, the wheels I used were 150mm caster wheels that should support more than 150kg of load each.
Therefore, after everything was tried on and adjusted it was time to remove the subframes from the car and get it up in the air.


And a proof of concept:

Seeing that this post already is getting reasonably long and thus I won't be covering much else here I think it would be a good place to list out some observations on the rotisserie.
First of all, it is a really solid piece and I wouldn't hesitate to build it again using those plans. But still, I would make a few minor adjustment.
- The center of gravity is a bit off for E28 using those attachment points. My hanging brackets are adjusted to the highest possible position but it is still a little bottom heavy. That being said, it isn't actually an issue as I can still operatate the rotisserie alone with ease. But you could probably solve this by designing different mounting brackets and/or using different mount points.
- After a lot of use I have developed a small issue with the four bolts on the round tubing that keep the car tilted. The ends of the bolts have been mushroomed against the inner tube so I can't get them out anymore. And since I have ruined the thread on one of the bolts I now have only three bolts to fix it in place. Again, not too big of an issue since even one or two of those bolts, depending on the angle, can keep the car tilted. If you'd get the center of gravity perfect you wouldn't have to tighten those bolts down that hard. You could use higher grade or bigger bolts (I've used 22mm grade 8.8 bolts). Or you could design another type of locking mechanism - gradual adjustment that these bolts provide is nice to have but you could easily get away with stepped adjustment.
- The inner round tube of the tilt mechanism has also been pushed a bit out of shape from repetitive fastening of those bolts, especially on the loose end (further away from the car). One could weld some reinforcement inside that inner round tube or use a pipe with thicker wall.
Furthermore, did some digging around and found out that this rotisserie did cost me about about third of the price of the cheapest car rotisserie Eastwood offers. Go find a bunch of scrap steel tubes and you could dial the price down even more.
Last edited by taavipa on Dec 06, 2020 4:10 PM, edited 1 time in total.
-
muleskinner
- Posts: 1340
- Joined: Sep 08, 2007 11:17 AM
- Location: John Graham ATL
Re: Another restoration - 83' 528i
Nice work all around. Looking forward to seeing updates of this project.
Re: Another restoration - 83' 528i
I almost built a rotisserie for Minerva. Given how easy you made it look, i wish i had!
Well done.
Well done.
Re: Another restoration - 83' 528i
Right now, I can't imagine how I could have done the repairs without one. I guess a lot of overhead welding/grinding and crawling under the car.cek wrote: Aug 15, 2020 12:09 PM I almost built a rotisserie for Minerva. Given how easy you made it look, i wish i had!
Well done.
Re: Another restoration - 83' 528i
Mar - Jun 2018
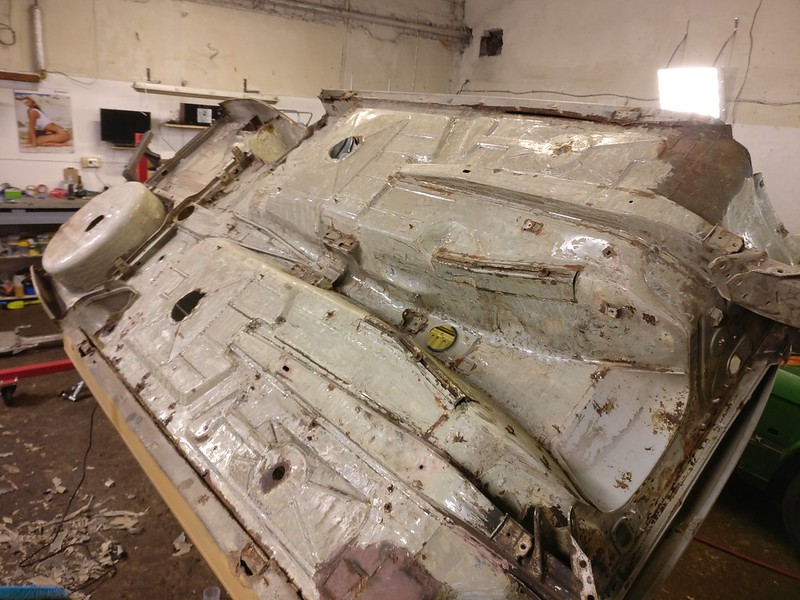
Rest of the March and April passed by removing the underseal to get the car ready for sandblasting. A great tool for the job was an oscillating tool. You can use the scraping attachments but what I liked even best is a saw blade with the teeth ground off and the end sharpened. Those saw blades were more flexible than scarper bits and allowed to get to all the nooks and crannies more easily. I've heard that blasting with dry ice works well for removing underseal but I have no experience with that myself. And it sounds rather expensive.
Most of the underseal off
The rear tow hook was completely rotten and since I was able to order a brand new one I just removed it revealing the rusted panel underneath
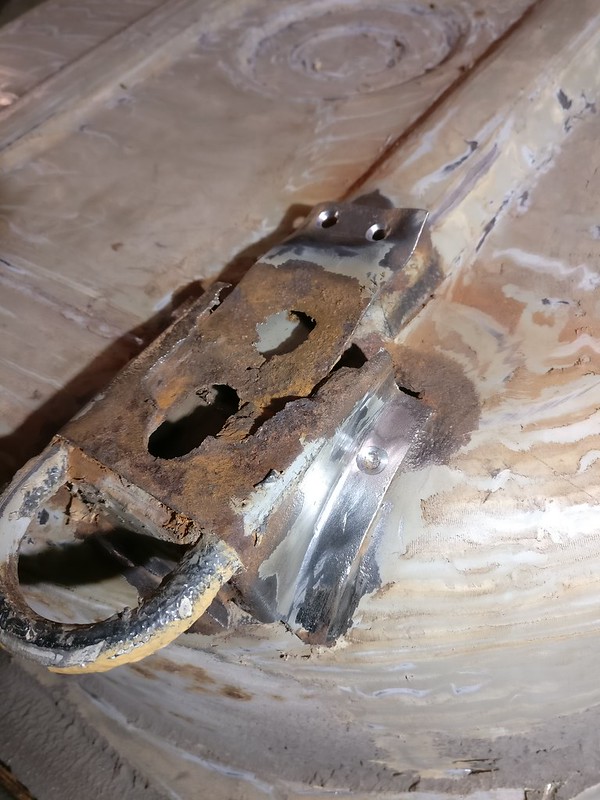
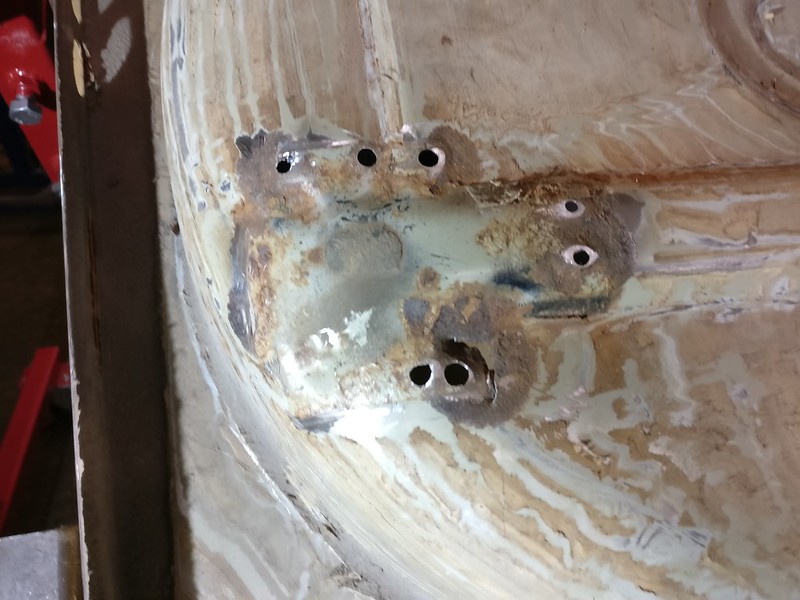
Some ugly repairs done one the rear corners
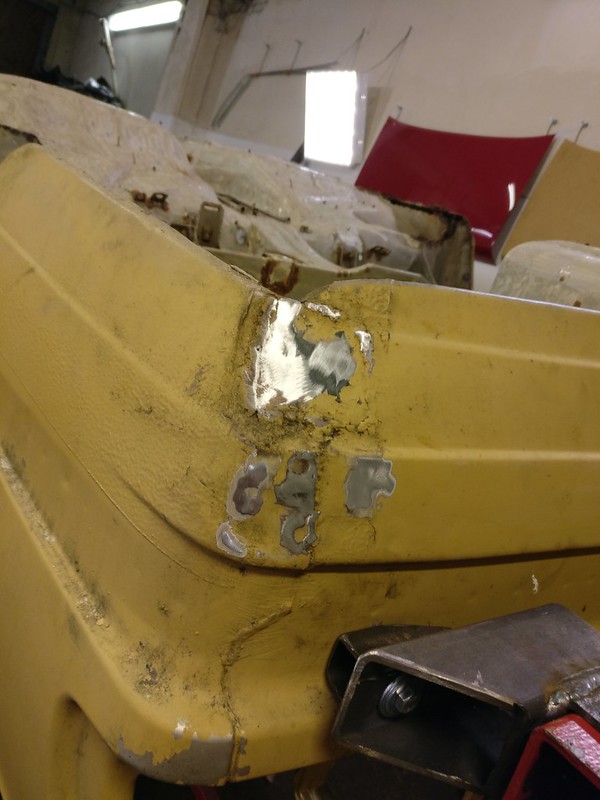
The rear valance was completely in the way to get the underseal off from the spare wheel housing. As I needed to either replace it or fix it I decided to cut it off right below where the rear bumper sits (sorry, no photos).
Yellow chassis came without any locks. I had a set from the first car but trunk lock was replaced before and was unlocked by a different key. So it was time to clean all the locks and recode the trunk lock to match others. I’ve seen people matching the tumblers to the key but, unless you don’t have another lock, it is really easy to just get the code from the matching lock.
Everything taken apart
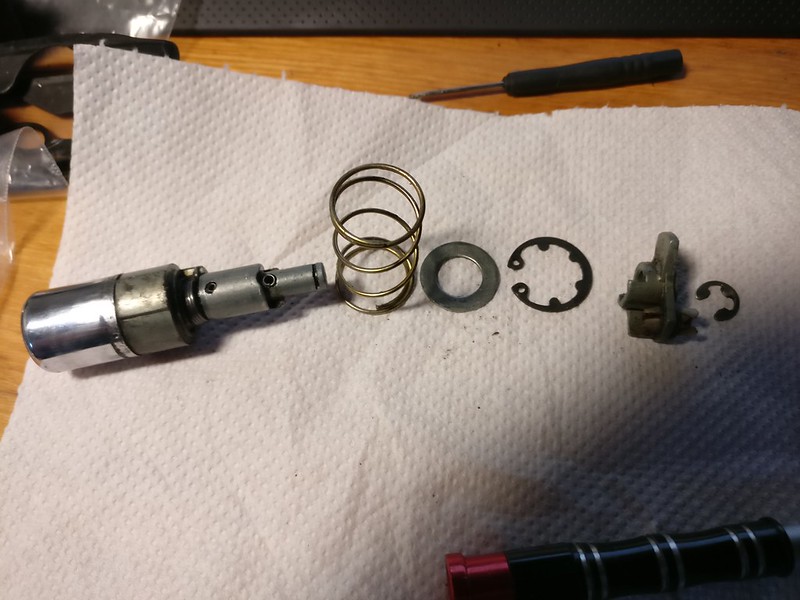
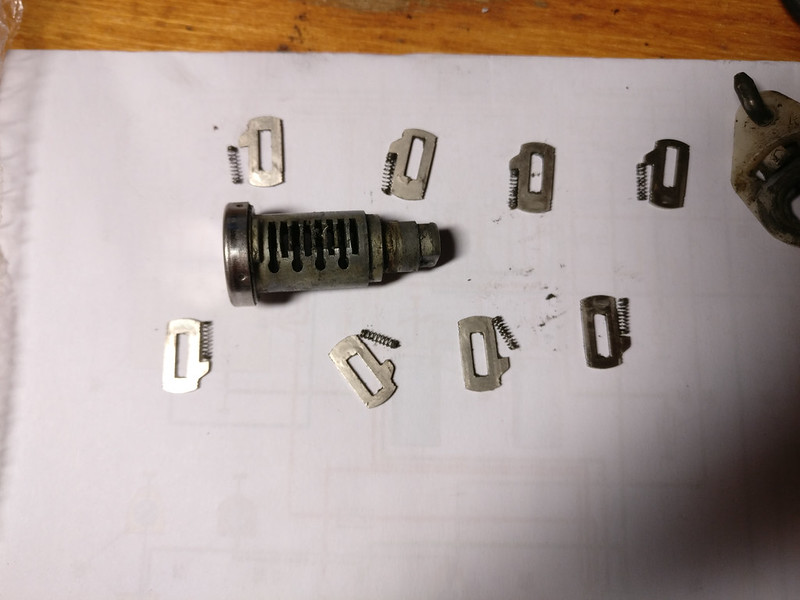
Ready for a good soak in some cleaning agent
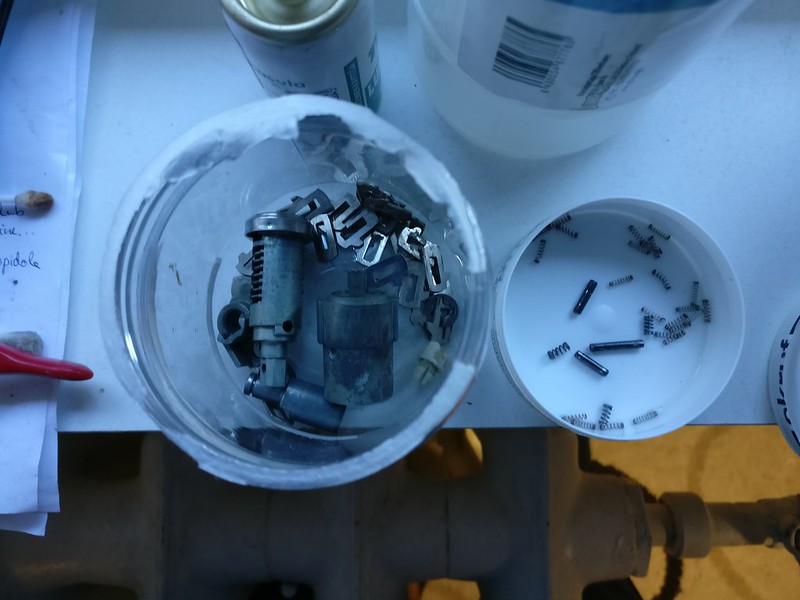
Some clean lock mechanism parts
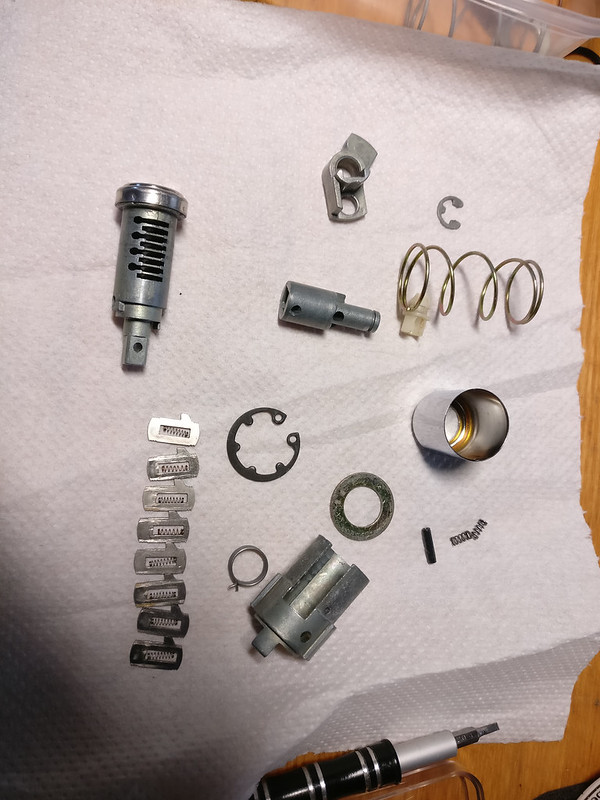
Locks got reassembled and oiled - it was amazing how much better they worked after being properly cleaned.
In April we received some bad news. Namely, the owner of our building sent us an eviction notice. The whole area was being cleared to be replaced by some apartment buildings. We just got moved in! Kind of a dick move to rent it out in the first place. Anyway, we had three months to move and started looking for a new place.
In the end of May this guy came over and sandblasted my underside, engine compartment and some other bits here and there.
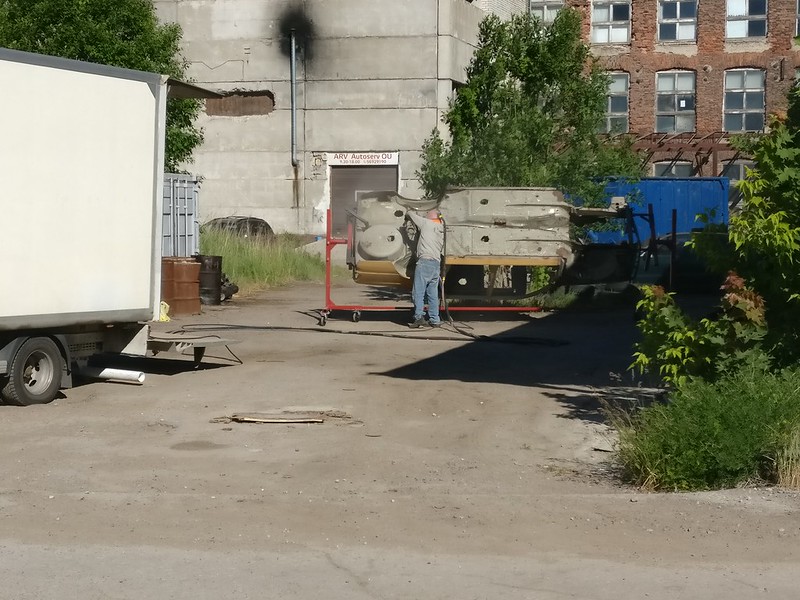
Everything done, I used compressed air and a vacuum cleaner to get most of the sand off the car
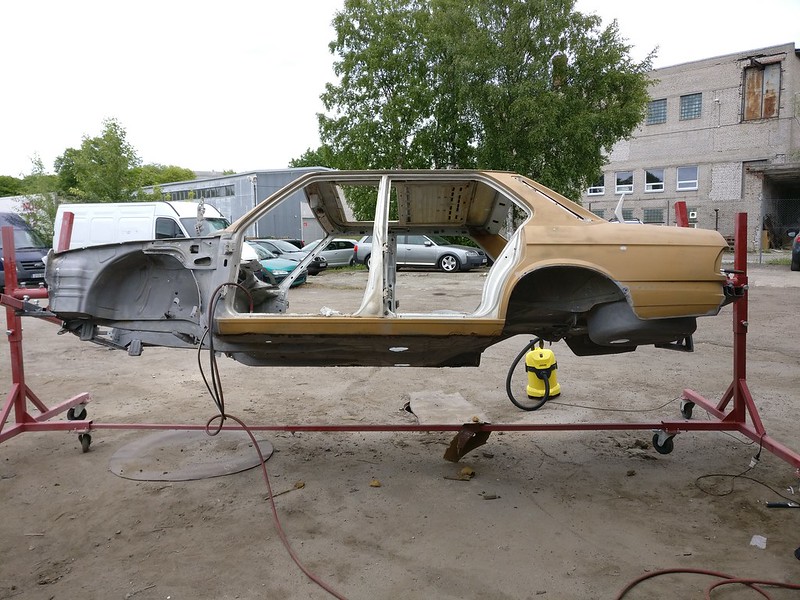
As you can see from the next photos, even the small pieces of remaining underseal are still there. So, if you don’t remove the underseal prior to sandblasting it doesn’t do much.
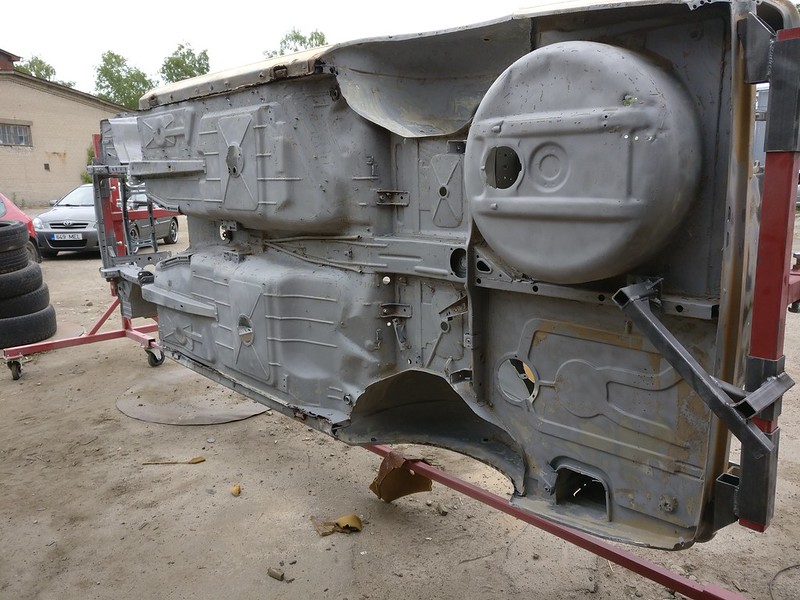
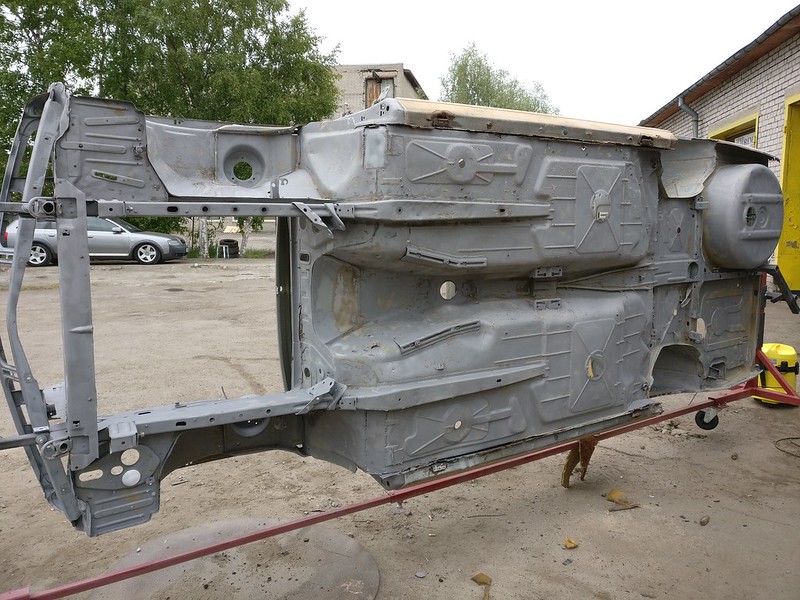
I was quite happy with the results and it gave me a nice clean slate to do the repairs on.
Next, I went over the whole car with some wire wheels and sand paper to get all the remnants of sandblasting off and it was time to lay down the etching primer.
To do that I quickly put together a “paint booth” made of plastic in one corner of the workshop.
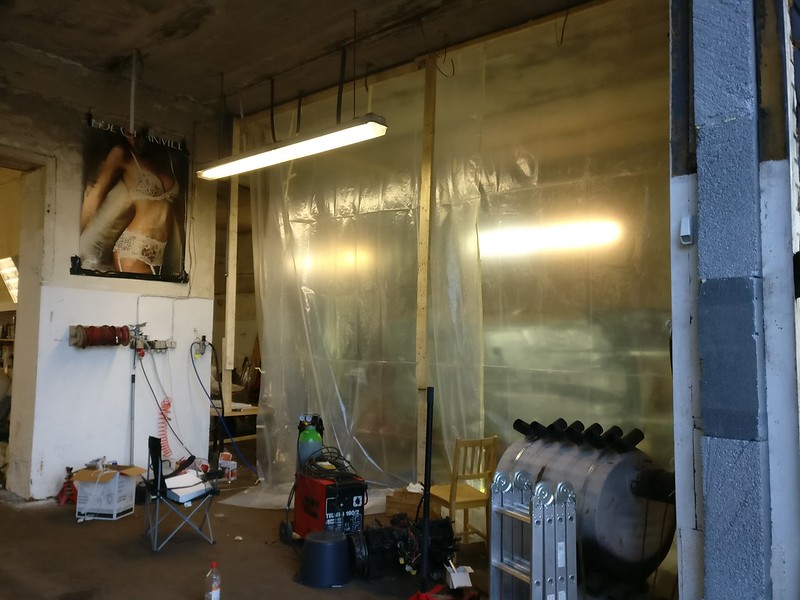
This worked quite well keeping everything else in the workshop clean.
I used Standox 2K etching primer (U2530).
For some reason, I didn’t take any pictures after the priming but you will get some in the upcoming posts.
Now, it was time to start packing everything up and setting up the new shop. We were lucky to find a place only two weeks before our rental agreement ended. New place was a shithole and needed quite a lot of work to get it ready. But it was cheap and had potential. I wasn’t able to continue any work on the chassis until 2019. Not to leave a large gap in the story, I might do a quick post about setting up the new workshop and some other work I did for the car during that time.
Rest of the March and April passed by removing the underseal to get the car ready for sandblasting. A great tool for the job was an oscillating tool. You can use the scraping attachments but what I liked even best is a saw blade with the teeth ground off and the end sharpened. Those saw blades were more flexible than scarper bits and allowed to get to all the nooks and crannies more easily. I've heard that blasting with dry ice works well for removing underseal but I have no experience with that myself. And it sounds rather expensive.
Most of the underseal off

The rear tow hook was completely rotten and since I was able to order a brand new one I just removed it revealing the rusted panel underneath


Some ugly repairs done one the rear corners

The rear valance was completely in the way to get the underseal off from the spare wheel housing. As I needed to either replace it or fix it I decided to cut it off right below where the rear bumper sits (sorry, no photos).
Yellow chassis came without any locks. I had a set from the first car but trunk lock was replaced before and was unlocked by a different key. So it was time to clean all the locks and recode the trunk lock to match others. I’ve seen people matching the tumblers to the key but, unless you don’t have another lock, it is really easy to just get the code from the matching lock.
Everything taken apart


Ready for a good soak in some cleaning agent

Some clean lock mechanism parts

Locks got reassembled and oiled - it was amazing how much better they worked after being properly cleaned.
In April we received some bad news. Namely, the owner of our building sent us an eviction notice. The whole area was being cleared to be replaced by some apartment buildings. We just got moved in! Kind of a dick move to rent it out in the first place. Anyway, we had three months to move and started looking for a new place.
In the end of May this guy came over and sandblasted my underside, engine compartment and some other bits here and there.

Everything done, I used compressed air and a vacuum cleaner to get most of the sand off the car

As you can see from the next photos, even the small pieces of remaining underseal are still there. So, if you don’t remove the underseal prior to sandblasting it doesn’t do much.


I was quite happy with the results and it gave me a nice clean slate to do the repairs on.
Next, I went over the whole car with some wire wheels and sand paper to get all the remnants of sandblasting off and it was time to lay down the etching primer.
To do that I quickly put together a “paint booth” made of plastic in one corner of the workshop.

This worked quite well keeping everything else in the workshop clean.
I used Standox 2K etching primer (U2530).
For some reason, I didn’t take any pictures after the priming but you will get some in the upcoming posts.
Now, it was time to start packing everything up and setting up the new shop. We were lucky to find a place only two weeks before our rental agreement ended. New place was a shithole and needed quite a lot of work to get it ready. But it was cheap and had potential. I wasn’t able to continue any work on the chassis until 2019. Not to leave a large gap in the story, I might do a quick post about setting up the new workshop and some other work I did for the car during that time.
Re: Another restoration - 83' 528i
Jul 2018 - May 2019
Essentially nothing happened with the chassis during next year’s time.
Most of the July went moving our stuff and after that begun the slow process of getting the workshop ready. It was an old stone building in an industrial park but hadn’t been in use for quite some time. Owner agreed to get the roof fixed and got the electricity to the building. Some of the major work we had to do included all new electrical wiring and lighting inside the building, painting the walls, filling up a huge truck inspection pit and setting our own stuff up.
Some of that aforementioned work in progress. You can play “Where’s Waldo?”, or to be precise “Where’s E28?”, on that photo.
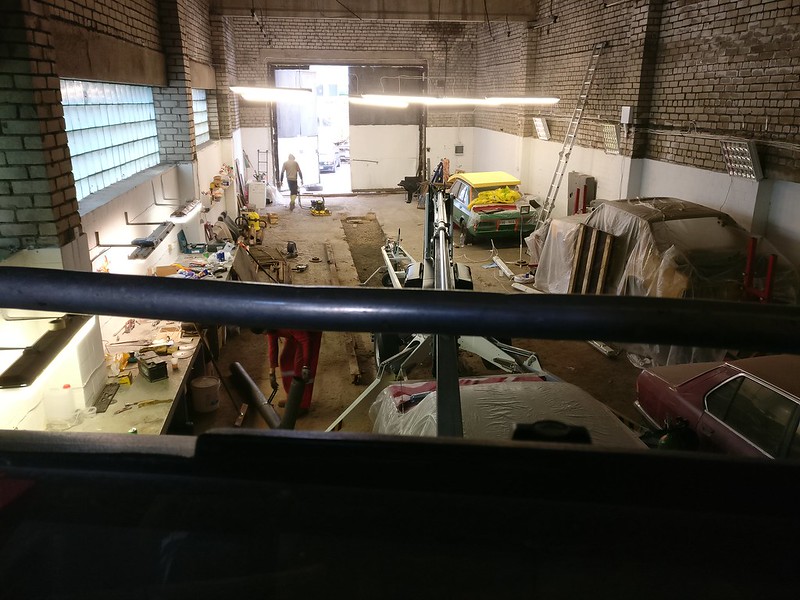
At a much later date. This is more or less how it is today. Nothing spectacular but fills our needs as hobbyists and fits the budget.
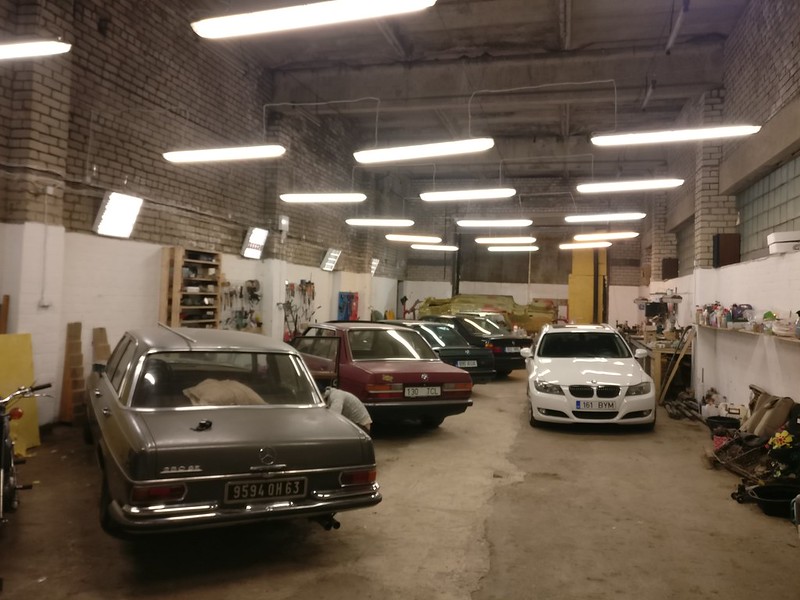
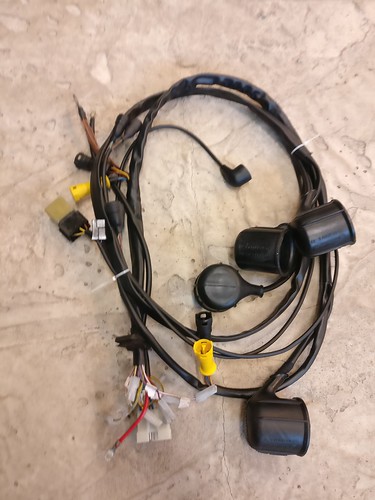
Meanwhile, I moved on with some other things. E.g, refurbishing all the wiring in the car. All the old wrapping got removed, wires wiped clean. Every last one of the connectors got pins removed, examined and cleaned if applicable. I was able to source most of the pins used on those cars so every corroded pin got replaced. Plastic connectors had a nice bath in some cleaning agent. Then everything got rewrapped with some black cloth tape. I used some Tesa tape that was readily available. Rated for engine compartement and with a nice touch. I opted to fully wrap everything contrary to what they came from the factory.
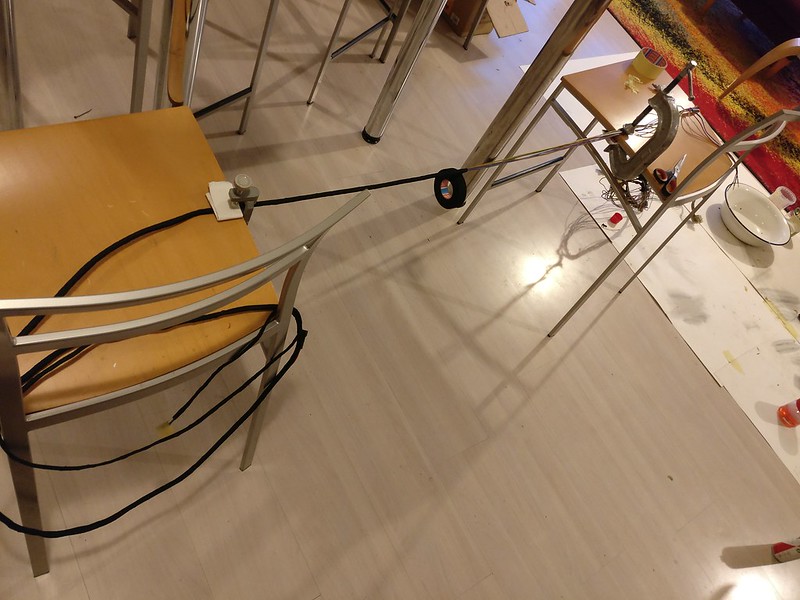
Some wrapping in progress. Don’t worry, no wire was harmed during the process. C-clamps were barely tightened and I used some extra rubber over the wires to protect them. I just found this setup a bit more comfortable to work with.
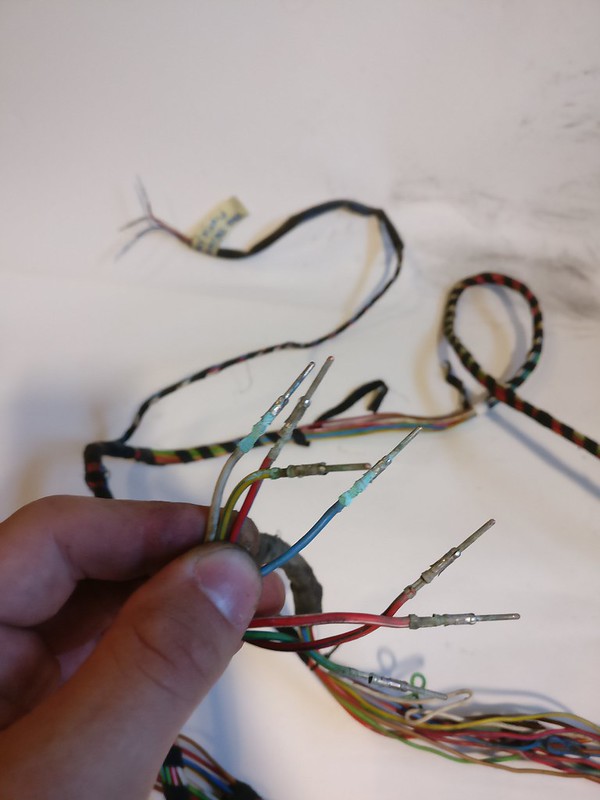
Such pins ended up in trash can and brand new pins got crimped on instead.
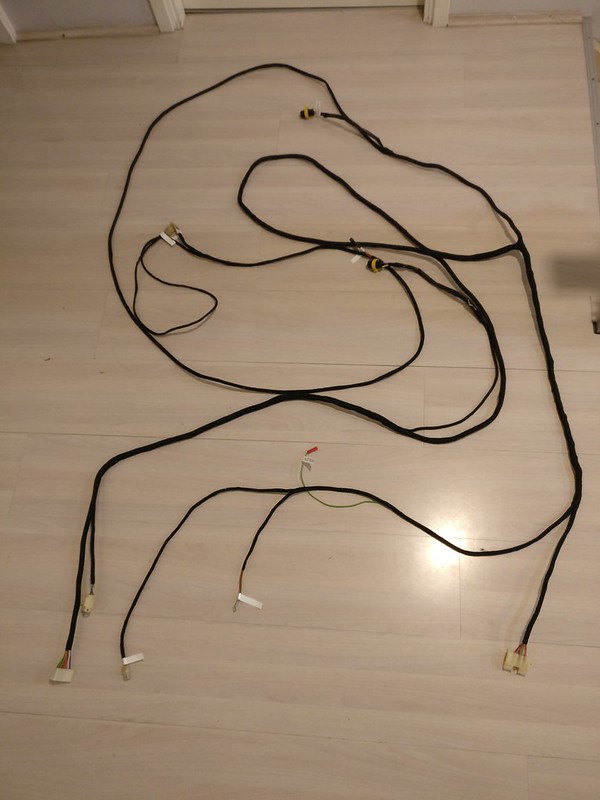
Accessory wiring done and labelled. In my case, the harness was only for central locking. As I obtained a wiring set for electric windows later I had to redo that one.
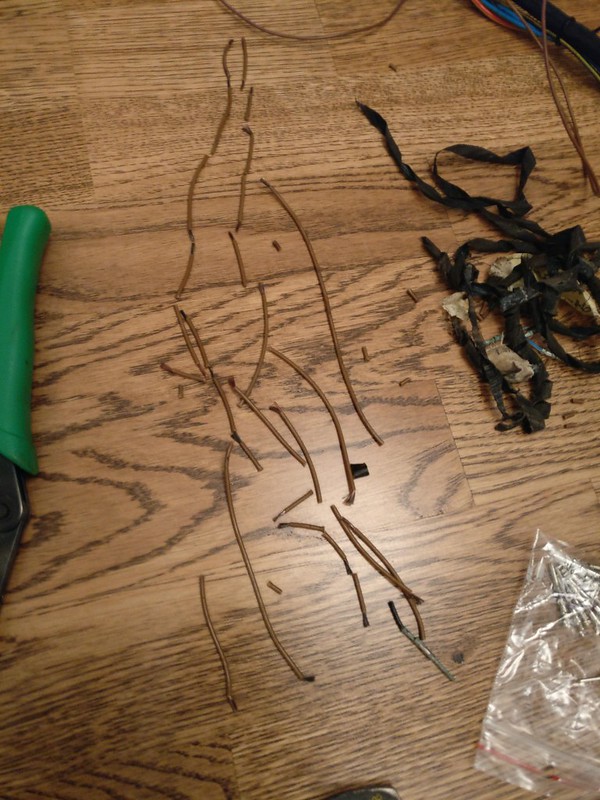
One of the harnesses, the one that goes from electrical mirror adjuster to the passenger mirror was in extremely bad condition. Just to see how much of that wire was rotten I cut it off bit by bit. This is how far the damage was gone. Those wires got fully replaced in the end.
After a long search online, I managed to find and source some PVC tubing similar to OEM to recondition front lights harness
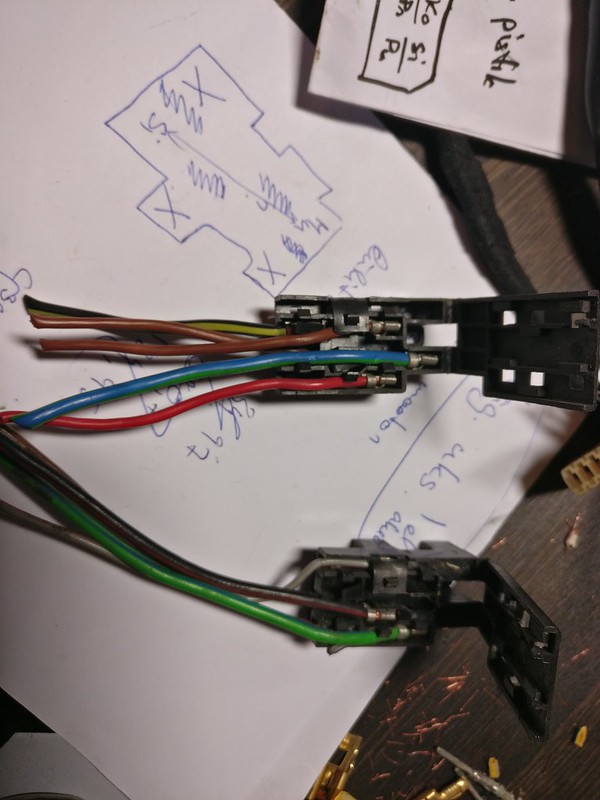
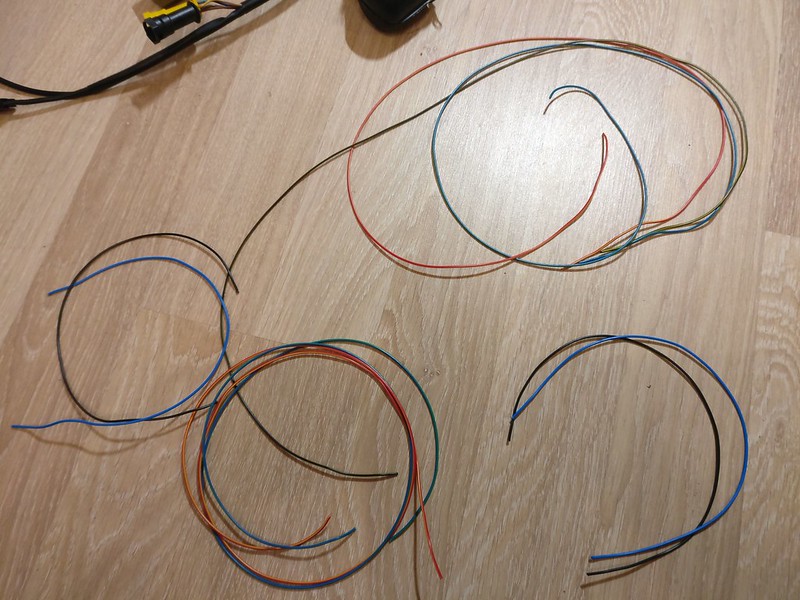
I didn’t have the door wiring harnesses for the rear electric windows. Rear electric windows being quite a rare option in these parts of the world, the chance of finding those was low. I had some pigtails and pins though. So I order some right colored wires and made my own.
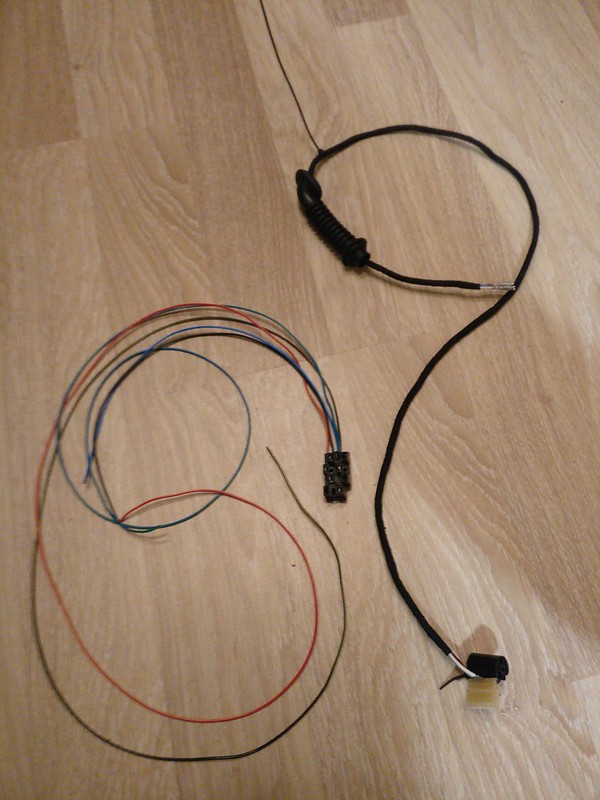
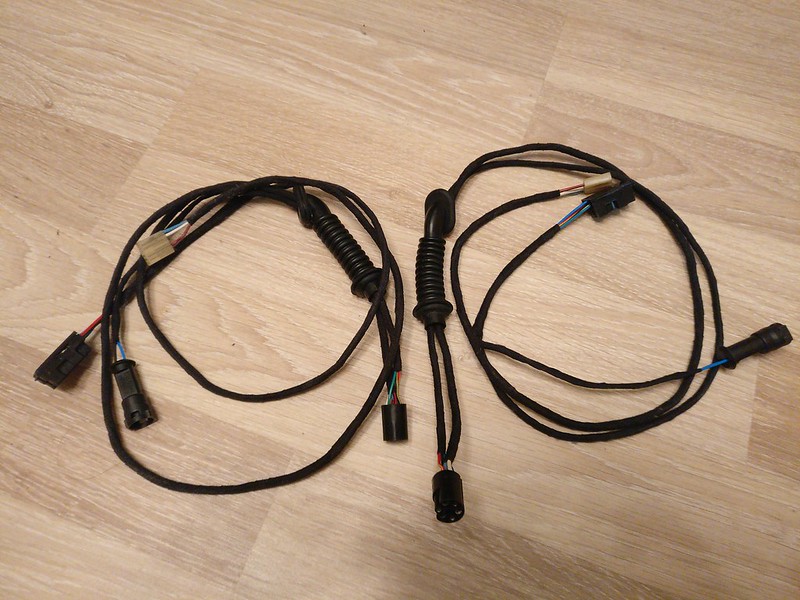
Door jamb tubings used here are from a Golf mark II (ref nr 191971840). Many thanks to whoever wrote about those on the E28 facebook page! I still need to find an acceptable alternative for the front doors, so if someone knows about anything that might work, please let me know.
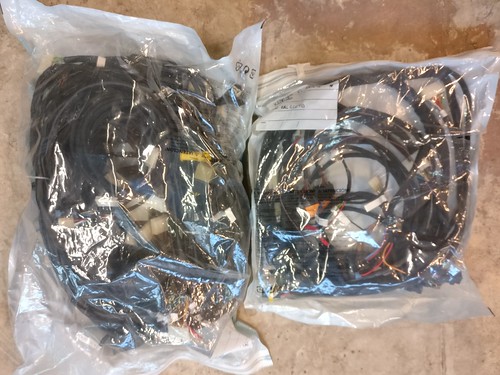
All the wiring except engine harness ready and packed up
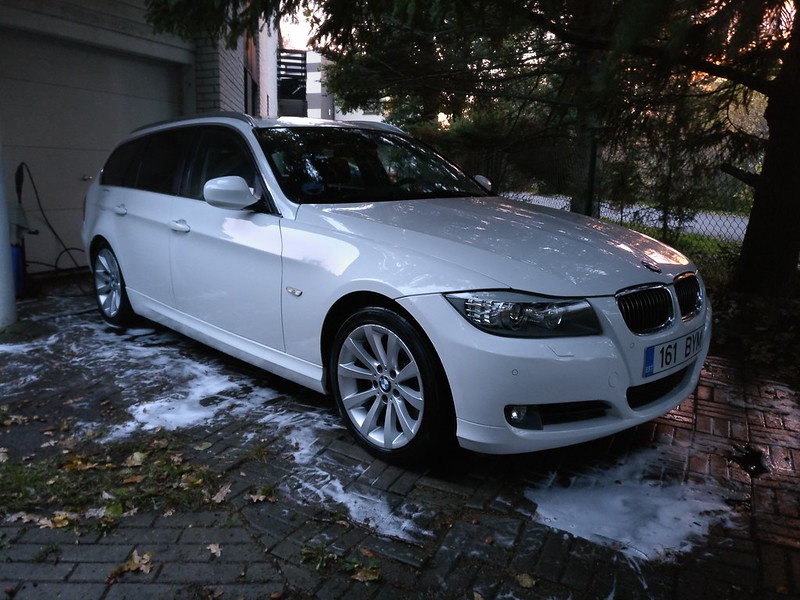
Got myself a new daily in the fall of 2018. It’s a 2011 E91 LCI 325d diesel wagon. I have never been a big fan of diesels but I thought I give one a try. Other than the tractor noise it makes when idle, not bad. N57 engine has plenty of oomph, it’s comfy, gets me from A to B, has great mileage and some really nice options like the Webasto preheater. Couldn’t get much better on those cold winter mornings!
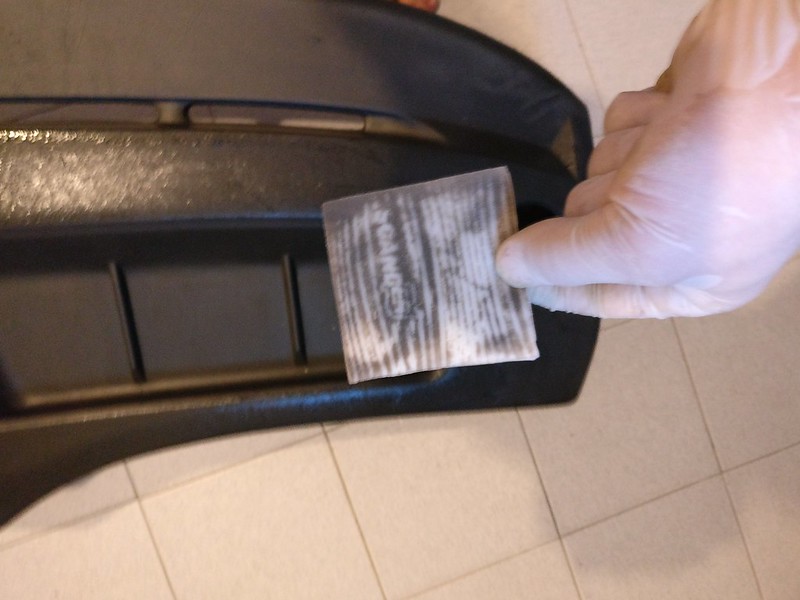
Cleaned my dash. Luckily mine was in really good condition with a few barely visible cracks just getting started. I tried to drill (more like punch) some small holes to the end of the cracks in hopes they wouldn’t progress but we’ll see.
There have been a lot of chatter in US forums about Leatherique products. My seats were in a pretty rough state and I definitely want to get some better ones to reupholster in the future. But this won’t be happening before all the bodywork and technical stuff is taken care of and I intend to drive the car before tackling with the interior. As Leatherique have a reseller in Europe, I decided to give it a try.
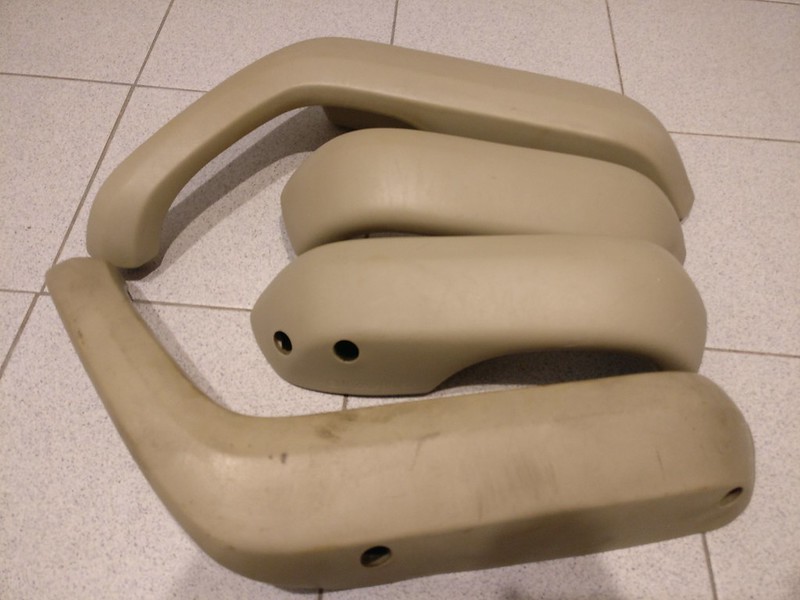
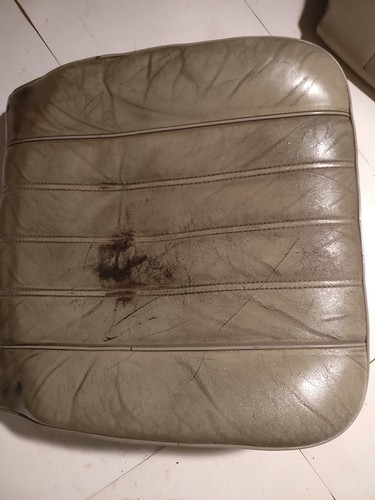
I also did some restitching - on the rear headrests, where leather was completely torn apart. And also the threads on both front and rear seat bases were completely worn out in some places. Added some foam to the seat bases while at it.
Headrests done
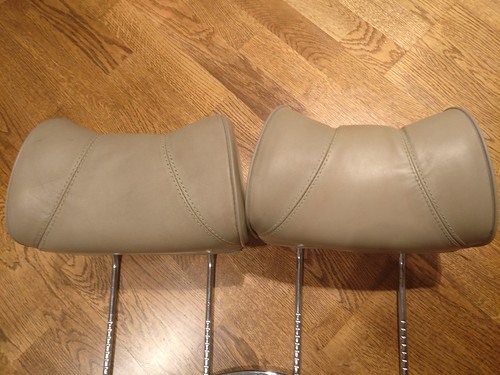
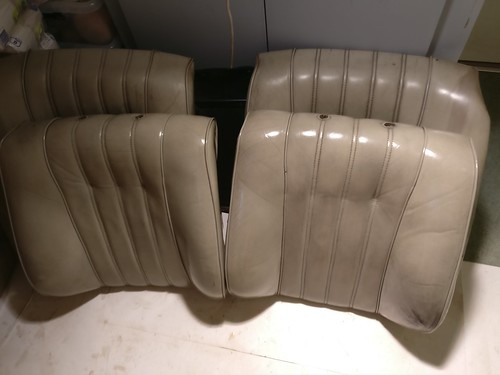
I loved the rejuvenating oil, it really brought some softness back into this old worn leather. But I haven’t been able to get the dye to adhere or soak into the leather. It looks okay, sure, but even months after dying when two headrests accidentally sticked together the dye transferred from one to another. I did remove all of the die then and started all over, thinking maybe I didn’t prep the surface properly, but the results were the same. Maybe the leather is too far gone, it did seem to work better on surfaces which weren’t that damaged by the sun and wear. Furthermore, I am not a fan of that putty. Anyway, I won’t trouble myself with that too much as the seats will be replaced in the future.
Not many photos were taken of that process. I make sure to take some more when I have everything finished as I still haven’t done all the pieces.
Some rejuvenating oil applied
A really worn out front seat base
One seat back dyed
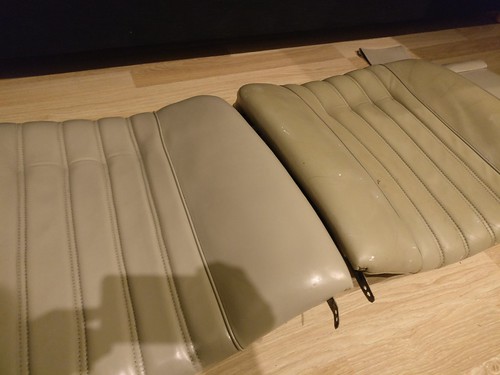
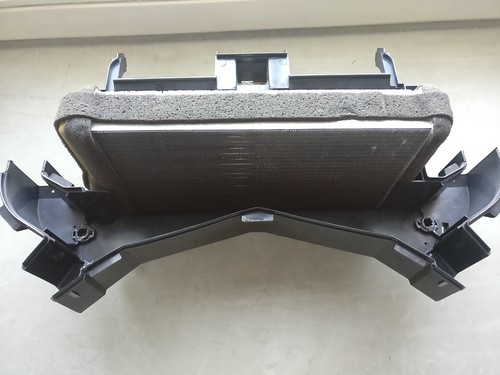
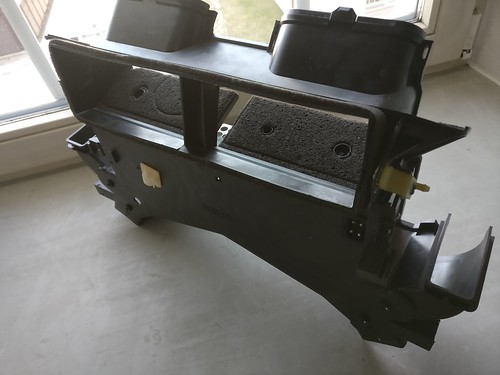
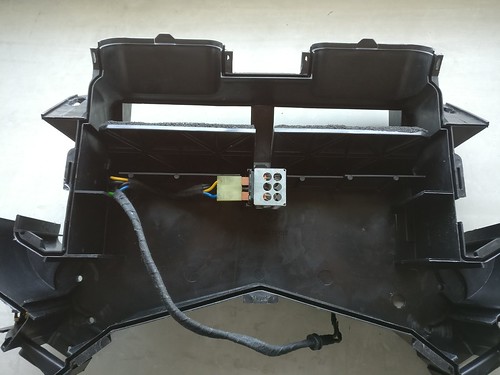
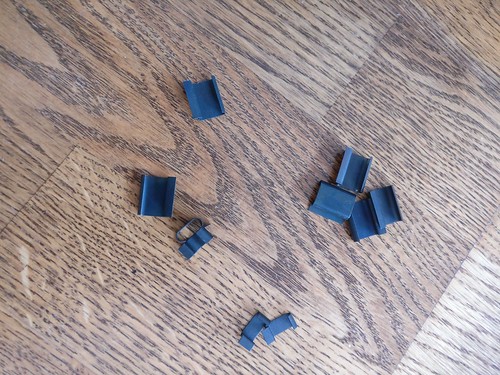
Reconditioned my heater unit - new foam padding, new resistor and new clips
Next up we’ll finally get to some rust repairs, so stay tuned.
Essentially nothing happened with the chassis during next year’s time.
Most of the July went moving our stuff and after that begun the slow process of getting the workshop ready. It was an old stone building in an industrial park but hadn’t been in use for quite some time. Owner agreed to get the roof fixed and got the electricity to the building. Some of the major work we had to do included all new electrical wiring and lighting inside the building, painting the walls, filling up a huge truck inspection pit and setting our own stuff up.
Some of that aforementioned work in progress. You can play “Where’s Waldo?”, or to be precise “Where’s E28?”, on that photo.

At a much later date. This is more or less how it is today. Nothing spectacular but fills our needs as hobbyists and fits the budget.

Meanwhile, I moved on with some other things. E.g, refurbishing all the wiring in the car. All the old wrapping got removed, wires wiped clean. Every last one of the connectors got pins removed, examined and cleaned if applicable. I was able to source most of the pins used on those cars so every corroded pin got replaced. Plastic connectors had a nice bath in some cleaning agent. Then everything got rewrapped with some black cloth tape. I used some Tesa tape that was readily available. Rated for engine compartement and with a nice touch. I opted to fully wrap everything contrary to what they came from the factory.
Some wrapping in progress. Don’t worry, no wire was harmed during the process. C-clamps were barely tightened and I used some extra rubber over the wires to protect them. I just found this setup a bit more comfortable to work with.

Such pins ended up in trash can and brand new pins got crimped on instead.

Accessory wiring done and labelled. In my case, the harness was only for central locking. As I obtained a wiring set for electric windows later I had to redo that one.

One of the harnesses, the one that goes from electrical mirror adjuster to the passenger mirror was in extremely bad condition. Just to see how much of that wire was rotten I cut it off bit by bit. This is how far the damage was gone. Those wires got fully replaced in the end.

After a long search online, I managed to find and source some PVC tubing similar to OEM to recondition front lights harness

I didn’t have the door wiring harnesses for the rear electric windows. Rear electric windows being quite a rare option in these parts of the world, the chance of finding those was low. I had some pigtails and pins though. So I order some right colored wires and made my own.


Door jamb tubings used here are from a Golf mark II (ref nr 191971840). Many thanks to whoever wrote about those on the E28 facebook page! I still need to find an acceptable alternative for the front doors, so if someone knows about anything that might work, please let me know.
All the wiring except engine harness ready and packed up

Got myself a new daily in the fall of 2018. It’s a 2011 E91 LCI 325d diesel wagon. I have never been a big fan of diesels but I thought I give one a try. Other than the tractor noise it makes when idle, not bad. N57 engine has plenty of oomph, it’s comfy, gets me from A to B, has great mileage and some really nice options like the Webasto preheater. Couldn’t get much better on those cold winter mornings!

Cleaned my dash. Luckily mine was in really good condition with a few barely visible cracks just getting started. I tried to drill (more like punch) some small holes to the end of the cracks in hopes they wouldn’t progress but we’ll see.

There have been a lot of chatter in US forums about Leatherique products. My seats were in a pretty rough state and I definitely want to get some better ones to reupholster in the future. But this won’t be happening before all the bodywork and technical stuff is taken care of and I intend to drive the car before tackling with the interior. As Leatherique have a reseller in Europe, I decided to give it a try.
I also did some restitching - on the rear headrests, where leather was completely torn apart. And also the threads on both front and rear seat bases were completely worn out in some places. Added some foam to the seat bases while at it.
Headrests done

I loved the rejuvenating oil, it really brought some softness back into this old worn leather. But I haven’t been able to get the dye to adhere or soak into the leather. It looks okay, sure, but even months after dying when two headrests accidentally sticked together the dye transferred from one to another. I did remove all of the die then and started all over, thinking maybe I didn’t prep the surface properly, but the results were the same. Maybe the leather is too far gone, it did seem to work better on surfaces which weren’t that damaged by the sun and wear. Furthermore, I am not a fan of that putty. Anyway, I won’t trouble myself with that too much as the seats will be replaced in the future.
Not many photos were taken of that process. I make sure to take some more when I have everything finished as I still haven’t done all the pieces.
Some rejuvenating oil applied

A really worn out front seat base

One seat back dyed

Reconditioned my heater unit - new foam padding, new resistor and new clips


Next up we’ll finally get to some rust repairs, so stay tuned.
Re: Another restoration - 83' 528i
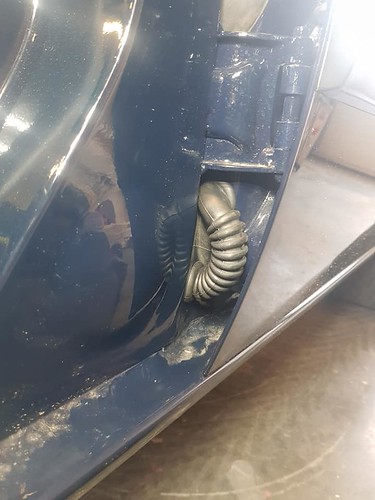
Do you have a pic of these installed???? I've been looking for something that would work from a modern car forever!Door jamb tubings used here are from a Golf mark II (ref nr 191971840). Many thanks to whoever wrote about those on the E28 facebook page! I still need to find an acceptable alternative for the front doors, so if someone knows about anything that might work, please let me know.
Re: Another restoration - 83' 528i
Unfortunately, no. But I might be able to mock something up in a few days.cek wrote: Aug 18, 2020 12:46 AMDo you have a pic of these installed???? I've been looking for something that would work from a modern car forever!Door jamb tubings used here are from a Golf mark II (ref nr 191971840). Many thanks to whoever wrote about those on the E28 facebook page! I still need to find an acceptable alternative for the front doors, so if someone knows about anything that might work, please let me know.
Also, I think it needs some trimming on the oblong end to fit the door properly.
EDIT:
I didn't manage to do any better than that:
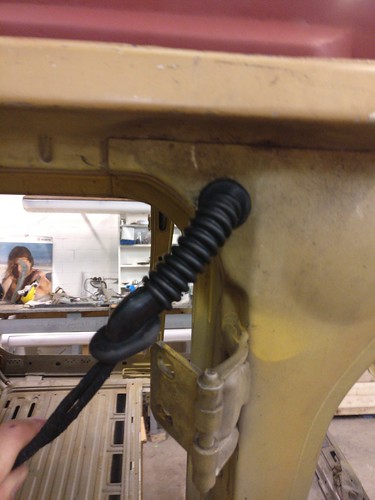
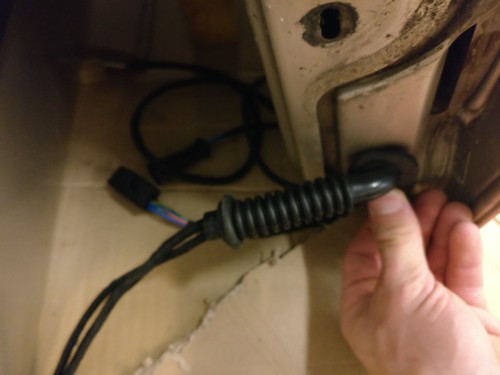
B pillar side is a snug fit but don't need any tinkering.
Rubber is beefier than on the OEM boot and won't fit through the hole in the doors. It looks to me that the body side connector of the harness needs to come apart and the tubing installed in place. The groove on the door grommet needs to be deepened as it is definitely larger than the passage. The original poster on Facebook did that too.
I wasn't able to find the original post until it suddenly occured to me to check under my saved items.
All the credit goes to Peter Zale.
EDIT2: PMd him on FB and he gave me thumbs up for sharing it here.
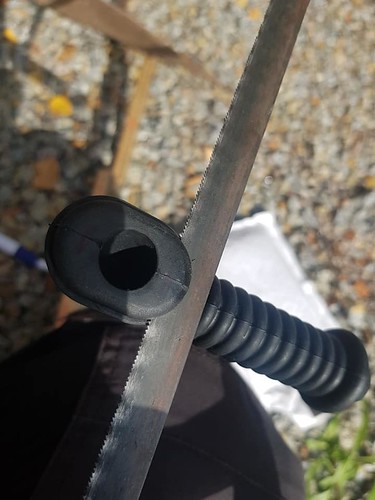
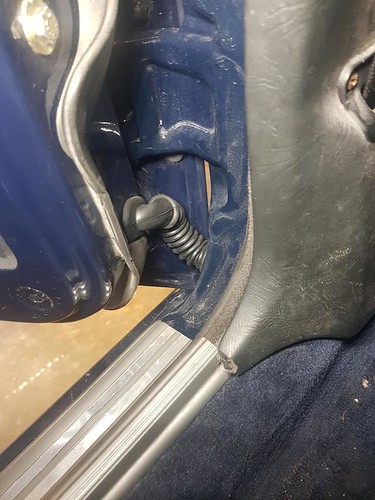
Re: Another restoration - 83' 528i
Jun - Sep 2019
As I finished my studies that spring I had some more time to spend in the workshop. So I began working on the chassis.
Small things first. As it happens, someone had routed the rear brake lines through the cabin. They were attached using some sheet metal screws which left some small holes and then I had the larger exit holes in the back. So I started off with welding them shut.
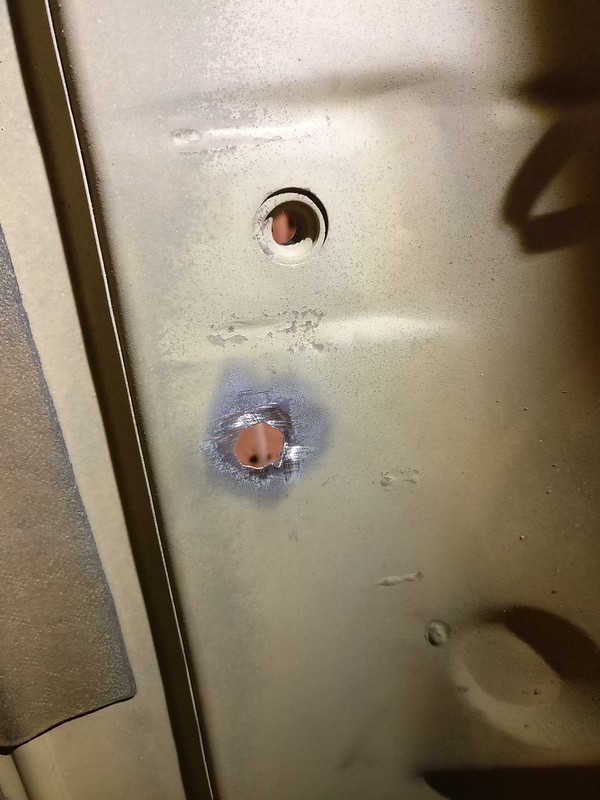
Other side but similar hole already filled.
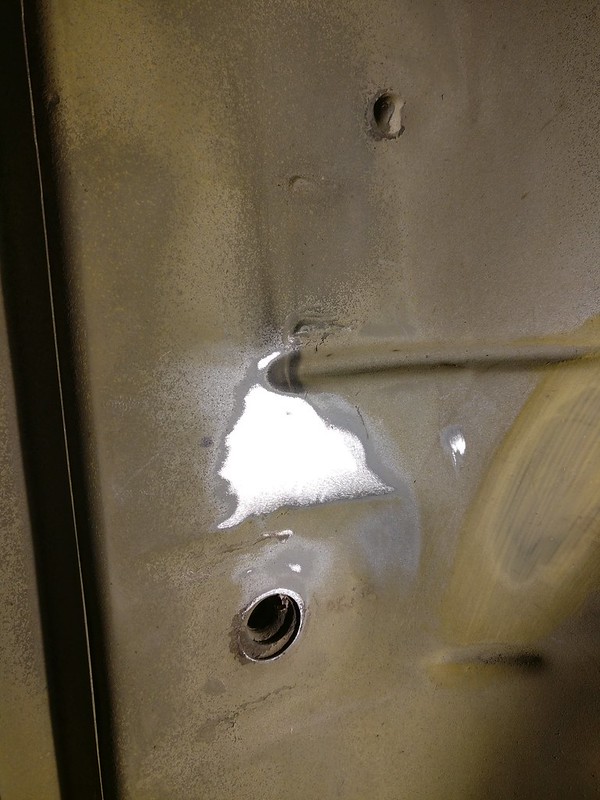
And here comes my first “patch panel”. A rust hole where once was an attachment for the insulation sheets.
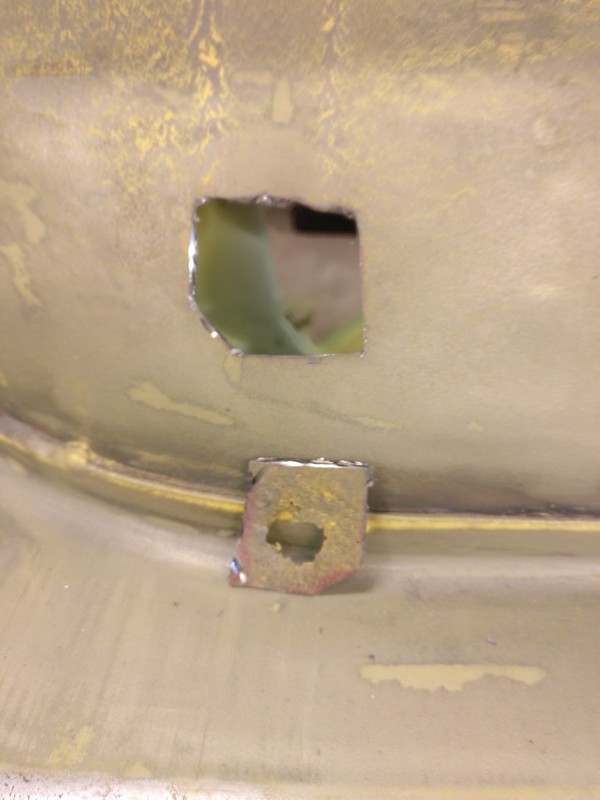
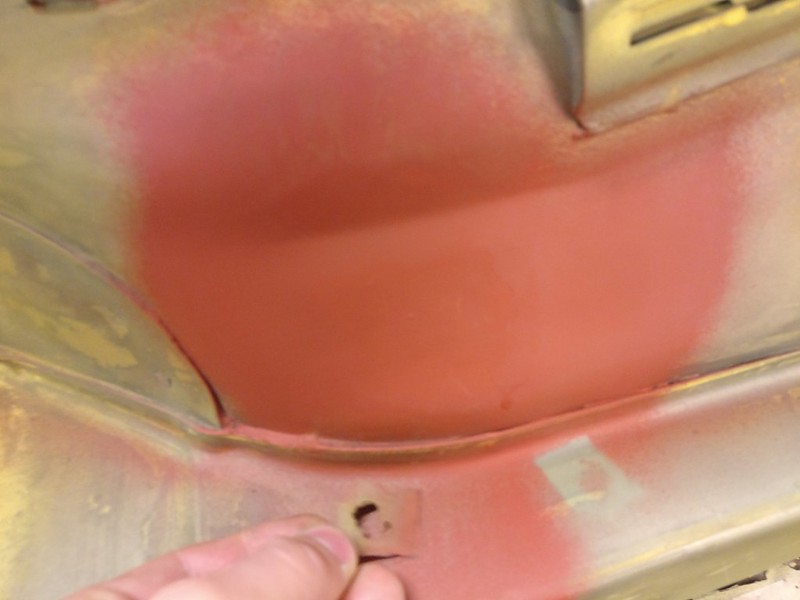
So on with some more serious stuff. Remember the hole that was cut in my parcel shelf to accommodate a subwoofer? I saved this section from the first car. So welded that in place
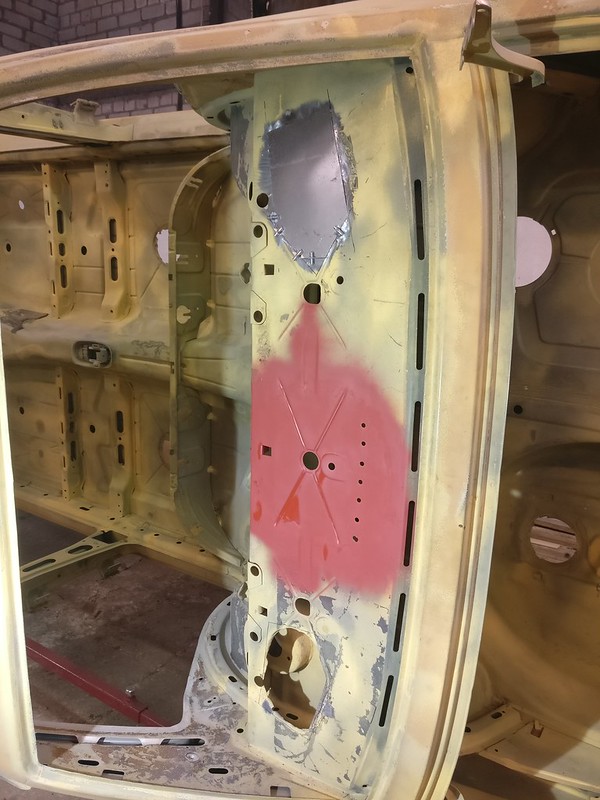
I didn’t care much for rear speakers so I also filled in the vandalized speaker holes. One side was pretty much just a straight piece of sheet metal. Driver side needed some ribs formed into it.
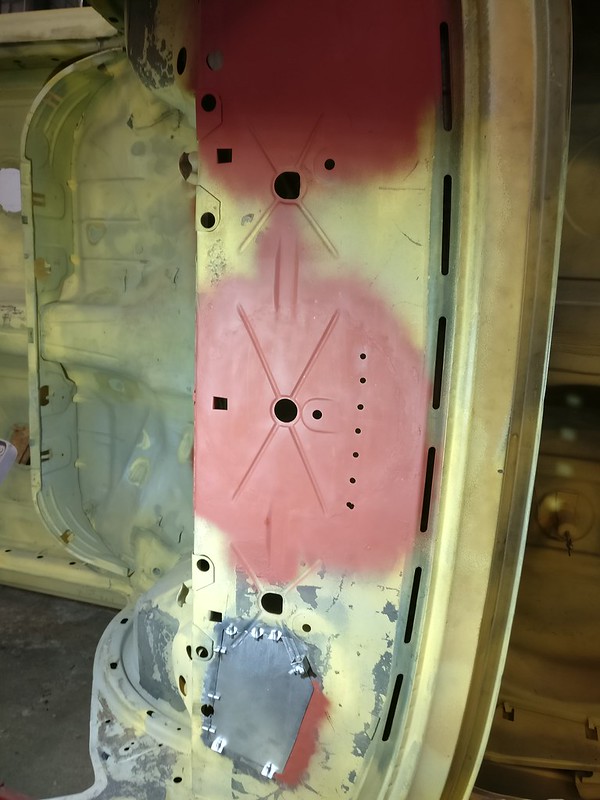
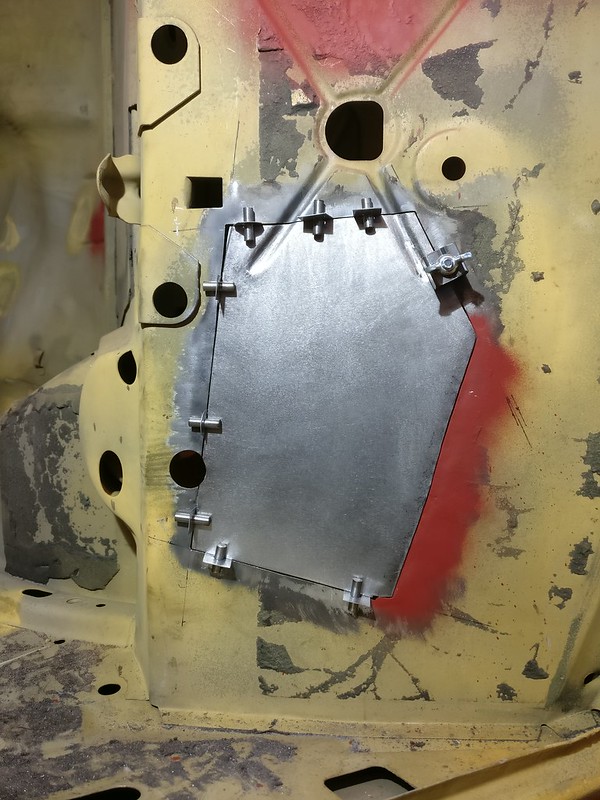
And as promised before I now have a rear parcel subwoofer hole for sale. Shipping worldwide.
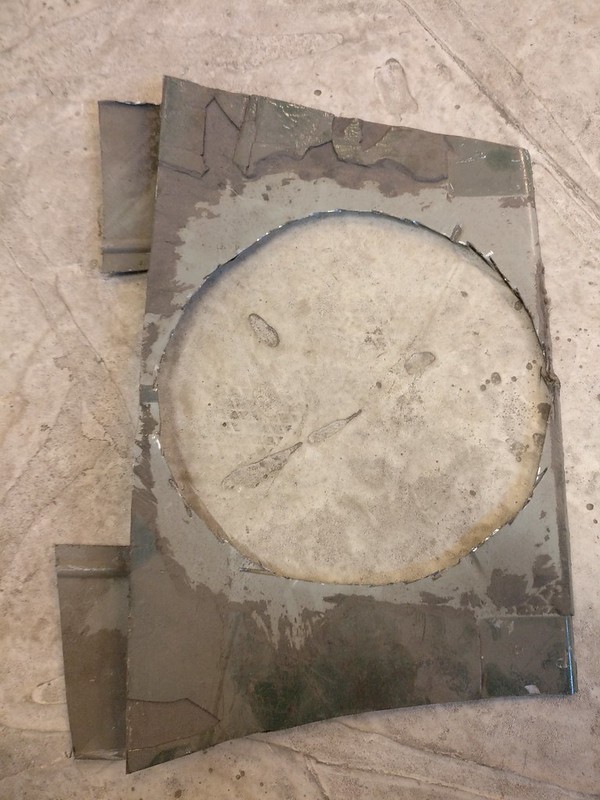
Next up, floor on the rear had those two large holes with cover lids on them. As the edges were quite badly rusted, I made some repairs there. I could have cut holes in the panels and bought new covers but I didn’t see much reason to do so. They would only accumulate moisture there and would be prone to rust again.
Hammerformed the repair panels
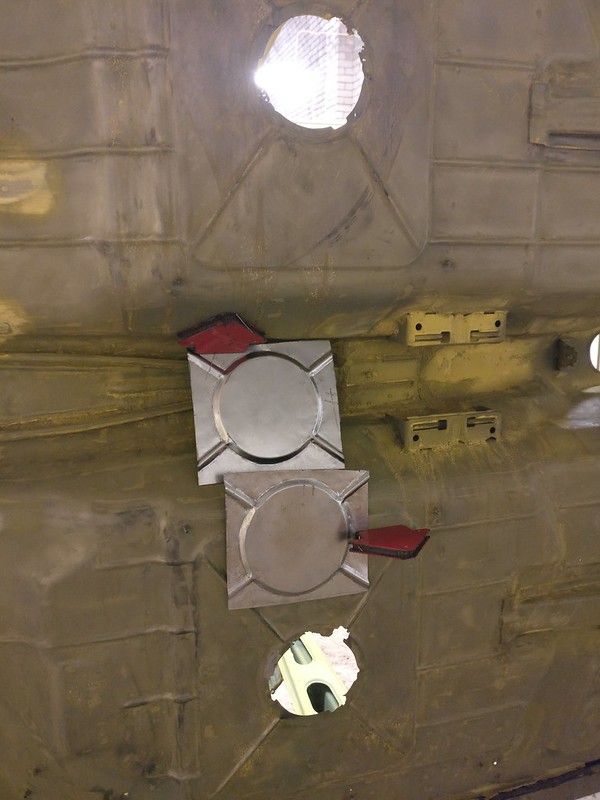
Welded them in
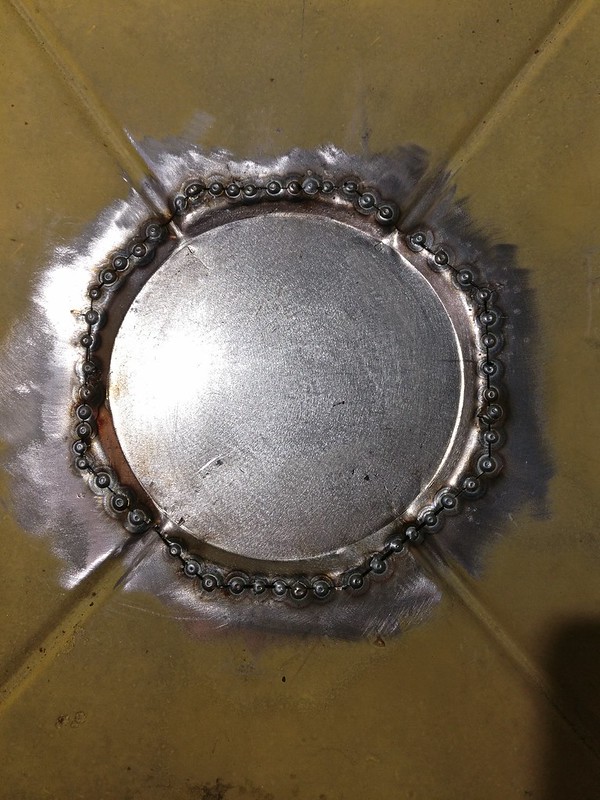
Cleaned up and primered
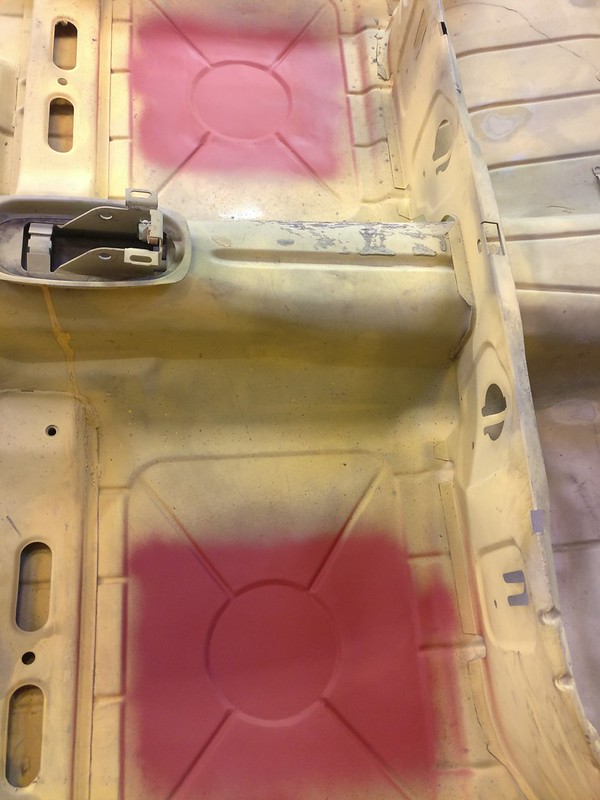
Don’t have a before picture but I suspect a small part of the trunk seal lip had rotten away
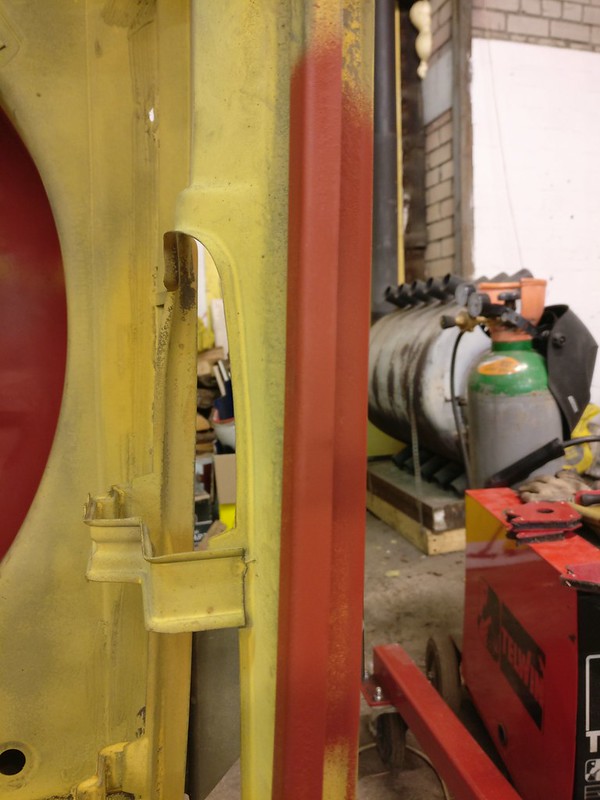
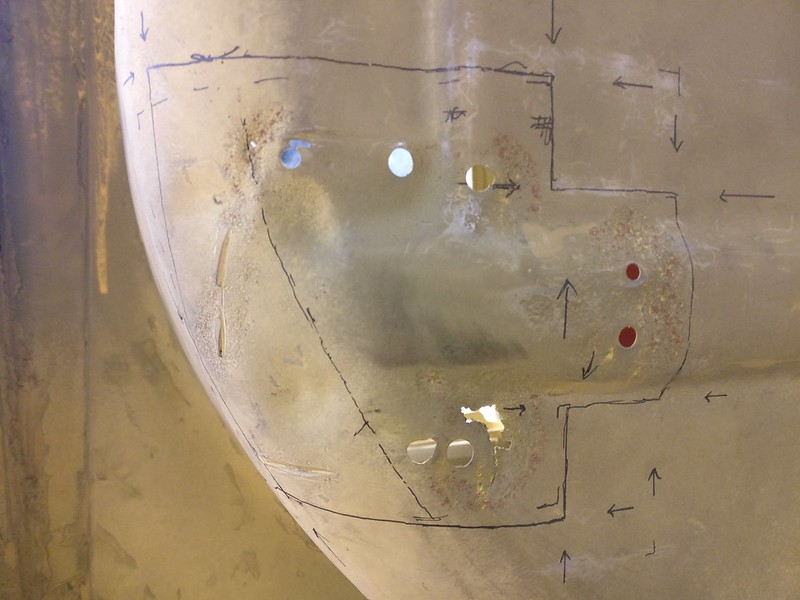
Repaired the section of spare wheel housing where the rear tow hook was attached to. This got cut out.
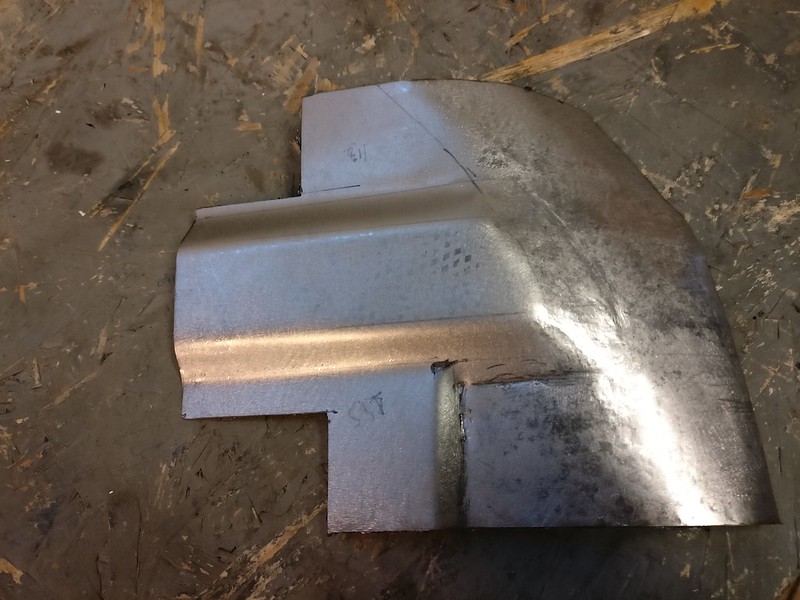
And replaced by this repair panel I made
With a brand new tow hook already welded in
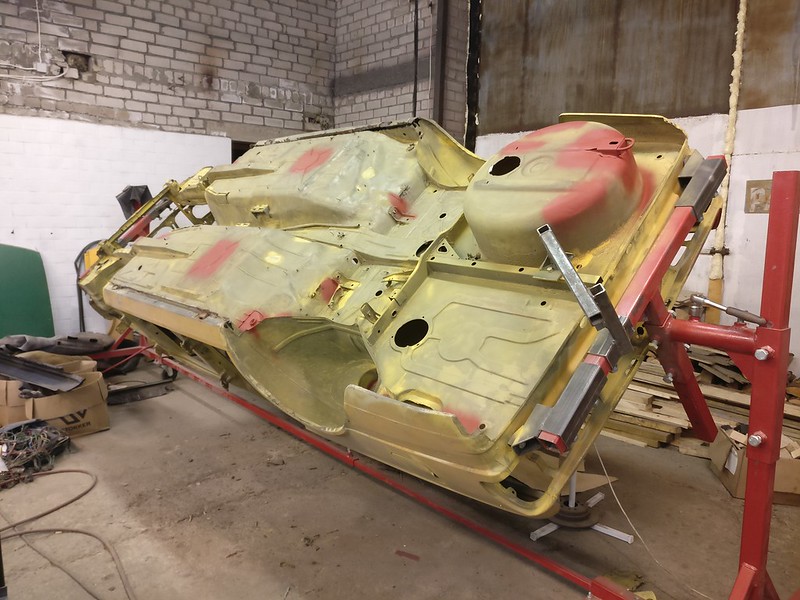
As I finished my studies that spring I had some more time to spend in the workshop. So I began working on the chassis.
Small things first. As it happens, someone had routed the rear brake lines through the cabin. They were attached using some sheet metal screws which left some small holes and then I had the larger exit holes in the back. So I started off with welding them shut.

Other side but similar hole already filled.

And here comes my first “patch panel”. A rust hole where once was an attachment for the insulation sheets.


So on with some more serious stuff. Remember the hole that was cut in my parcel shelf to accommodate a subwoofer? I saved this section from the first car. So welded that in place

I didn’t care much for rear speakers so I also filled in the vandalized speaker holes. One side was pretty much just a straight piece of sheet metal. Driver side needed some ribs formed into it.


And as promised before I now have a rear parcel subwoofer hole for sale. Shipping worldwide.

Next up, floor on the rear had those two large holes with cover lids on them. As the edges were quite badly rusted, I made some repairs there. I could have cut holes in the panels and bought new covers but I didn’t see much reason to do so. They would only accumulate moisture there and would be prone to rust again.
Hammerformed the repair panels

Welded them in

Cleaned up and primered

Don’t have a before picture but I suspect a small part of the trunk seal lip had rotten away

Repaired the section of spare wheel housing where the rear tow hook was attached to. This got cut out.

And replaced by this repair panel I made

With a brand new tow hook already welded in

Last edited by taavipa on Aug 27, 2020 9:57 AM, edited 2 times in total.
Re: Another restoration - 83' 528i
LMAO.And as promised before I now have a rear parcel subwoofer hole for sale. Shipping worldwide.
Re: Another restoration - 83' 528i
Oct - Nov 2019
Rear subframe mounting points looked like this
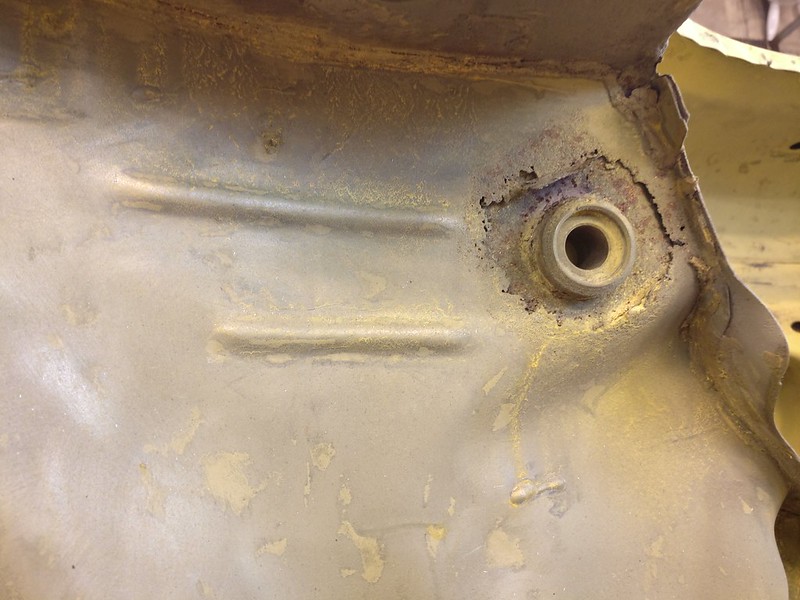
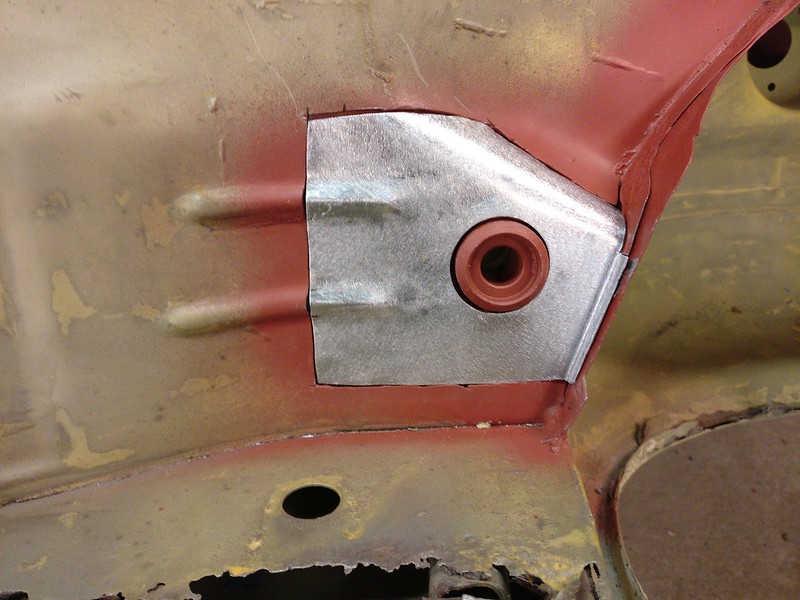
So removed the rusted part of top layer, wire-wheeled it clean and let it sit with some rust converter. Then got cleaned again and primered. Made a new section there and welded in.
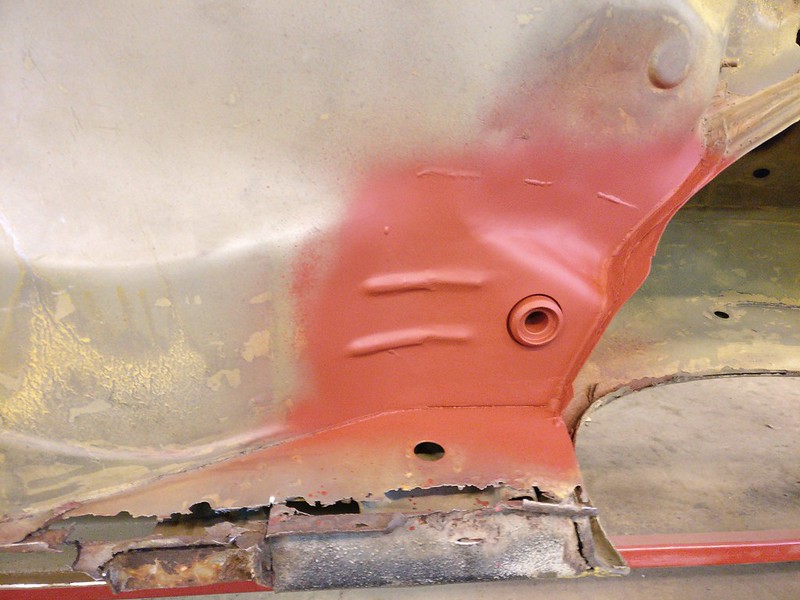
Next, work continued on right side inner sills.
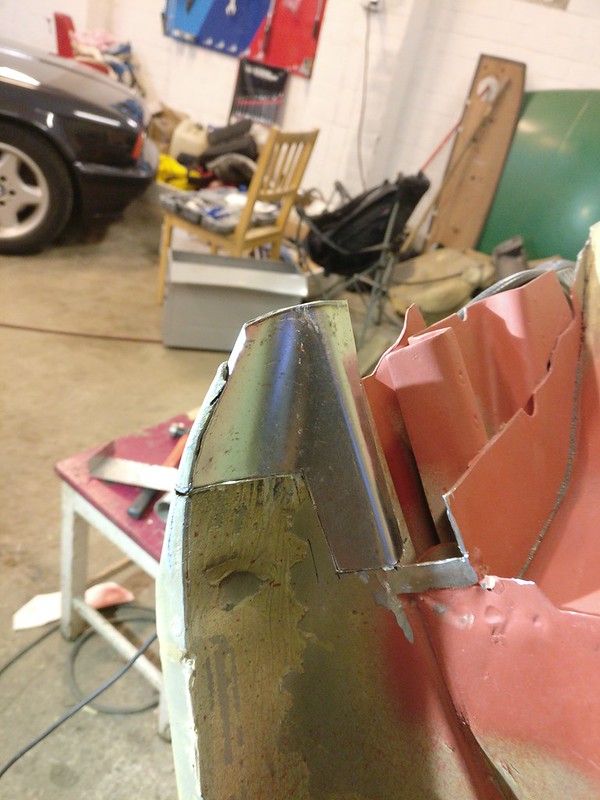
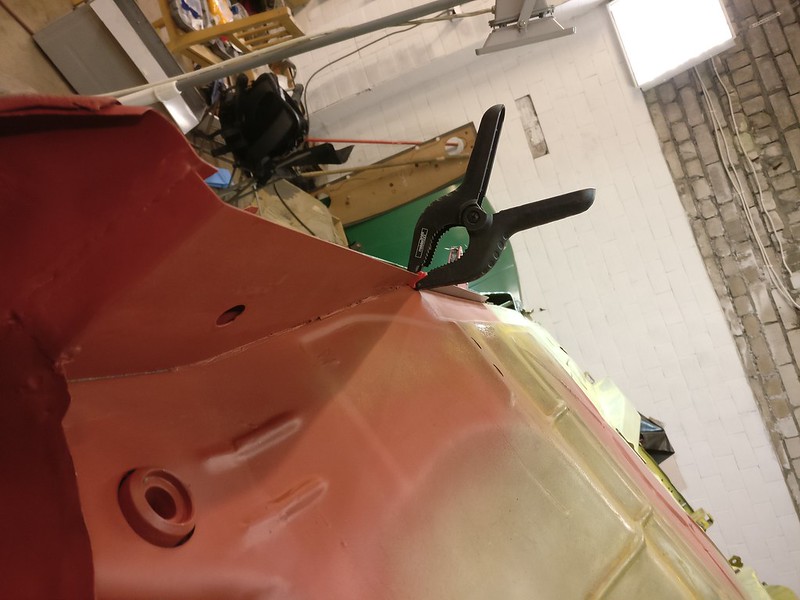
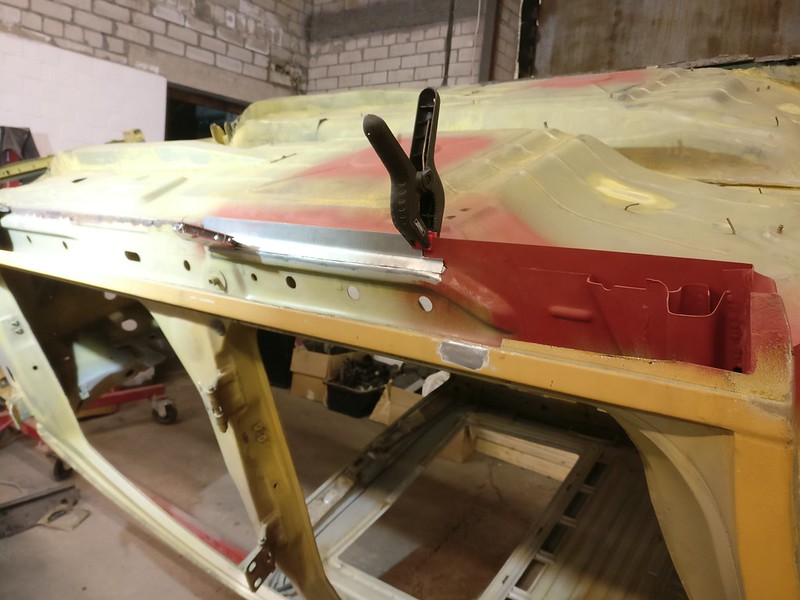
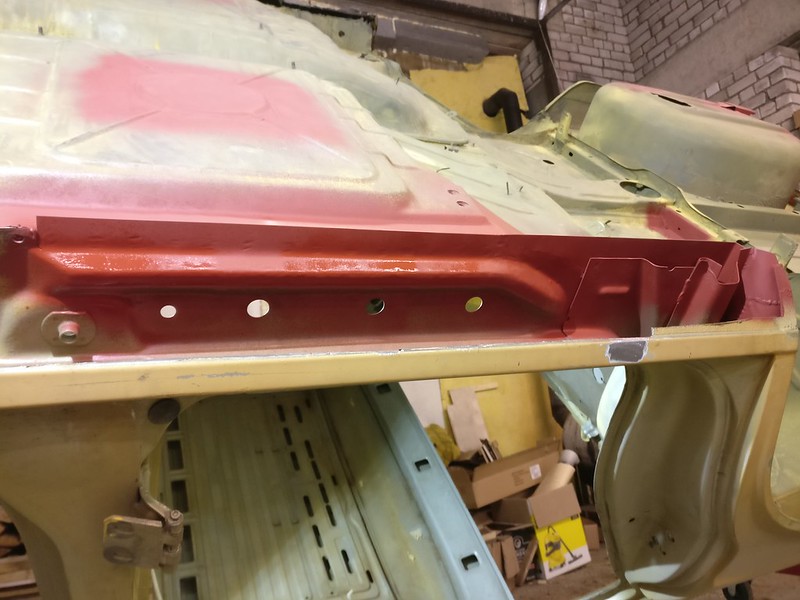
There was a lot of sandwich rust creeping out from under all the different mounts and brackets under the car. Such as this under the brake line mounts and rear seatbelt mount.
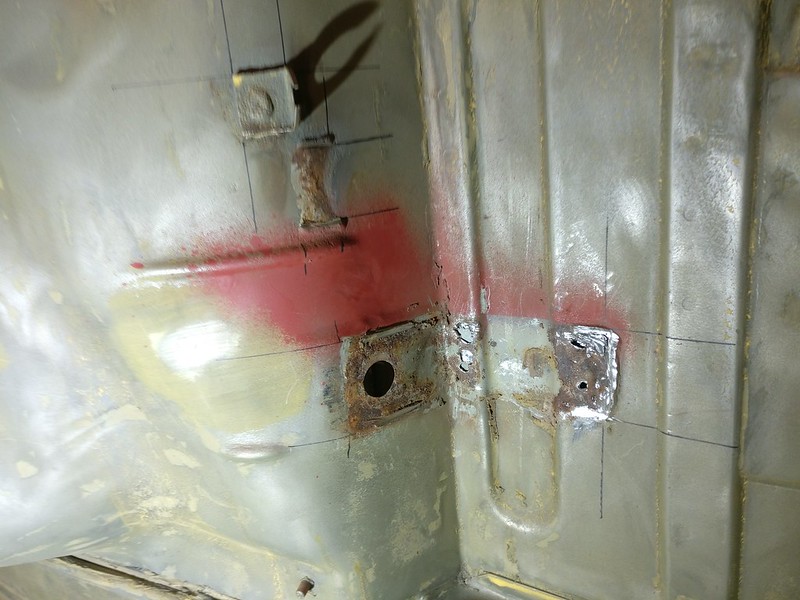
This happened next
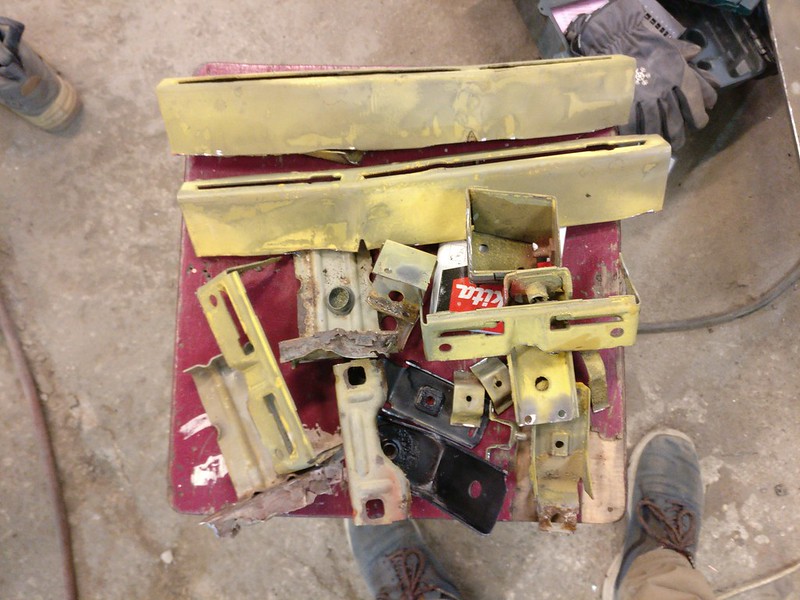
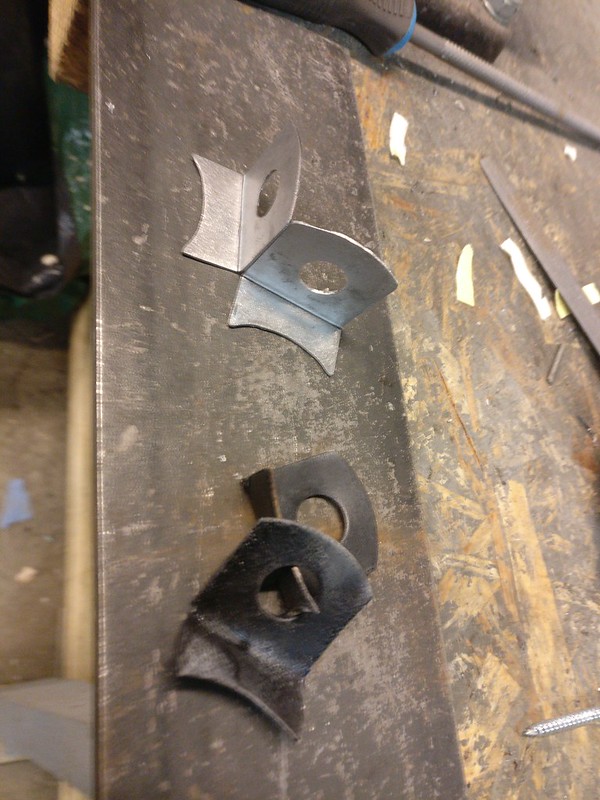
I was able to use a sandblasting cabinet at my friends work, so two hours later I had these
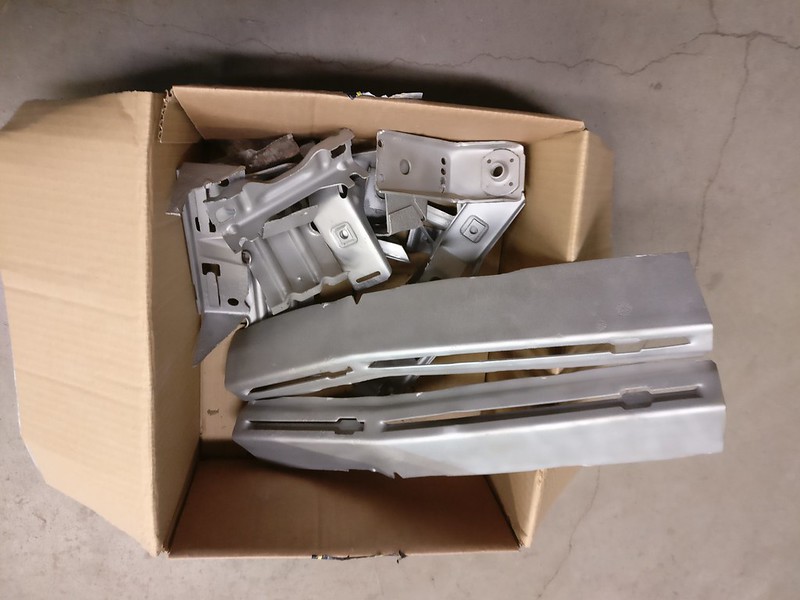
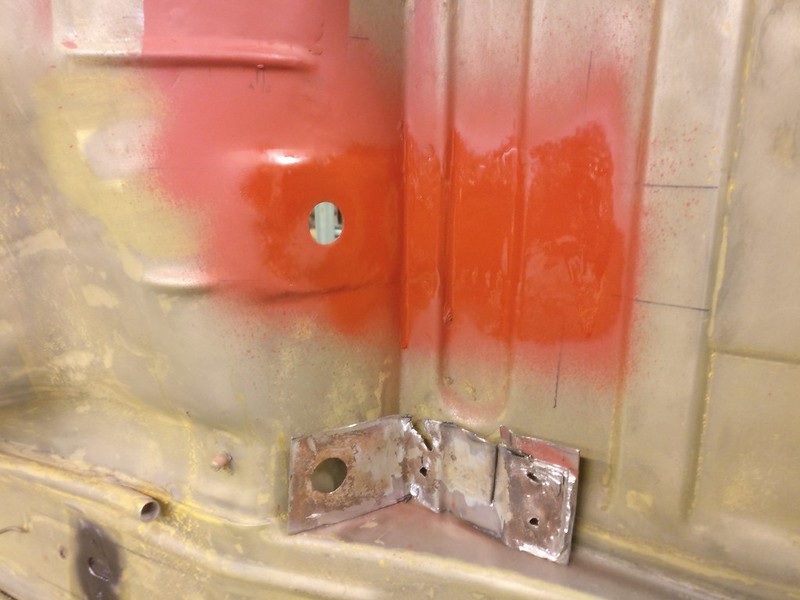
Not all of those brackets got welded back as I was able to still order some of them new (e.g driveshaft mount brackets and rear exhaust carrier). Some I made replacements myself.
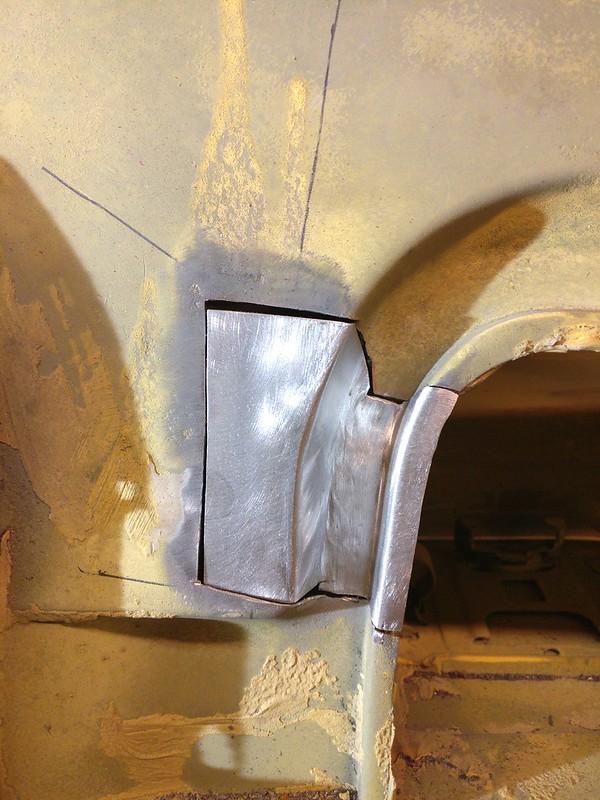
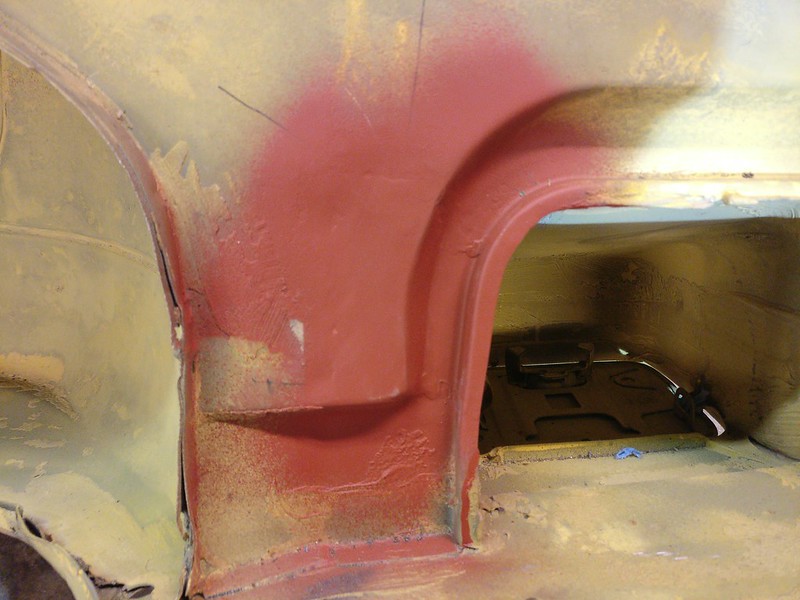
Where metal was really rusted under the brackets I patched it. Other spots got away with just wiring and cleaning.
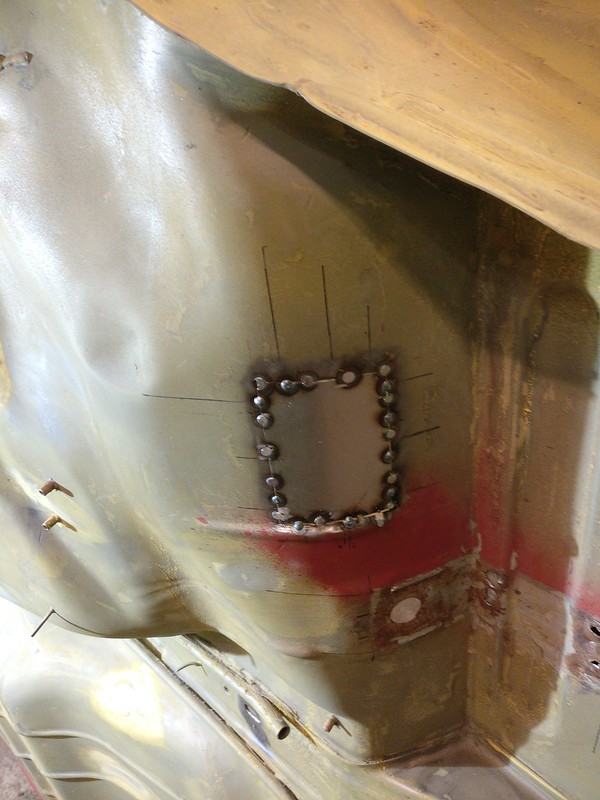
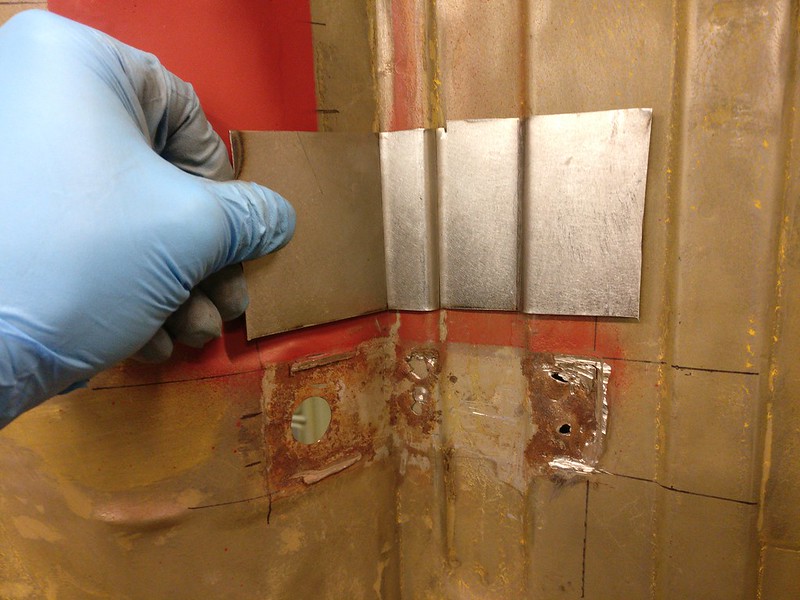
Some new small brackets in the making. Didn’t need the gas pedal mount at that moment but made it for future anyway.
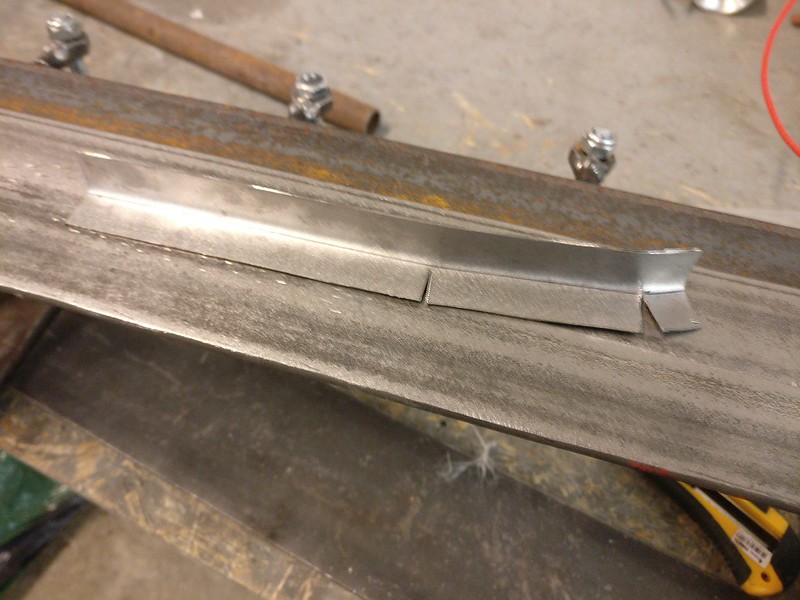
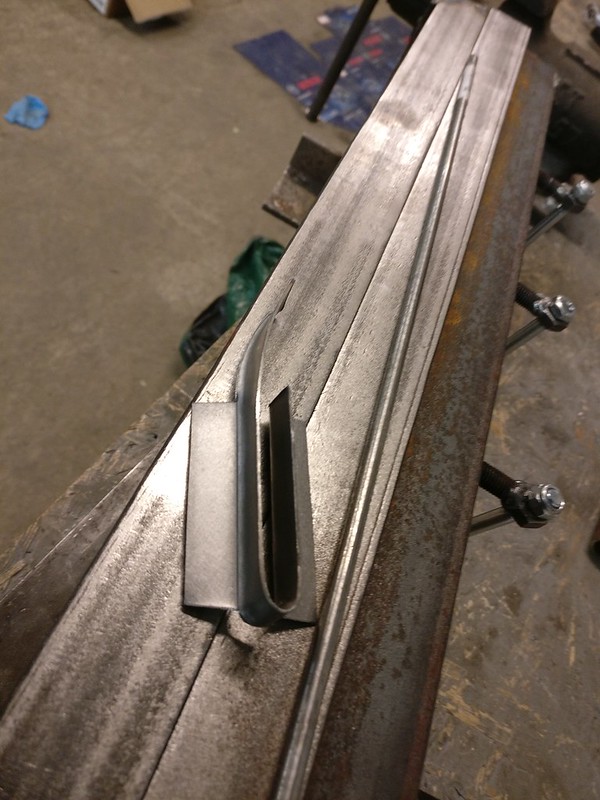
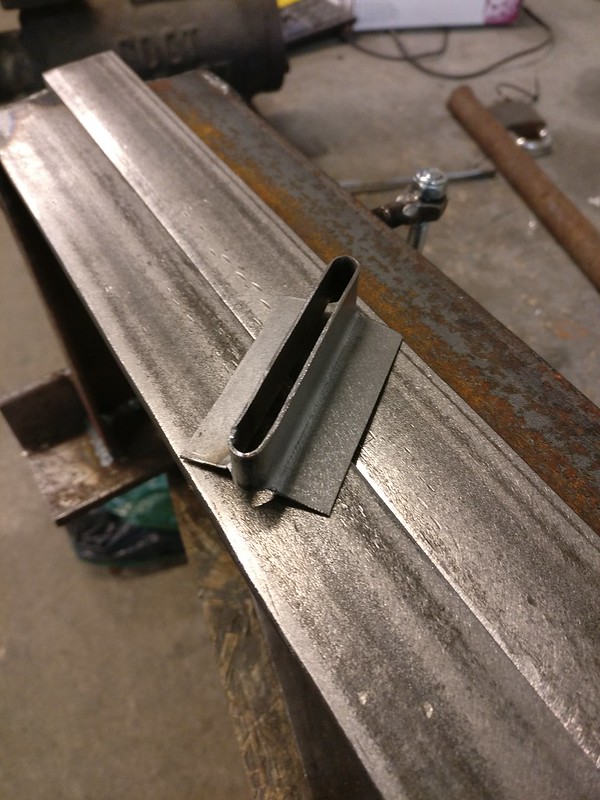
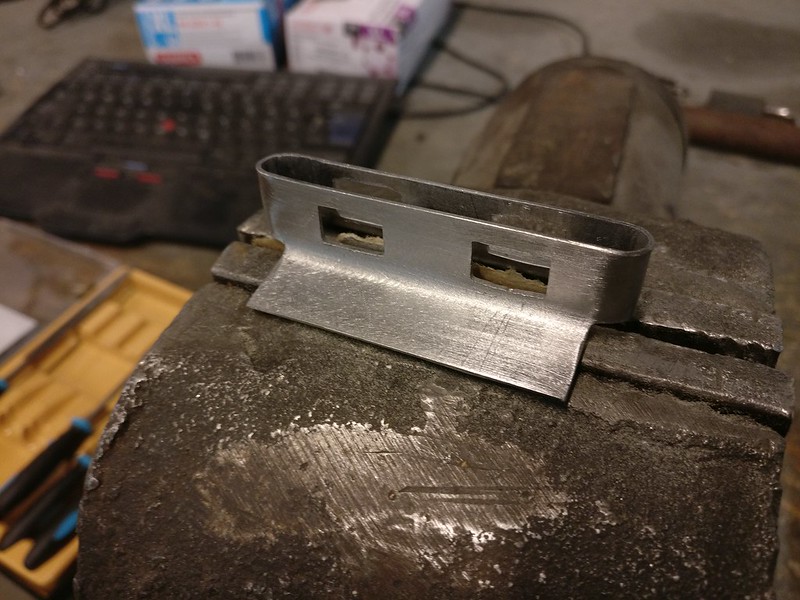
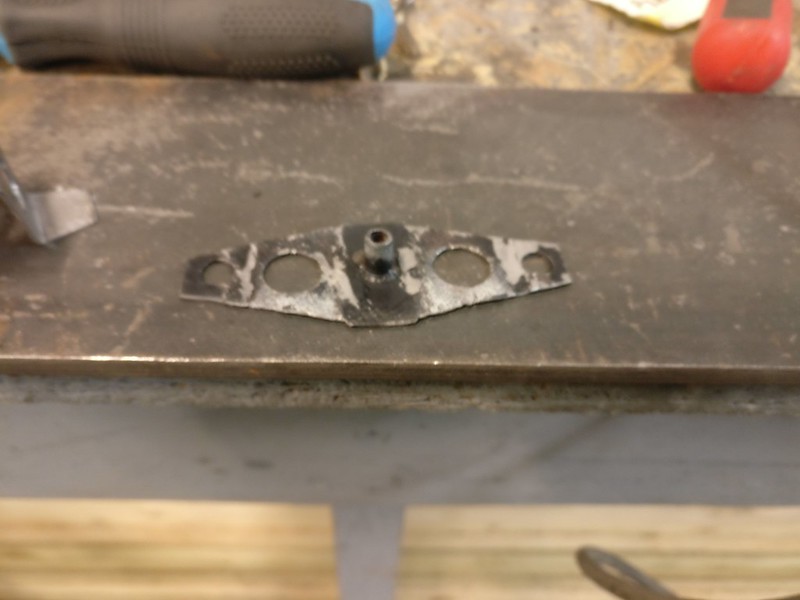
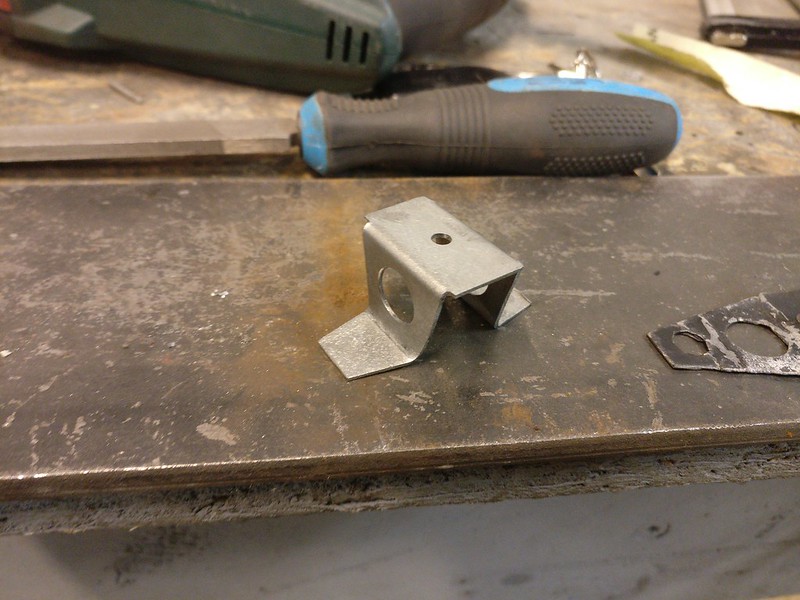
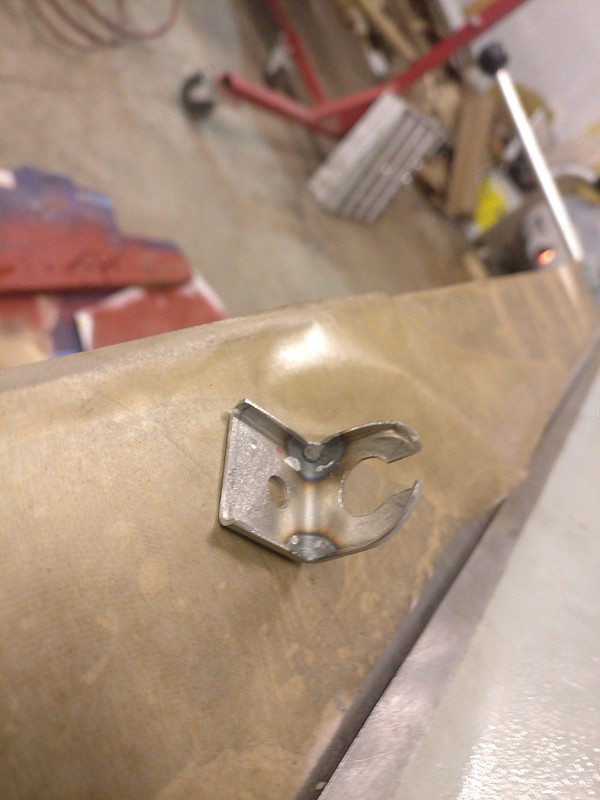
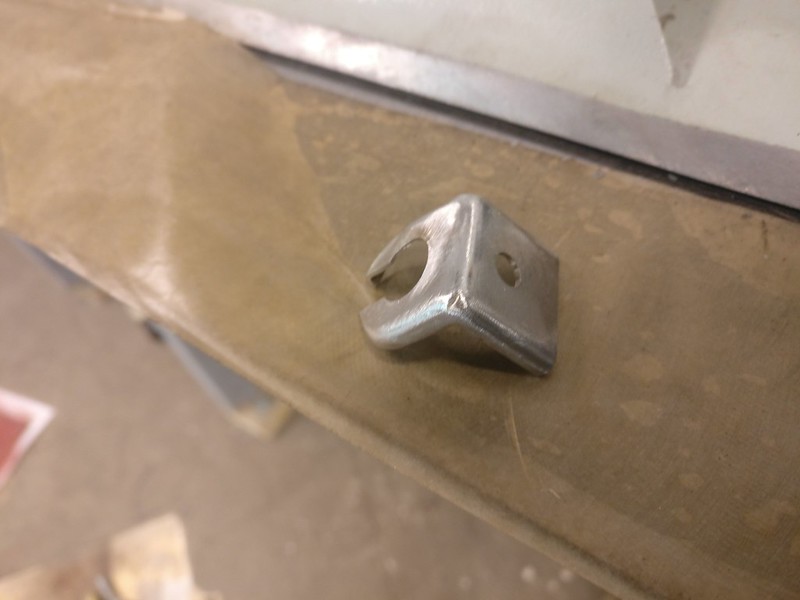
Some brackets already welded back on
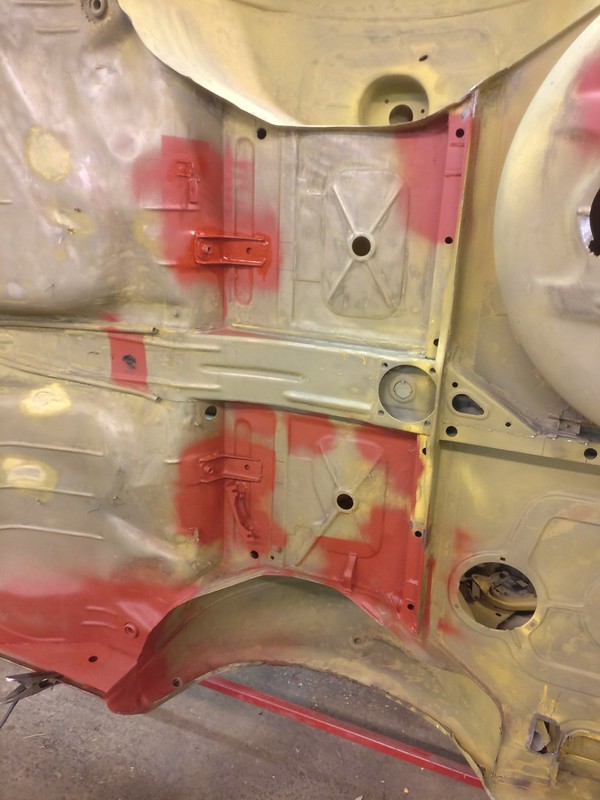
Rear subframe mounting points looked like this

So removed the rusted part of top layer, wire-wheeled it clean and let it sit with some rust converter. Then got cleaned again and primered. Made a new section there and welded in.


Next, work continued on right side inner sills.


There was a lot of sandwich rust creeping out from under all the different mounts and brackets under the car. Such as this under the brake line mounts and rear seatbelt mount.

This happened next

I was able to use a sandblasting cabinet at my friends work, so two hours later I had these

Not all of those brackets got welded back as I was able to still order some of them new (e.g driveshaft mount brackets and rear exhaust carrier). Some I made replacements myself.
Where metal was really rusted under the brackets I patched it. Other spots got away with just wiring and cleaning.


Some new small brackets in the making. Didn’t need the gas pedal mount at that moment but made it for future anyway.


Some brackets already welded back on

Re: Another restoration - 83' 528i
Really impressive metal working skills. Thoroughly enjoying following this build. Keep up the great work.
Re: Another restoration - 83' 528i
Excellent work!
Could you post a photo of the bending brake you are using?
Could you post a photo of the bending brake you are using?
Re: Another restoration - 83' 528i
Looking forward to seeing how it looks painted and put back together completely!
Re: Another restoration - 83' 528i
Thank you all!
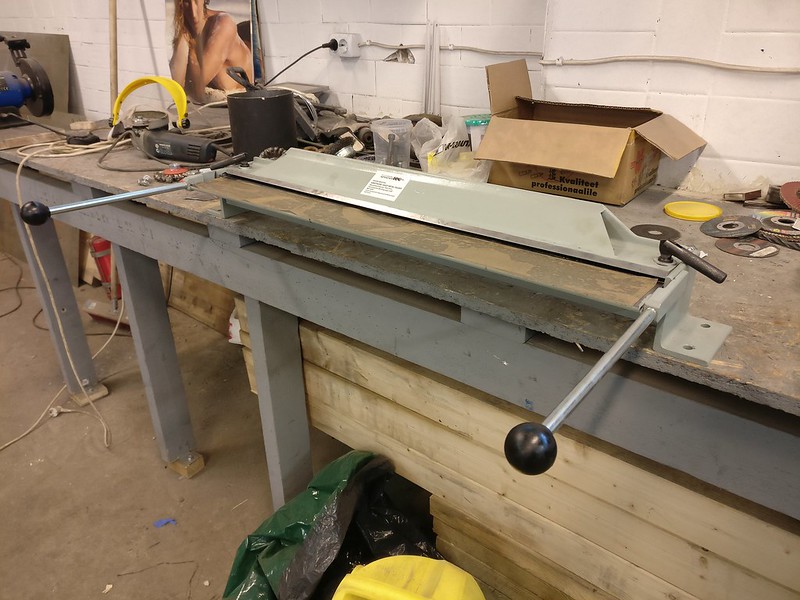
But to be honest, I don't find myself using it too often. It doesn't do very sharp bends, has limited size and for large pieces the bend won't be nice and uniform as it sags some in the middle.
I do have a tool made out of angle irons that I often prefer. You can see it in action in the upcoming post.
I do have one of these

But to be honest, I don't find myself using it too often. It doesn't do very sharp bends, has limited size and for large pieces the bend won't be nice and uniform as it sags some in the middle.
I do have a tool made out of angle irons that I often prefer. You can see it in action in the upcoming post.
Re: Another restoration - 83' 528i
taavipa wrote: Aug 21, 2020 4:12 PM
I do have a tool made out of angle irons that I often prefer. You can see it in action in the upcoming post.
Re: Another restoration - 83' 528i
Dec 2019 - Feb 2020
As the rear corners were patched before and in a rough shape they needed some attention.
Left side patch first
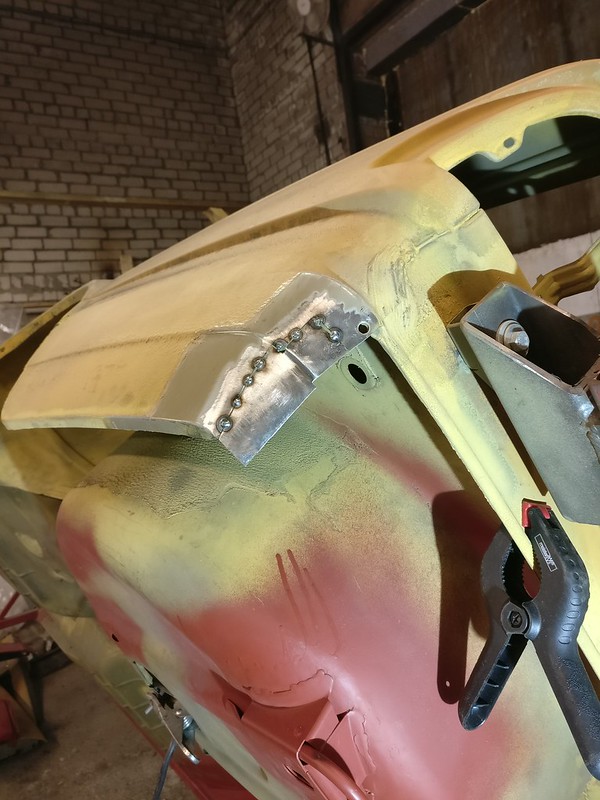
And cleaned off
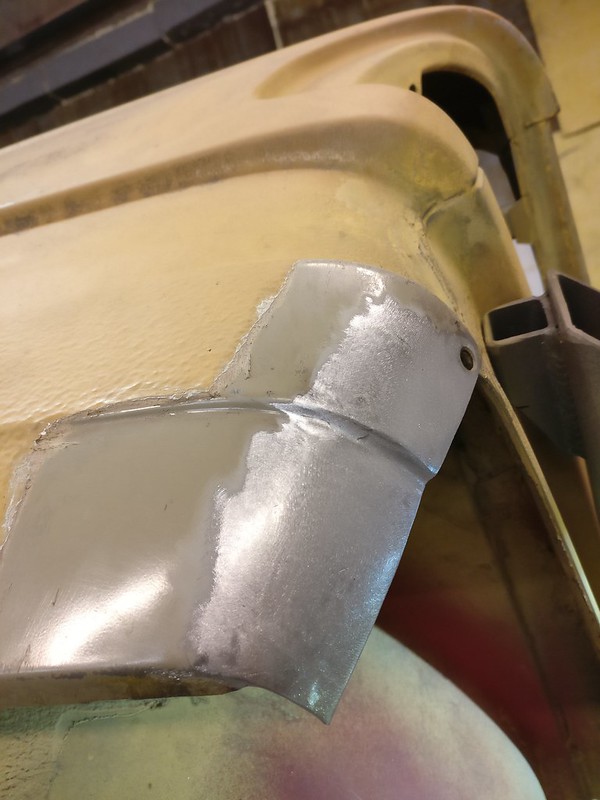
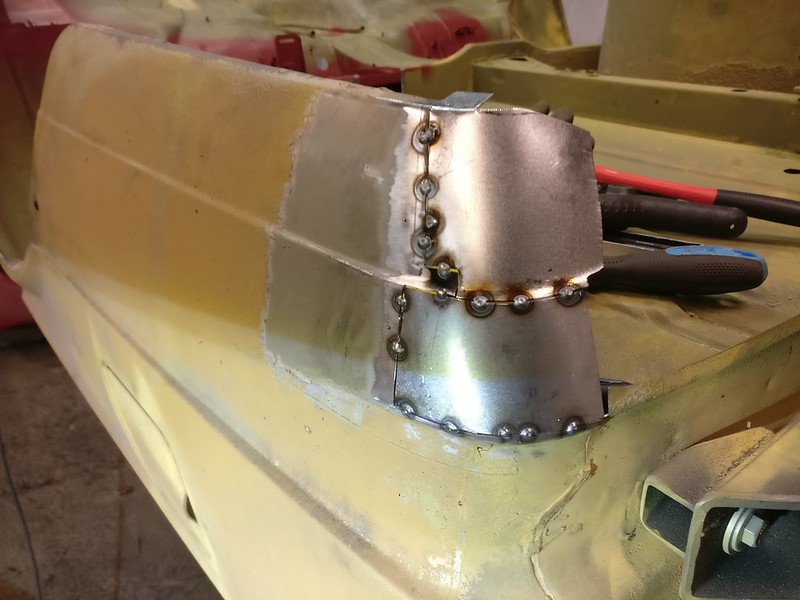
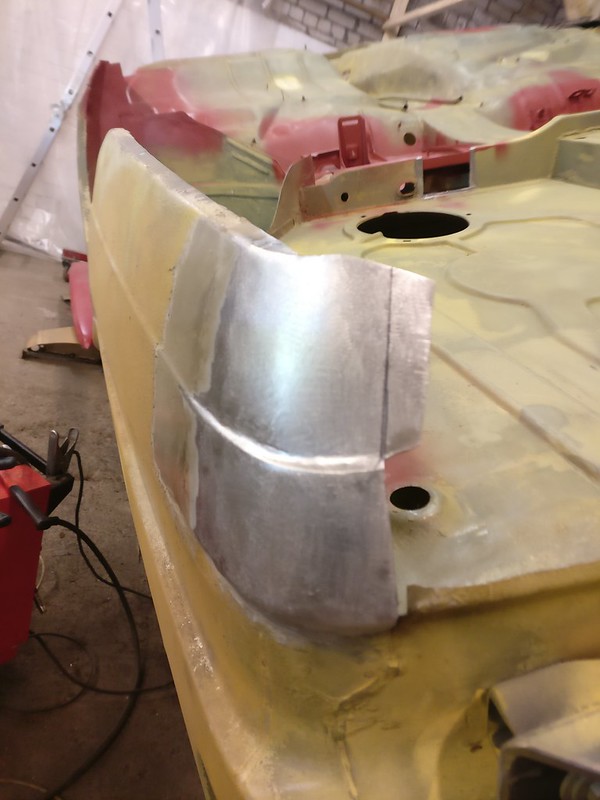
And then on to the right side which needed a larger patch. As both the lower and upper sections are curved from front to back and also from up to down I decided to do it in two pieces to make my life a bit easier.
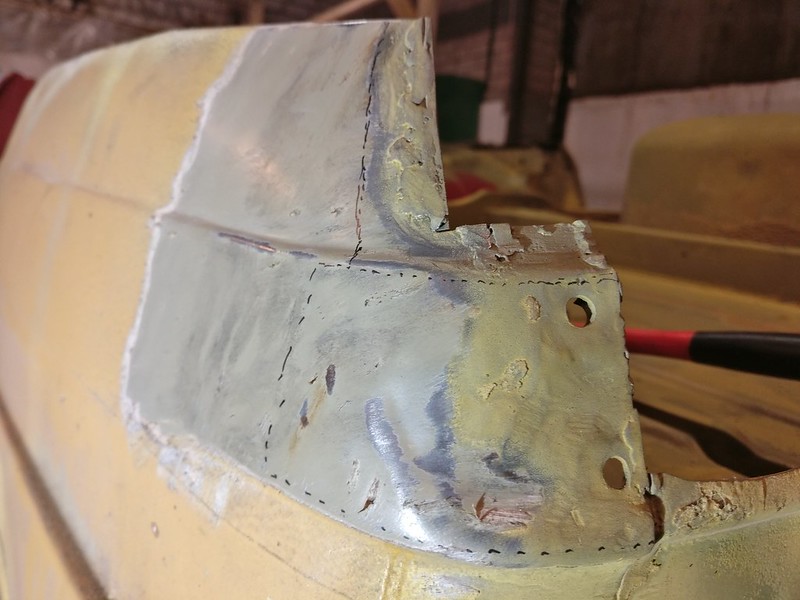
Lower piece first
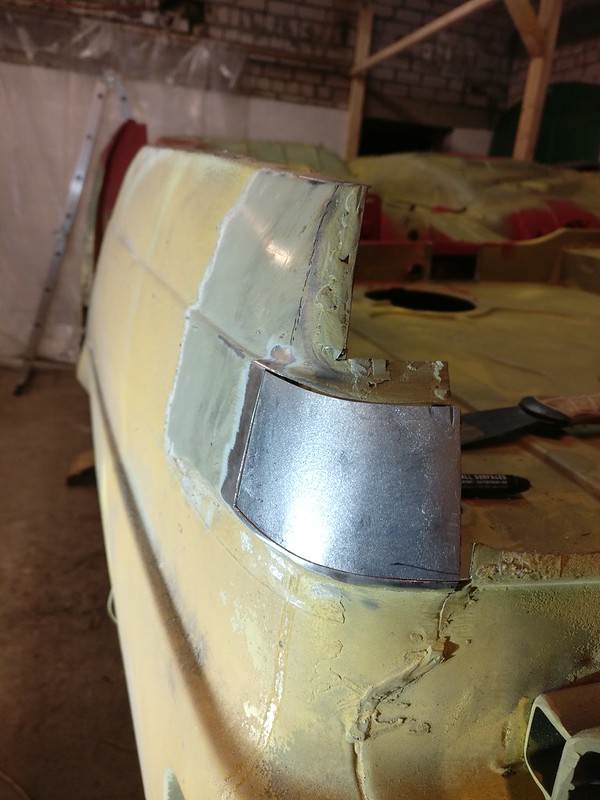
Both pieces tacked in
Finished off. Will be trimmed to size later.
Now, it seemed like a good time to fill the void between the corners. The rear valance I cut off this car had a lot of rust problems. I had salvaged the rear valance from the other car. I intended to use that one as it seemed to be in much better shape. Plan B was to buy a new rear panel.
So I started to clean up the green panel but found tons of filler underneath the paint. Panel was really wavy and I even discovered quite a bit of rust. And as if that wasn’t enough, the rear panel now showed up as NLA. It was still available for a reasonable price when I began with the disassembly. Maybe I could have still found a panel somewhere…
But instead year 2020 began like this
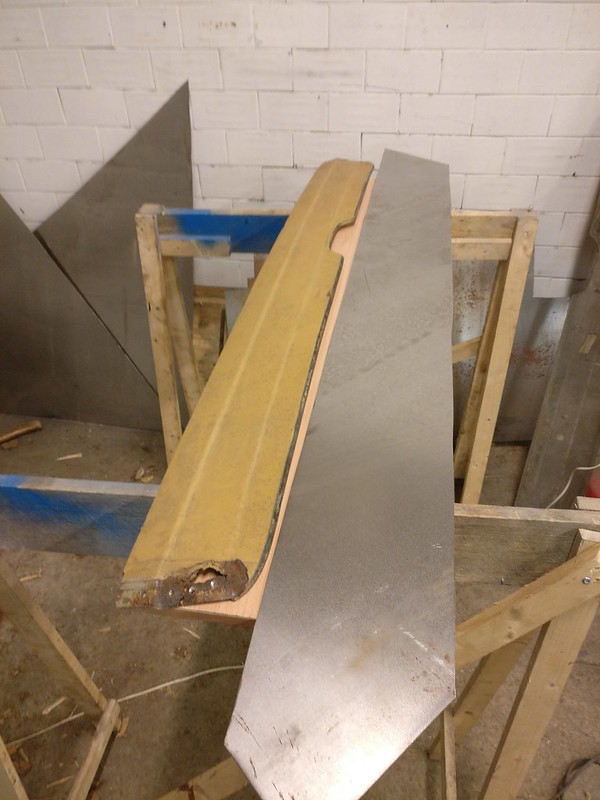
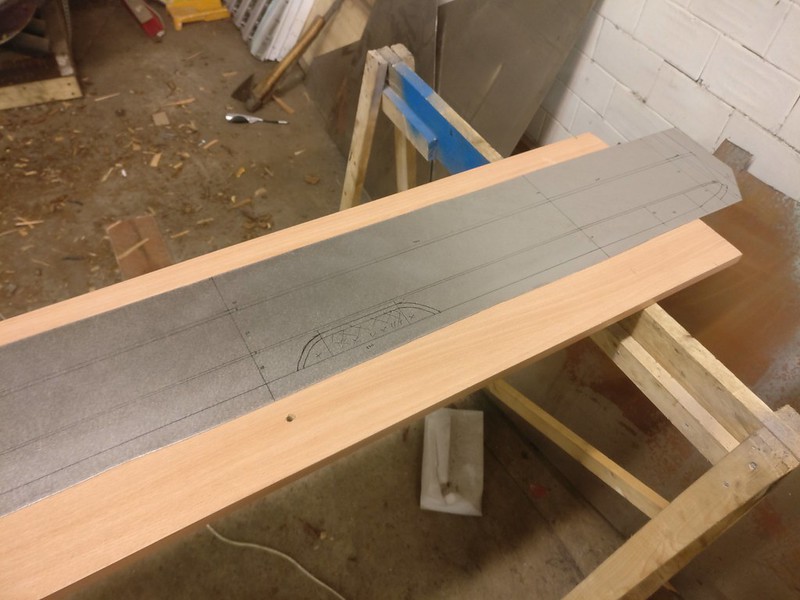
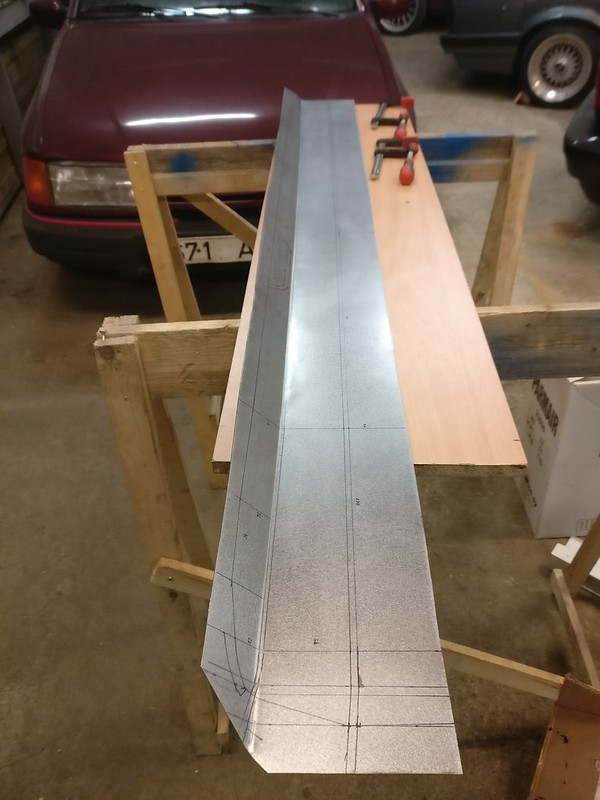
Spent an evening to measure and then remeasure everything and mark it up on the sheet metal
Idea was to make the bends between two angle irons as I had done multiple times before. But I discovered it would be close to impossible to level the irons with a large piece of metal where I can’t access both ends. Furthermore, those steps on the rear valance are not straight but have a slight upward curve in them. So a little later I came up with this.
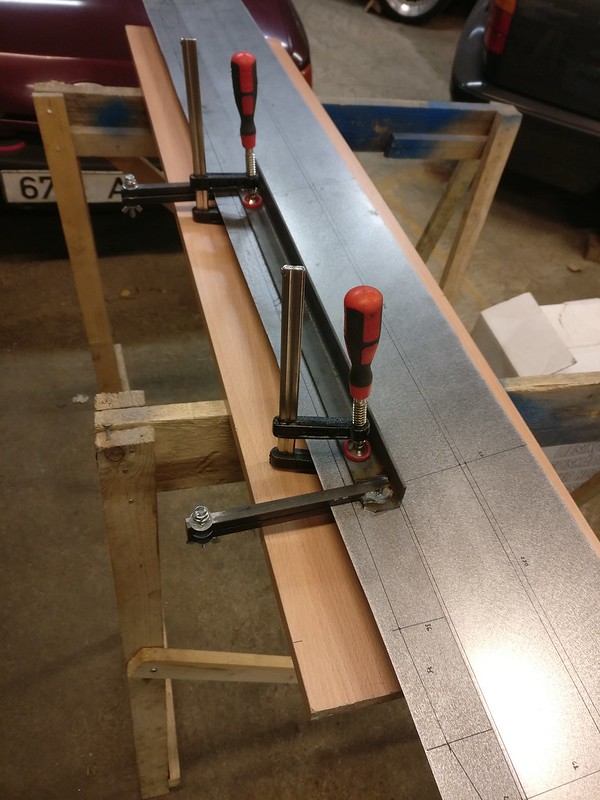
I basically welded some square bars on the angle irons, drilled a tight hole through both of them and put a 6mm bolt there. This would keep the irons level and help a lot with setting everything up.
You can then mount it in the vice and use some C-clamps (vise grips would be even better) to put some pressure on the loose ends.
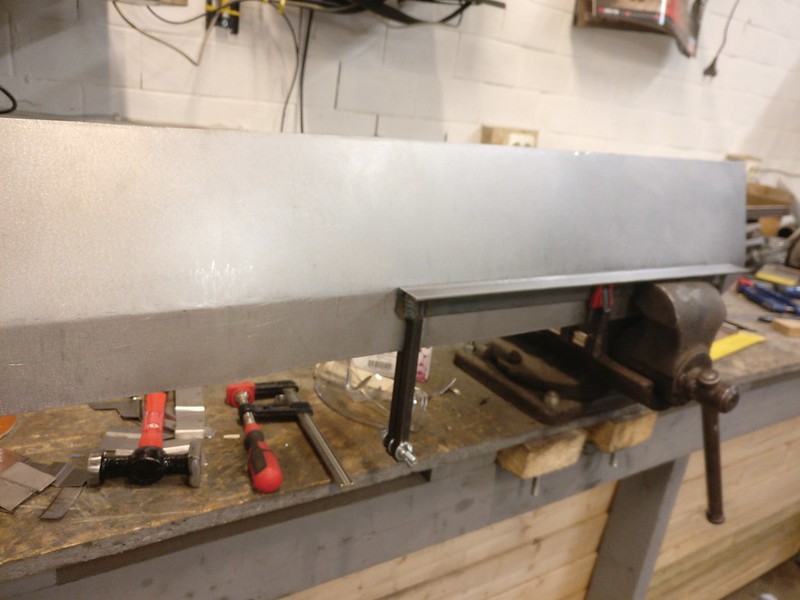
Then I was able to gradually make the bend and follow the curve I drew up before.
First bend done.
Next, I had to struggle with the very tight return bend. And none of my usual methods didn’t work on such a large piece of metal (even messed up one corner a bit trying). So I made this tool to help me with the bend.
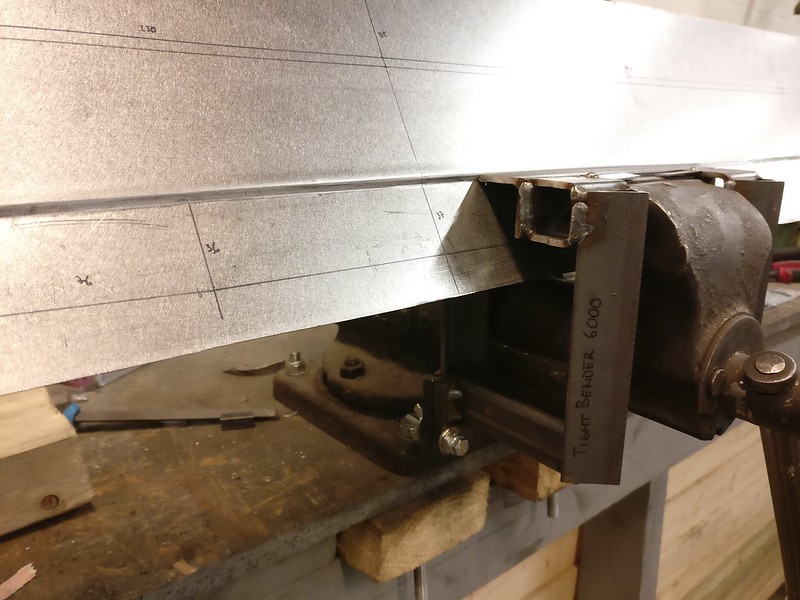
While being quite a slow process it worked. I did use some blocks of wood here and there to support the metal and give me better leverage.
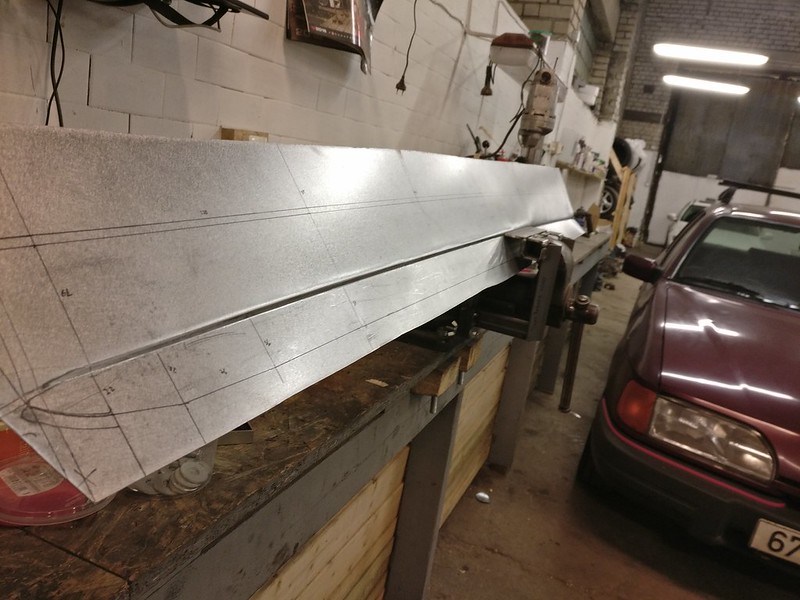
Some more bends made
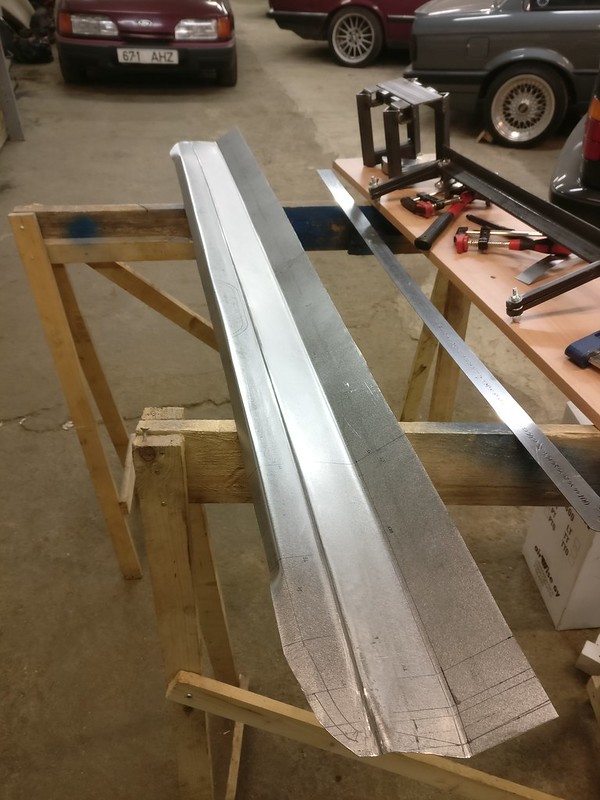
All the bends done
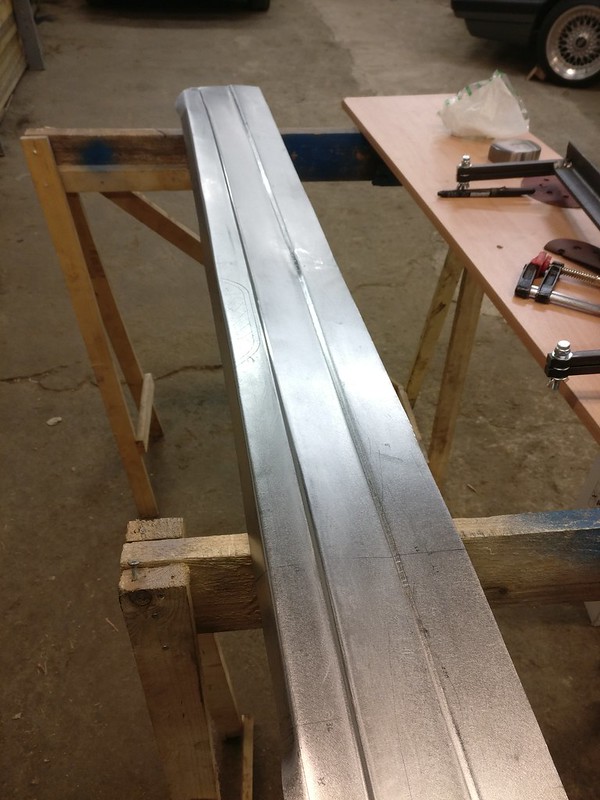
Then did the exhaust cutout using hammer and dolly.
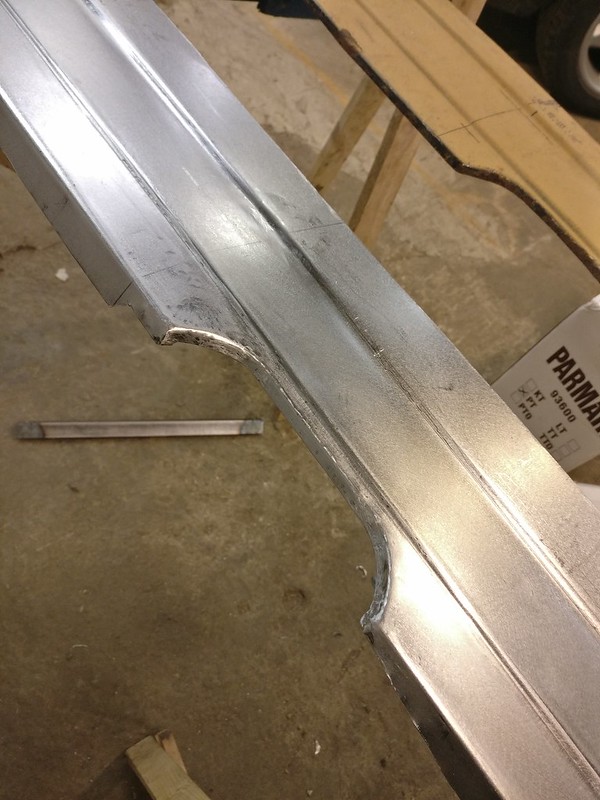
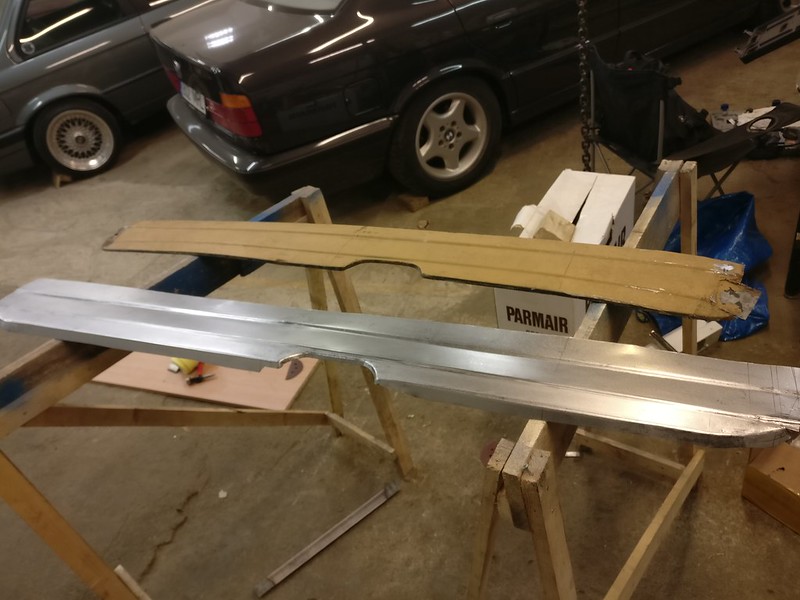
A side by side comparison
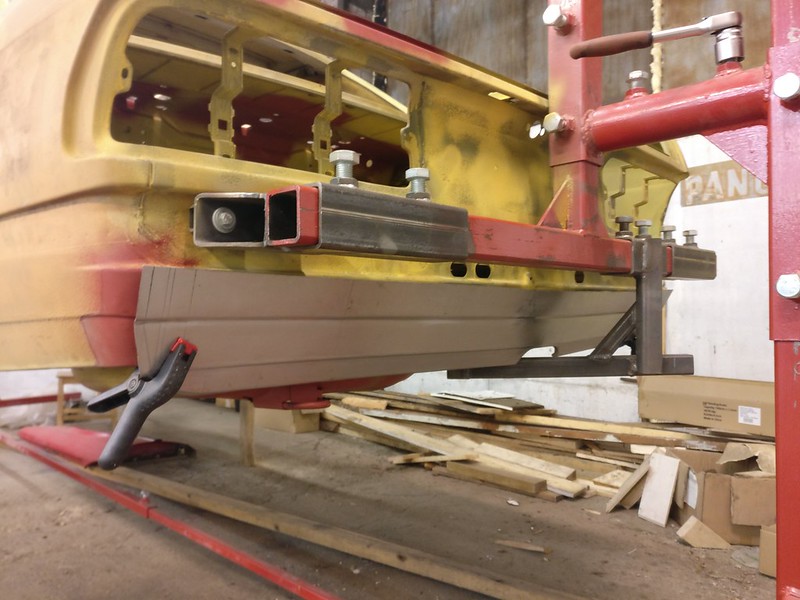
And clamp it to the car for fun
Then became the slow process of hammering the panel into shape. Each layer has some curve in upward direction and the whole panel has some radius from left to right.
Some progress here
And some more
This was sometime in Feburary. At that point it still needed some tinkering but I got a bit tired working on it for such a long time. I decided to put it aside to do a few more straightforward fixes.
As the rear corners were patched before and in a rough shape they needed some attention.
Left side patch first

And cleaned off

And then on to the right side which needed a larger patch. As both the lower and upper sections are curved from front to back and also from up to down I decided to do it in two pieces to make my life a bit easier.

Lower piece first

Both pieces tacked in

Finished off. Will be trimmed to size later.

Now, it seemed like a good time to fill the void between the corners. The rear valance I cut off this car had a lot of rust problems. I had salvaged the rear valance from the other car. I intended to use that one as it seemed to be in much better shape. Plan B was to buy a new rear panel.
So I started to clean up the green panel but found tons of filler underneath the paint. Panel was really wavy and I even discovered quite a bit of rust. And as if that wasn’t enough, the rear panel now showed up as NLA. It was still available for a reasonable price when I began with the disassembly. Maybe I could have still found a panel somewhere…
But instead year 2020 began like this

Spent an evening to measure and then remeasure everything and mark it up on the sheet metal

Idea was to make the bends between two angle irons as I had done multiple times before. But I discovered it would be close to impossible to level the irons with a large piece of metal where I can’t access both ends. Furthermore, those steps on the rear valance are not straight but have a slight upward curve in them. So a little later I came up with this.

I basically welded some square bars on the angle irons, drilled a tight hole through both of them and put a 6mm bolt there. This would keep the irons level and help a lot with setting everything up.
You can then mount it in the vice and use some C-clamps (vise grips would be even better) to put some pressure on the loose ends.

Then I was able to gradually make the bend and follow the curve I drew up before.
First bend done.

Next, I had to struggle with the very tight return bend. And none of my usual methods didn’t work on such a large piece of metal (even messed up one corner a bit trying). So I made this tool to help me with the bend.

While being quite a slow process it worked. I did use some blocks of wood here and there to support the metal and give me better leverage.

Some more bends made

All the bends done

Then did the exhaust cutout using hammer and dolly.

A side by side comparison

And clamp it to the car for fun

Then became the slow process of hammering the panel into shape. Each layer has some curve in upward direction and the whole panel has some radius from left to right.
Some progress here

And some more


This was sometime in Feburary. At that point it still needed some tinkering but I got a bit tired working on it for such a long time. I decided to put it aside to do a few more straightforward fixes.
-
foundlostart
- Posts: 75
- Joined: Mar 30, 2019 10:10 AM
- Location: Indiana
Re: Another restoration - 83' 528i
This is all outstanding! You refer to yourself as a 'hobbyist' - it's official, the bar has been raised, and I'm merely a hack. Thanks for taking the time to document it.
Re: Another restoration - 83' 528i
Mar 2020
The rear valance set aside I went poking around to find something else to repair.
Welded in a brand new exhaust hanger that I had ordered
Then this piece fell off
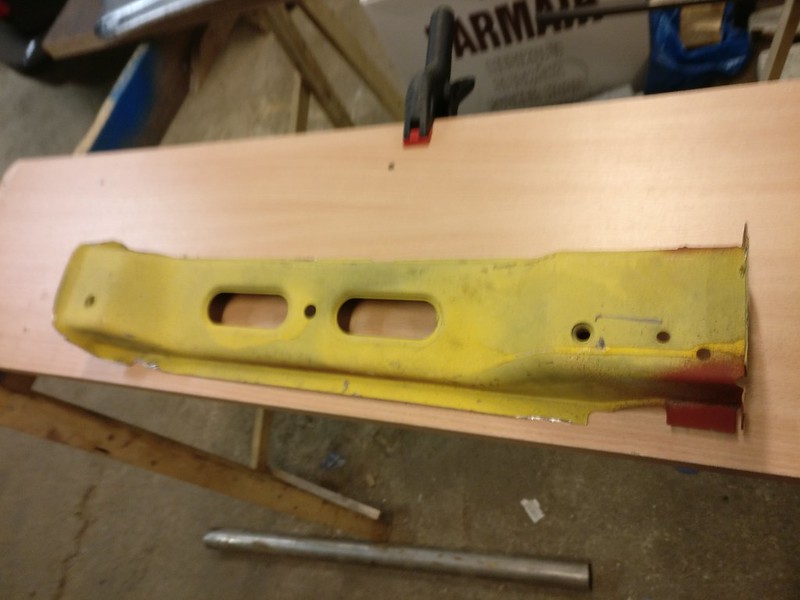
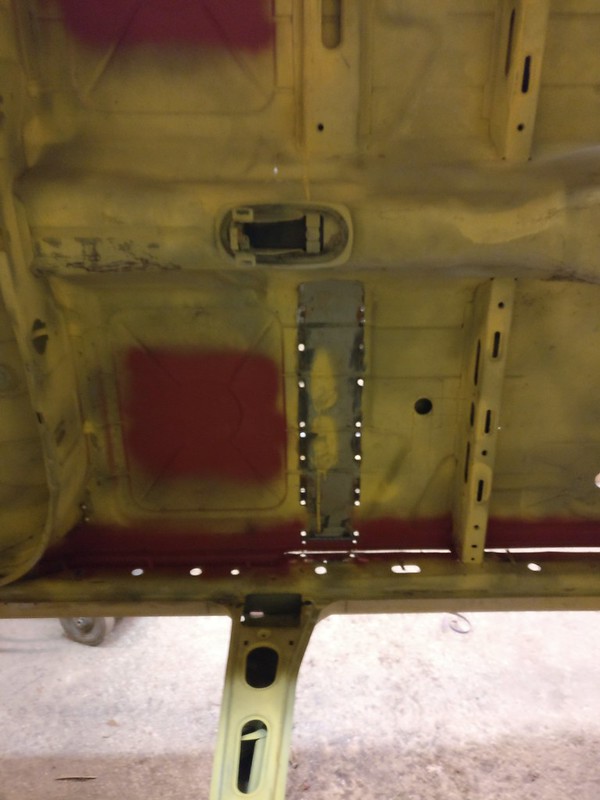
I believe it goes here
And here’s the main reason why I wanted it out of the way - some rust in between the frame rail and floorpan.
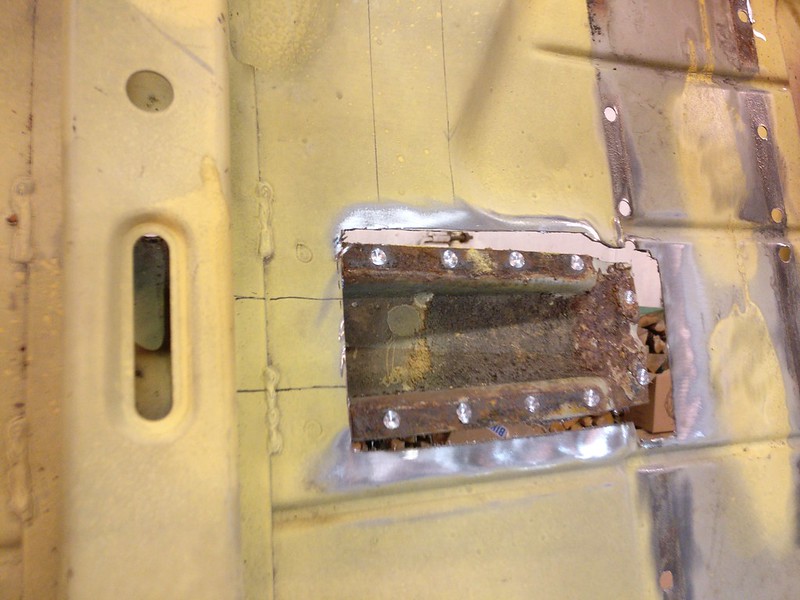
As there was plenty of good metal left, rust on the frame rail got ground off, treated with rust converter and then primered
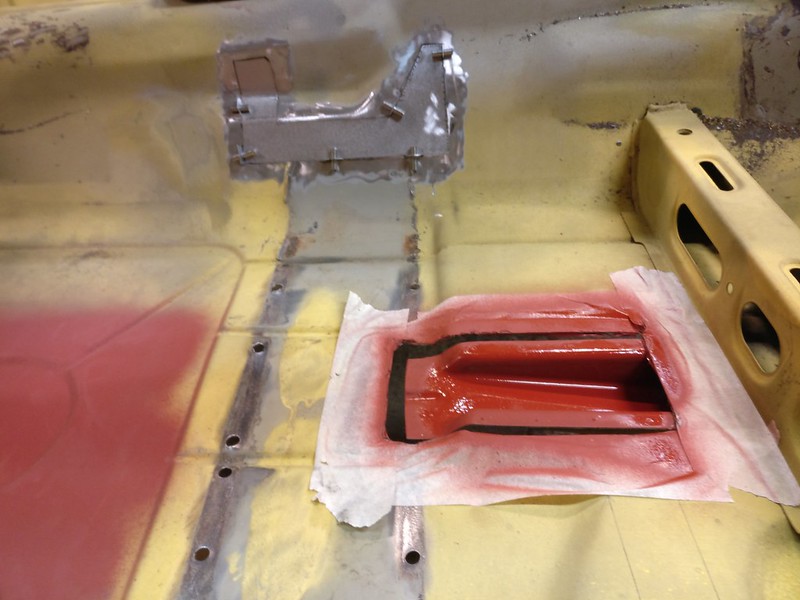
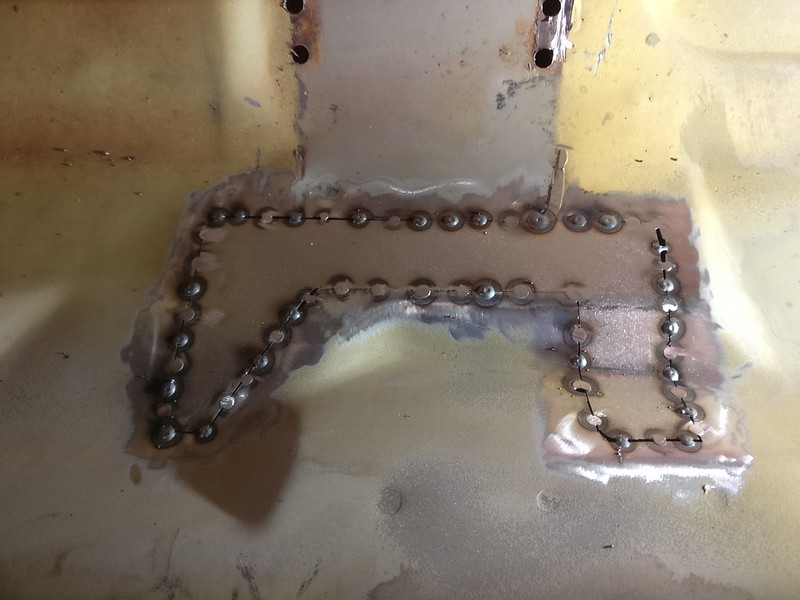
Also decided to cut out and replace an odd shaped section that sat behind drive shaft bracket.
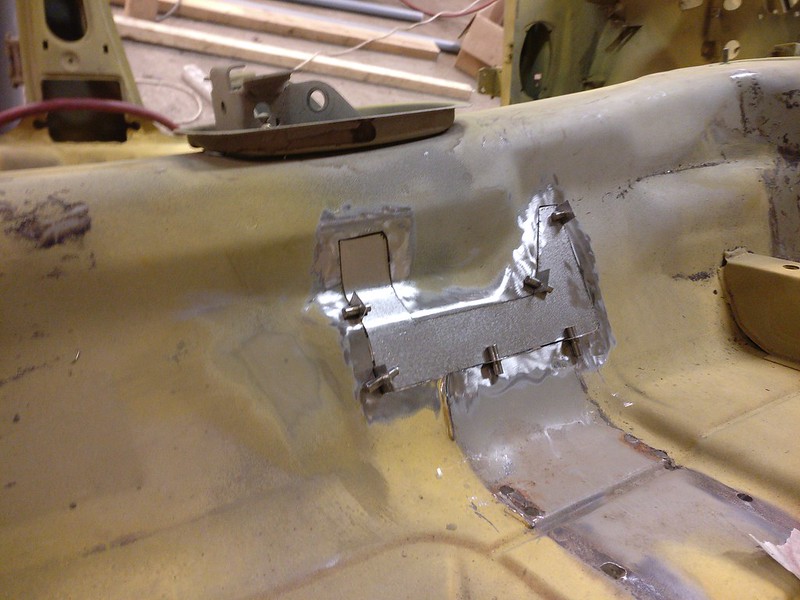
Replacement tacked in
I was able to order brand new driveshaft brackets. Right side installed
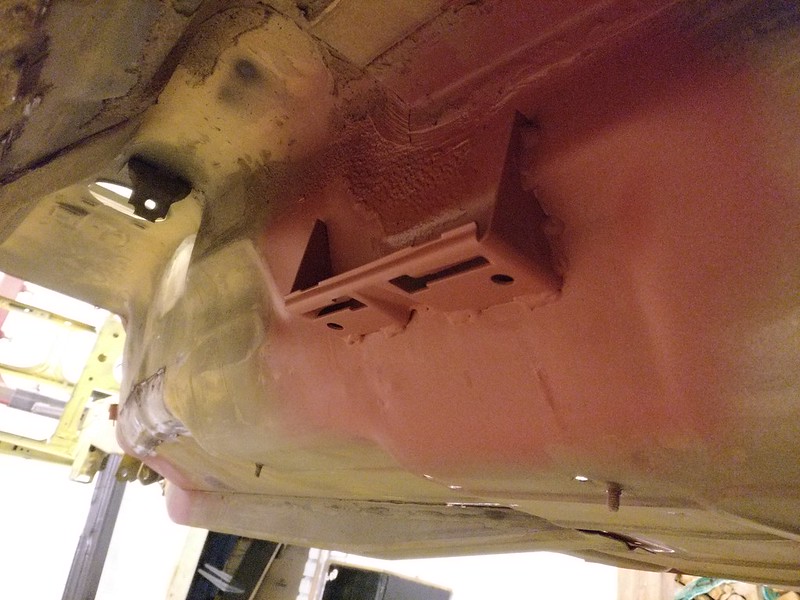
And then a patch to cover up the subframe
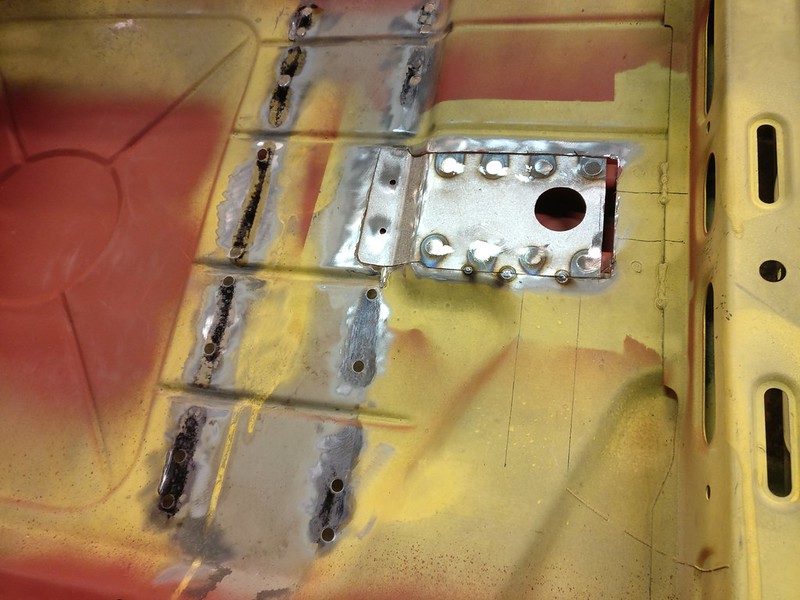
Replaced the edge of the floorpan and continued with the repairs on inner sill.
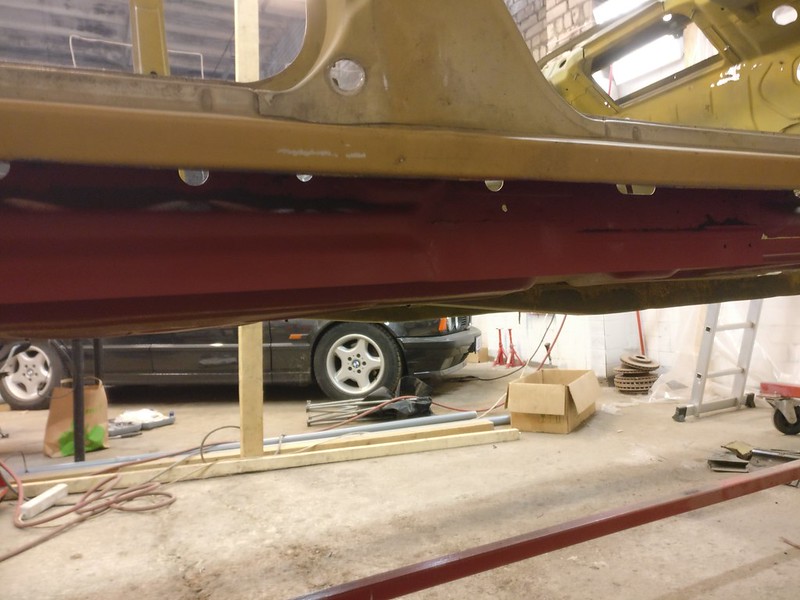
And then went back to finish up the rear valance. Will need a little bit of final trimming but the shape was mostly to my liking now
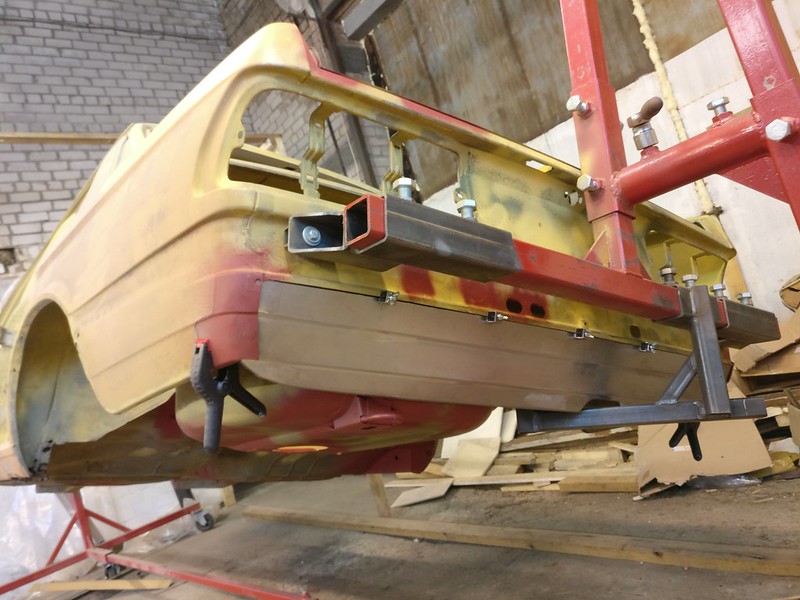
I wanted to prime the rear section and the underside of the replacement panel before welding it in. It is quite tight in there and would be hard to do it properly later. So the panel was set aside again.
During a month or so no progress was made as I was stranded at home due the pandemic. But I received some replacement sections for front floor that I had ordered from Valcas Garage to speed up the process.
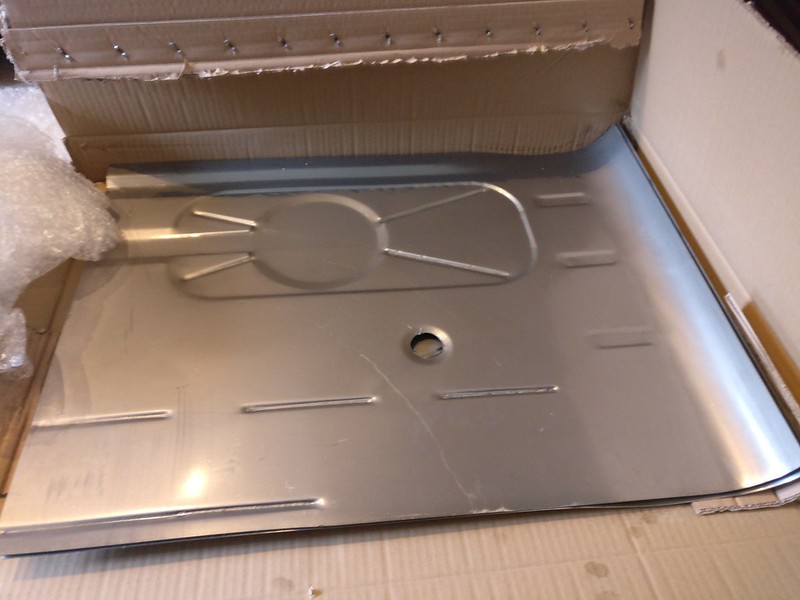
Later on I had some issues with those which I am going to point out here.
NB! They now have some smaller panels available with “PROF” label sticked to them. At least on the photos these seem to be produced to higher standards and might be a better fit. If I were doing it now, I would go for those.
The rear valance set aside I went poking around to find something else to repair.
Welded in a brand new exhaust hanger that I had ordered

Then this piece fell off

I believe it goes here

And here’s the main reason why I wanted it out of the way - some rust in between the frame rail and floorpan.

As there was plenty of good metal left, rust on the frame rail got ground off, treated with rust converter and then primered

Also decided to cut out and replace an odd shaped section that sat behind drive shaft bracket.

Replacement tacked in

I was able to order brand new driveshaft brackets. Right side installed

And then a patch to cover up the subframe

Replaced the edge of the floorpan and continued with the repairs on inner sill.


And then went back to finish up the rear valance. Will need a little bit of final trimming but the shape was mostly to my liking now

I wanted to prime the rear section and the underside of the replacement panel before welding it in. It is quite tight in there and would be hard to do it properly later. So the panel was set aside again.
During a month or so no progress was made as I was stranded at home due the pandemic. But I received some replacement sections for front floor that I had ordered from Valcas Garage to speed up the process.

Later on I had some issues with those which I am going to point out here.
NB! They now have some smaller panels available with “PROF” label sticked to them. At least on the photos these seem to be produced to higher standards and might be a better fit. If I were doing it now, I would go for those.
- First of all, as you can see from the photo above, those panels are missing the flange on the outer edge. I was completely aware of that before ordering and was ready to add it to the panels. (They seem to have solved this with PROF panels)
- One of the beads had a crack in it which I discovered only after replacing the panel. You can see a photo of that in the future.
- The step on the outer edge is ugly, especially where it diminishes in the front. So this got also replaced when I added the flange.
- The front end is bent too much and the bend should actually happen where those three wider beads are. This is a quite simple fix and I wouldn’t expect such panels to be a good fit out the box. Still, I would’ve been much happier if they hadn’t bent the front ends at all.
- The driver side panel had a ton of stretch in the middle section of the panel and was tin canning really badly. As I don’t have good means to shrink such a large panel back to shape I ended up cutting a large section out and replacing it.
- The large rounded rectangle on the panels was too wide. Like 20mm too wide. It didn’t bother me on the passenger side but on the driver side, as I discovered later, it meant I can’t fit my fuel and brake lines between that rectangle and chassis leg any more.
- The groove leading from the rectangle to the back was way too shallow. (This also seems to be perfected on the PROF panels they offer).
Re: Another restoration - 83' 528i
I was today years old when I learned of https://www.valcasgarage.com/category/bmw-e28/
Re: Another restoration - 83' 528i
Might be wrong but I don't think they have been around for very long. And they seem to have much more stuff available for other models, like e30.cek wrote: Aug 24, 2020 10:55 AM I was today years old when I learned of https://www.valcasgarage.com/category/bmw-e28/
Apr - May 2020
Didn’t have the primer for the rear end yet so I decided to start the work on the front passenger corner and floorboard.
This is what I had to deal with
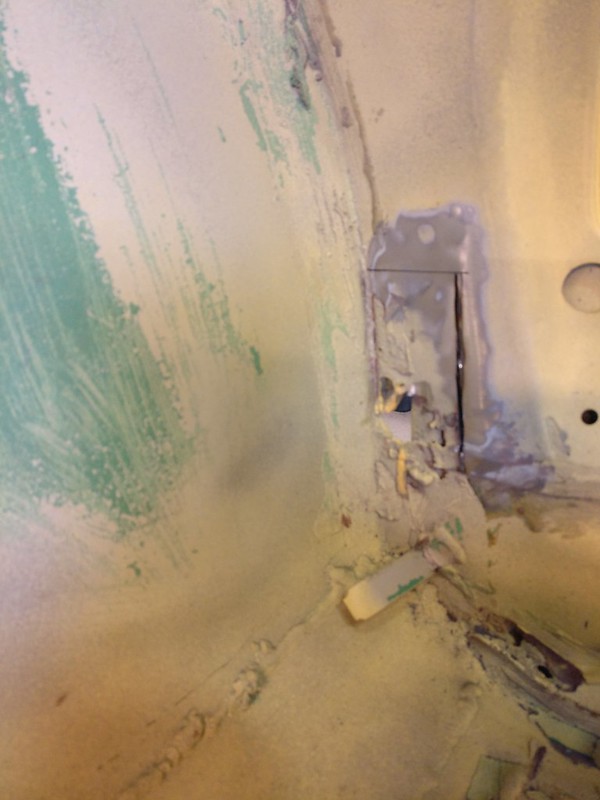
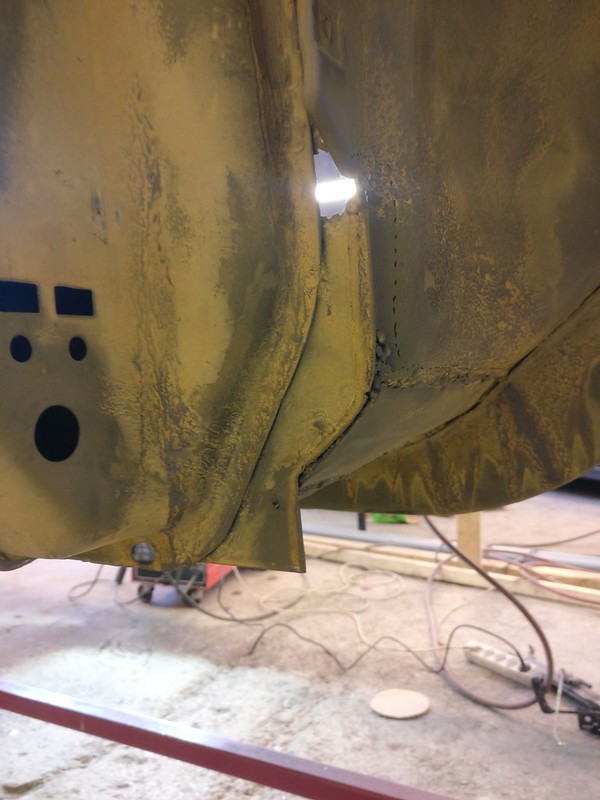
So began with cutting away all the rot layer by layer.
Then made the final piece for inner sill
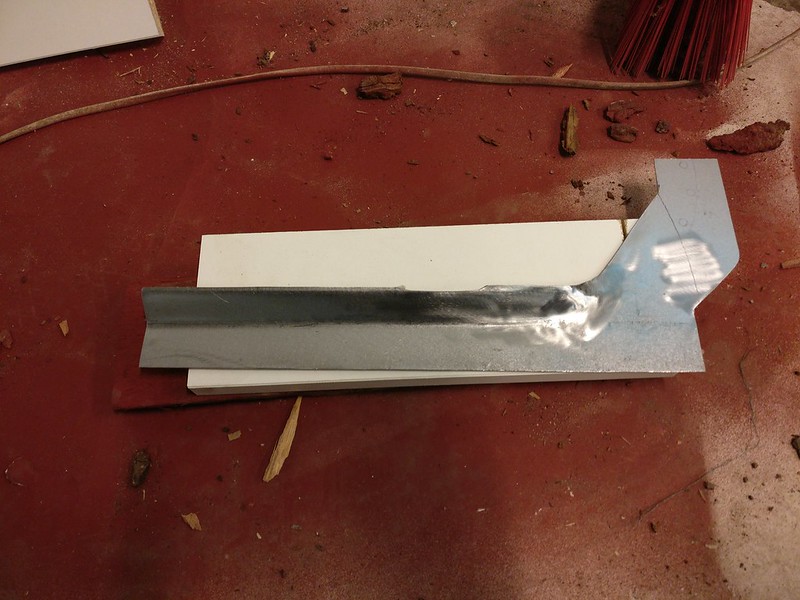
And welded it in
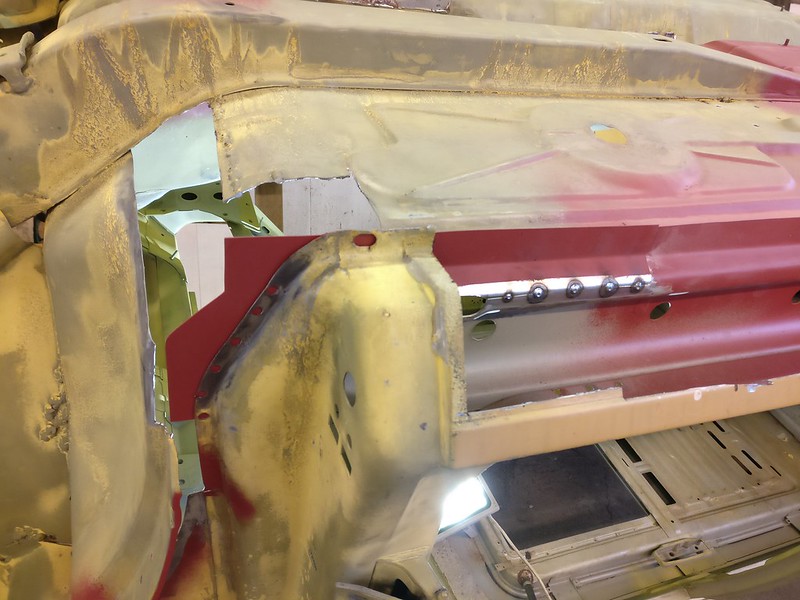
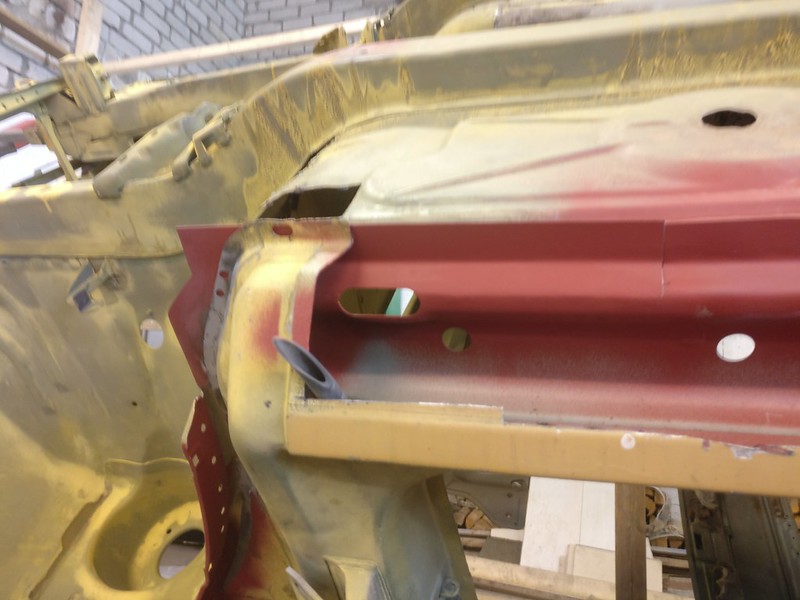
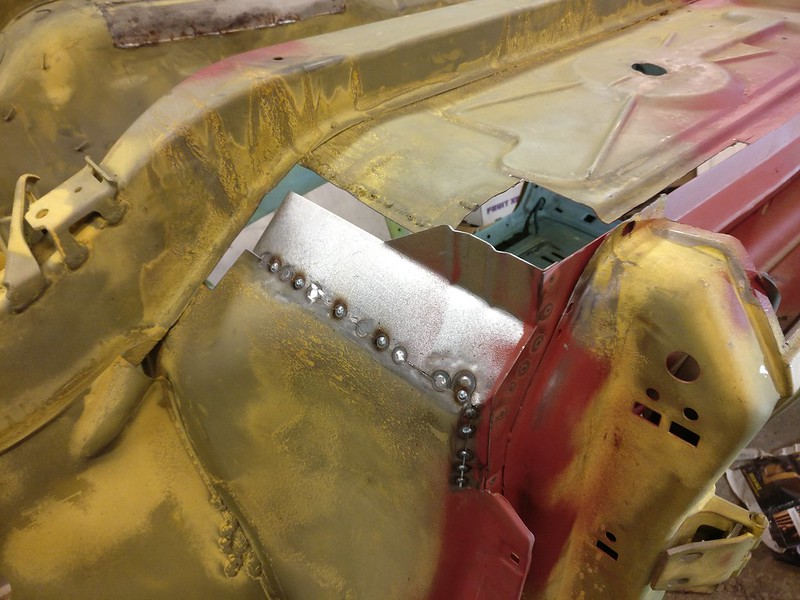
You may notice on the last pictures that also a small section of inner A-pillar cover plate was removed (and later replaced). As the whole A-pillar was already quite loose I didn’t dare to cut away any more firewall or floor and made the firewall piece in two sections. I should’ve just welded in some temporary reinforcements and then I could’ve done it in one piece.
This piece of metal
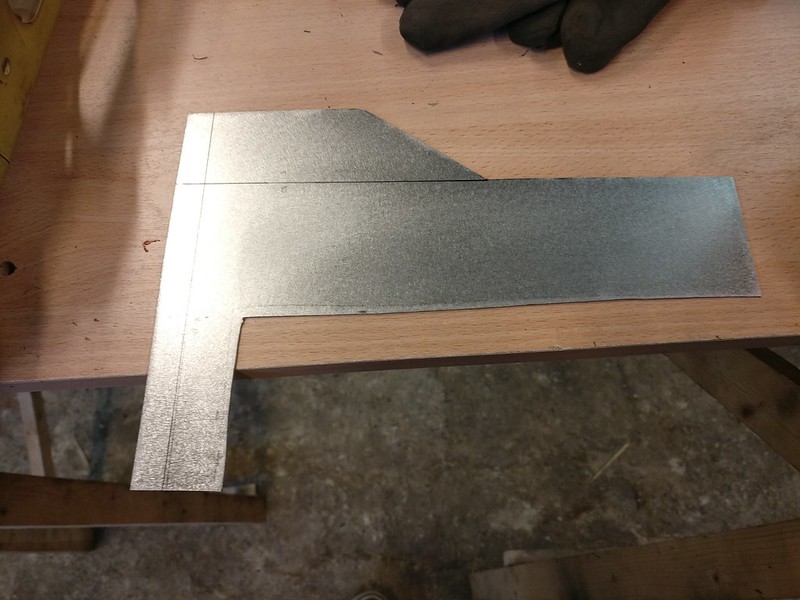
Ended up here
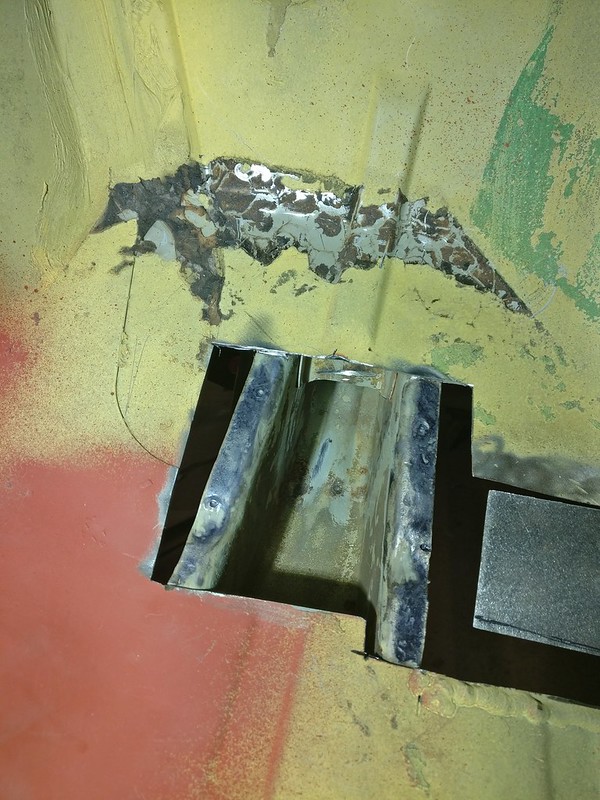
Then cut away some more of the firewall and discovered this
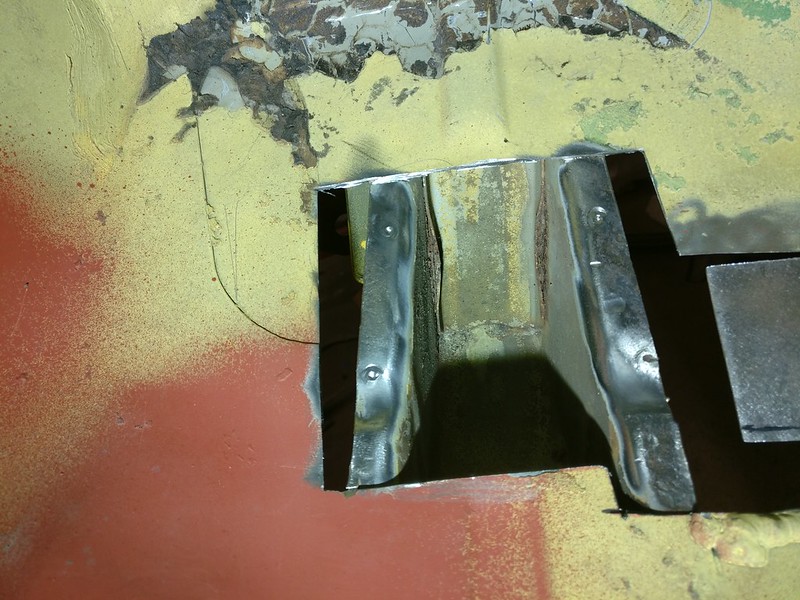
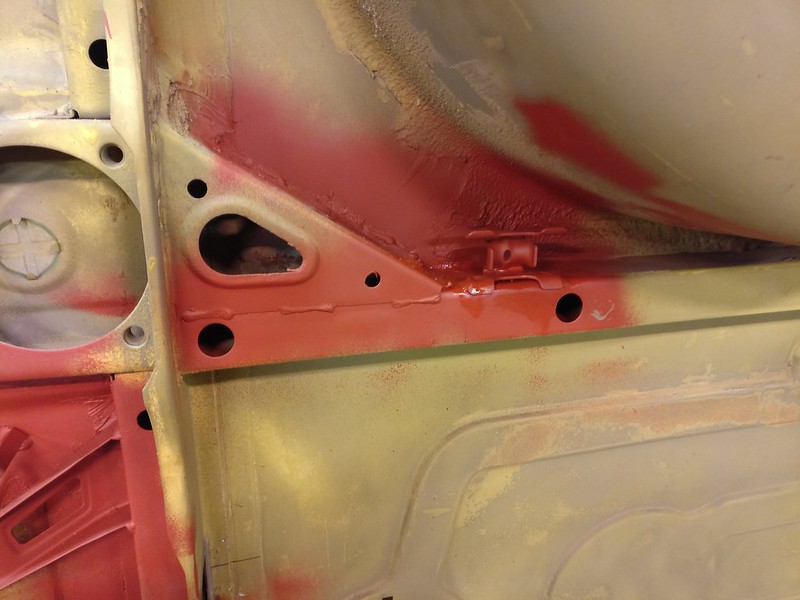
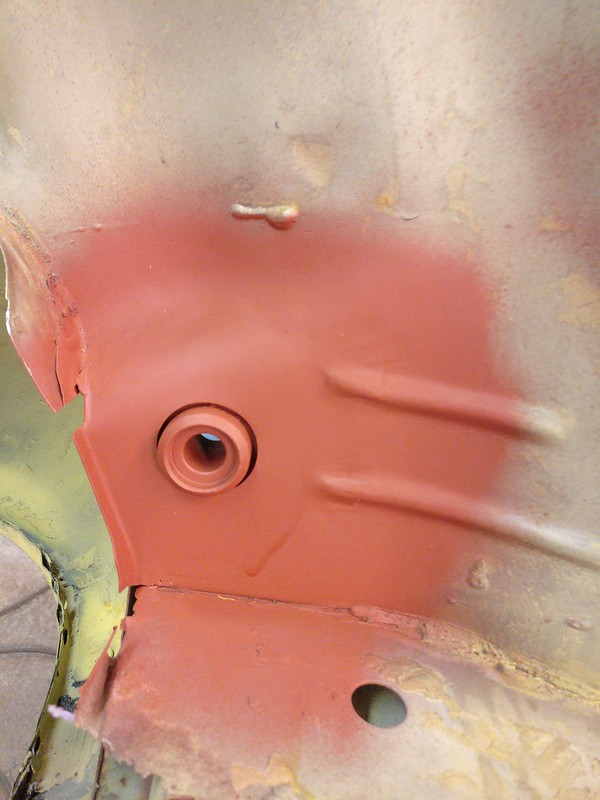
I’ve seen pictures online where people have trouble with a completely rotten chassis leg in that spot. The cover piece that closes the frame rail in engine bay bends down and is spotted to frame rail. In result, it captures ton of moisture there and is prone to rust.
As the frame rail itself was still in acceptable condition my solution was to use a power file and grind some of that metal away so I could get the better of rust. I don’t see it adding much to the rigidity or strength or filling any other important function there. Like that, I didn’t have to remove everything in the way to get there.
First firewall piece fully welded
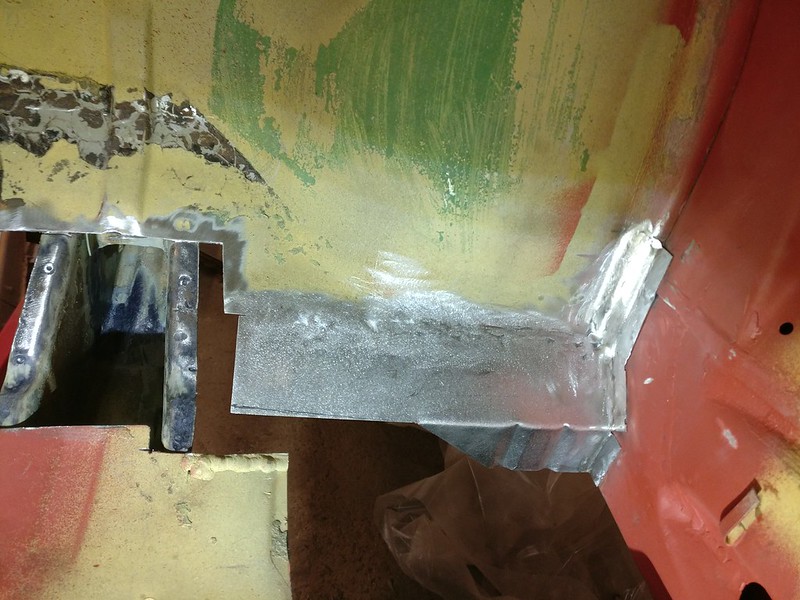
A-pillar was now secure enough to cut away the rusted floor and get access to the rest of the frame rail and clean it up.
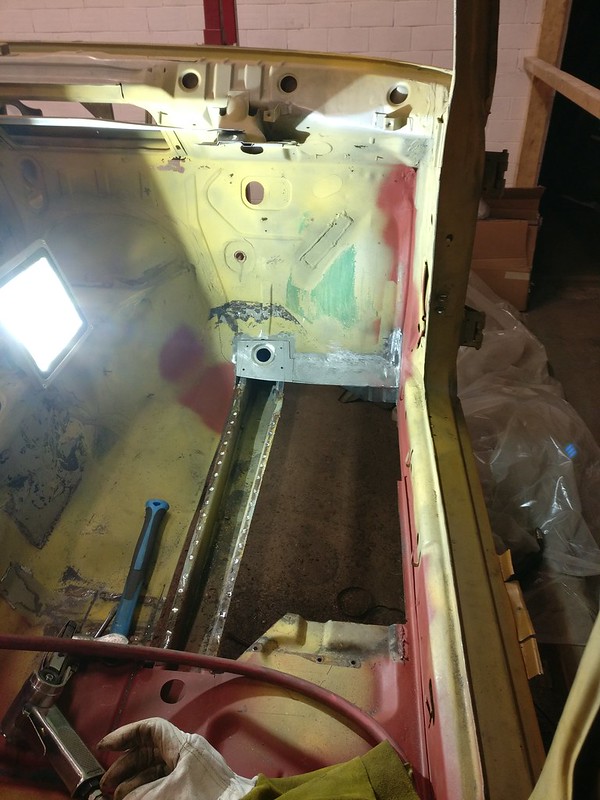
Welded in the second piece of firewall
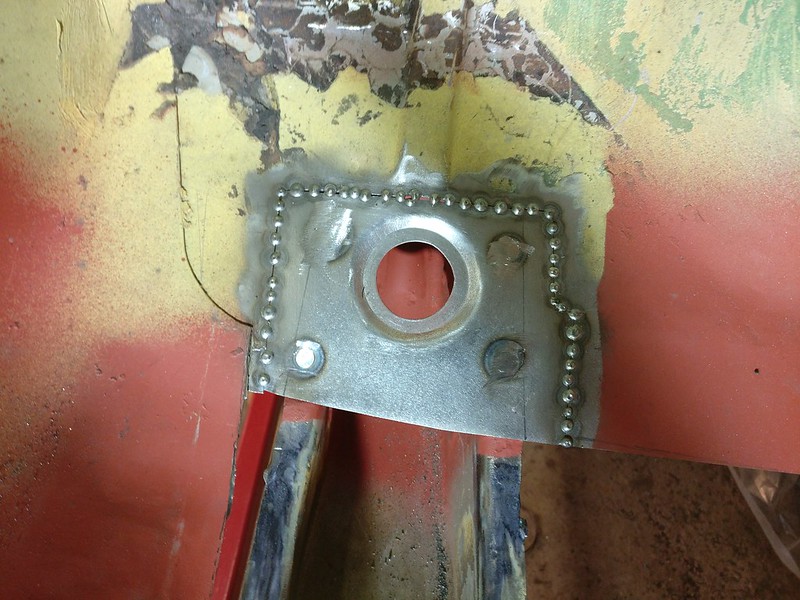
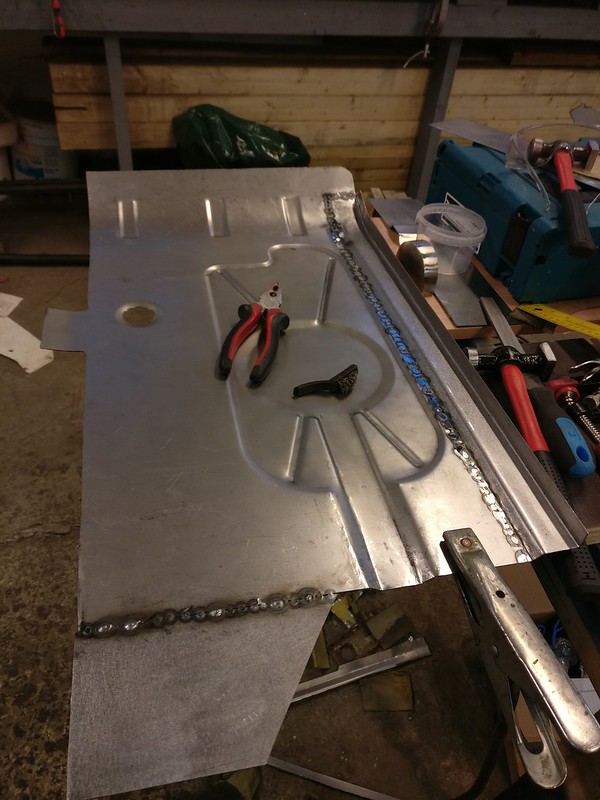
And got the replacement floorboard ready. That included getting the radius correct in the front, extending the rear end, drilling some holes for plug welds (went a little bit overboard where it meets with the firewall) and replacing the outer side to add the flange and get rid of that ugly step.
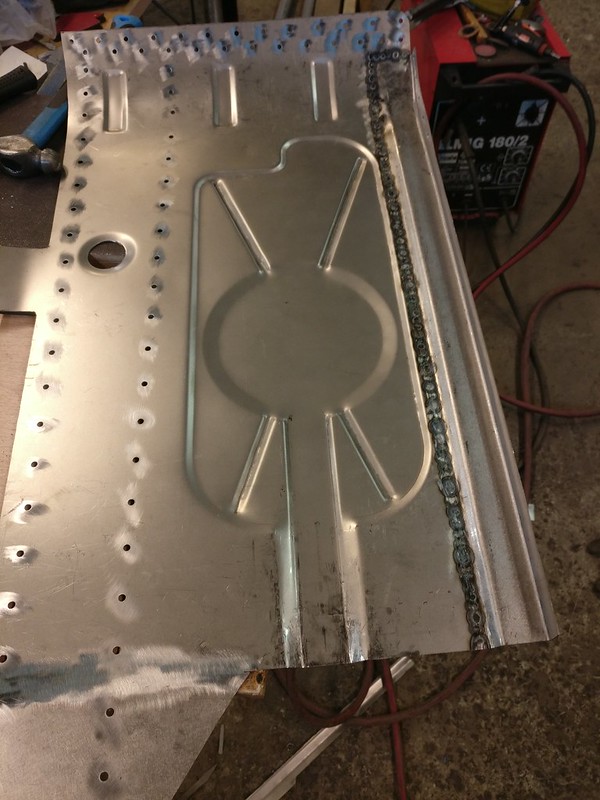
Began with the plug welds
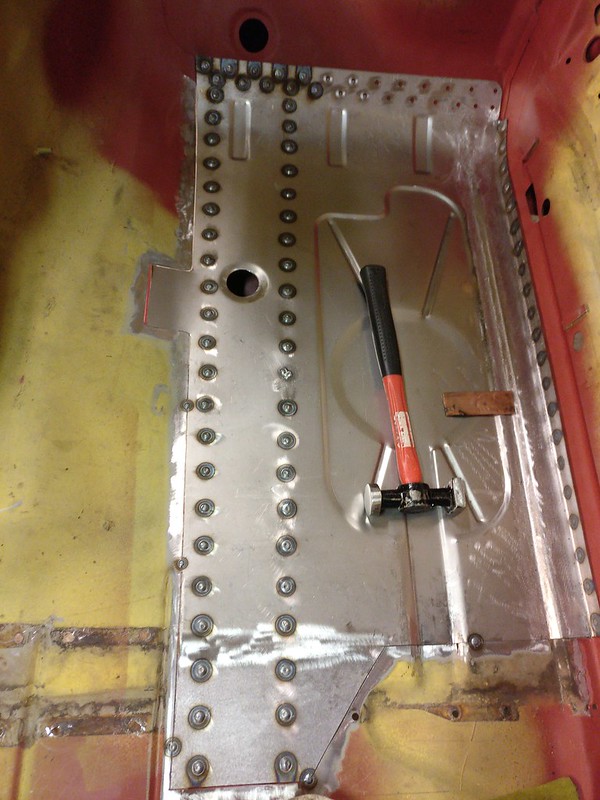
Almost completely welded in
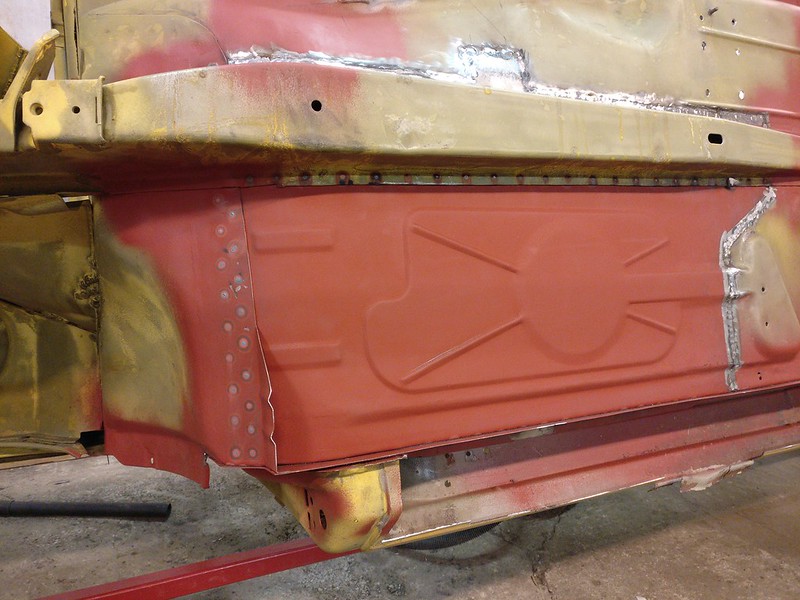
And done
Re: Another restoration - 83' 528i
Some great looking sheetmetal work there, seems you have your technique nailed down really well! Lots and lots of time and effort! Looking forward to seeing the end result!
Re: Another restoration - 83' 528i
oh to have talent like that! incredible work.
Re: Another restoration - 83' 528i
Second half of May 2020
To get more done during single paint session I started prepping my side sills so I could prime the insides.
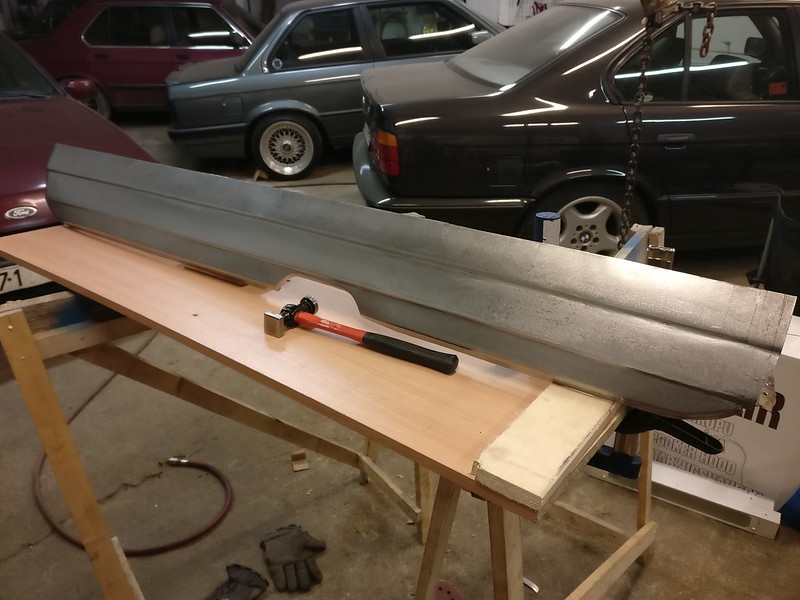
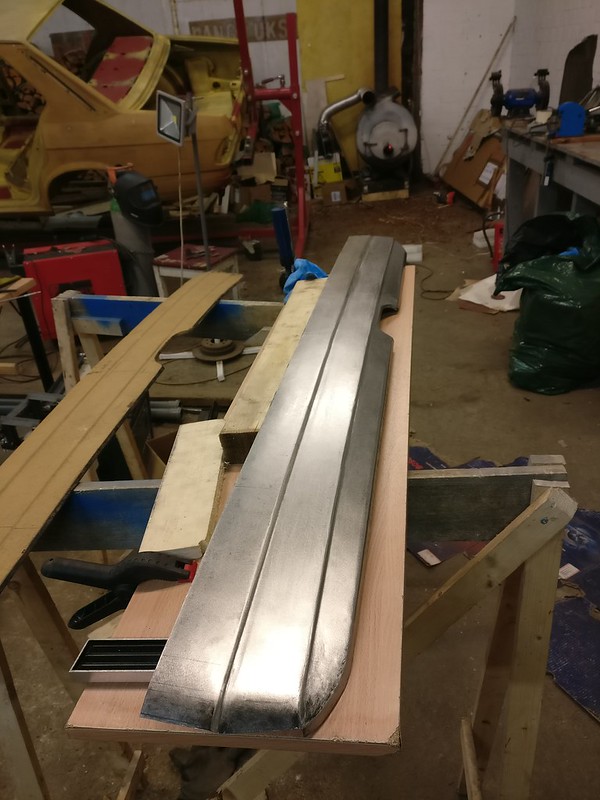
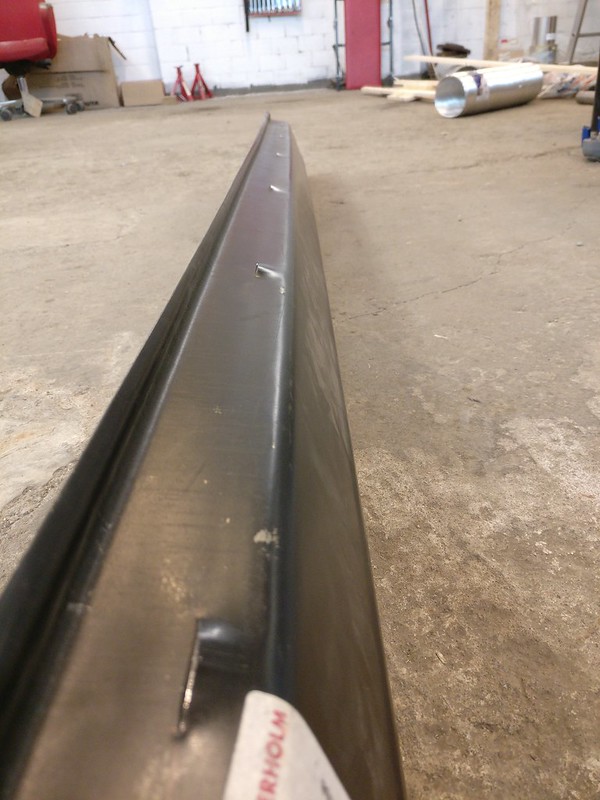
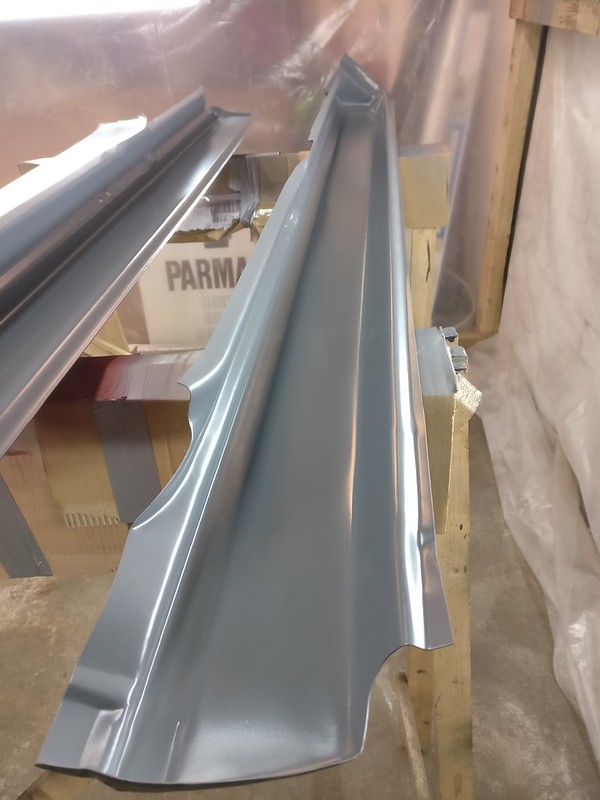
These are some repro side sills made by Klokkerholm. It’s a pity to use repro sills on the car but the right side OEM sill is NLA. Furthermore, OEM sills don’t run full length and you’d have to buy the front and rear column as well. So these will have to do.
I could’ve just drilled some drain holes which could probably even work better as they wouldn’t get clogged as easily but I wanted to replicate the OEM look. So I made these drain holes into the sills. I just have to remember to clean them every once in a while in the future.
Front section of the sills had a few spots where metal was folded on itself.
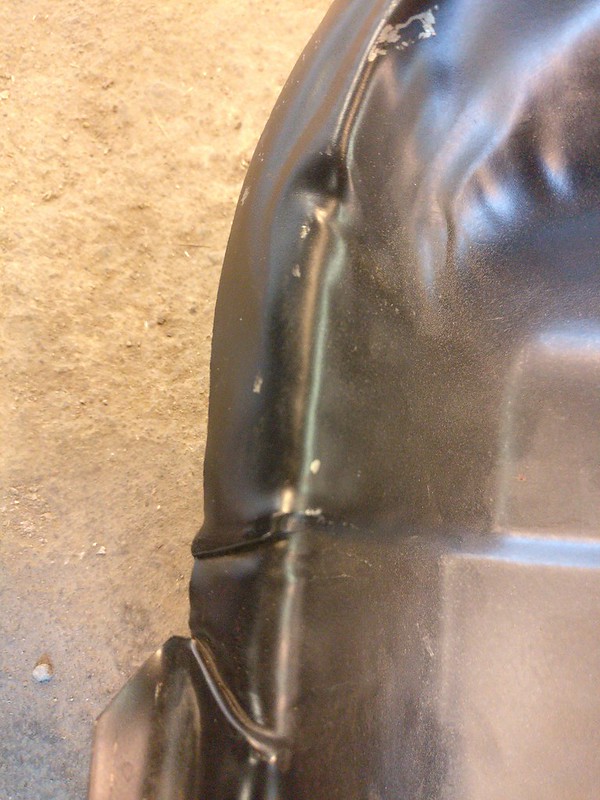
To avoid moisture getting trapped in there I made small cuts and welded them up.
Then started to remove the primer on the inside. By sanding it down.
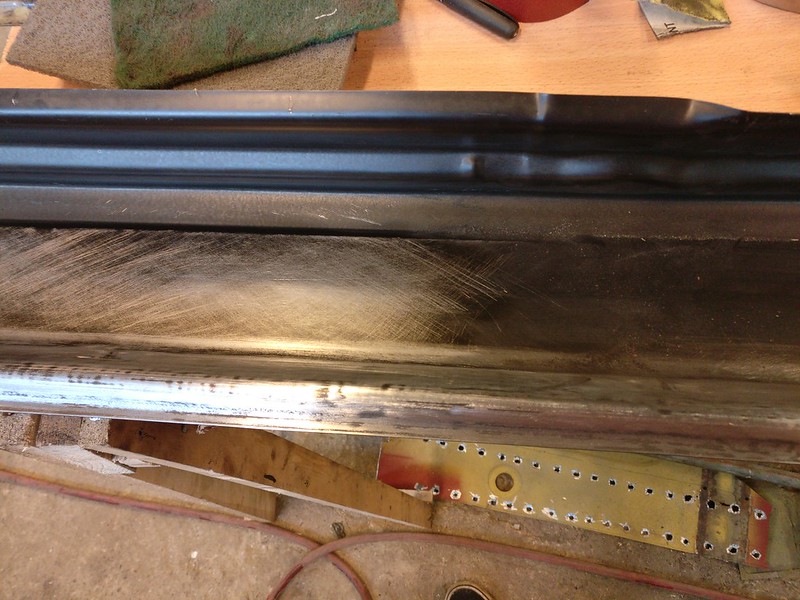
After I had wasted about one and a half hours on sanding a friend came by and asked why didn’t I just use some solvent. It took like ten to twenty minutes to get them clean using solvent. Tip: use a scouring pad dipped in solvent (instead of towel) to remove primer and prep the metal in one go.
So, (don’t quote me on the following) what I learned was that OEM parts come with some really nice quality e-coating on top of them. You do not want to remove it as it’s probably superior to anything you can put on the panel yourself, just roughen it up a little for better adhesion of the next layers. On the other hand, most repro panels come with some really crappy primer on them and you do not want it under your paint. Simple test is to use some solvent and wipe the panel with it. If some of the primer ends up on your towel then it’s not the e-coat.
I had also removed the lifting supports from the old sills. They got sandblasted and then later spot welded to the new sills at my friends workshop (no pictures).
Outer jack points were too far gone so I cut new ones out of some random brackets I got from a hardware store.
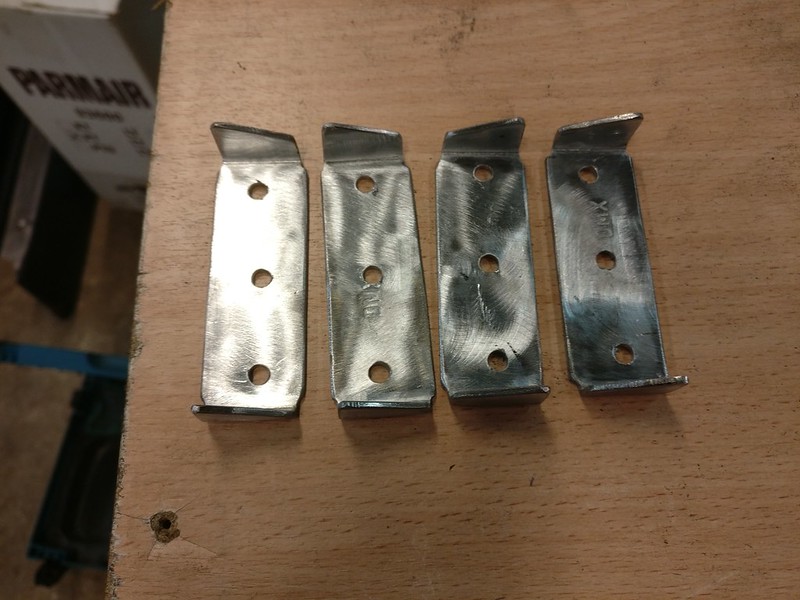
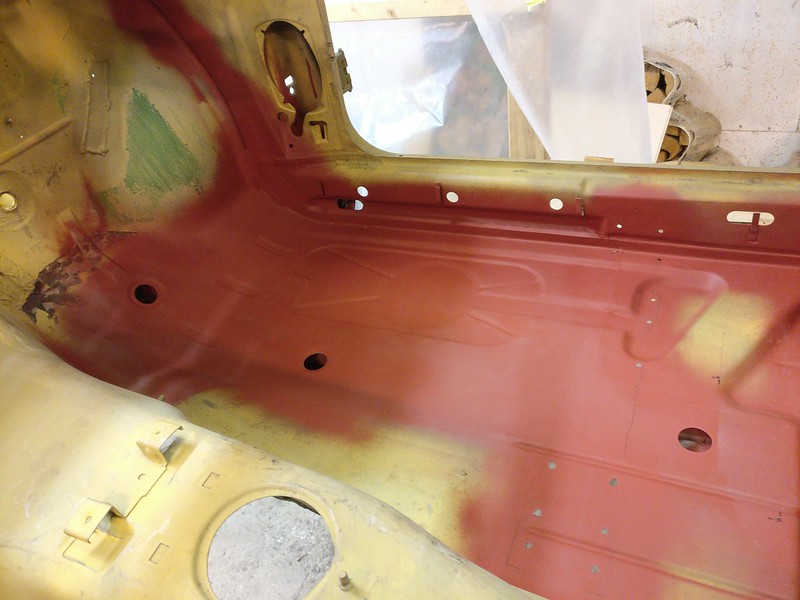
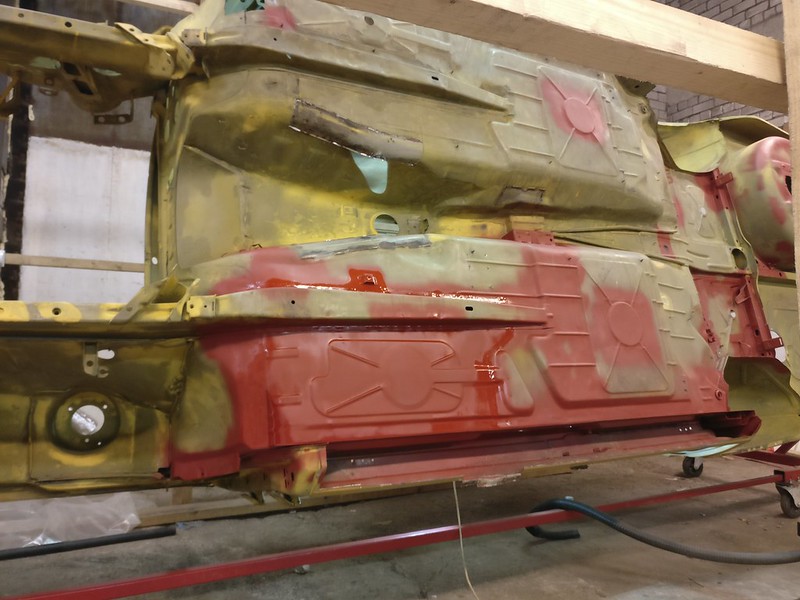
I was going to use Standox nonstop 2K primer (U7580). As this is not meant to be used on bare metal I put down a thin layer of my weld through primer. By the way, this red weld through primer (also by Standox) you see me using everywhere is awesome stuff. It’s sticks really well to the metal for a 1K primer. And what’s best, it’s available in spray cans which makes it perfect for someone like me who needs to cover a small detail every once in a while.
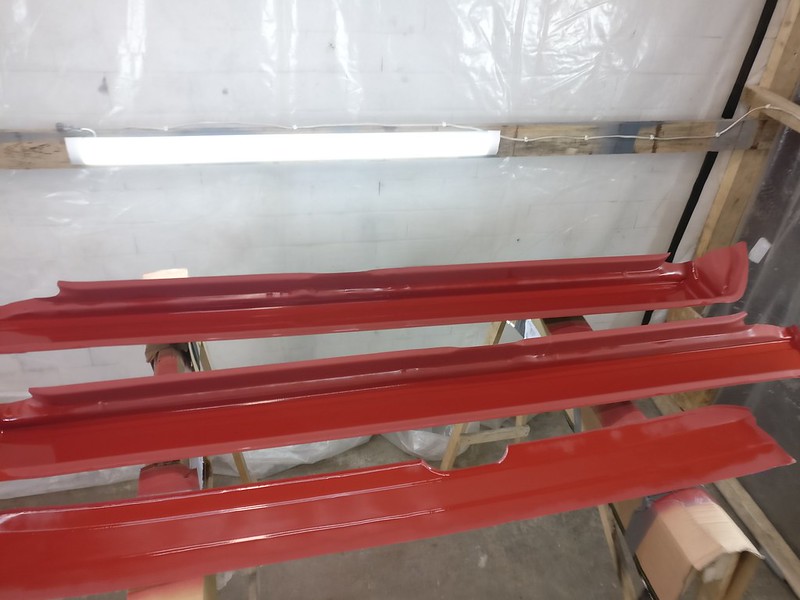
And then one of my friends who once was an automotive painter put some of that 2K primer on the panels and on the rear section of the car. He was going to show me some tips on using the paint gun but ended up doing everything himself.
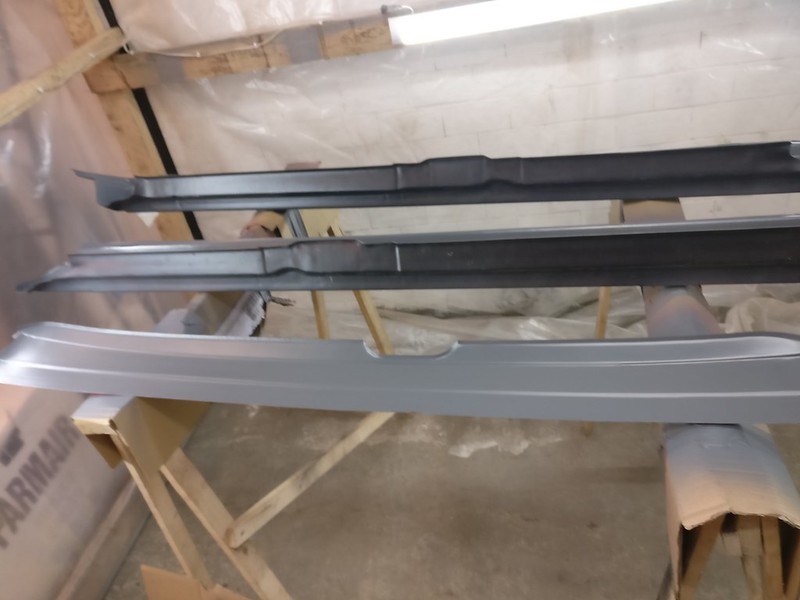
I intended to use 3M 2K panel adhesive to glue the rear valance in the corners instead of plug welding it. This would fill the gap between panels completely so no moisture gets entrapped. So I had to wait until my friend could borrow the glue gun from work.
Then I discovered this crack in my new floor panel.
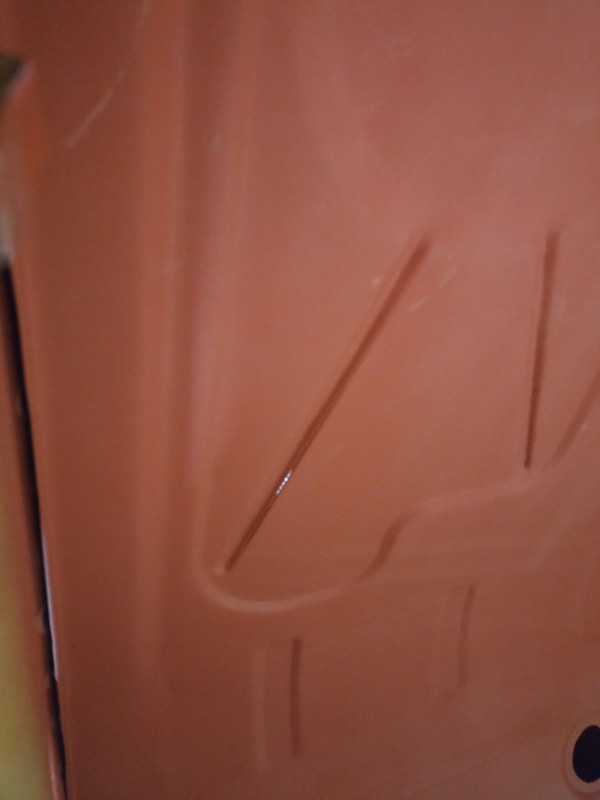
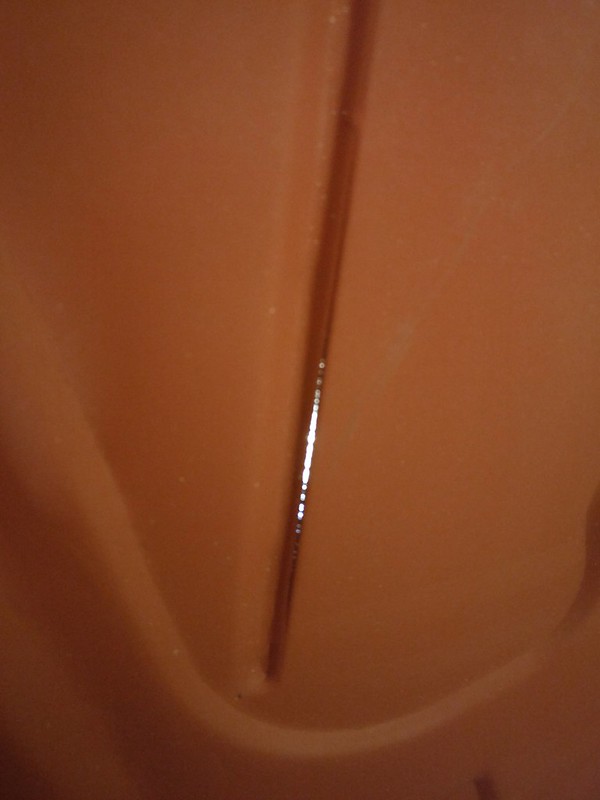
So welded it shut
Put back one of the fuel tank brackets
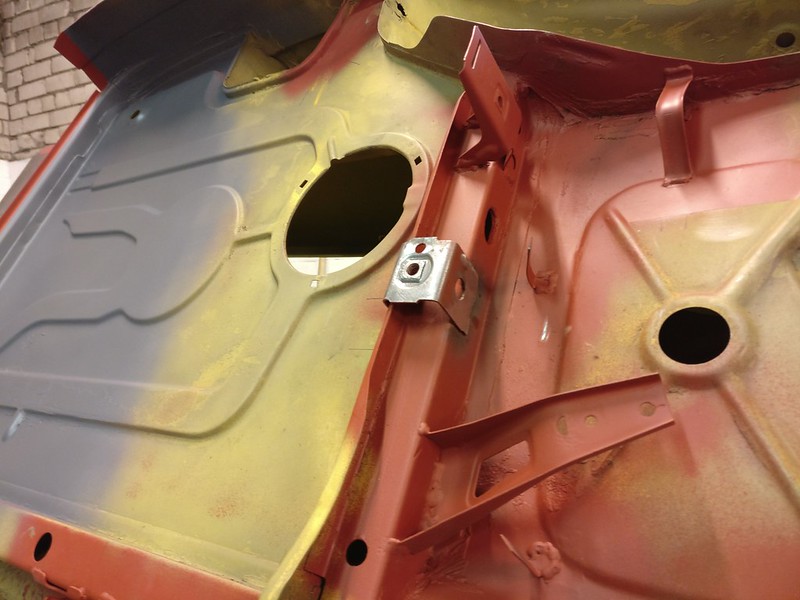
And the front seat beam on the passenger side
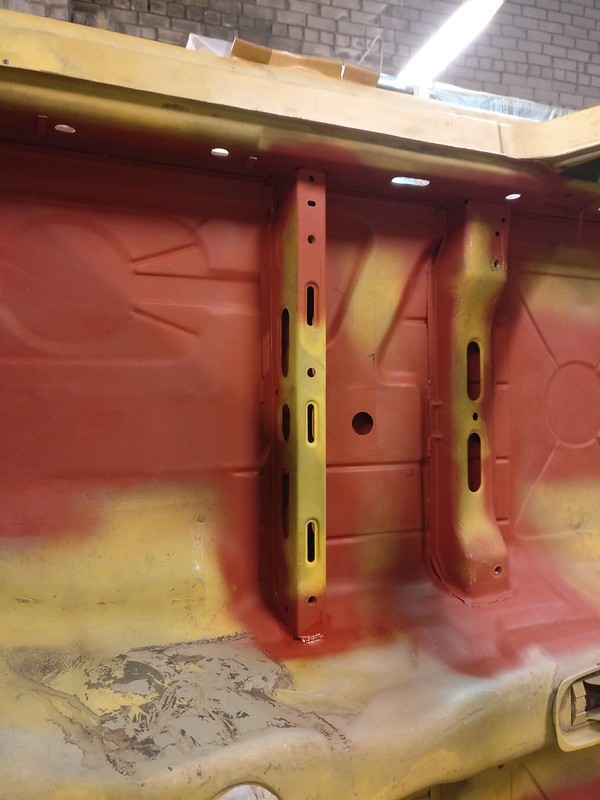
Began to cut off the driver side sill so I could do the floors on this side while I still remembered how everything went together. This side had even more rust.
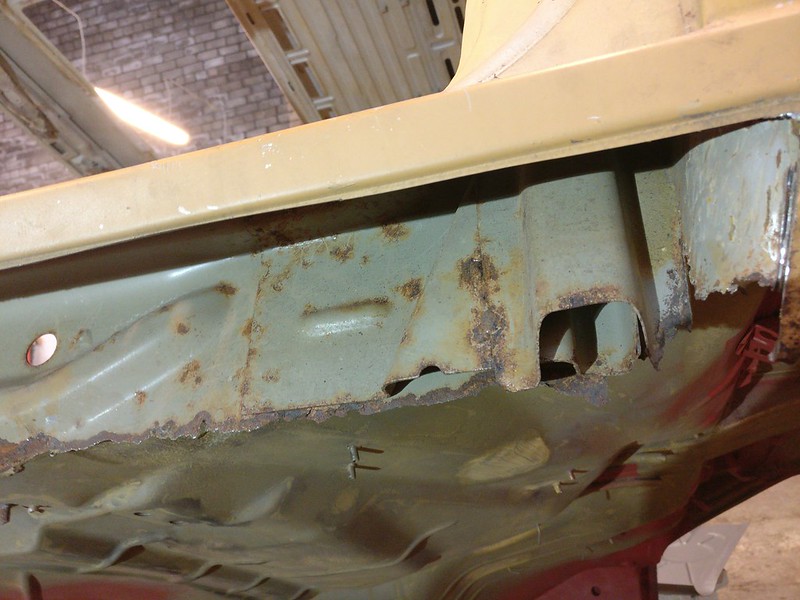
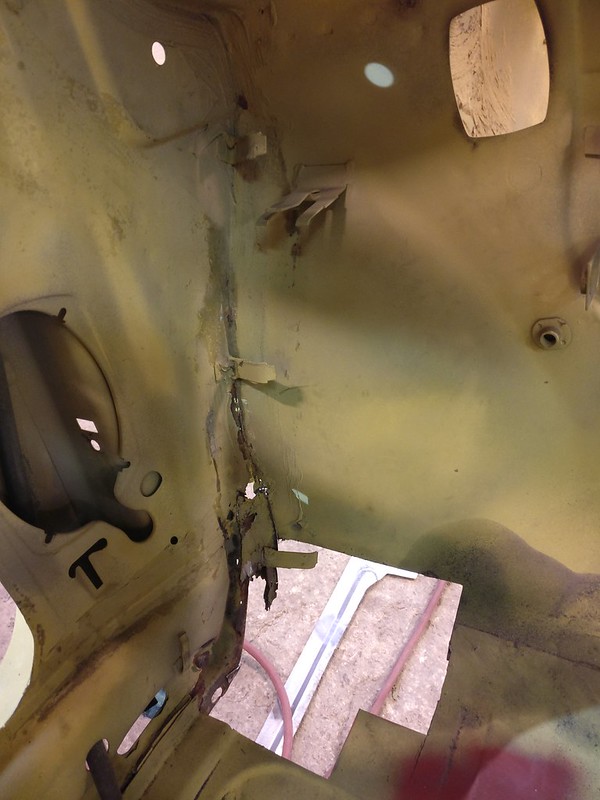
Made this to fix up the front section of inner sill.
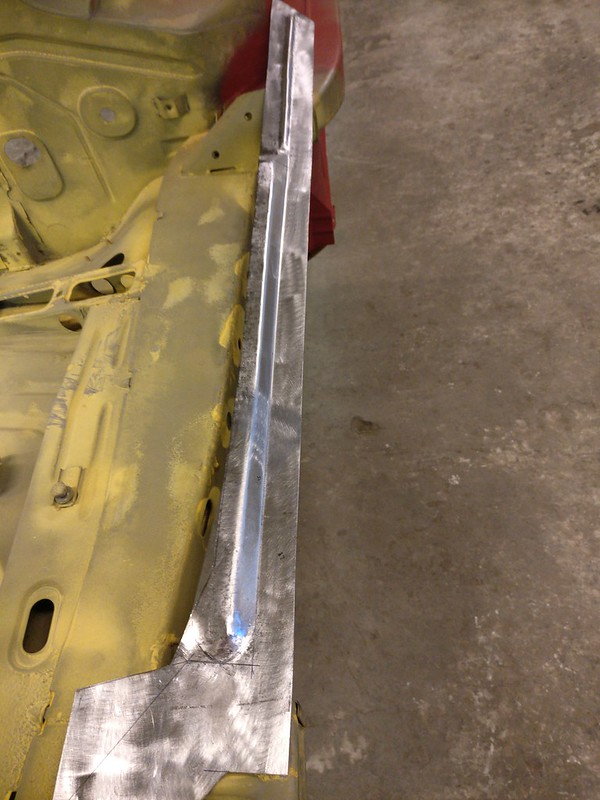
A rusty spot on front column got fixed
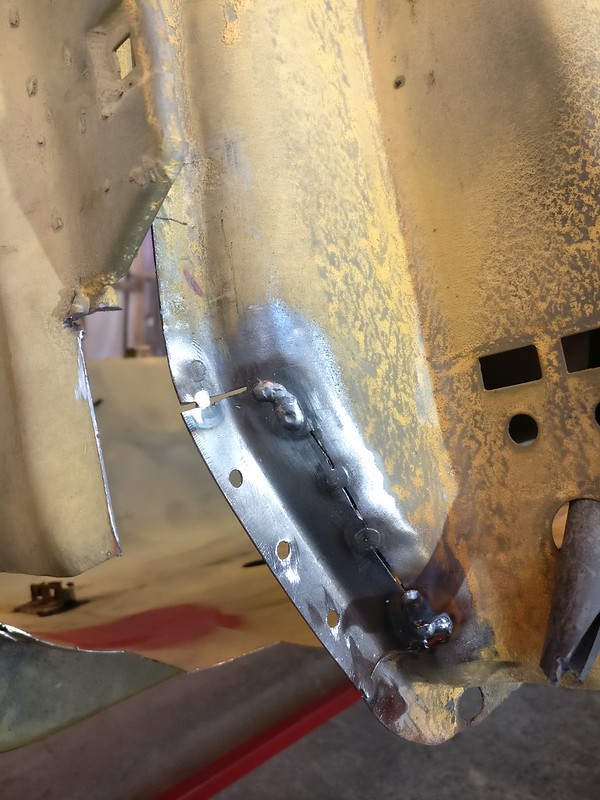
And welded in the inner sill repair
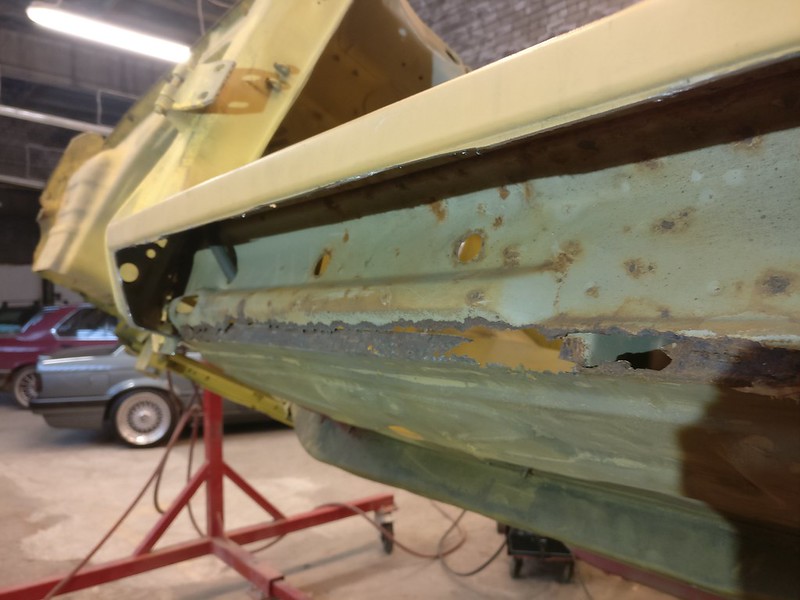
Some sandwich rust here
And some more
And just like that I ended up here
Best course of action would be to sandblast it. So I ordered myself a 75L (20 gal) sandblaster. Those have become quite affordable and it will get its fair share of use during this and any future projects.
To get more done during single paint session I started prepping my side sills so I could prime the insides.
These are some repro side sills made by Klokkerholm. It’s a pity to use repro sills on the car but the right side OEM sill is NLA. Furthermore, OEM sills don’t run full length and you’d have to buy the front and rear column as well. So these will have to do.
I could’ve just drilled some drain holes which could probably even work better as they wouldn’t get clogged as easily but I wanted to replicate the OEM look. So I made these drain holes into the sills. I just have to remember to clean them every once in a while in the future.

Front section of the sills had a few spots where metal was folded on itself.

To avoid moisture getting trapped in there I made small cuts and welded them up.
Then started to remove the primer on the inside. By sanding it down.

After I had wasted about one and a half hours on sanding a friend came by and asked why didn’t I just use some solvent. It took like ten to twenty minutes to get them clean using solvent. Tip: use a scouring pad dipped in solvent (instead of towel) to remove primer and prep the metal in one go.
So, (don’t quote me on the following) what I learned was that OEM parts come with some really nice quality e-coating on top of them. You do not want to remove it as it’s probably superior to anything you can put on the panel yourself, just roughen it up a little for better adhesion of the next layers. On the other hand, most repro panels come with some really crappy primer on them and you do not want it under your paint. Simple test is to use some solvent and wipe the panel with it. If some of the primer ends up on your towel then it’s not the e-coat.
I had also removed the lifting supports from the old sills. They got sandblasted and then later spot welded to the new sills at my friends workshop (no pictures).
Outer jack points were too far gone so I cut new ones out of some random brackets I got from a hardware store.

I was going to use Standox nonstop 2K primer (U7580). As this is not meant to be used on bare metal I put down a thin layer of my weld through primer. By the way, this red weld through primer (also by Standox) you see me using everywhere is awesome stuff. It’s sticks really well to the metal for a 1K primer. And what’s best, it’s available in spray cans which makes it perfect for someone like me who needs to cover a small detail every once in a while.

And then one of my friends who once was an automotive painter put some of that 2K primer on the panels and on the rear section of the car. He was going to show me some tips on using the paint gun but ended up doing everything himself.


I intended to use 3M 2K panel adhesive to glue the rear valance in the corners instead of plug welding it. This would fill the gap between panels completely so no moisture gets entrapped. So I had to wait until my friend could borrow the glue gun from work.
Then I discovered this crack in my new floor panel.


So welded it shut

Put back one of the fuel tank brackets

And the front seat beam on the passenger side

Began to cut off the driver side sill so I could do the floors on this side while I still remembered how everything went together. This side had even more rust.


Made this to fix up the front section of inner sill.

A rusty spot on front column got fixed


And welded in the inner sill repair

Some sandwich rust here

And some more

And just like that I ended up here

Best course of action would be to sandblast it. So I ordered myself a 75L (20 gal) sandblaster. Those have become quite affordable and it will get its fair share of use during this and any future projects.
Re: Another restoration - 83' 528i
First half of June 2020
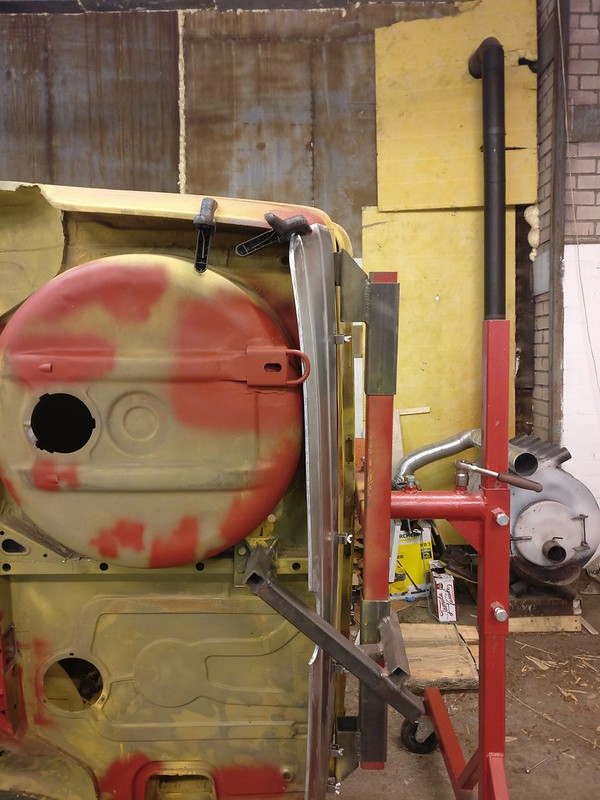
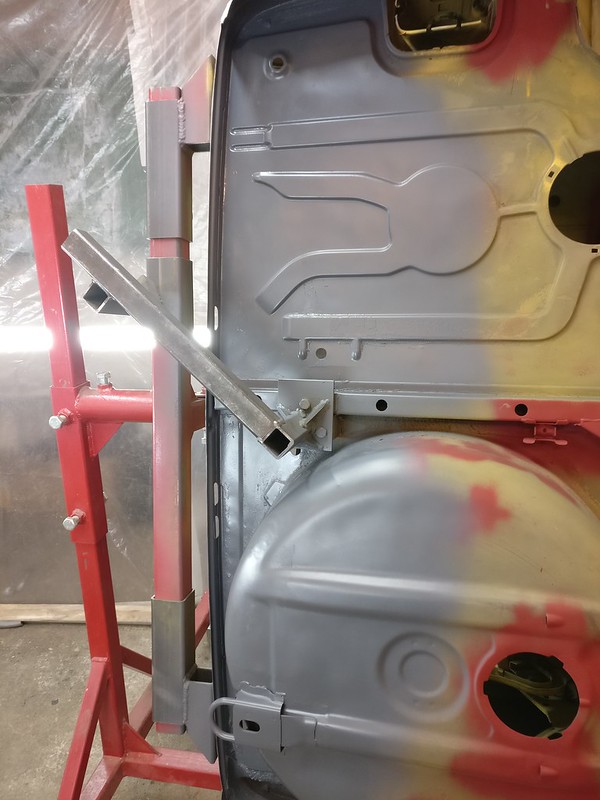
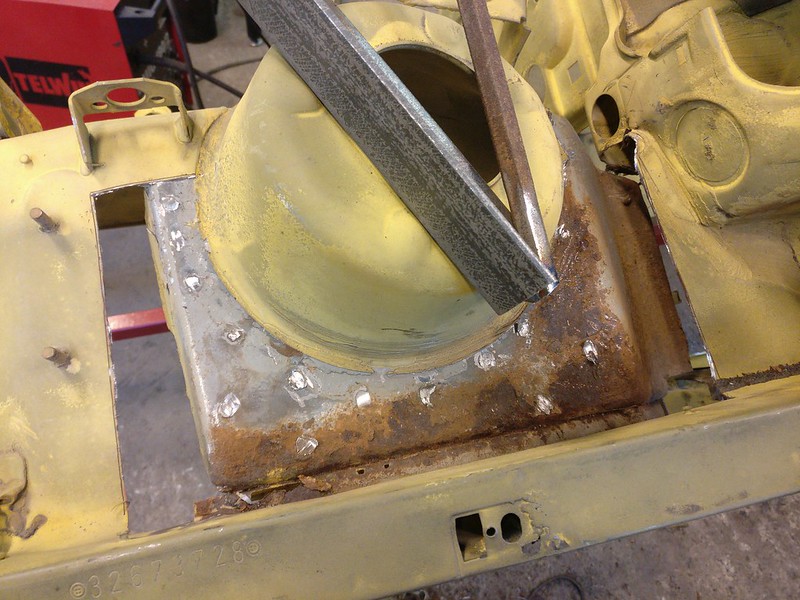
To fix the strut tower in position while dealing with the repairs I bolted on a strut bar made of scraps and welded some temporary bars on the side
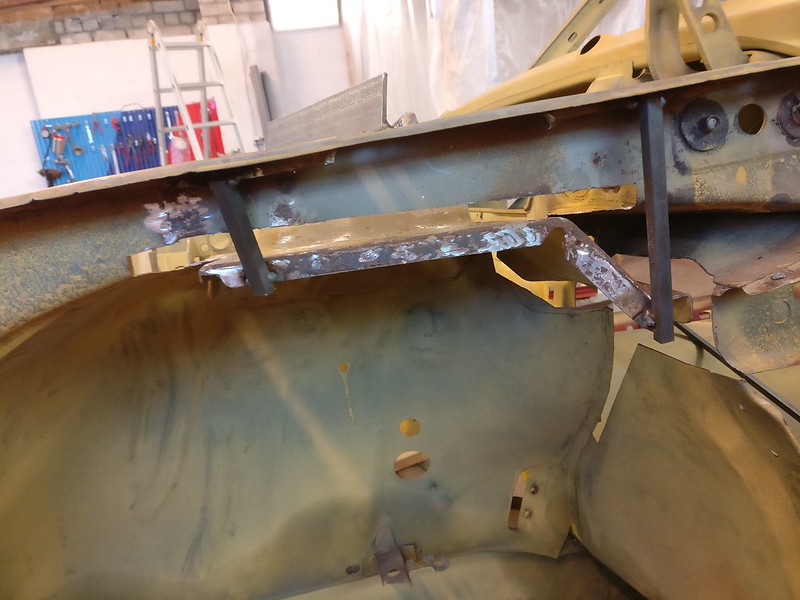
It was only reasonable to find some more rusty spots to sandblast in one go so I cut open driver’s side rear subframe mount.
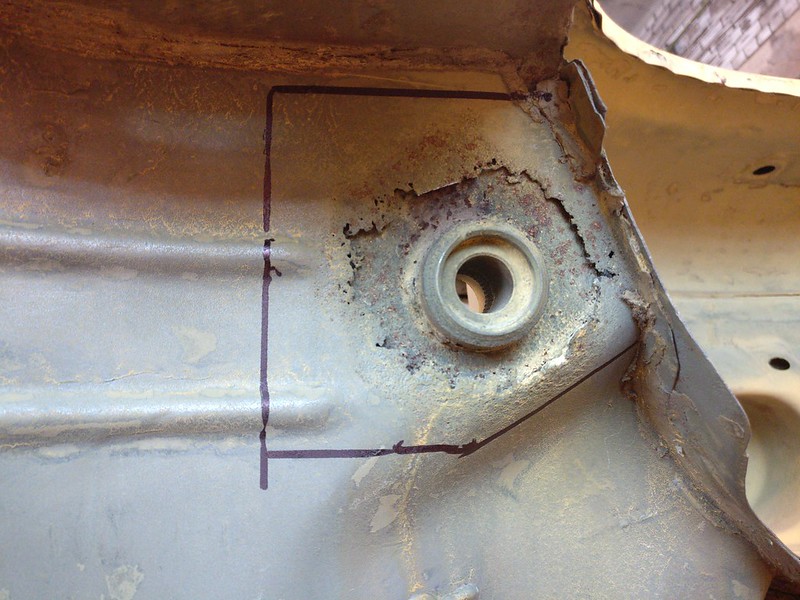
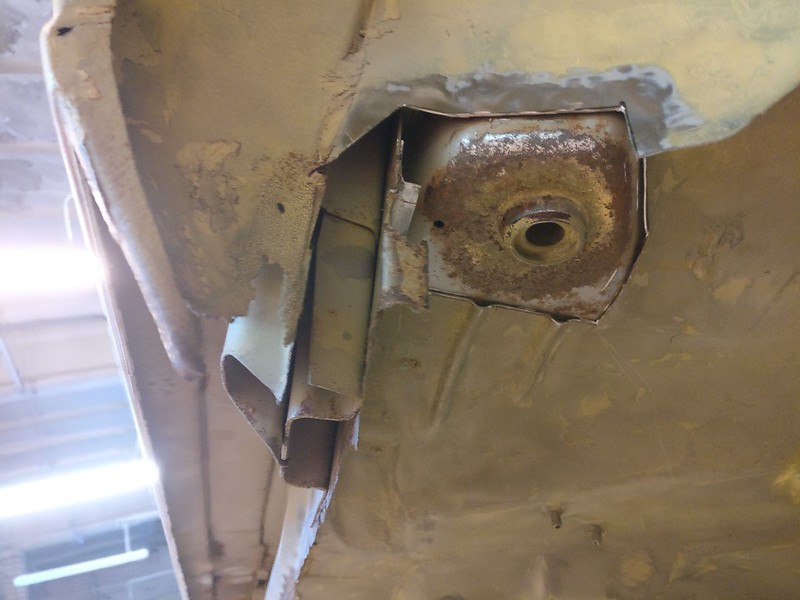
Sandblaster made a quick job of removing the rust. Did also clean the rusty spots inside the side sill. I can’t find any after pictures or even a picture of the sandblaster, so you have to take my word for it.
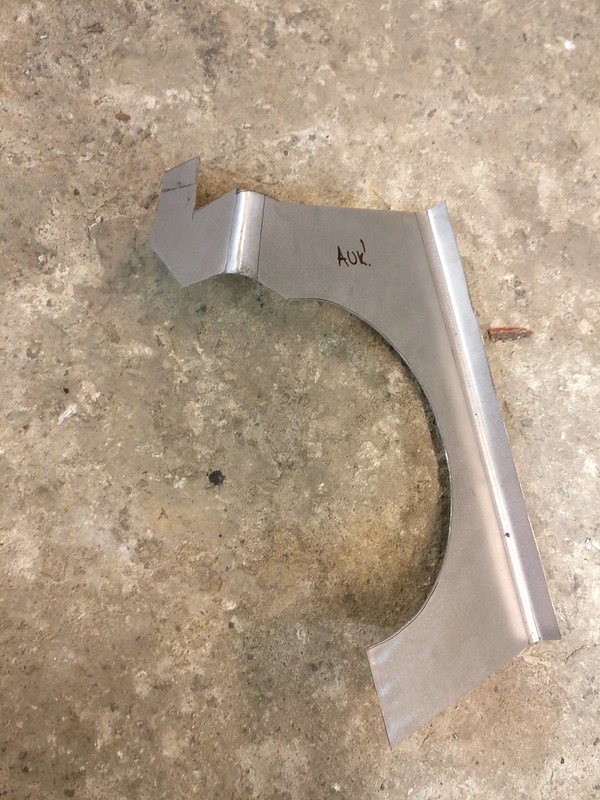
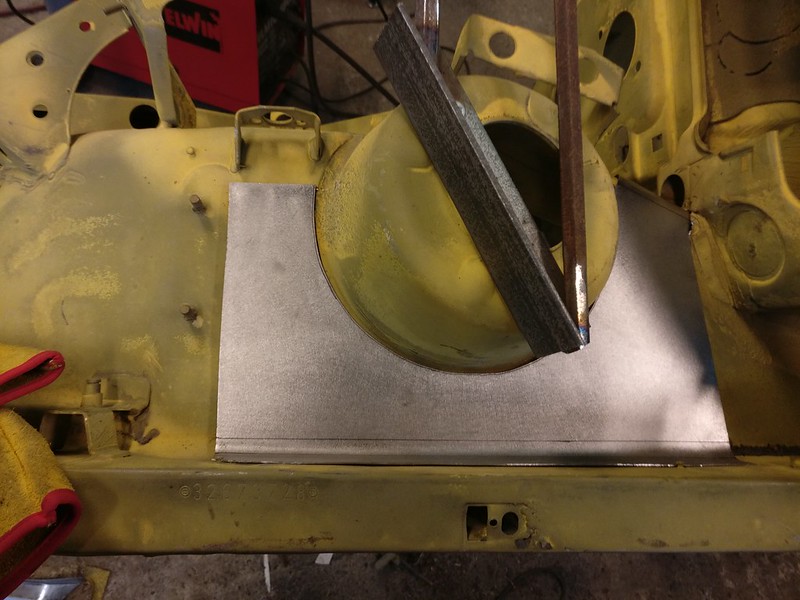
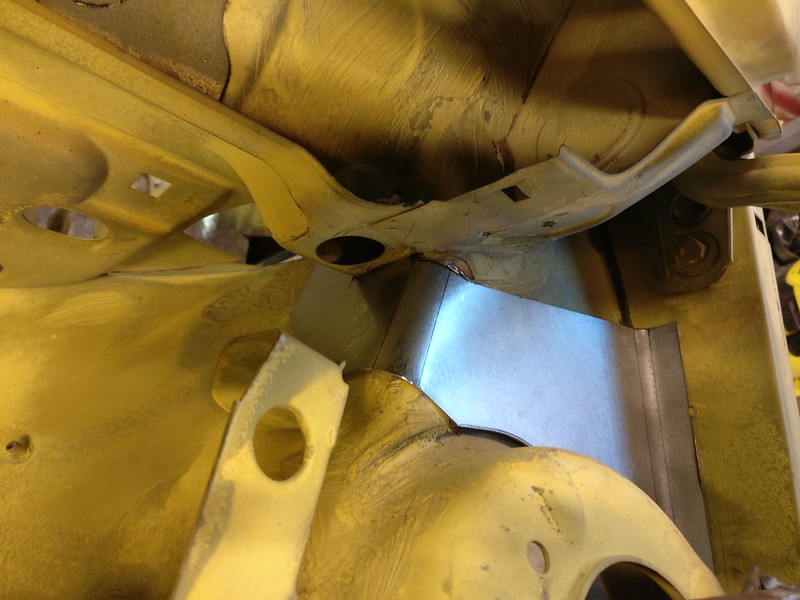
Later, made some patches. Top of front wheel housing:
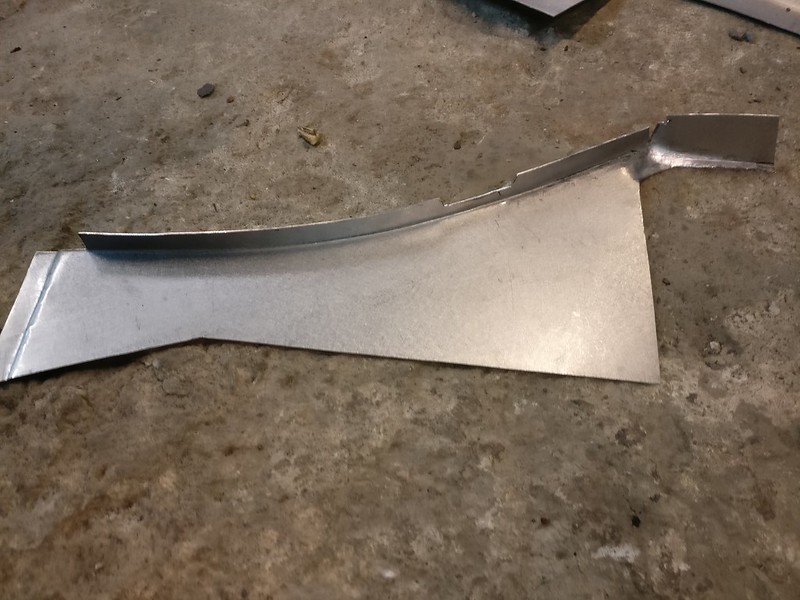
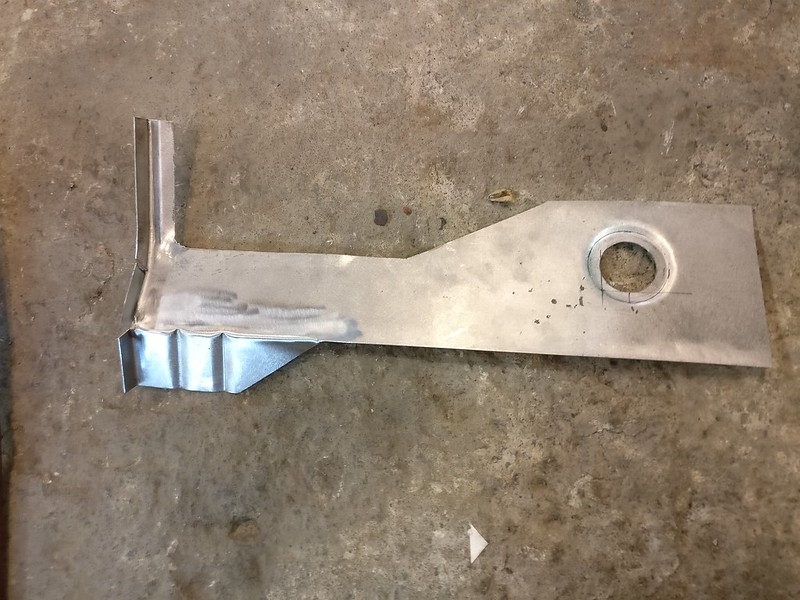
Inner panel on front column where it joins the firewall
Lower piece of firewall
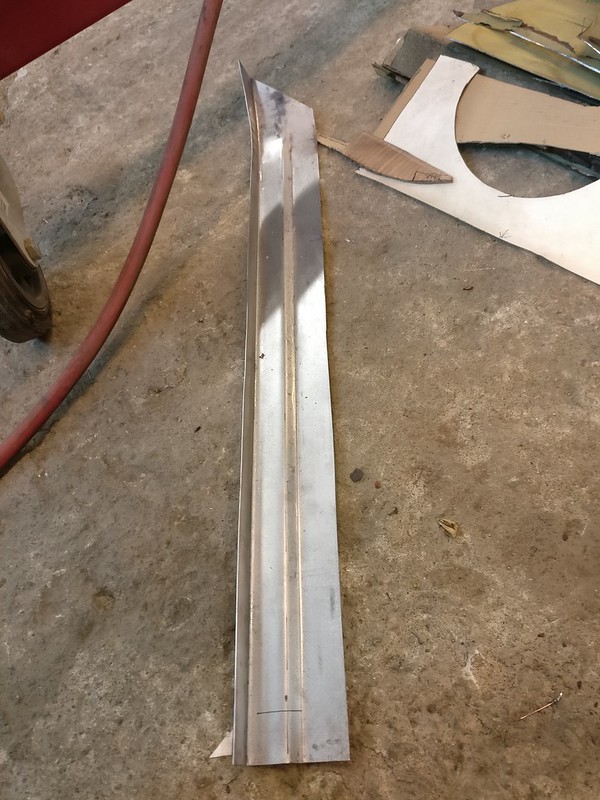
And a new edge for the driver’s floor panel
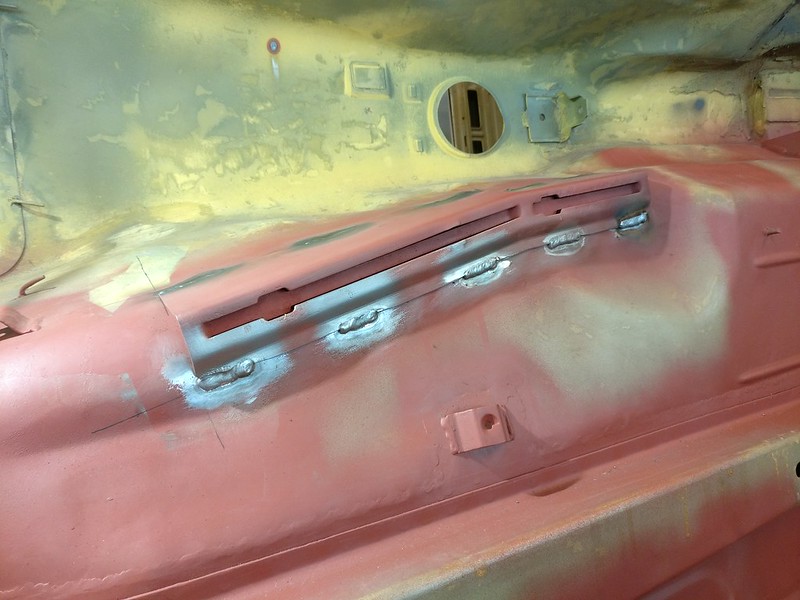
Passenger side tranny bracket went back on
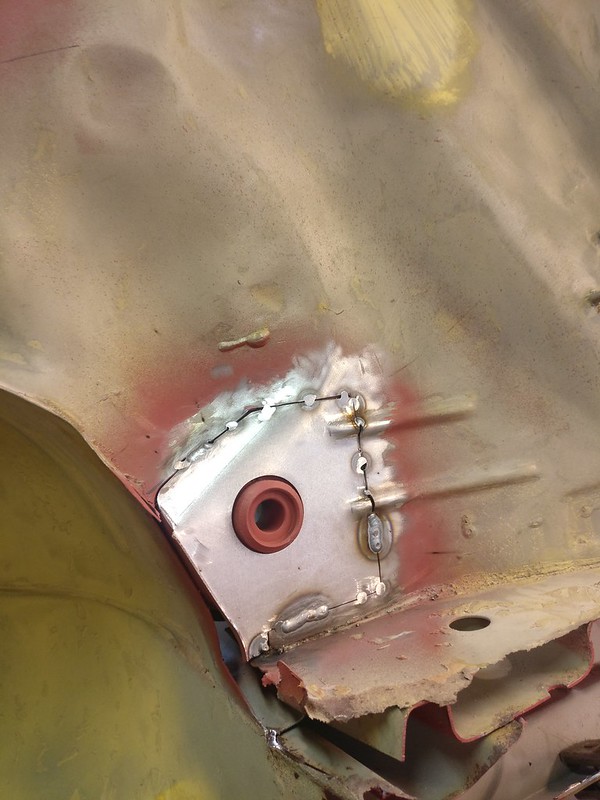
Patched up rear subframe mount
Finally, my buddy was able to borrow the glue gun from work so it was time to fix up the rear end. First, only the middle section of the rear valance was tack welded. This kept everything lined up while still allowing to bend it away enough on the corners to shoot some adhesive between the panels.
After the adhesive had dried more tacks were made
Then seam welded between the tacks
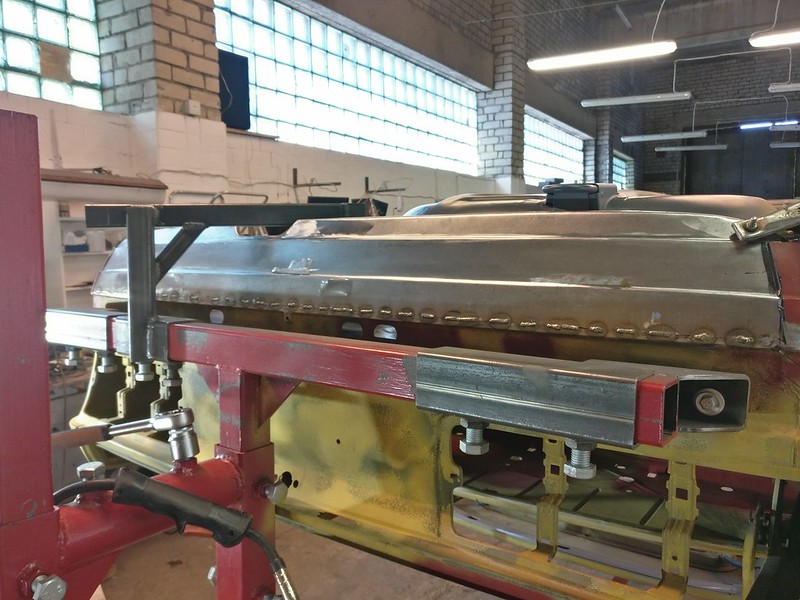
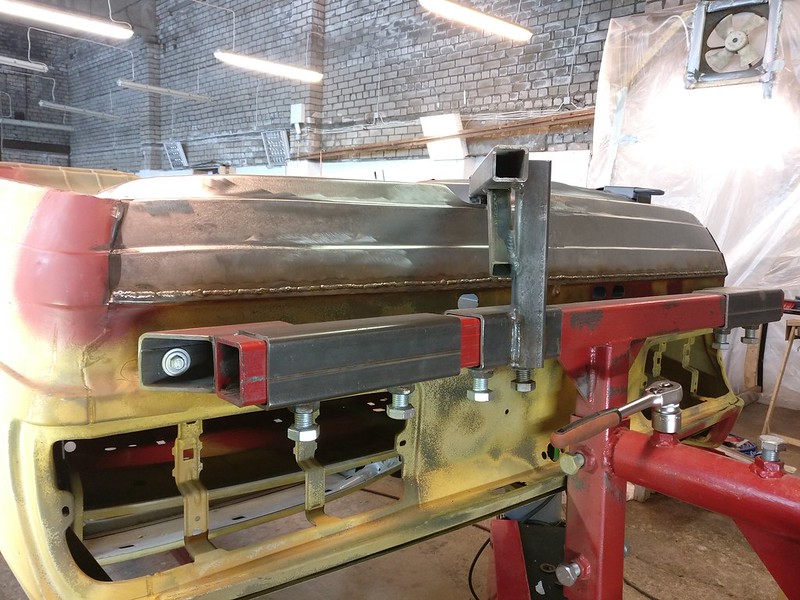
And after some grinding and hammering I had this
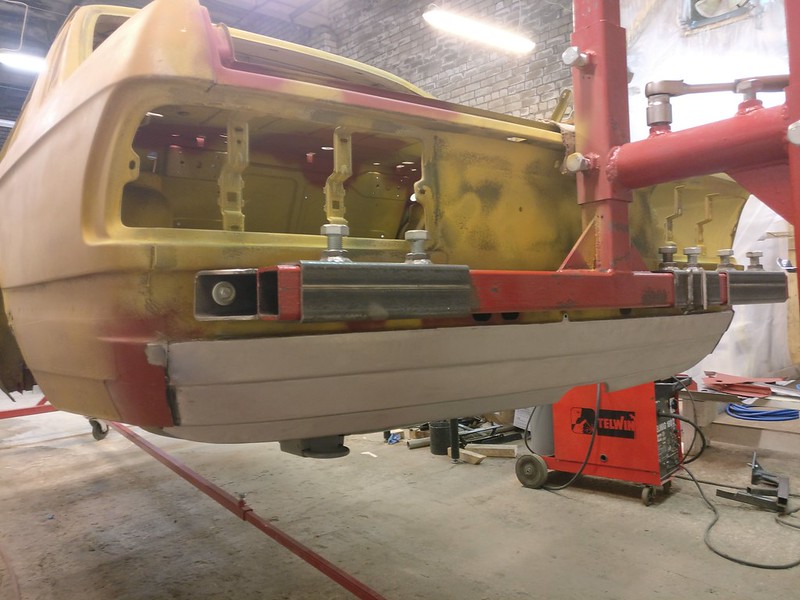
I did get surprisingly little heat distortion in the weld area.
Still needed a bit more hammer and dolly action in the joint area but I was quite happy with the results.
To fix the strut tower in position while dealing with the repairs I bolted on a strut bar made of scraps and welded some temporary bars on the side

It was only reasonable to find some more rusty spots to sandblast in one go so I cut open driver’s side rear subframe mount.


Sandblaster made a quick job of removing the rust. Did also clean the rusty spots inside the side sill. I can’t find any after pictures or even a picture of the sandblaster, so you have to take my word for it.
Later, made some patches. Top of front wheel housing:


Inner panel on front column where it joins the firewall

Lower piece of firewall

And a new edge for the driver’s floor panel

Passenger side tranny bracket went back on

Patched up rear subframe mount


Finally, my buddy was able to borrow the glue gun from work so it was time to fix up the rear end. First, only the middle section of the rear valance was tack welded. This kept everything lined up while still allowing to bend it away enough on the corners to shoot some adhesive between the panels.


After the adhesive had dried more tacks were made

Then seam welded between the tacks


And after some grinding and hammering I had this

I did get surprisingly little heat distortion in the weld area.
Still needed a bit more hammer and dolly action in the joint area but I was quite happy with the results.
Re: Another restoration - 83' 528i
Second half of June 2020
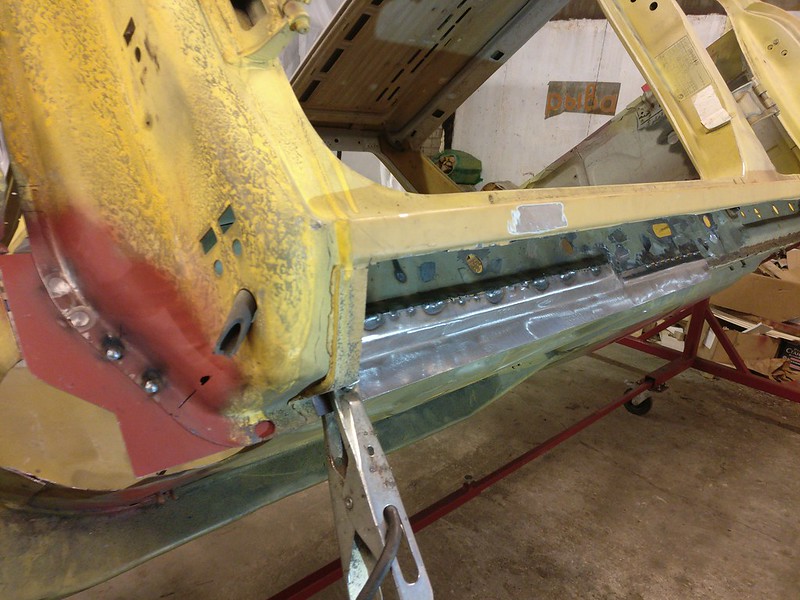
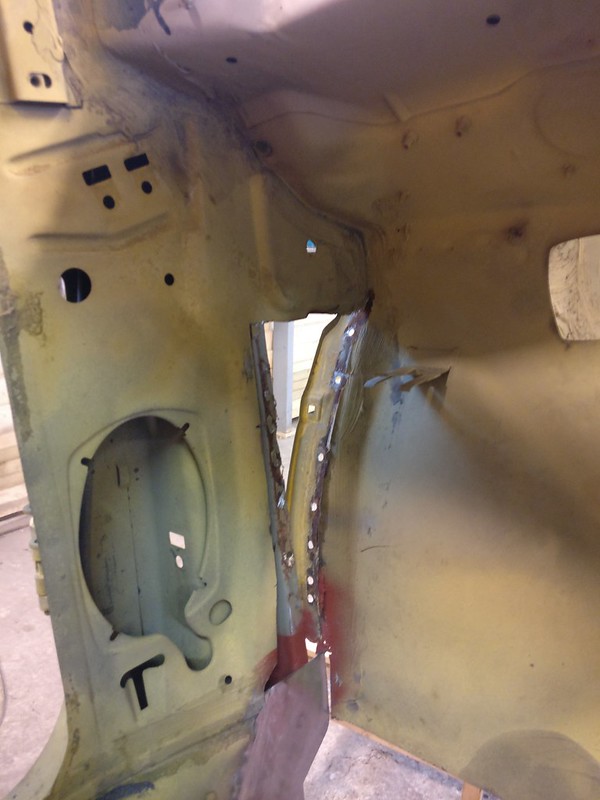
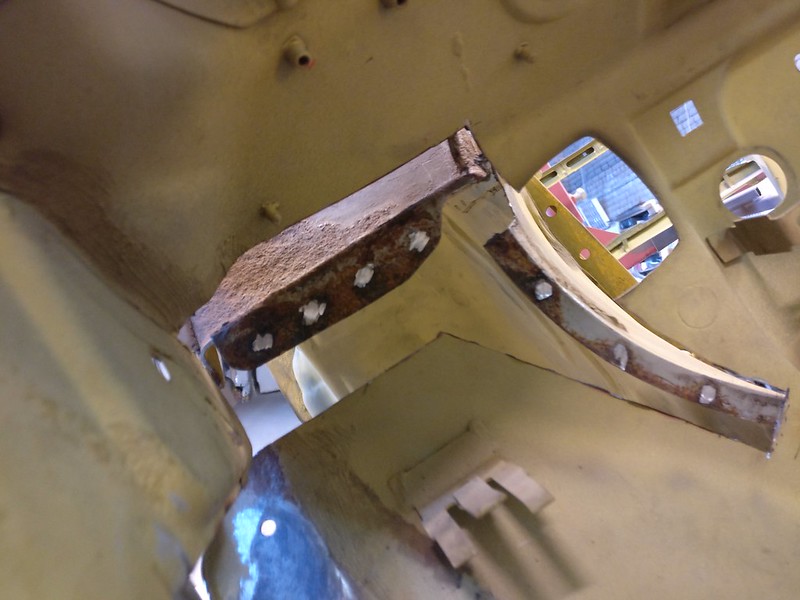
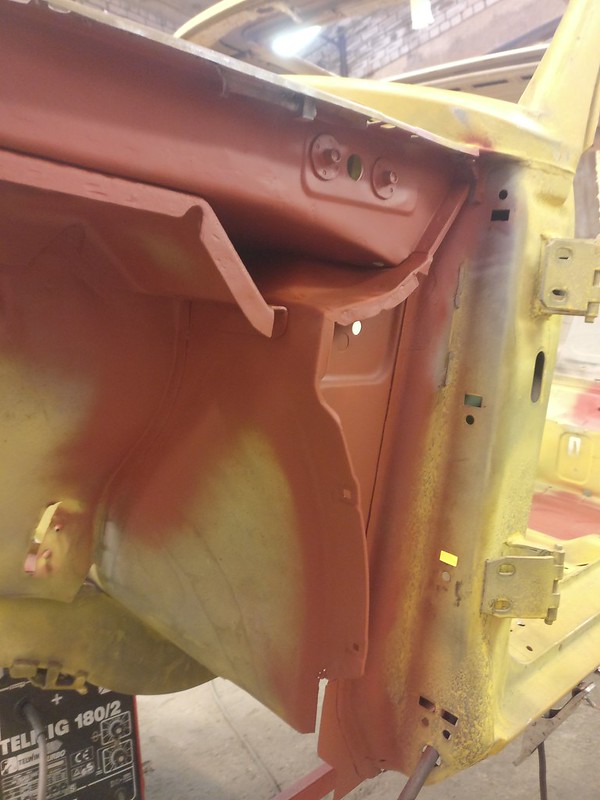
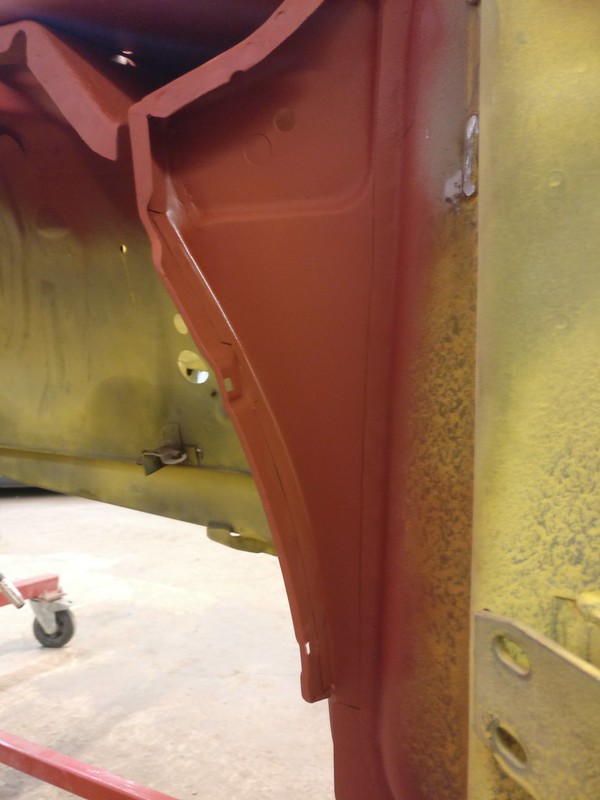
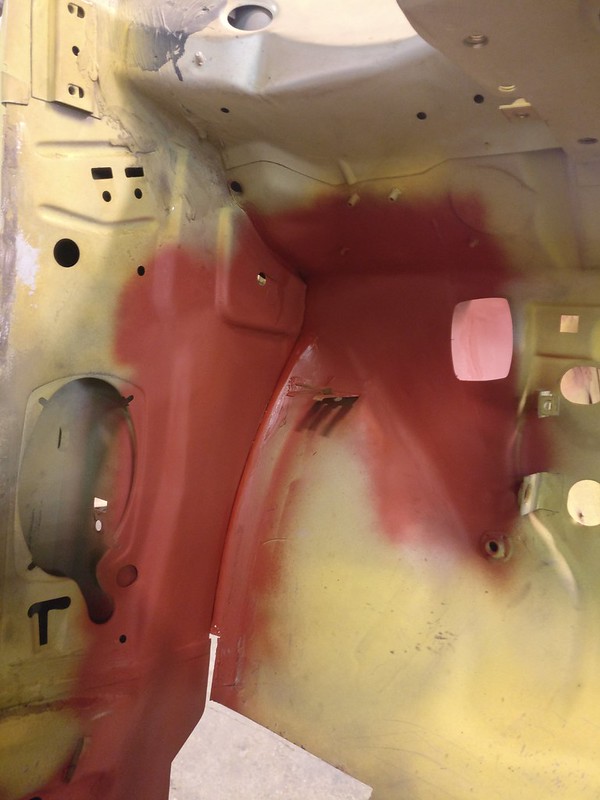
It was time to weld in all the repair pieces. Not much to comment here, let the pictures do the talking.
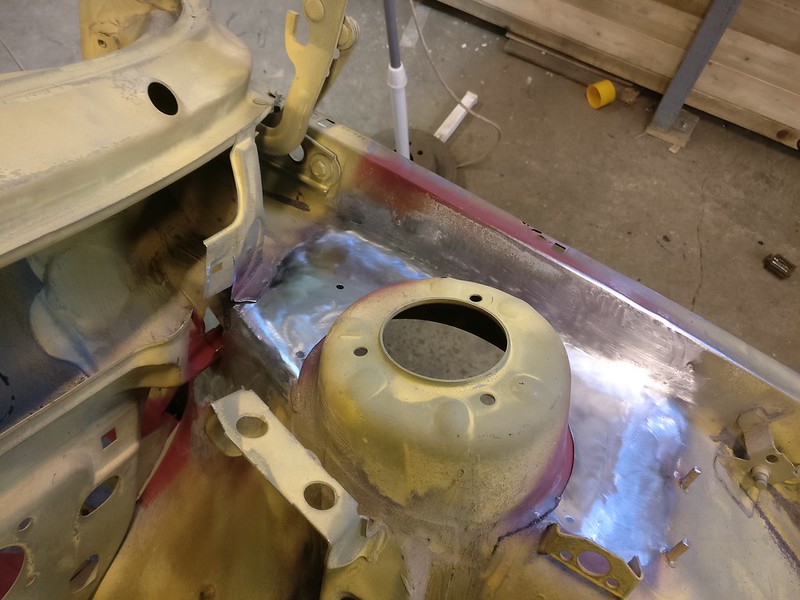
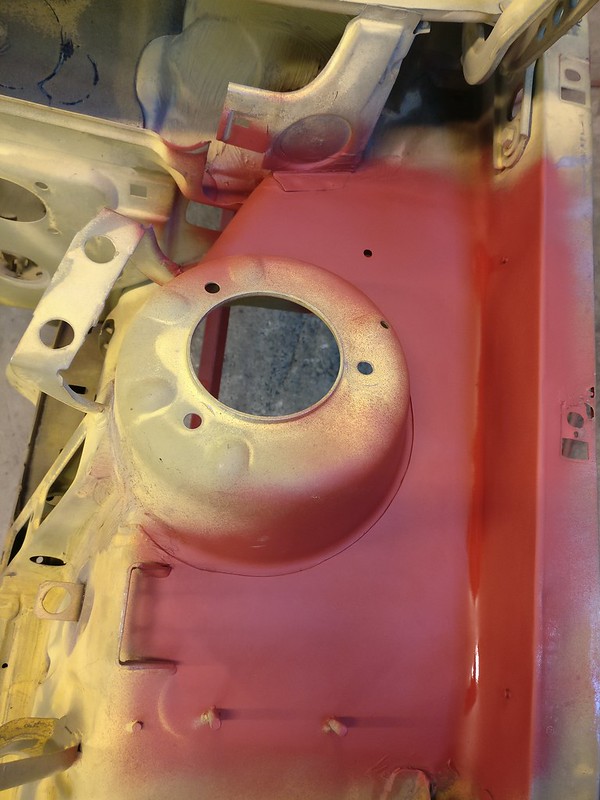
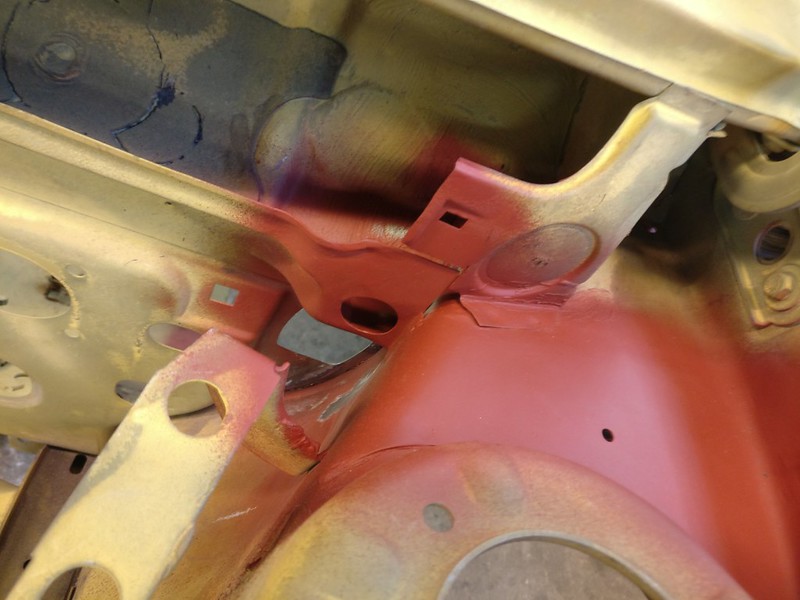
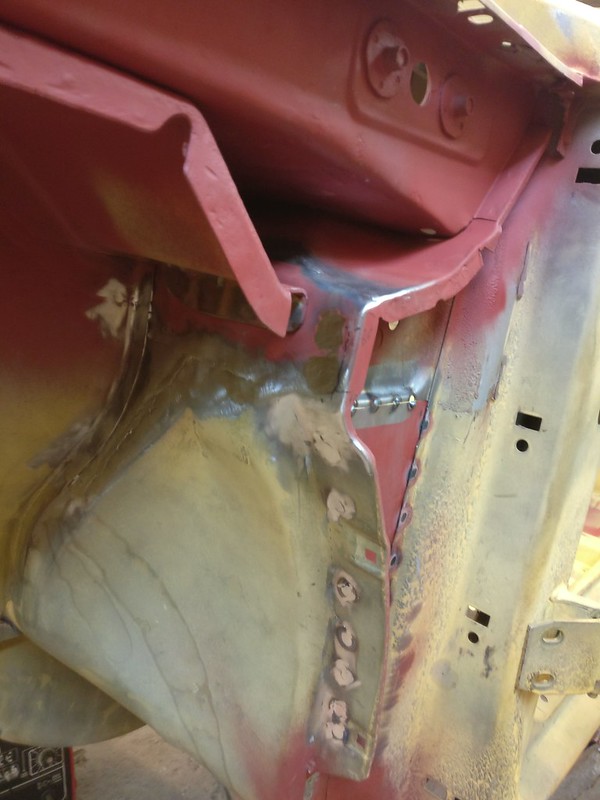
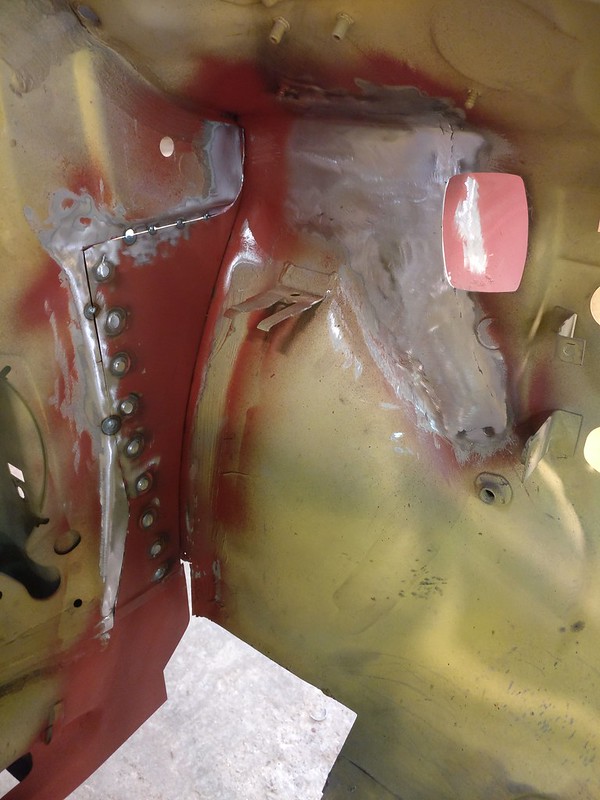
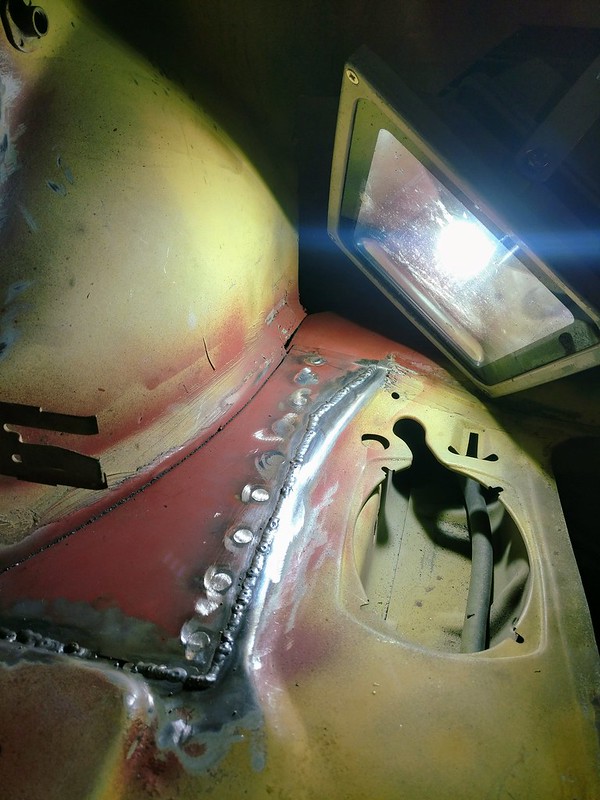
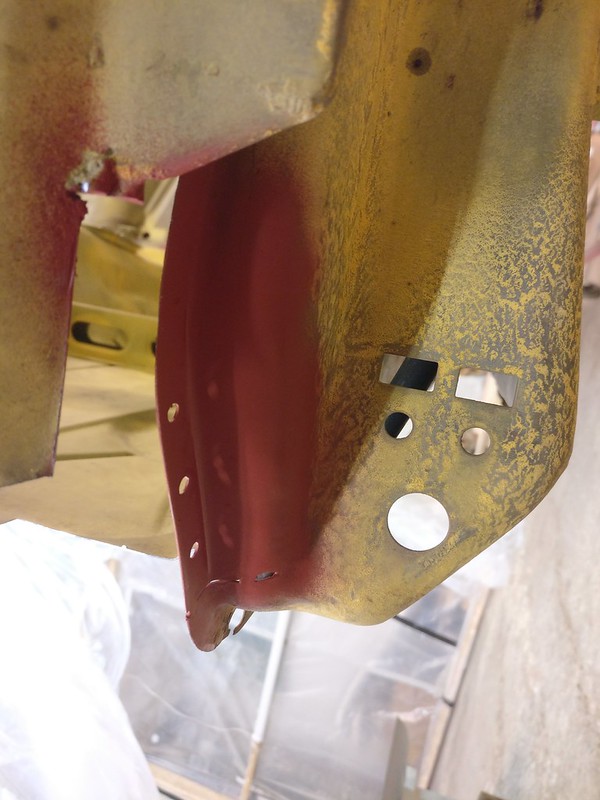
No way I can get any of my tool in there to grind down the weld so I decided to join it close to the flange. This way it gets hidden away by seam sealer later.
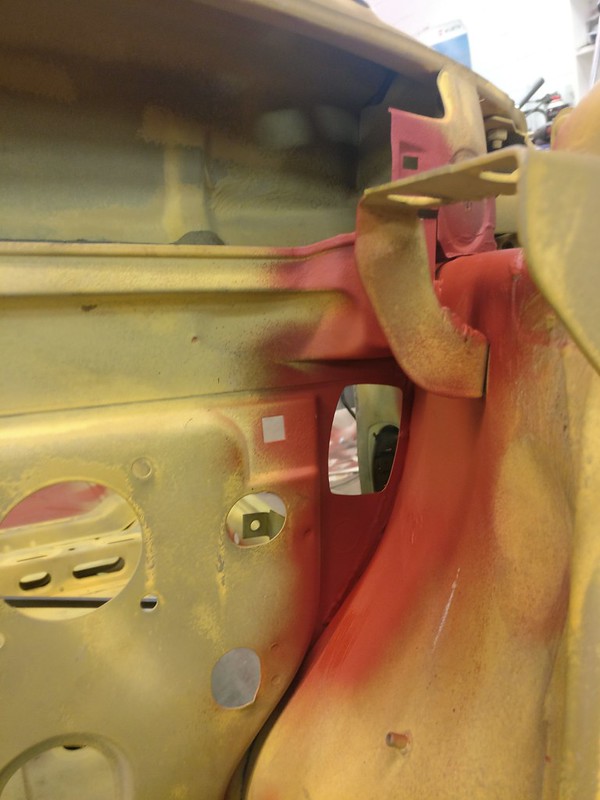
Cut off some of the old floor
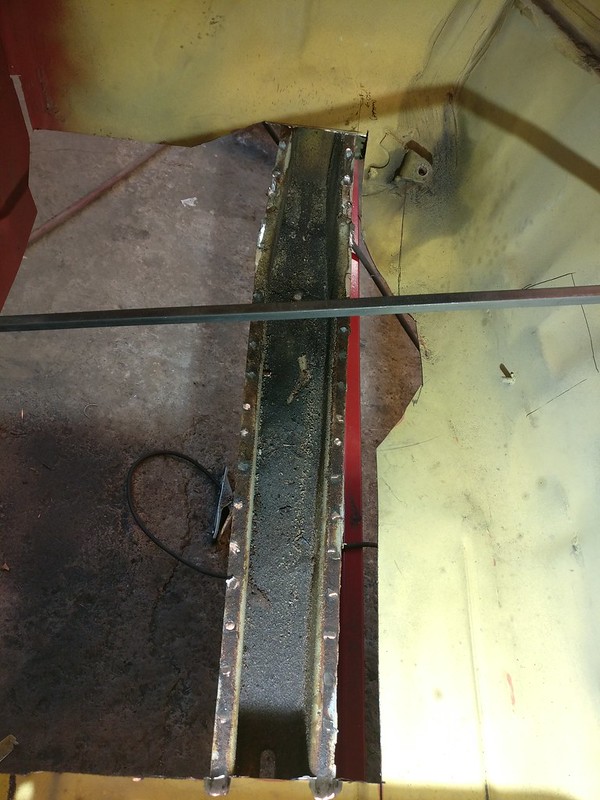
While full of dirt the frame rail was actually in a better condition than other side. Even this rust-prone joint. Still received the same treatment as the other side.
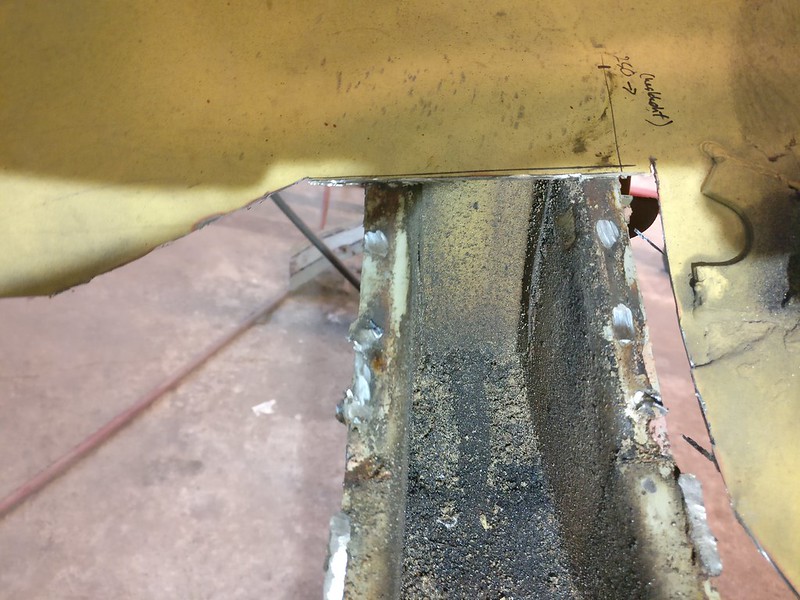
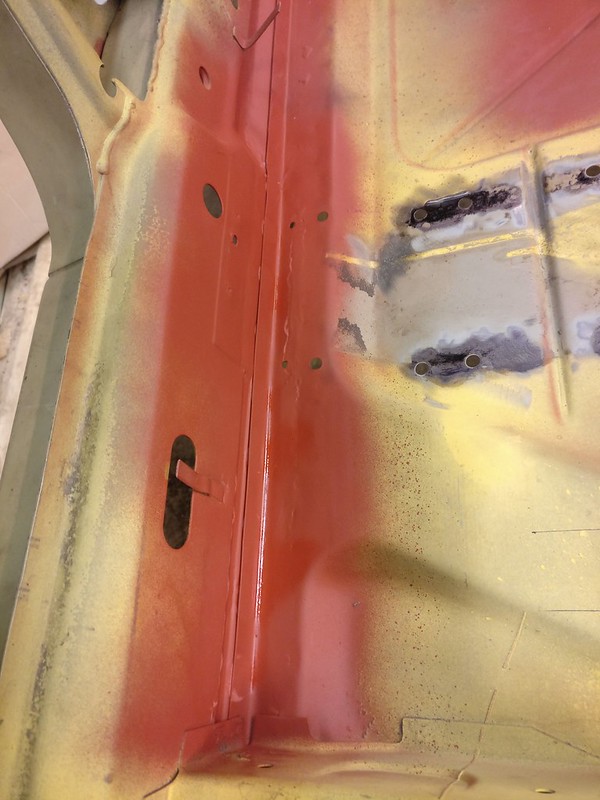
Cleaning in progress
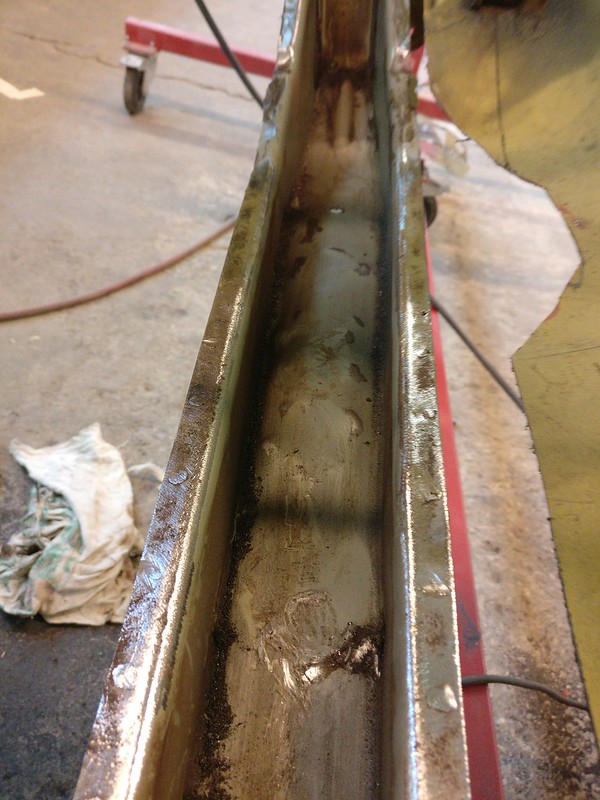
Then it was time to push and knock out those dents. Not sure what has happened here. Is it damage from lifting the car or has it crashed onto a rock in the past.
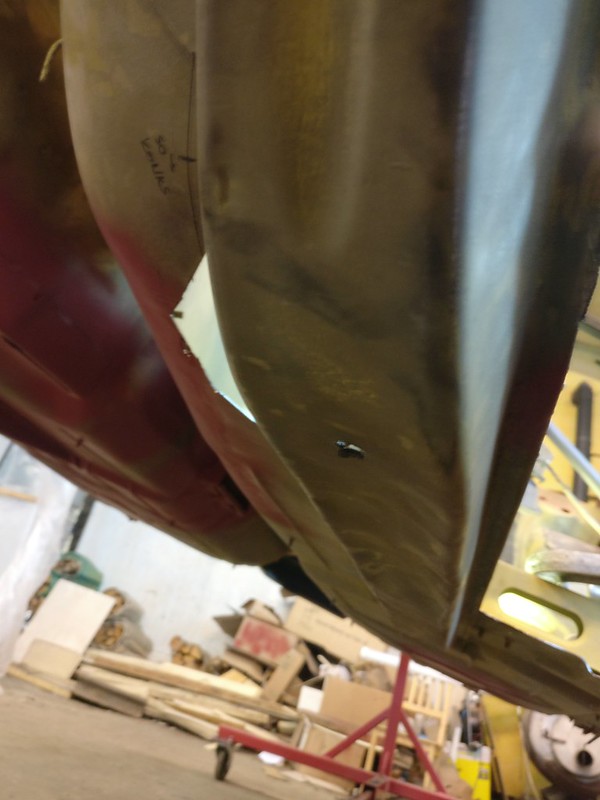
Didn’t bother with smaller dents and kinks but was able to get it pretty straight (after pictures in upcoming posts).
It was time to weld in all the repair pieces. Not much to comment here, let the pictures do the talking.


No way I can get any of my tool in there to grind down the weld so I decided to join it close to the flange. This way it gets hidden away by seam sealer later.

Cut off some of the old floor

While full of dirt the frame rail was actually in a better condition than other side. Even this rust-prone joint. Still received the same treatment as the other side.

Cleaning in progress

Then it was time to push and knock out those dents. Not sure what has happened here. Is it damage from lifting the car or has it crashed onto a rock in the past.

Didn’t bother with smaller dents and kinks but was able to get it pretty straight (after pictures in upcoming posts).

