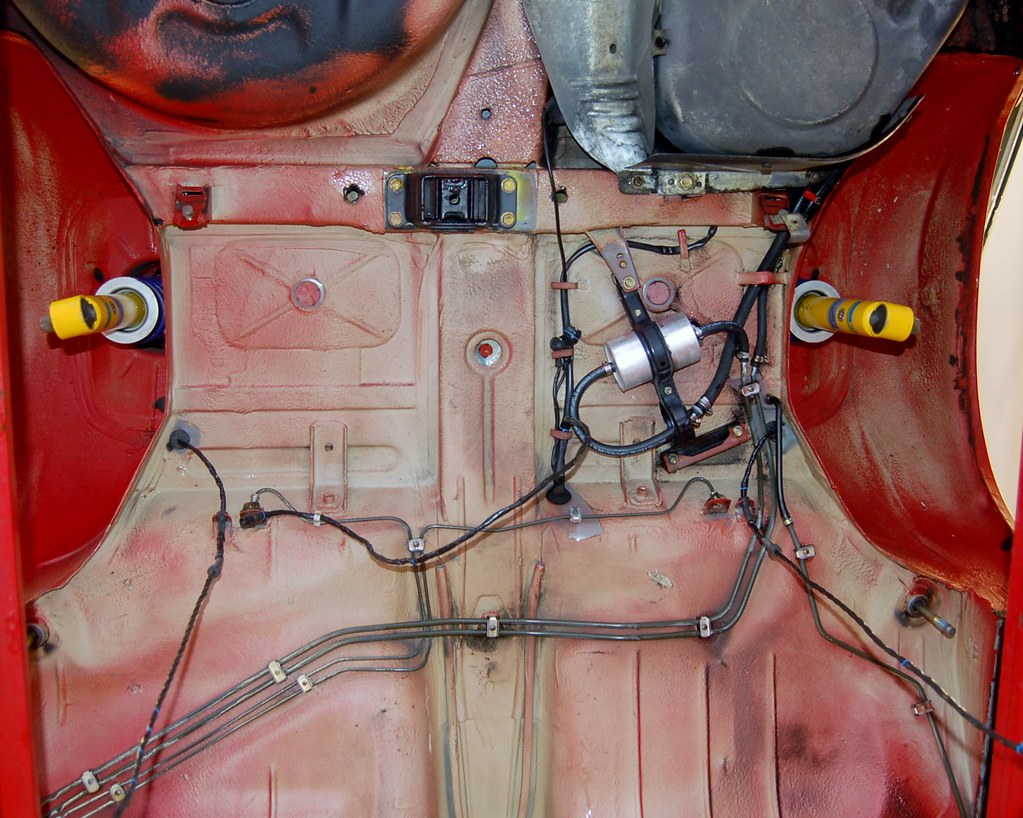
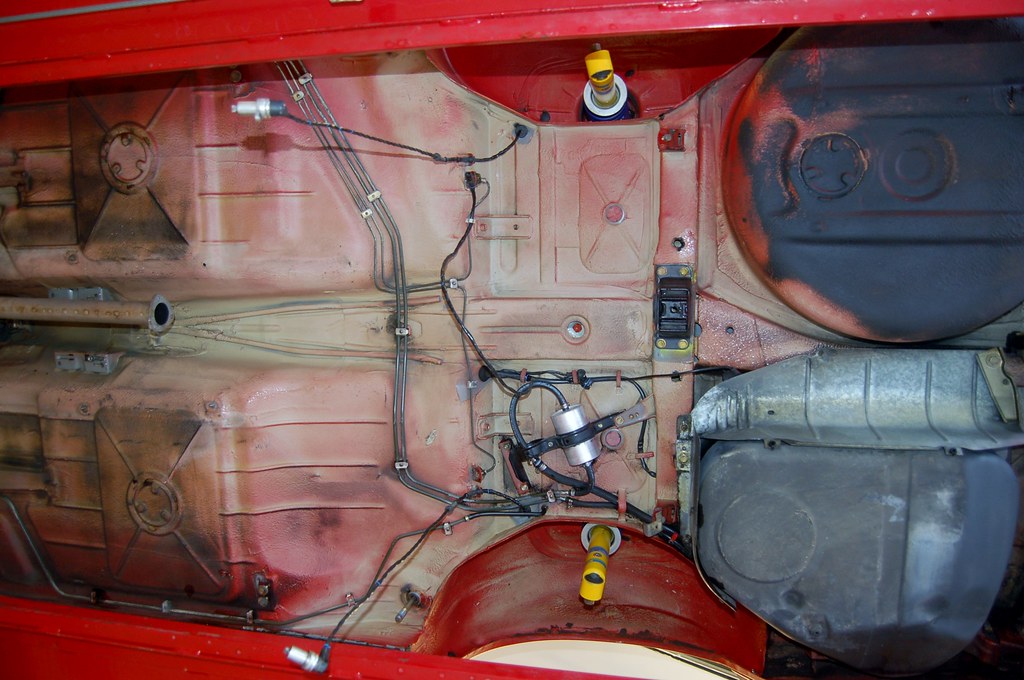
Another restoration - 83' 528i
Re: Another restoration - 83' 528i
Every post further establishes you as a hero I aspire to be. Wow.
-
Nebraska_e28
- Beamter

- Posts: 9062
- Joined: Apr 13, 2006 11:18 PM
- Location: Council Bluffs, IA
- Contact:
Re: Another restoration - 83' 528i
You sir are beyond ambitious! I tip my hat to you. 
Re: Another restoration - 83' 528i
July 2020
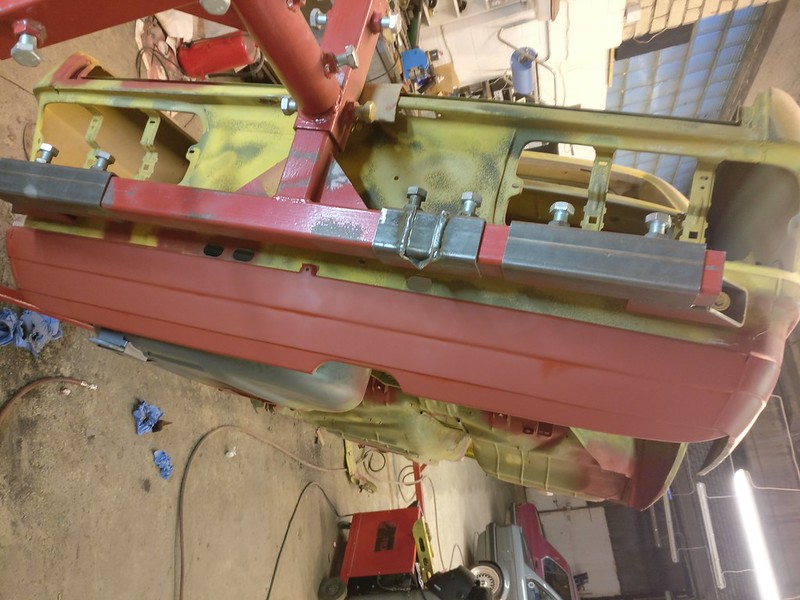
Wrapped up the work on rear valance - some hammering on weld line and a coat of primer
Added new edge to the floor repair panel. I decided to join the firewall and floor pieces off the car to make it a bit easier. Also added some extra sheet metal to the rear of the panel (and lost the focus on my camera in the process).
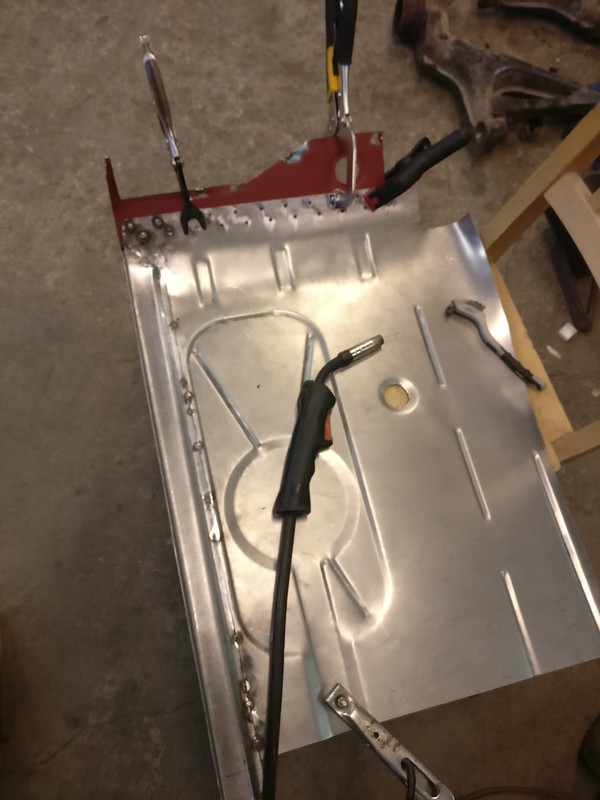
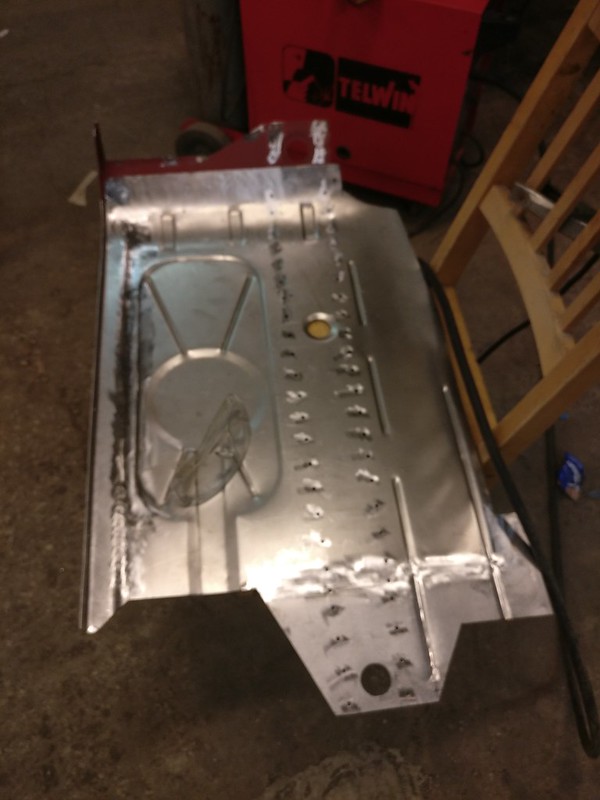
This piece should fill a substantial part of that hole.
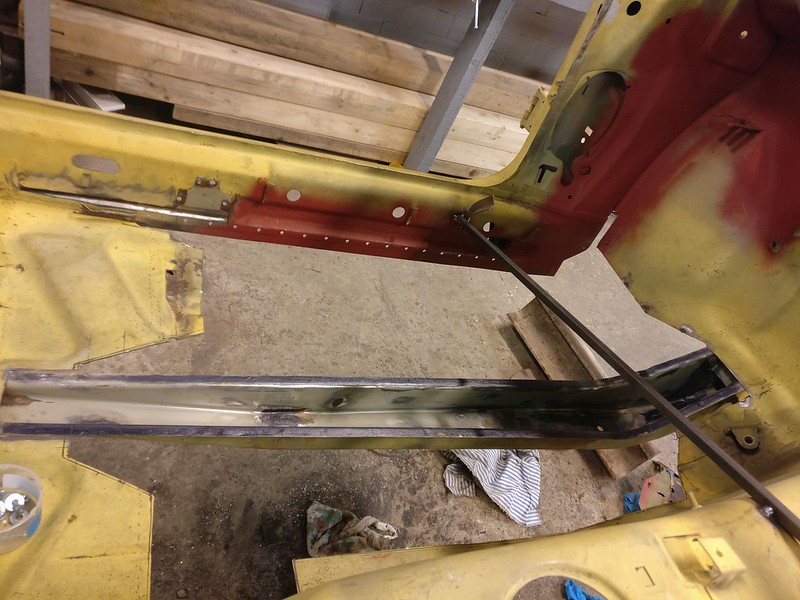
Cleaned and prepped the frame rail
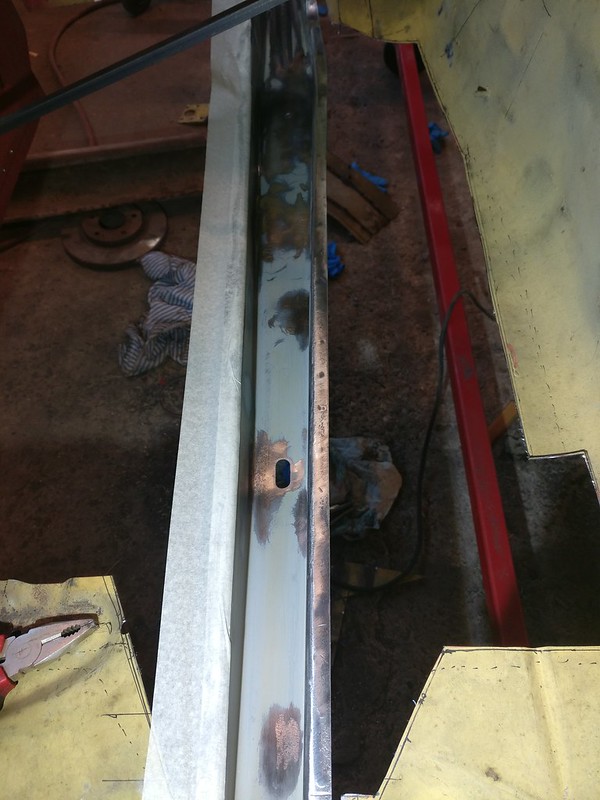
Sprayed some 1K epoxy primer I had lying around on the inside and weld-through primer on the flanges of frame rail. Same was done on the other side earlier.
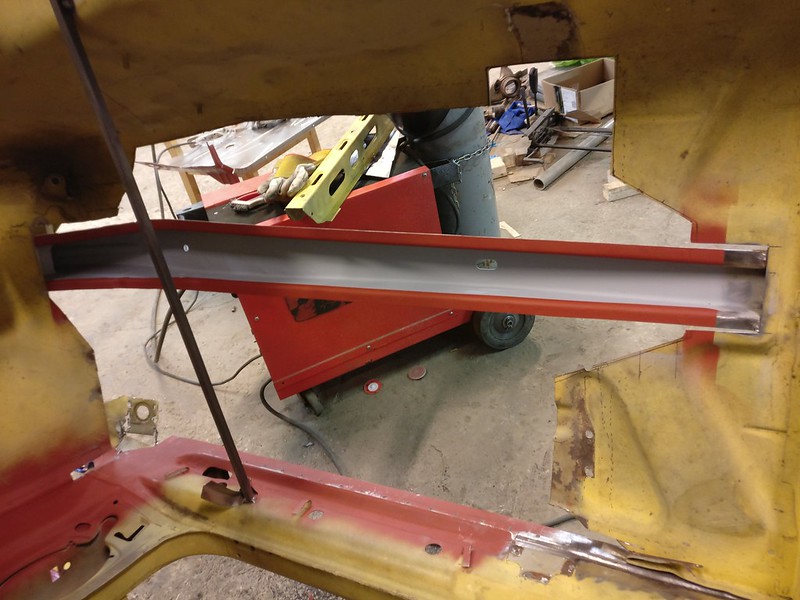
After a lot of frustrating hours it was finally in. Replaced a large portion of metal where the panel covers frame rail. It had ton of extra metal there and it was oil canning. I was hoping I could push it against the frame rail and make the plug welds but the metal just bulged up next to the welds. Also, you can see that the large rounded rectangle of that panel is too wide and sits too close to the frame rail so fuel and brake lines won’t both fit there any more. I’ll probably route one set of lines over that rectangle unless I come up with something better.
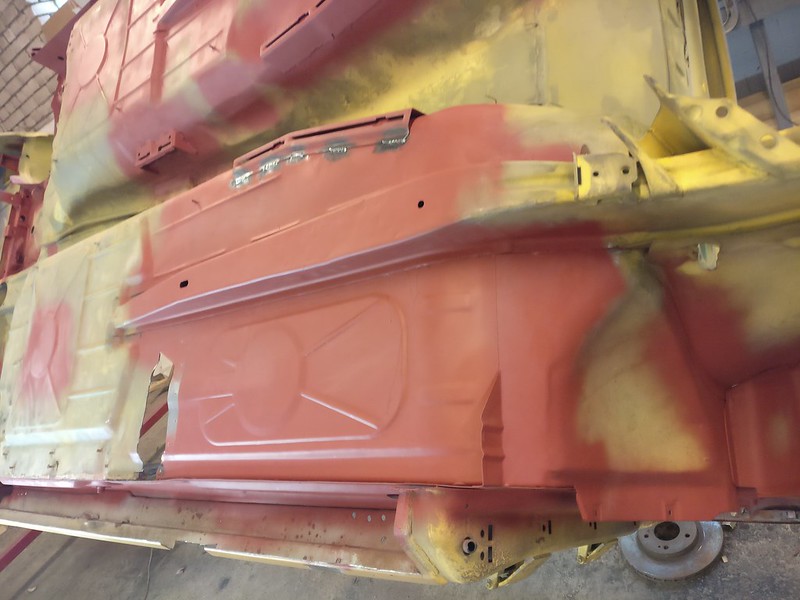
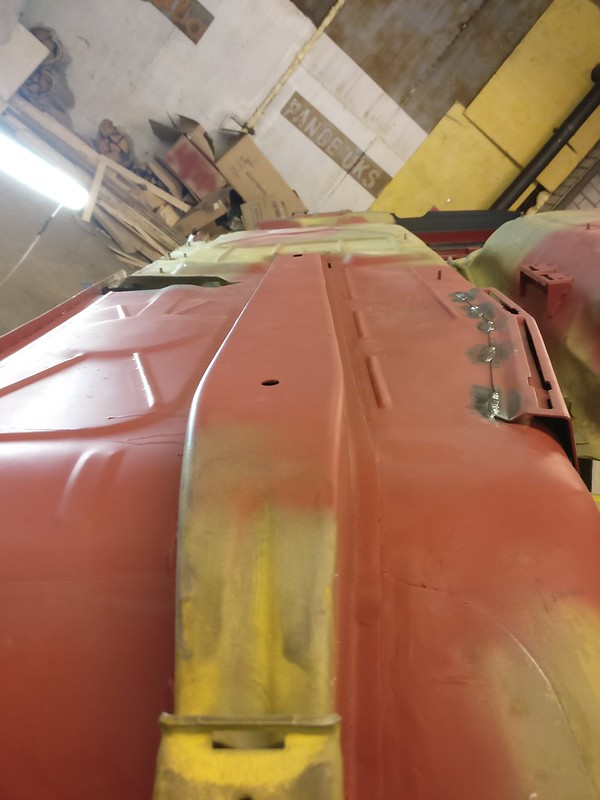
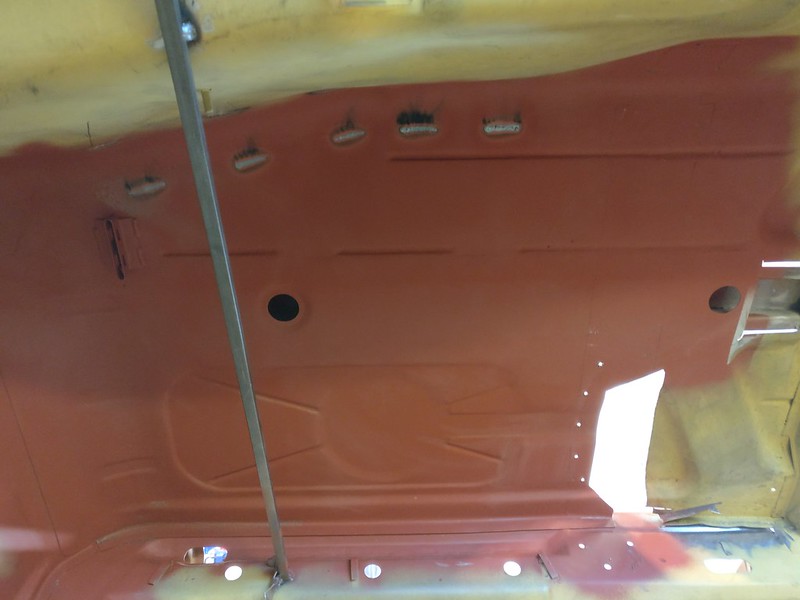
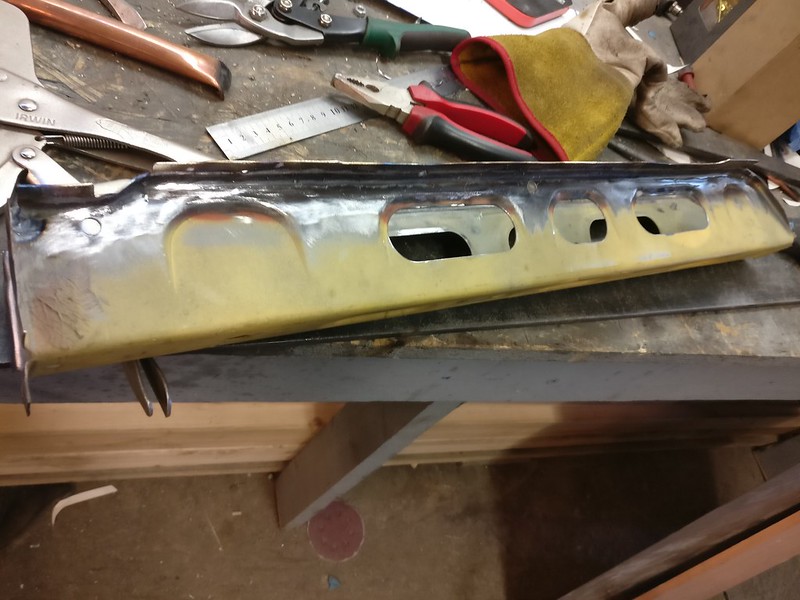
Front flange of the seat beam was rotten and got replaced
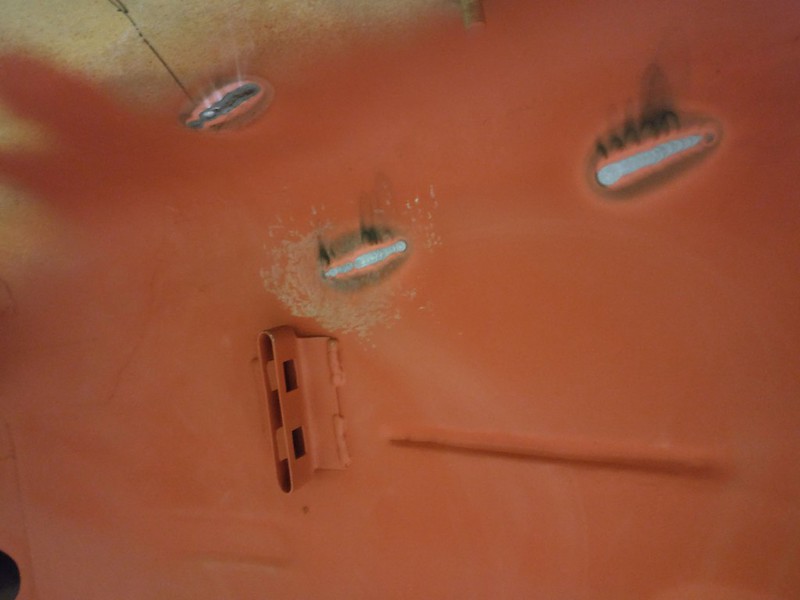
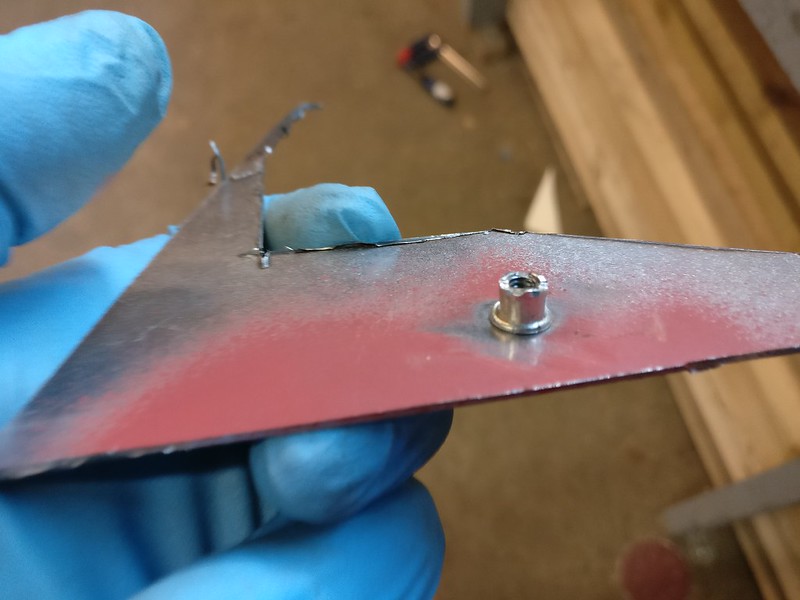
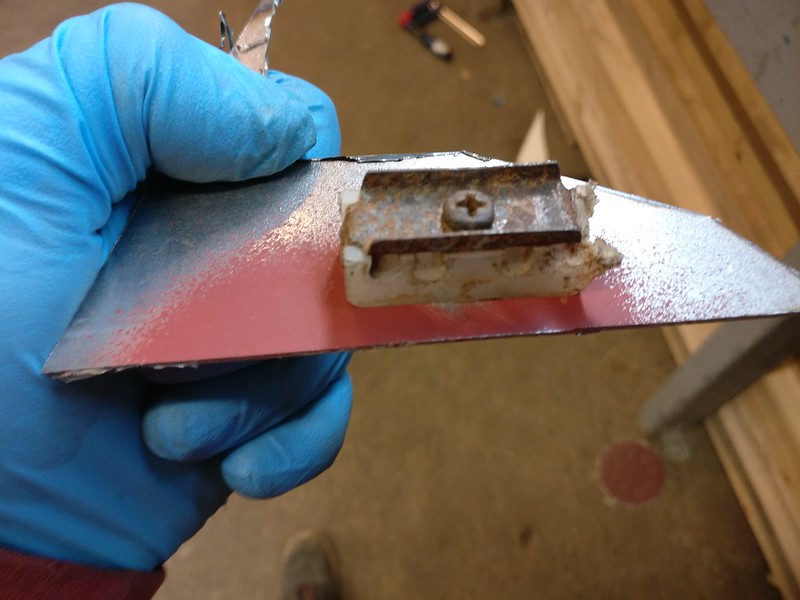
I am going to use these rivet nuts to mount brake and fuel line clips. I also tried welding them on the panel which would really give OEM look but it wasn’t easy and I don’t think it’s worth the effort. Don’t mind the damage on the rivet nut. Back then, I didn’t have correct tool yet and used some bolts, nuts and bench vise to install it.
Wrapped up the work on rear valance - some hammering on weld line and a coat of primer

Added new edge to the floor repair panel. I decided to join the firewall and floor pieces off the car to make it a bit easier. Also added some extra sheet metal to the rear of the panel (and lost the focus on my camera in the process).


This piece should fill a substantial part of that hole.

Cleaned and prepped the frame rail

Sprayed some 1K epoxy primer I had lying around on the inside and weld-through primer on the flanges of frame rail. Same was done on the other side earlier.

After a lot of frustrating hours it was finally in. Replaced a large portion of metal where the panel covers frame rail. It had ton of extra metal there and it was oil canning. I was hoping I could push it against the frame rail and make the plug welds but the metal just bulged up next to the welds. Also, you can see that the large rounded rectangle of that panel is too wide and sits too close to the frame rail so fuel and brake lines won’t both fit there any more. I’ll probably route one set of lines over that rectangle unless I come up with something better.


Front flange of the seat beam was rotten and got replaced

I am going to use these rivet nuts to mount brake and fuel line clips. I also tried welding them on the panel which would really give OEM look but it wasn’t easy and I don’t think it’s worth the effort. Don’t mind the damage on the rivet nut. Back then, I didn’t have correct tool yet and used some bolts, nuts and bench vise to install it.


-
Bonsaibacker
- Posts: 967
- Joined: Oct 26, 2017 3:36 PM
- Location: Fleming Island FL
Re: Another restoration - 83' 528i
Most (99%- dare I say 99.9%) of us will never get this deep into the chassis. Incredible work. Thank you for documenting! Looking forward to the progress and how you approach the trim, driveline and electronics. Should keep us entertained for a while!
Re: Another restoration - 83' 528i
Not so long ago I was pretty sure I’ll never do any body/chassis work. Then this project came along, and it turns out to be a really enjoyable although time-consuming activity.Bonsaibacker wrote: Sep 13, 2020 8:32 AM Most (99%- dare I say 99.9%) of us will never get this deep into the chassis.
Early August 2020
It was time to get all the floorboards finished. After some examination I realized that there’s no need to completely remove the rear seat beam on driver’s side. End of the frame rail was in pristine condition and I could access other rusty areas without removing it.
Front beam back in place and a few patches made
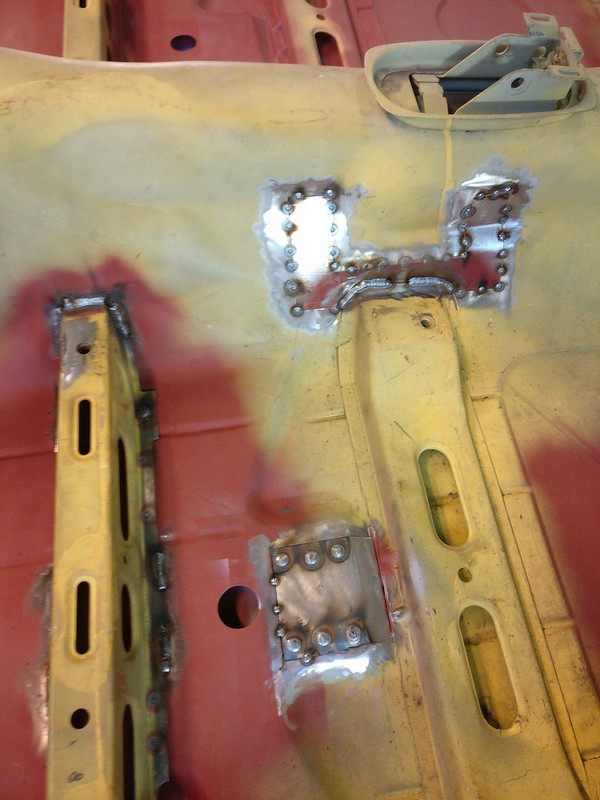
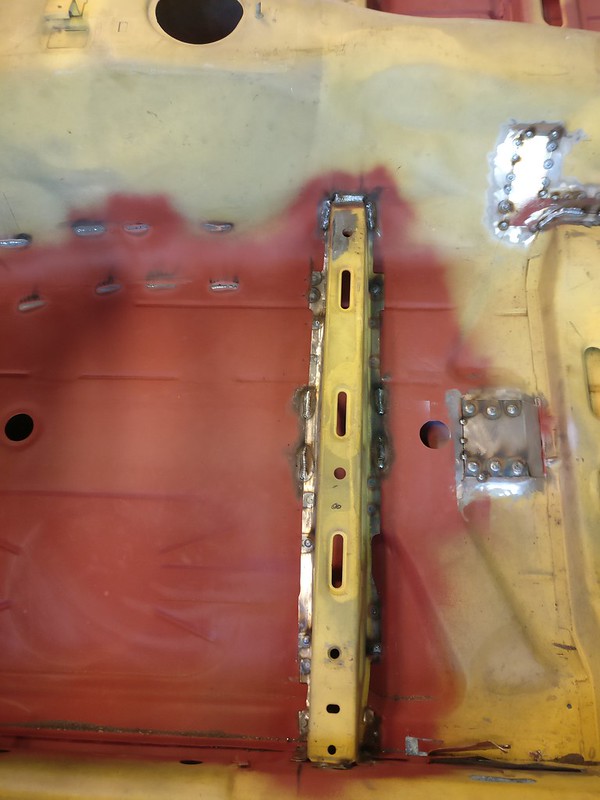
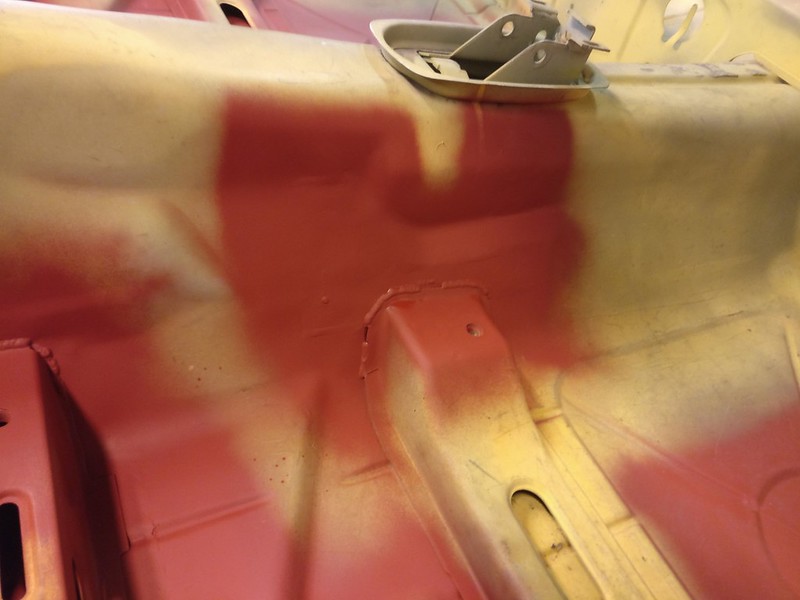
A buddy gave me the idea to join this patch where the beam is. There are two shorter seam welds instead of one long weld from the factory. A small victory - almost OEM look without the need to grind the weld down.
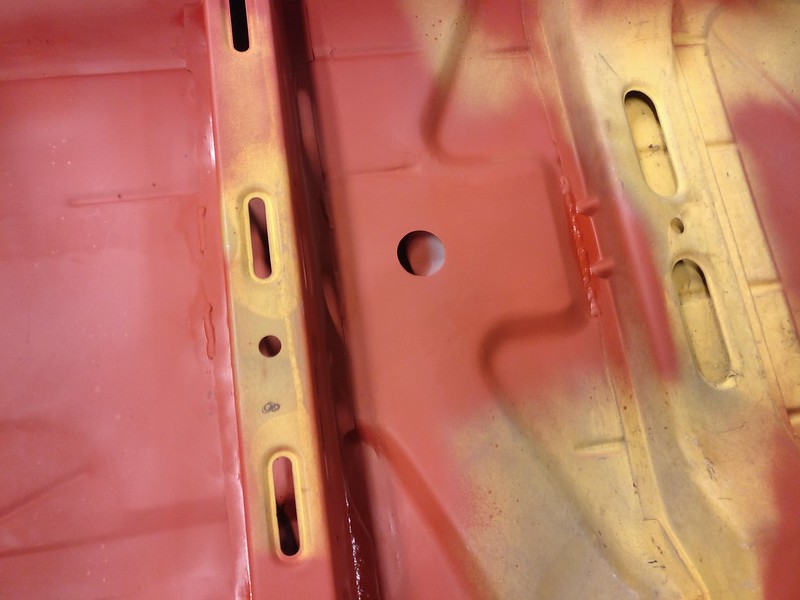
And on with the final piece of floor board and rear section of inner sill to fill this hole.
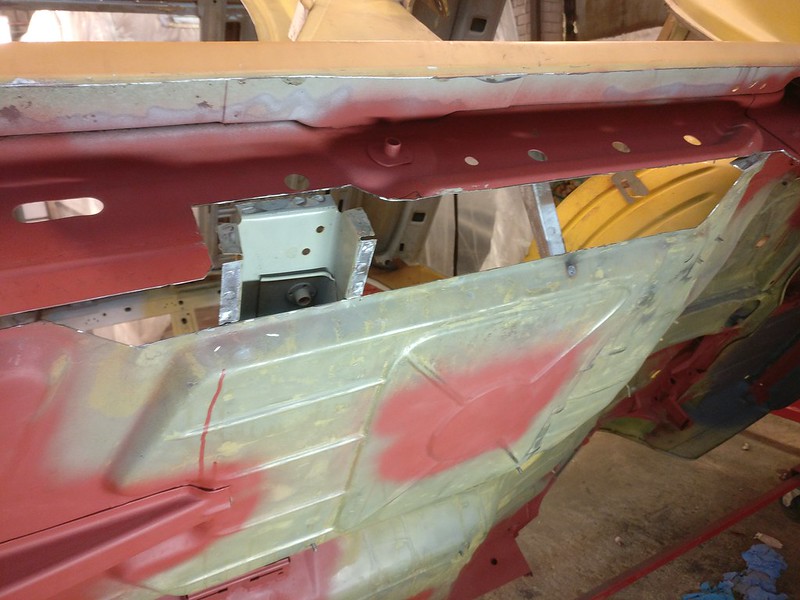
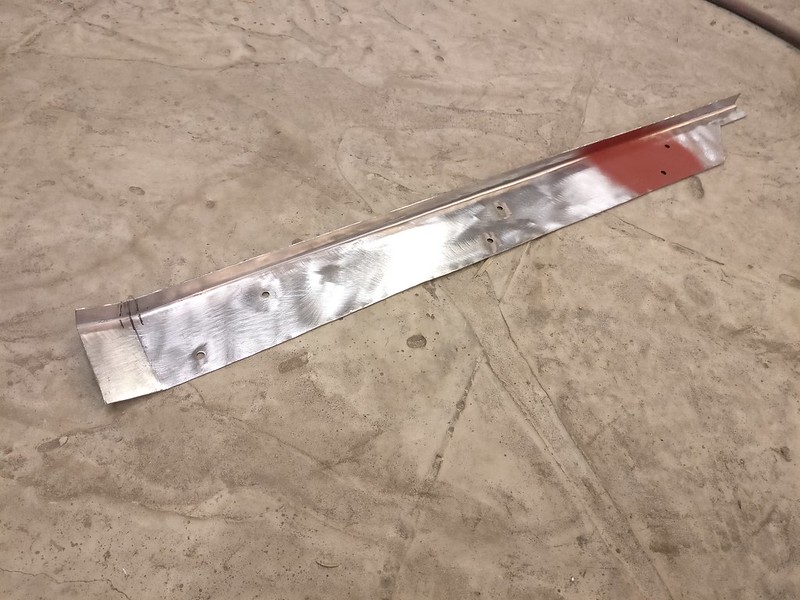
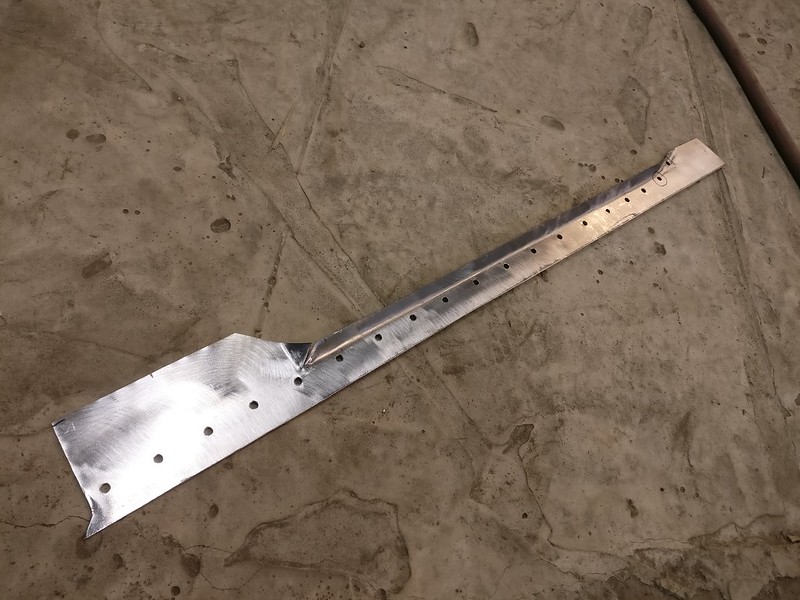
Decided to put the sill patch in first to have better access to the weld from the inside
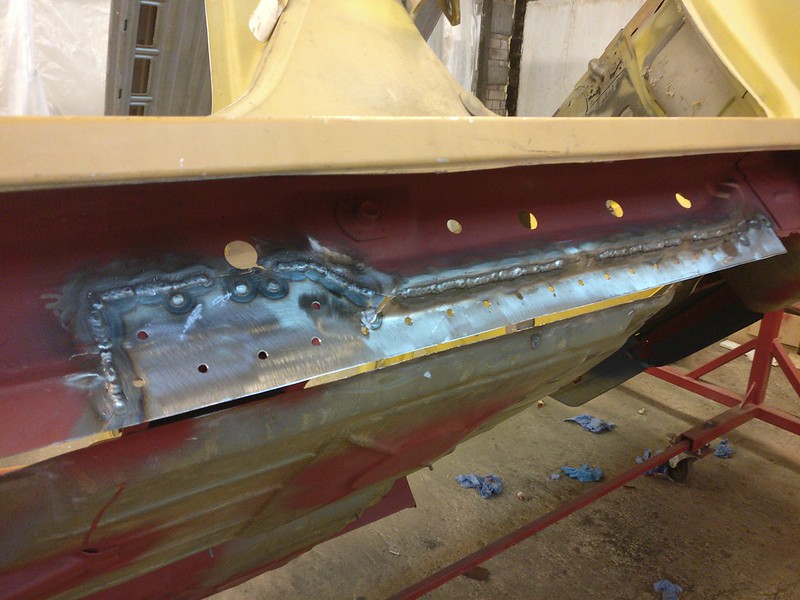
Followed by the floor patch
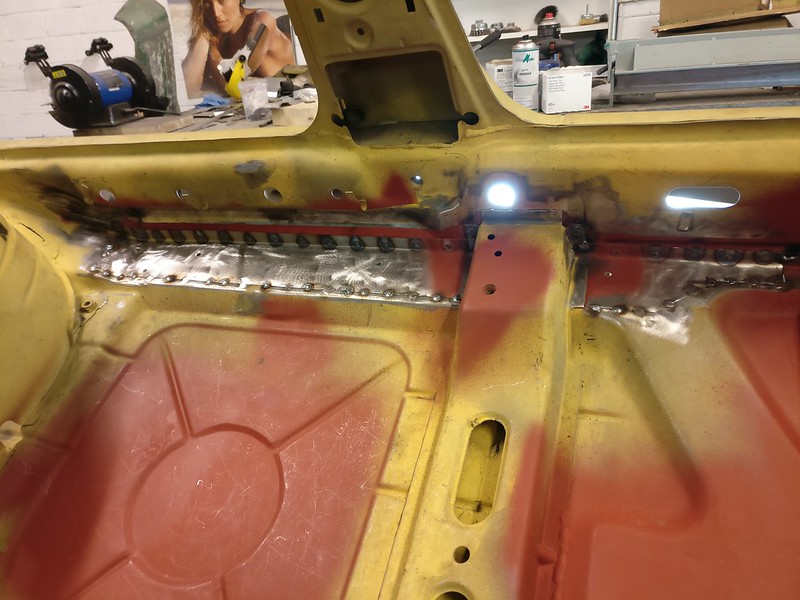
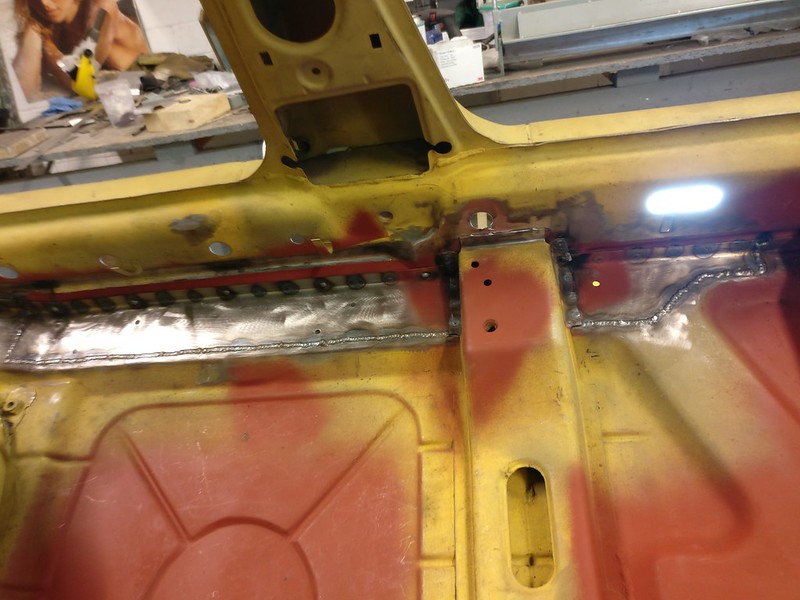
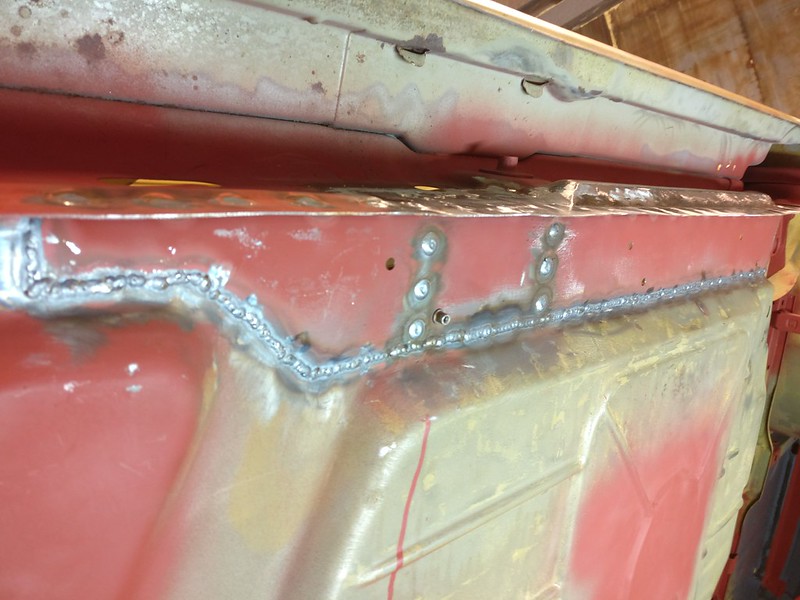
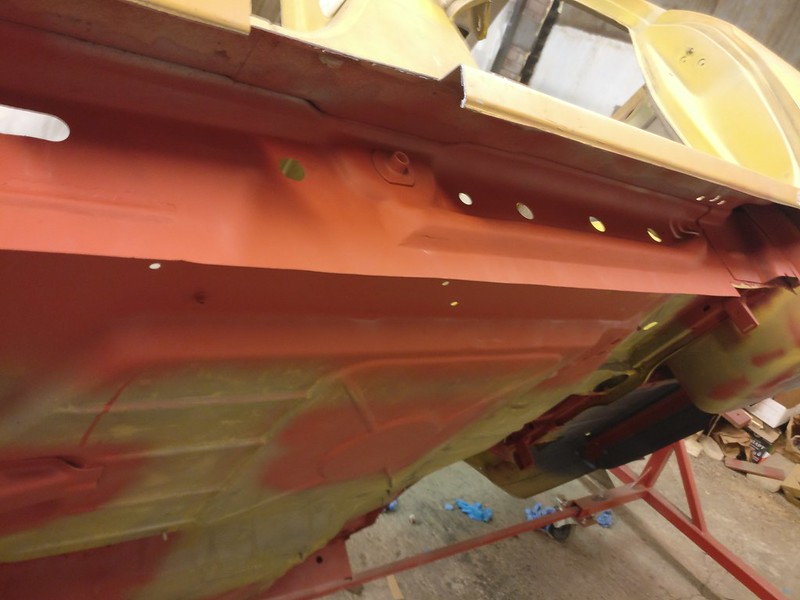
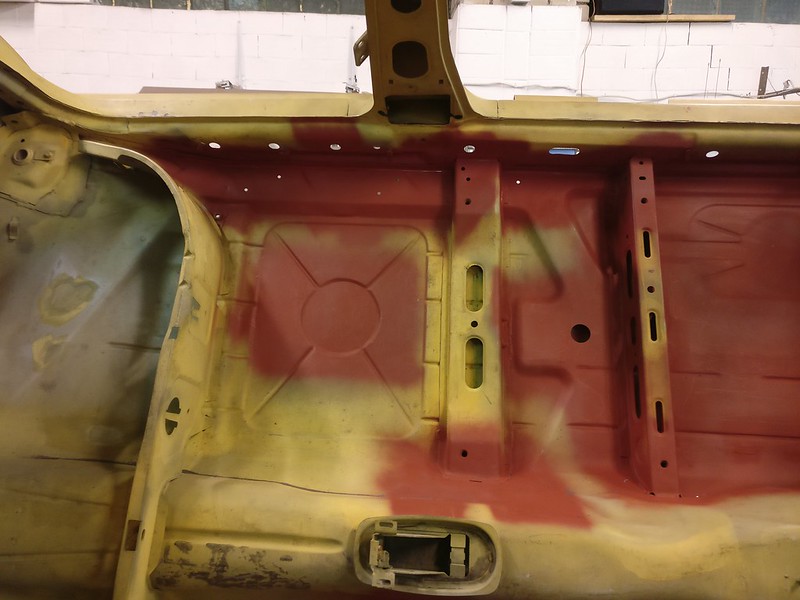
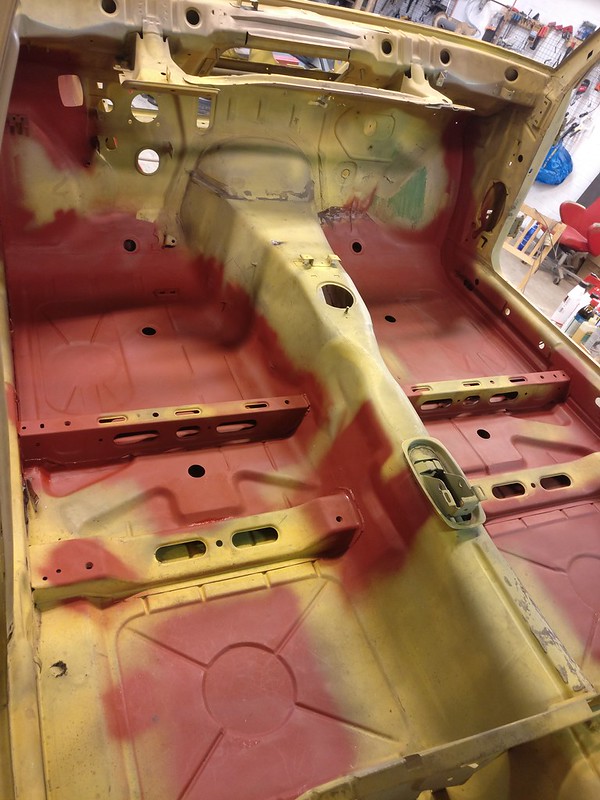
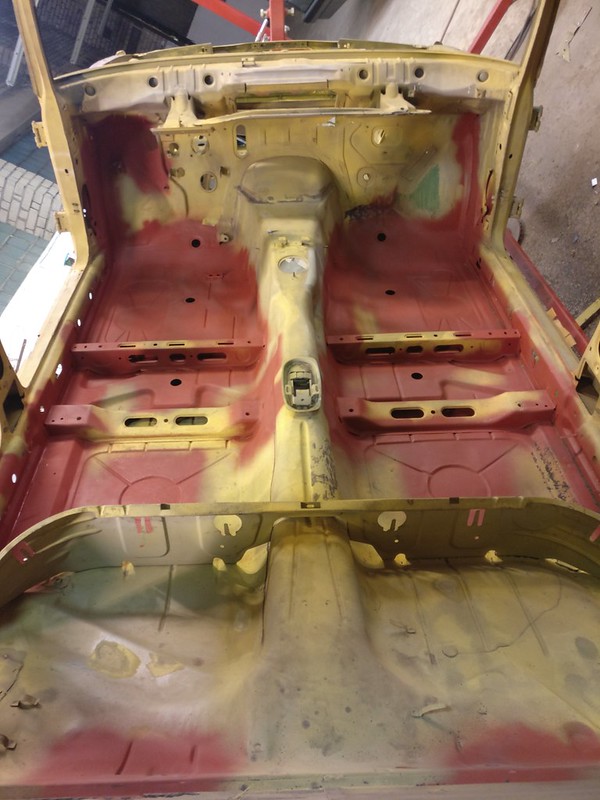
And a picture of the whole cabin to sum it up. Floorboards are done (with an exception of a few holes for rivet nuts and some other attachments).
Re: Another restoration - 83' 528i
Incredible work, thanks for posting. If you plan to install AC in the future, it is the perfect timing to drill a hole for the evaporator. It is a bit complicated, when you have the tranny in place. Don’t ask how I know this...
Re: Another restoration - 83' 528i
Curious about something: Are you making any "improvements" as you go? E.g. beefing up known weak spots like the sway bar mounts?
Re: Another restoration - 83' 528i
And the B-Pillar to roof joints.cek wrote: Sep 14, 2020 5:51 PM Curious about something: Are you making any "improvements" as you go? E.g. beefing up known weak spots like the sway bar mounts?
Re: Another restoration - 83' 528i
I wasn't aware cracking sway bar mounts is a thing.cek wrote: Sep 14, 2020 5:51 PM Curious about something: Are you making any "improvements" as you go? E.g. beefing up known weak spots like the sway bar mounts?
Did a quick search and it seems people were using M5 mounts for fronts but those are NLA now. Any other preferred method to reinforce those? Is it the slot for the tab that usually gives in?
I have old style mounts in the rear. Should be able to fabricate something for these if that's recommended.
According to the bushings I have ordered my sway bars should be 17mm front and 15.5mm rear but I can remeasure to be sure. I have no plans to upgrade the sway bars in the near future but you'll never know and it would be nice to eliminate any possible issues now.
I have read about that but I wasn't able to find any pictures of the issue online. On my chassis those joints look good. Or maybe I am looking in the wrong place. Do you happen to have any photos of such cracks? I can take a few of mine in the upcoming days if anyone bothers to mark up the problematic spot.
Are there any other weak points I should be aware of? Steering box mount, rear subframe and clutch pedal bracket are in the agenda. Anything else chassis related?
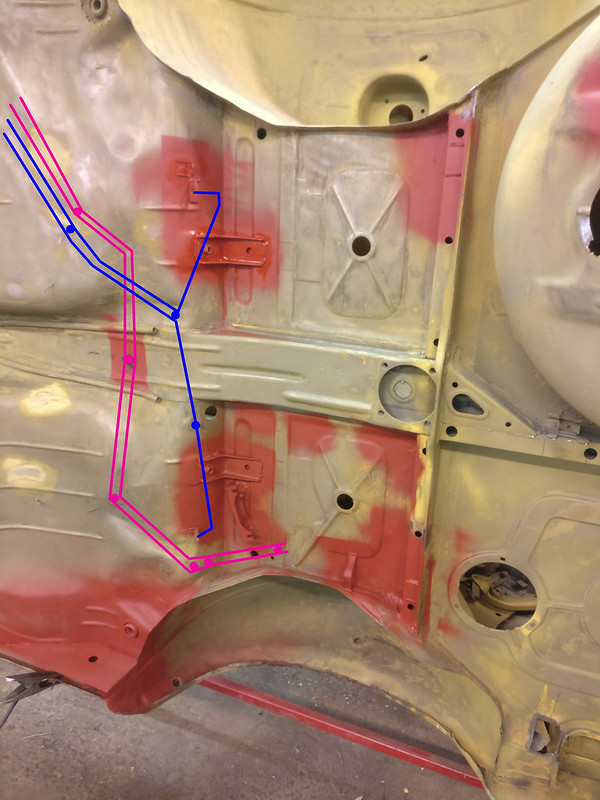
And since the Q&A rounds began, is this how the brake and fuel lines are routed in the rear? Blue for brake lines, pink for fuel lines and dots mark the mount points.
While I probably don't respond to every comment, know that I really appreciate your feedback. Thanks!
Re: Another restoration - 83' 528i
It is very much a thing especially the rear mounts when larger bars are installed.taavipa wrote: Sep 15, 2020 4:39 AM I wasn't aware cracking sway bar mounts is a thing.
Did a quick search and it seems people were using M5 mounts for fronts but those are NLA now. Any other preferred method to reinforce those? Is it the slot for the tab that usually gives in?
I have old style mounts in the rear. Should be able to fabricate something for these if that's recommended.
According to the bushings I have ordered my sway bars should be 17mm front and 15.5mm rear but I can remeasure to be sure. I have no plans to upgrade the sway bars in the near future but you'll never know and it would be nice to eliminate any possible issues now.
There is guy here that starting fabricating new BMW M5 style 25/19mm mounts:
viewtopic.php?p=1480778#p1480778
I am not sure about using smaller bars with these (maybe with an oversized bushing?).
The larger bars do offer a noticeable handling improvement but do introduce increased stress on the known weak mounting method from BMW. There is no other method than welding the fronts on. For the rears you can box frame the factory mounts and do a full weld to the chassis; it is the best way.
I have no photos (nor have seen any yet) but it was discussed in this thread recently, which is why it came to mind:taavipa wrote: Sep 15, 2020 4:39 AM I have read about that but I wasn't able to find any pictures of the issue online. On my chassis those joints look good. Or maybe I am looking in the wrong place. Do you happen to have any photos of such cracks? I can take a few of mine in the upcoming days if anyone bothers to mark up the problematic spot.
viewtopic.php?f=3&t=153387&p=1481140&hi ... r#p1481140
With all the work you're doing and you're evident welding skills, it would be easy enough to do a close exam of those joints and look very closely. It seems to me you could do some added plates over them just to be safe. With all the rot you have on the rockers, I would pay close attention to the bottoms of those B-Pillars as well. This joint is a main stress and transfer point on an E28 frame.
I have been admiring your work as you are a skilled bodyman with welding prowess I can only aspire to, but, and don't take this the wrong way, wouldn't it have been easier to start with a better shell? The level of body rot on this one seems excessive and the amount of time and energy you're expending just to return it to baseline is equally as excessive. Did you consider stopping and finding one better at any point? I have to imagine that even importing a solid US shell would have been both quicker and cheaper in the long run than all the work you're pouring into this one. Again, I mean no disrespect as you're a great craftsman and wish you were close to me so I could avail of your skills for my own projects. I don't think I am alone in that I would have considered this body a loss once the extent of rot was discovered.
Interested in your thoughts on this now that you are into this far.
Re: Another restoration - 83' 528i
These mounts do look really nice!vinceg101 wrote: Sep 15, 2020 12:29 PM It is very much a thing especially the rear mounts when larger bars are installed.
There is guy here that starting fabricating new BMW M5 style 25/19mm mounts:
viewtopic.php?p=1480778#p1480778
I am not sure about using smaller bars with these (maybe with an oversized bushing?).
The larger bars do offer a noticeable handling improvement but do introduce increased stress on the known weak mounting method from BMW. There is no other method than welding the fronts on. For the rears you can box frame the factory mounts and do a full weld to the chassis; it is the best way.
Currently, overall plan is to get the car back on the road without exceeding the budget too much and then work on improvements and things that are (relatively) easy to access. Sway bar mounts seem to go into the you-better-do-it-now category. On the other hand, sway bars themselves don't. I now have something to think over.
I will go over the joints again and in the meantime let's hope somebody will post a picture in that thread. Bottoms of the B-pillars are fortunately in good condition, thanks for the tip.vinceg101 wrote: Sep 15, 2020 12:29 PM I have no photos (nor have seen any yet) but it was discussed in this thread recently, which is why it came to mind:
viewtopic.php?f=3&t=153387&p=1481140&hi ... r#p1481140
With all the work you're doing and you're evident welding skills, it would be easy enough to do a close exam of those joints and look very closely. It seems to me you could do some added plates over them just to be safe. With all the rot you have on the rockers, I would pay close attention to the bottoms of those B-Pillars as well. This joint is a main stress and transfer point on an E28 frame.
I was expecting this question to pop up sooner or later and I believe it deserves a thorough answer.vinceg101 wrote: Sep 15, 2020 12:29 PM I have been admiring your work as you are a skilled bodyman with welding prowess I can only aspire to, but, and don't take this the wrong way, wouldn't it have been easier to start with a better shell? The level of body rot on this one seems excessive and the amount of time and energy you're expending just to return it to baseline is equally as excessive. Did you consider stopping and finding one better at any point? I have to imagine that even importing a solid US shell would have been both quicker and cheaper in the long run than all the work you're pouring into this one. Again, I mean no disrespect as you're a great craftsman and wish you were close to me so I could avail of your skills for my own projects. I don't think I am alone in that I would have considered this body a loss once the extent of rot was discovered.
Interested in your thoughts on this now that you are into this far.
It definitely would have been easier to find a better shell. And if your main goal is to get a nice car that is exactly what you should do, no arguing there.
Now, I wanted to try my hand at sheet metal work and for that purpose maybe an older/rarer car would be a better fit. But I also really wanted an E28 so (at least to me) it makes sense. I've been doing chassis work on that car for a little bit more than a year now (more intensly from the beginning of 2020) and I haven't felt overwhelmed or bored yet. If something feels too difficult at the moment I can just put it aside and come back to it later with more experience and new ideas I have gathered in the meantime. Seeing it all coming together just makes me want to put even more work into it.
While bodywork is extremely time consuming it doesn't cost much if you do the work yourself (OEM panels would be an exception here). I do consider this time well spent and I am enjoying the process.
A whole other story is finding a good chassis in this country (I'll leave imports for later). I have kept my eyes on local car sales portals and forums/FB pages after buying this car. The prices of E28s are through the roofs, people are asking thousands of euros for cars that could very well be in worse state than mine. I actually joined my friend to check on few of those, nothing good. The price tags on more decent vehicles (at least based on photos) are usually closer to 10k. And they do not pop up often.
I should have got an E28 maybe five years earlier. I wasn't actively following the scene back then but I am quite sure the same thing happened with the E28s (and E30s) that's going on with E36s and E34s at the moment. There's quite a large group of people (mostly young lads) that buy those to trash them during winter months. If the car doesn't end up bent around a tree or with a blown engine it might survive for another season. Otherwise it gets dismantled for parts. And often even quite decent cars go down that way as it's an easy way to make a buck. To be honest, it is getting hard to find a decent E36 or E34.
I have stumbled on some old ads dating back to 2010 and earlier where E28s with near perfect chassis were torn apart and sold for parts. It's a sad sight.
Importing a car could be an option. But I am afraid the situation is not that much better in neighboring countries. Getting it from someplace further away is quite an adventure by itself. Unless you pay someone to bring you the car you have only seen on pictures. I know a guy who did just that and got an E28 imported from Sweden a few years back. Can't say it was in any better shape than mine. Only way I would import a car without actually seeing it is if there's someone I trust to examine it for me.
Re: Another restoration - 83' 528i
@taavipa, I love your attitude and am grateful that you are sharing your experience with us. Please carry on!
Re: Another restoration - 83' 528i
You are more or less correct in the general routing. I just scoured through my files and found these photos from Rear End Rebuild from 2014. I don't have specific final photos of the brake lines, but you get to see some of them in these photos:taavipa wrote: Sep 15, 2020 4:39 AM And since the Q&A rounds began, is this how the brake and fuel lines are routed in the rear? Blue for brake lines, pink for fuel lines and dots mark the mount points.
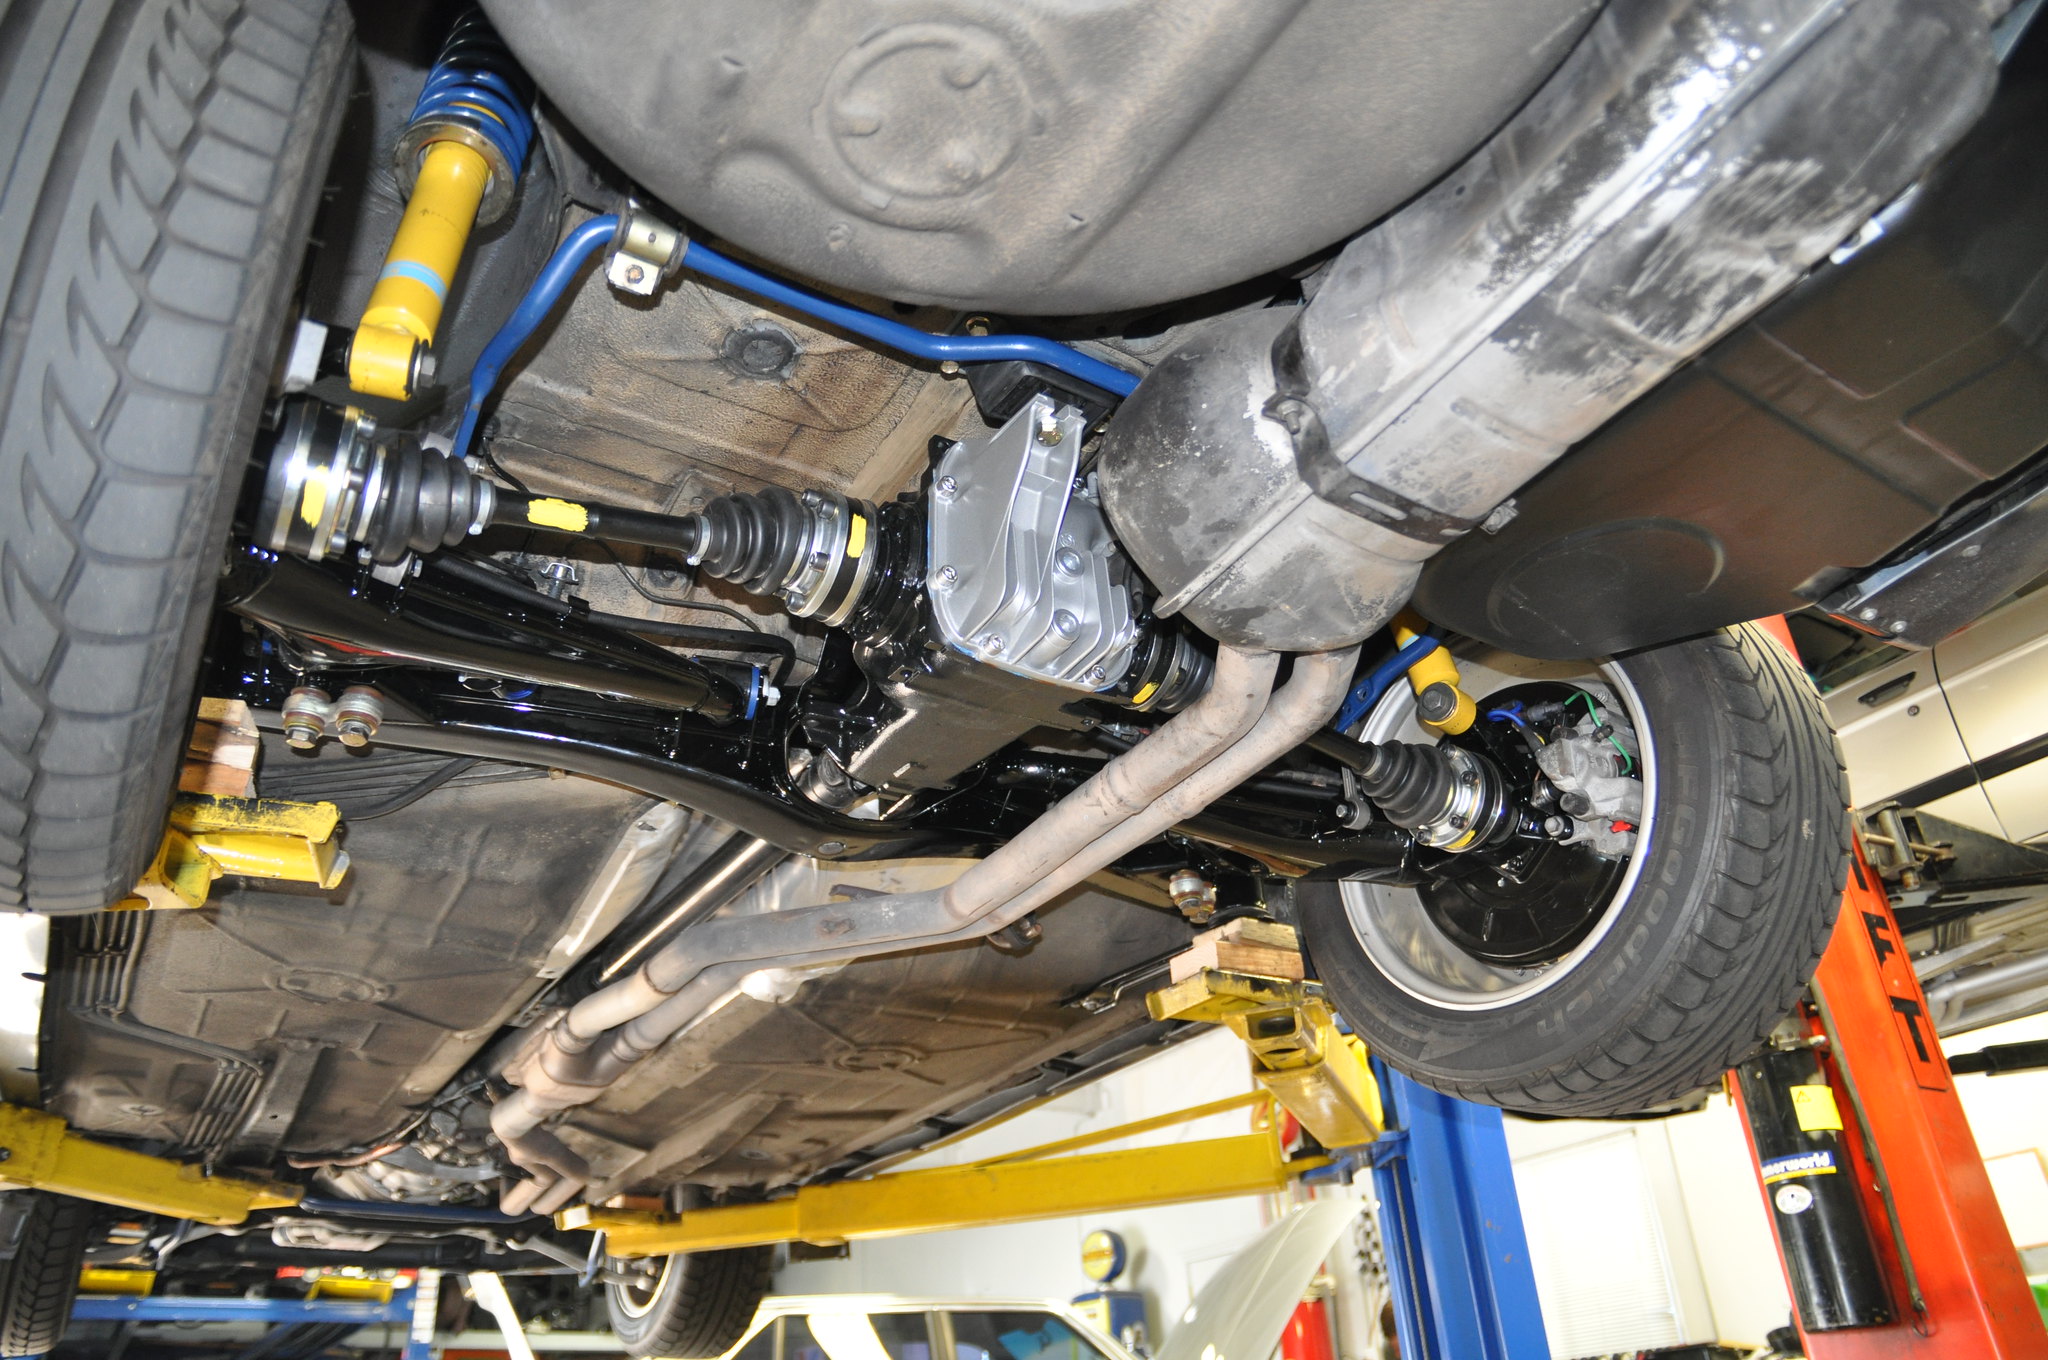
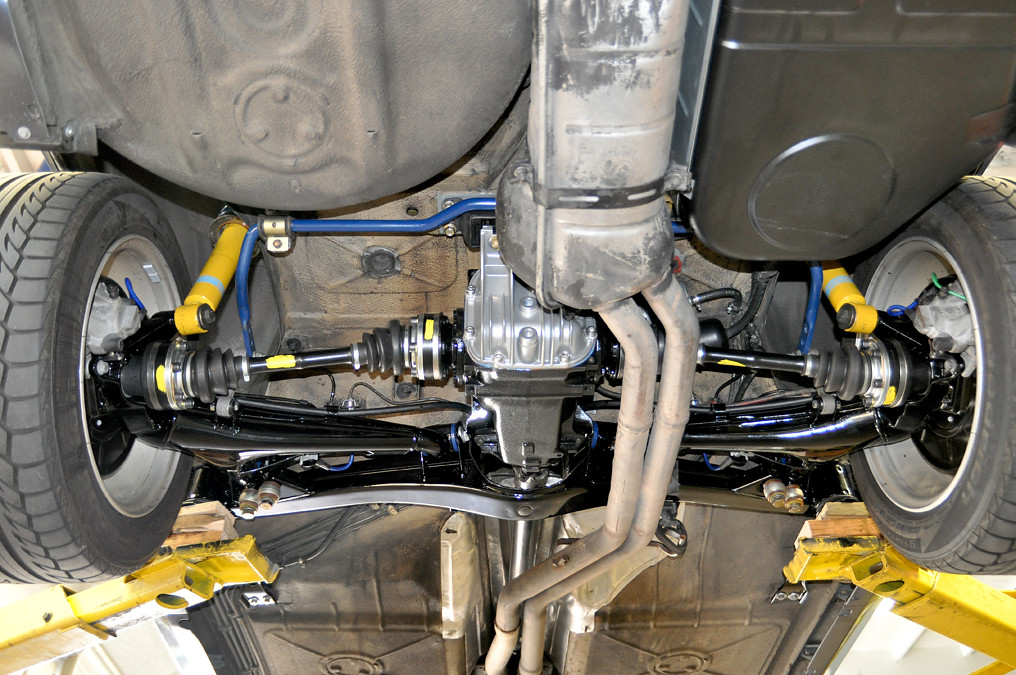
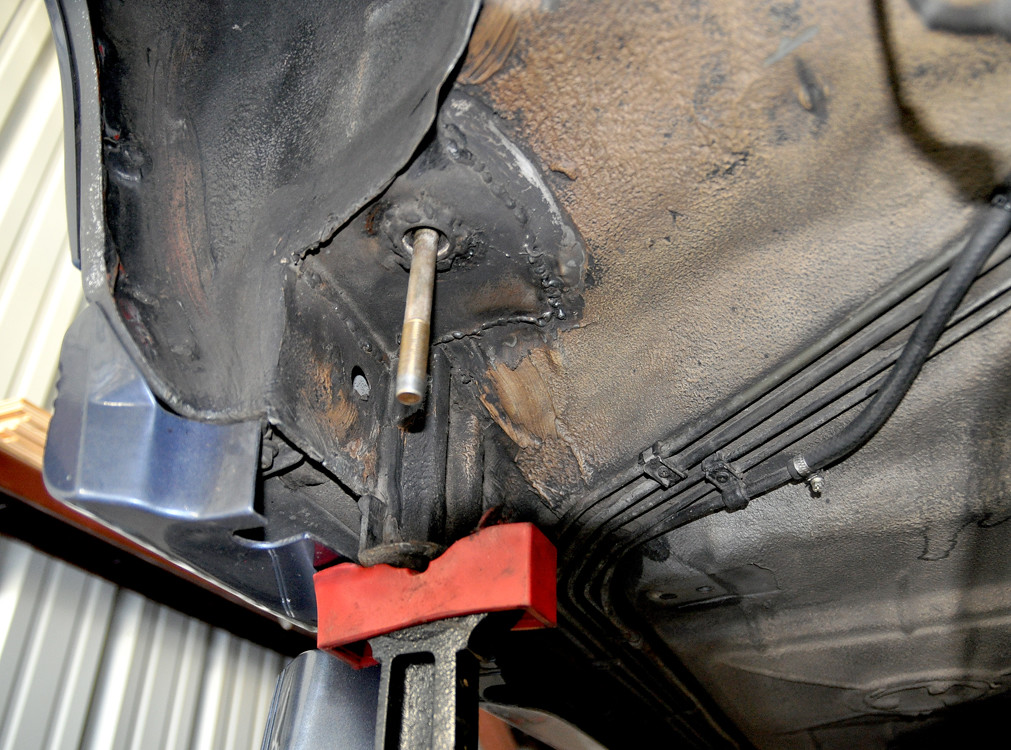
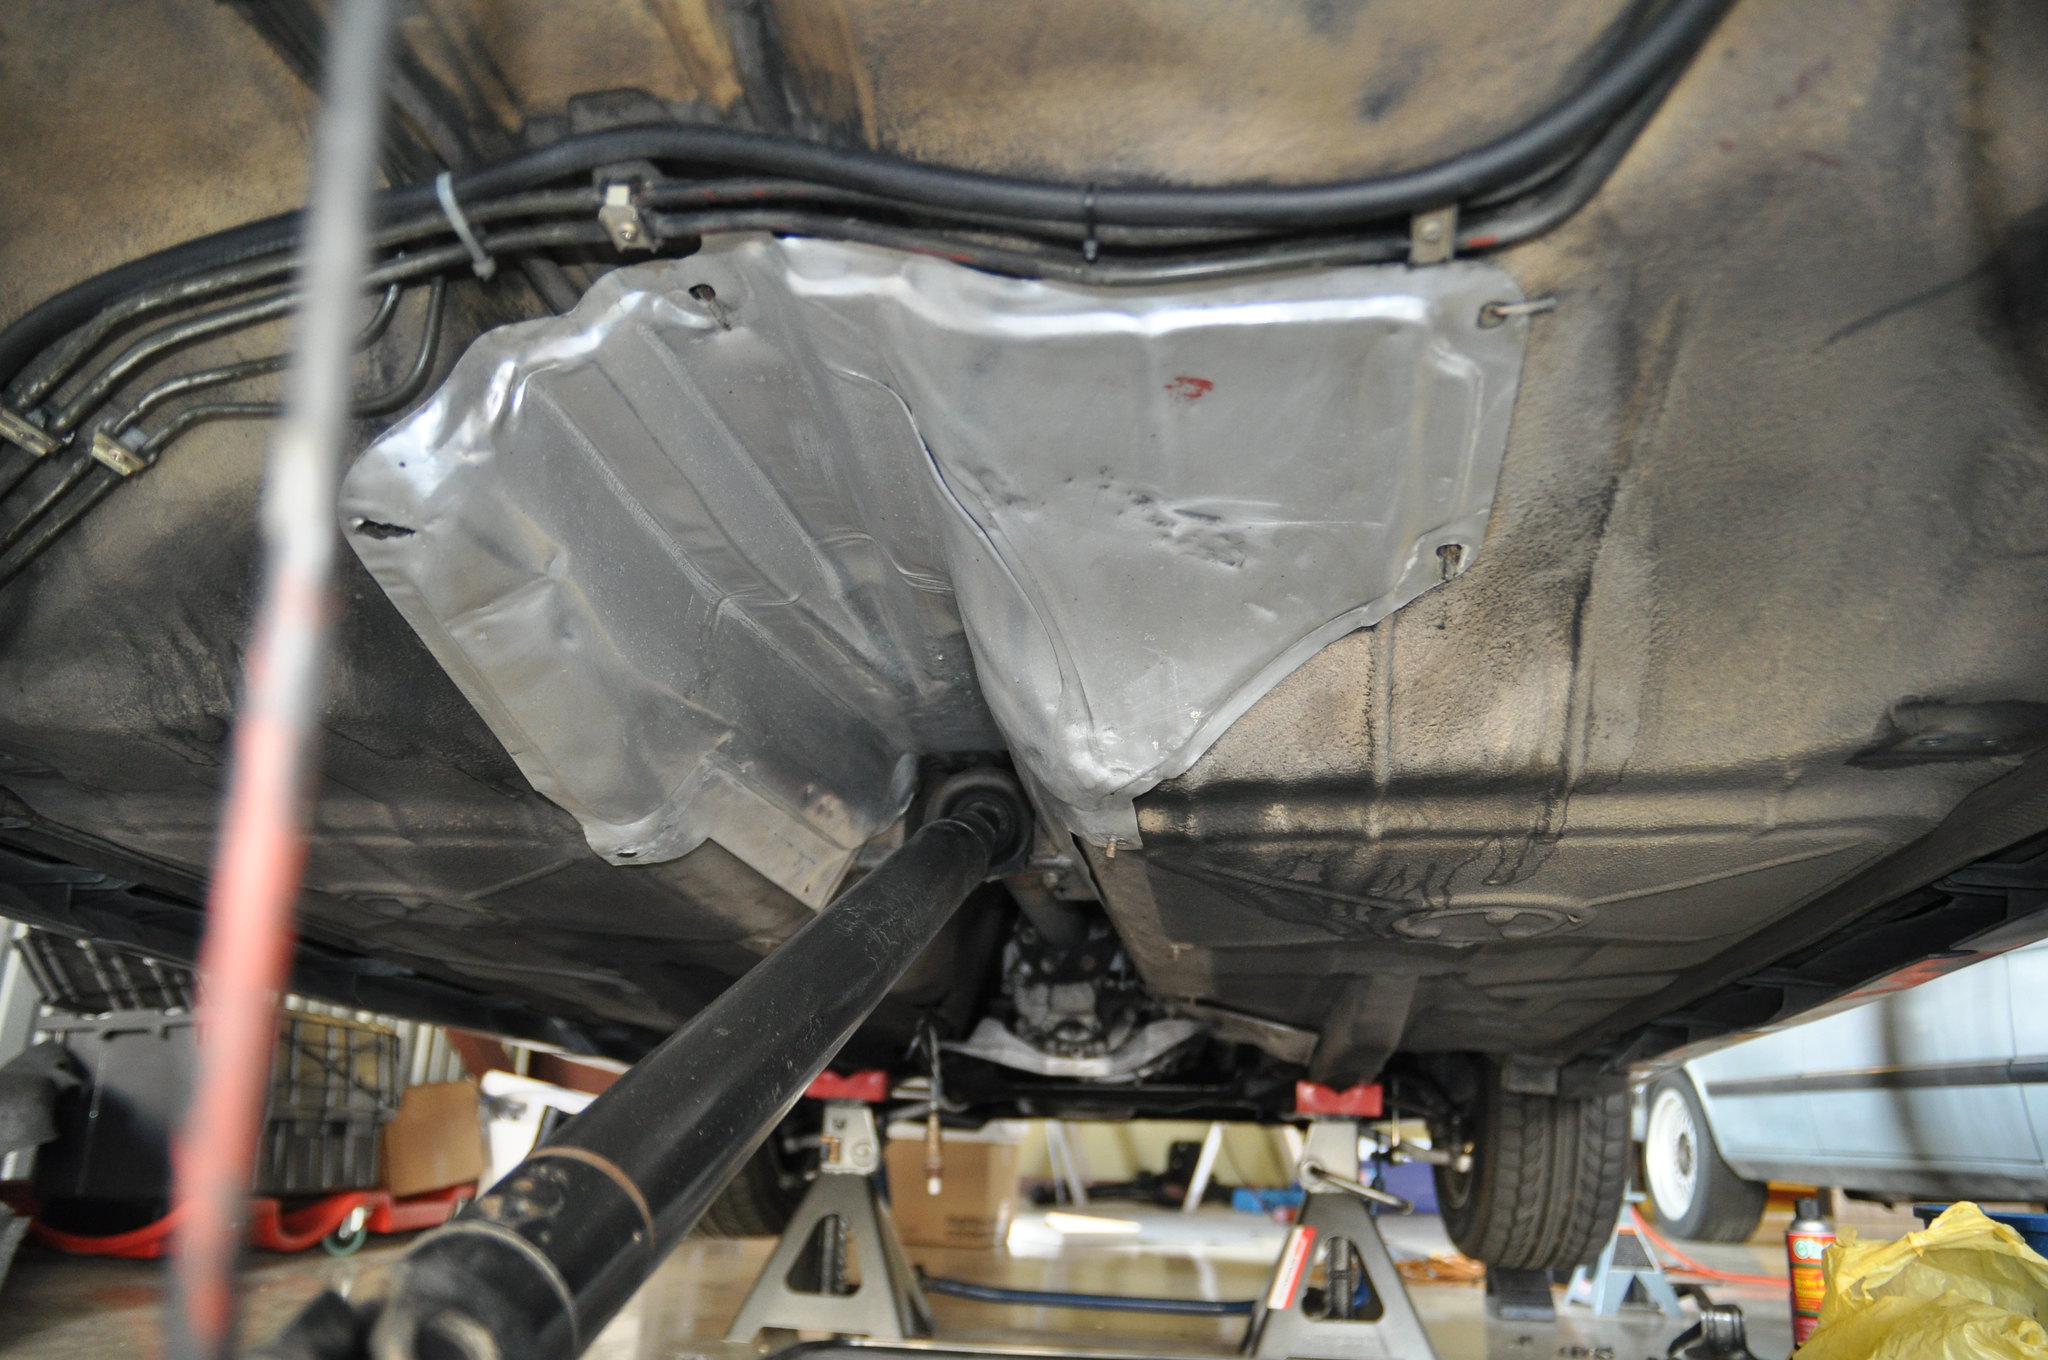
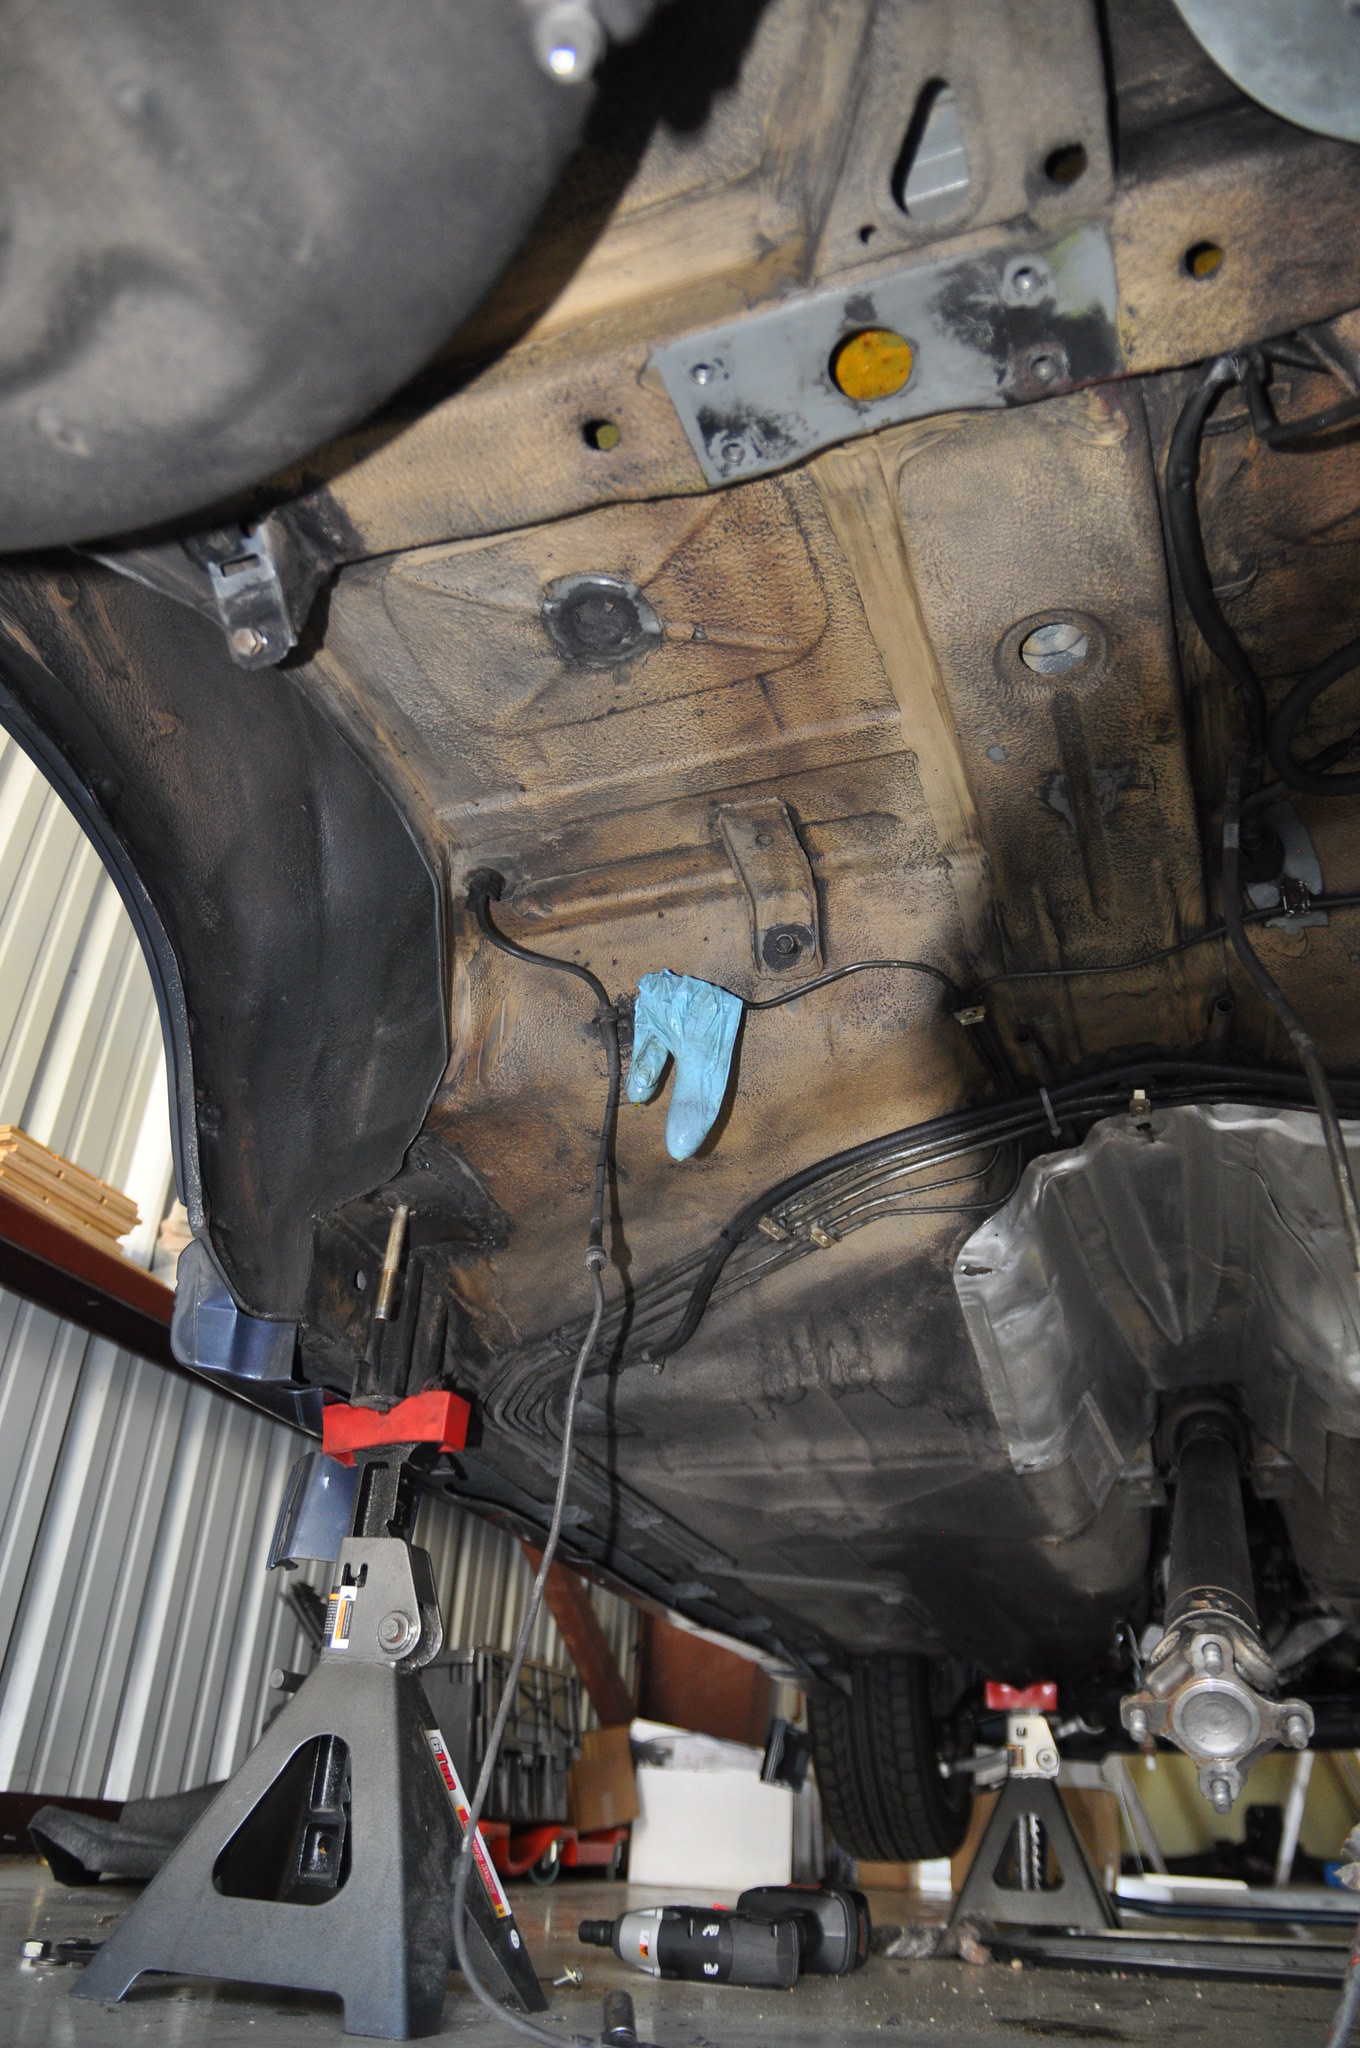
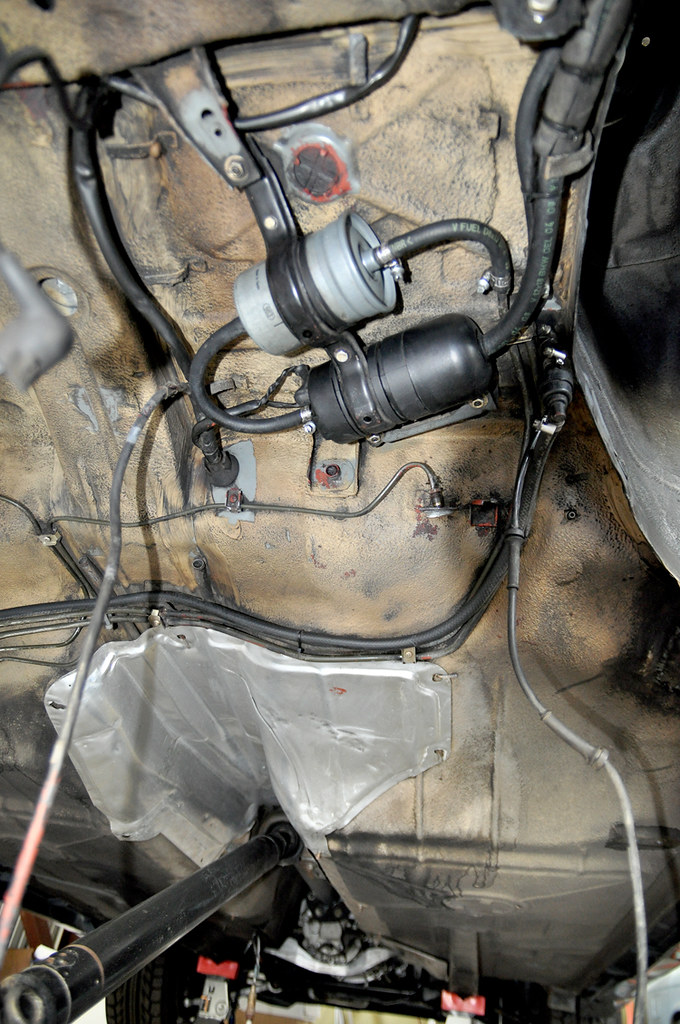
In the second to last photo you can see the reinforced boxed Rear Sway Bar mount they did when the previous owner installed the Dinan sway bars. You can also see what other body welding repairs happened to this car from previous body rot: notice the re-welded Rear Sub Frame mounts.
Re: Another restoration - 83' 528i
I couldn't agree more. Thanks for the thoughtful response and your reasoning; clear concise logic like this is rare these days.cek wrote: Sep 15, 2020 4:26 PM @taavipa, I love your attitude and am grateful that you are sharing your experience with us. Please carry on!
In for the updates.
Re: Another restoration - 83' 528i
@vinceg101 and @cek, those pictures are exactly what I needed, thanks guys!
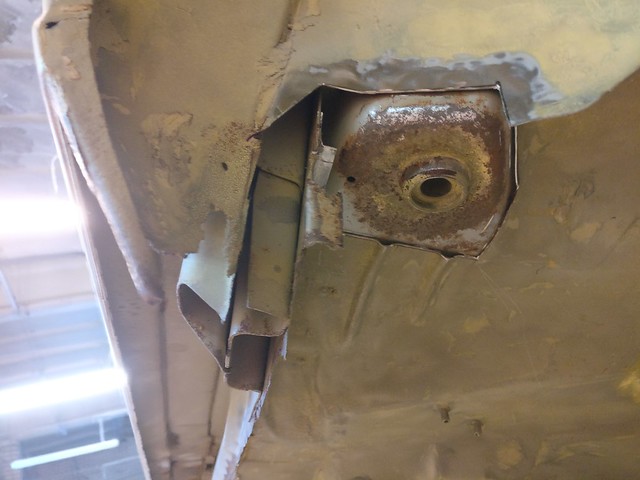
My conclusion at the time was that any condensate should be able to escape through the slot between mount and bottom panel.
I have once done the mistake to clog some drain holes on a car with sound insulation panels so now I am really careful with such things.
In addition, I didn't see any evidence that the bottom layer of sheet metal was actually attached to the mount from the factory.
Just to share some great content and to elaborate some more on the subject of finding a good chassis to begin with.
Possibly some of you might already be familiar with his work but check out this thread on retro-rides forum: https://forum.retro-rides.org/thread/11 ... 28-m5-blue
While this car was showing some dangerous signs, it could pass as a half-decent chassis in my opinion. Especially, in an online ad. If you bother to scroll through the whole thread, you can see how many rust issues the car actually had. Of course, I wouldn't dare to compare saving an M5 to saving an 528i.
Other than that, this guy does wonderful work using just basic tools and hands out a lot of useful tips. I have learned a great deal following his threads on that forum (he has one about an E12 M535i and a few others).
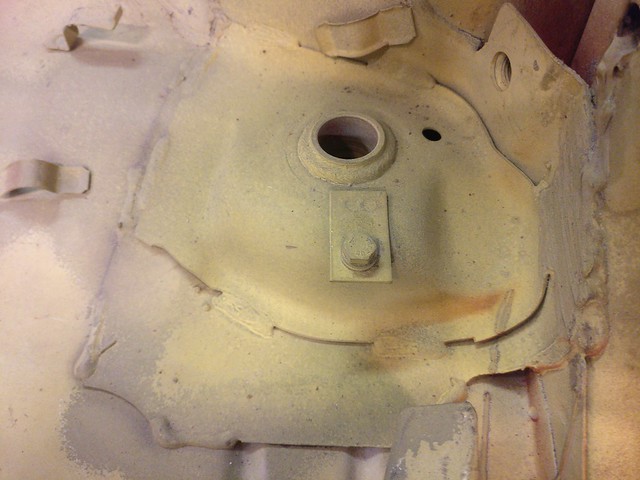
This is how I intended to weld them at first. But when I cut away the rotten bottom layer I discovered a drain hole (at least I think it's a drain hole) in the next layer. Take a look at that photo

My conclusion at the time was that any condensate should be able to escape through the slot between mount and bottom panel.
I have once done the mistake to clog some drain holes on a car with sound insulation panels so now I am really careful with such things.
In addition, I didn't see any evidence that the bottom layer of sheet metal was actually attached to the mount from the factory.
Just to share some great content and to elaborate some more on the subject of finding a good chassis to begin with.
Possibly some of you might already be familiar with his work but check out this thread on retro-rides forum: https://forum.retro-rides.org/thread/11 ... 28-m5-blue
While this car was showing some dangerous signs, it could pass as a half-decent chassis in my opinion. Especially, in an online ad. If you bother to scroll through the whole thread, you can see how many rust issues the car actually had. Of course, I wouldn't dare to compare saving an M5 to saving an 528i.
Other than that, this guy does wonderful work using just basic tools and hands out a lot of useful tips. I have learned a great deal following his threads on that forum (he has one about an E12 M535i and a few others).
Re: Another restoration - 83' 528i
My take is that is not a drain hole, however I'm not sure what it would be. It would be located in the cabin, specifically in the rear seat well and kind of in the back corner against the wheel well bulkhead. I do not recall any hole in either of my cars back there nor underneath either car. Even if water were to accumulate in the rear seat well, there are holes in the vertical wall that would release water onto the rear seat floor (and then to the drains in the floor pan).taavipa wrote: Sep 16, 2020 6:00 AM This is how I intended to weld them at first. But when I cut away the rotten bottom layer I discovered a drain hole (at least I think it's a drain hole) in the next layer.
My conclusion at the time was that any condensate should be able to escape through the slot between mount and bottom panel.
I have once done the mistake to clog some drain holes on a car with sound insulation panels so now I am really careful with such things.
In addition, I didn't see any evidence that the bottom layer of sheet metal was actually attached to the mount from the factory.
Don't worry about it is my opinion.
Re: Another restoration - 83' 528i
You must be right. I took a look at the mount from cabin side today and the top layer has another hole in it. I can't see how this could possibly function as a drain. So I'll probably weld the floor panel to the mount and use the holes to spray some cavity wax between the layers after the car is painted.vinceg101 wrote: Sep 16, 2020 11:37 AM My take is that is not a drain hole, however I'm not sure what it would be. It would be located in the cabin, specifically in the rear seat well and kind of in the back corner against the wheel well bulkhead. I do not recall any hole in either of my cars back there nor underneath either car. Even if water were to accumulate in the rear seat well, there are holes in the vertical wall that would release water onto the rear seat floor (and then to the drains in the floor pan).
Don't worry about it is my opinion.
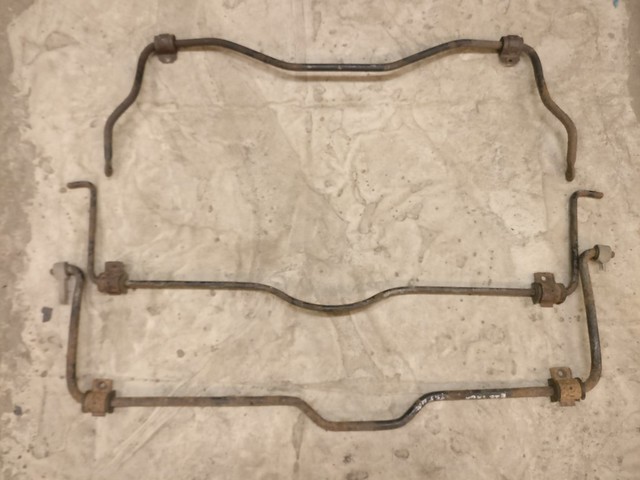
But damn sway bars and their mounts.
I was going through the photos posted yesterday when I realized that the newer rear mounts face the opposite direction compared to the old ones. So I visited realoem and go figure - new and old rear sway bars do also differ. And of course the 15.5mm rear sway bar I have sourced goes with the new mounts. I do have another rear sway bar but that one measures only 12mm. The thickest older sway bar I could find on realoem was 14mm.
Furthermore, turns out my front sway bar is also a skinny one - 16mm with a thick coat of paint.
Interestingly enough, realoem lists some front sway bars "up to 09/83". I don't recall any changes in front axle throughout the production years that could possibly need a sway bar in different shape. Or have I missed something?
You can spot the differences on that photo. Newer sway bar has longer arms and the bend is off center to clear the newer diff mount.
So my options for the rear, as I see it, would be:
- Reinforce the older mounts I currently have. This way I could run my humble 16/12mm setup until I could source a 14mm rear bar and whatever I see fit for the front. I looked around online and it seems to me all aftermarket options are made keeping the newer cars in mind. Some were listed for 82 and up but I suspect that they actually won't work with older mounts. Only way to get something thicker than 14mm would be a custom-order.
- Fabricate some custom rear mounts. OEMs are NLA. And actually the cross-beam they attach to also differs from older cars. My buddy's 86 sits right next to mine so I can crawl under it and take all the measurements I need. Only question that remains is: would the newer sway bar clear my old style diff mount? This would allow me to use my 15.5mm sway bar now and in the future I'd have plenty to choose from.
Re: Another restoration - 83' 528i
Could possibly be a locating hole for a pin in the production line assembly jig, allowing that piece to drop on the pin and to easily align before welding.vinceg101 wrote: Sep 16, 2020 11:37 AM My take is that is not a drain hole, however I'm not sure what it would be. It would be located in the cabin, specifically in the rear seat well and kind of in the back corner against the wheel well bulkhead. I do not recall any hole in either of my cars back there nor underneath either car. Even if water were to accumulate in the rear seat well, there are holes in the vertical wall that would release water onto the rear seat floor (and then to the drains in the floor pan).
Don't worry about it is my opinion.
Re: Another restoration - 83' 528i
Mid-August 2020
Next up was passenger side rocker panel.
Lucky for me I have a buddy who’s in sheet metal fabrication and car restoration business. He’s currently restoring an alloy body Alfa Romeo 6C from the 30s and he’s done a few e-type Jags and other cars in the past. He was happy to help me out with the rockers. His experience was more than welcome and while you probably could do the rockers alone, I find it’s actually more of a two man job to fit them.
I first removed the remnants of old side sill so I could do a clean up before my friend came over. I didn’t realize back then that it would actually be a good idea to fit the doors before removing old sills as it would make adjusting them easier. But to be honest, I did this later on the driver’s side and since my old rockers were anything but straight (partly because I had abused them when fixing inner sills) this wasn’t that helpful.
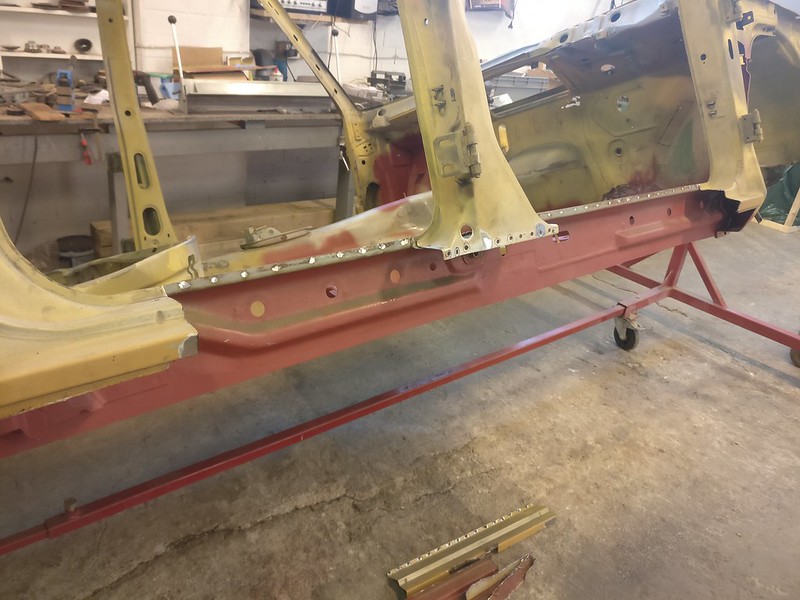
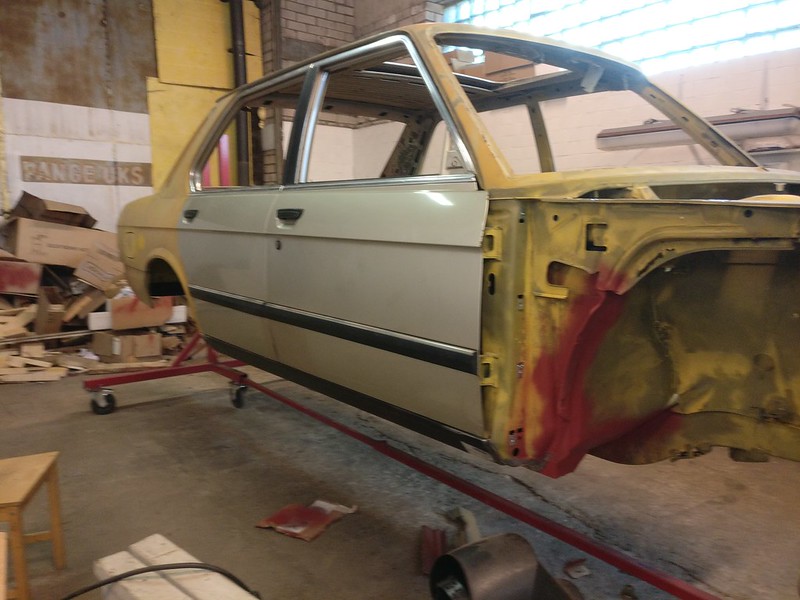
After many long hours of adjusting the doors we were content with how they sat. The idea of installing the doors if car is already painted scares me. One small wrong movement and you have nicked you fresh paintjob.
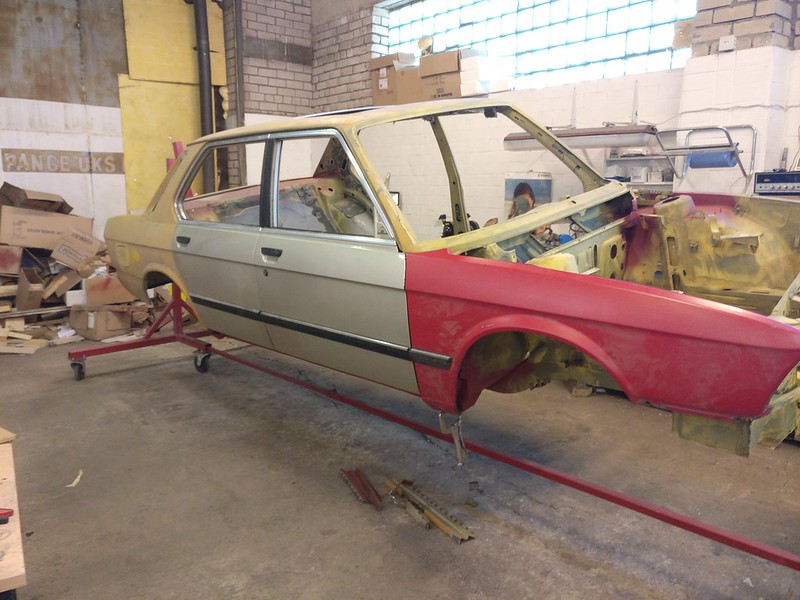
Those repro sills were quite awful to fit. The depression for B-pillar was off by 5-6mm. Angles of some bends were off. The step in front where the sill panel gets covered by front wing was crooked. The depression or hole in the B-pillar area that should accommodate the front lower corner of rear door when you open it was completely missing.
The front joint line was chosen so that no weld would be on the bottom of the sill where it would disrupt water getting to the drains. Unfortunately, rear weld line had to cross the outer face of the sill. The joint of rear wheel arch and side sill is brazed together from the factory so you can’t weld it there.
Anyway, we got the new sill fitted and tacked in place
Next task was to remove the doors and do all the welding
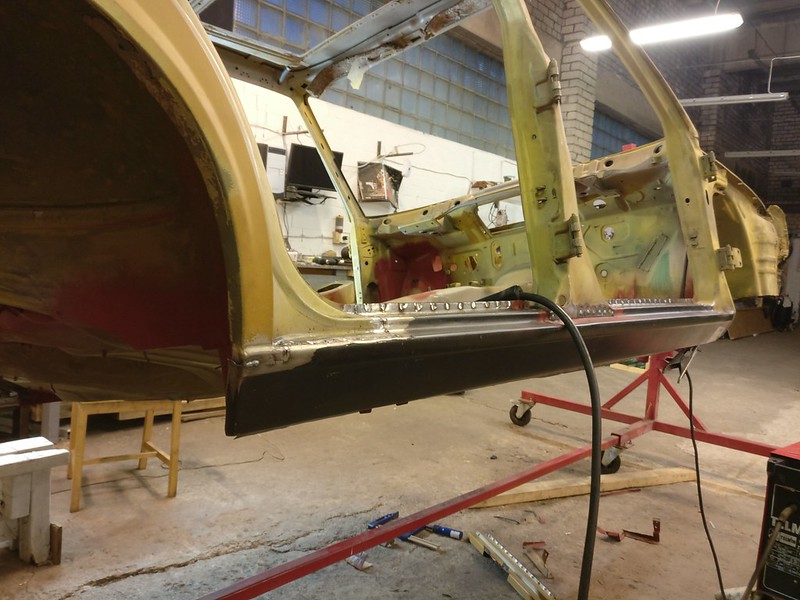
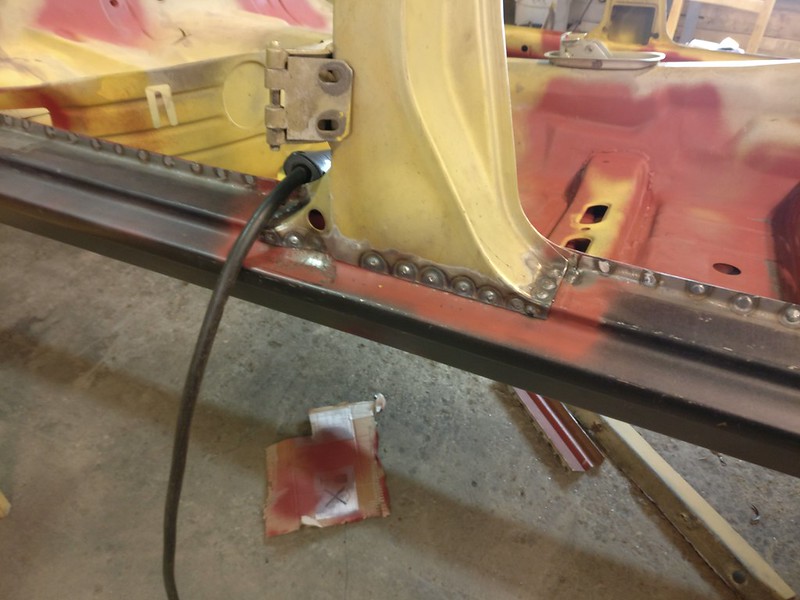
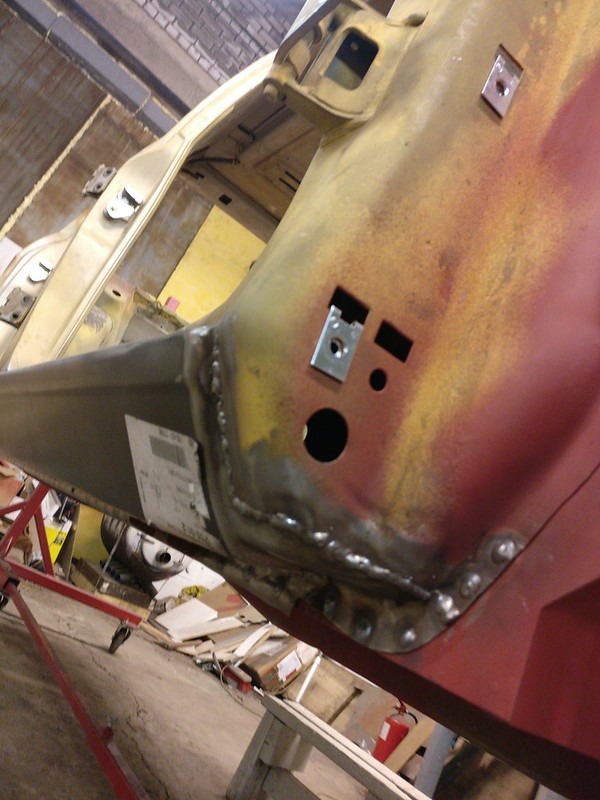
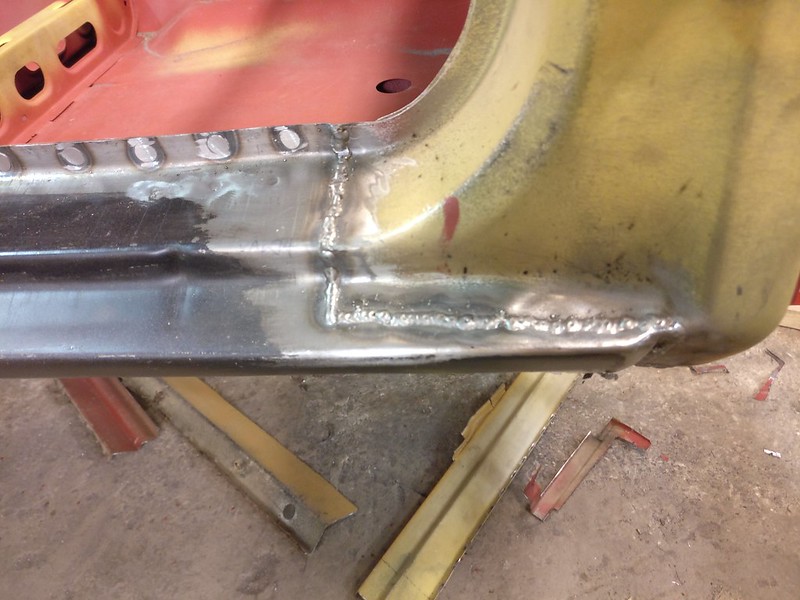
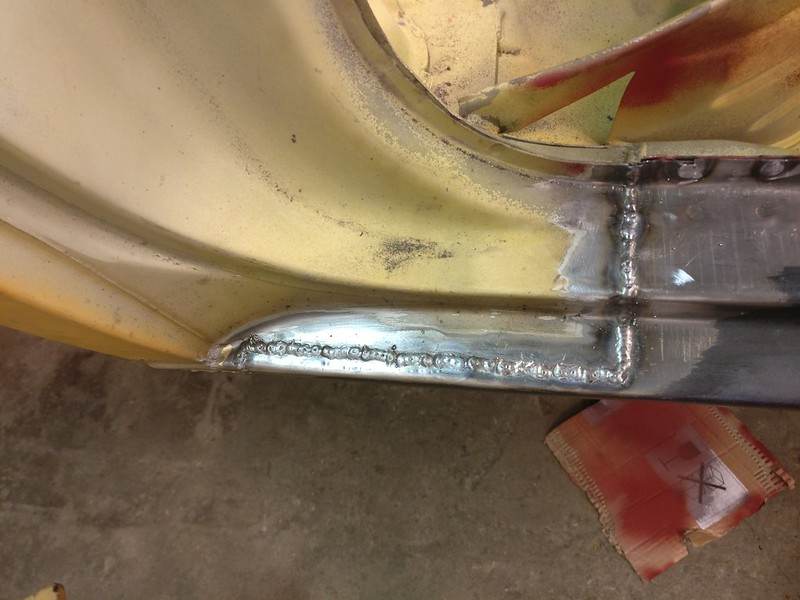
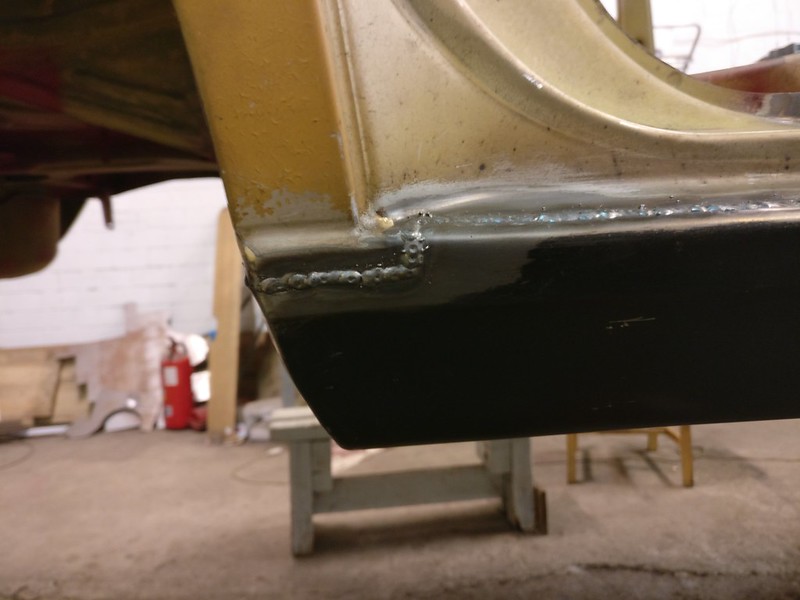
Then some grinding and primer later we had this
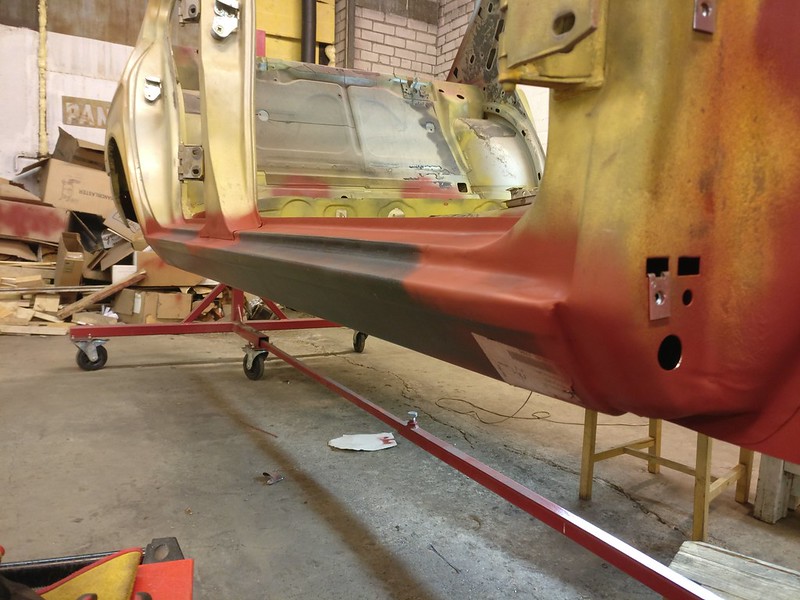
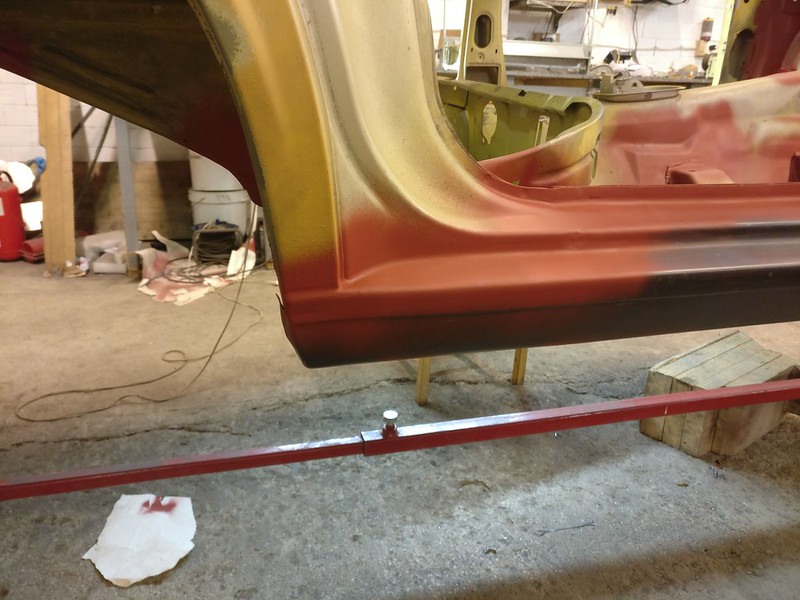
I guess some warpage is inevitable when welding the sills like that, especially with no access to the inside to stretch the metal back out.
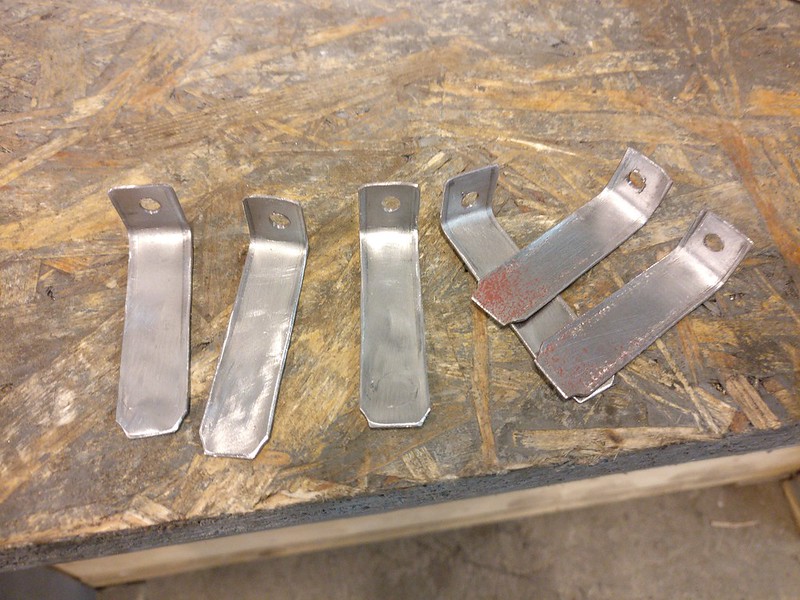
Also made some new wiring harness clips
And installed them
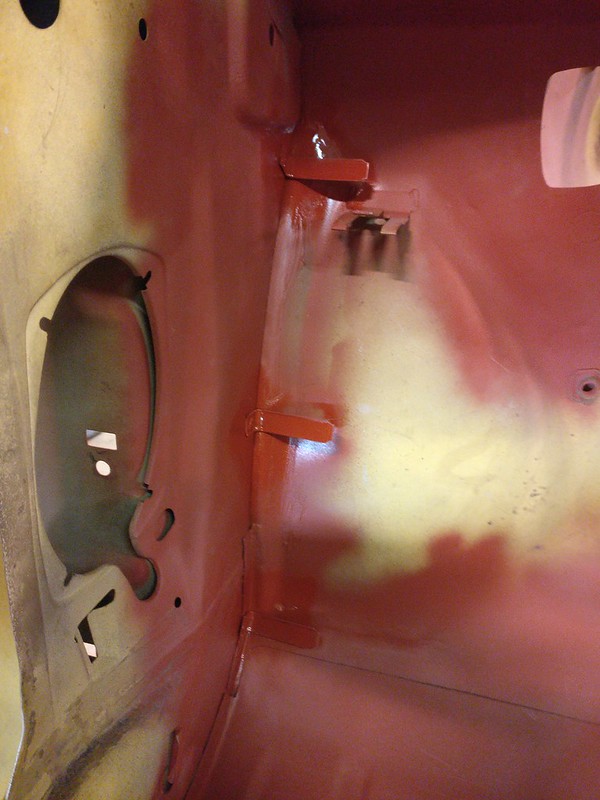
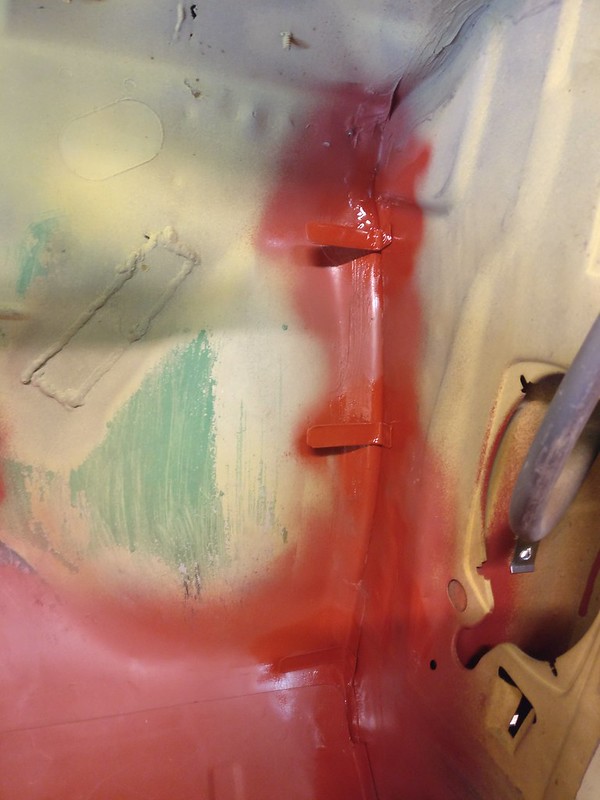
I think the passenger's side had only two of those clips from the factory (top and bottom). But I see no harm in adding an additional clip there.
Next up was passenger side rocker panel.
Lucky for me I have a buddy who’s in sheet metal fabrication and car restoration business. He’s currently restoring an alloy body Alfa Romeo 6C from the 30s and he’s done a few e-type Jags and other cars in the past. He was happy to help me out with the rockers. His experience was more than welcome and while you probably could do the rockers alone, I find it’s actually more of a two man job to fit them.
I first removed the remnants of old side sill so I could do a clean up before my friend came over. I didn’t realize back then that it would actually be a good idea to fit the doors before removing old sills as it would make adjusting them easier. But to be honest, I did this later on the driver’s side and since my old rockers were anything but straight (partly because I had abused them when fixing inner sills) this wasn’t that helpful.

After many long hours of adjusting the doors we were content with how they sat. The idea of installing the doors if car is already painted scares me. One small wrong movement and you have nicked you fresh paintjob.

Those repro sills were quite awful to fit. The depression for B-pillar was off by 5-6mm. Angles of some bends were off. The step in front where the sill panel gets covered by front wing was crooked. The depression or hole in the B-pillar area that should accommodate the front lower corner of rear door when you open it was completely missing.
The front joint line was chosen so that no weld would be on the bottom of the sill where it would disrupt water getting to the drains. Unfortunately, rear weld line had to cross the outer face of the sill. The joint of rear wheel arch and side sill is brazed together from the factory so you can’t weld it there.
Anyway, we got the new sill fitted and tacked in place

Next task was to remove the doors and do all the welding


Then some grinding and primer later we had this

I guess some warpage is inevitable when welding the sills like that, especially with no access to the inside to stretch the metal back out.

Also made some new wiring harness clips

And installed them


I think the passenger's side had only two of those clips from the factory (top and bottom). But I see no harm in adding an additional clip there.
Re: Another restoration - 83' 528i
I was wondering about panel and body alignment/fitment with all that cutting and re-welding; looks like you're on top of it.
Re: Another restoration - 83' 528i
I do weld in temporary supports to keep eveything lined up whenever I cut out a larger section or when it might move otherwise.vinceg101 wrote: Sep 17, 2020 11:22 AM I was wondering about panel and body alignment/fitment with all that cutting and re-welding; looks like you're on top of it.
Late August 2020
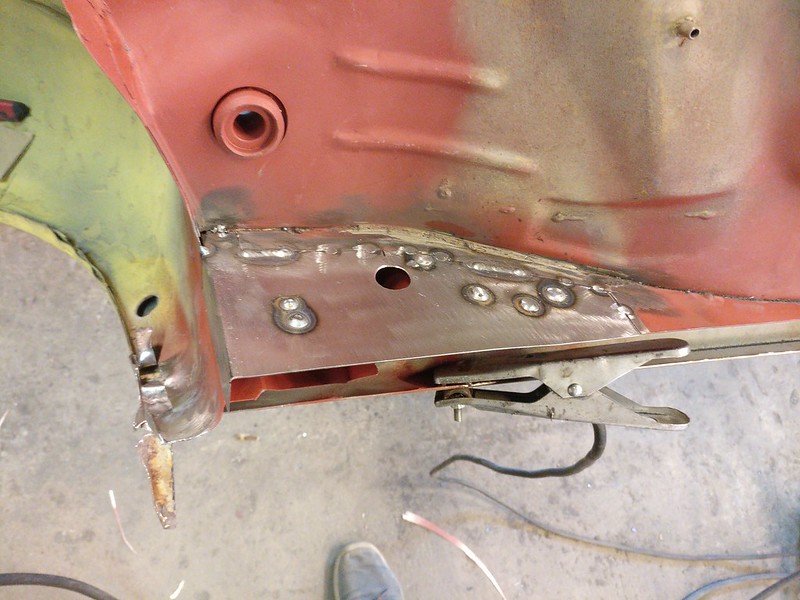
To get the driver’s side rocker done I had to first finish up this rear section
I had a few days before my buddy could come over to assist with the rocker so I decided to begin work on that ugliness in engine compartment. Notice how the firewall has actually bulged from the previous repair or whatever you call it.
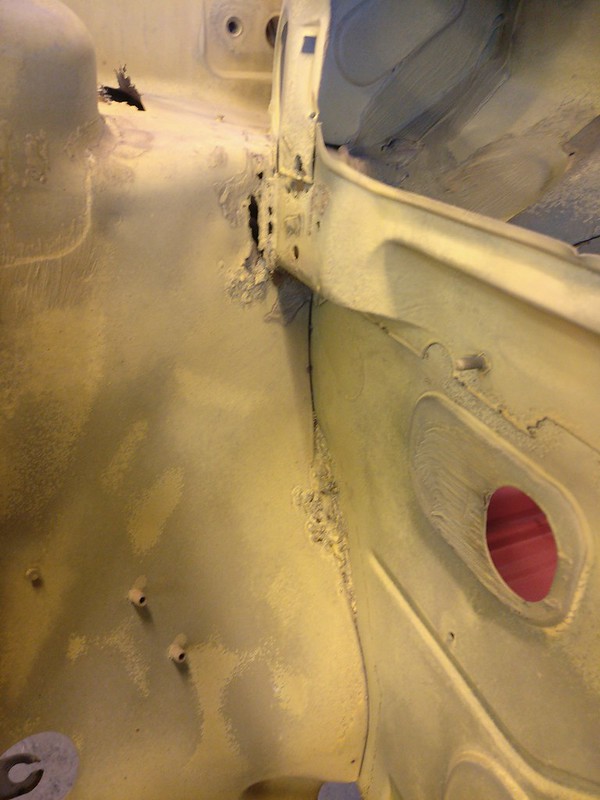
View from the front wheel housing
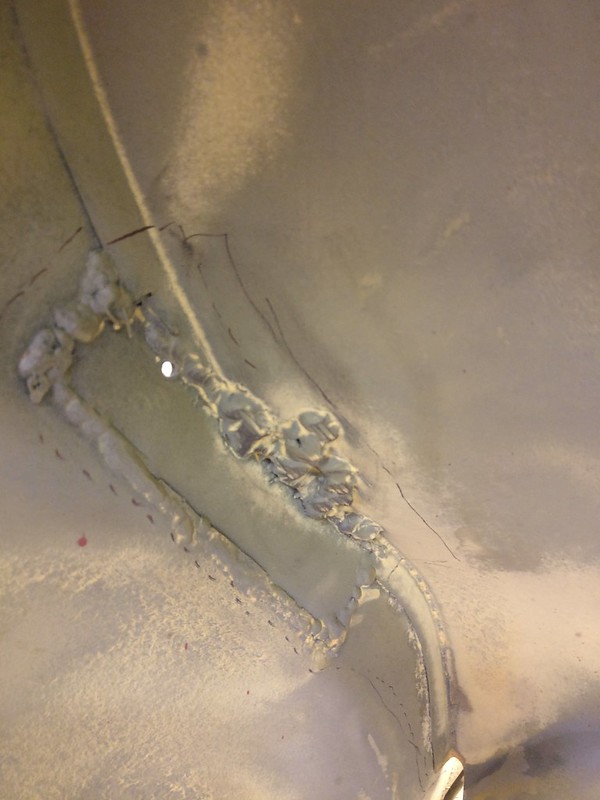
A small piece tacked in
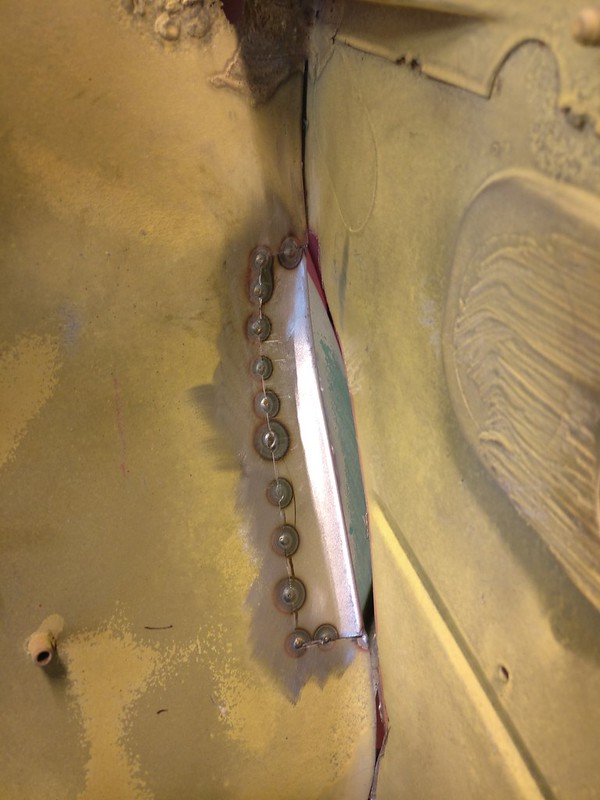
Welded up and finished
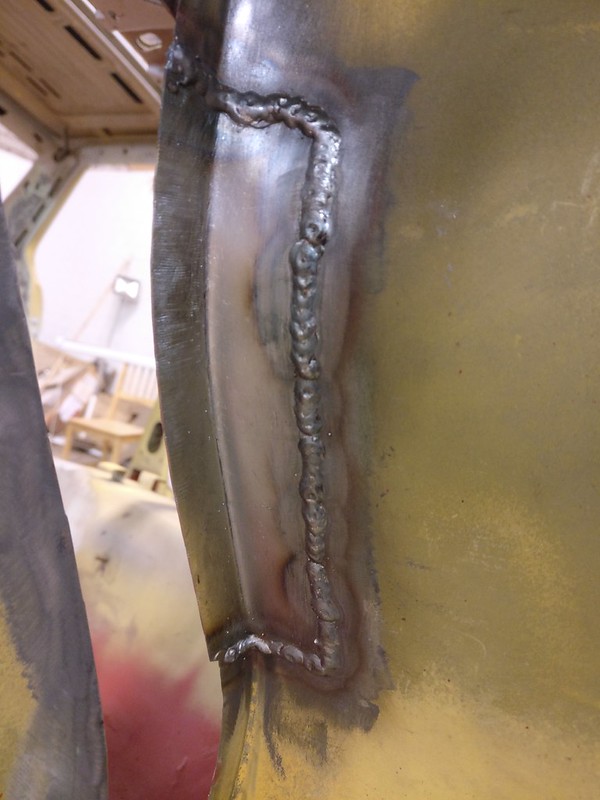
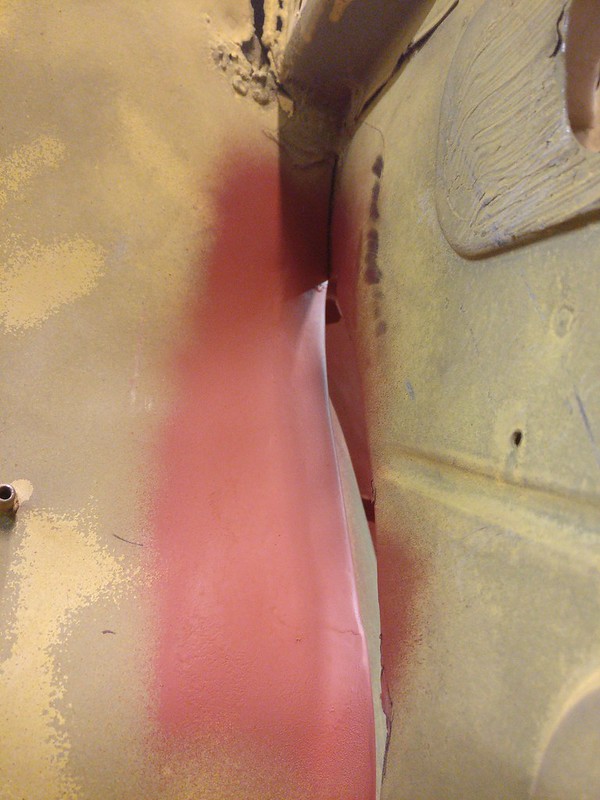
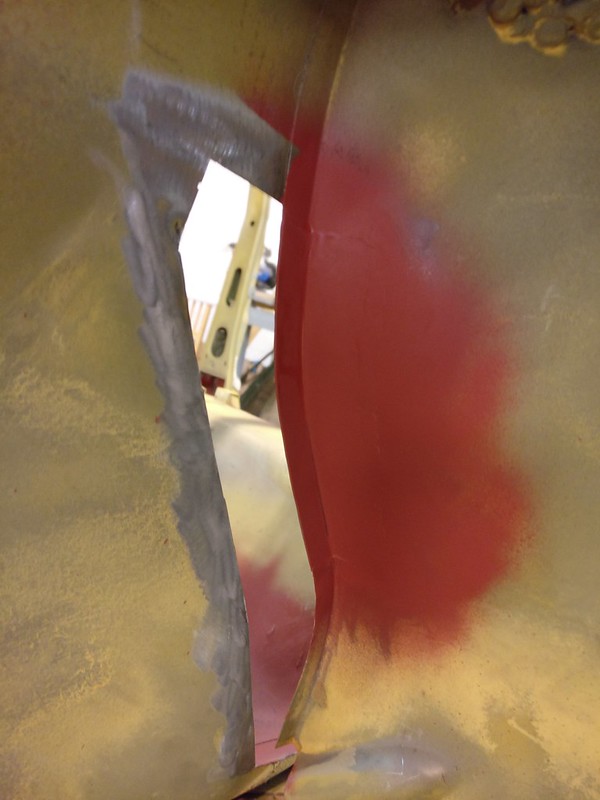
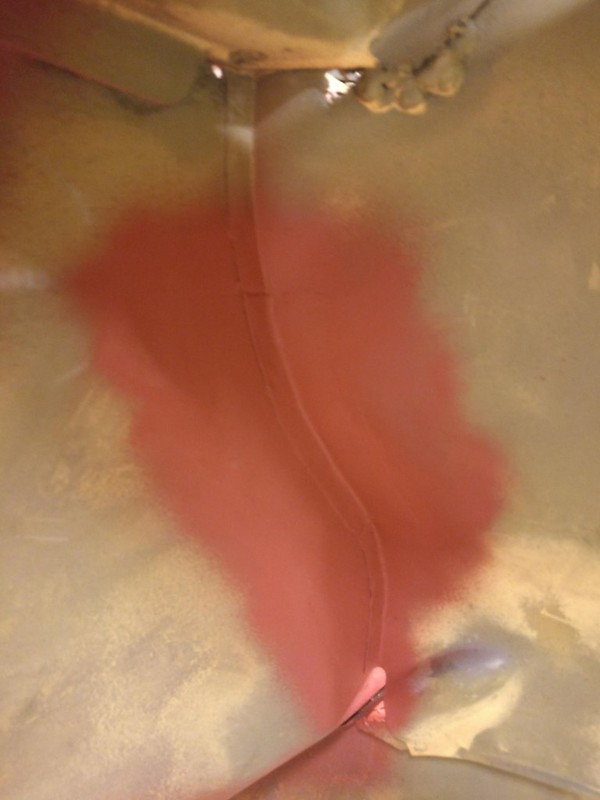
And then the hole in the firewall got filled in
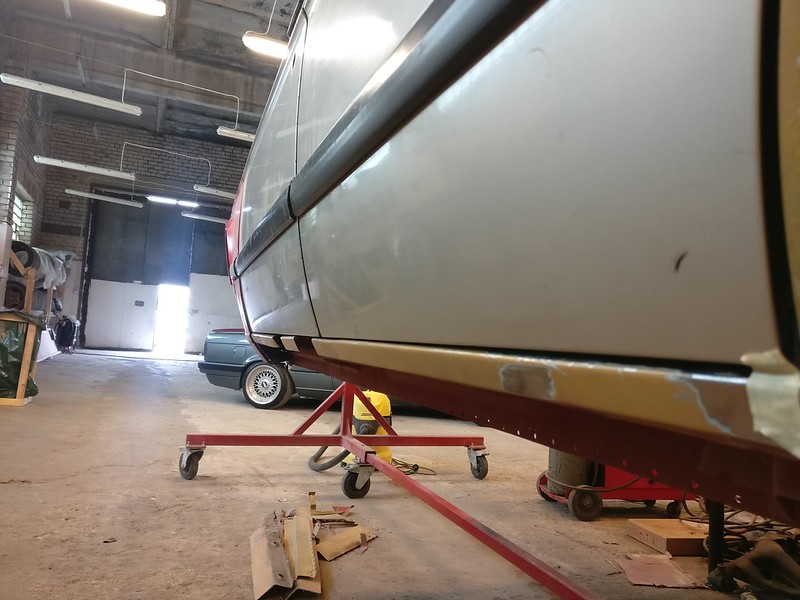
Doors fitted. As I mentioned before, the remains of the rocker panel were of little help aligning the doors.
Then removed the rocker and as I suspected there was a bit too much sandwich rust to my liking here.
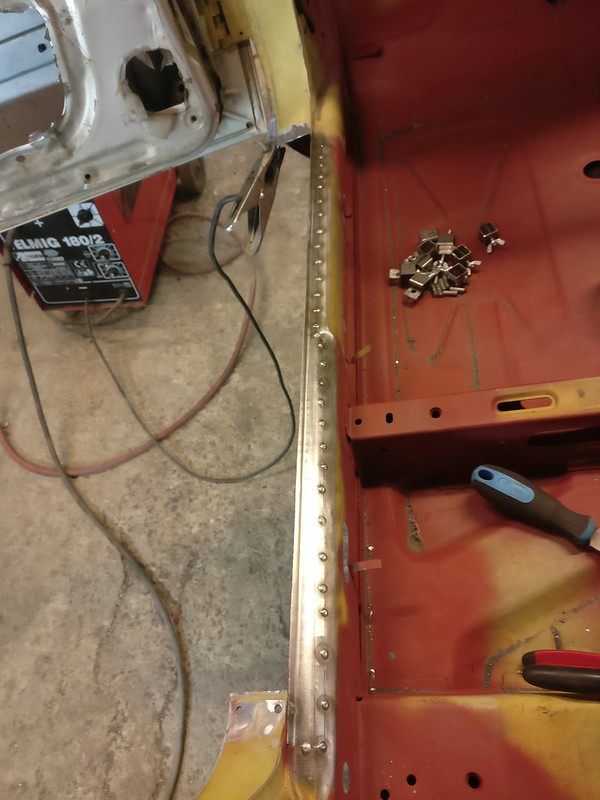
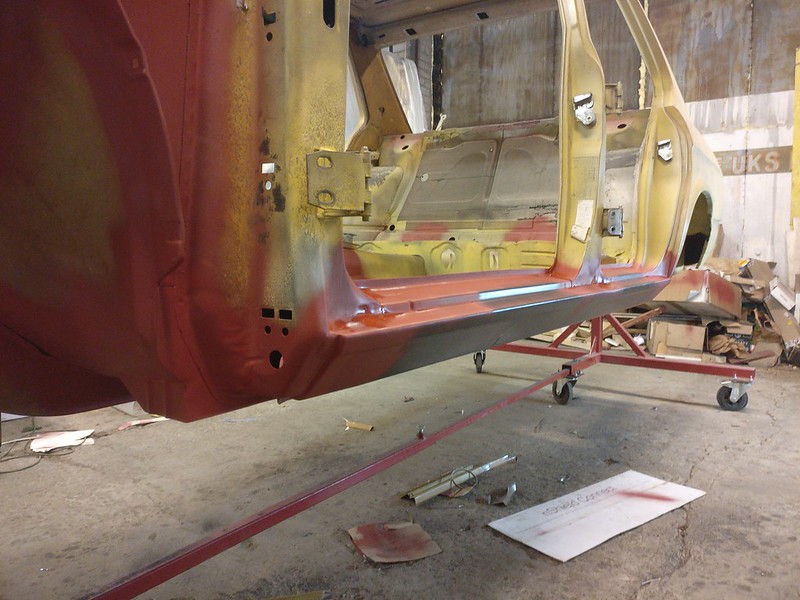
After this, new side sill panel was fitted and welded in. Interestingly, the front of the driver’s side panel had much better fitment out of the box than the other side. E.g the front line where it meets the wing was straight.
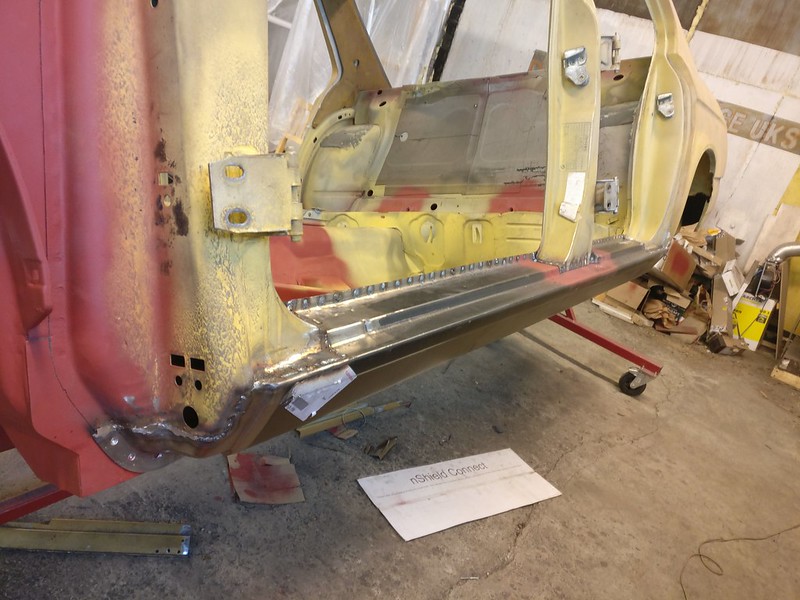
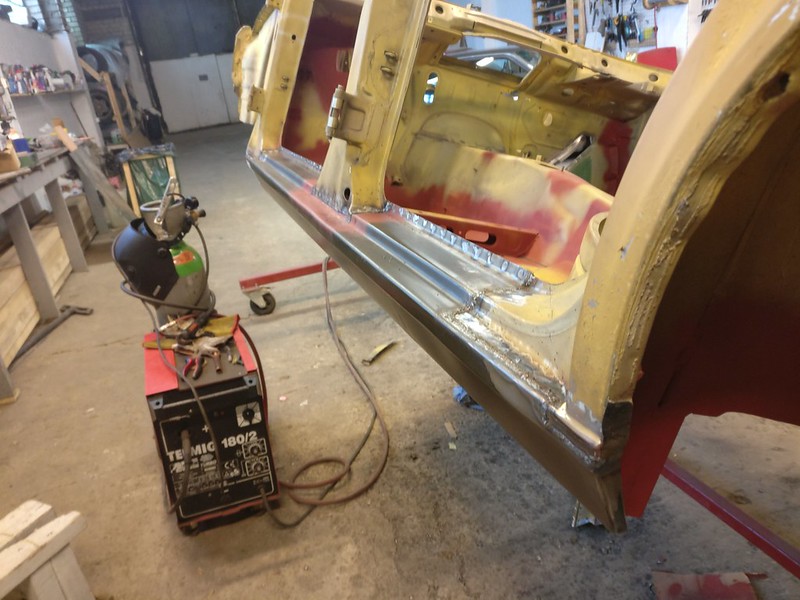
And finished off. Could have used some more work on the inner side where it meets the front and rear pillars but it will do.
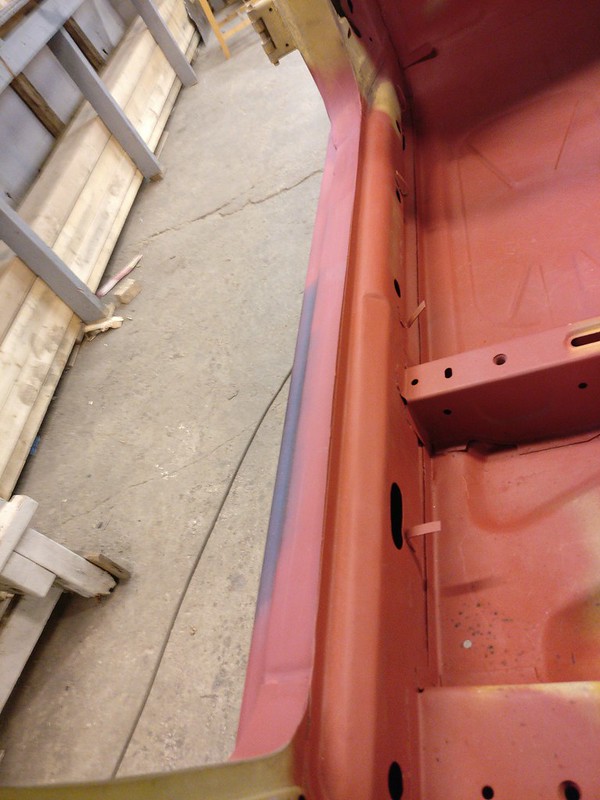
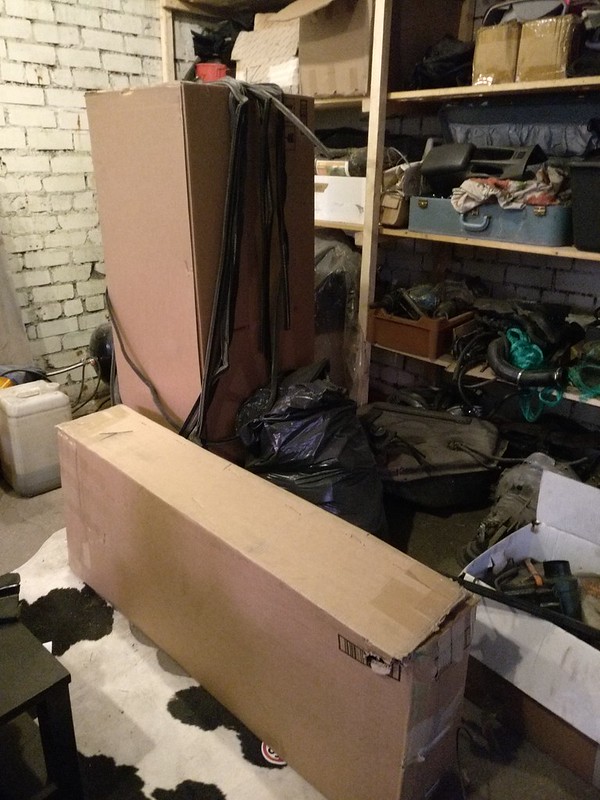
Today, a courier came by and dropped me off a large box. I now have two large boxes (and a nice cow hide carpet).
Re: Another restoration - 83' 528i
First half of September 2020
To move on with passenger side front strut tower I first wanted to finish up other side so if necessary I could see how everything goes together there. This meant fixing the front wing support flange and installing new support plate.
This was removed
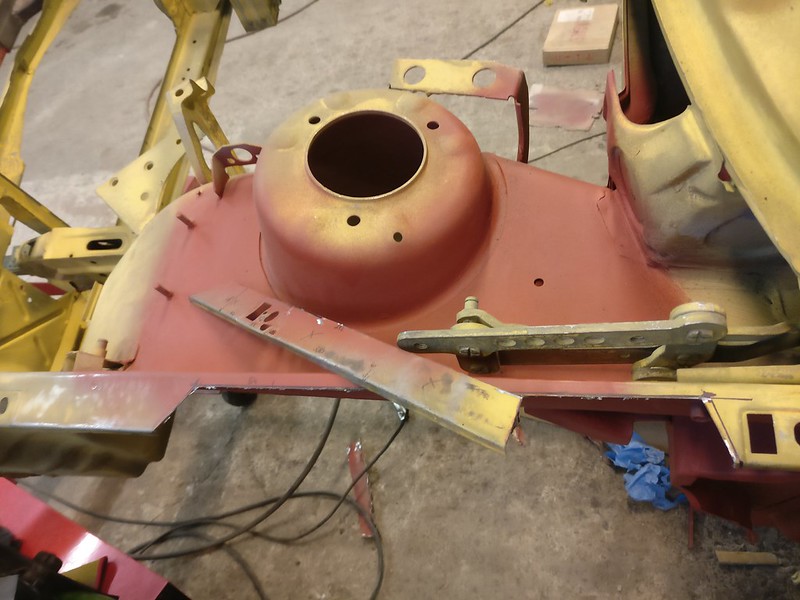
And a replacement made
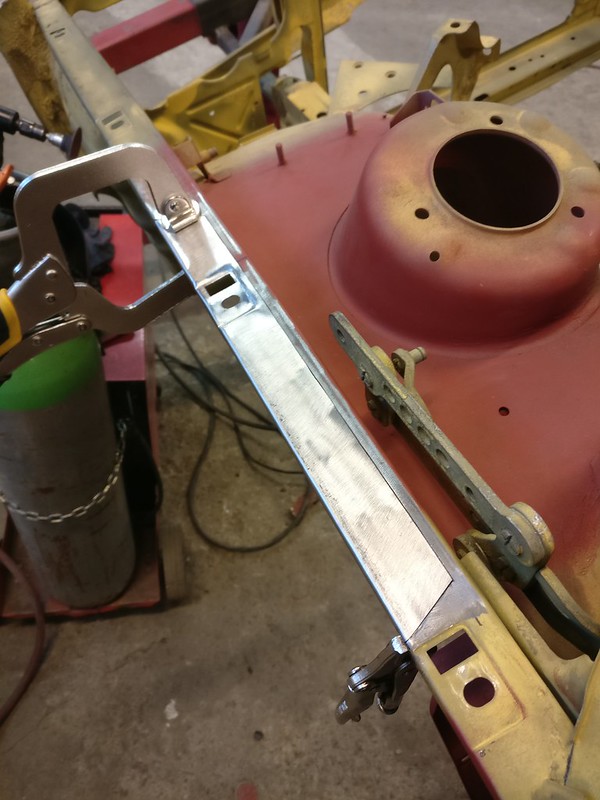
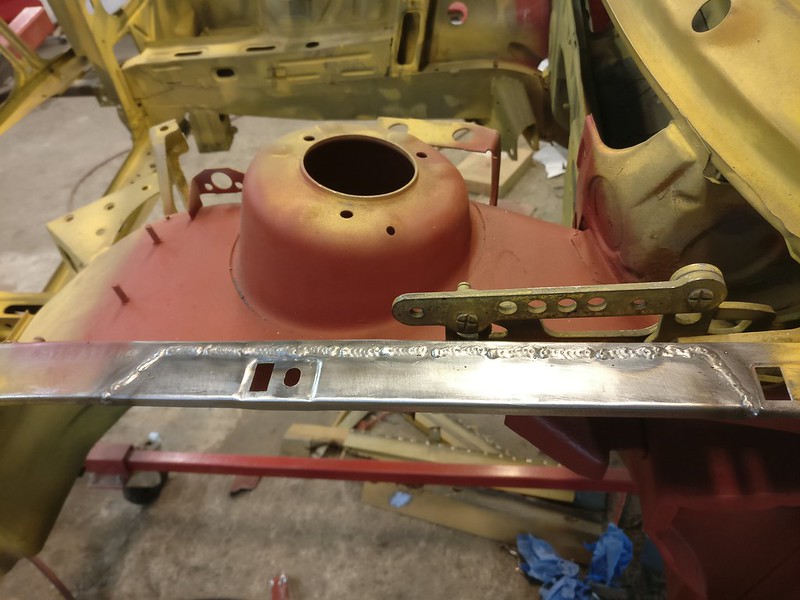
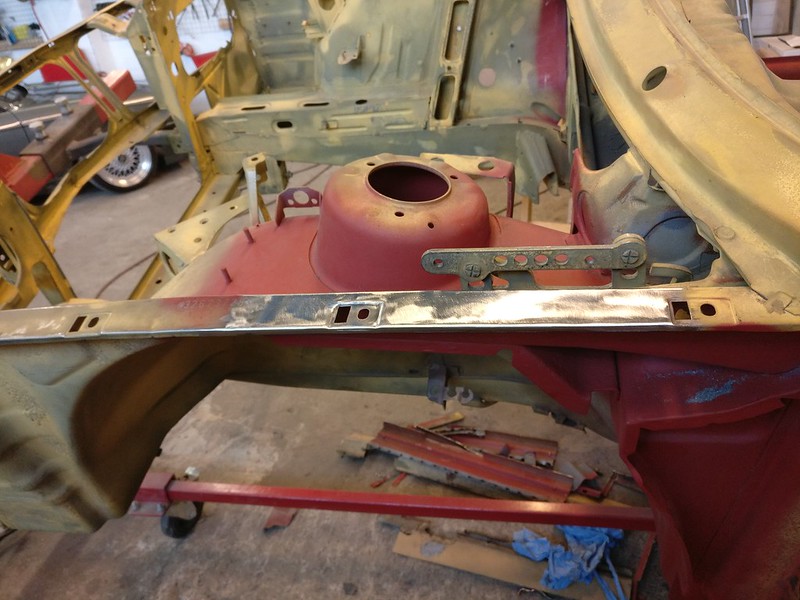
Brand new OEM support panels for both sides. Those were quite cheap and would have been a pain to replicate.
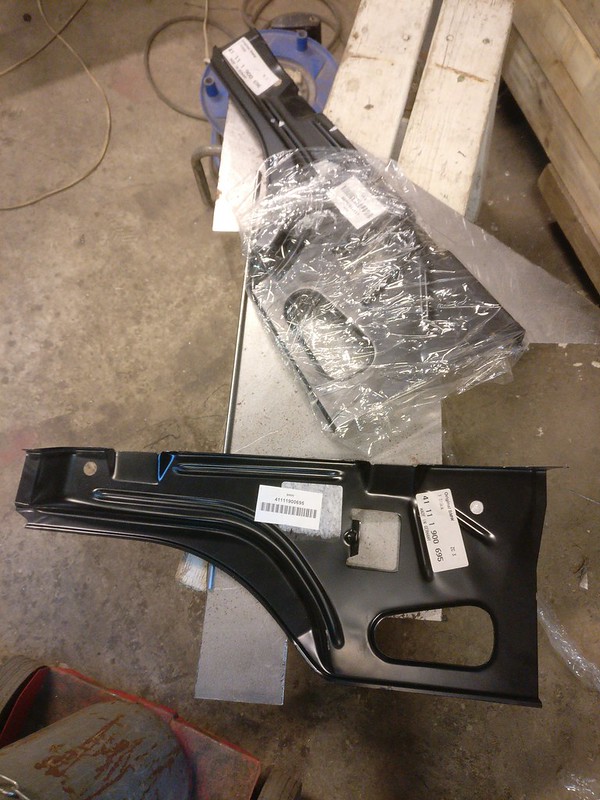
Sits there like that
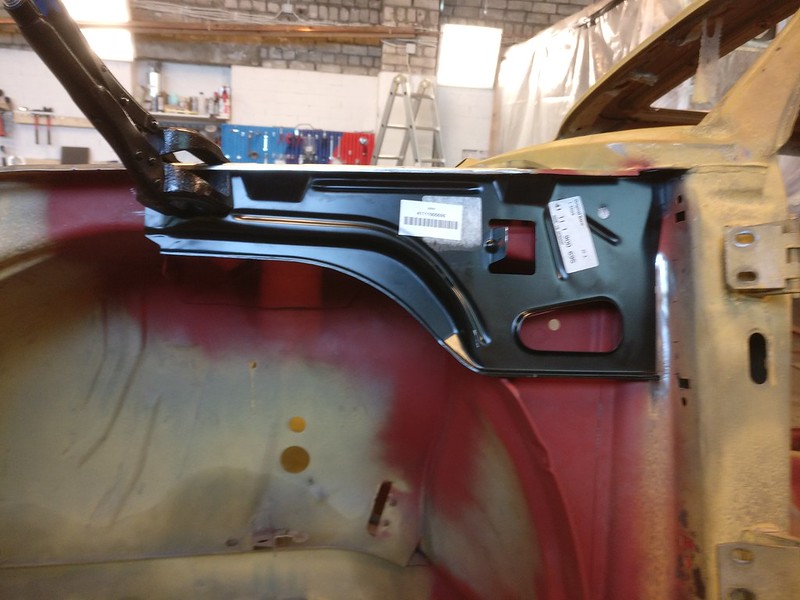
Some prepping, drilling (for plug welds) and welding later it was installed.
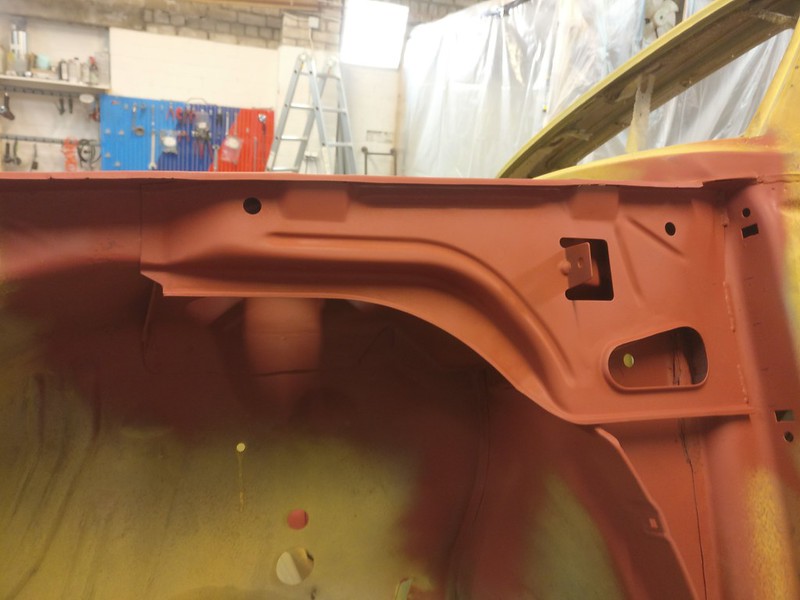
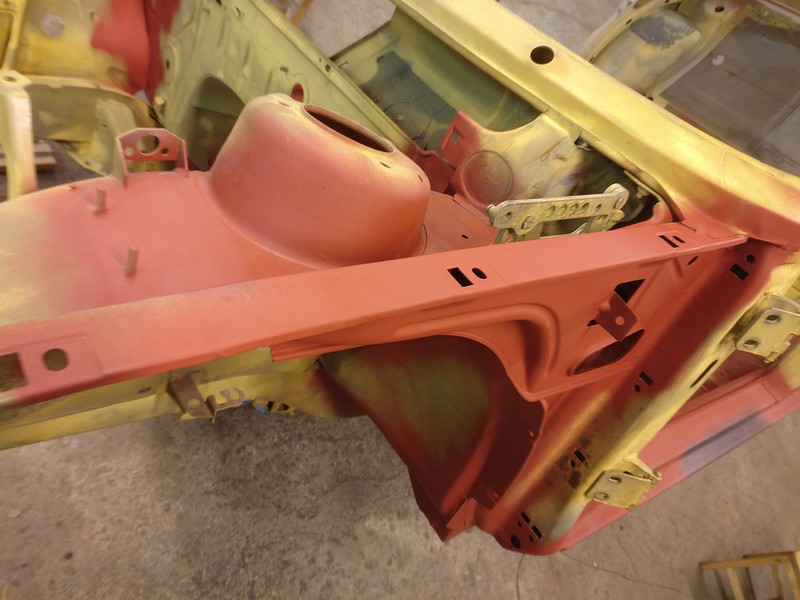
On with the passenger side then. This is what I had to begin with.
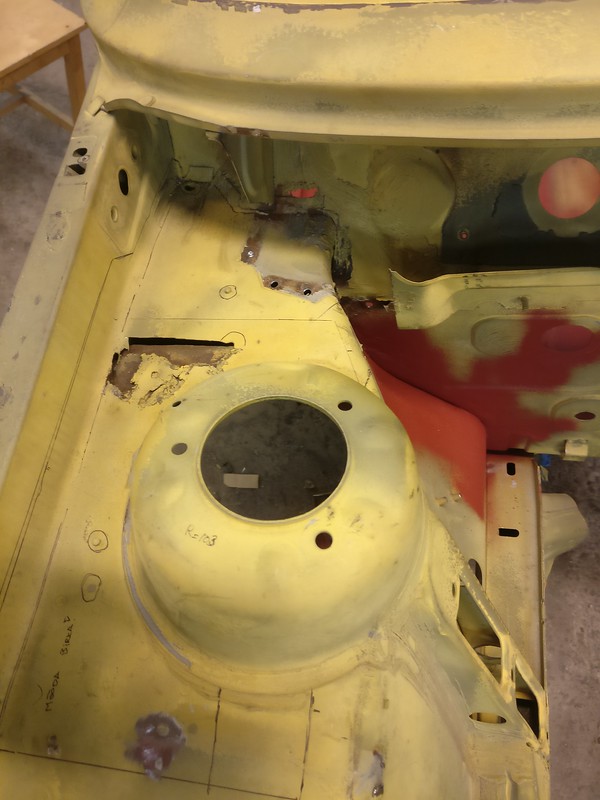
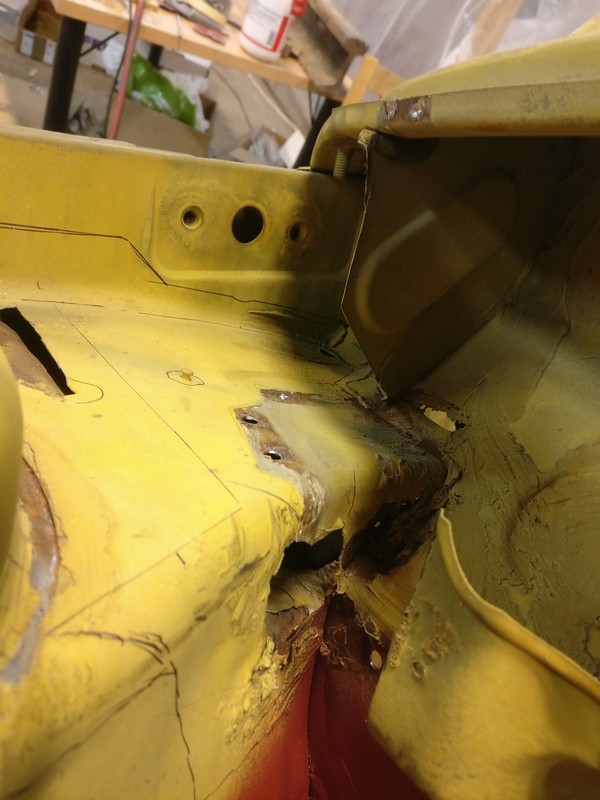
Before cutting it open and sandblasting the strut tower I began working on the replacement. Cut out a piece of sheet metal and bent it more or less into shape.
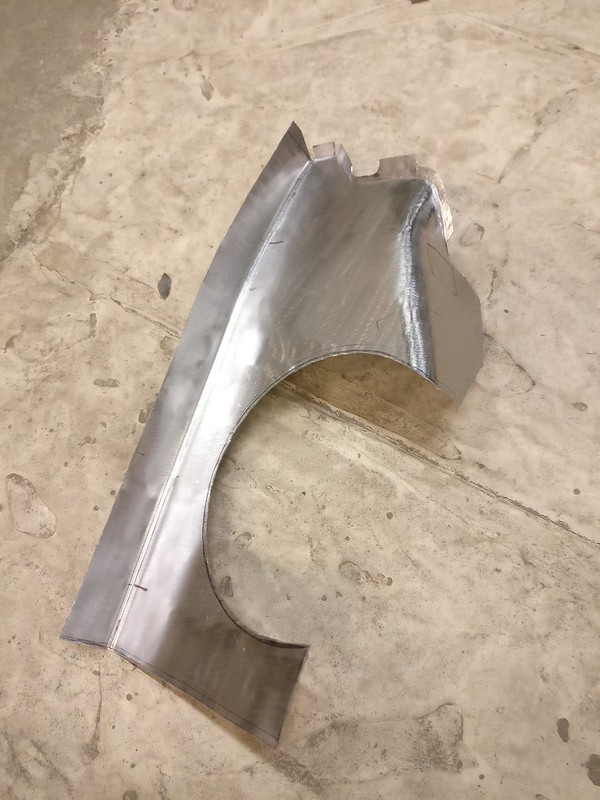
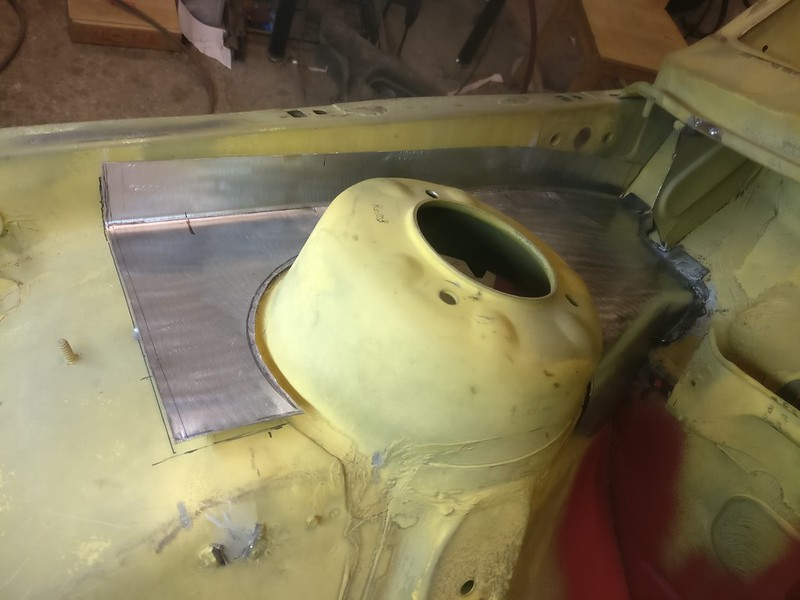
Later on (a bit too late), I realized that I should’ve made the panel bigger and included the whole front wing flange. This could’ve saved some time on welding/grinding and I’d usually prefer a single larger repair to multiple smaller ones.
Anyway, strut tower was in a similar condition to the other side.
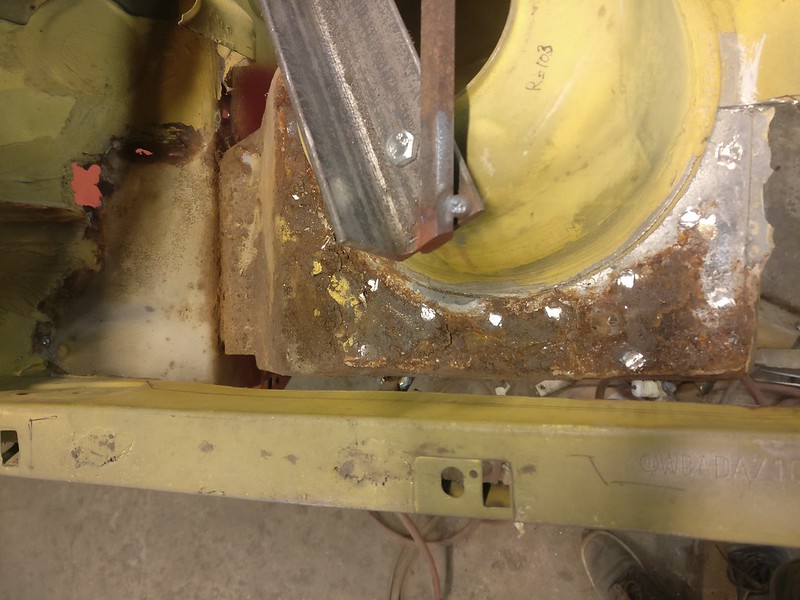
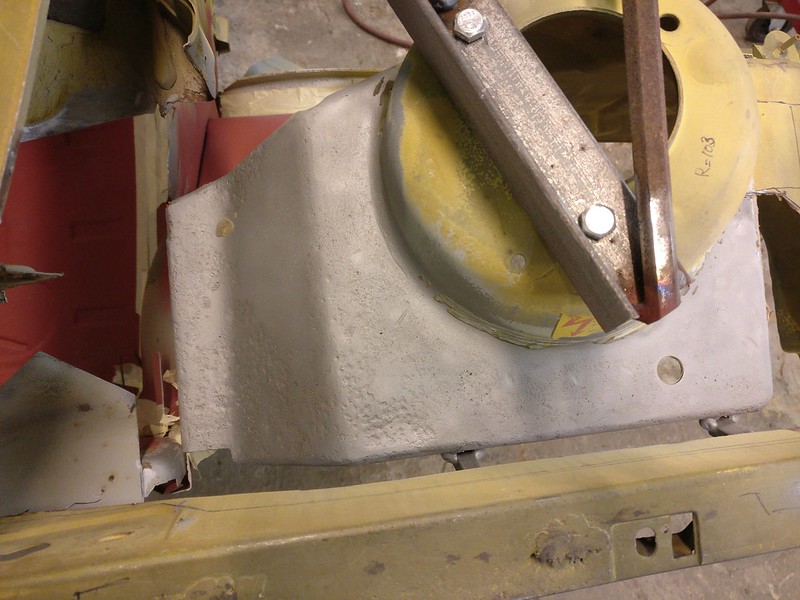
This time I didn’t forget to take any photos of the results of sandblasting. Just to be on the safe side, I treated it with rust-converter as well.
I also sandblasted a small (about 15mm diameter) rust spot on windshield frame. And of course I didn’t take any pics of that. There was no way I was going to do any cutting and welding in a spot like that and I wasn’t too confident with just filling it with bondo. So, after consulting with my buddy (the car restorer) we decided to apply some lead over that spot. As always, he was happy to help.
After the area was thoroughly cleaned, tinning butter was applied followed by some lead.
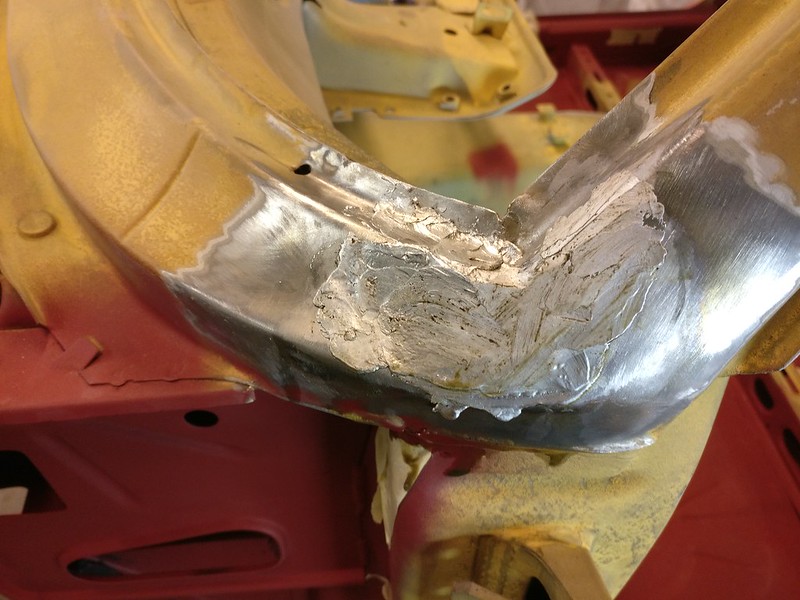
Then excess lead was filed down
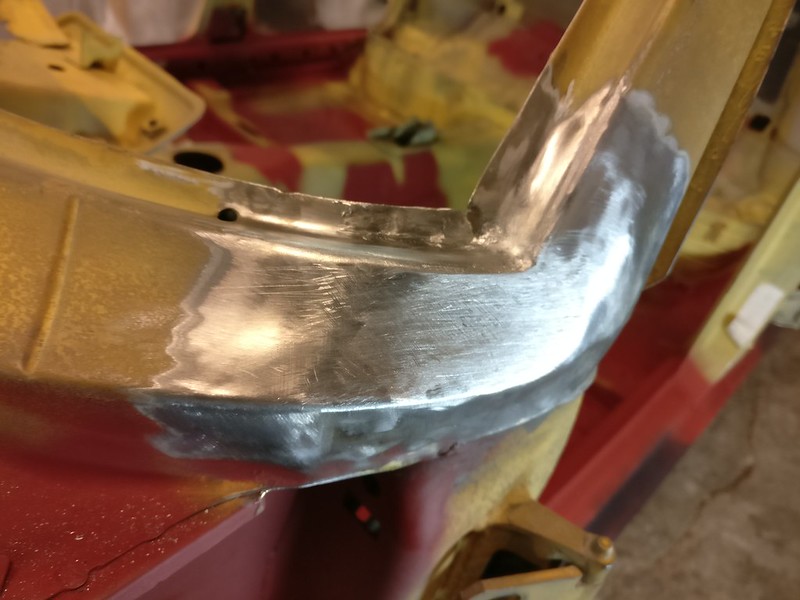
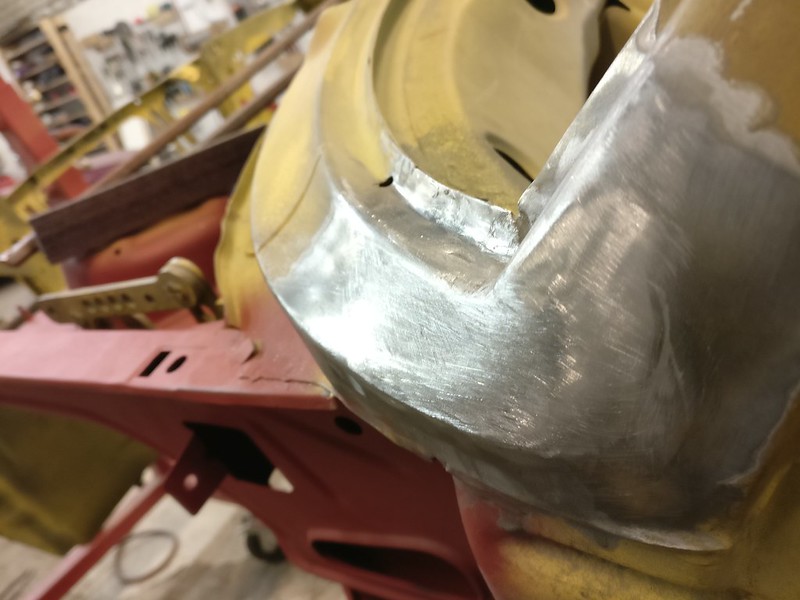
After the treatment with rust-converter, firewall got patched up on the other side
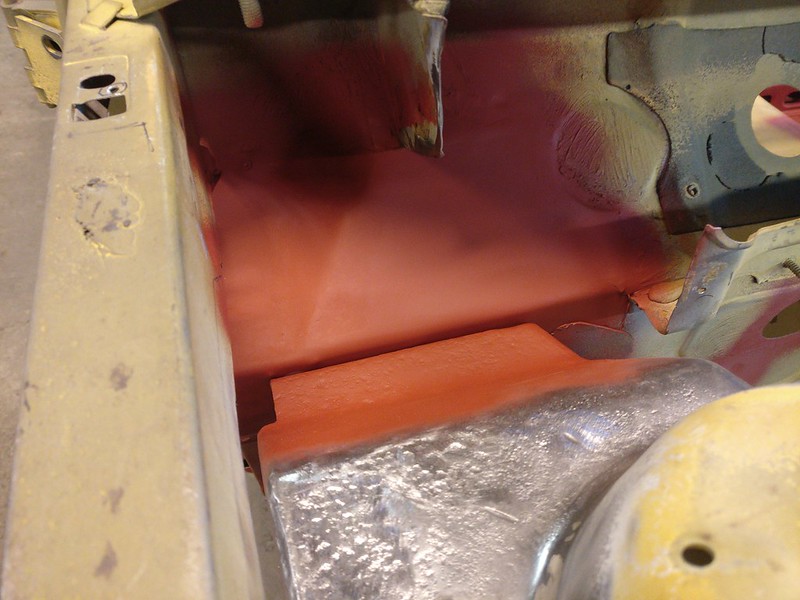
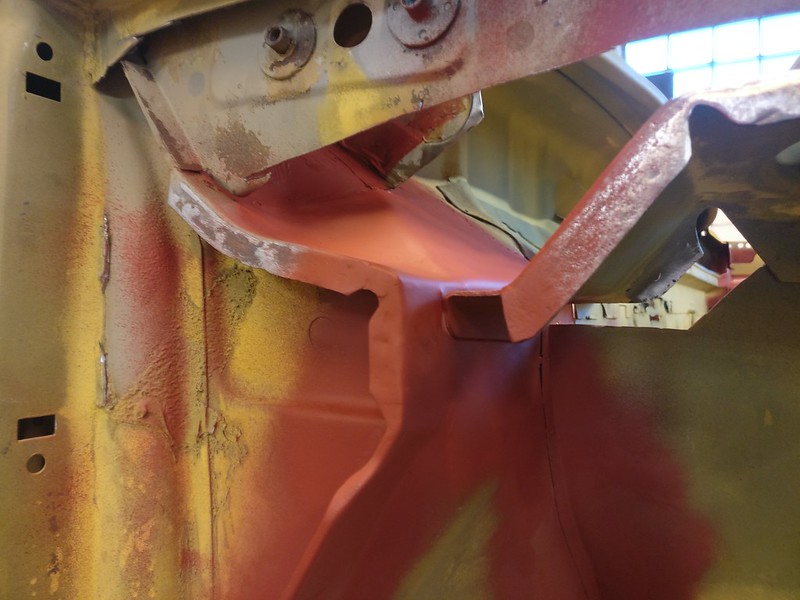
And then work continued on the wheel housing panel. Not well visible on this pic but a couple of nails were welded to the panel to replicate the fixings for the clips.
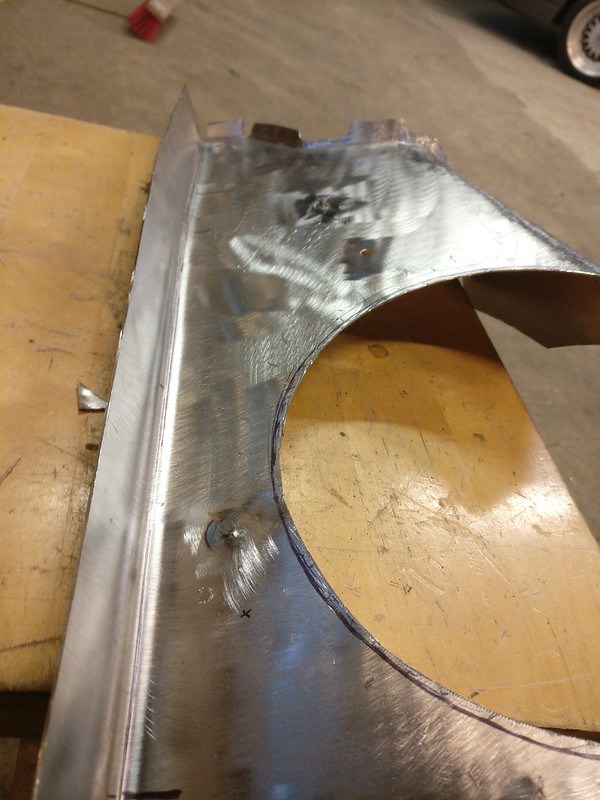
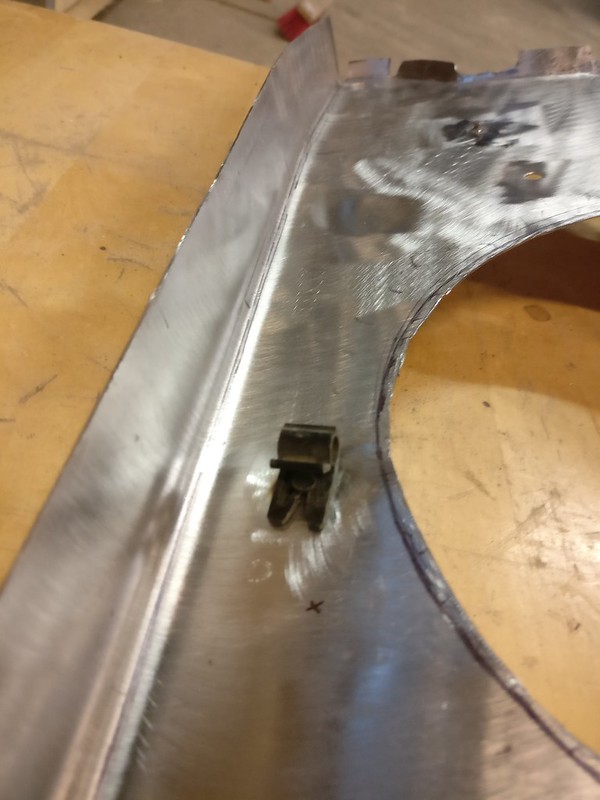
Some adjustments to the shape and all the drains and holes for plug welds done.
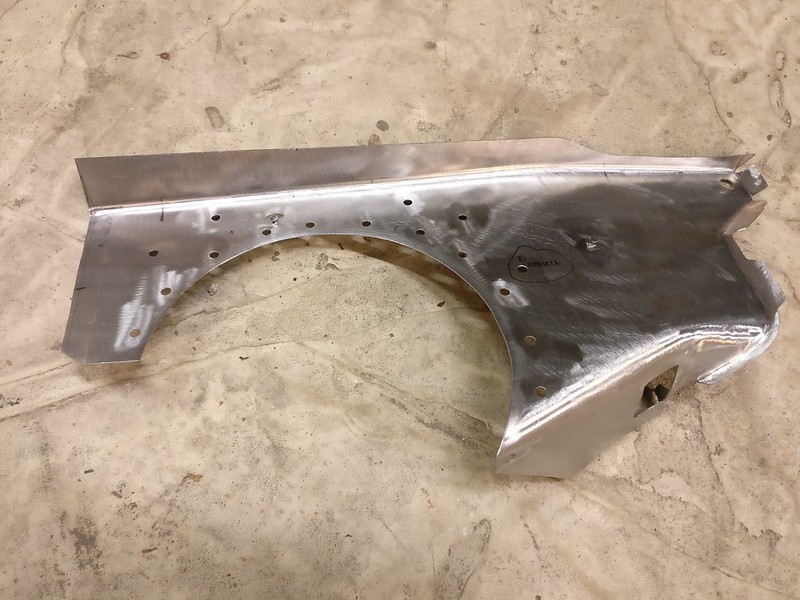
It fit like a glove, really happy about it.
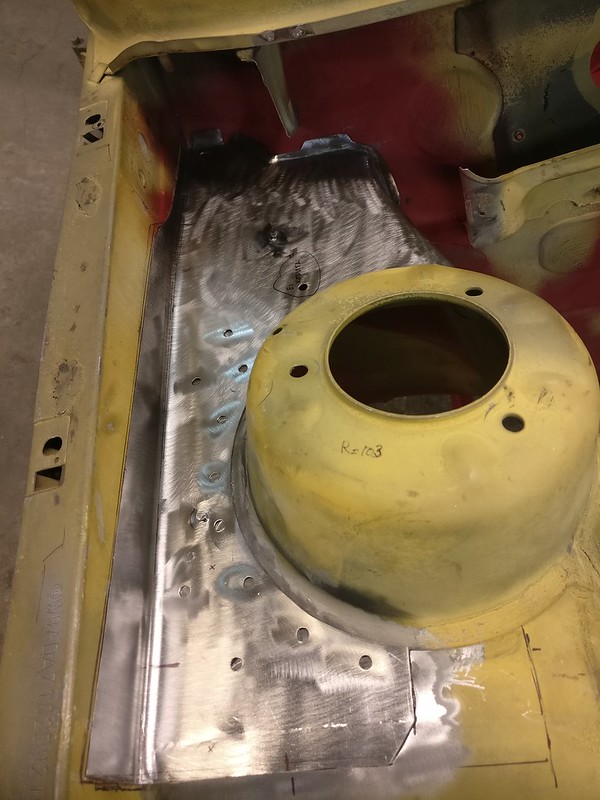
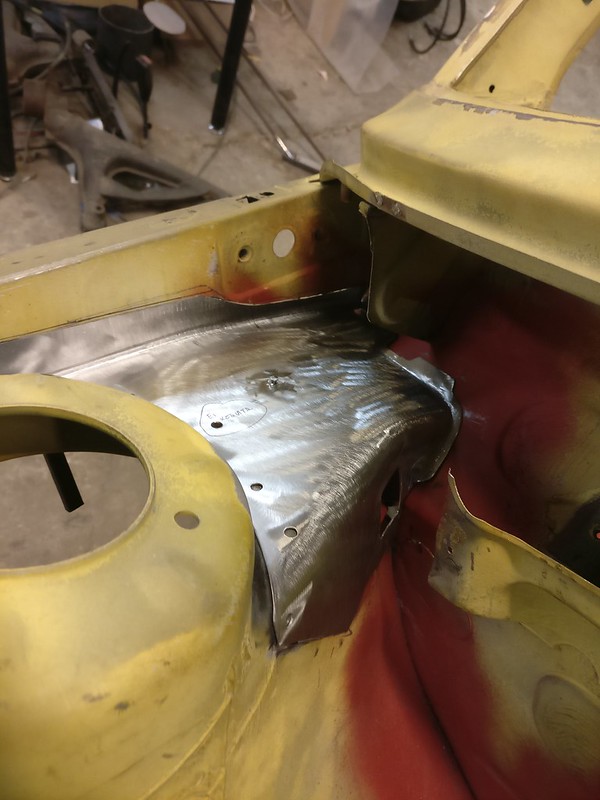
That was it for the first half of September. Stay tuned for finished product!
To move on with passenger side front strut tower I first wanted to finish up other side so if necessary I could see how everything goes together there. This meant fixing the front wing support flange and installing new support plate.
This was removed

And a replacement made


Brand new OEM support panels for both sides. Those were quite cheap and would have been a pain to replicate.

Sits there like that

Some prepping, drilling (for plug welds) and welding later it was installed.


On with the passenger side then. This is what I had to begin with.


Before cutting it open and sandblasting the strut tower I began working on the replacement. Cut out a piece of sheet metal and bent it more or less into shape.


Later on (a bit too late), I realized that I should’ve made the panel bigger and included the whole front wing flange. This could’ve saved some time on welding/grinding and I’d usually prefer a single larger repair to multiple smaller ones.
Anyway, strut tower was in a similar condition to the other side.

This time I didn’t forget to take any photos of the results of sandblasting. Just to be on the safe side, I treated it with rust-converter as well.

I also sandblasted a small (about 15mm diameter) rust spot on windshield frame. And of course I didn’t take any pics of that. There was no way I was going to do any cutting and welding in a spot like that and I wasn’t too confident with just filling it with bondo. So, after consulting with my buddy (the car restorer) we decided to apply some lead over that spot. As always, he was happy to help.
After the area was thoroughly cleaned, tinning butter was applied followed by some lead.

Then excess lead was filed down


After the treatment with rust-converter, firewall got patched up on the other side


And then work continued on the wheel housing panel. Not well visible on this pic but a couple of nails were welded to the panel to replicate the fixings for the clips.


Some adjustments to the shape and all the drains and holes for plug welds done.

It fit like a glove, really happy about it.


That was it for the first half of September. Stay tuned for finished product!
Re: Another restoration - 83' 528i
Second half of September 2020
Tacks and plug welds done on wheel housing repair
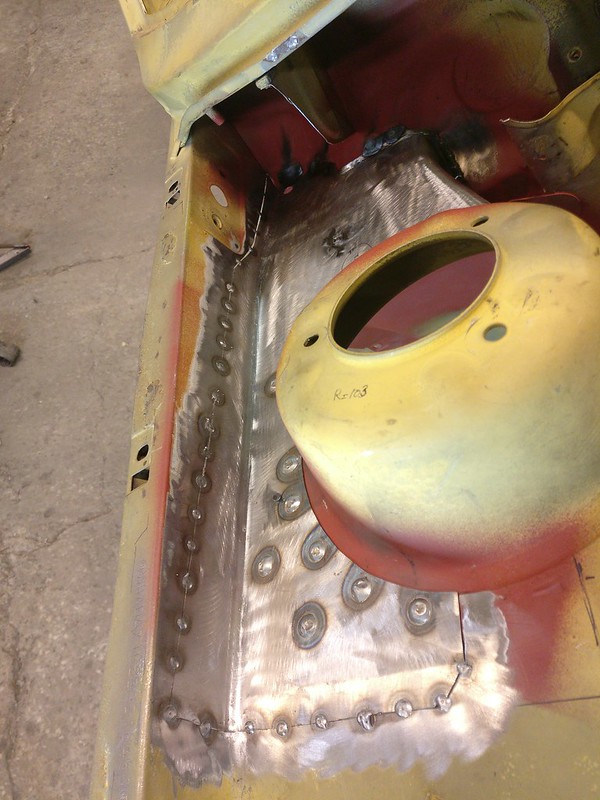
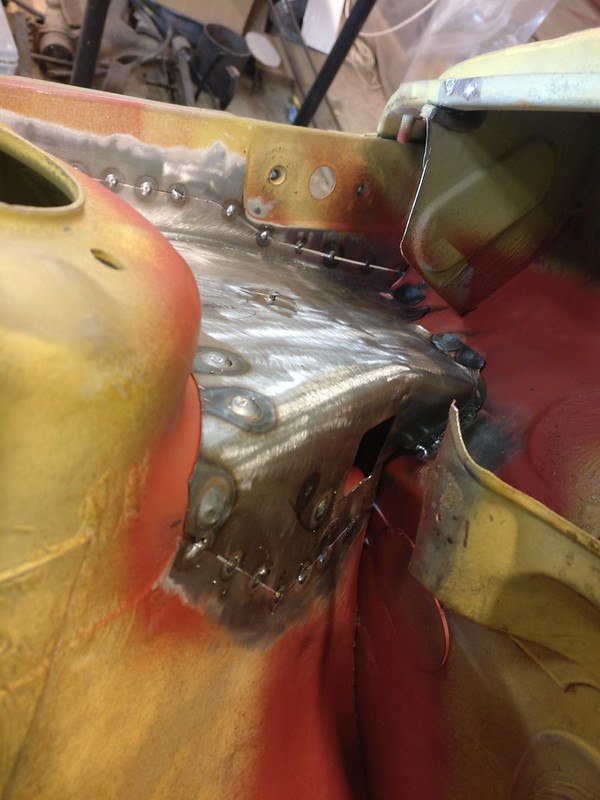
Fully welded
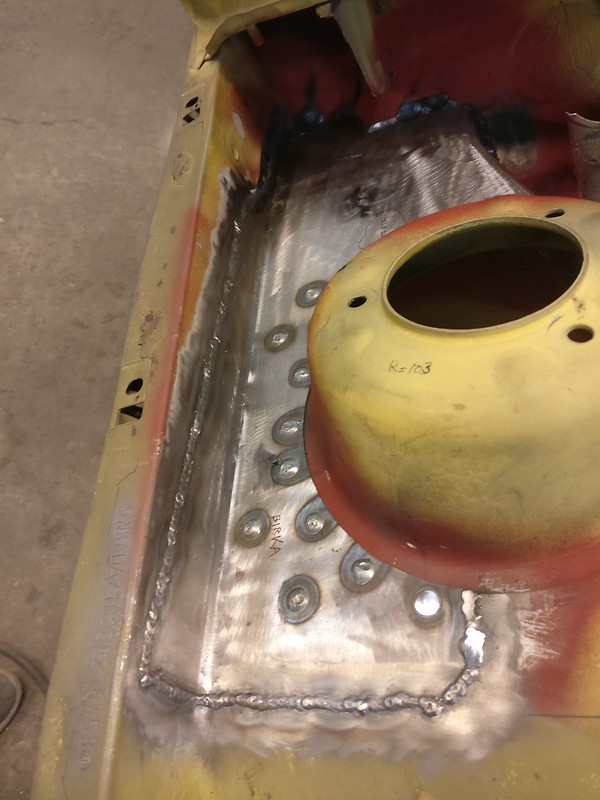
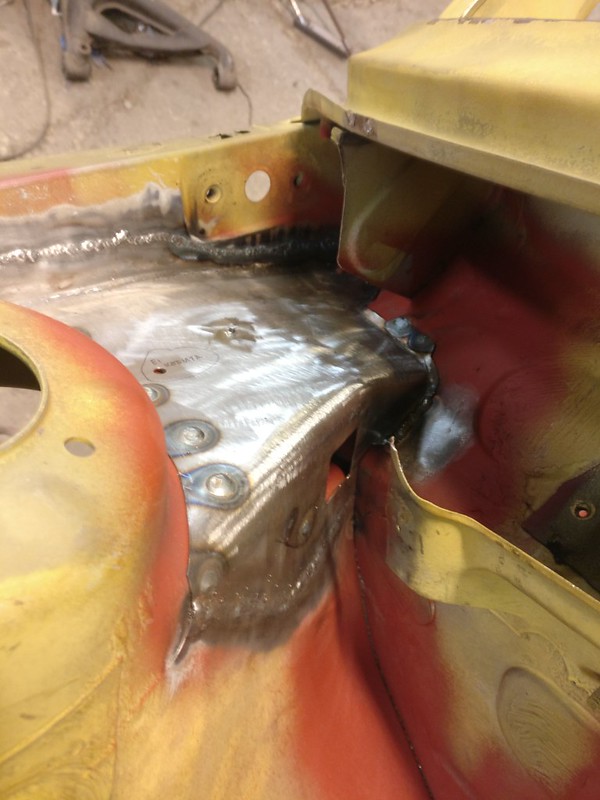
And cleaned up
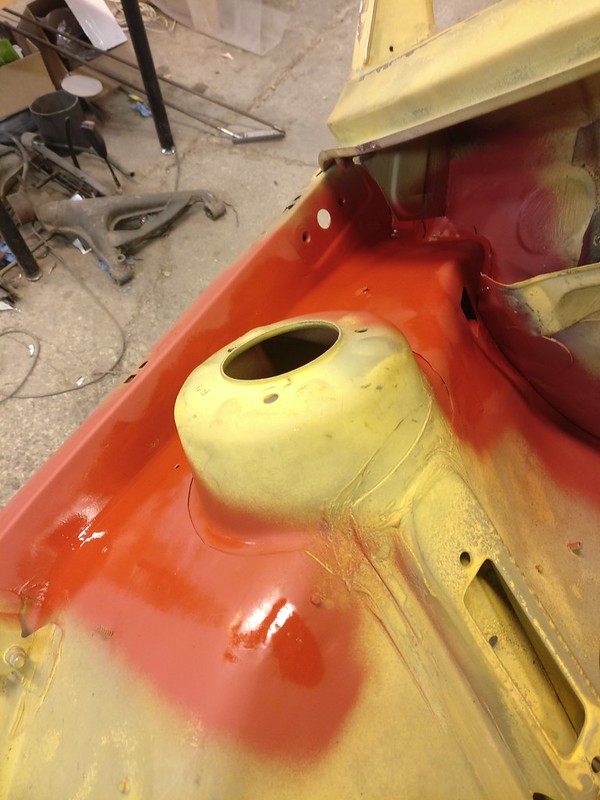
Then work continued on the firewall. I do not have a fresh “before” photo so this one will have to do.
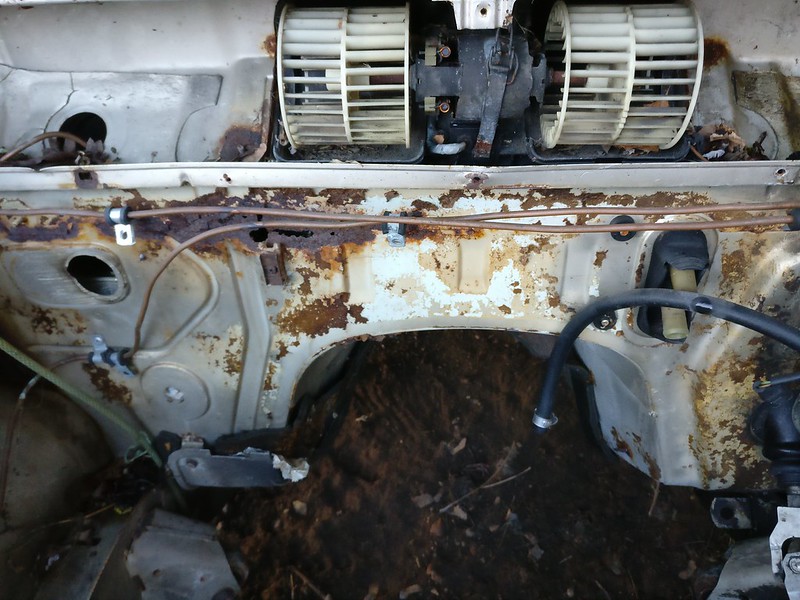
I had saved a section of firewall from the other car. That included the bottom panel of the fan area. Unfortunately, I didn’t cut it off in full length and this bottom panel is NLA.
I didn’t like the idea of welding it in as is and it looked like I can’t separate the two panels (firewall from fan bottom panel) without destroying one of them. They had quite some seam sealer/glue in addition to plug welds in between them. So I decided to make a repair for firewall and use the fan bottom panel from the other car. Latter still needed to be extended to the passenger corner.
I happen to have a full series of photos of how the firewall piece was made, so here they are.
First cut out a suitable piece of sheet metal and mark down everything
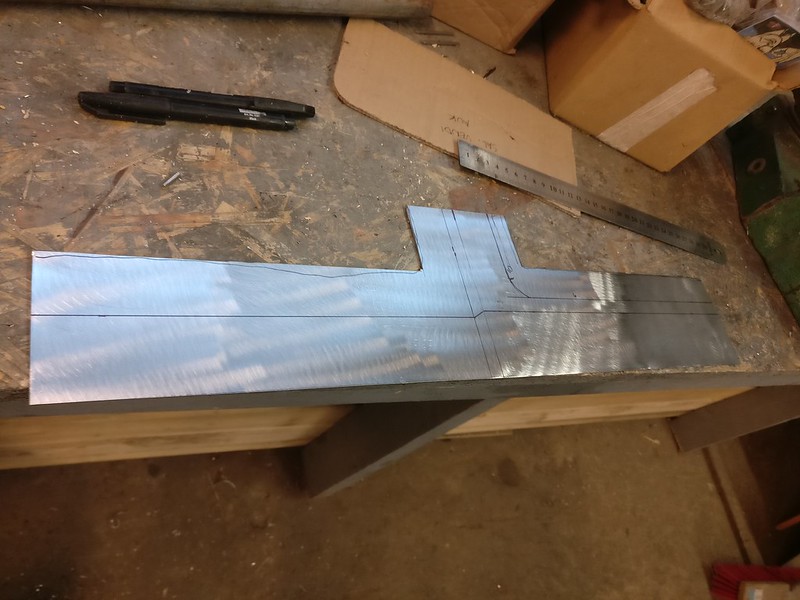
Then bent the corner using my bending assistant. This is not a very tight bend thus pushing it over by hand gave me exactly the correct radius. Usually I use an appriopriately sized metal rod or similar to make those radiused bends.
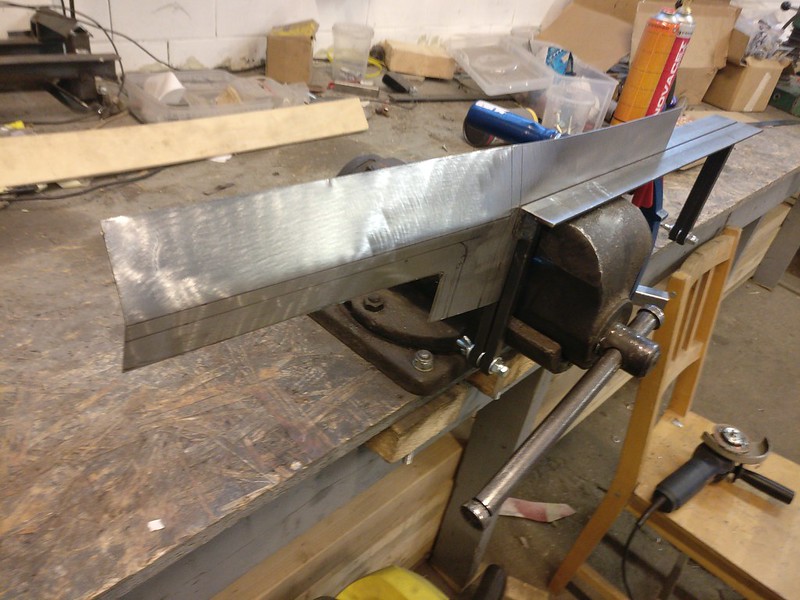
After those two bends were done I had something like this
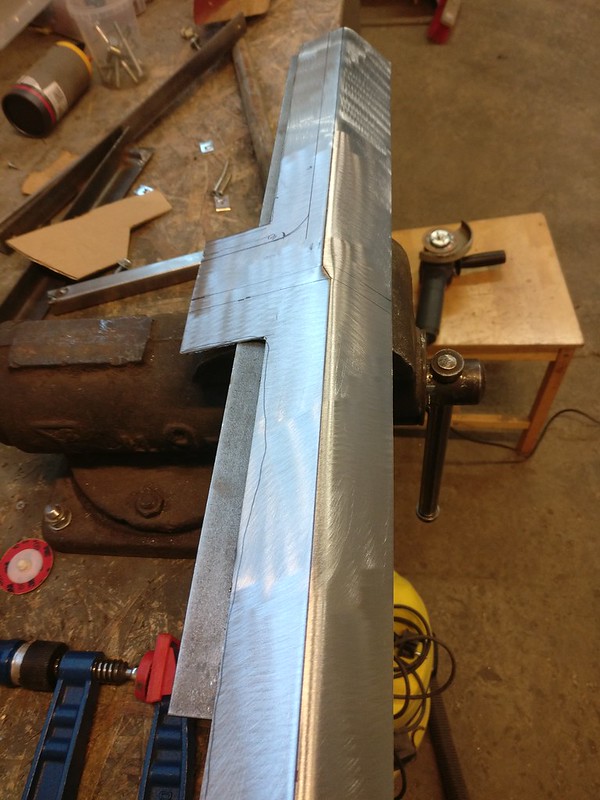
Next, made two bends here. Used some repurposed and dulled chisels to help me out there.
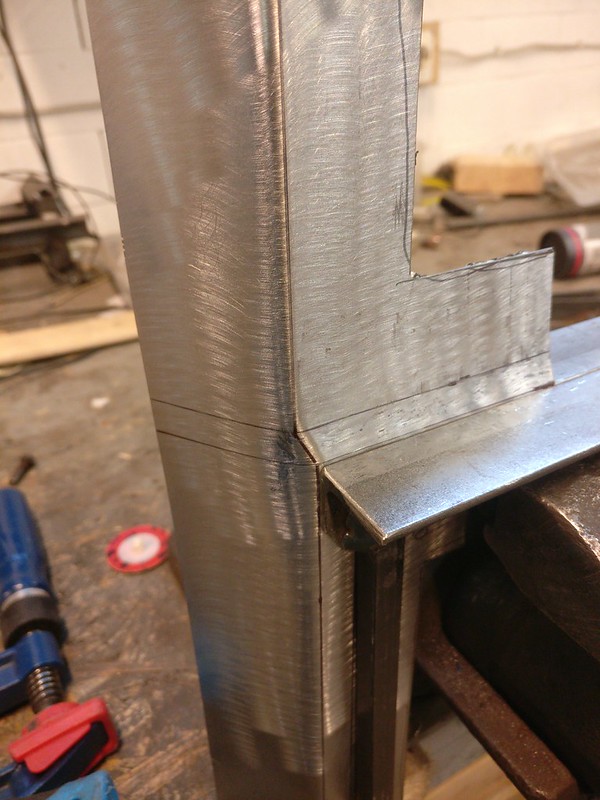
After that, made the small step by just hitting it with the chisel while the piece was attached to my tool
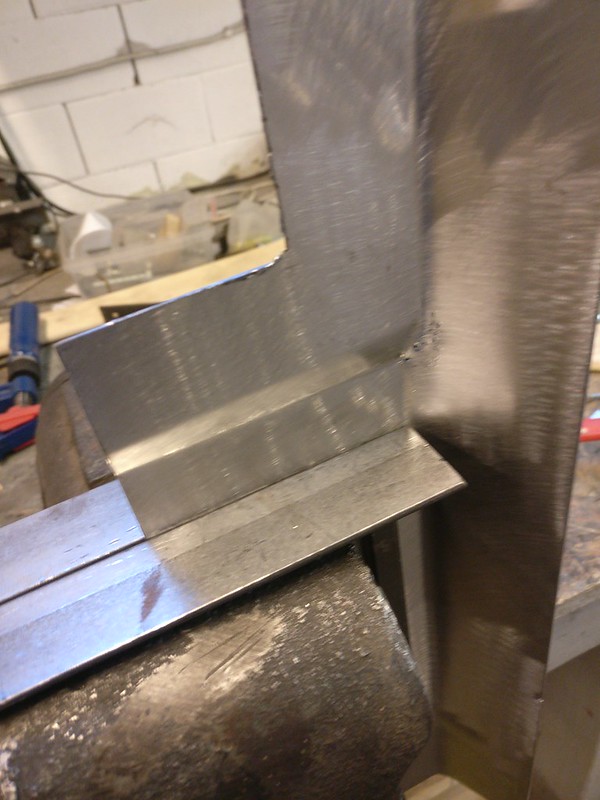
Needs a little bit dressing here and then it will do fine
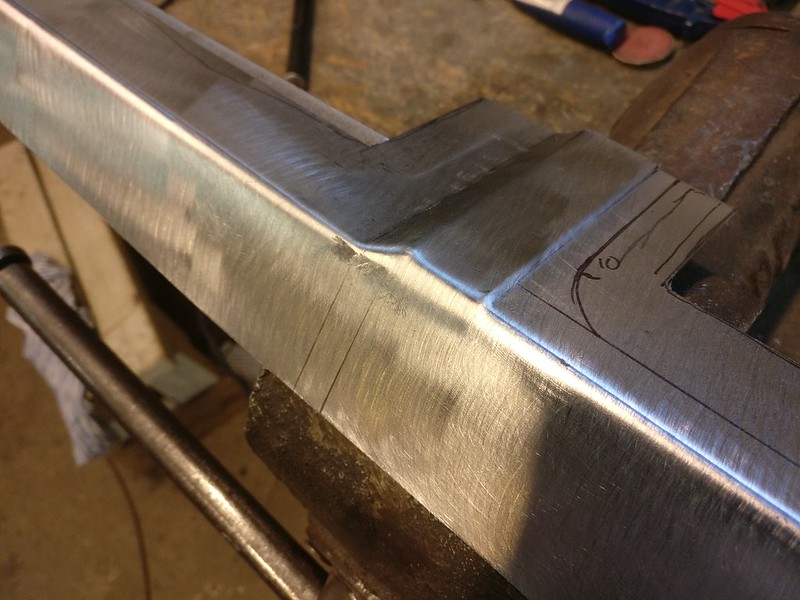
Finally, added the lip for heater box. The corner needs quite a stretch and I actually messed up the first repair panel here. On the first try, I was just bending over the corner without stretching it against a dolly and that twisted the whole top part. As it was quite quick to remake I didn’t bother to fix it and redid the previous bends on a fresh piece of sheet metal
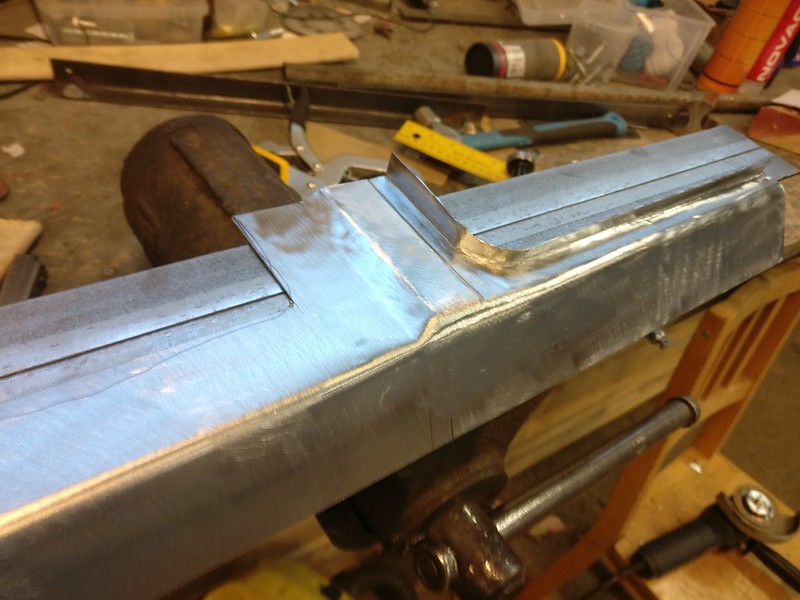
Rust removed and repair tacked in
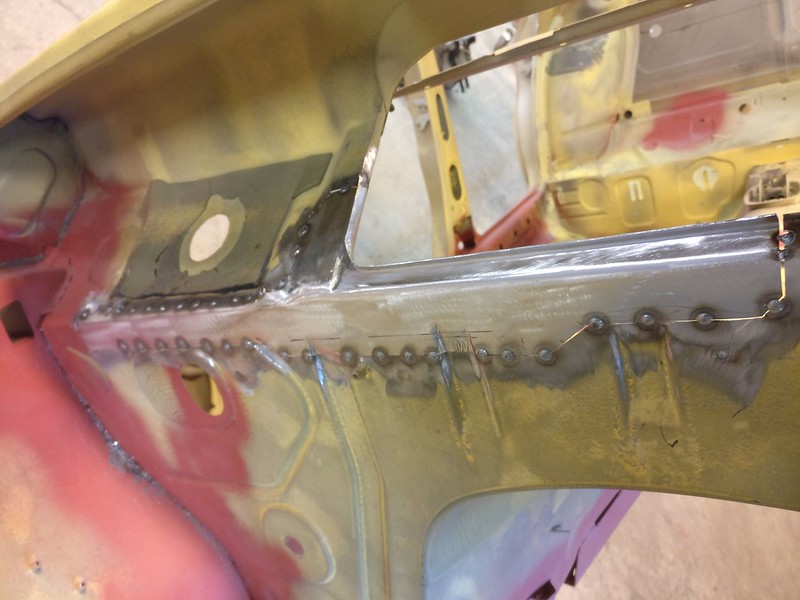
I did the top parts of the beads after tacking it in to avoid any twisting of the repair panel. Didn’t realize before it was too late that the beads get wider in the ends not go straight as I did them. Compare the top and bottom end of that short bead on the following photo. But as all that gets covered up by a thick layer of insulation I didn’t bother with it much.
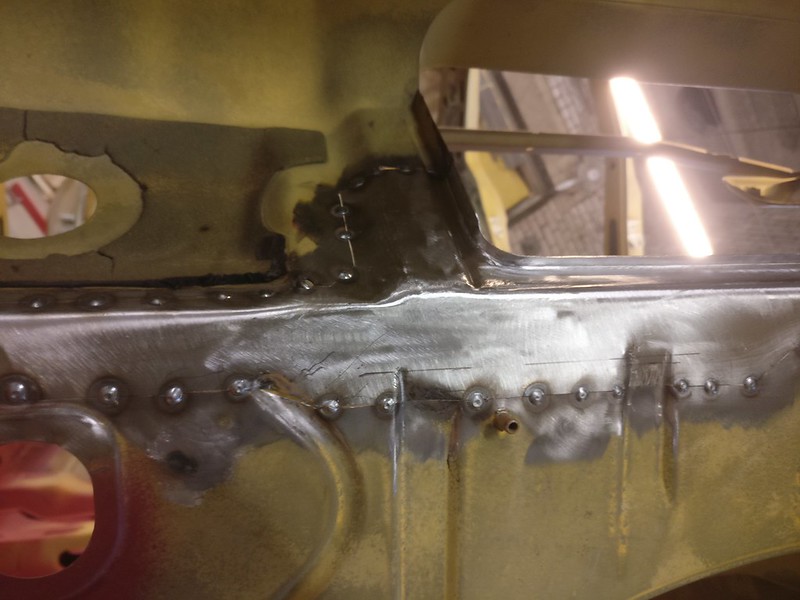
And firewall is whole again
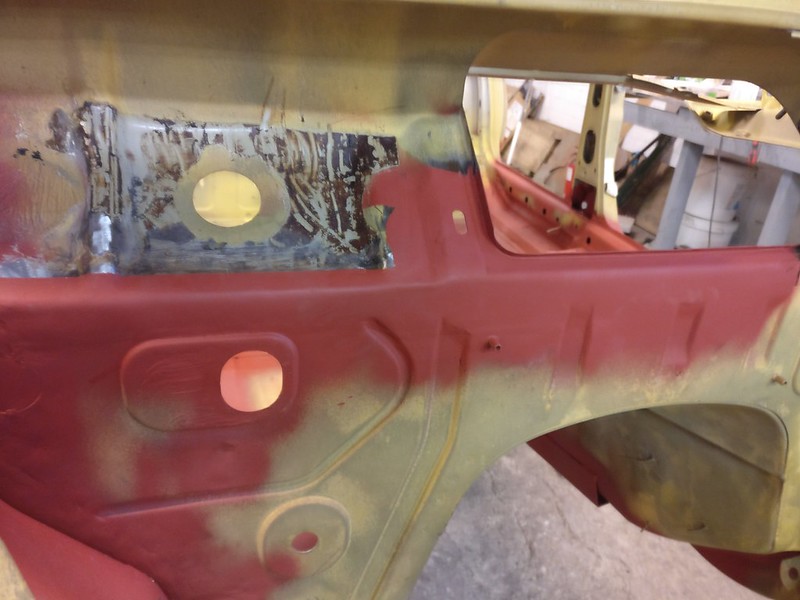
I didn’t take any pictures of the process but the passenger corner piece of fan area got reinstalled and bottom fan panel extended and put back where it belongs. Those are made out of 0.6mm (24 gauge) sheet metal so need a bit more extra care welding but, on the plus side, less bead to grind off.
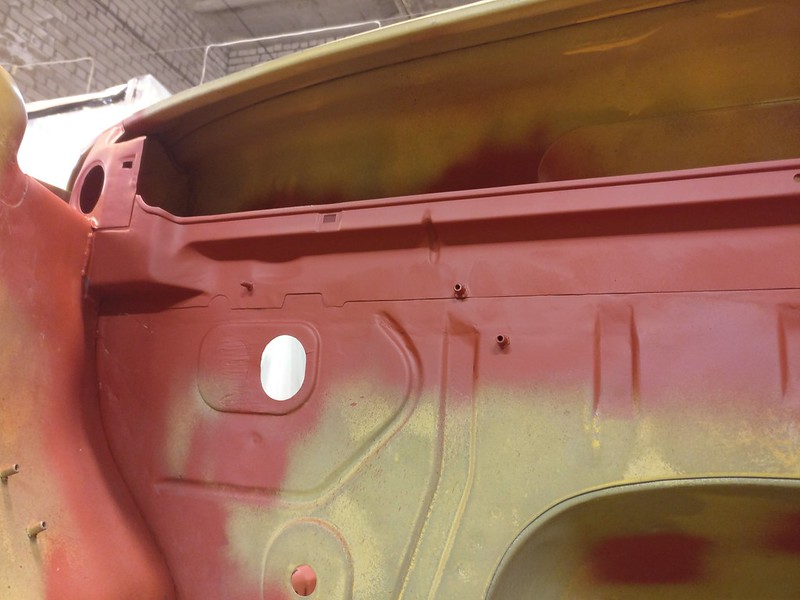
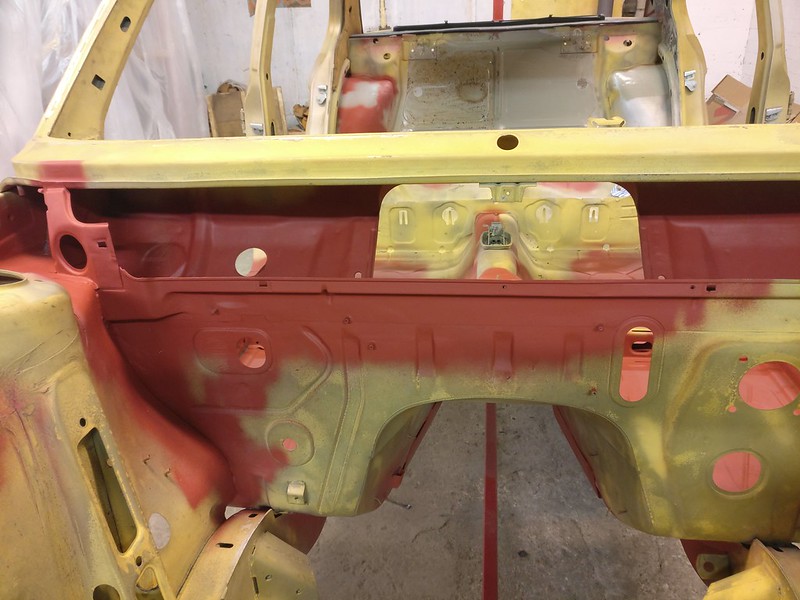
This was finished off only few hours ago so we have caught up with the progress now.
Tacks and plug welds done on wheel housing repair


Fully welded


And cleaned up

Then work continued on the firewall. I do not have a fresh “before” photo so this one will have to do.

I had saved a section of firewall from the other car. That included the bottom panel of the fan area. Unfortunately, I didn’t cut it off in full length and this bottom panel is NLA.
I didn’t like the idea of welding it in as is and it looked like I can’t separate the two panels (firewall from fan bottom panel) without destroying one of them. They had quite some seam sealer/glue in addition to plug welds in between them. So I decided to make a repair for firewall and use the fan bottom panel from the other car. Latter still needed to be extended to the passenger corner.
I happen to have a full series of photos of how the firewall piece was made, so here they are.
First cut out a suitable piece of sheet metal and mark down everything

Then bent the corner using my bending assistant. This is not a very tight bend thus pushing it over by hand gave me exactly the correct radius. Usually I use an appriopriately sized metal rod or similar to make those radiused bends.

After those two bends were done I had something like this

Next, made two bends here. Used some repurposed and dulled chisels to help me out there.

After that, made the small step by just hitting it with the chisel while the piece was attached to my tool

Needs a little bit dressing here and then it will do fine

Finally, added the lip for heater box. The corner needs quite a stretch and I actually messed up the first repair panel here. On the first try, I was just bending over the corner without stretching it against a dolly and that twisted the whole top part. As it was quite quick to remake I didn’t bother to fix it and redid the previous bends on a fresh piece of sheet metal

Rust removed and repair tacked in

I did the top parts of the beads after tacking it in to avoid any twisting of the repair panel. Didn’t realize before it was too late that the beads get wider in the ends not go straight as I did them. Compare the top and bottom end of that short bead on the following photo. But as all that gets covered up by a thick layer of insulation I didn’t bother with it much.

And firewall is whole again

I didn’t take any pictures of the process but the passenger corner piece of fan area got reinstalled and bottom fan panel extended and put back where it belongs. Those are made out of 0.6mm (24 gauge) sheet metal so need a bit more extra care welding but, on the plus side, less bead to grind off.


This was finished off only few hours ago so we have caught up with the progress now.
-
Bonsaibacker
- Posts: 967
- Joined: Oct 26, 2017 3:36 PM
- Location: Fleming Island FL
Re: Another restoration - 83' 528i
That firewall patch is pure craftsmanship!
Re: Another restoration - 83' 528i
Fantastic work bud. I've been down this road before myself, and I really appreciate the skill you are applying to your work (which far exceed my results back in the day). Very, very. well done indeed!
Re: Another restoration - 83' 528i
Thank you guys!
First, I think I figured out most of my sway bar stuff. Thanks to JohnH who posted about this amazing site (https://bmw-grouparchiv.de/) under tech talk I stumbled across an old parts catalogue. Turns out they did use 16mm front sway bar on 525i up to build date 09/82. My front sway bar came from a 81 525i. However, realoem has no knowledge of such sway bar, therefore my earlier confusion.
I crawled under my friend’s late E28 and realized there’s no way I could get away with late rear sway bar. It sits too tight around the diff mount to clear the old style mount/cover. This is actually quite clearly visible from vinceg photos he shared in this thread. My only hope was that maybe the newer sway bar sits further back than the old one but that doesn’t seem to be the case.
For the sake of knowledge I paired up the photo of Vlad with one of my chassis. I hope you don’t mind, cek.
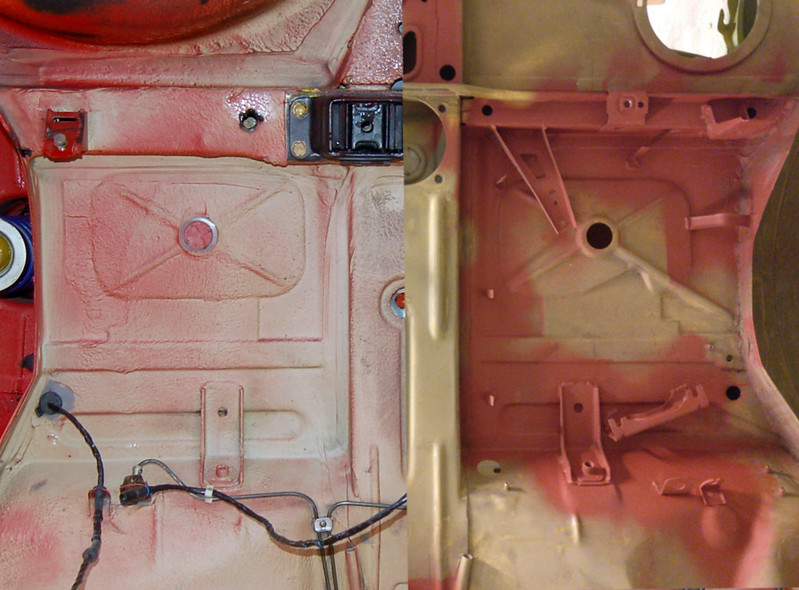
The longitudinal beam that’s between fuel tank and spare wheel housing is actually a difference between US and Euro cars not early/late cars. All the late euro cars I’ve seen share the same beam with my chassis.
Floor pan sheet metal seems to be identical for late and early cars.
Late cars have wider crossbeam with different sway bar and diff mounts. Longitudinal beam between wheels is a bit different but has the same width.
My initial though was that rear sway bar on late cars is mounted further back because the arms of the sway bar are longer and mounts face the rear end. Comparing the two photos, I find they sit almost in the same position. Late sway bar might be a little bit further back but not much.
Unfortunately, I didn’t do any measuring on my friend’s car as it was clear to me that no matter what I do with the mounts I'd have to use the old style sway bar to clear the differential.
However, I finally found a 16mm aftermarket sway bar that, at least according to the pictures, should fit my older chassis. So at least I have some options.
In conclusion, I’ll most likely reinforce my rear mounts and fabricate some custom mounts for front.
So on with the progress on chassis repairs.
1 - 7 Oct 2020
I have changed my mind about speakers on the rear parcel shelf. I have a quite decent set of 6 ½ inch component speakers lying around and I’d like to use them on this car. I guess some car audio enthusiasts would hate me for running such setup but I’ve been thinking about mounting the midwoofers from that set on my rear parcel, probably run them through some LPF. I’d use tweeters and filters from that set for front end and source a nice quality 4 inch midrange speakers to go into A-pillars. Also, I have a 4-channel amp I could use to run this setup.
Now, I know that there’s no way 6 ½ half speakers fit there without hacking everything up but I already have some plans for a custom parcel shelf cover that wouldn’t look too out of place on an E28. If that doesn’t pan out I’ll most likely ditch those speakers for a cleaner look.
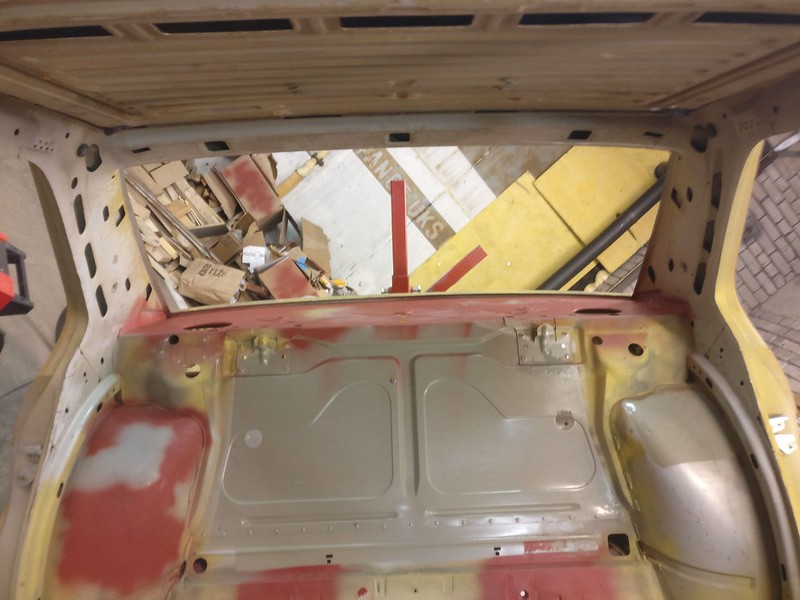
Anyway, I now need some holes there for speakers.
I began with cutting some rough holes in my recently repaired parcel shelf
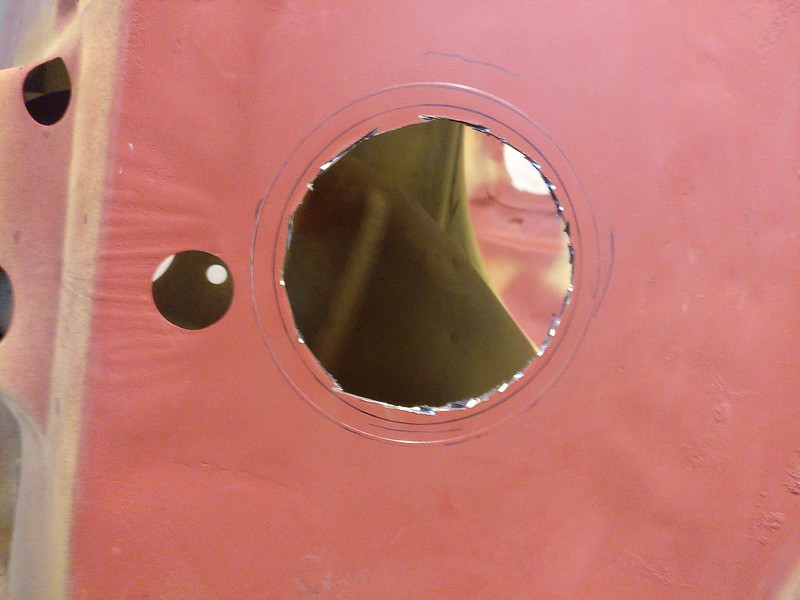
Did a little bit grinding and filing to tidy them up
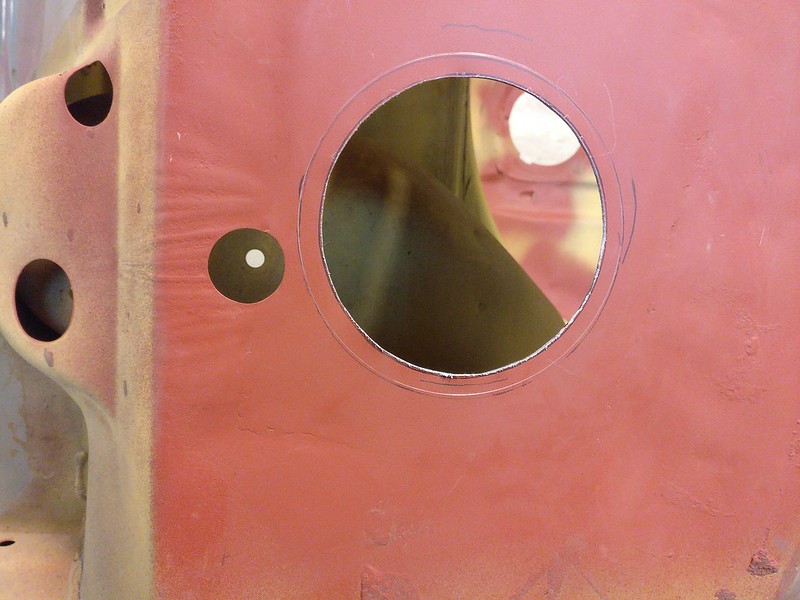
Cut out some molds out of plywood. The holes in the corners helped to align the bottom and top piece. Used some C-clamps to tighten them up and started hammering.
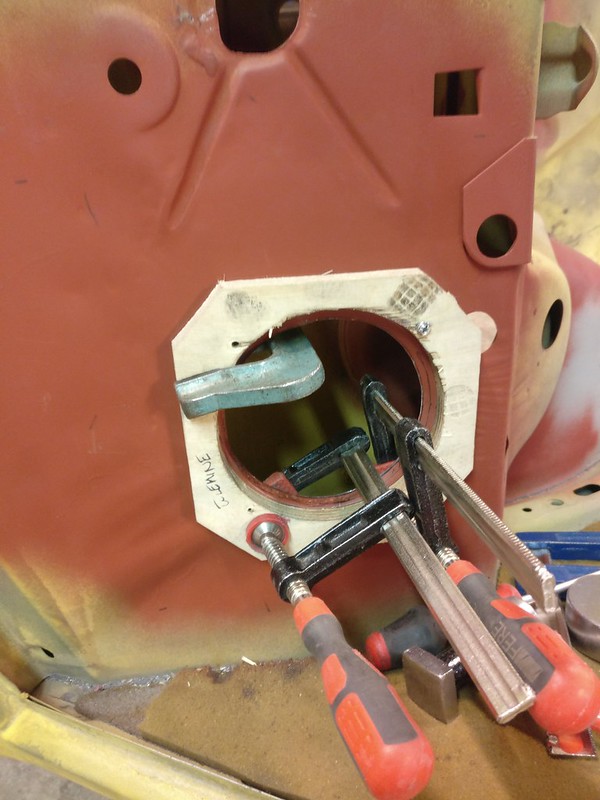
A little bit later I had something like this
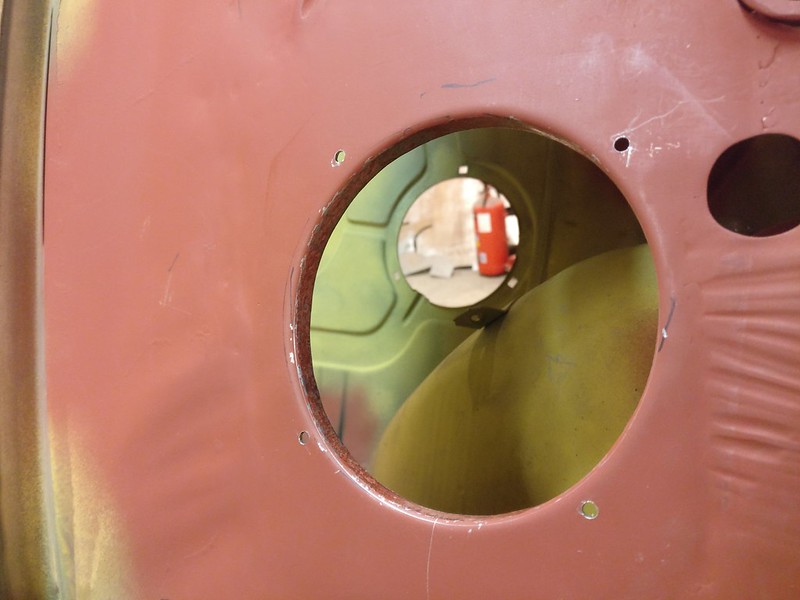
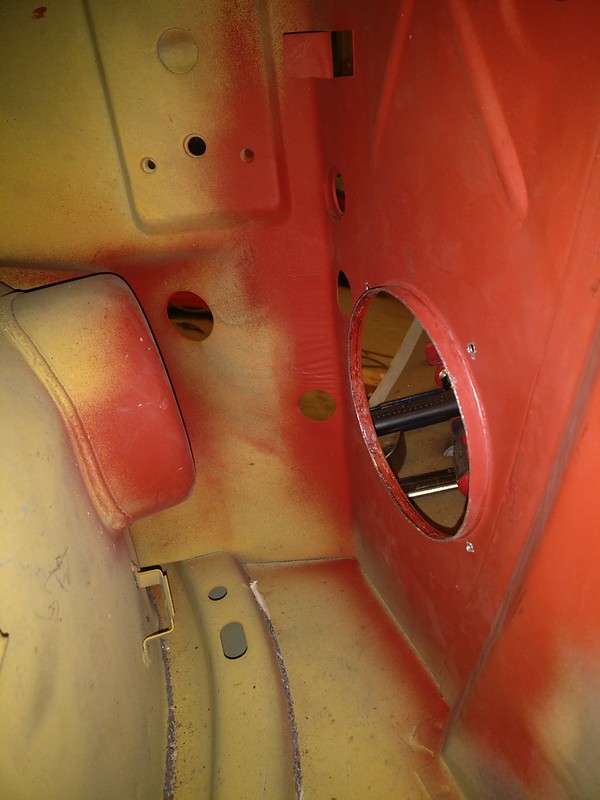
These holes were made for 5 ¼ inch speakers as this is the largest you could mount flush without going into the lower panel. I went through multiple datasheets for different speakers to look up the dimensions beforehand so most of the 5 ¼ inch speakers should fit there nicely. Some speakers might hit the fuel expansion tank but I am not concerned about that right now.
Here’s a random speaker mounted.
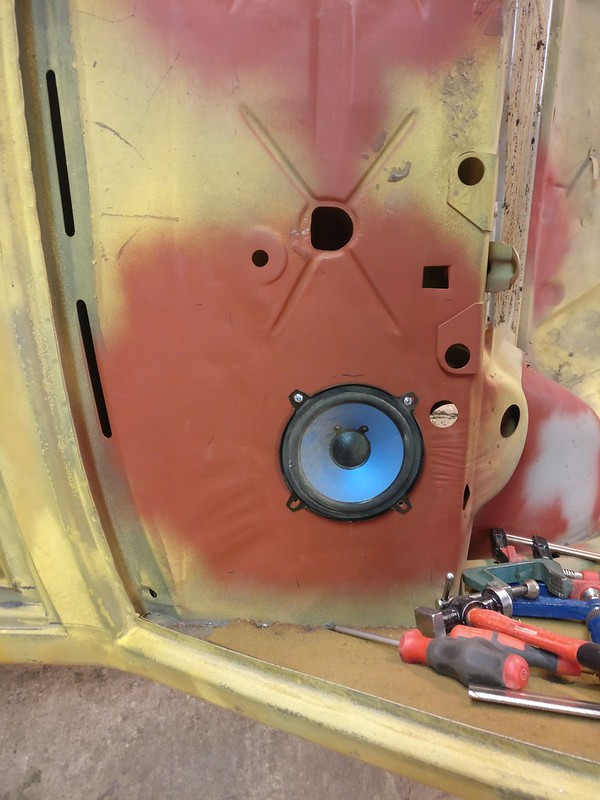
After both sides were done, I trimmed the flare and enlarged the small holes so they could be used to attach the speaker. I could’ve done mounting points for the sheet metal nuts, something like BMW did for A-pillar speakers. This would’ve made mounting the speakers easier (no need to hold the nut from the trunk) but then I would’ve lost some rigidity of the panel by removing the lip in the corners.
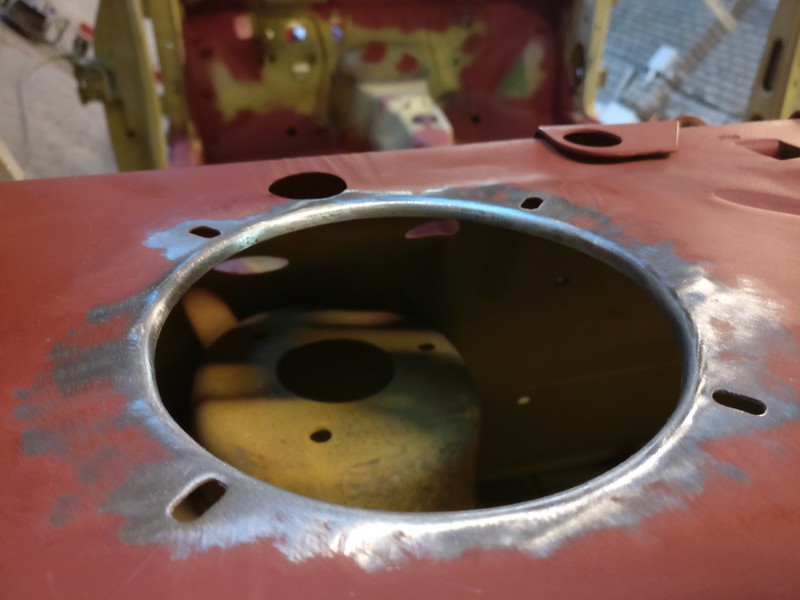
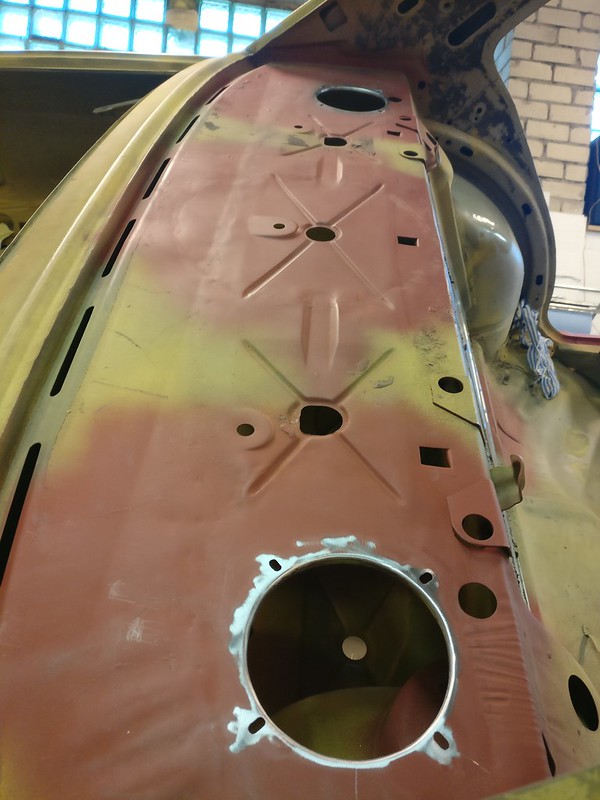
I am happy with these. Nothing like the crap that was there before.
Then I went on and cleaned up any remaining sound insulation and glue residue on C-pillars and parcel shelf. This time I used heat gun and scraper. To be honest, I can't say it was worse than freezing the insulation panels. Xylene was used to remove glue residue.
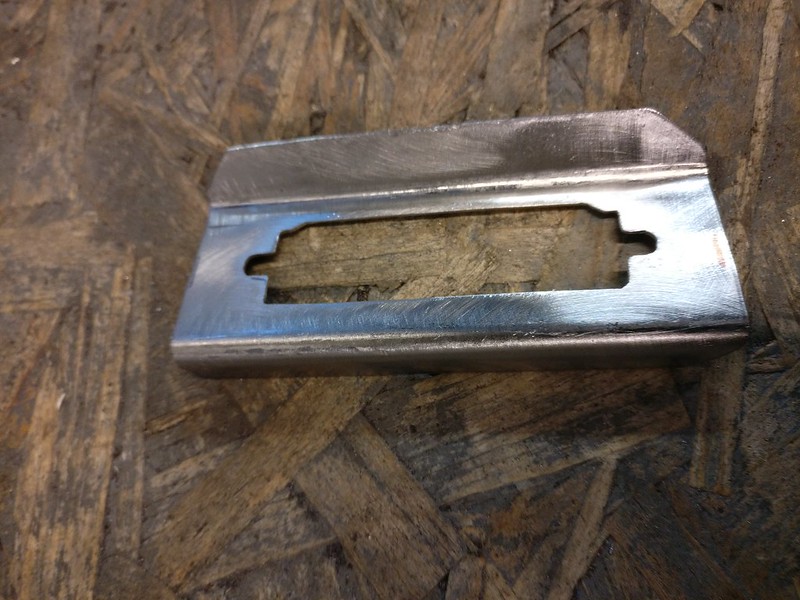
One of the license place light openings was rather badly rusted so I cut it out and made a piece to fix it.
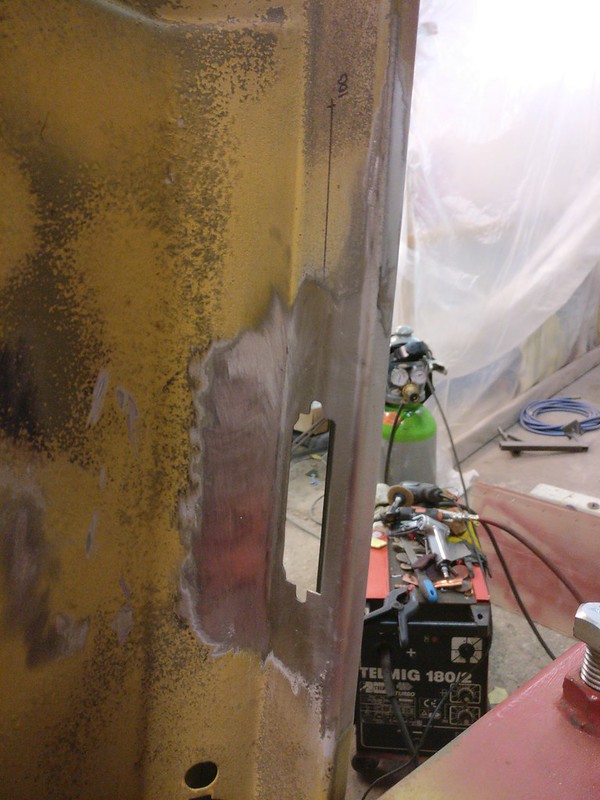
The other side has a little bit of rust pits. It was blasted clean and no rust has creeped through the etching primer since then. Haven’t decided yet if I want to replace it or leave it be.
I know I had two small pit holes where the panel seen on the next photo was attached to the fuel filler neck housing in the trunk. I though I’ll just weld them up and be done with it. But on a closer look there was more like 20 small holes hidden behind that panel. So it had to come out. And I am glad it did, as it turned out the bottom flange of this piece was also quite rusted.
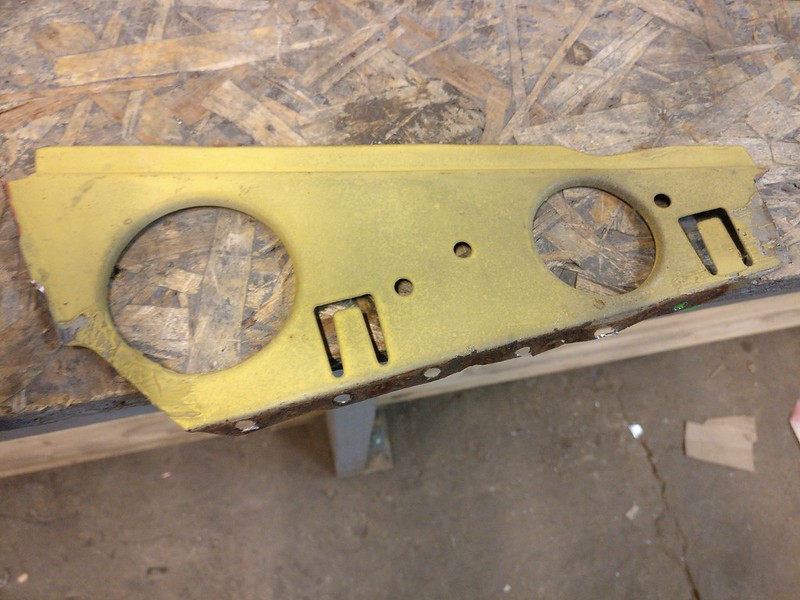
OEM panel is still available and doesn’t cost much. But then I’d have to wait for it to arrive and besides where’s the fun in that. So I decided to replicate this myself.
I began with the toughest part - return bend on top. I still haven’t figured out an easy way to do those tight return bends without a bead roller. My methods give some results but I usually need to tidy it up later.
Cut out a suitable piece of sheet metal and tacked it to a metal bar so it wouldn’t move while I work on the bend.
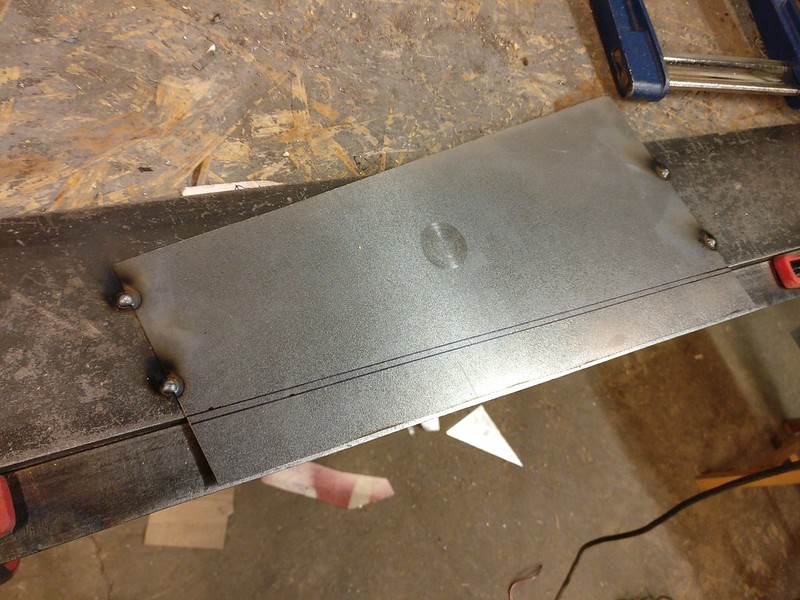
I clamped an additional bar on the top part to keep the bend tight and used a blunt chisel to hit it on the bottom line. That gave me this
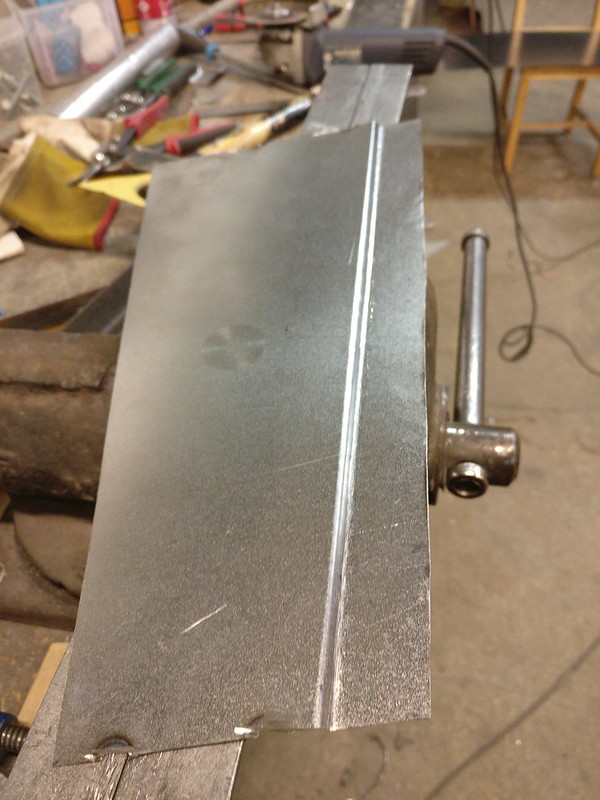
Then cut some holes
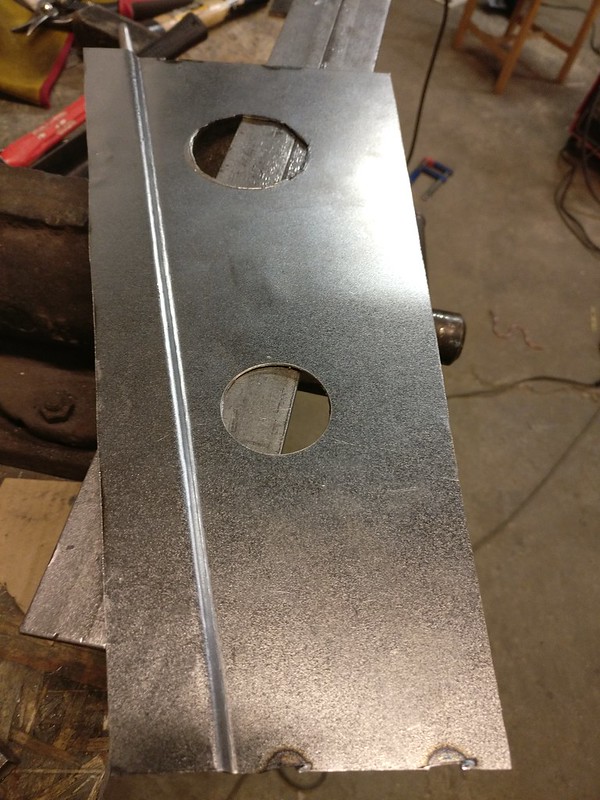
And used the same method I used for speaker holes to form the flares
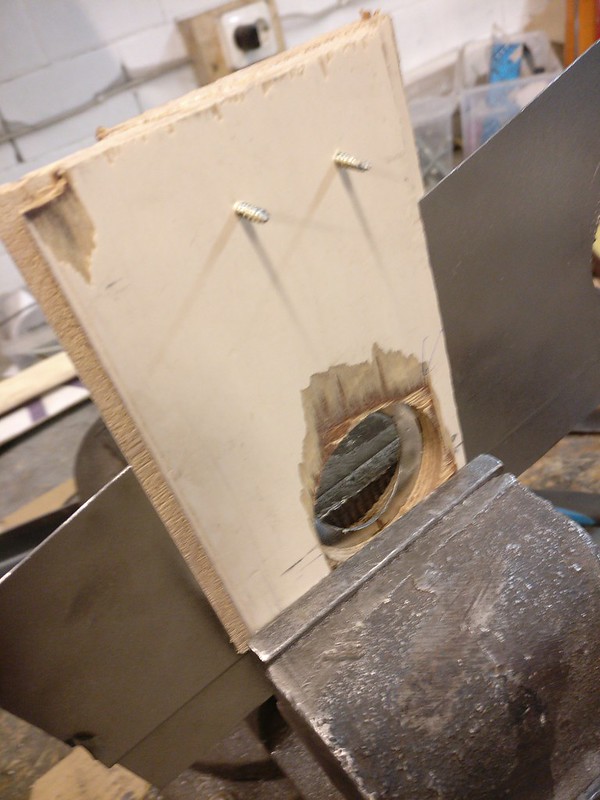
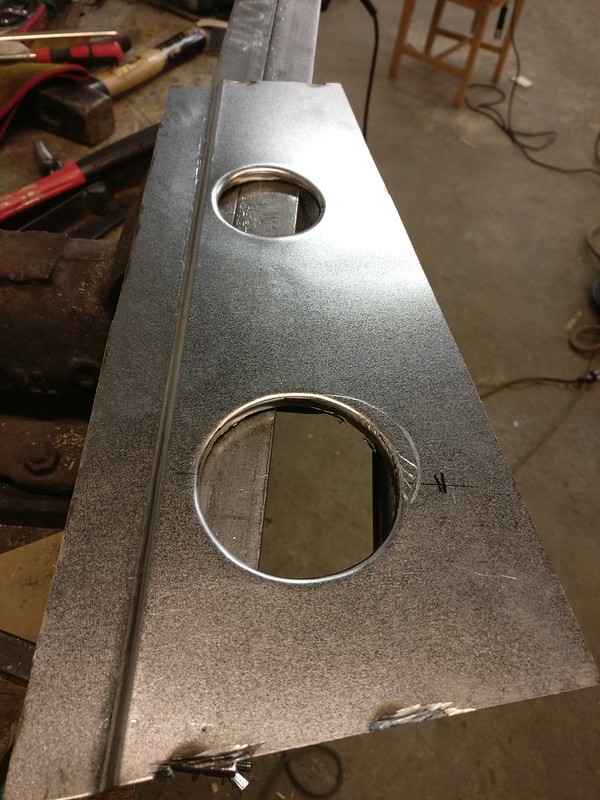
Next, did the bottom flange. Messed up the smaller hole a bit during bending but it can be saved with some hammering.
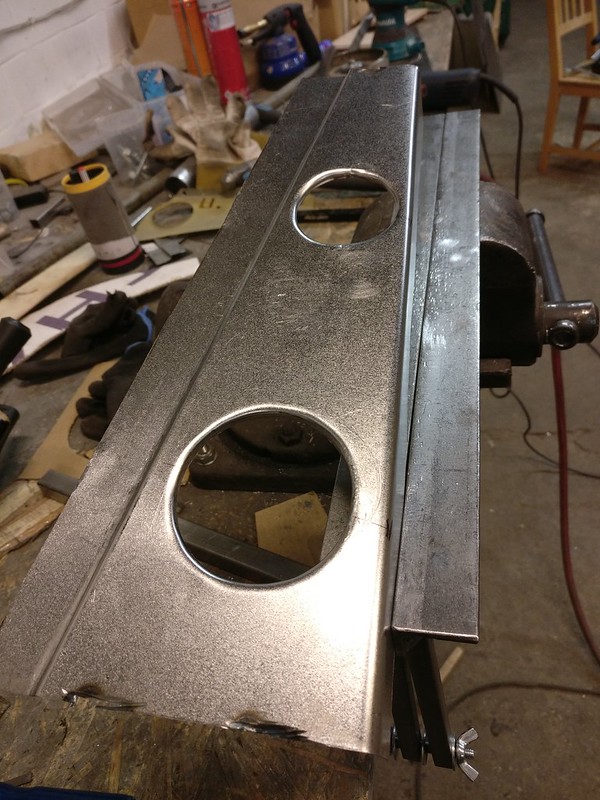
Trimmed to size
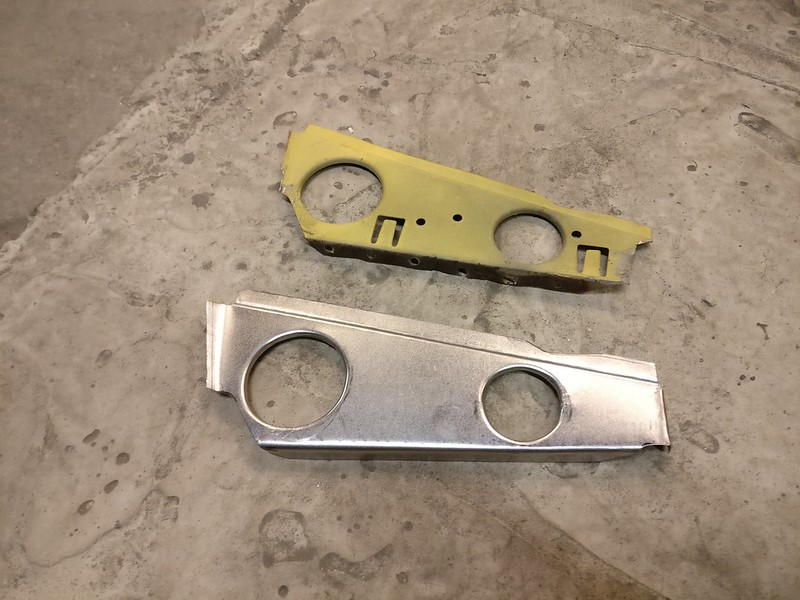
Finally, drilled the small holes, did the harness attachment clips and made it shine.
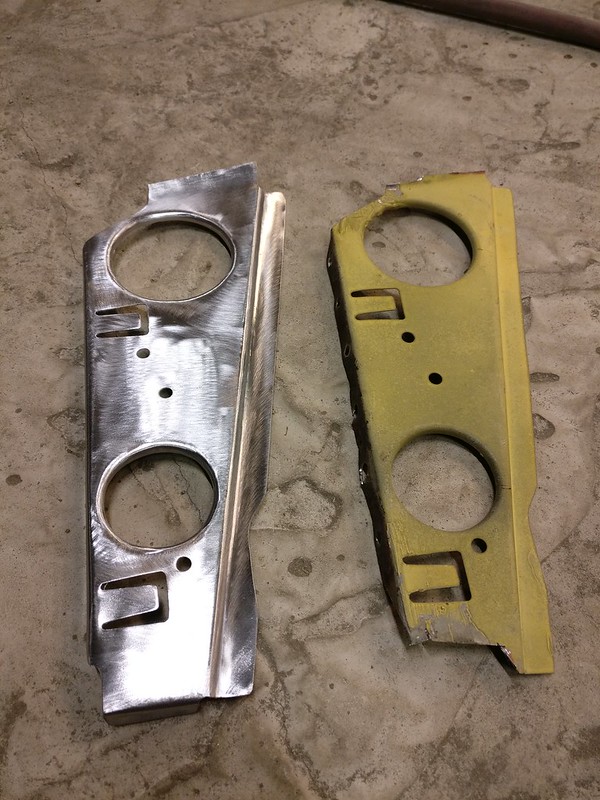
I wonder if anyone knows what those clips are for? I first though the central locking harness for fuel door runs past there but my old photos tell me otherwise. I can’t think of anything else electrical there.
Today, I came home to this parcel
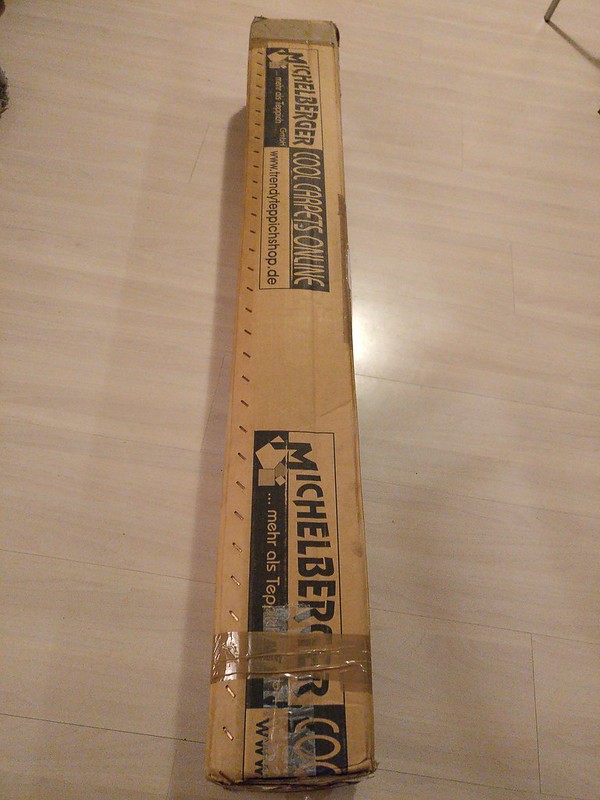
In there was a brand new front bumper
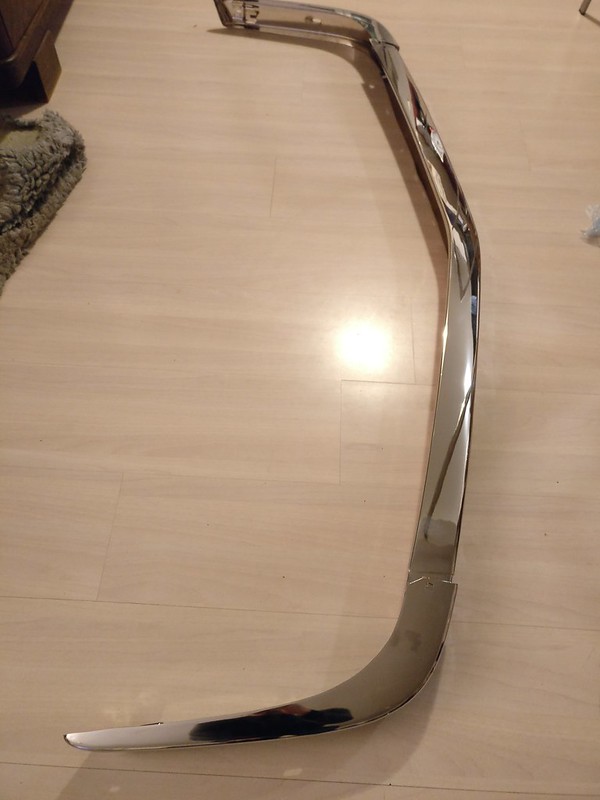
Got it at a very decent price from a German gentleman. Sad thing about it is that my rear bumper was actually in worse state than the front (front I could've run as is) and there’s no way I can get that lucky twice.
First, I think I figured out most of my sway bar stuff. Thanks to JohnH who posted about this amazing site (https://bmw-grouparchiv.de/) under tech talk I stumbled across an old parts catalogue. Turns out they did use 16mm front sway bar on 525i up to build date 09/82. My front sway bar came from a 81 525i. However, realoem has no knowledge of such sway bar, therefore my earlier confusion.
I crawled under my friend’s late E28 and realized there’s no way I could get away with late rear sway bar. It sits too tight around the diff mount to clear the old style mount/cover. This is actually quite clearly visible from vinceg photos he shared in this thread. My only hope was that maybe the newer sway bar sits further back than the old one but that doesn’t seem to be the case.
For the sake of knowledge I paired up the photo of Vlad with one of my chassis. I hope you don’t mind, cek.

The longitudinal beam that’s between fuel tank and spare wheel housing is actually a difference between US and Euro cars not early/late cars. All the late euro cars I’ve seen share the same beam with my chassis.
Floor pan sheet metal seems to be identical for late and early cars.
Late cars have wider crossbeam with different sway bar and diff mounts. Longitudinal beam between wheels is a bit different but has the same width.
My initial though was that rear sway bar on late cars is mounted further back because the arms of the sway bar are longer and mounts face the rear end. Comparing the two photos, I find they sit almost in the same position. Late sway bar might be a little bit further back but not much.
Unfortunately, I didn’t do any measuring on my friend’s car as it was clear to me that no matter what I do with the mounts I'd have to use the old style sway bar to clear the differential.
However, I finally found a 16mm aftermarket sway bar that, at least according to the pictures, should fit my older chassis. So at least I have some options.
In conclusion, I’ll most likely reinforce my rear mounts and fabricate some custom mounts for front.
So on with the progress on chassis repairs.
1 - 7 Oct 2020
I have changed my mind about speakers on the rear parcel shelf. I have a quite decent set of 6 ½ inch component speakers lying around and I’d like to use them on this car. I guess some car audio enthusiasts would hate me for running such setup but I’ve been thinking about mounting the midwoofers from that set on my rear parcel, probably run them through some LPF. I’d use tweeters and filters from that set for front end and source a nice quality 4 inch midrange speakers to go into A-pillars. Also, I have a 4-channel amp I could use to run this setup.
Now, I know that there’s no way 6 ½ half speakers fit there without hacking everything up but I already have some plans for a custom parcel shelf cover that wouldn’t look too out of place on an E28. If that doesn’t pan out I’ll most likely ditch those speakers for a cleaner look.
Anyway, I now need some holes there for speakers.
I began with cutting some rough holes in my recently repaired parcel shelf

Did a little bit grinding and filing to tidy them up

Cut out some molds out of plywood. The holes in the corners helped to align the bottom and top piece. Used some C-clamps to tighten them up and started hammering.

A little bit later I had something like this


These holes were made for 5 ¼ inch speakers as this is the largest you could mount flush without going into the lower panel. I went through multiple datasheets for different speakers to look up the dimensions beforehand so most of the 5 ¼ inch speakers should fit there nicely. Some speakers might hit the fuel expansion tank but I am not concerned about that right now.
Here’s a random speaker mounted.

After both sides were done, I trimmed the flare and enlarged the small holes so they could be used to attach the speaker. I could’ve done mounting points for the sheet metal nuts, something like BMW did for A-pillar speakers. This would’ve made mounting the speakers easier (no need to hold the nut from the trunk) but then I would’ve lost some rigidity of the panel by removing the lip in the corners.


I am happy with these. Nothing like the crap that was there before.
Then I went on and cleaned up any remaining sound insulation and glue residue on C-pillars and parcel shelf. This time I used heat gun and scraper. To be honest, I can't say it was worse than freezing the insulation panels. Xylene was used to remove glue residue.

One of the license place light openings was rather badly rusted so I cut it out and made a piece to fix it.


The other side has a little bit of rust pits. It was blasted clean and no rust has creeped through the etching primer since then. Haven’t decided yet if I want to replace it or leave it be.
I know I had two small pit holes where the panel seen on the next photo was attached to the fuel filler neck housing in the trunk. I though I’ll just weld them up and be done with it. But on a closer look there was more like 20 small holes hidden behind that panel. So it had to come out. And I am glad it did, as it turned out the bottom flange of this piece was also quite rusted.

OEM panel is still available and doesn’t cost much. But then I’d have to wait for it to arrive and besides where’s the fun in that. So I decided to replicate this myself.
I began with the toughest part - return bend on top. I still haven’t figured out an easy way to do those tight return bends without a bead roller. My methods give some results but I usually need to tidy it up later.
Cut out a suitable piece of sheet metal and tacked it to a metal bar so it wouldn’t move while I work on the bend.

I clamped an additional bar on the top part to keep the bend tight and used a blunt chisel to hit it on the bottom line. That gave me this

Then cut some holes

And used the same method I used for speaker holes to form the flares


Next, did the bottom flange. Messed up the smaller hole a bit during bending but it can be saved with some hammering.

Trimmed to size

Finally, drilled the small holes, did the harness attachment clips and made it shine.

I wonder if anyone knows what those clips are for? I first though the central locking harness for fuel door runs past there but my old photos tell me otherwise. I can’t think of anything else electrical there.
Today, I came home to this parcel

In there was a brand new front bumper

Got it at a very decent price from a German gentleman. Sad thing about it is that my rear bumper was actually in worse state than the front (front I could've run as is) and there’s no way I can get that lucky twice.
Last edited by taavipa on Oct 18, 2020 5:31 PM, edited 1 time in total.
Re: Another restoration - 83' 528i
Inspirational. I think your work is superb. Well done.
A question. What tools are you using to cut the bodywork and repair pieces, especially those around the strut towers. I'm looking to do the same task on mine and have been using a dremel with its 38mm cutting wheel which works quite well in the restricted spaces around the tower.
A question. What tools are you using to cut the bodywork and repair pieces, especially those around the strut towers. I'm looking to do the same task on mine and have been using a dremel with its 38mm cutting wheel which works quite well in the restricted spaces around the tower.
Re: Another restoration - 83' 528i
Thanks!JohnH wrote: Oct 08, 2020 9:45 PM Inspirational. I think your work is superb. Well done.
A question. What tools are you using to cut the bodywork and repair pieces, especially those around the strut towers. I'm looking to do the same task on mine and have been using a dremel with its 38mm cutting wheel which works quite well in the restricted spaces around the tower.
Most of my cutting gets done by an air cut off tool/grinder. I use 75mm (~3 inch) x 1mm discs on that. I keep the worn out discs to get into tight places.
I've also used Dremel and those 38mm discs are quite nice. Although, from the last batch I had almost every disc had a premature failure in the middle where the EZ SpeedClick shaft gets attached. I haven't bought any more of these after that. I also use those tiny and narrow cutting discs (0.5mm) for Dremel that sometimes come in handy (e.g those cuts I made for the rocker drains). If the cutting tools don't fit, I grind away excess metal with either rolocs or with my belt sander/powerfile, sometimes you can even make cuts with snips where power tools don't fit.
For new repair panels I usually use cutting discs only for cutting the initial piece out of sheet metal. I haven't yet invested into an air or electric snipping tool or nibbler, otherwise I'd use that. Trimming gets mostly done with aviation snips. If I'd like to get a cleaner edge, I grind the last millimeter or two. For a very tight panel fitment you can't beat hand filing the very last part.
I guess it would be a perfect place to also list some of the tools I use for grinding the welds and finishing.
Nothing beats my 90 degree angled air die grinder equipped with roloc discs. Whenever possible I try to plan the repairs so that I have good access to the welds with this tool. For grinding I use 50mm (~2 in) 3M red Cubitron discs. They also have a purple series of Cubitron discs but in my experience they wear out quicker and have too stiff backing. I start with 60+ grit discs and sometimes, on more visible areas, I use 80+ grit for the last bit. When fresh, these roloc discs cut through welds like a knife through butter. Some discs also have soft backing and those are useful to remove welds from the inner corner of the bends. I bought a big bag of Chinese made roloc discs off eBay that have really soft backing. They don't last for long but help me out sometimes. I don't have one but I imagine a 45 degree angled die grinder would also come in handy for tighter areas.
To smooth everything out after the grinding I use coarse (brown) Scotch Brite roloc discs on the same tool. Mostly 75mm (3in), sometimes 50mm (2in).
Second best tool I have for grinding the welds is the air powered belt sander/powerfile. I use 10x330mm 3M Cubitron belts on that. For the belt sander I do like the purple belts more than the red ones. Not sure why, but the red ones tend to snap in two from the joint more easily. 60+ grit and 80+ grit. The tip of this tool can get into quite tight spots. But it is much harder to achieve a nice flat finish with this and it is much more agressive than rolocs so care must be taken when grinding. They also do offer Scotch Brite belts but I haven't had a chance to try one yet.
For both of these I prefer the "original" accessories made by 3M. The replicas aren't that much cheaper, wear out quicker and perform worse. As the grinding is definitely the most appalling part of the work, I see no reason to use them.
For really tight spots I have a tiny 3mm carbide bit for Dremel. Its hard to get a smooth finish with that but it helps to at least take the tops off the welds.
For the inner corners of bends the edge of a cutting disc works to remove the majority of the weld.
When the weld doesn't get ground off, like if there was a seam weld there from the factory or in some hidden place where no tool would fit, I run a wire wheel over the weld and the surrounding area to clean it up. Not doing so results in primer/paint not adhering properly.
Re: Another restoration - 83' 528i
Great reply. I'm still digesting it. 3M roloc takes a bit of beating as does most 3M stuff. Iv'e still got my old Speedglas, which is a great bit of kit.


