Rebuilding My 1988 US-spec M5

Post your photos and videos here!
jhh925
Posts: 917
Joined: Jul 11, 2015 12:23 AM
Location: Reno

Re: Rebuilding My 1988 US-spec M5

Post by jhh925 »

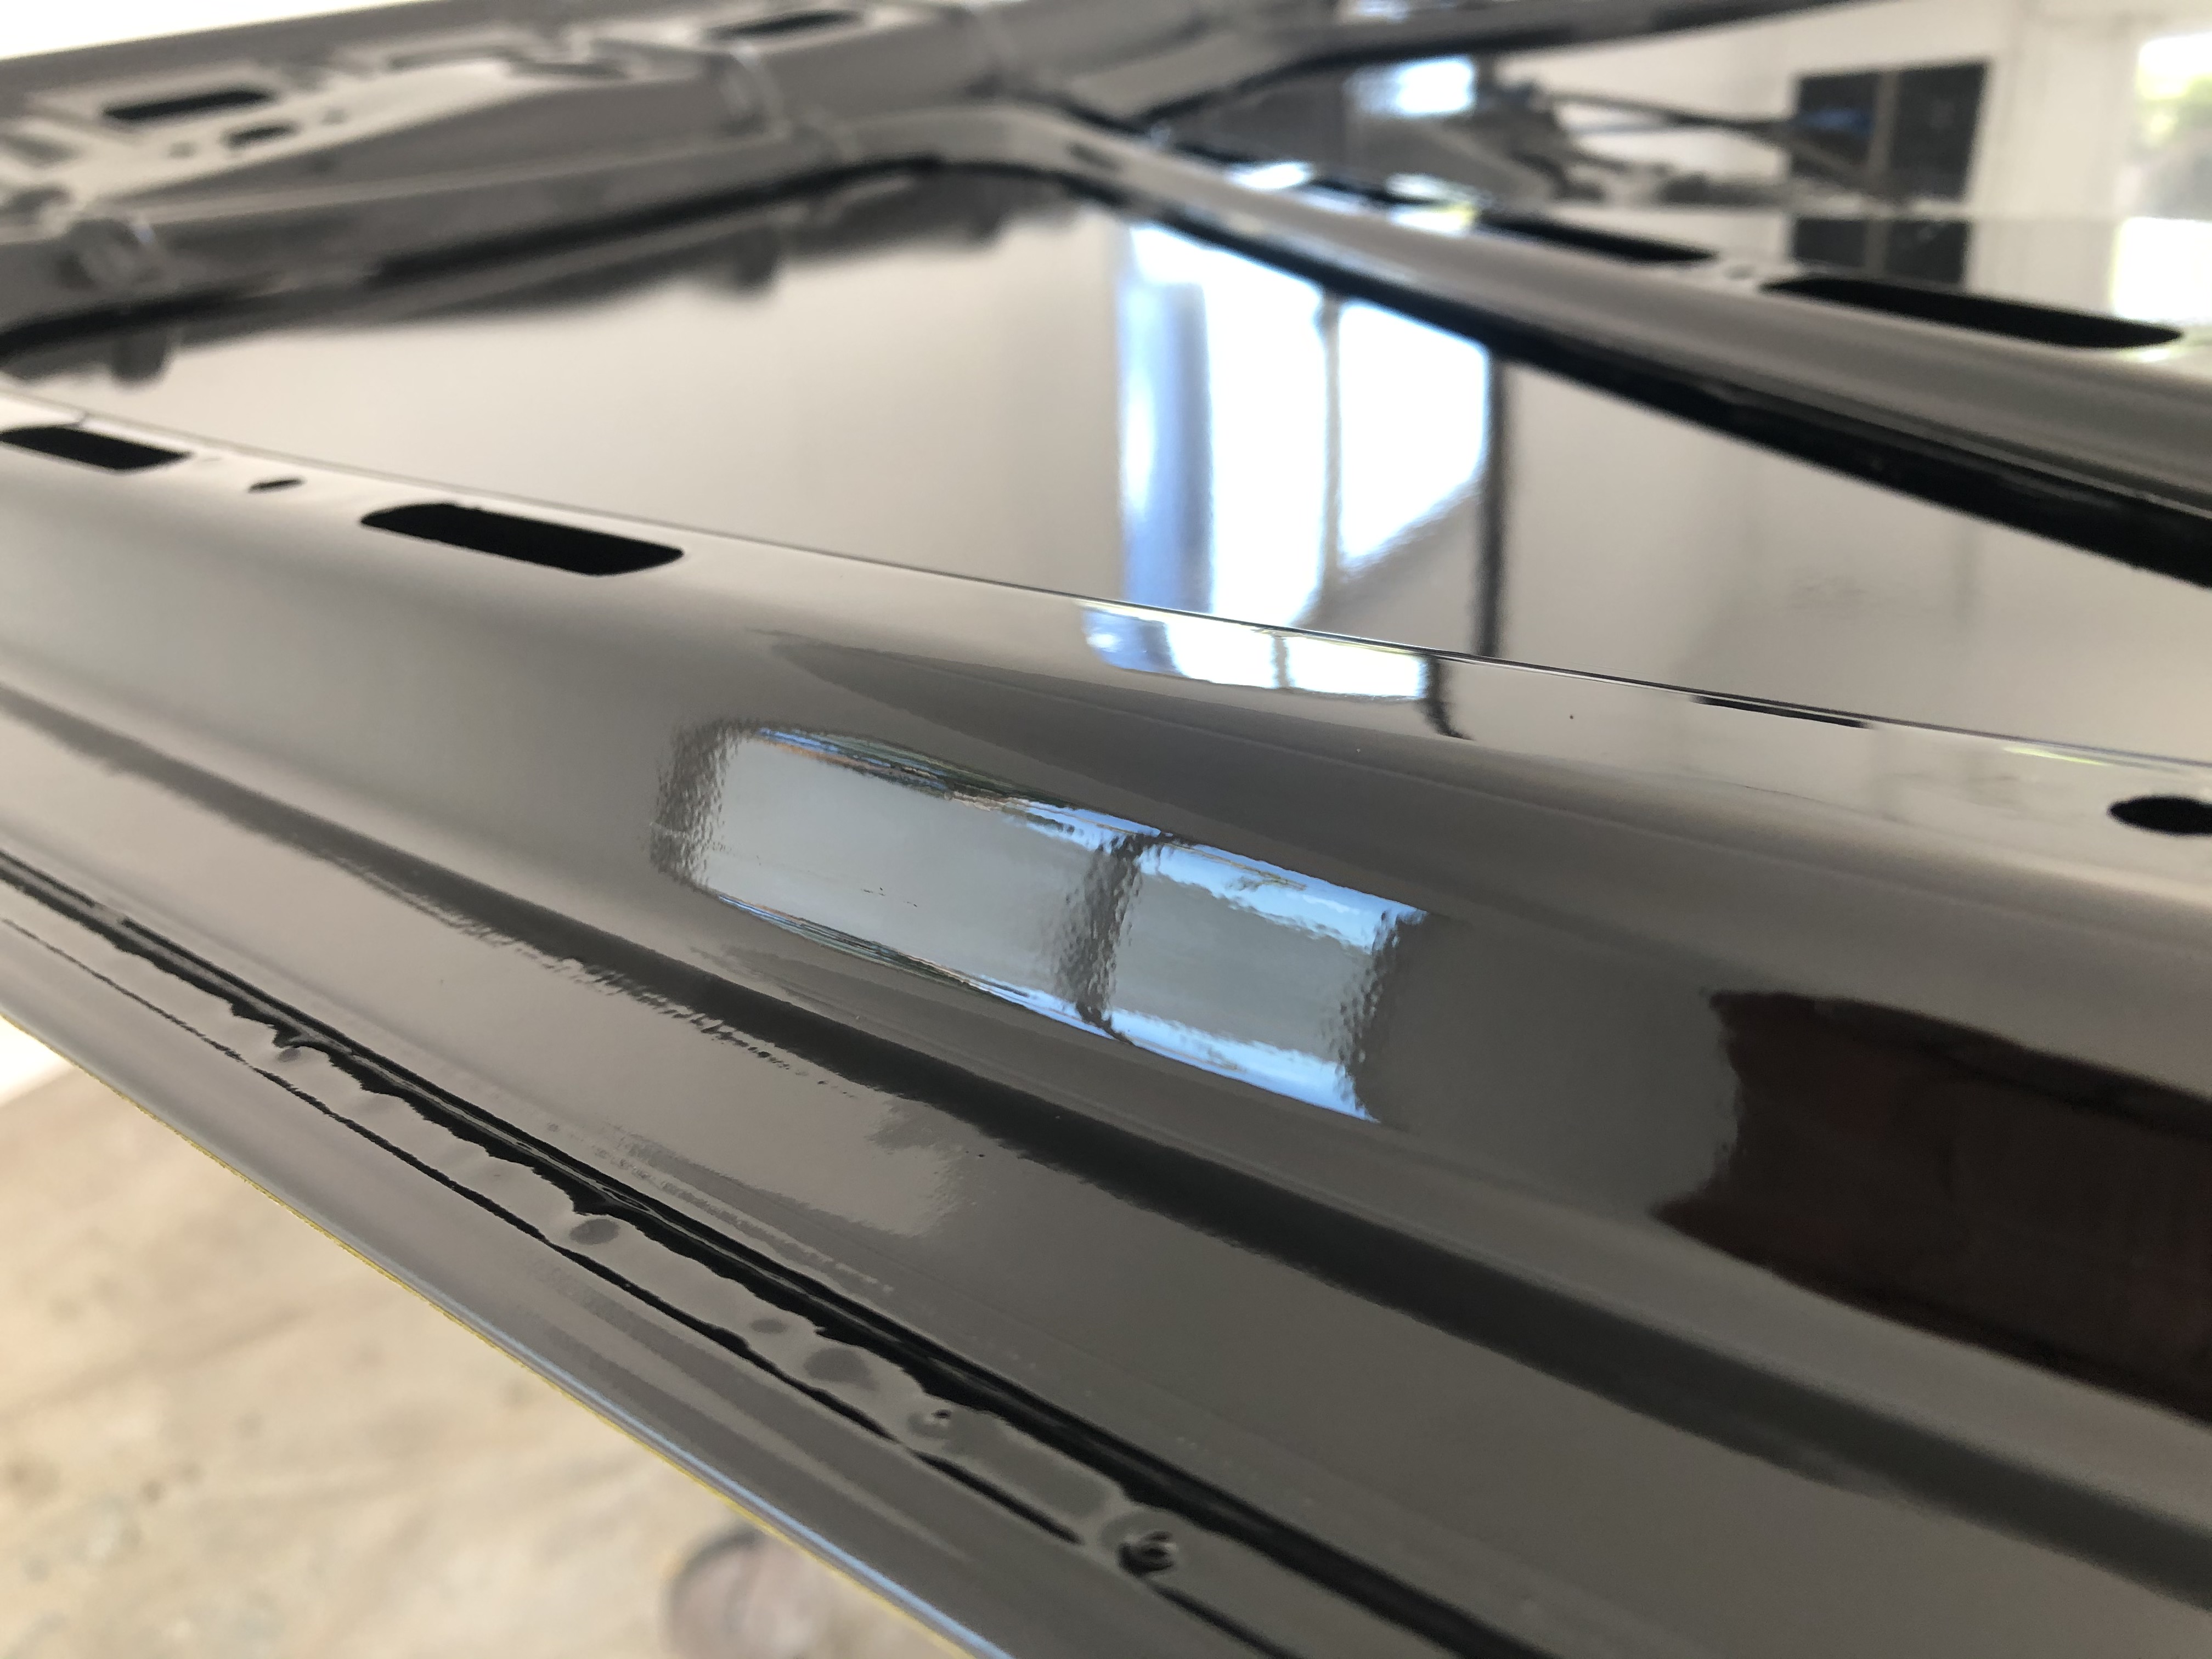
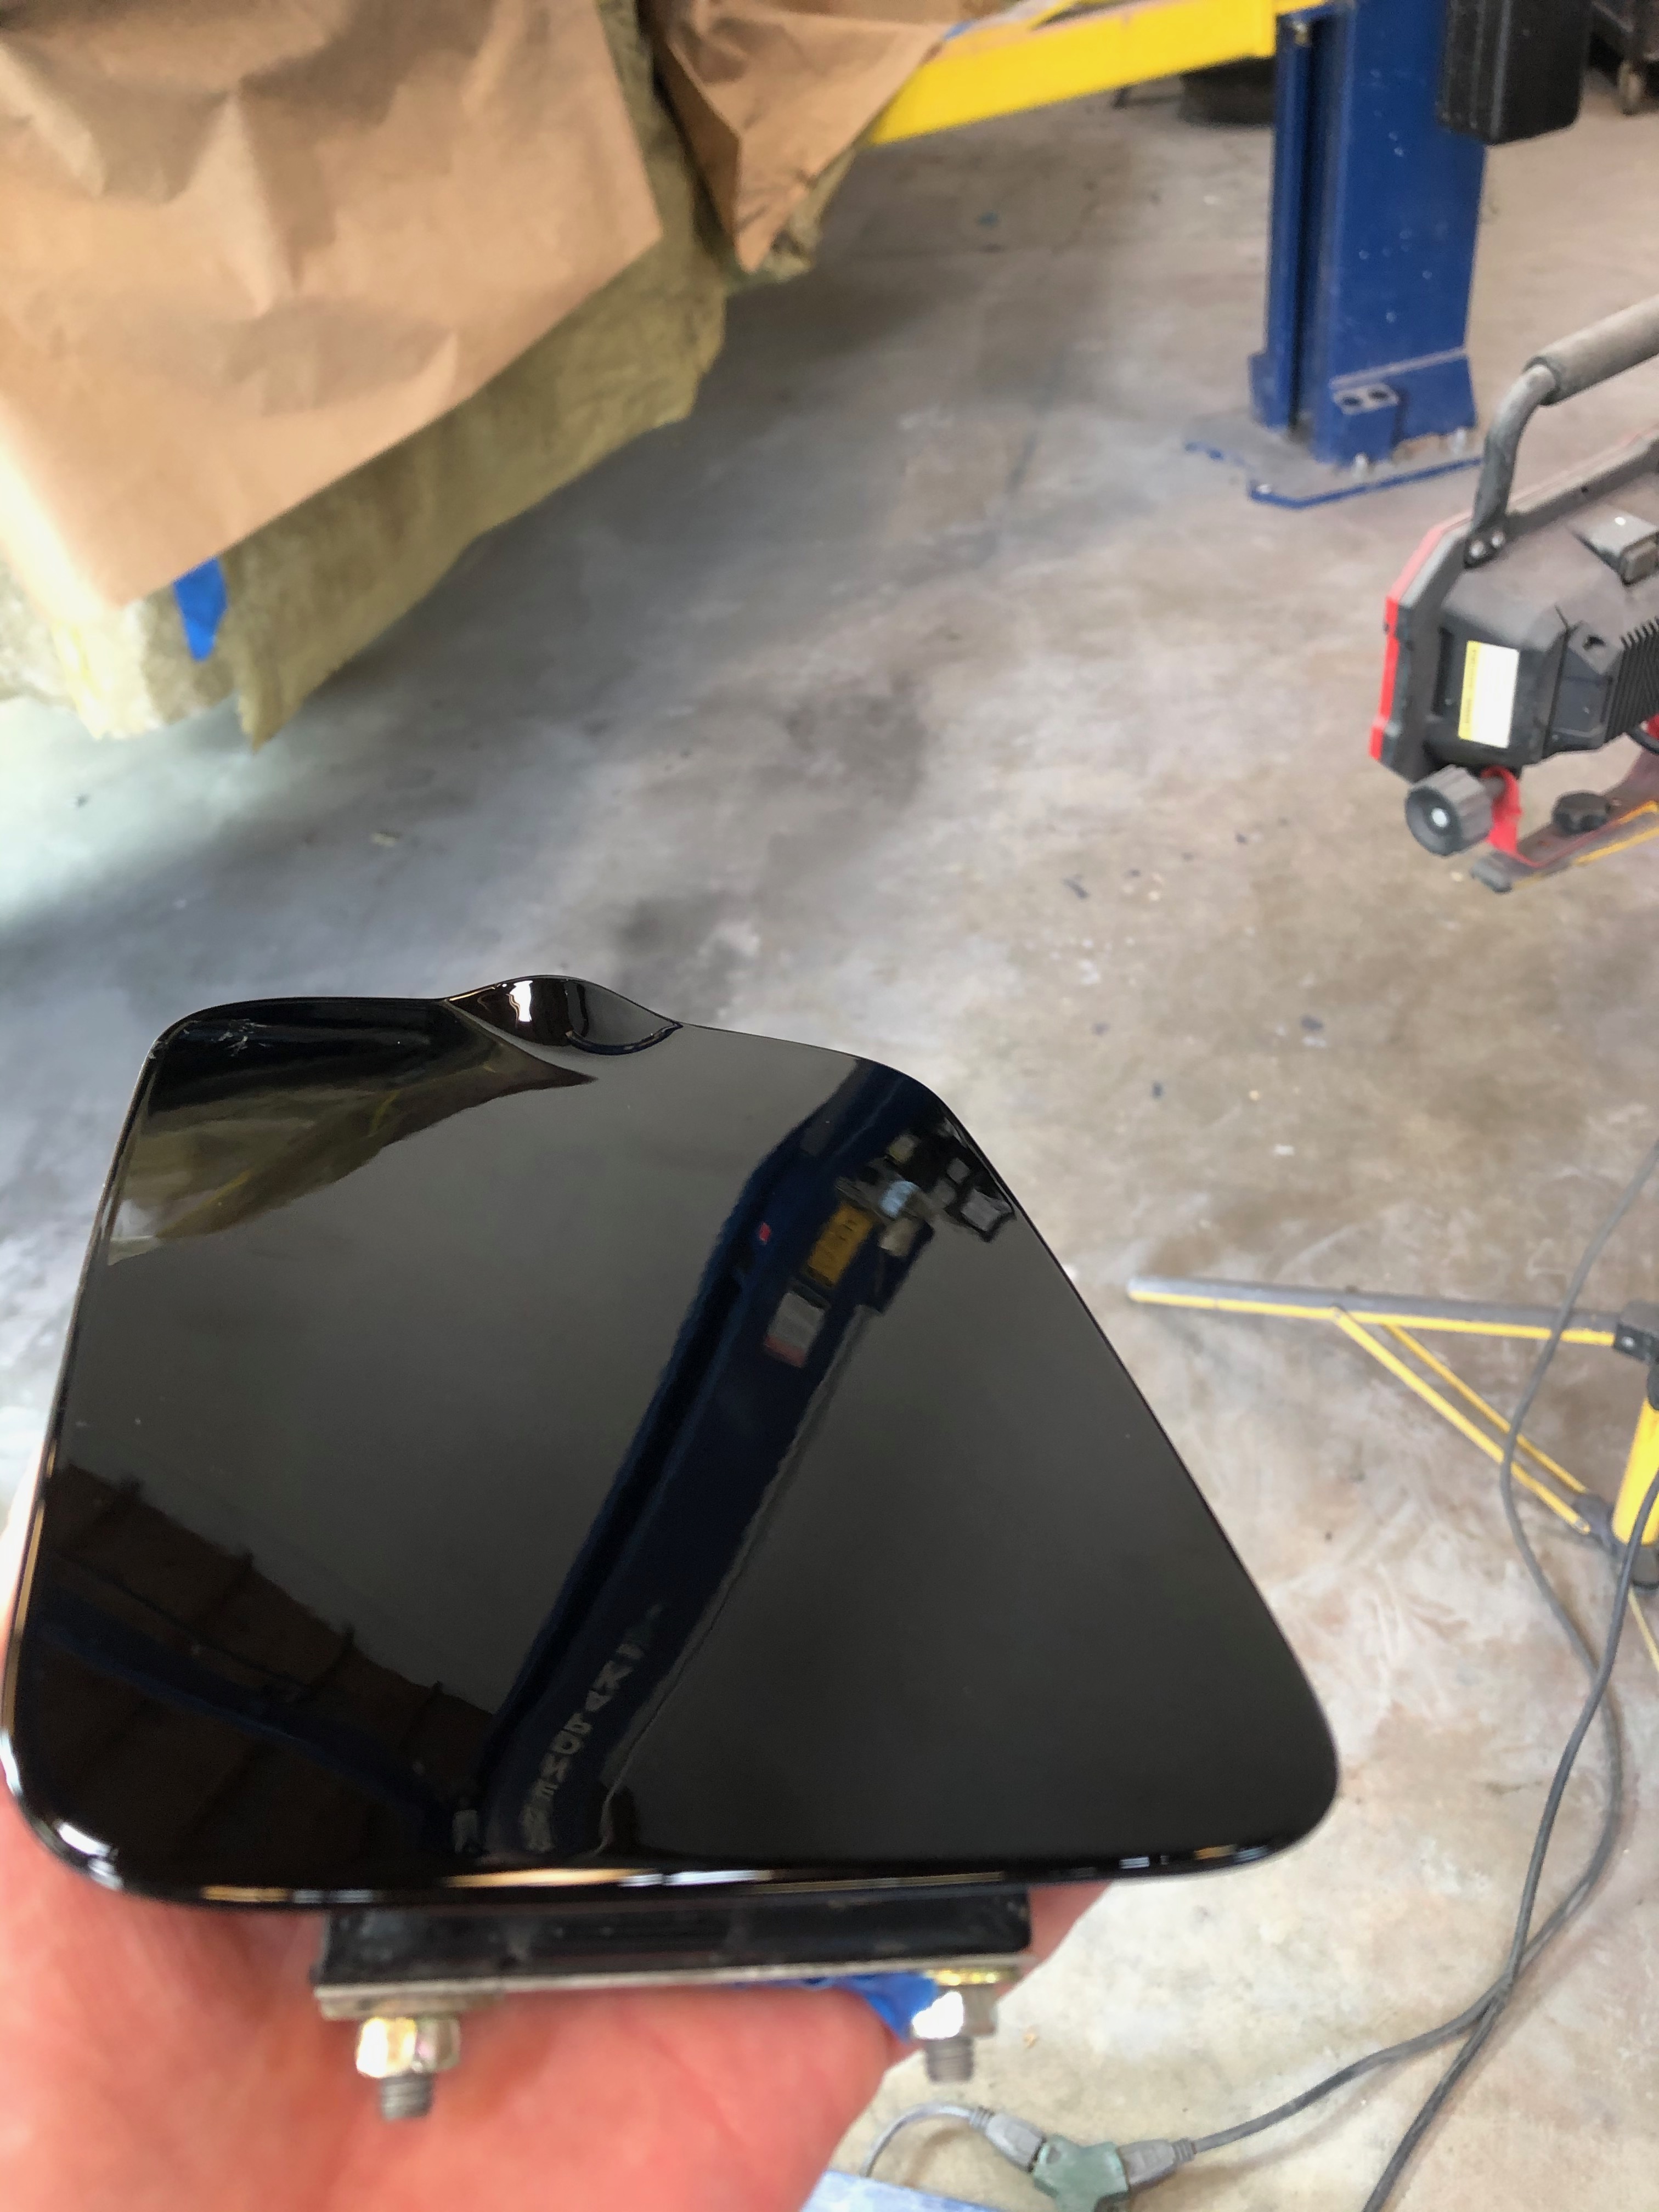
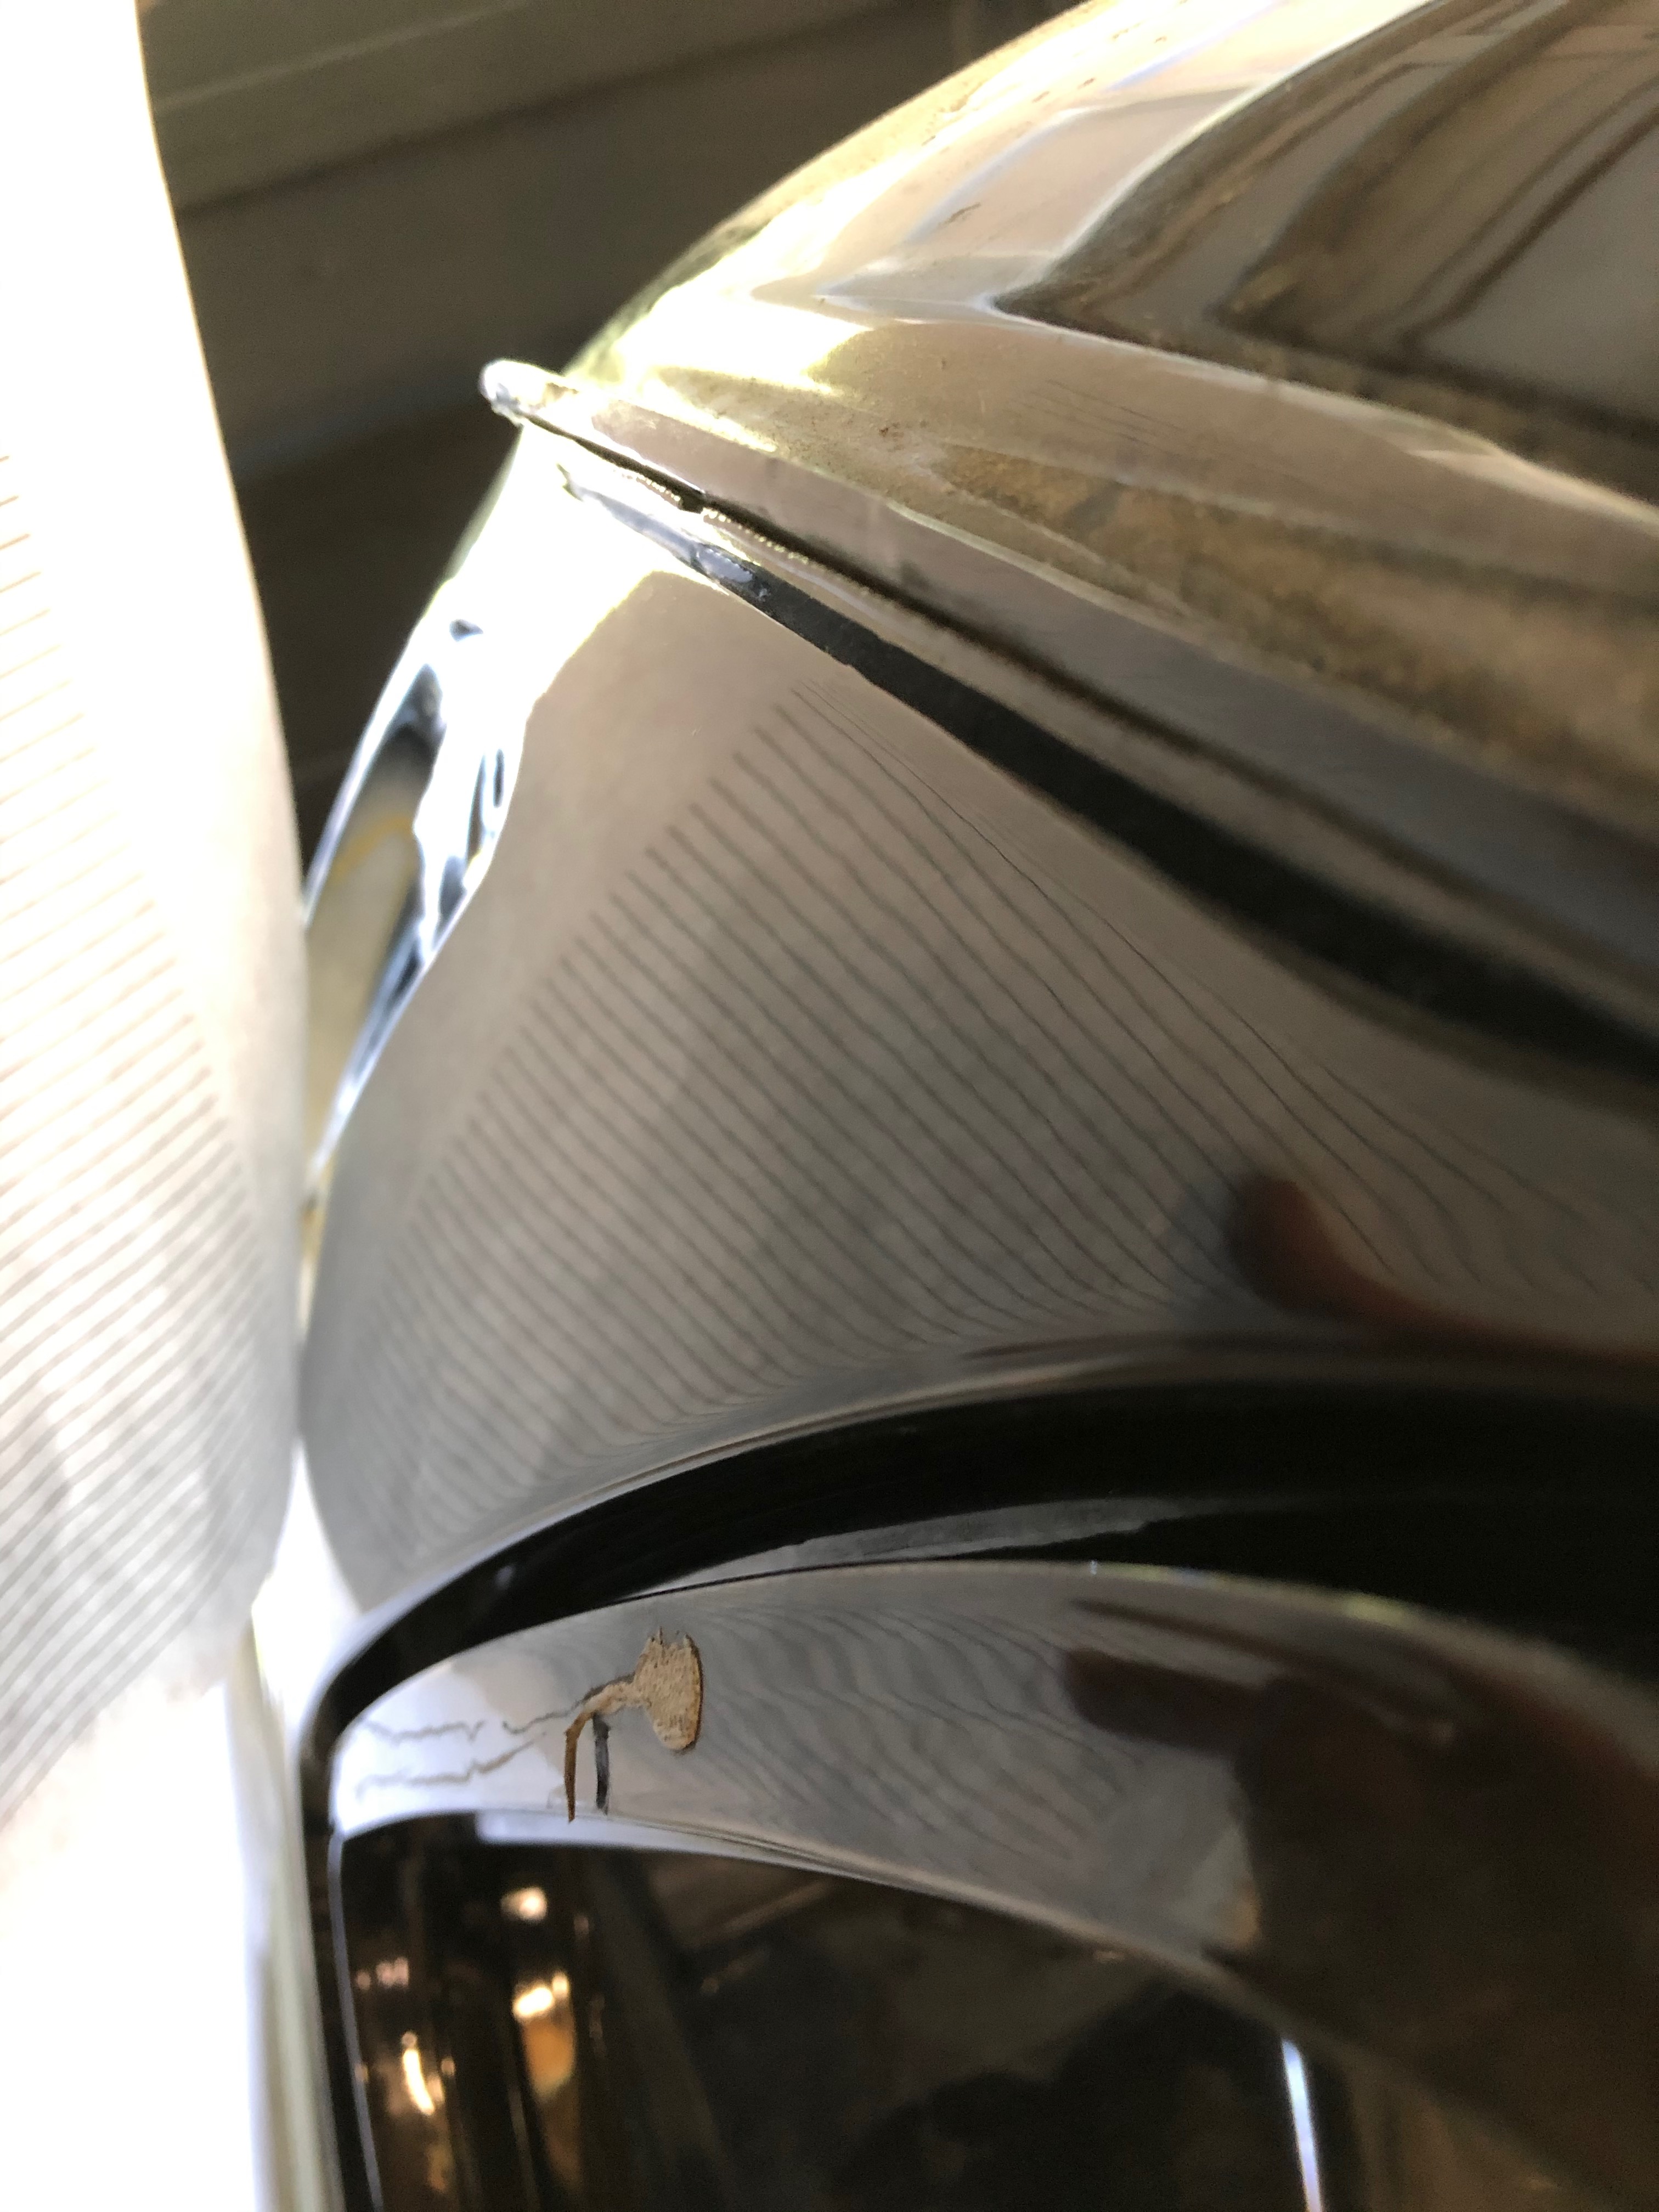
OK, so I know I'm obsessing too much on this one small section of the car, but I'm fascinated by what this guy has done with his bag of tricks to pull a dent that I thought for sure was going to have to get filled & repainted. Here's his final product:

Image

I have to admit that this camera angle is sort of a cheat; the light in the garage is pretty bad and this was one of the few angles that clearly shows the fixed area with a nice clear reflection of the repair. With the naked eye, the area still shows remnants of the repair. Regardless, I feel like I've found a brand new tool!
jhh925
Posts: 917
Joined: Jul 11, 2015 12:23 AM
Location: Reno

Re: Rebuilding My 1988 US-spec M5

Post by jhh925 »

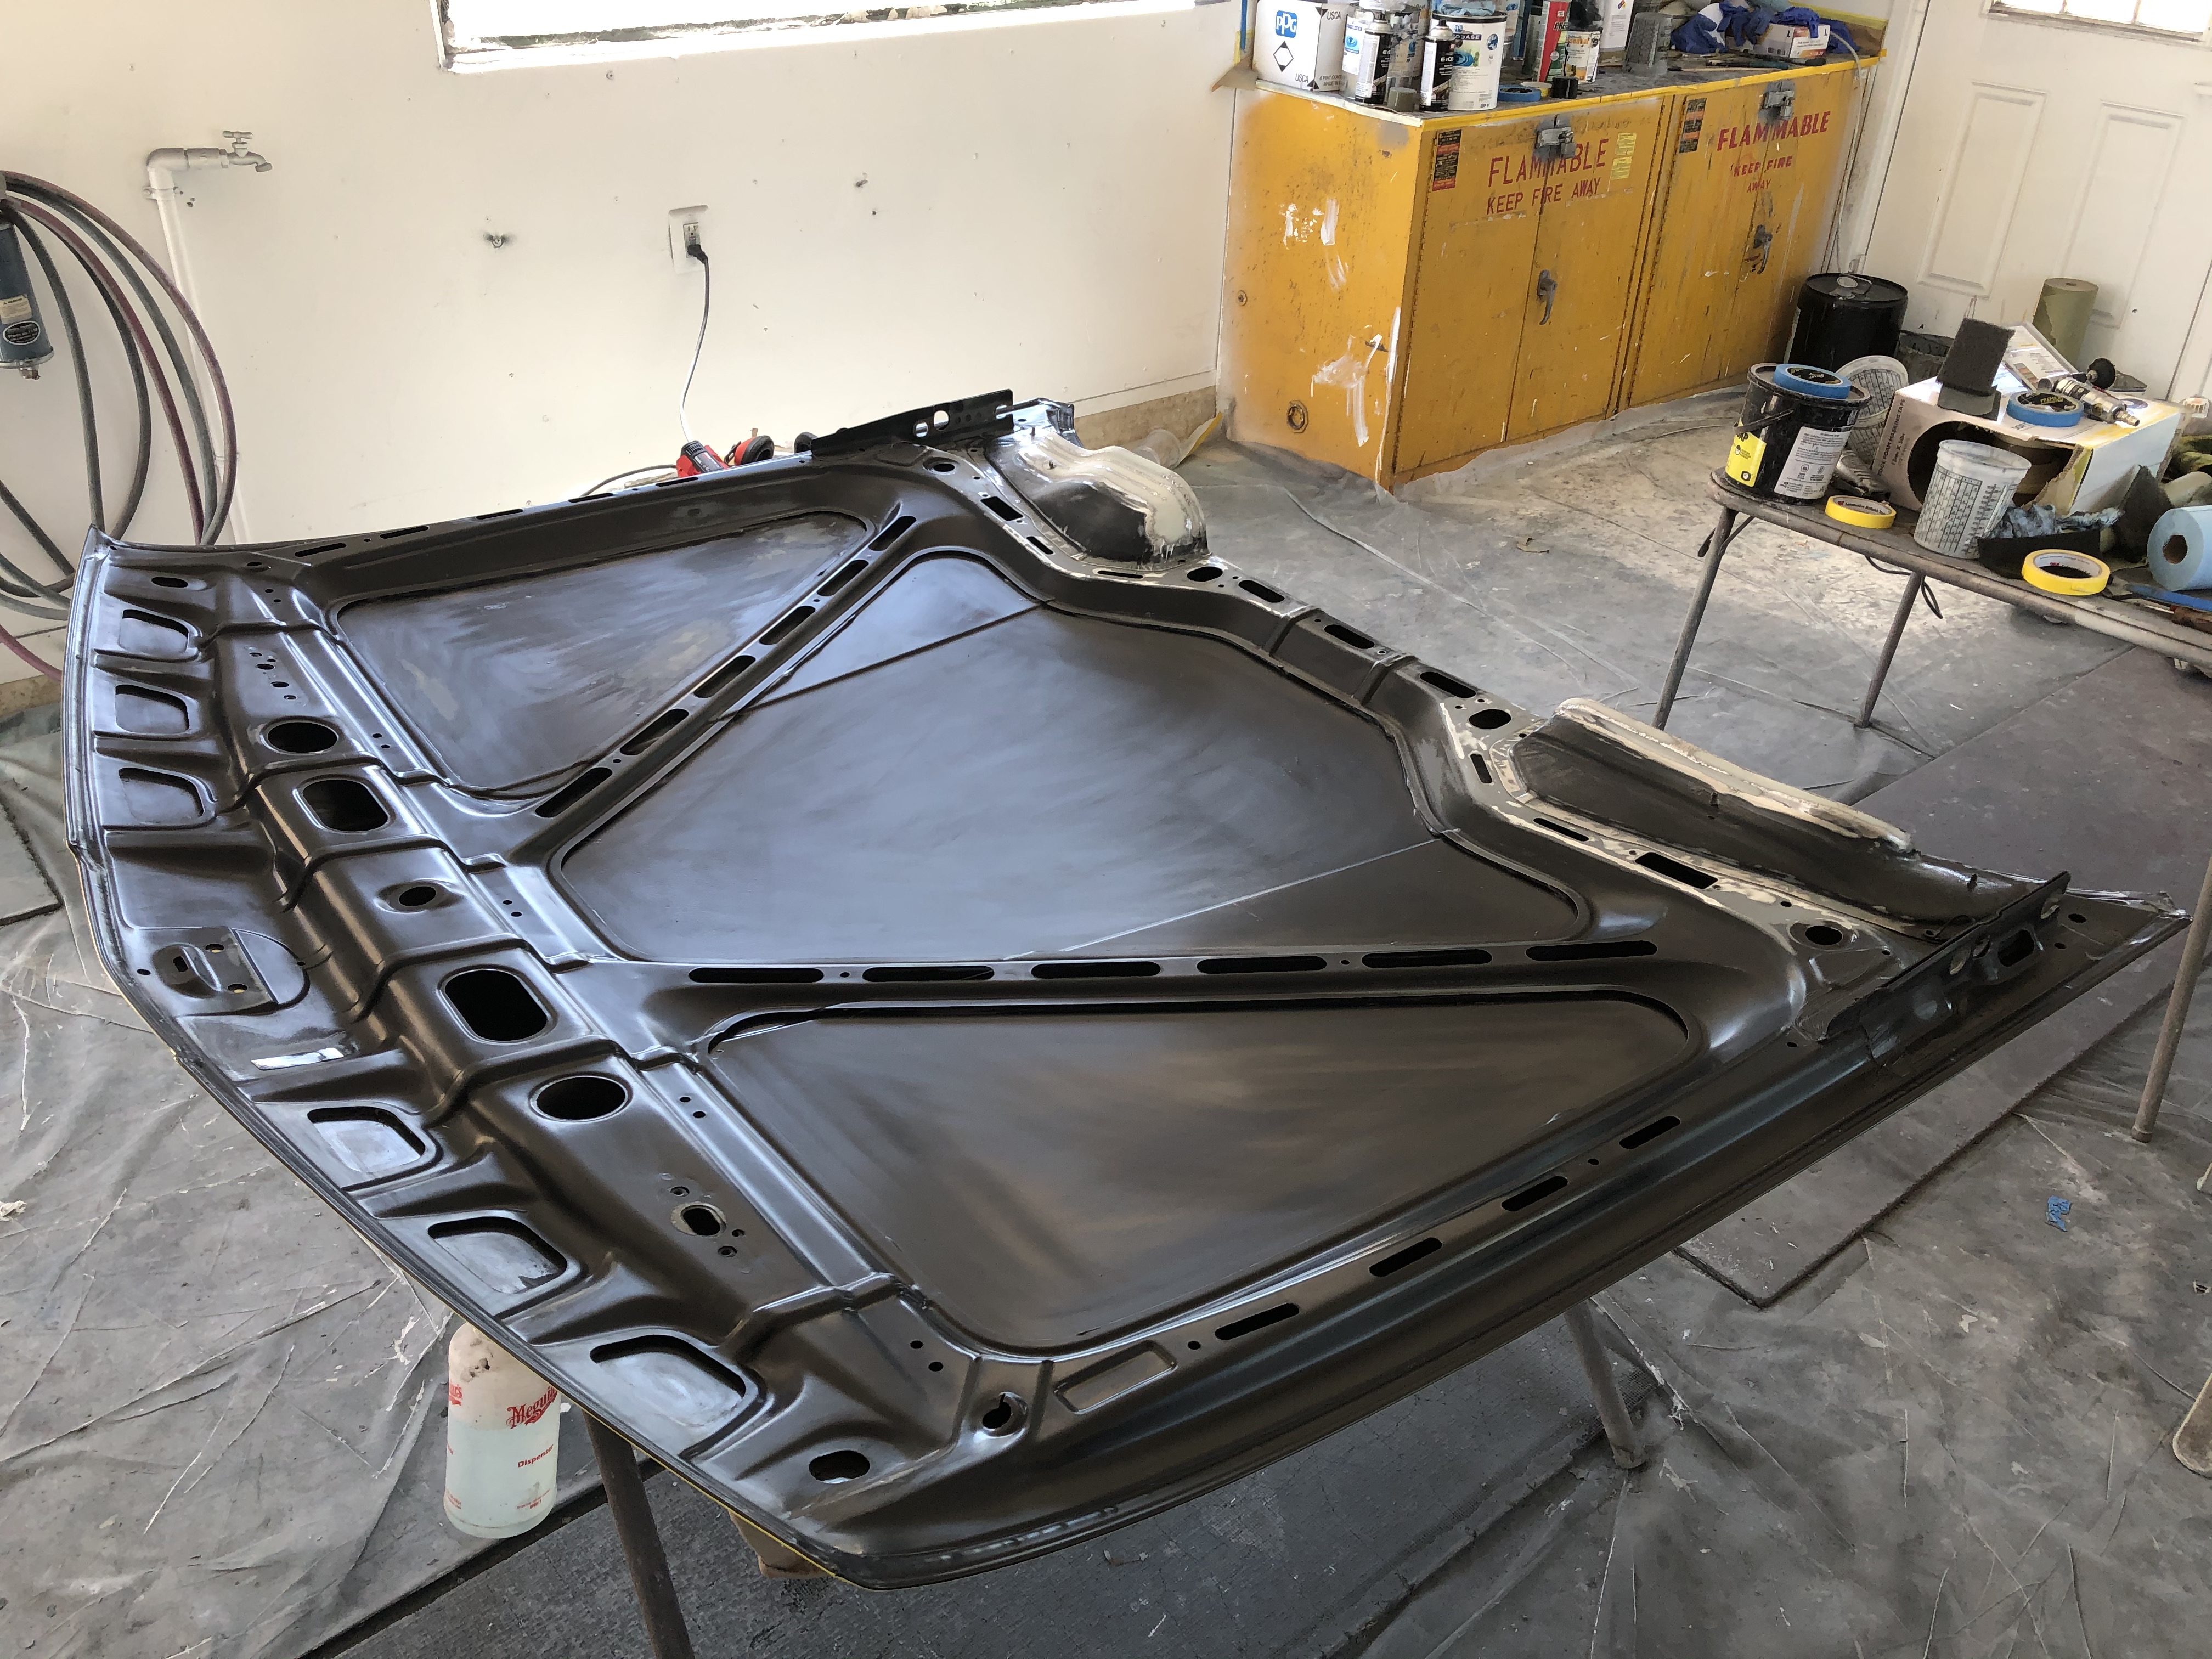
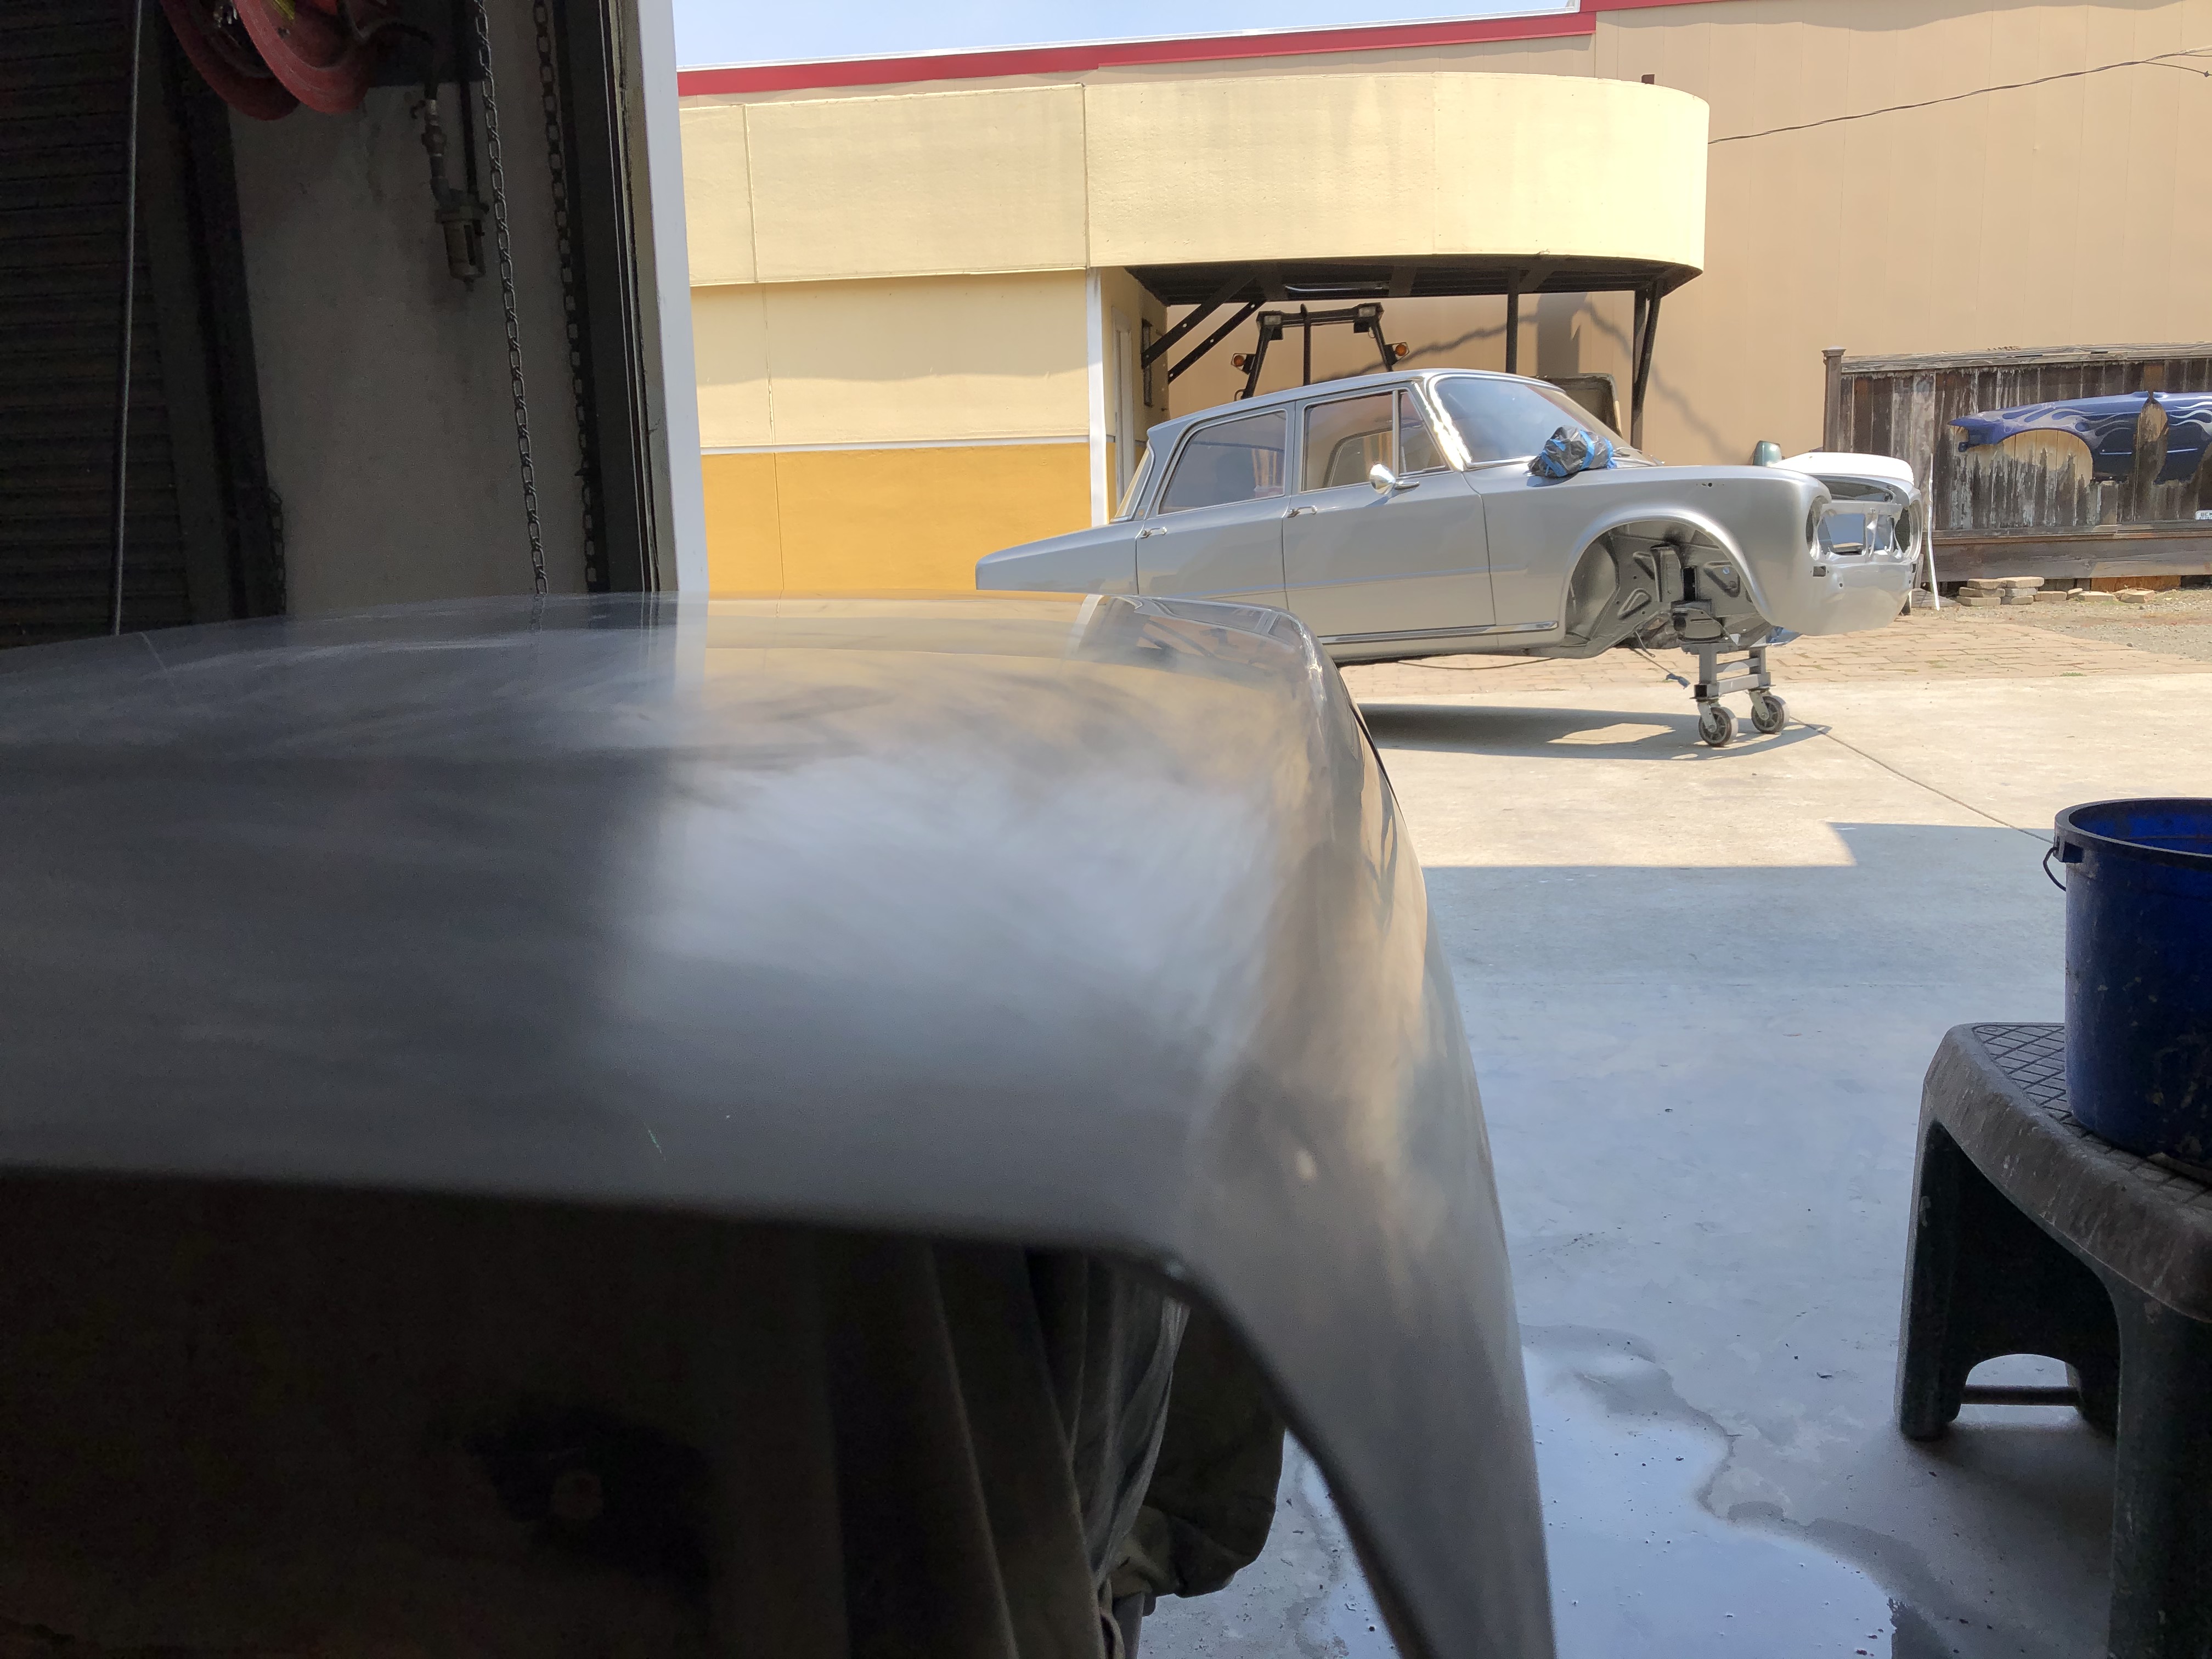
Quick update: The restoration shop nearby should be ready for the whole car next week (fingers crossed). The hood has already been delivered:

Image

I was at the shop over the weekend, and Roger had already done a fair amount of work on the top side of the hood. We had been worked that the hood had been painted at some point, but Roger's paint meter said, "Nope, original paint." The improvement that Roger had made with just a coupe hours work was pretty amazing. Of course, we got to talking ... and I forgot to take pics. Next time.

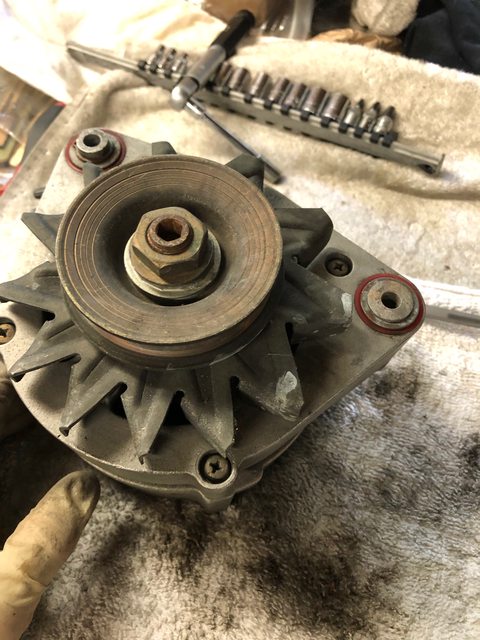
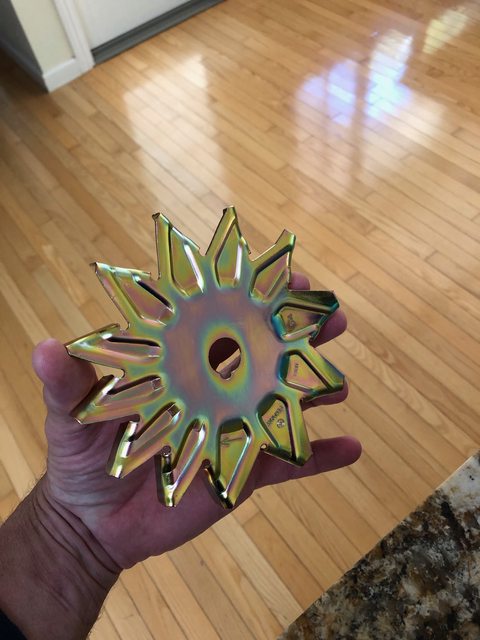
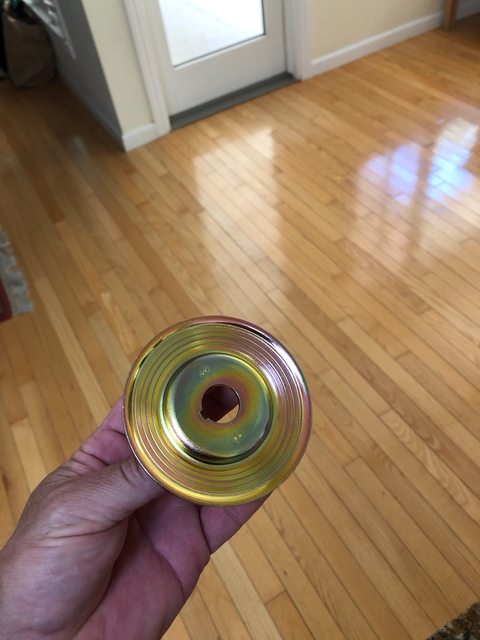
In other news, I'm continuing to collect bits and parts for the motor, including getting a bunch more parts back from the zinc plating shop. The local shop I'm using in San Leandro has a brand new zinc plating line ... the result so far have been amazing. Here's a before and after on the alternator.

Image
Image
Image

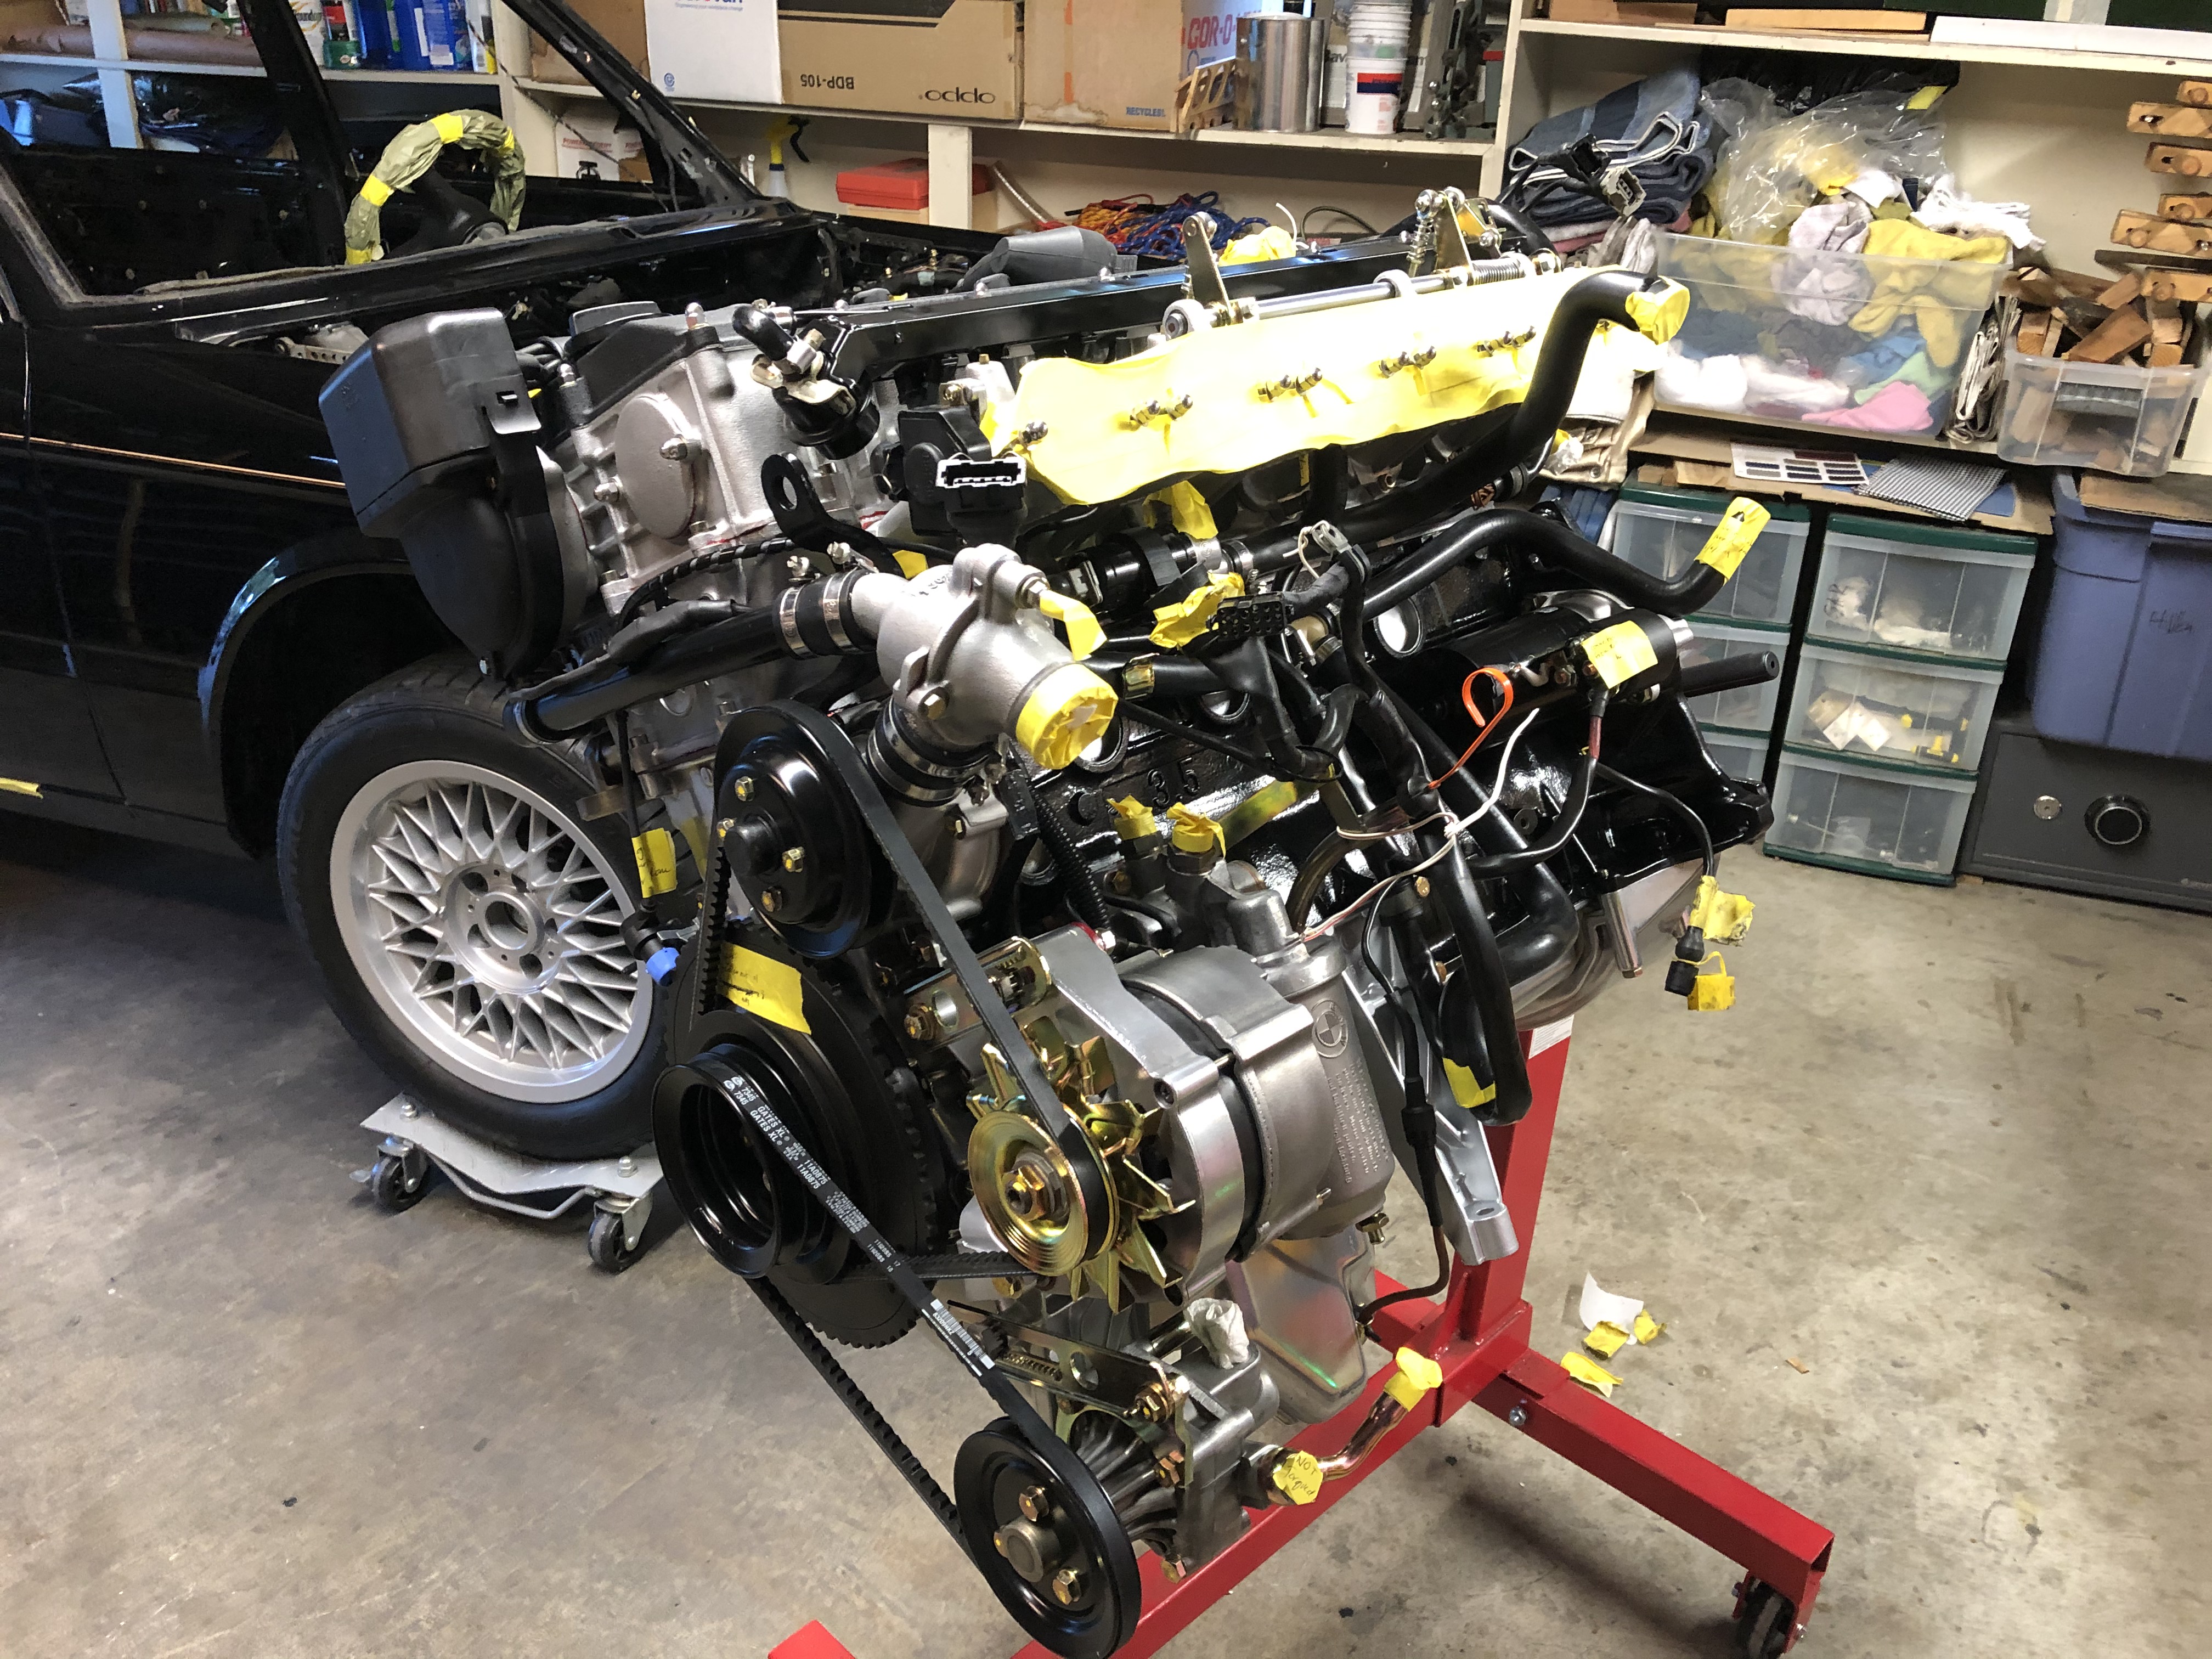
Here's the current status on the motor. With the accessories slowly going on, it seemed like the right time to start fitting the engine wiring harness back on.

Image

Next step will be to splice in a new 4-wire O2 connector and fab a new mounting bracket that will hold the O2 sensor-to-harness connector plus hold the other wires that snake down from the lower left block to the underside of the car.

Image
jhh925
Posts: 917
Joined: Jul 11, 2015 12:23 AM
Location: Reno

Re: Rebuilding My 1988 US-spec M5

Post by jhh925 »

Making slow progress. The "slow" part is a bit frustrating, I guess ... given that I'm working from home, I have plenty of time, but parts are harder to get, and I'm at a stage where I'm highly reliant on others (e.g., body & paint).

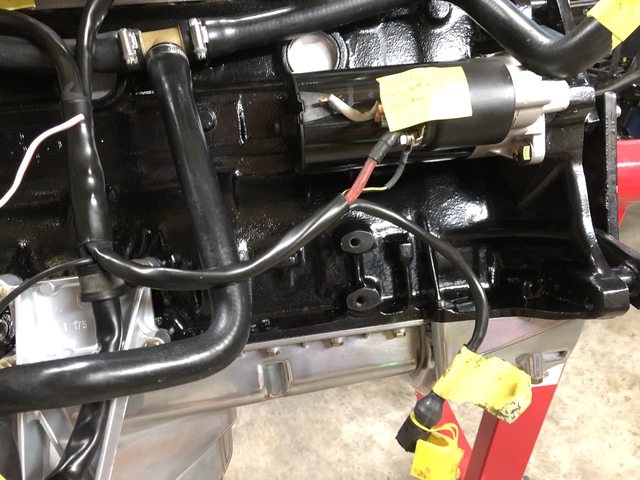
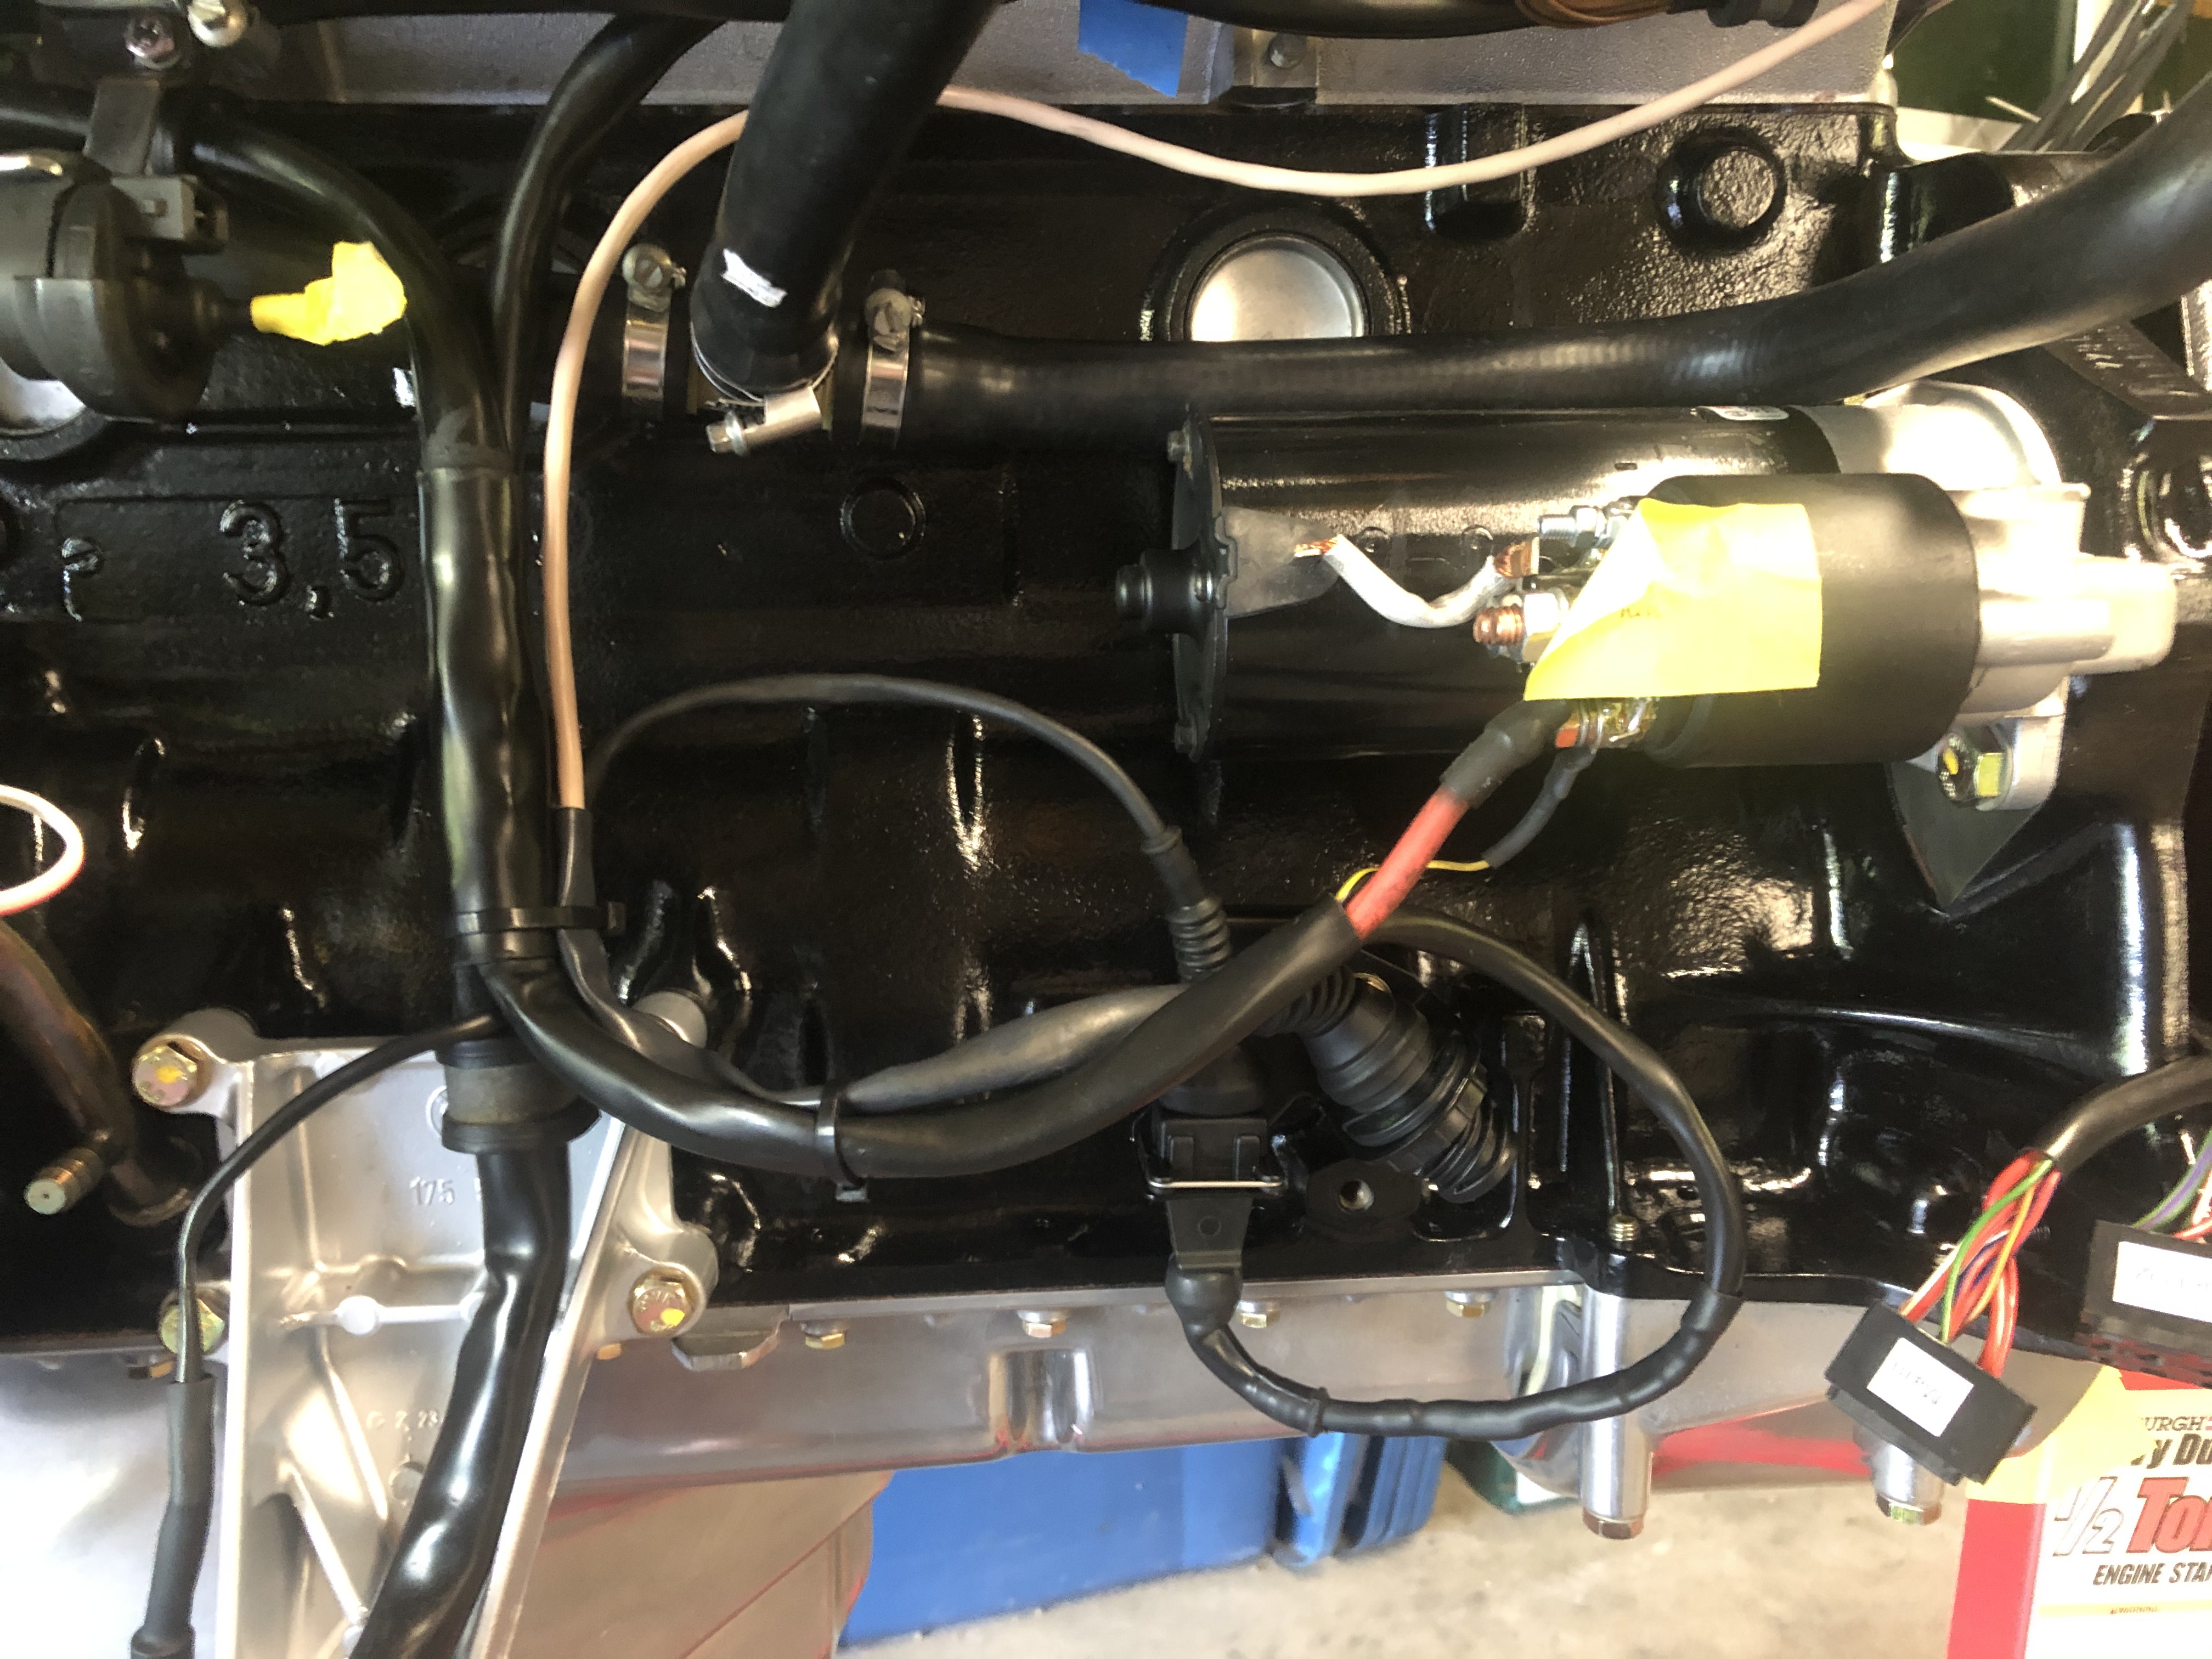
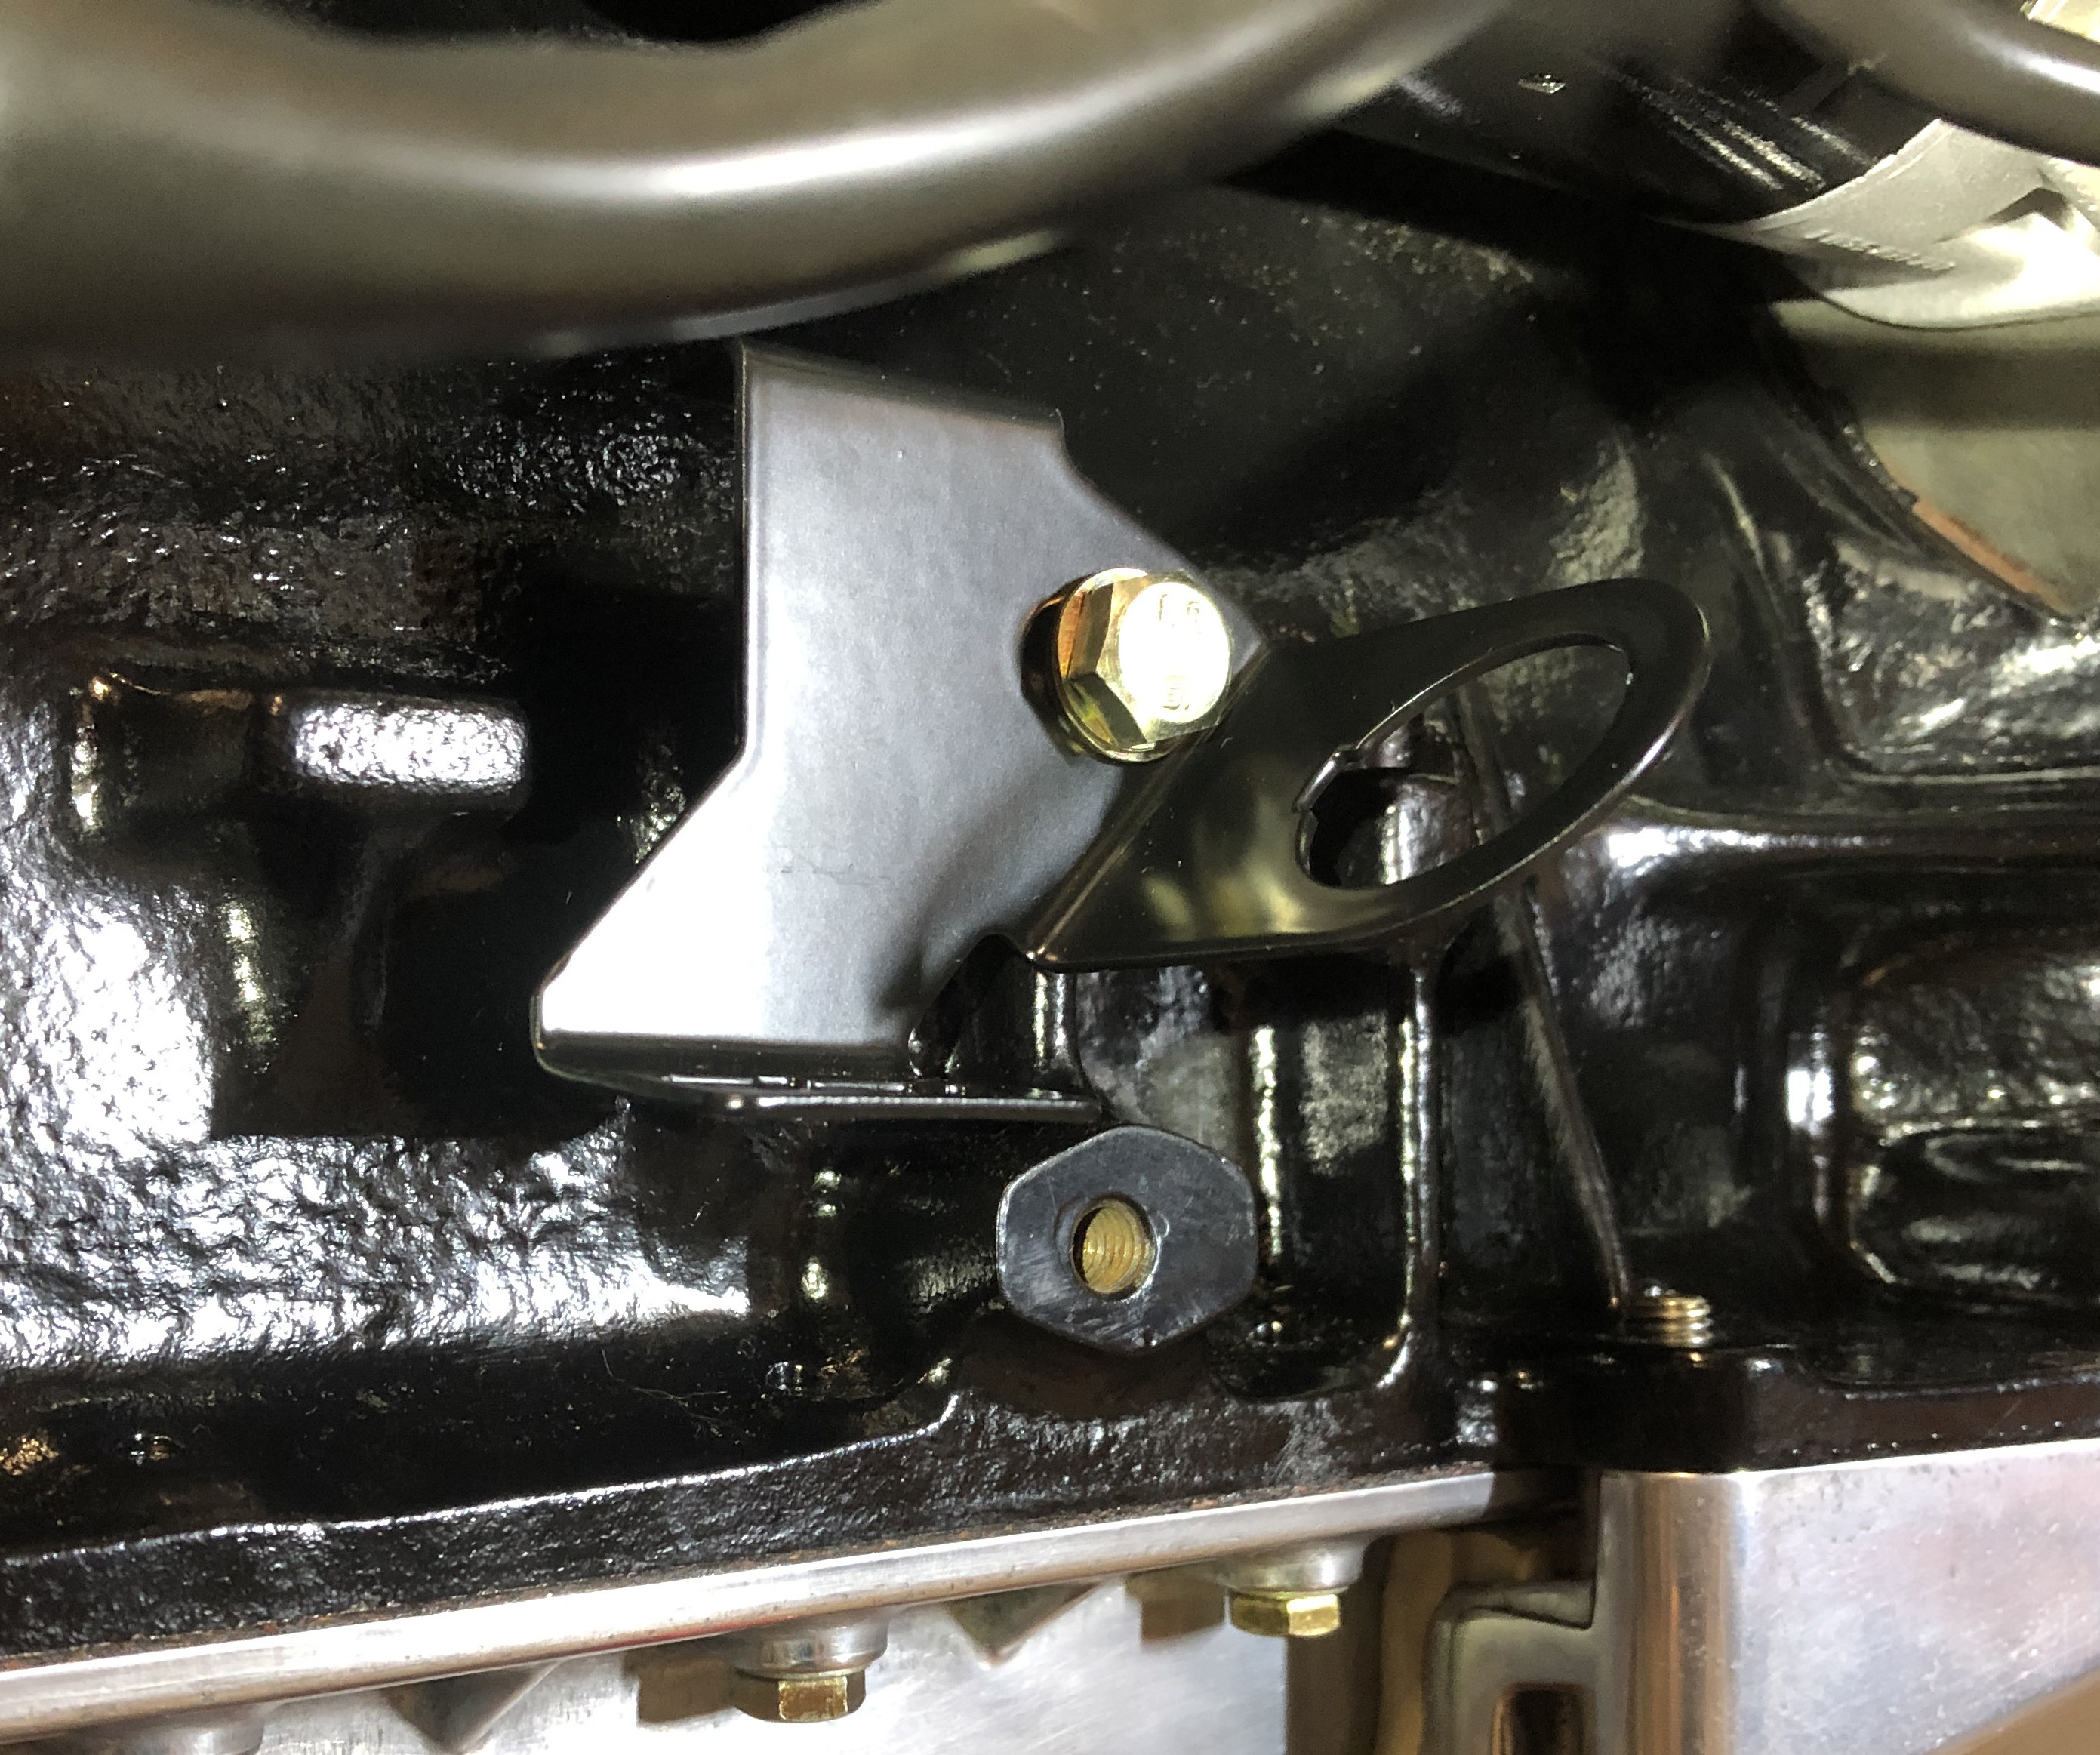
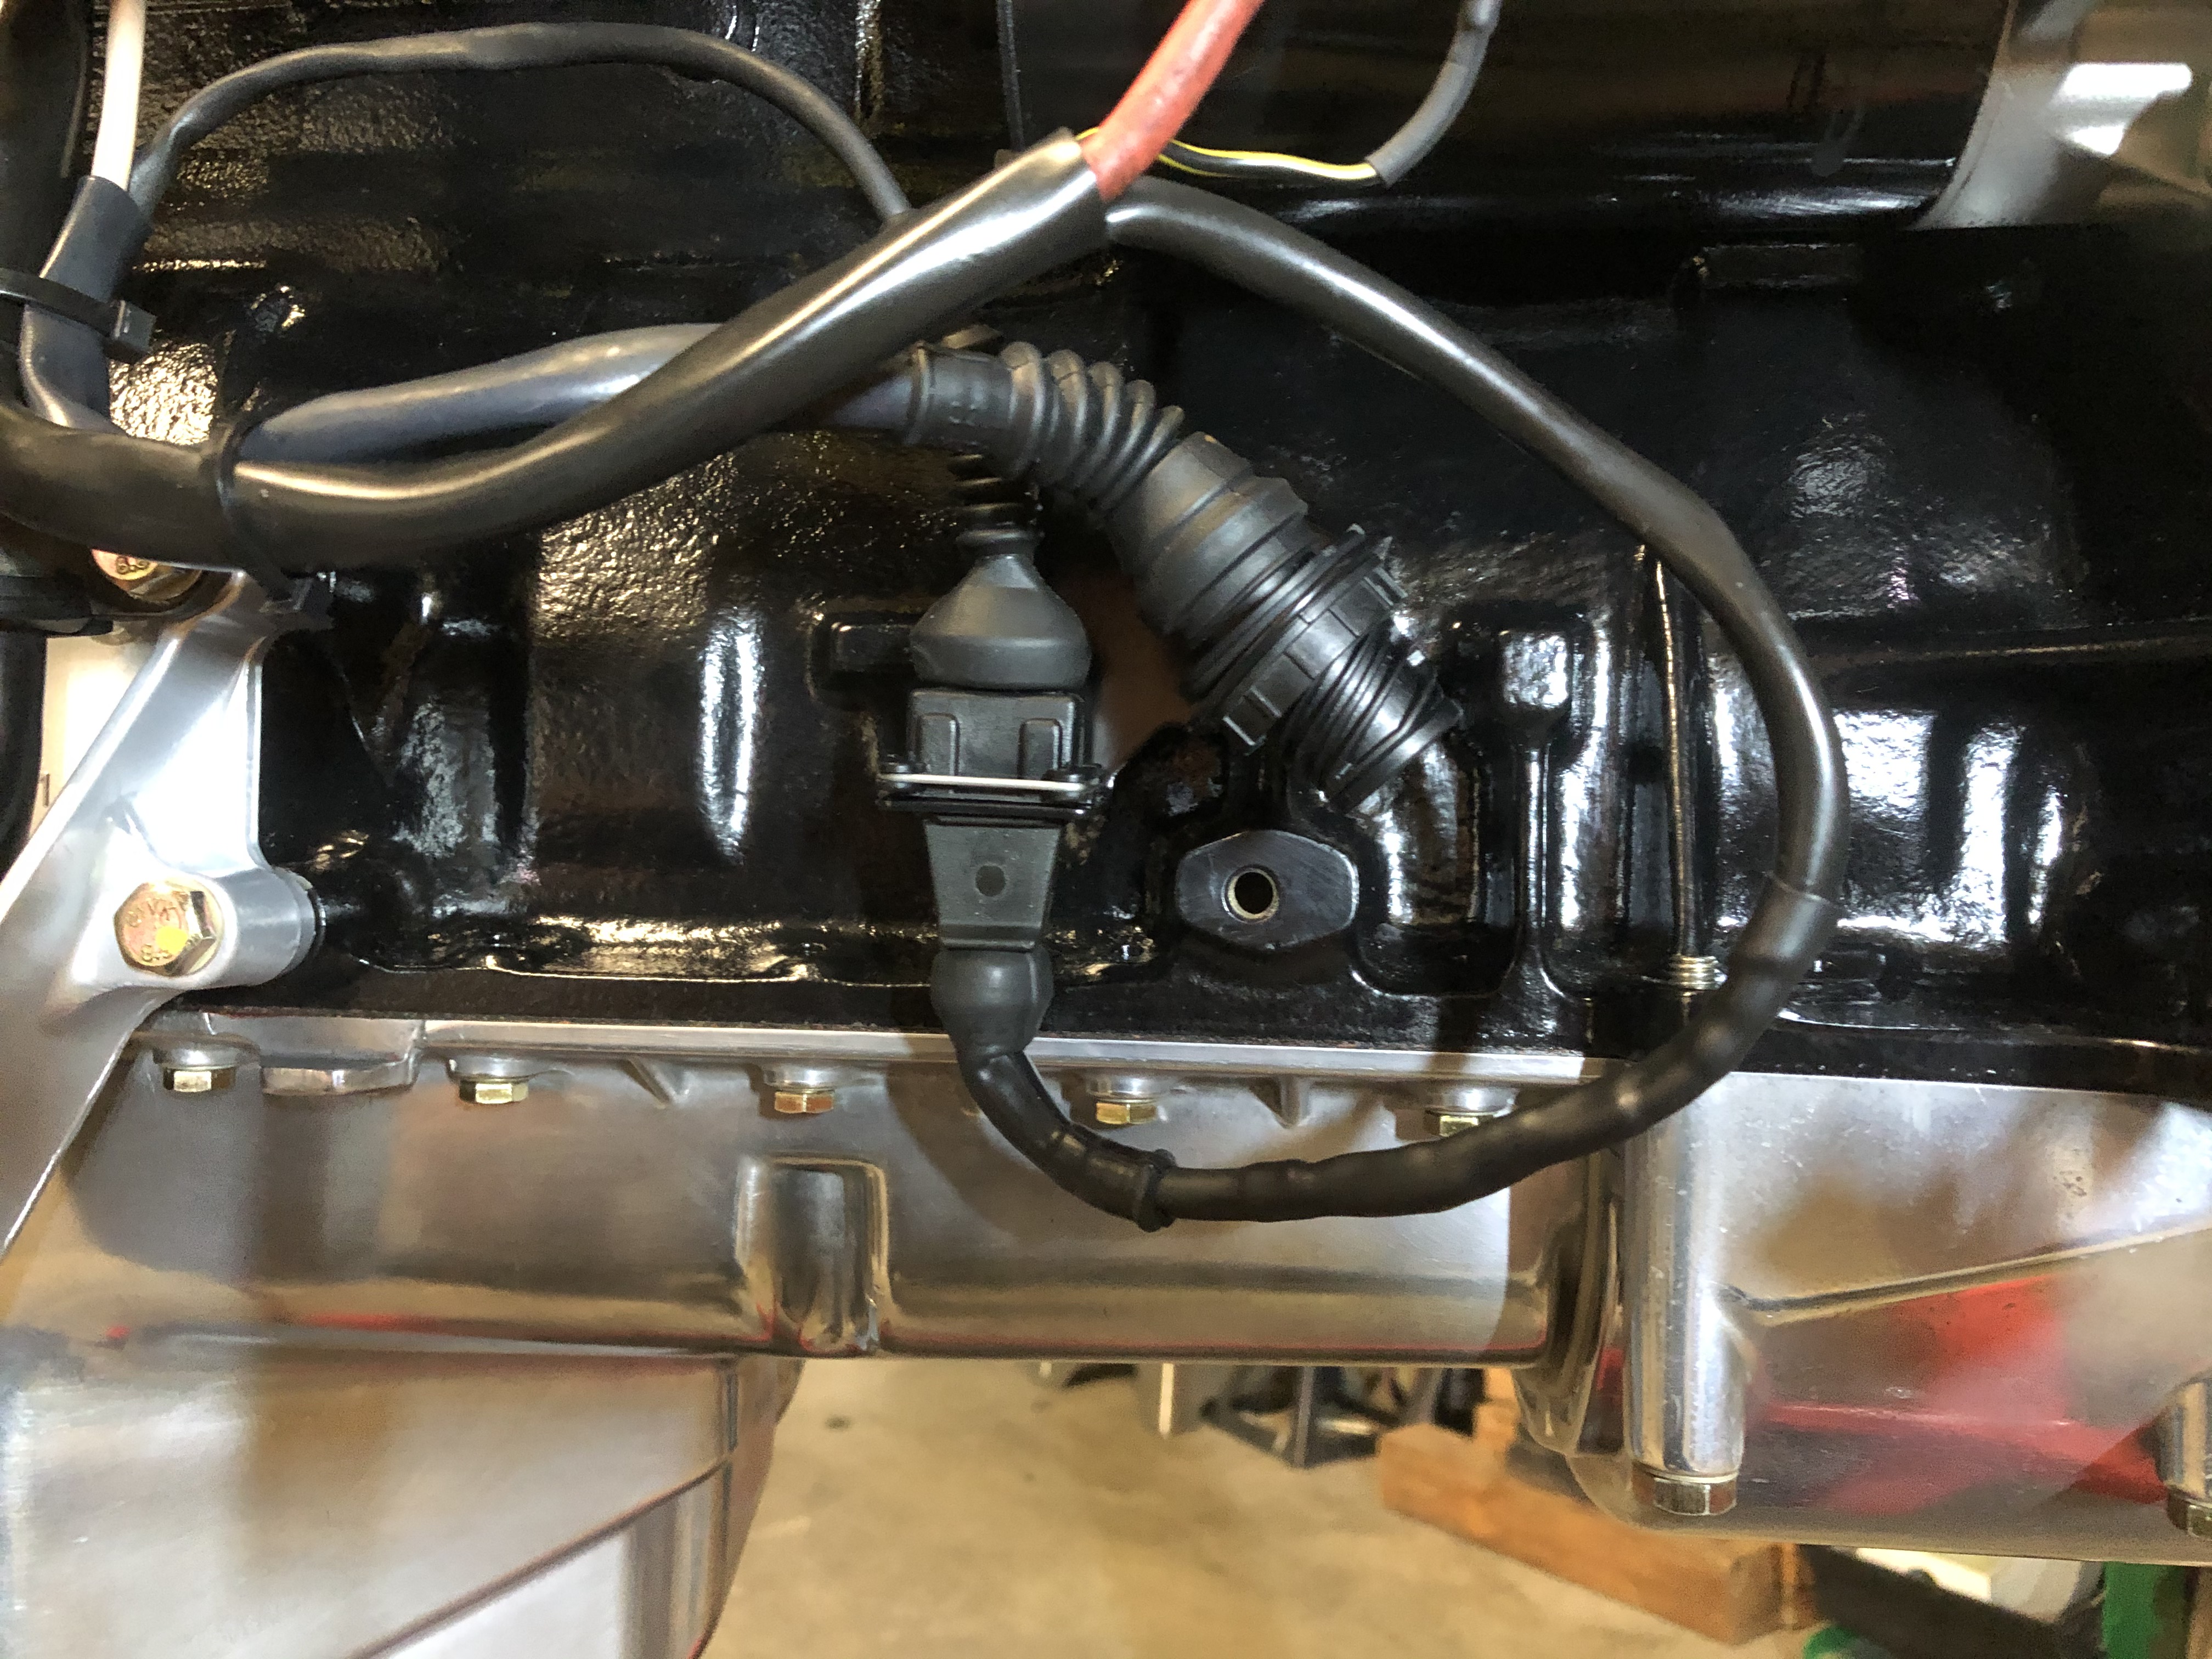
On the engine wiring, I'm mostly happy with the change-over to a 4-wire O2 sensor. I cut the 3-wire harness-side connector off, then put a 4-wire connector in. However, because the 4-wire setup has two signal wires, you can't just splice the 4-wire connector into the existing harness. Instead, I bought a length of new, 2-conductor (18 ga), shielded wire and I'm using that to carry the low voltage signal all the way from the connector to the ECU. That's the gray wire in the pic below. Since the existing engine harness is in really good shape, I obviously won't cut the original plastic loom off. It's not ideal, but the gray wire will just run parallel to the harness, run all the way through the firewall grommet and straight into the ECU. I'll be using the original wires in the existing harness for ground and the O2 sensor heater. Also, since the 4-wire connector is just a standard part on a bunch of these cars, I'm able to use the connector bracket from an M30-B35 (a bit difficult to see in this pic - it's cut off an old steel "loom" from a B35 what shields the heavy starter motor wire running from the alternator to the starter). That bracket also gives a handy spot to mount the 2-wire connector I spliced in for the ground and 12v+ lines.

Image

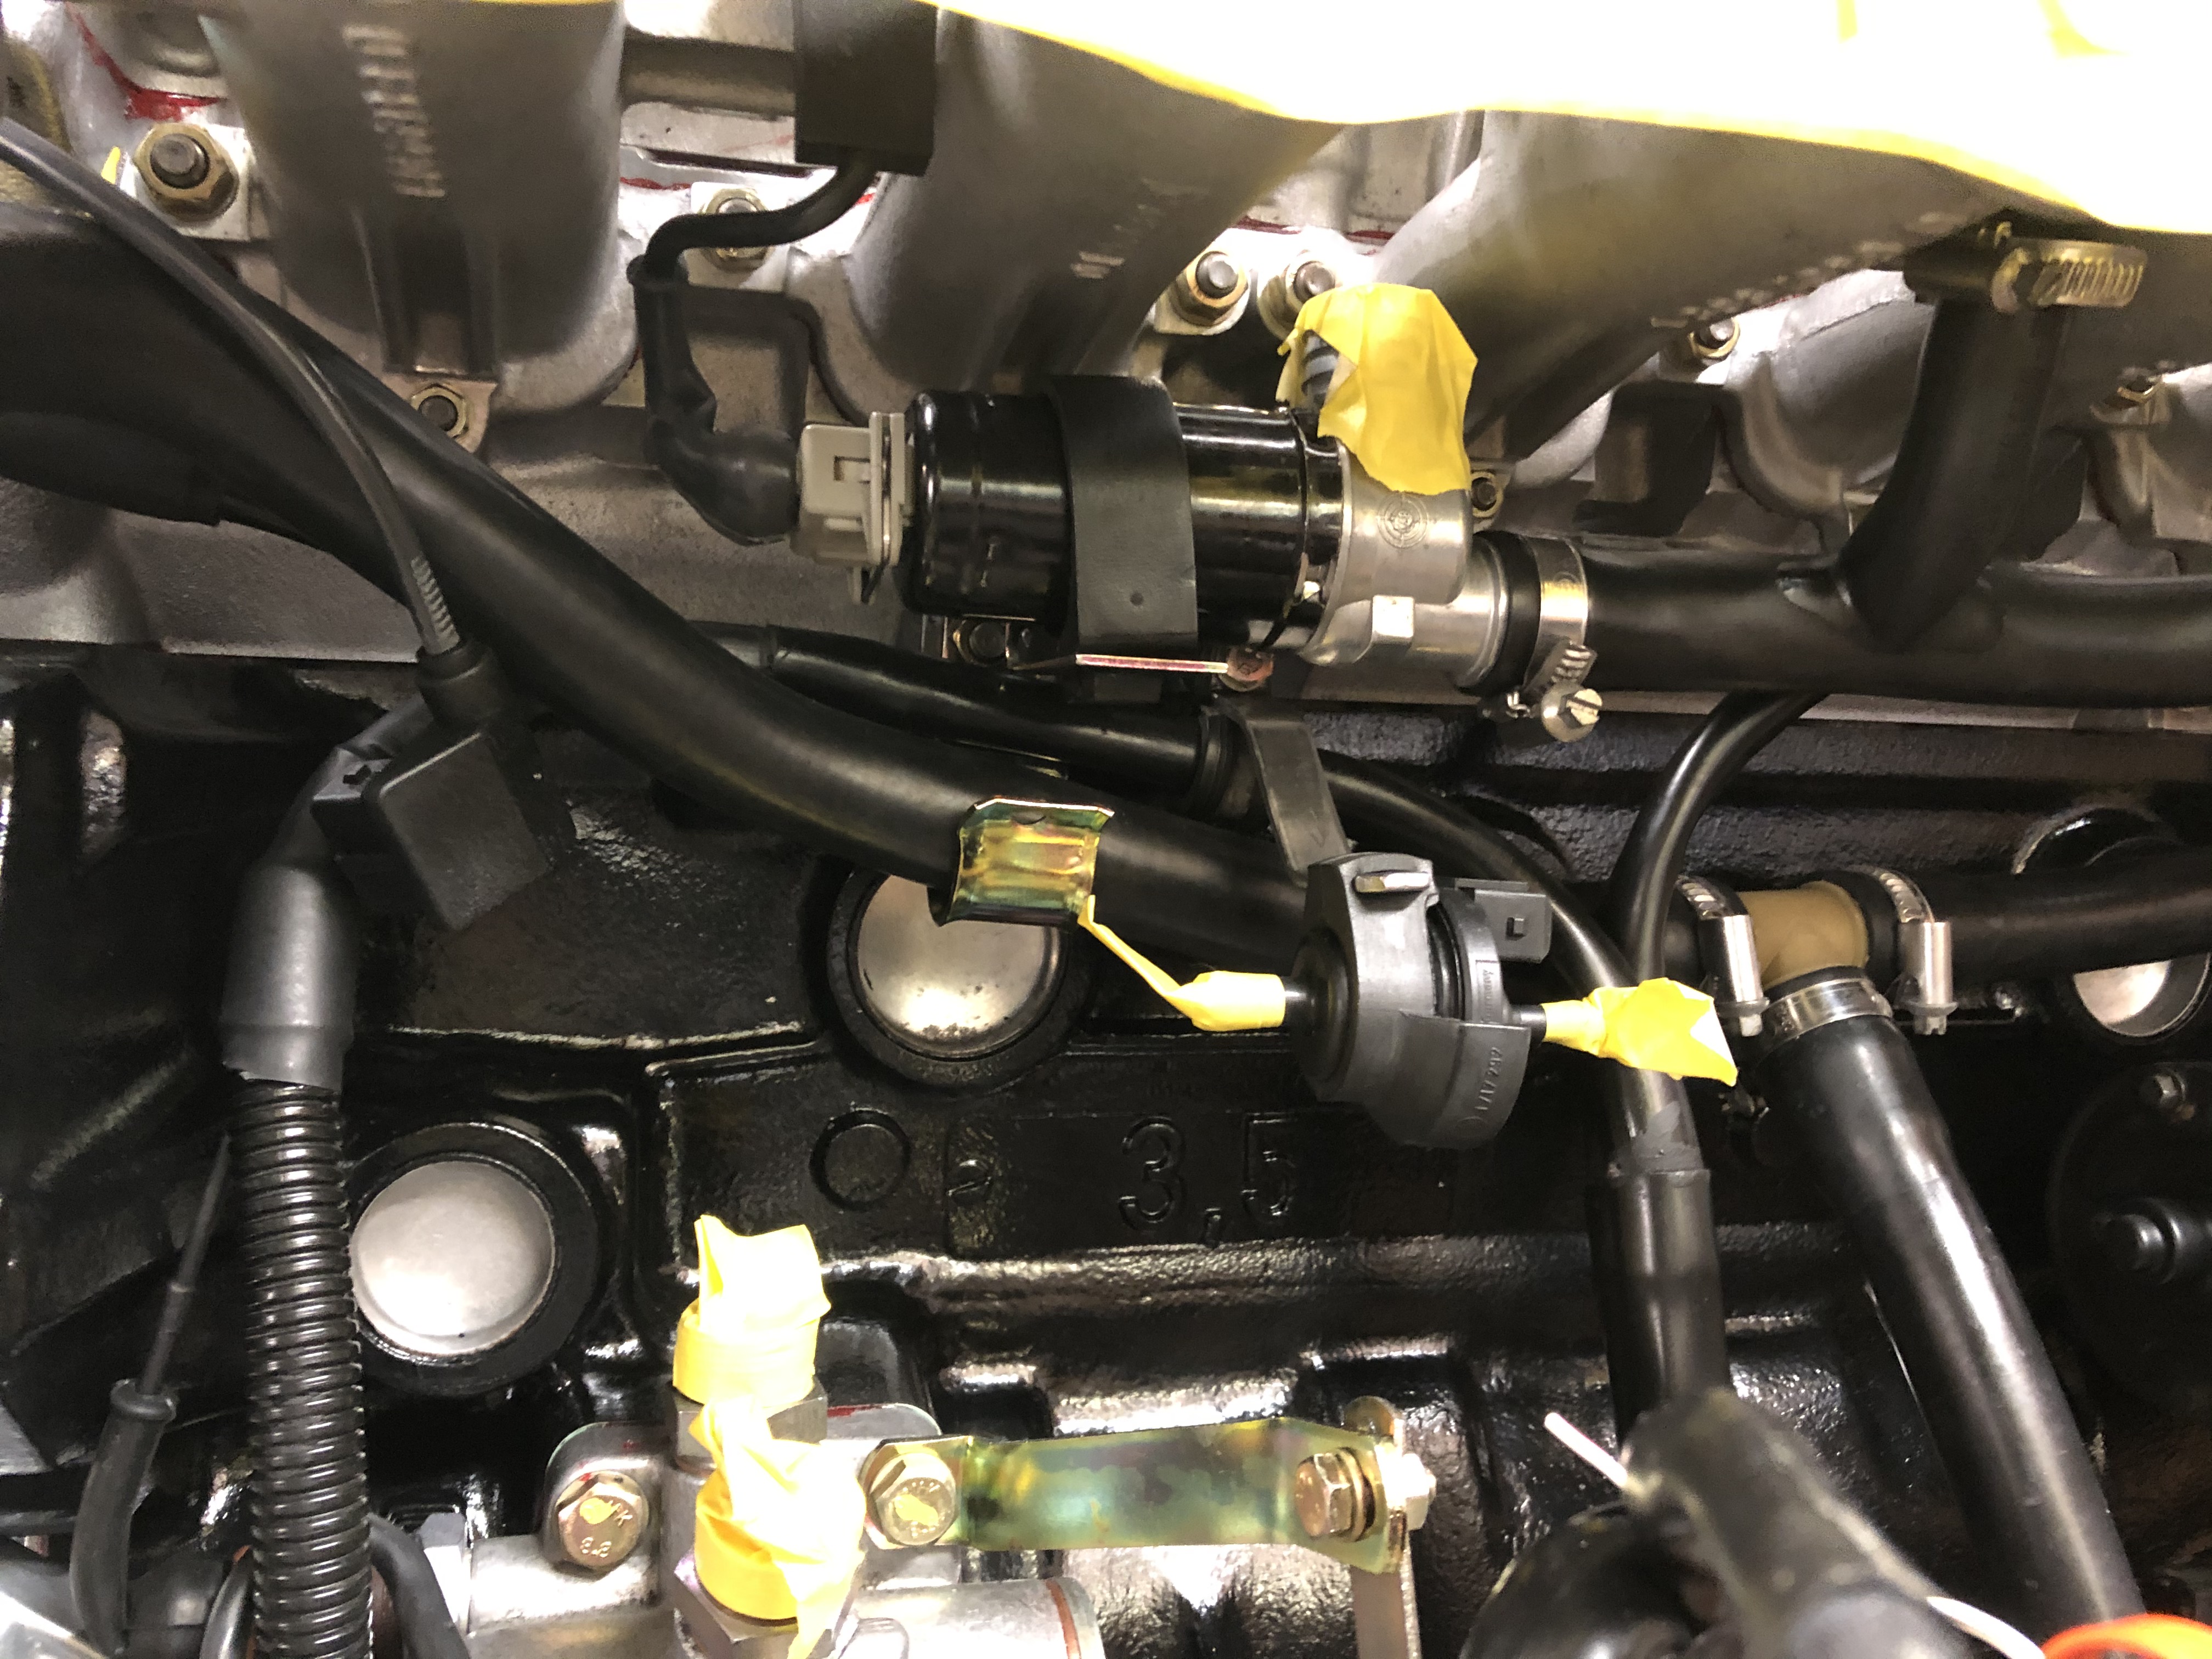
I'd also sort of hoped to re-jigger the location of the purge valve. On an M30-B35 motor running Motronic 1.3, the purge valve is mounted on the underside of the intake with the purge line running over the motor to the charcoal canister that sits front-right next to the ABS pump. I was able to fab a bracket that could hold an M1.3-style purge valve underneath the ITBs. I think it looks nice & clean, and the purge line can run from there along the original path along the front of the motor:

Image

But if I put the purge valve in that position, then I run into the same wiring issue I have with the O2 sensor. That is, in the original harness, the purge valve wires are totally in the wrong place and run along the front-right wheel well up to the purge valve / relay / barometric pressure switch assembly that sits above the ABS pump. I can't just pull those wires out of the original plastic loom (there's a splice hidden in there somewhere), and if I just orphan them over there, then I'll need to run new wires from the M1.3 valve parallel to the existing harness, through the firewall grommet and into the ECU. That feels like too many "extra" wires outside the loom. Probably easier to just put the new purge vale in the same location as the old one. That should make it easier to pass smog as well since the location of the purge valve will match the smog diagram.

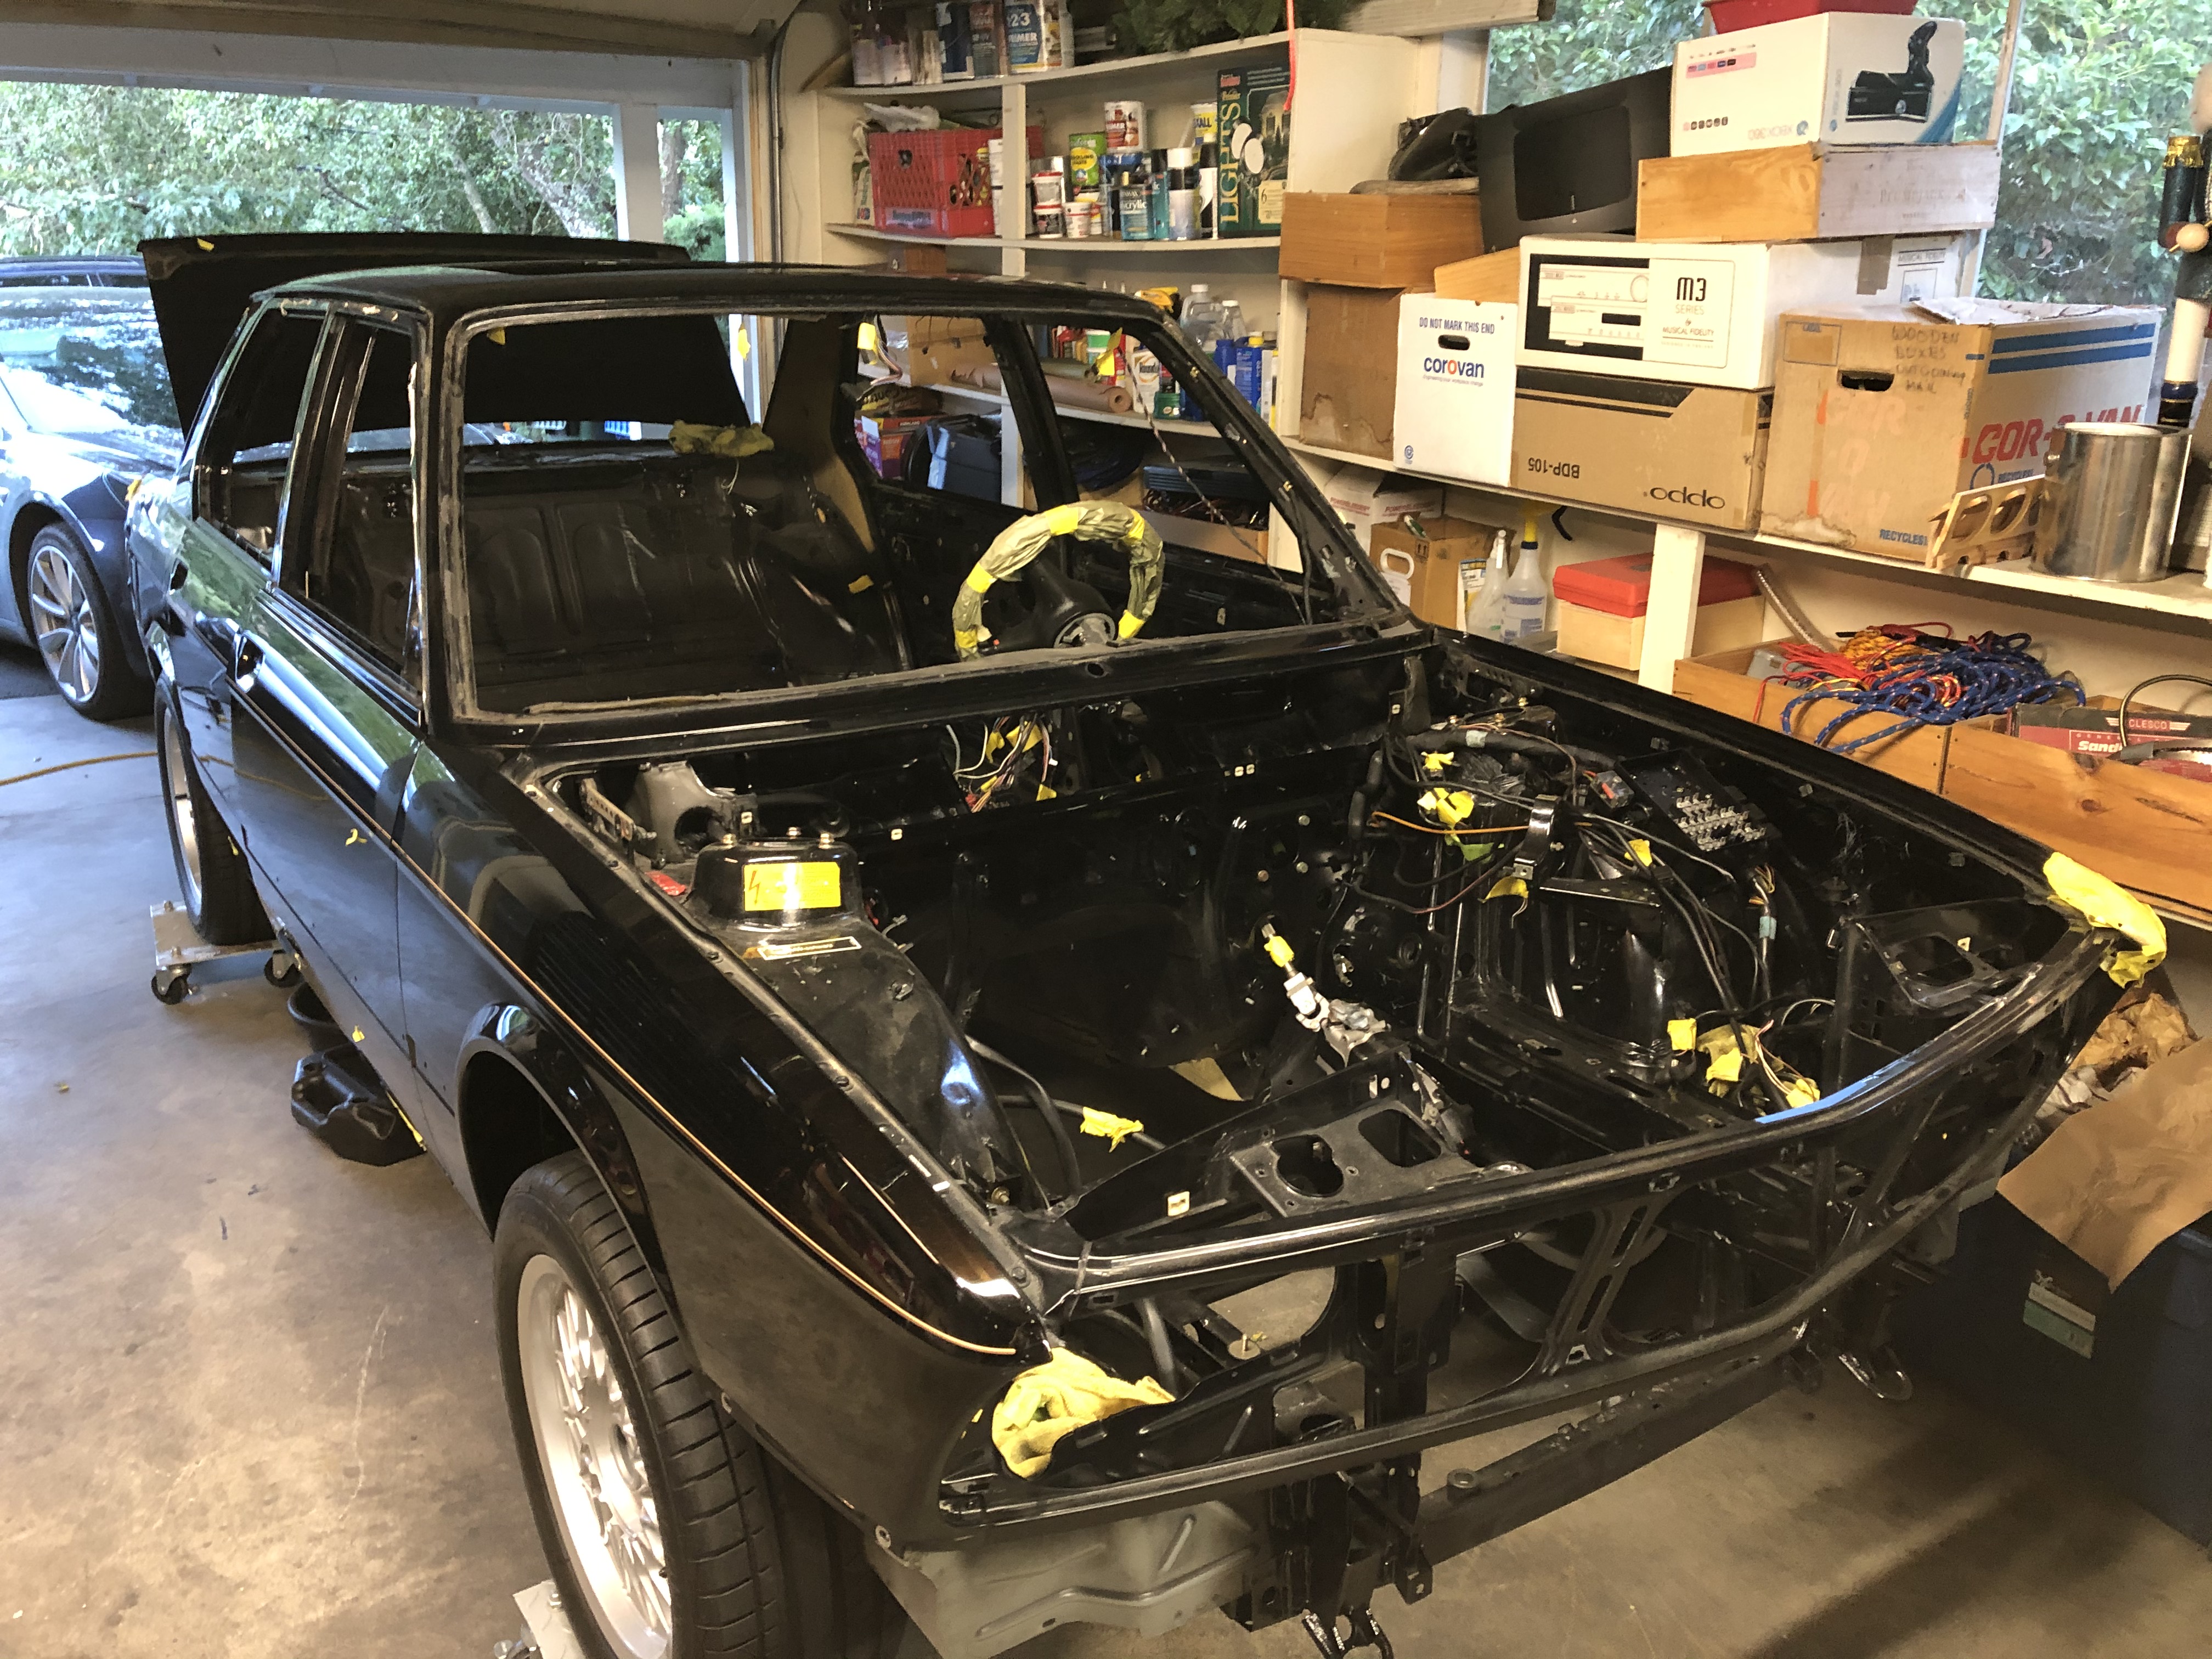
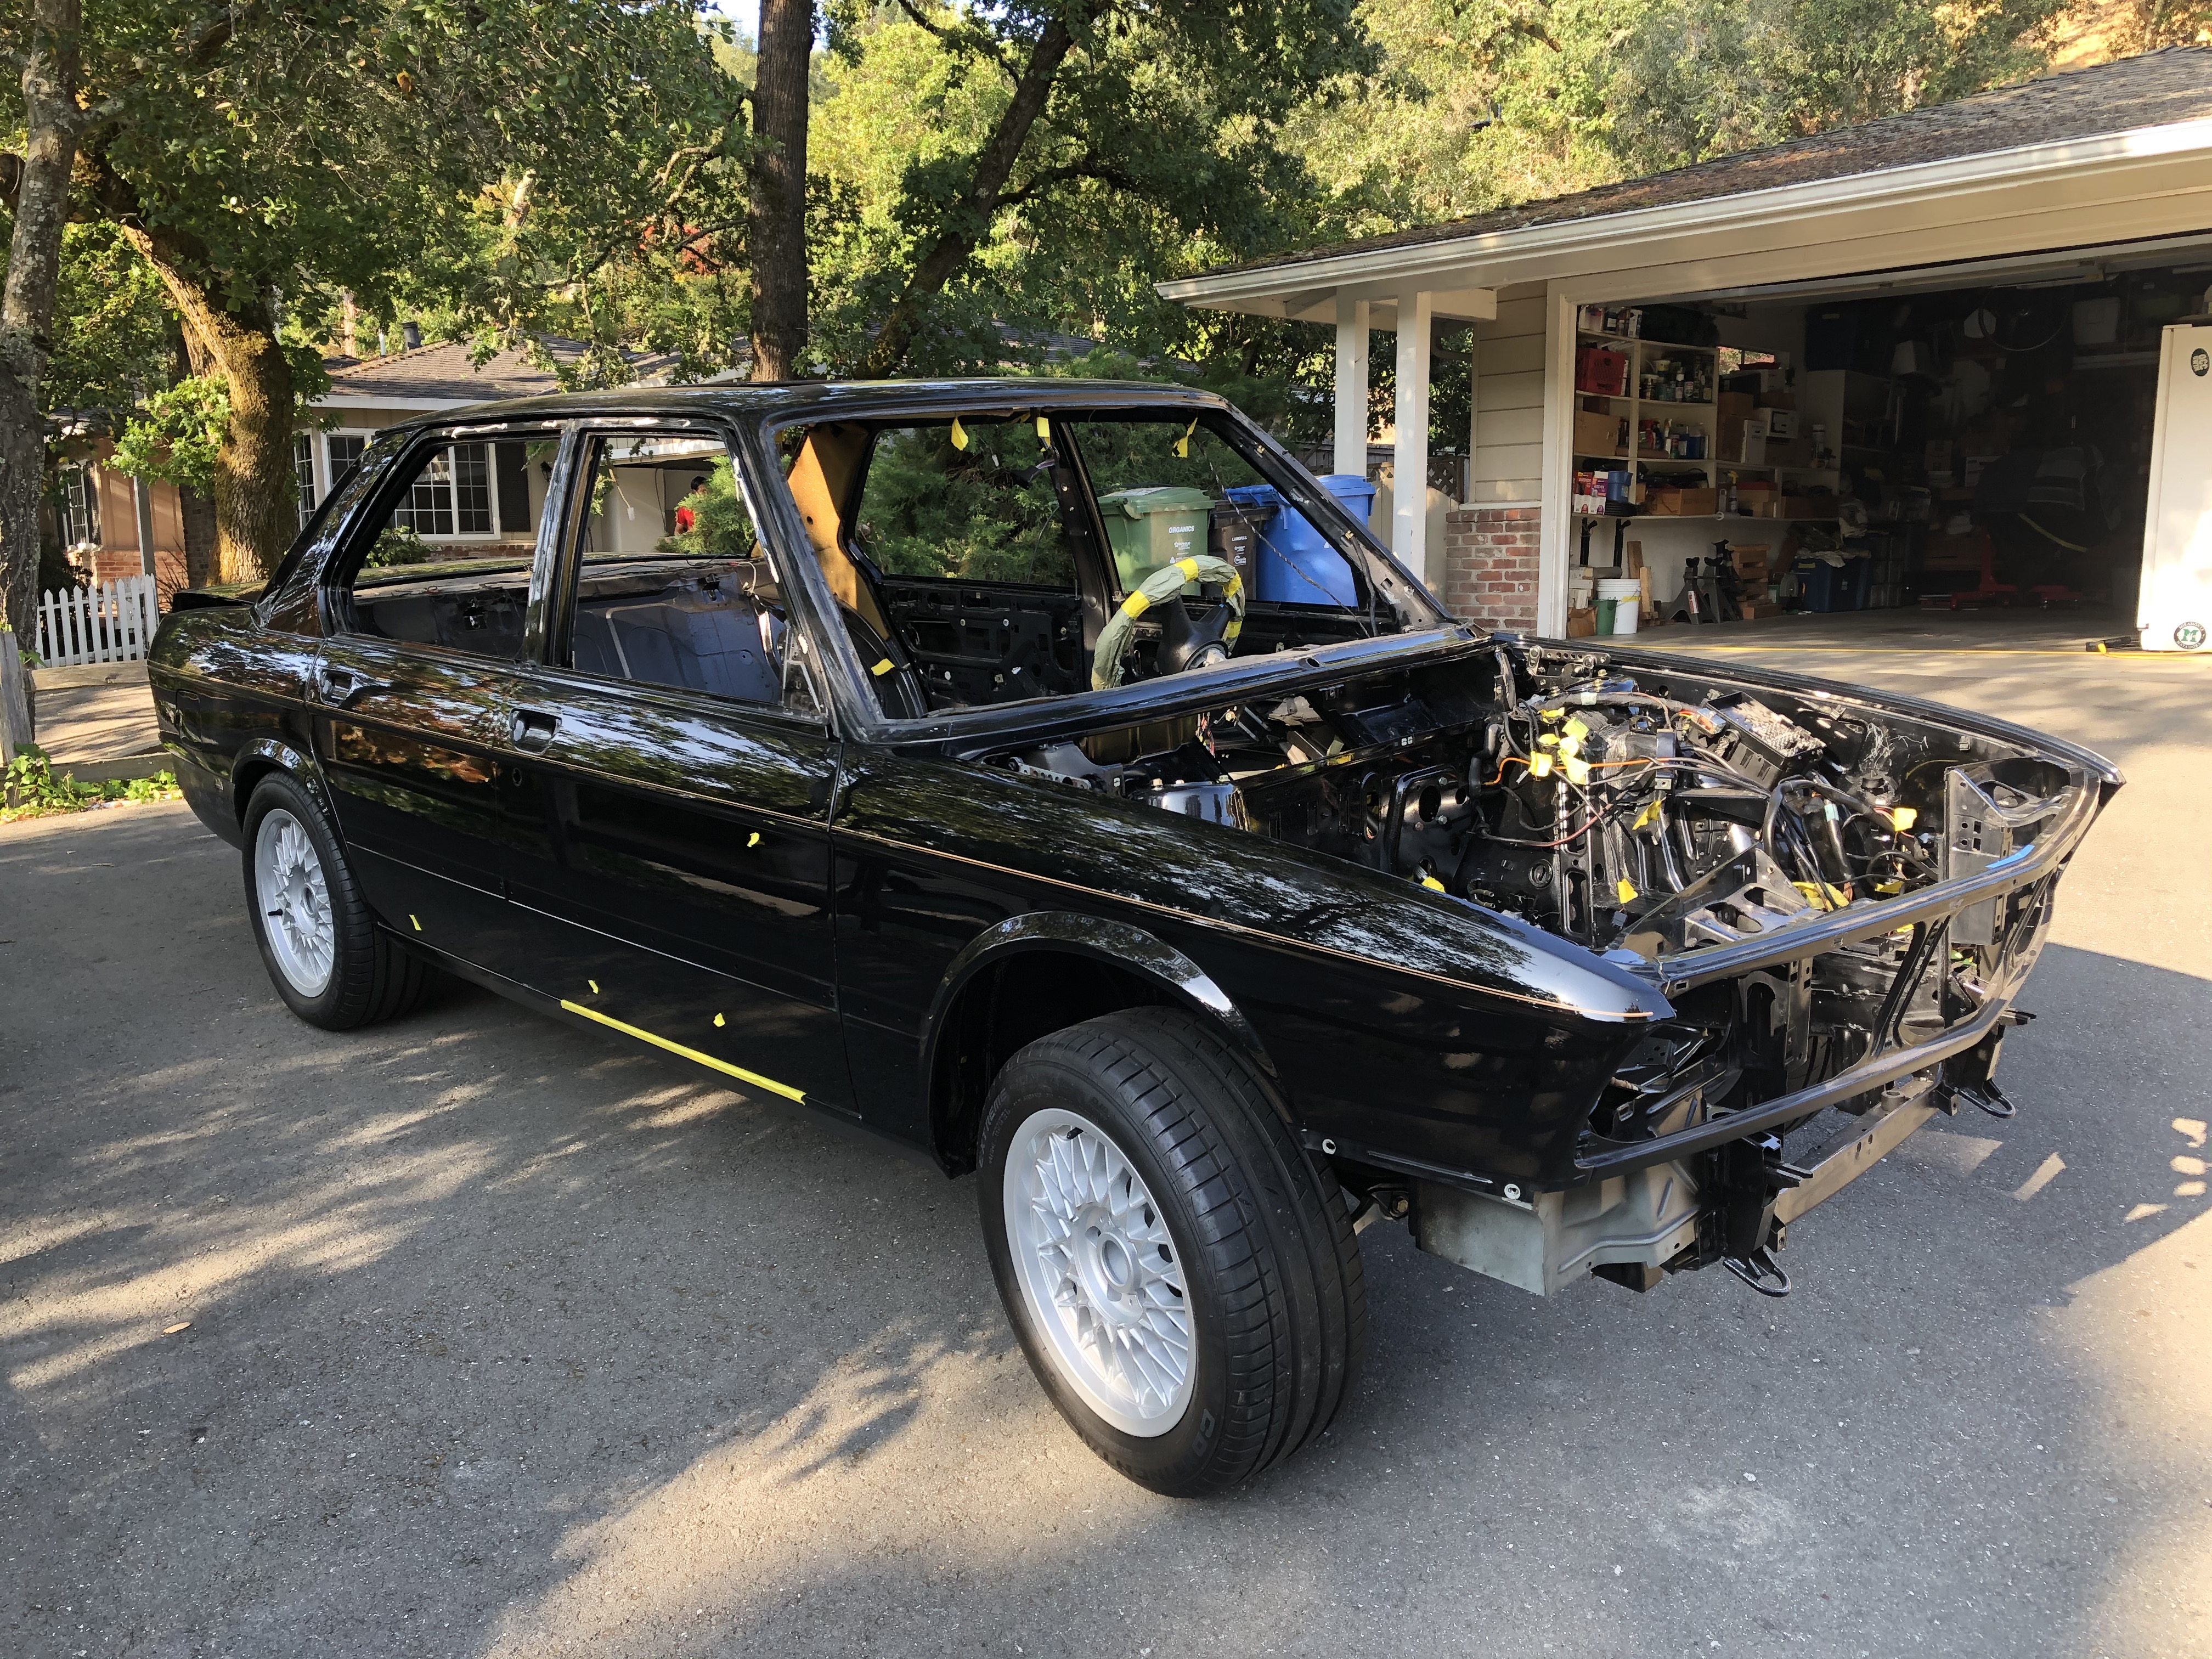
My time slot also opened up the restoration shop, so for the first time in many months the car rolled out of the garage.

Image

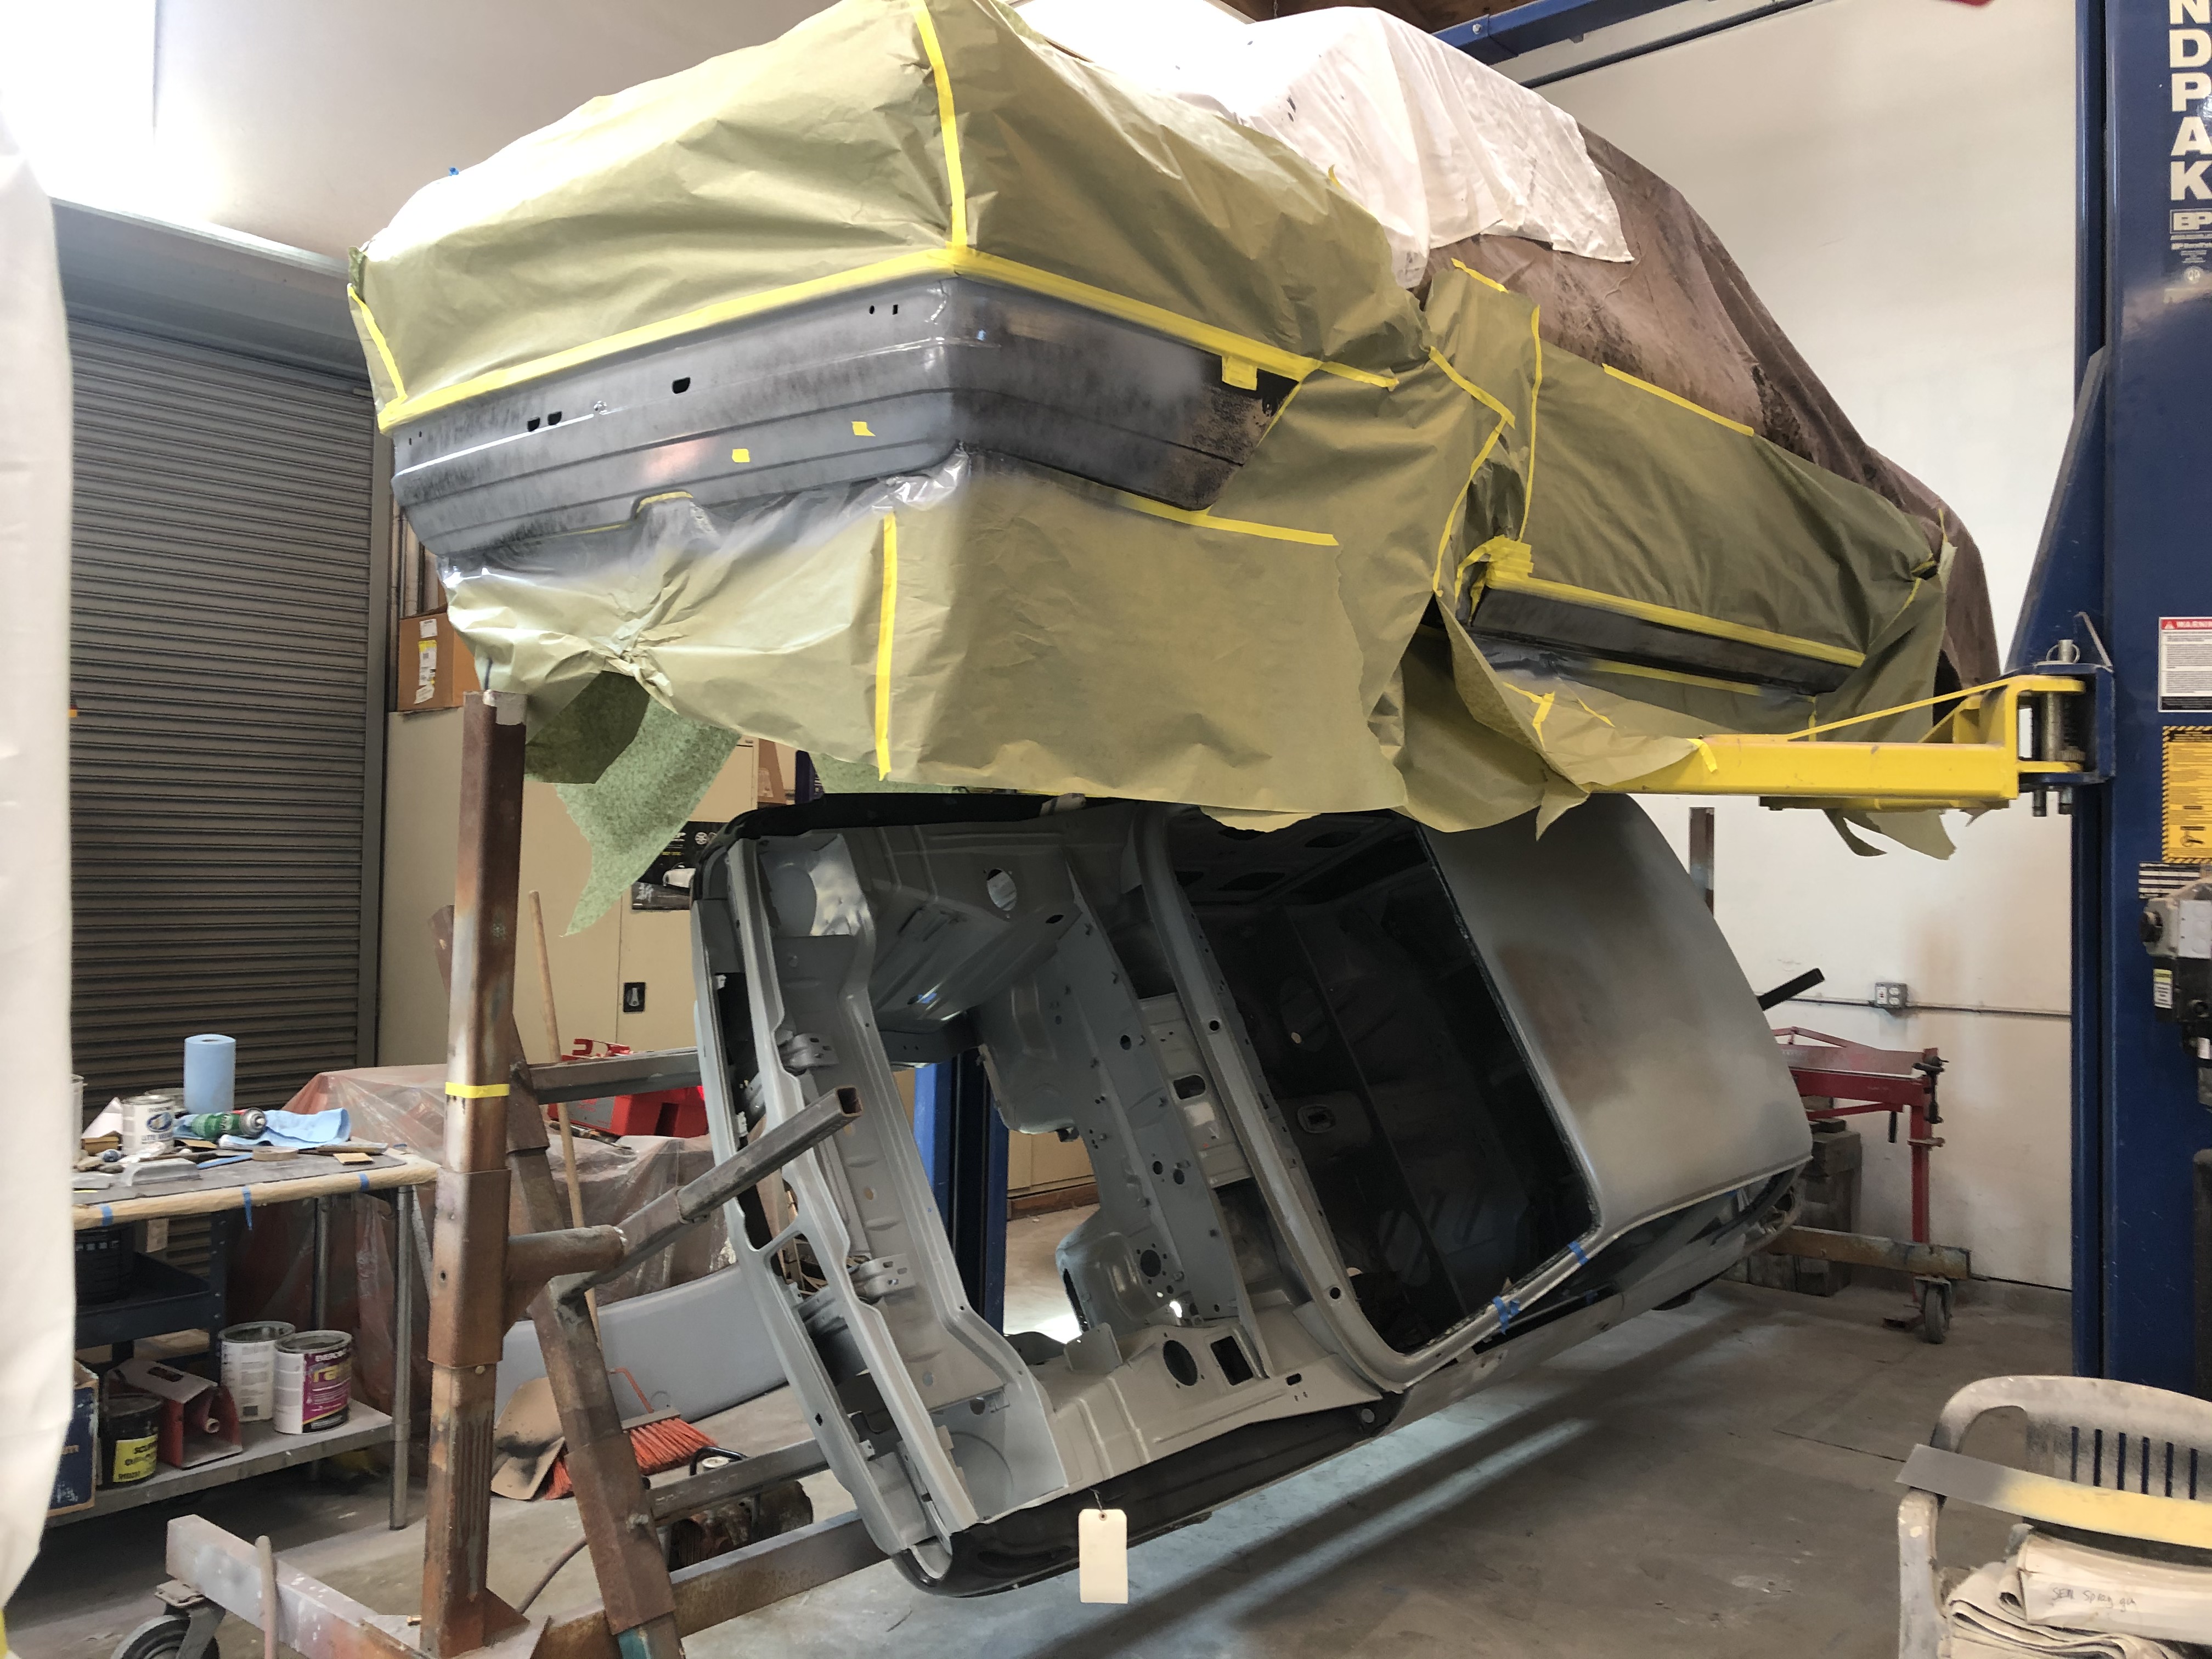
Here's some progress so far ... hood will get re-painted on the underside. You can't see it in this shot, but the top side is all original and in very good shape, so that's been polished. I forgot to get a pic before Roger covered it up, but trust me, it looks sweet.

Image

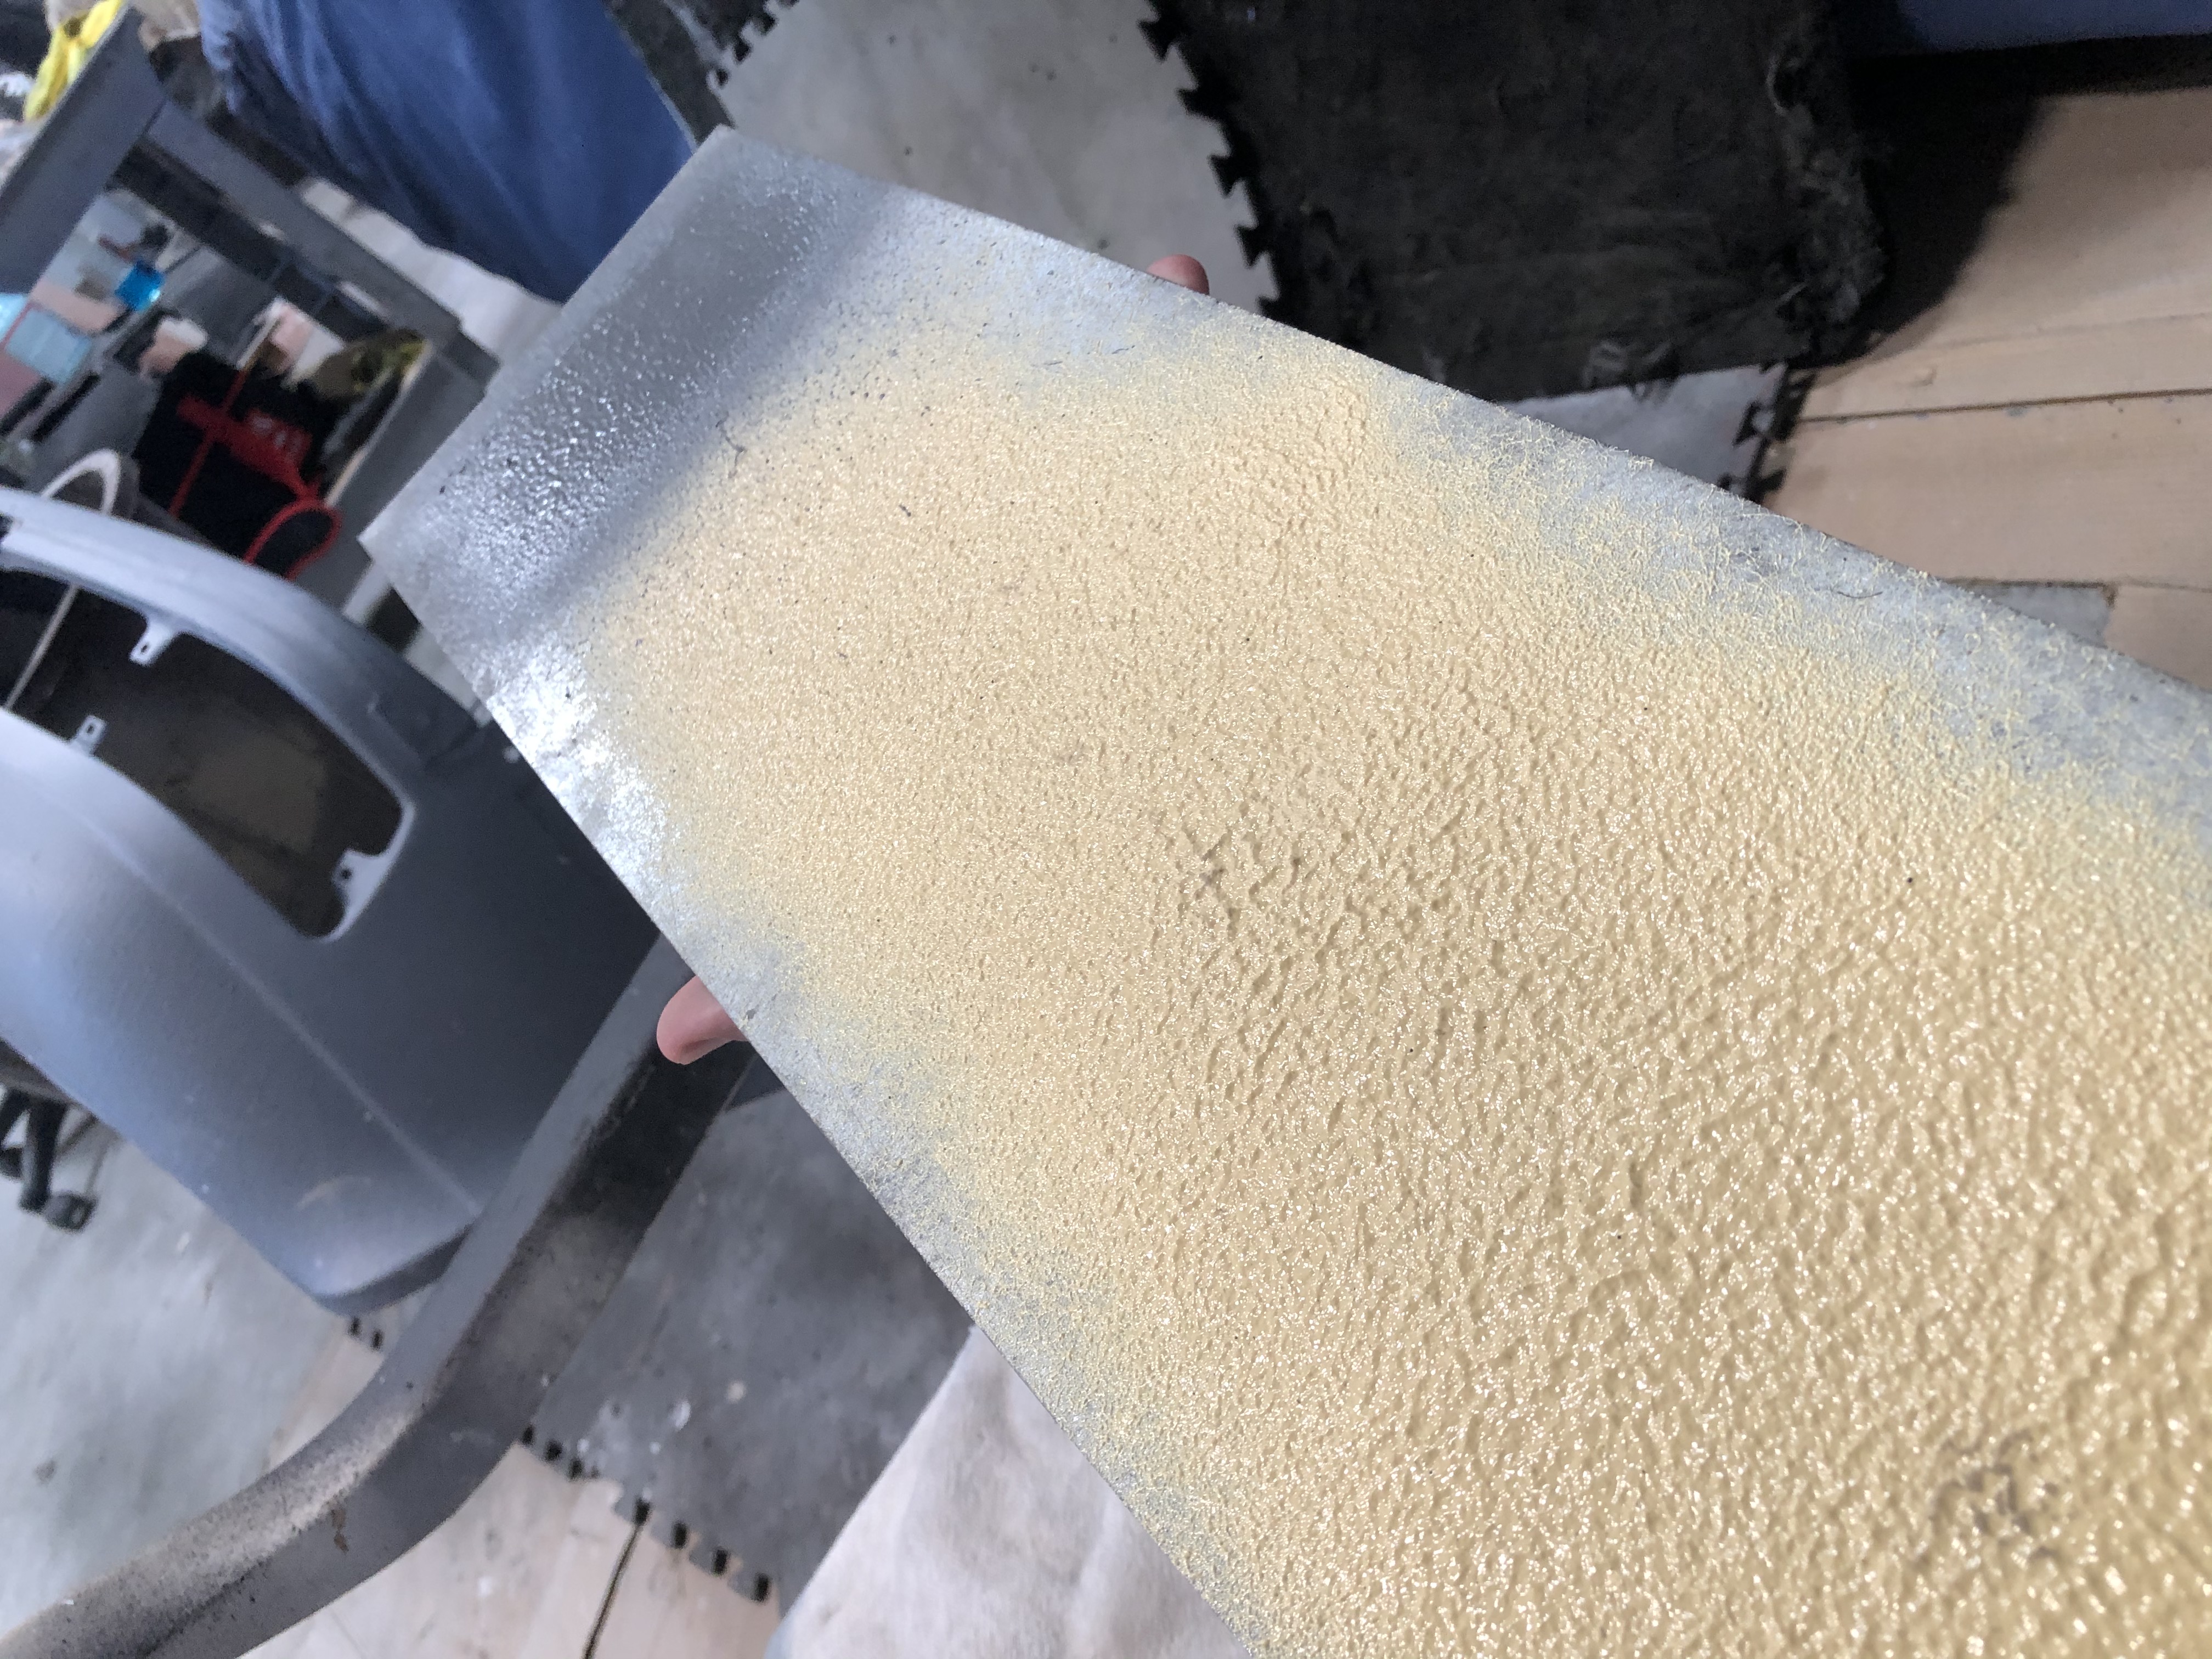
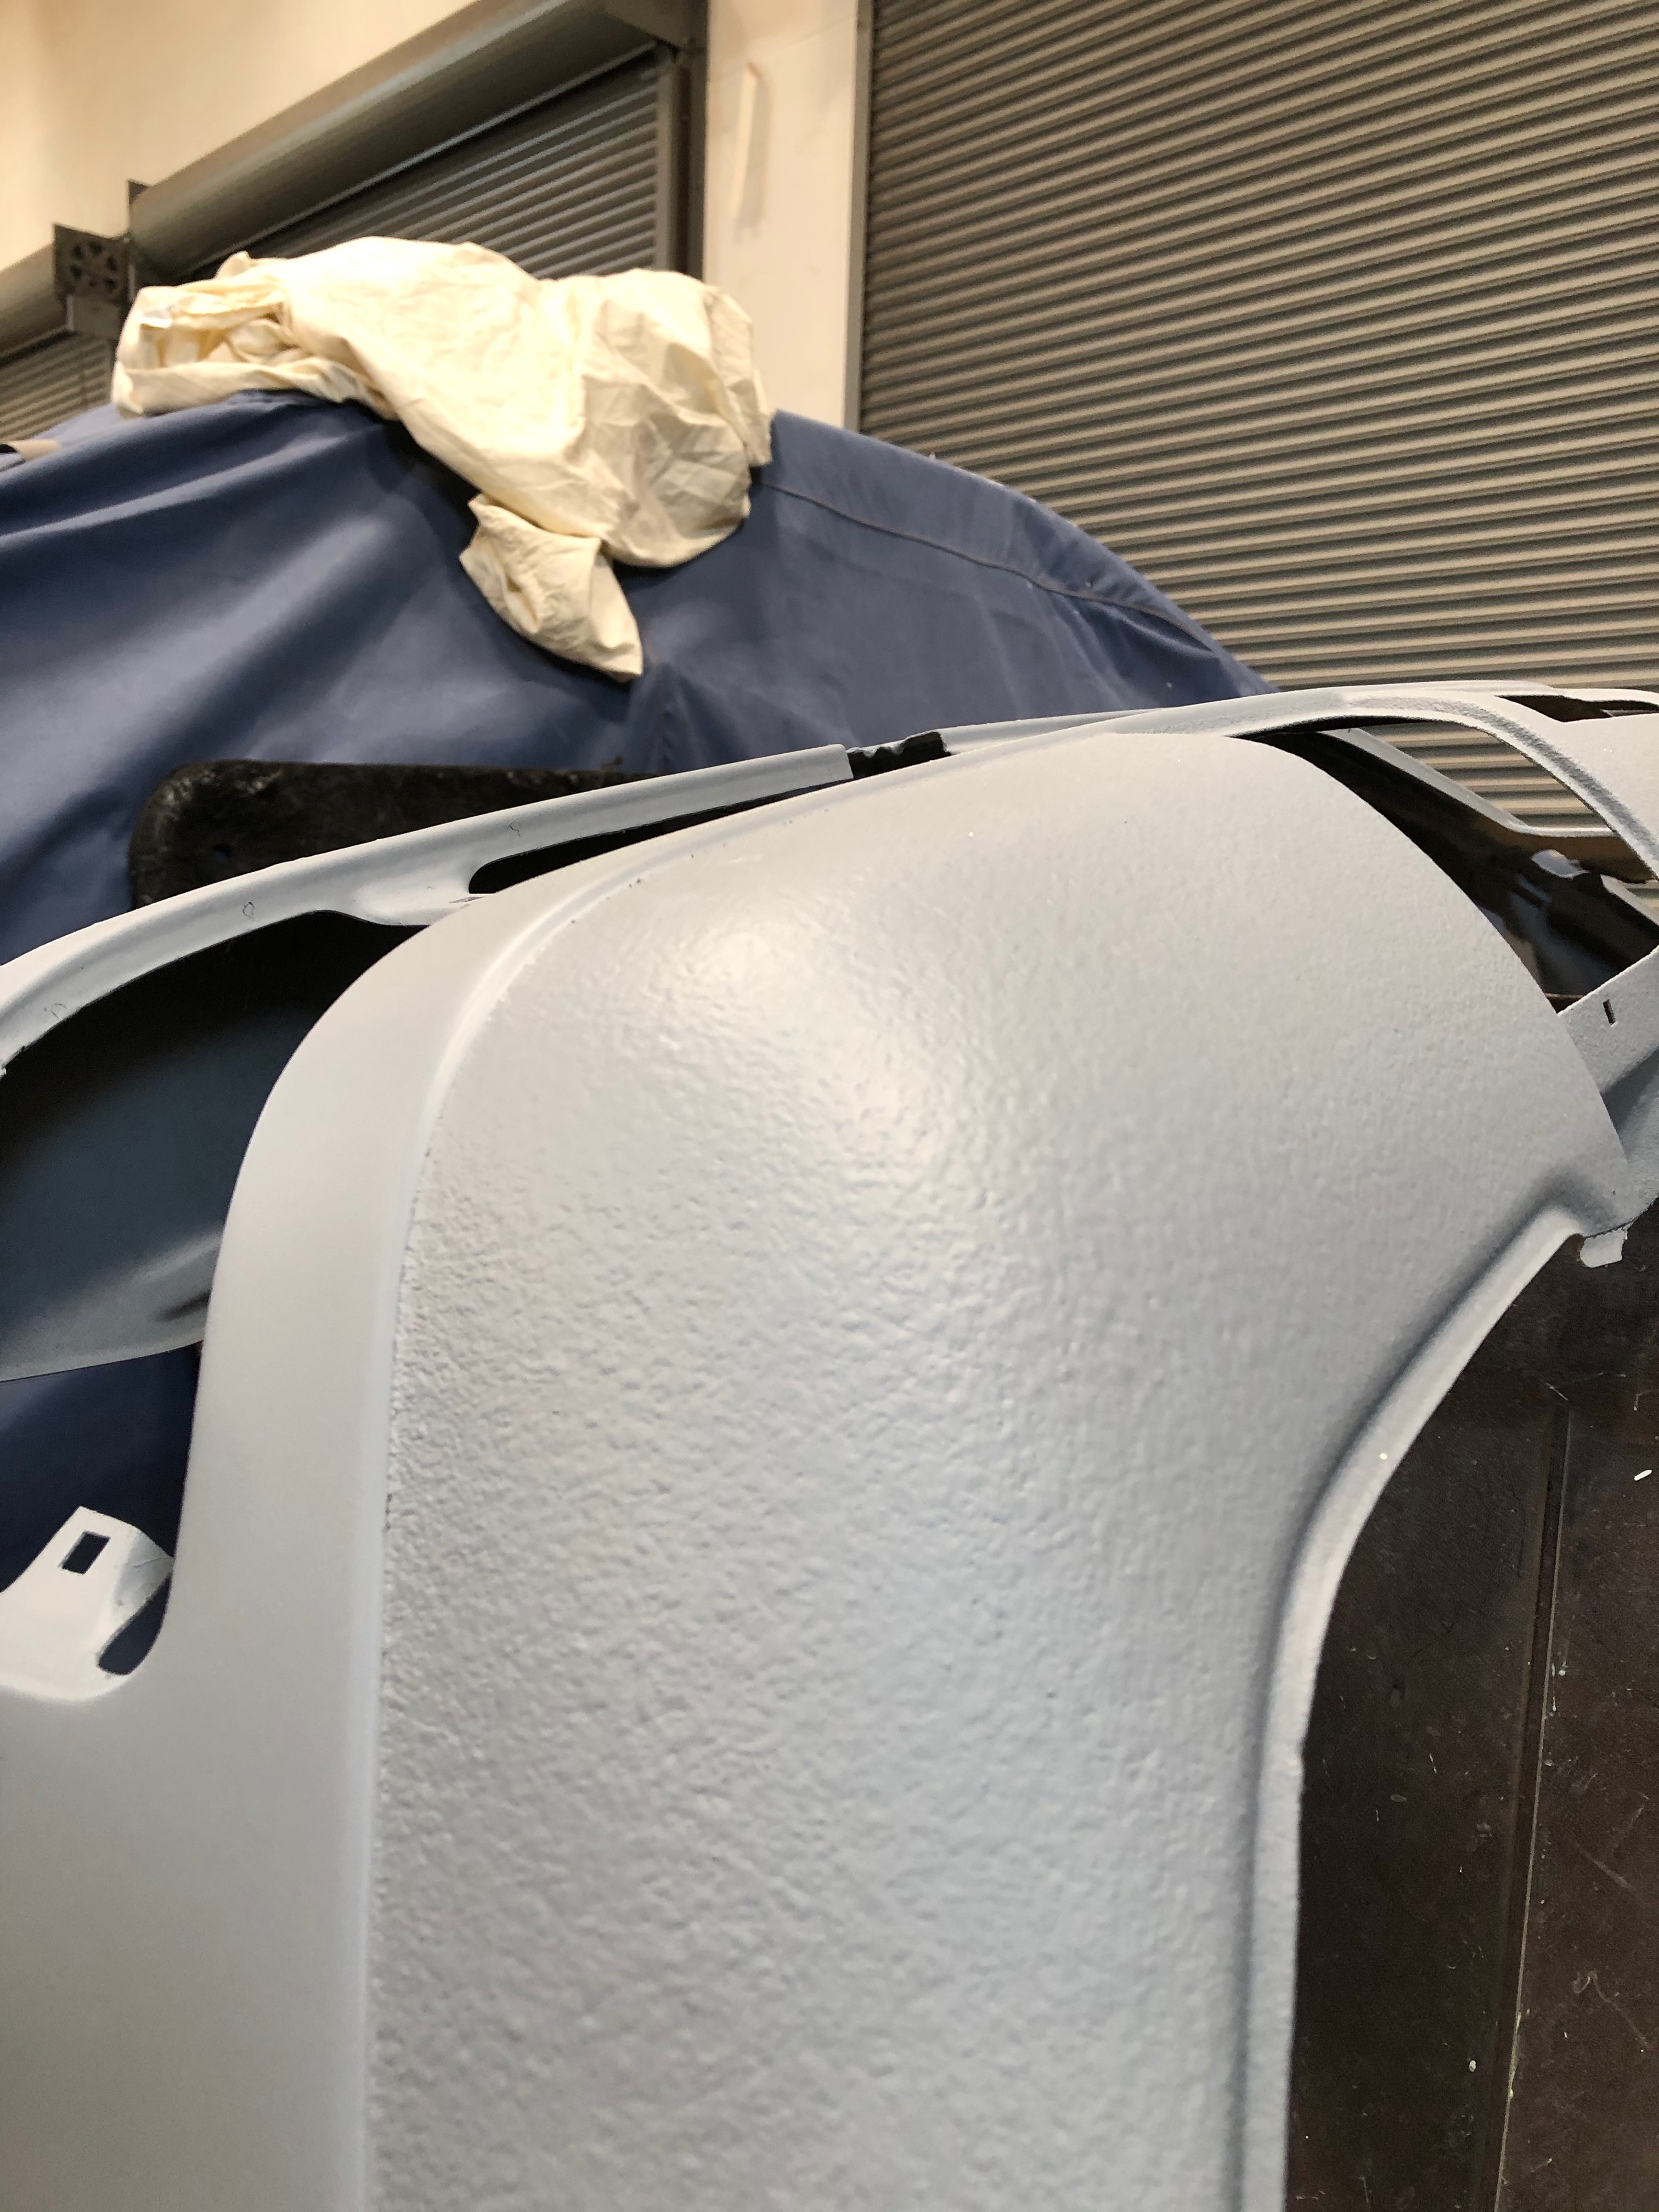
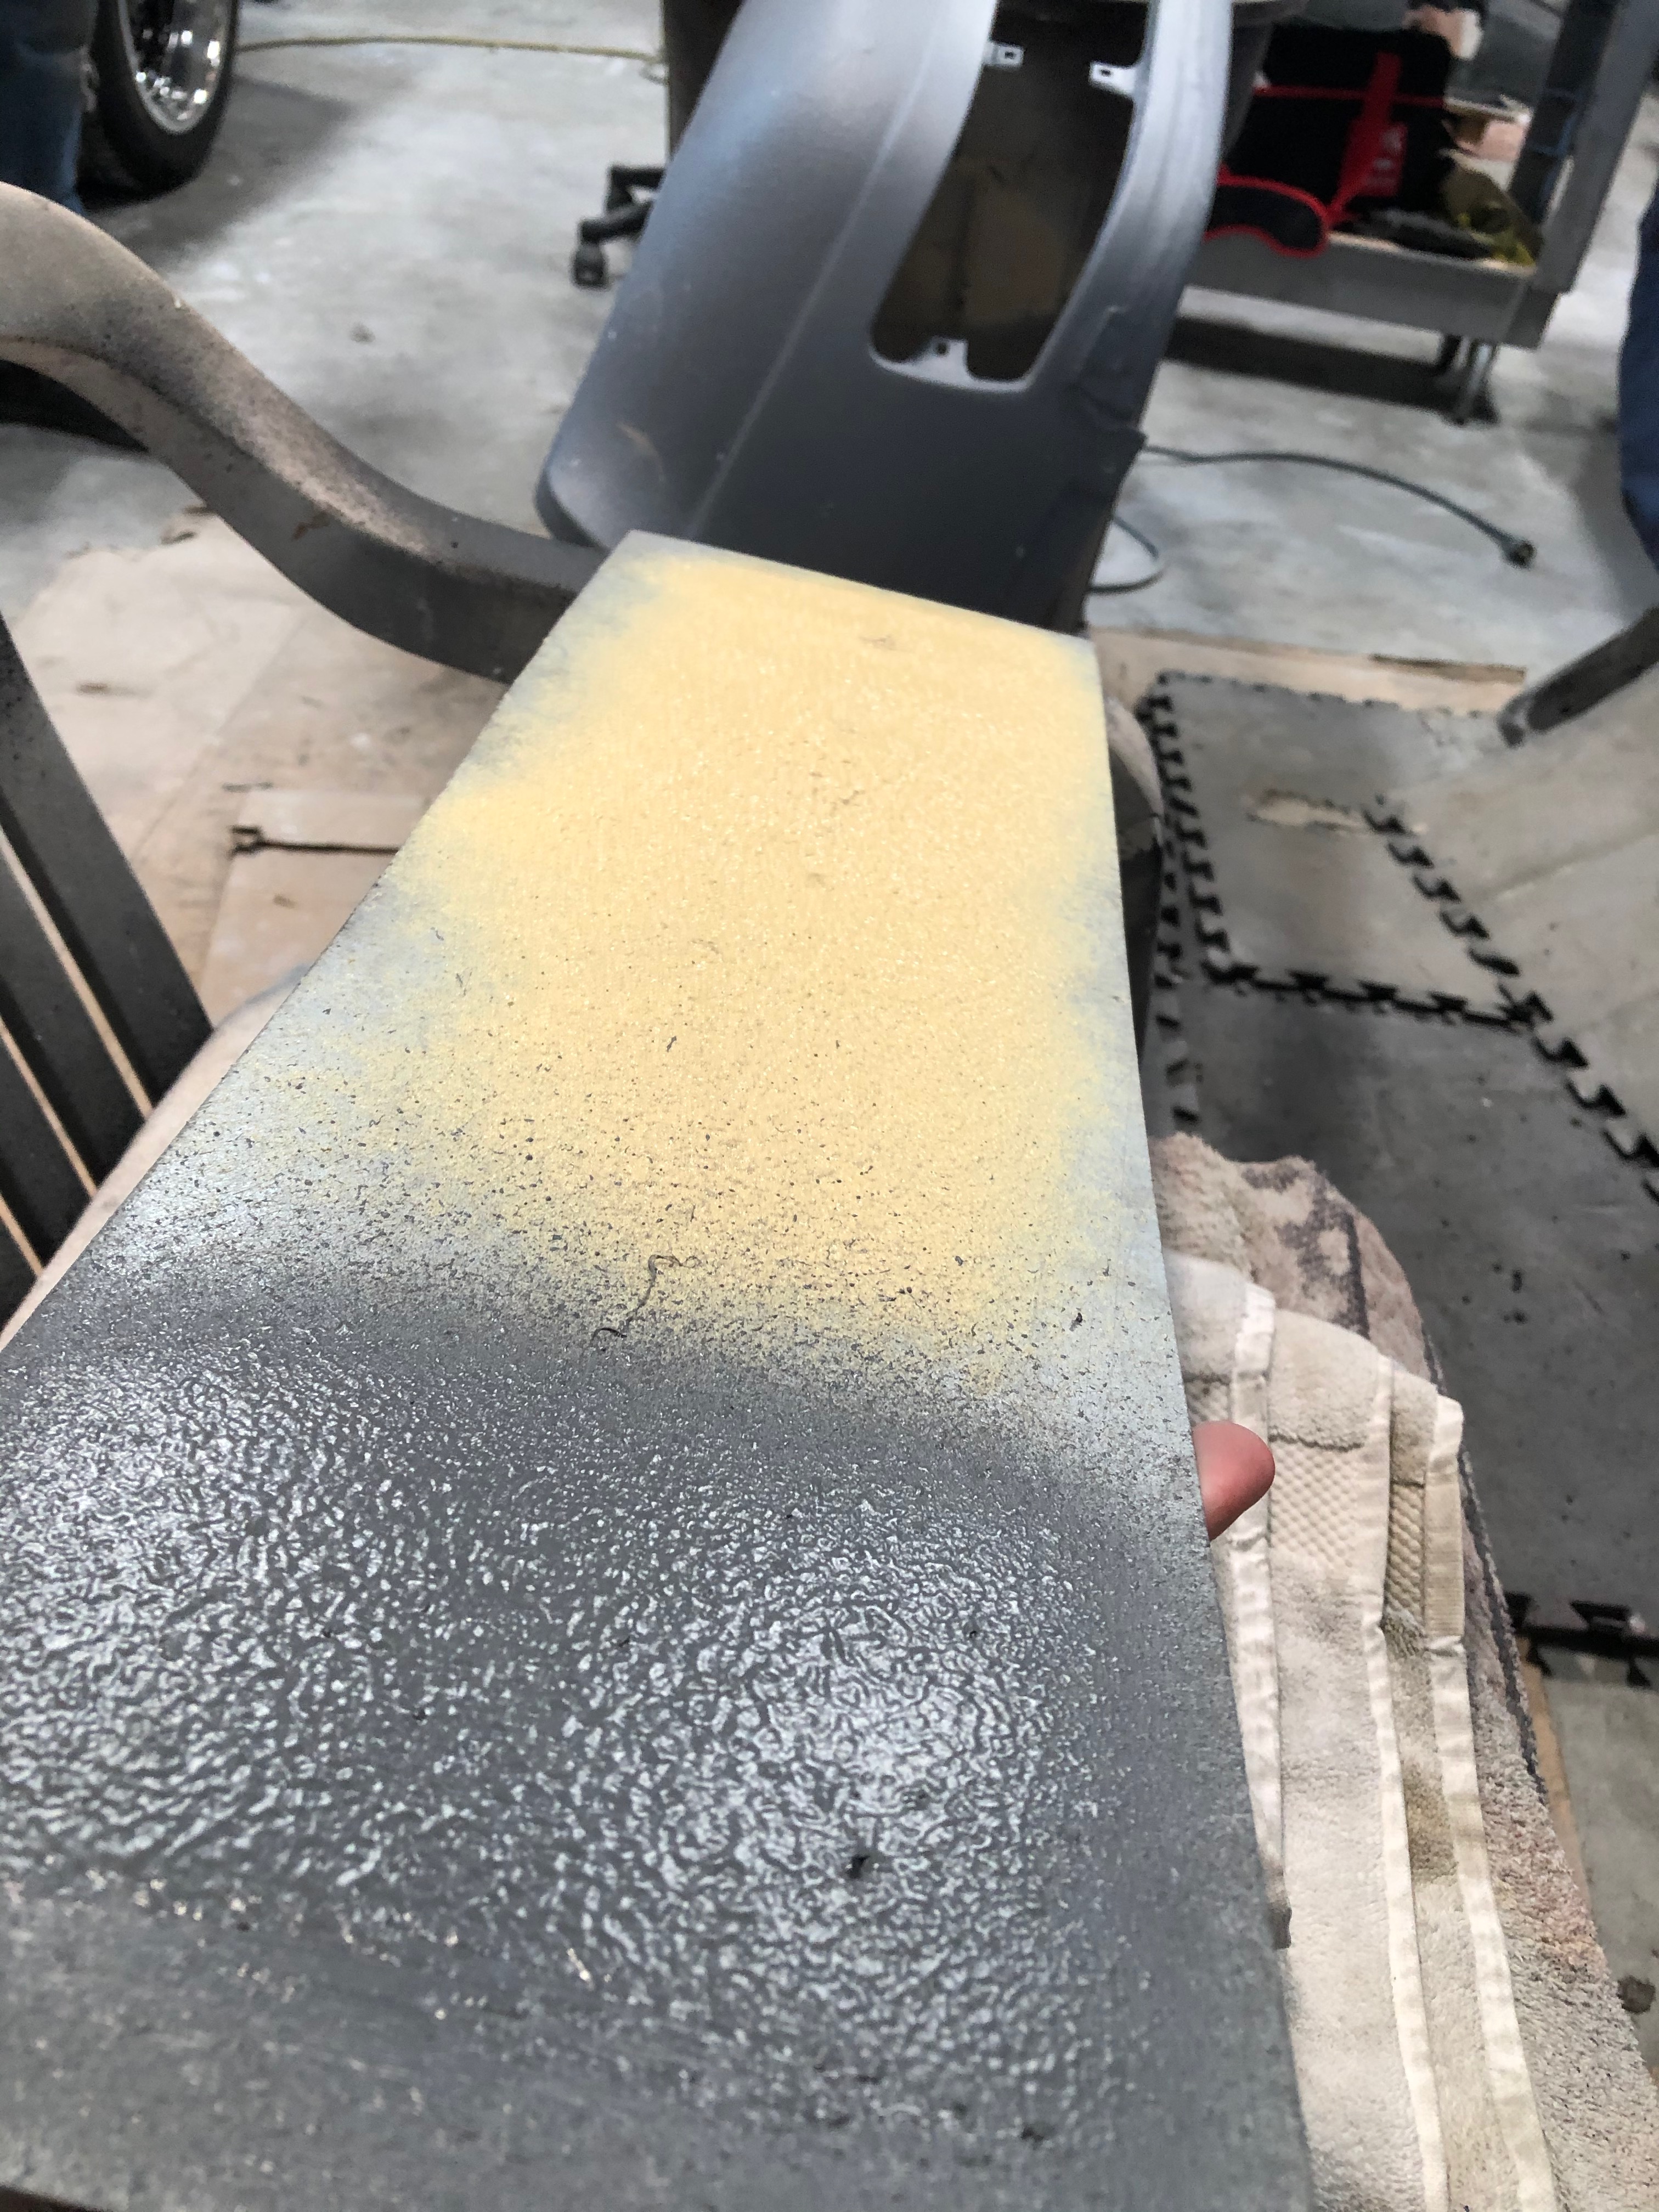
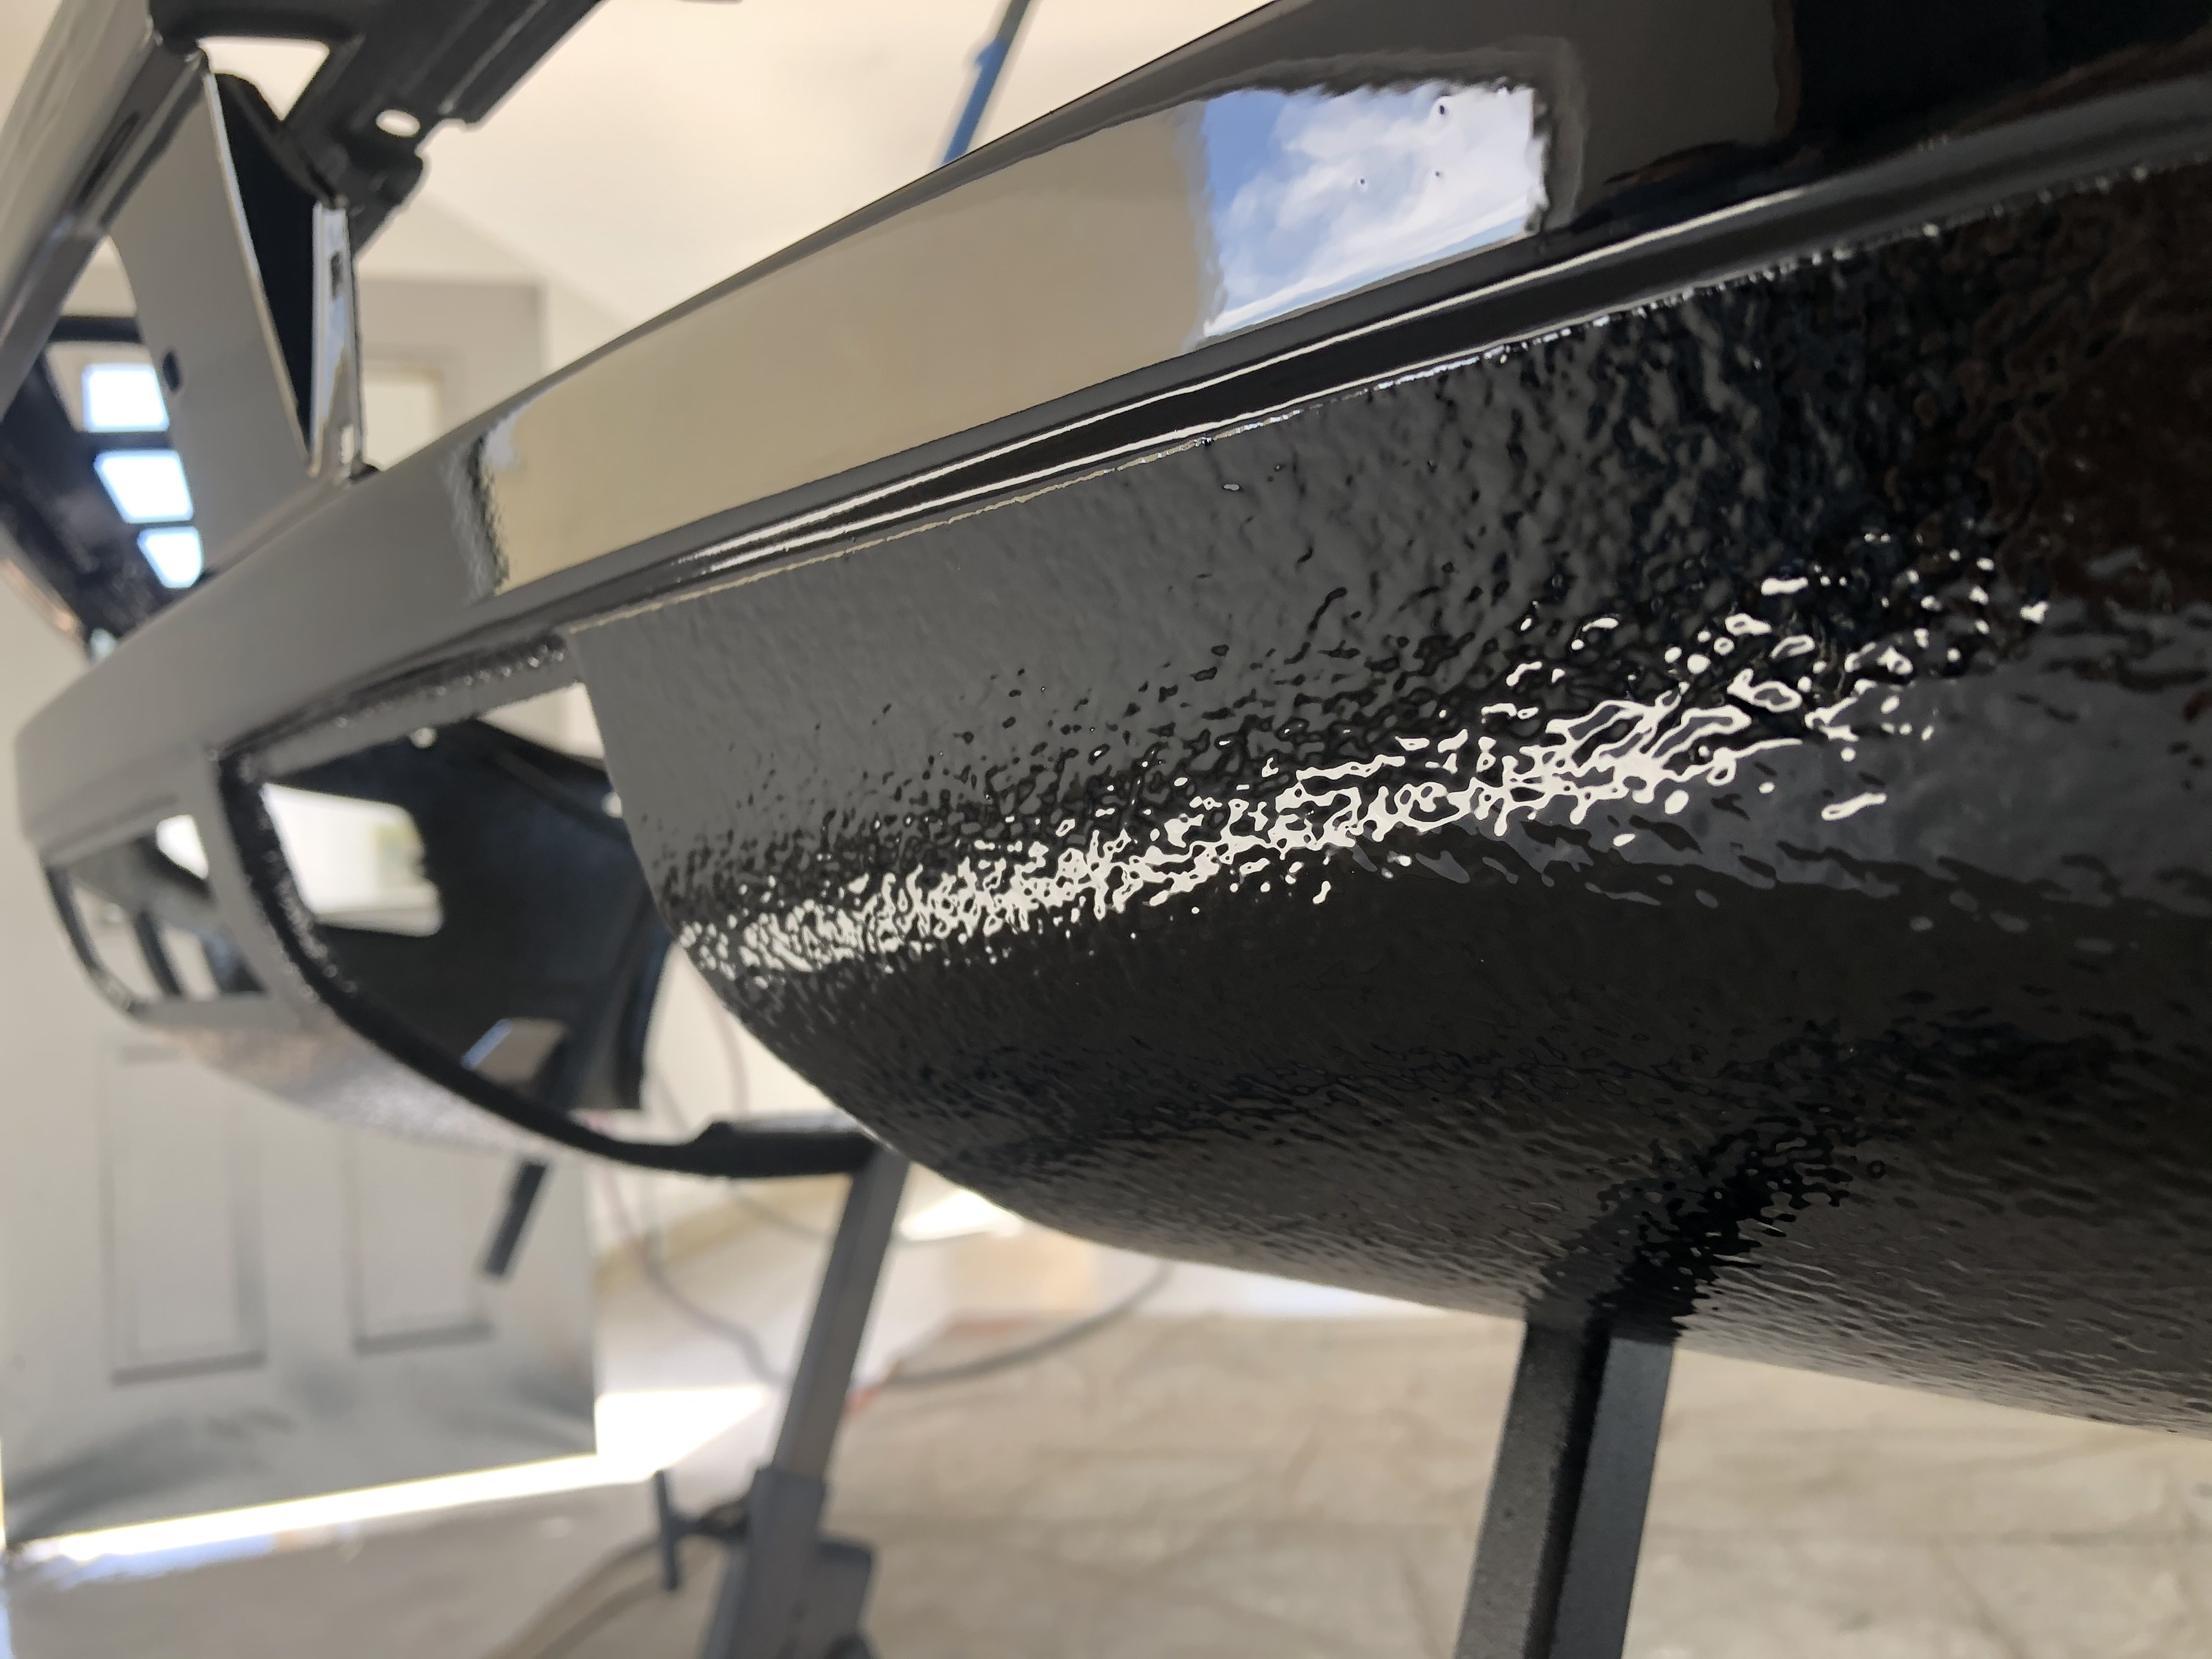
Here are shots where we're experimenting with different undercoating textures. The yellow is SEM sprayable seam sealer, the primered stuff on the front valance is a water-based coating, and the gray/black stuff next to the yellow SEM is Würth solvent-based coating. We're going to go with the Würth. Note that the glitches in that sample don't come from the coating ... apparently the gun hadn't been completely cleaned, so those glitches are from bits that had been stuck in the gun.

Image
Image
Image

Exciting to see progress!

Image

Last item for today. I have this idea that with the new euro bumpers, the large trunk spoiler from the US car will look out of proportion. One possible remedy is to get rid of the spoiler completely ... but since I definitely DON'T want to damage the existing trunk lid welding the mounting holes shut, my idea is to get a good donor lid from a car without a spoiler (e.g., a 528e), get that painted up black, and mount that on the car. That way I can keep the original trunk unmolested but also get that super-clean euro M5 look. It will likely be very tough to exactly match the black paints, but this should be a relatively cheap experiment. We'll see.

An even better solution would be to find a smaller BMW spoiler that would fit on this car. Any ideas?
tig
Posts: 9311
Joined: Mar 18, 2013 6:25 PM
Location: Durango
Contact:

Re: Rebuilding My 1988 US-spec M5

Post by tig »

I dig the spoiler-less look.

You are doing this so right. Big tip of the hat in your direction.
jhh925
Posts: 917
Joined: Jul 11, 2015 12:23 AM
Location: Reno

Re: Rebuilding My 1988 US-spec M5

Post by jhh925 »

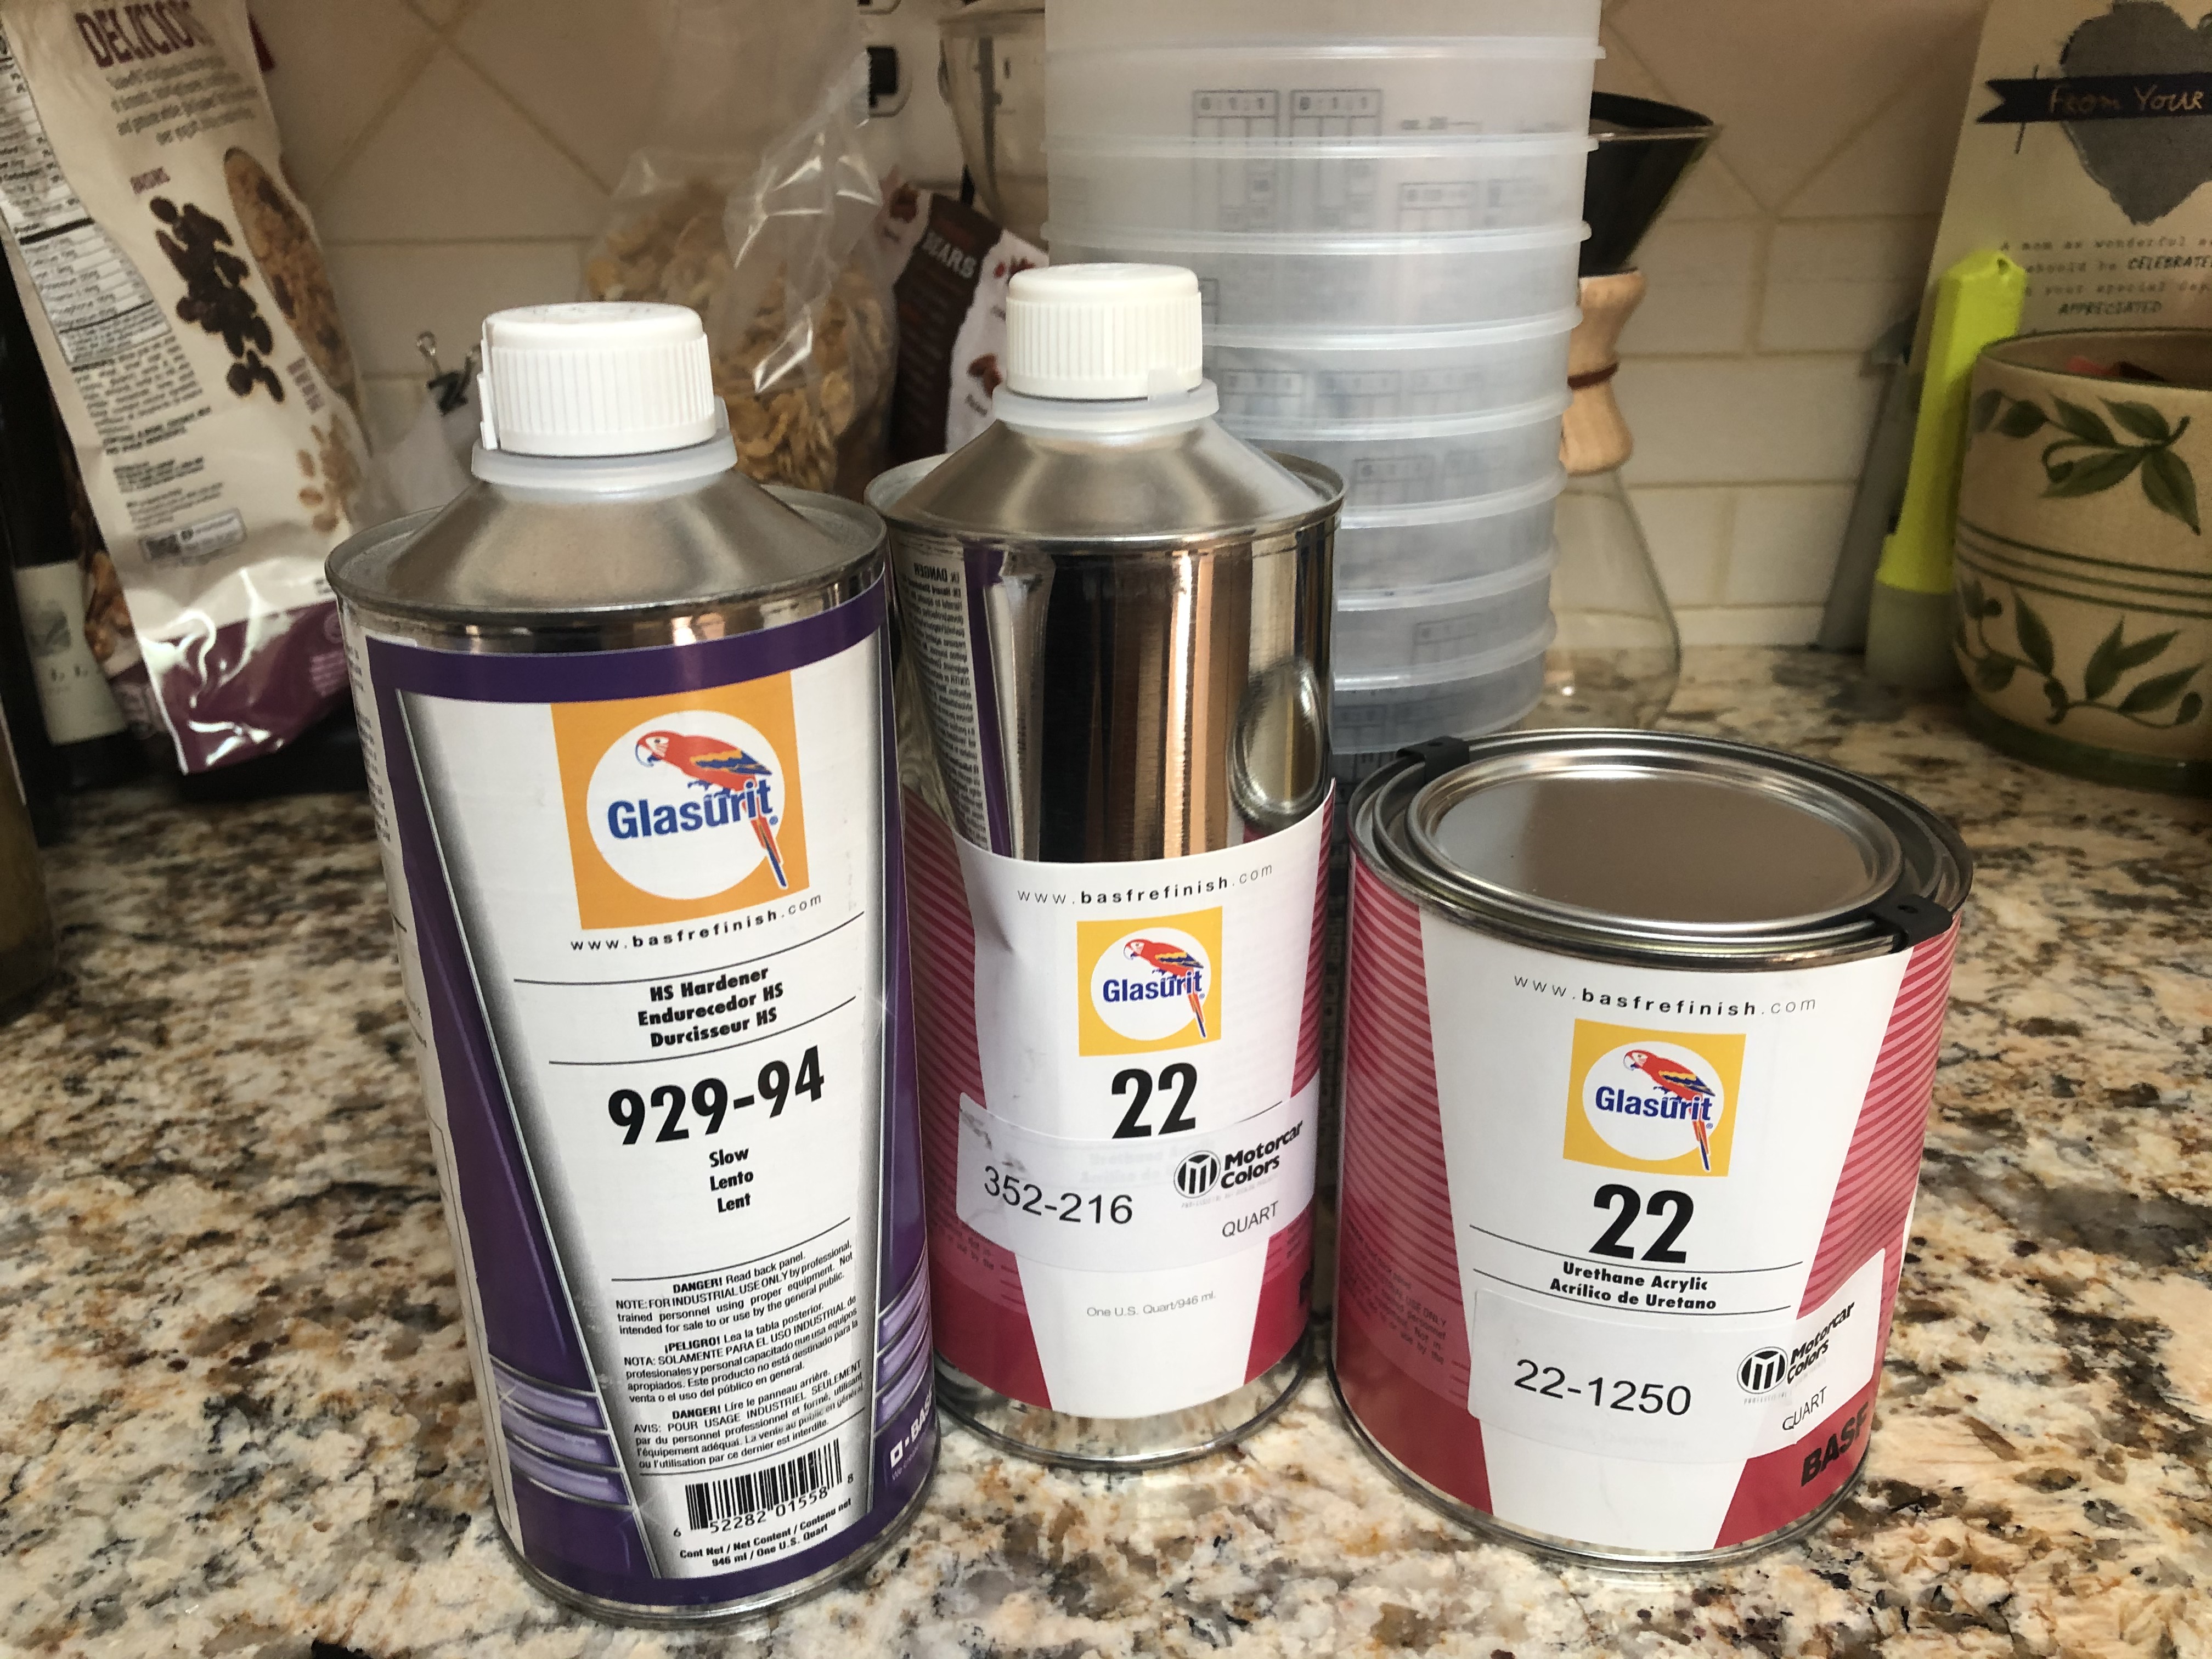
The paint arrived yesterday. Actual honest-to-god single stage Glasurit 22 Line paint. Very excited to have the new paint be so close to the original.

Image

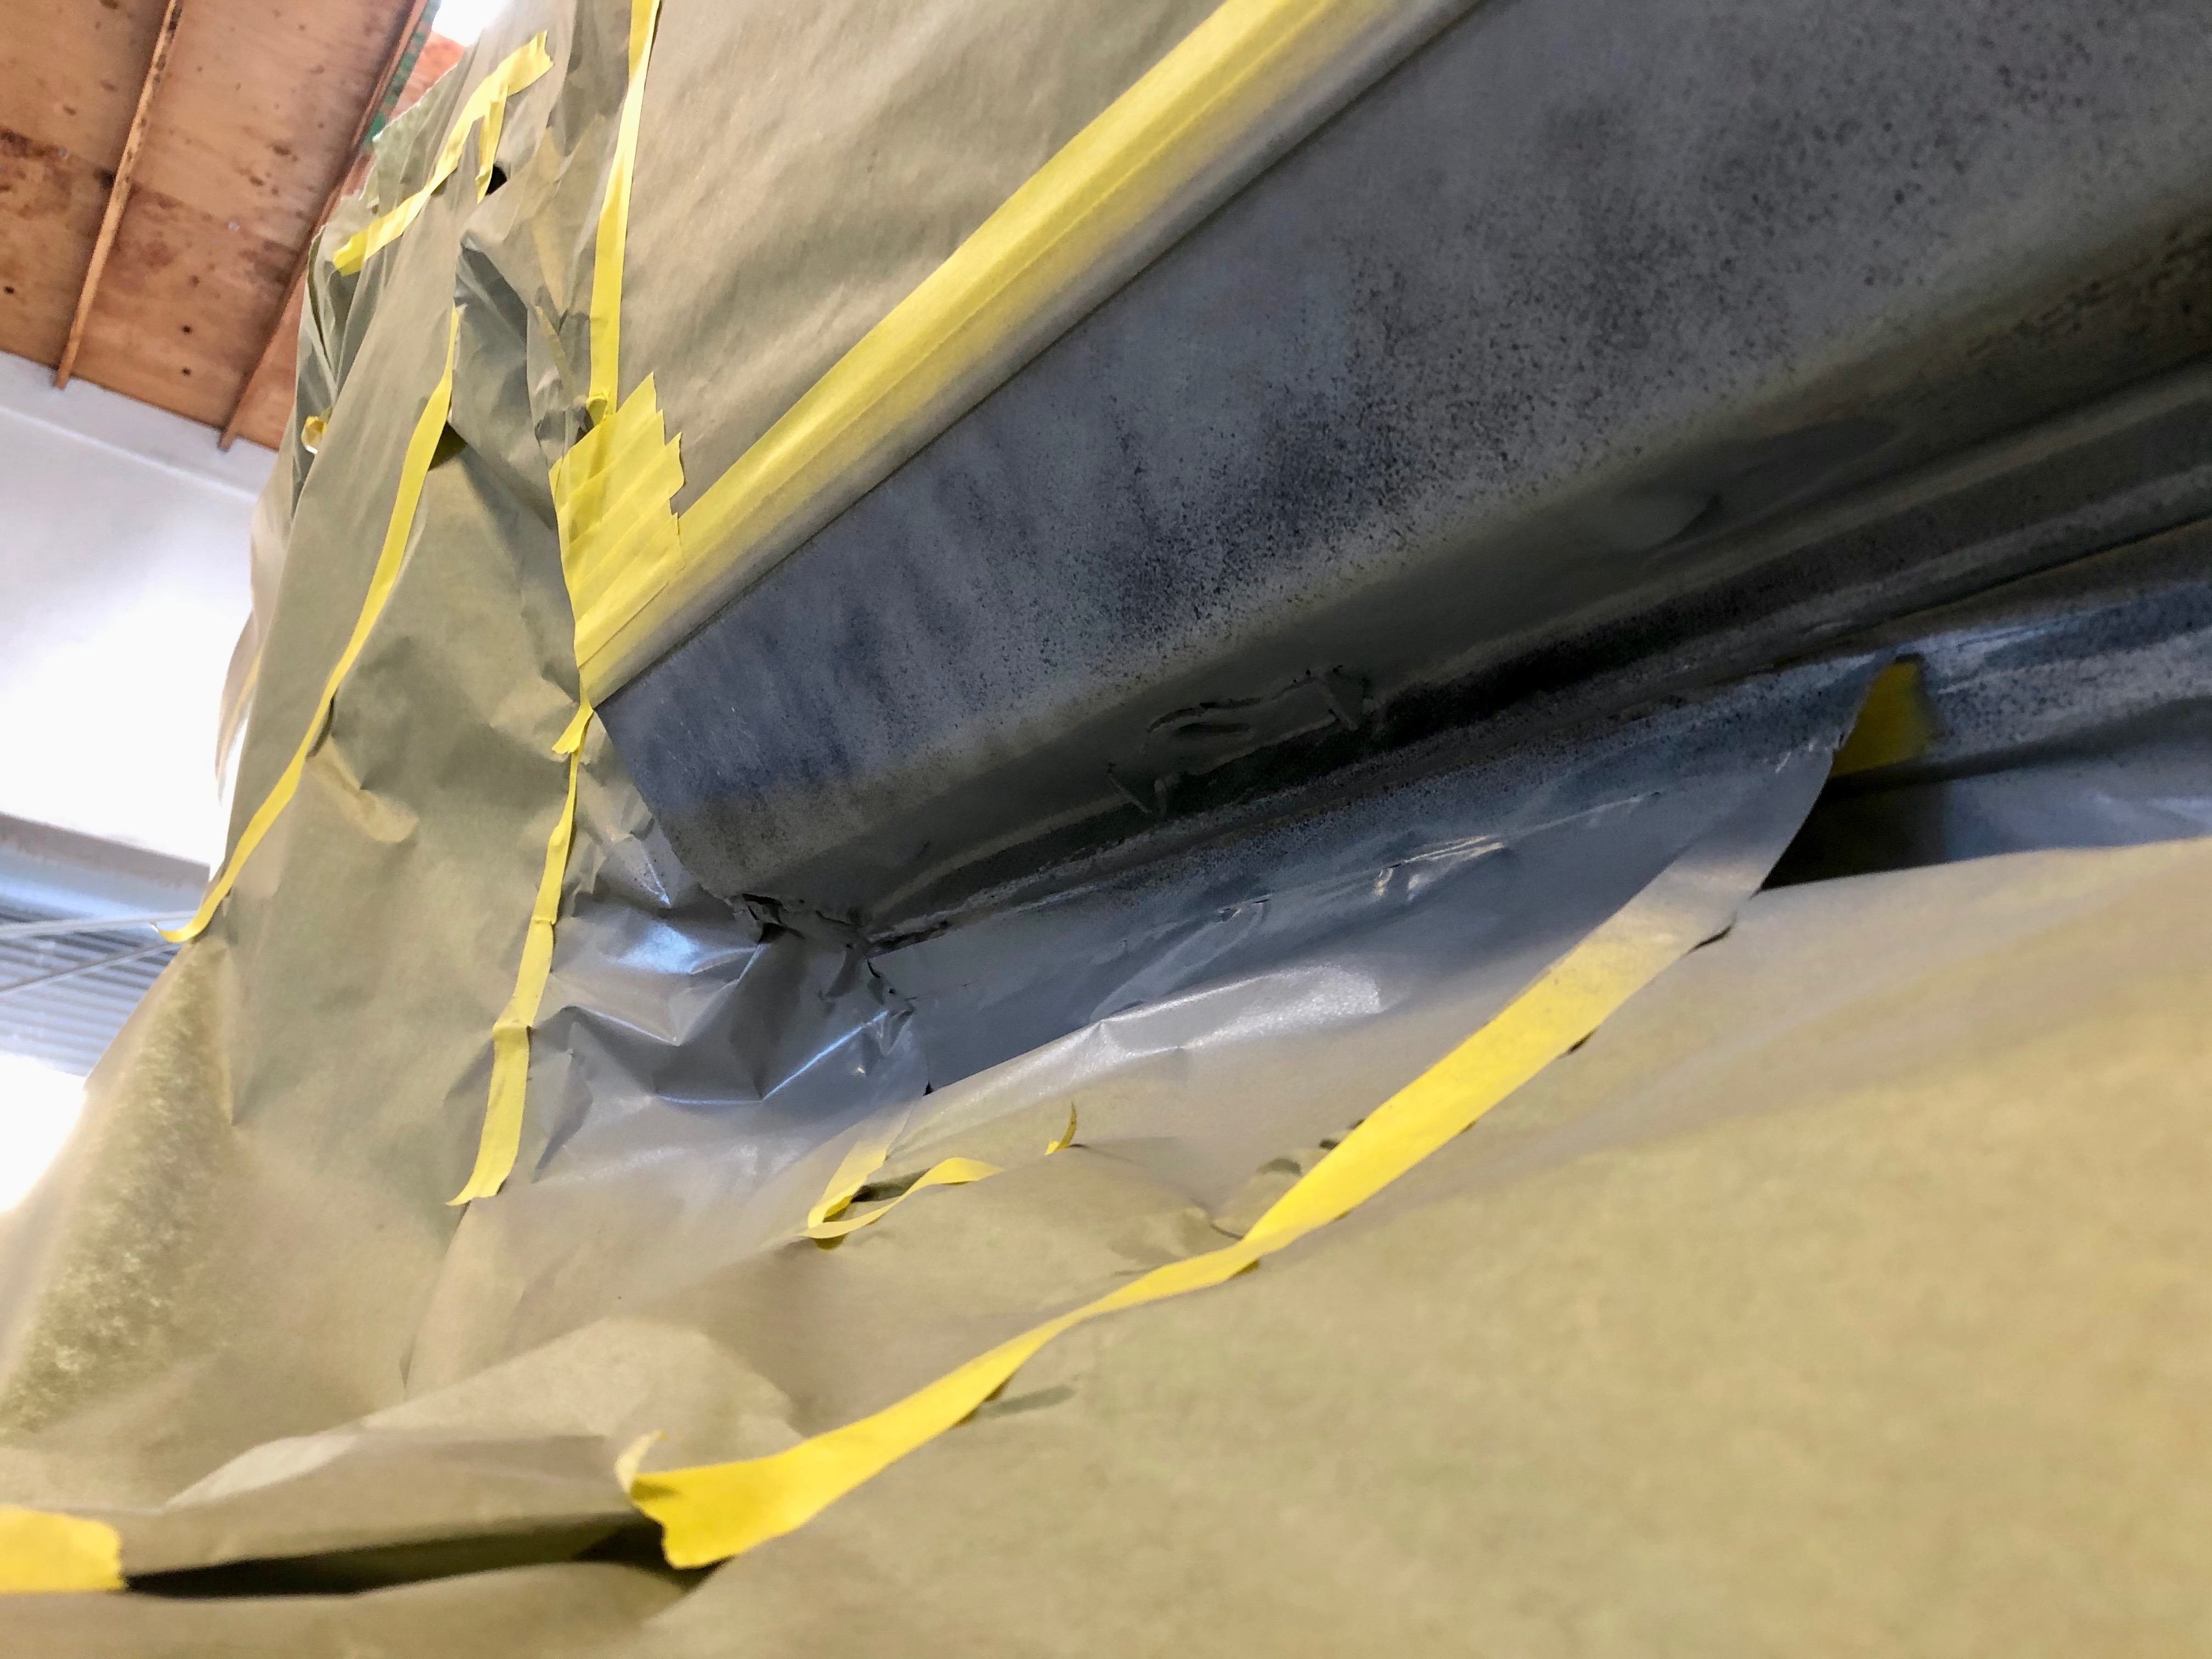
Drove by the shop to drop the paint off, and got a picture of some more work in progress ... nirvana is a straight rocker.

Image

And one edit to the posts above. I hate my crappy potato pic above of the work I did hooking up the 4-wire O2. The M30-B35 O2 sensor wire bracket is pretty cool, but that pic doesn't show it at all, so here's a new and improved potato pic. The bracket was powdercoated in the last batch.

Image
Image
jhh925
Posts: 917
Joined: Jul 11, 2015 12:23 AM
Location: Reno

Re: Rebuilding My 1988 US-spec M5

Post by jhh925 »

cek wrote: Aug 01, 2020 9:02 PM I dig the spoiler-less look.

You are doing this so right. Big tip of the hat in your direction.
Thanks. Needless to say, your projects set a pretty high bar. And since my mind is on paint recently, I'll also say that your comments about your experience with Glasurit pushed me to keep looking for a source.
lizard
Posts: 122
Joined: Mar 23, 2013 12:39 PM

Re: Rebuilding My 1988 US-spec M5

Post by lizard »

OP: I enjoy reading about all the small stuff. Keep posting!
Adam W in MN
Posts: 5053
Joined: Feb 12, 2006 12:00 PM
Location: Don't waste my motherf***in' time!
Contact:

Re: Rebuilding My 1988 US-spec M5

Post by Adam W in MN »

jhh925 wrote: Aug 05, 2020 9:14 PM
cek wrote: Aug 01, 2020 9:02 PM I dig the spoiler-less look.

You are doing this so right. Big tip of the hat in your direction.
Thanks. Needless to say, your projects set a pretty high bar. And since my mind is on paint recently, I'll also say that your comments about your experience with Glasurit pushed me to keep looking for a source.
Not sure what the comments were, positive or negative, but I used Glasurit Alpineweiss on my E12 M535i resto and I get lots of compliments on the paint. I am very happy with it.
jhh925
Posts: 917
Joined: Jul 11, 2015 12:23 AM
Location: Reno

Re: Rebuilding My 1988 US-spec M5

Post by jhh925 »

Charlie's comments were very positive, along the lines of Glasurit being "tits" and that for car painted in Glasurit, he's "wax that."

Out of curiosity, where did you source your paint, Adam?

And speaking of paint, here are shots of a couple painted items. Front valance:

Image

Underside of hood (I think the amount of orange peel here is pretty good compared to factory, which was the goal):

Image

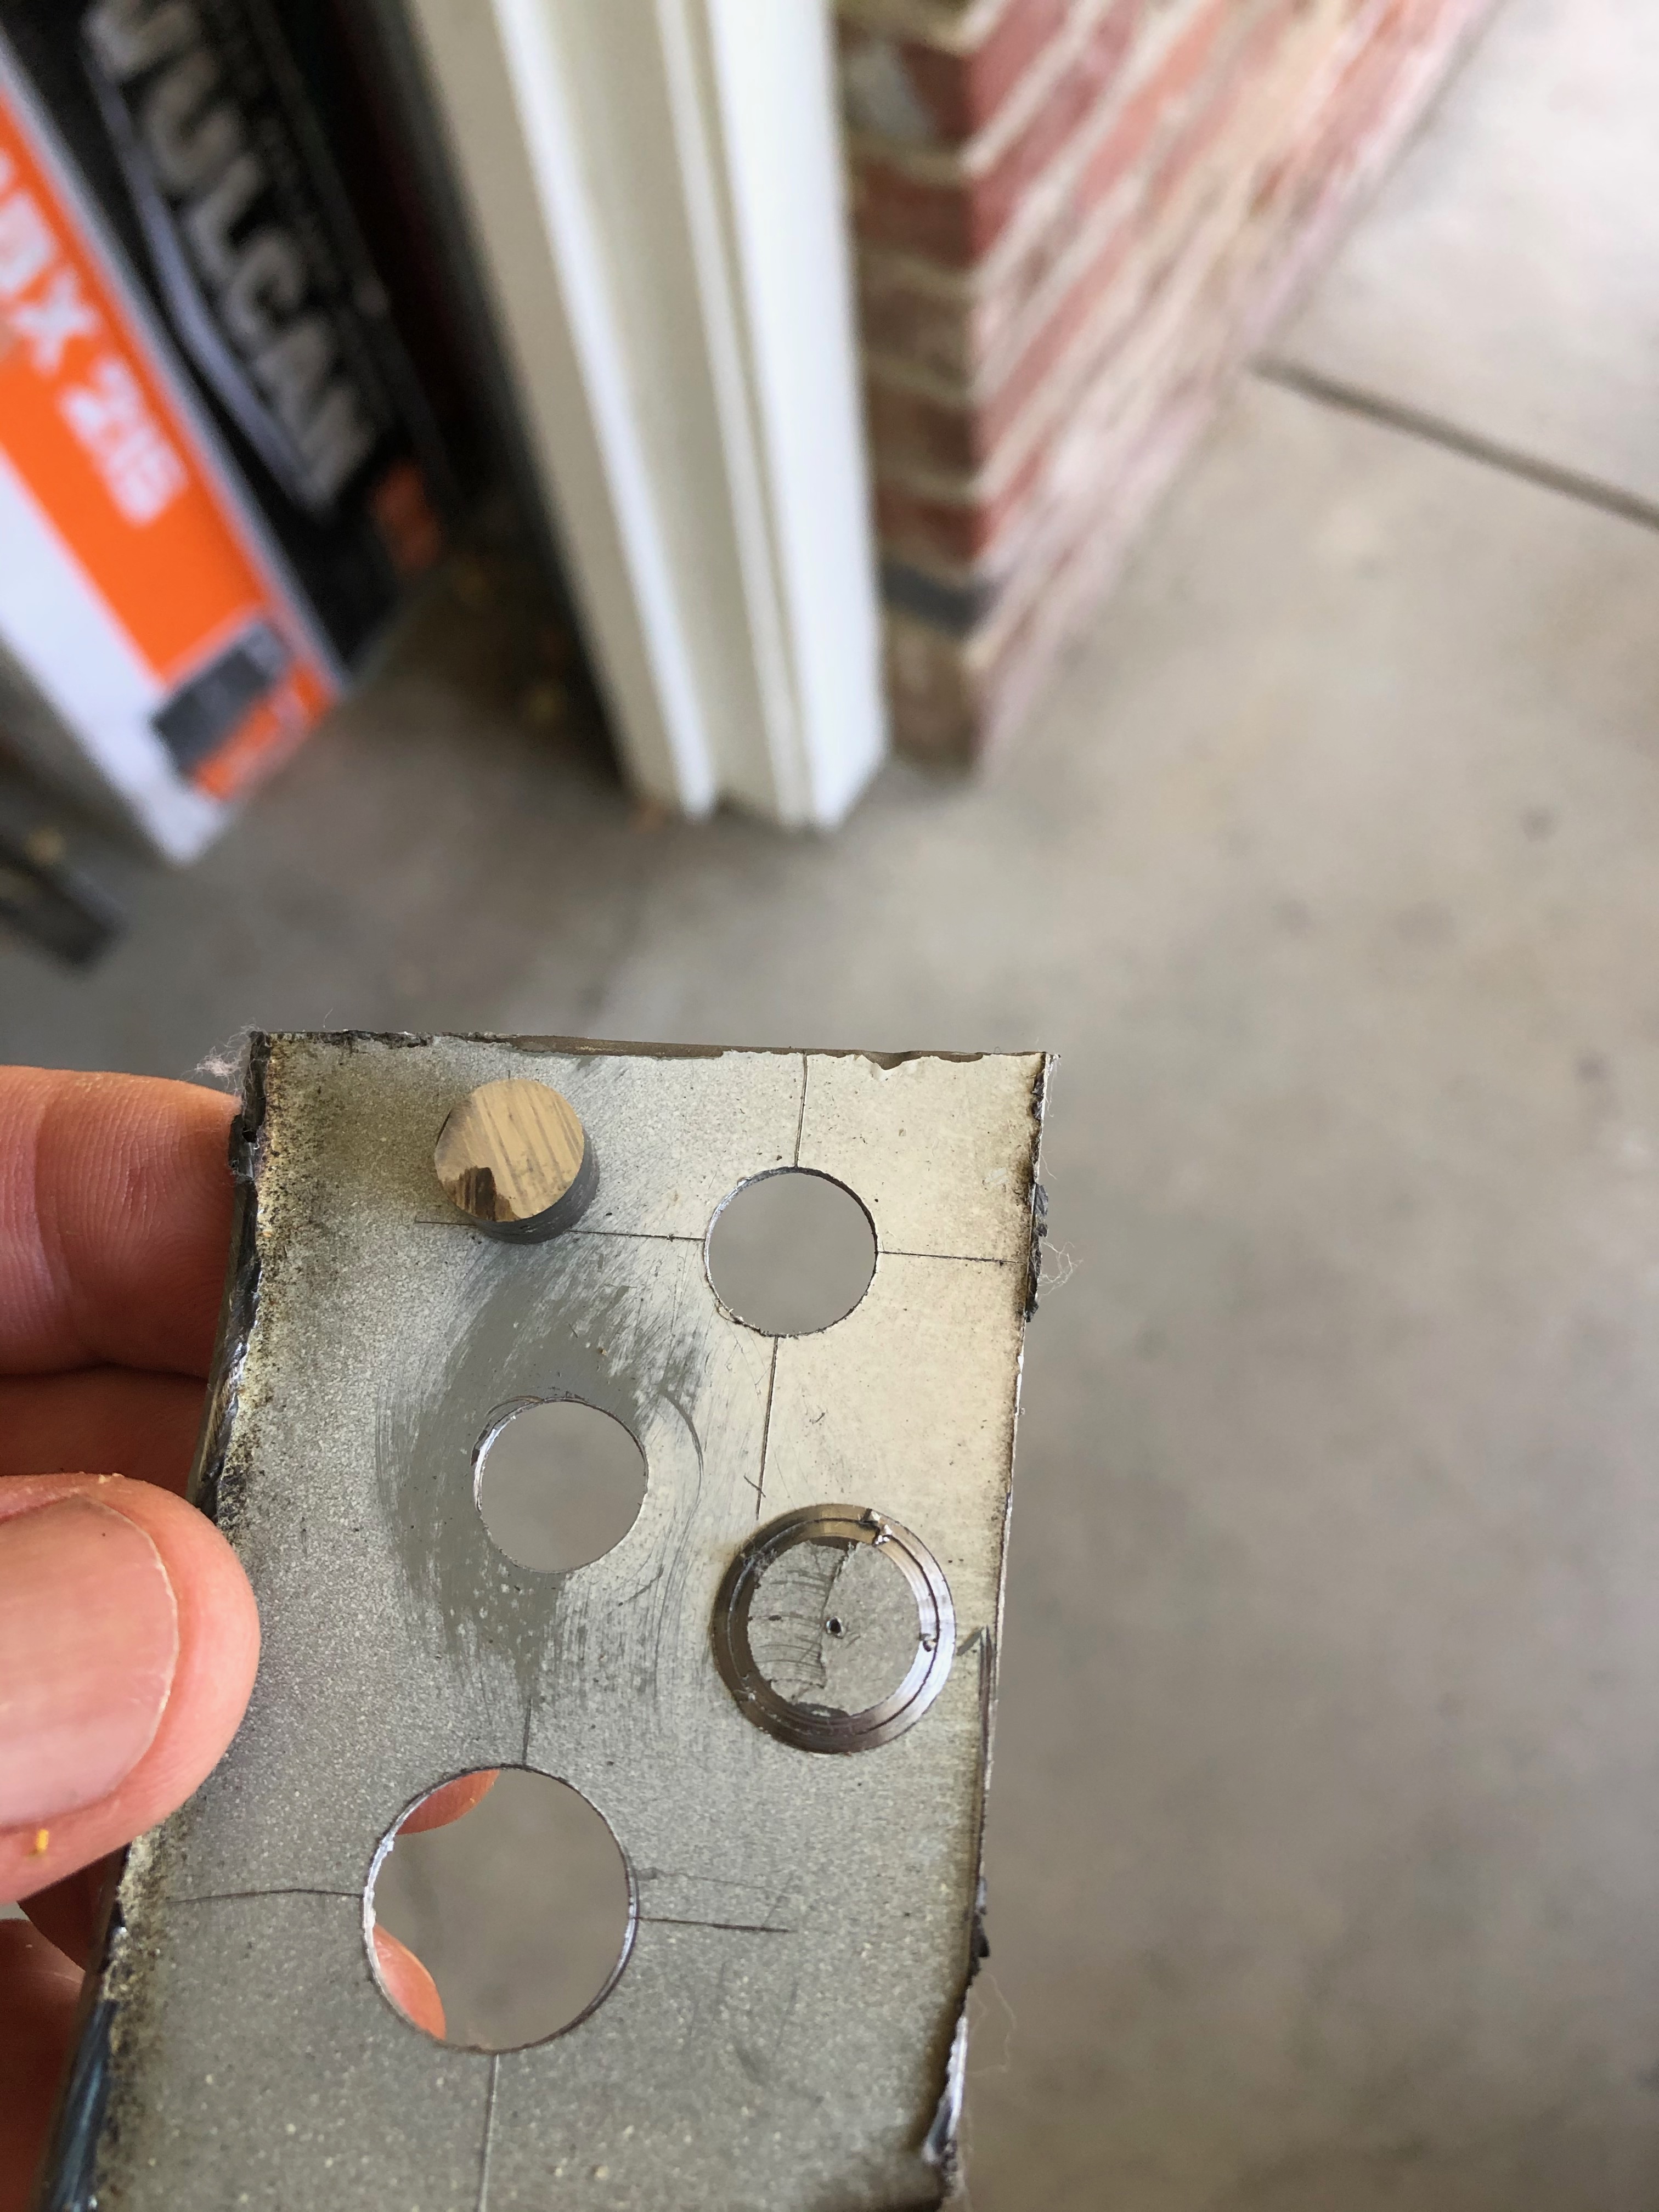
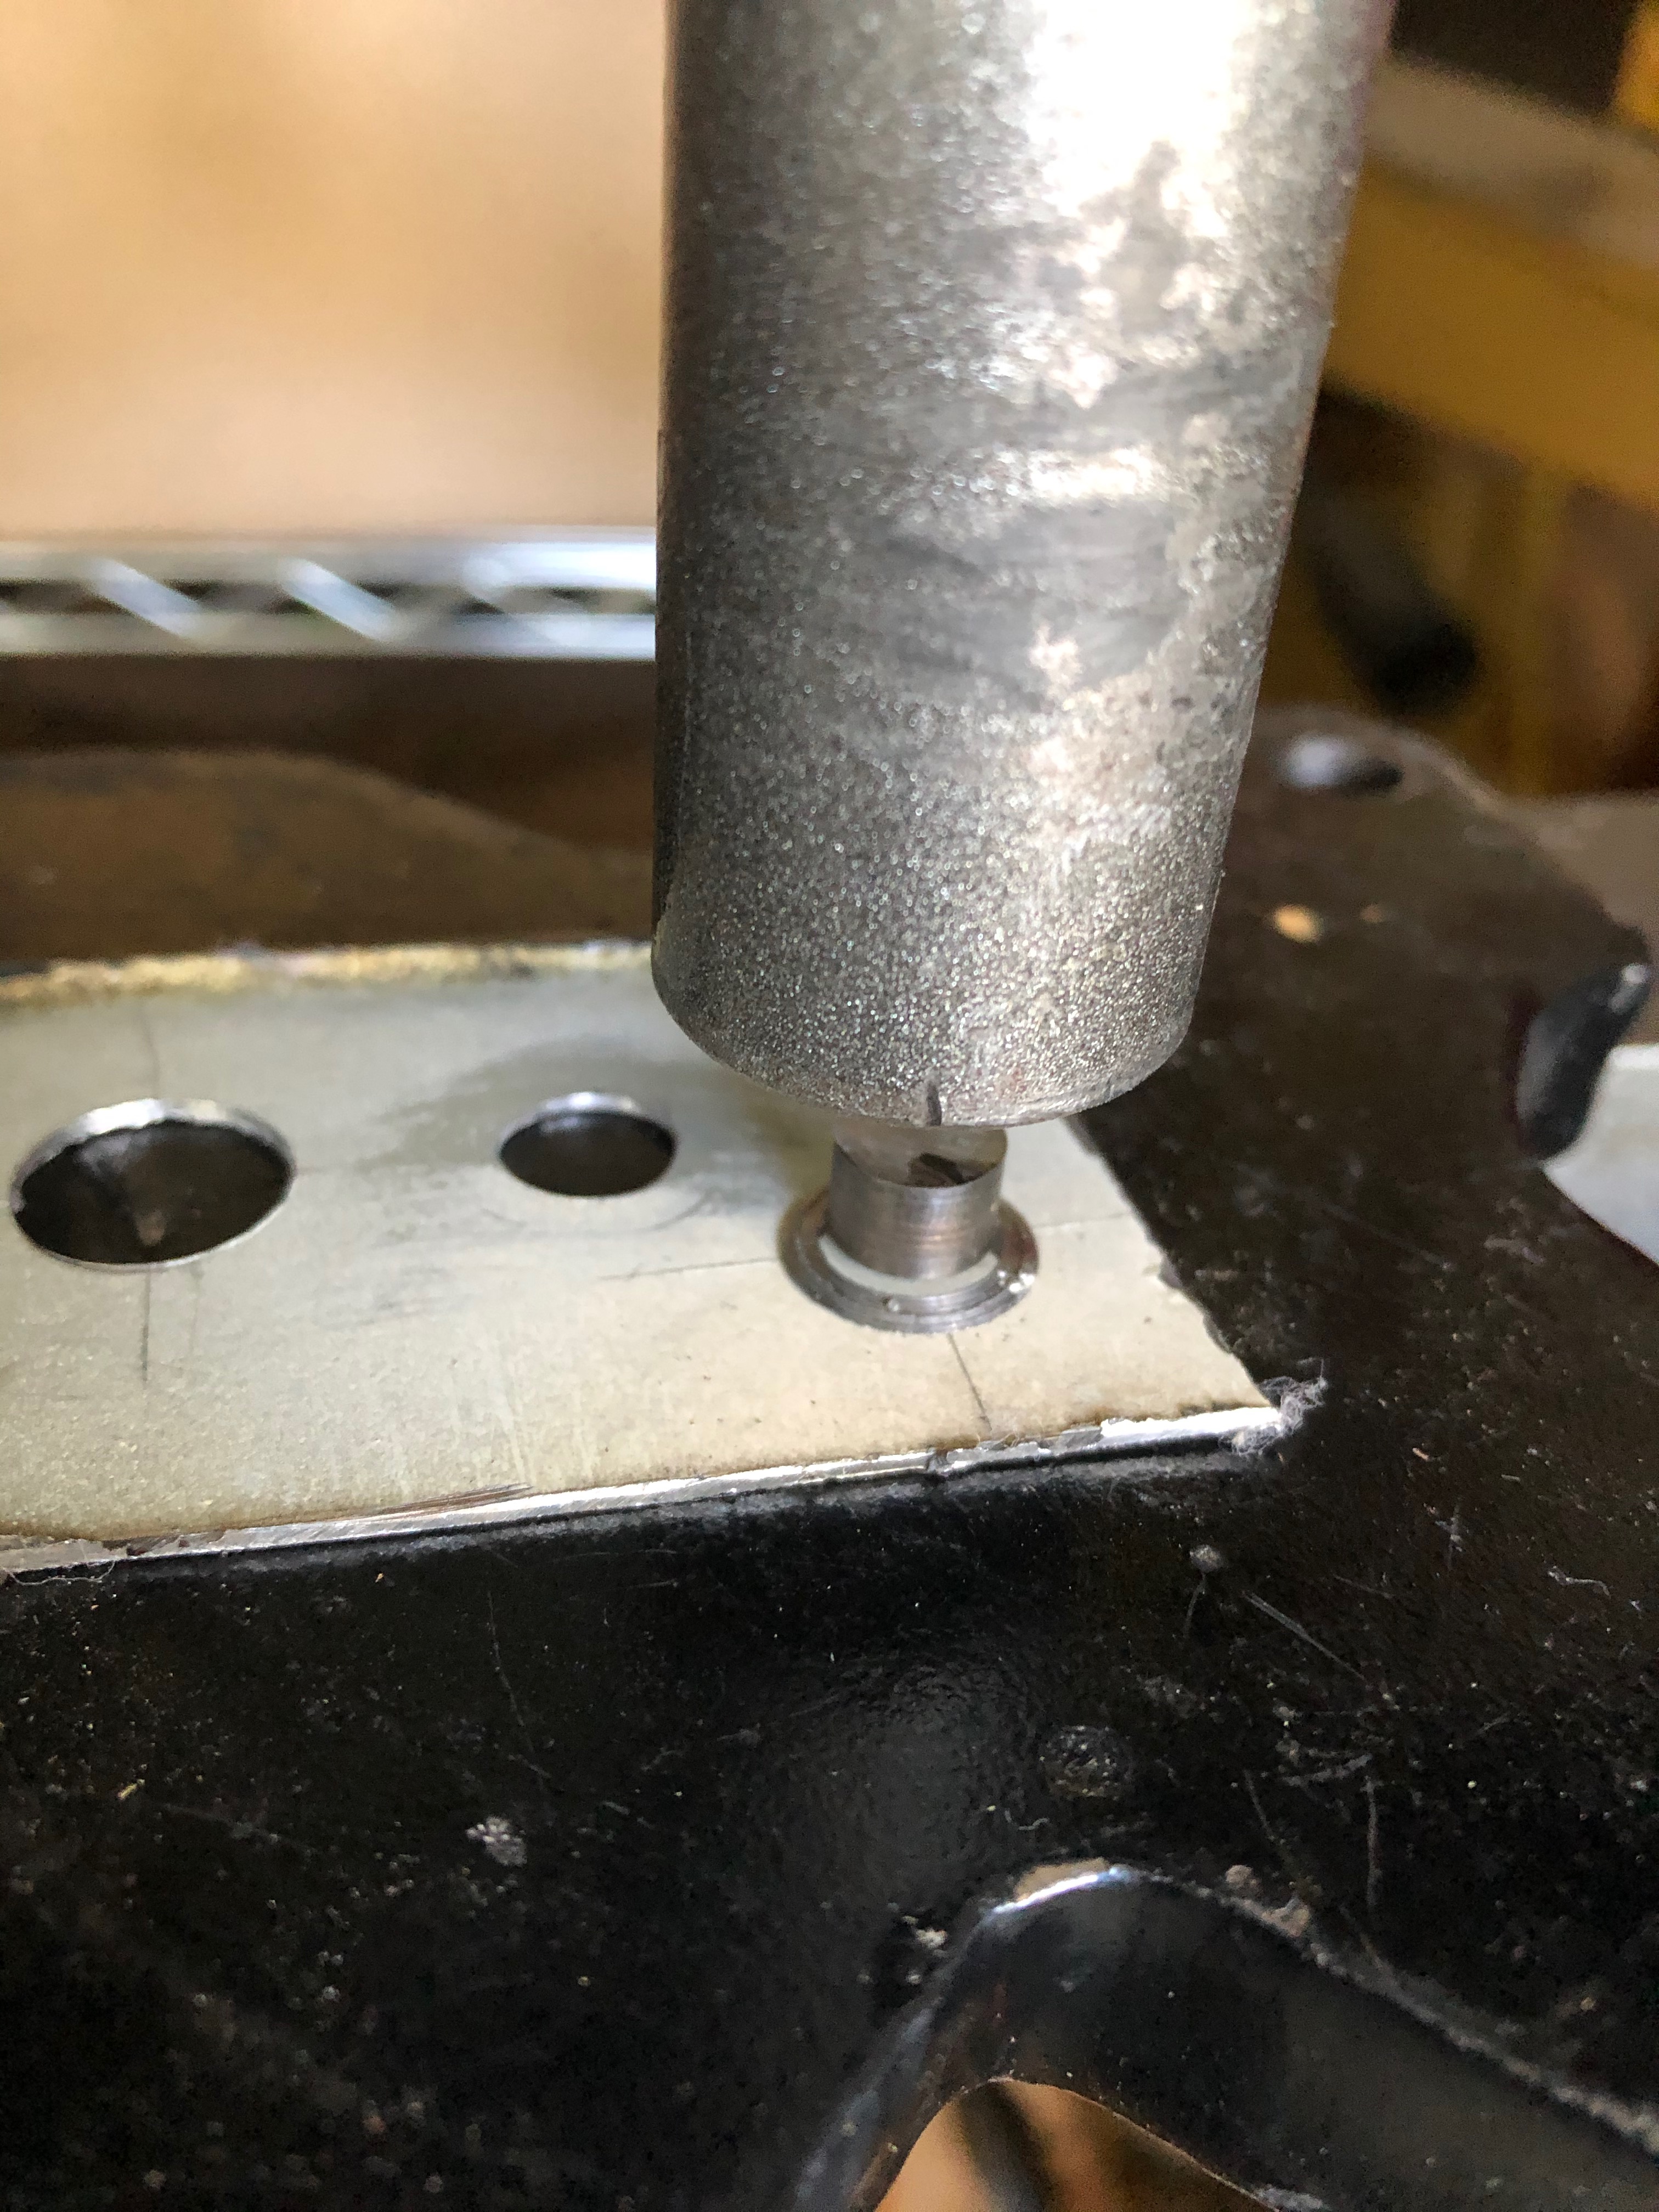
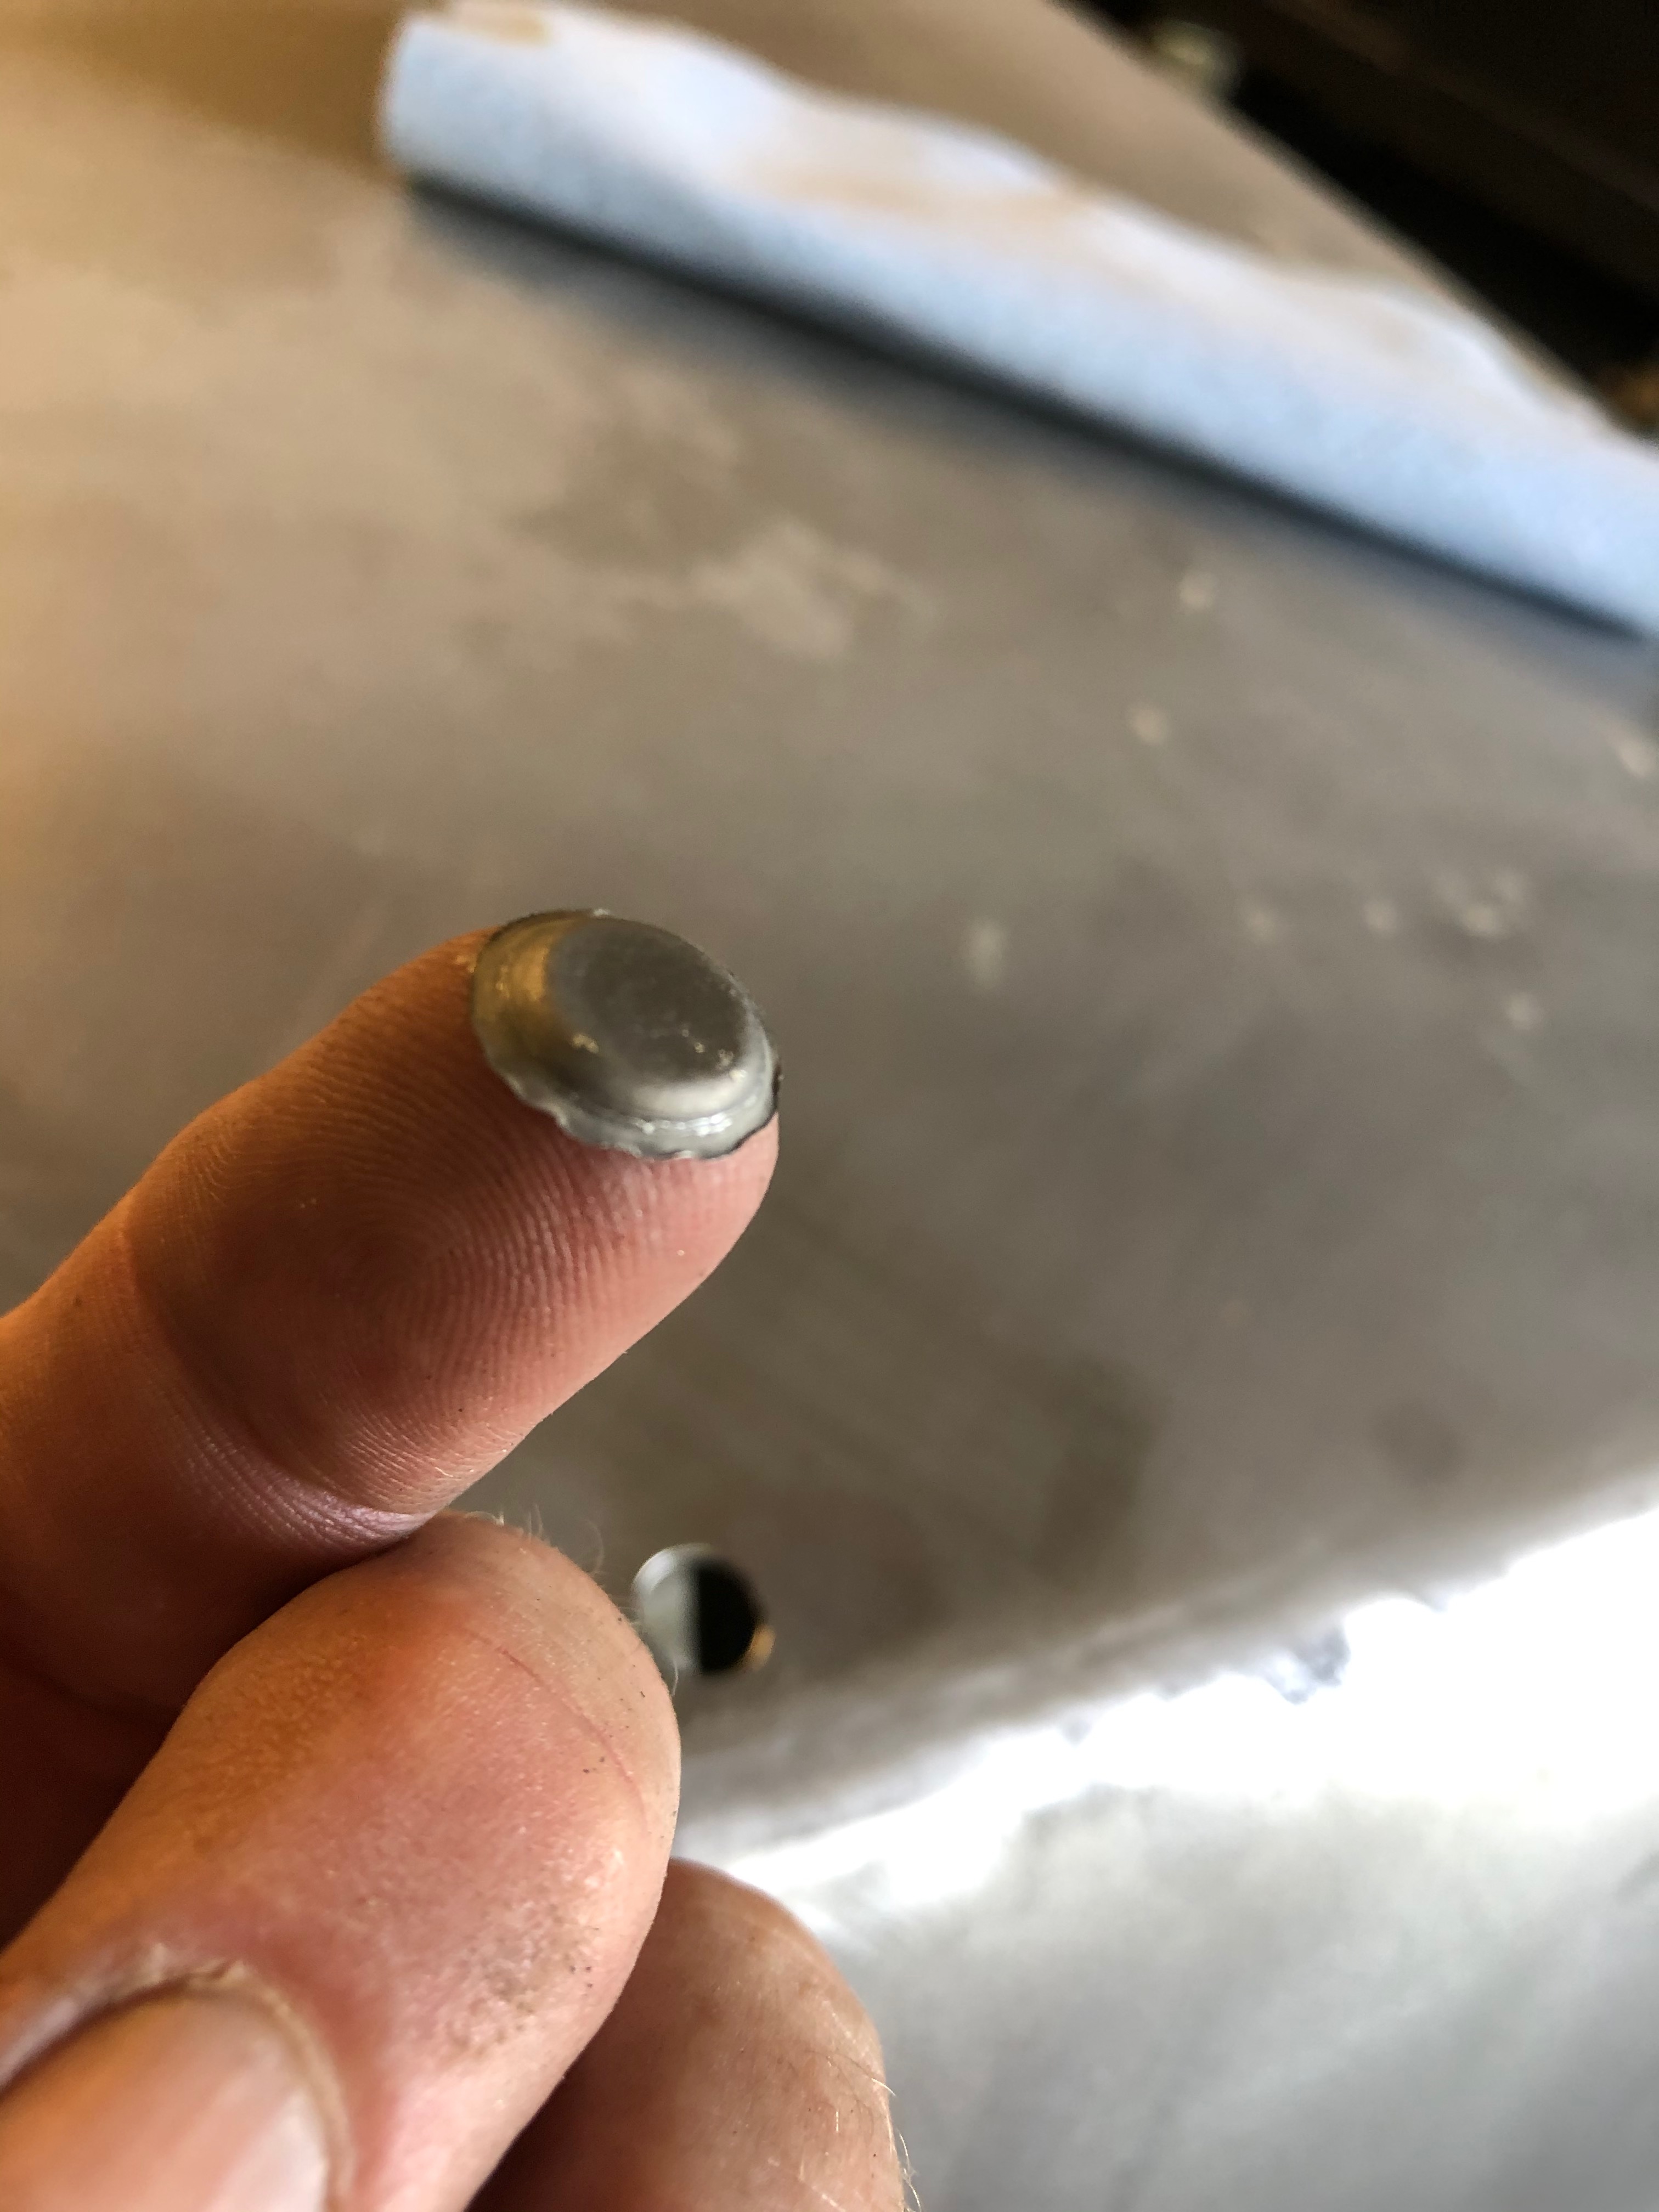
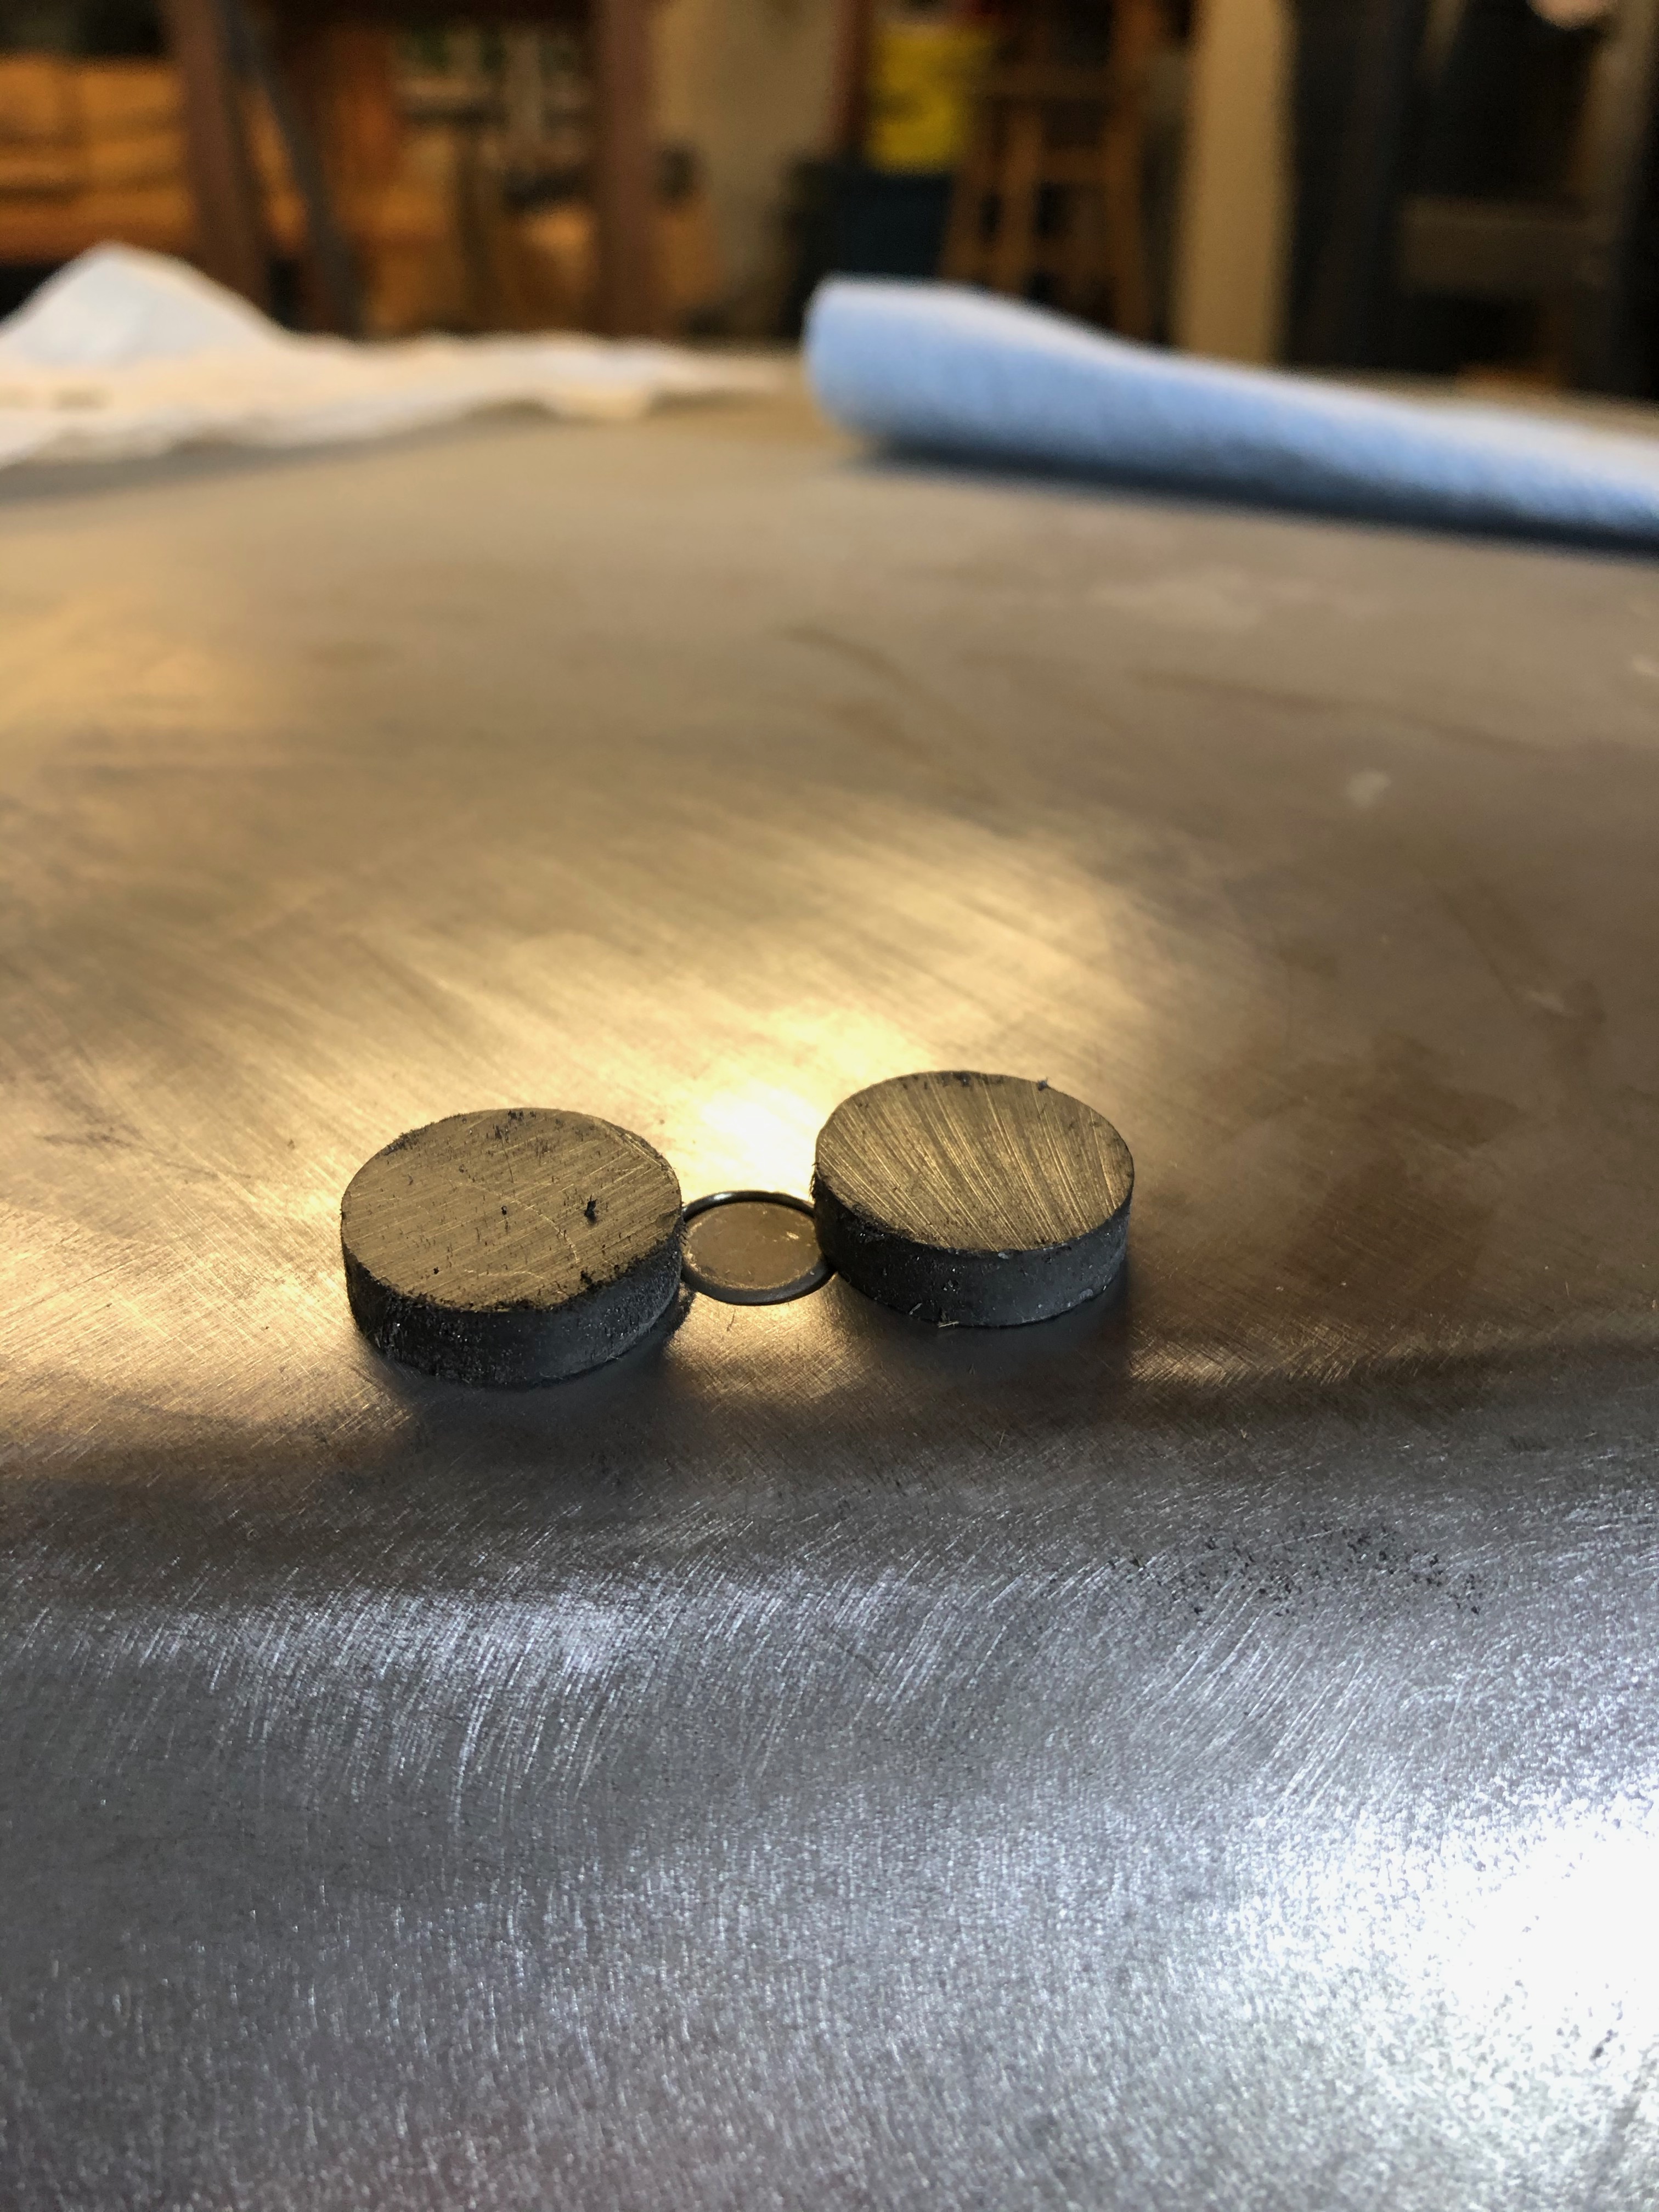
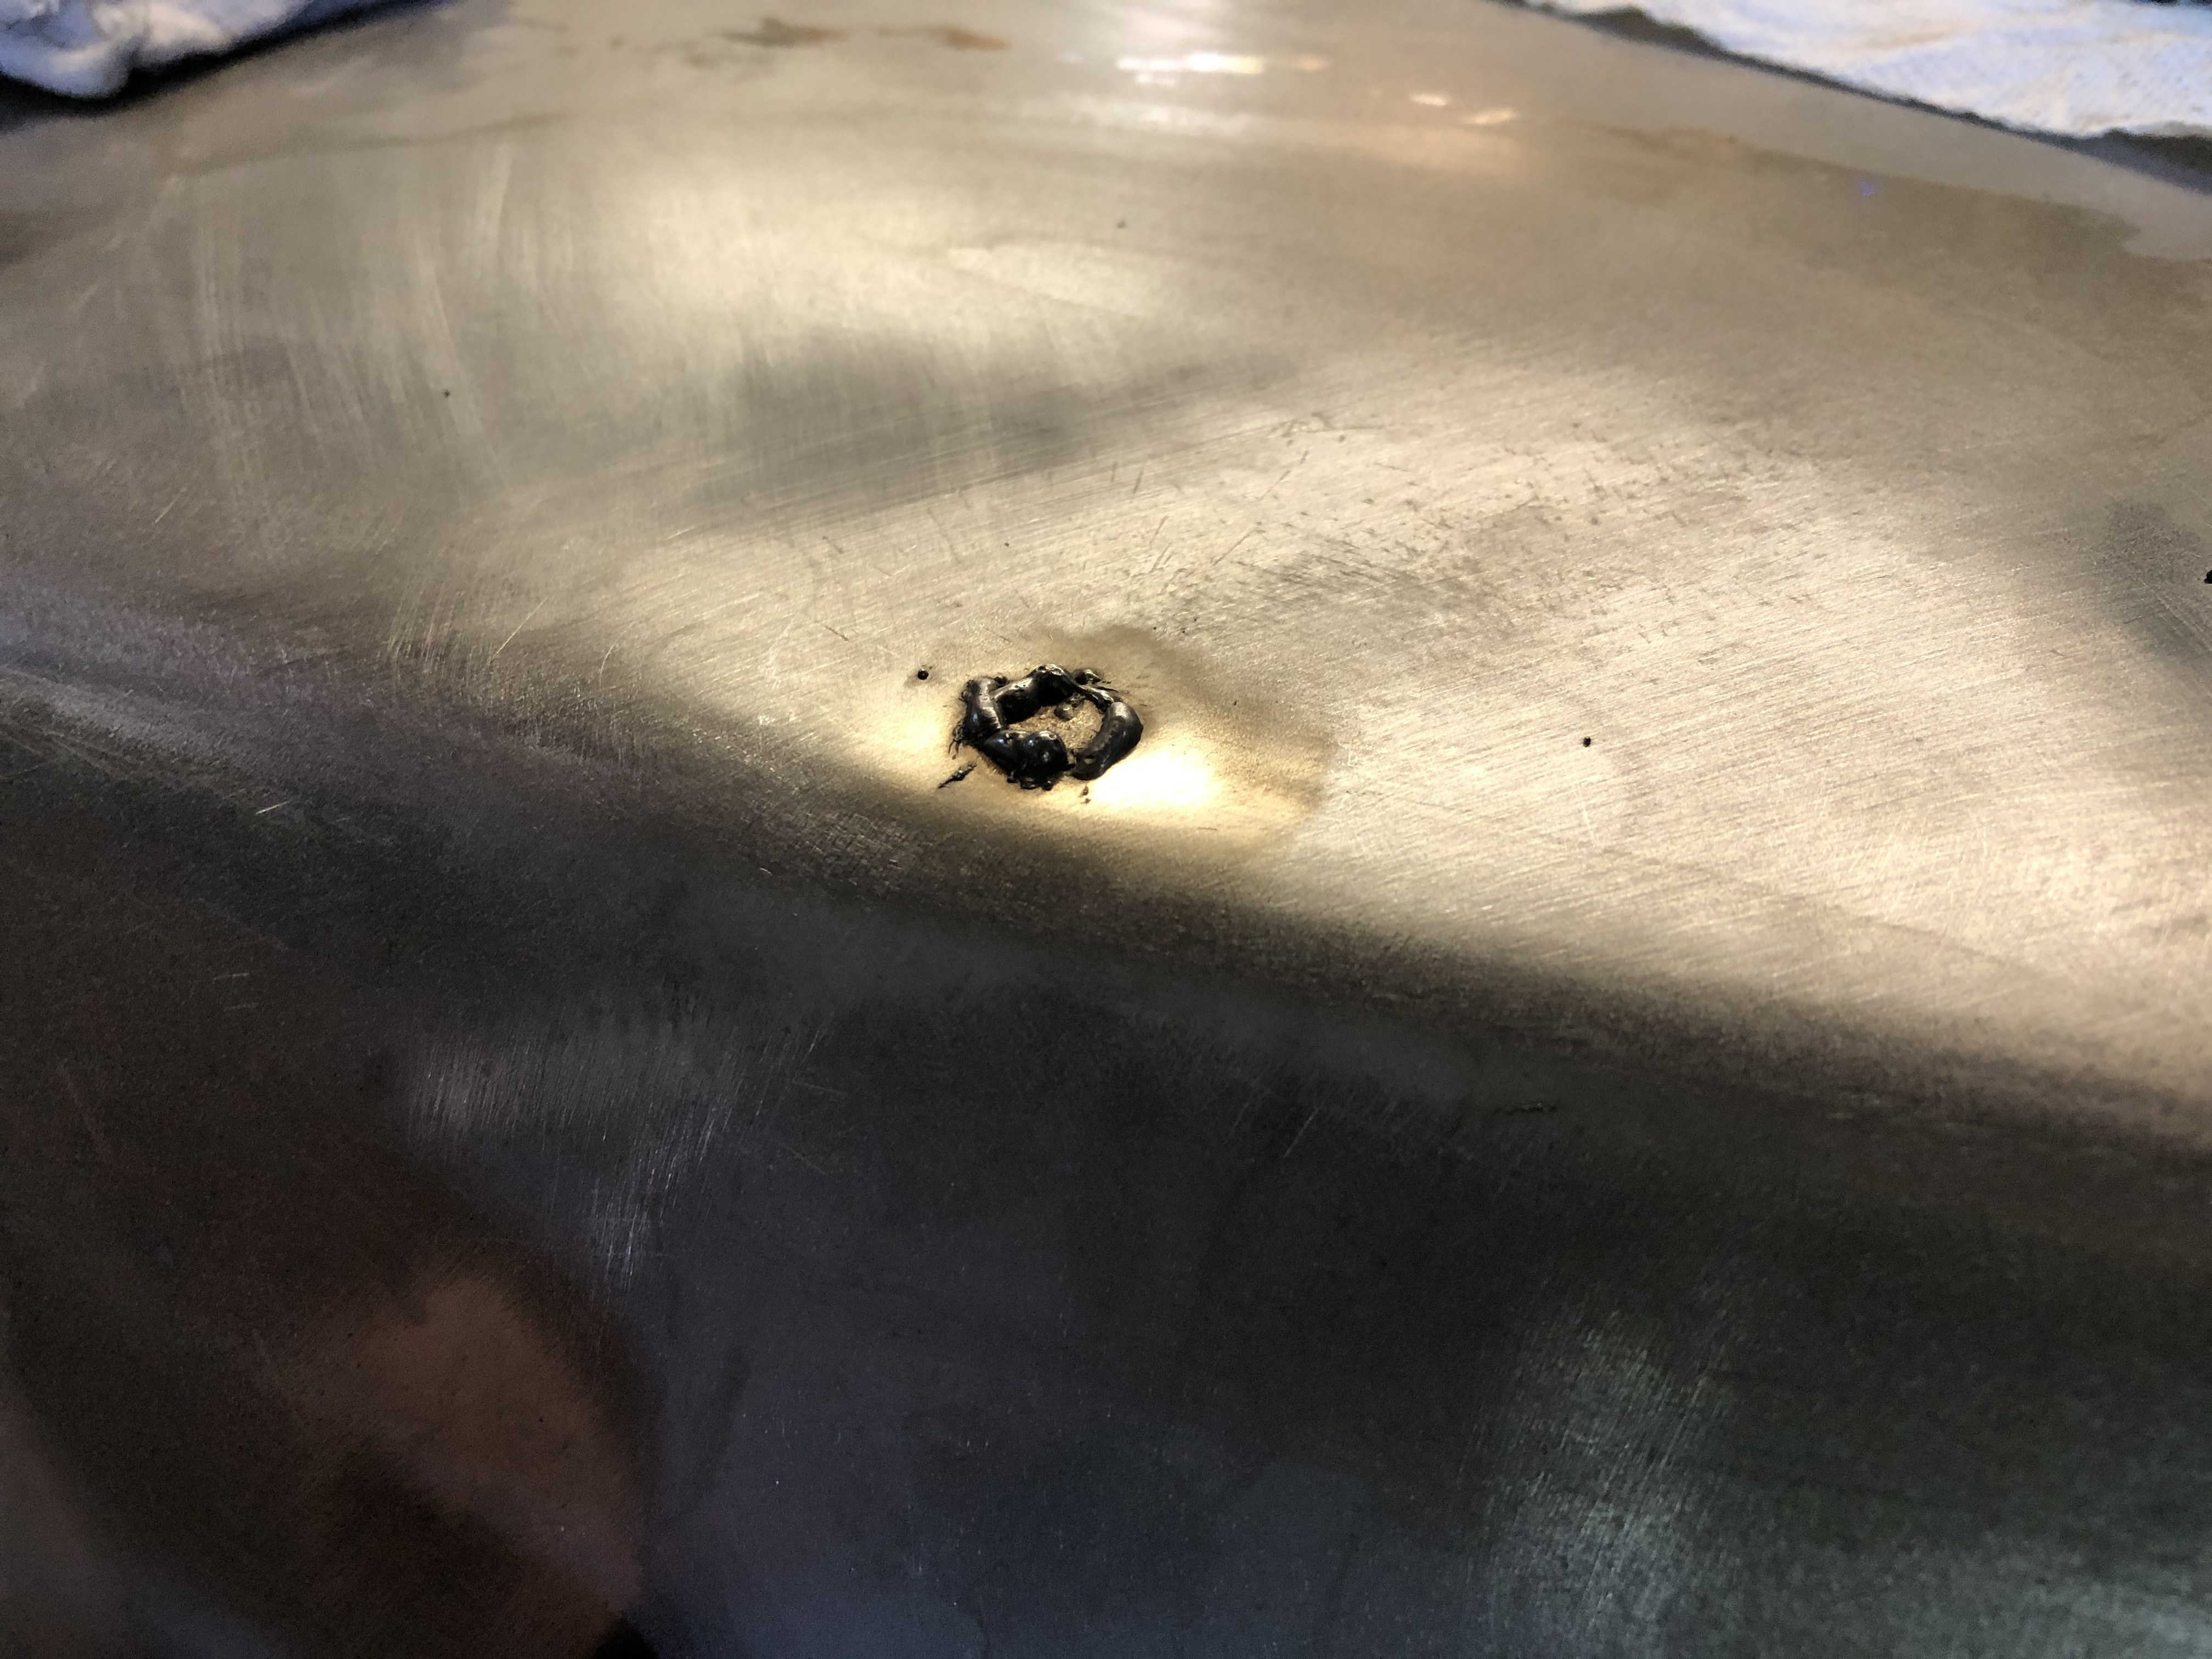
I also made progress on the "no spoiler" trunk lid. I found what seemed to be a very good trunk lid off of a 528 (so no spoiler holes at all), but when we got it into the shop, we could see that it had two dents that would have to be fixed. I decided to look some more and found a perfect trunk lid off of a 535. Metal work was perfect, but now I had six holes to weld up. The method I used was to fabricate some pressed plugs, then weld the plugs into place. The trunk lid skin is about 1mm and the spoiler mounting holes are 10mm, so I cut a 3/8" hole (about 9.5mm) in a piece of scrap metal that was about 1.2mm thick, then cut donor plugs out of 1mm scrap using a 12mm rotabroach. Then I pressed the flat donor plugs into the 3/8" hole with my 12 ton press using a nub I'd cut off of the end of a 5/16" twist drill. Like so:

Image

Image

Image

Image

Image

I'm not going to claim I'm any kind of an expert welder, but the benefit of this system is that it's pretty easy to hold the plug in the right position, and you're doing less welding (so less heat distortion of the skin) to get the end result. One downside is that you get an edge on the backside where moisture may get in, so you need to be careful to seal it up correctly. Regardless, that I'm aware of, there's no room to do any grinding on the back side anyhow, so even using an un-flanged plug, or using the copper backing method, would likely result in inclusions that could hold moisture.

I ground down the welds (no pics) and the result was that the metal had deformed a bit in the area of the welds (welded area was slightly below the ideal surface as if it had been pressed in a bit). The body shop will work a bit on that and the end result should be a nice clean no-spoiler trunk.

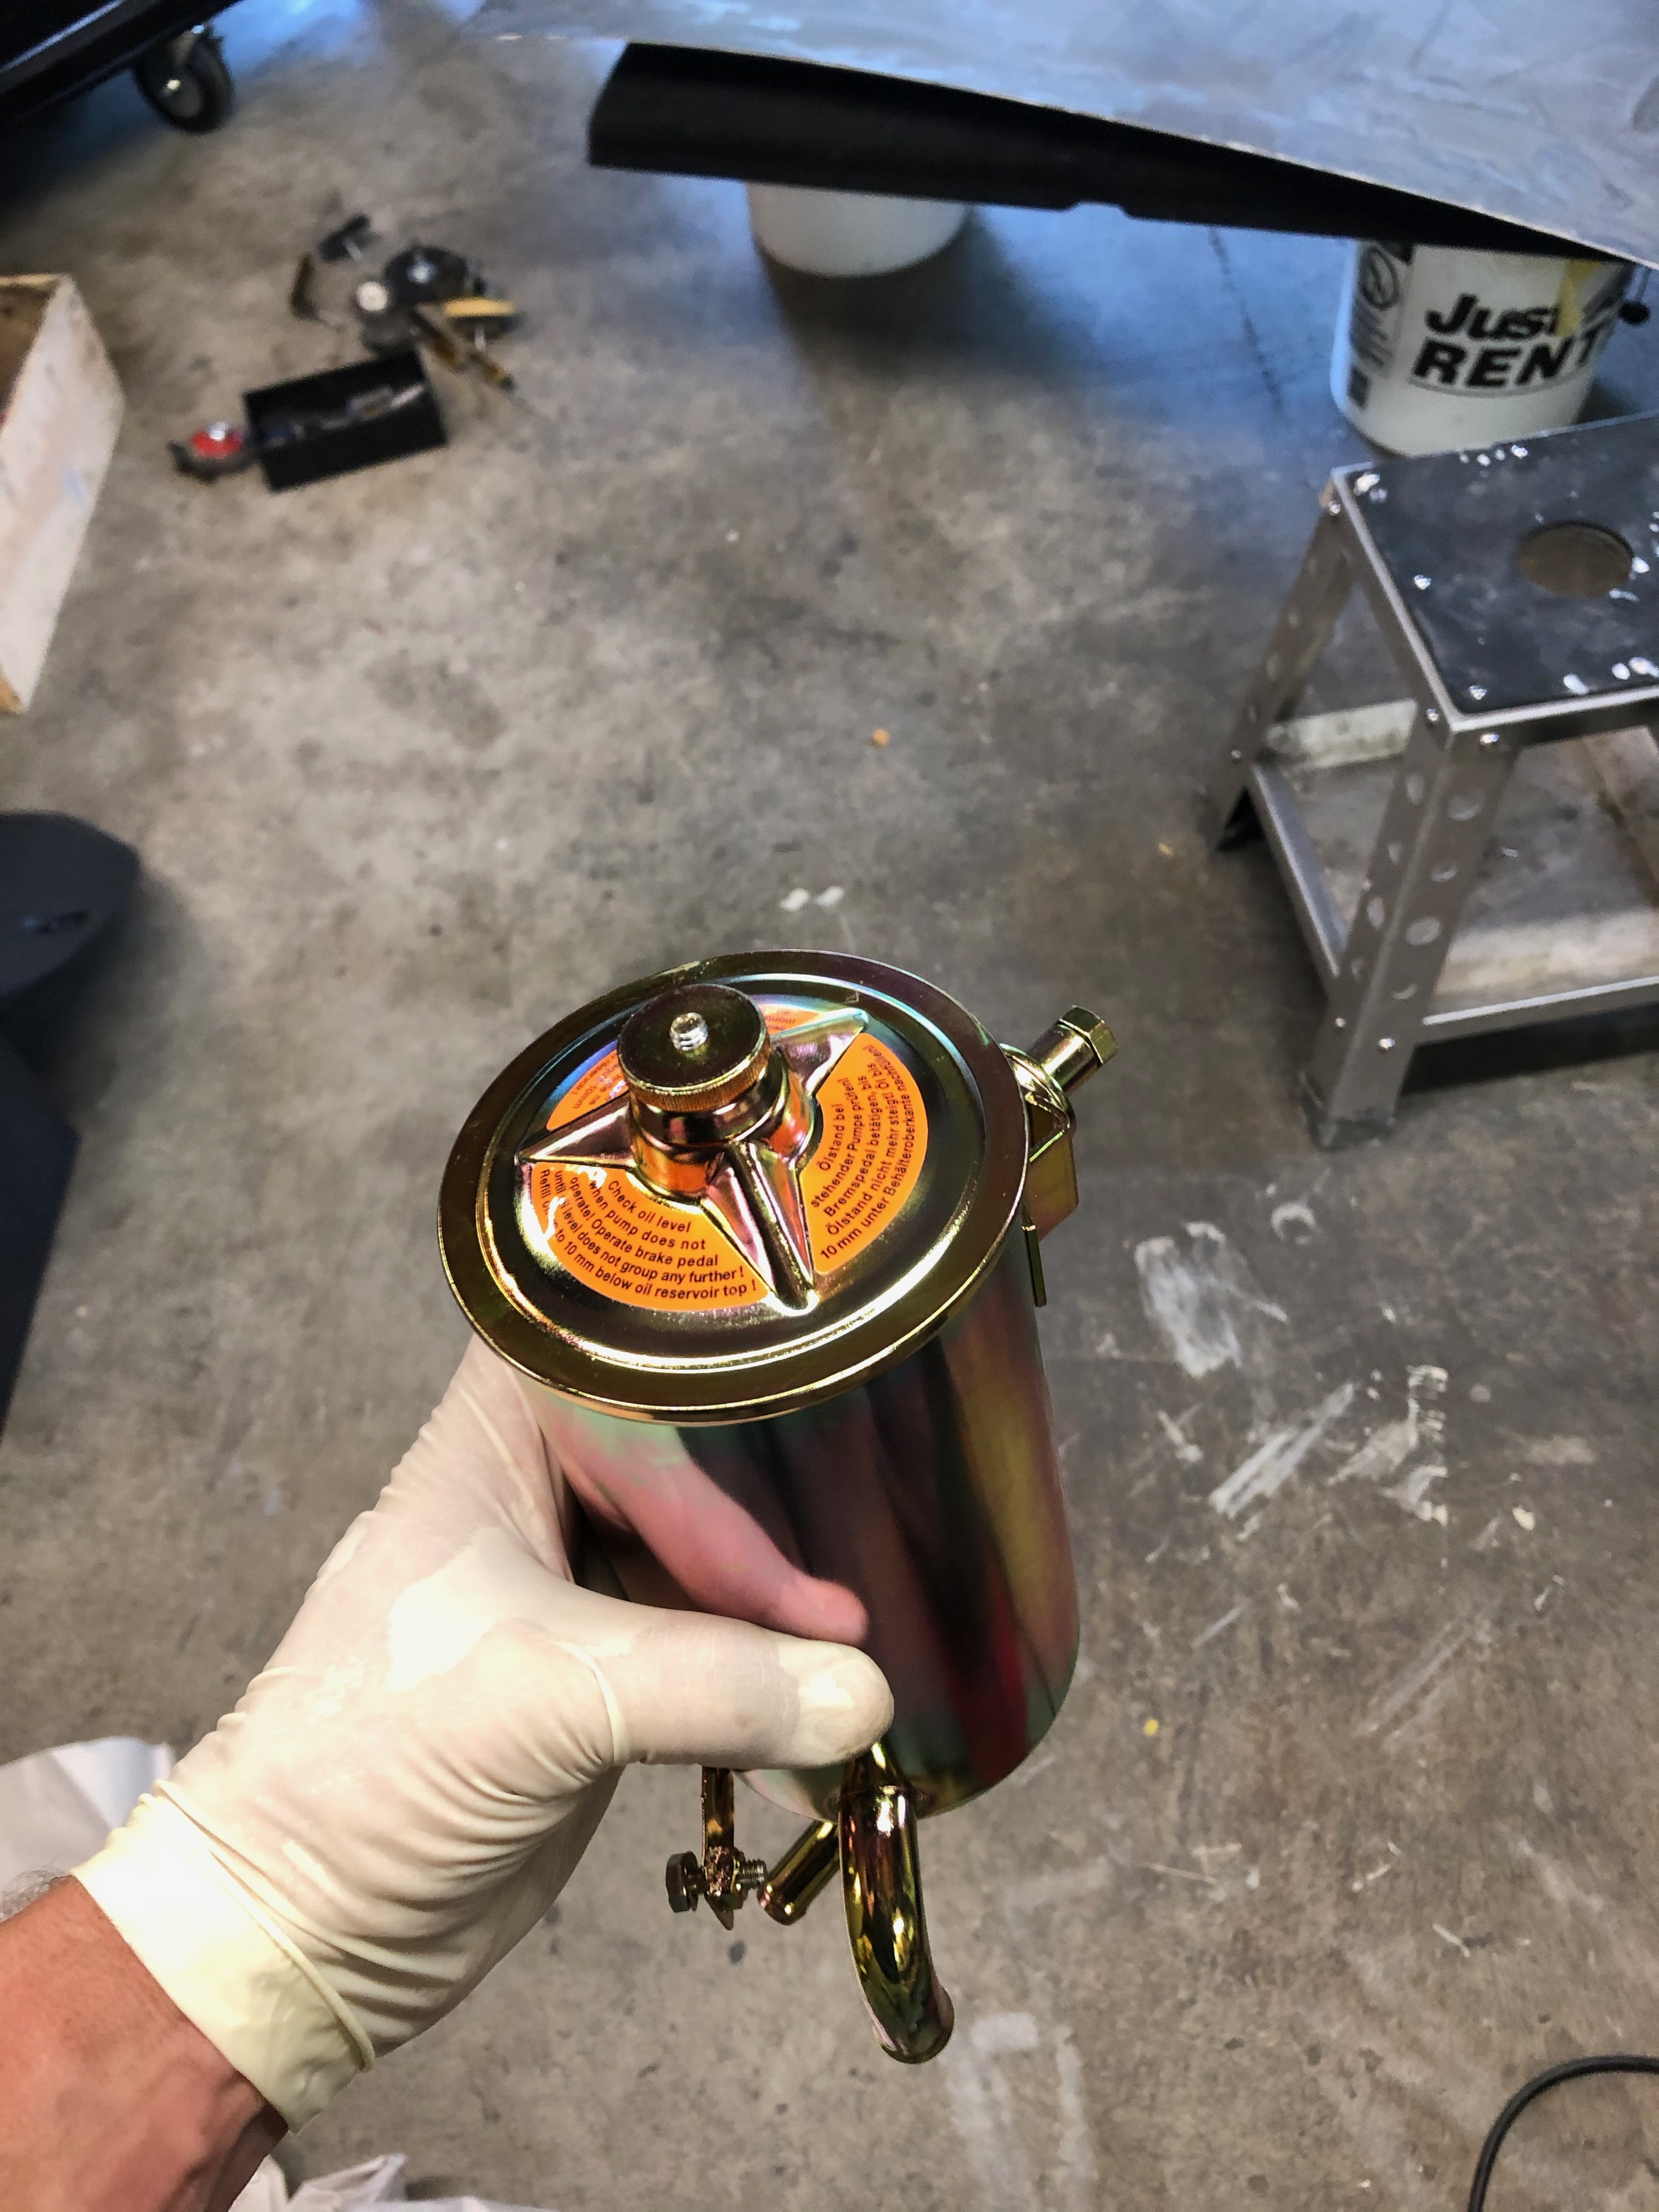
In the "meaningless bling" category, I got my PS reservoir back from the plating shop and put on the new stickers. Mmmmm, yellow ...

Image
jhh925
Posts: 917
Joined: Jul 11, 2015 12:23 AM
Location: Reno

Re: Rebuilding My 1988 US-spec M5

Post by jhh925 »

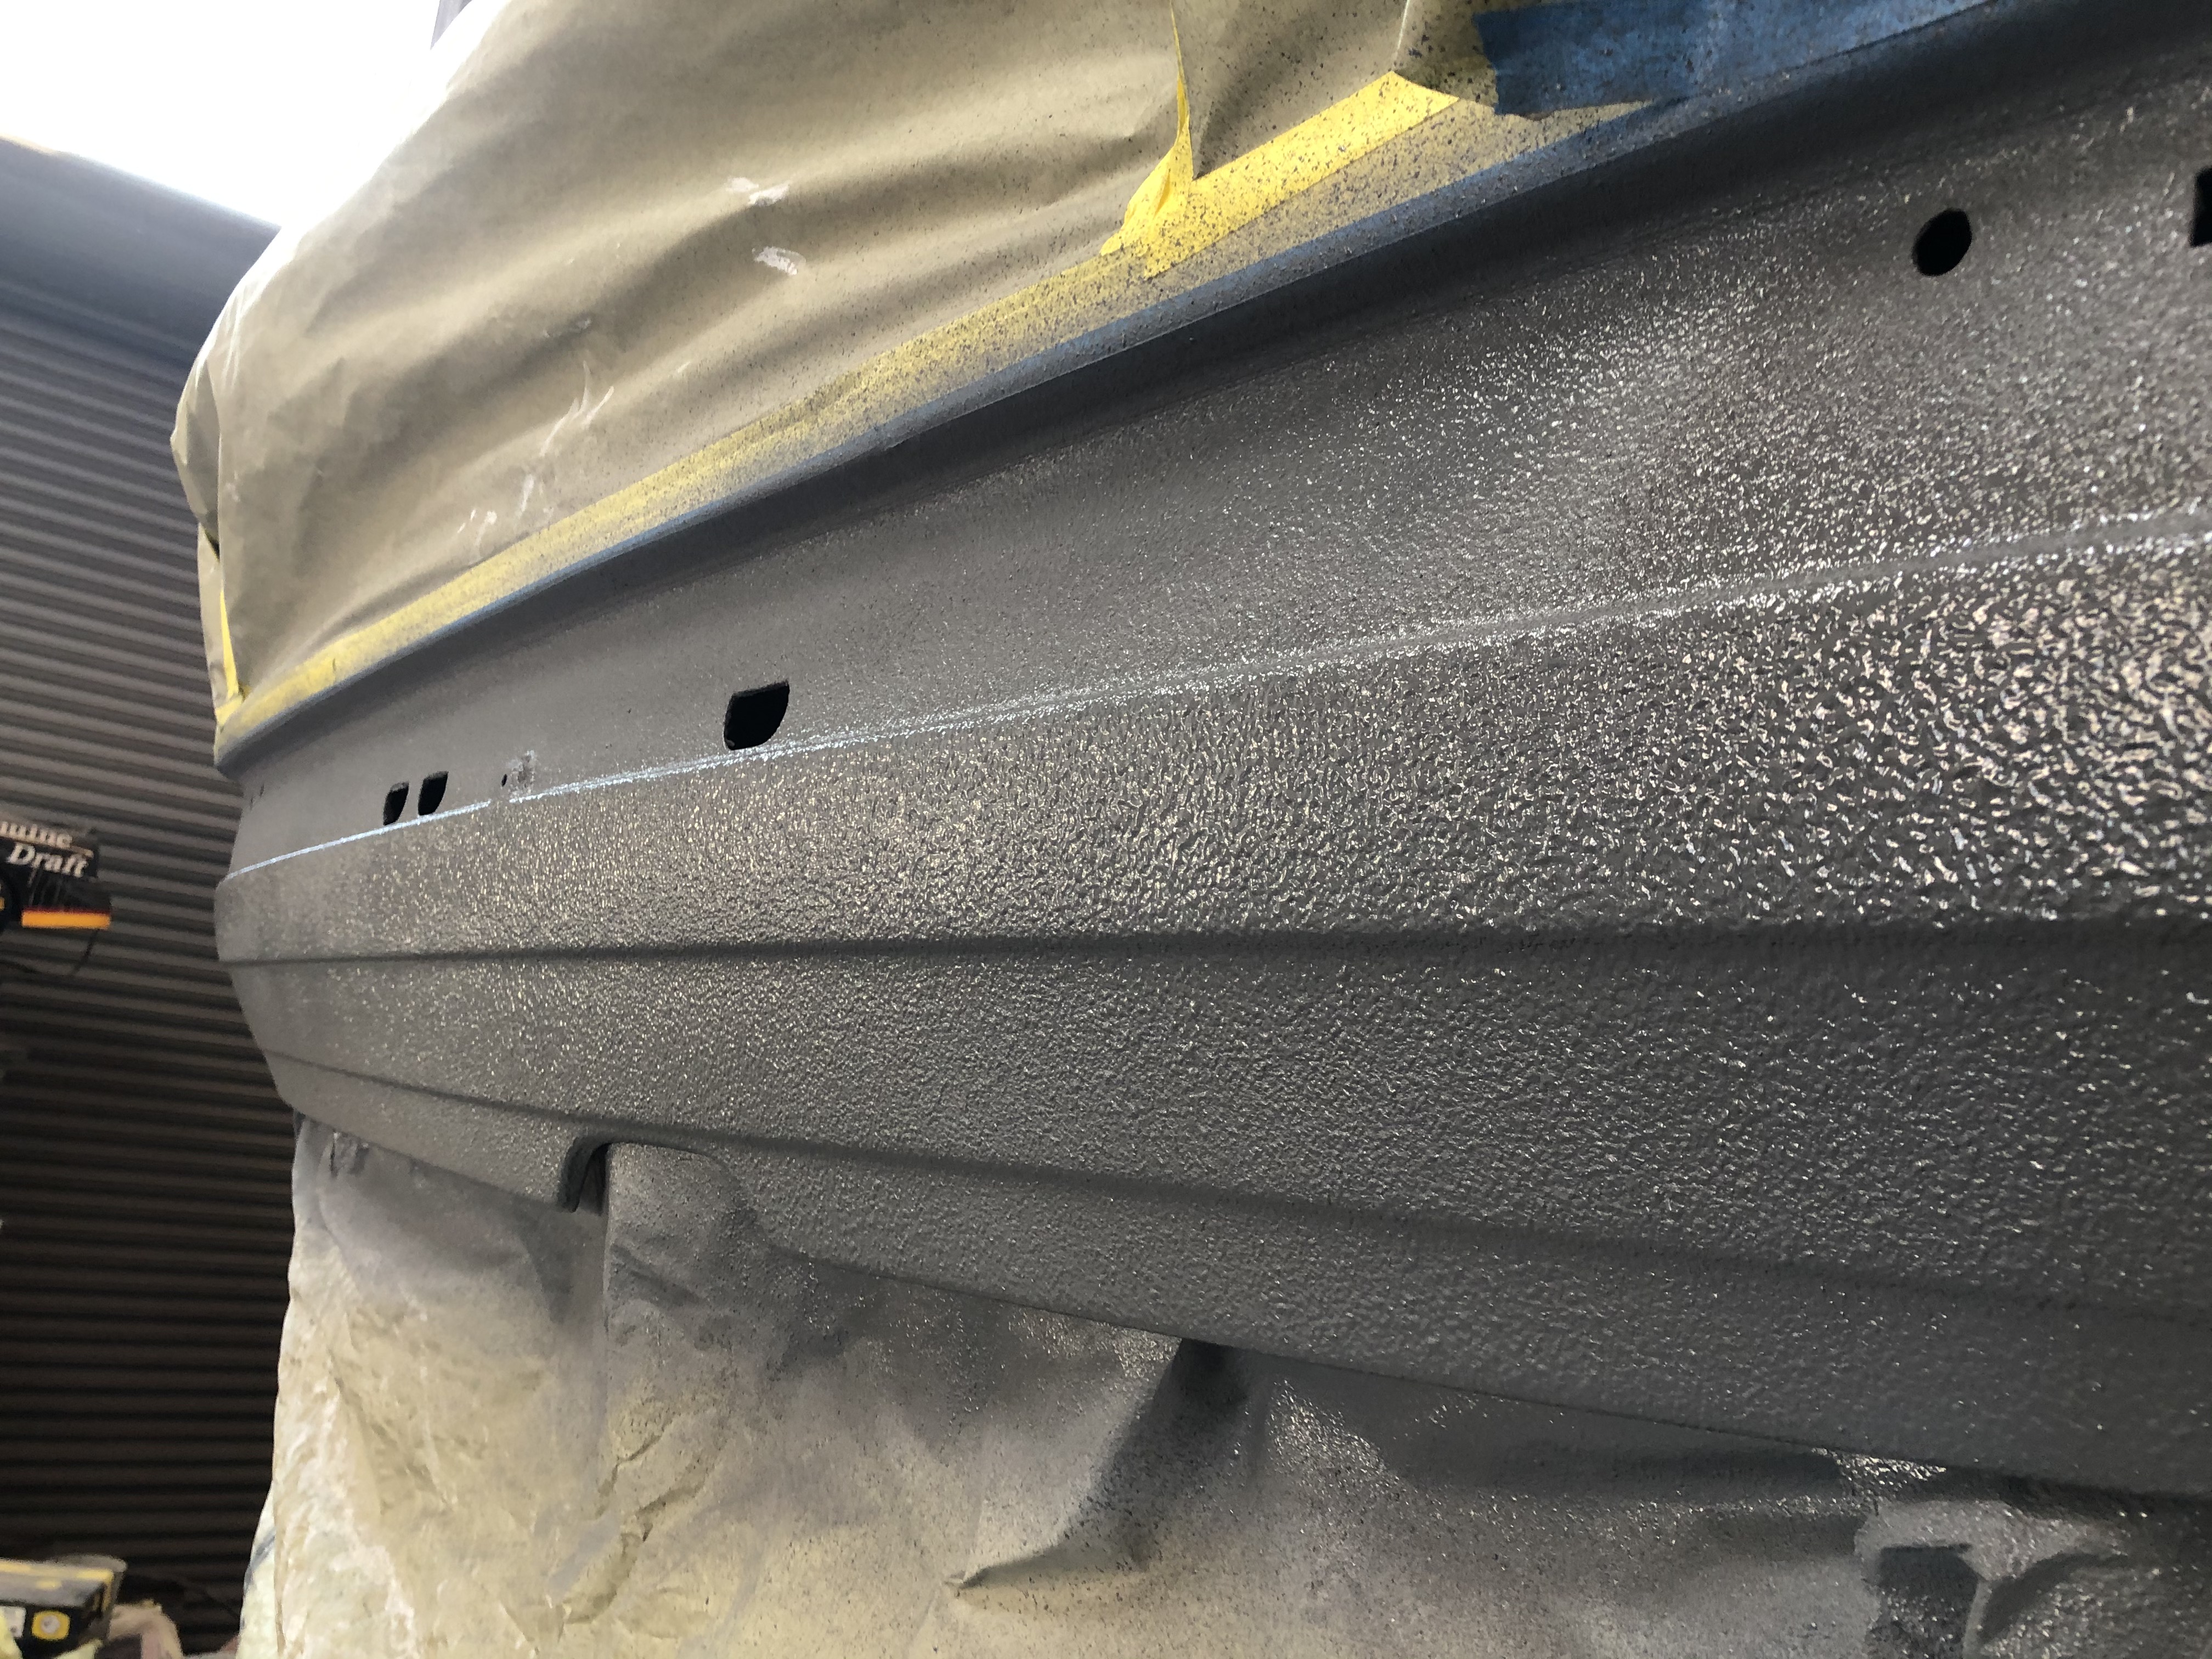
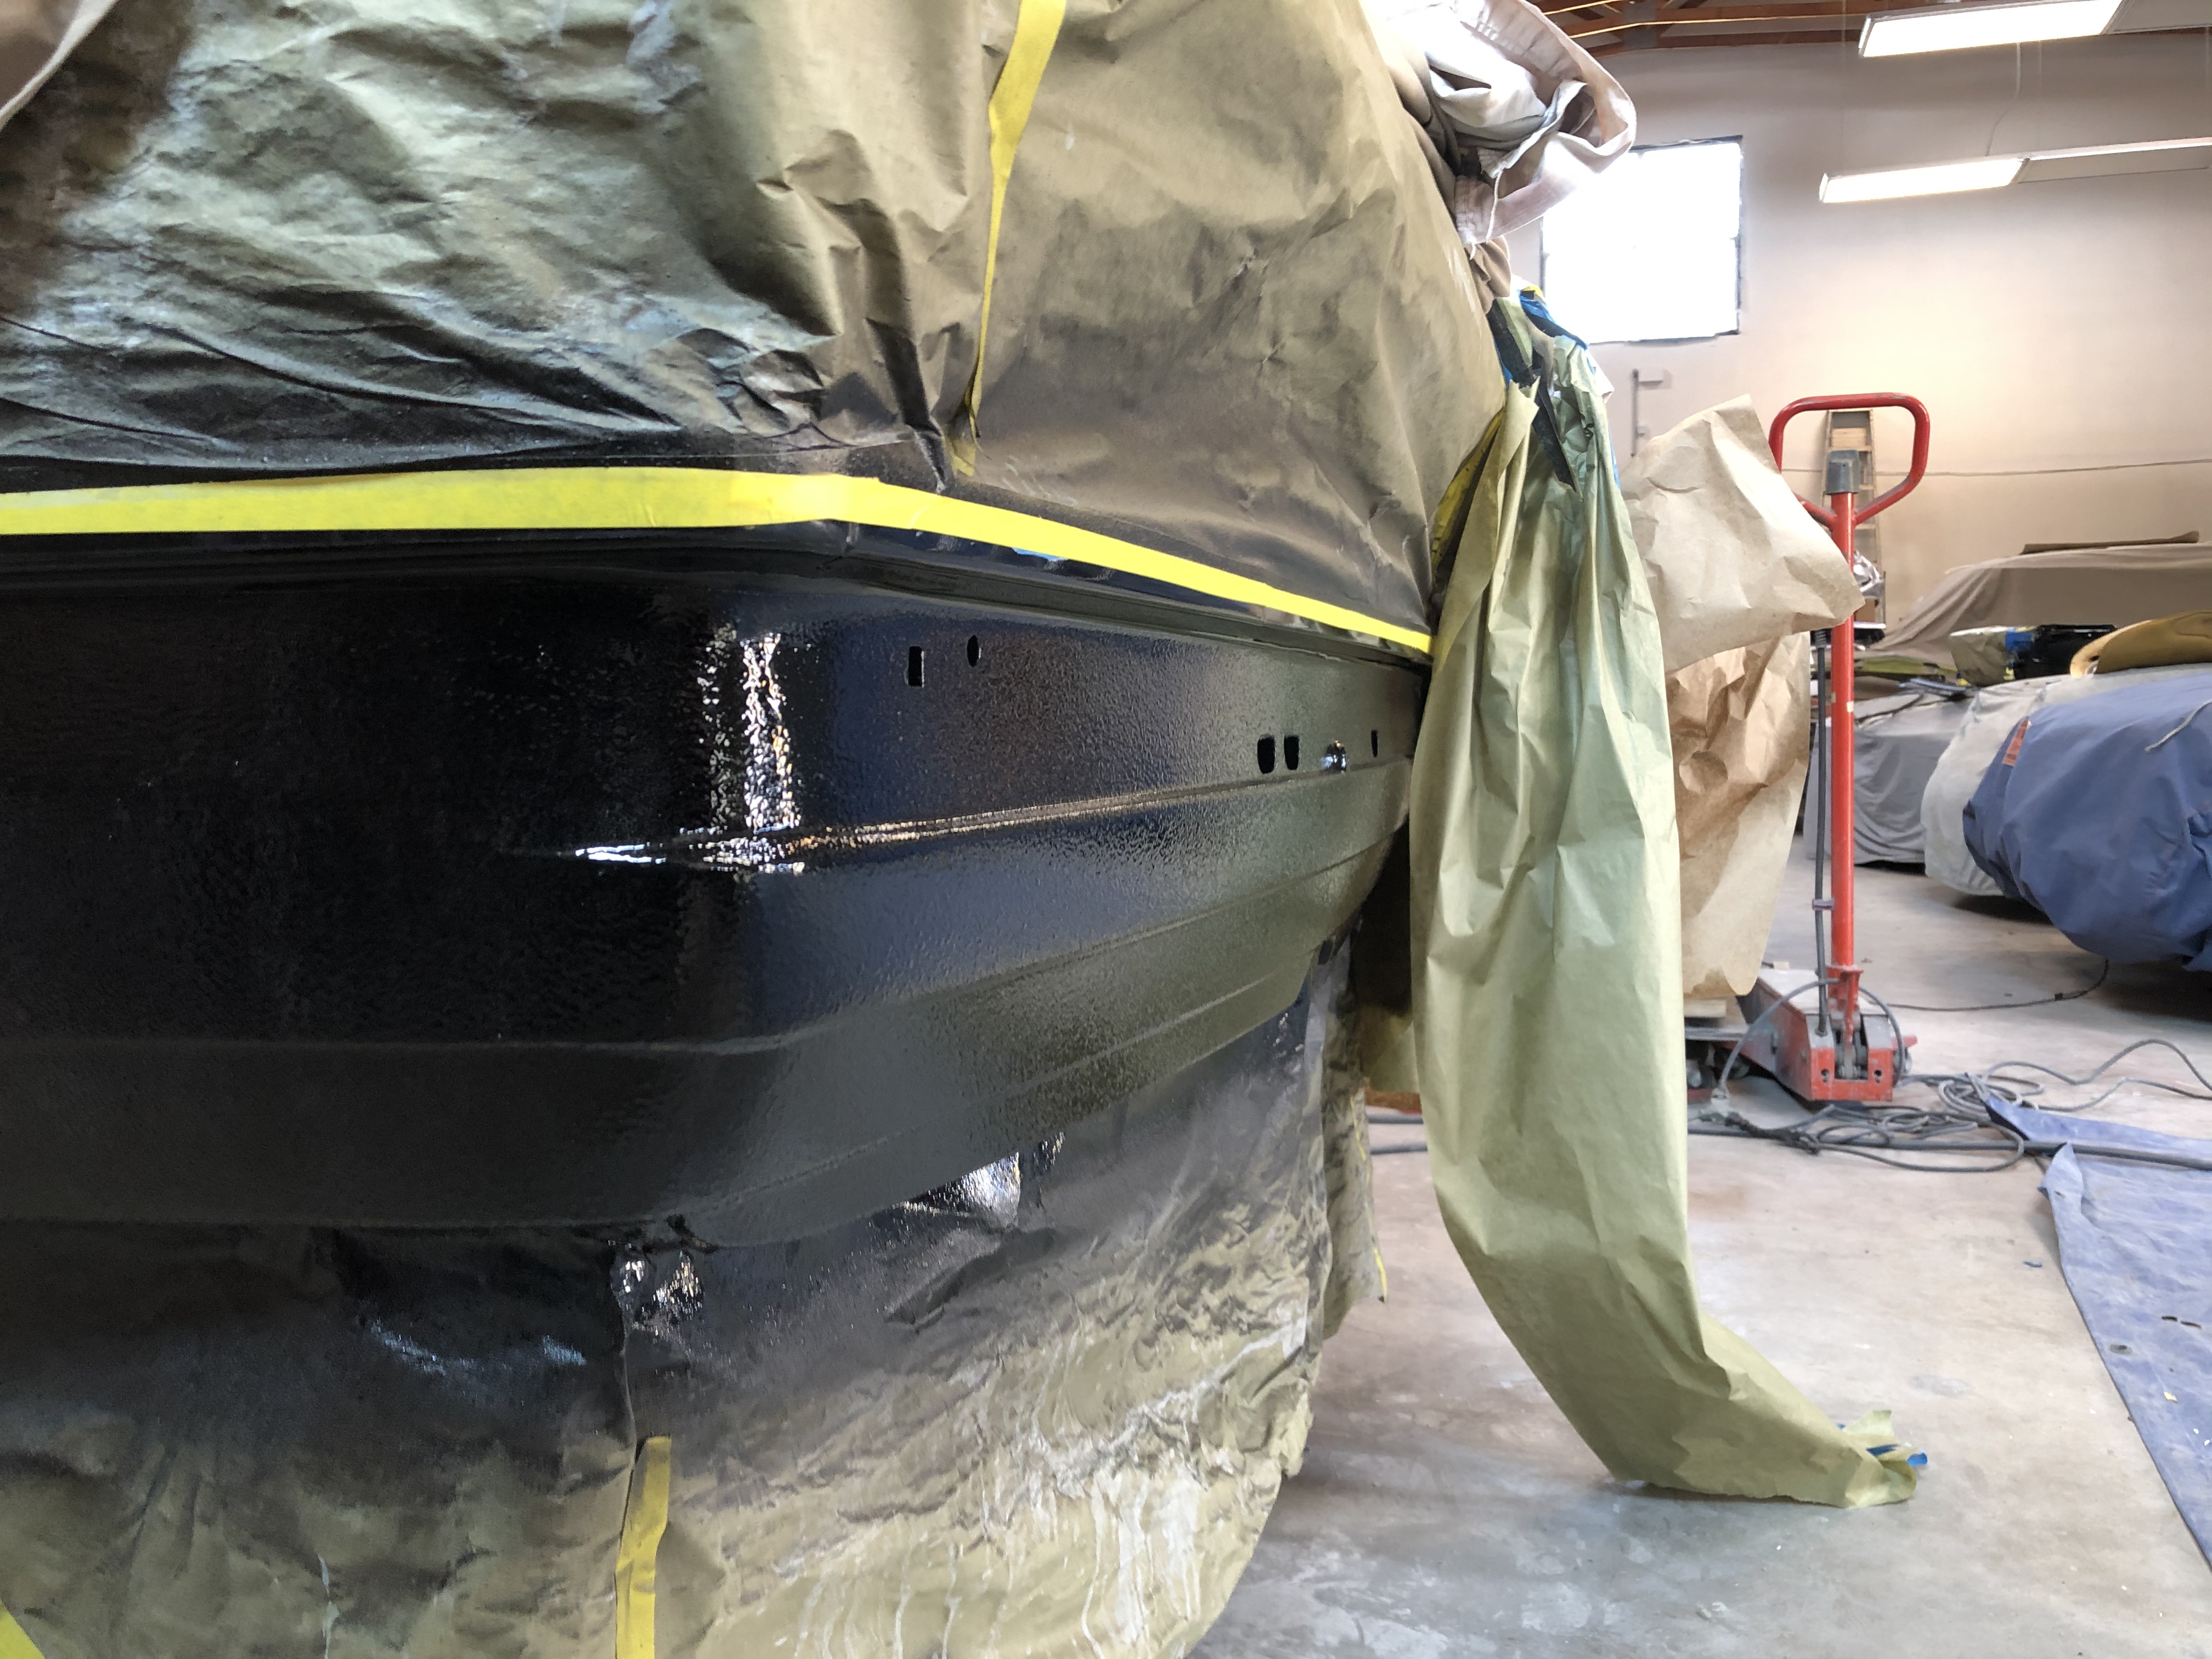
Got the tail panel & rockers schutzed today. That texture should mellow a bit when the primer, sealer, paint, etc. goes on there:

Image

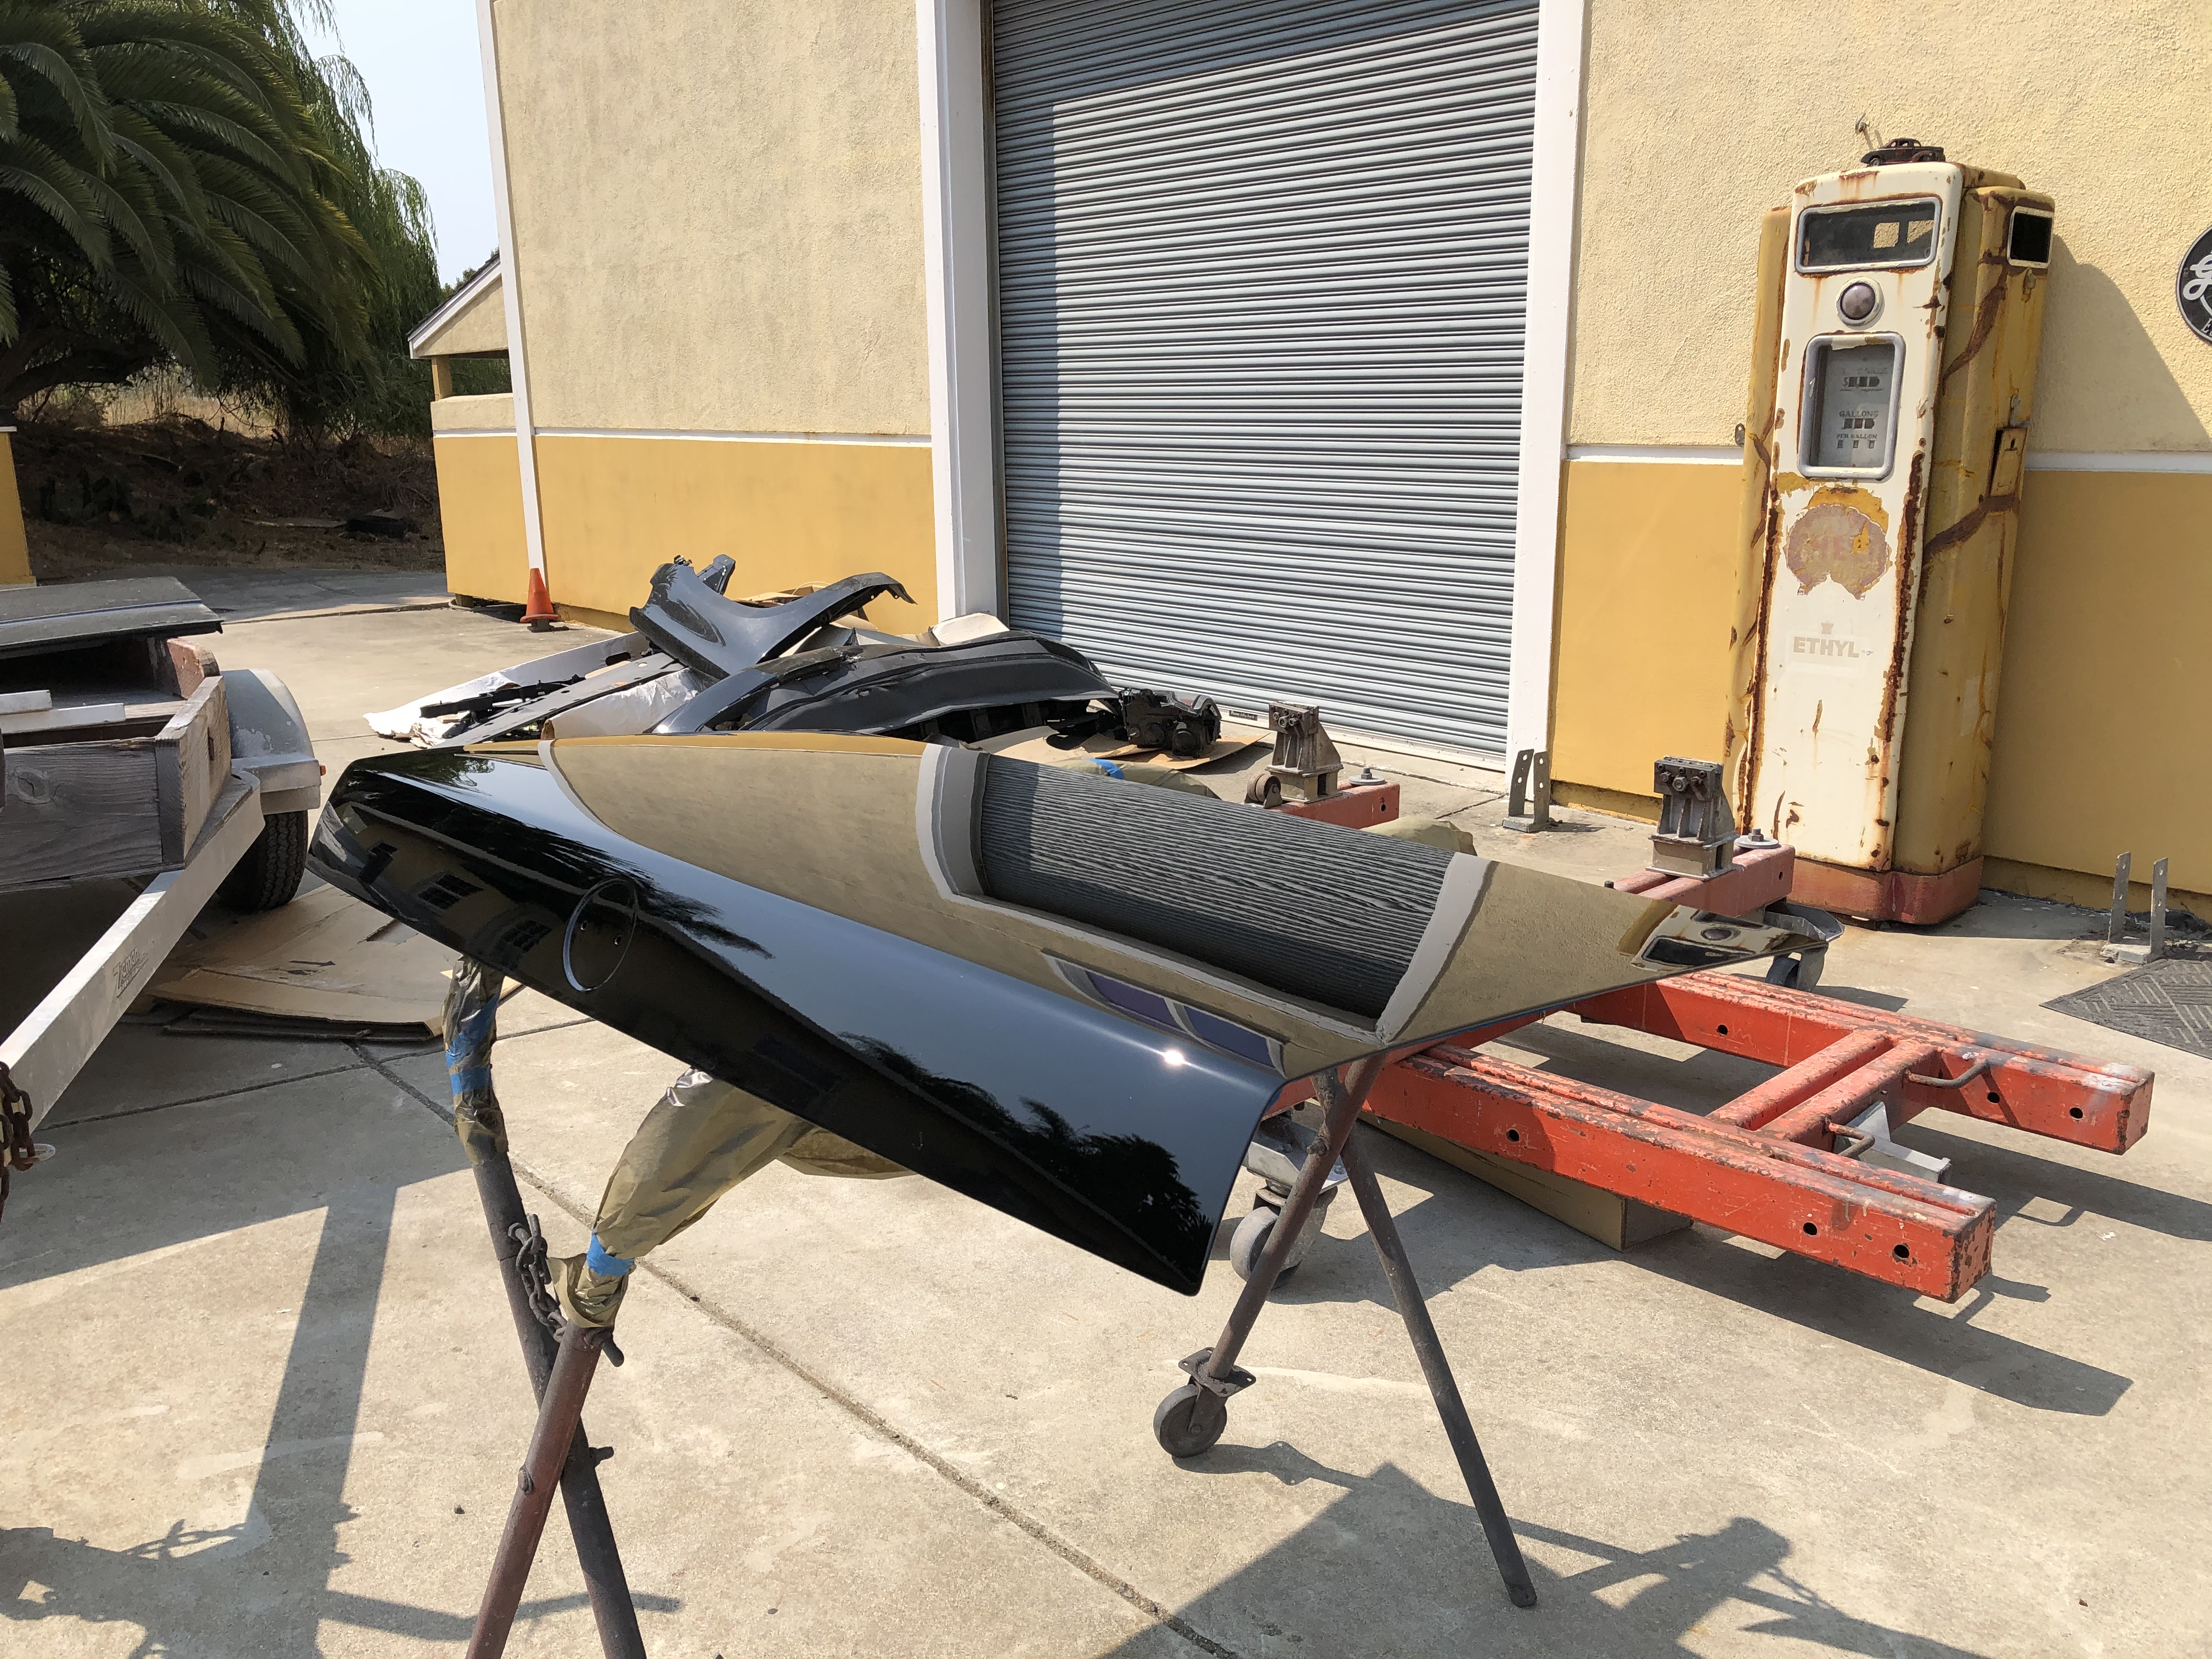
And here's progress on the smooth trunk. I can't tell at all where the welded holes were:

Image
Philo
Posts: 2197
Joined: Feb 12, 2006 12:00 PM
Location: Long Beach, CA

Re: Rebuilding My 1988 US-spec M5

Post by Philo »

Nice work ! Might consider the Ed Raether steering box post kit. http://www.mwrench.com/download/steeringfix.pdf And, something I failed to do on my S38 build but wish I did, install the oil pump chain tensioner. That is if your block has the hole for the pin. Mine did, not sure about yours.

Great work again, keep it up.
jhh925
Posts: 917
Joined: Jul 11, 2015 12:23 AM
Location: Reno

Re: Rebuilding My 1988 US-spec M5

Post by jhh925 »

Philo wrote: Aug 21, 2020 5:33 PM Nice work ! Might consider the Ed Raether steering box post kit. http://www.mwrench.com/download/steeringfix.pdf And, something I failed to do on my S38 build but wish I did, install the oil pump chain tensioner. That is if your block has the hole for the pin. Mine did, not sure about yours.

Great work again, keep it up.
Thank you!

On the tensioner, yup, got it, though I'd been reassembling the engine roughly in the order that worked on the M30. That didn't work here, so when I discovered that the oil pump chain I'd bought didn't match the oil pump sprocket, I ended up ordering & installing a new sprocket plus the chain tensioner after I'd already put on the head, cam tray, timing chains, etc., which made the oil pump chain & tensioner installation tricky.

On the steering post kit ... I think you're talking about the steering box mounting reinforcement discussed in this thread? I didn't put in the inserted reinforcement, but I did weld in a third "wall" on the mounting bracket to strengthen it up a bunch. Hoping that holds.
Philo
Posts: 2197
Joined: Feb 12, 2006 12:00 PM
Location: Long Beach, CA

Re: Rebuilding My 1988 US-spec M5

Post by Philo »

OK, glad you did the tensioner. Keep up the great work !
tig
Posts: 9311
Joined: Mar 18, 2013 6:25 PM
Location: Durango
Contact:

Re: Rebuilding My 1988 US-spec M5

Post by tig »

jhh925 wrote: Aug 22, 2020 4:47 PM On the steering post kit ... I think you're talking about the steering box mounting reinforcement discussed in this thread? I didn't put in the inserted reinforcement, but I did weld in a third "wall" on the mounting bracket to strengthen it up a bunch. Hoping that holds.
This will work fine. The post is a great design and makes the job easy, but adding the other wall should def work too. You are doing great work, sir.
Zengineer
Posts: 59
Joined: May 01, 2006 7:22 PM
Location: Vancouver Island, Canada
Contact:

Re: Rebuilding My 1988 US-spec M5

Post by Zengineer »

Love everything about this thread. Great work! You are too hard on yourself for not being a "professional" - lots of pros turn out work far worse than yours!
jhh925
Posts: 917
Joined: Jul 11, 2015 12:23 AM
Location: Reno

Re: Rebuilding My 1988 US-spec M5

Post by jhh925 »

Gratuitous Glasurit shot.

Image

Roger's comment when he showed me this was, "If I could do a whole car that well, I'd charge double!"

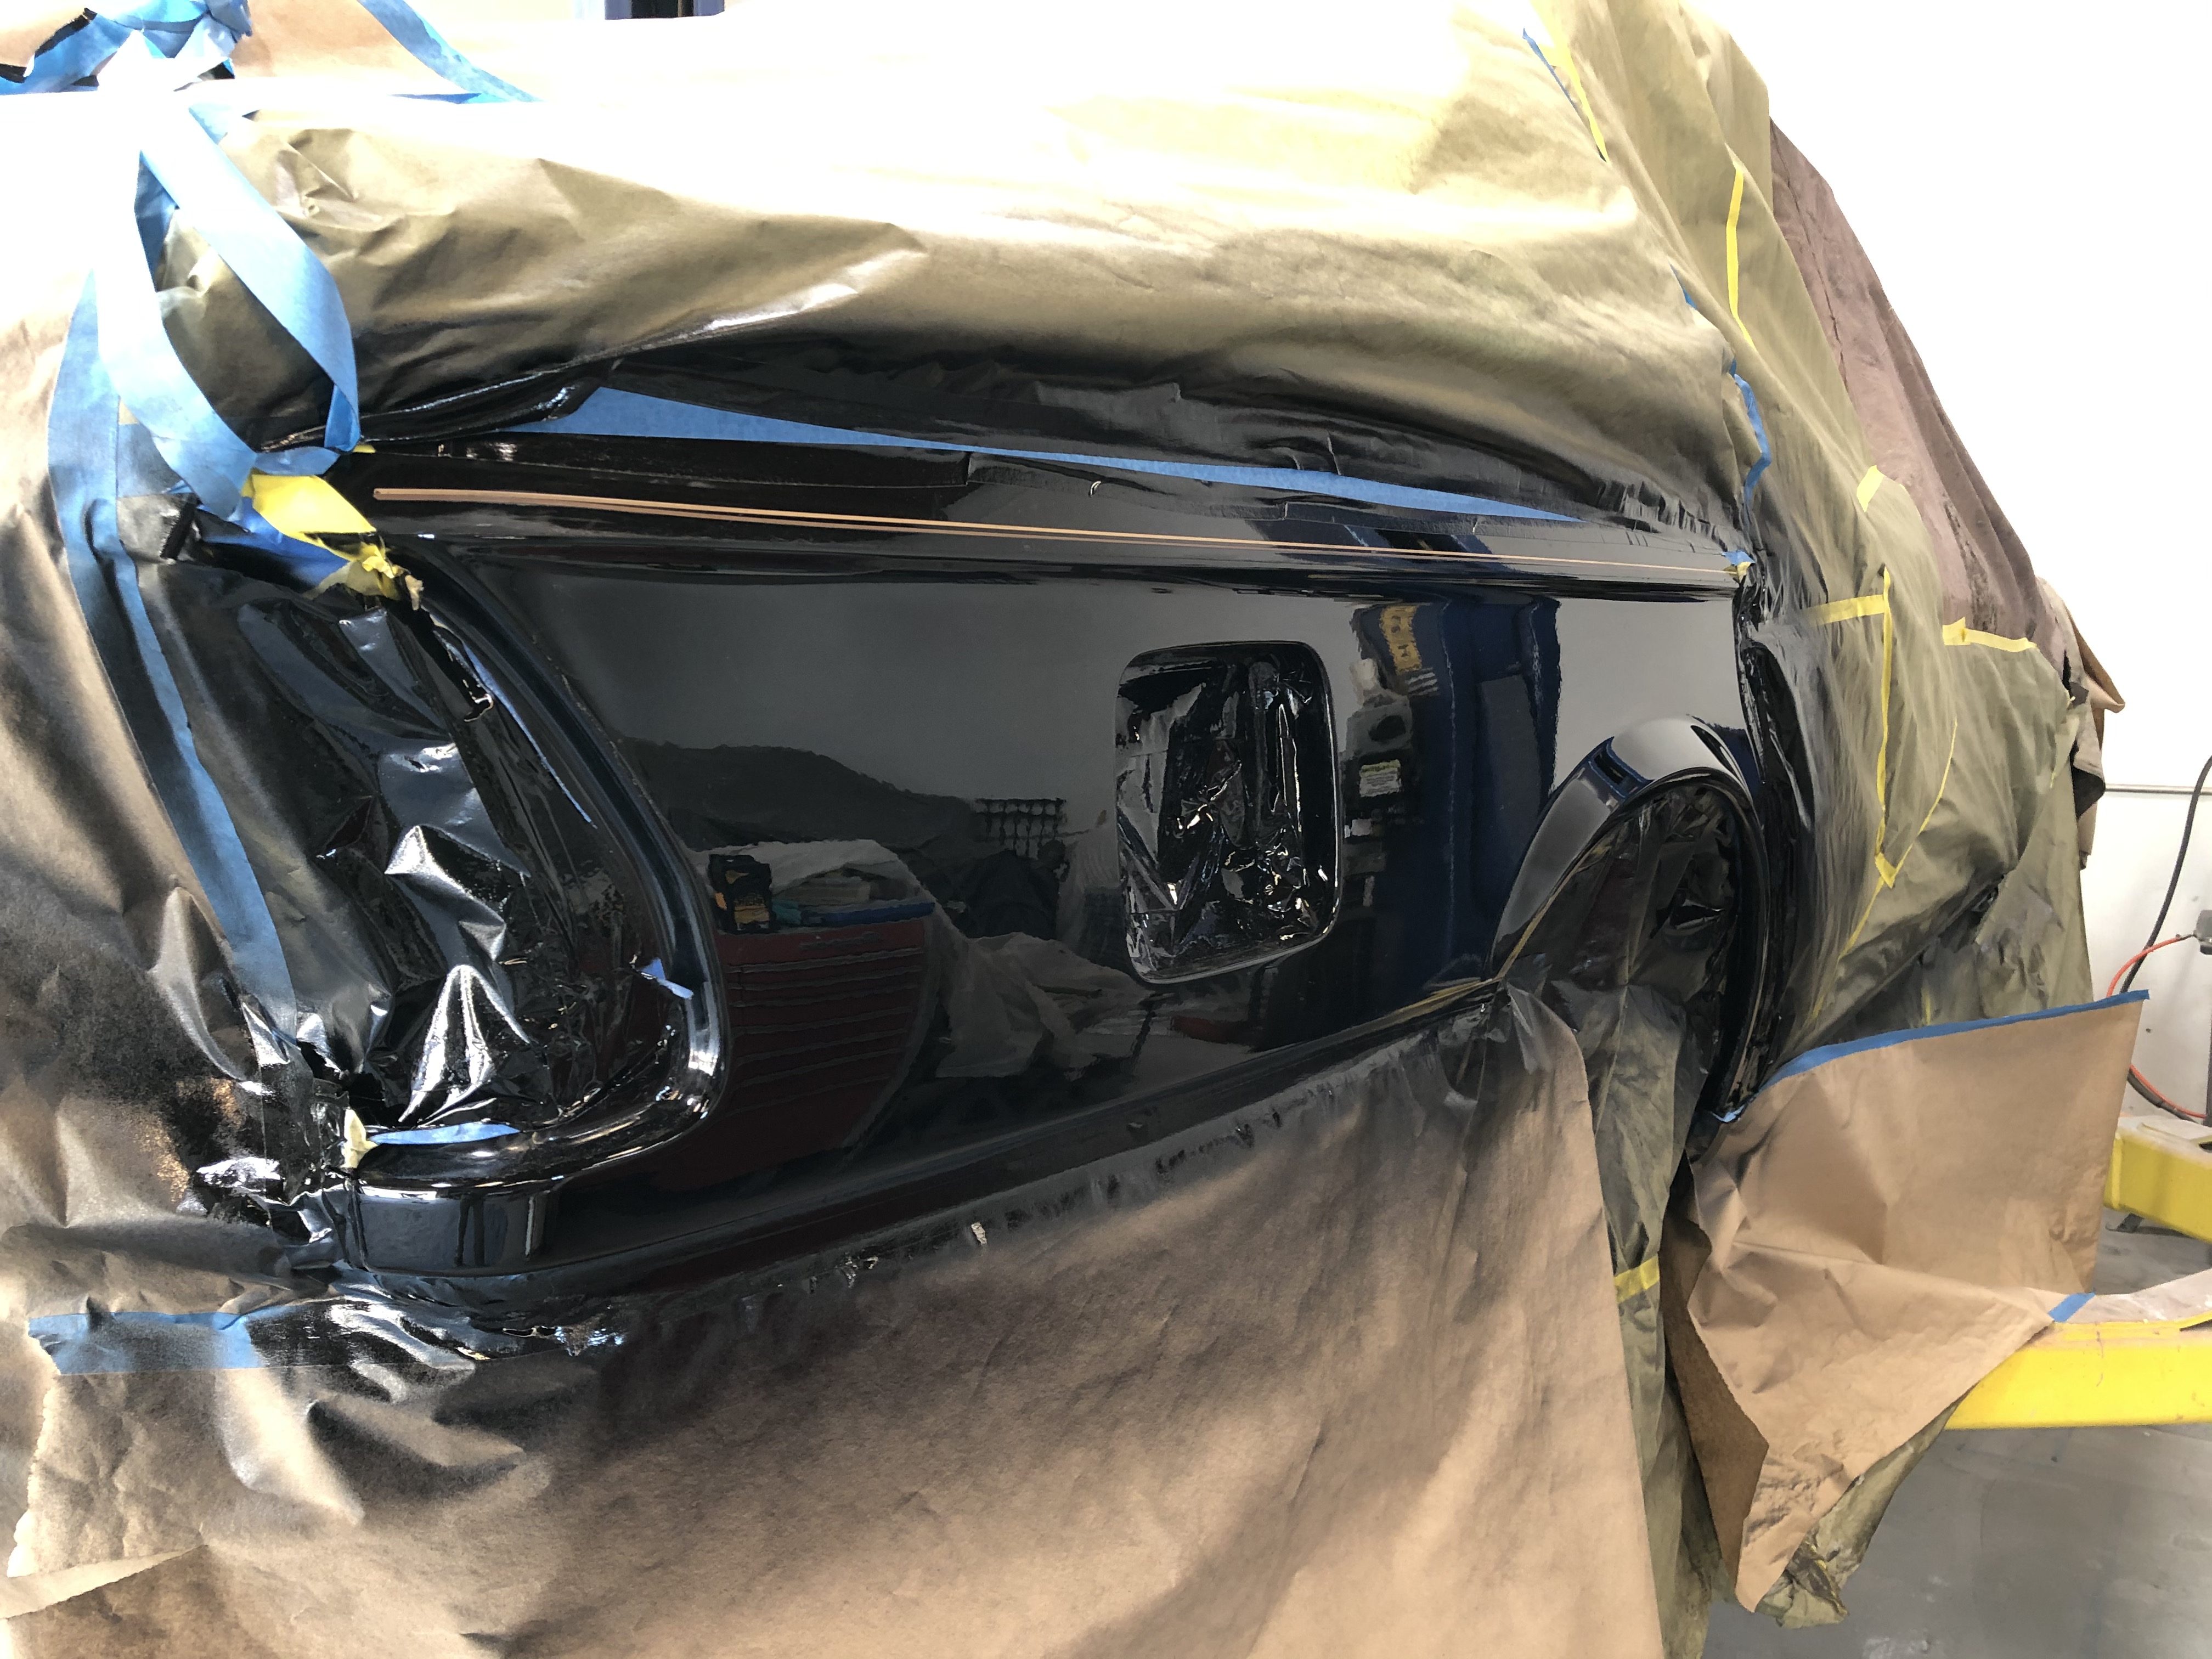
He also re-did the right rear quarter. This was the one area where we found prior damage, and the repair work hadn't been that good.

Image

The depth and "blackness" of this black paint is pretty cool.
tig
Posts: 9311
Joined: Mar 18, 2013 6:25 PM
Location: Durango
Contact:

Re: Rebuilding My 1988 US-spec M5

Post by tig »

I feel like I got such a steal from Ken.

Looks amazing Jens.
jhh925
Posts: 917
Joined: Jul 11, 2015 12:23 AM
Location: Reno

Re: Rebuilding My 1988 US-spec M5

Post by jhh925 »

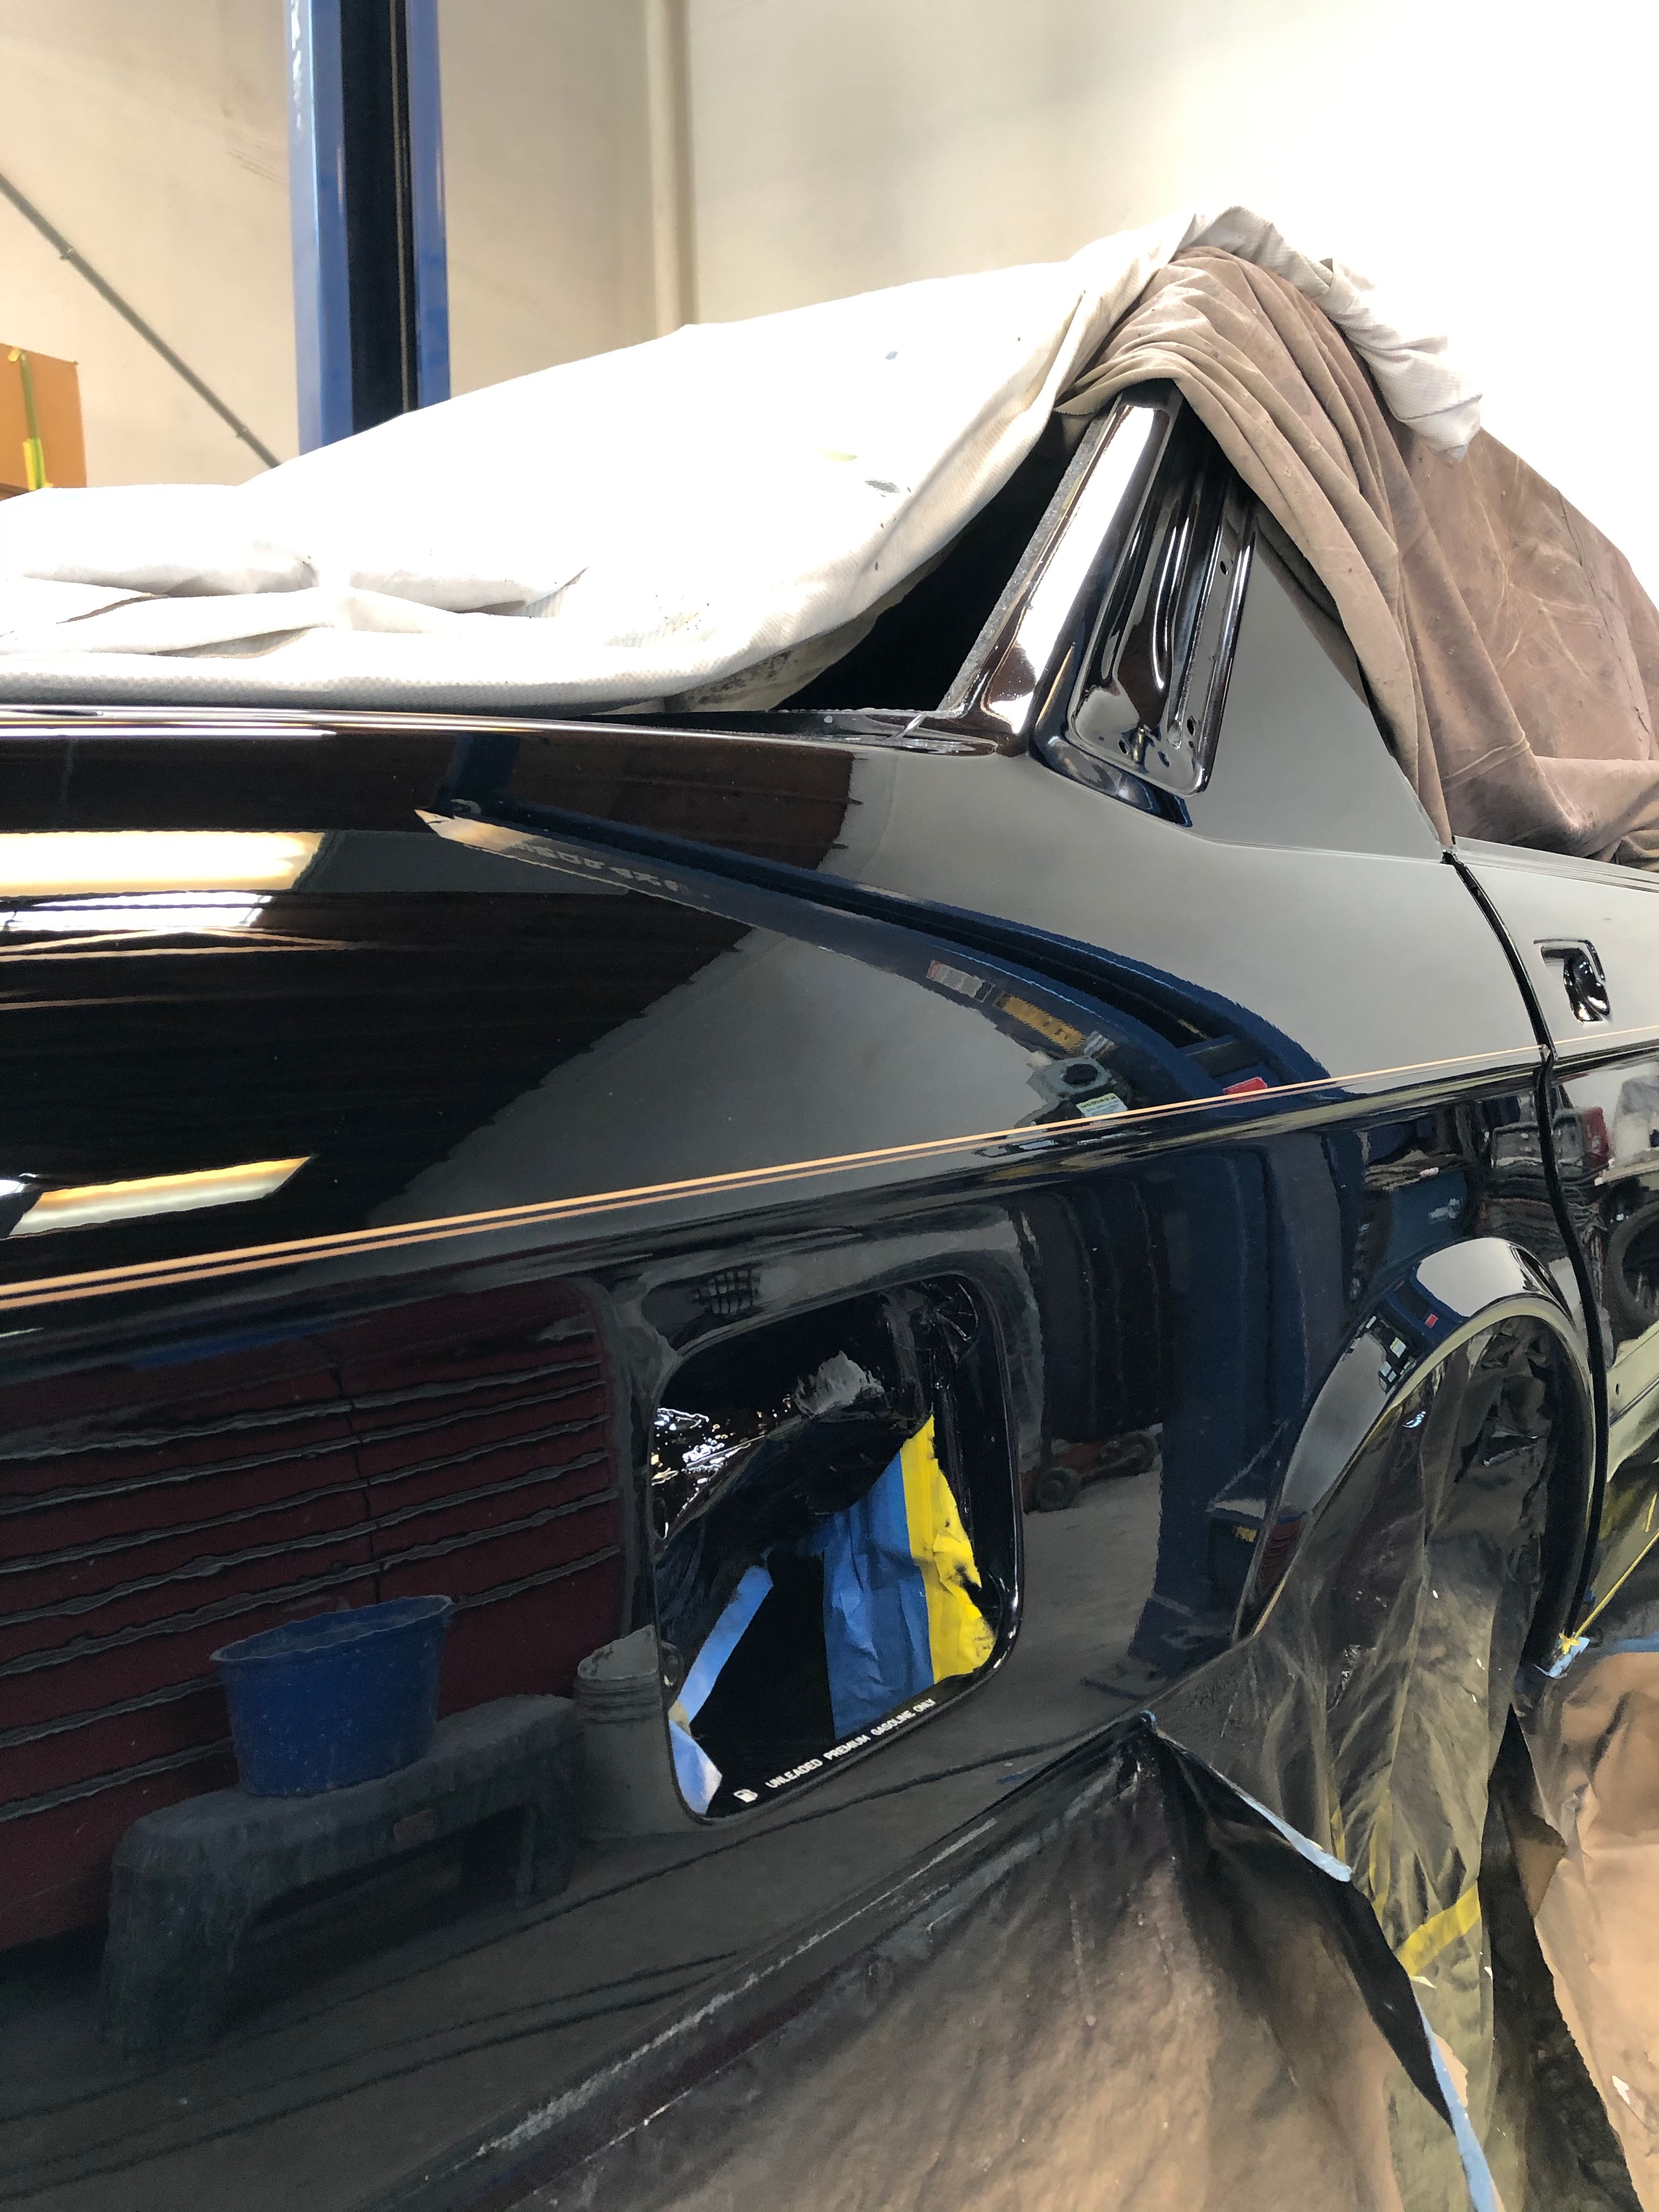
OK, I know I'm being a bit gratuitous with all these bodyshop pics, but Roger told me I ought to come by today and have a look, and that I ought to bring a roll of TP, "Cause when you see this you're gonna shit!" Uh oh.

So, here's the rear right quarter. The area under the pinstripe is the new paint. Above the pinstripe is the original paint, carefully worked with a buffer. In-person, I can see signs of where the old ends & the new begins, but I have to be a couple of inches from the car:

Image

Newly painted "slick top" trunk:

Image

And here's the newly painted rear valance. Note that I decided to do the stone guard all the way around.

Image

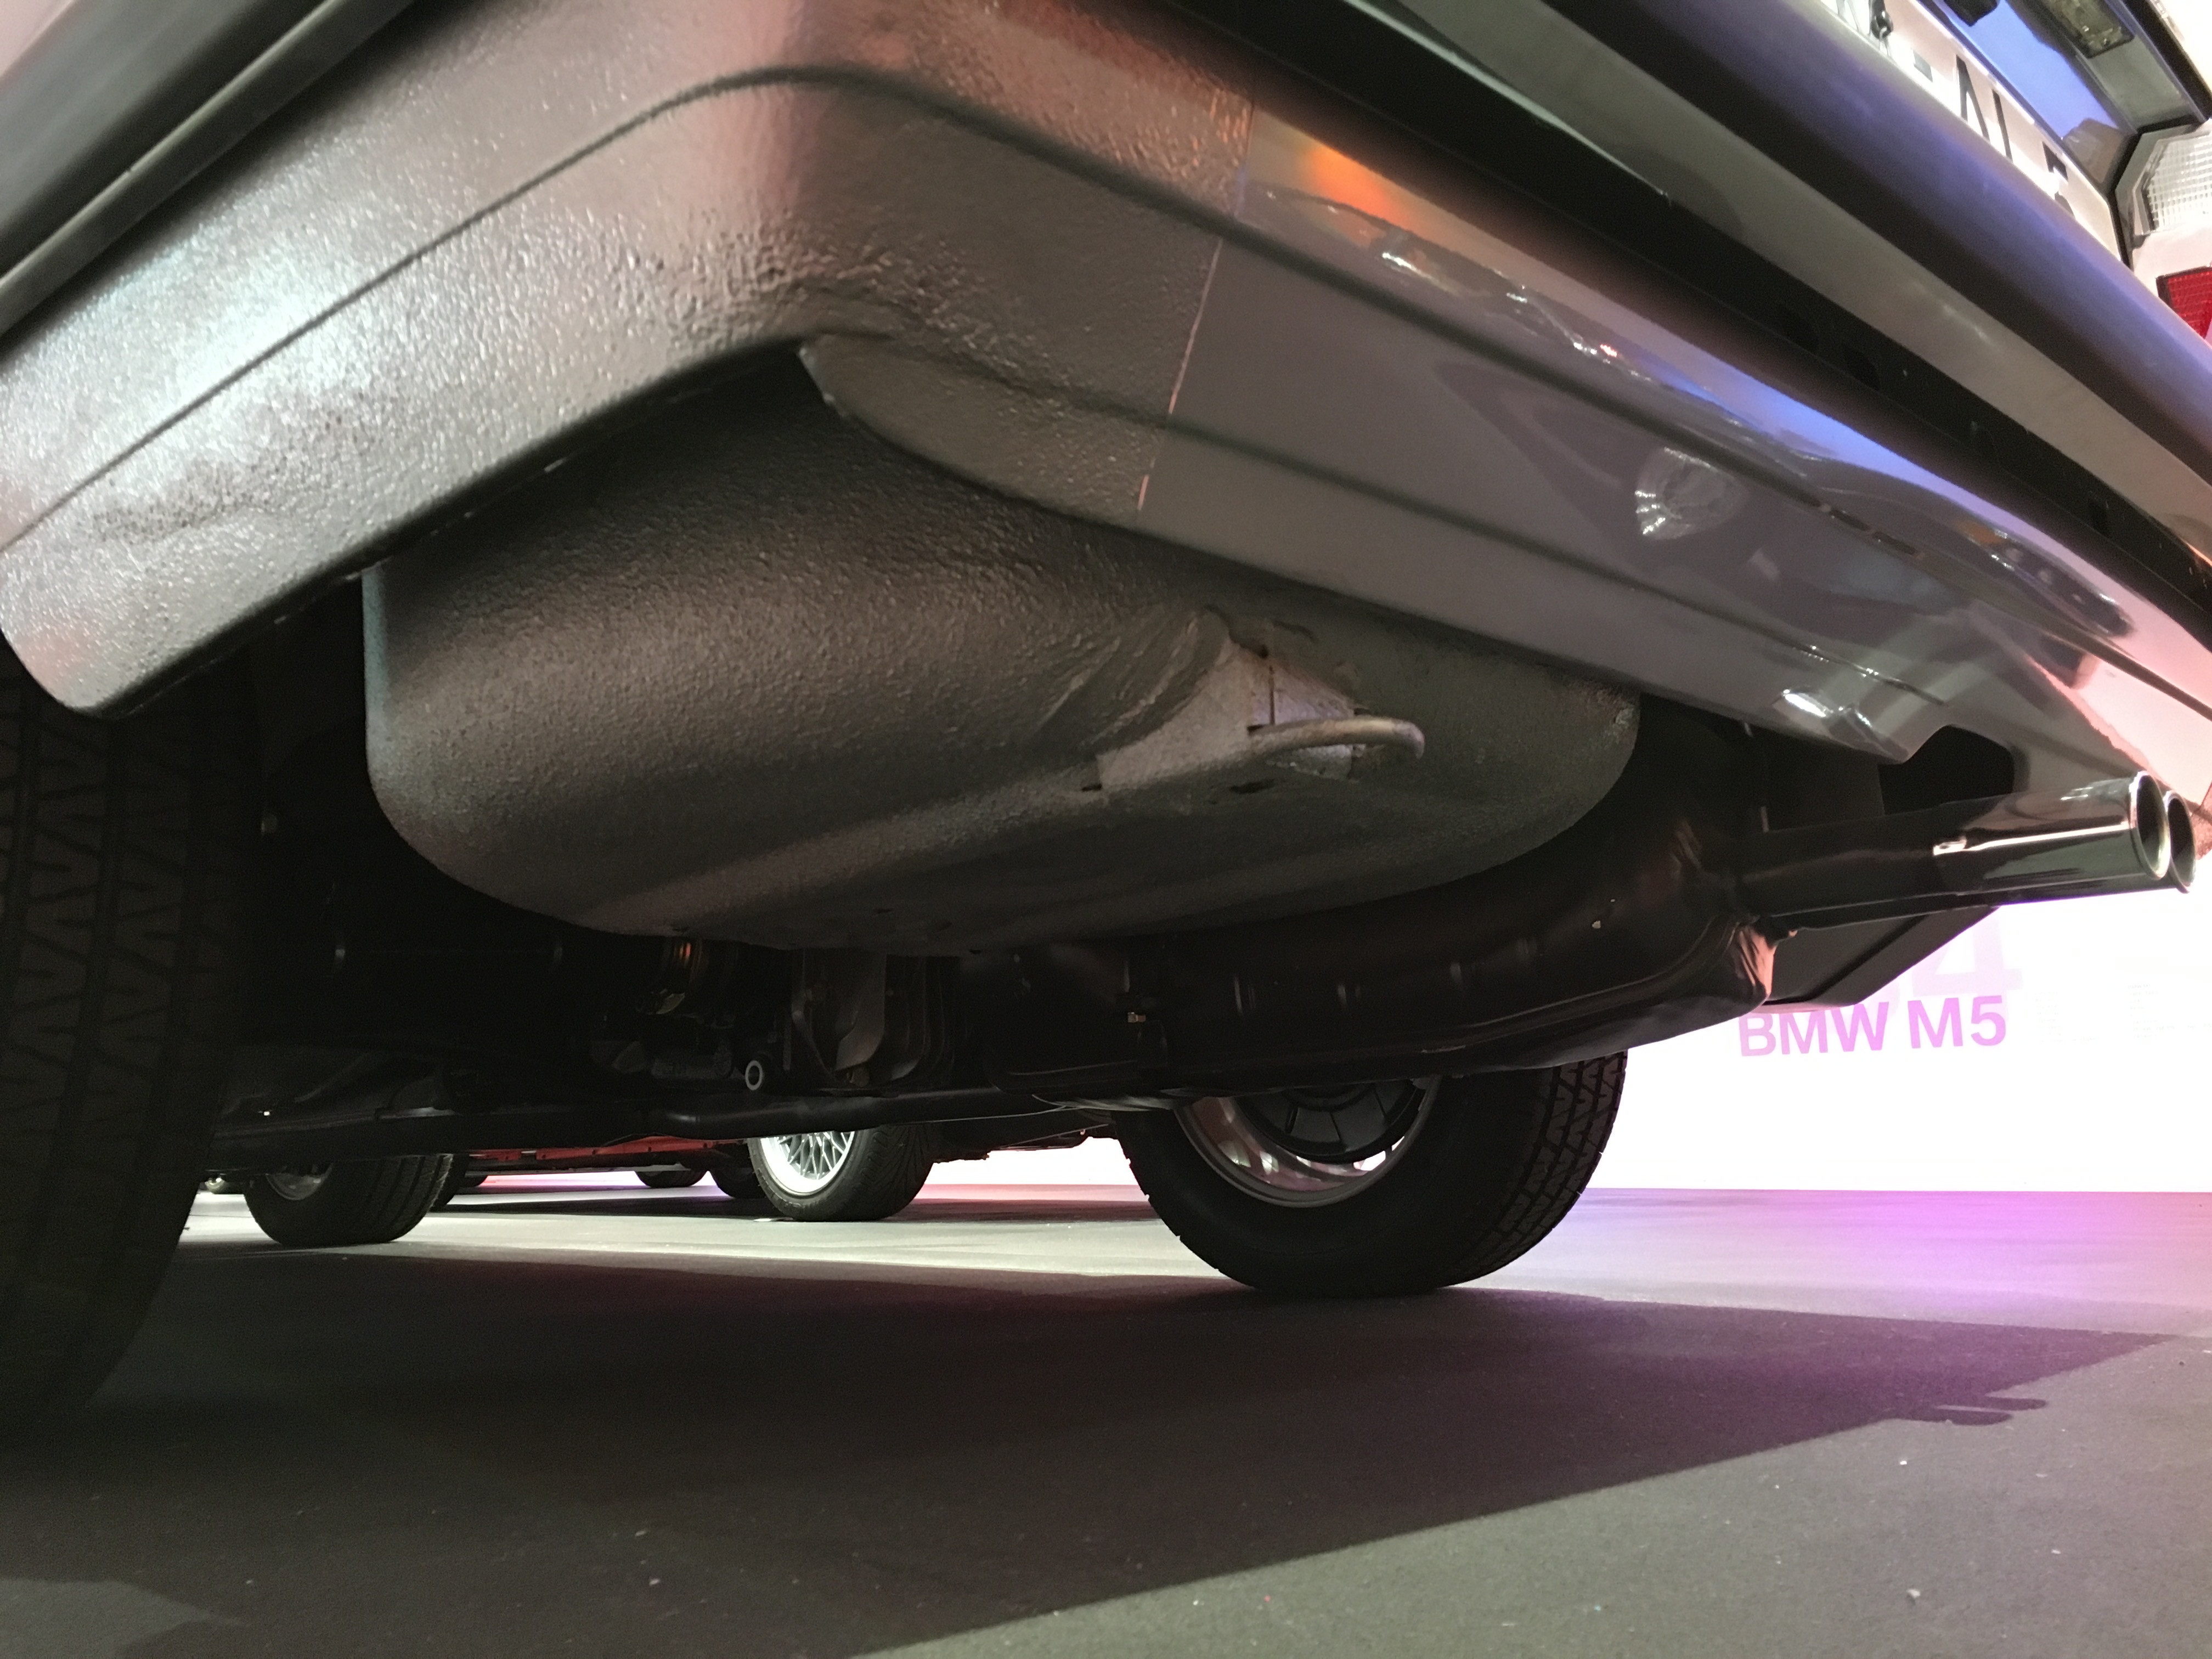
I'm not sure if I'm remembering it correctly, but I think some or all years of the true Euro M%s had the stone guard only coming around the back corner by 4 or 5 inches. As an example, here's a pic I took of the M5 that BMW has at it's museum in Munich. I think that this is an '85, but I'm not sure:

Image

The original tail panel on all the US cars has stone guard all the way around. I think that looks a lot better and offers better protection. If anyone here vehemently disagrees (or perhaps can confirm that even the Euro M5 had stone guard all the way around?), I'm all ears.

Oh, also, Roger is def going to help clean up the engine bay by painting selected areas to fix scratches & damaged paint, so that's a bit of a relief. In closely related news, I'm resigned to the fact that this car is highly, highly unlikely to be done by St. Paddy's Day 2021 (which had been my original goals). I'll likely get the car back from body & paint before the end of September, but that will be pretty tight timing to get everything back together. And I'm sure tuning the engine management will take longer than expected.
Zengineer
Posts: 59
Joined: May 01, 2006 7:22 PM
Location: Vancouver Island, Canada
Contact:

Re: Rebuilding My 1988 US-spec M5

Post by Zengineer »

Not much in the car world that looks better than a quality, deep, black paint job. Very nice, you must be stoked! As the owner of what looks to be an outdoor respray, I'm a bit jealous. ;)
reesesboot
Posts: 493
Joined: Jun 28, 2009 8:29 PM
Location: Costa Mesa, CA

Re: Rebuilding My 1988 US-spec M5

Post by reesesboot »

Incredible work, subscribed. Where did you source the new power steering reservoir stickers? I ordered a set from Pukar Designs a couple months back and haven't heard back - I'm starting to suspect they'll never arrive.
jhh925
Posts: 917
Joined: Jul 11, 2015 12:23 AM
Location: Reno

Re: Rebuilding My 1988 US-spec M5

Post by jhh925 »

reesesboot wrote: Sep 10, 2020 6:24 PM Incredible work, subscribed. Where did you source the new power steering reservoir stickers? I ordered a set from Pukar Designs a couple months back and haven't heard back - I'm starting to suspect they'll never arrive.
I got them from Pukar. I have two more orders that I'm waiting for, and I'm at about 3 months now. I assume you've seen his most recent autoresponder?
Thank you for your email and please take the time to read this automated reply
Please bear with me and I will reply to all messages ASAP.
There are on going genuine and serious family priorities at this time
and i am unable to reply as quickly as I would like to. All orders are
being processed and will be processed and shipped, BUT everyone get
their order.
Also affecting orders and deliveries times is the ongoing Covid19
pandemic which is impacting 3rd party deliveries to us and there are
internal issues with postal services (mainly USPS)
We have been in business for over 10 years and will continue to
operate and fulfil your order, there is no need to worry
Thank you for your patience & understanding
I'd received an earlier email from him on Aug 20 saying "Bear with me. My mother felll and broke her hip. Will advise."
reesesboot
Posts: 493
Joined: Jun 28, 2009 8:29 PM
Location: Costa Mesa, CA

Re: Rebuilding My 1988 US-spec M5

Post by reesesboot »

Yes, I did receive the automated email. Good to know that it will eventually come, not like it's critical.
milarsky
Posts: 521
Joined: Jan 26, 2013 11:19 AM
Location: NYC

Re: Rebuilding My 1988 US-spec M5

Post by milarsky »

He is always frustratingly slow and has excuses all the time. He should not take money until he ships. In fact, even when he ships (if he ships) two of my orders never showed up. Just sayin'.
reesesboot
Posts: 493
Joined: Jun 28, 2009 8:29 PM
Location: Costa Mesa, CA

Re: Rebuilding My 1988 US-spec M5

Post by reesesboot »

I’ll give it another few weeks.
mtrspt5
Posts: 65
Joined: Feb 12, 2006 12:00 PM
Location: Naperville, IL

Re: Rebuilding My 1988 US-spec M5

Post by mtrspt5 »

The original tail panel on all the US cars has stone guard all the way around. I think that looks a lot better and offers better protection. If anyone here vehemently disagrees (or perhaps can confirm that even the Euro M5 had stone guard all the way around?), I'm all ears.

My 1985 Euro M5 does not have the stone guard all the way around, consistent with the BMW museum car.
marek
Posts: 333
Joined: Mar 21, 2008 11:51 AM

Re: Rebuilding My 1988 US-spec M5

Post by marek »

mtrspt5 wrote: Sep 13, 2020 11:19 PM The original tail panel on all the US cars has stone guard all the way around. I think that looks a lot better and offers better protection. If anyone here vehemently disagrees (or perhaps can confirm that even the Euro M5 had stone guard all the way around?), I'm all ears.

My 1985 Euro M5 does not have the stone guard all the way around, consistent with the BMW museum car.
My 1985 Euro M5 also does not have the stone guard all the way around.
Boneyard Dynamics
Posts: 90
Joined: Apr 26, 2011 5:46 PM
Location: Bavaria, not far away from the place the e28s where build

Re: Rebuilding My 1988 US-spec M5

Post by Boneyard Dynamics »

Undercoating on the rear panel depends on the date of production.

early '86 and before => only the corners and sides with undercoating

later 86' and newer => everything below the rear bumper is covered with undercoating

It doesn't depend on the engine or anything else, it's just a matter of production date

According to my pile of e28s the change was between early February '86 and mid March '86

greetings from bavaria,
Wolfgang
jhh925
Posts: 917
Joined: Jul 11, 2015 12:23 AM
Location: Reno

Re: Rebuilding My 1988 US-spec M5

Post by jhh925 »

Boneyard Dynamics wrote: Sep 24, 2020 3:20 PM Undercoating on the rear panel depends on the date of production.

early '86 and before => only the corners and sides with undercoating

later 86' and newer => everything below the rear bumper is covered with undercoating

It doesn't depend on the engine or anything else, it's just a matter of production date

According to my pile of e28s the change was between early February '86 and mid March '86

greetings from bavaria,
Wolfgang
Good to know. And I think the M5 in the Museum was an '85? So that would be consistent.
Preacher's 5
Posts: 219
Joined: Aug 20, 2007 11:50 PM
Location: Decatur, GA
Contact:

Re: Rebuilding My 1988 US-spec M5

Post by Preacher's 5 »

Incredible work!! Great attention to detail in every aspect of the build. Very impressive!!
jhh925
Posts: 917
Joined: Jul 11, 2015 12:23 AM
Location: Reno

Re: Rebuilding My 1988 US-spec M5

Post by jhh925 »

Past due for an update. I got the car back from the body shop about 10 days ago. I feel like I haven't made a ton of progress in the time the the car was at the body shop, but now that it's back, I really want to get the momentum going again.

First, one nice surprise is that Roger was able to blend in the bright yellow SEM sprayable seam sealer that I'd used on the underside. Here's what it looked like after I sprayed it:
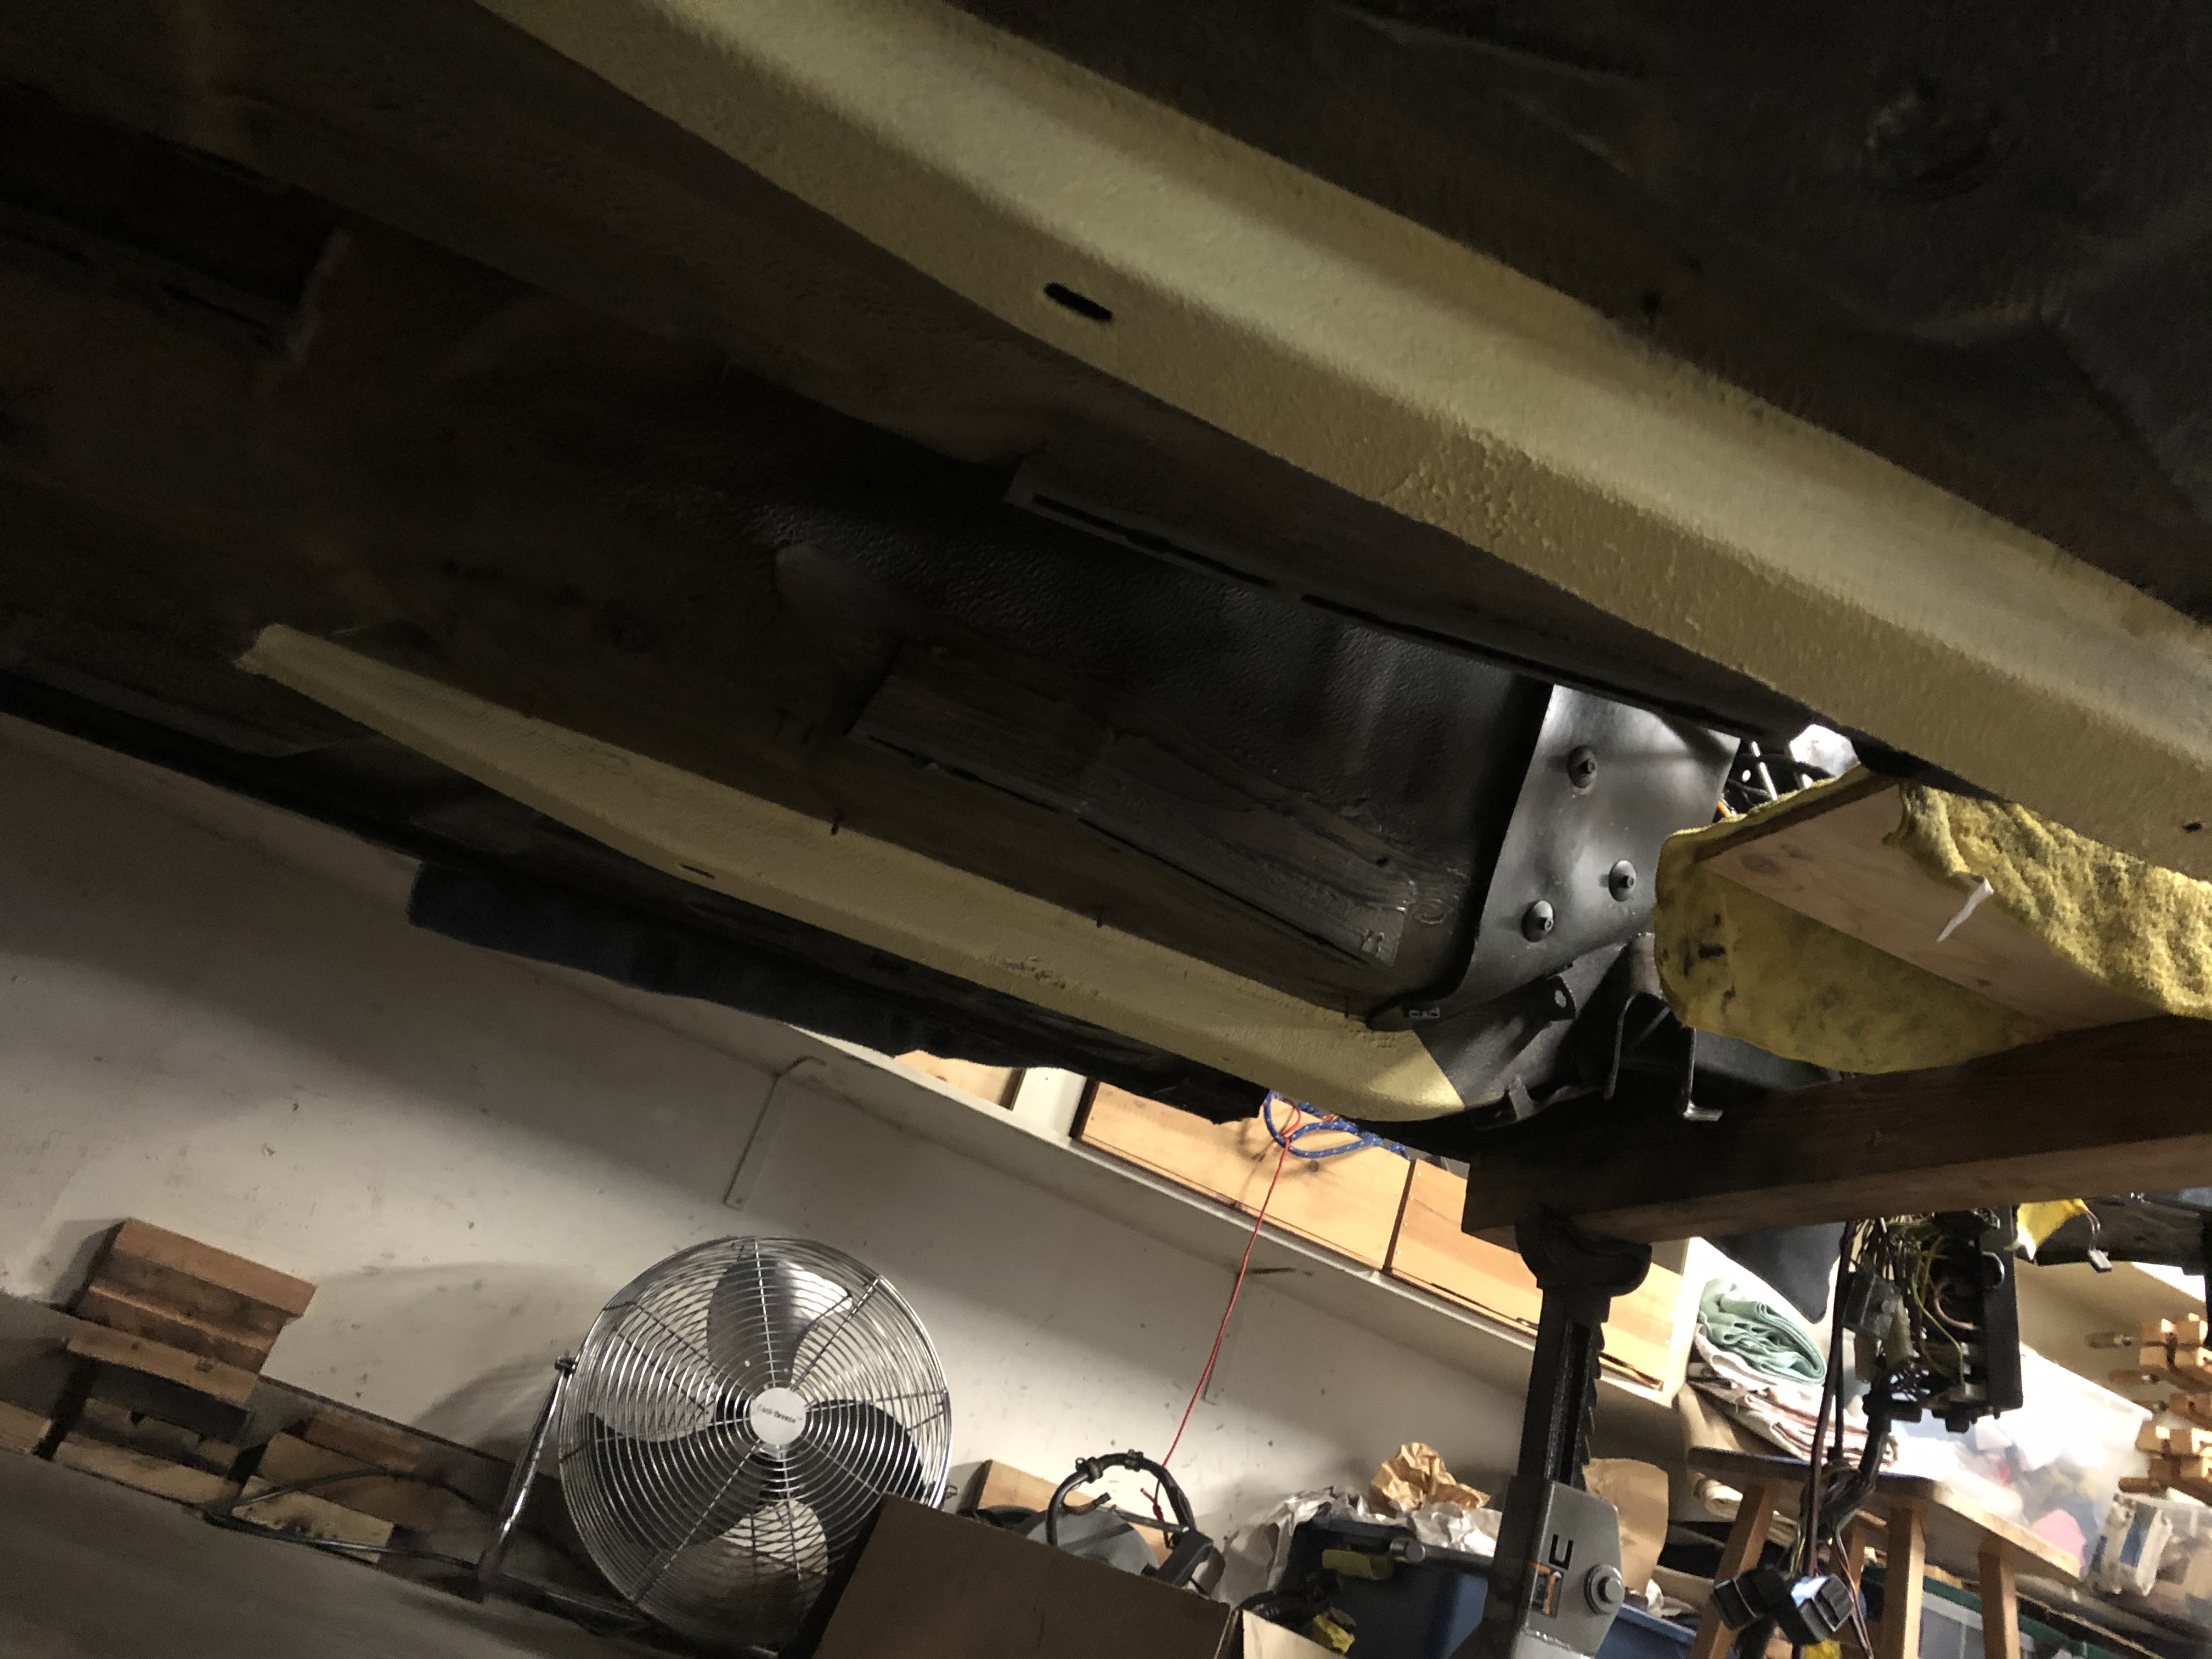
Image

And here's what it looks like after Roger fixed it:
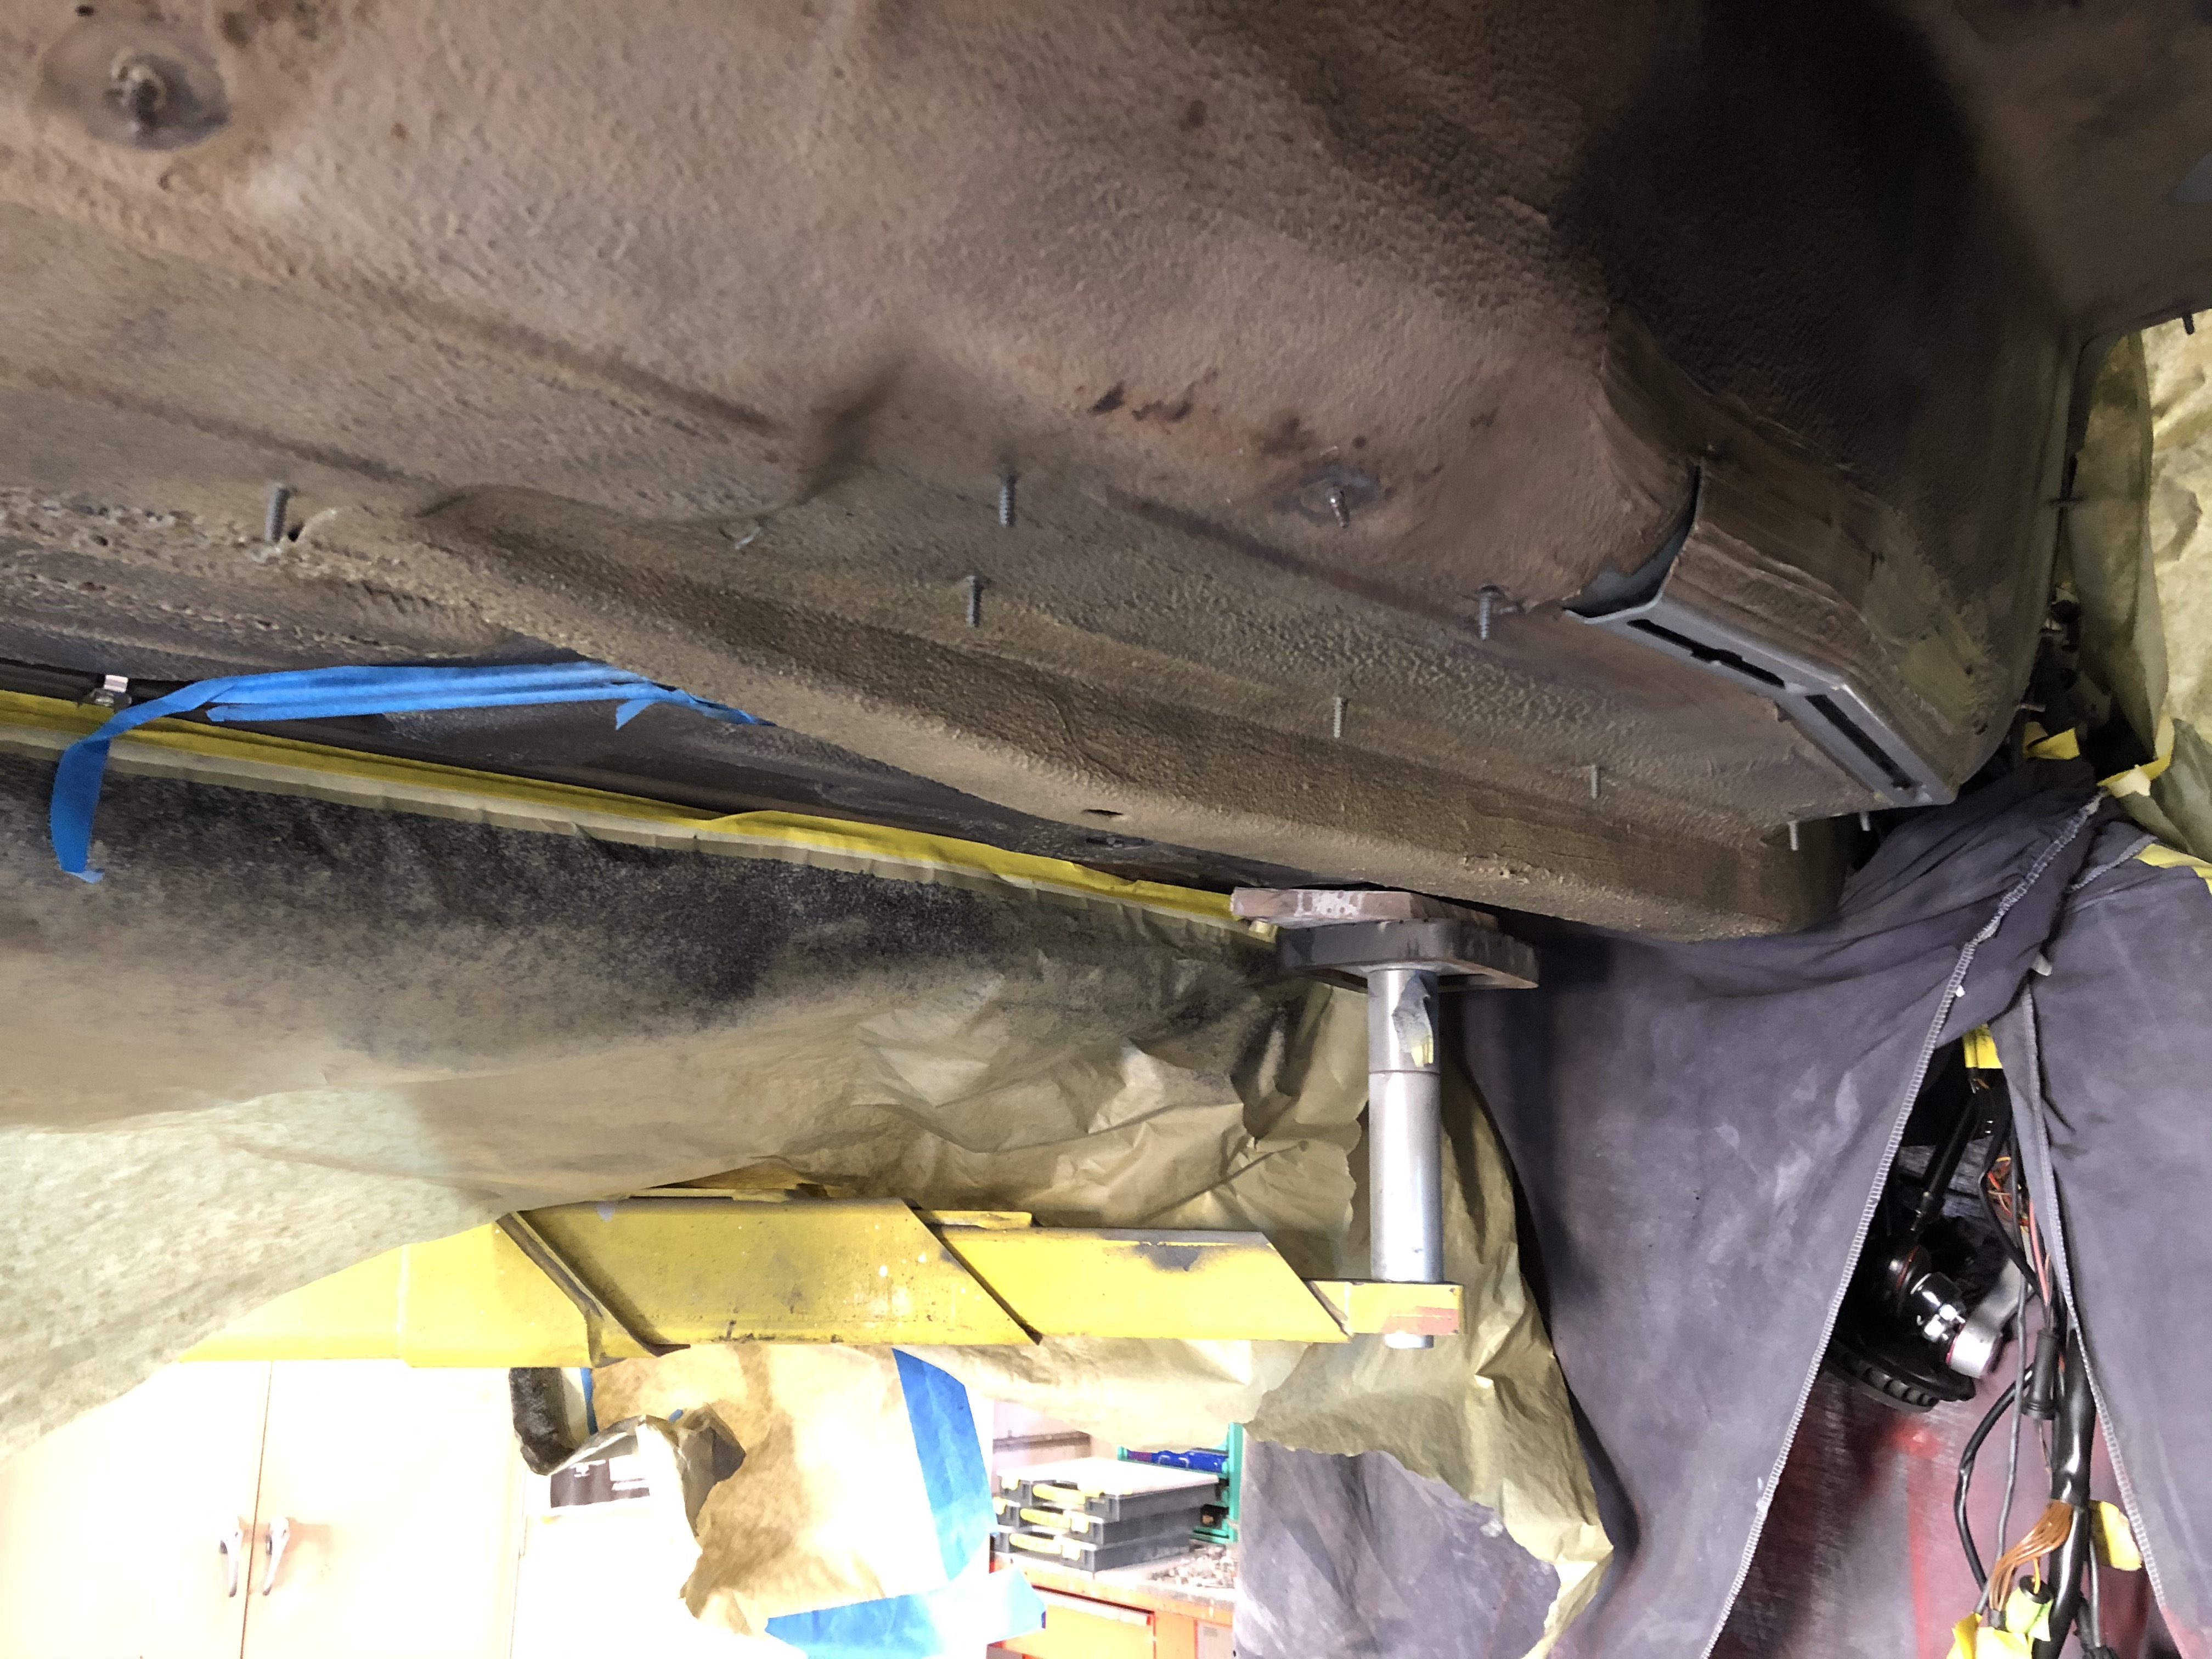
Image

Turns out, SEM makes a product specifically intended to blend new undercoats with the color of our old stuff:
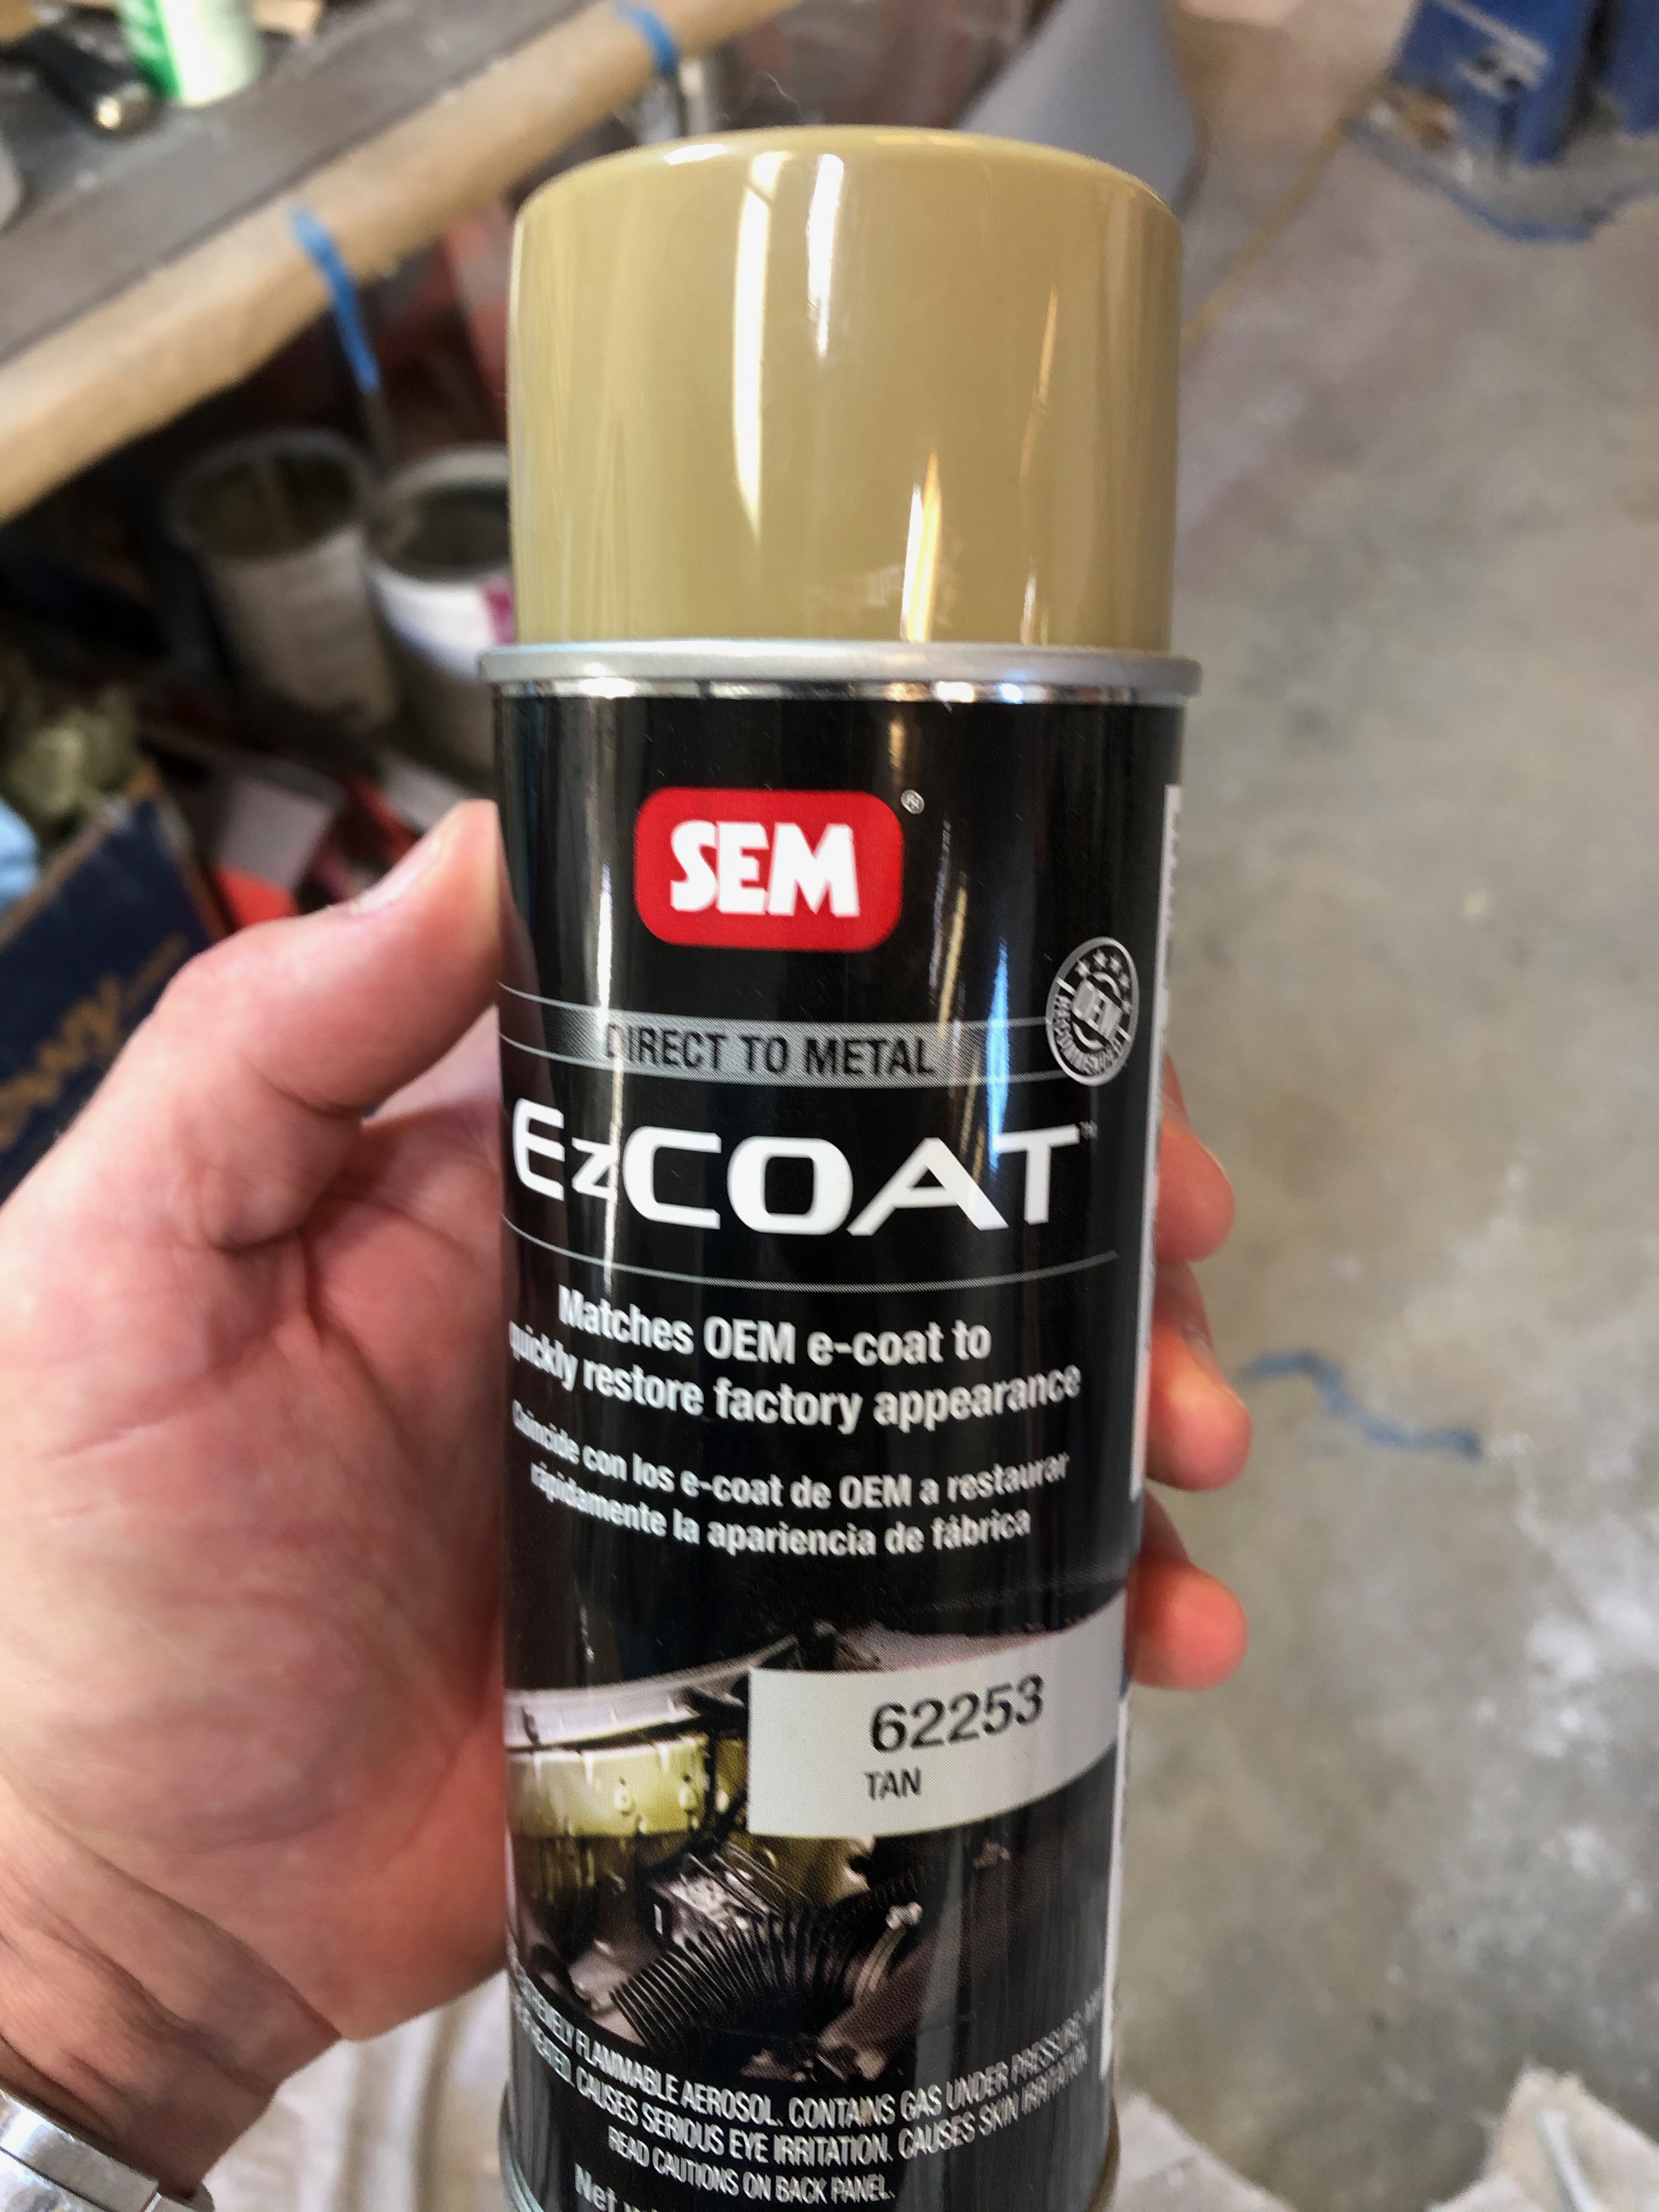
Image

I also cleaned up the transmission. Before:
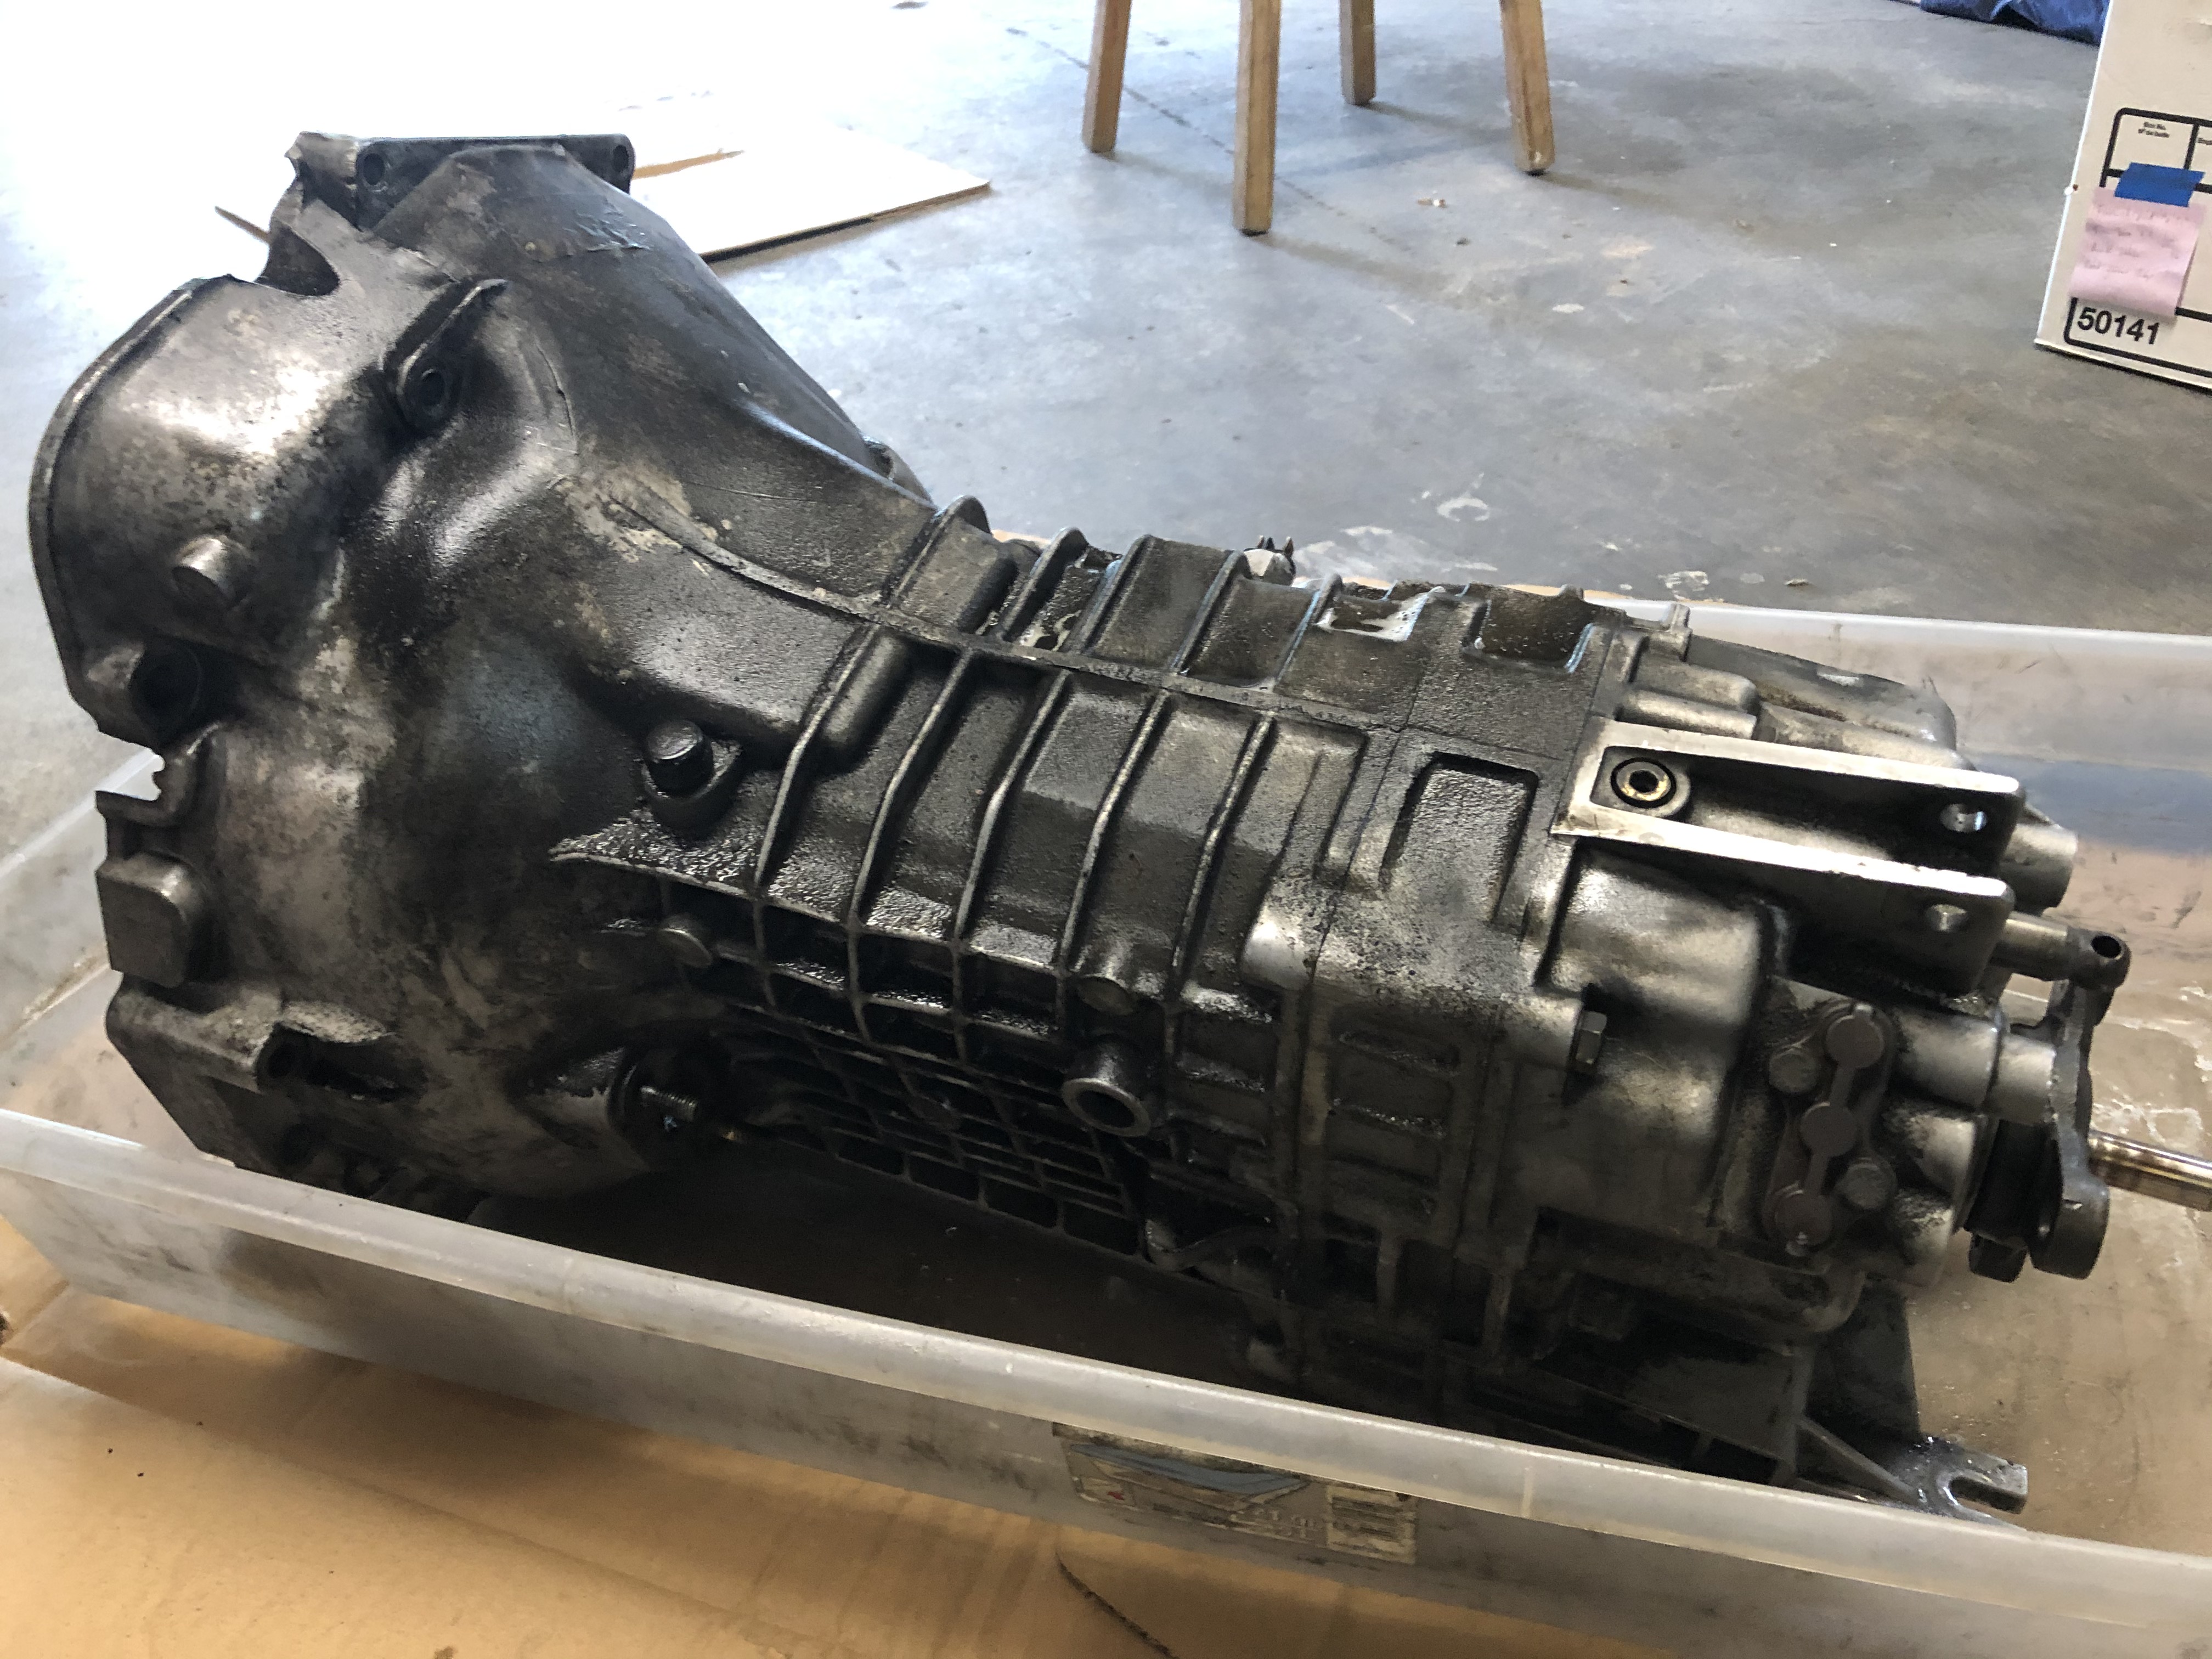
Image

And here's after. New seals (input, output & selector shaft), new reverse light switch, all new rubber & bushings for the linkage. Note that the rubber boot at the base of the stick shift was butchered on some prior occasion when whoever was working on the car was unable to figure out how to get the reverse-light switch wiring up from the tranny into the cabin (they just cut a gash in the side of the boot & stuffed the wire through, I guess). So I bought a new boot (not installed yet).
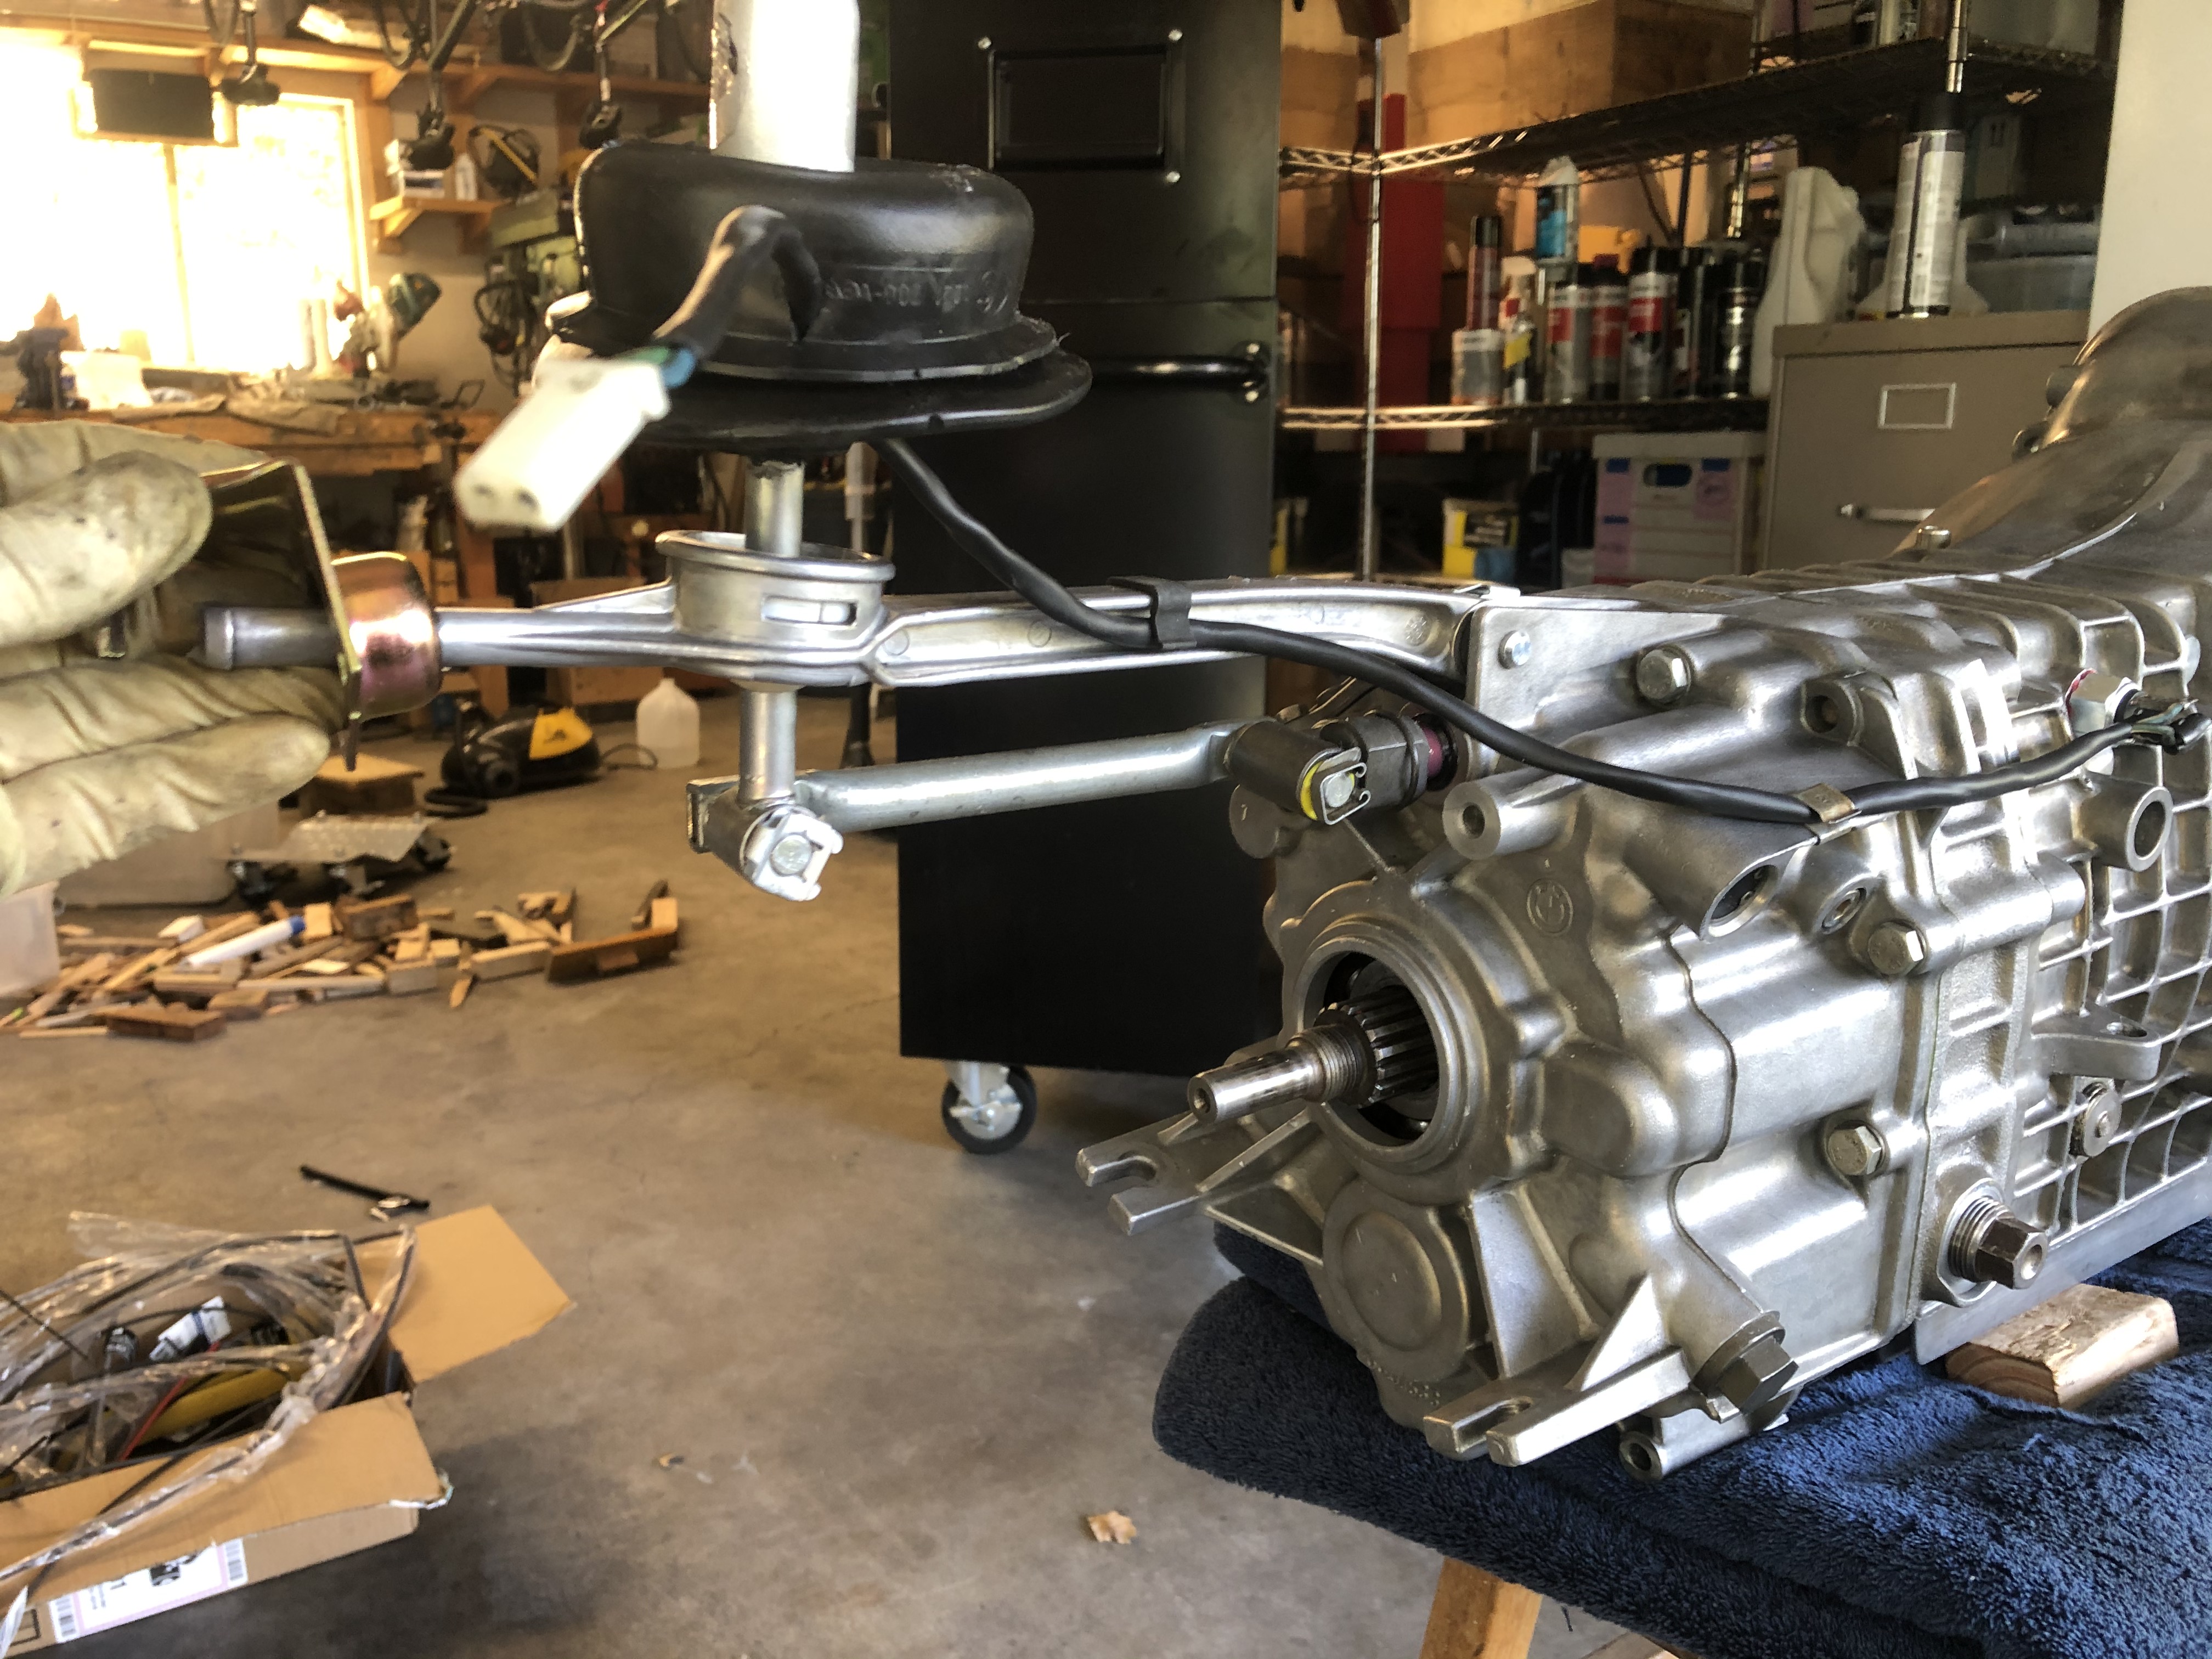
Image

Also, in case it's of interest, here's a pic down the elector shaft hole. There's zero room to push the old seal down in order to press a new one in on top of it. I don't get how some people think it's OK to try to just jam a new seal in on top.
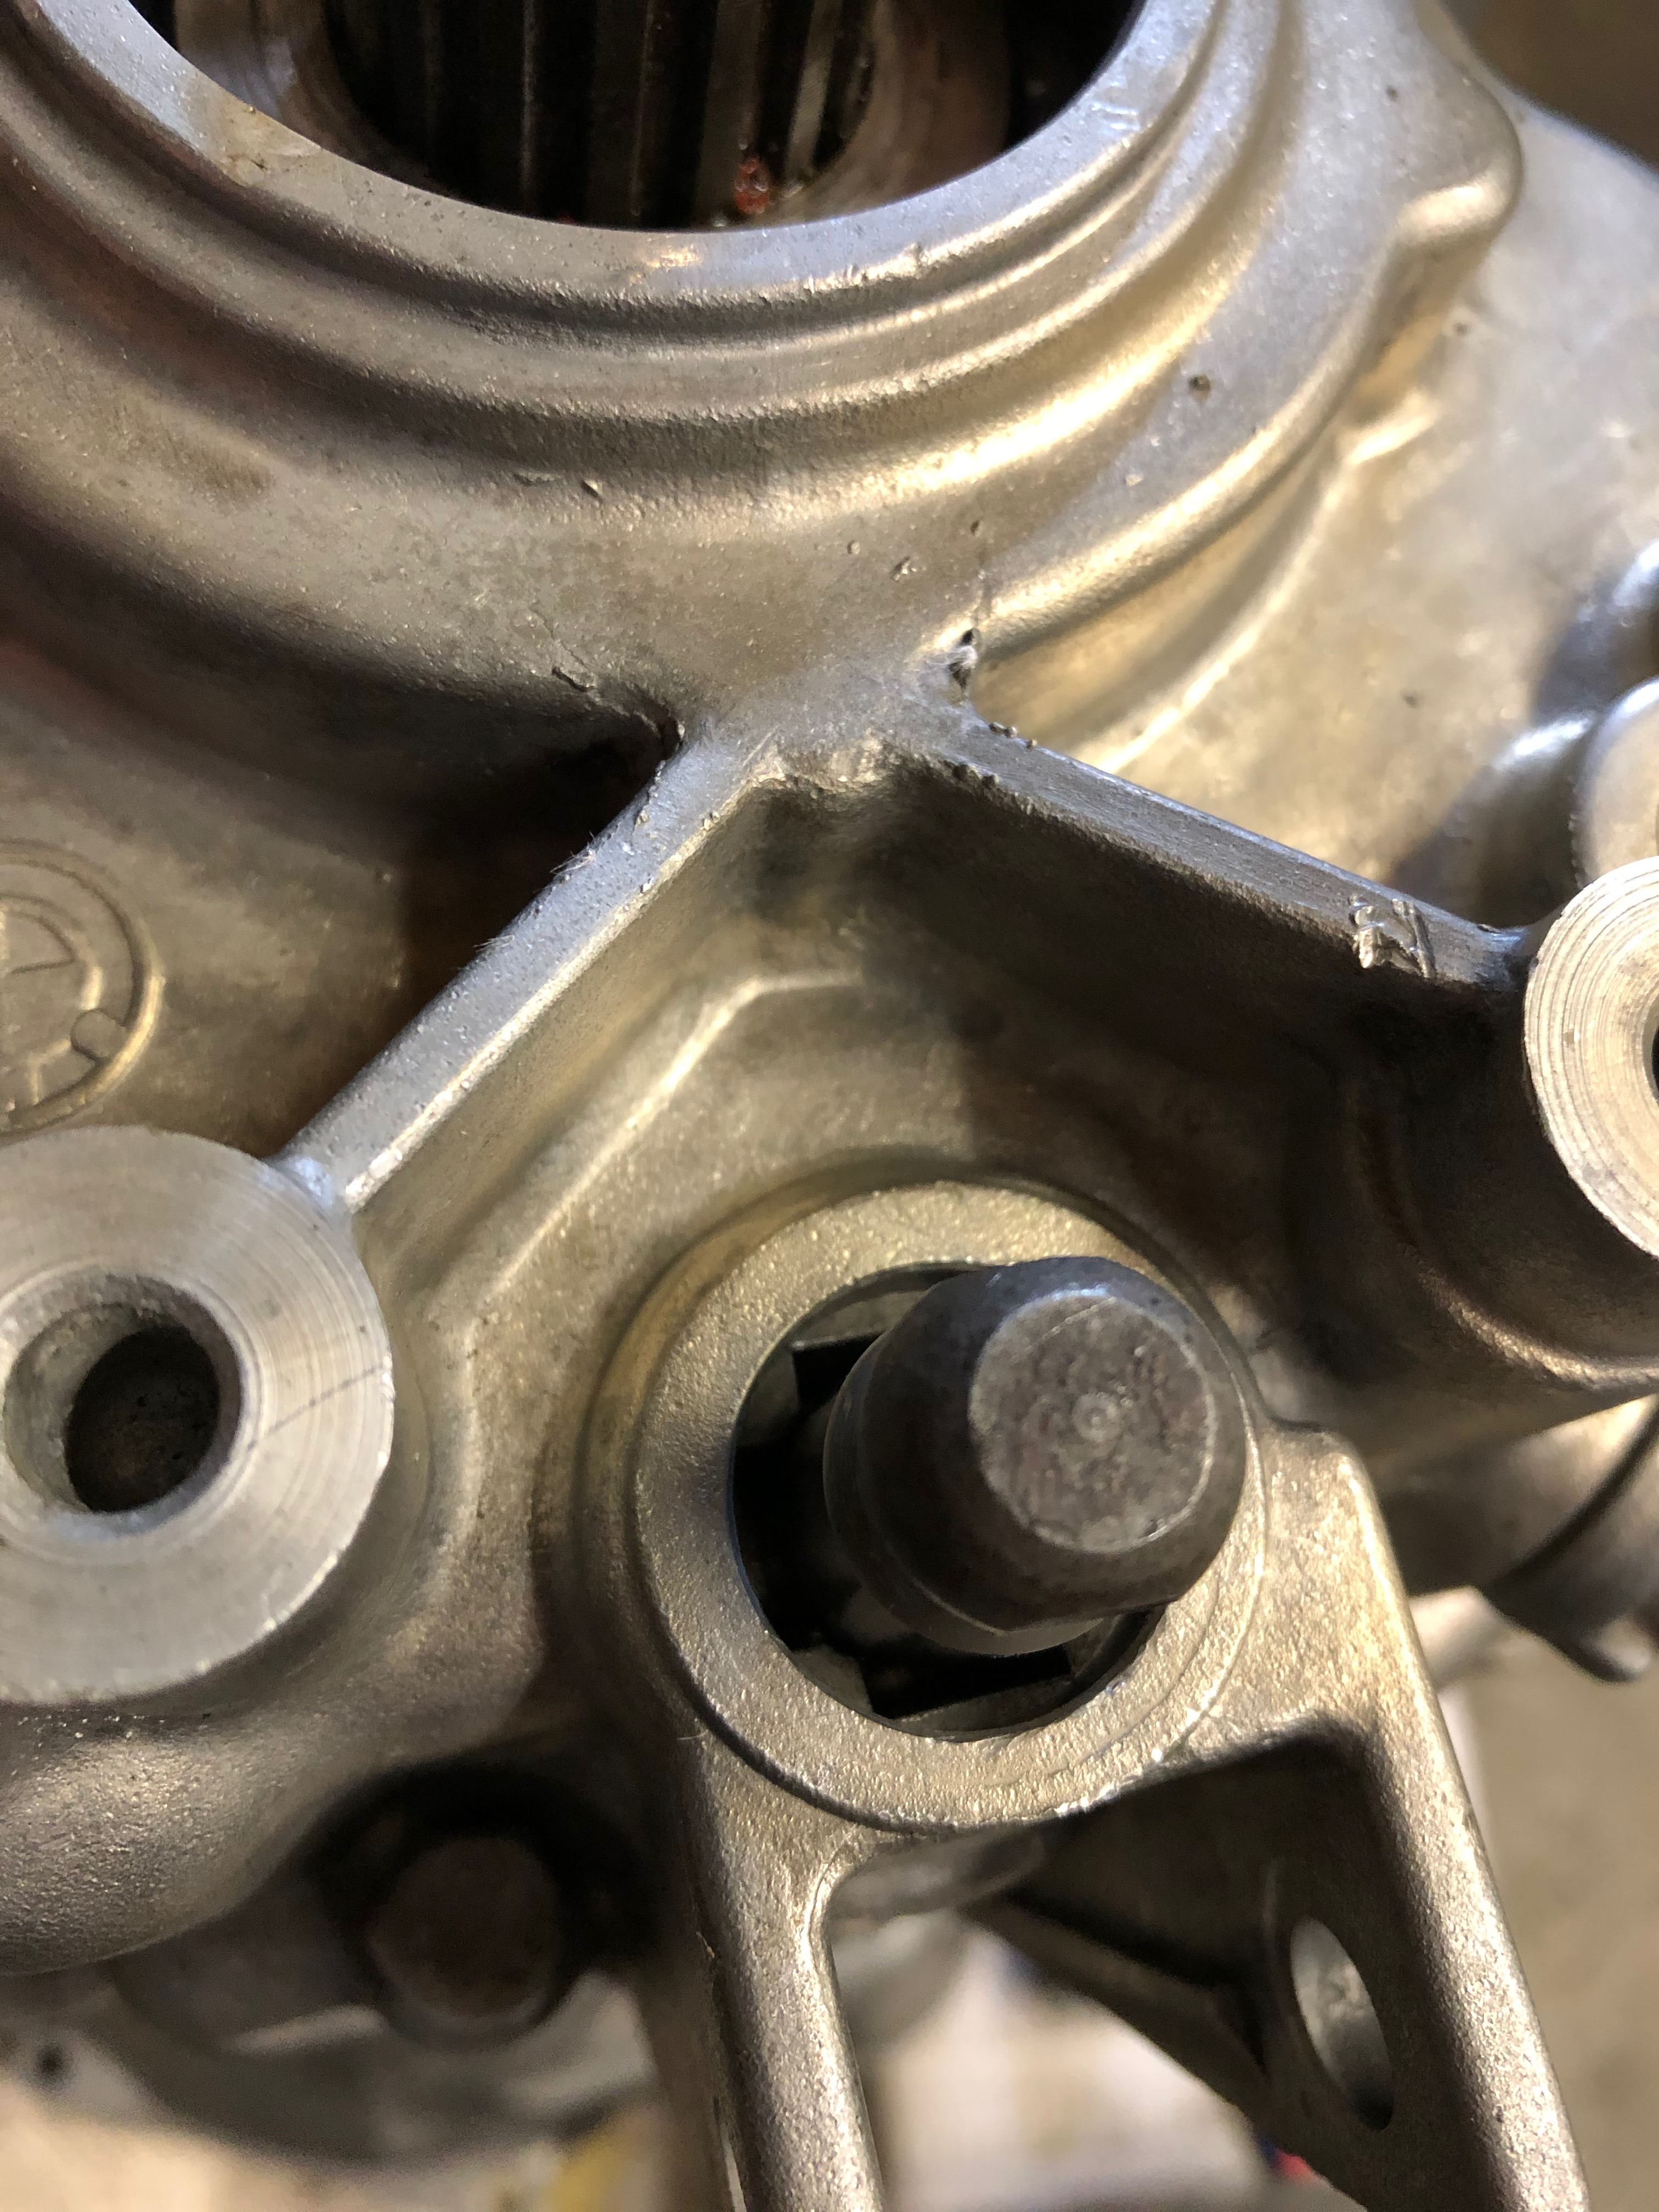
Image

We also painted the engine compartment. Here's the sanding & scuffing in progress and then the painted result:
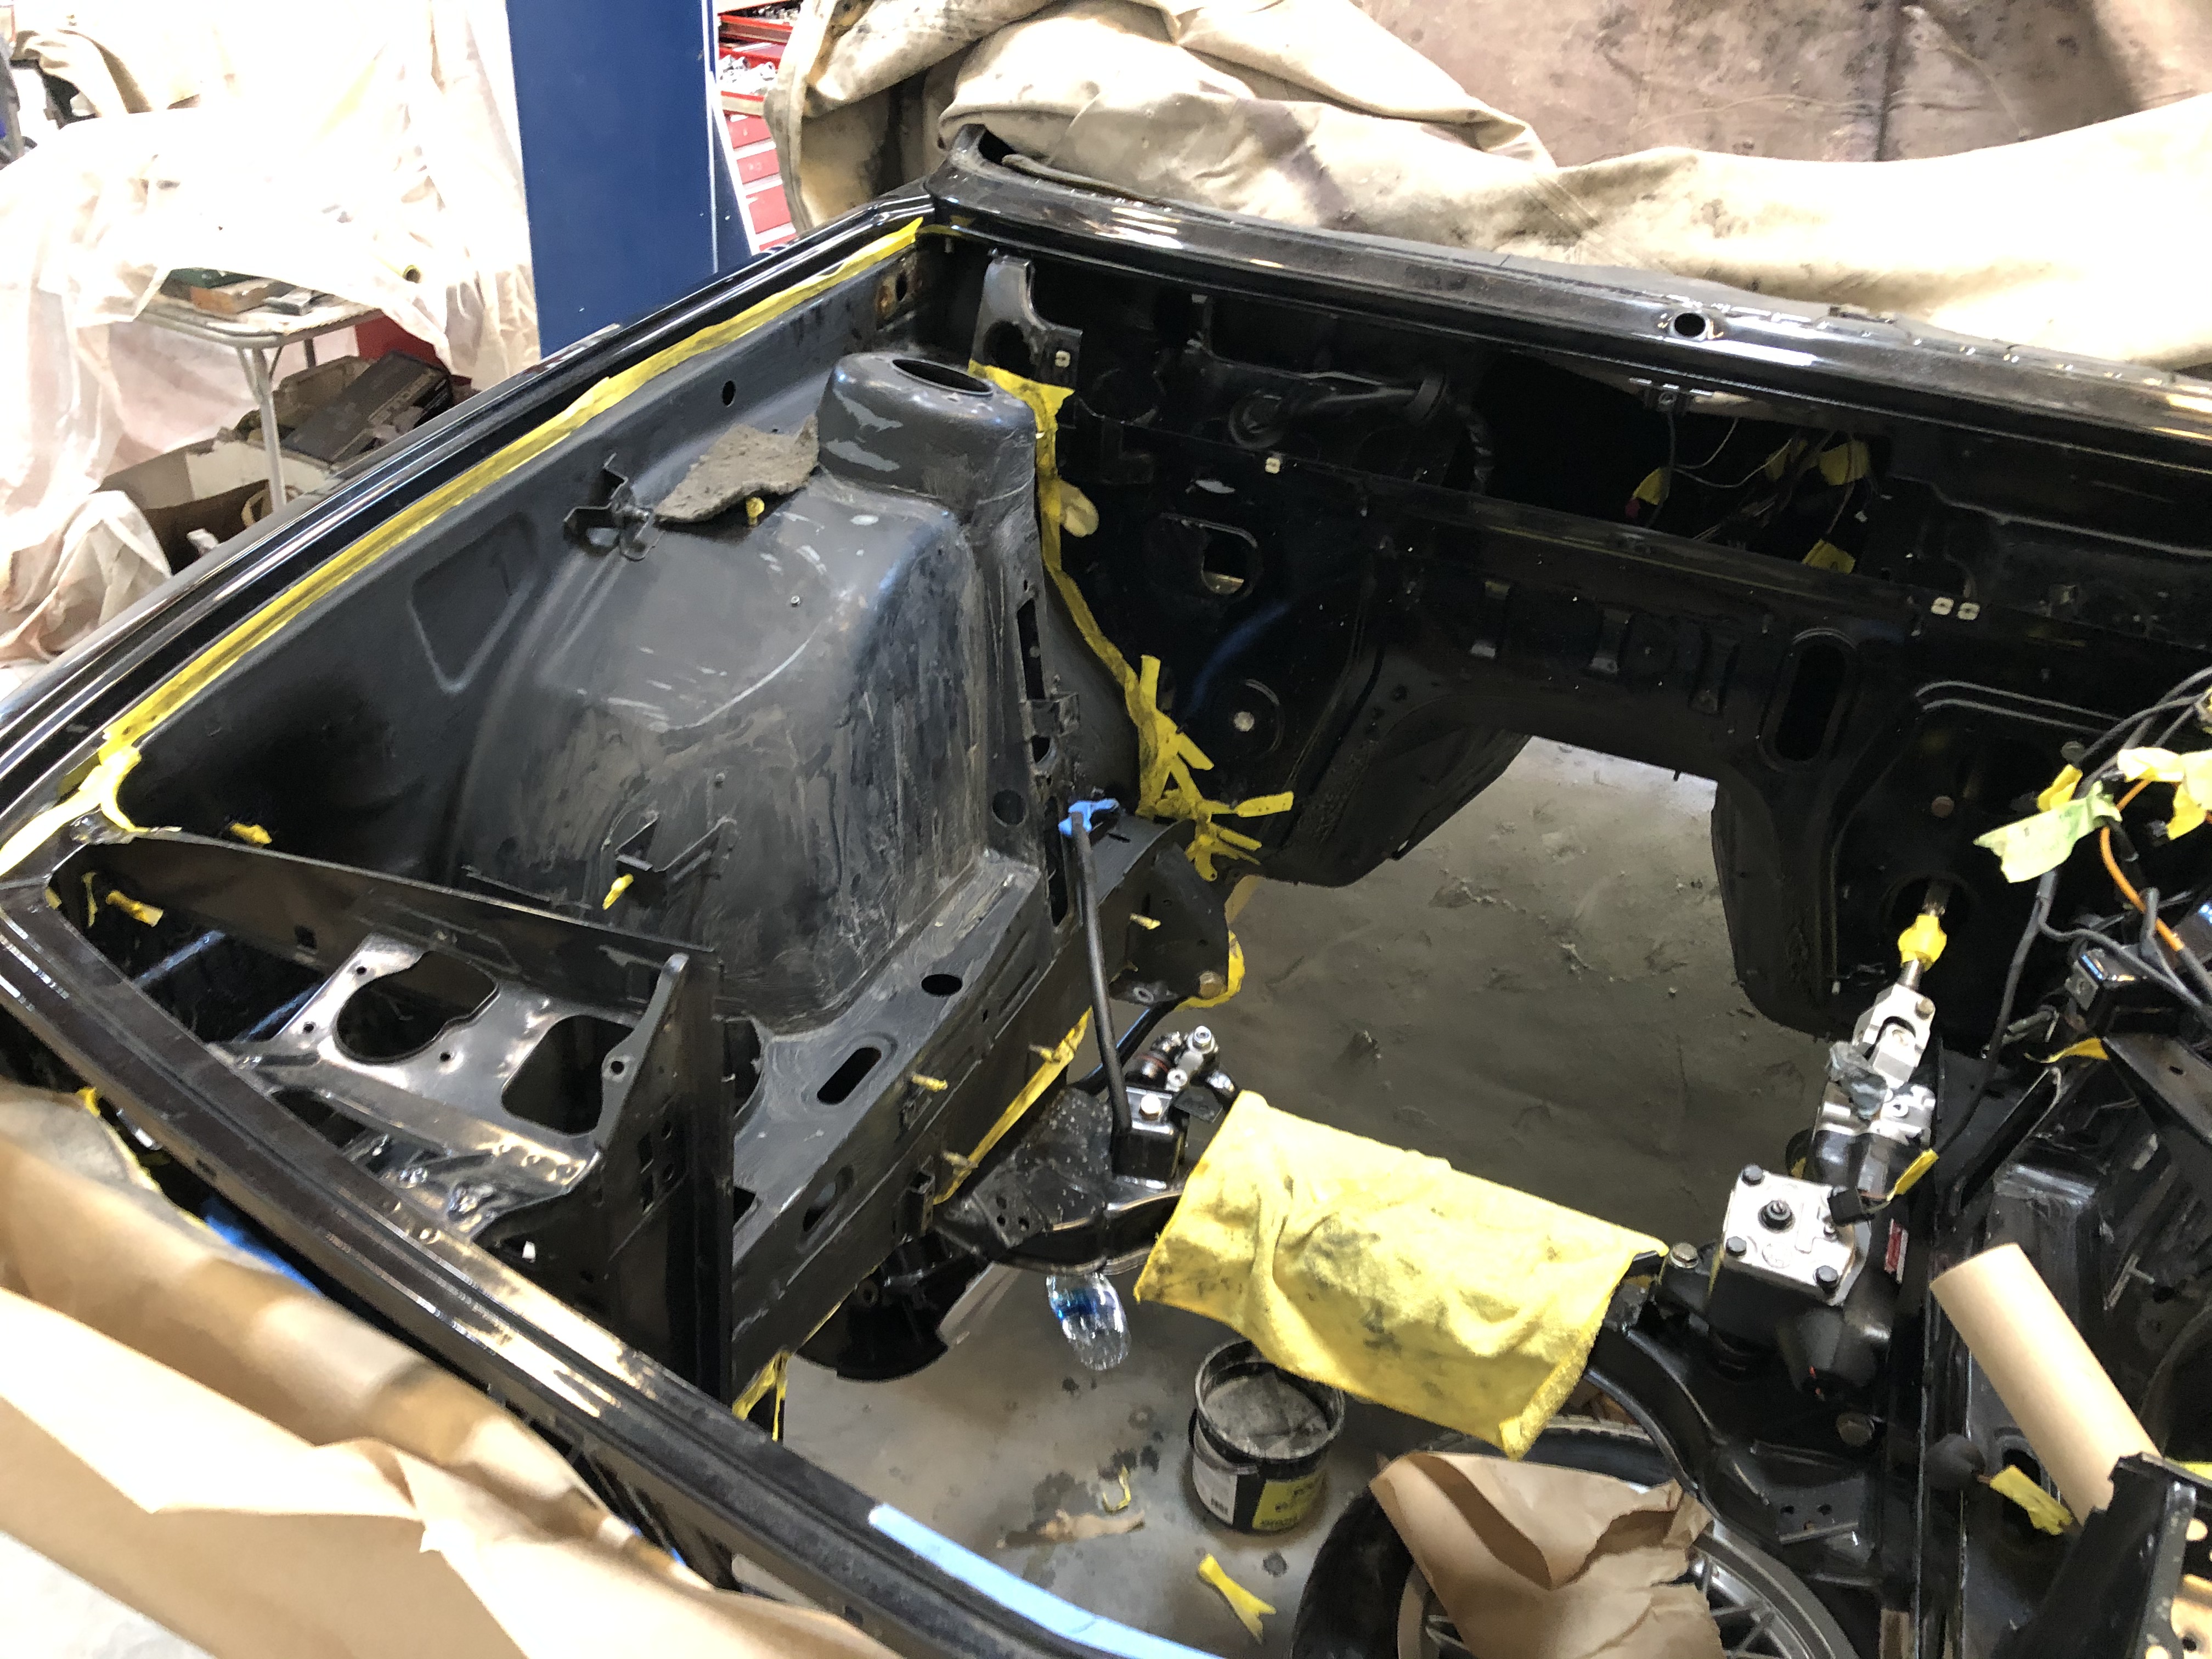
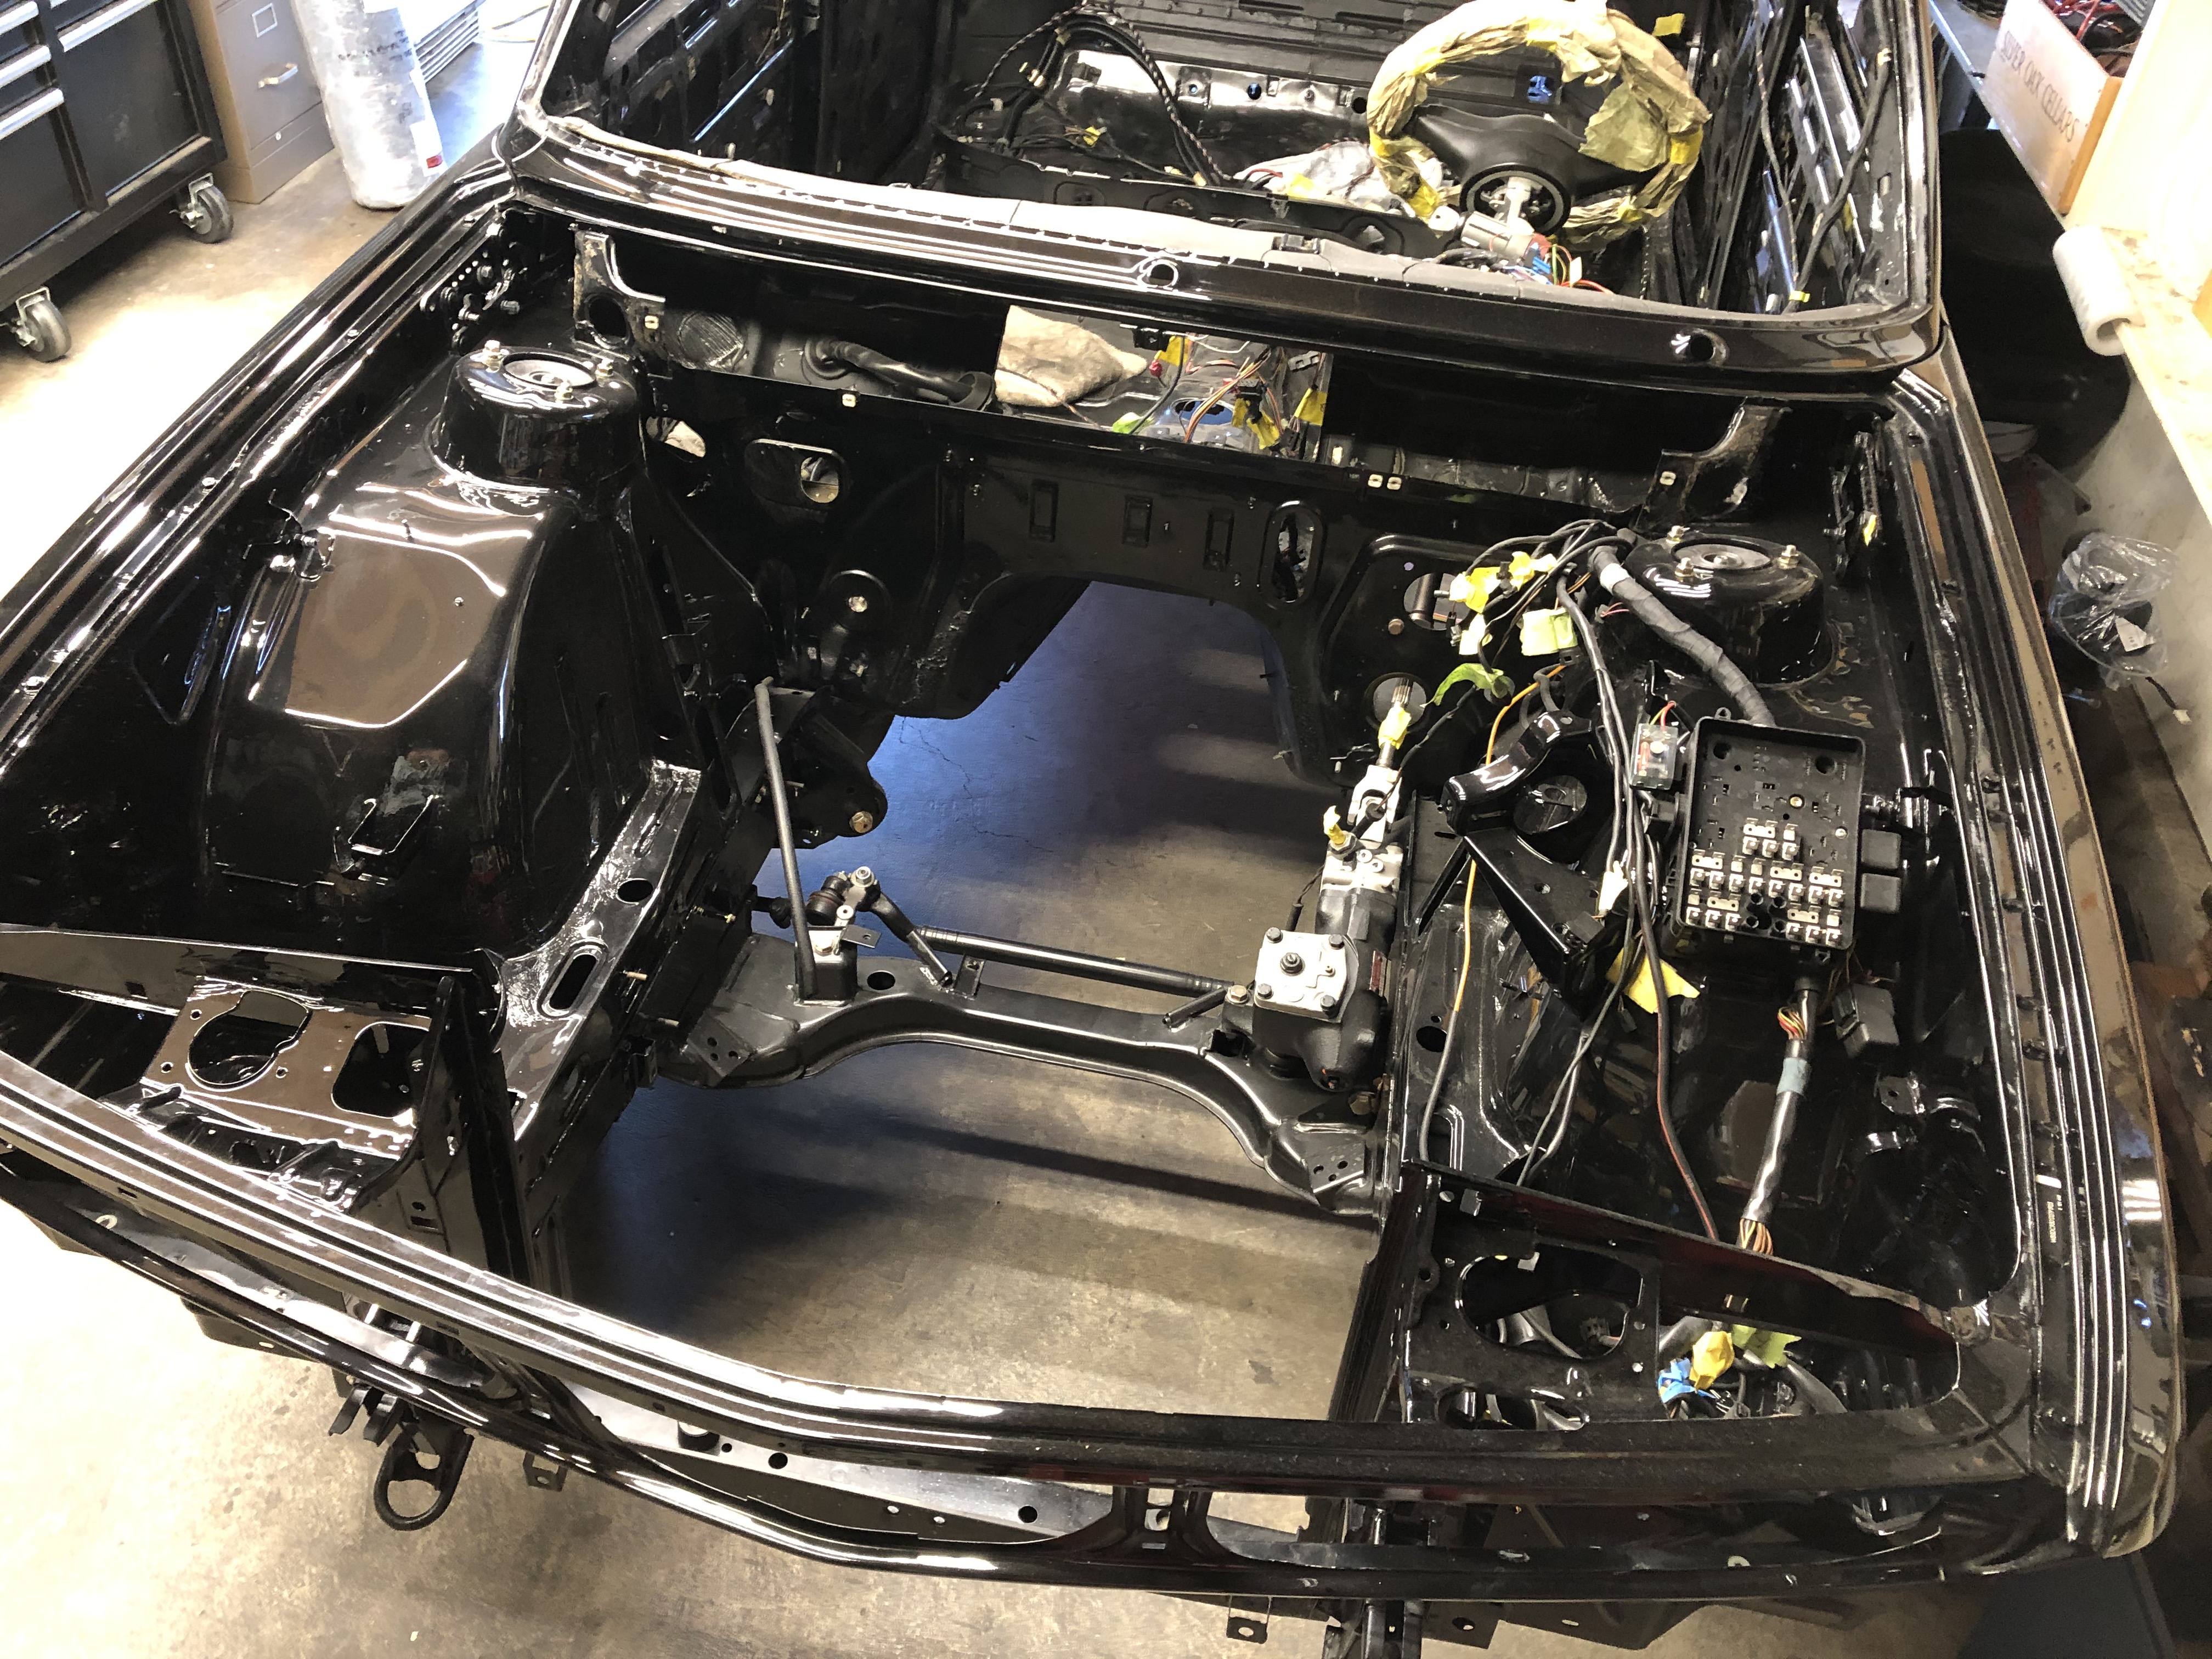
Image

Image

I also solved a small minor mystery. It's tough to see in this pic, but I'd always puzzled why a block of wood had been inserted into one of the trunk hinges. Turns out that the right trunk hinge had been bent back - as if someone had bent the hood back when it was open. (You can see that the tab at the right side of the pic is slightly bent away from the hinge; the brown thing in between the tab & the hinge is a small block of wood.) The block had been inserted in there to make up for the "hyper extension" of the hinge and keep the hood from opening more than it was supposed to. Needless to say, I have two new hinges in hand. They'll get painted (along with the rest of the trunk) in the coming days (weeks is more likely).
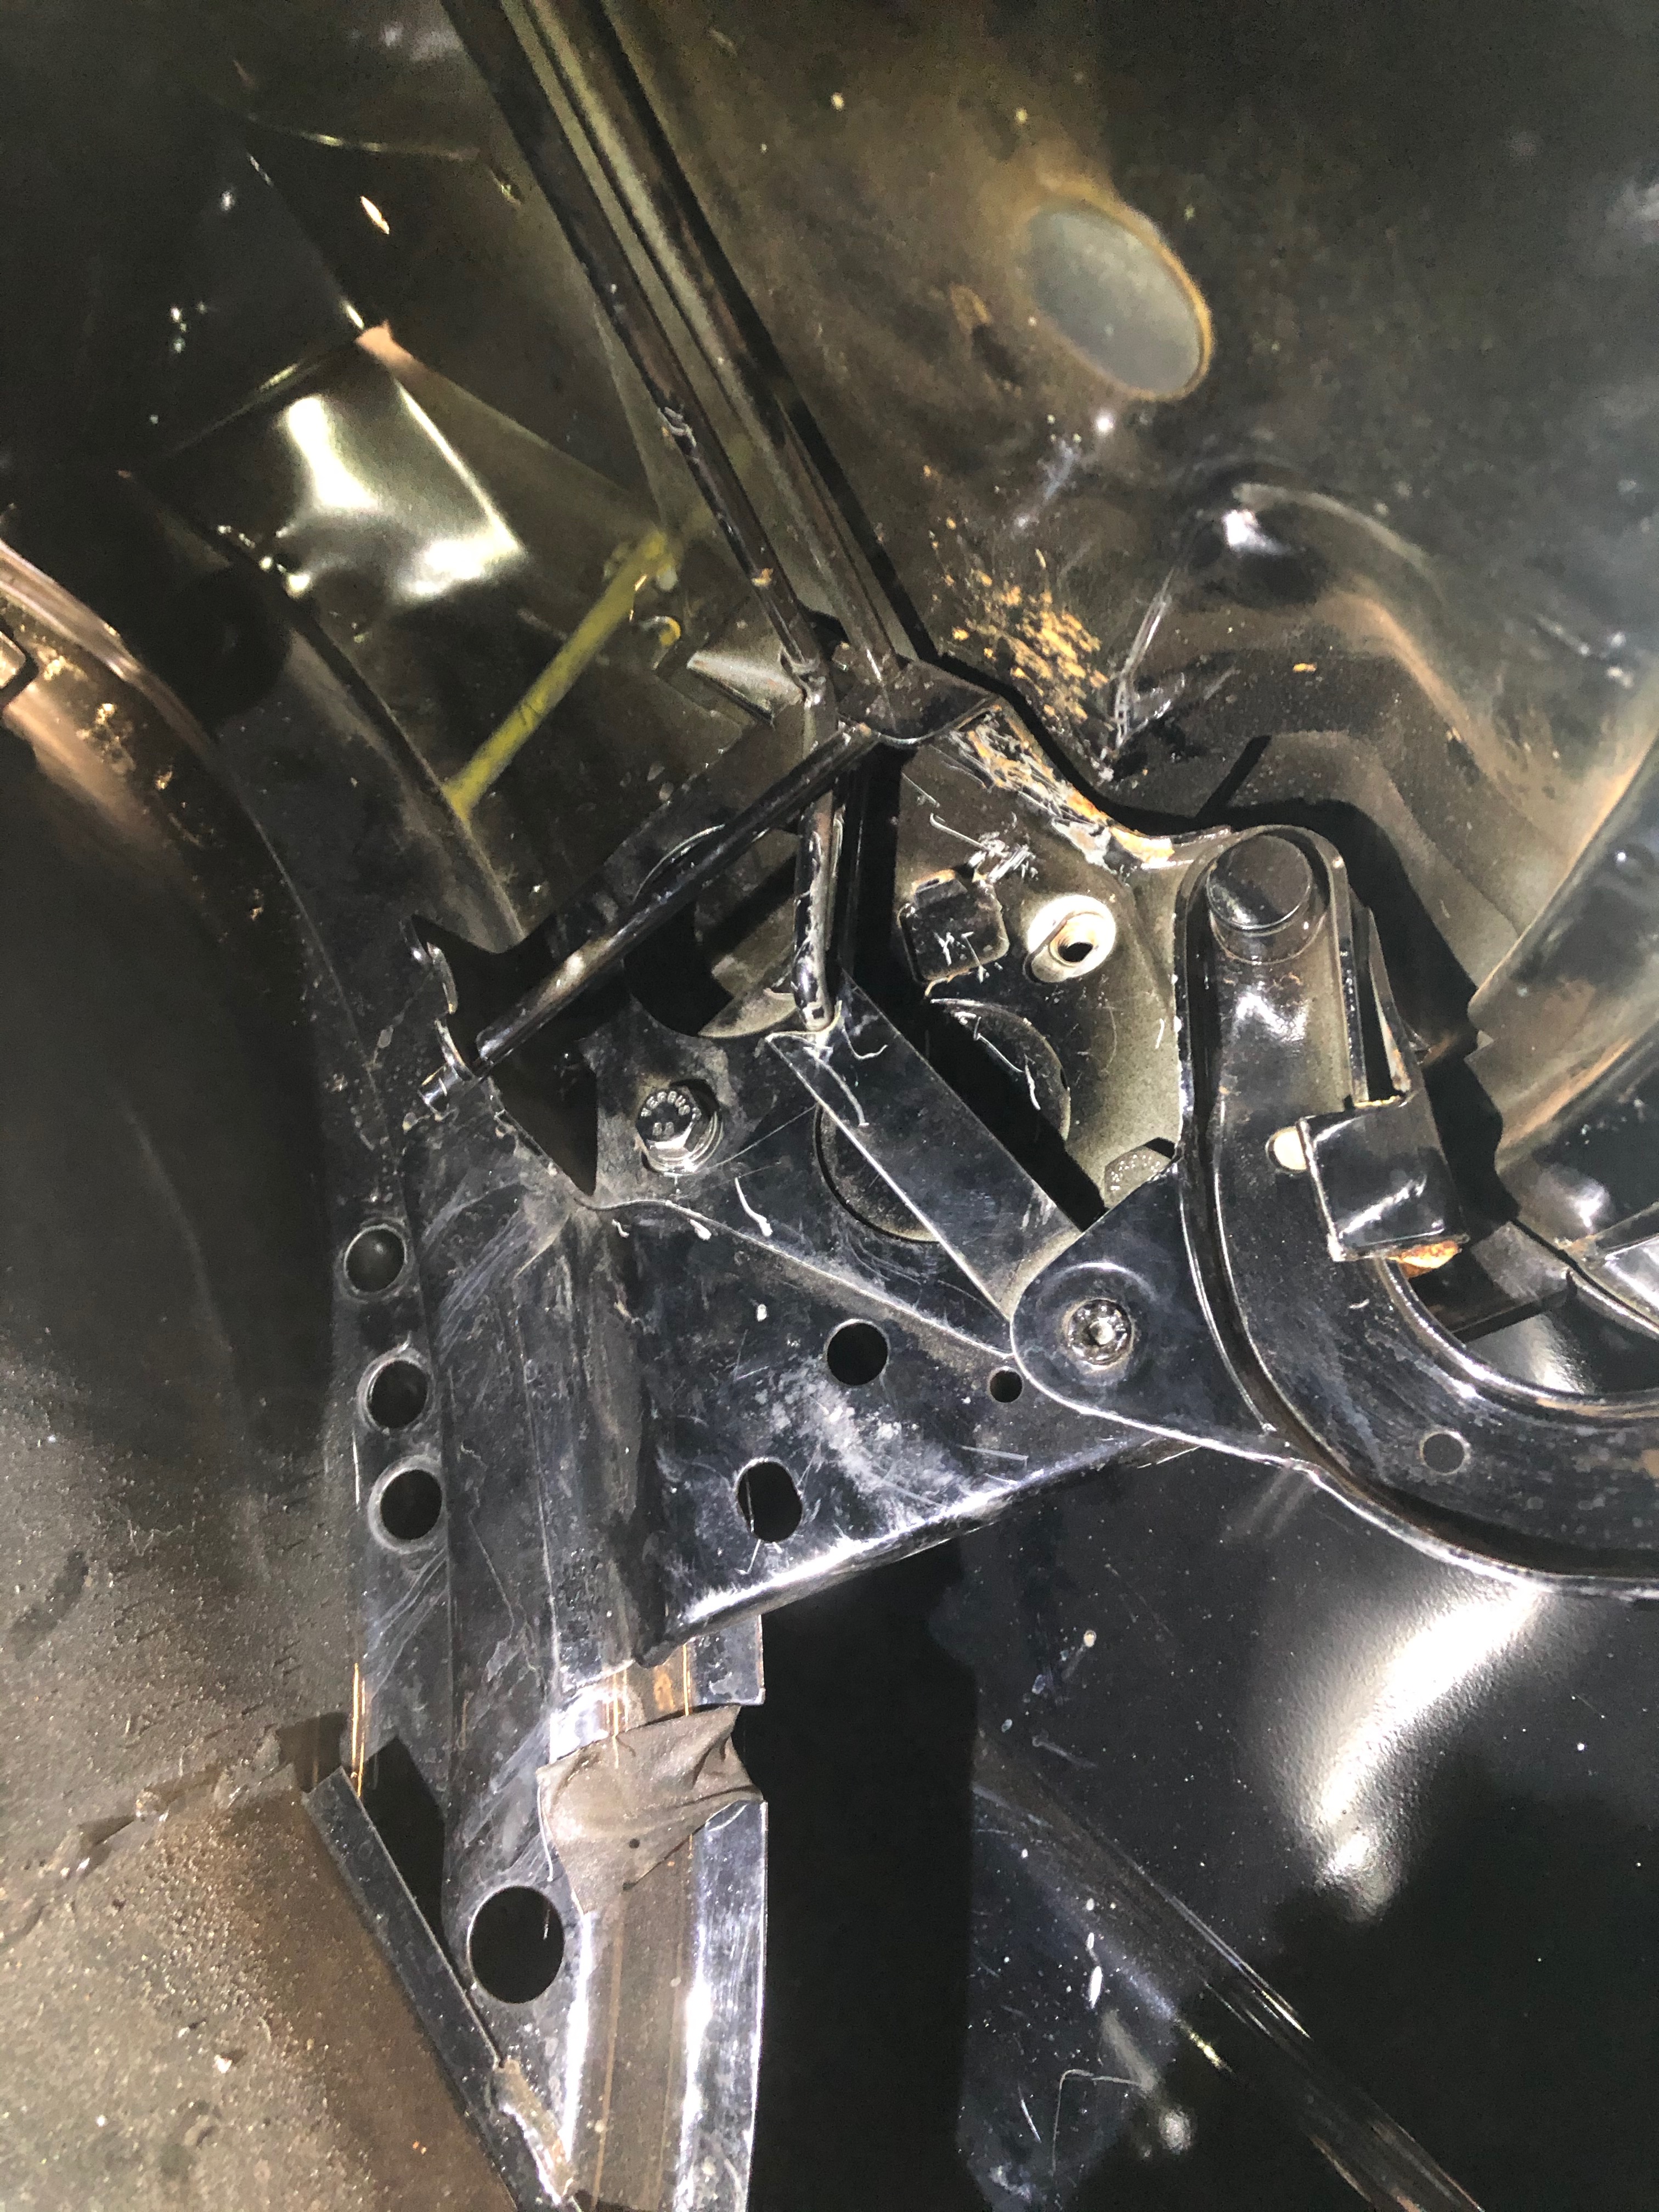
Image

Aaaand here's the car all dolly'ed up getting ready to get towed home.
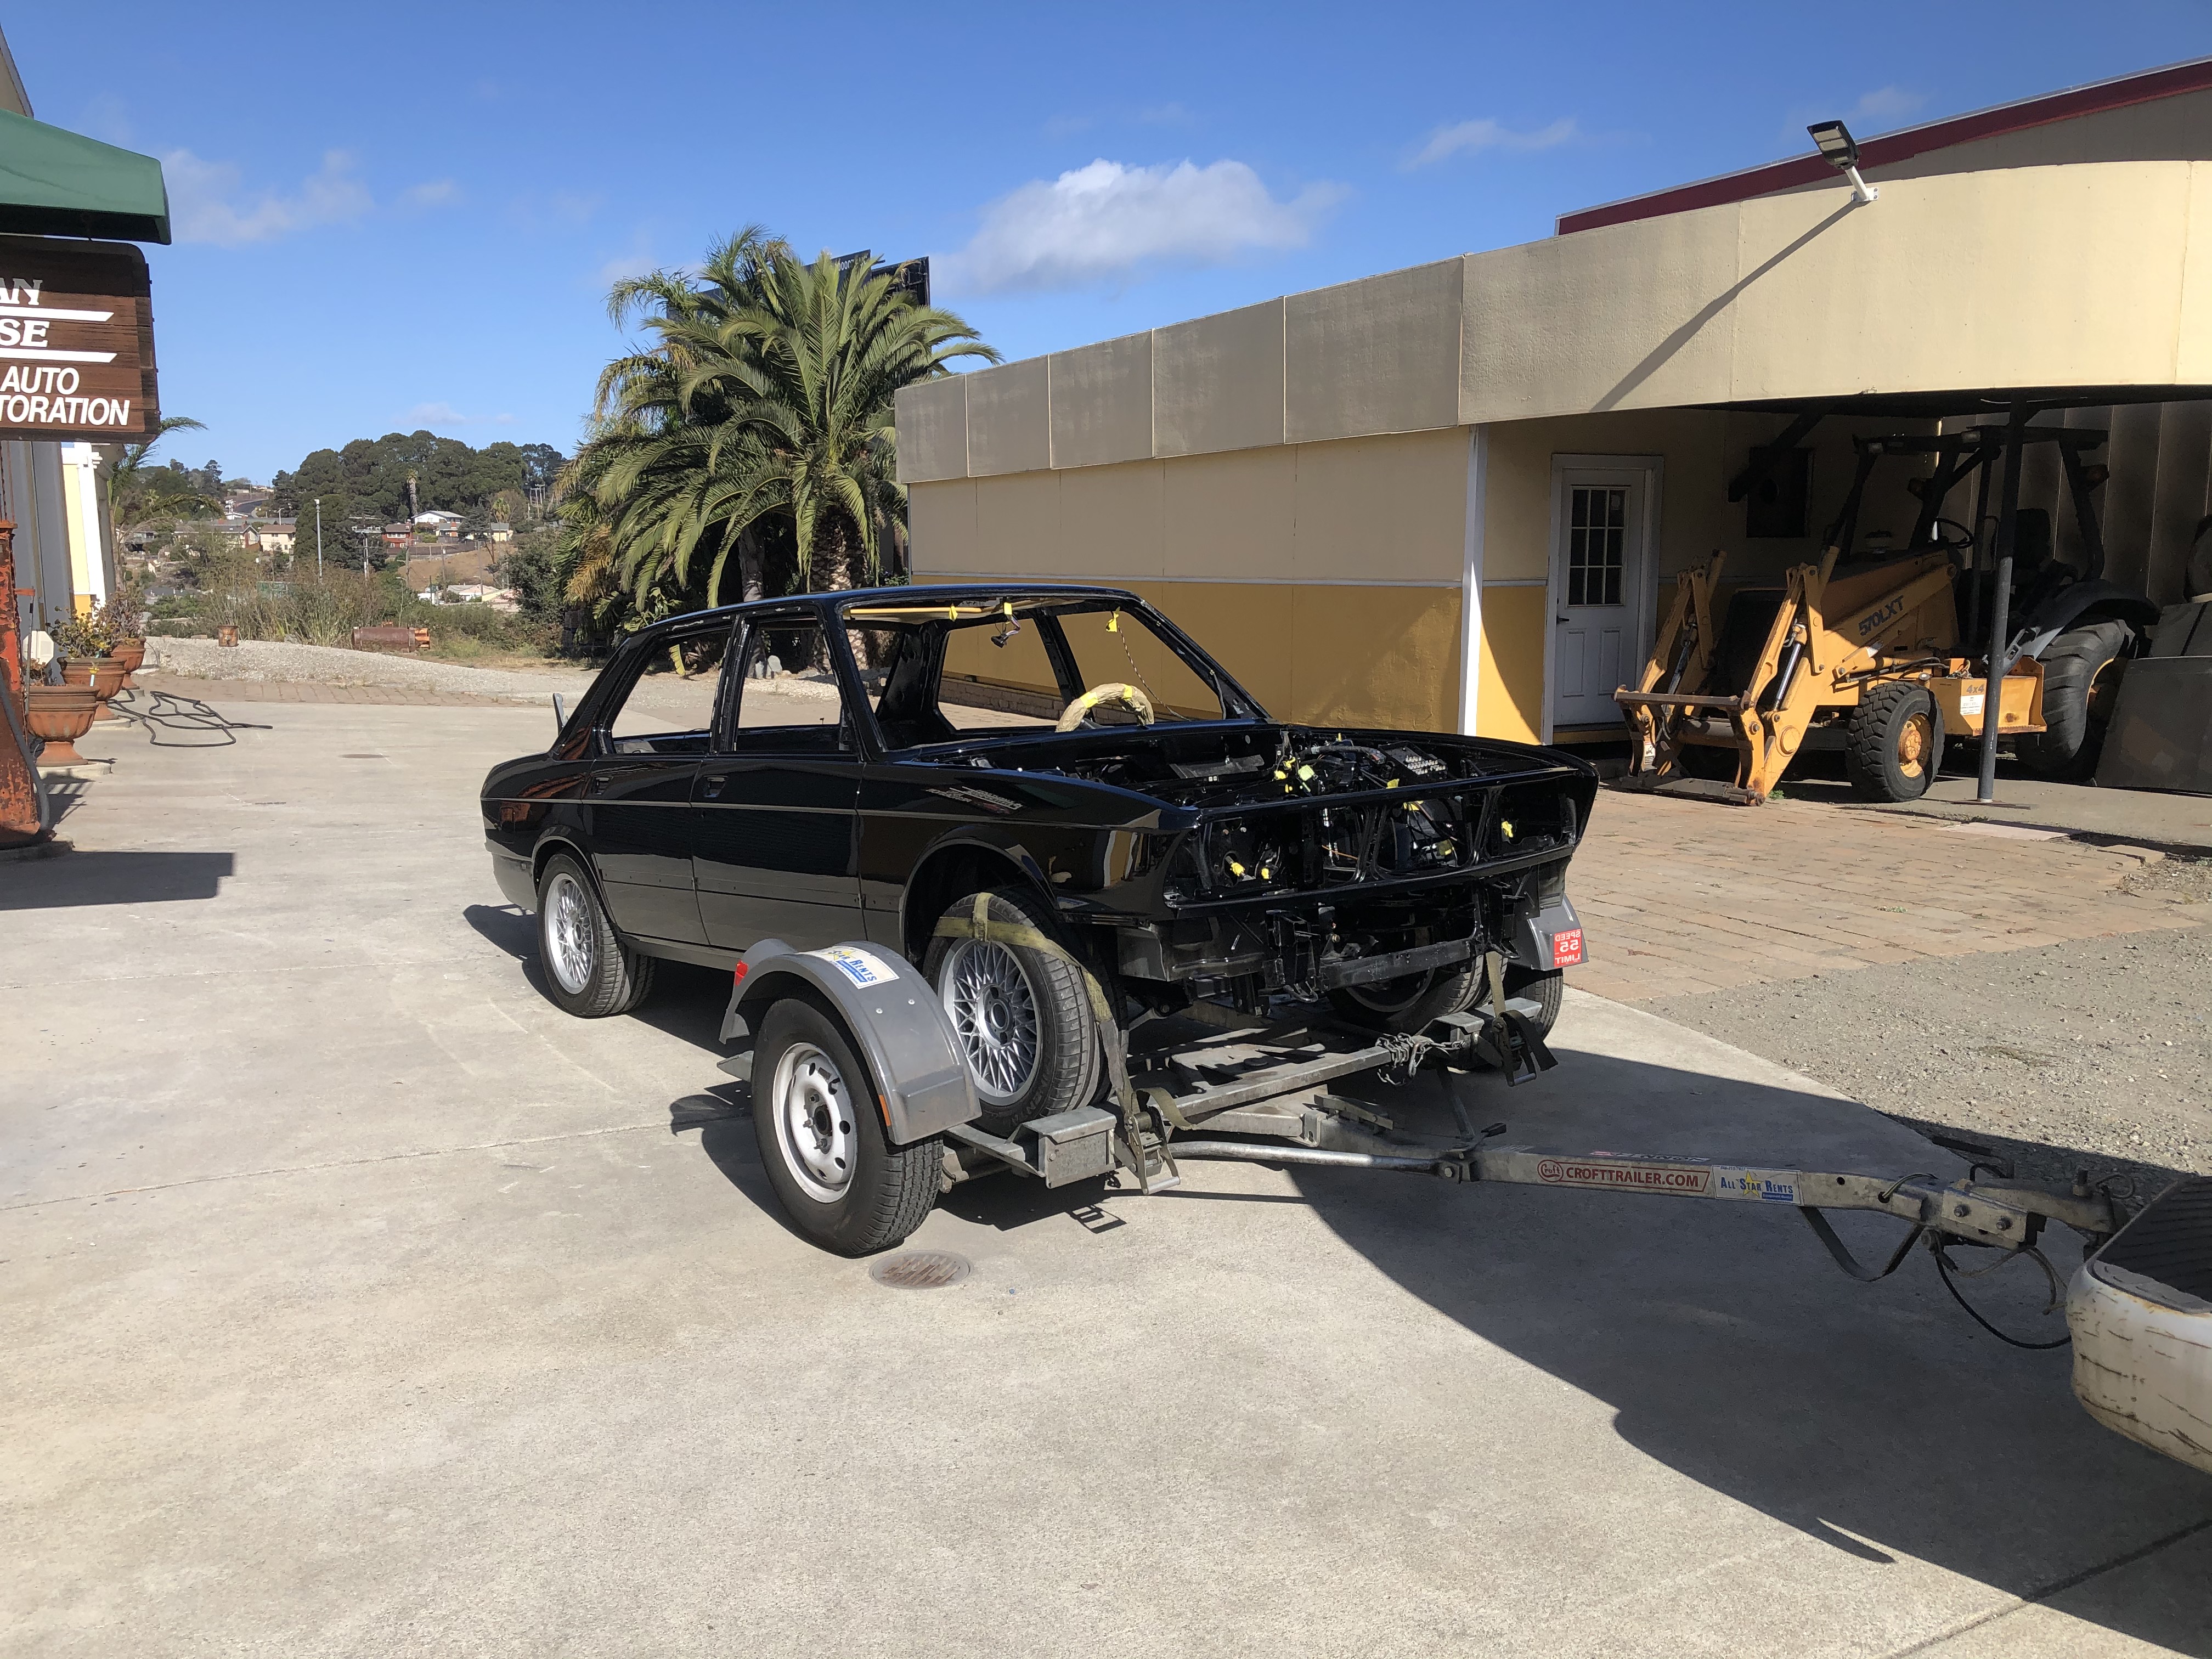
Image

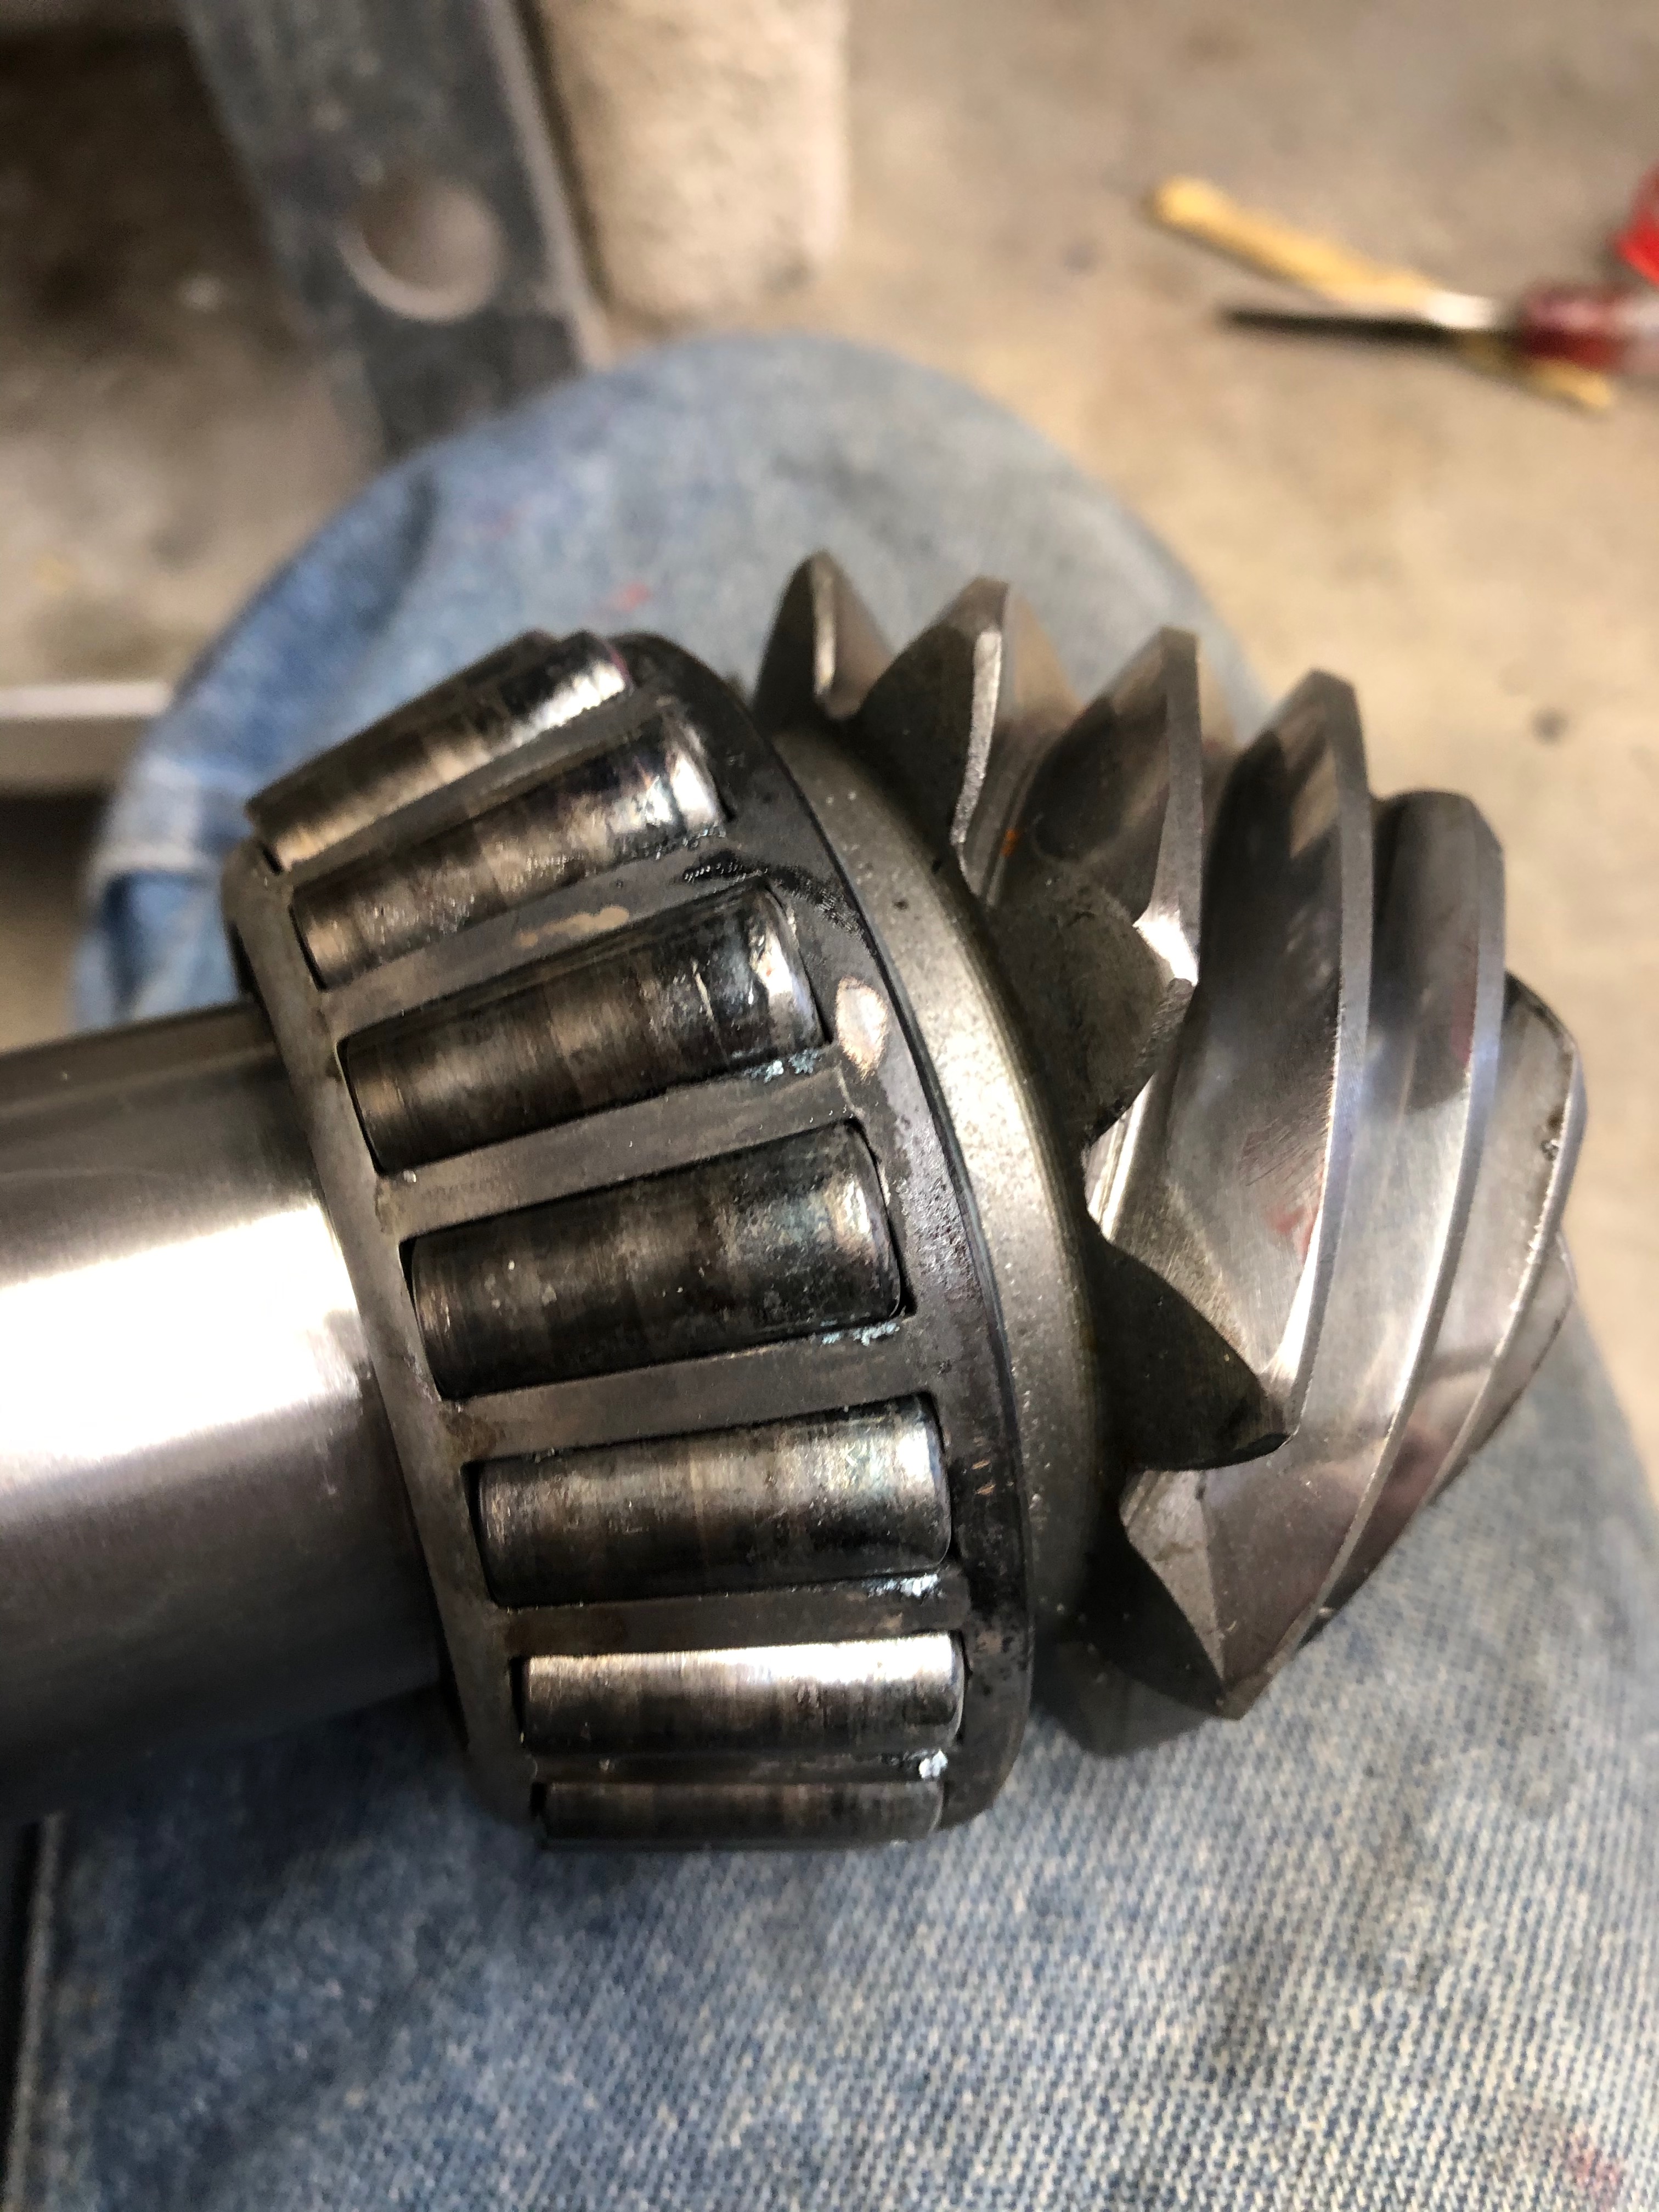
This was shortly before a minor disaster struck. About a mile into the trip the rear wheels locked up. I was immediately reminded that I'd never filled the diff with new fluid - DAMN! That seemed like a good idea at the time - I figured I'd be more likely to get all the fluids into the car if I did them all in one step instead of trying to remember what I'd put in and what I hadn't. As a result of having no fluid in the diff, the rear pinion gear overheated, expanded and seized up, causing the rear wheels to lock up. Here's a pic of the burnt pinion bearing.
Image

As it turned out, this ended up being a HUGE blessing in disguise. I don't have pics (or videos), but after I got the new bearings pressed in and started to torque down the new crush collar, it became clear that my original pinion bearings had likely been bad all along (or were about to go bad). I can't remember if I posted this earlier, but I replaced the original crush collar at the same time that I replaced the pinion input shaft seal. This was my first time torquing down a crush collar. I followed all the directions I could find. When I was testing the pre-load last time, the static drag torque (torque required to get the pinion spinning) was ~40+ in-lbs, and then even though the running torque was in the correct range (I was shooting for 15 to 20 in-lbs), it was a tiny bit notchy - that is, it spun fine to my fingers, but the needle on the beam-style torque wrench was vibrating.

This go-round, the static drag was maybe 19-20 in-lbs and the running drag was 16-17 in-lbs. (I was shooting for 15 but it snuck up on me quicker this time, too.). Also, the needle on the torque wrench was smooth & steady.

In case it's helpful, based on what I found online, running drag of 14-16 in-lbs is ideal (getting that from a Metric Mechanic PDF), so I think I pretty much hit it.

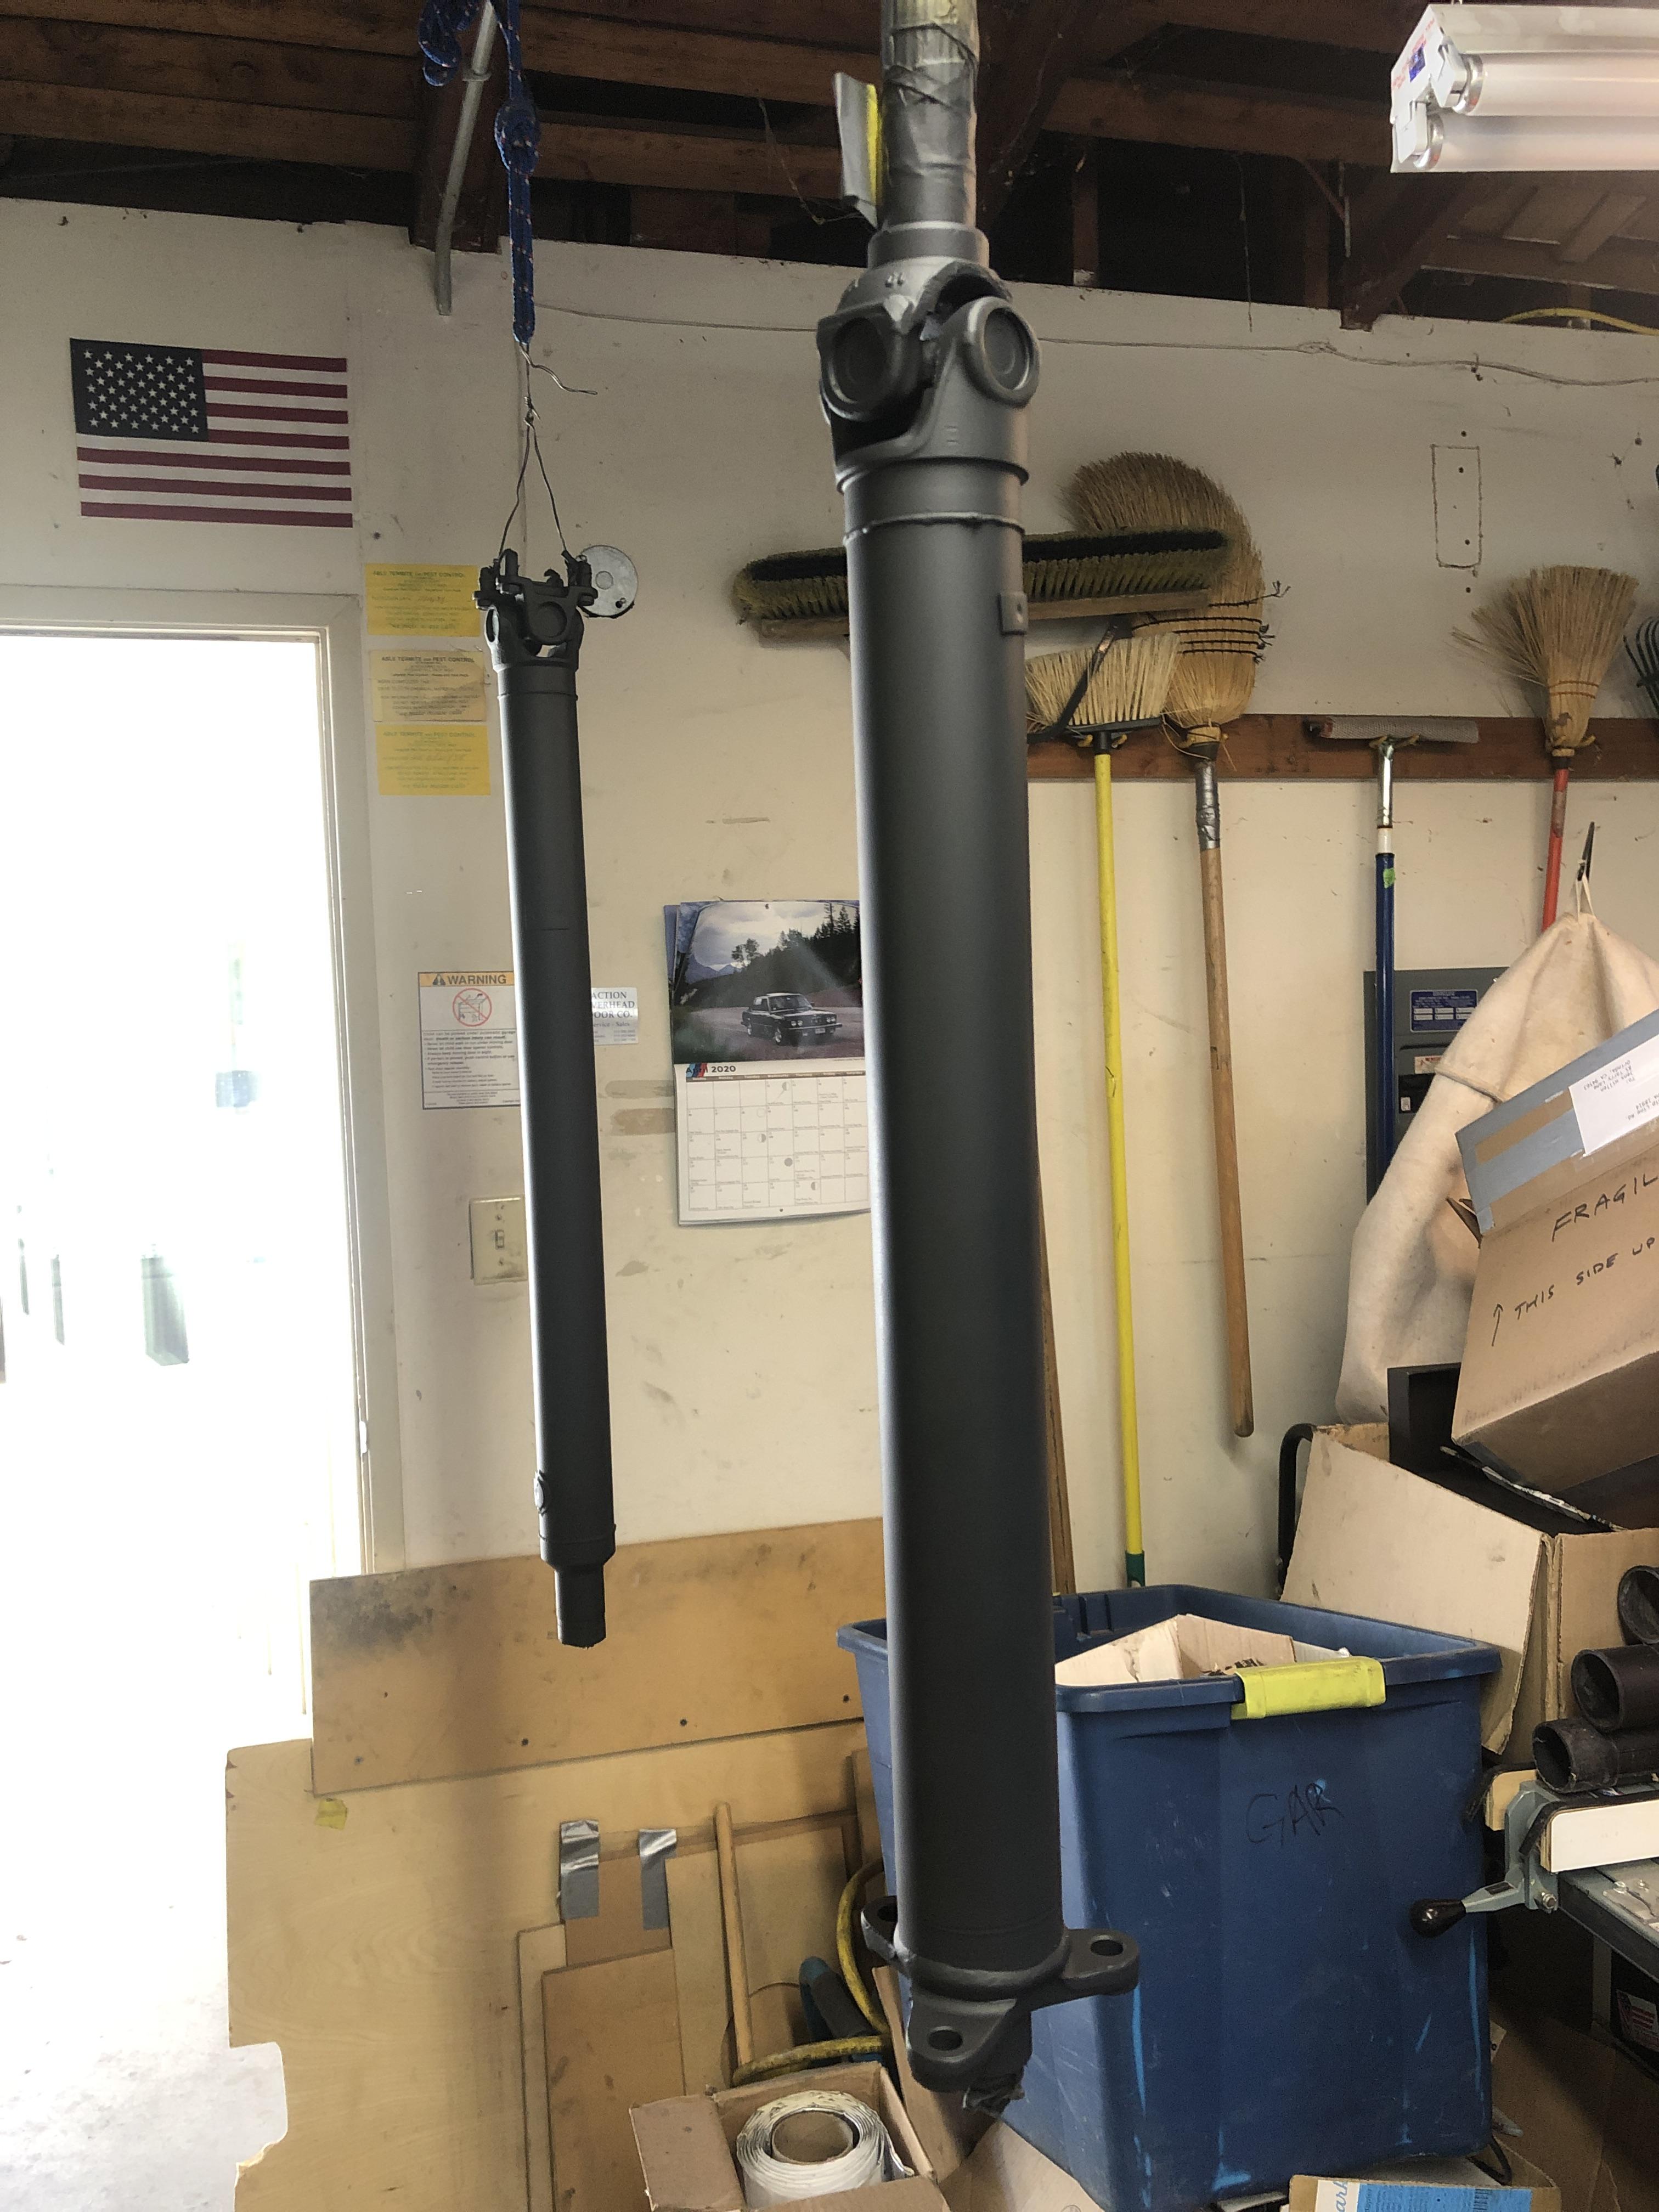
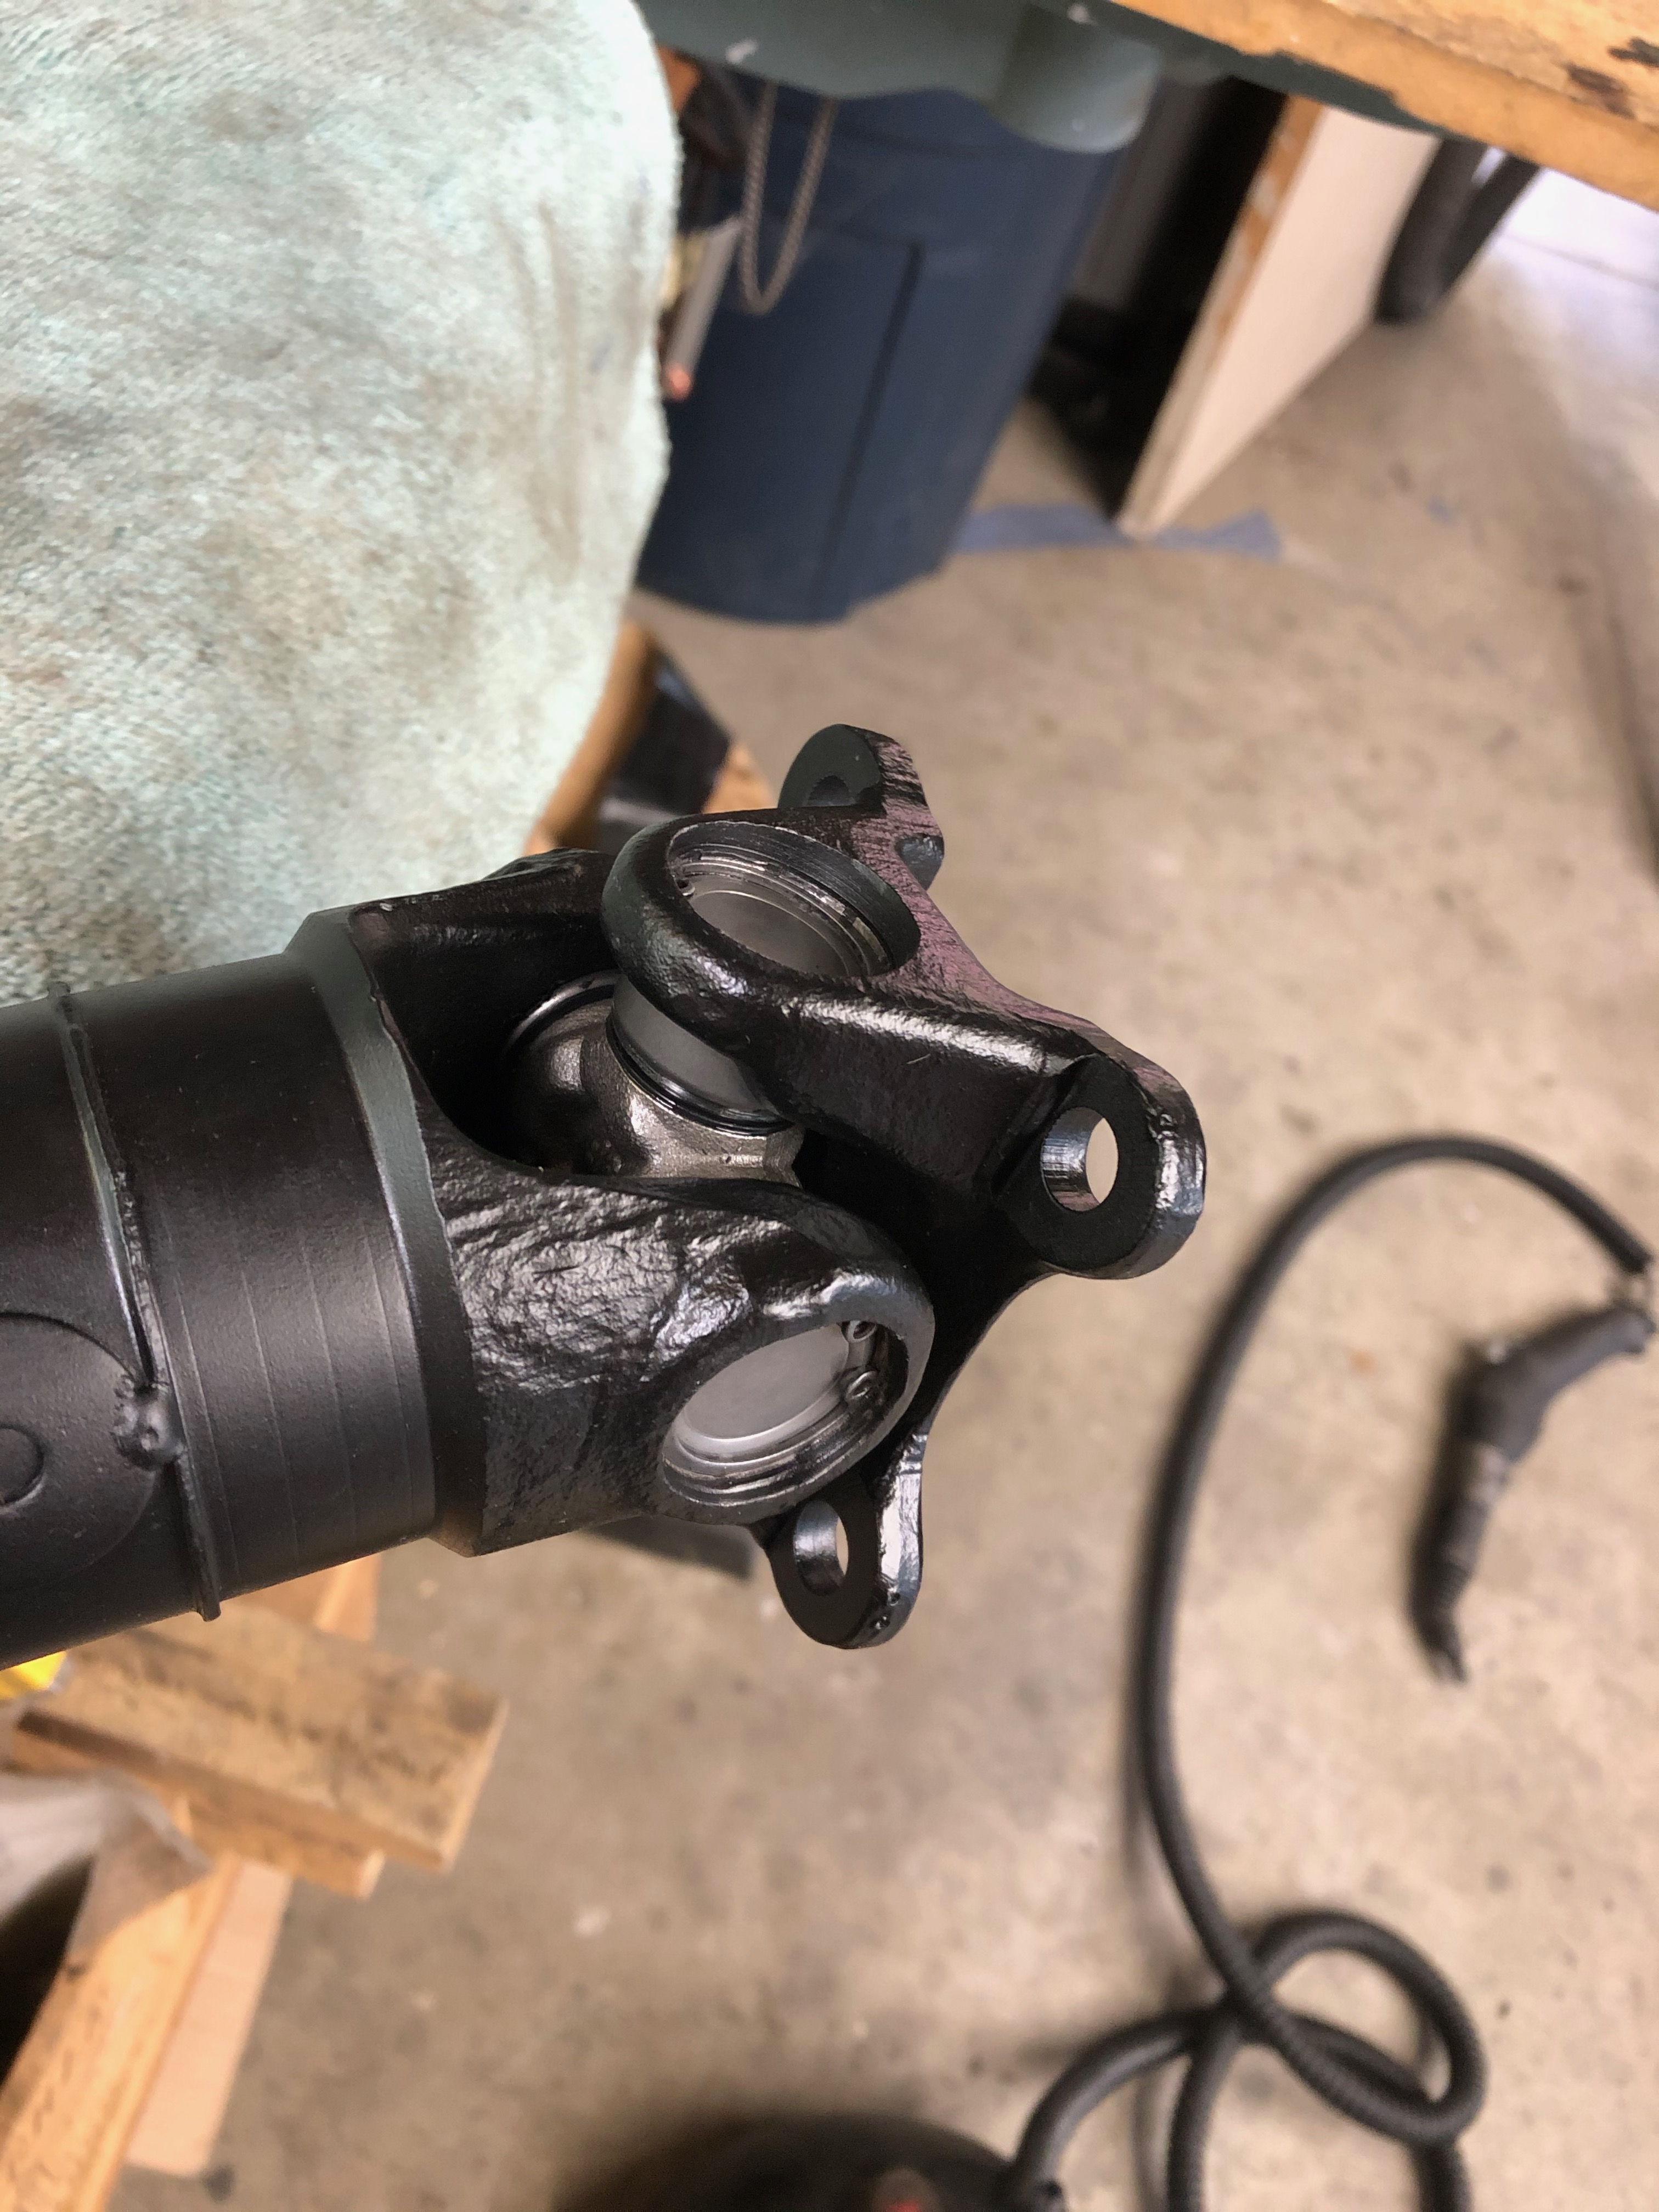
I also cleaned up the drive shafts. The rear U-joint was stiff, so I ended up replacing the center cross-member & the associated bearings. This drive shaft had already been serviced once before, so the U-joints had already been "de-staked" and replacing the cross-member was pretty straightforward.
Image

Image

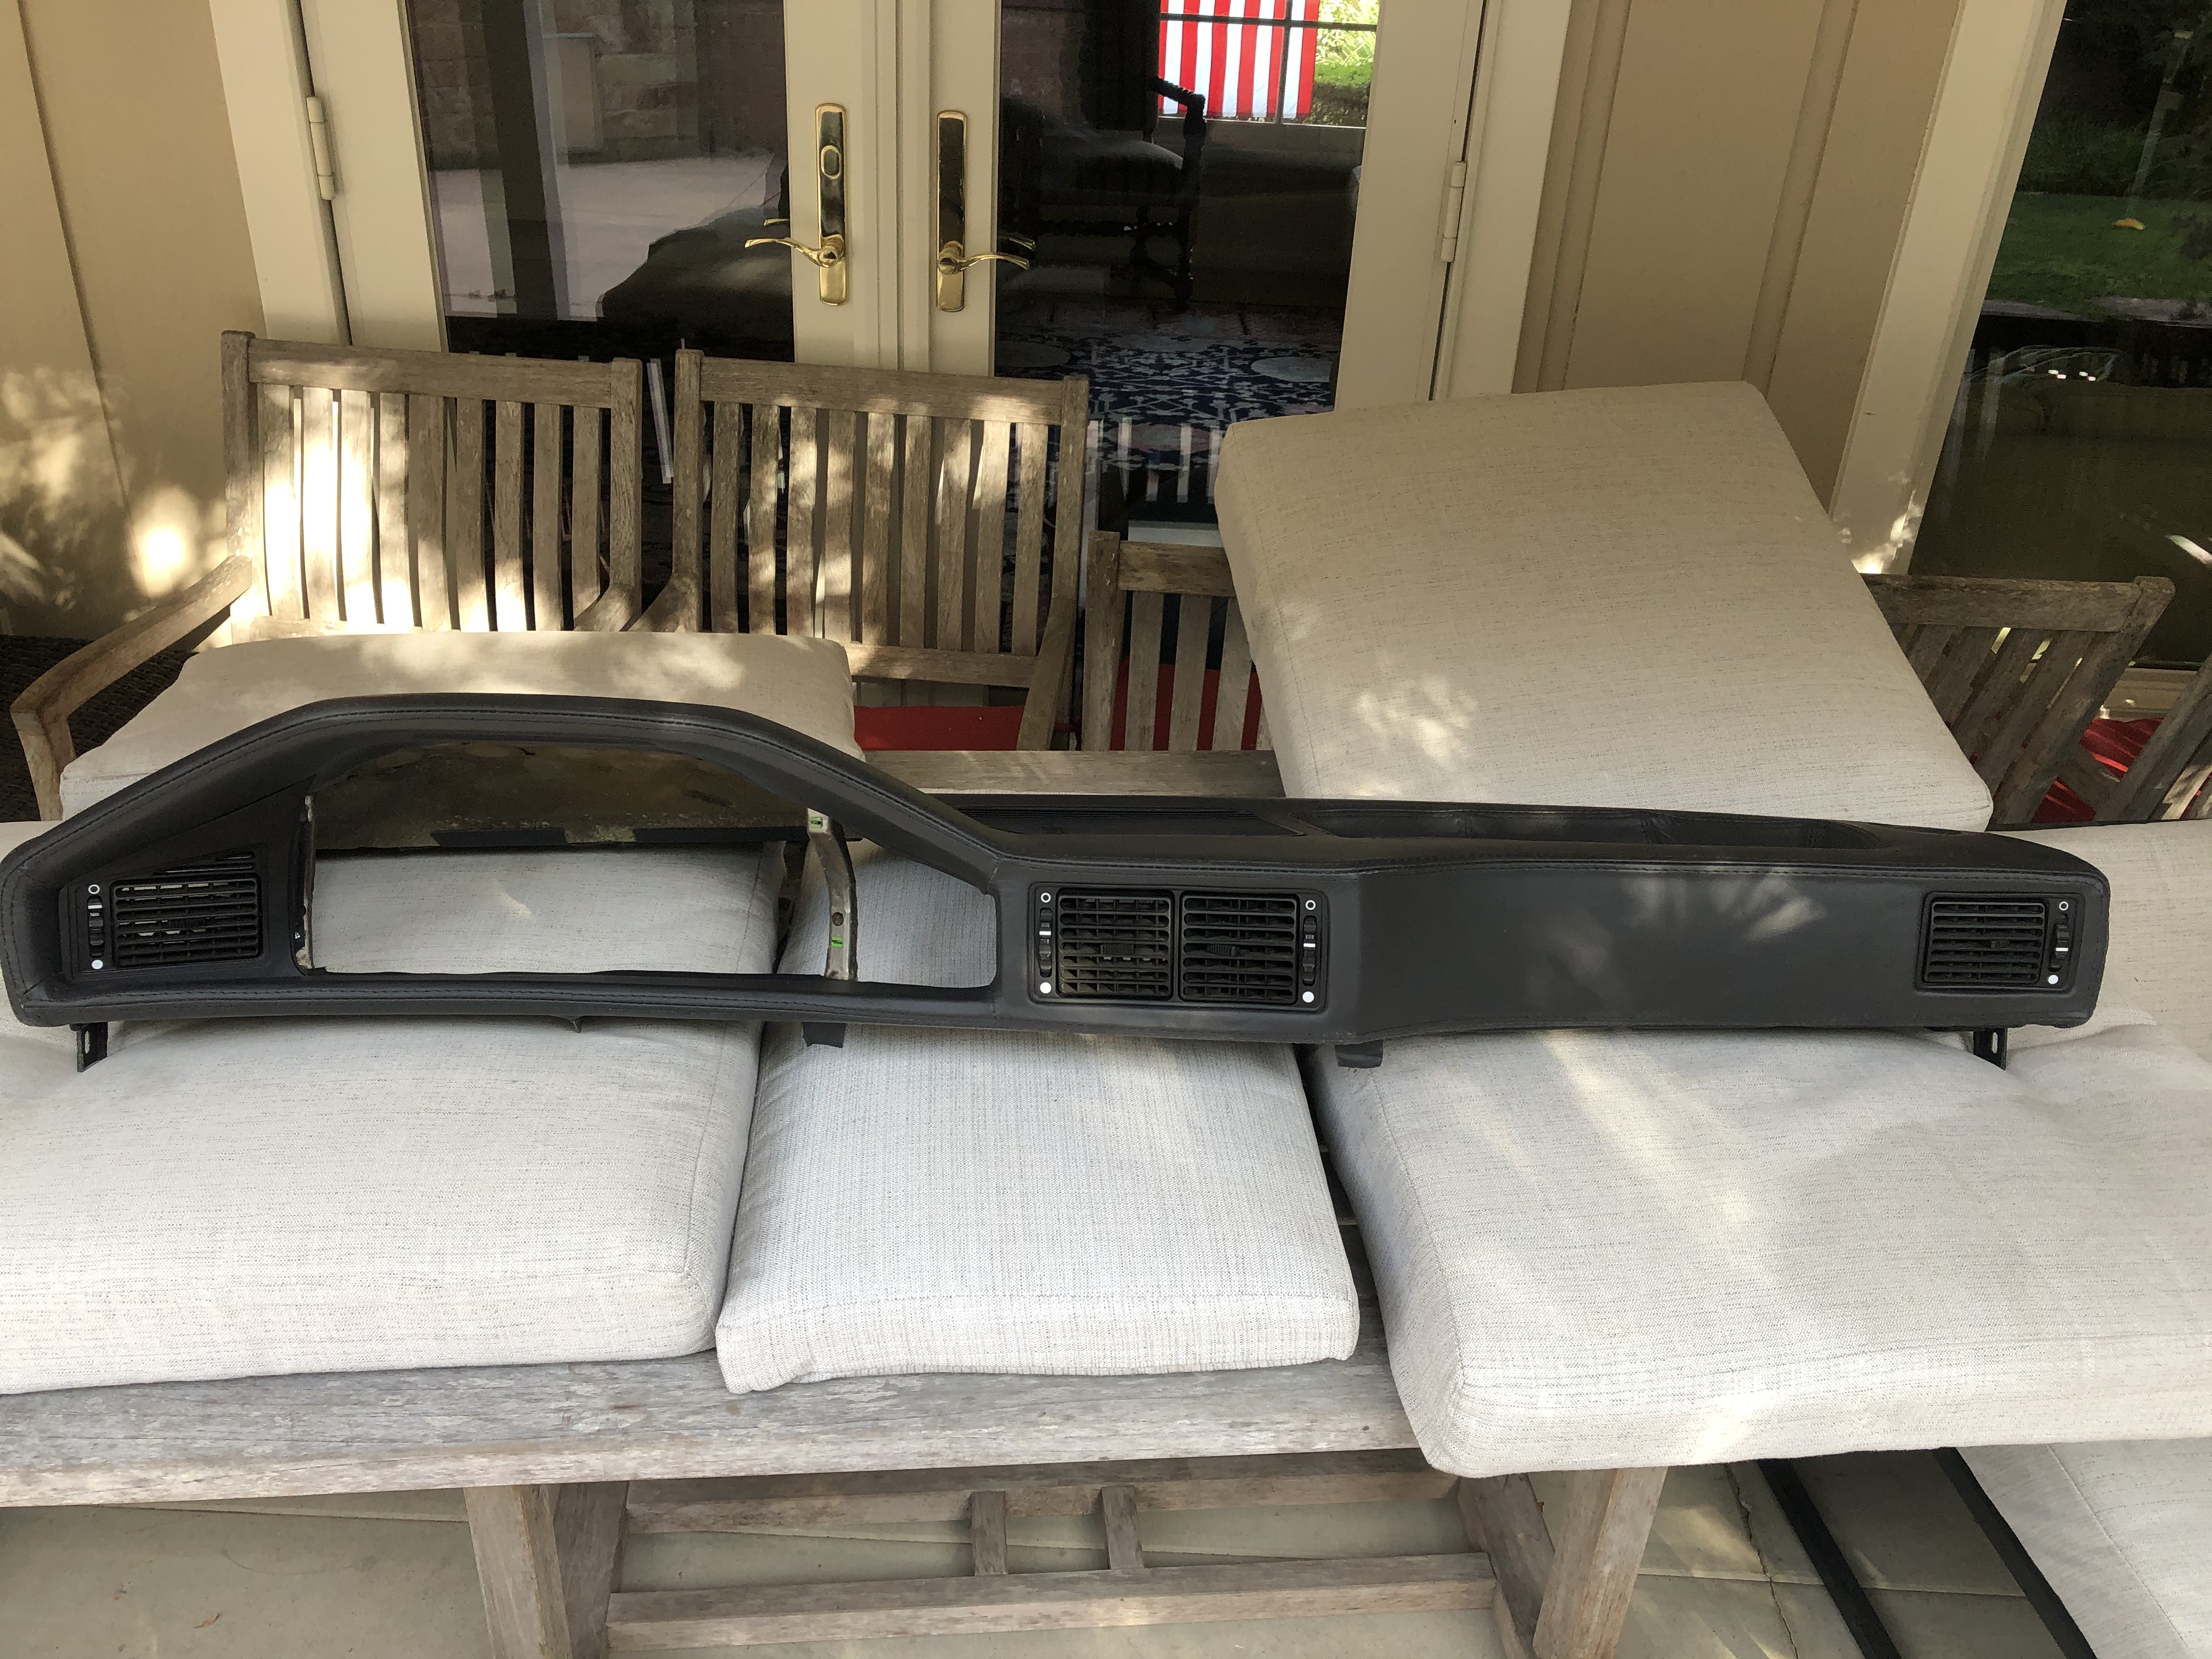
I also got my leather dash finished! Damn ... I wish this project was already to the point where all I had to do is just put parts back on the car.
Image
Post Reply