Rebuilding My 1988 US-spec M5

Post your photos and videos here!
tig
Posts: 9322
Joined: Mar 18, 2013 6:25 PM
Location: Durango
Contact:

Re: Rebuilding My 1988 US-spec M5

Post by tig »

jhh925 wrote: Nov 19, 2020 6:27 PM And here's after. New seals (input, output & selector shaft), new reverse light switch,...
No washer on that reverse light switch!
jhh925 wrote: Nov 19, 2020 6:27 PM As it turned out, this ended up being a HUGE blessing in disguise.
I'd like some of that lemonade you made here.

I'd also like to congratulate you on some really amazing work. This car is going to be baller!
jhh925
Posts: 917
Joined: Jul 11, 2015 12:23 AM
Location: Reno

Re: Rebuilding My 1988 US-spec M5

Post by jhh925 »

cek wrote: Nov 19, 2020 7:01 PM
jhh925 wrote: Nov 19, 2020 6:27 PM And here's after. New seals (input, output & selector shaft), new reverse light switch,...
No washer on that reverse light switch!
Great point. My recollection is that I was surprised that there was no washer with the switch so I then checked RealOEM ... but my memory sucks, so I'm going to double-check my work today.
tig
Posts: 9322
Joined: Mar 18, 2013 6:25 PM
Location: Durango
Contact:

Re: Rebuilding My 1988 US-spec M5

Post by tig »

jhh925 wrote: Nov 20, 2020 12:09 PM
cek wrote: Nov 19, 2020 7:01 PM
jhh925 wrote: Nov 19, 2020 6:27 PM And here's after. New seals (input, output & selector shaft), new reverse light switch,...
No washer on that reverse light switch!
Great point. My recollection is that I was surprised that there was no washer with the switch so I then checked RealOEM ... but my memory sucks, so I'm going to double-check my work today.
And to be clear: DO NOT PUT ONE ON. THE SWITCH WILL NOT WORK CORRECTLY IF THERE'S A WASHER.
jhh925
Posts: 917
Joined: Jul 11, 2015 12:23 AM
Location: Reno

Re: Rebuilding My 1988 US-spec M5

Post by jhh925 »

So with work being slow over the holidays (and hopefully a semi-retirement right around the corner - fingers crossed), I actually am working a bunch on the car. St. Paddy's day 2021 and 5er West (if & when they take place) are definitely out of the question for this car, so I'm feeling very behind. My mantra is to work on the car at least a little every day - just try to get at least one little thing done every day. We'll see.

Anyhow, my current thinking is to (i) get the trunk refinishing done, (ii) clean up & test the main wiring harness from fuse box to all the various dash connections (prior owners turned that into a rat's nest); and (iii) clean up & repair a few spots on the sound deadening on the floor boards. In theory, that all should be just a few hours of work over a few days, then I'm hoping to go full-speed-ahead on reassembly.

On the trunk, I decided to do that work because there were lots of scratches in various places from just normal use, plus scratches on the inside of the right rear quarter where a dent had gotten PDR'ed out, plus the unpainted sections where I'd repaid prior stereo installation madness. I'd also decided to use the trunk as my opportunity to learn a bit more about automotive painting, so in anticipation of this part of the project I've upgraded my air compressor set up (40 gal 15 cfm compressor plus two filter-dryers plus new couplings) and also gotten a couple of guns from Eastwood. Roger gave me some quick lessons, and I was off to the races.

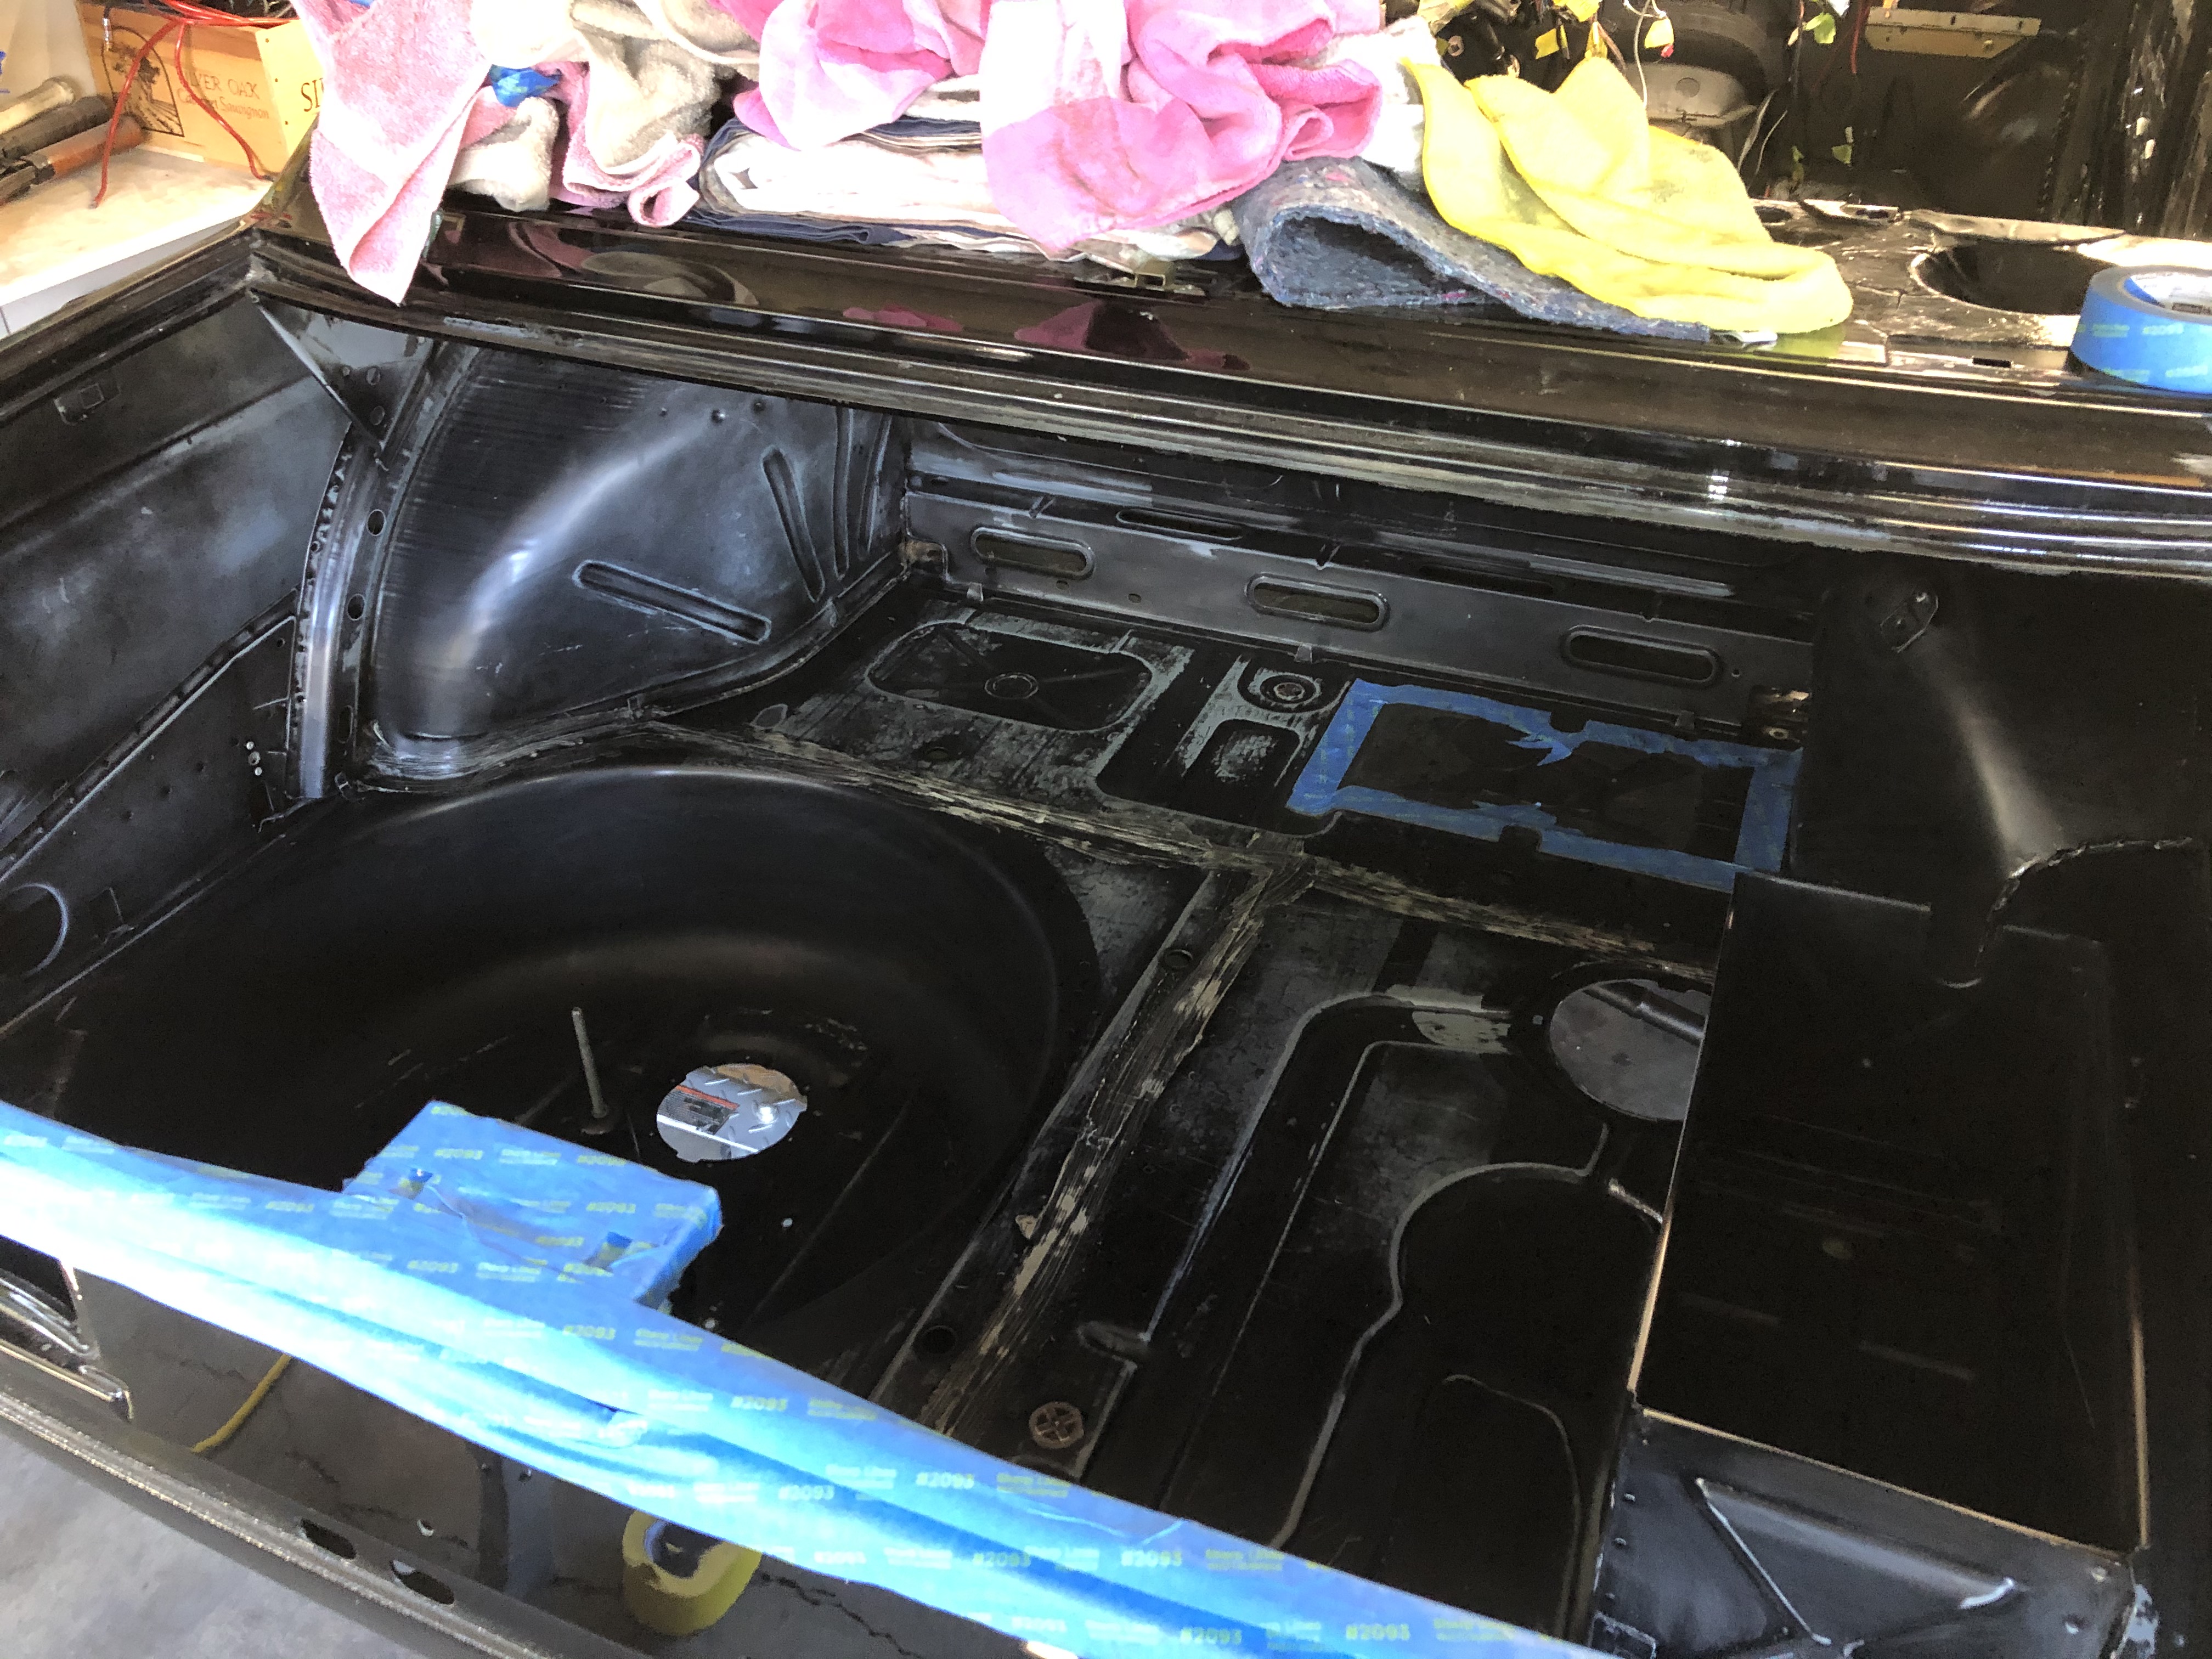
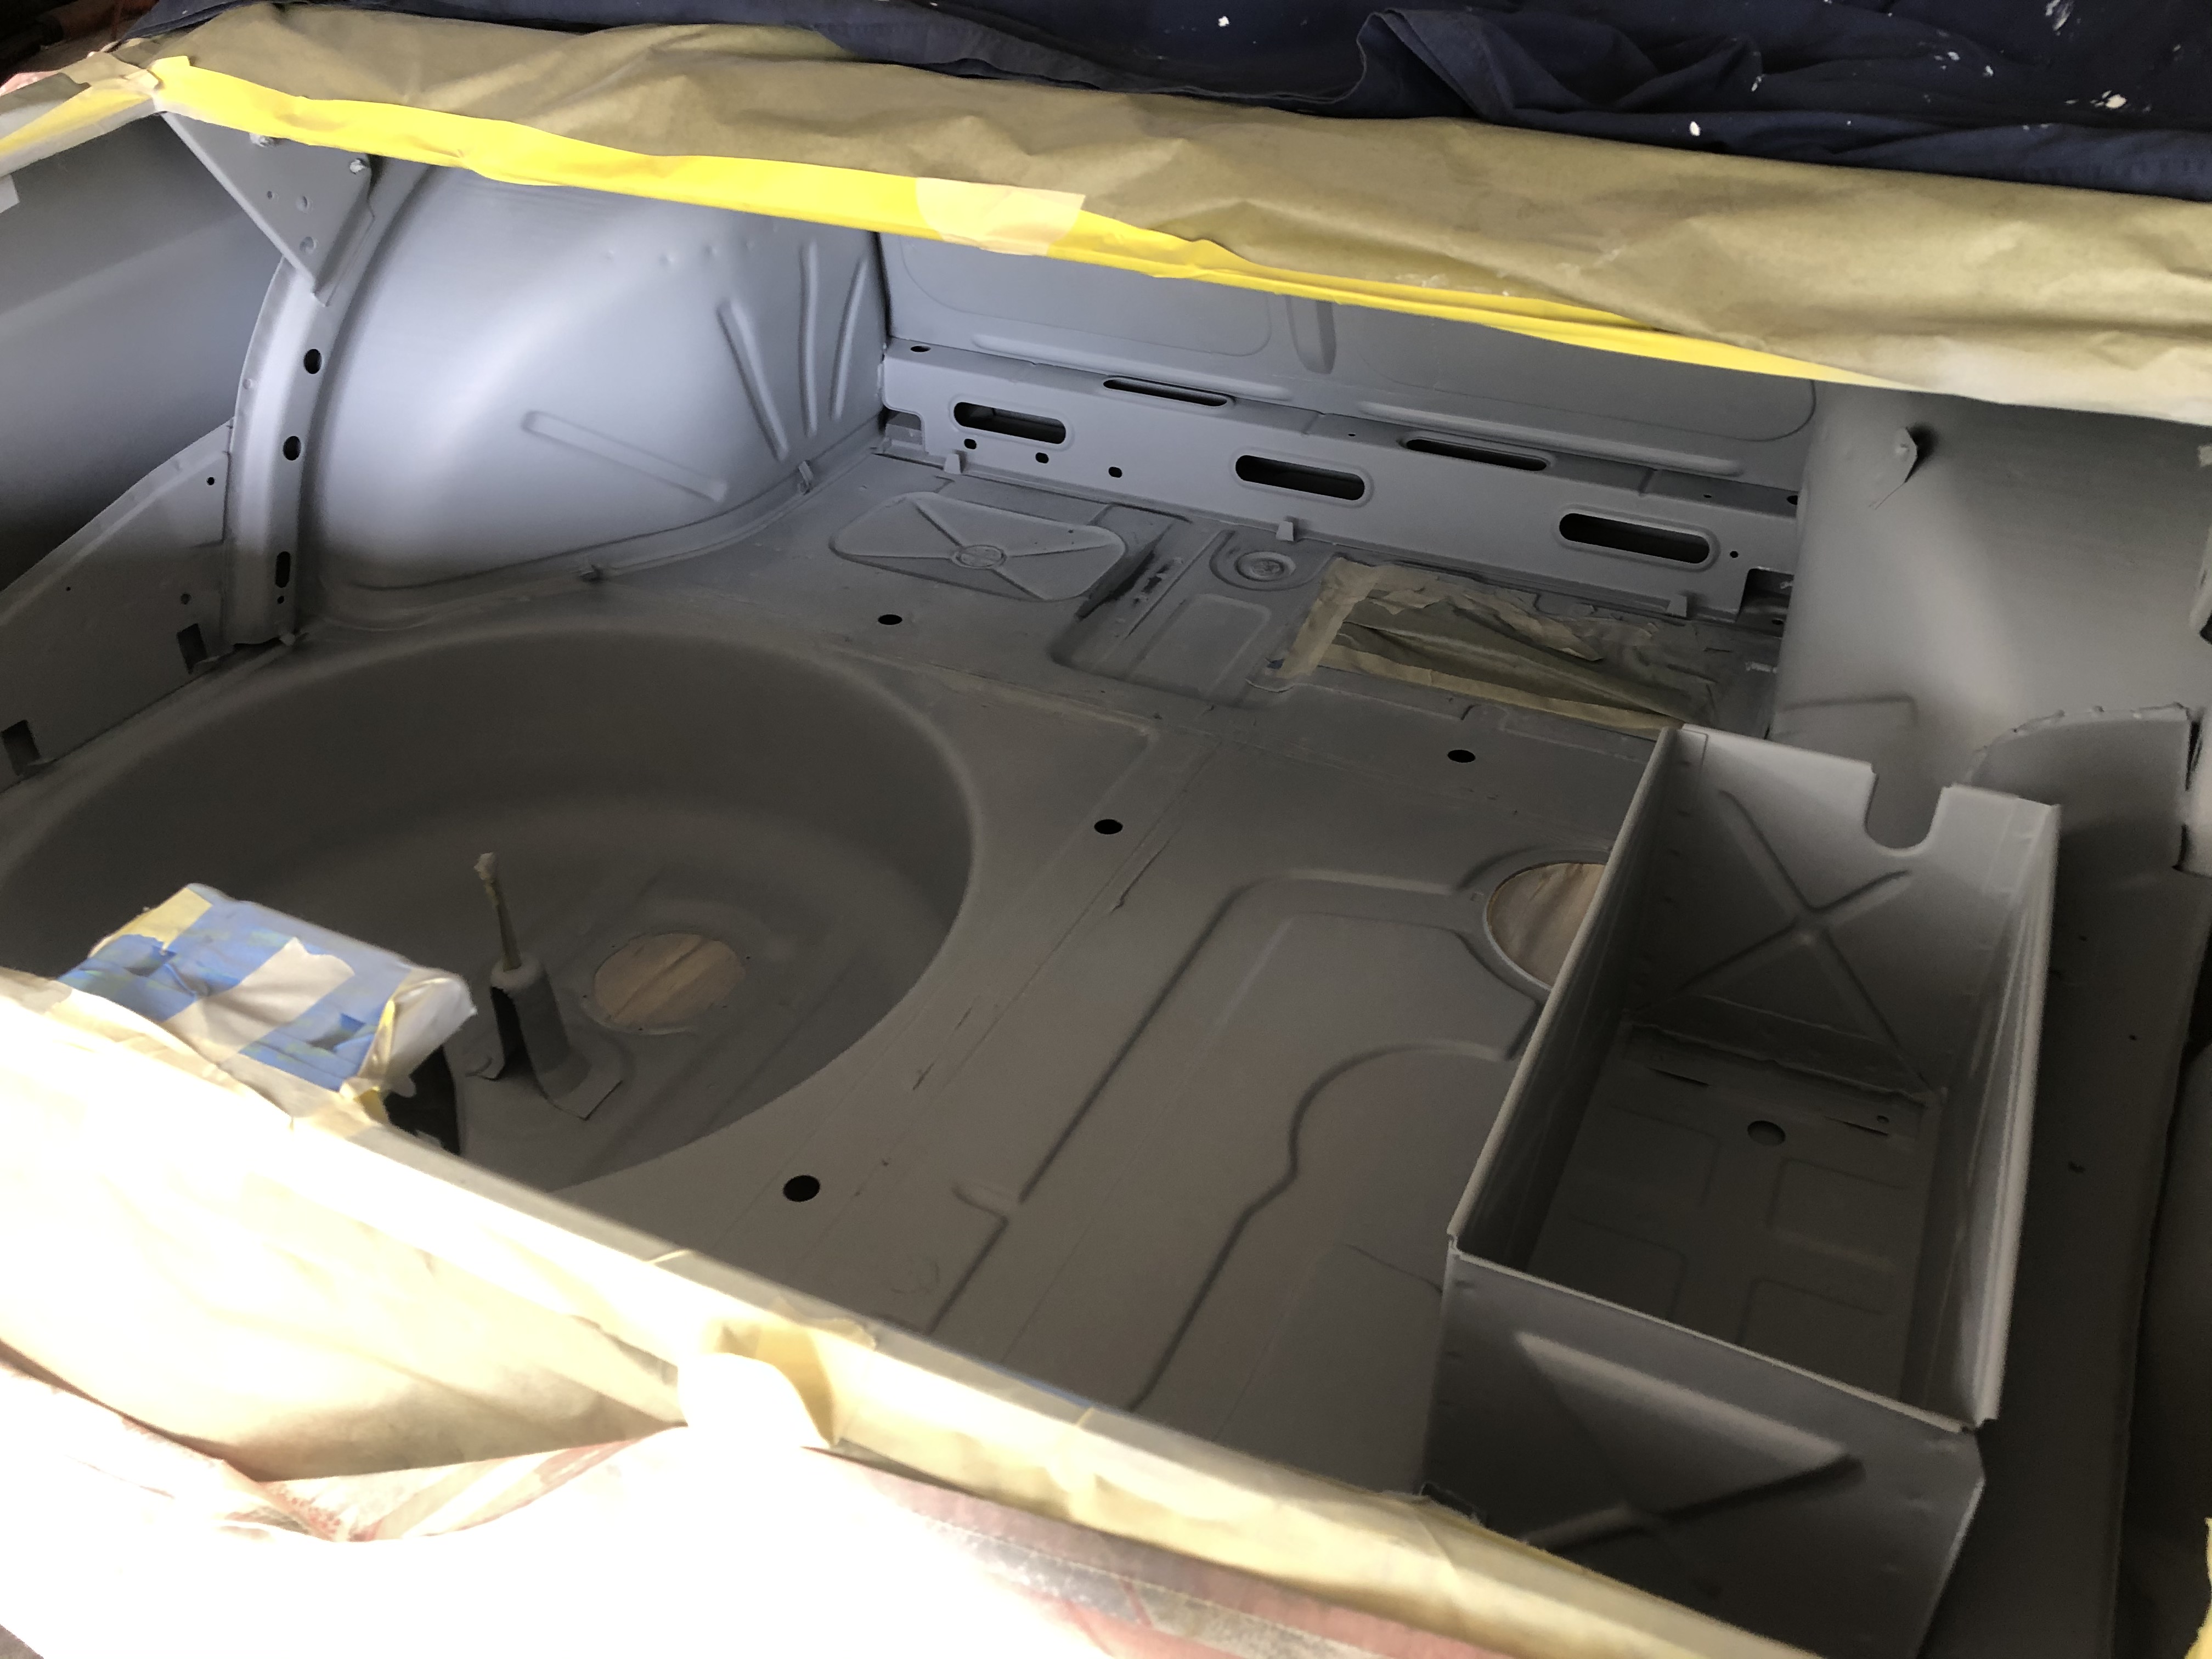
Here's the trunk right before the first coat of primer. Everything scuffed & sanded, plus I used the rubber wheel to get all the glue off from the felt pad.

Image
Image

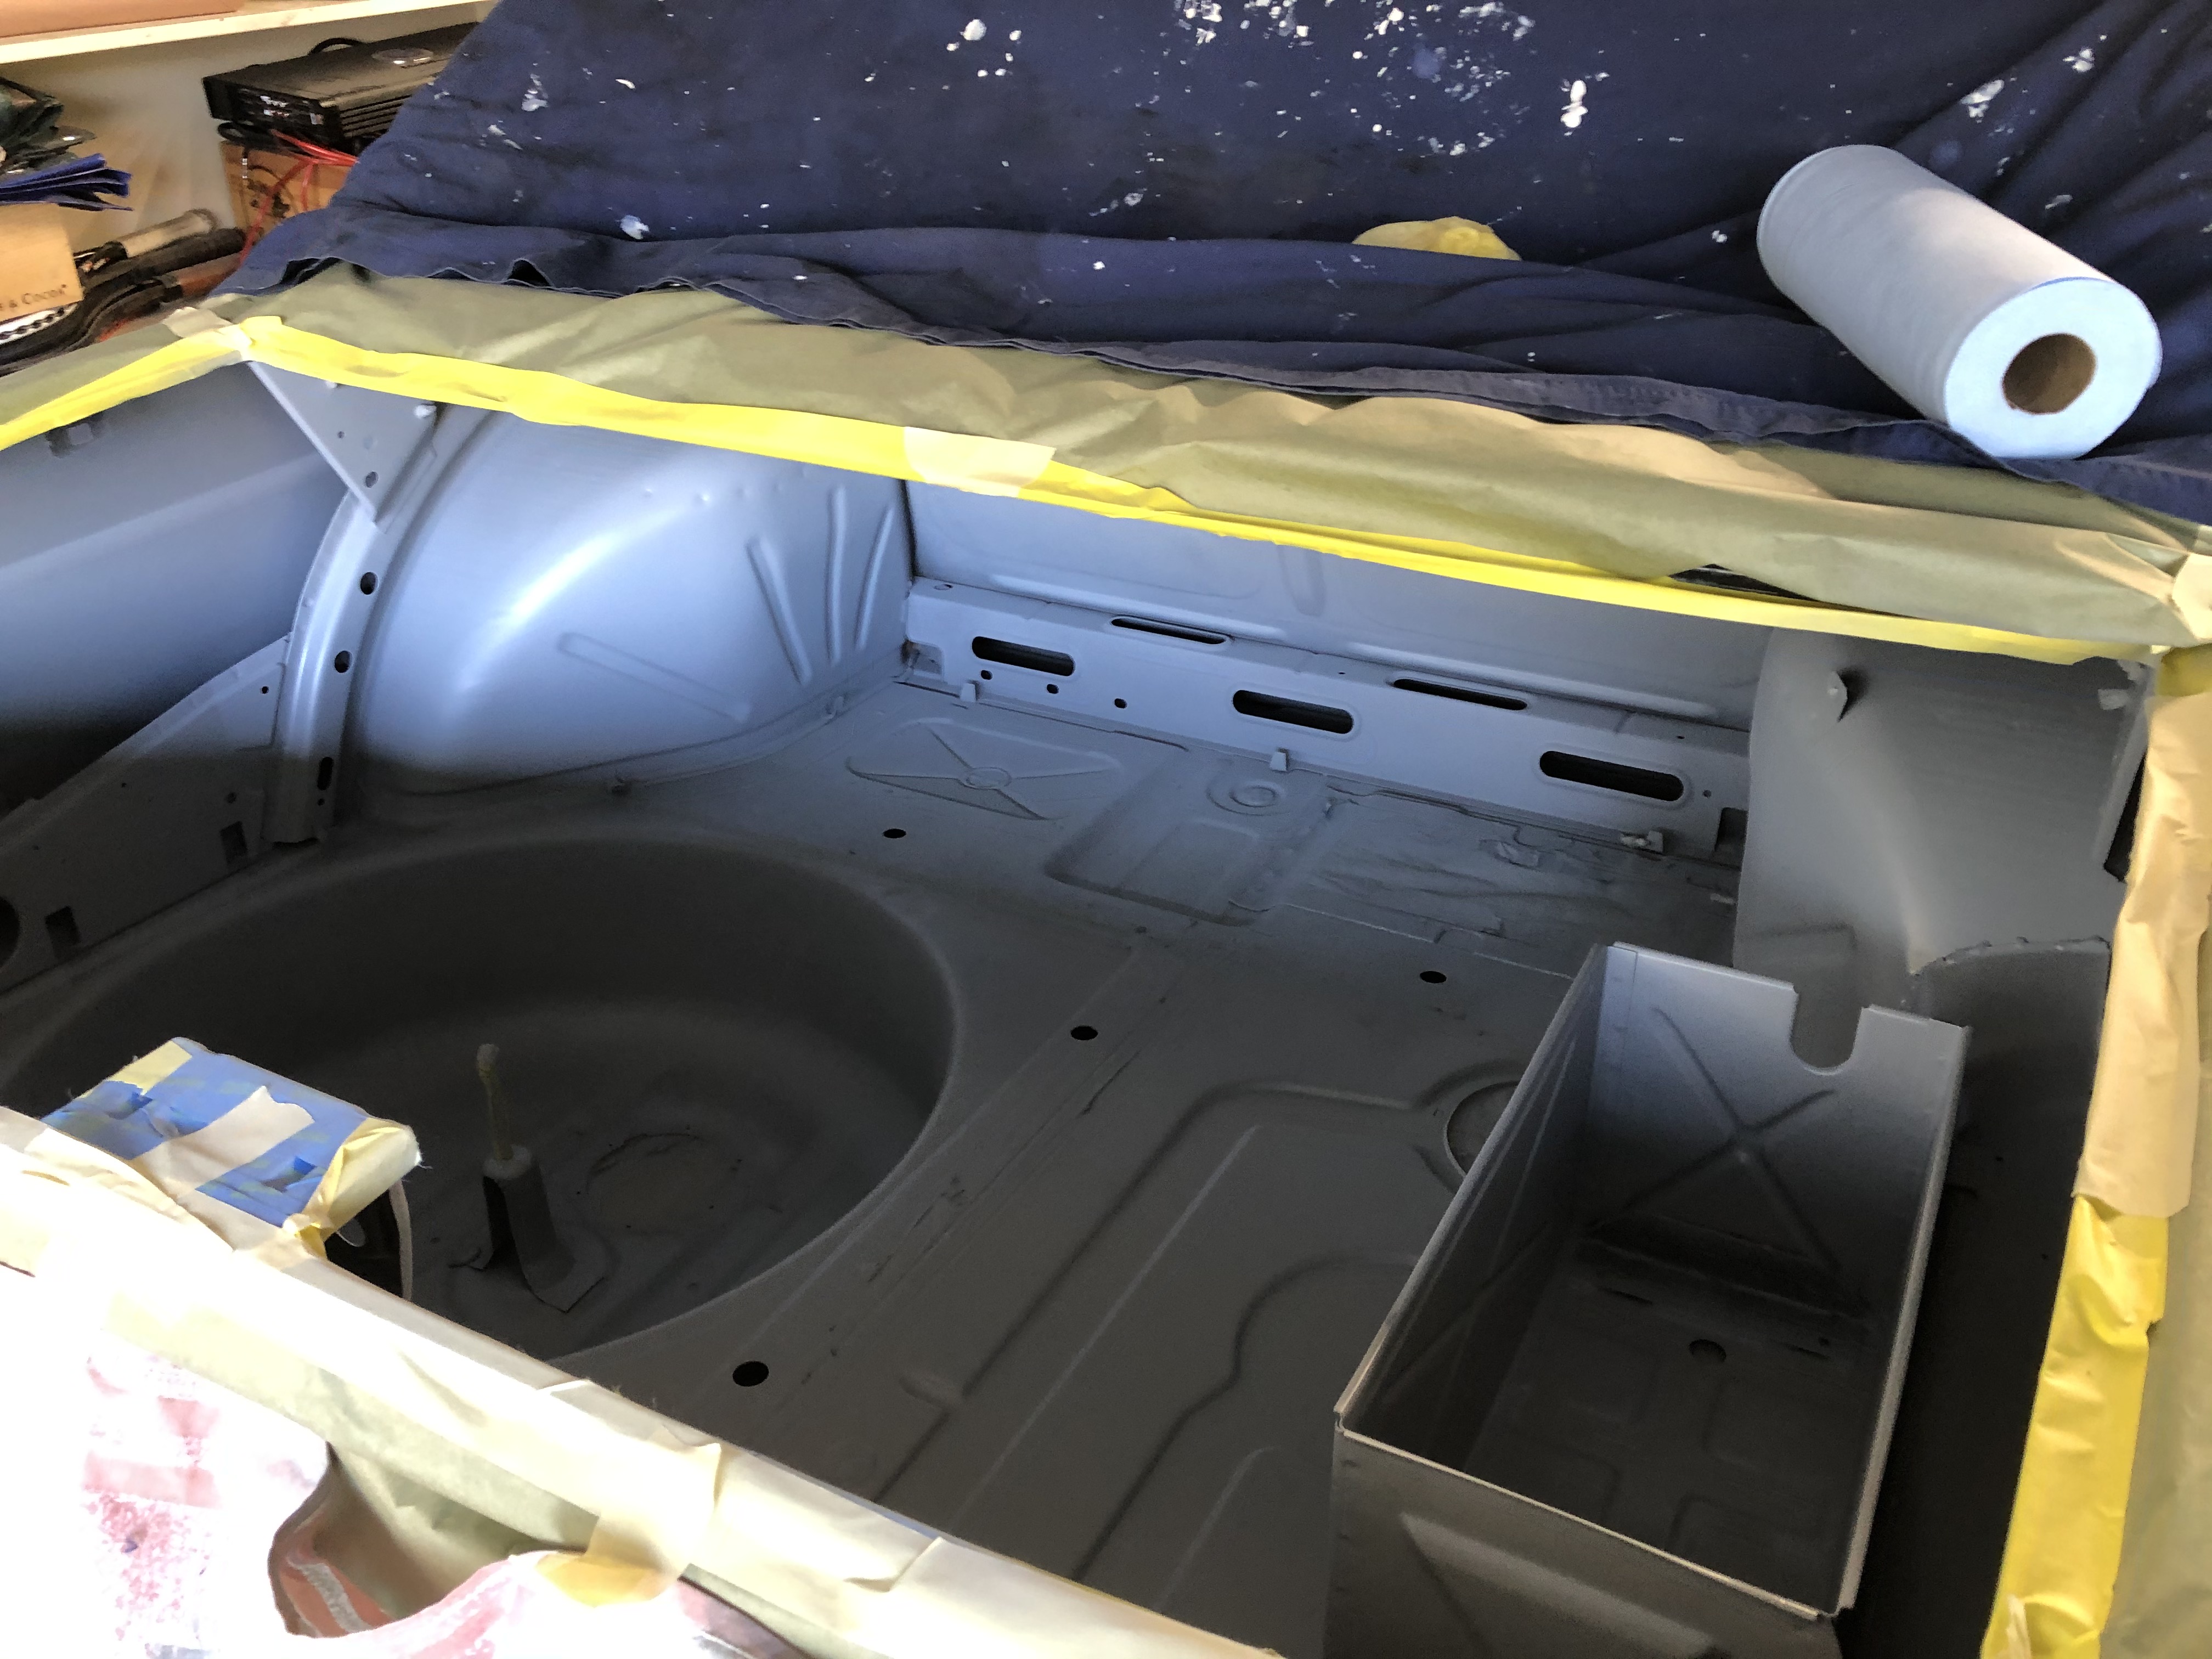
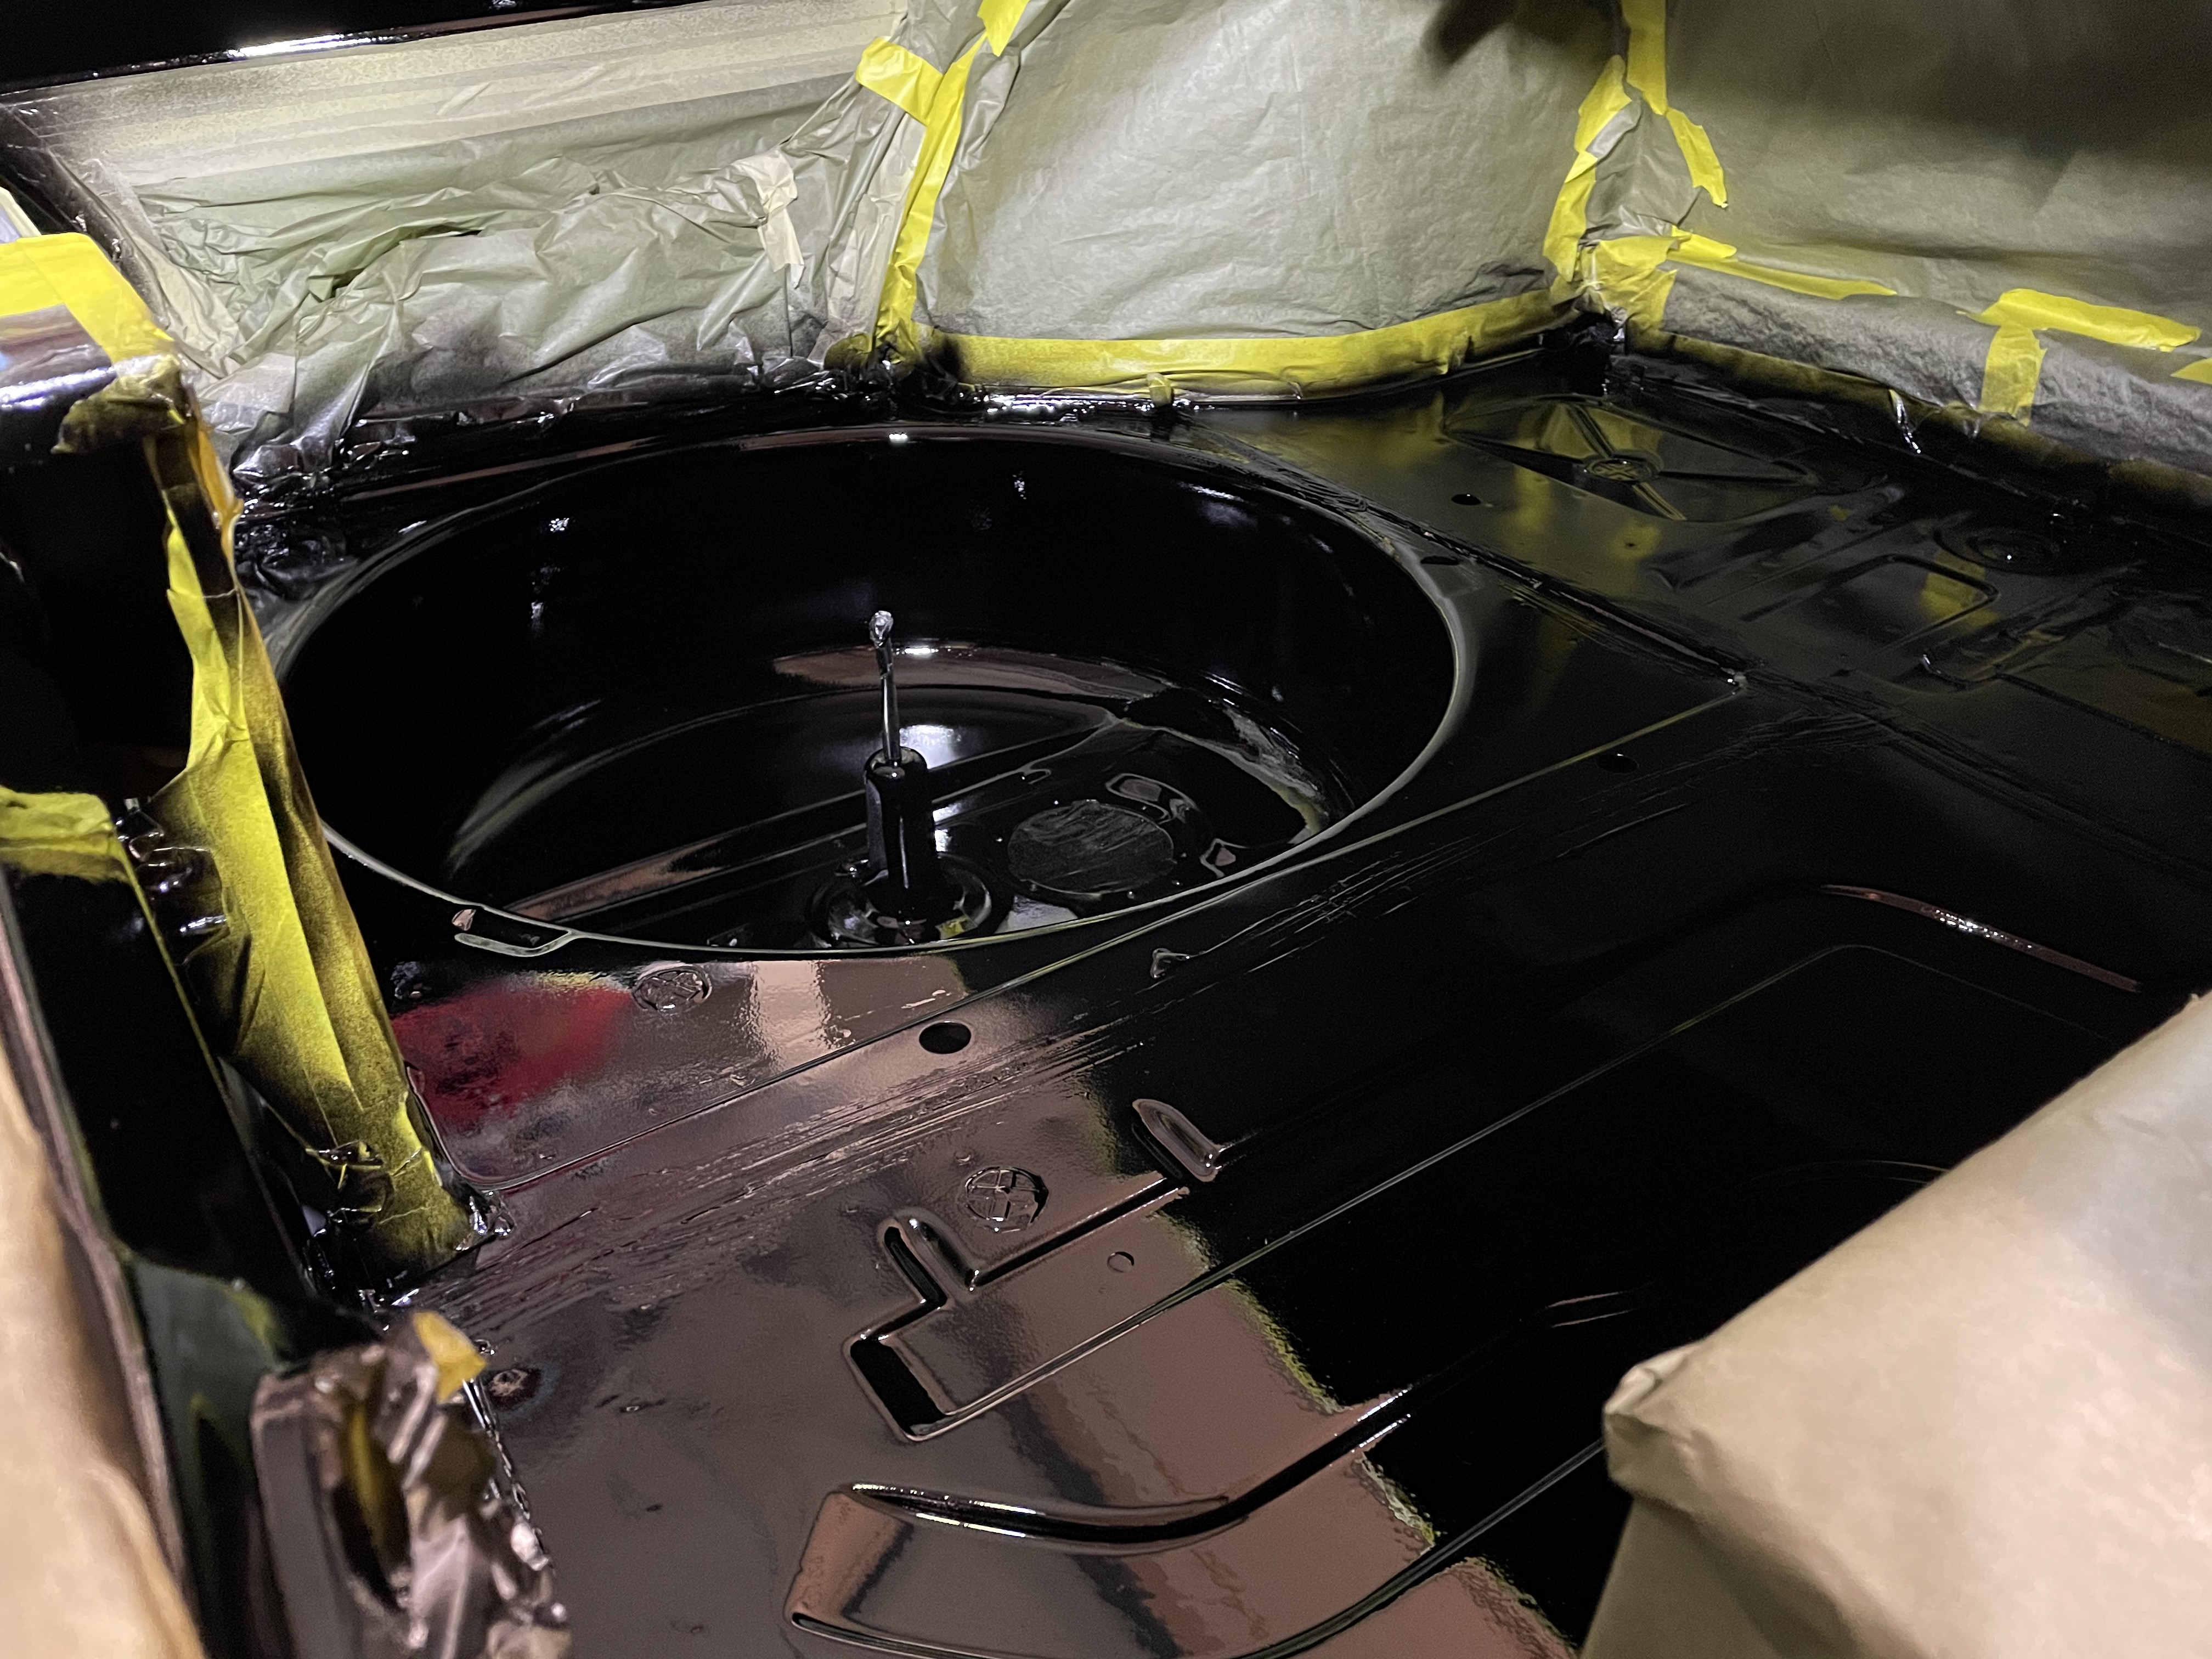
And here's the first coat of primer. The pic looks good, but I didn't do a good job. First, the primer was supposed to be a 4:1:2 mix ("2" being the reducer) and I mixed it 4:1:1. Then, to compound the error, I wasn't anticipating how much ^**#@^@% blow-back I was going to get by shooting 10 cfm into the closed trunk. Yuck. The result was that my gun was spraying too much primer, that was too thick anyhow, from too far away. That gave me a very rough, almost "gravelly" finish. Ugh. So that resulted in another 3 or 4 hours of sanding as I sanded off the bad parts.

Image

Second try ... this time I practiced with the gun (air but no paint) to figure out what my pattern should be, then mixed the primer right, then set the air flow a bit lower. Eureka! What a huge difference. So, primer is done with a nice smooth complete covering. I'll give this a couple of days, scuff with a bit of 600 grit wet paper, then do a first coat of some nice Schwarz paint!

Image

Also, FWIW, the difference between rattle-can primer and this three-part automotive primer (it's "Shopline" from PPG) is night & day. So much harder and "stickier" than even good rattle can primer. It sands nicely but you don't burn right through it. Holy cow.

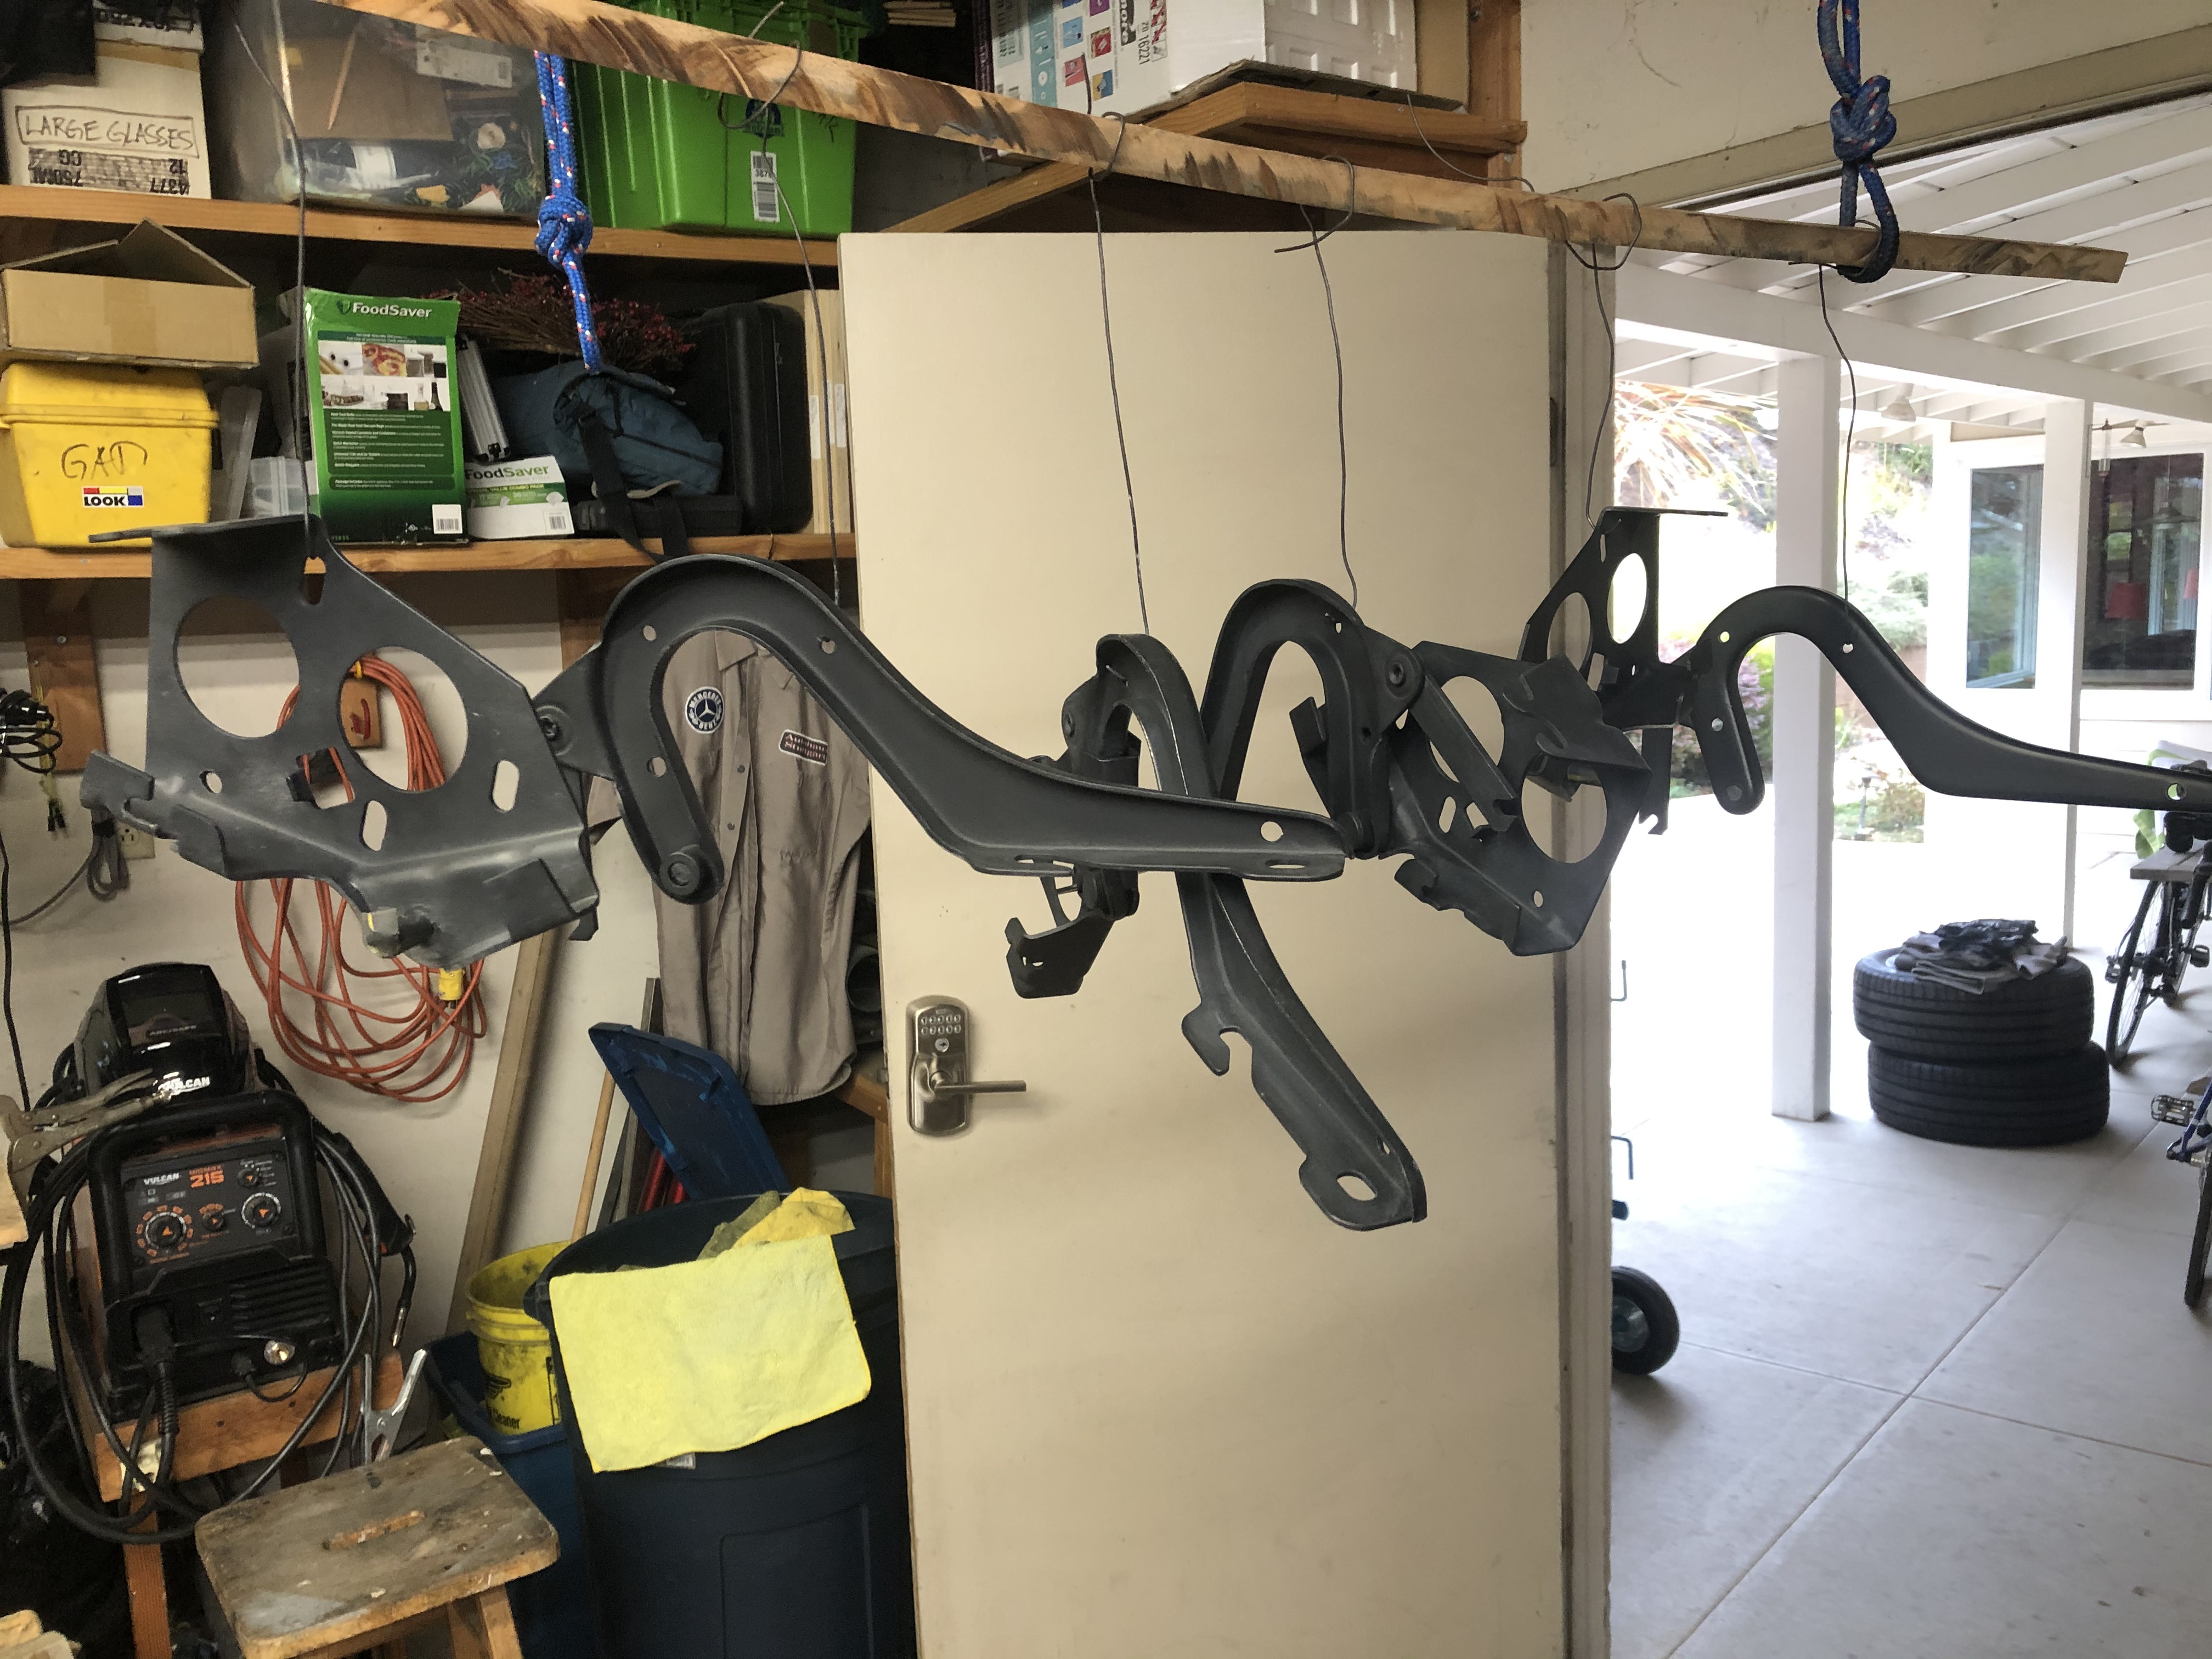
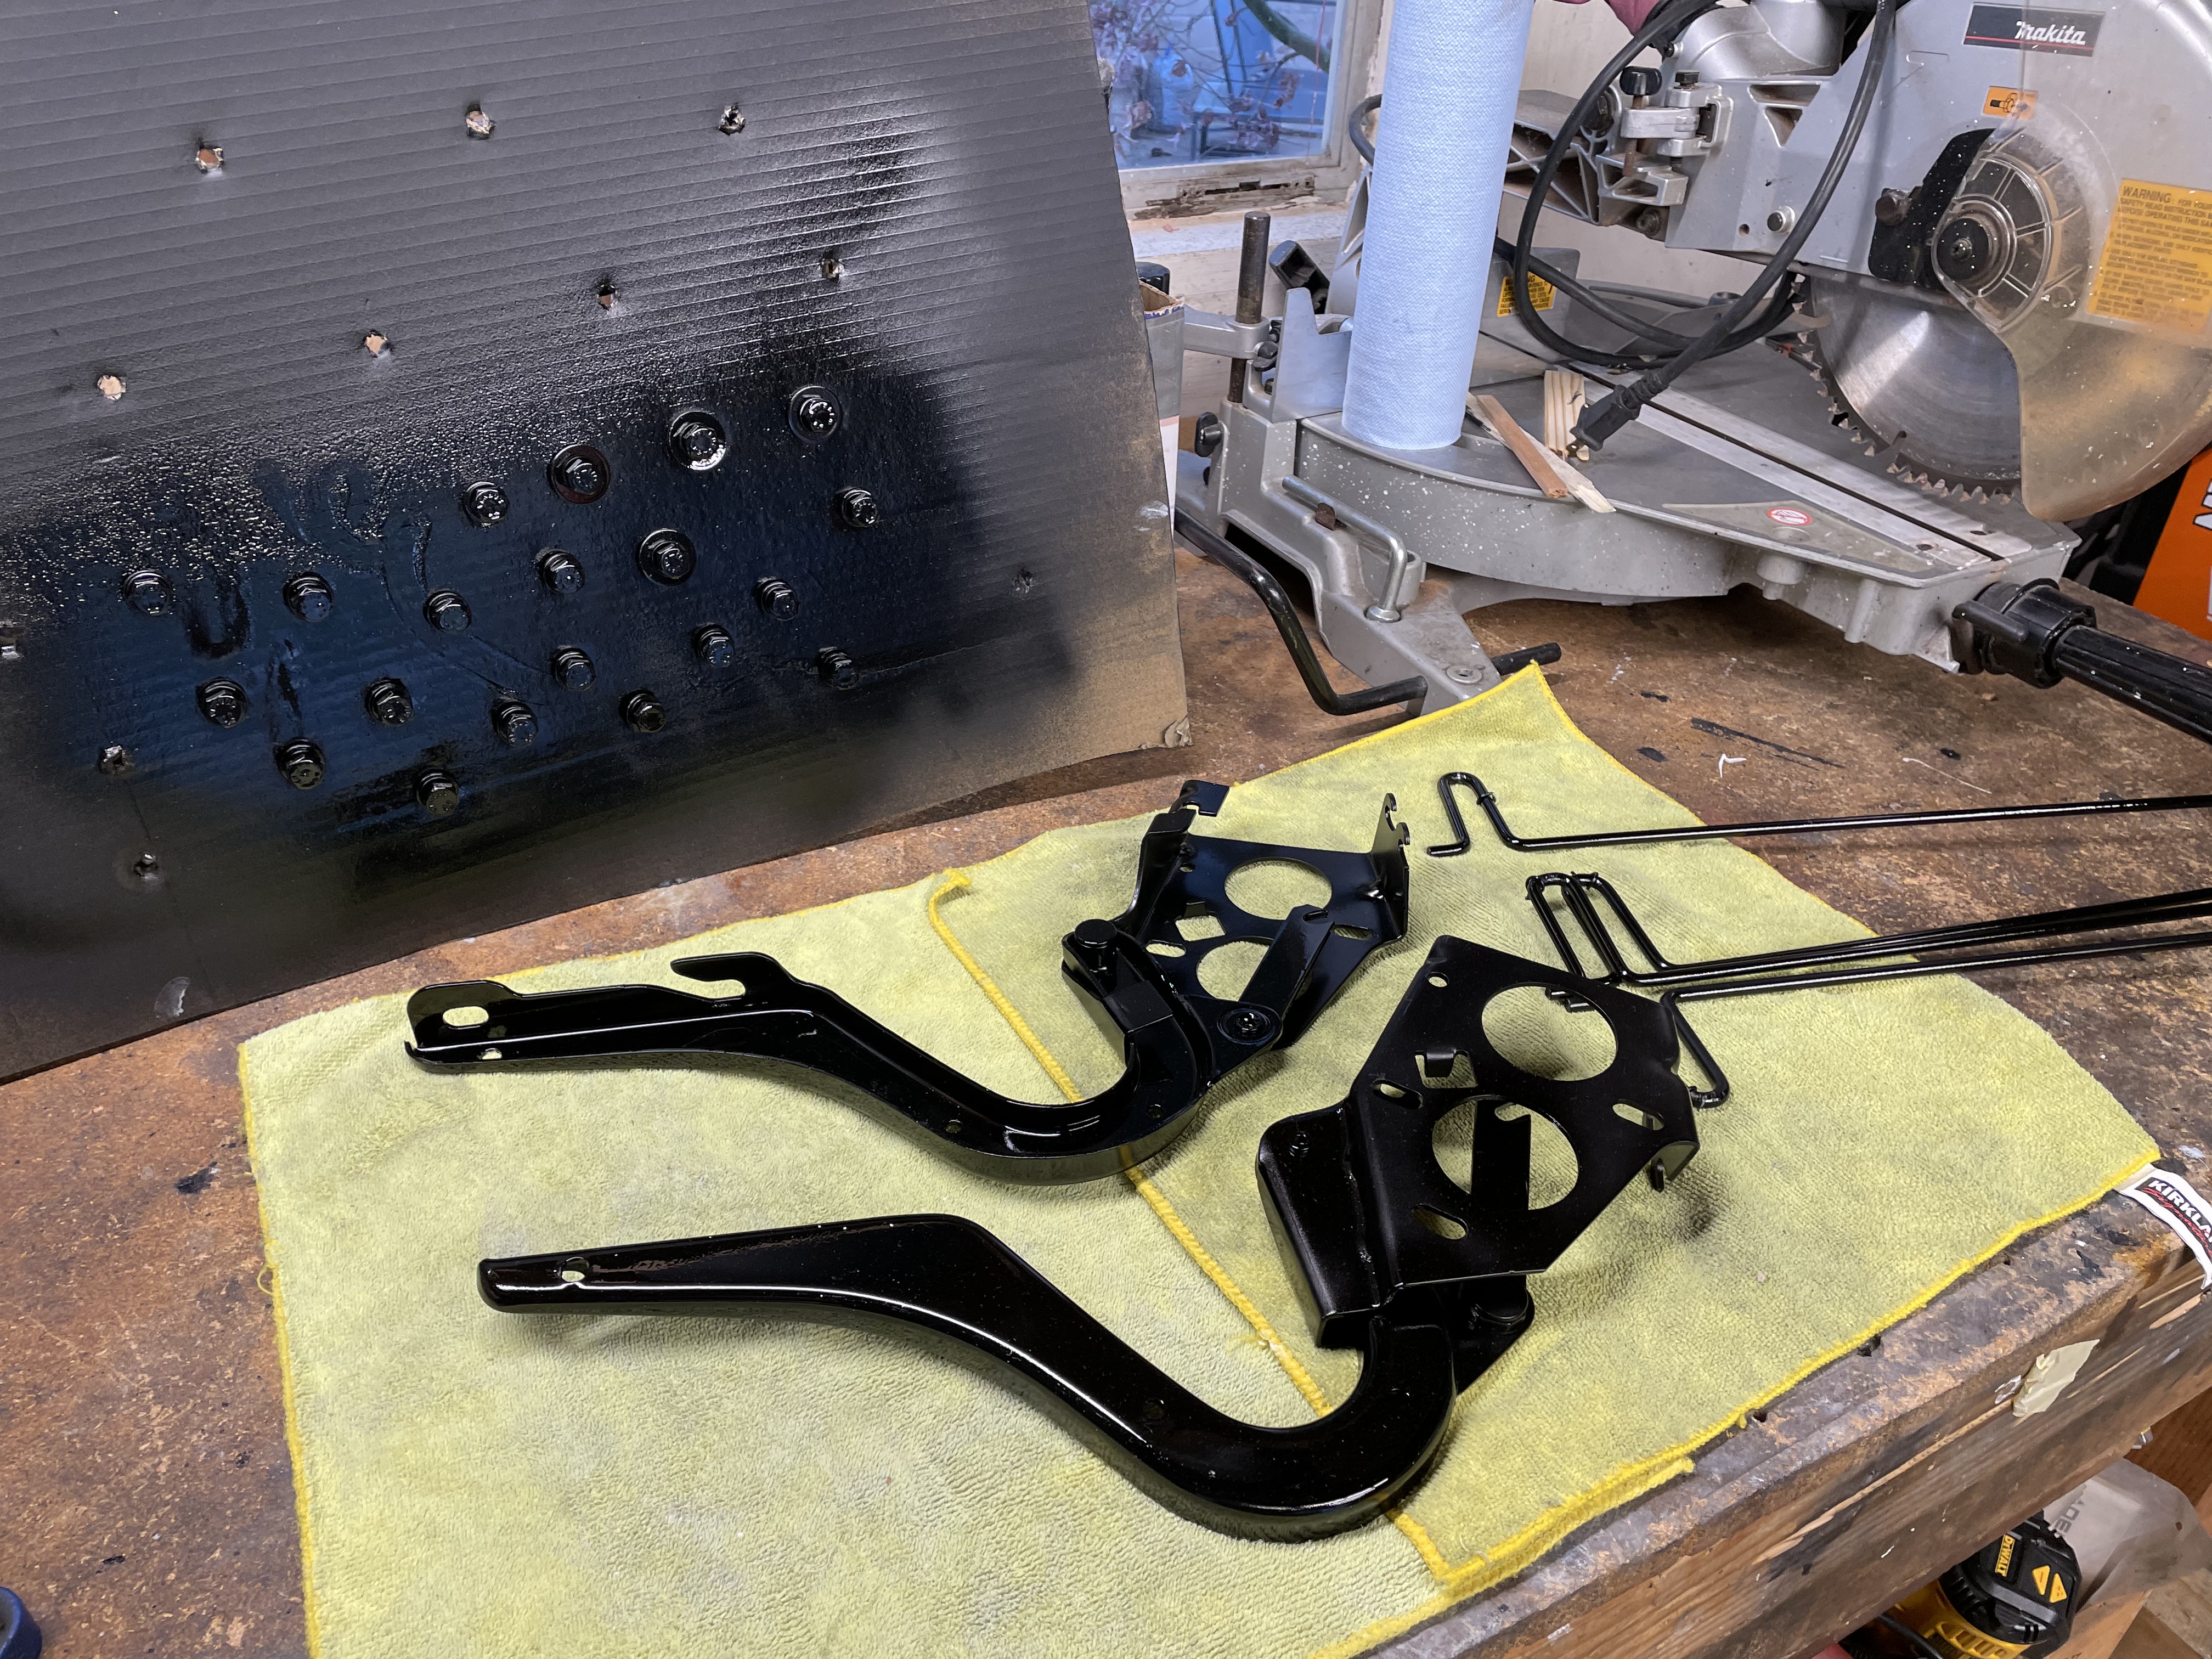
I'm also repainting the hinges, trunk springs & trunk bolts:

Image

I'm repainting two sets of hinges. One set is brand new BMW, but the two parts are riveted together, so the painting will have "shadows" where the spray can't reach. The other is used out of an '83 car, so the two hinge parts come apart with a clip. That makes the painting easier, but technically it won't be the hinge design that came with the car. I figure I'll paint both sets and see what I like when I reassemble.
Tiit
Posts: 290
Joined: Oct 06, 2017 6:27 AM
Location: Canberra

Re: Rebuilding My 1988 US-spec M5

Post by Tiit »

Great read. Thanks for sharing
jhh925
Posts: 917
Joined: Jul 11, 2015 12:23 AM
Location: Reno

Re: Rebuilding My 1988 US-spec M5

Post by jhh925 »

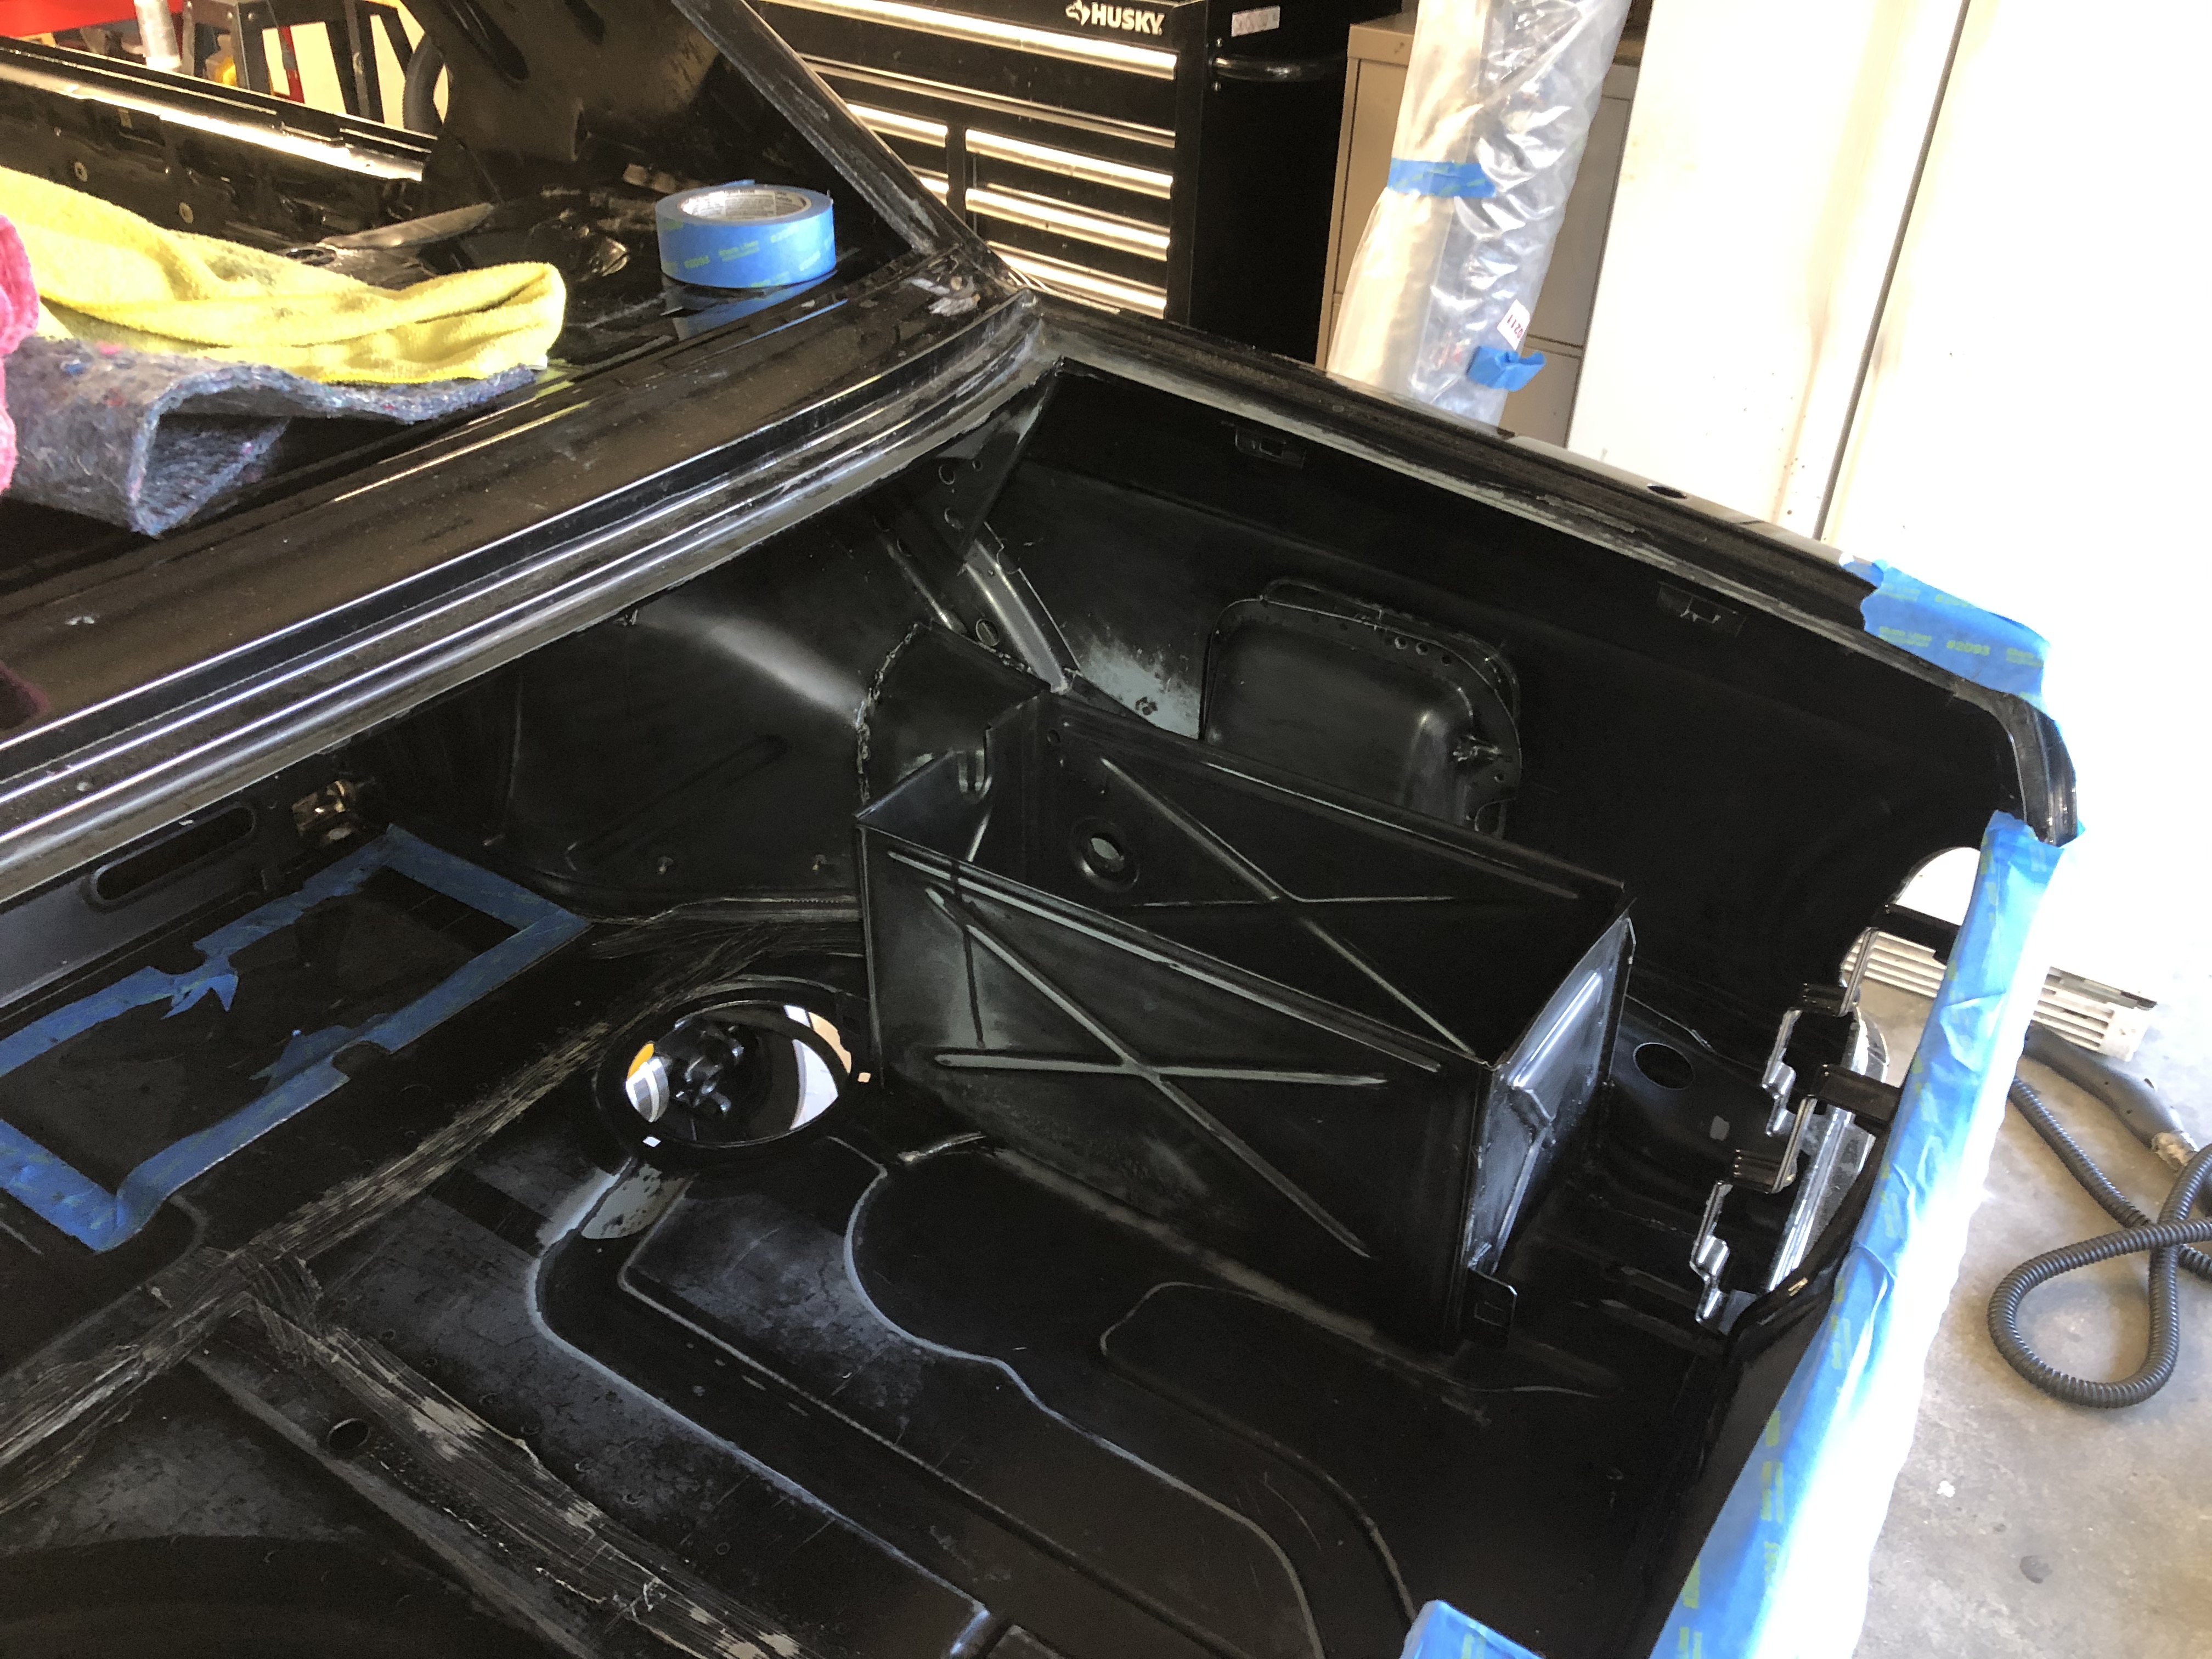
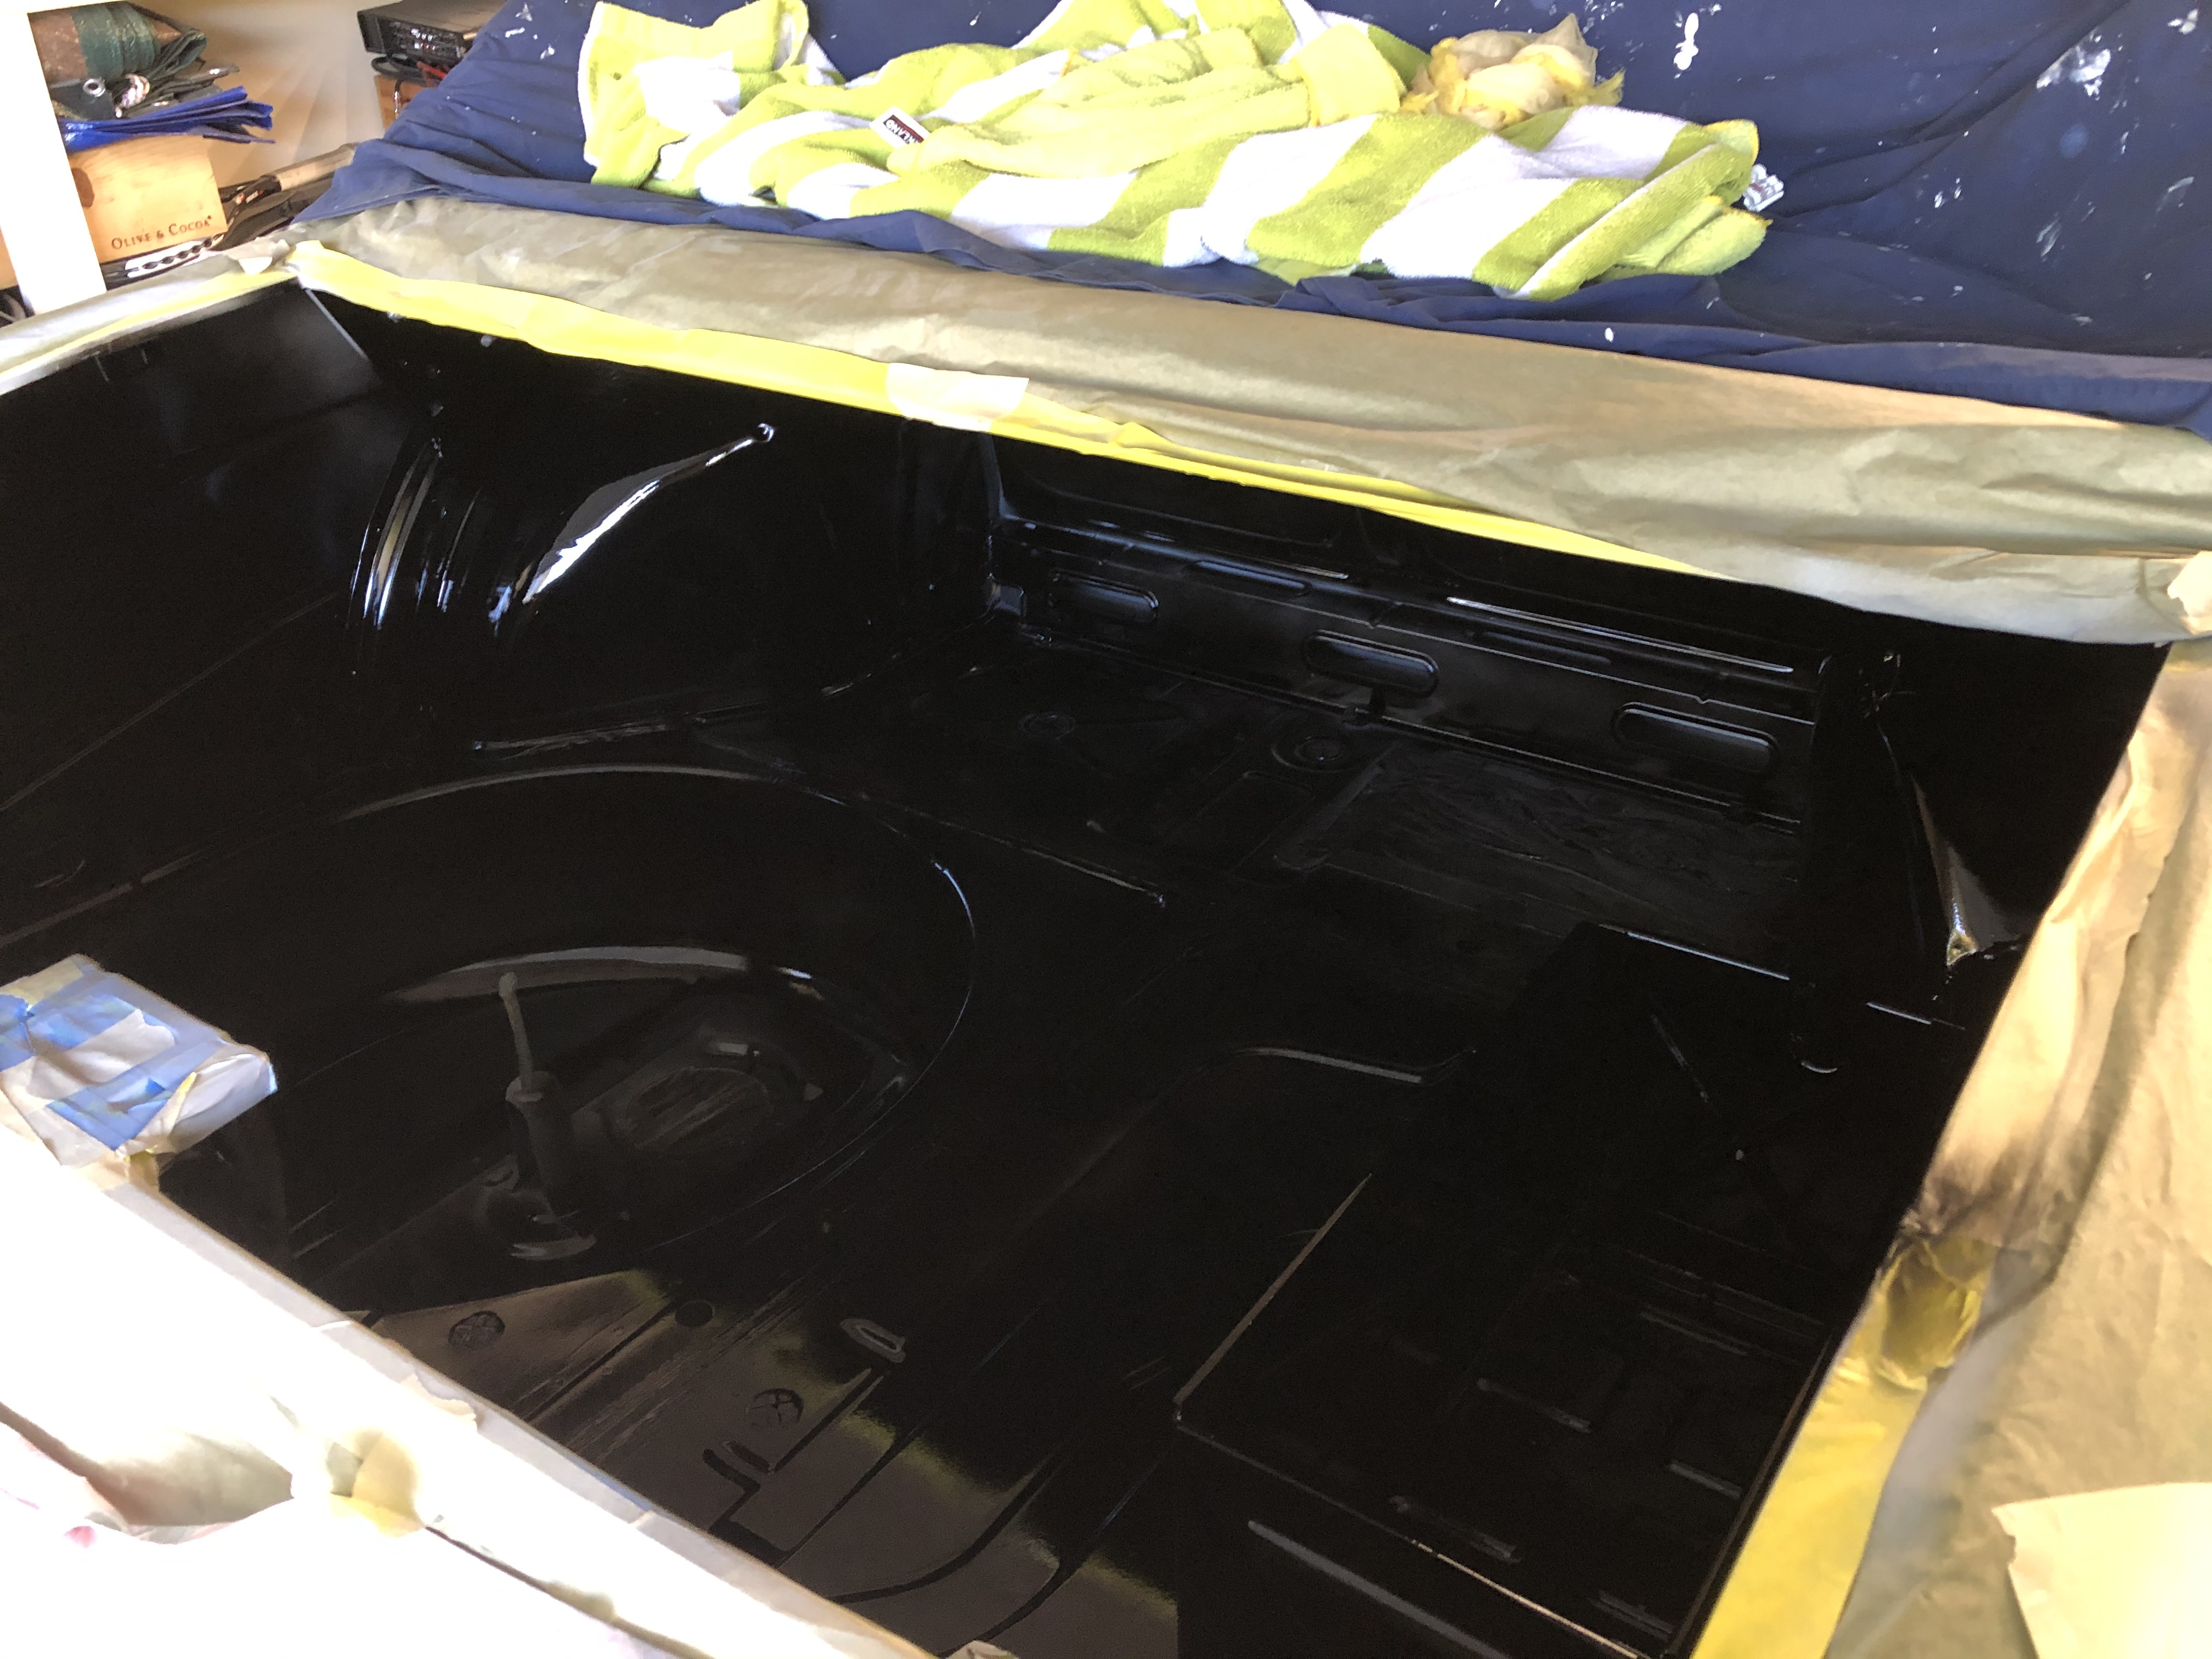
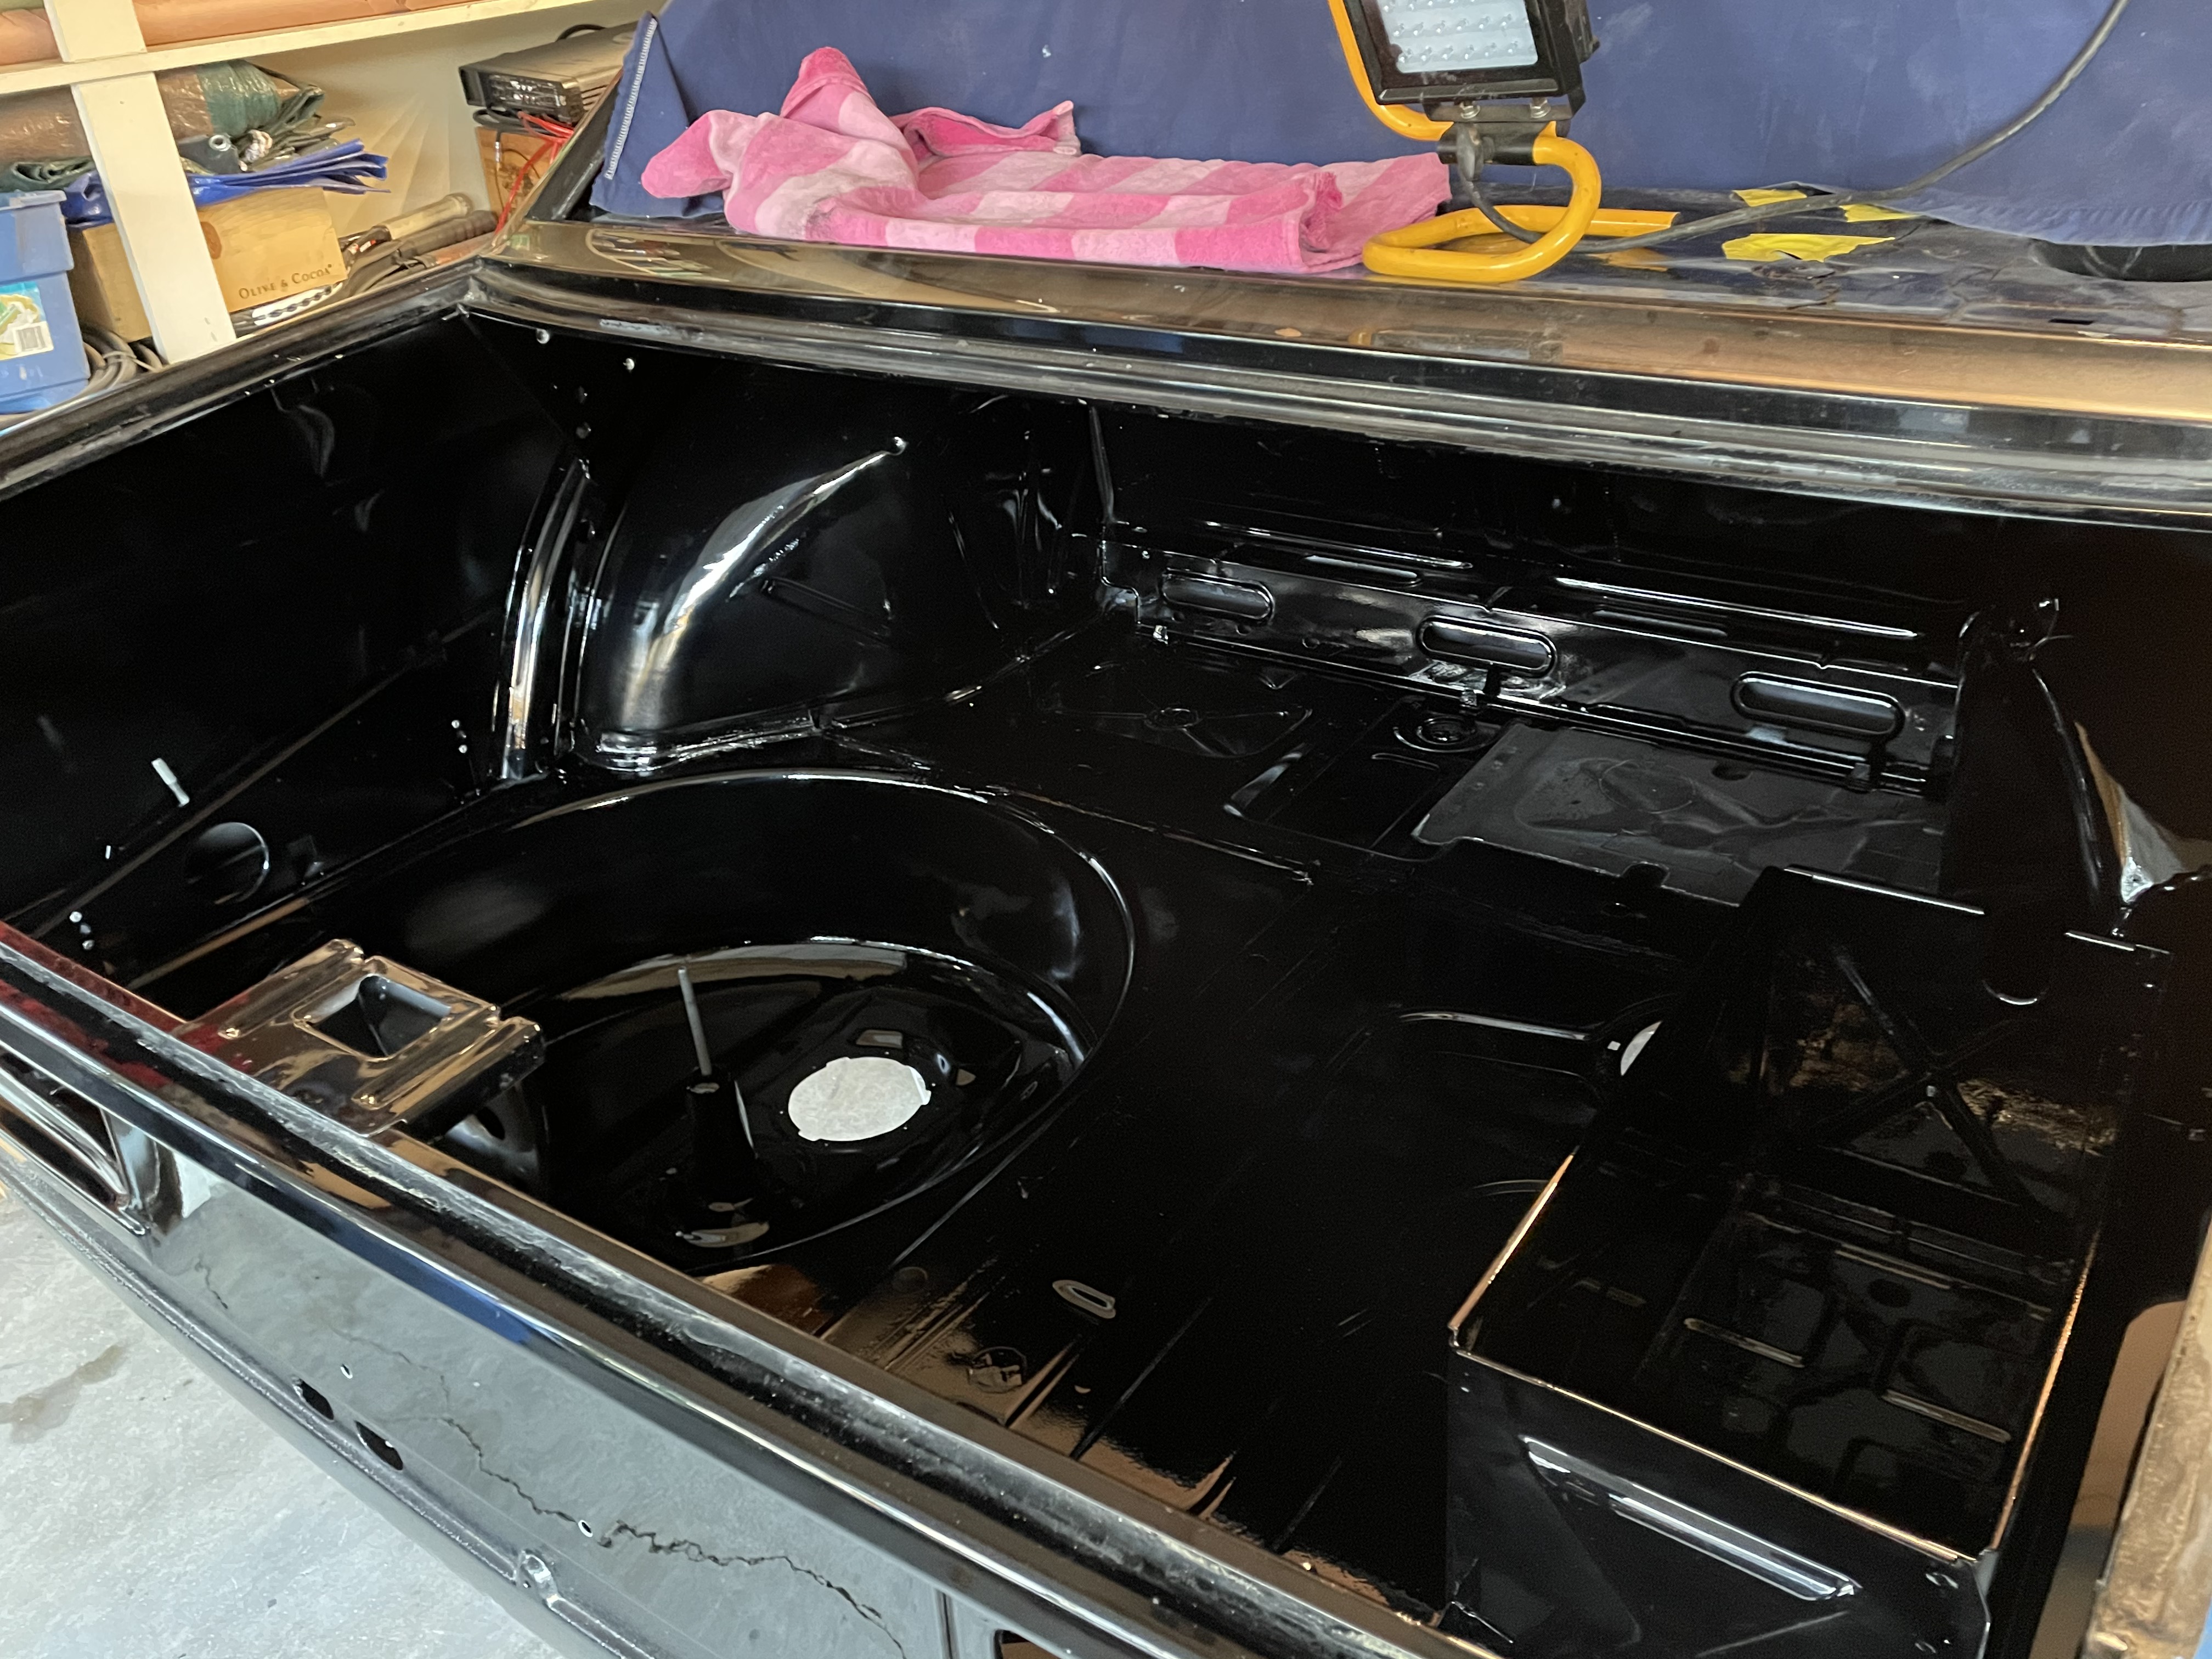
Finally got the first coat of actual black paint on in the trunk. There were at least three prior times when I thought "today's the day," but one little bug or another would pop up its ugly head. The last two were a pair of those little tabs that hold the wiring harness down along the left wheel well. For some reason, they picked separate days to reveal that the metal had fatigued at their roots and were about to break off. I broke them all the way off, sanded off the primer, welded them back and sprayed a bit of new primer. And by then the light was fading and the beer was calling, and spraying real black paint would have to wait another day or three.

This coat wasn't very thick - I definitely didn't "hose" it on. Good news is that I didn't get any runs. Bad news is that at this rate I'll be doing four coats (with sanding in between each one) to get good coverage.

Image

Image
jhh925
Posts: 917
Joined: Jul 11, 2015 12:23 AM
Location: Reno

Re: Rebuilding My 1988 US-spec M5

Post by jhh925 »

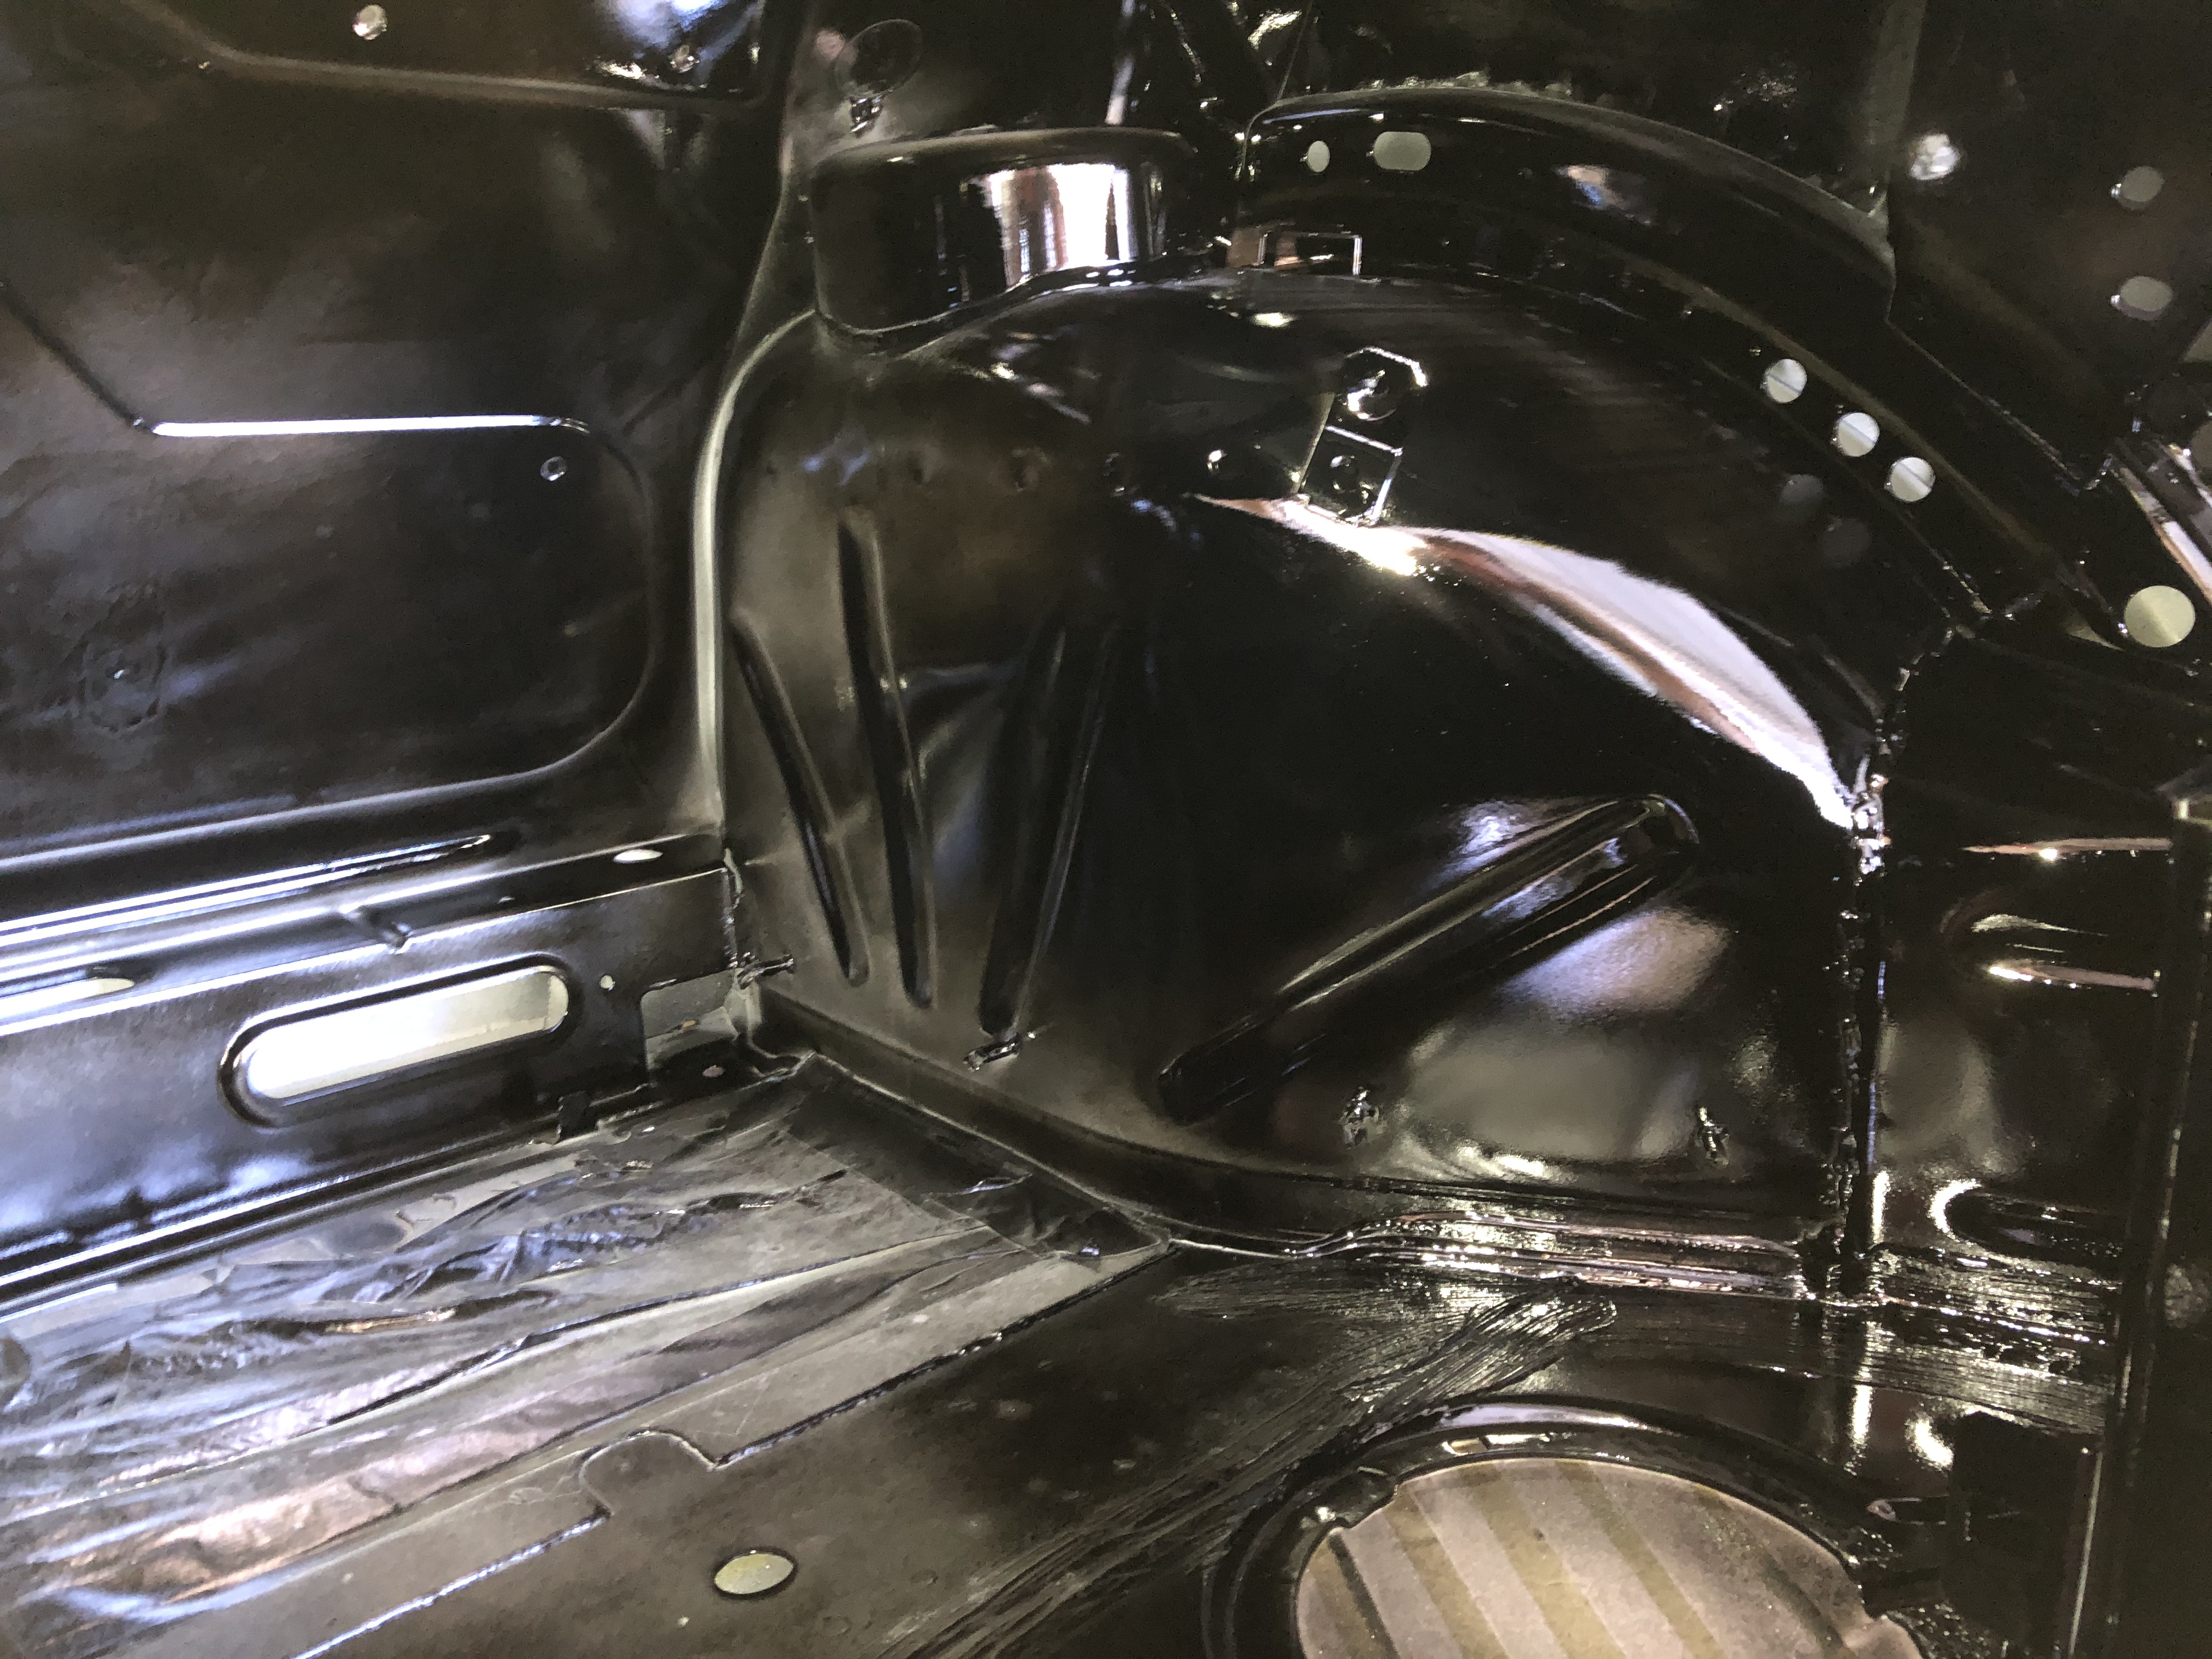
Holy shit ... I've painted my trunk. It's not perfect, but it's a ton better than when I started. And I just looked at the date on the first pics I took when I started working on the trunk: First pics were on November 14th, and I only finished today, December 28th. A month & a half. Yikes.

After the last coat, on closer inspection, there were areas that needed another coat, but also lots of areas that came out just right, and I didn't want to risk ruining them on a respray. So I covered off the good areas, used "back taping" (at least, I think that's what it's called?) at the interfaces and resprayed the areas that needed it.

Image

I'm very pleased with the results. I had a couple foggy areas I fixed, the interfaces needed blending of course, plus one set of drips, then I buffed everything with some Griot's compound.

Image

I also separately painted the hinges, torsion springs and bolts. I'm not actually sure you're supposed to paint the bolts while they're off the car? Regardless, I'll give this a try; I assume I'll need to touch them up after they're tightened down.

Image

The gutter where the trunk seal gets glued in is in good shape (straight, no rust), but the paint is ruined where the glue bit in hard. I can't see any purpose in completely refinishing the gutter, but I do want the paint to be thick & strong enough that the chance of future rust is minimized, so I'll need to work on that.

One of the main reasons I wanted to paint the trunk was to learn a bit about painting. This was my first real go at this, but I feel like this is a decent start. If I were to do this again, here are a few things I'd do differently:
  • I used an Eastwood HVLP touchup gun with a normal gravity feed paint cup. In the confined space of these trunks, I had to nearly turn the gun upside down a few times, This caused all kinds of problems with the pain oozing out of the bleed hole at the top of the cup. Next time (and maybe just in general), I'd use one of those disposable, collapsing cup deals (like the "DeKups" system).
  • I used a gray primer thinking that it would look more like the "original" gray primer this car had under the black paint. Bad decision. That forced me to focus a lot more on getting base coat into lots of little nooks & crannies, which was a waste of time & paint.
  • And if I'd used black primer, it would have made it a lot more obvious early on that it would have been easy to improve the finish in the trunk seal gutter.
  • I should have ground down all the little original factory welding glitches. Lots of spot welds had "splinters" sticking up and there was lots of welding splatter on & near the fender wells. Those welding glitches could have easily been ground off to start, and that wold have made sanding & finishing a lot easier later on.
Next on the list, I think, will be to start in on the braking system.
jhh925
Posts: 917
Joined: Jul 11, 2015 12:23 AM
Location: Reno

Re: Rebuilding My 1988 US-spec M5

Post by jhh925 »

Time for an update. My memory (no doubt through rose-colored lenses) is that it took me a lot longer to dismantle my '87 than it did to put it back together. Logically, that makes no sense.

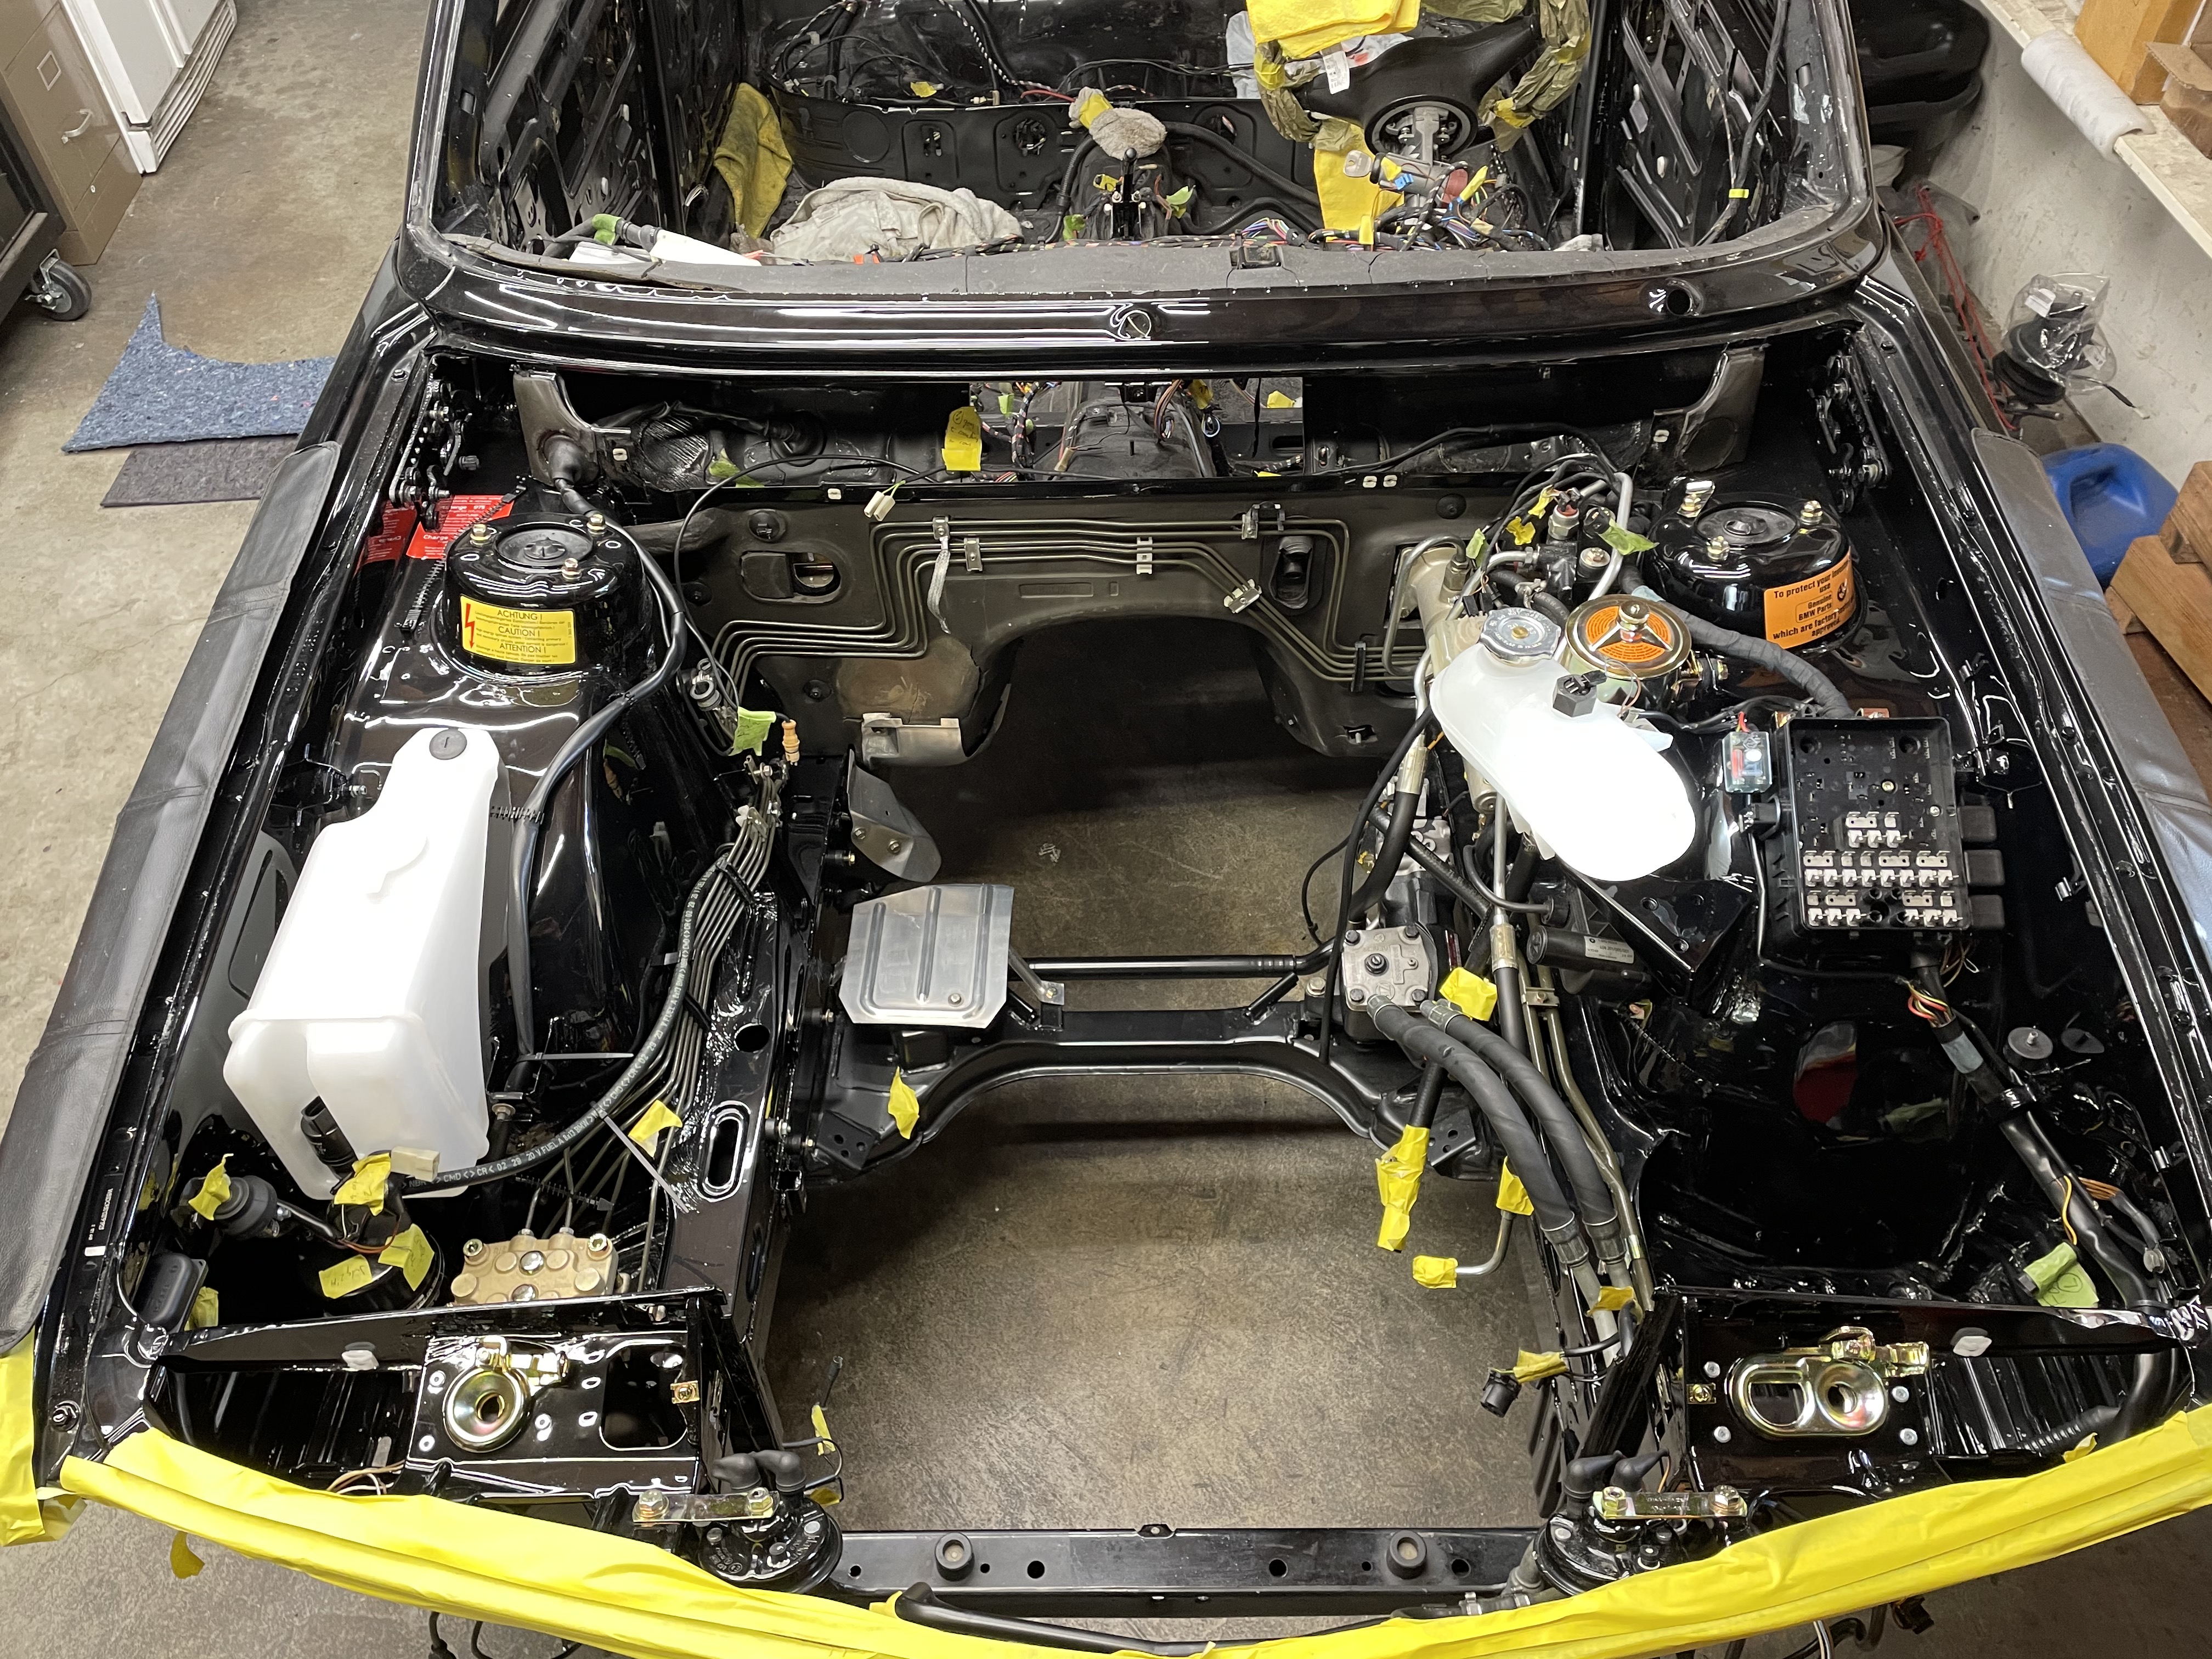
And sure enough, progress feels much slower this time around. My guess is that's for two reasons: First, I tore this car down further, so cleaning all the little bits & parts up this time is taking longer just cause there are more of them. Second, my impression is that with the S38 motor, there's zero room to maneuver in the engine compartment, so I'm being paranoid about getting as much done in there as possible before I drop the motor back in. One result is that essentially I need to get far enough on the interior work that I'm comfortable putting the carpet in before I can drop the motor back in. The logic there is, coolant hoses & heater control valve before engine, which implies heater core box back in, which means carpet has to go in before heater core, which means all the wiring under the carpet has to be done before the carpet can go back in.

The bummer about having to wait so long to put the motor back in is that I have this big lump on a stand in the corner of the garage taking up a bunch of room. Oh well.

So, progress since last post:

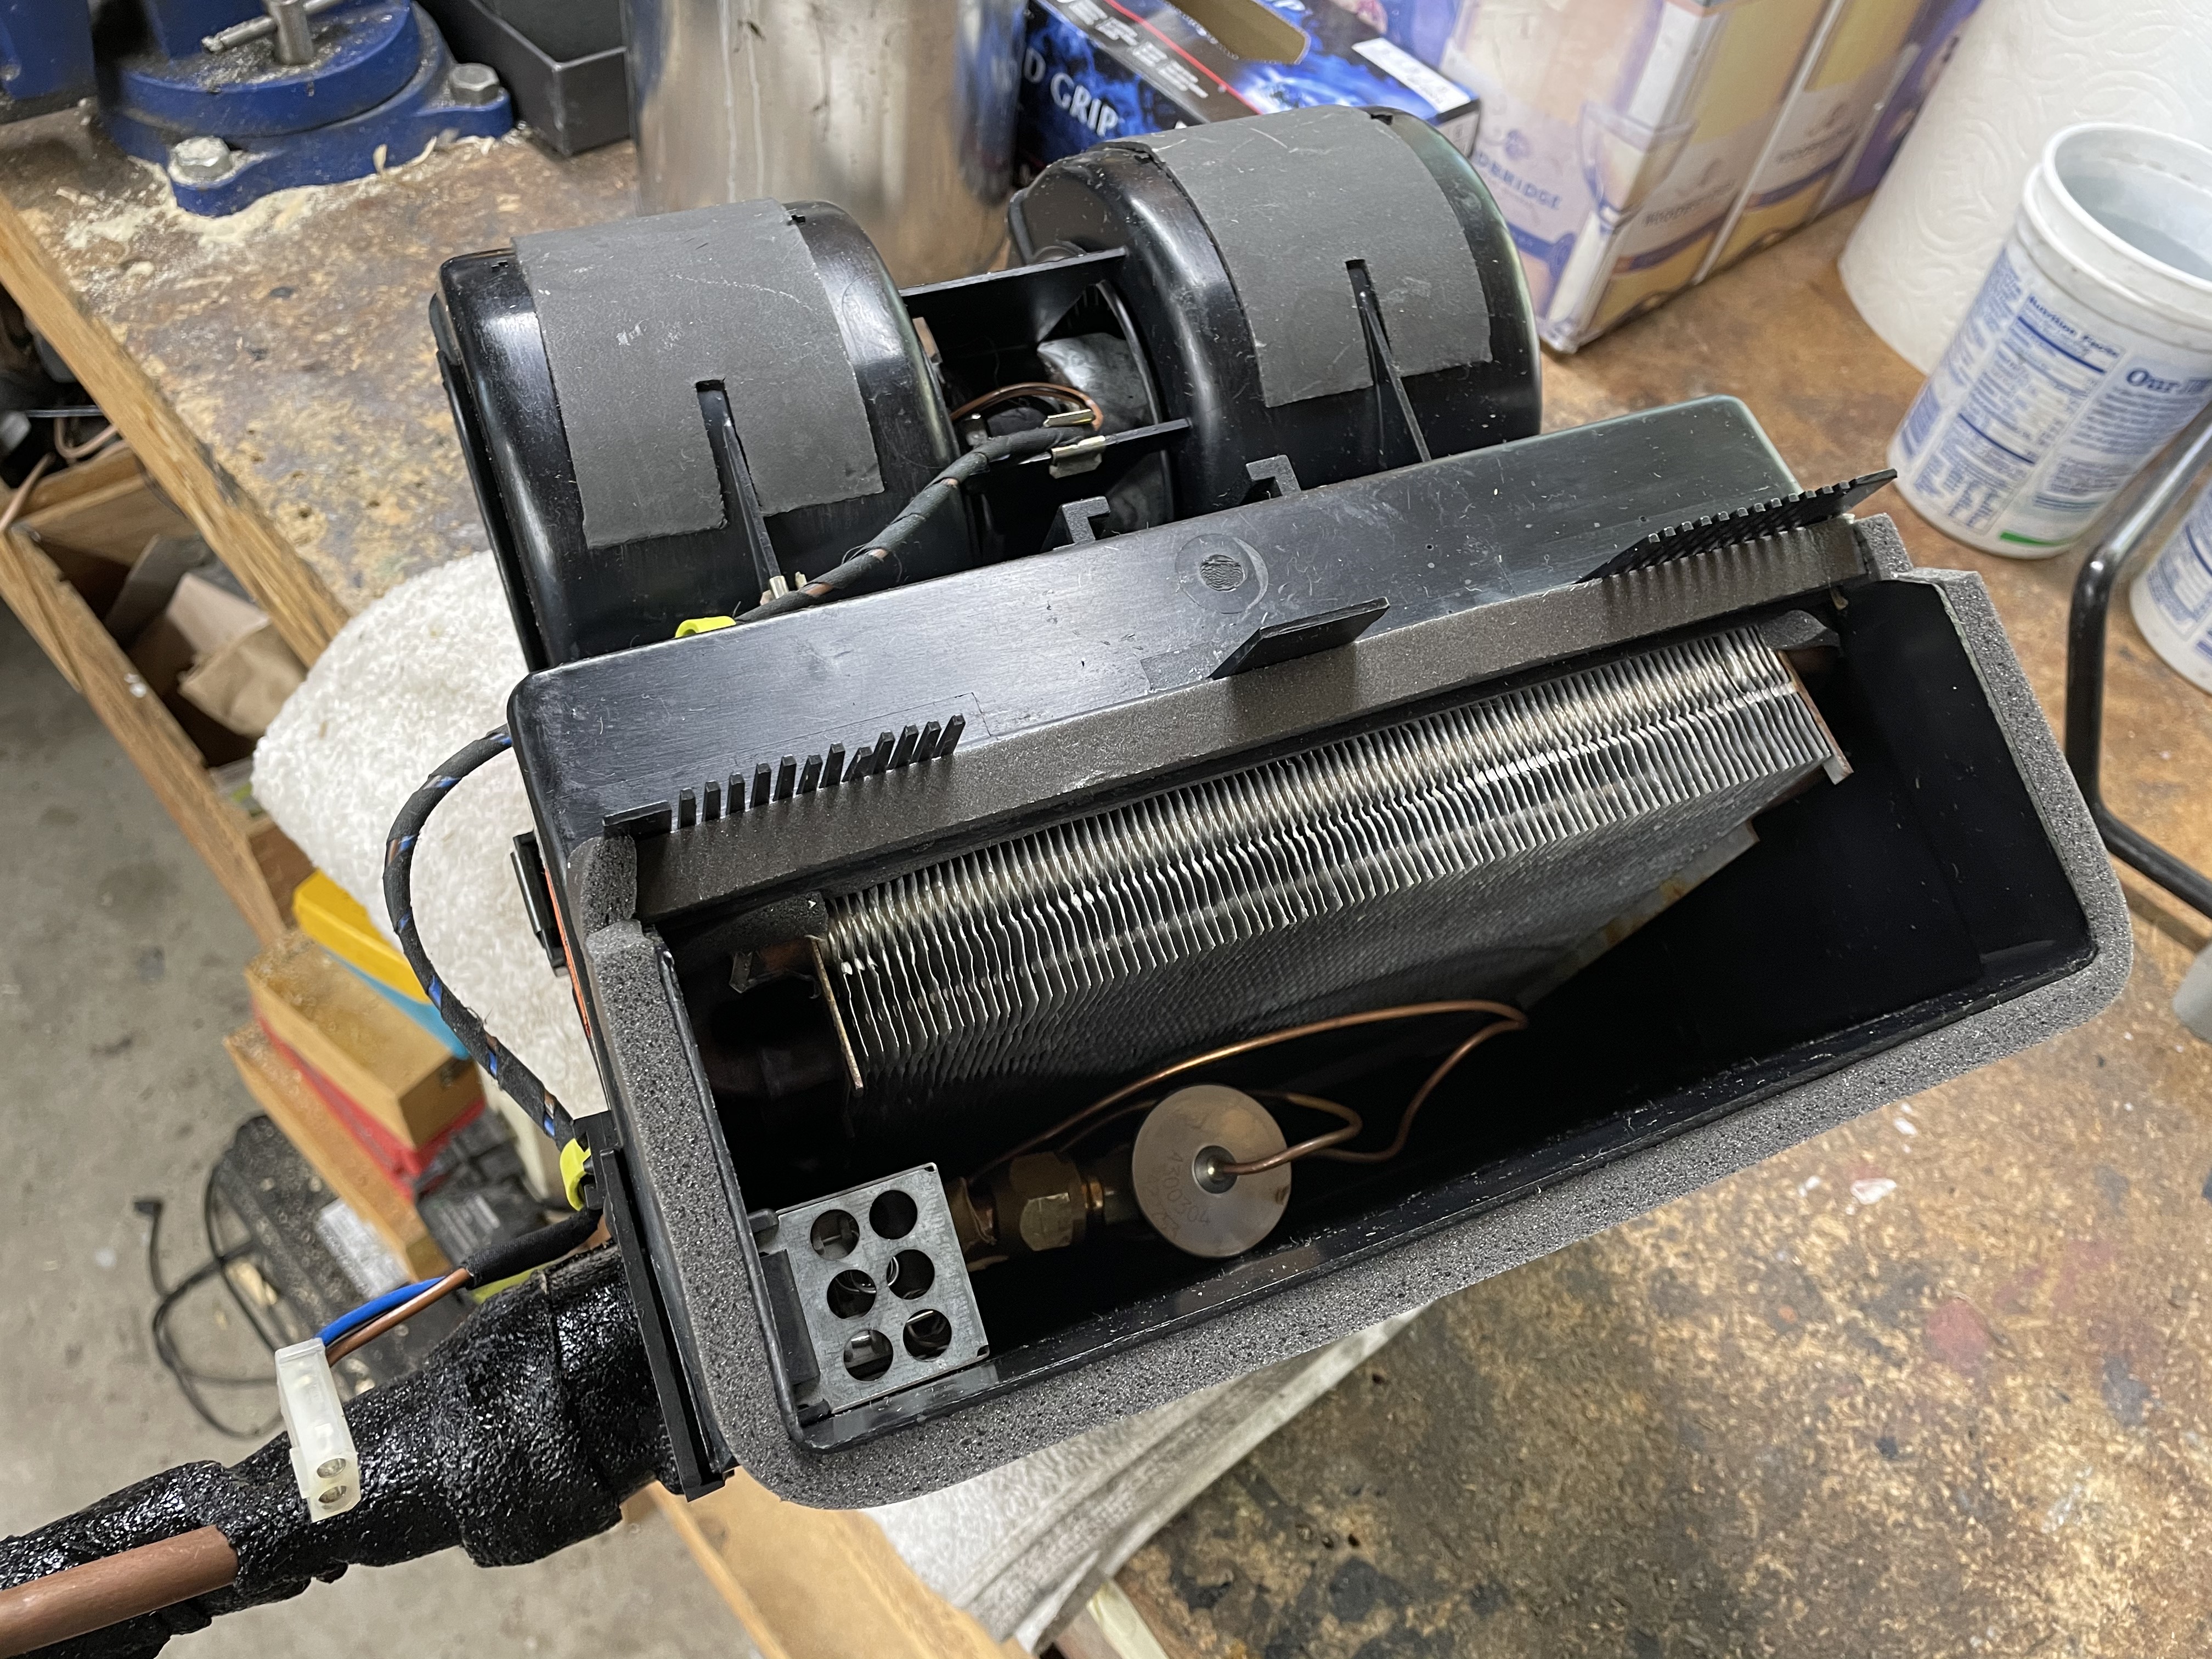
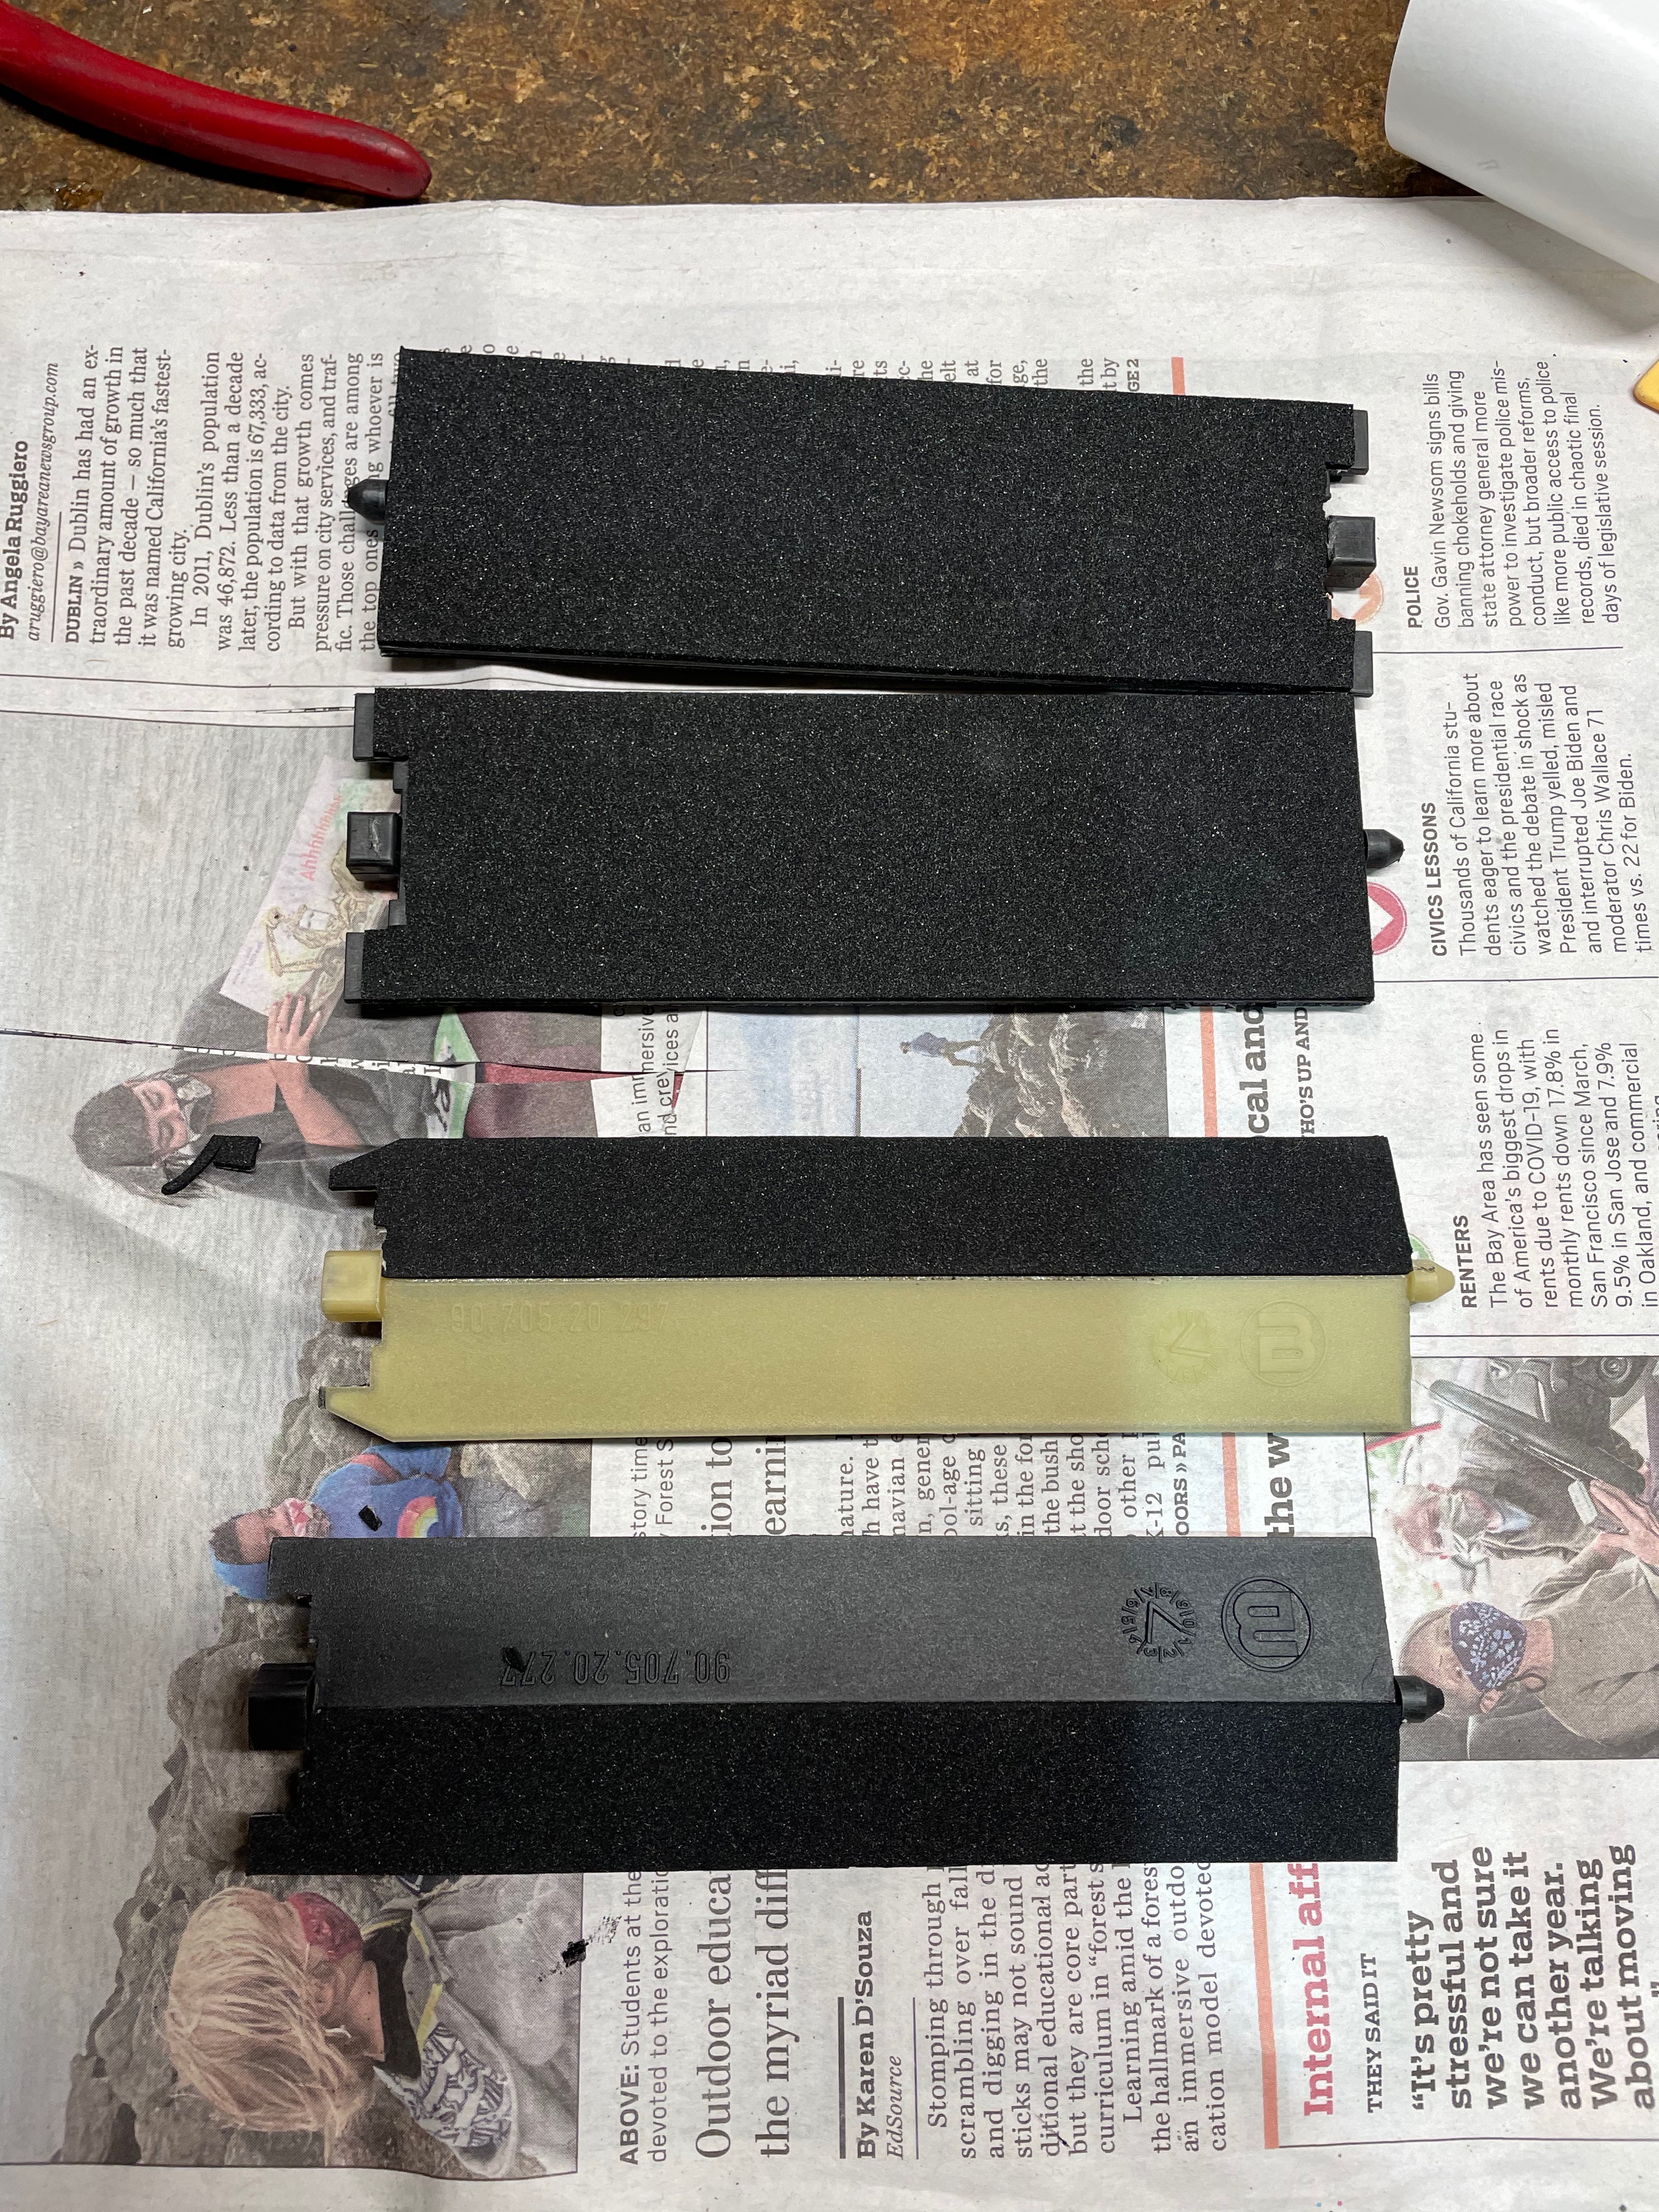
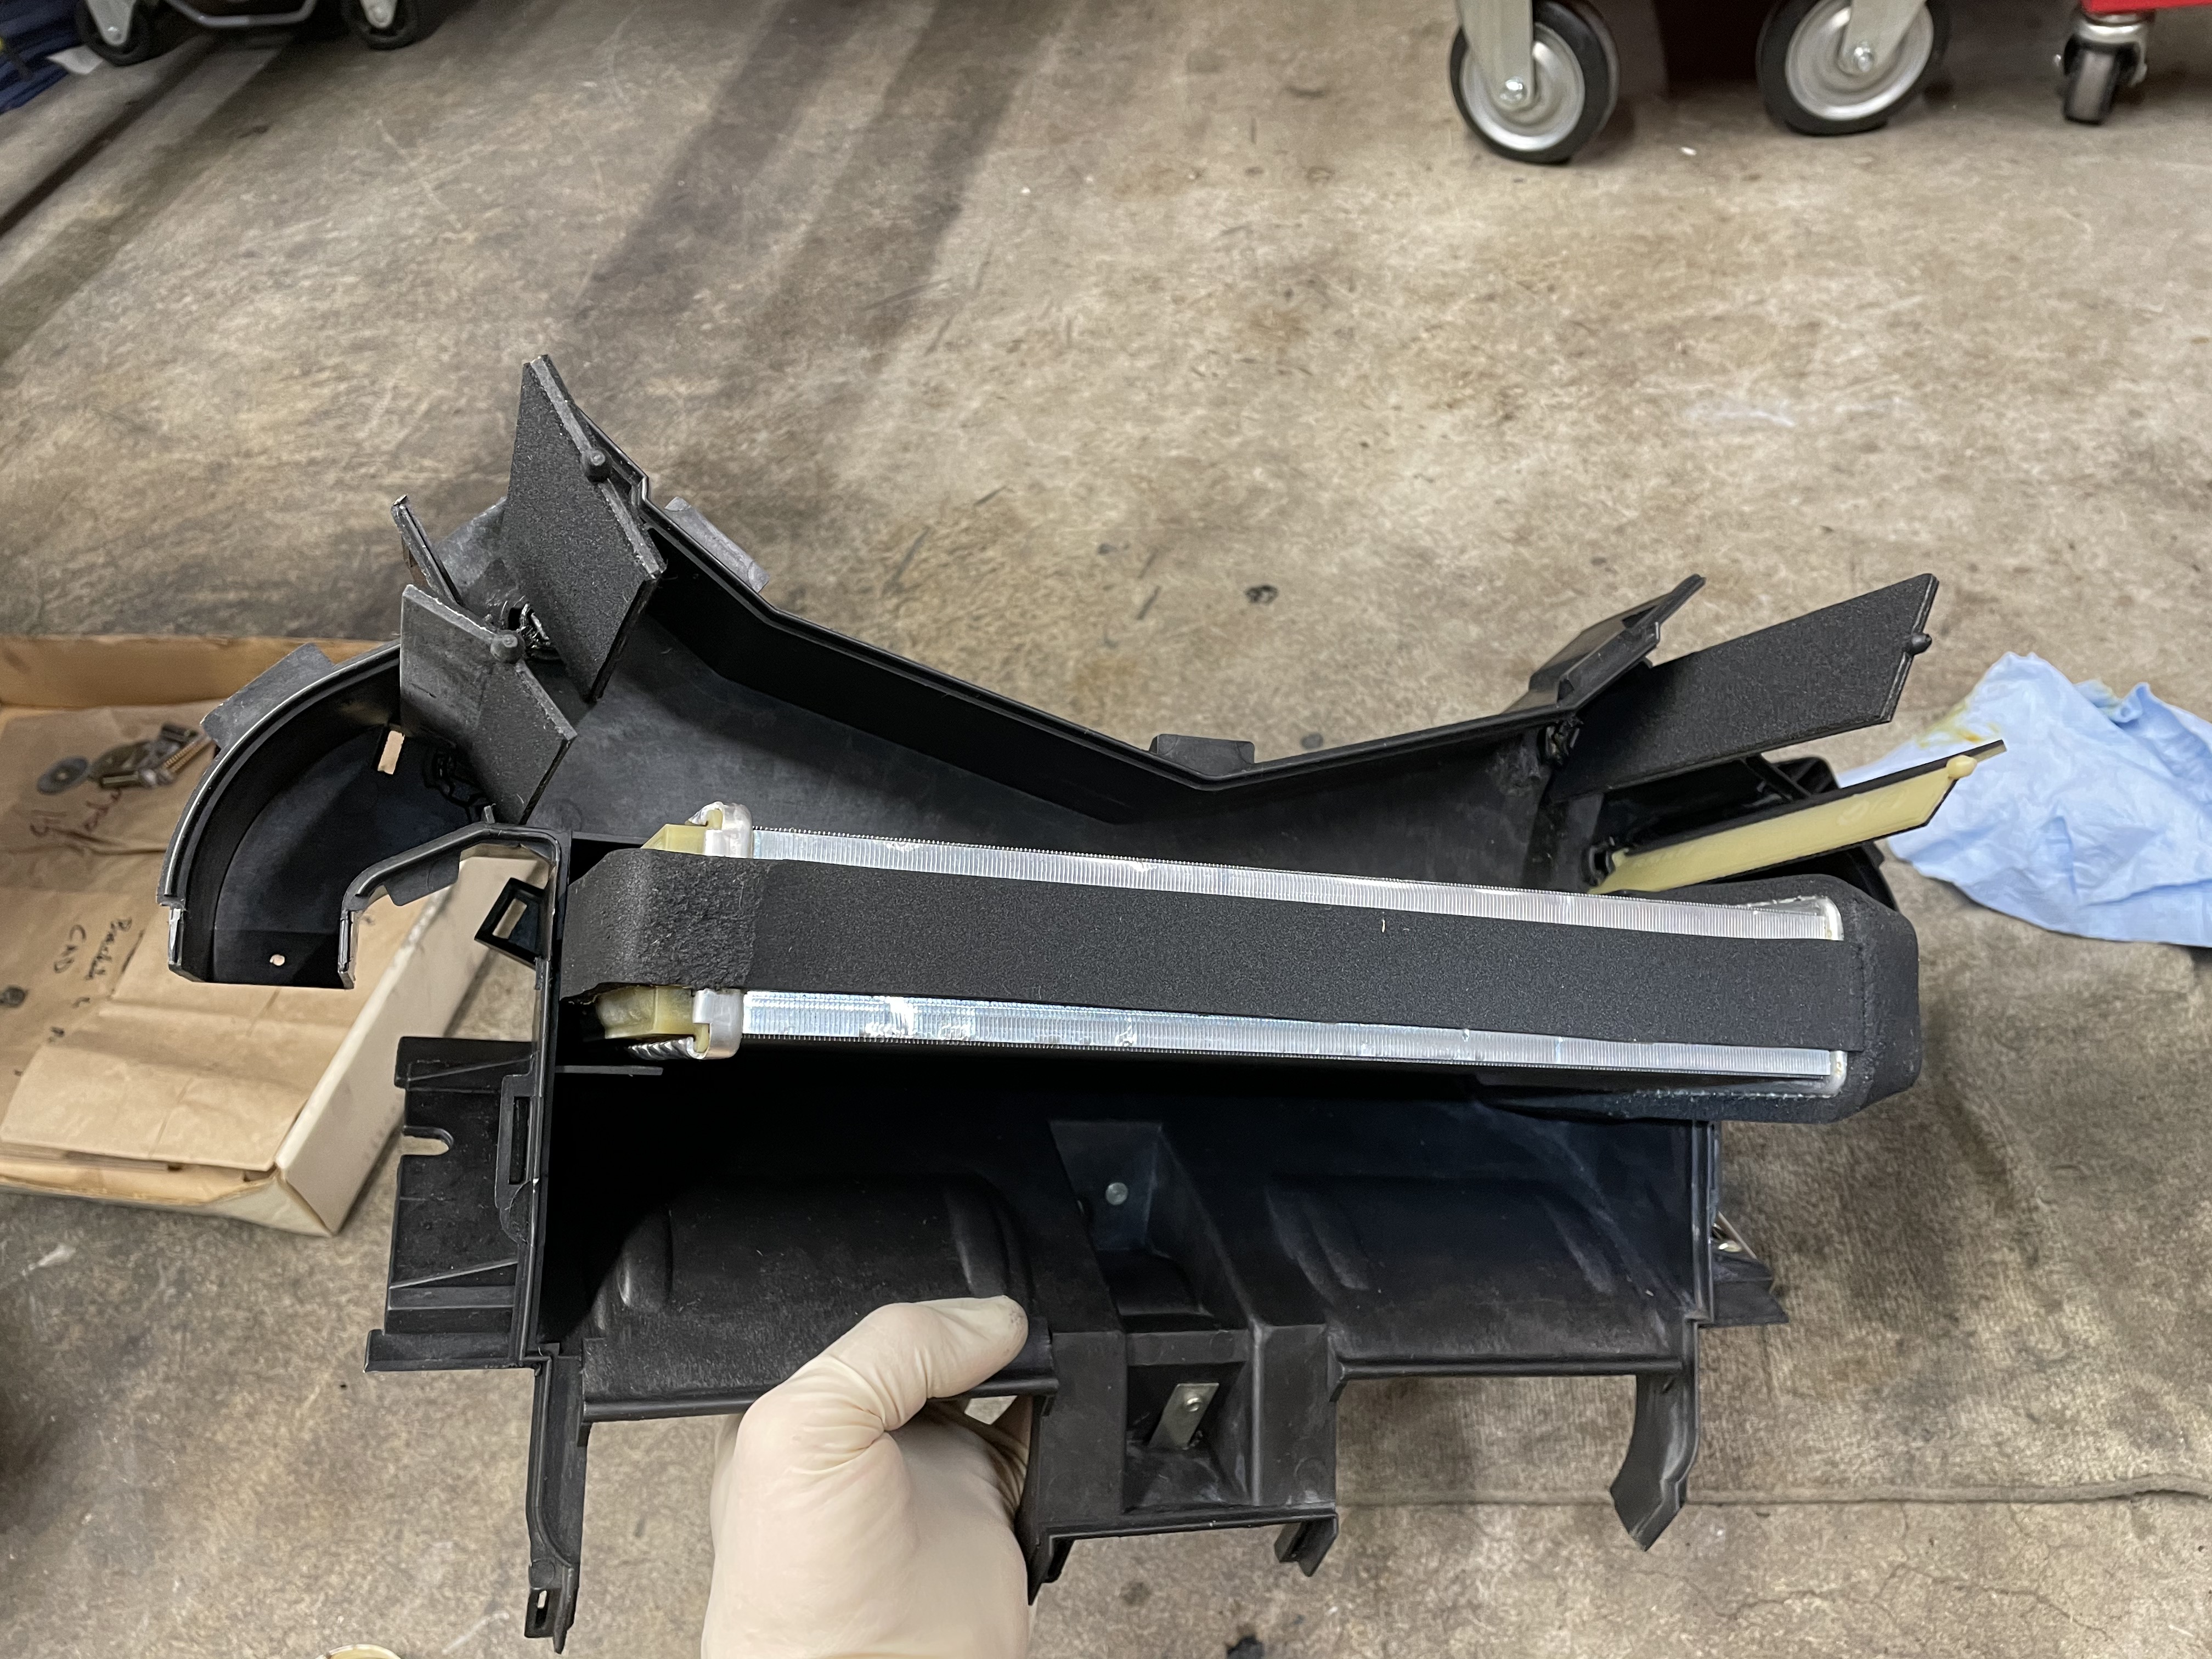
I've cleaned & refurbished the hearer core box. I pressure tested the BEHR core, which seems to be original and in good shape. It's a risk, but I've decided not to replace the core itself. All the foam sealing in the box, though, is a different story. The local hardware store had nice soft 1 x 3/16th inch foam strips, which worked really well around the core, and I found great 1/16th inch adhesive open cell foam on Amazon, which was perfect for the flapper doors. That thin foam will also work well in a number of other applications (dash vents & flappers, fuel pump access cover to name a couple). Some before & after:

Image

Image

Image

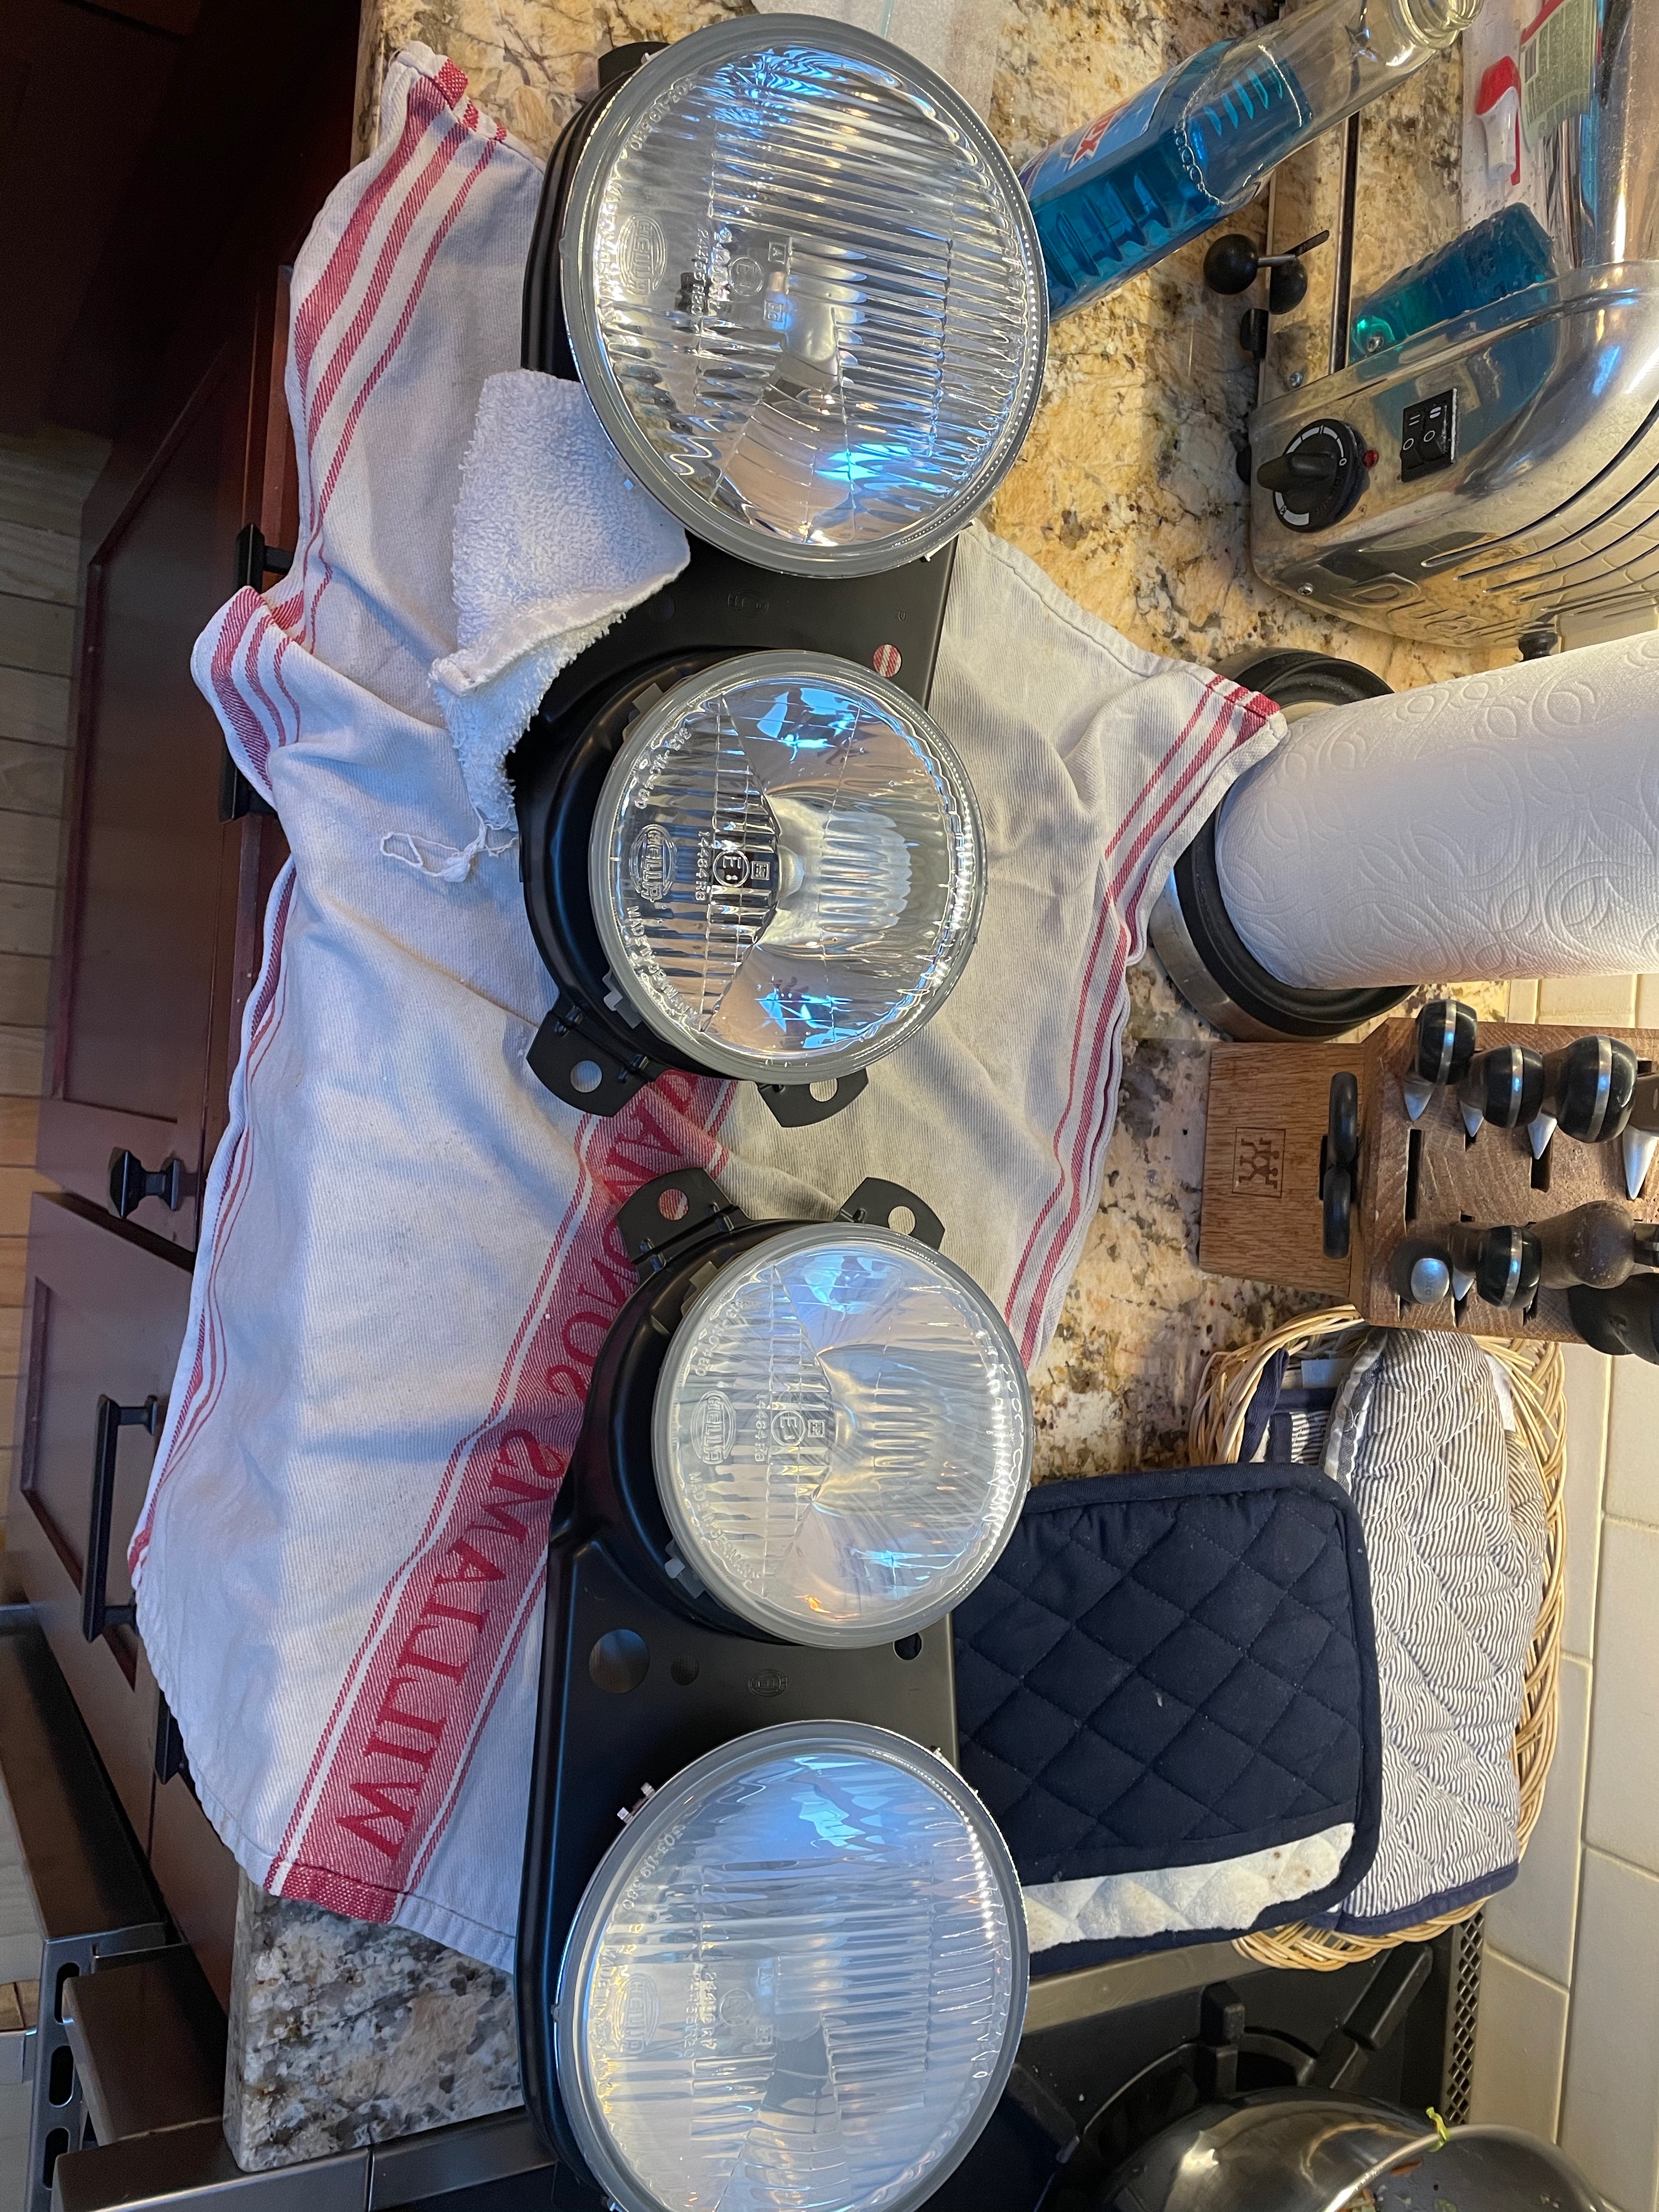
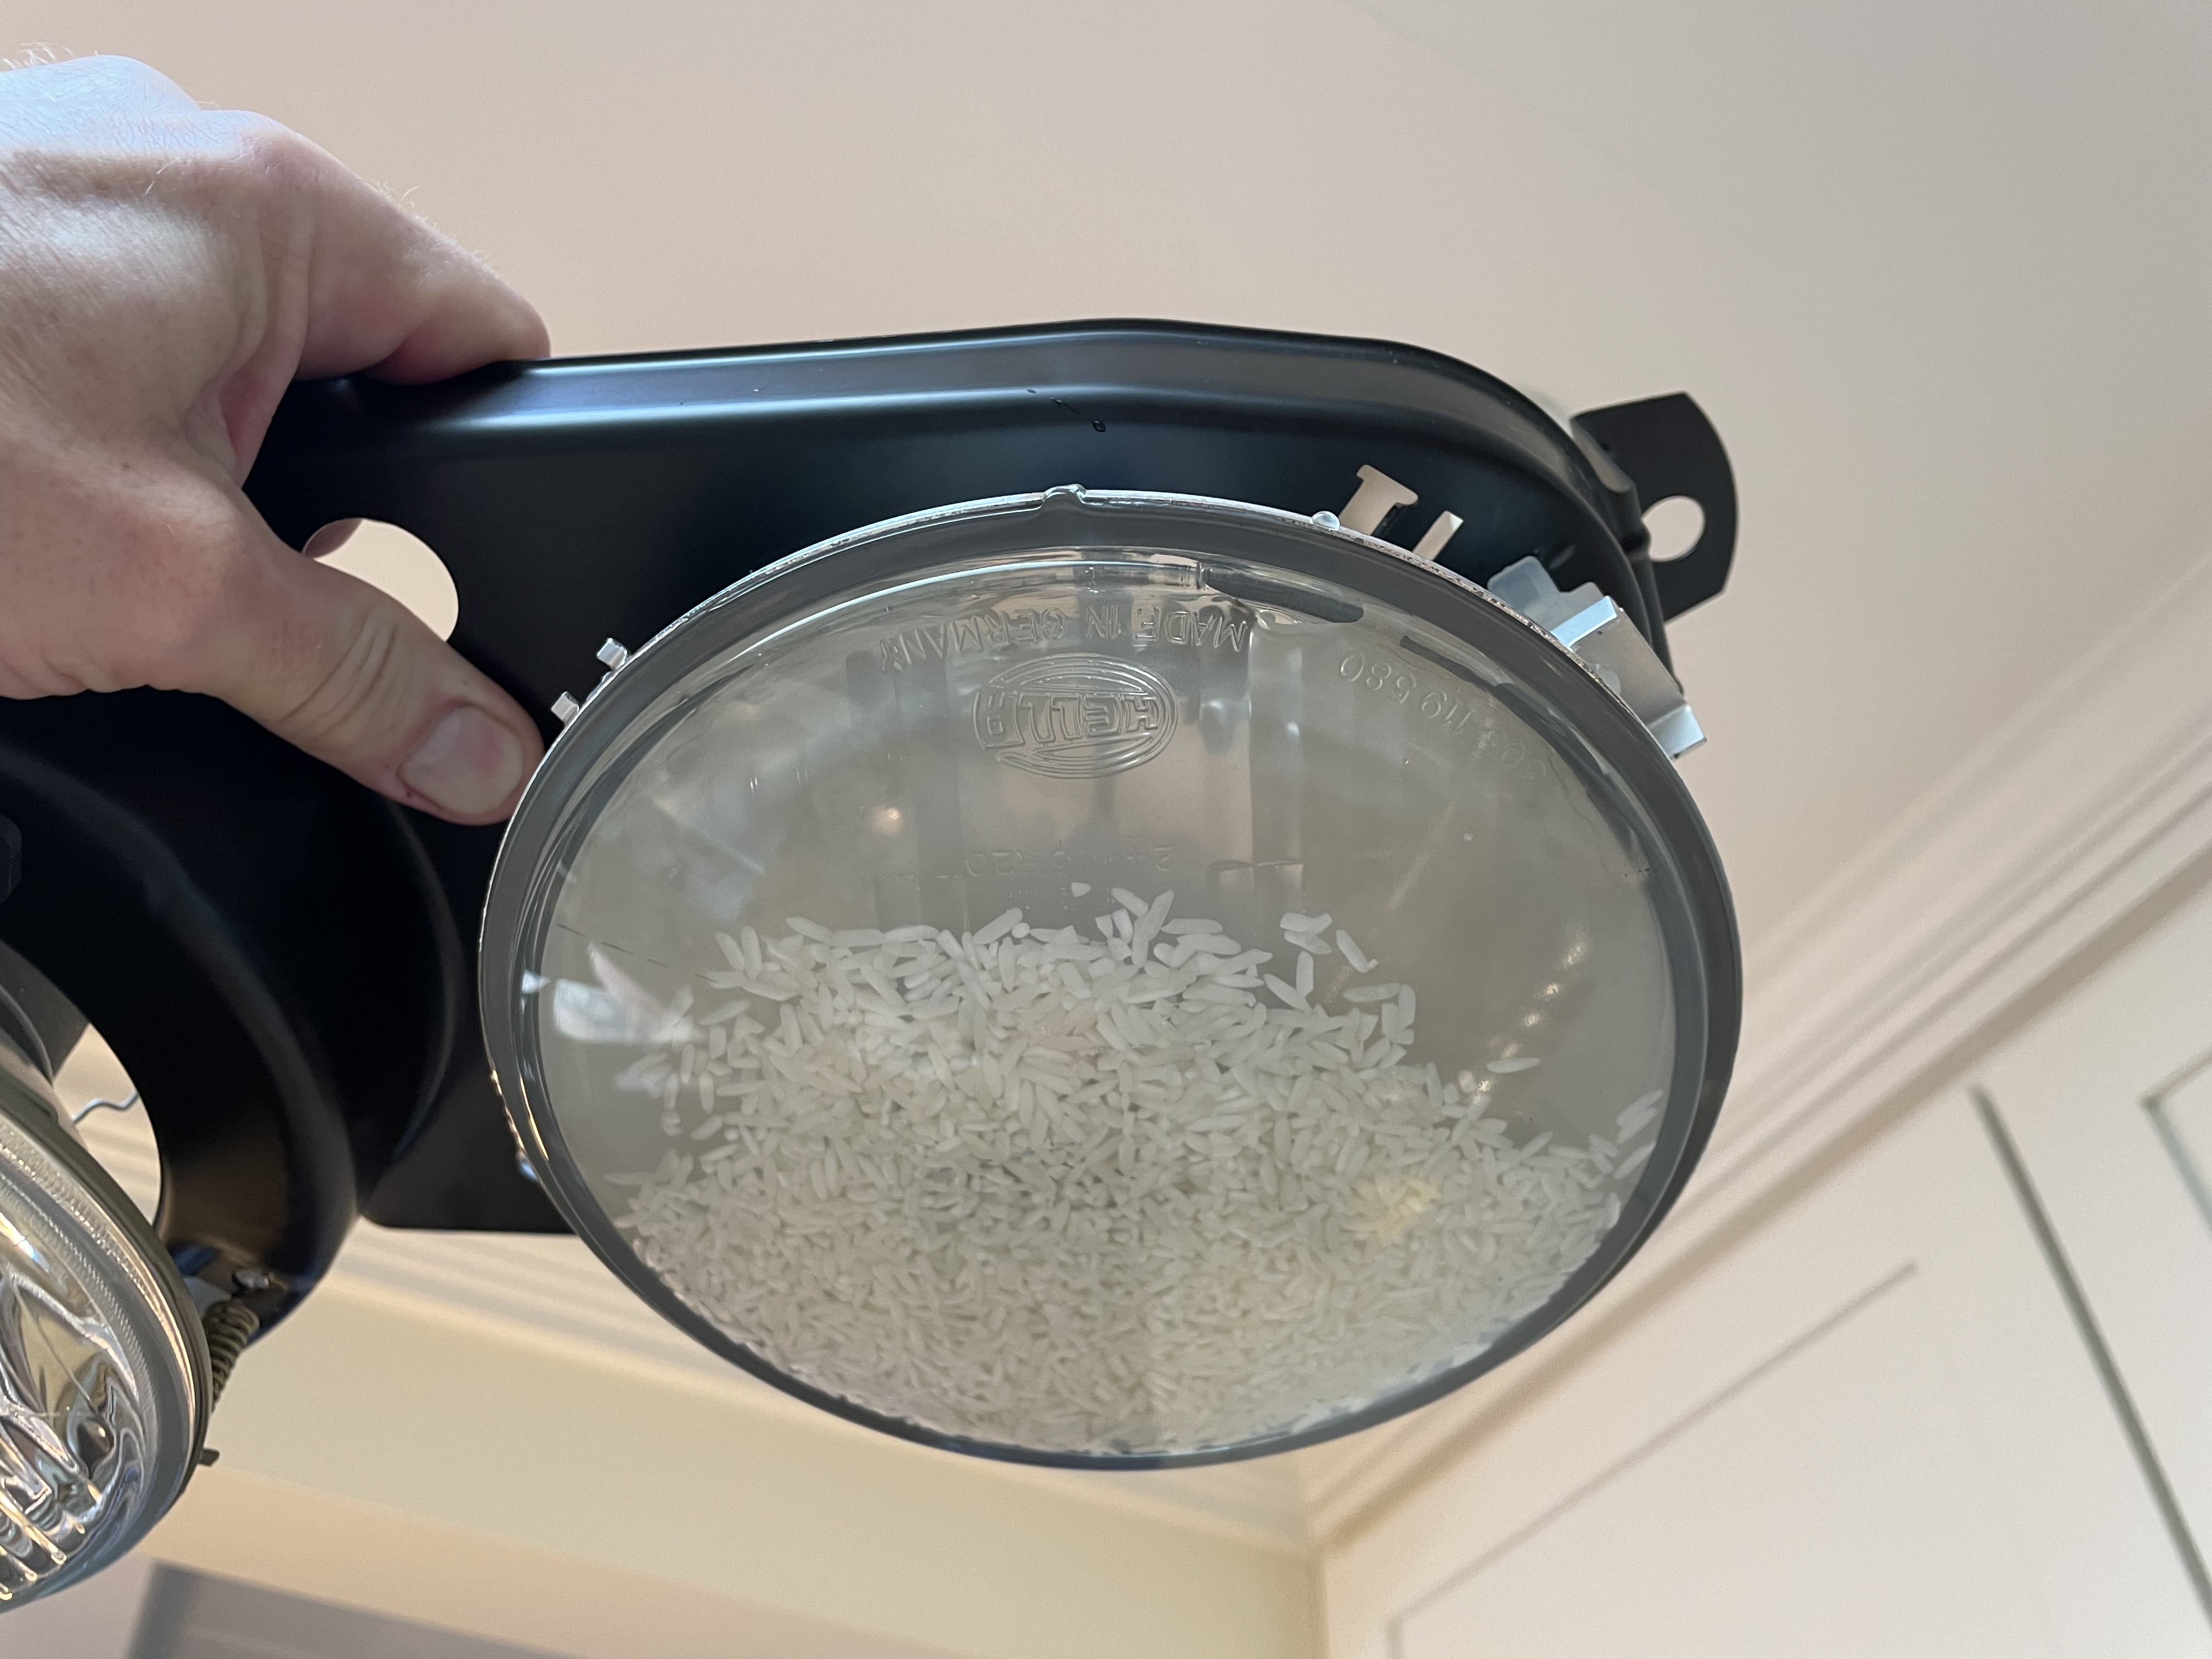
I also decided to tackle the foggy headlight lenses. A couple years ago I found brand new Euro headlight assemblies (lenses, frames, springs, adjusting parts, etc.) but the lenses were thick with that gray off-gassing fog. My approach was to put soapy water in there with clean rice, then gently swirl the slurry with the glass facing down for several minutes to try to gently scrub the fog off. That got it to maybe 90% better in the small lenses & 80% in the large? I then used a sponge with isopropyl alcohol in the large lenses, which improved things more. Before & after:

Image

Rice cleaning:

Image

I also riveted in the body-side hood latches in. These were yellow zinc plated a while back, and the rivets are the correct BMW OEM steel rivets. Seeing the latches in place now, I think the "yellow-aluminum finish rivets-black paint" combo isn't great. Oh, well - I'm not going to redo them. I'm hoping that as more stuff gets put back on the car, the bright yellow latches will blend in better.

Image

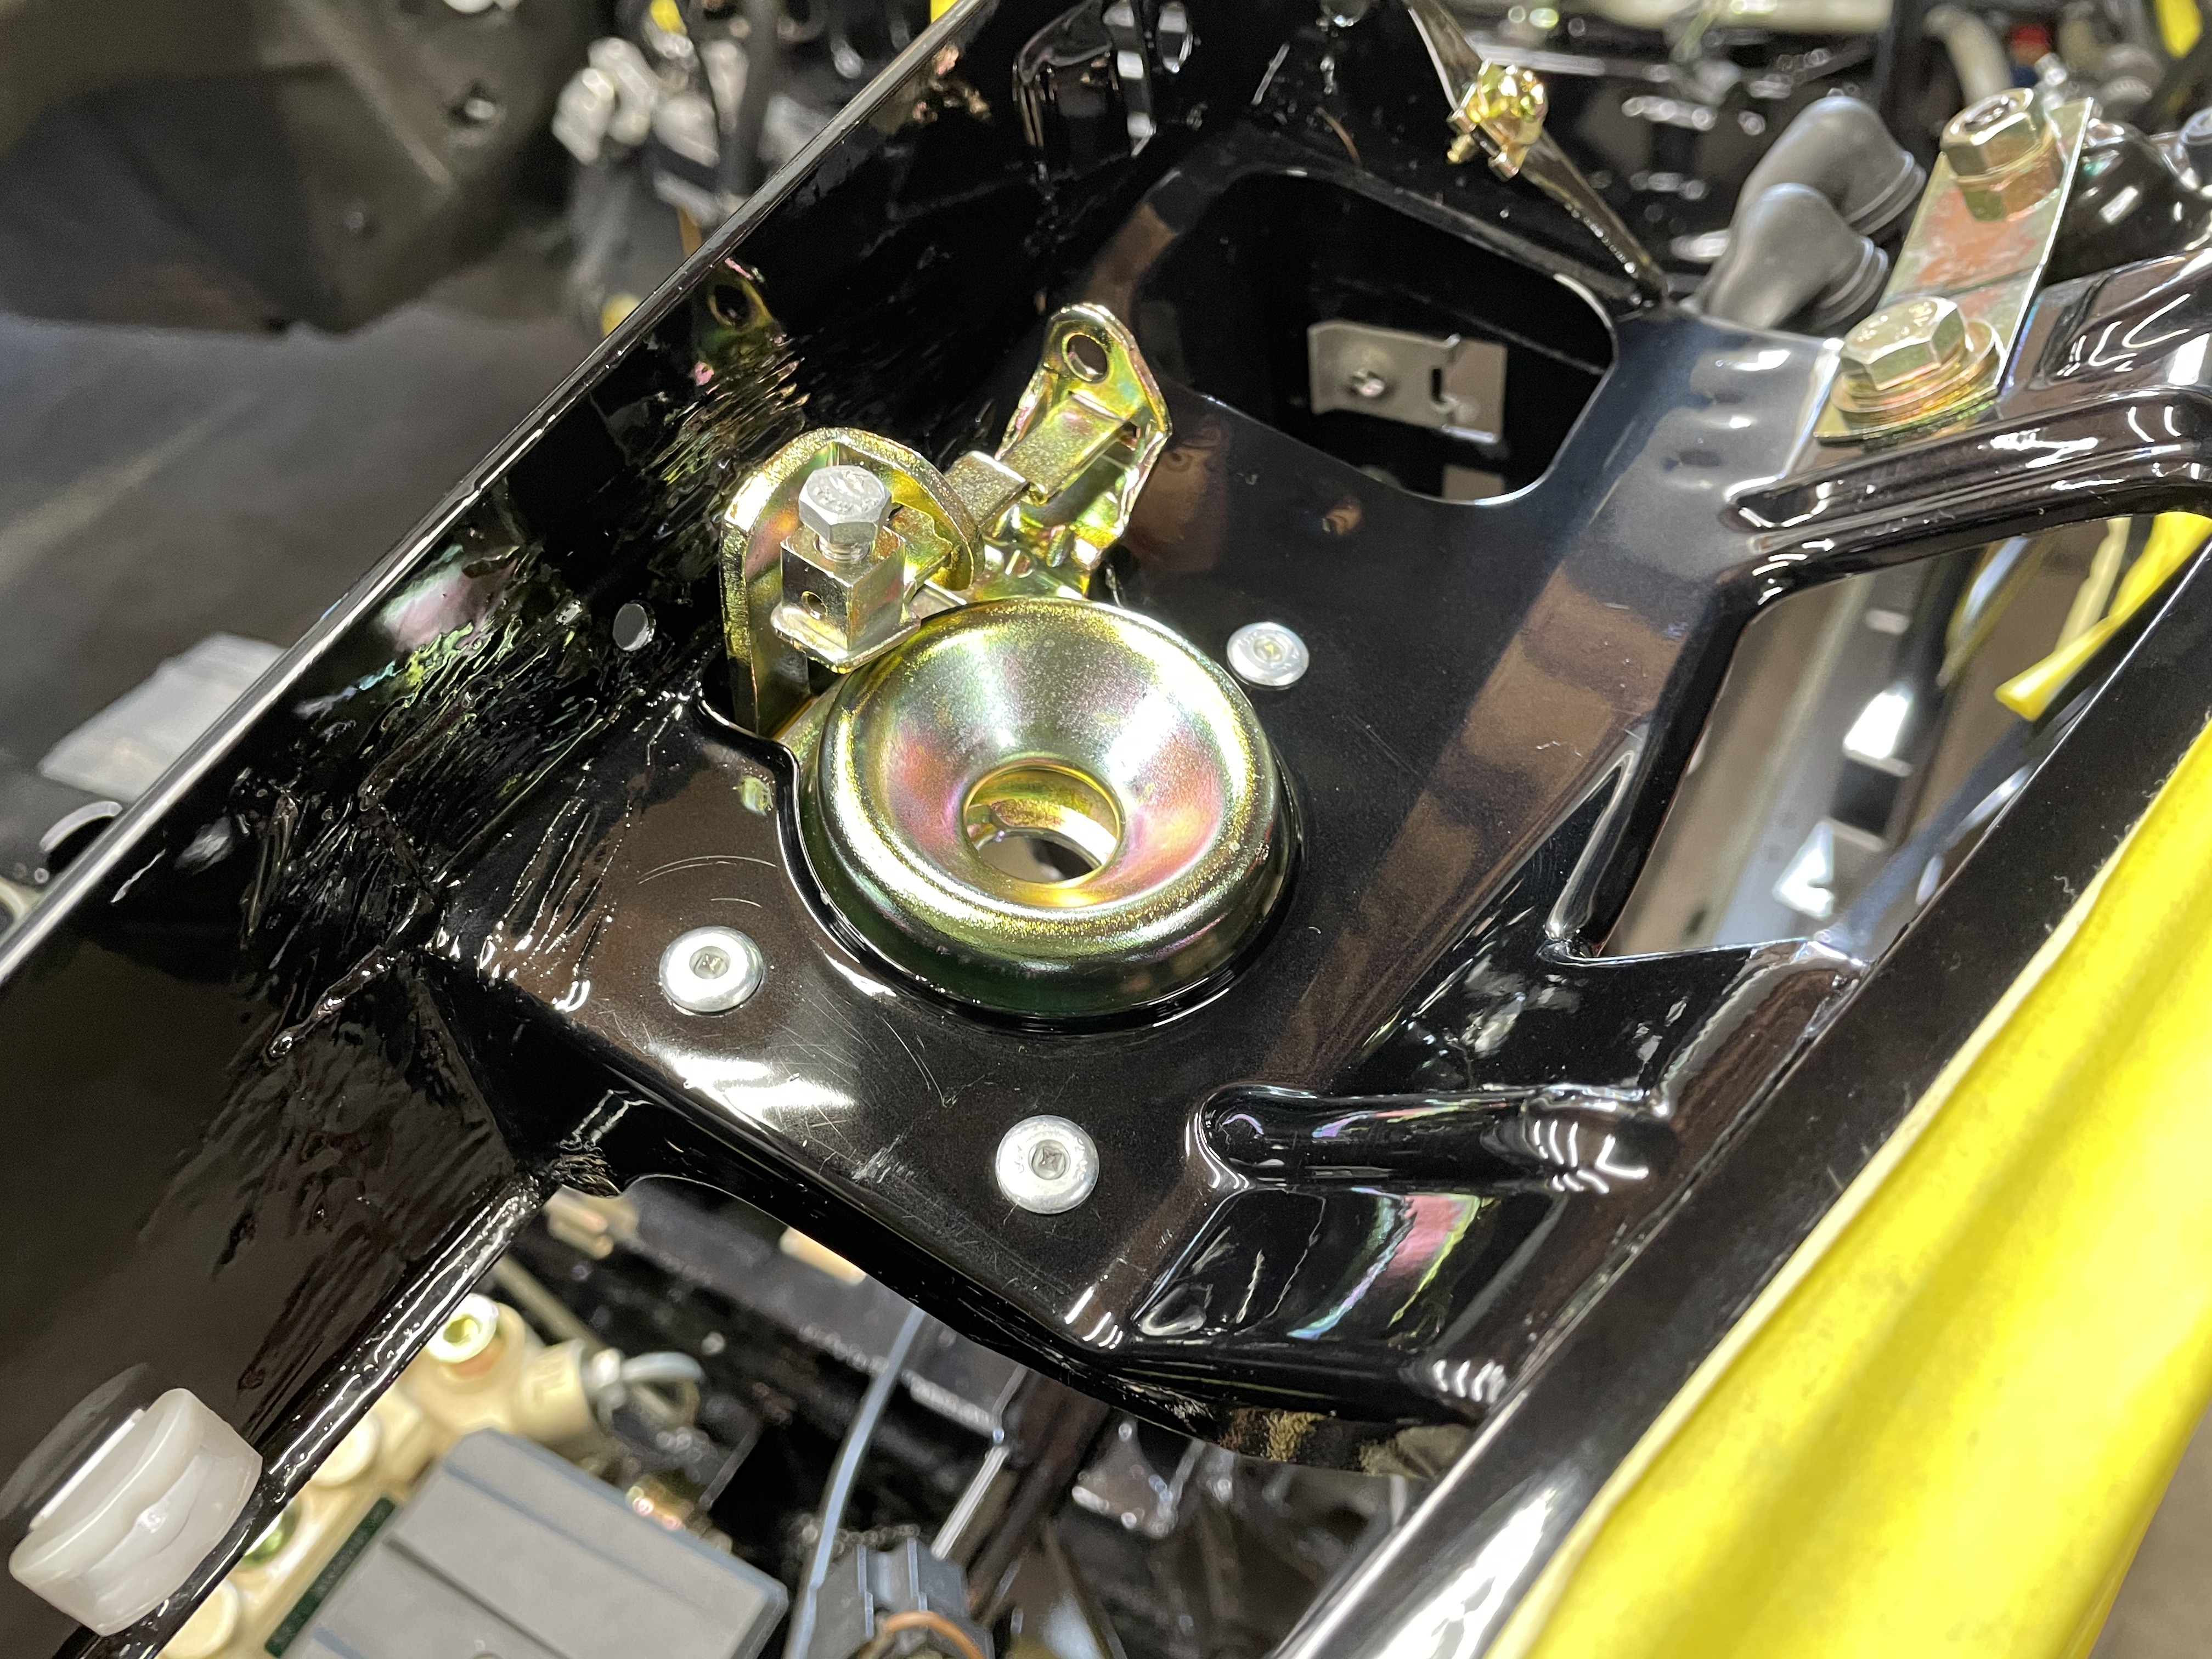
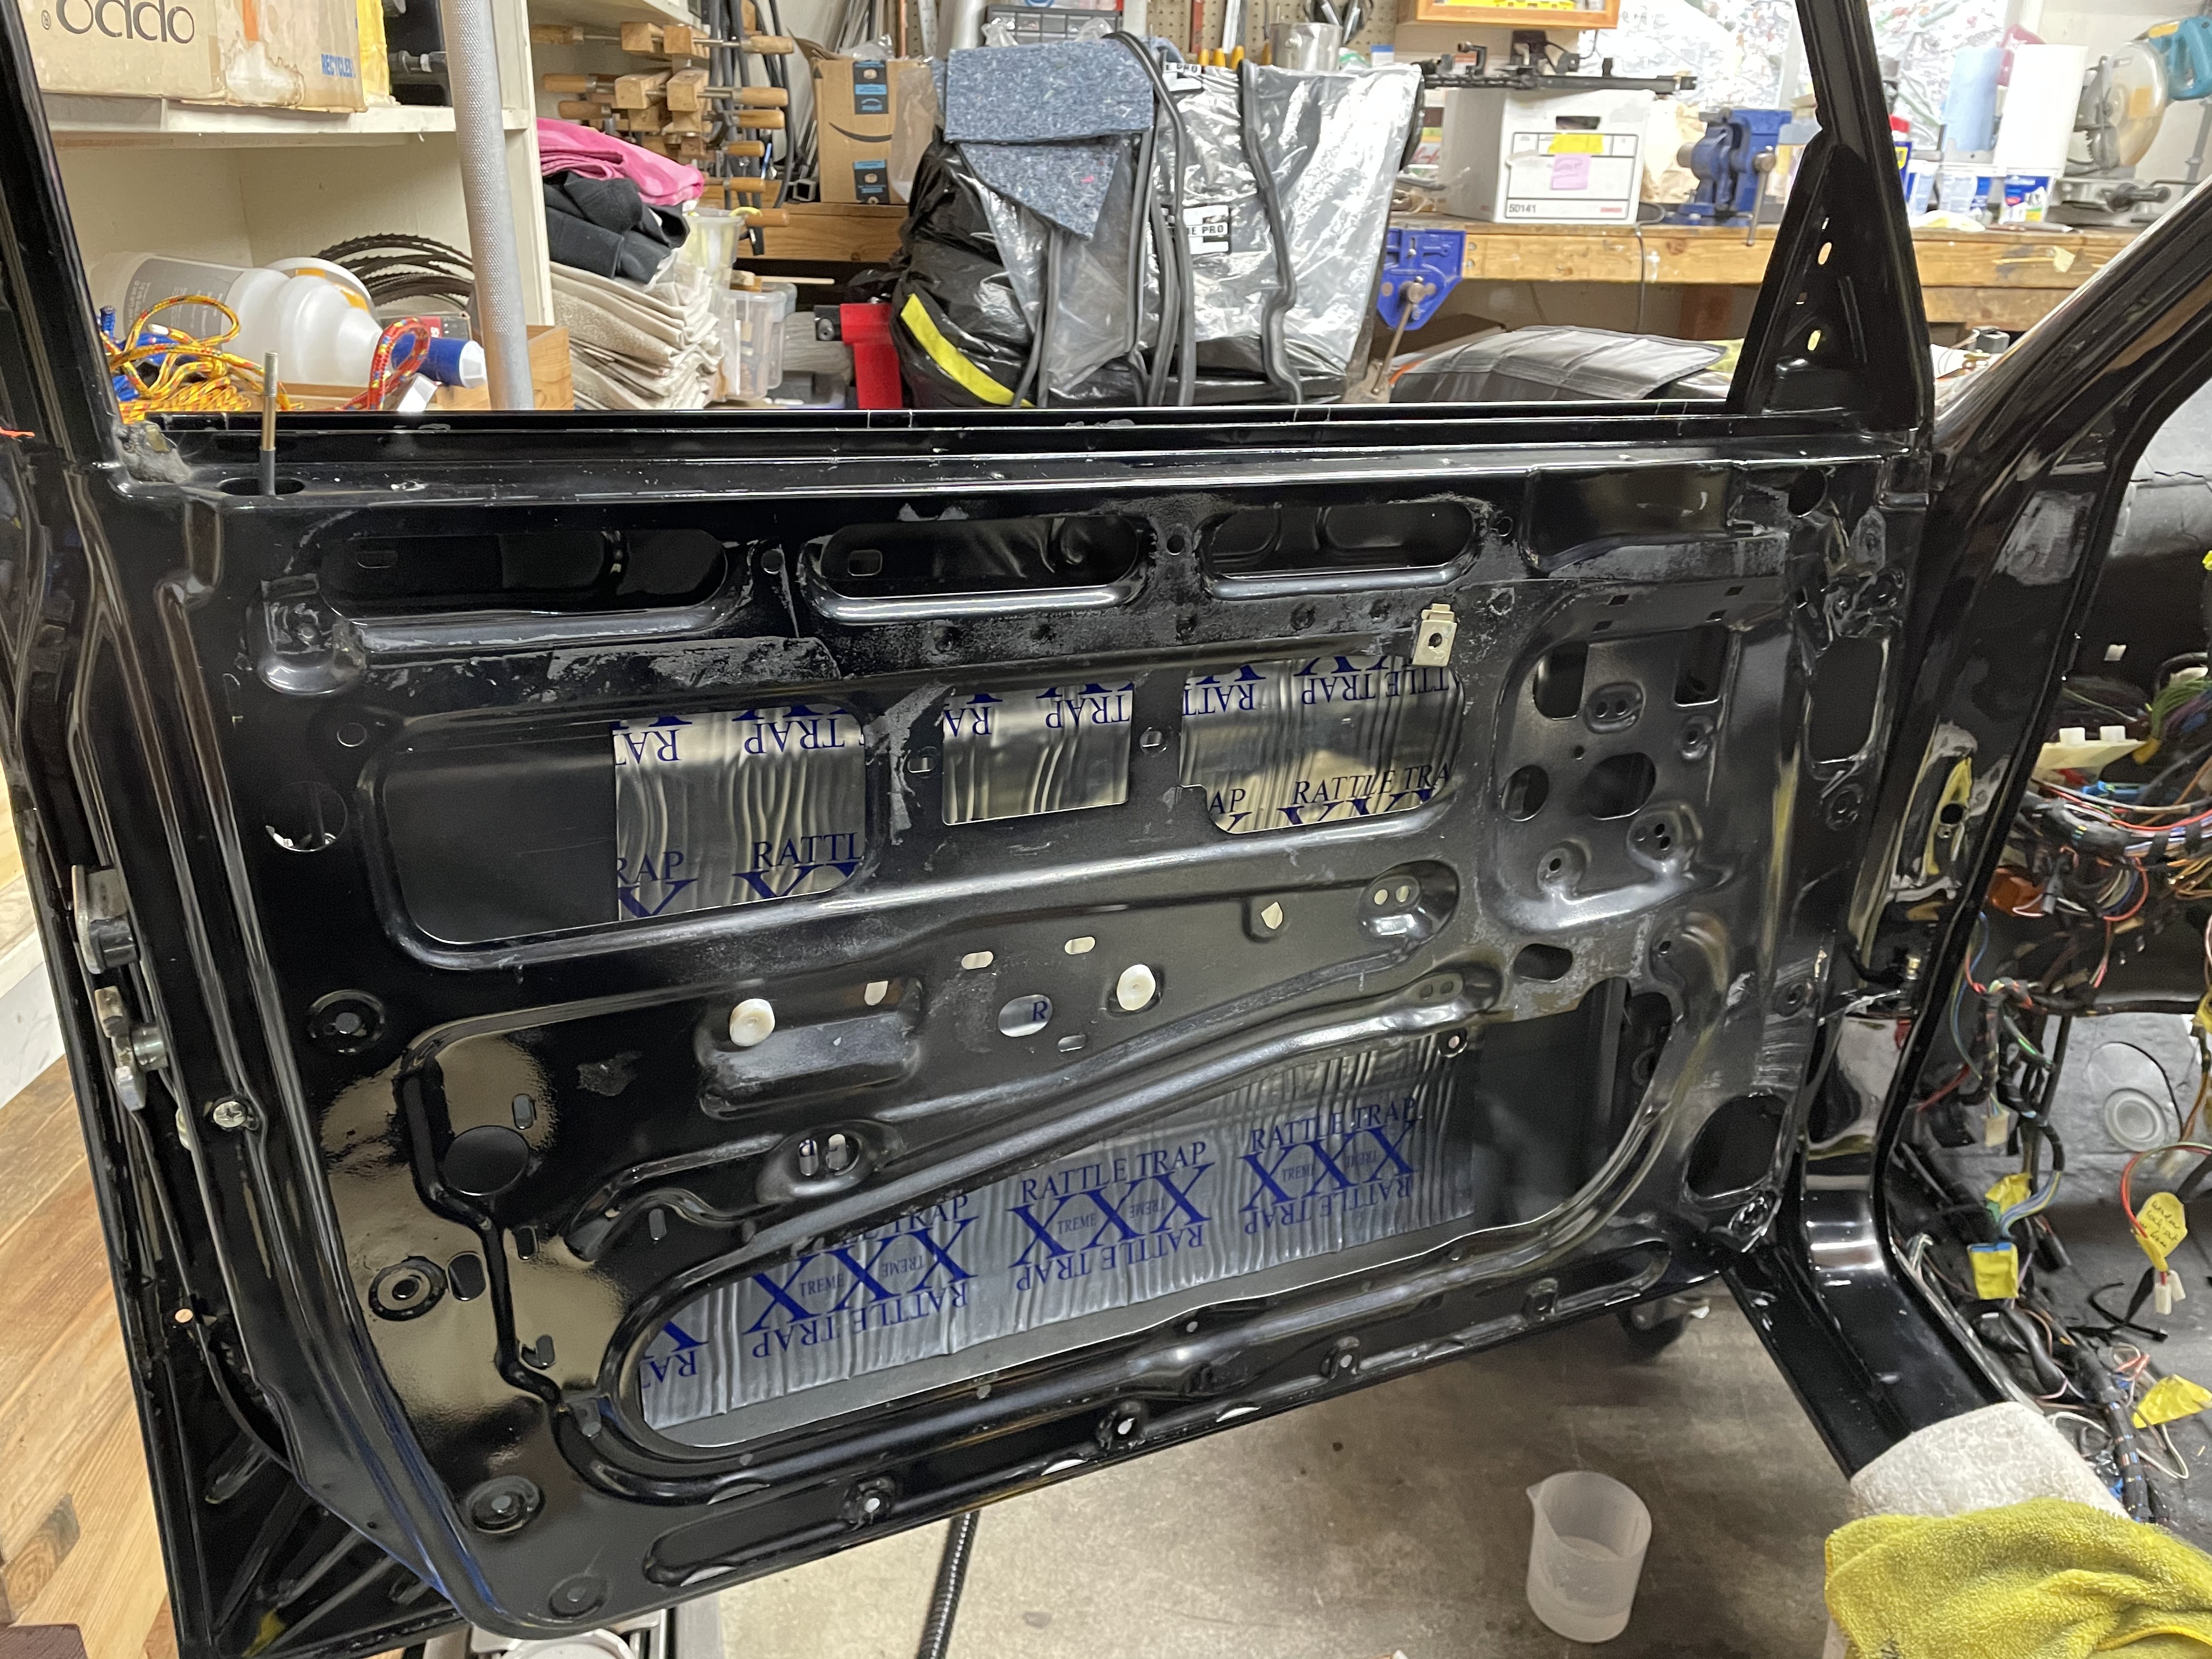
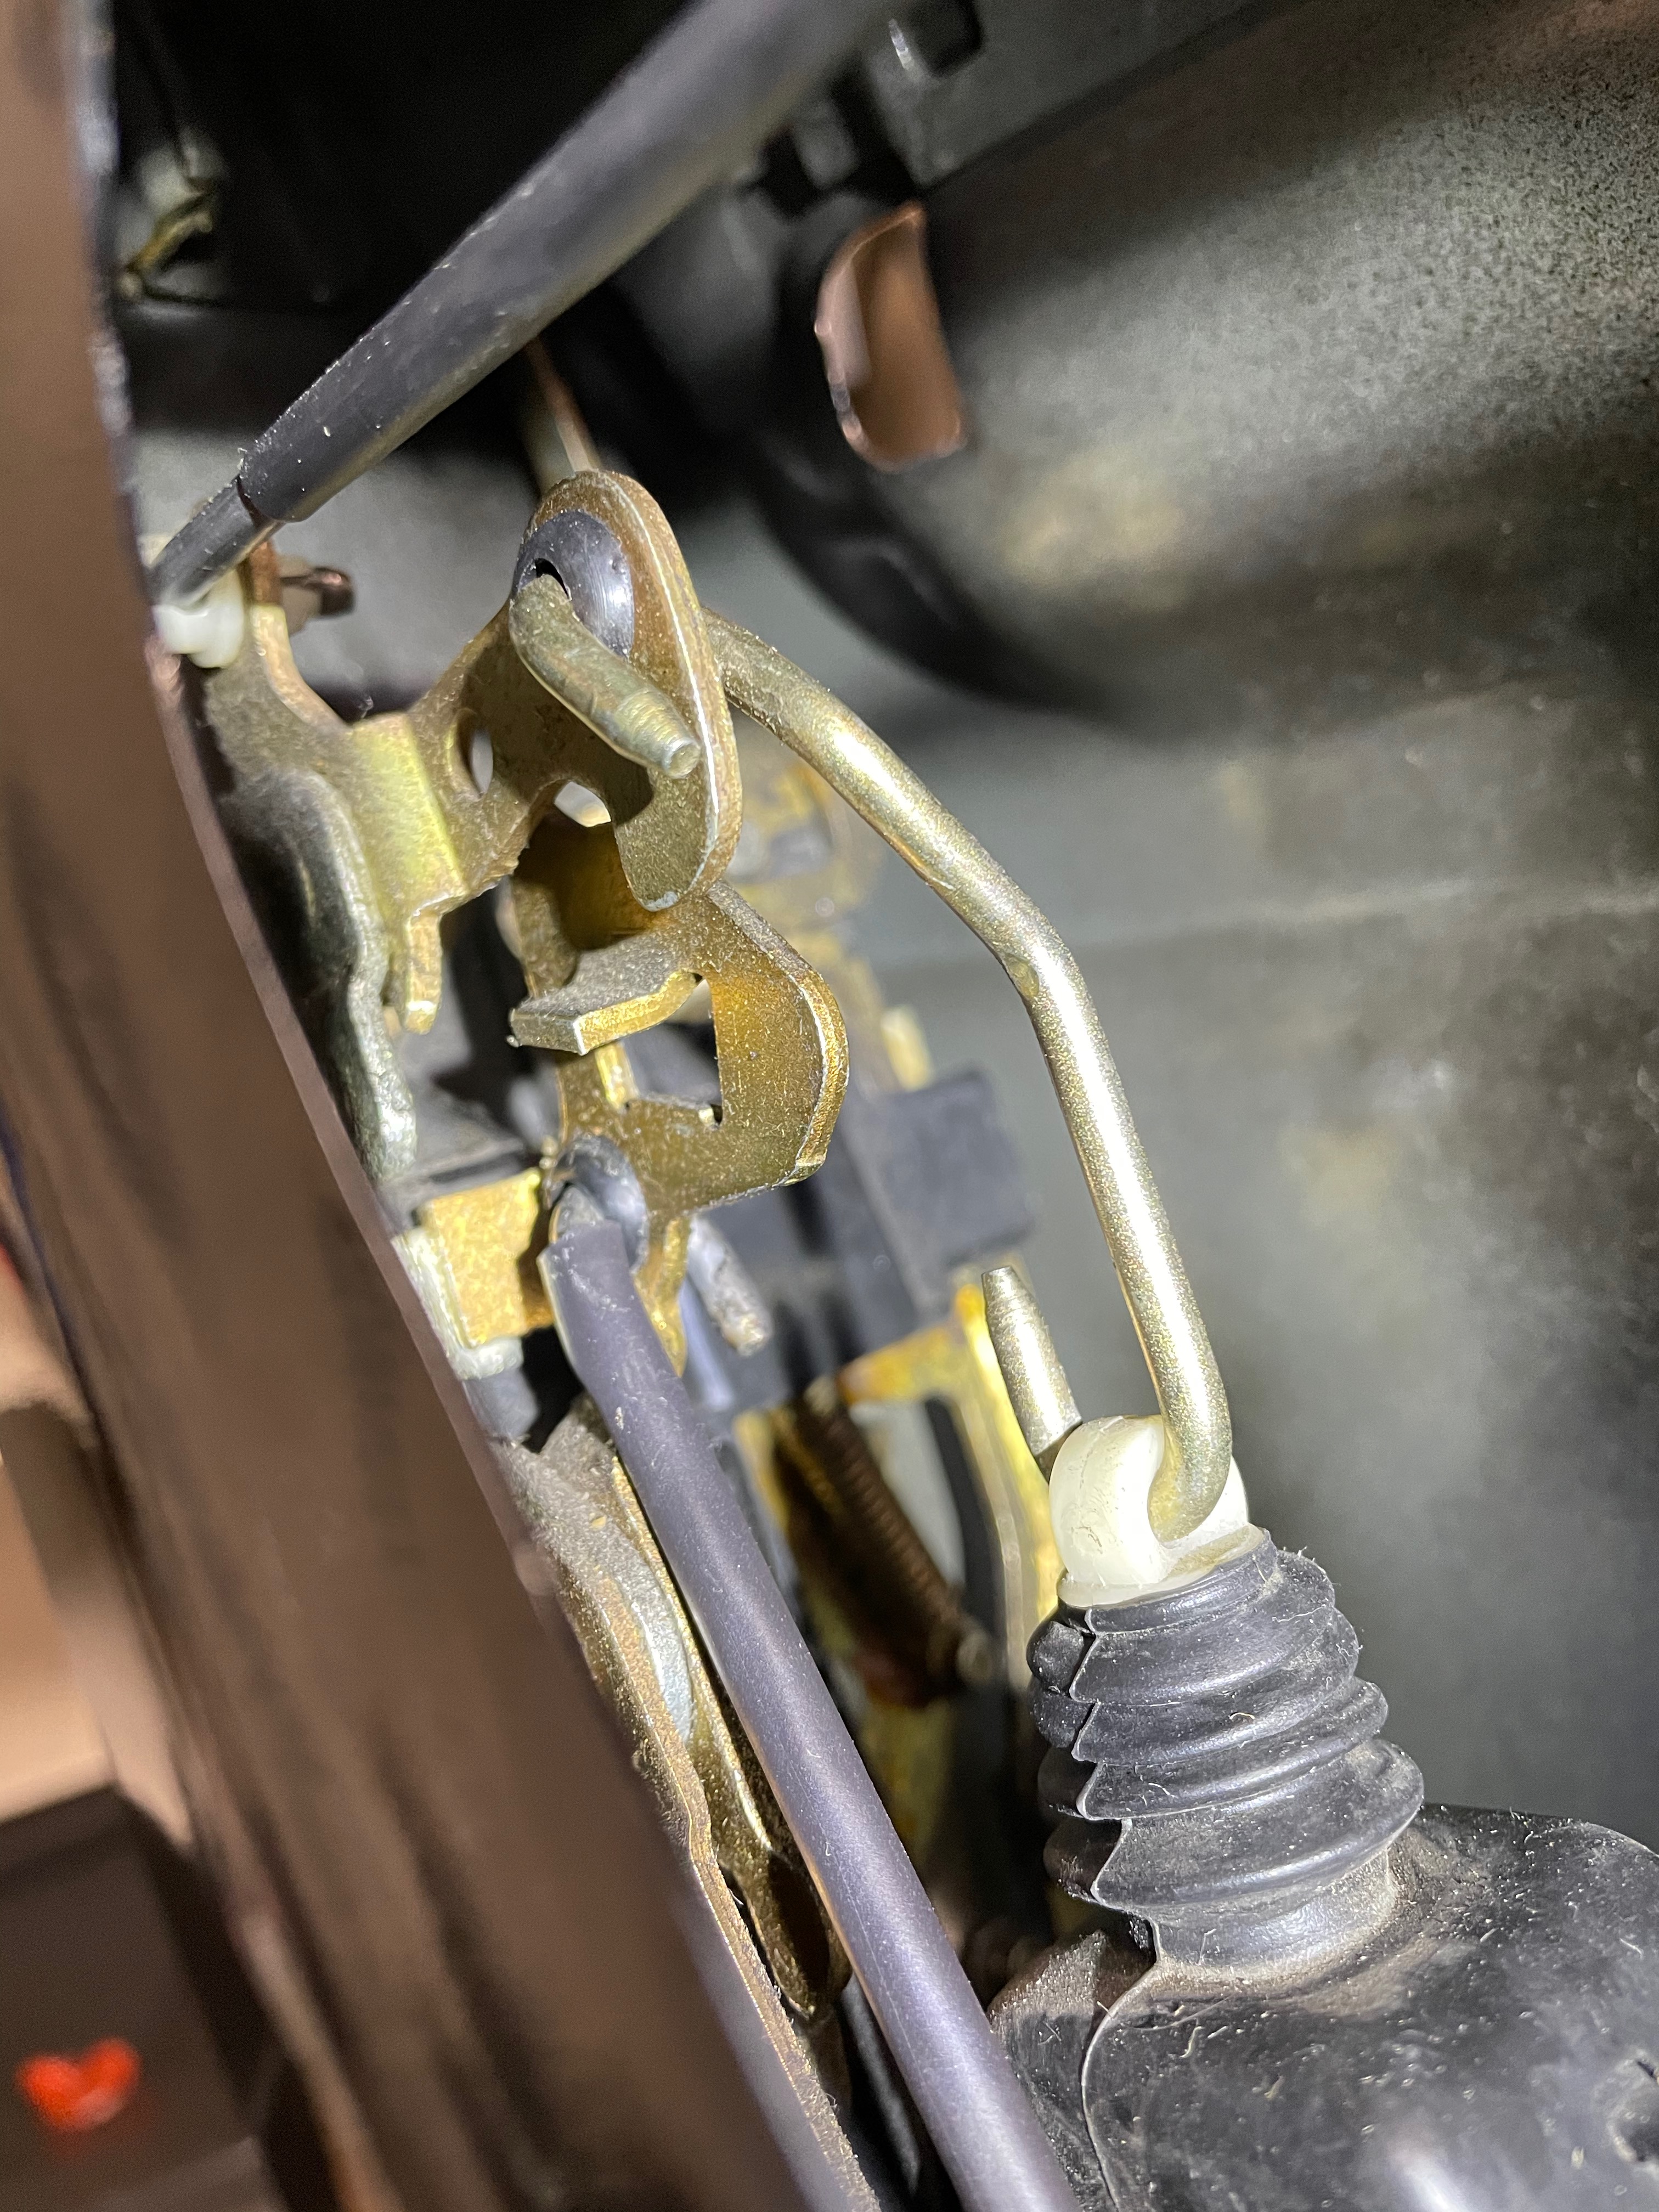
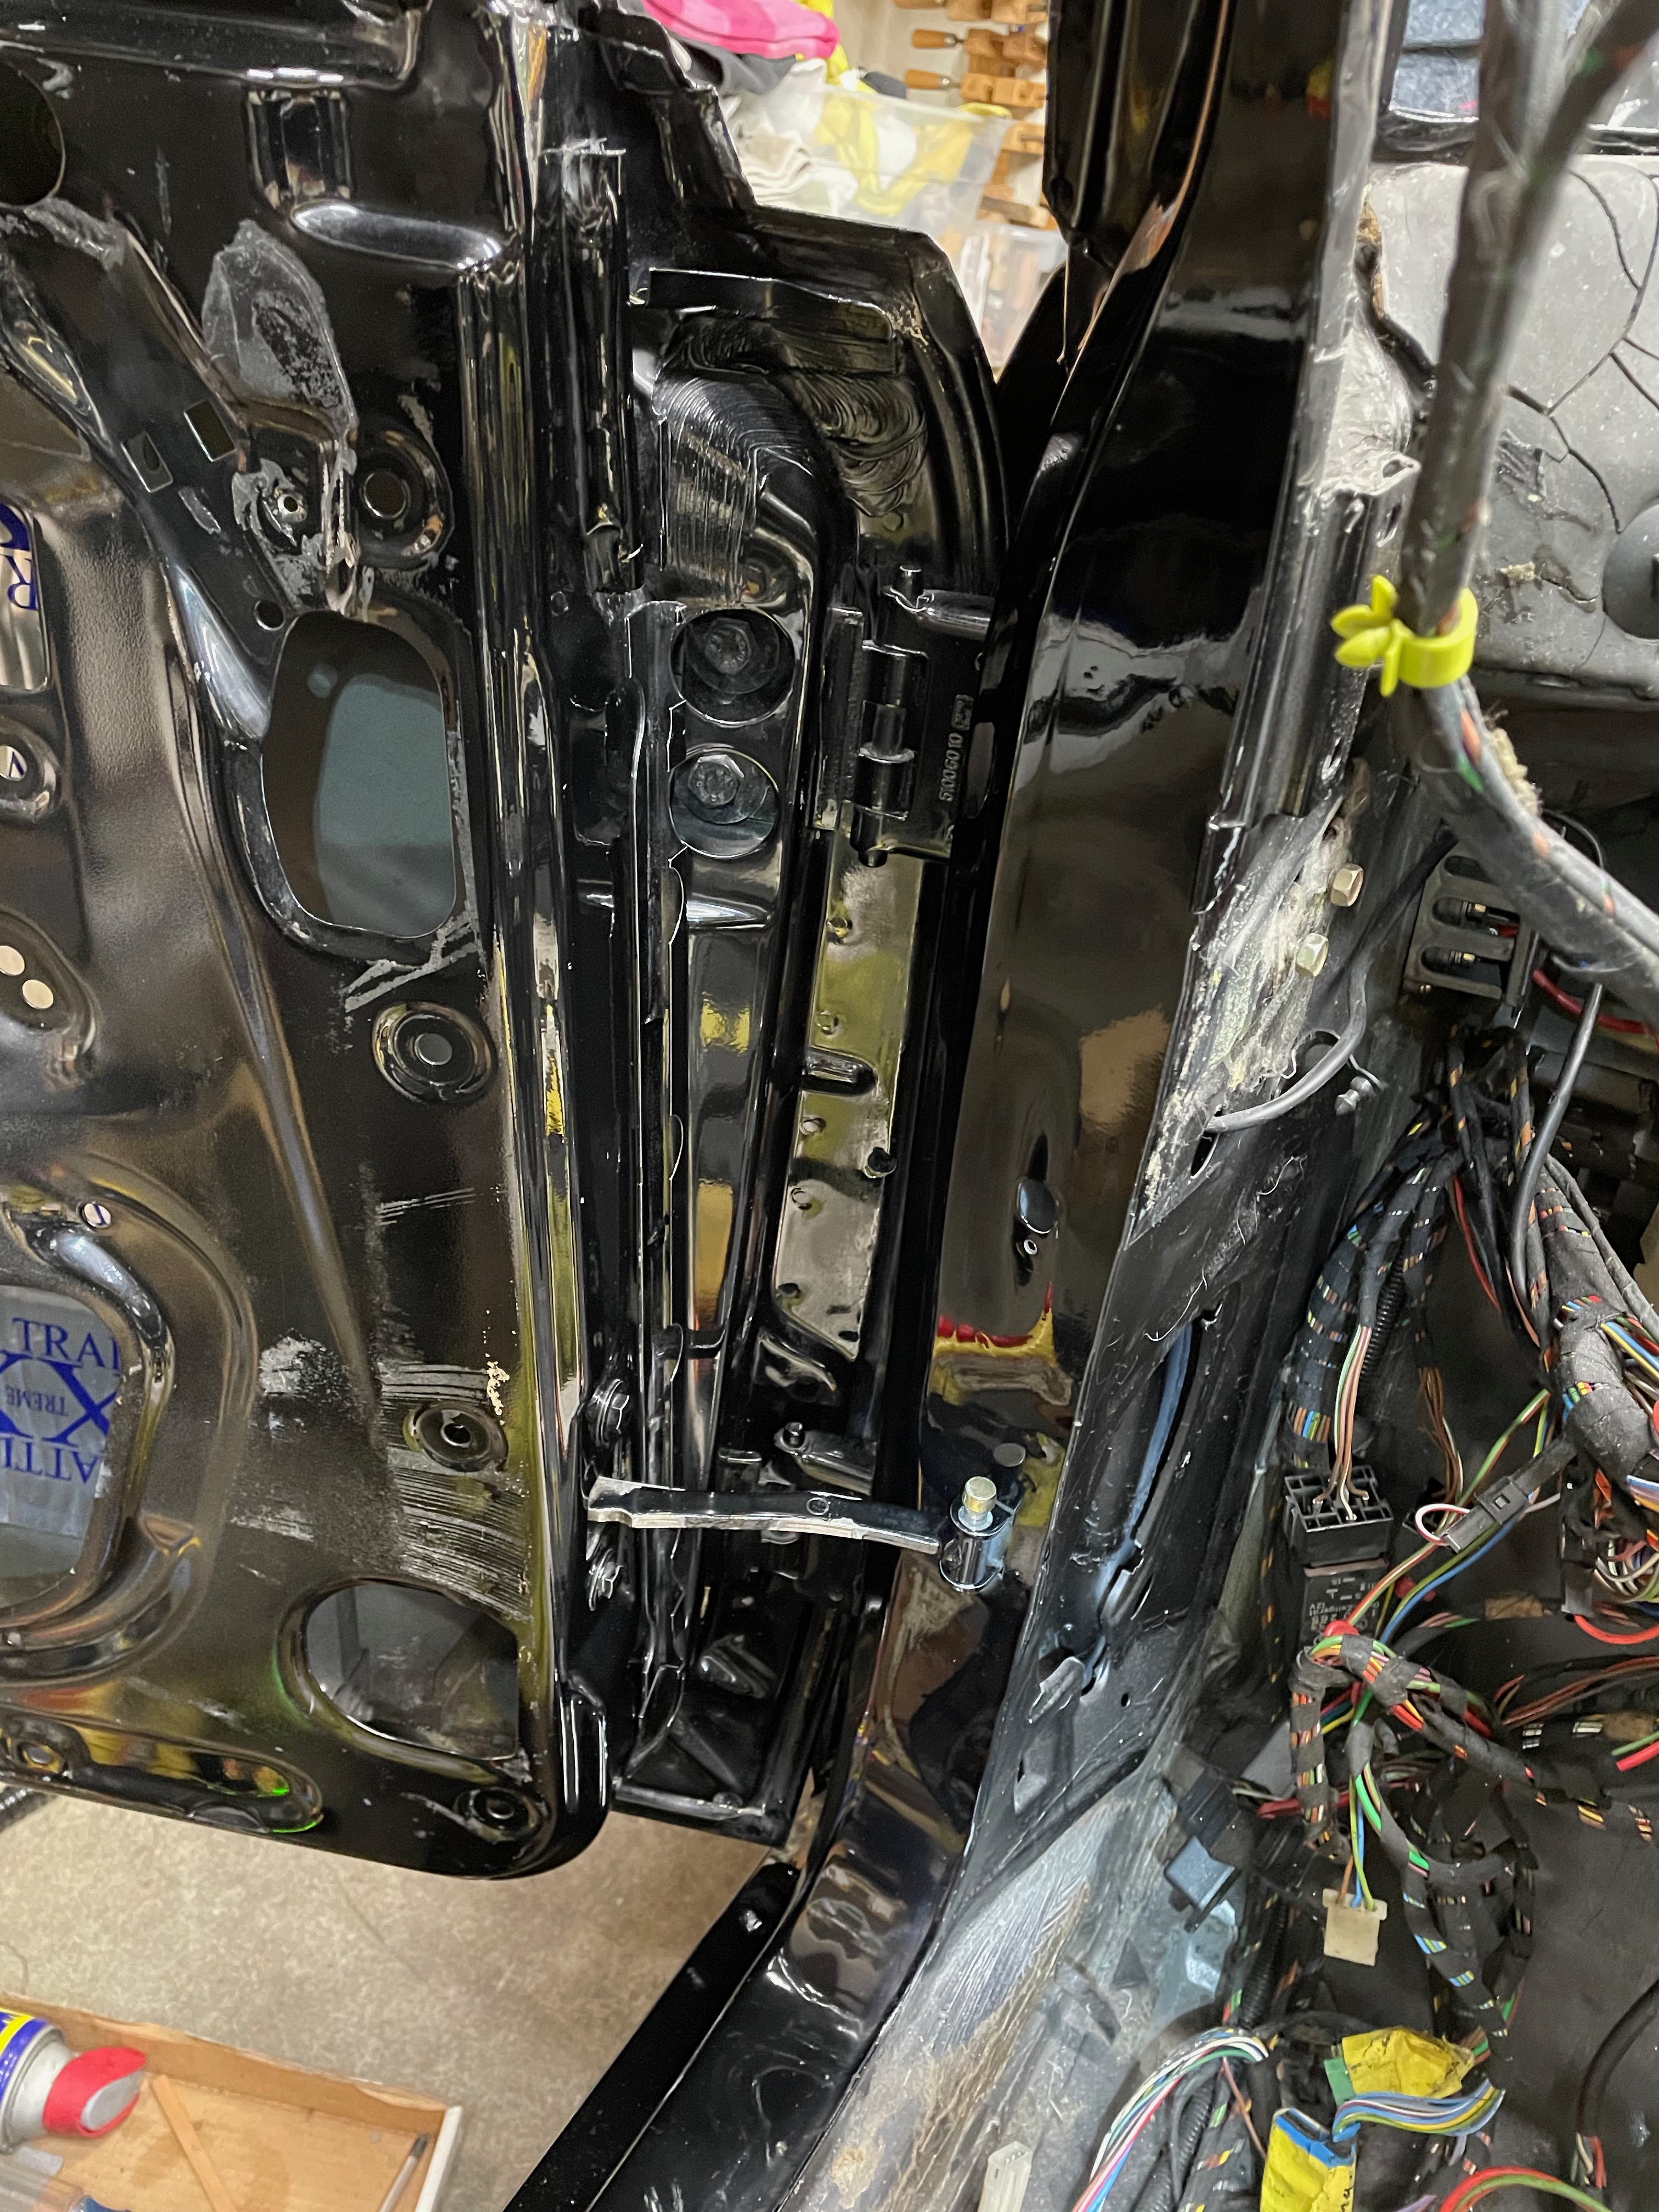
On the doors, before I start putting seals, wiring, etc back in, I've spent a bunch of time cleaning them out, making sure all the drain holes are open, adding some sound deadener and trying to refurb some of the bits inside. The effort here is focused on ensuring future weather protection and eliminating rattles. For the sound deadening, I didn't go nuts ... I just put a second larger pad on top of the original. I also added heat shrink tubing over as many of the door latch / lock linkage parts as I could reach. I also pressed new rubber grommets in place of the disintegrating grommets that were there from the factory. I have no expectation that these rubber grommets will stand up to the bearing pressure between the linkage parts, but my hope is that even after the linkage cuts a hole in the rubber, the rest of the grommet will stay in the hole to dampen any rattling.

Image

Image

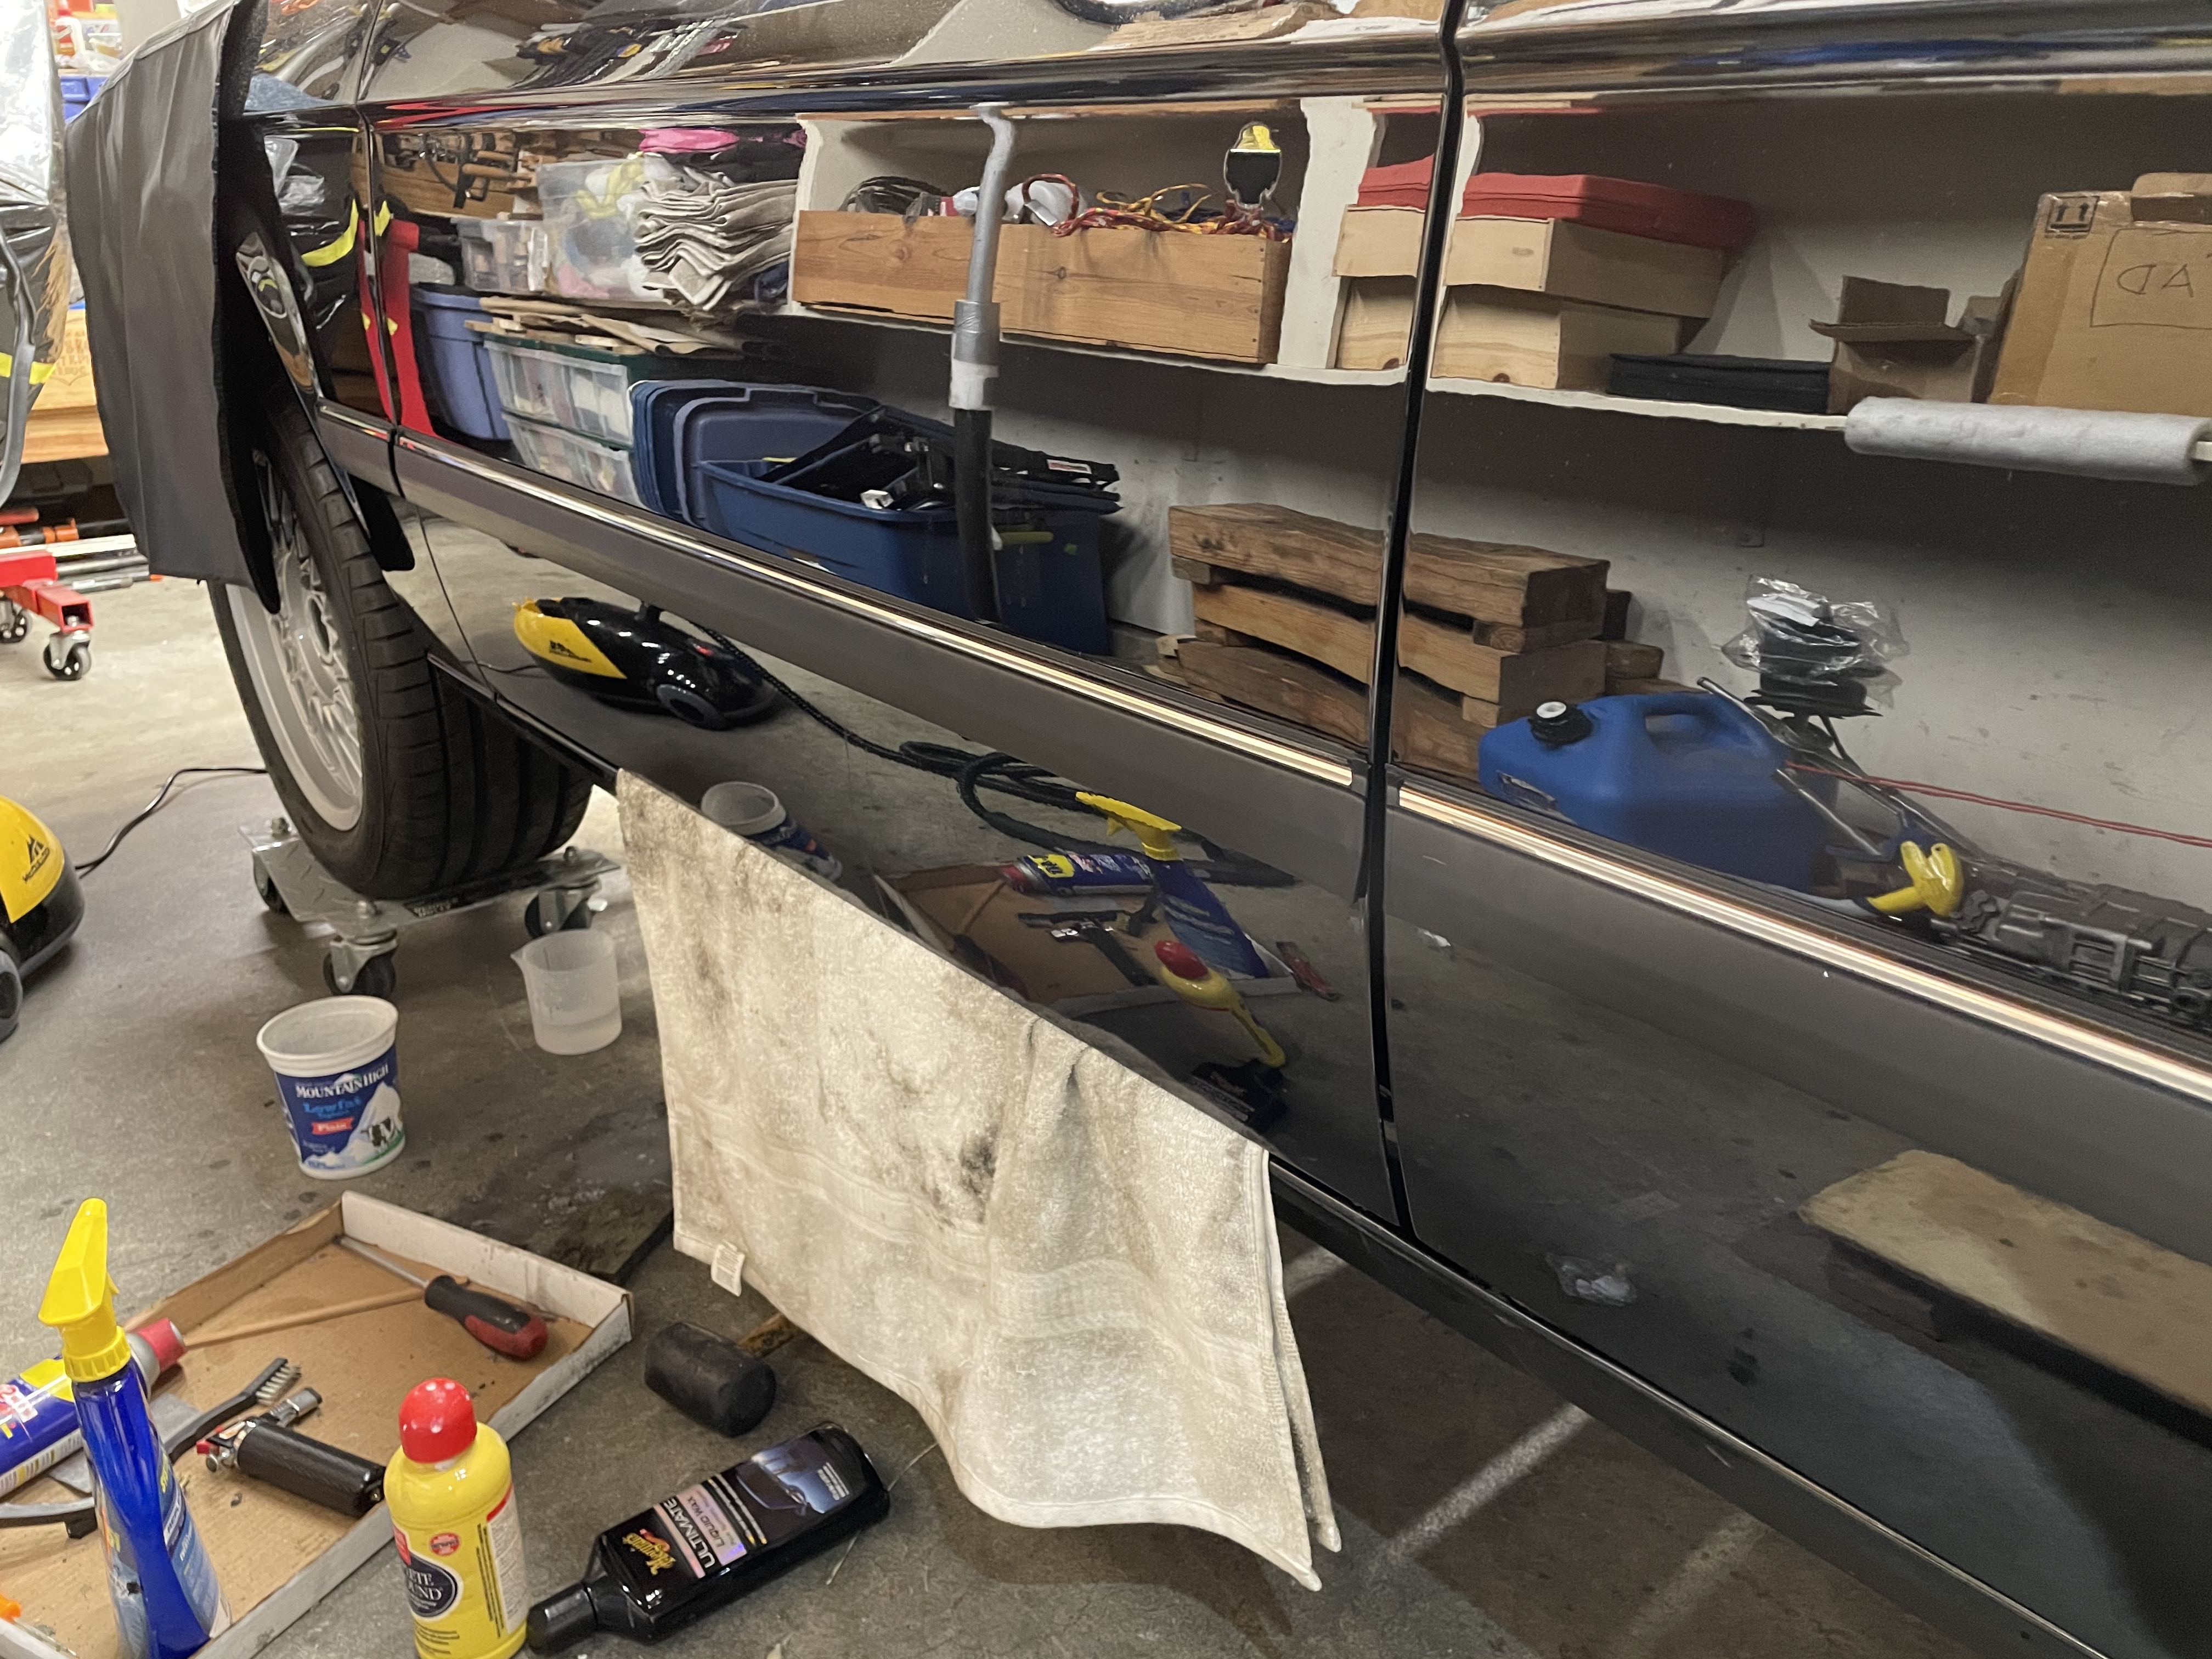
I also did my best to clean & buff the door jambs.

Image

And installed the door bumpers. Can't remember if I said this earlier, but I'm going with chrome euro bumpers and the non-M5 style door trim (with chrome strip, not the M5-style blacked out version) all the way around. For now the plan is to stick with shadow line above the midline - so black trim on all the windows plus black drip rail. We'll see ... I think all these decisions are reversible in the long term.

Image

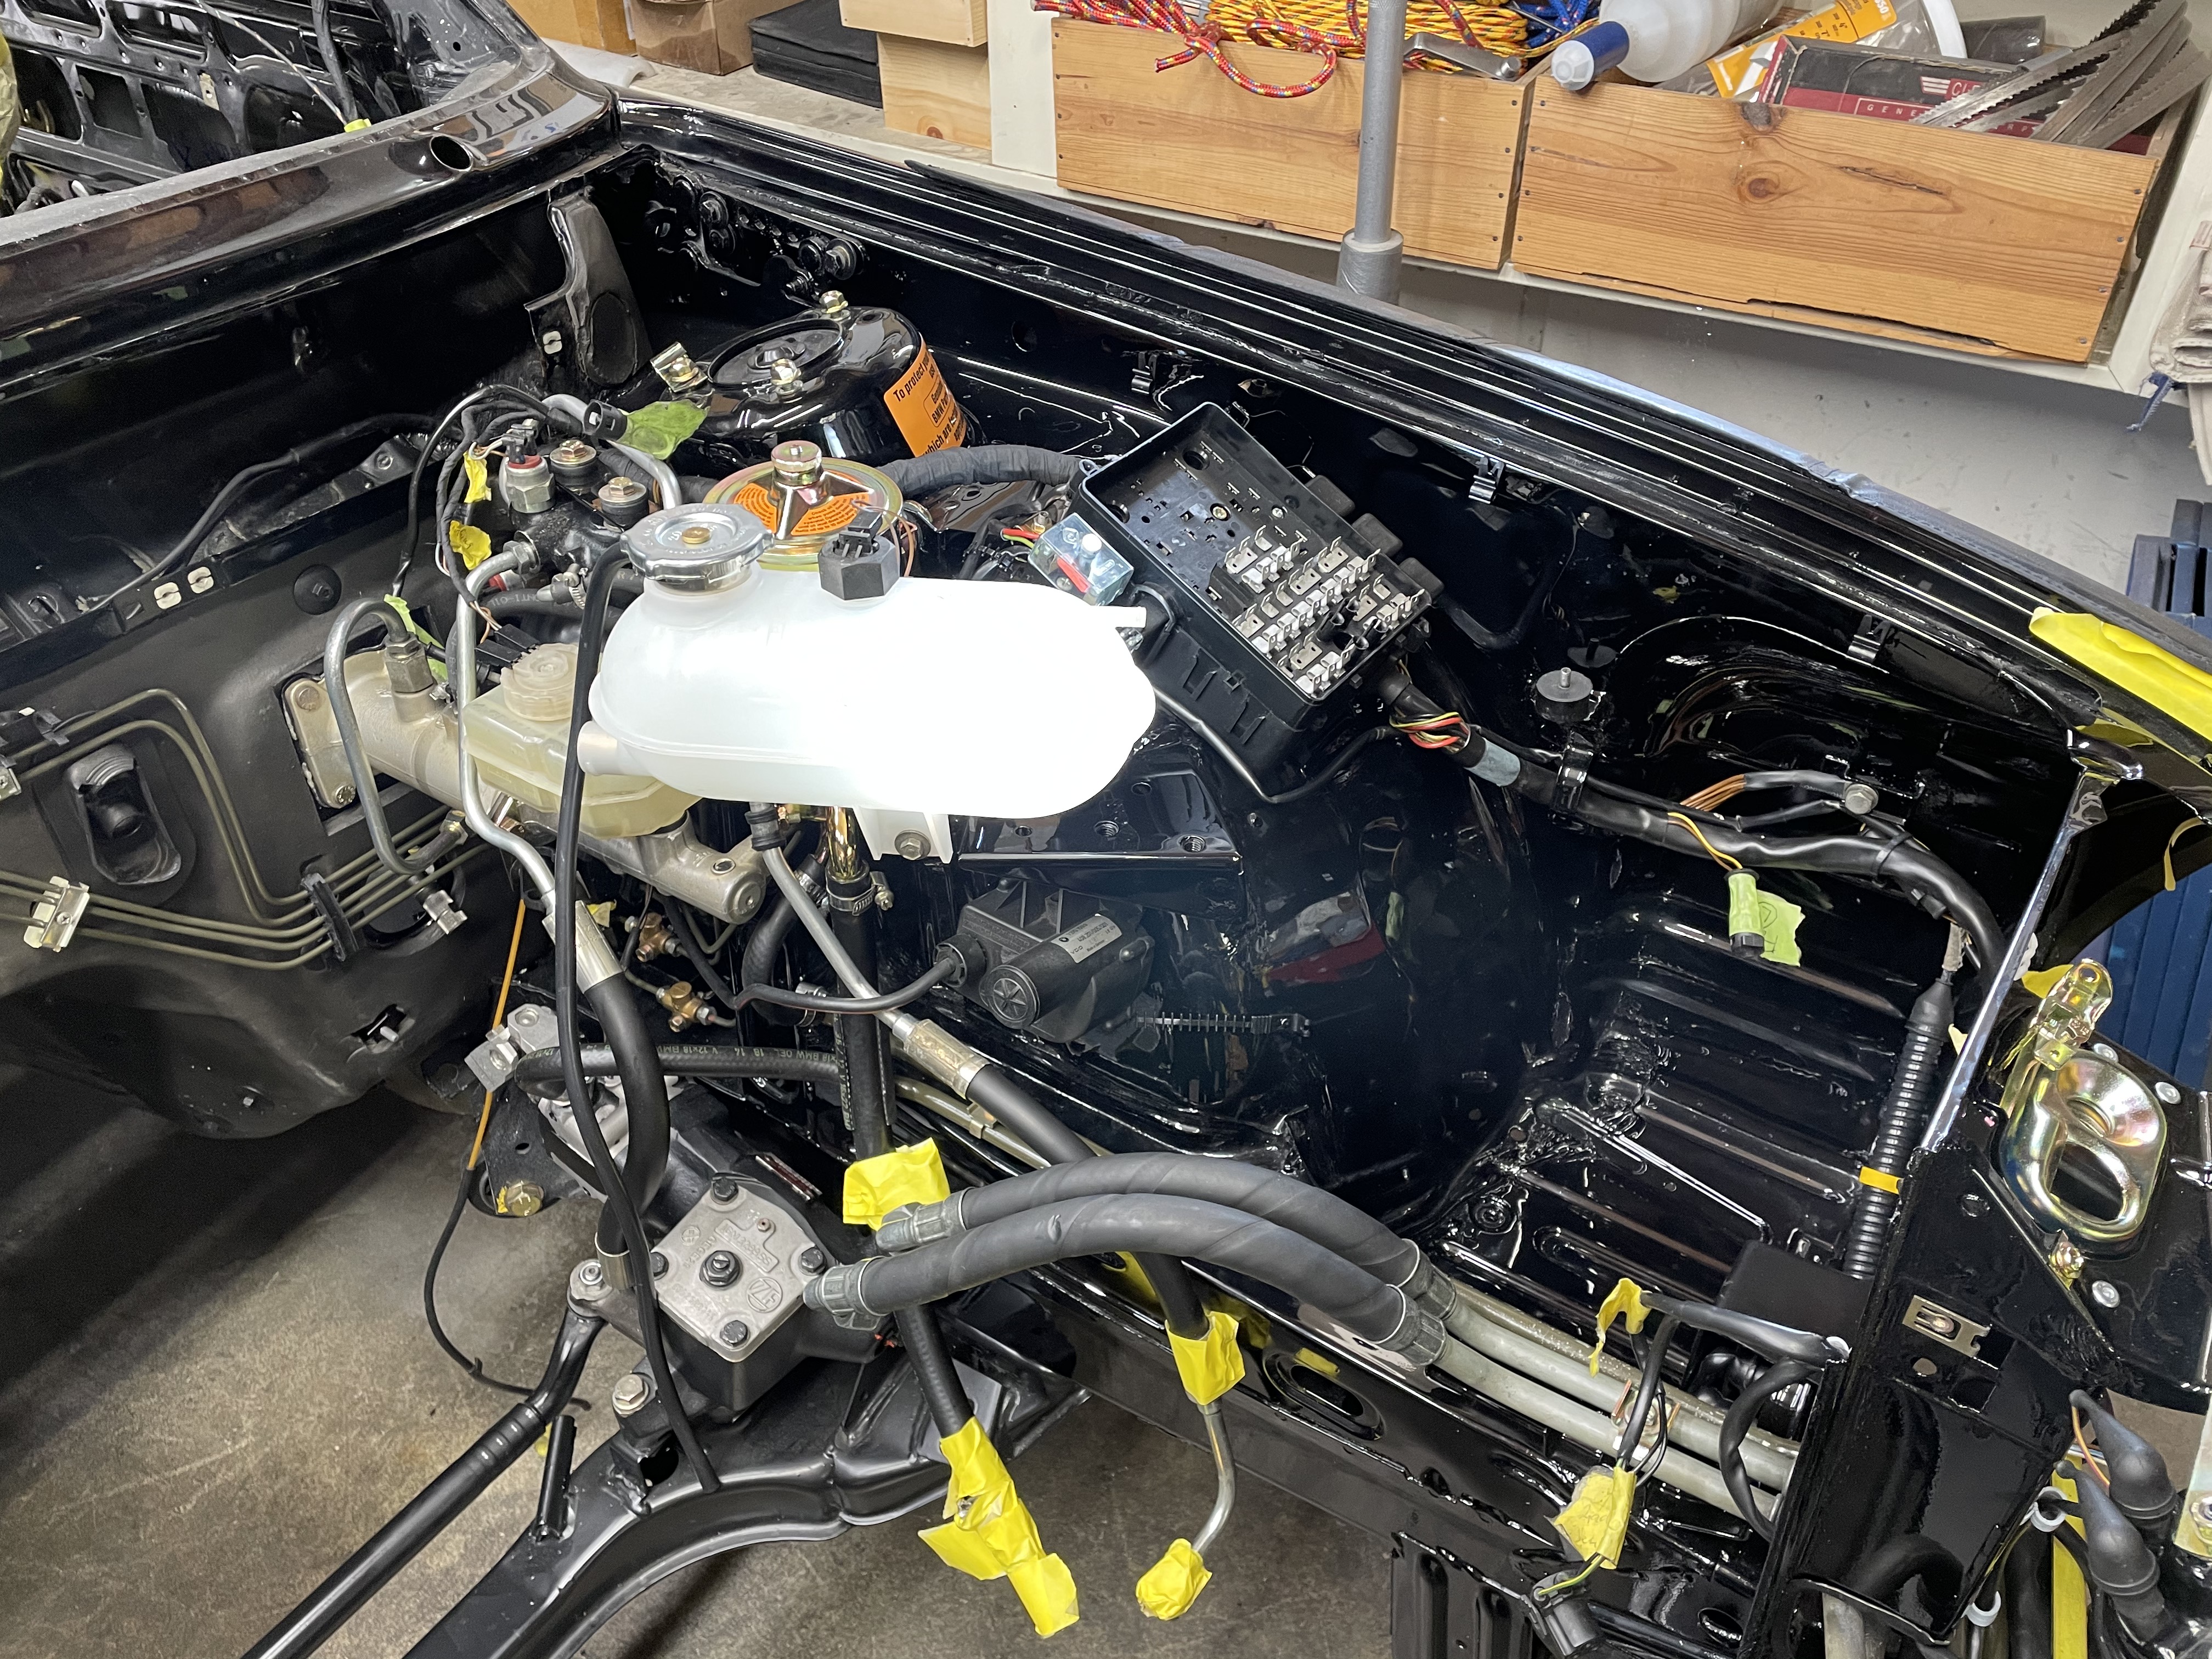
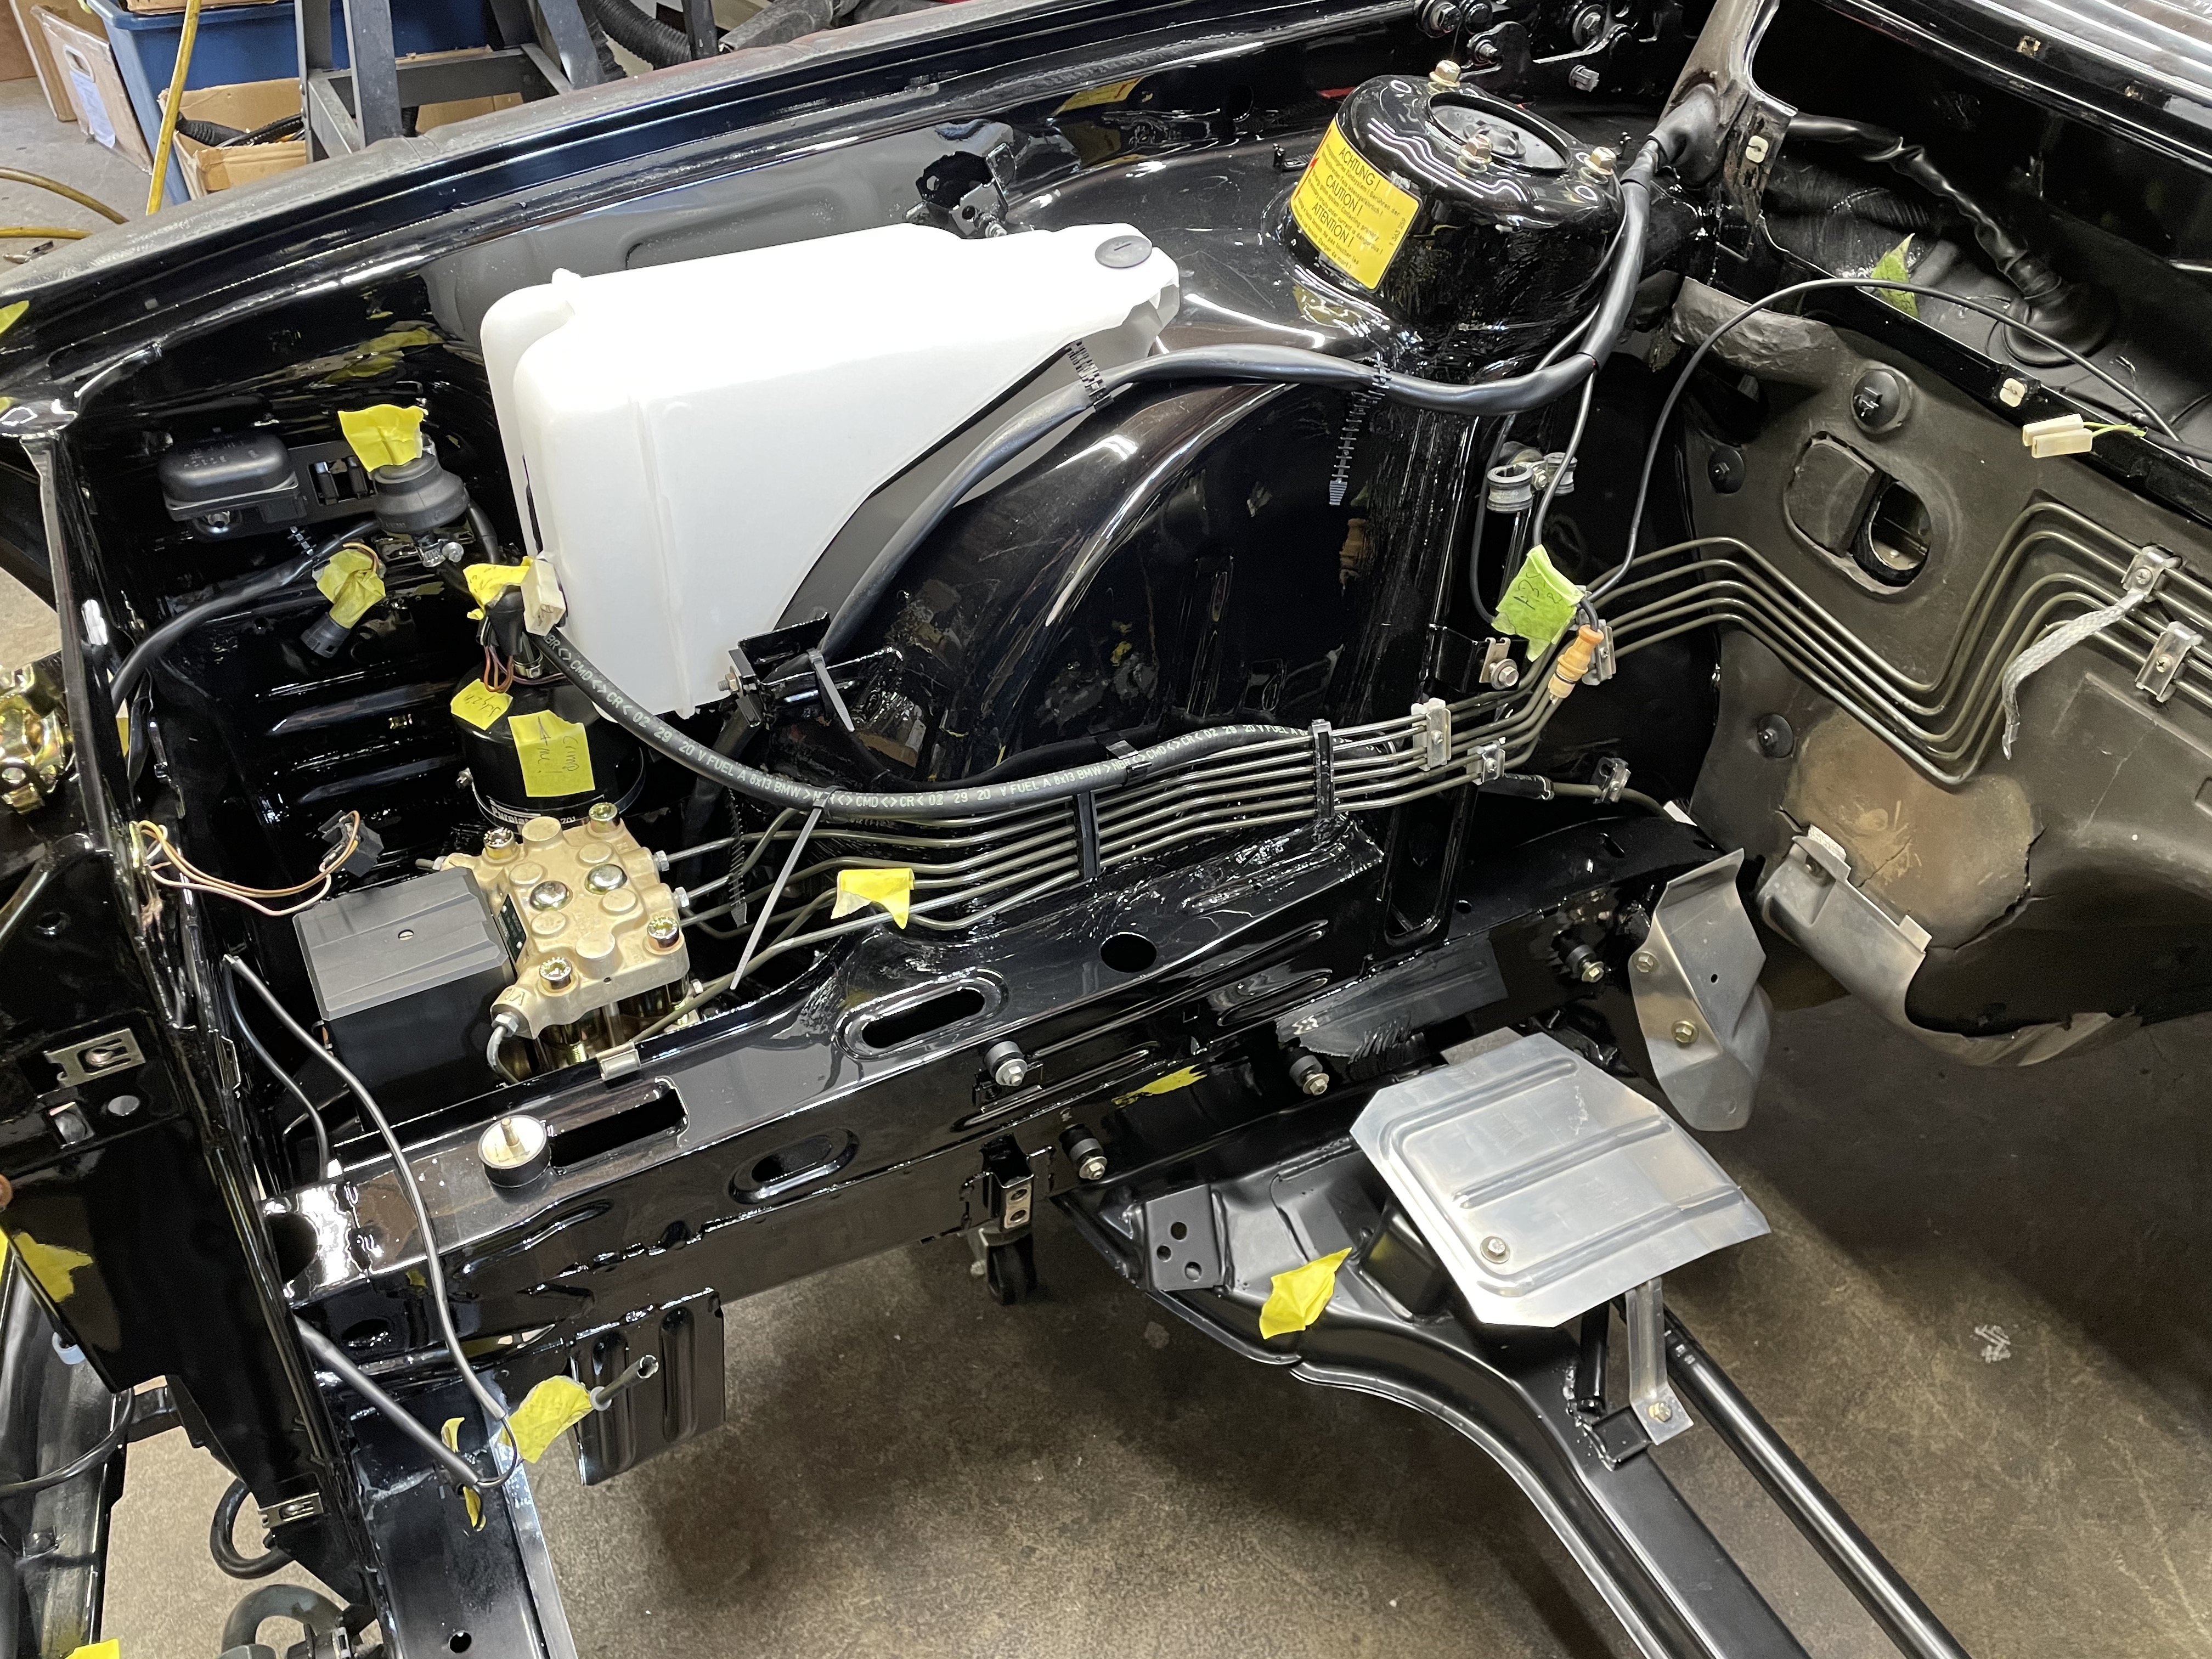
Here's a pic of current progress in the engine bay. All new rubber (excluding high pressure hoses that have the banjo bolt ends pressed on - they're all in good shape). New expansion tank. New windshield wiper tank. FCP owes me a Christmas card.

Image

Image

Image

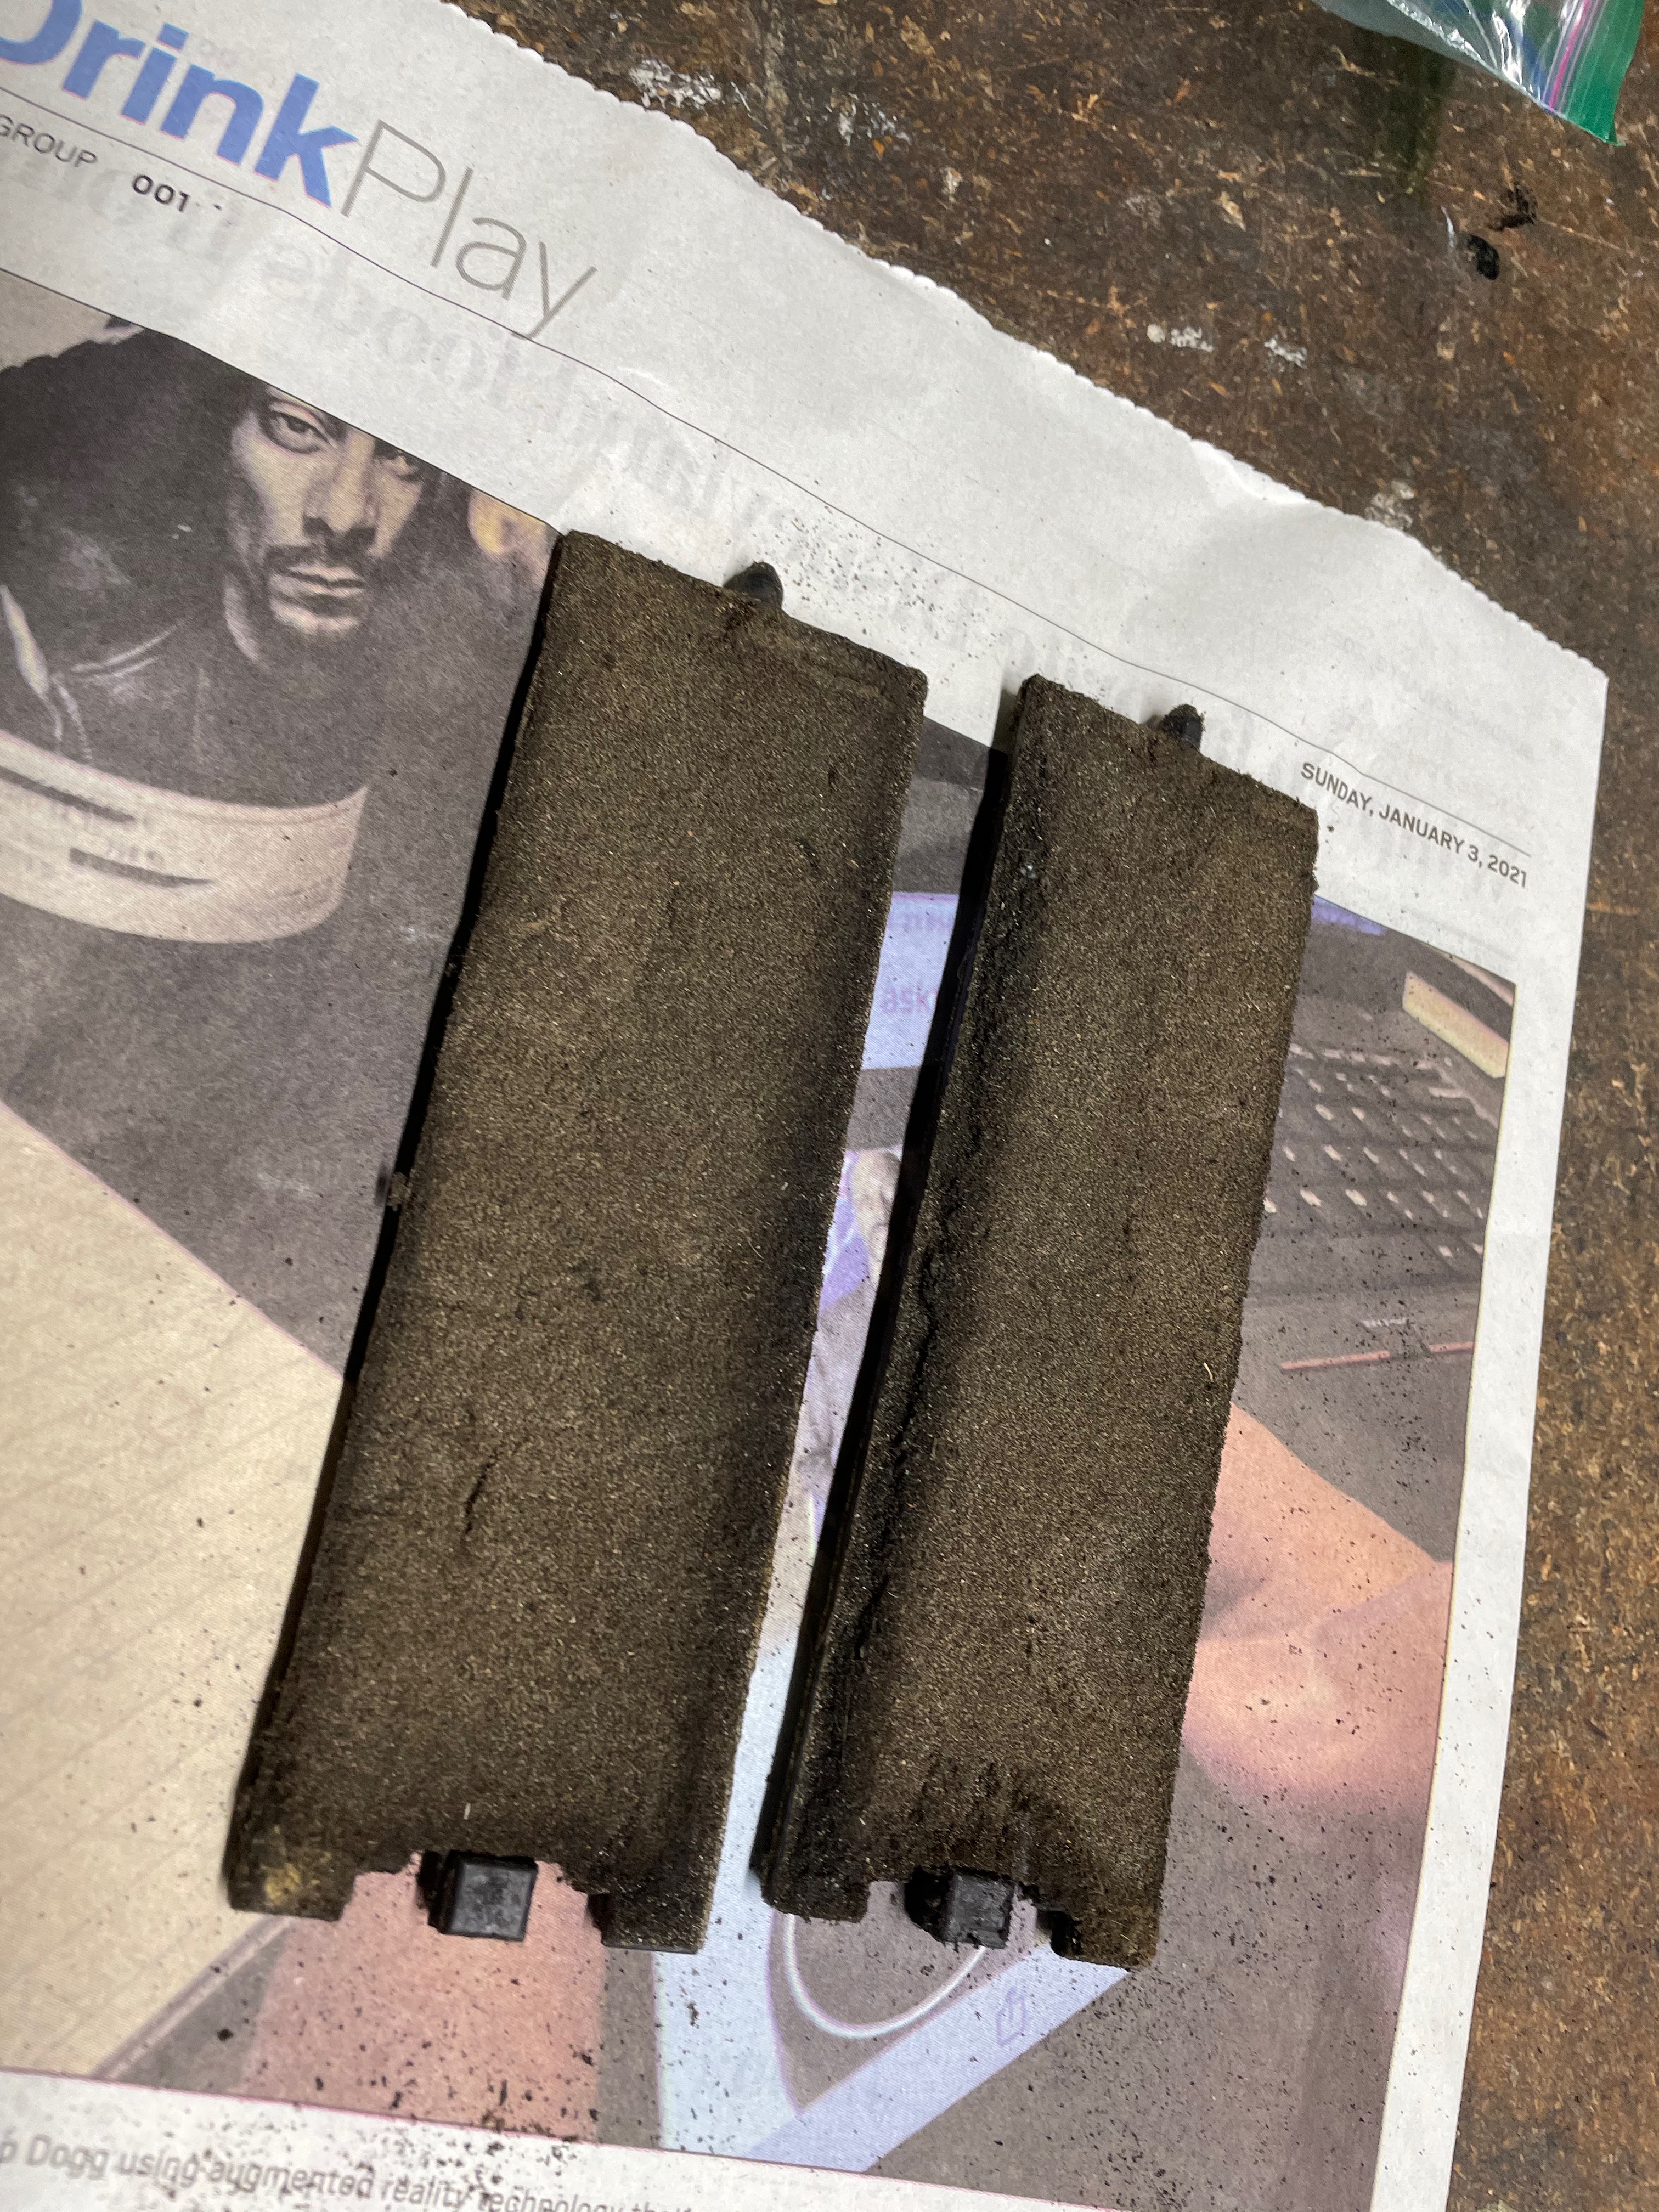
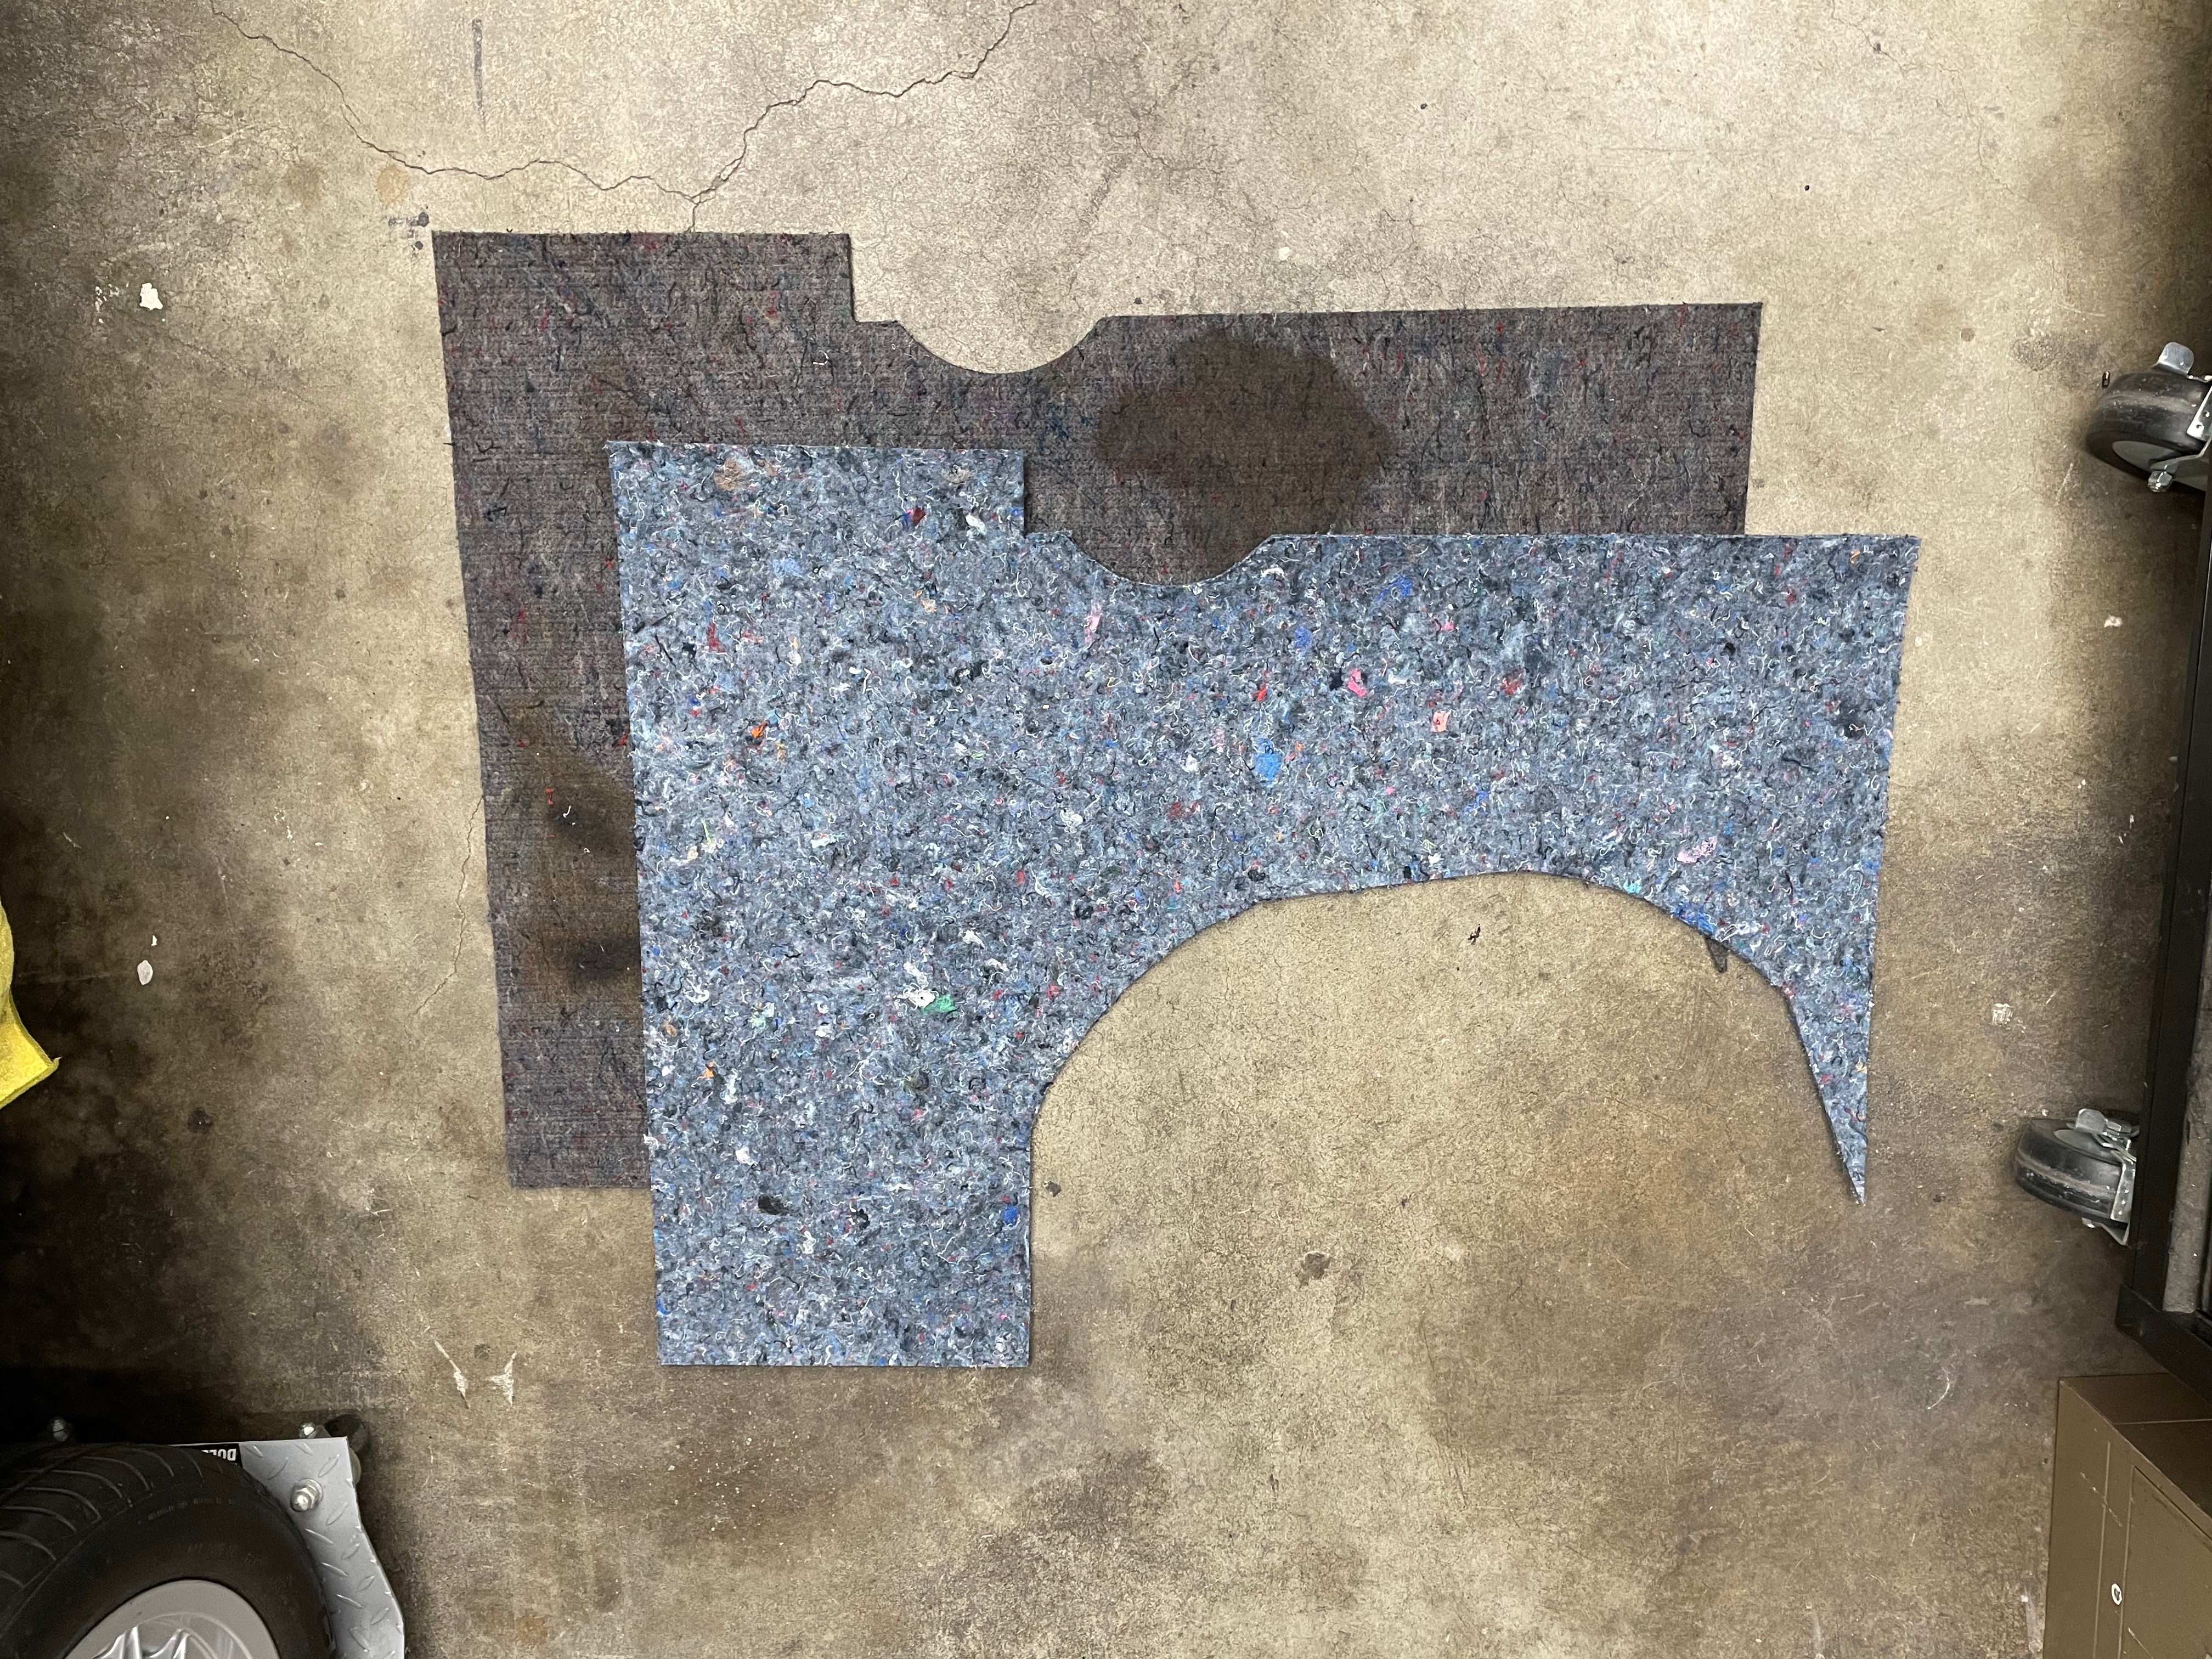
One current dilemma: The felt pad in the trunk is shot. That's mostly my fault - it caught fire when I welded up the big hole in the bulkhead - live 'n learn. Regardless, I found near perfect replacement material. This is industrial felt with a very similar pattern, identical thickness and wide enough that I can cut the entire piece without any seams. The issue is that the color is wrong. The original is a darker gray and the new stuff is much bluer. And I assume that the original wasn't anywhere near this blue when it was new. Does anyone know of a good source for a better color match? Were there OEM versions of these mats (maybe from different suppliers) where the color actually was this blue?

Image
EuroShark
Posts: 1493
Joined: Feb 12, 2006 12:00 PM
Location: Colorado

Re: Rebuilding My 1988 US-spec M5

Post by EuroShark »

What a great thread. You're doing excellent work. There's nothing more beautiful than perfect brand new paint.
tig
Posts: 9322
Joined: Mar 18, 2013 6:25 PM
Location: Durango
Contact:

Re: Rebuilding My 1988 US-spec M5

Post by tig »

Awsome work. Go Navy!
M5BB
Posts: 1567
Joined: Jun 13, 2007 10:13 AM
Location: Peachtree Corners, Georgia

Re: Rebuilding My 1988 US-spec M5

Post by M5BB »

Just catching up.
Great work and attention to detail.
I own some pretty cool BMW's but Black Betty is my fav and may be the fastest too!

:popcorn:
jhh925
Posts: 917
Joined: Jul 11, 2015 12:23 AM
Location: Reno

Re: Rebuilding My 1988 US-spec M5

Post by jhh925 »

cek wrote: Jan 25, 2021 7:44 PM Awsome work. Go Navy!
You're giving me motivation to change my avatar ... Anna just got her congressional nomination!
knunger
Posts: 744
Joined: Feb 12, 2006 12:00 PM
Location: Tucson,AZ.

Re: Rebuilding My 1988 US-spec M5

Post by knunger »

Stunning Jens,
Absolutely stunning.

Can't wait to see it at the Sheraton for the next SandyEggo day!
jhh925
Posts: 917
Joined: Jul 11, 2015 12:23 AM
Location: Reno

Re: Rebuilding My 1988 US-spec M5

Post by jhh925 »

knunger wrote: Jan 26, 2021 9:19 PM Stunning Jens,
Absolutely stunning.

Can't wait to see it at the Sheraton for the next SandyEggo day!
Yeah, I can't wait to get this thing on the road! And in that sense, having SPD '21 canceled was a blessing in disguise - no disappointment about not having this done by March.
vinceg101
Posts: 4897
Joined: Jun 20, 2007 2:40 AM
Location: Los Angeles, CA

Re: Rebuilding My 1988 US-spec M5

Post by vinceg101 »

jhh925 wrote: Feb 17, 2021 1:14 PM
knunger wrote: Jan 26, 2021 9:19 PM Stunning Jens,
Absolutely stunning.

Can't wait to see it at the Sheraton for the next SandyEggo day!
Yeah, I can't wait to get this thing on the road! And in that sense, having SPD '21 canceled was a blessing in disguise - no disappointment about not having this done by March.
But maybe by Nov. 1 for SoCal Vintage Meet? (here in LA)

I feel the same way about not having my new interior done by March also.
Karl Grau
Posts: 9717
Joined: Mar 10, 2006 7:34 PM
Location: Sandy Eggo

Re: Rebuilding My 1988 US-spec M5

Post by Karl Grau »

vinceg101 wrote: Feb 17, 2021 6:30 PMI feel the same way about not having my new interior done by March also.
New interior?
vinceg101
Posts: 4897
Joined: Jun 20, 2007 2:40 AM
Location: Los Angeles, CA

Re: Rebuilding My 1988 US-spec M5

Post by vinceg101 »

Karl Grau wrote: Feb 18, 2021 9:22 PM
vinceg101 wrote: Feb 17, 2021 6:30 PMI feel the same way about not having my new interior done by March also.
New interior?
(Shhhh...it's a secret :cool: )
jhh925
Posts: 917
Joined: Jul 11, 2015 12:23 AM
Location: Reno

Re: Rebuilding My 1988 US-spec M5

Post by jhh925 »

vinceg101 wrote: Feb 17, 2021 6:30 PM
jhh925 wrote: Feb 17, 2021 1:14 PM
knunger wrote: Jan 26, 2021 9:19 PM Stunning Jens,
Absolutely stunning.

Can't wait to see it at the Sheraton for the next SandyEggo day!
Yeah, I can't wait to get this thing on the road! And in that sense, having SPD '21 canceled was a blessing in disguise - no disappointment about not having this done by March.
But maybe by Nov. 1 for SoCal Vintage Meet? (here in LA)

I feel the same way about not having my new interior done by March also.
Oooh ... yeah, maybe!
jhh925
Posts: 917
Joined: Jul 11, 2015 12:23 AM
Location: Reno

Re: Rebuilding My 1988 US-spec M5

Post by jhh925 »

Overdue for an update. The rate of progress really seems to be picking up and there's lots to report.

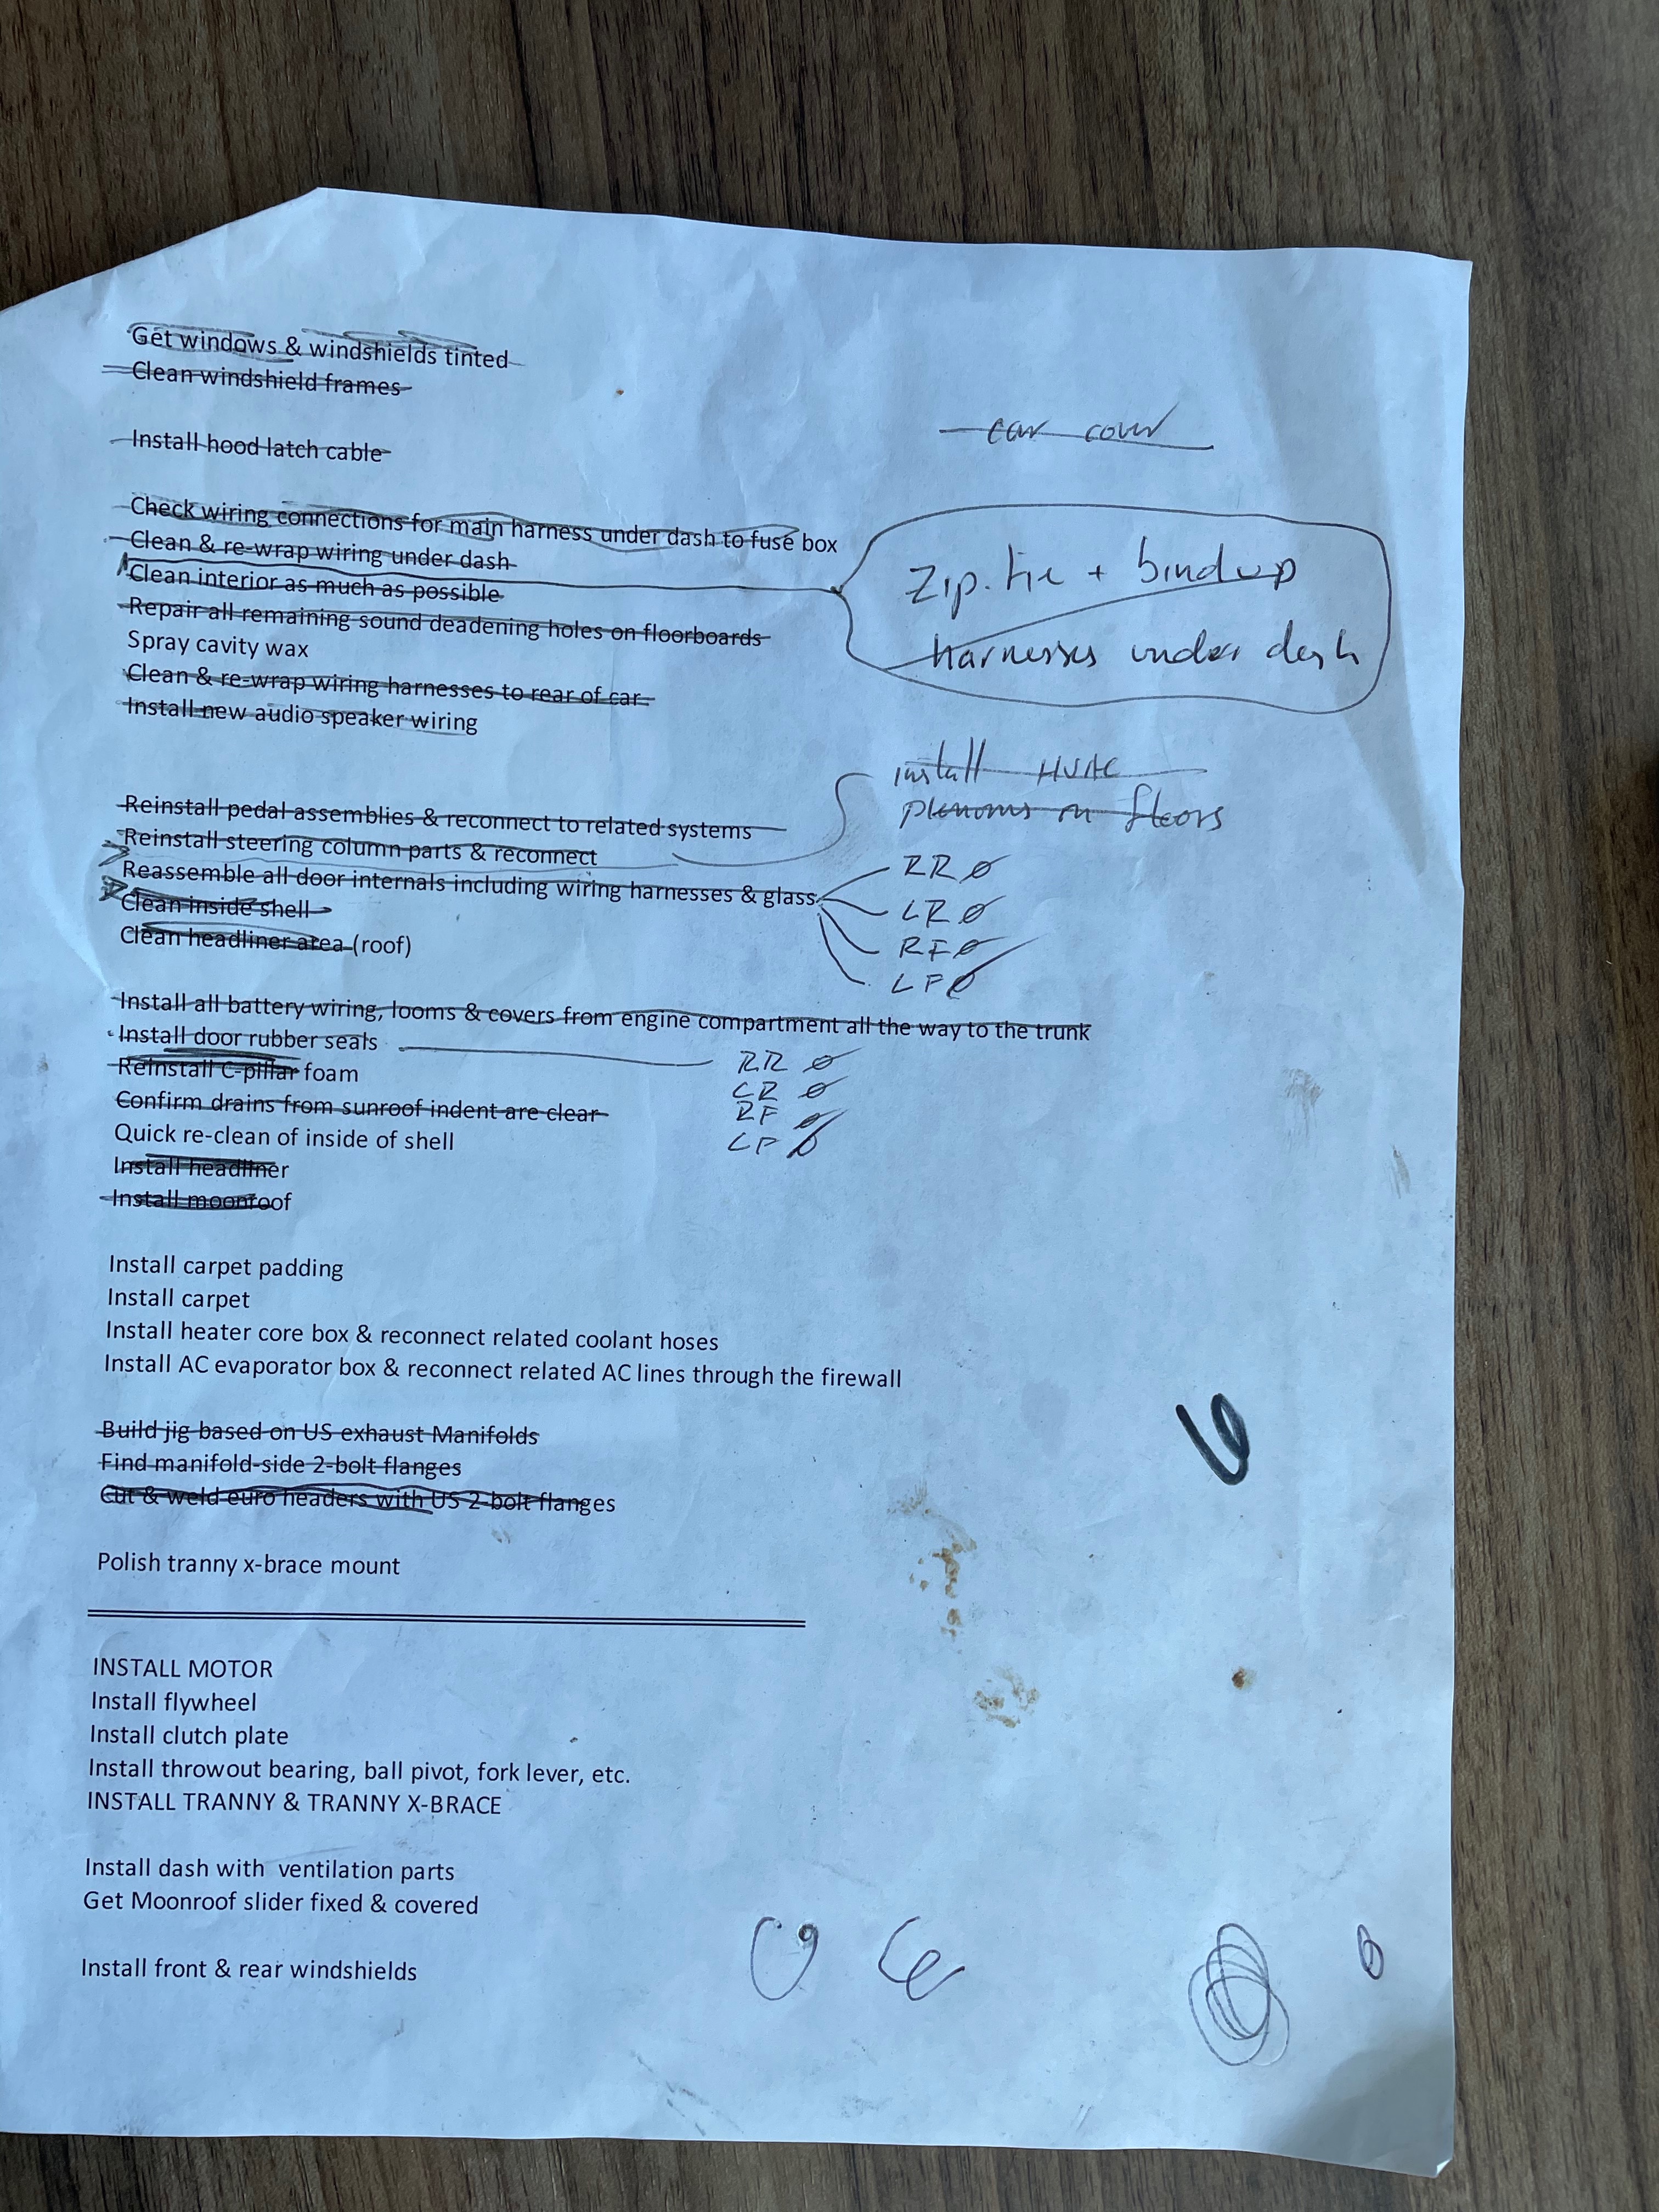
Right now, everything I'm doing is geared at getting the motor back in ASAP. To get the motor in, I want to have all the cooling system hoses and AC lines that go through the firewall back in (once the motor is in, getting those parts installed would be near impossible). Getting all those hoses & lines back in means having to get the heater core & AC evaporator boxes back in. Getting those boxes back in means putting the carpet back in. Putting the carpet back in ... well, you get the idea. It all started to feel like a pretty long & complicated task, so to keep me on task (so to speak), I did this to-do list that was intended to be in order of what needs to get done first to last. Since doing this list, I've modified my strategy a bit, but more on that later.
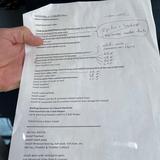
Image

Cleaning up and checking the wiring felt like the elephant in the room for me. When I took the car apart, what I found in the electrical system was a combination of prior bad stereo installations (probably multiple), a Viper installation and incorrect connections in the fuse block. The result of that was that I had anxiety about whether the wiring in my car would match the wiring diagram, and that I'd end up with a bunch of gremlins that would be super hard to diagnose & correct once the car was back together. So my plan was to test all the fuse pin connections to as many of the "fused components" as I could; e.g., test continuity from the radio power supply fuse to the radio power supply end-point, etc. All of that seemed to check out, though I had a moment of panic when all the side make lights were indicating that they were shorted out to ground. It took me a while to figure out that the bulbs were installed in the taillights and were in fact grounding the system out.

Here's before view under the dash:
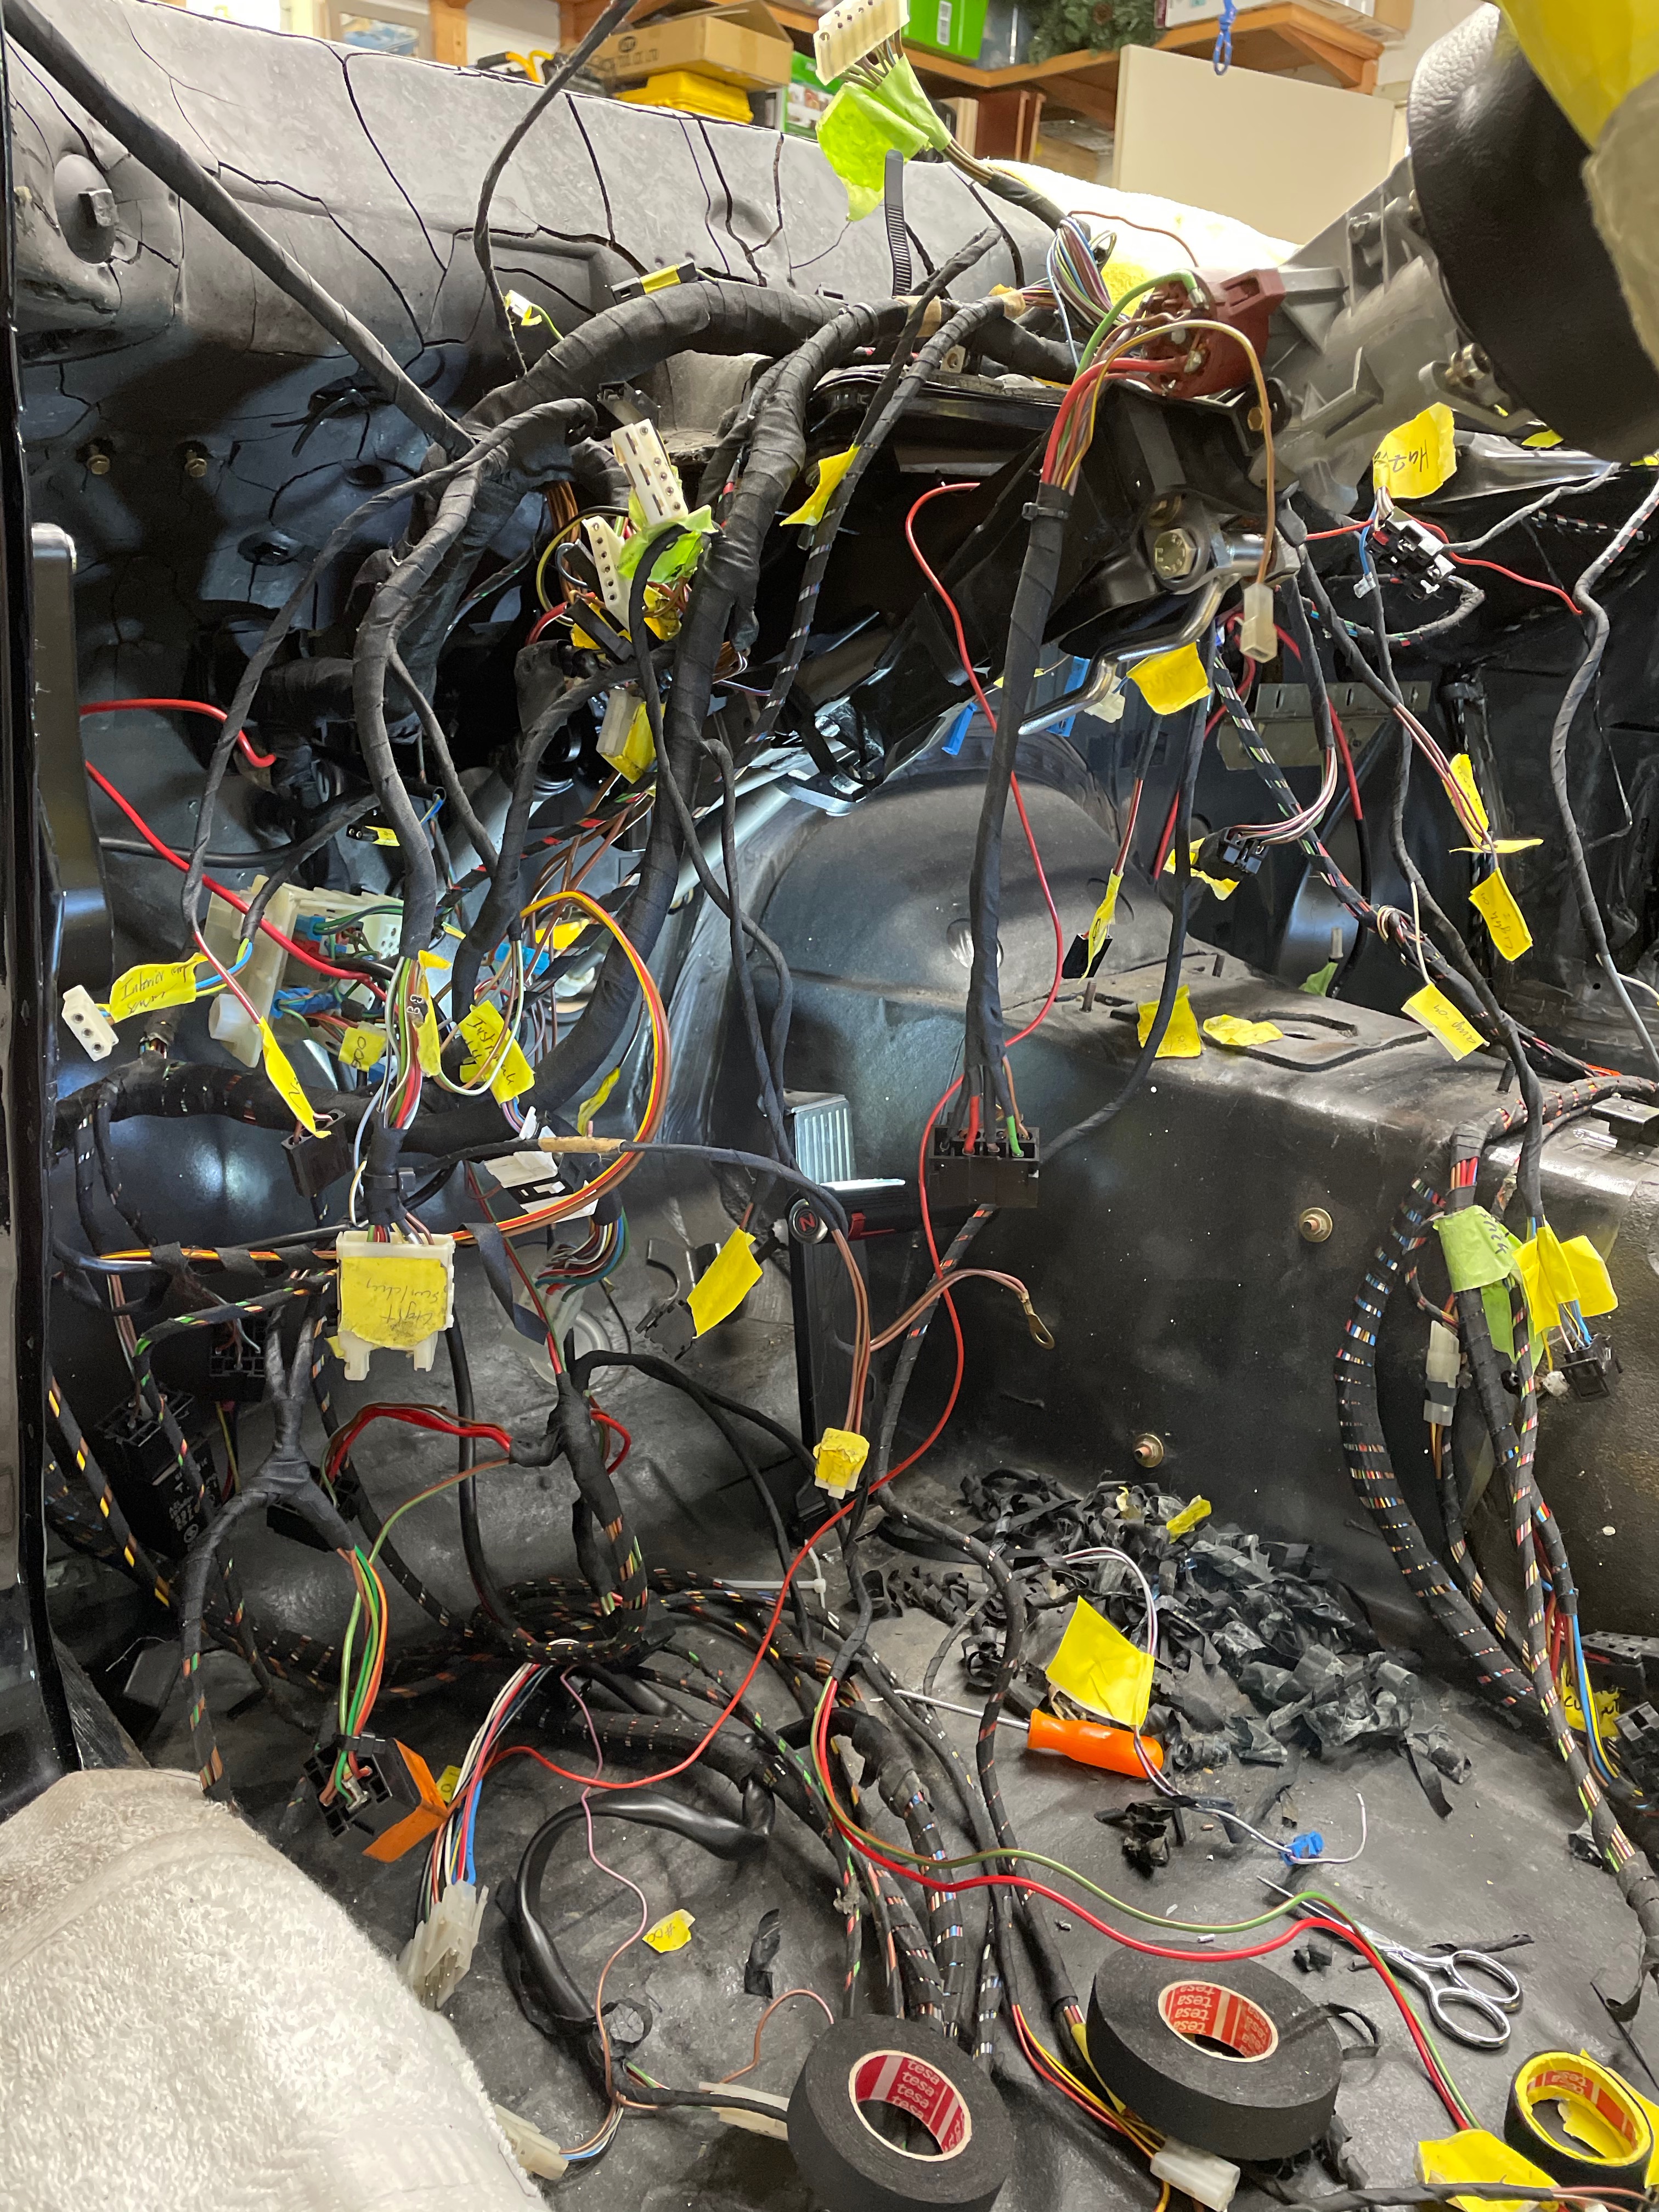
Image

And here's a pic from when I was nearly done. Any harnesses I found where the tape wrap had c one loose or was disintegrating got re-wrapped with Tessa high temp tape. I've come to the conclusion that most of the gray dust & dry powdery grim in all the interior nooks & crannies is disintegrated harness wrapping. The wrap on all the big main harnesses behind the cluster all disintegrated at my touch, and in clear sunlight you can see all the dust cascading down as you remove the tape fragments.
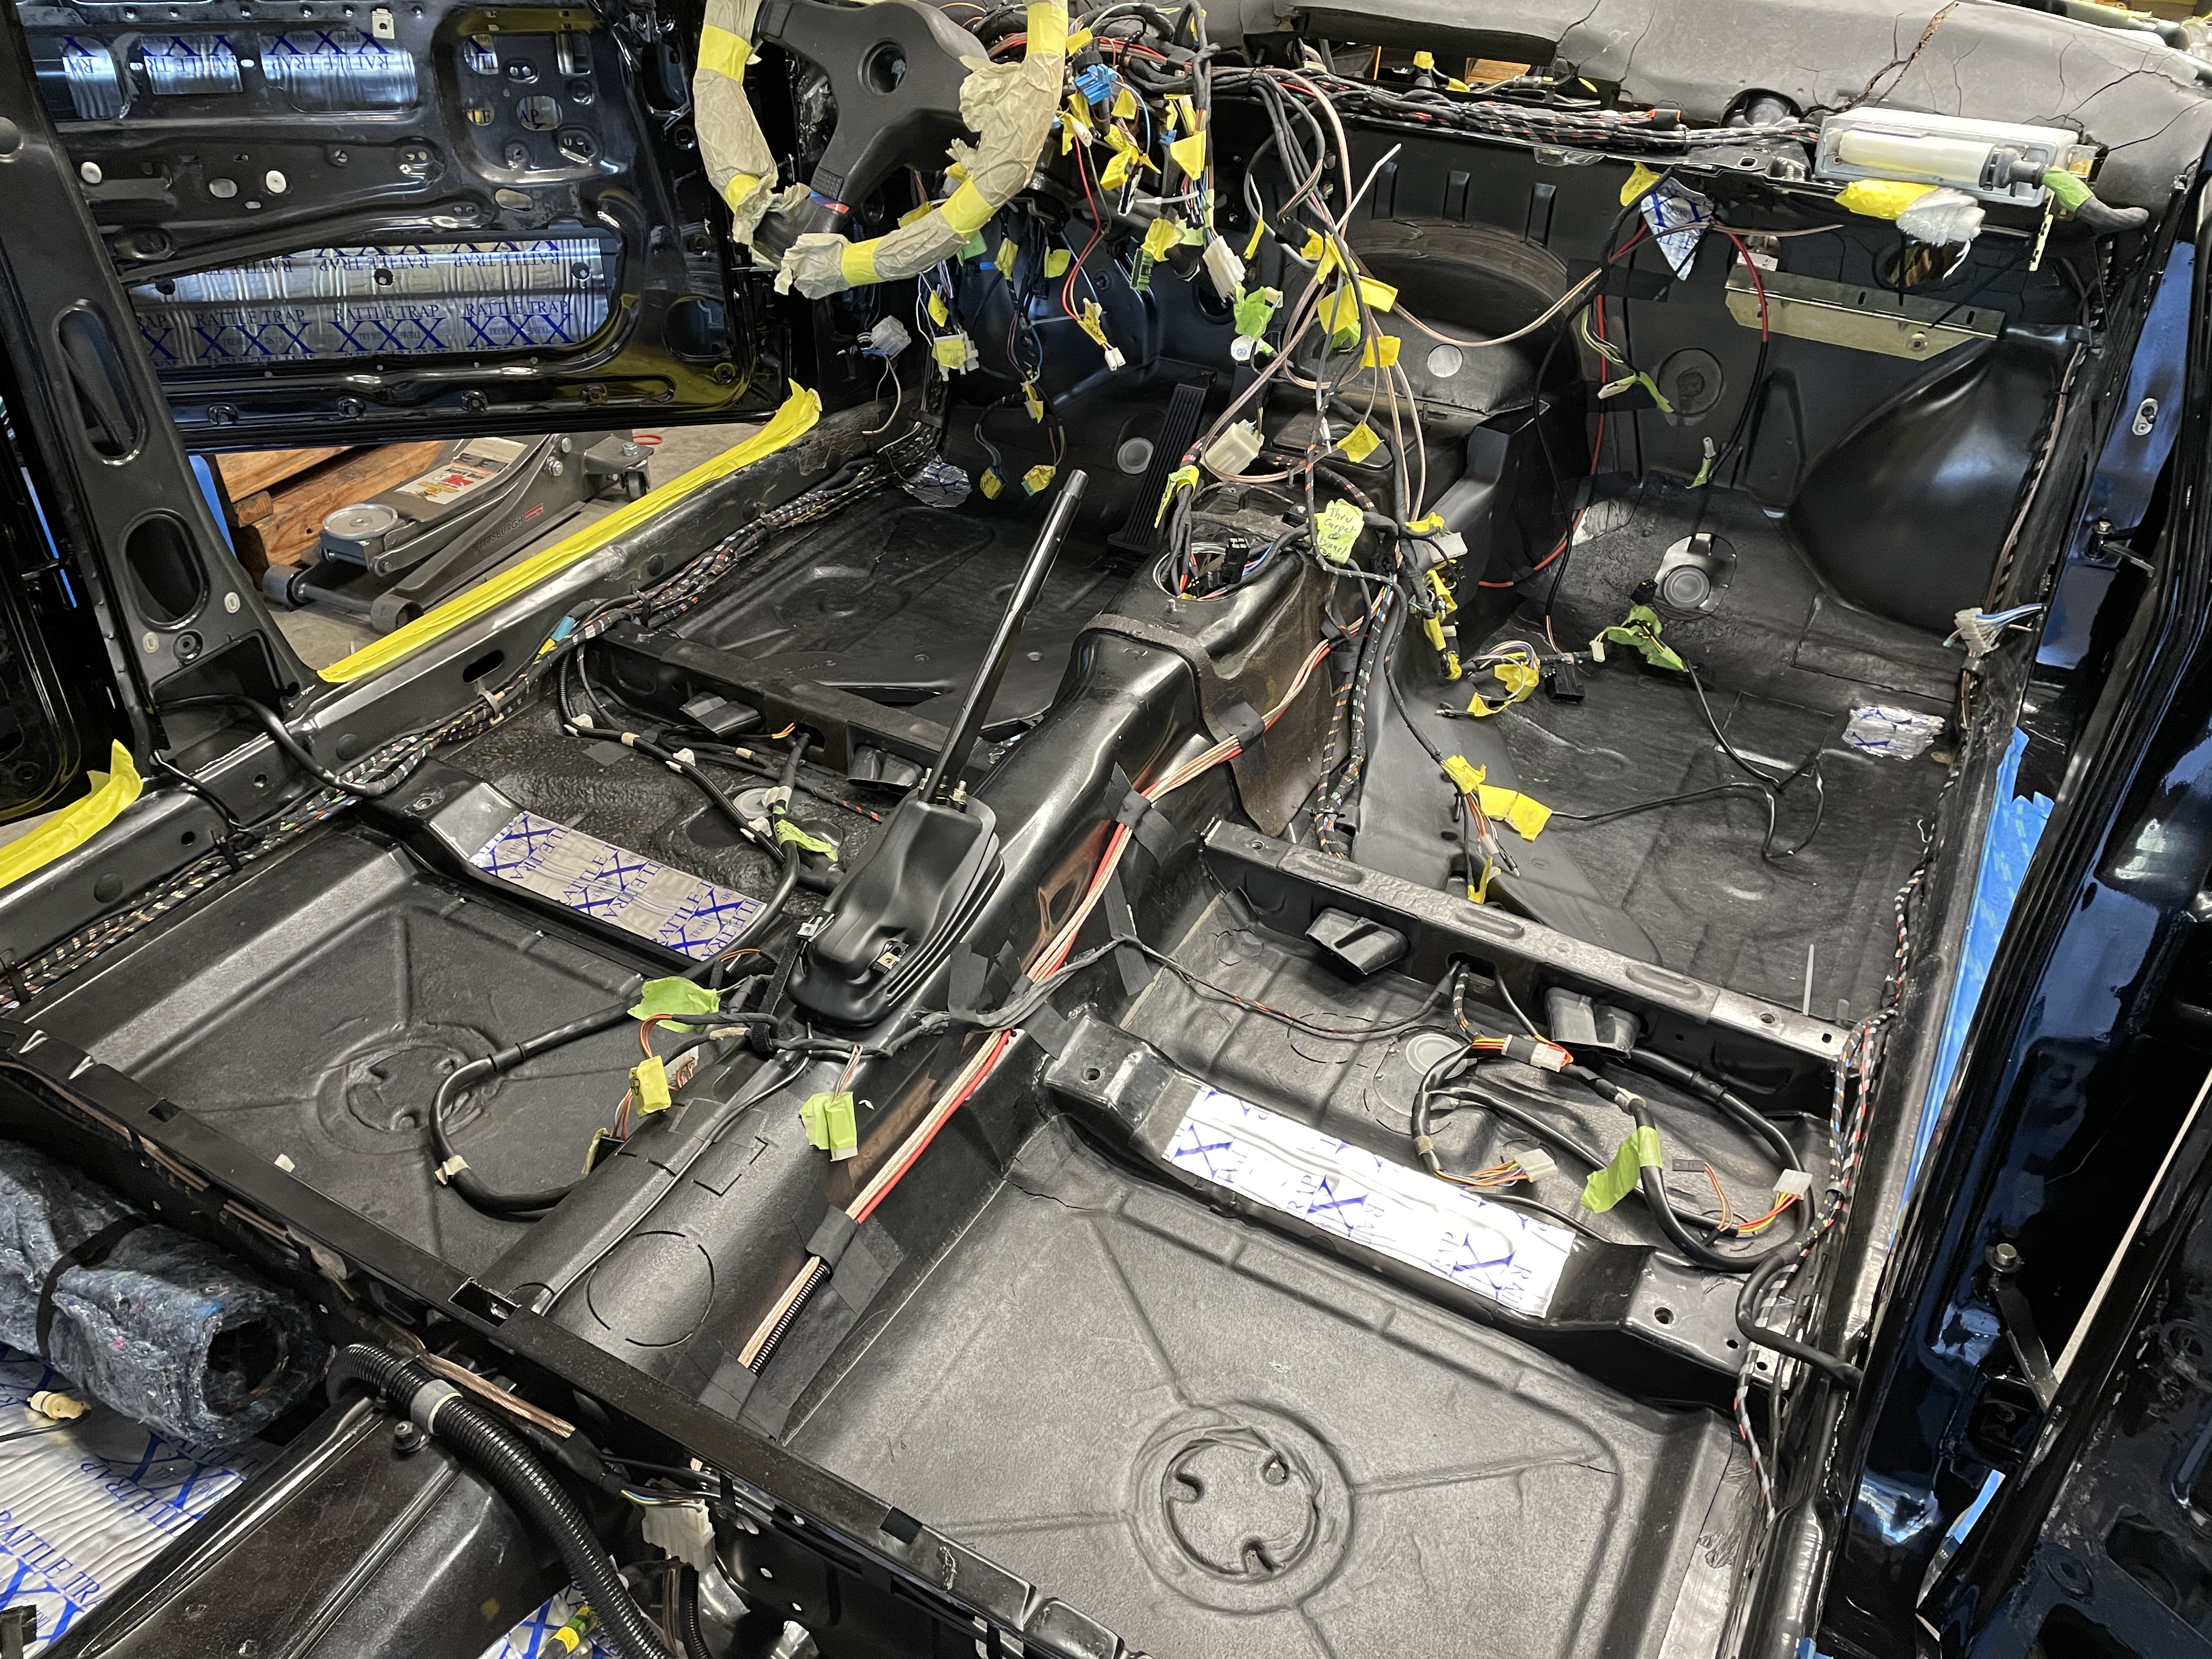
Image

In that pic above, I've steam cleaned, used compressed air and vacuumed as much as I Gould get to. If nothing else, it smells so much nicer & cleaner!

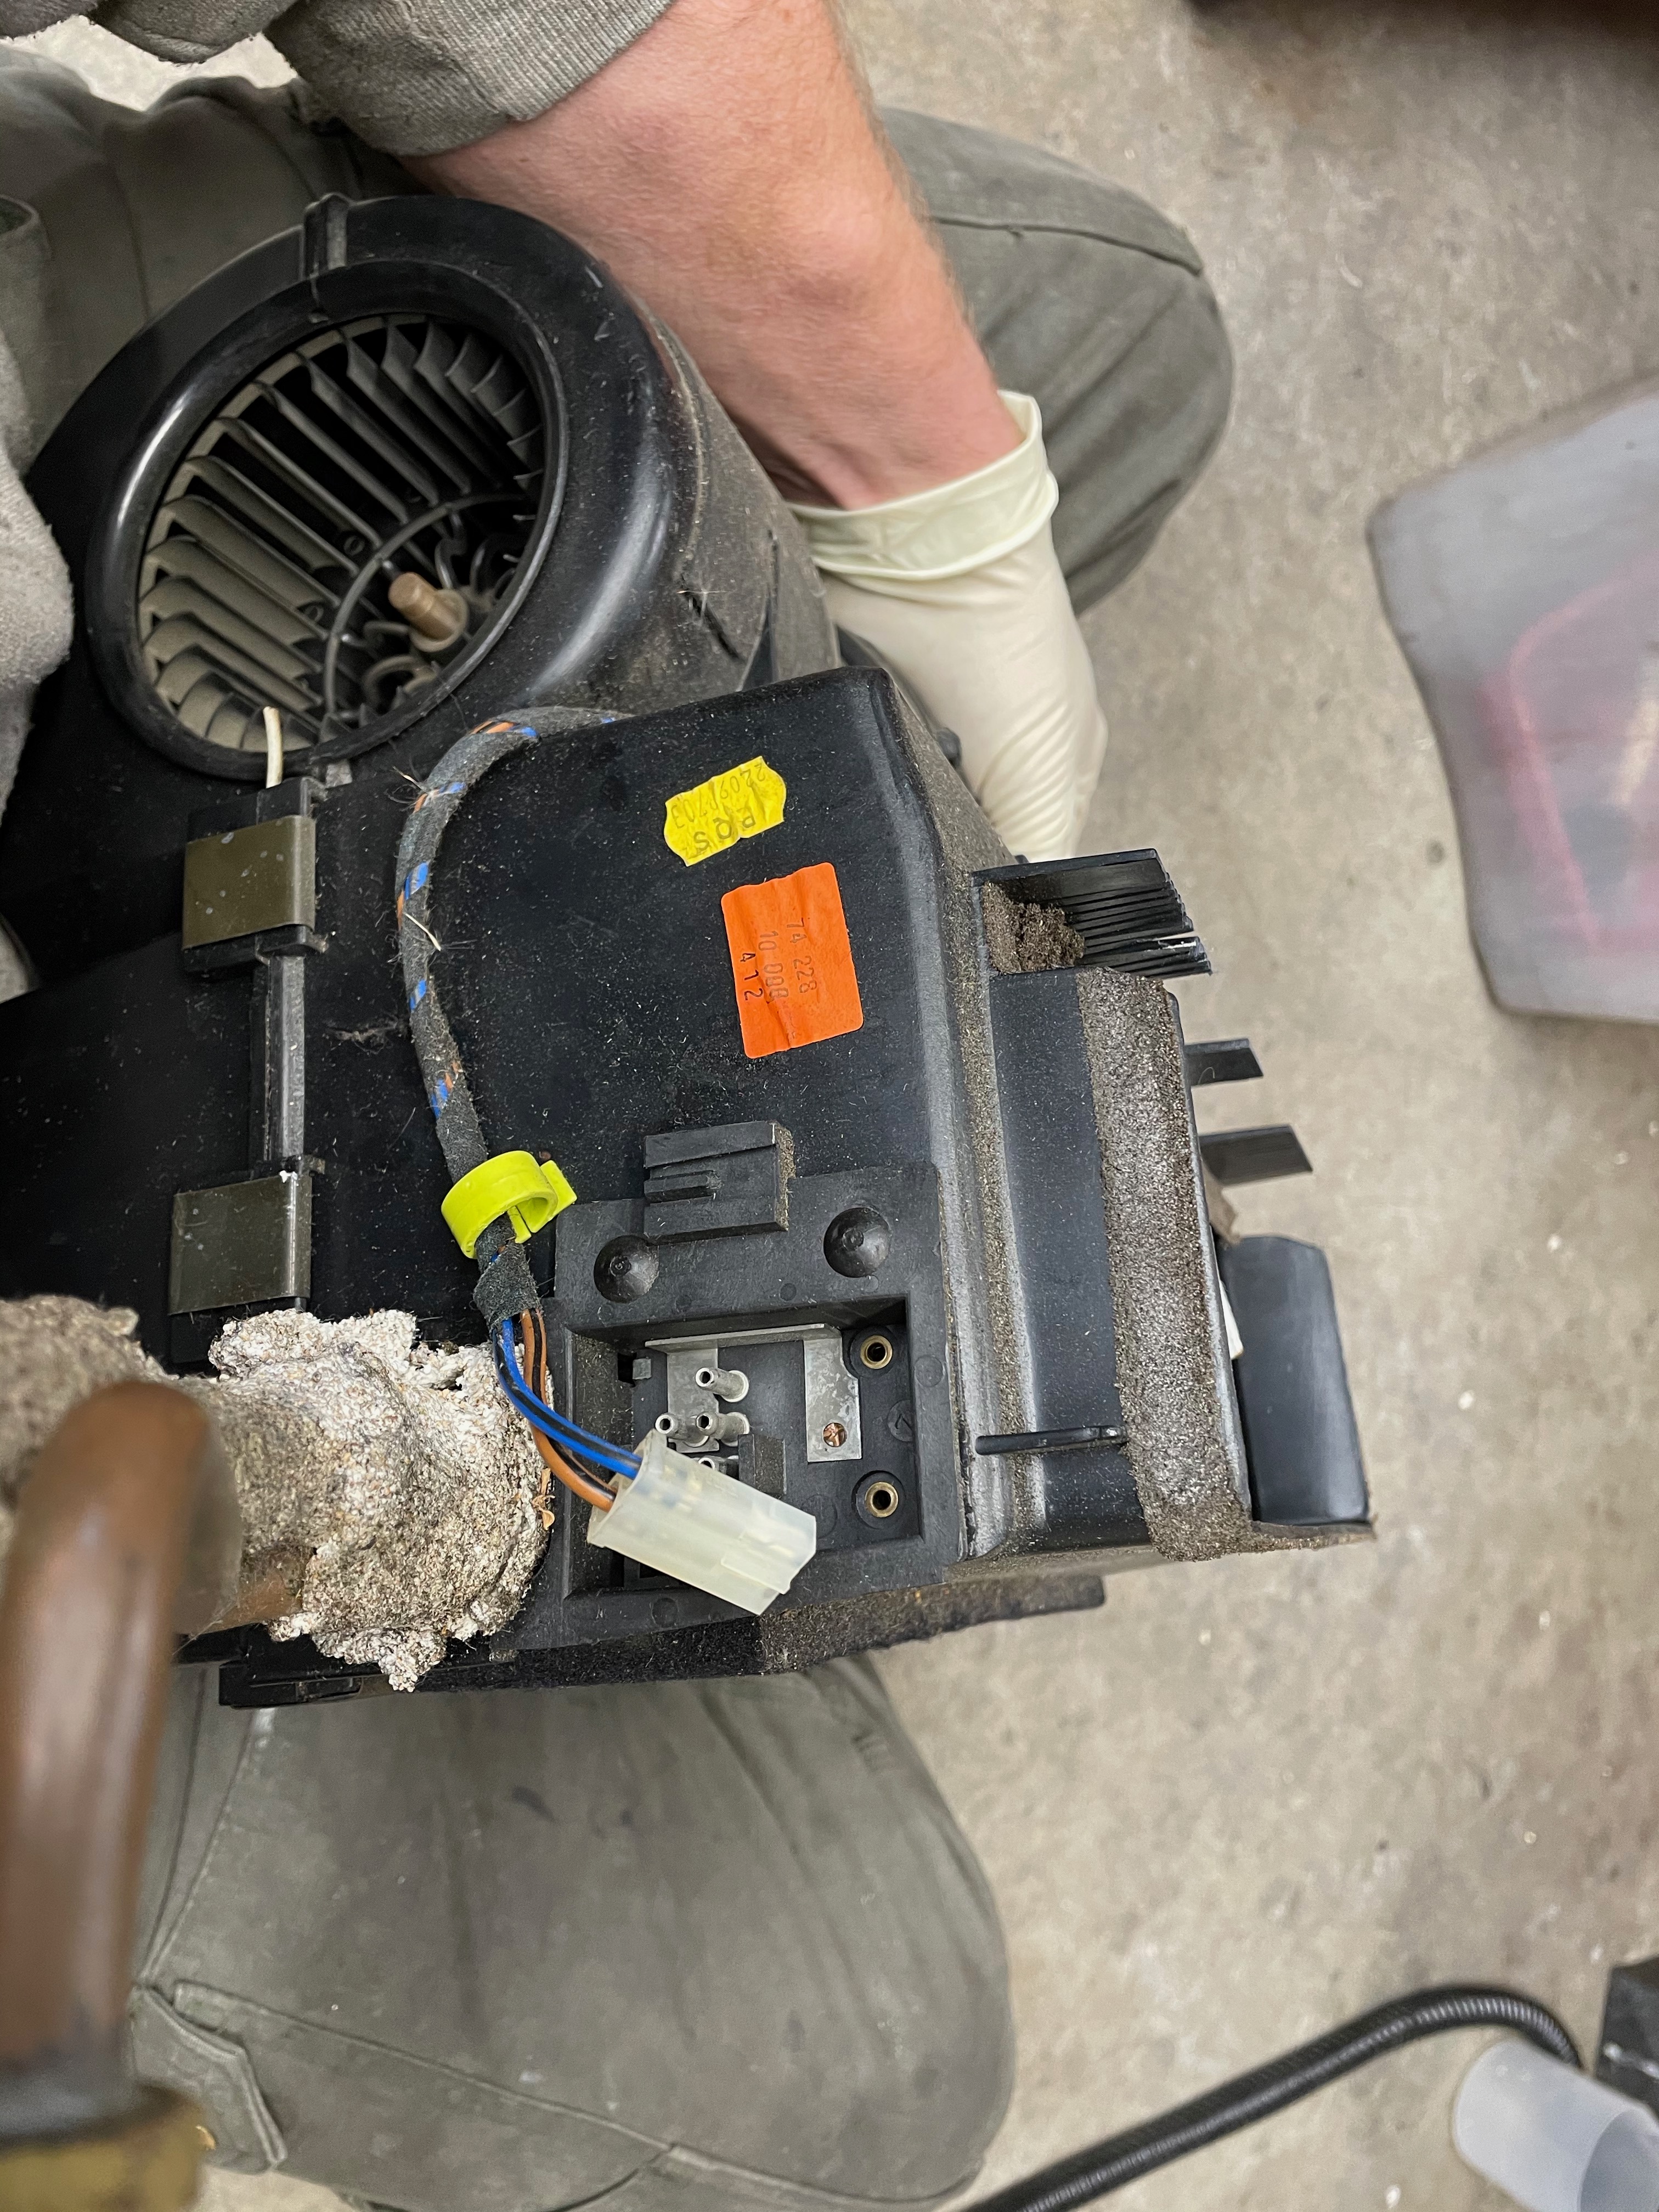
I also (nearly) finished refurbishing the evap box. Before:
Image

After:

Image

The only thing I'm not happy with is that the "O" ring kit I bought didn't have a small enough one to seal the small pipe on the expansion valve, so I reused the old one. Not a day later I found a better kit and ordered it. So, unfortunately, before the evap box goes back in, I'll have to disassemble and re-do one of the connections. I also discovered that one of the new Knipex needle nose pliers (angled jaw, slightly flattened tips) worked perfectly to straighten all the bent aluminum fins.

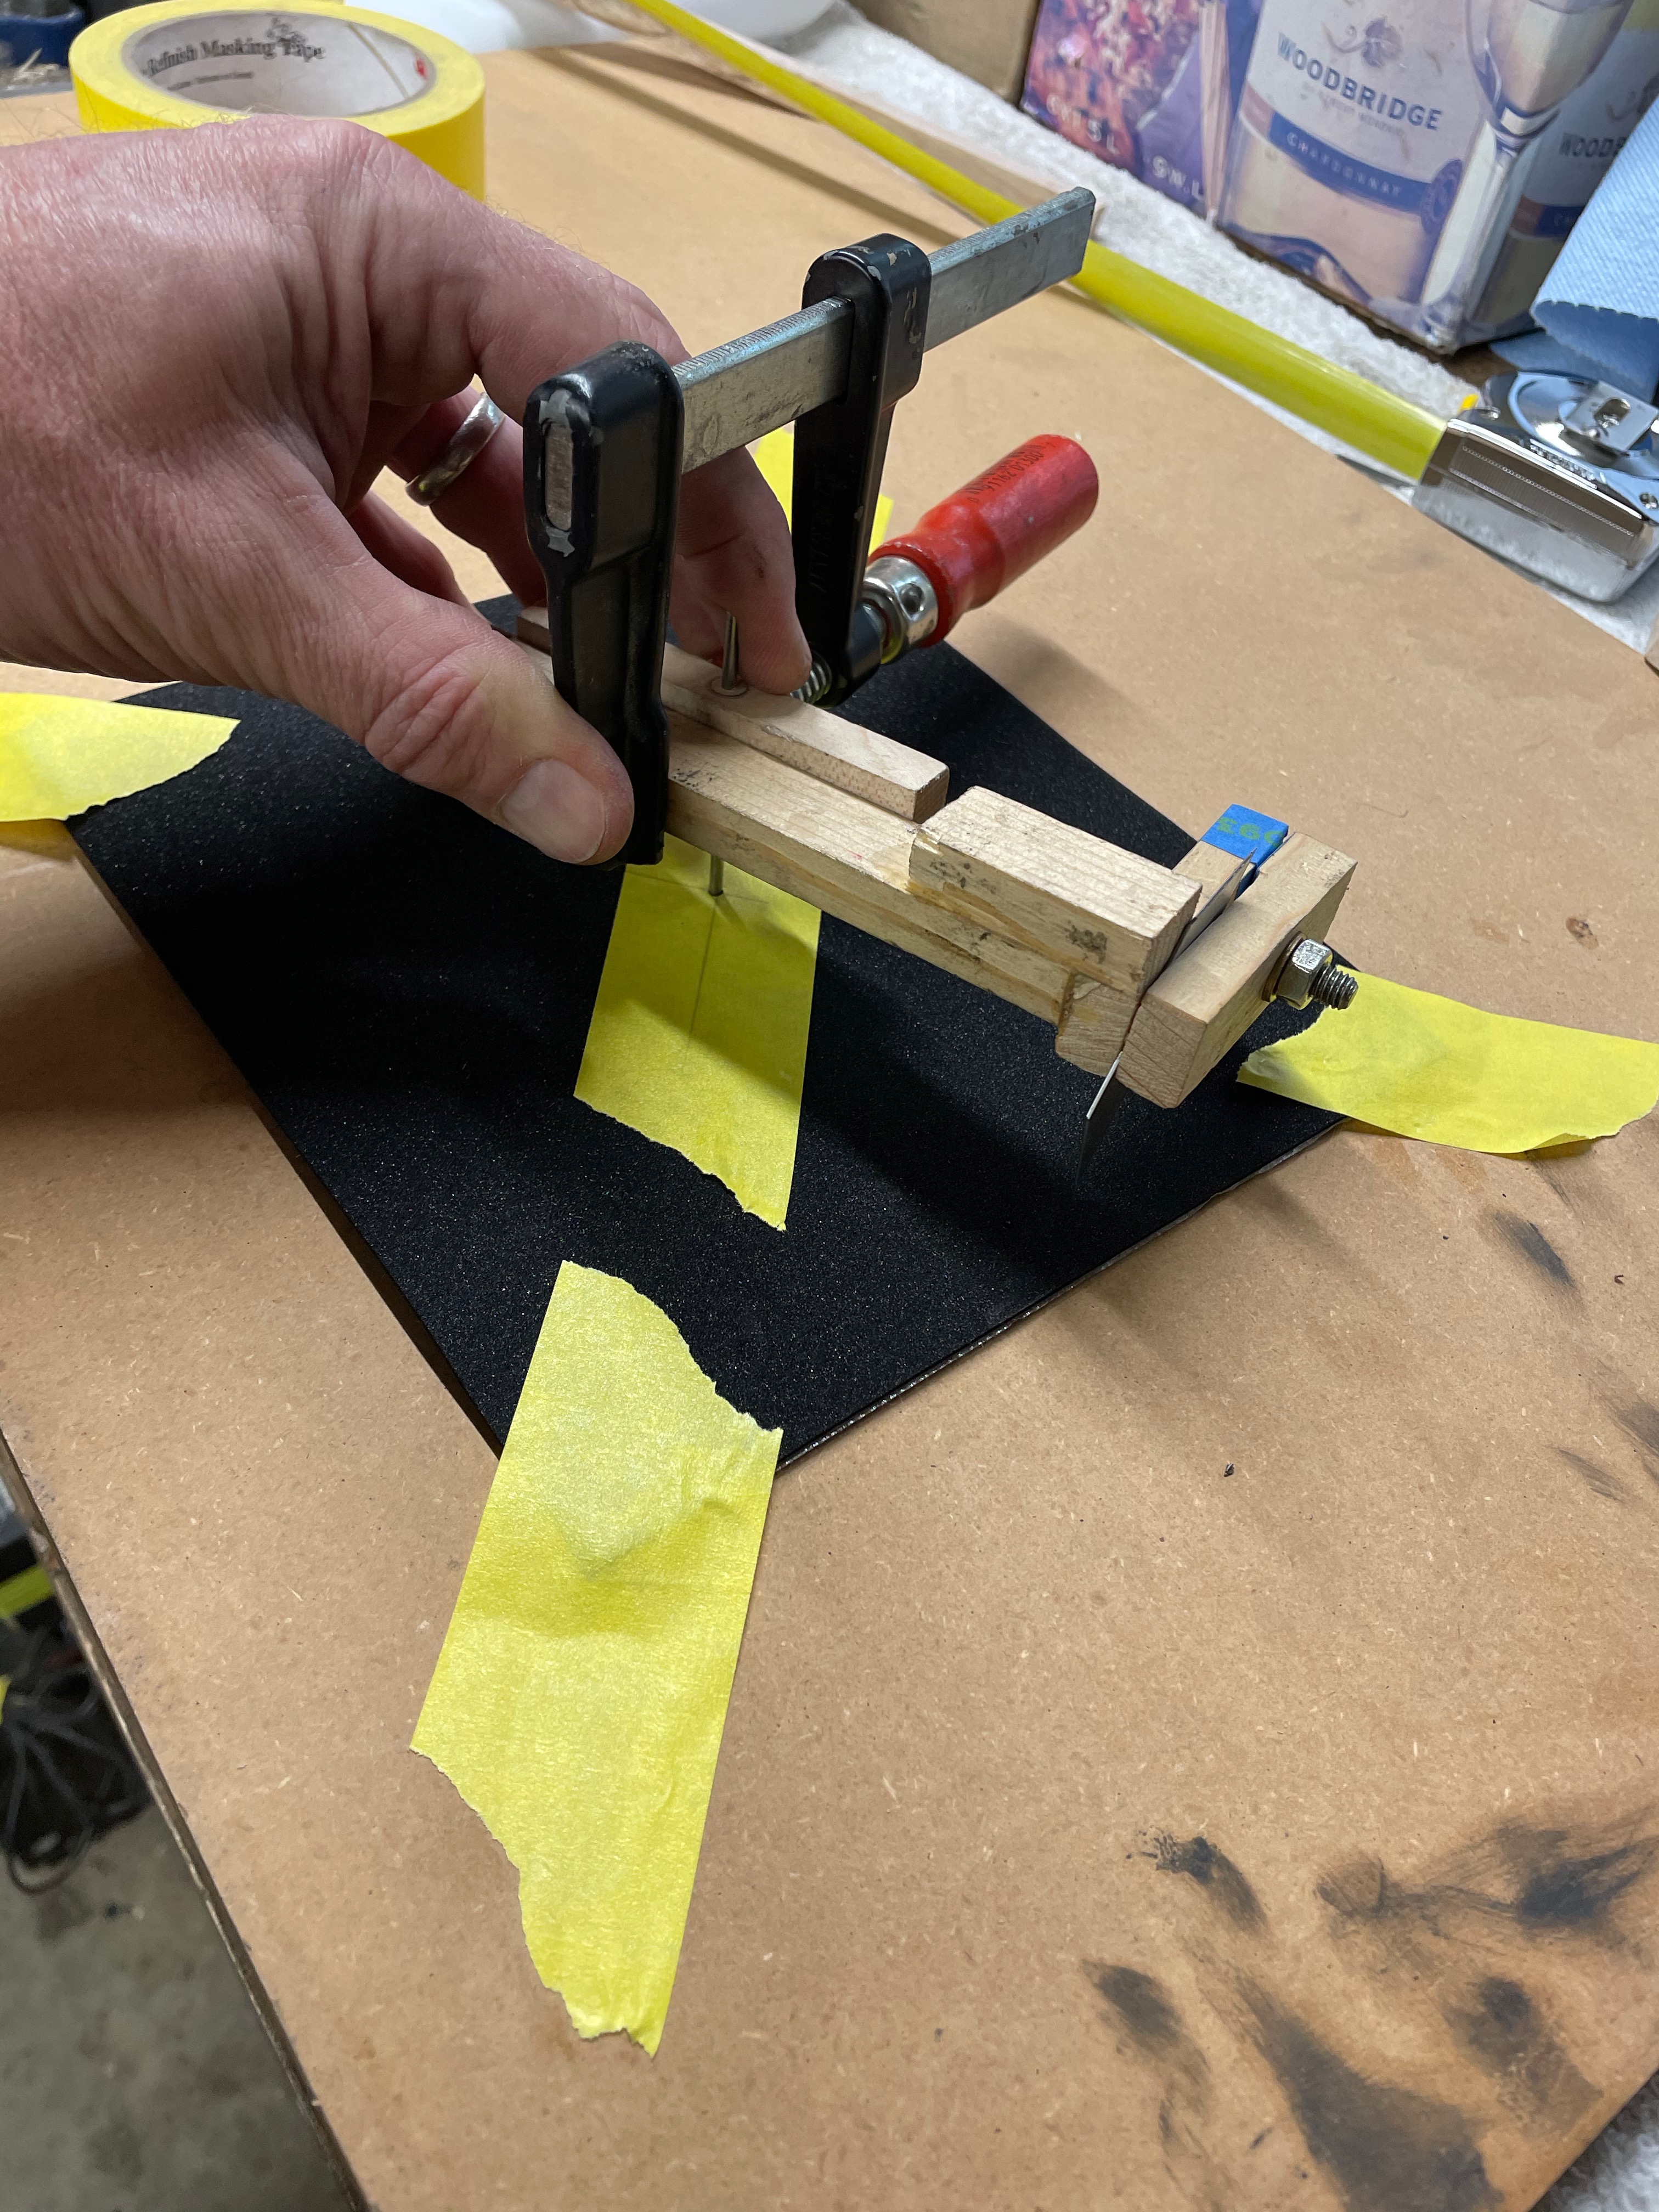
And this one is a bit geeky, but given the amount of damage by the battery box where it looked like battery fluid had leaked out, I was particularly motivated to replace the fuel pump cover gasket on the trunk floor. That part is NLA, and my old was was ruined. So, I took two sheets of that thin foam, stuck them together, and build this round cutter:
Image

I cut the outside edge first, then the inside, then used Rotabroach to cut the bolt holes. Result (before the bolt holes were cut):
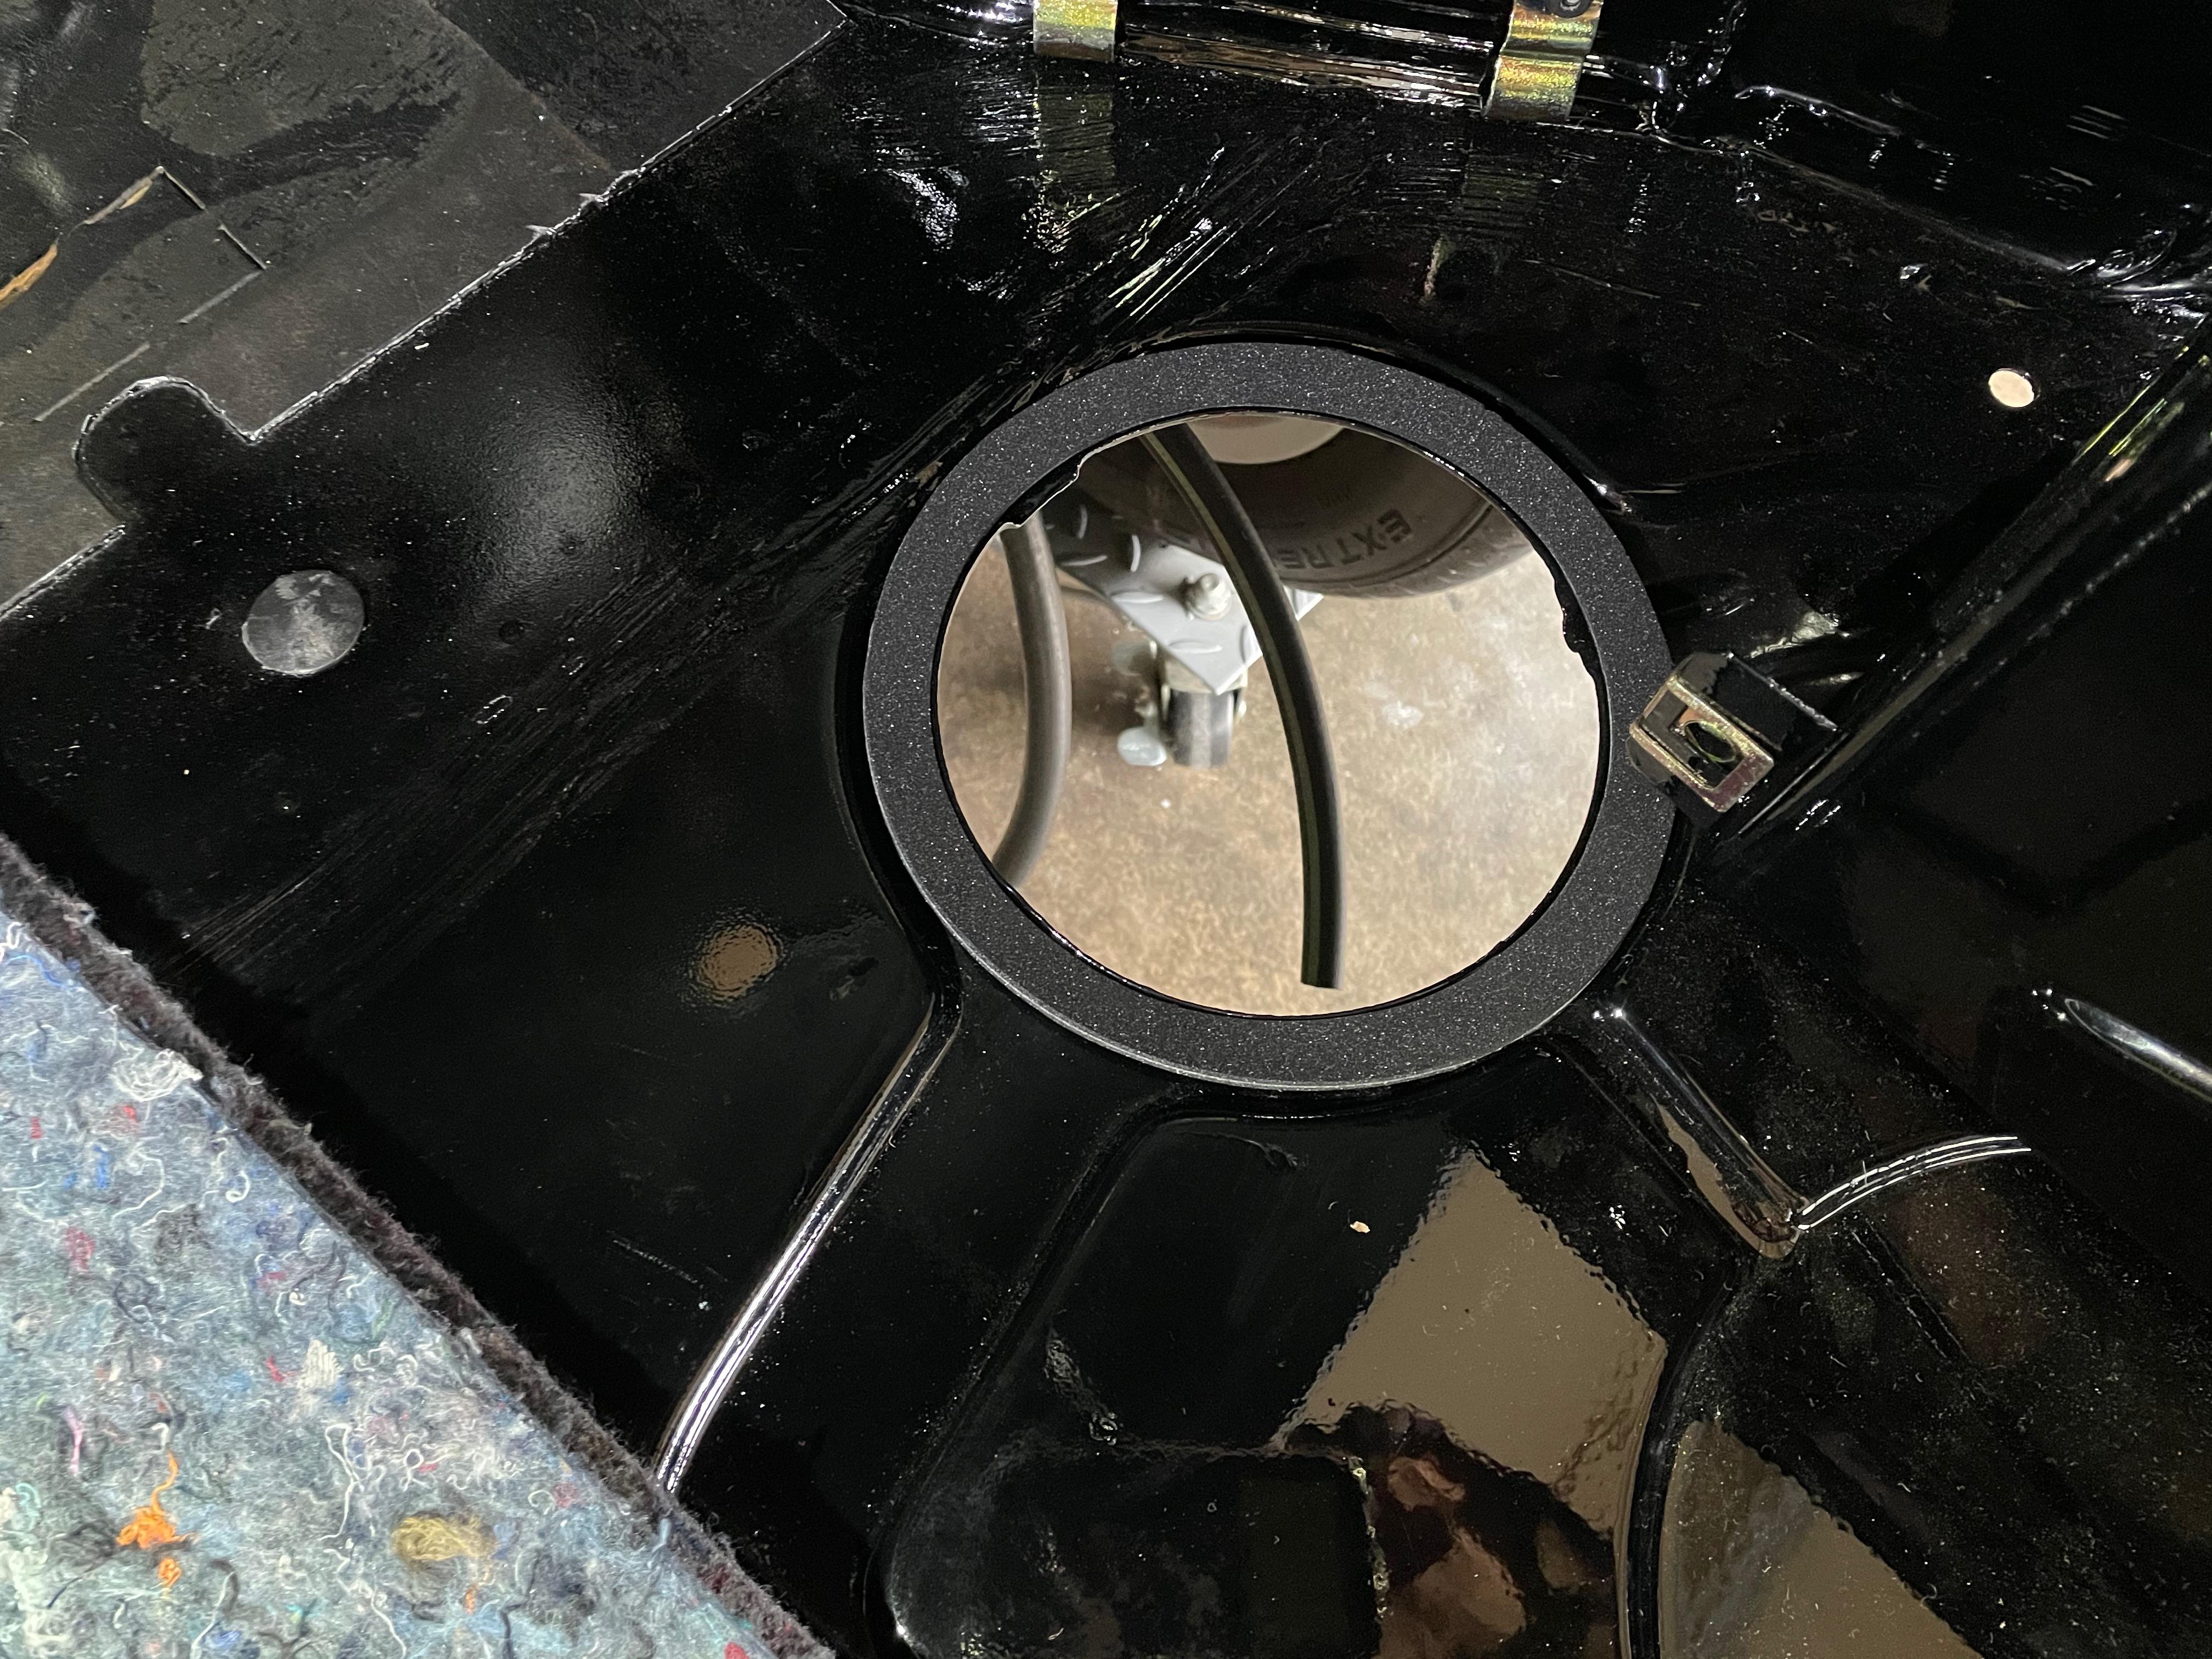
Image

New stickers arrived. Most of them were from Pukar Designs, but he sent the wrong paint code sticker, so I actually had to design my own in Adobe Illustrator and get it printed up. "But wait!" you say, "Aren't there plenty of other places to buy BMW paint code stickers?!?" Well, lots of places on eBay and Etsy appear to sell them, but they were all incorrect ... wrong size, wrong color, wrong font, wrong orientation, no part numbers, etc. I finally found one of the Etsy sellers who was fine printing up my design.
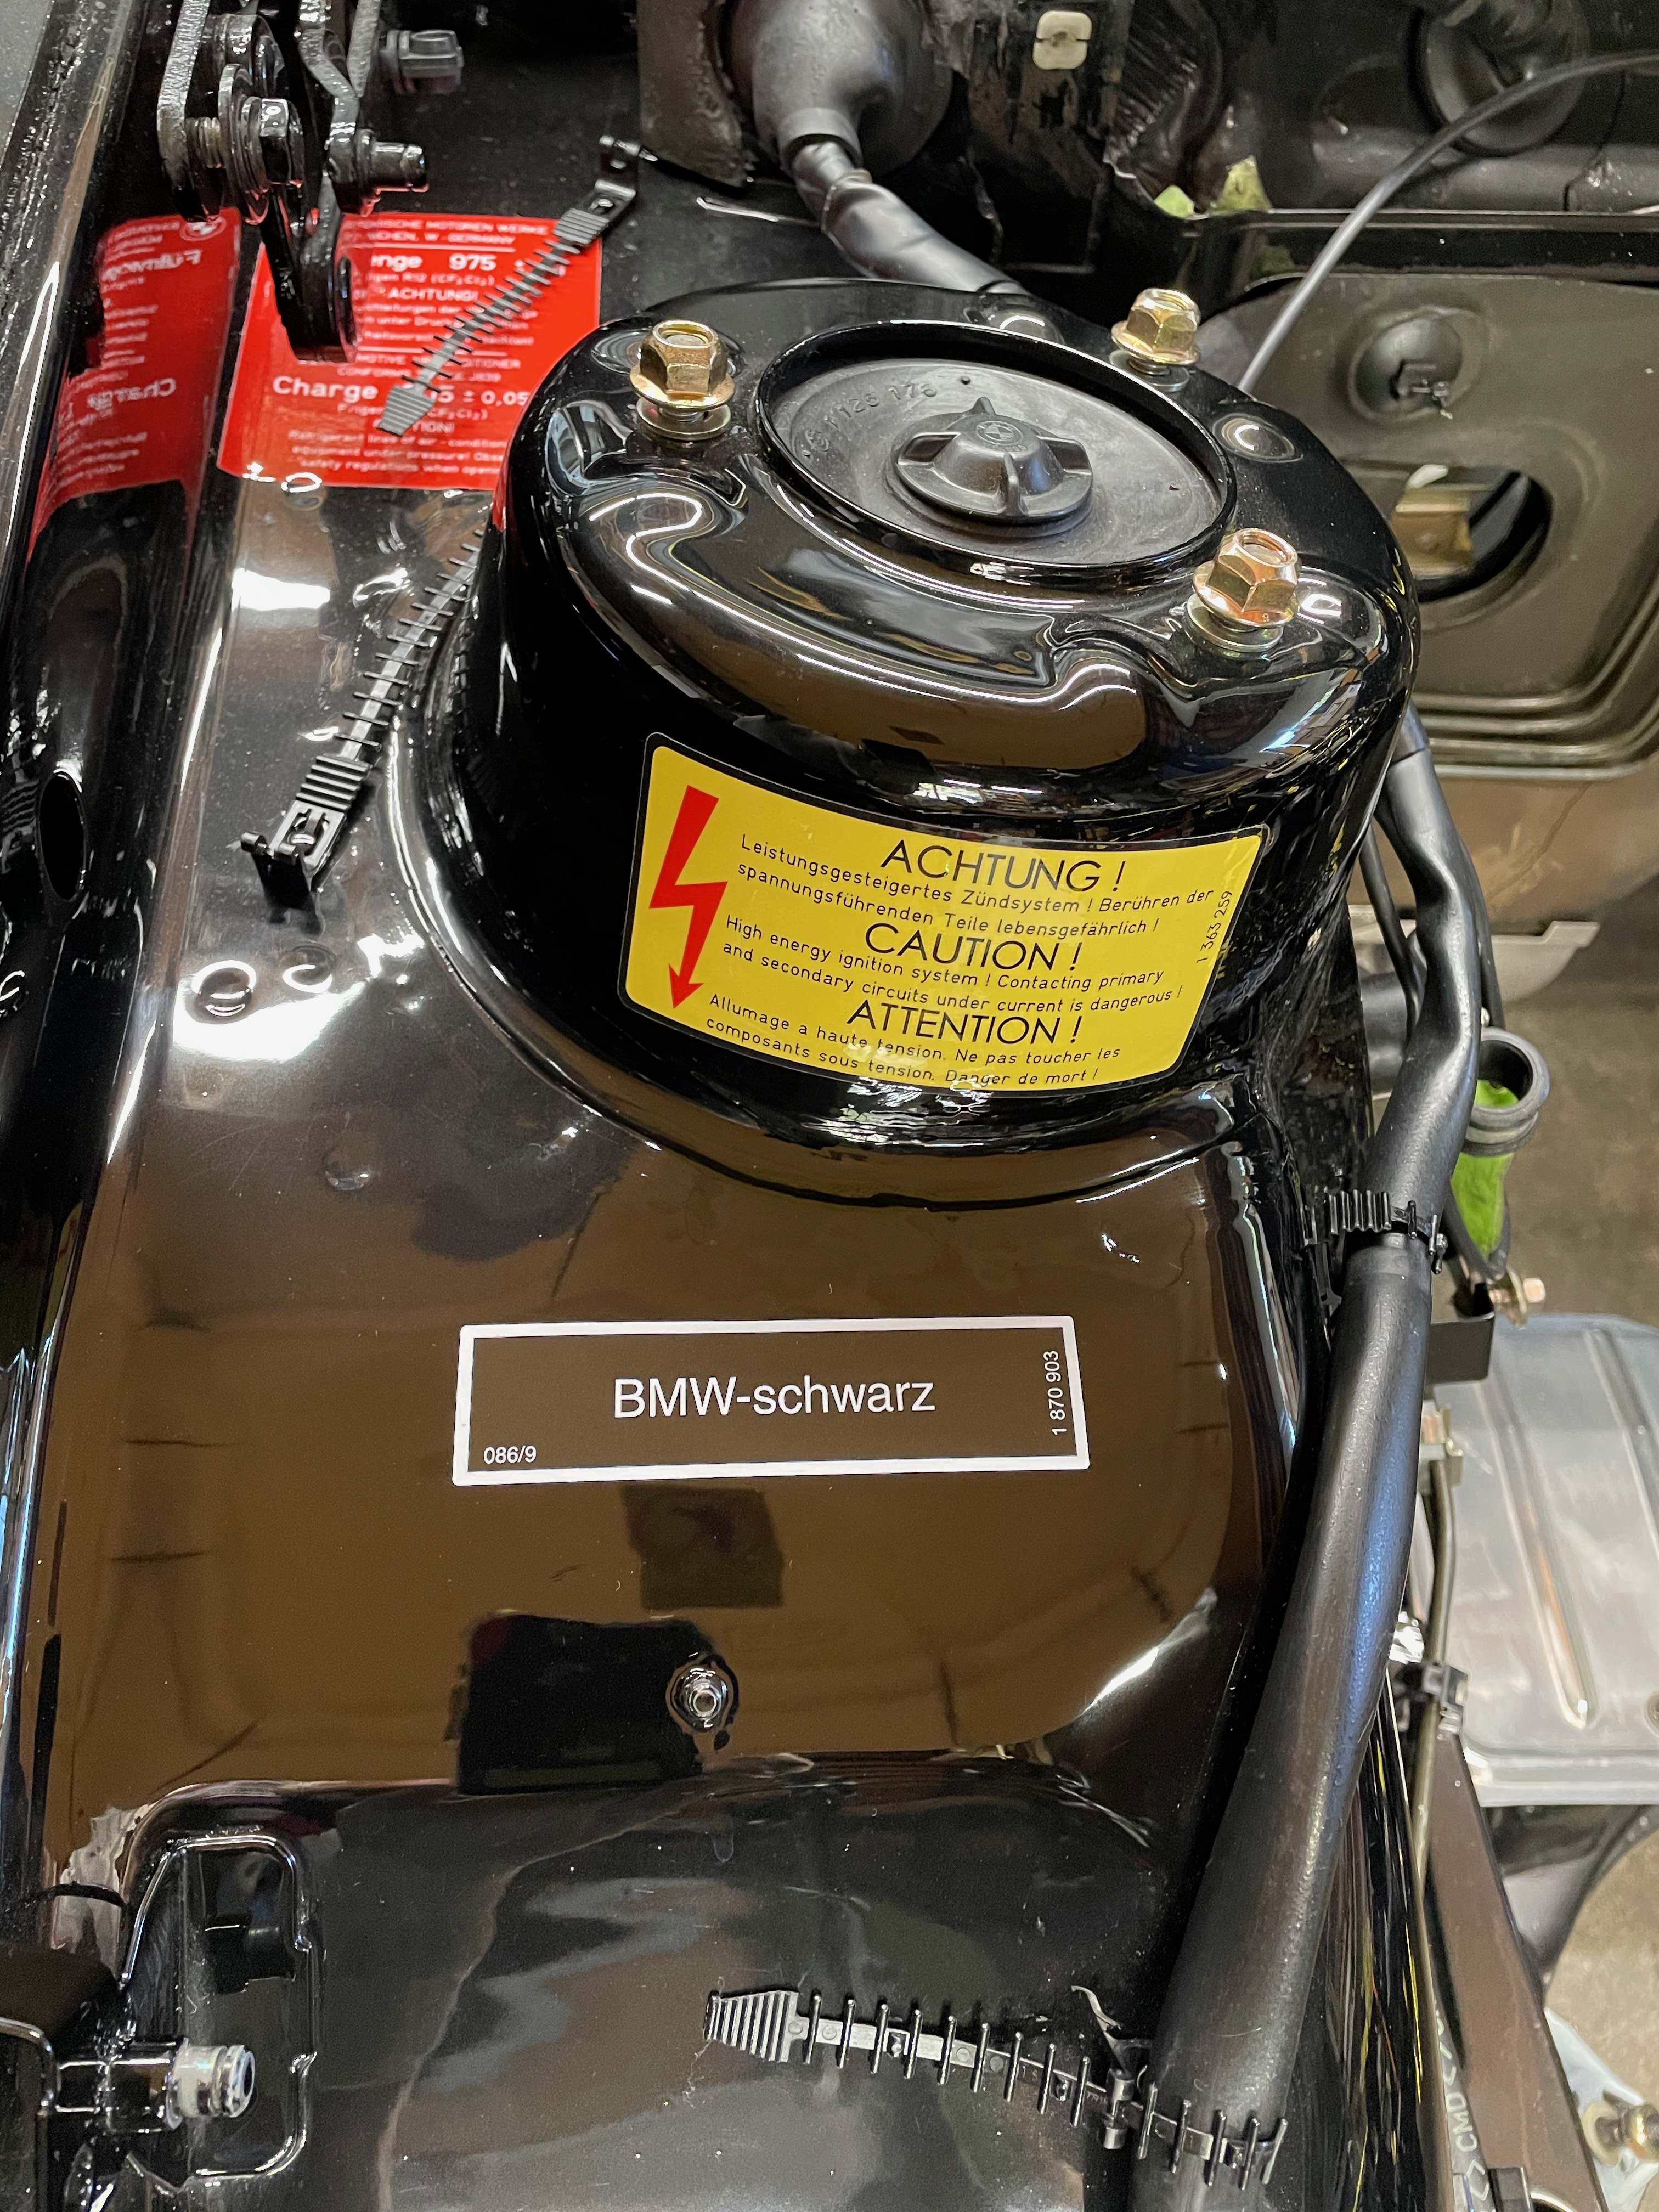
Image

I've no also got the doors mostly reassembled, including the trim, glass & handles. This is starting to make my collection of parts look a bit more like an actual car. Most of the trip clips are new. (For some idiotic reason, I only ordered 25 new clips when I actually needed a total of closer to 36, so I had to reuse some of the old ones.) I also used the 3M strip caulk under the aluminum trip to replace the old white putty that had been removed. The 3M stuff is a bit stickier, so removal will take a bit of care if I ever have to do that.
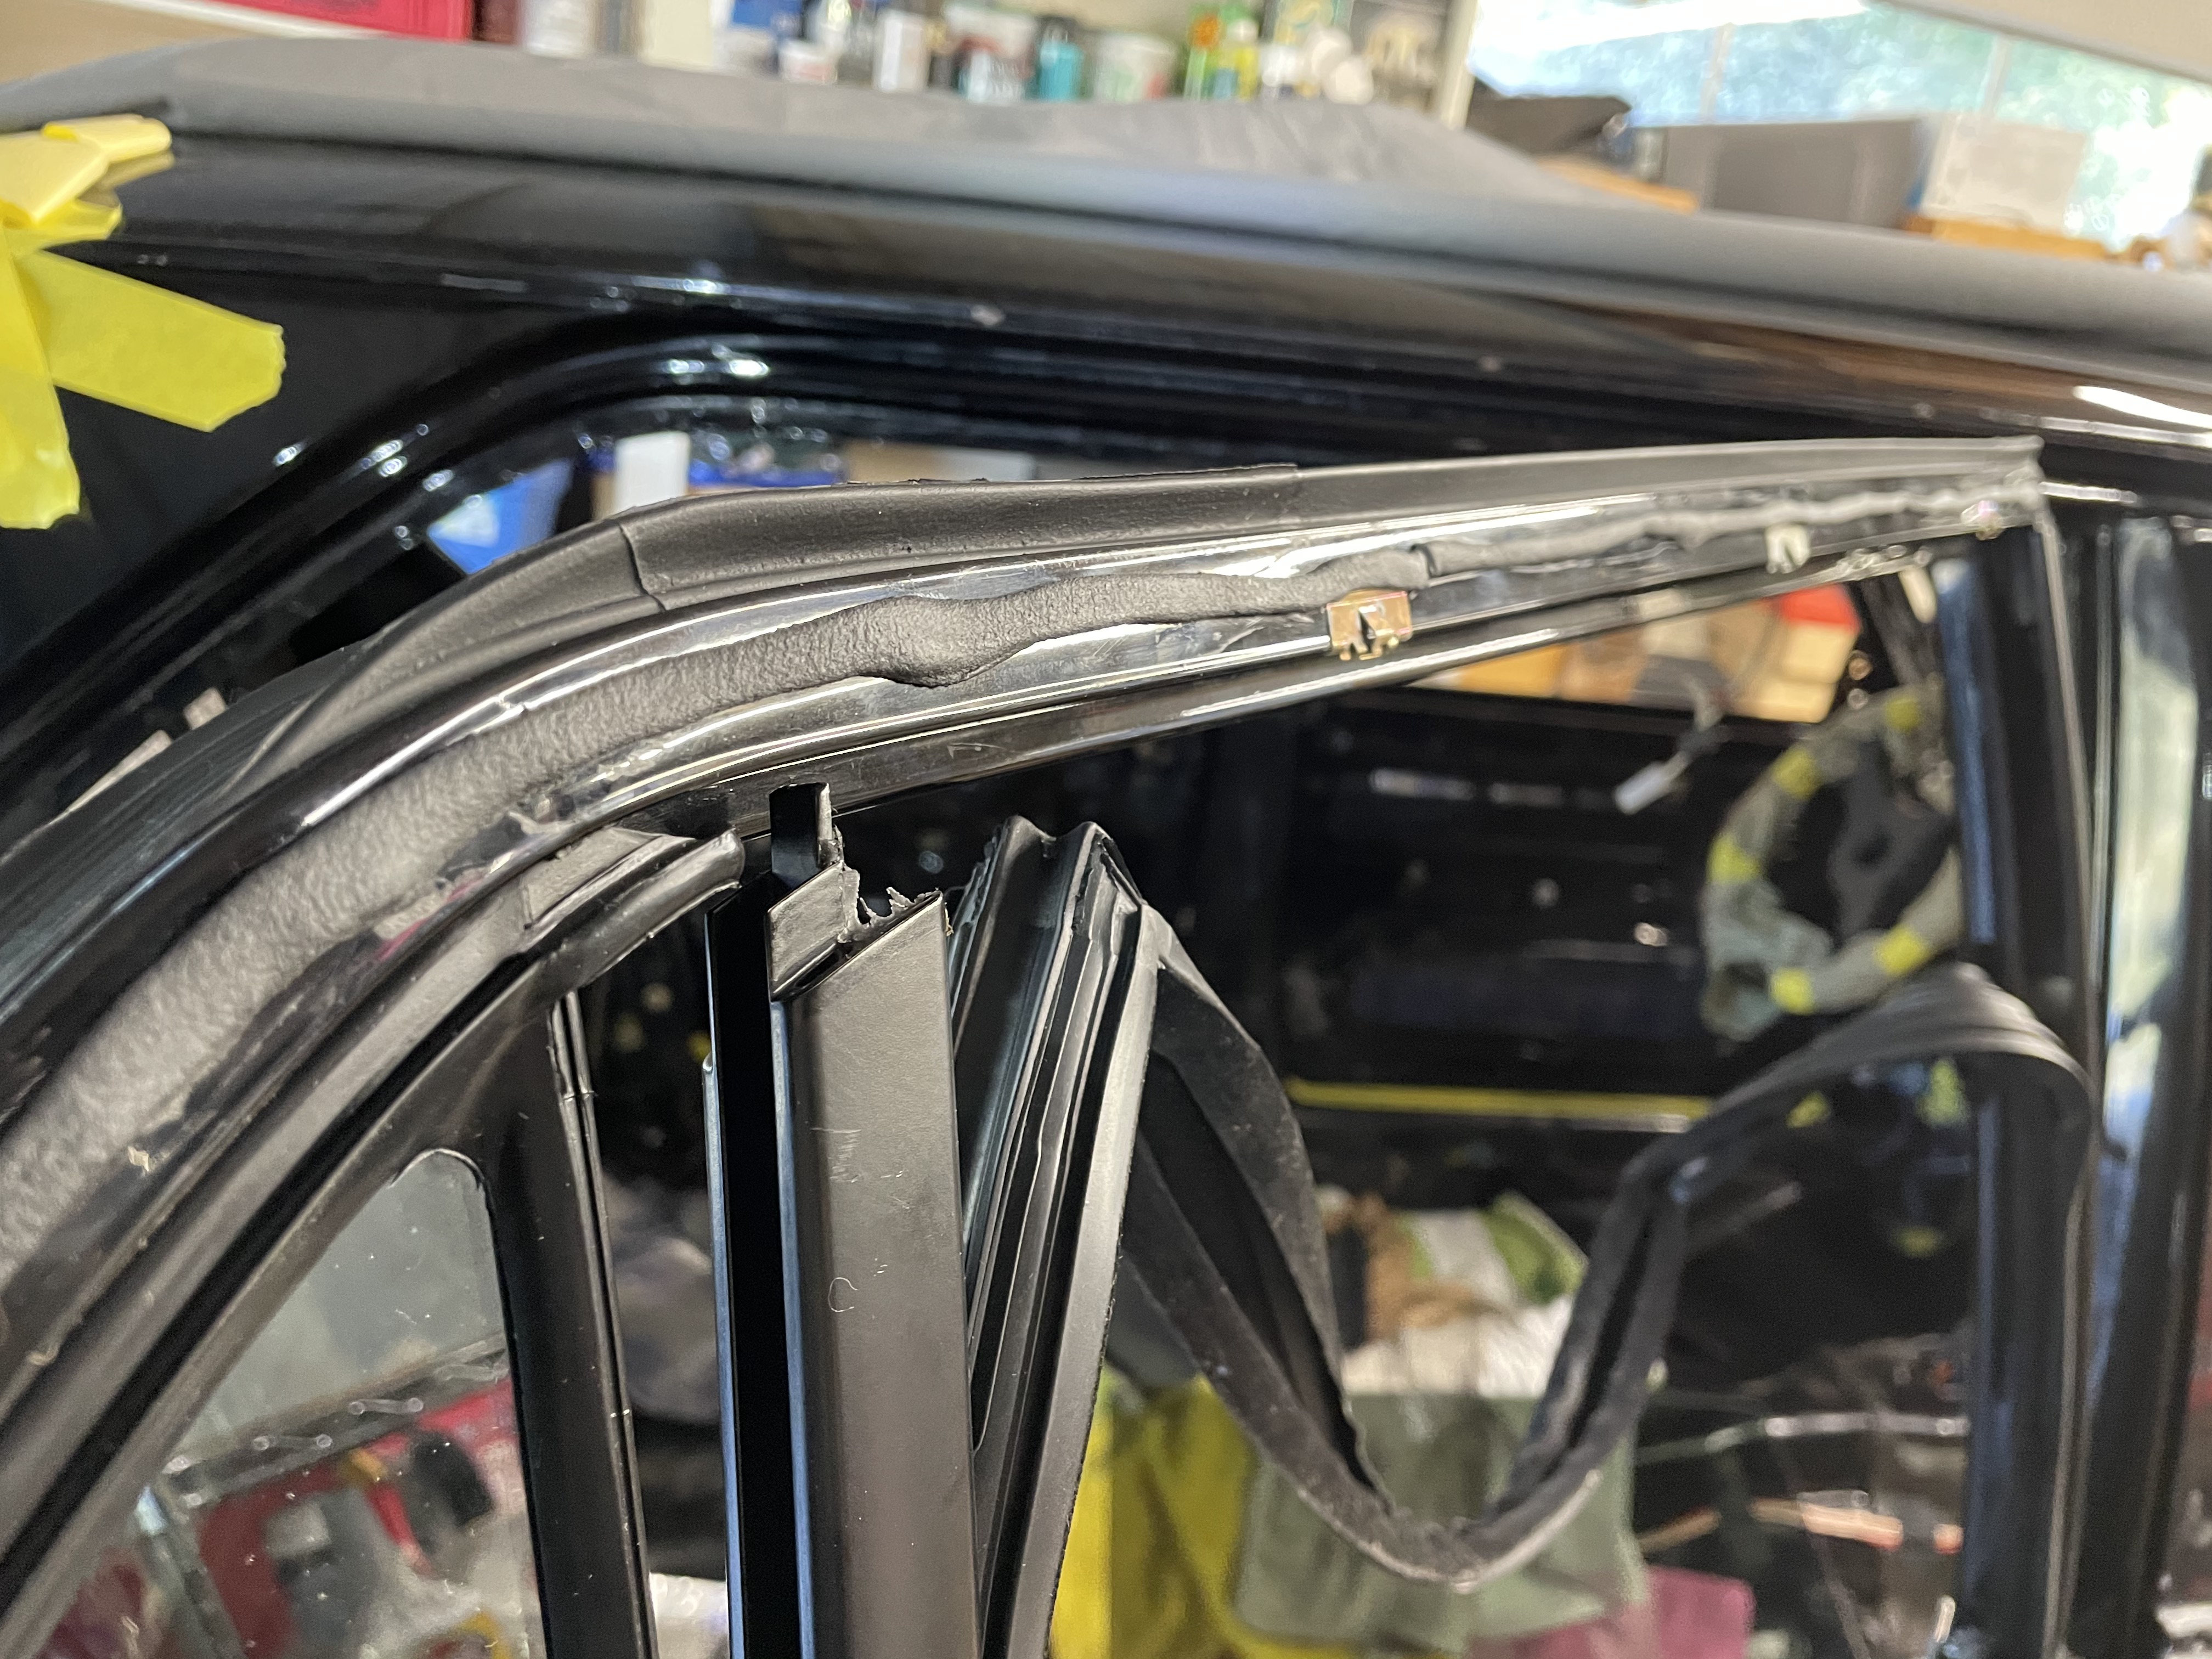
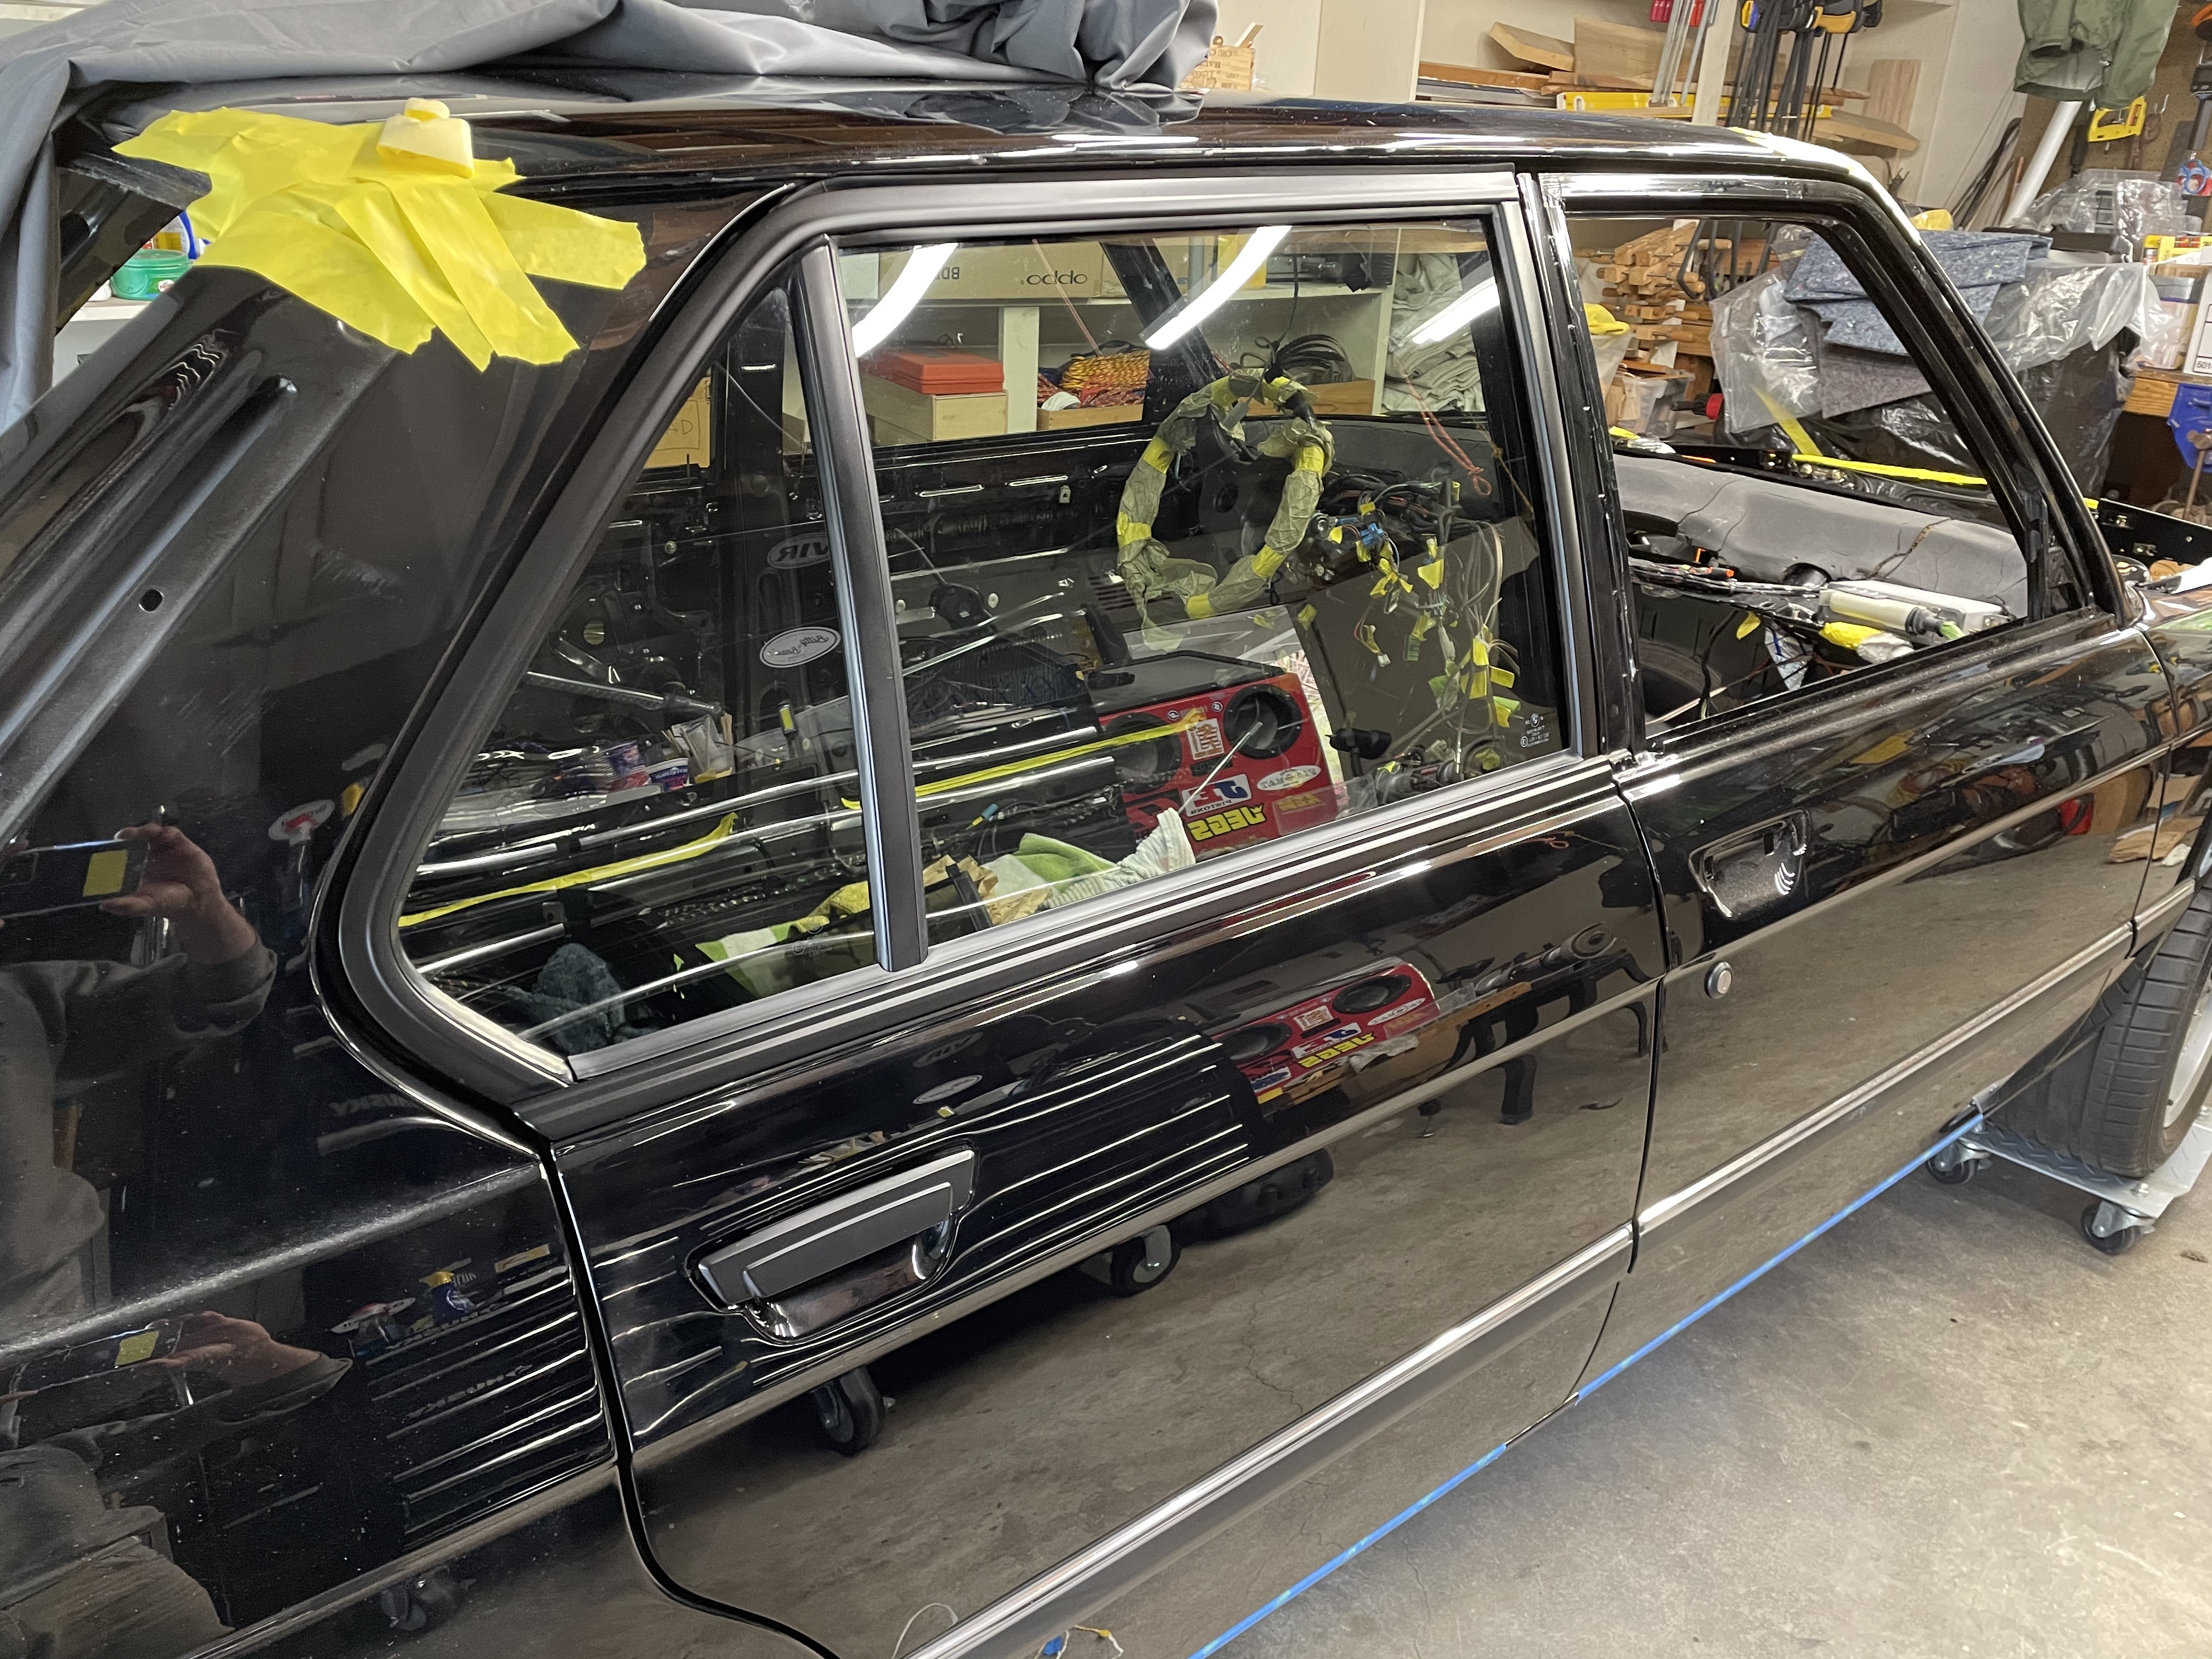
Image

Image

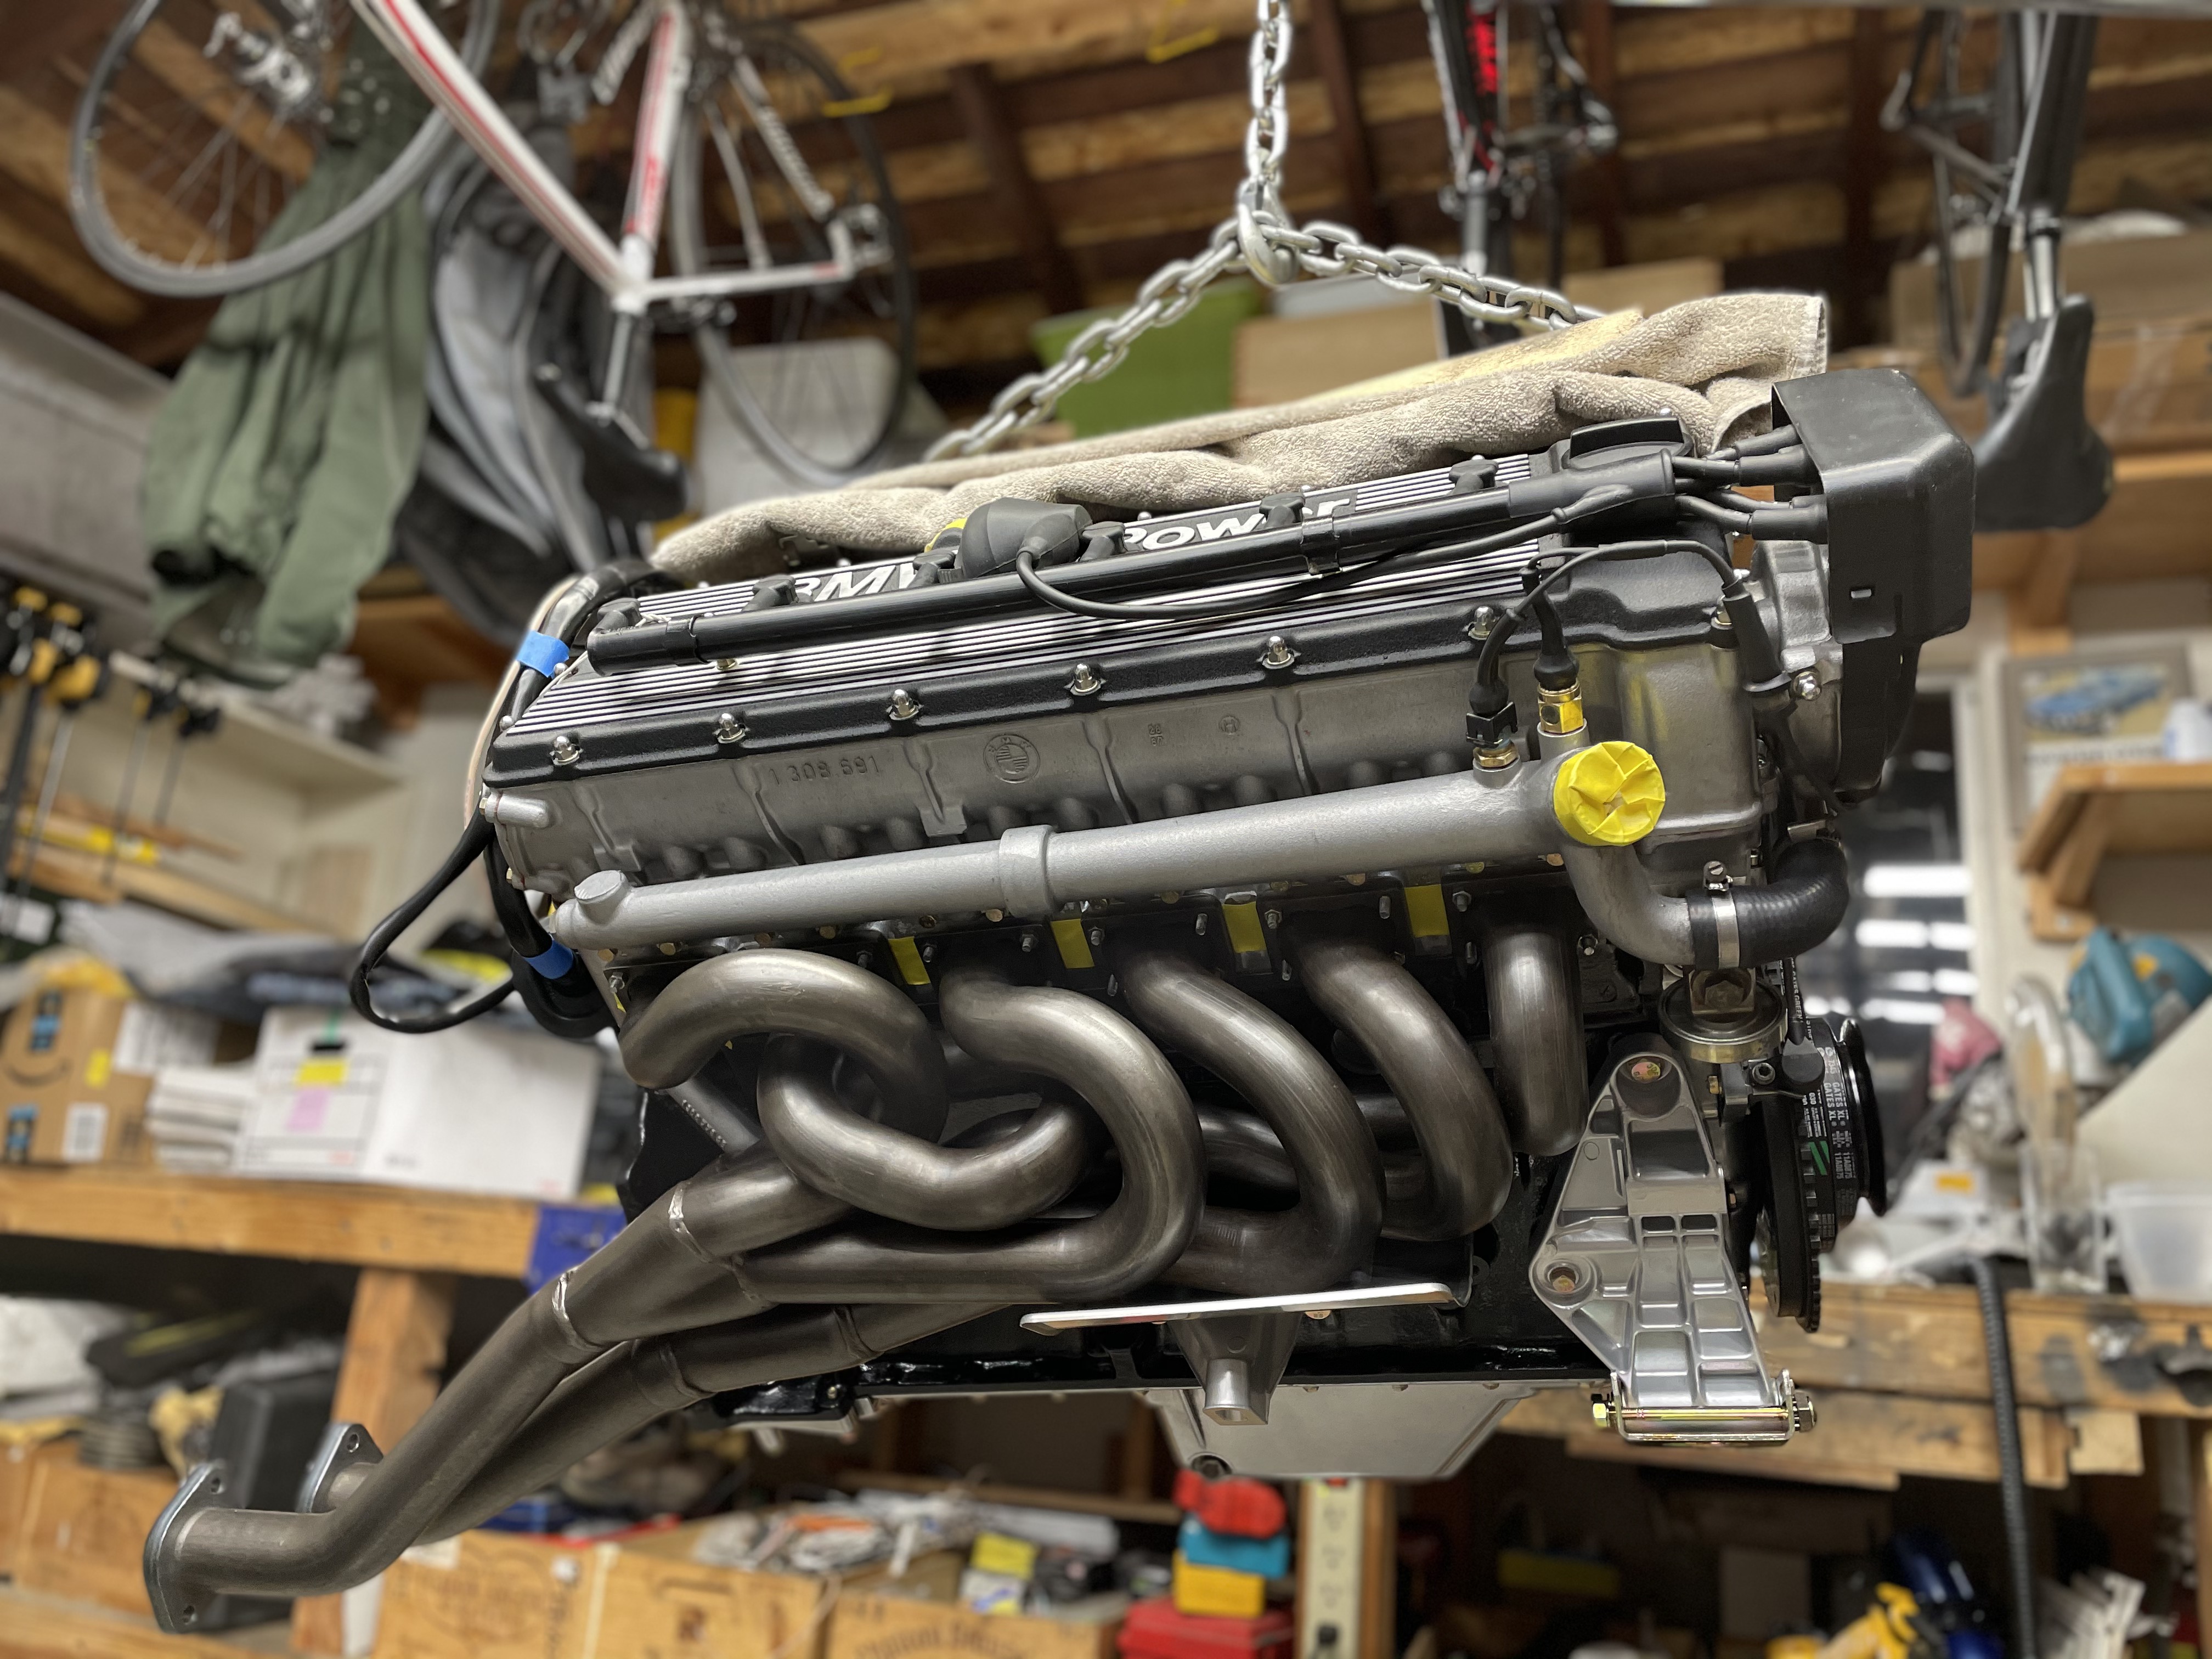
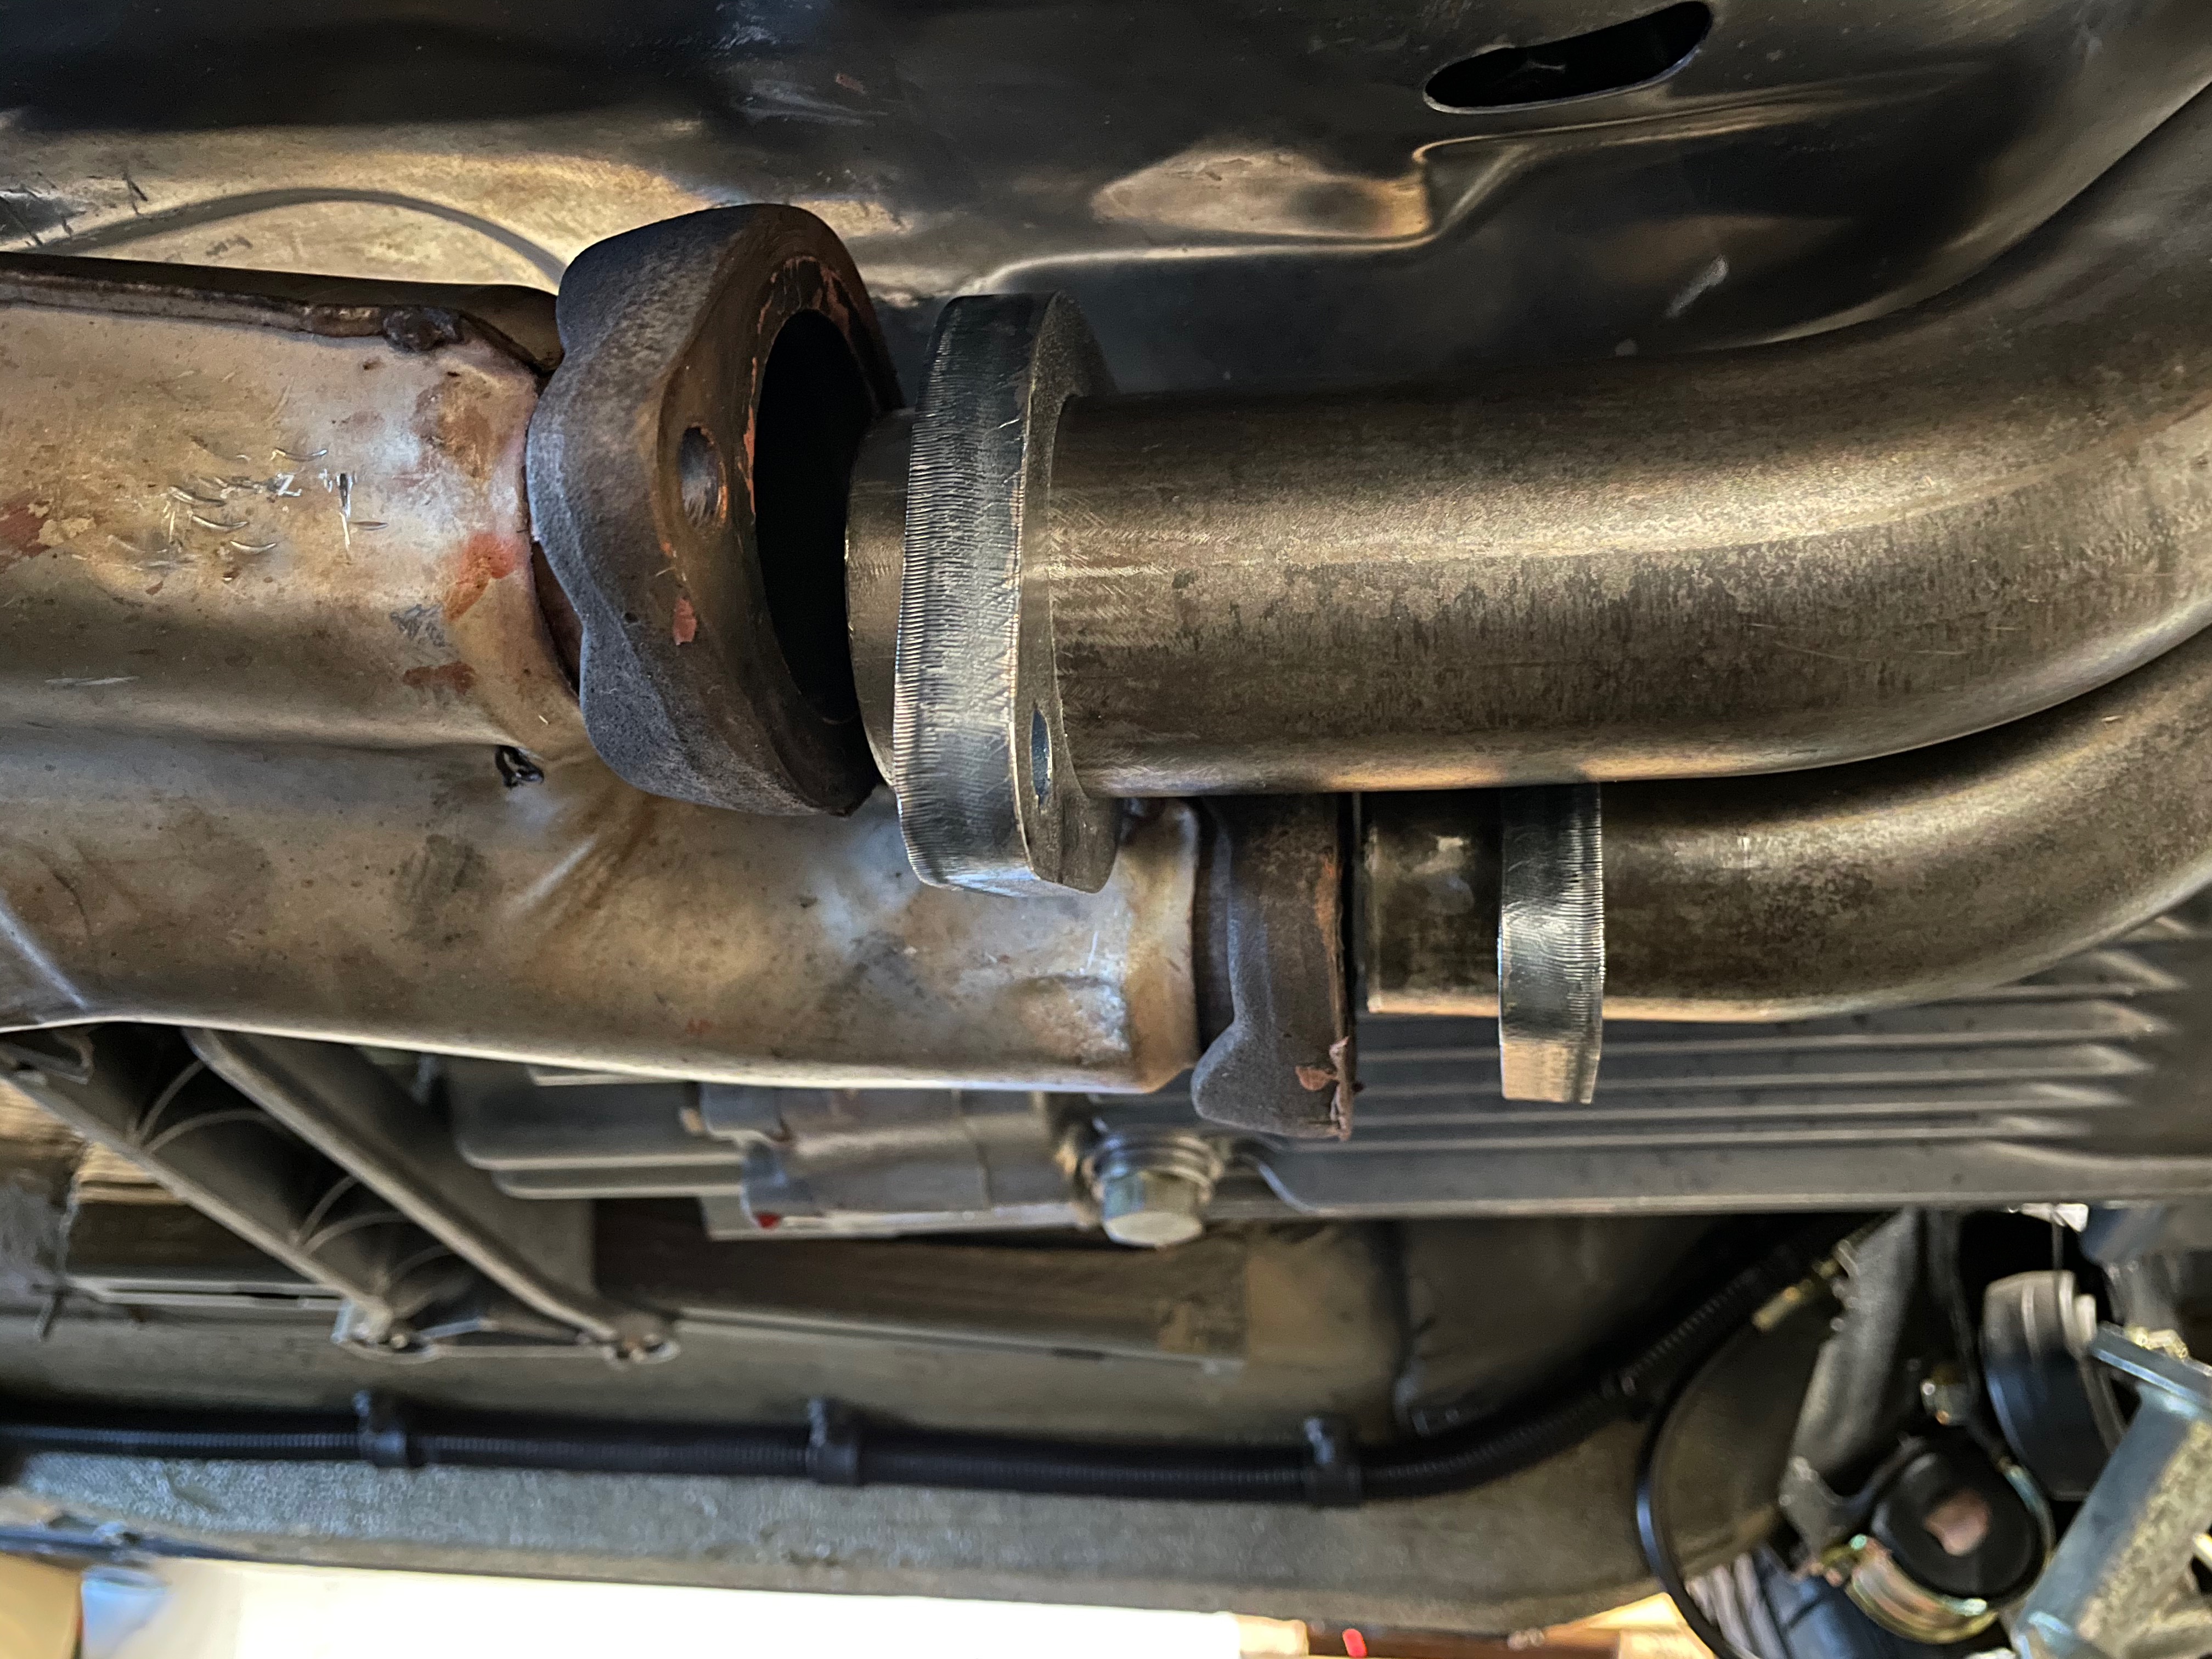
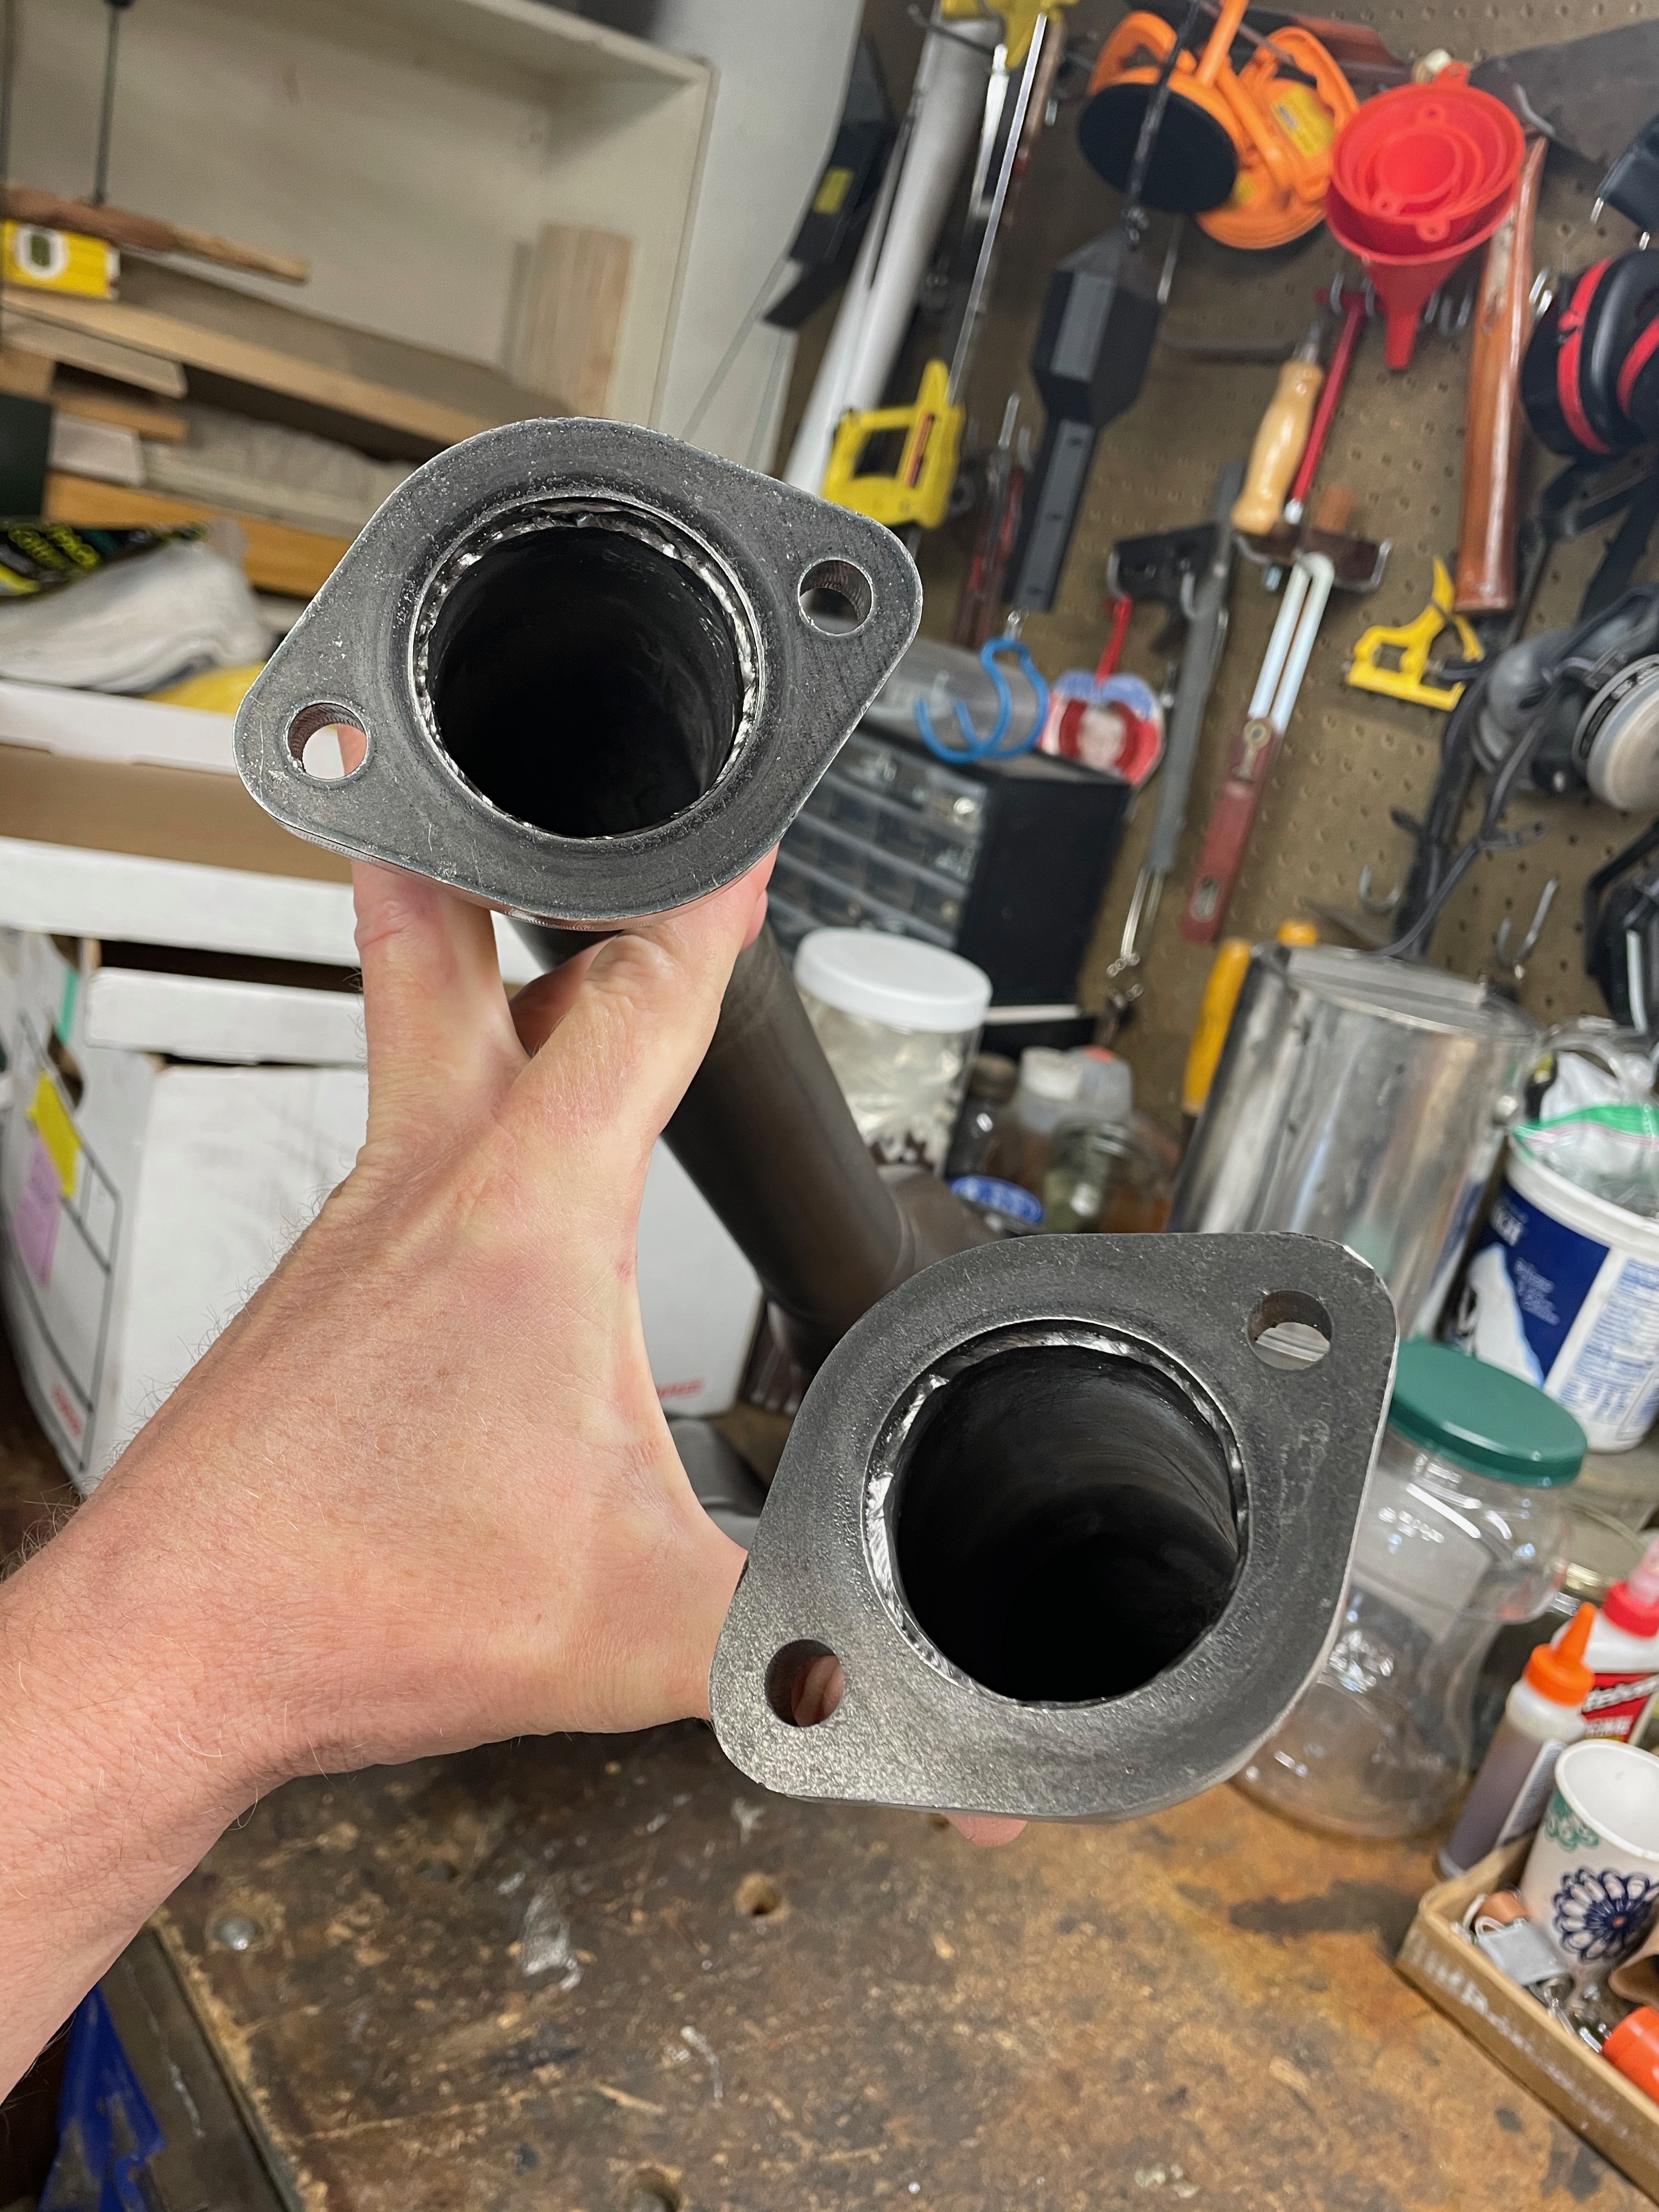
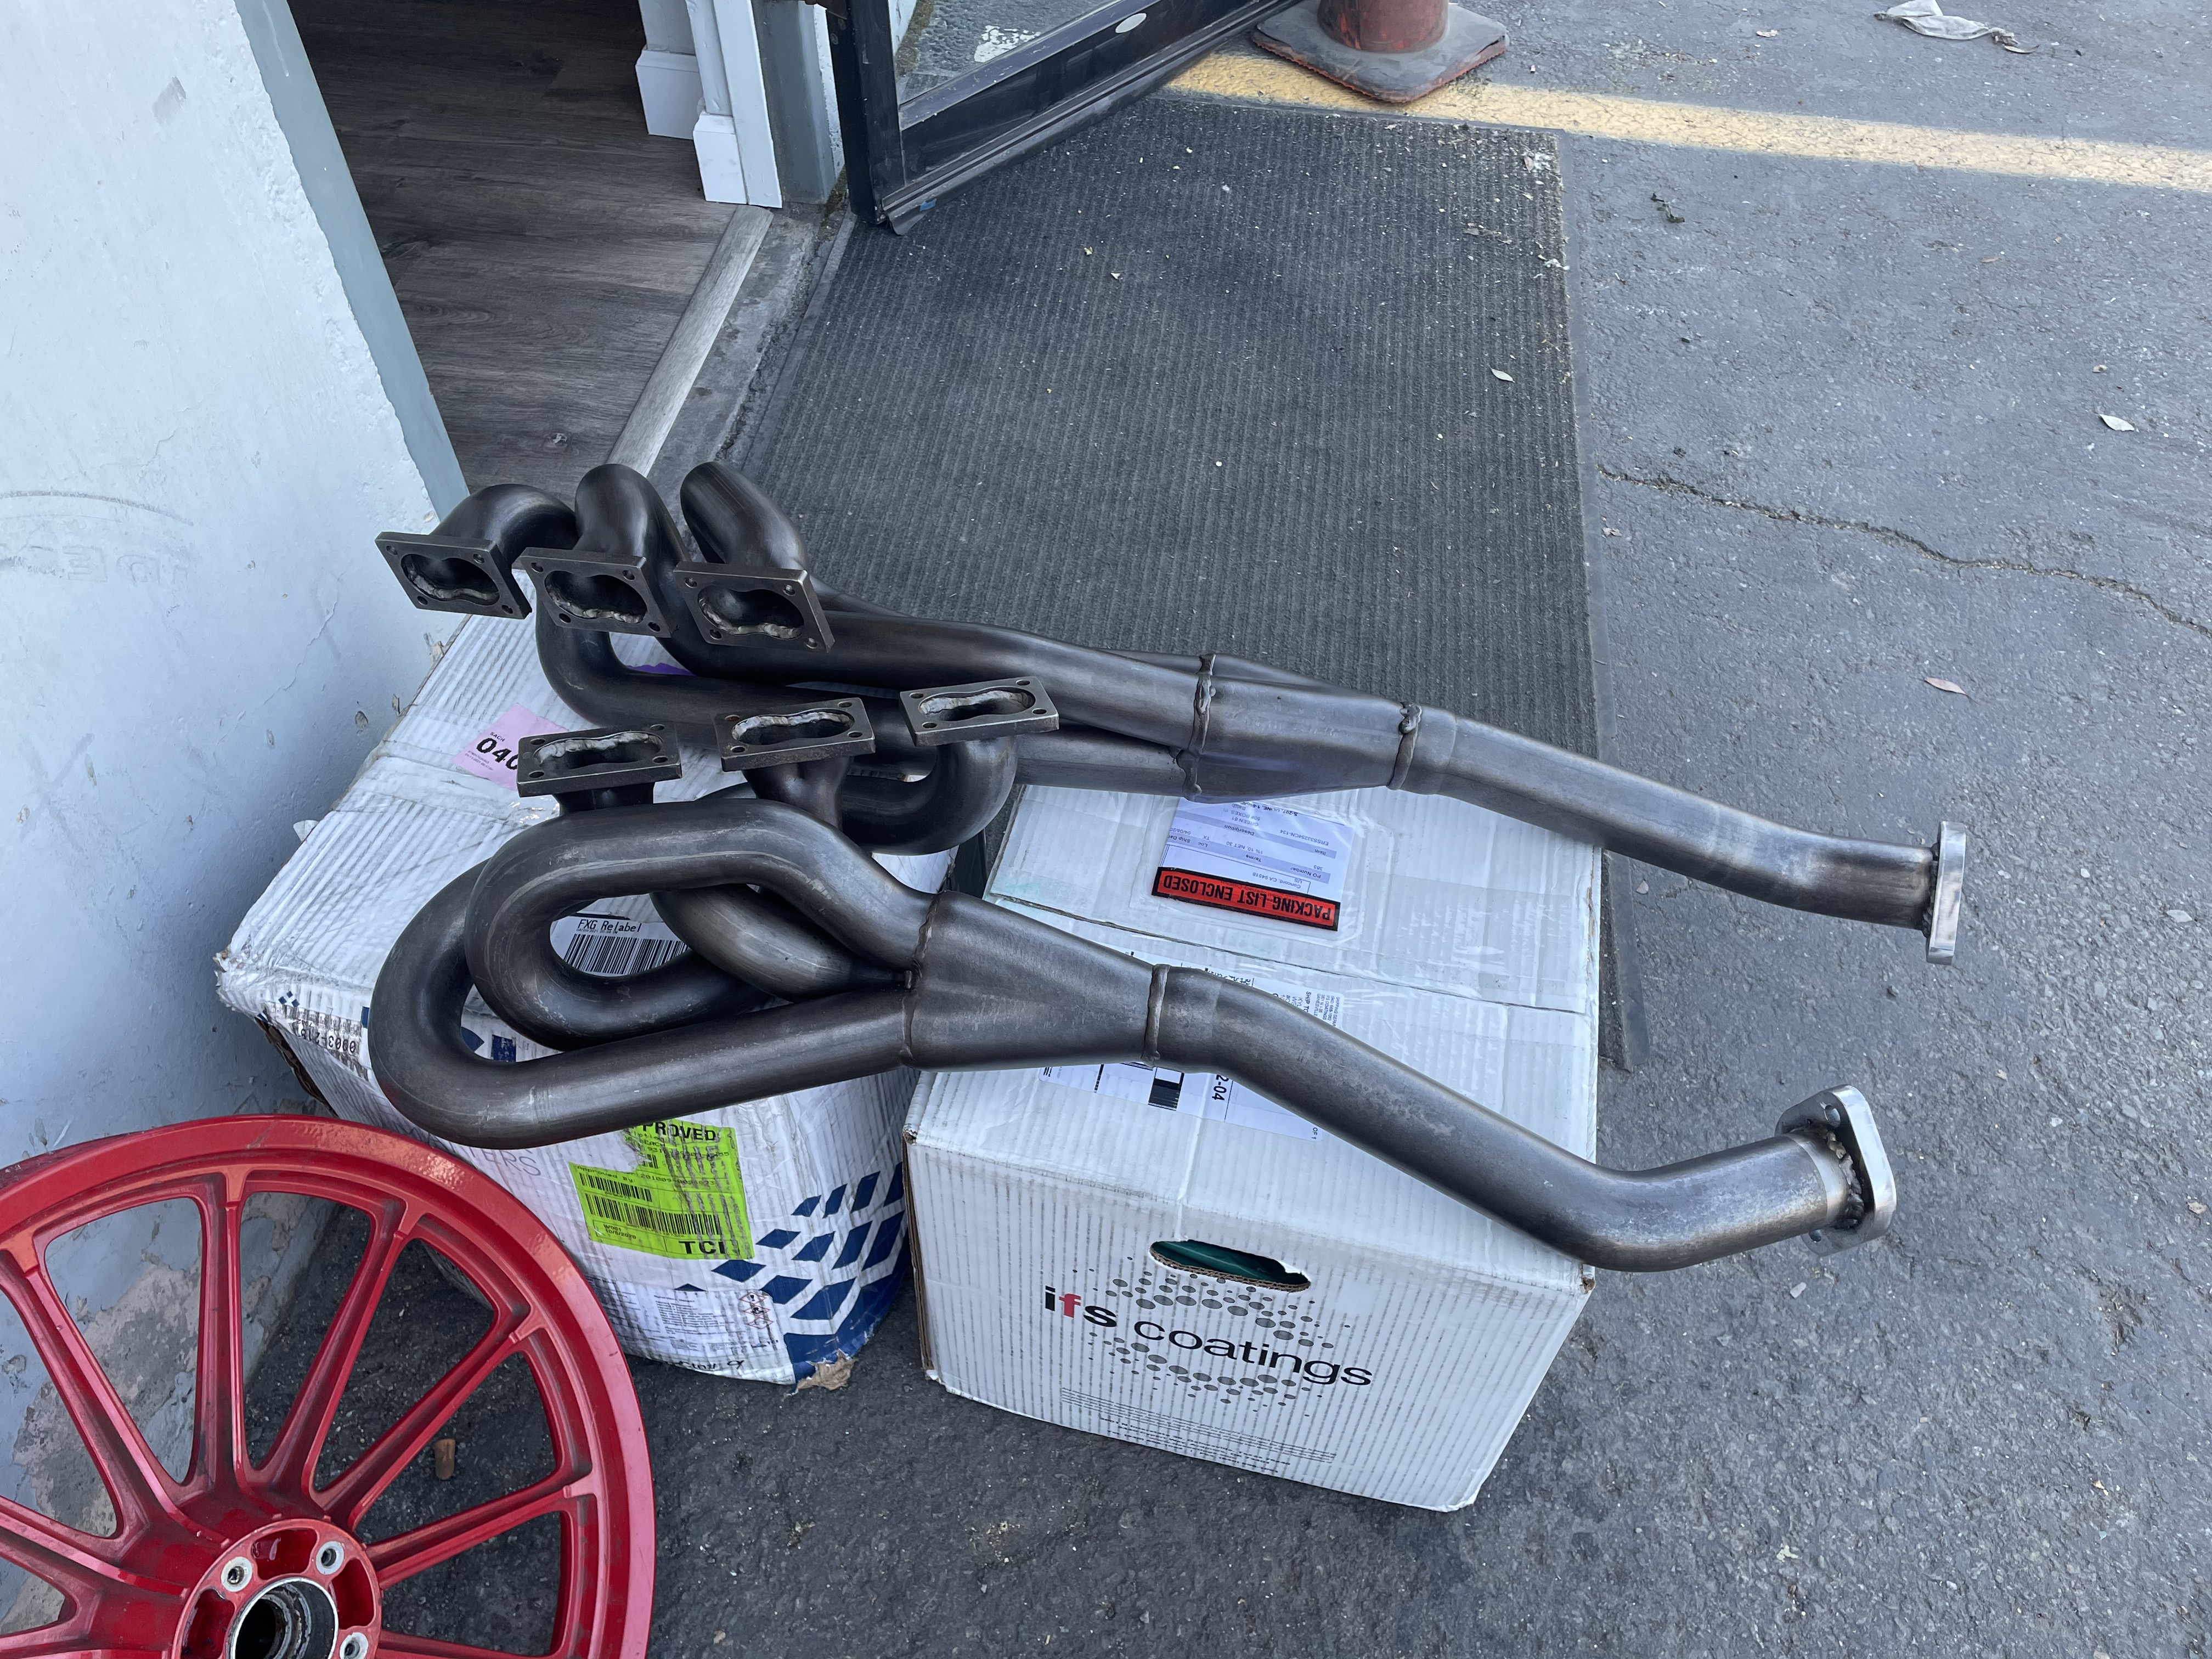
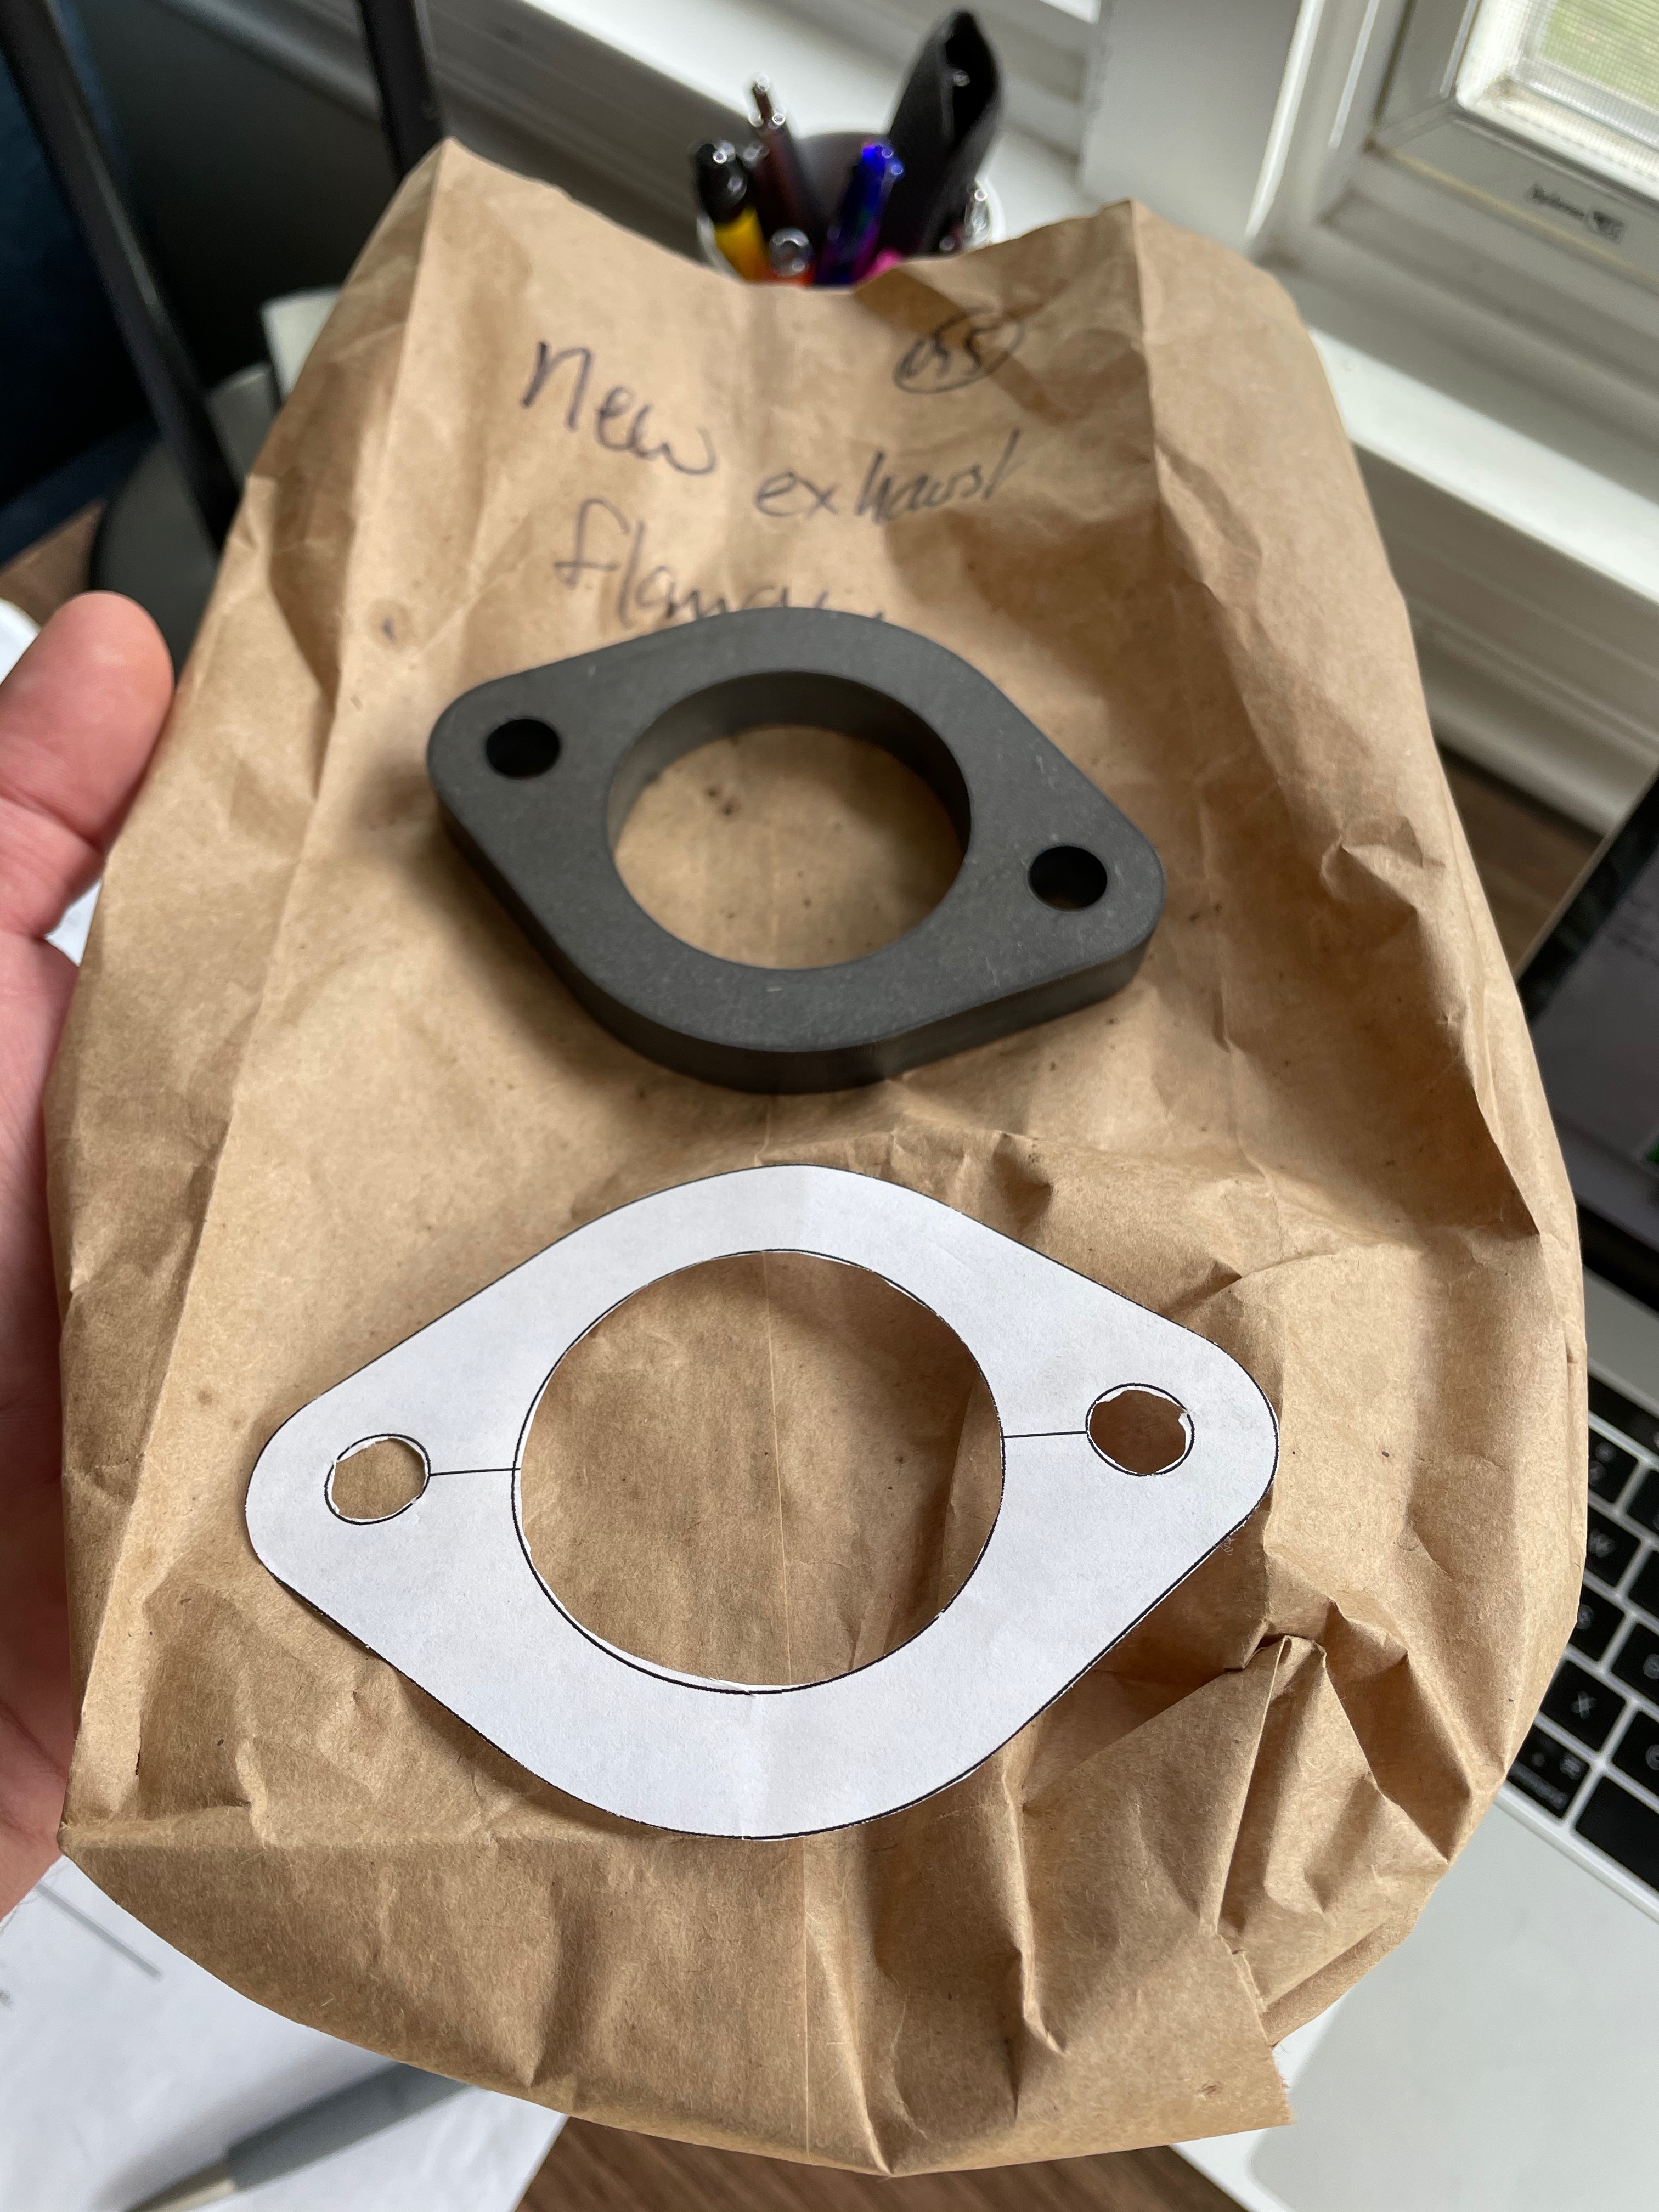
And now one of the small victories that I'm particularly excited about. One challenge I knew I was going to have to deal with with how to attach the Euro M88 headers (with their 3-bolt flakes) to the US-spec cat section (with their 2-bolt flanges). As it's been explained to me, the usual solution when installing euro headers is to cut the 2-bolt flanges off of the US exhaust manifolds and then onto the euro headers. I didn't want to do that juuuuust in case I had smog emissions certification issues and had to go back to the US manifolds. Unfortunately, I couldn't find a set of aftermarket flanges that seemed to have the right specs without going to some of those klugy "universal" flanges that have the elongated bolt holes.

So, I designed my own and had it fabbed! I used a company called Oshcut.com. Design your part in AI, upload the cutting diagram, specify your material, and they'll cut it using a laser CNC machine. This service is limited to cutting out of a sheet and bending, but this was plenty for what I needed. First I drew the part on AI, printed it out in paper, confirmed that the paper part fit onto the US flanges, then had Oshcut cut the part & send them to me. This basically didn't take any longer than it would have if Summet Racing actually had the part in stock. I was pretty amazed.

Here's the new flange:
Image

And here's the set up to cut the euro headers. I made a jig to hold the US part correctly, with the bottom and end boards rigid so that they exactly replicate the two mating surfaces (at the head & at the input flanges to the cats). Then I remove the US manifold, bolt in the euro headers and use the vertical board to mark where to cut the euro headers.
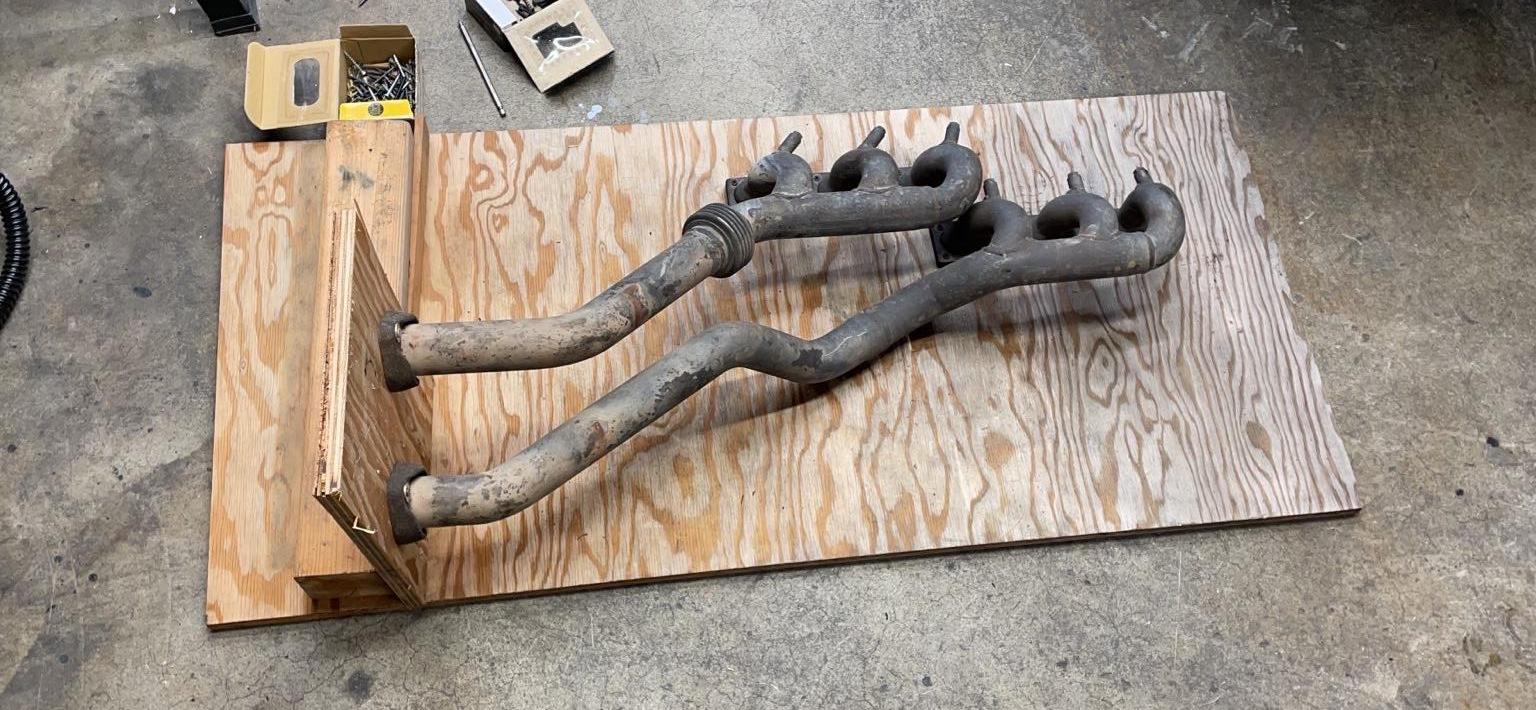
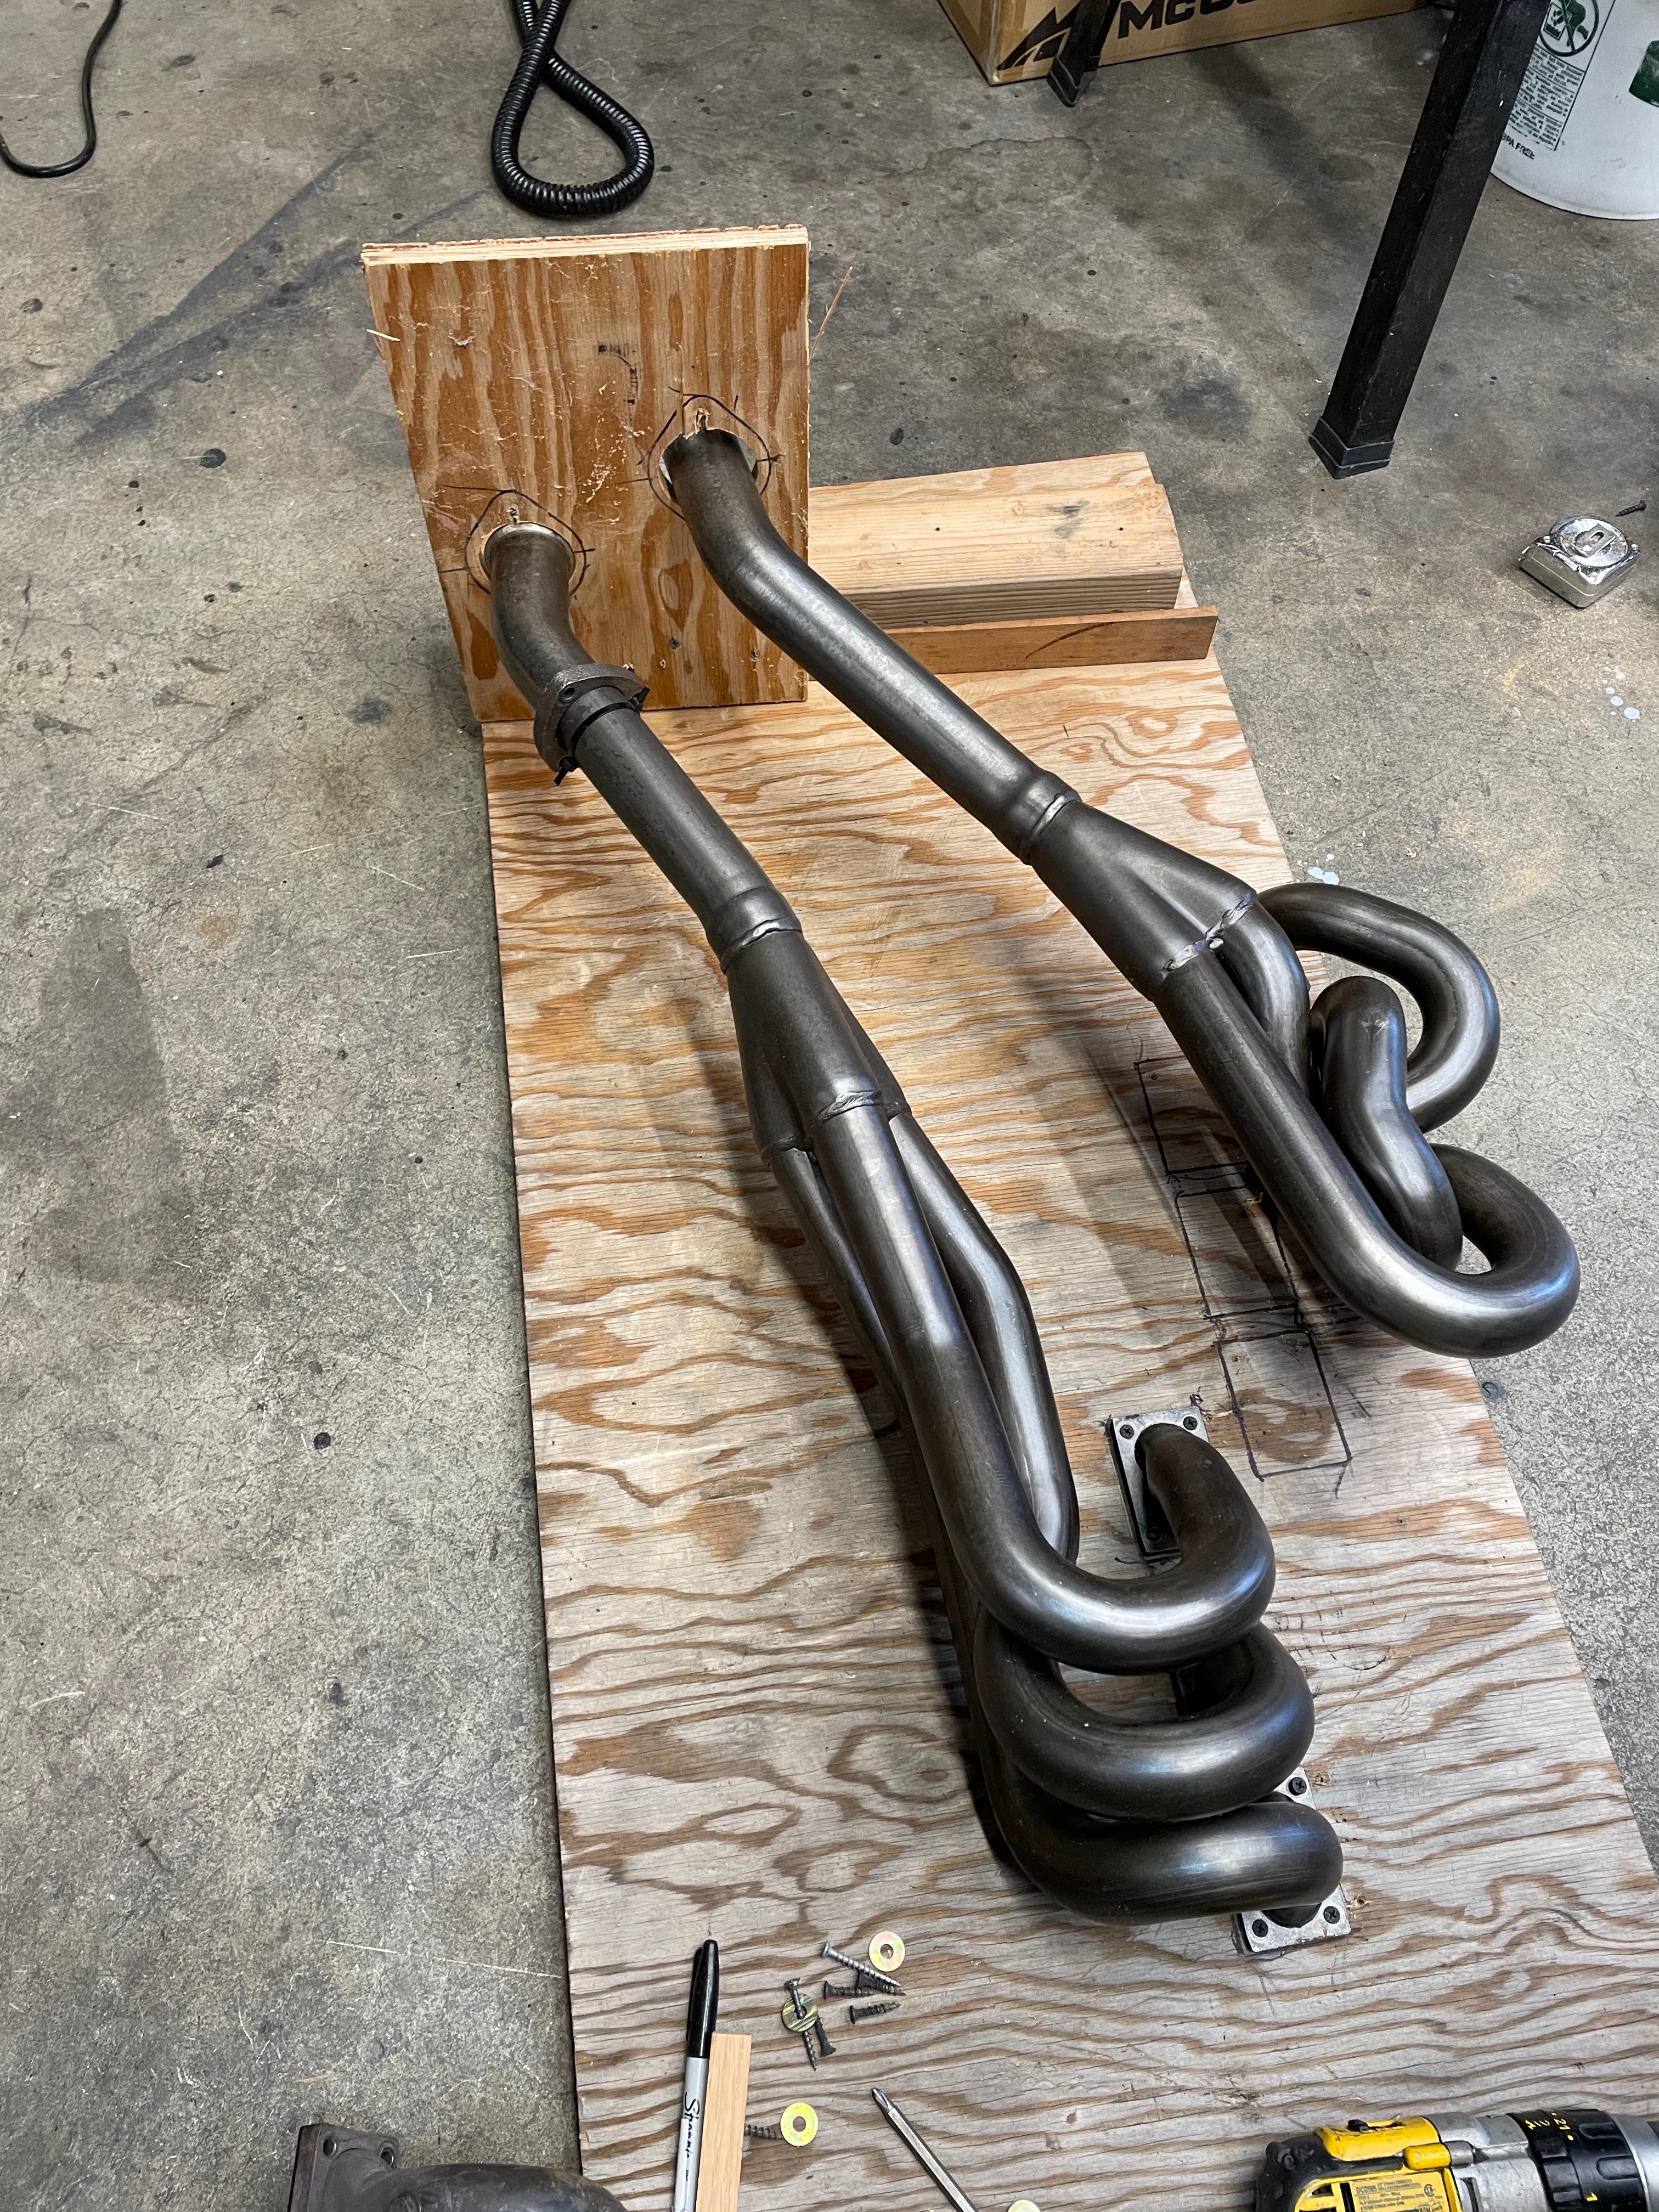
Image

Image

Under the "measure twice, cut once" principal, I haven't cut the euro headers yet.

The next step would be to cut the headers, then bolt the new flanges to the vertical board, then weld the flanges to the headers in the jig. Out of an abundance of caution and a bit of OCD, instead what I've decided to do is cut the headers, then mount the exhaust in the car, drop the engine & tranny in there, tack the flanges to the headers while their actually bolted in place to the cats, pull it all back out again and then fully weld the flanges to the headers after the motor is removed from the car. First, I have the time. Second, because there's no springy billows section in the euro headers, that whole set up will be more rigid and a proper, unstressed fit will be more important.
jhh925
Posts: 917
Joined: Jul 11, 2015 12:23 AM
Location: Reno

Re: Rebuilding My 1988 US-spec M5

Post by jhh925 »

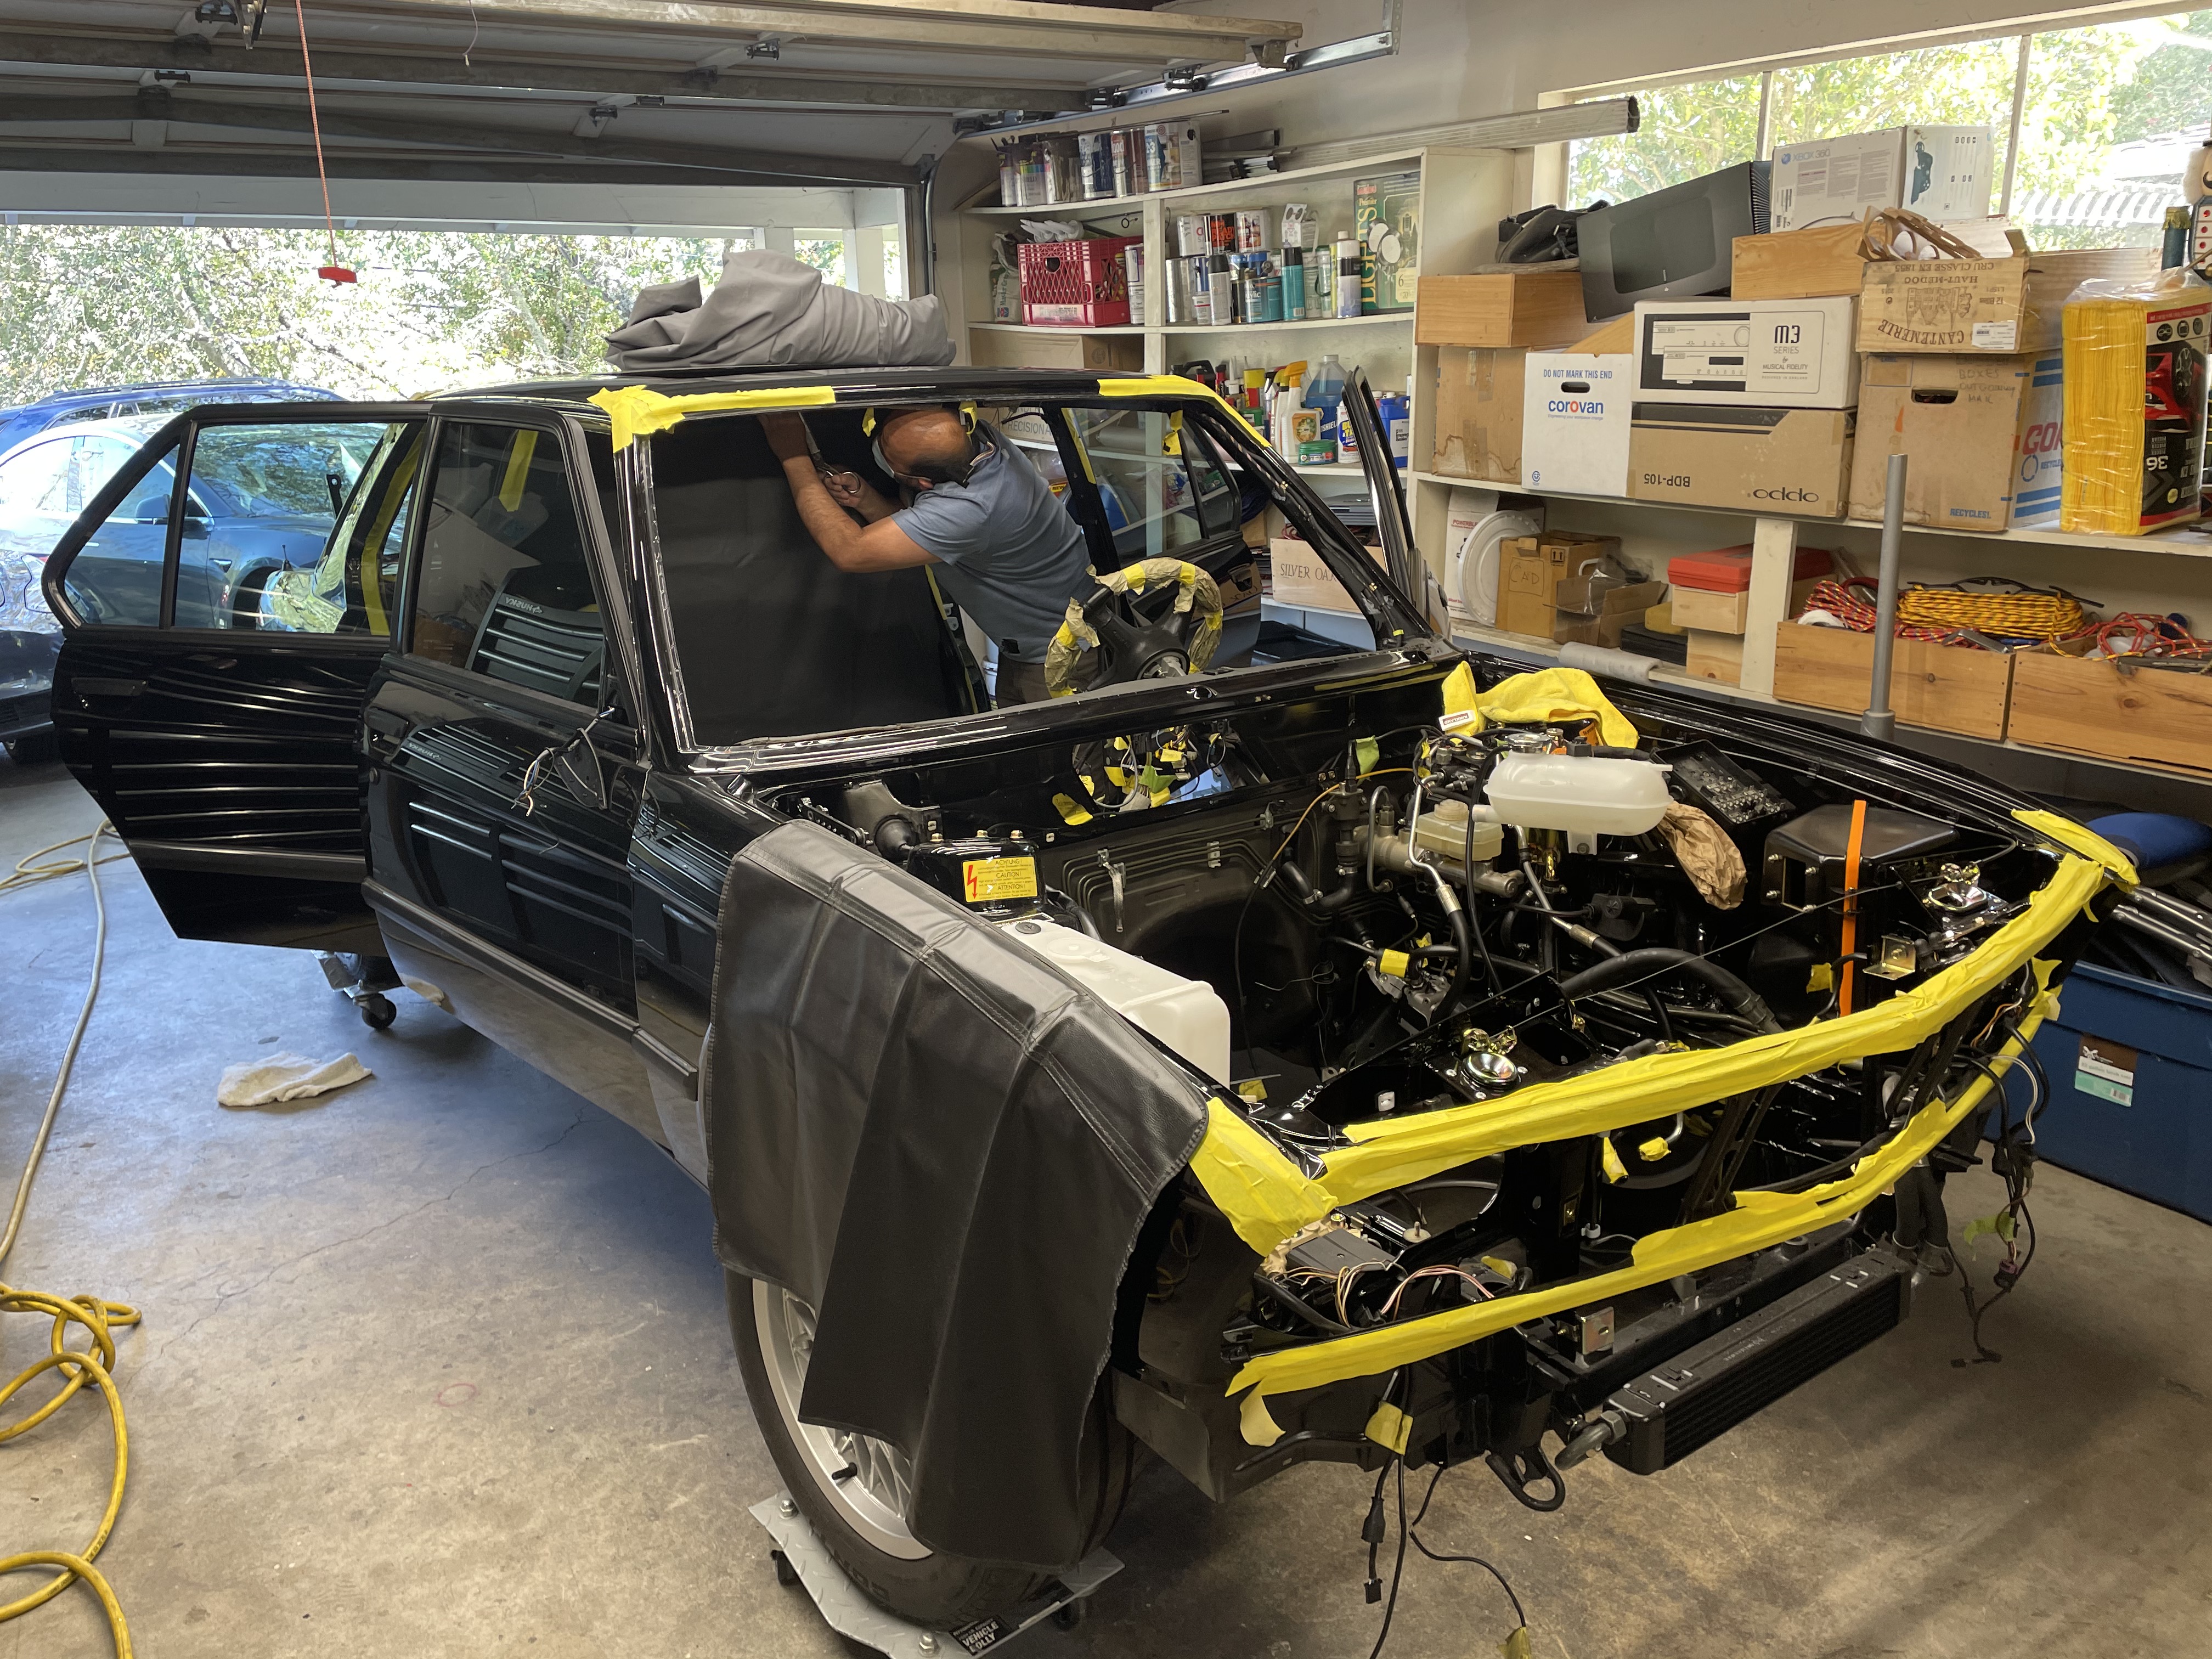
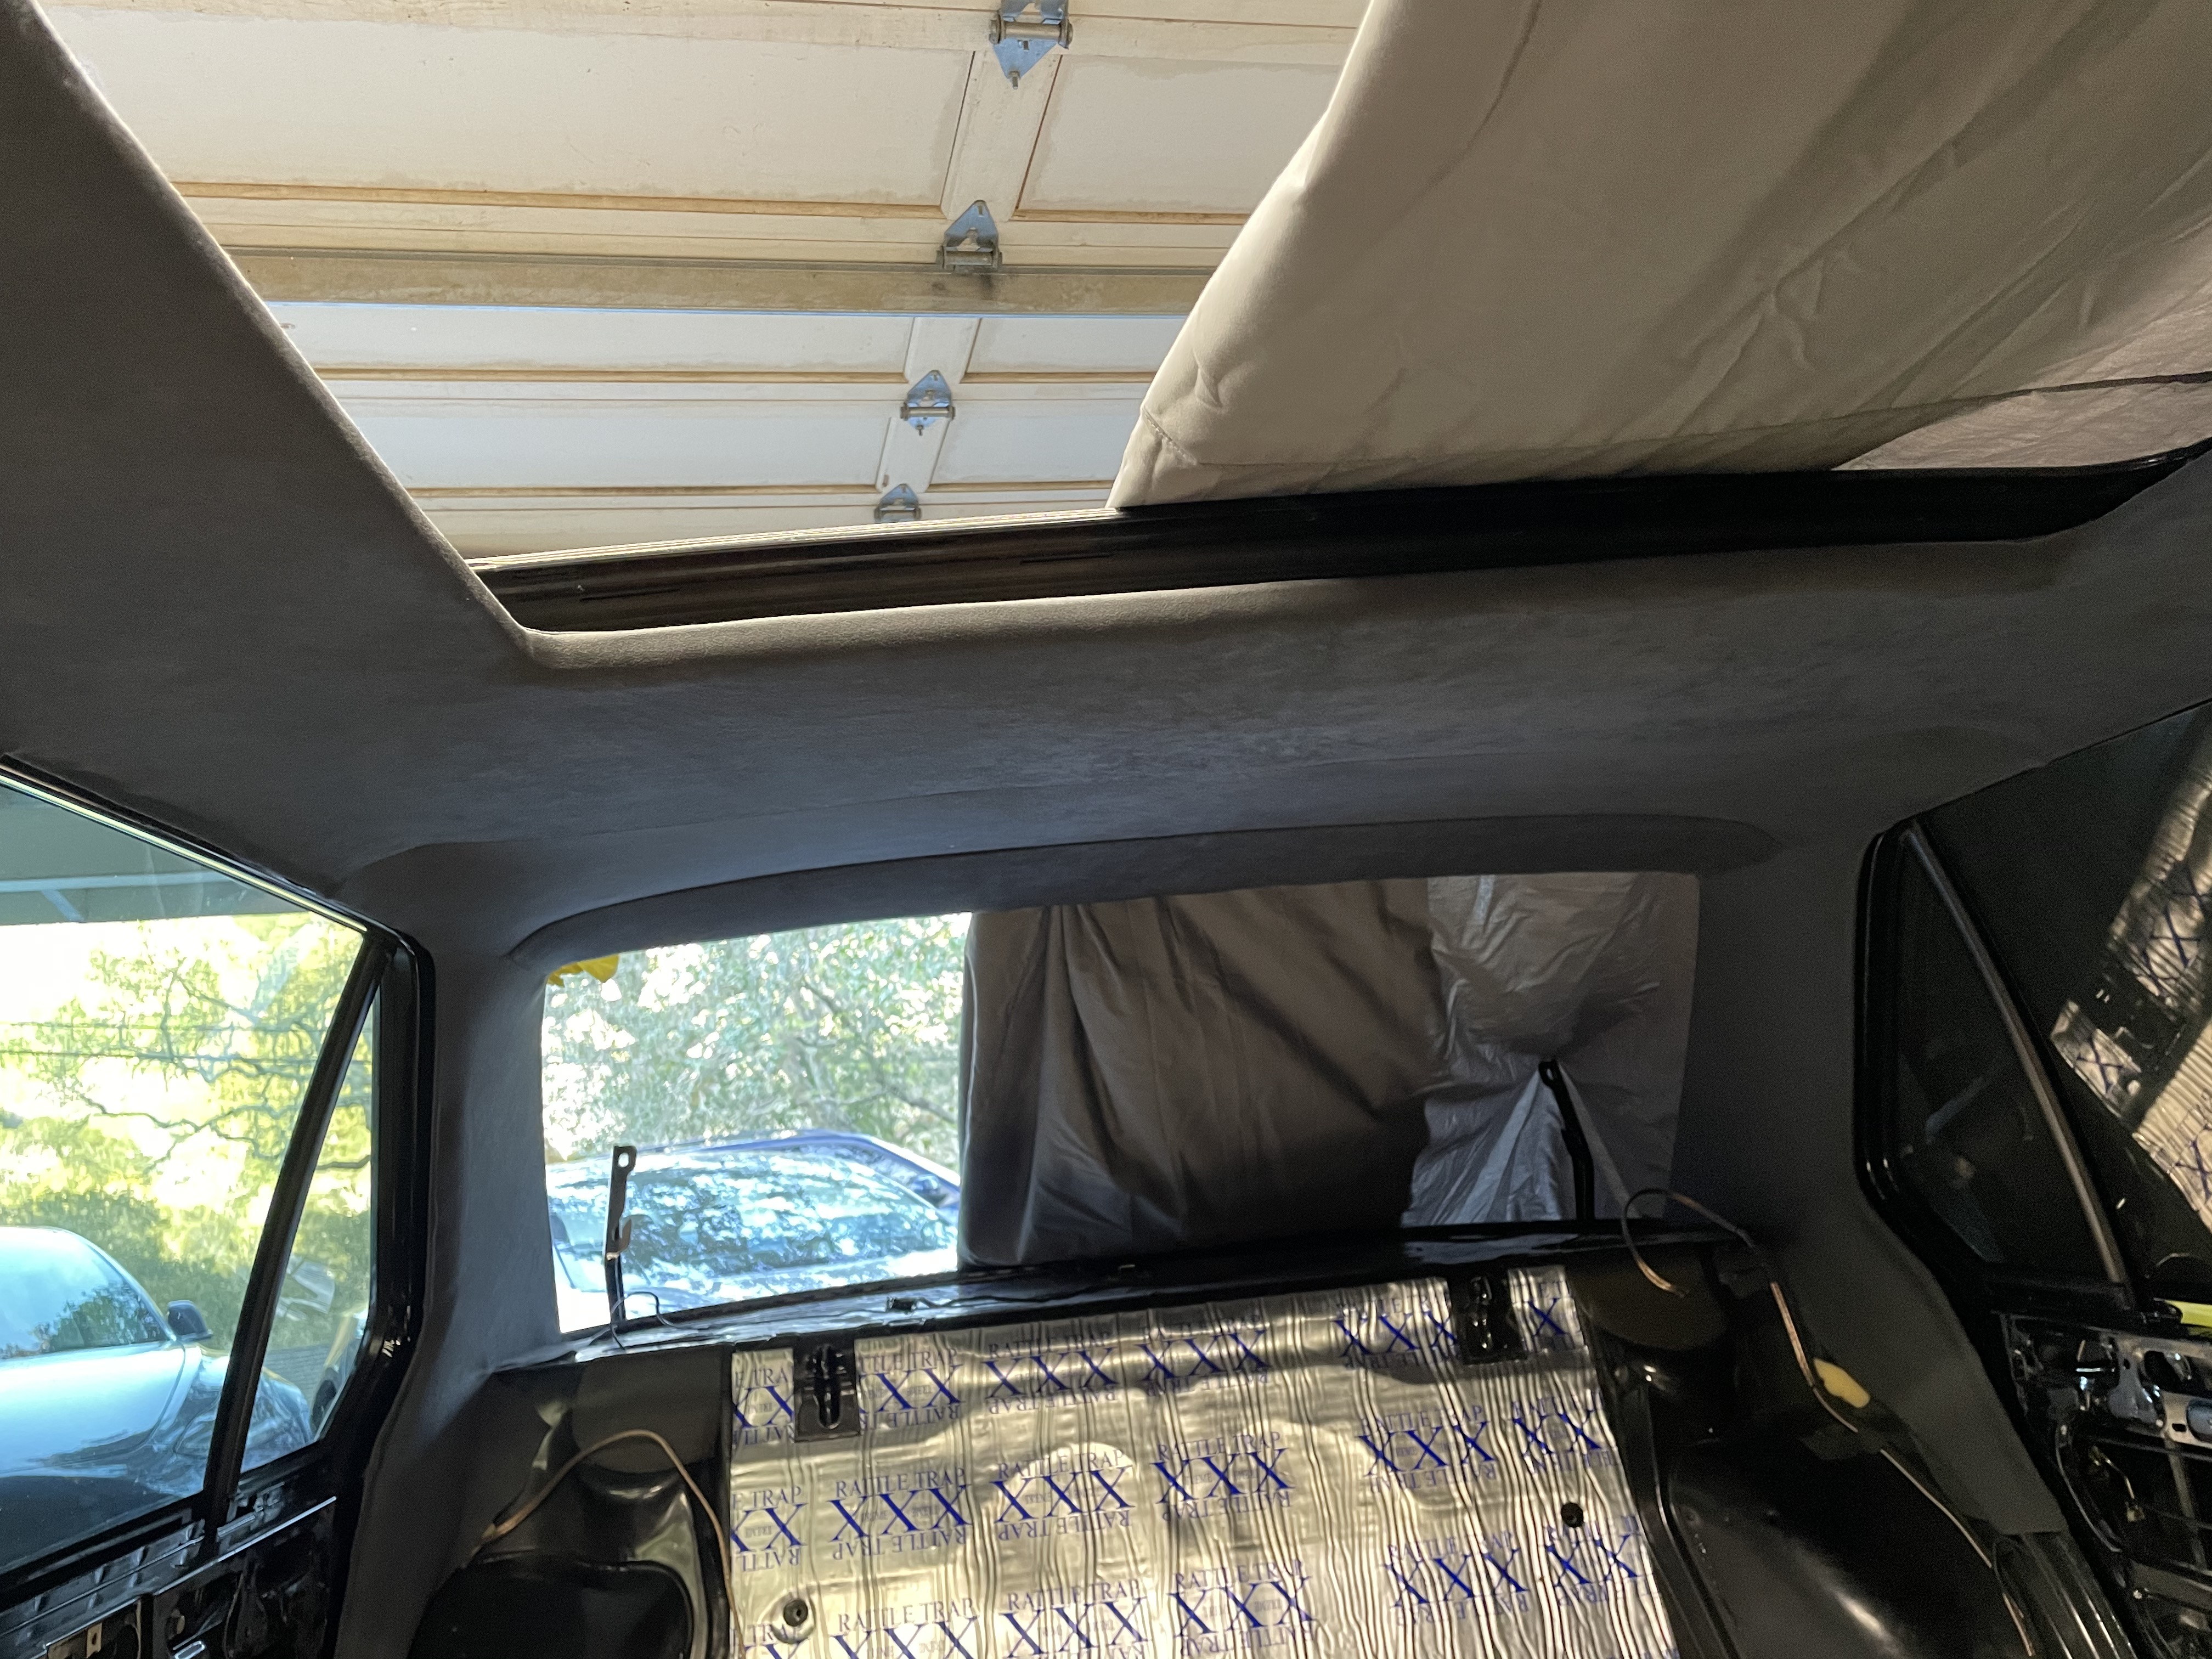
Headliner day at "Casa JHH925."

Image

Image
jhh925
Posts: 917
Joined: Jul 11, 2015 12:23 AM
Location: Reno

Re: Rebuilding My 1988 US-spec M5

Post by jhh925 »

Making progress on the "pre-install checklist" to install the motor:

Image

One note - I've ticked off the "install moonroof" item, but I didn't actually install the moonroof. I thought (naively) that because I have an original BMW moonroof that installing it would be very plug-n-play. I had previously read (though it was a long time ago and even then I hadn't read very carefully) JBORT's instructions on how to install the Saab moonroof. Well, I didn't have a Saab moonroof, did I? So naturally, the BMW version would be hella easy.

Well, based on a couple other threads here on the forum, I came to realize that I'd have to modify a couple parts. Still relatively easy, but without ready access to spares, I decided I could do without the moonroof. So, anyhow, the original sunroof is reinstalled.

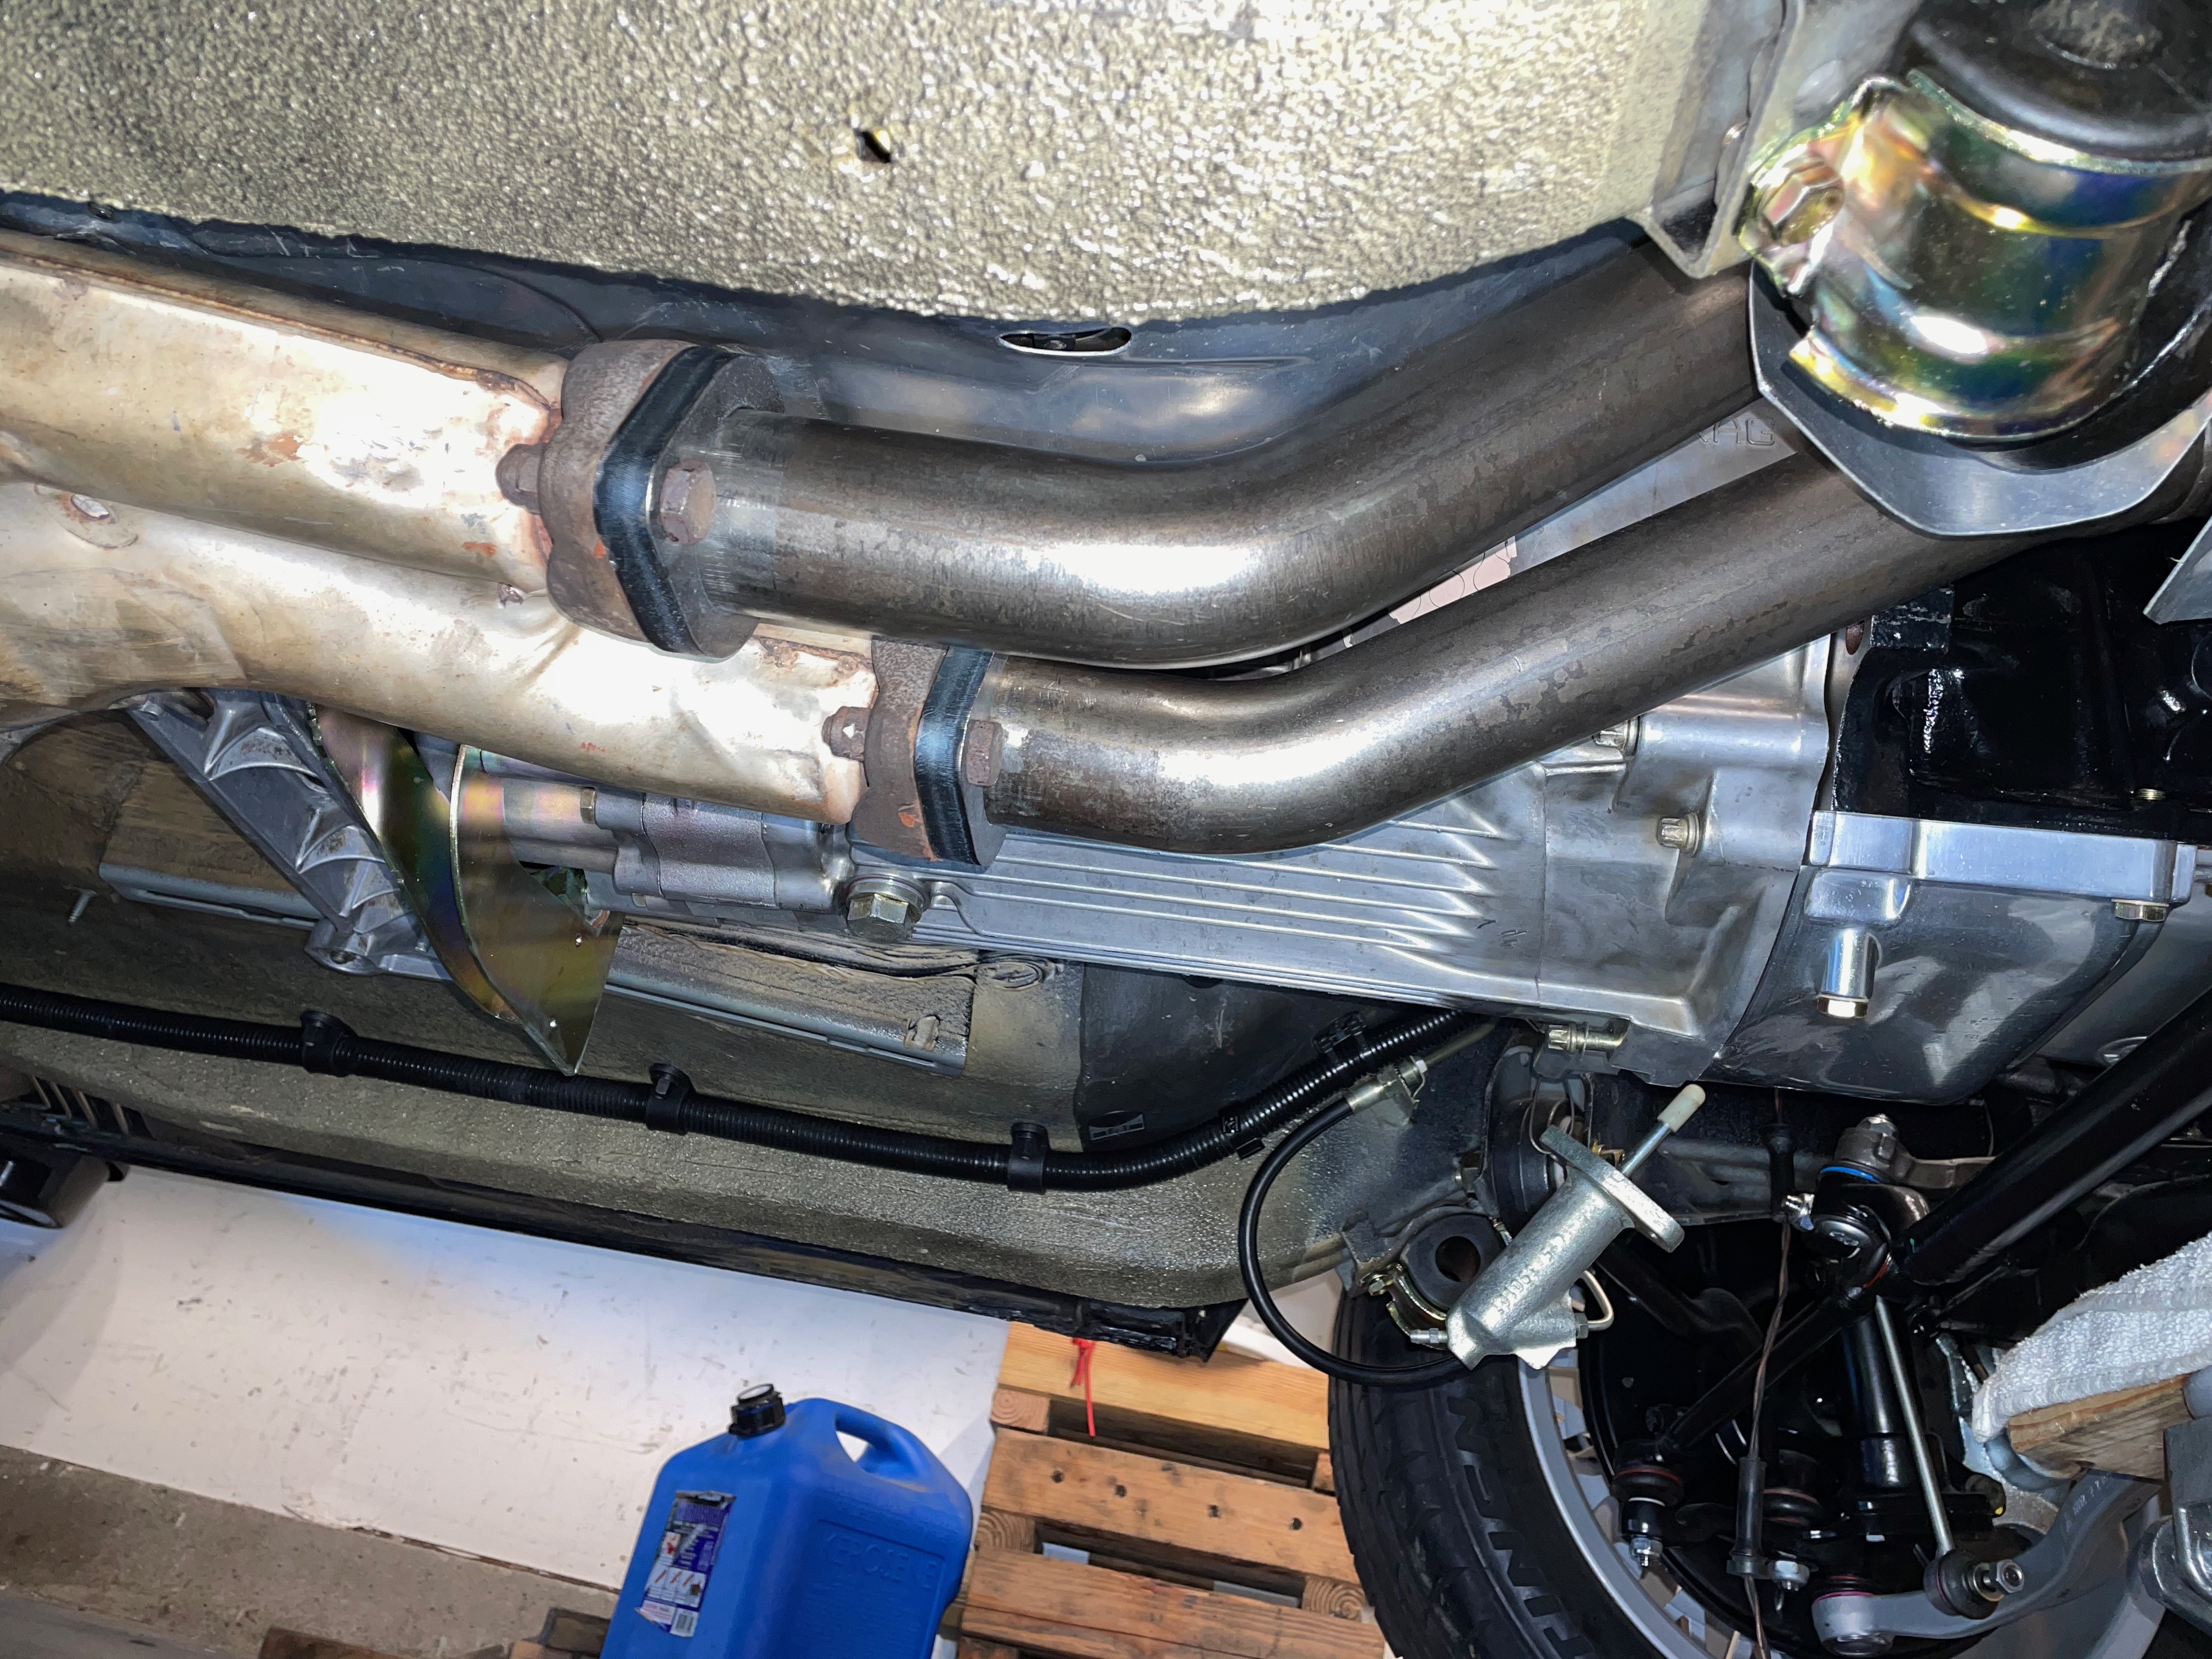
On a more constructive note, I got the 2-bolt flanges welded on to the modified euro M88 headers and I'm very happy with the results!

To recap, I built a jig to hold the original manifolds, then mounted the headers in the jig to mark where to cut the pipes. I also had a pair of 2-bolt flanges fabricated in mild steel.

Next step: slide the flanges onto the headers, mount the headers on the motor, drop the motor onto the mounts in the engine bay & attach the tranny & tranny mount. With that done, the ends of the headers would be positioned under the car exactly where they will be sitting when everything gets put back together.

Image

Next, I installed the cat section and the resonator exhaust section. That step locates the flanges for the cat intake side. The headers lined up to the cats pretty well. Then I bolted them together, tacked the 2-bolt flanges to the headers ... and then dropped the tranny, pulled the motor, removed the headers and welded up the flanges. It actually went pretty well and took a lot less time than I was anticipating.

Image

Image

Image

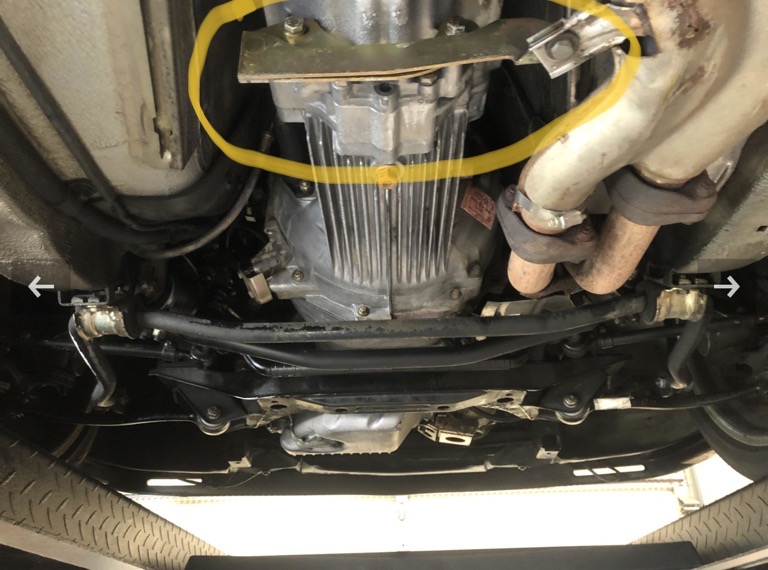
While I had the cat section in there, I also repaired the tranny-to-exhaust brace. This is the plate that attaches to the underside of the tranny & bridges over to a tab on the cat section. Here's a pic of what it's supposed to look like (not my pic, this is from a BaT auction):

Image

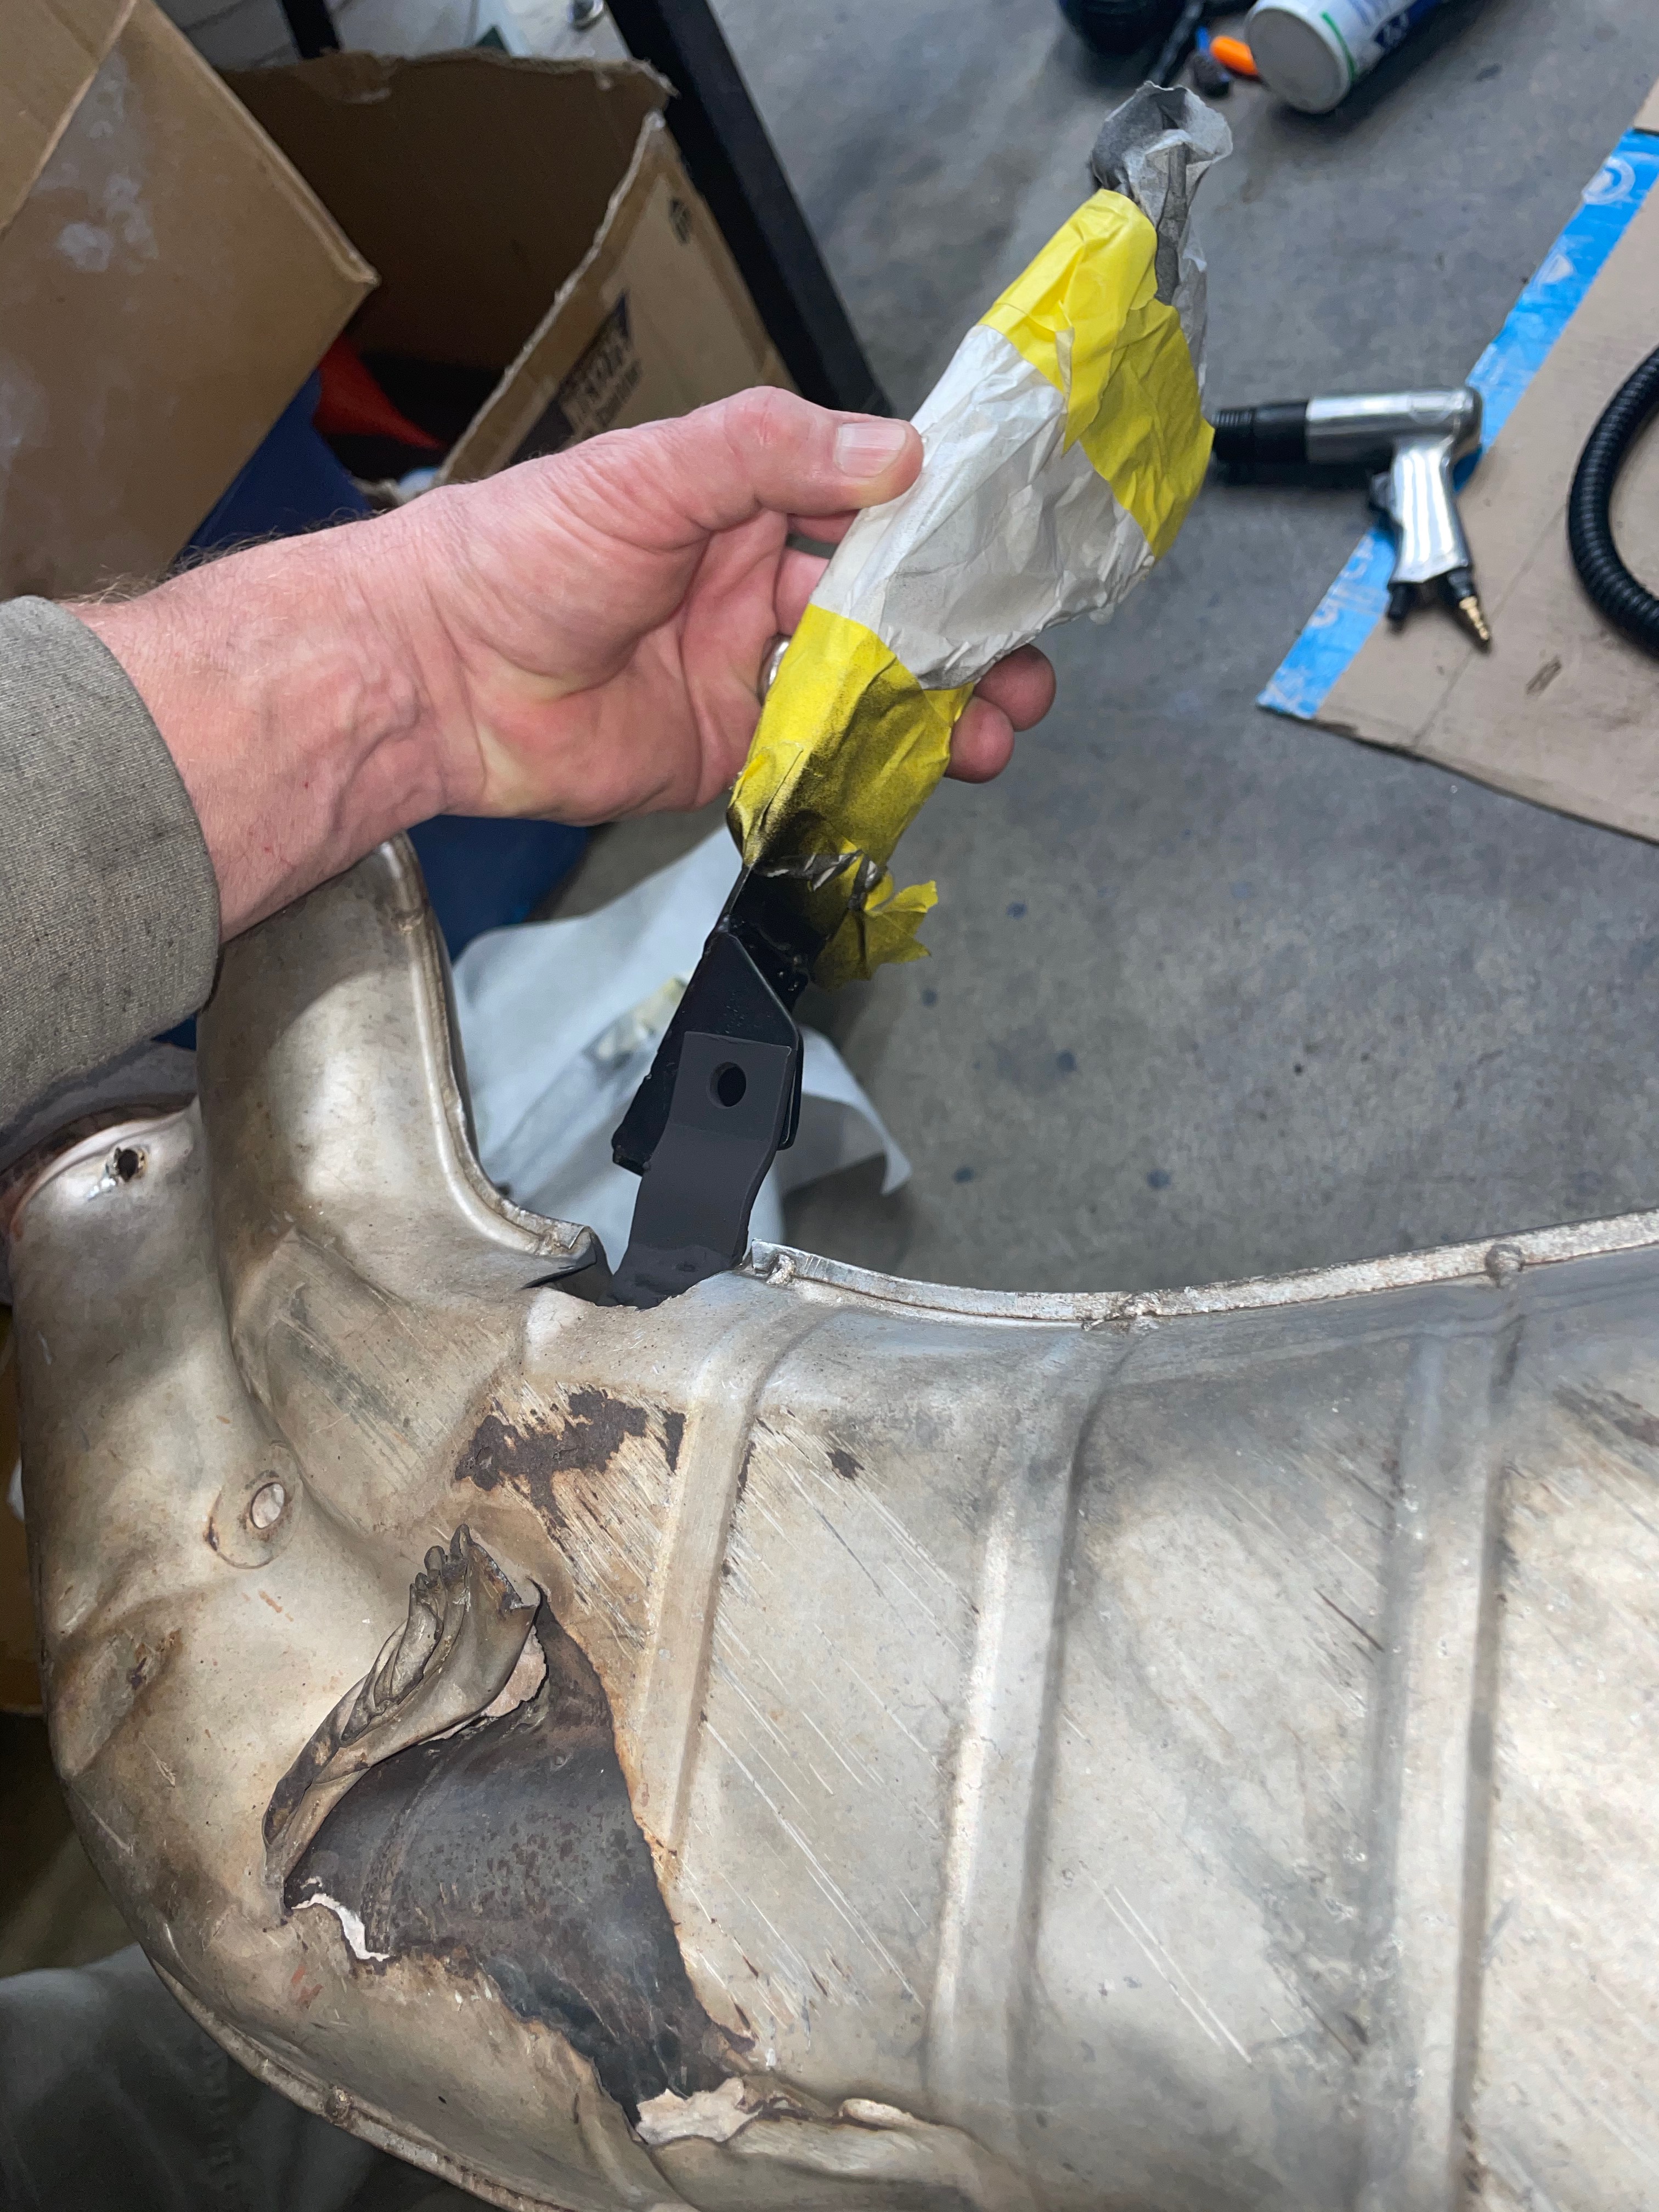
In my case, the end of the tranny brace was cut off, and the tab on the cat section was likewise mostly cut off. I tabbed an "L" bracket for the tranny brace and a new tab for the cat section and tacked them in place while everything was still installed on the car. I painted all the new parts with some high-temp exhaust pipe paint. Not as elegant as the yellow zinc (hidden under the paper wrapping), but it suits me fine at this point.

Image

That big tear in the shroud is bugging me. Not sure yet how to address that.
tig
Posts: 9322
Joined: Mar 18, 2013 6:25 PM
Location: Durango
Contact:

Re: Rebuilding My 1988 US-spec M5

Post by tig »

jhh925 wrote: Apr 07, 2021 6:20 PM
Image
I has warm feels seeing this. Nice work buddy!
jhh925
Posts: 917
Joined: Jul 11, 2015 12:23 AM
Location: Reno

Re: Rebuilding My 1988 US-spec M5

Post by jhh925 »

Much progress being made!

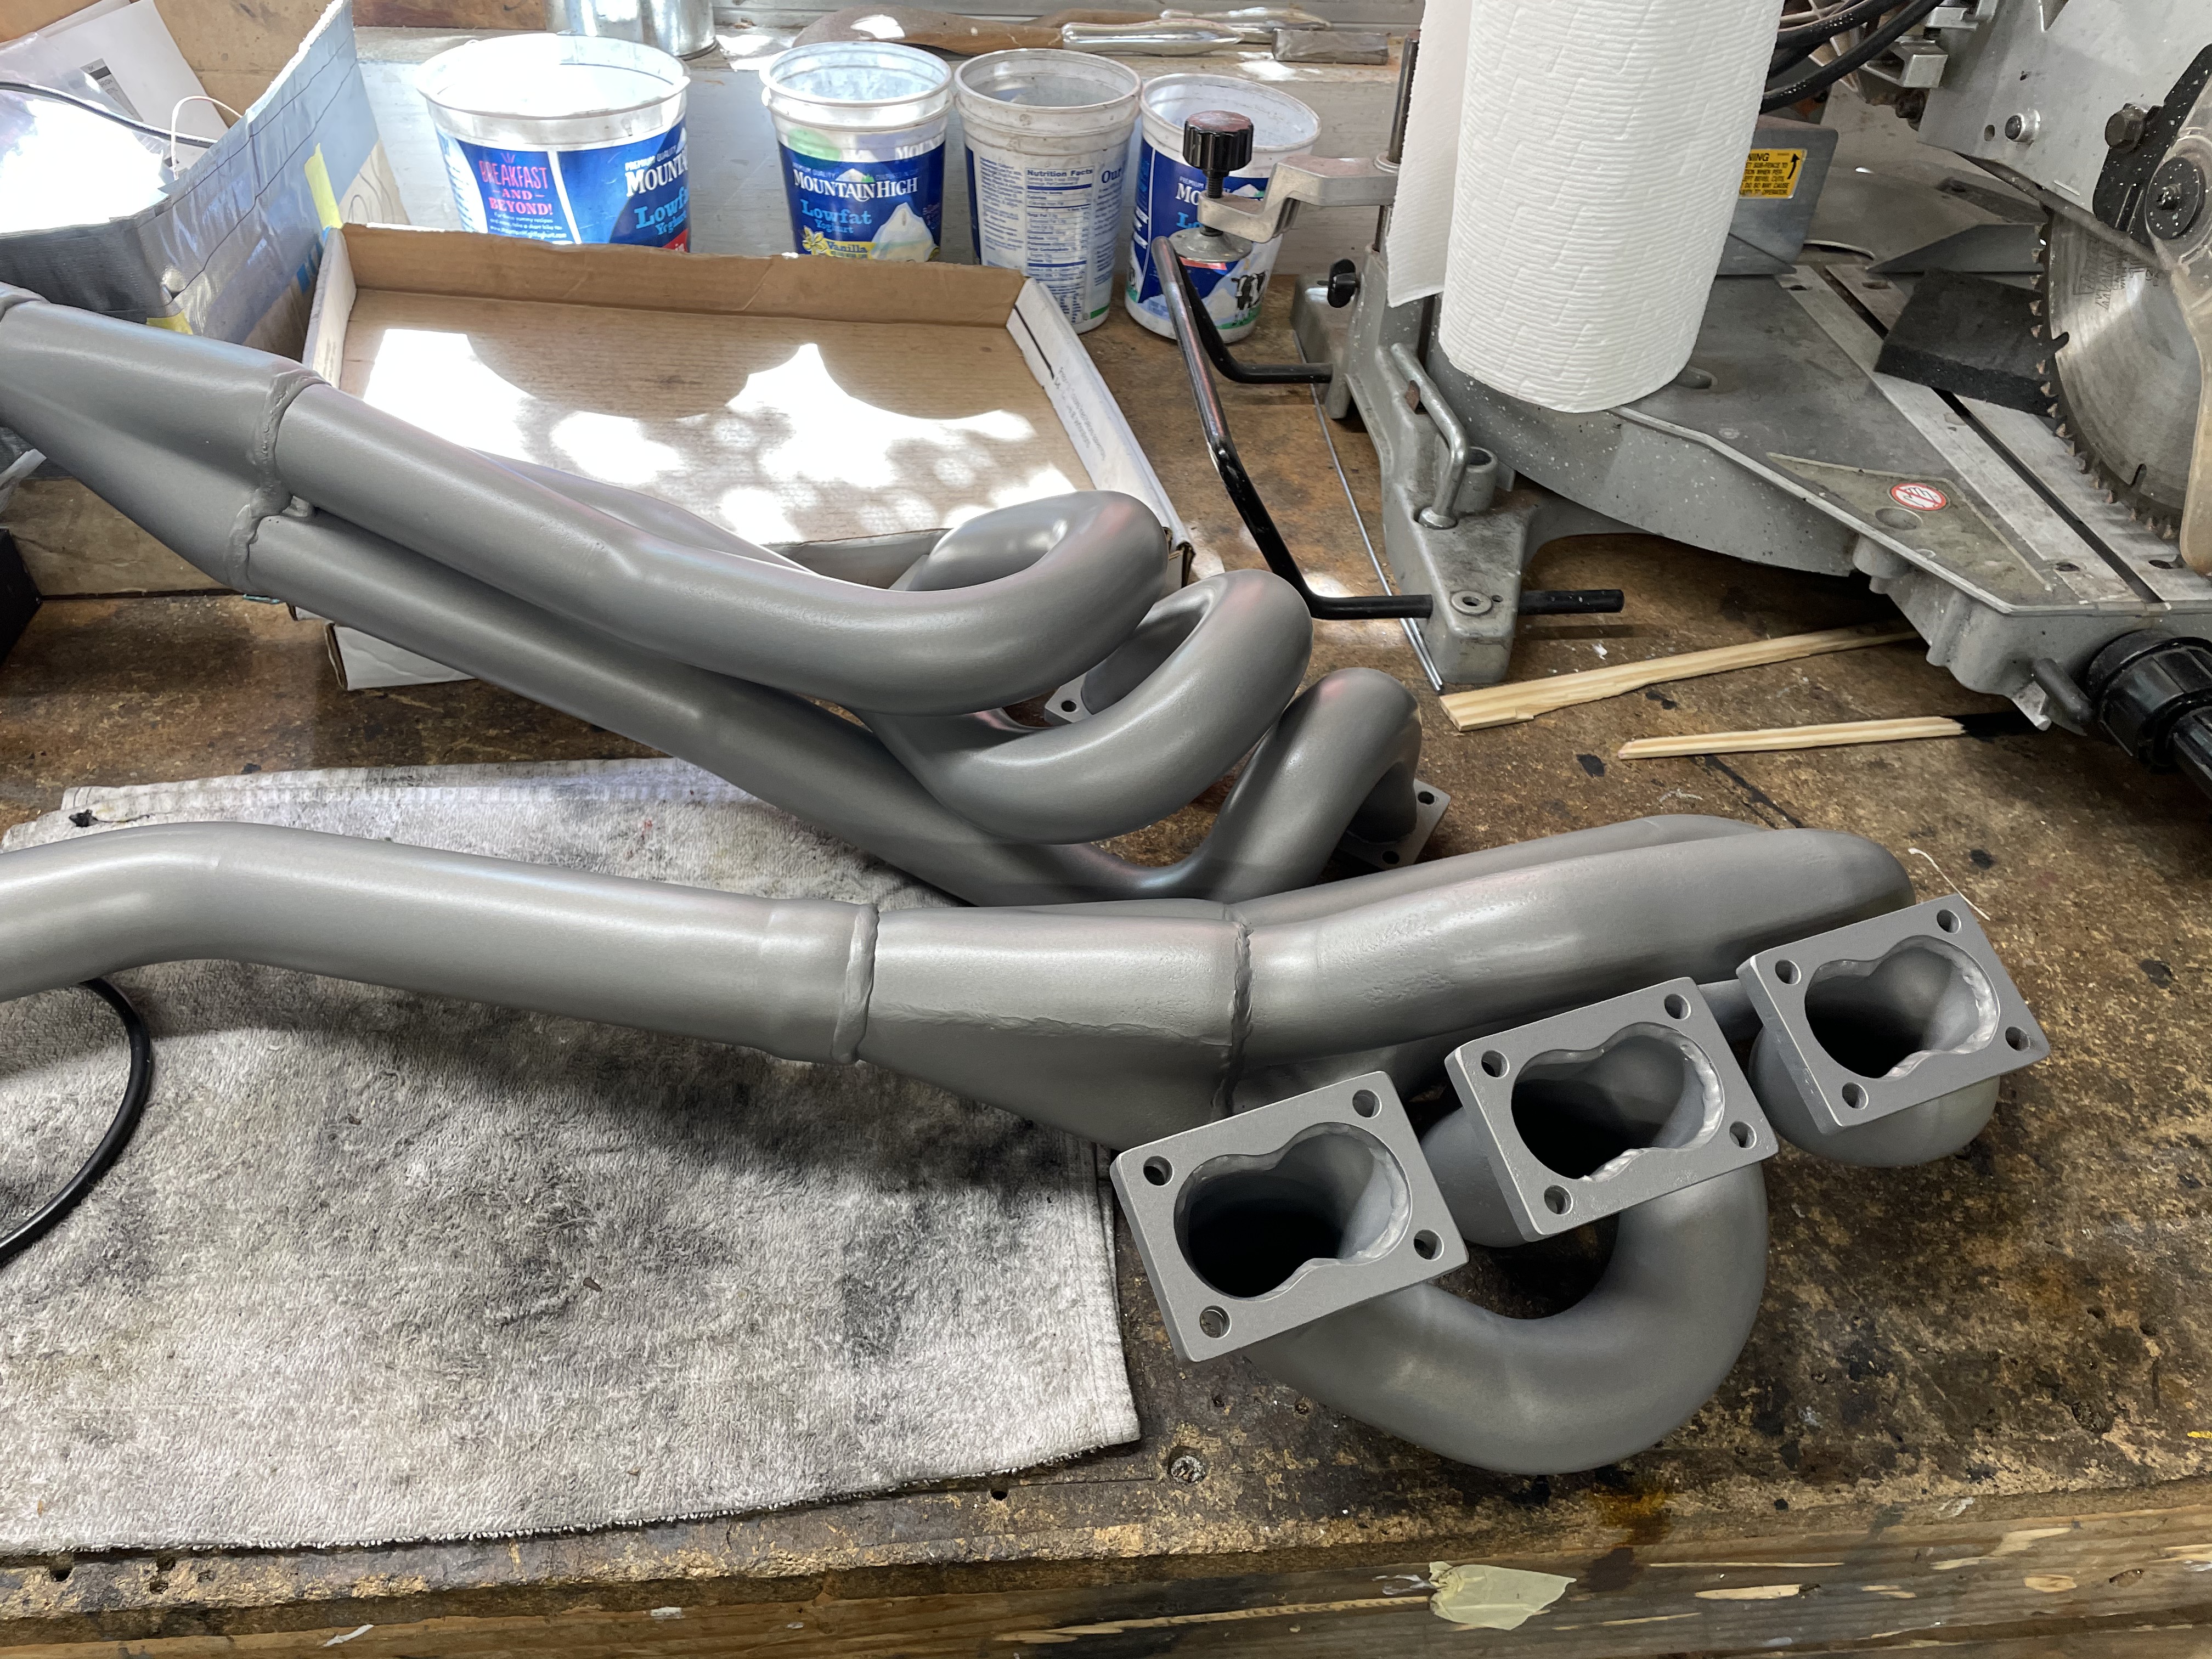
Got the headers ceramic powder coated (before / after):

Image
Image

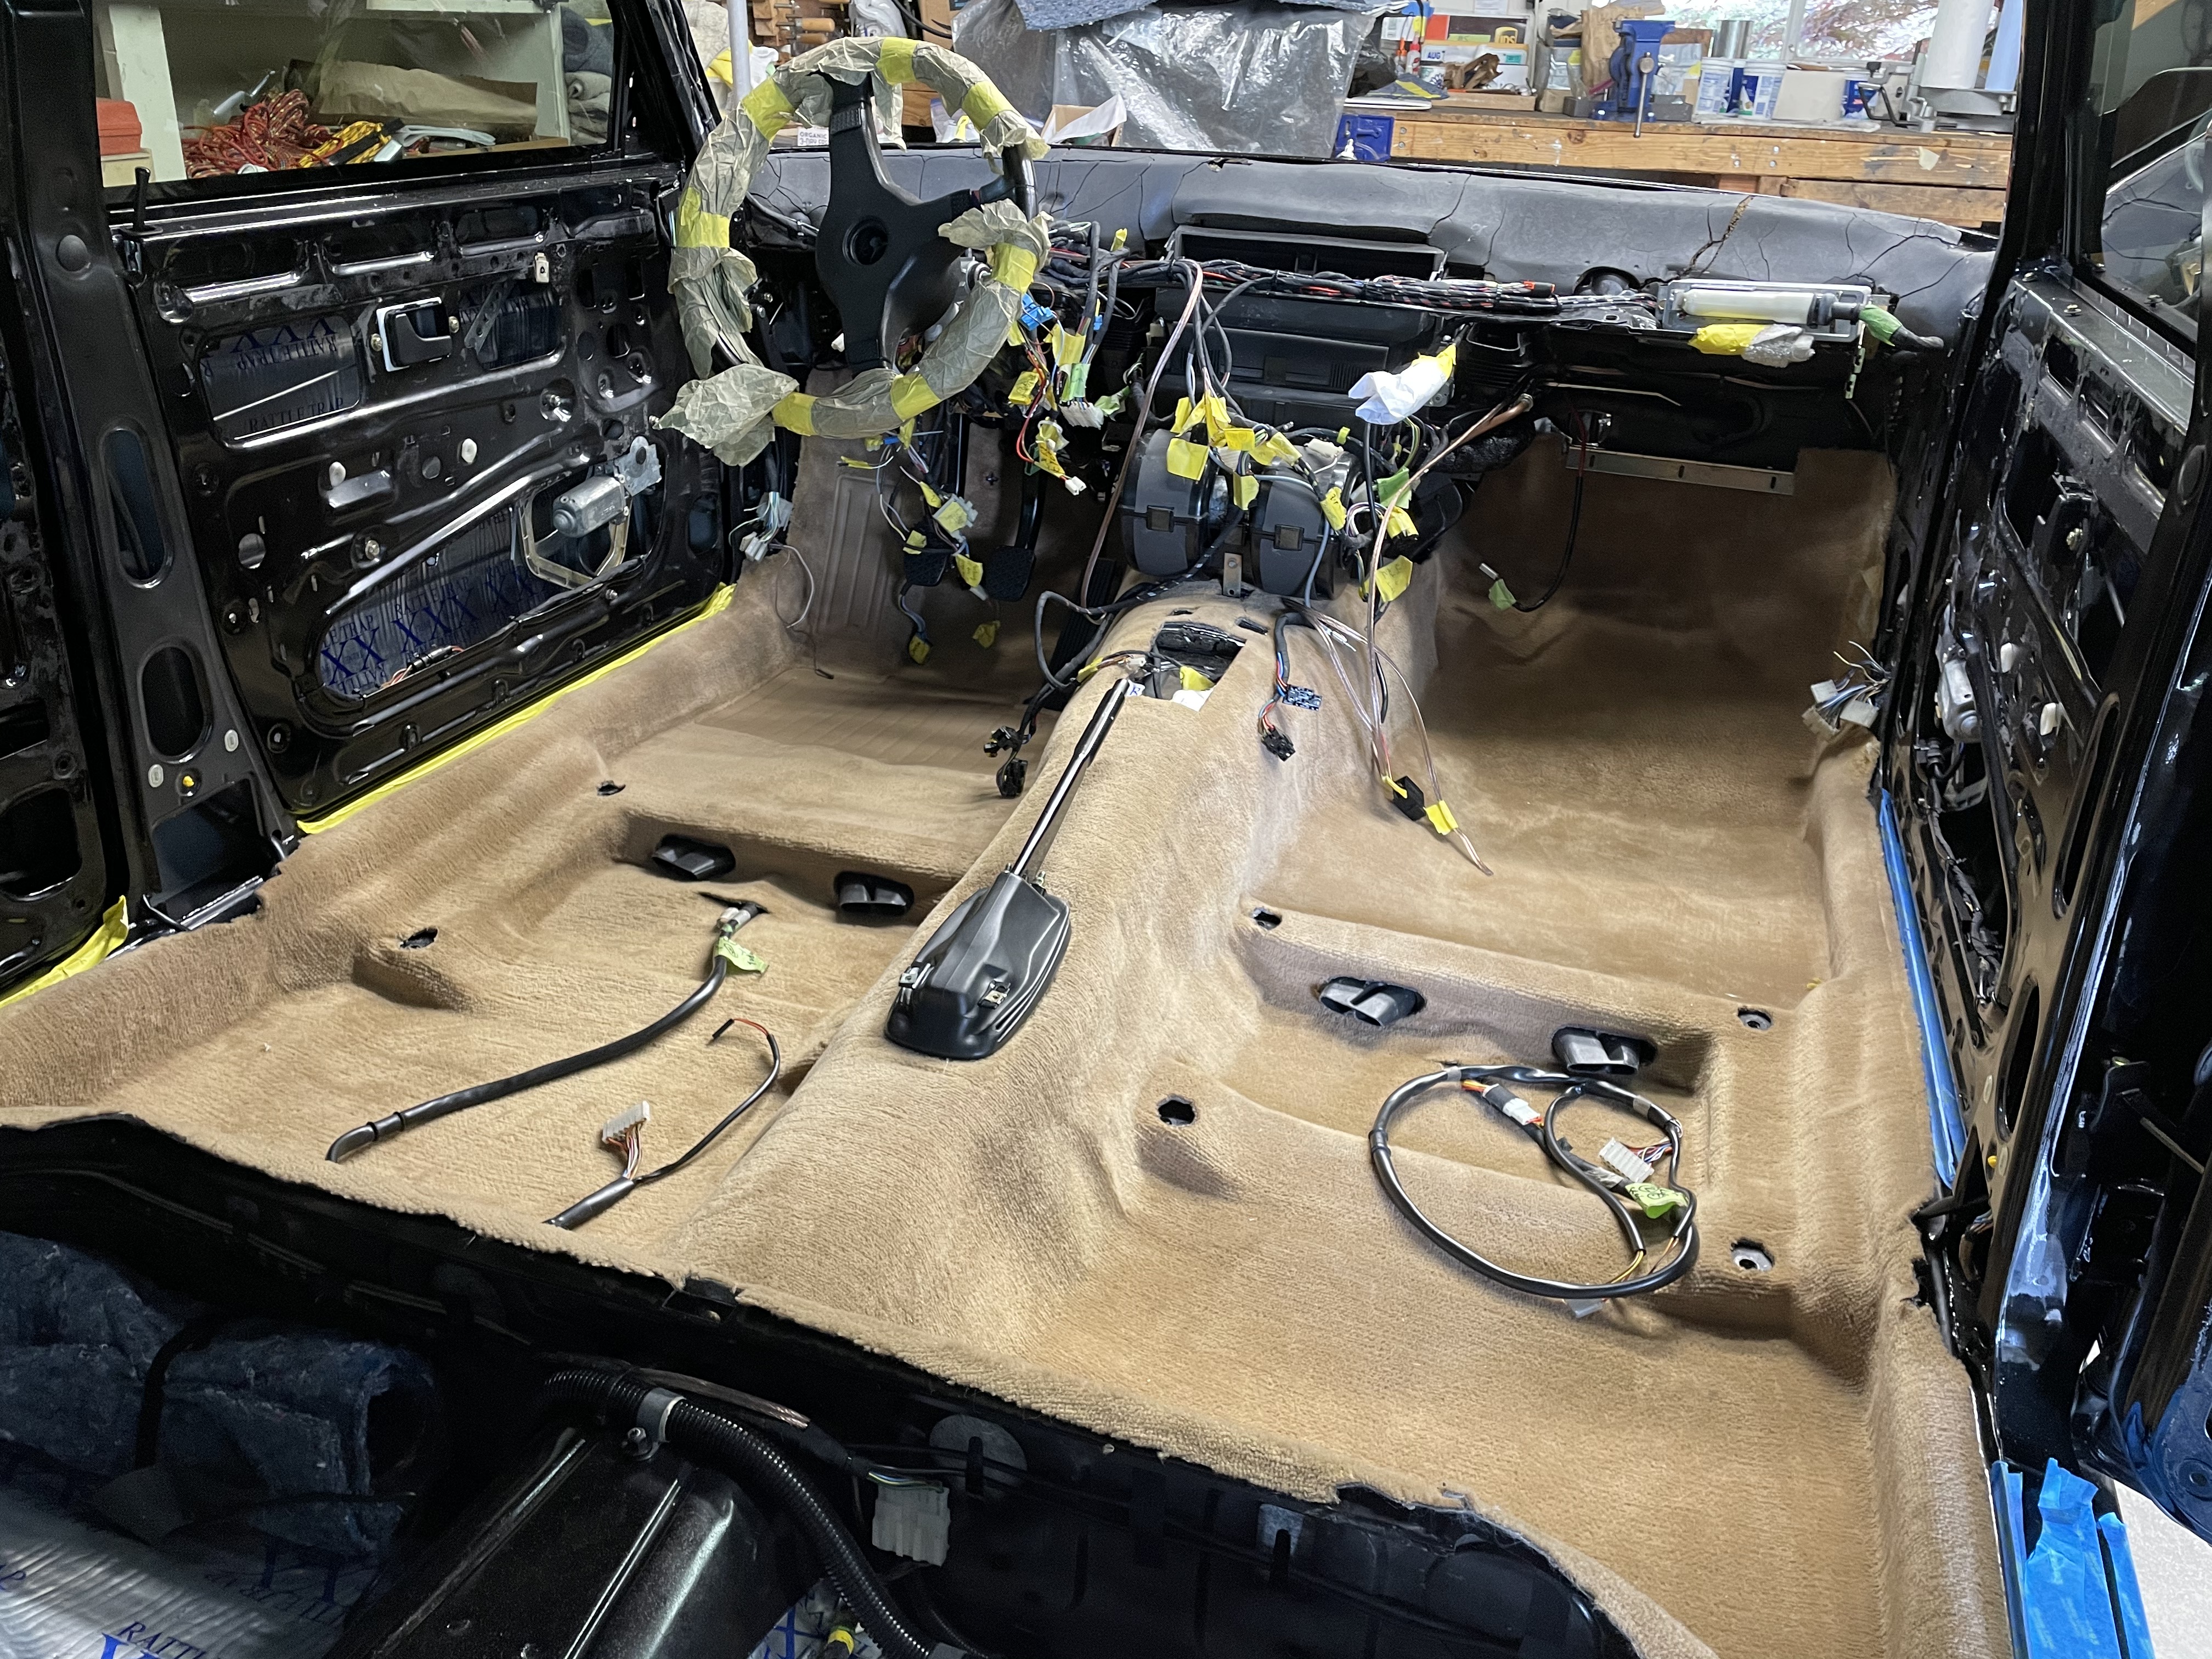
Got the heater core box, A/C evaporator box, front A/C lines and carpet back in ... I like this 'natur' color more than I remember:

Image

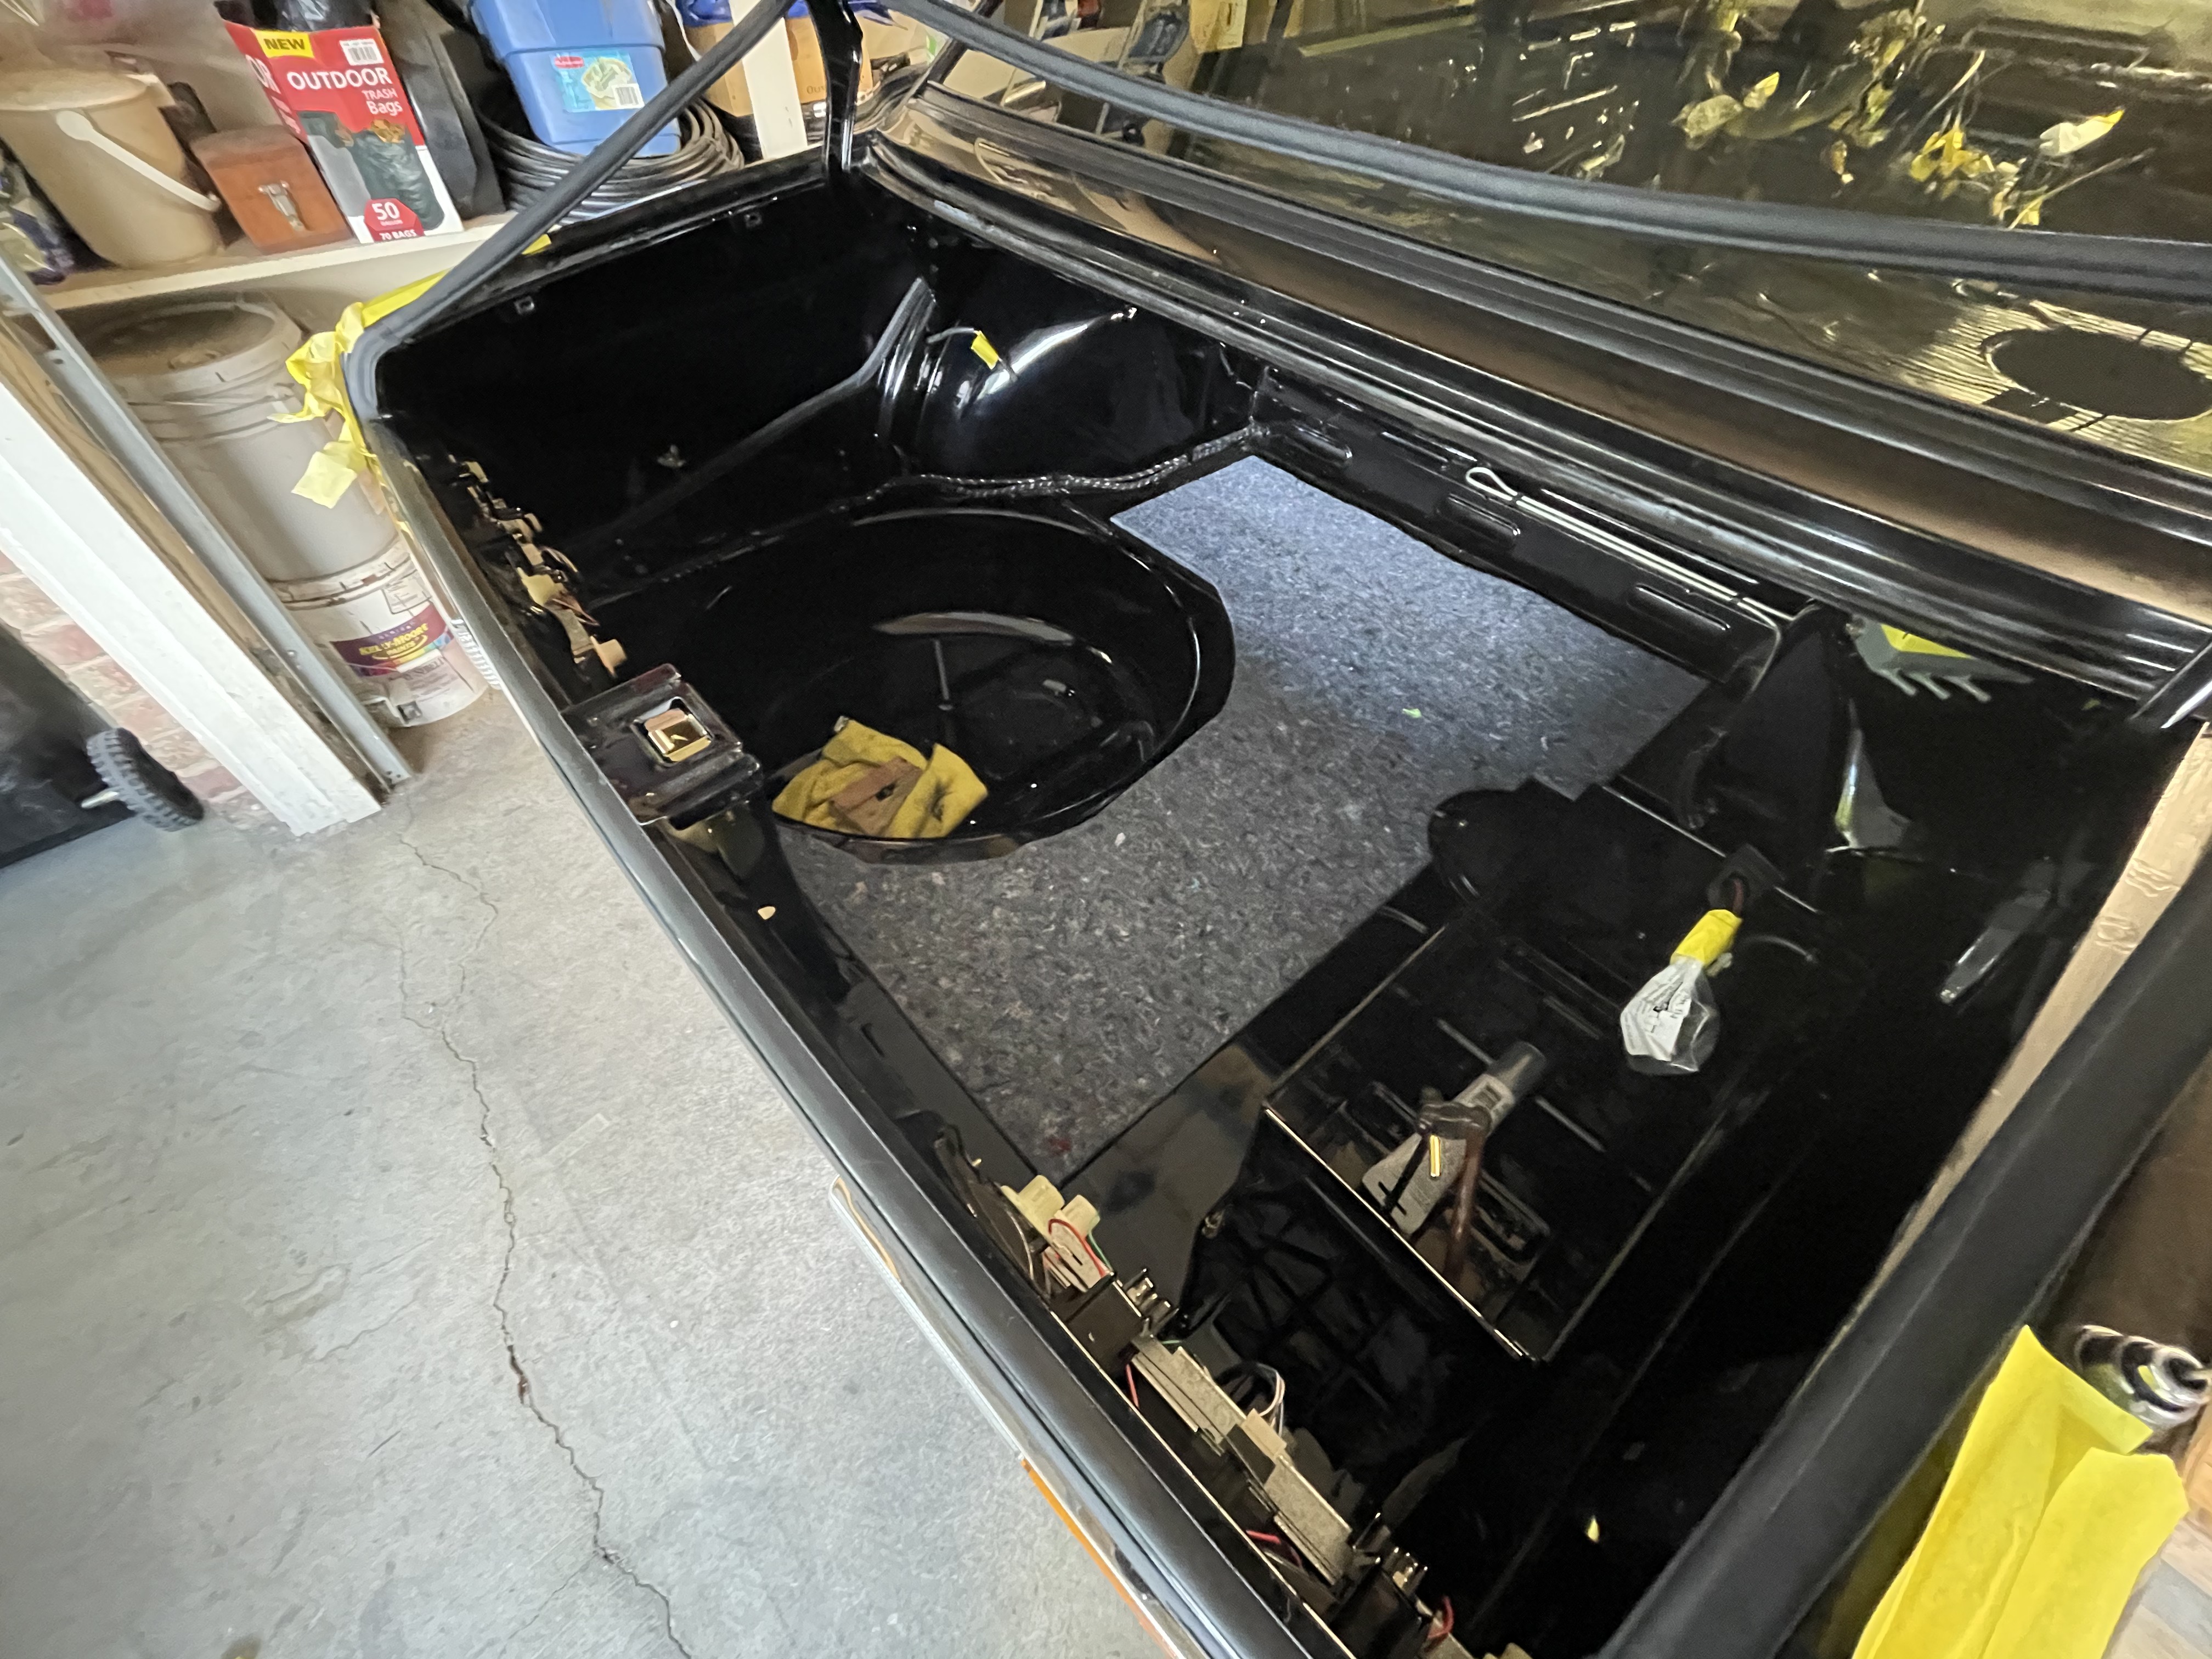
Taped the trunk felt insulation pad back in. I didn't think to get pics, but I bought a roll of two-sided picture hanging tape (this stuff from Amazon) to hold the felt down. My thought is that if I don't like this felt or if the results don't last has hoped for, the tape will be a whole lot easier to remove than contact cement. I also ended up spraying a thin layer of 3M sprayable glue along the edges of the felt. This industrial felt seems to be very willing to "separate" if you fray the edges, so by spraying the glue into the edge fibers, I'm hoping to give the felt a bit more structure & protection.

Image

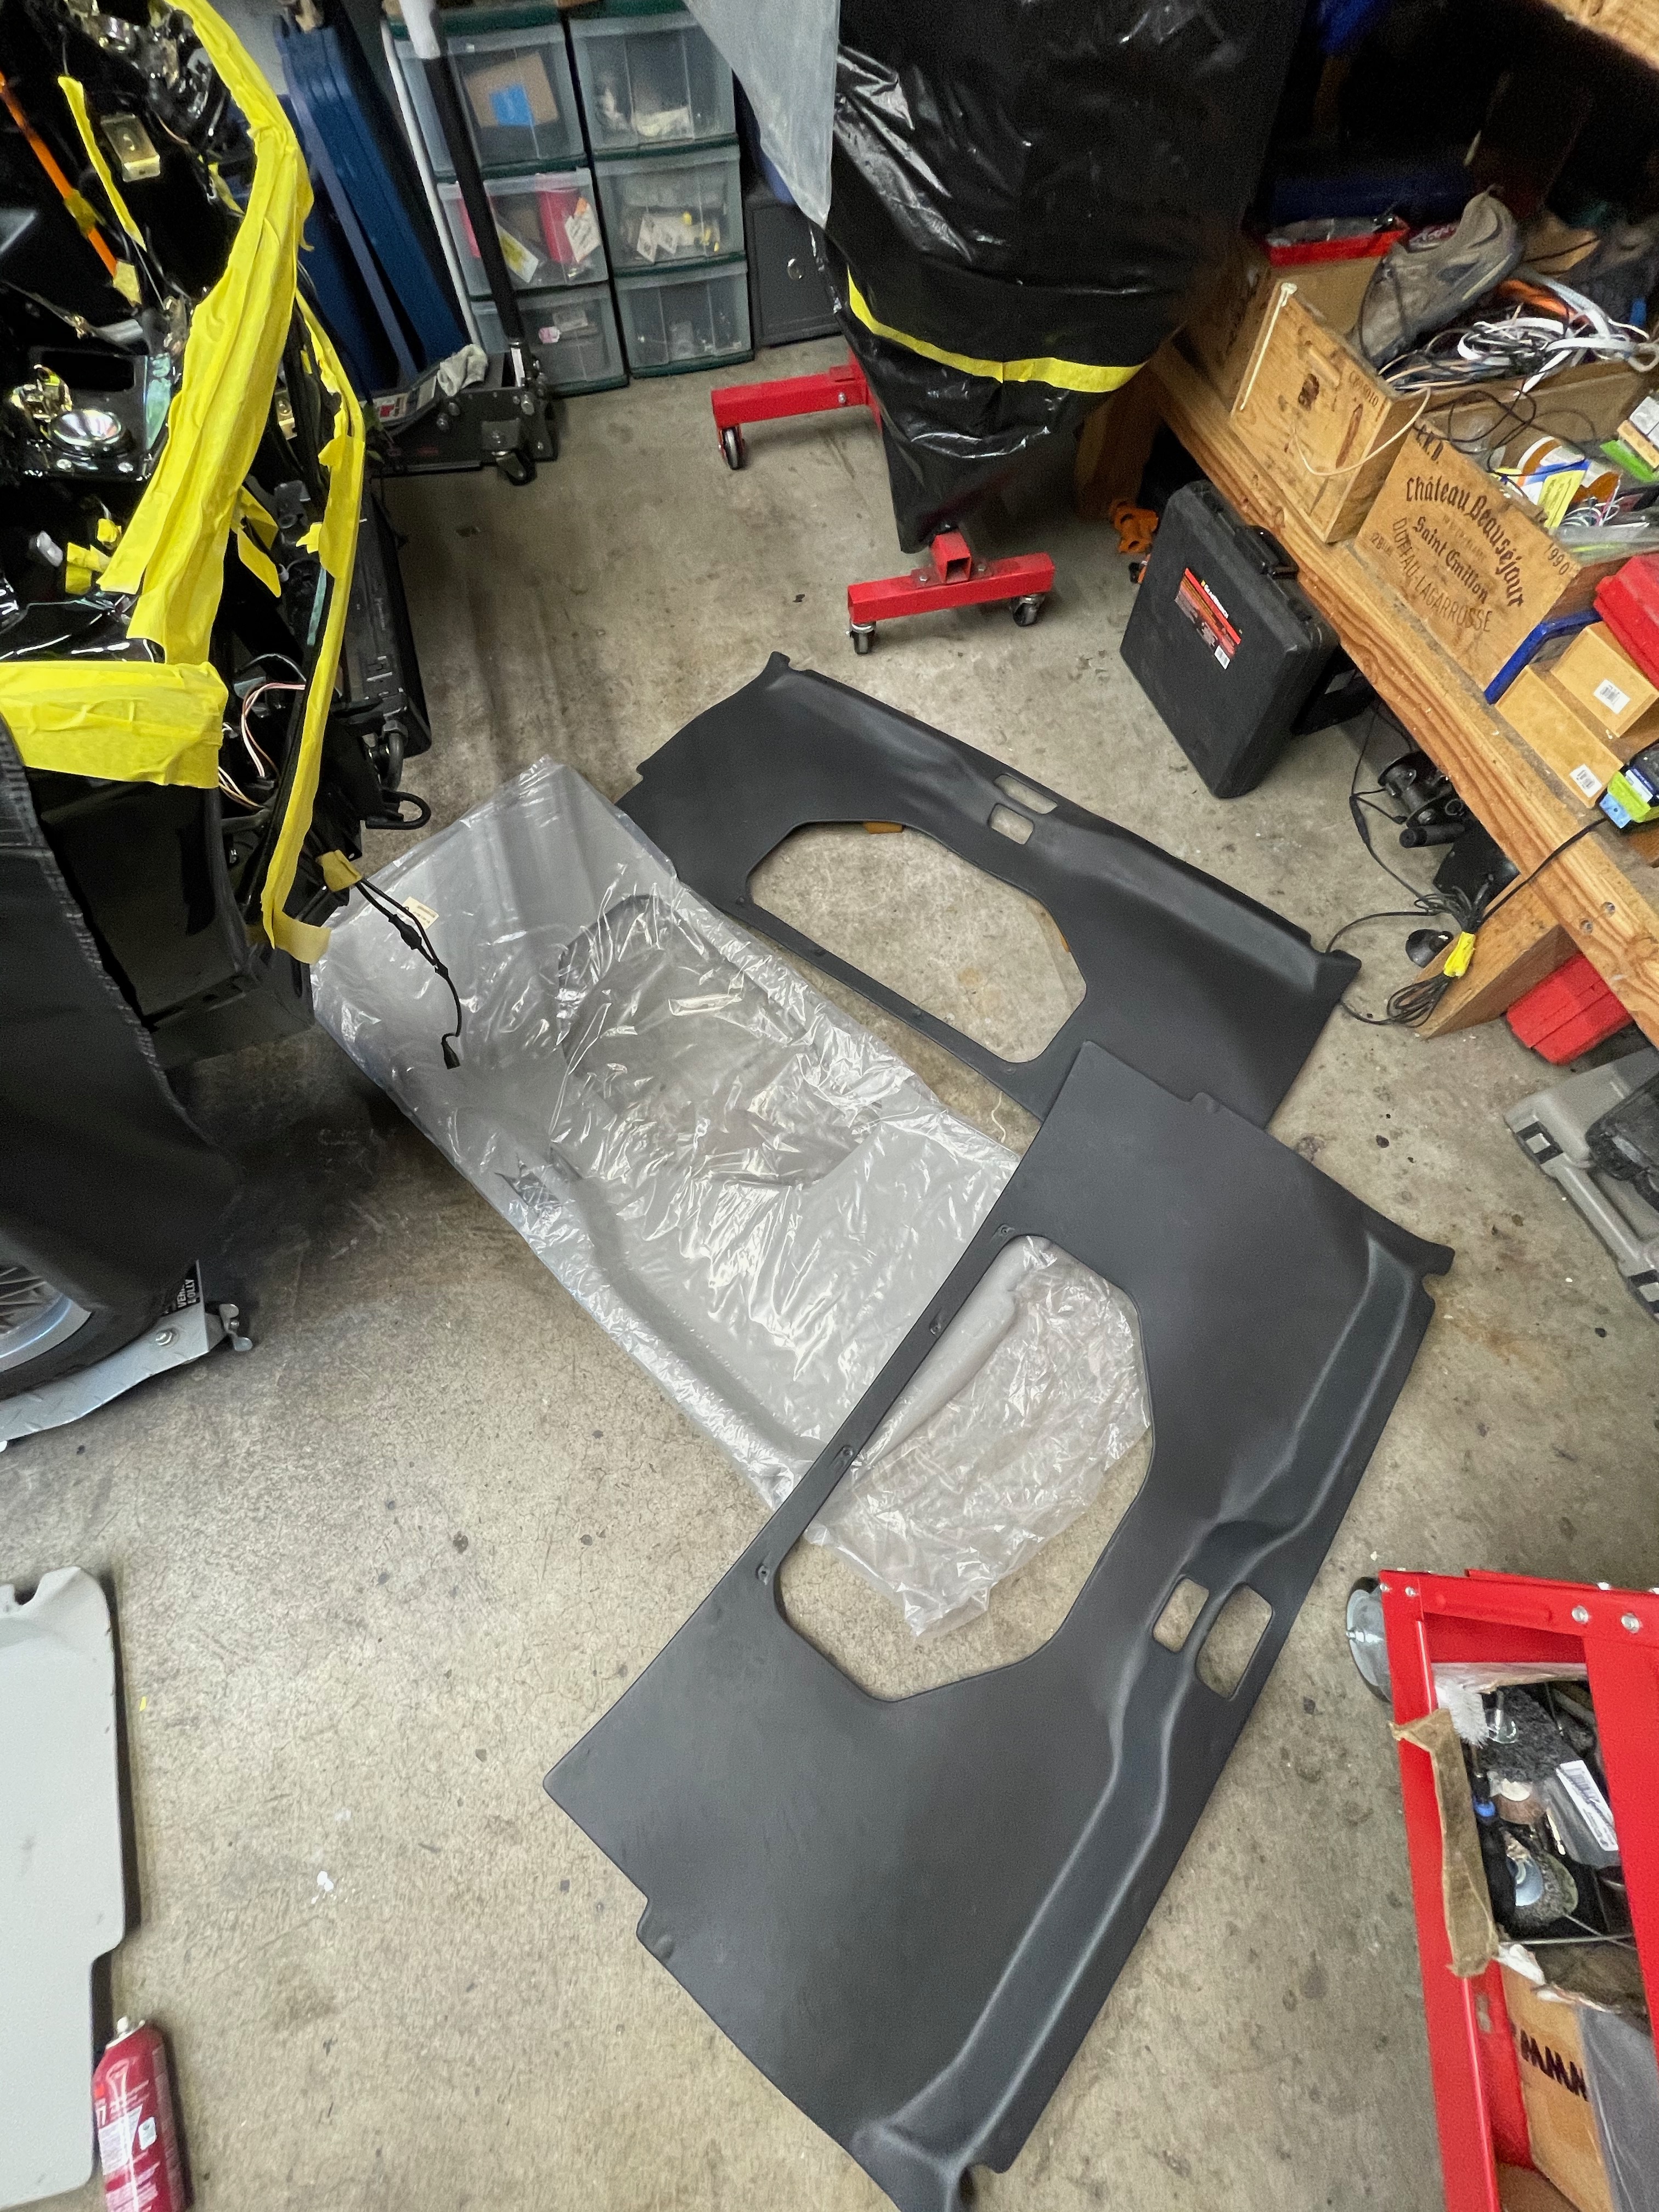
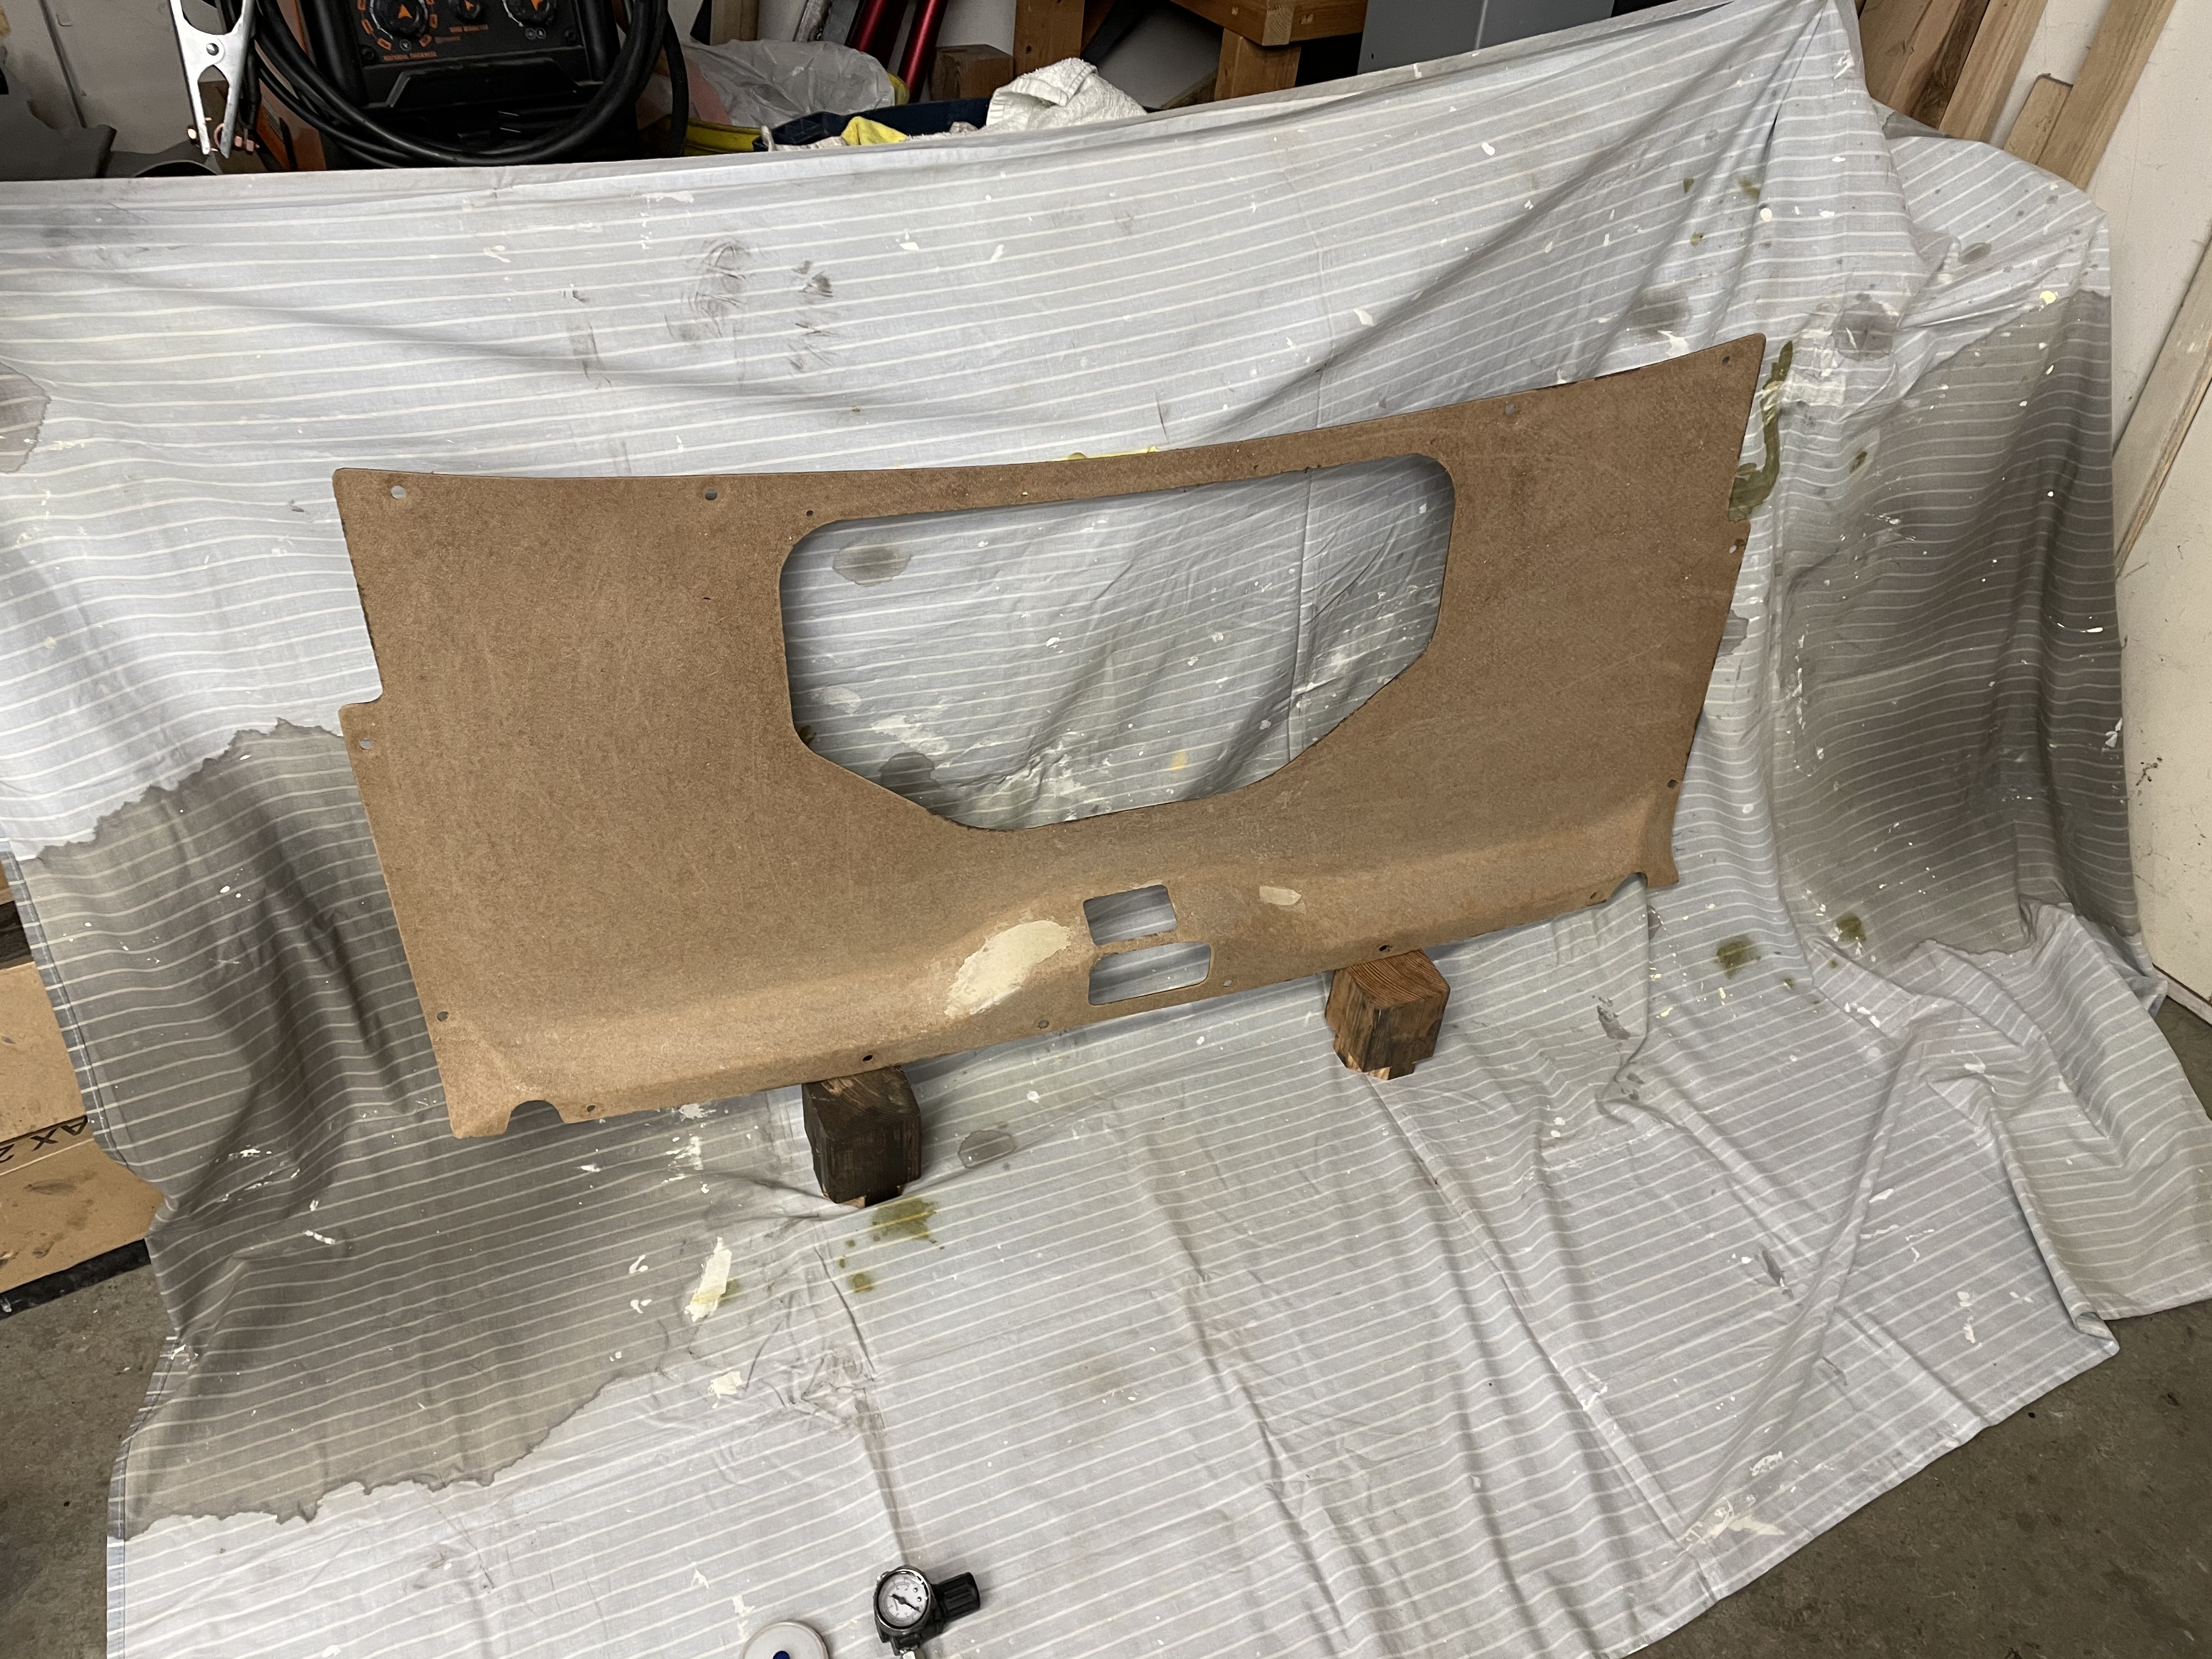
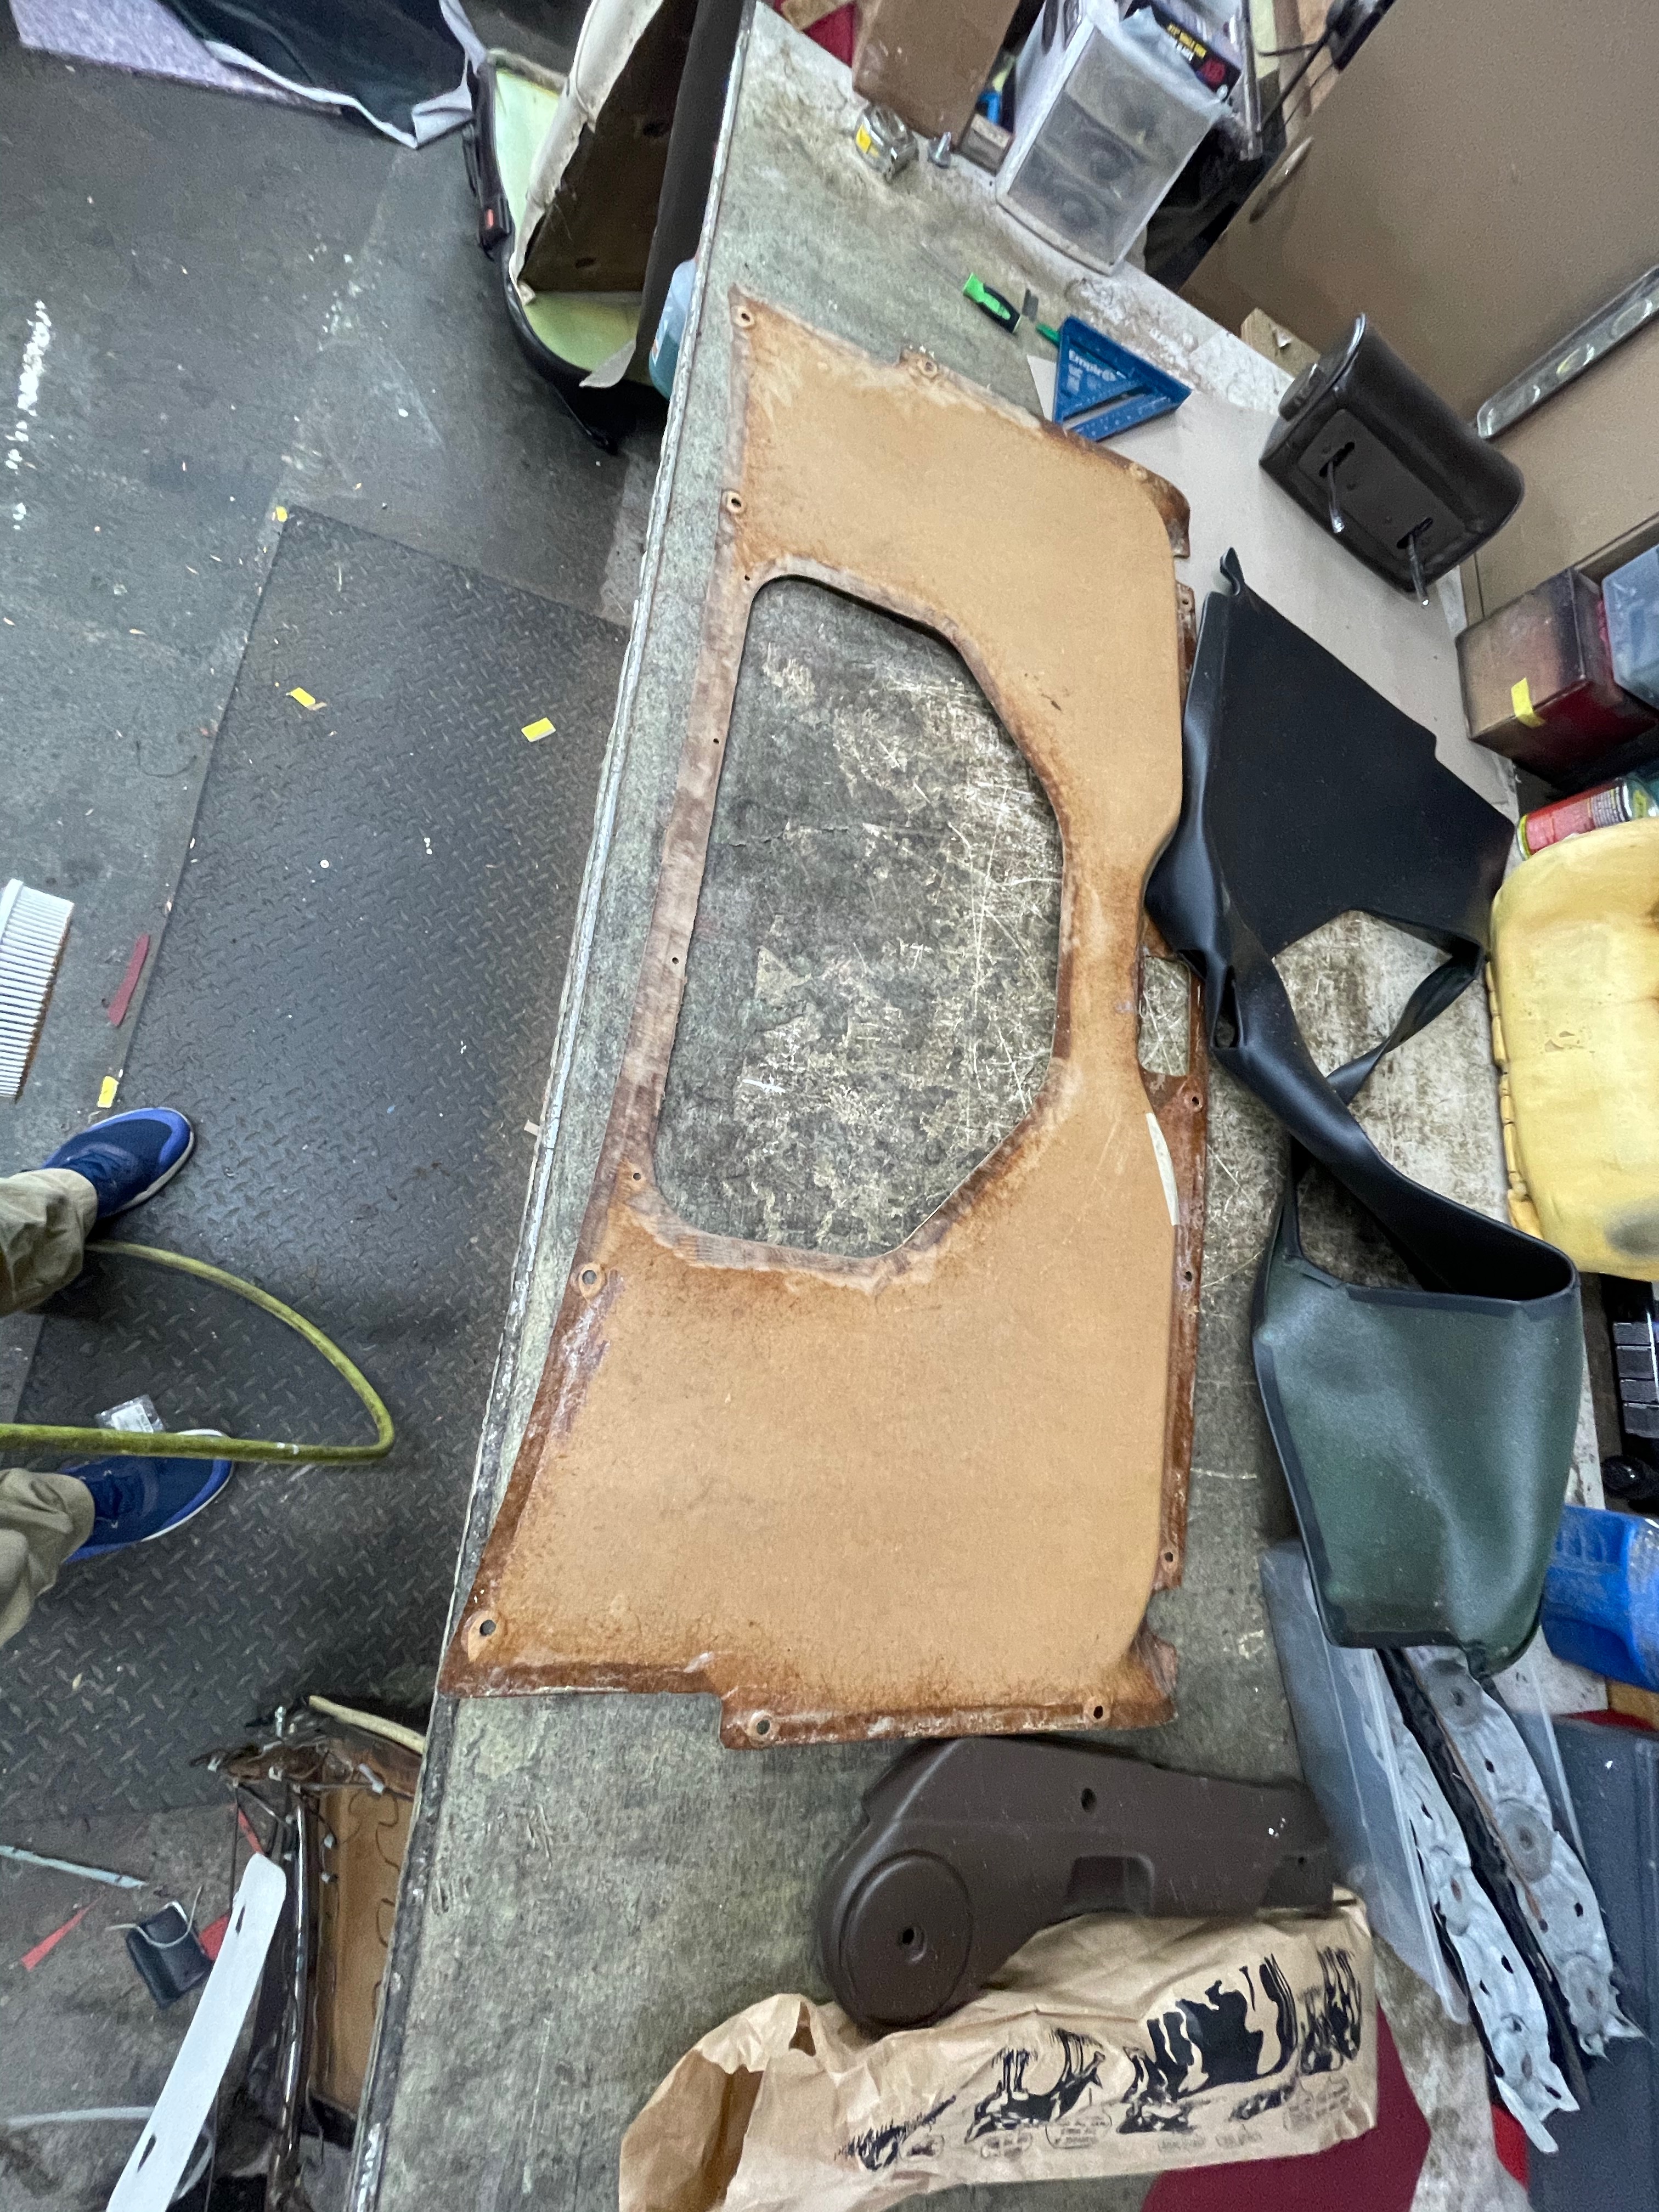
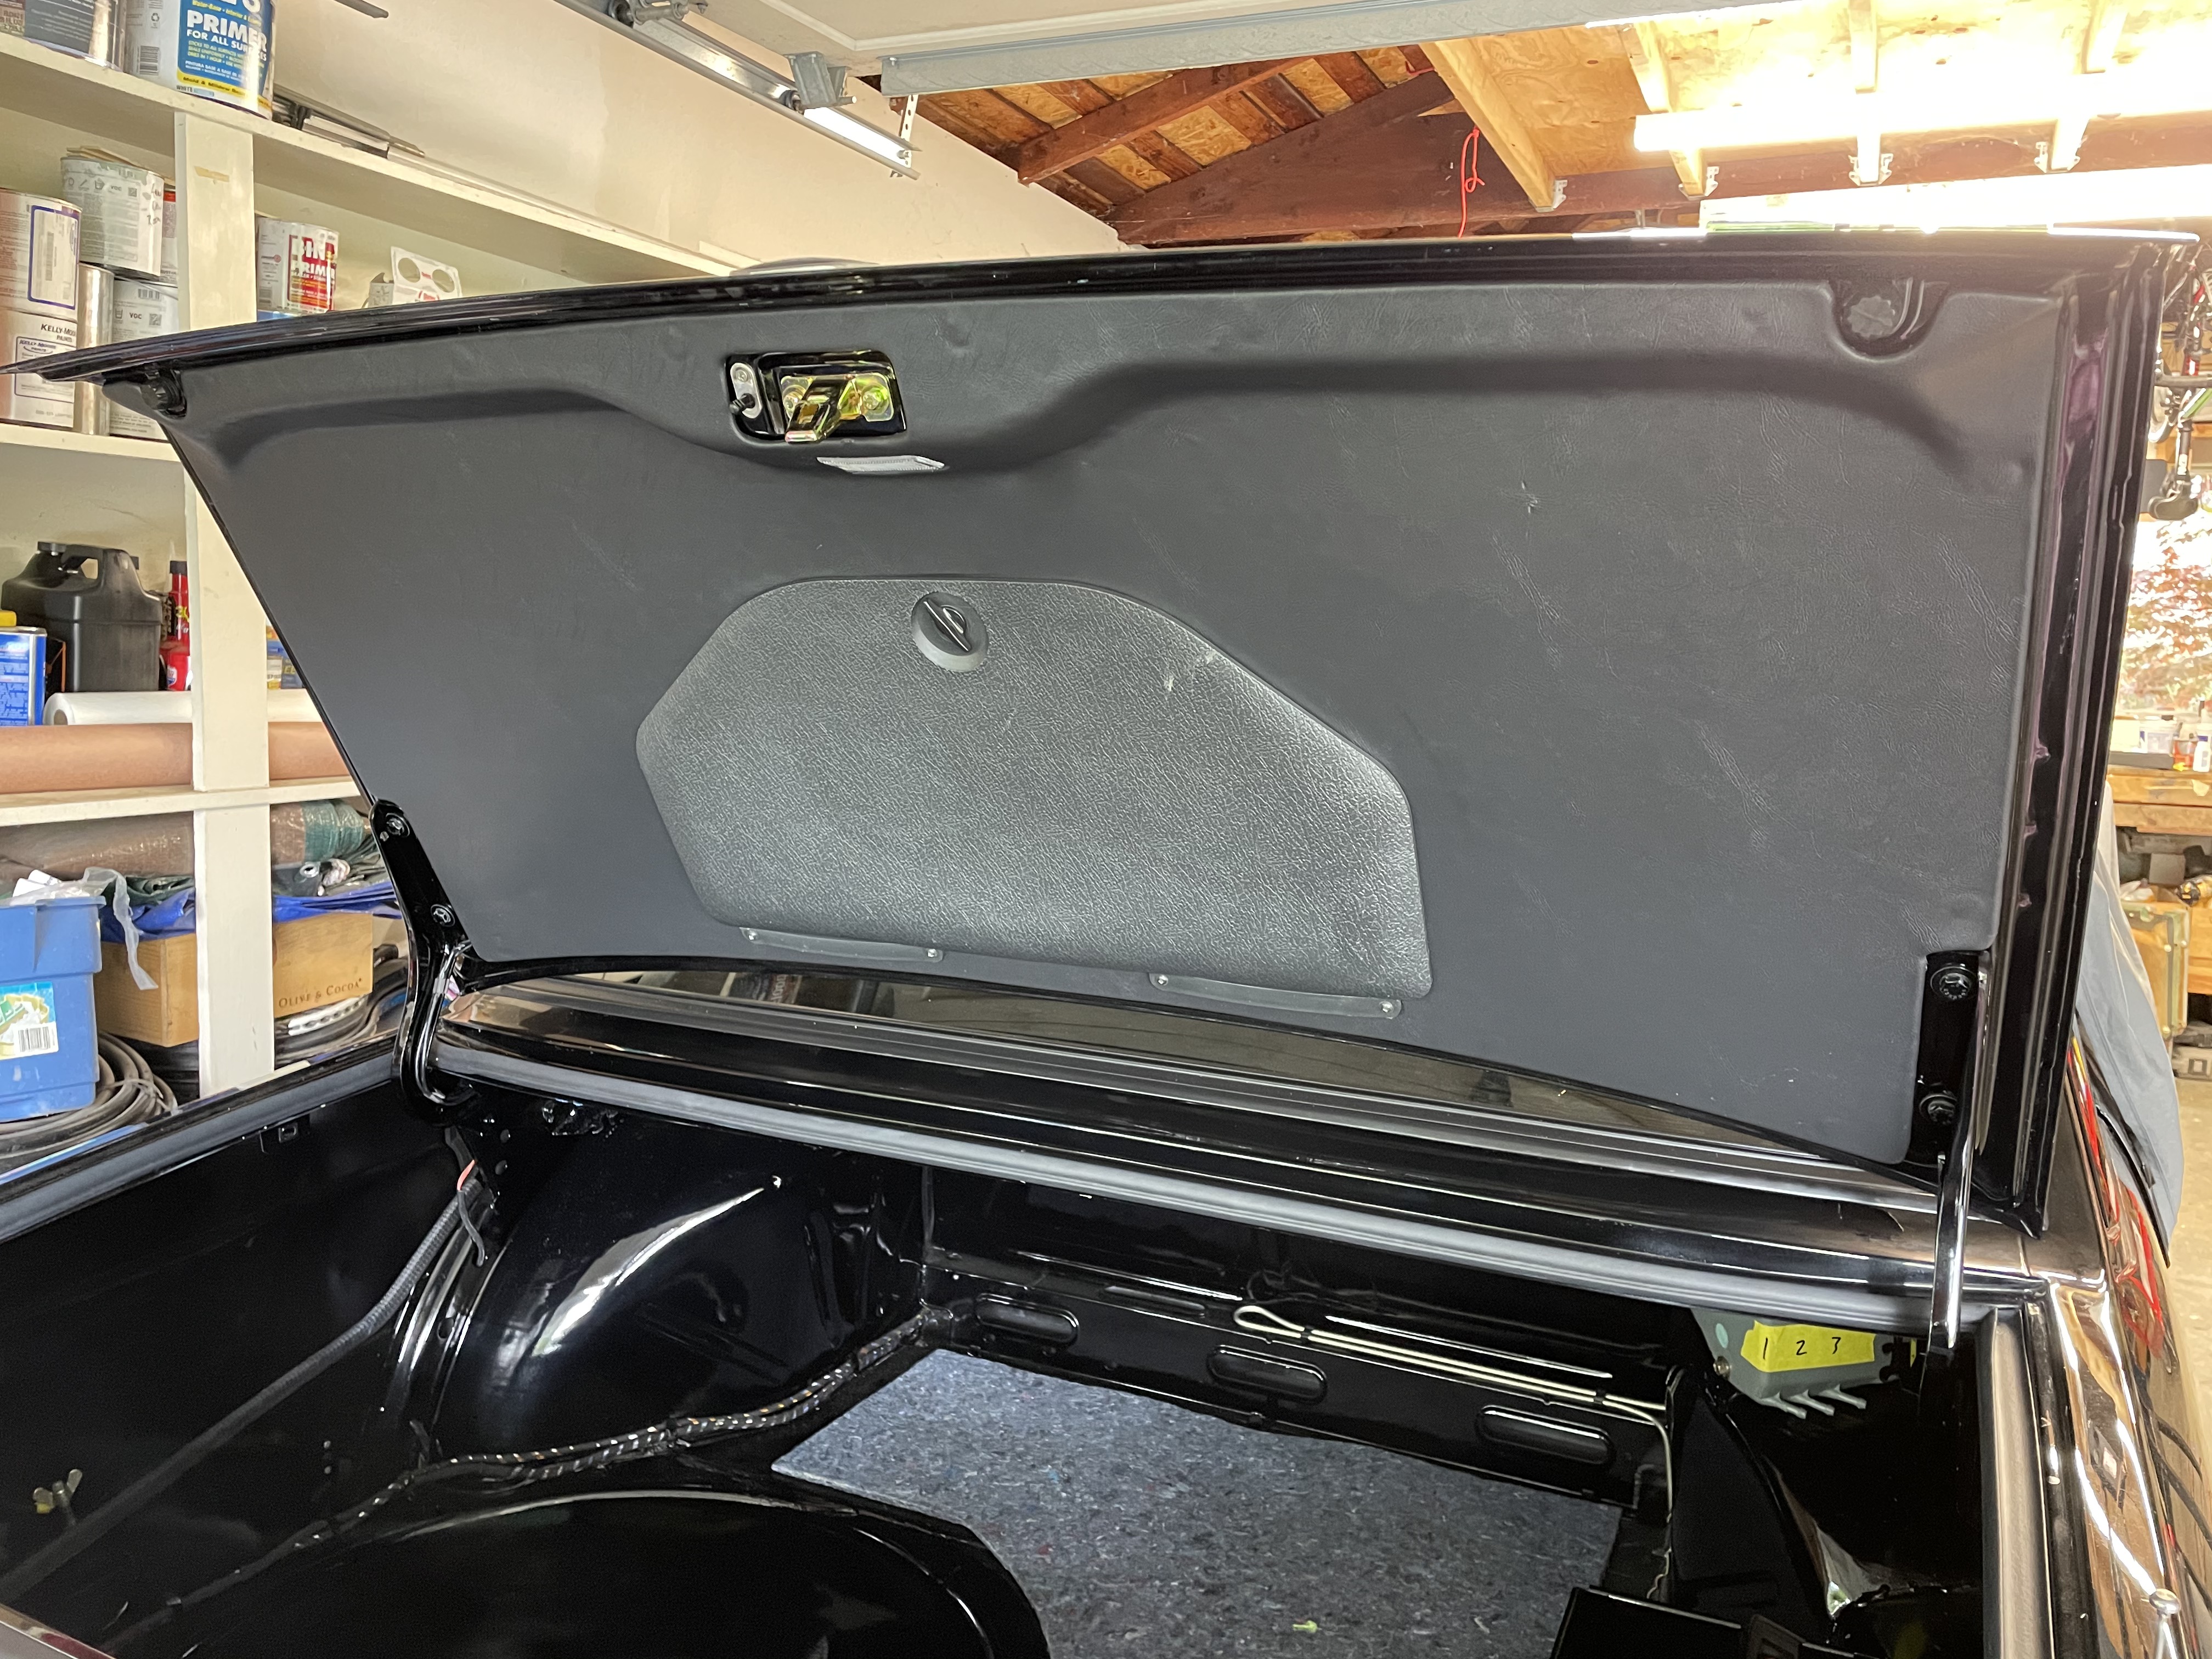
Next, I tackled the trunk lid liner. I started with the original anthracite vinyl liner (which had a very warped fiber board backing), collected a second M5 anthracite liner, and managed to fine a new OEM gray liner (wrong color, but the fiber board was in very very good condition). My plan was to pick the best anthrazit vinyl sheet, remove the gray vinyl from the new liner, then glue the anthracite liner to the good fiber board panel. So far, that seems to have worked like a charm. Starting parts:

Image

Stripped, cleaned fiber board, sprayed with a thin coat of polyurethane for a bit of moisture protection:

Image

Gluing the fiberboard:

Image

Result:

Image

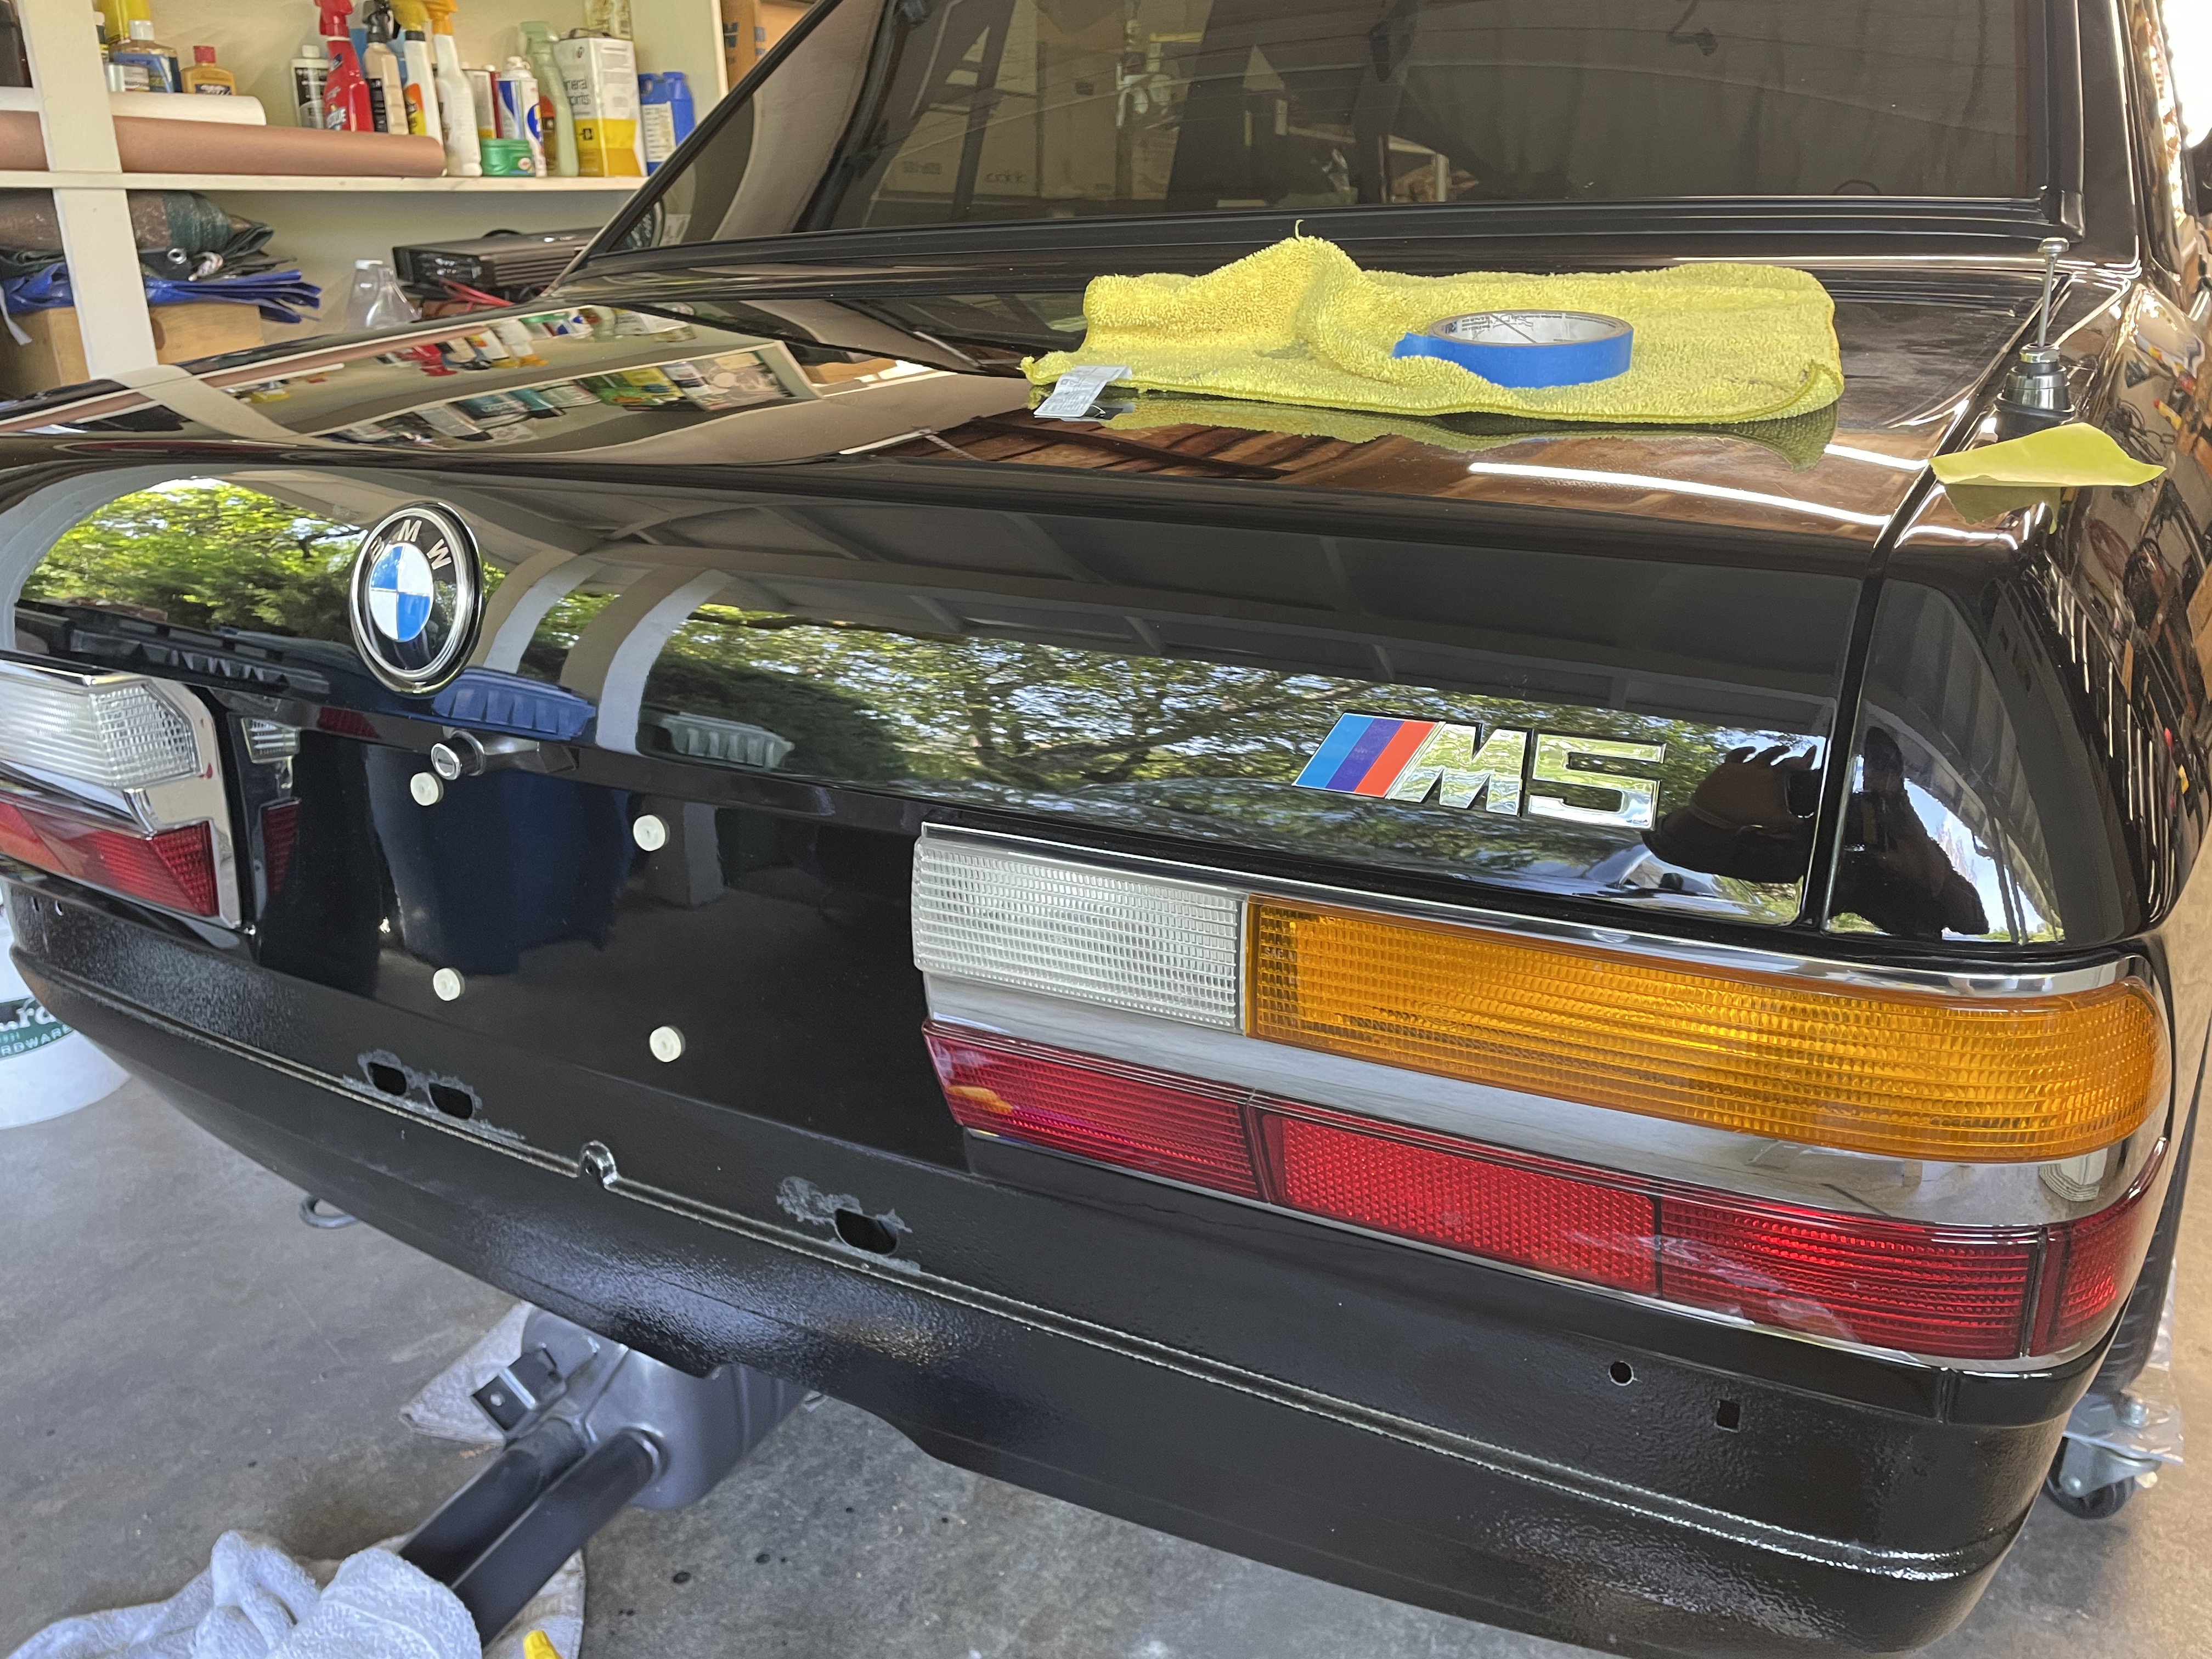
I also mounted the new non-spoiler, non-M5 trunk lid with Roundel and M5 badge, and also set in the rear windshield:

Image

And today, I'm finally going to dive back into the engine wiring harness and finish that MF'er up so that I can drop the engine in for good.
jhh925
Posts: 917
Joined: Jul 11, 2015 12:23 AM
Location: Reno

Re: Rebuilding My 1988 US-spec M5

Post by jhh925 »

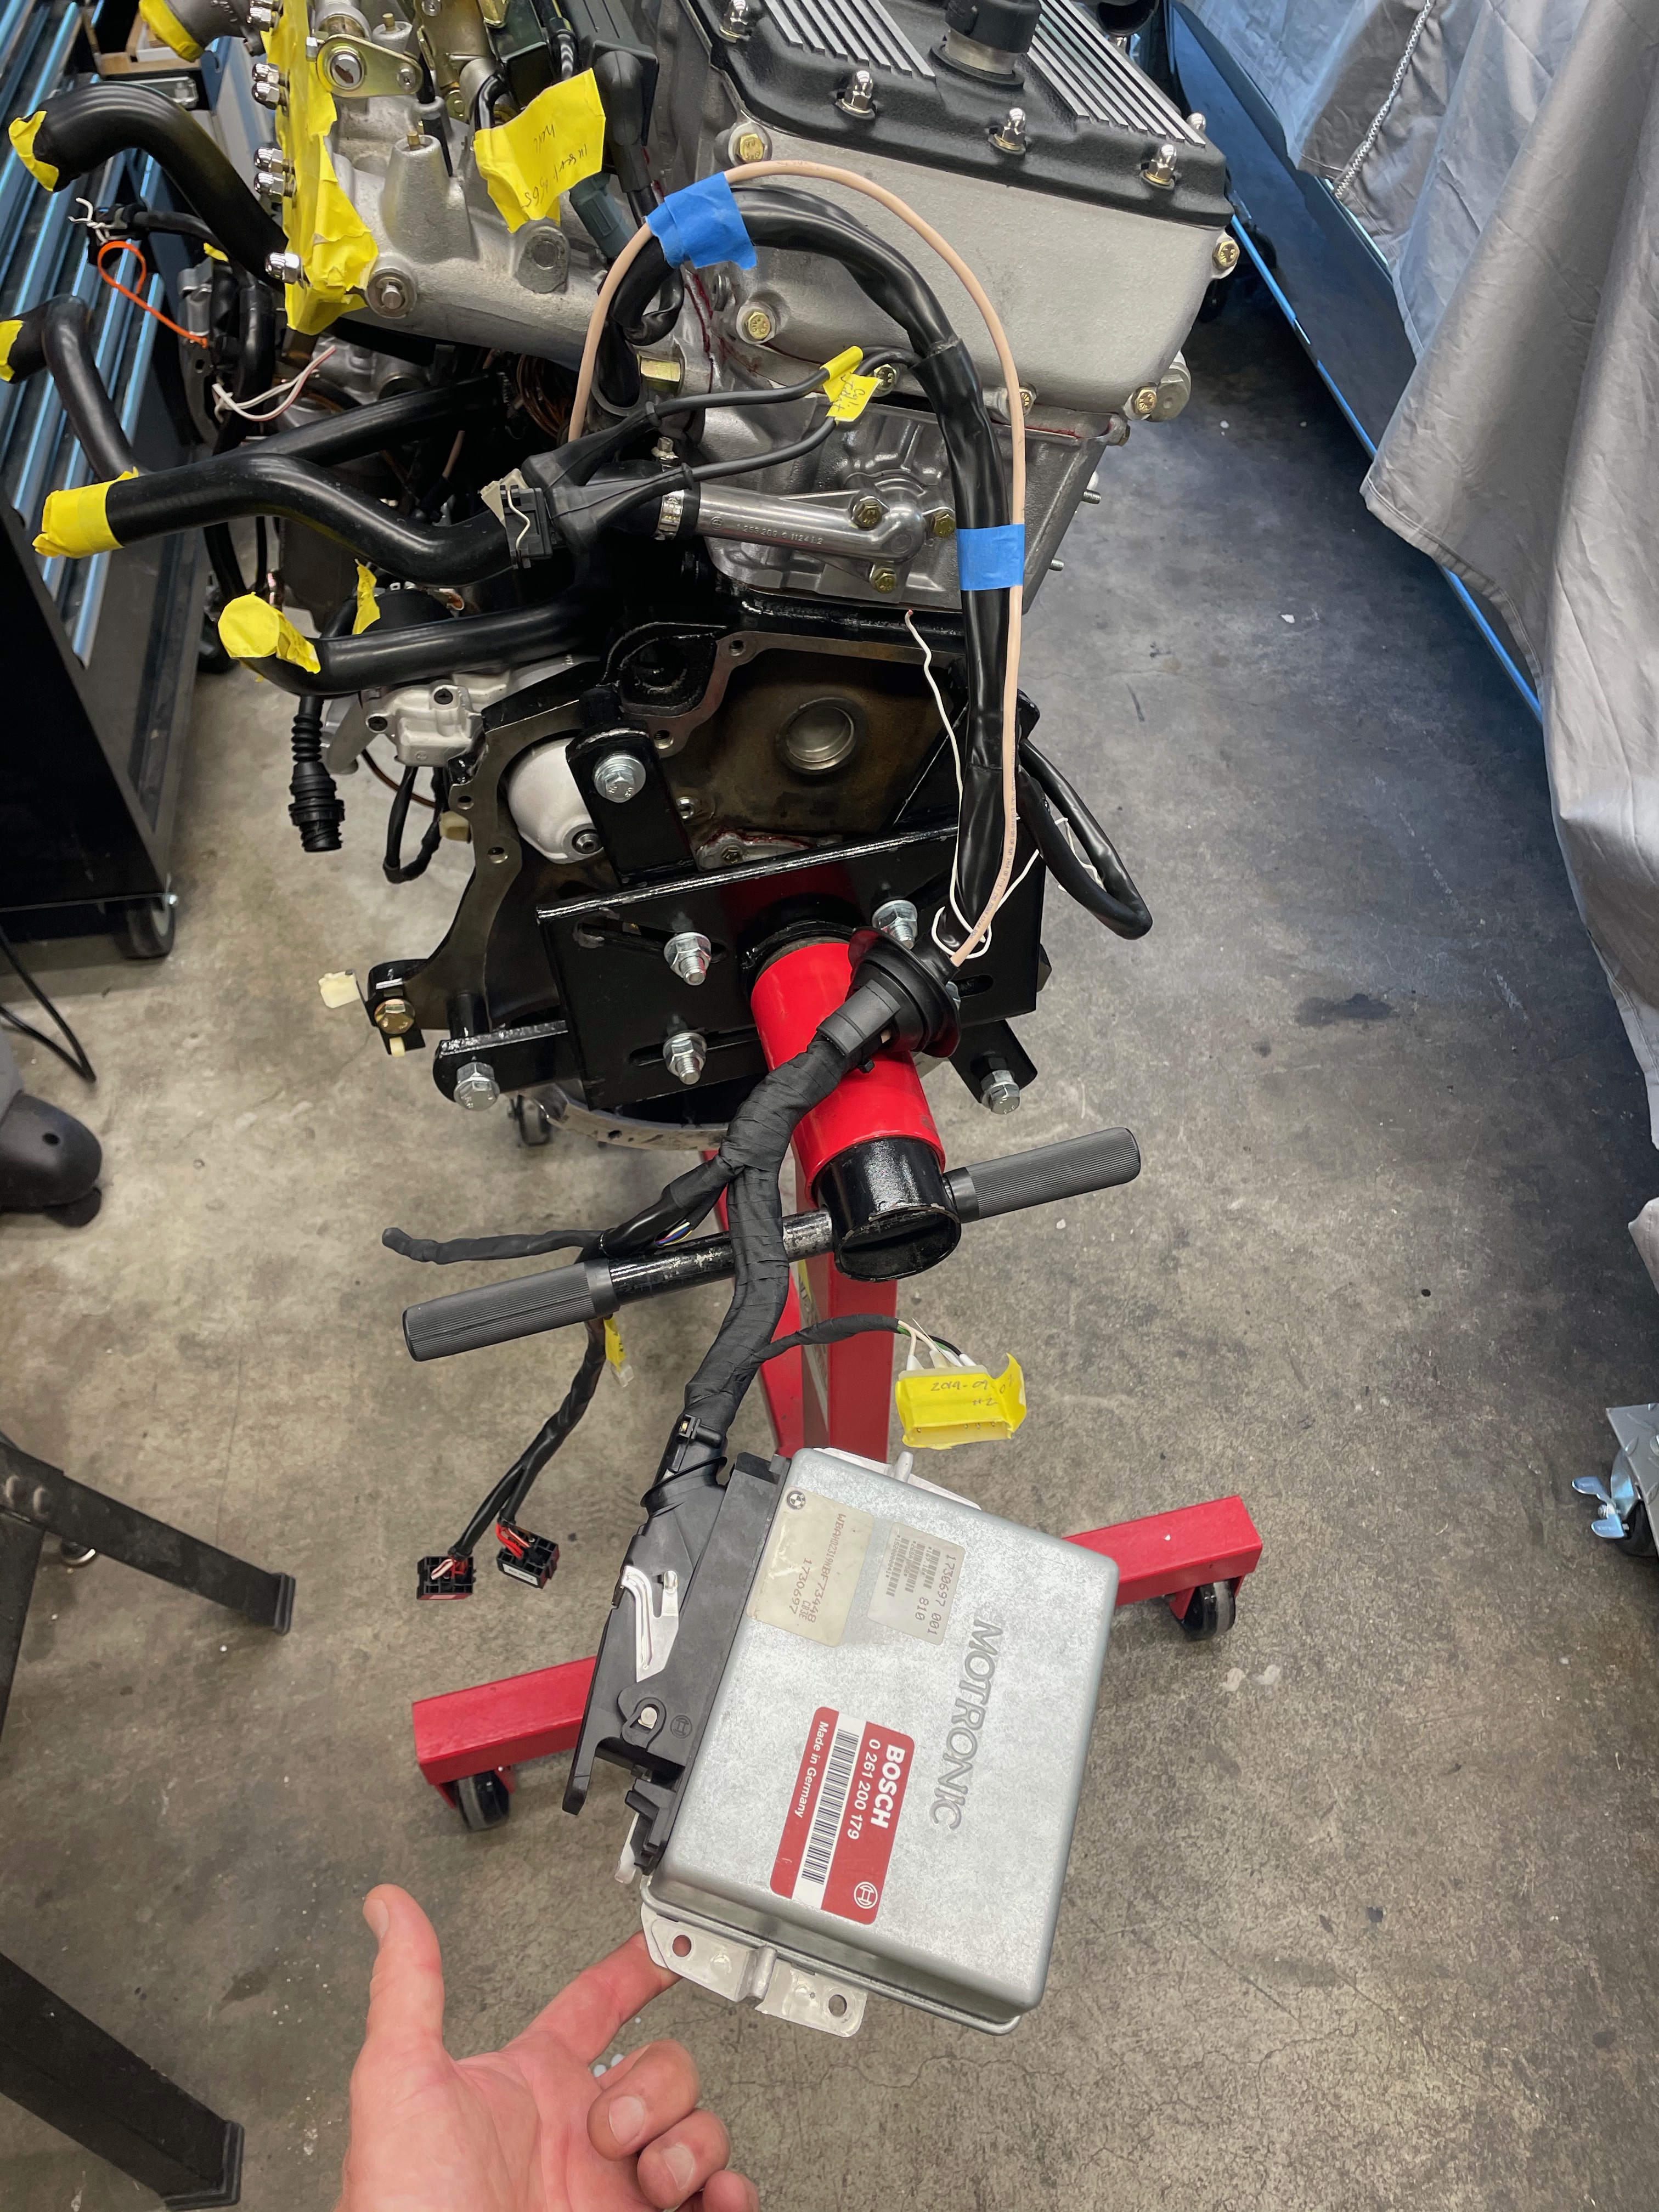
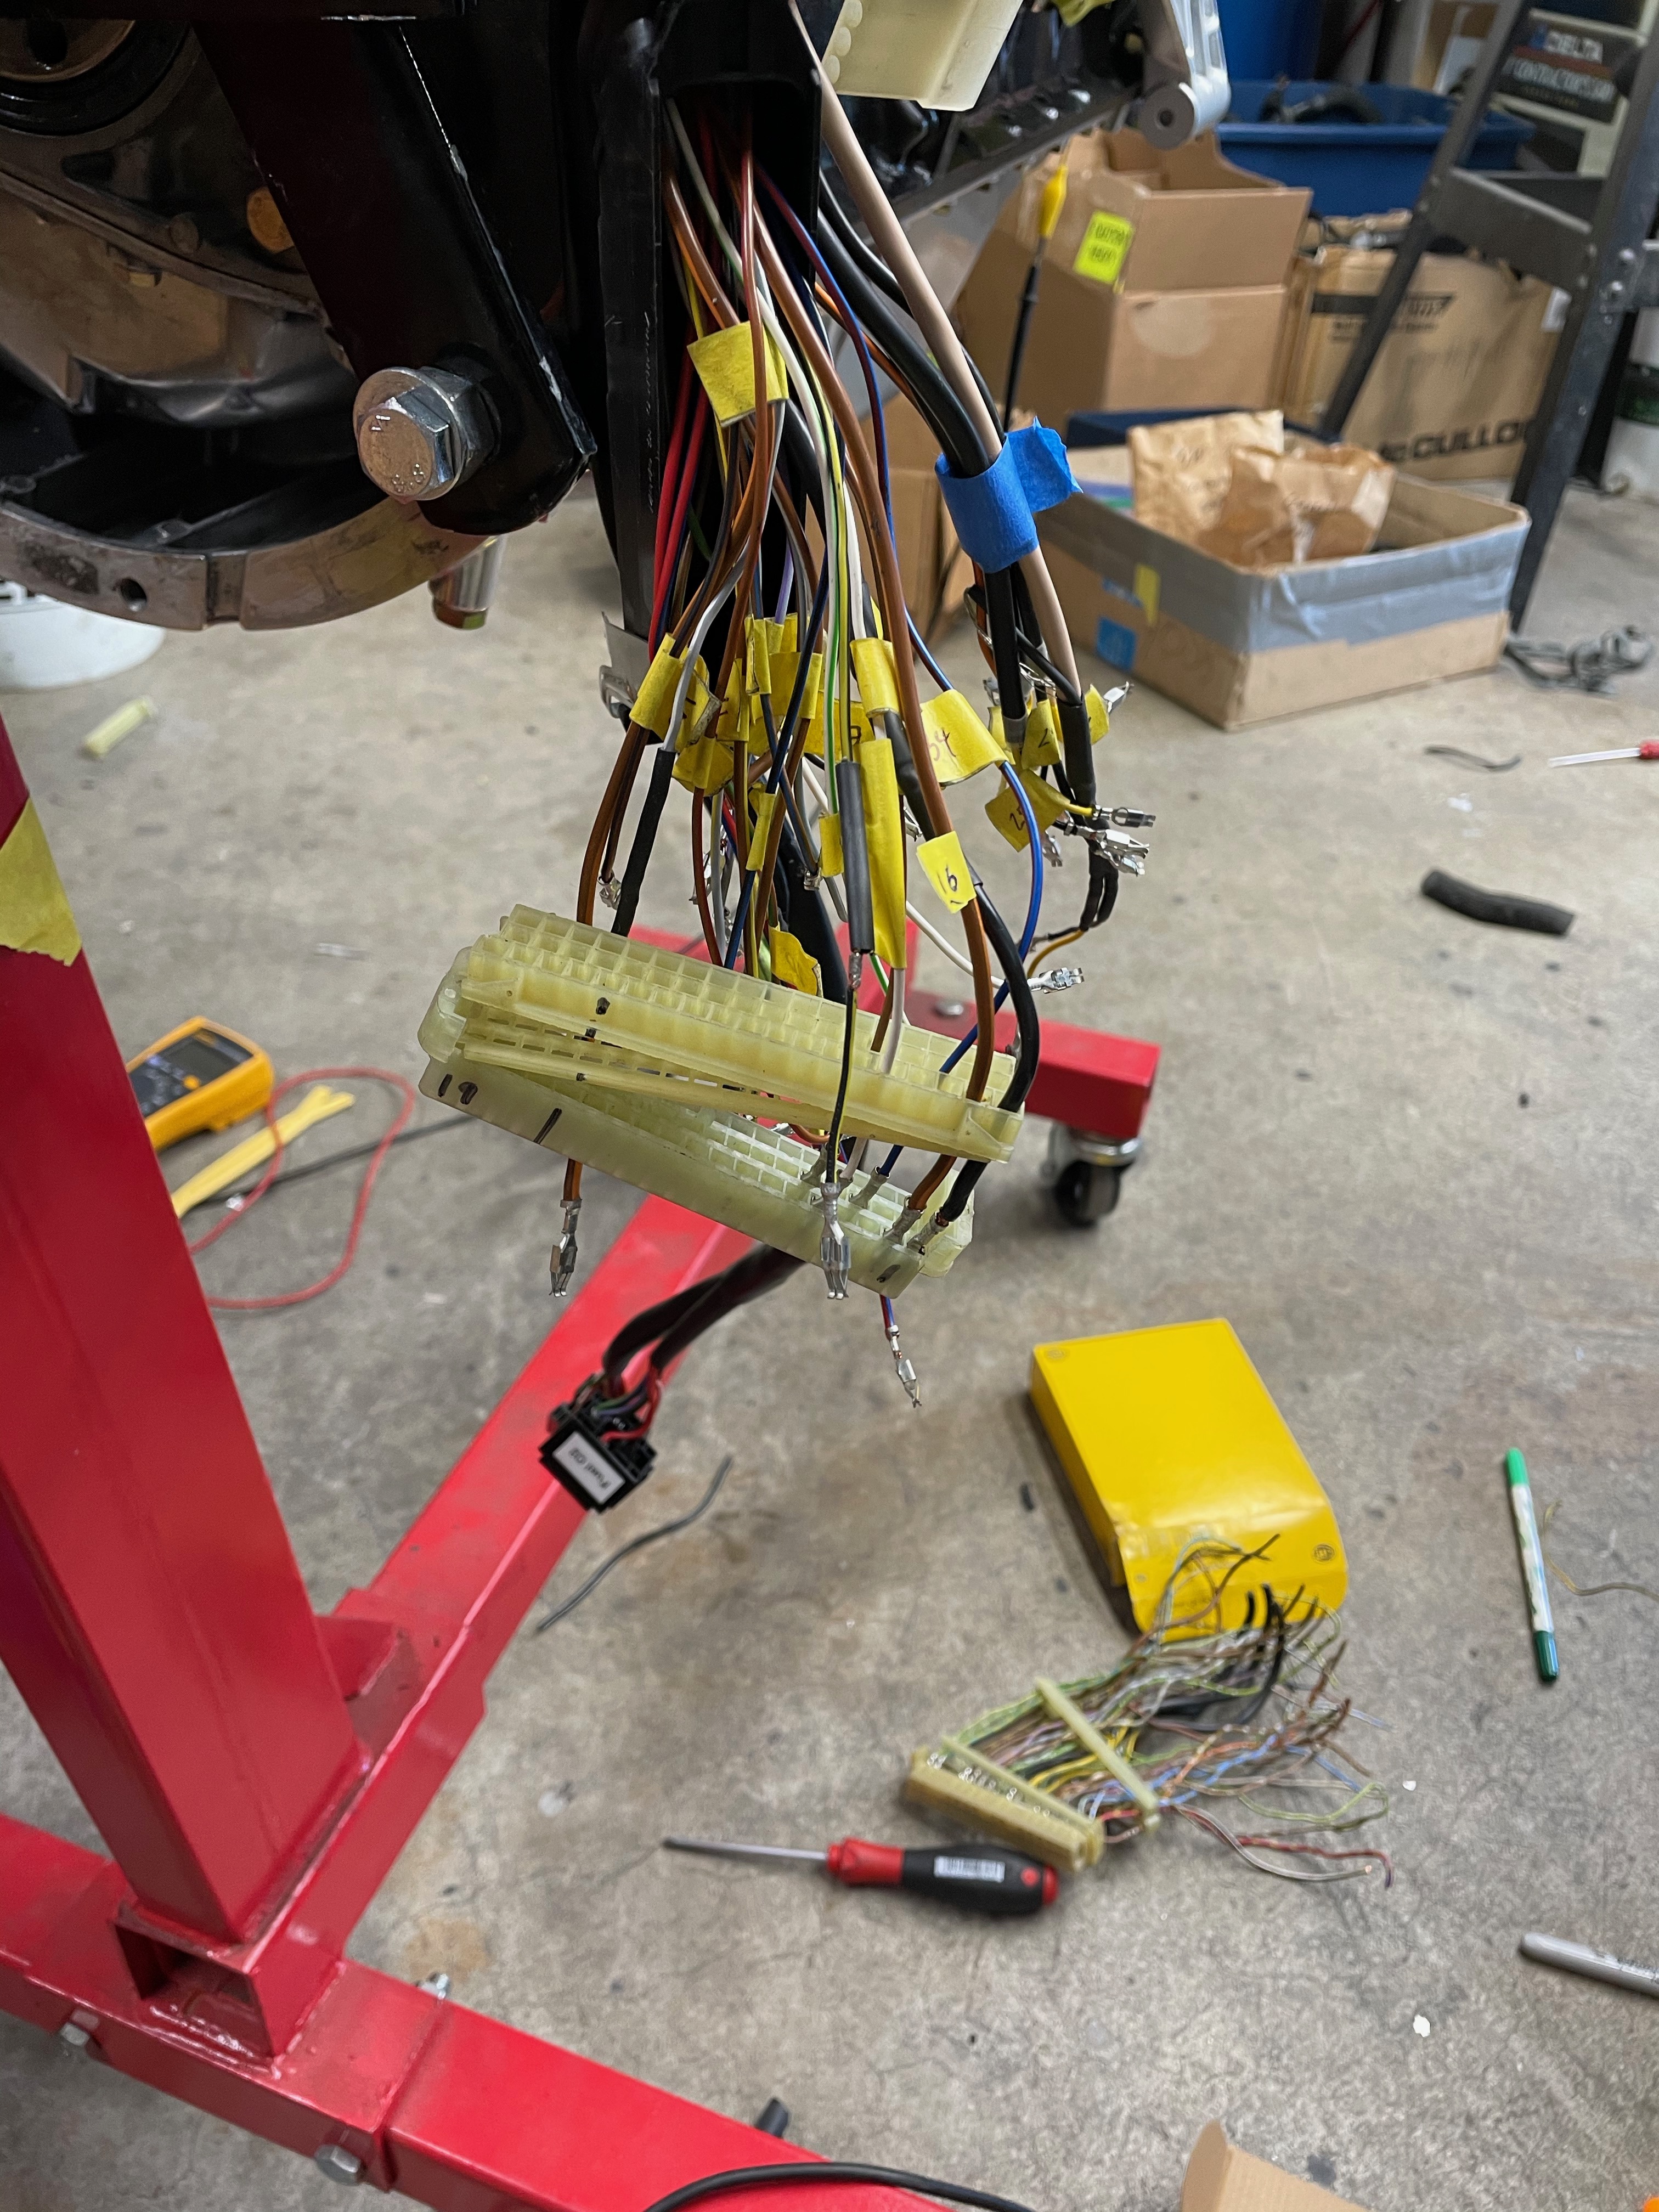
What a relief ... the engine wiring harness is done and the 55-pin connector for the '179 ECU is all wired up, tested and taped clean. Final result:

Image

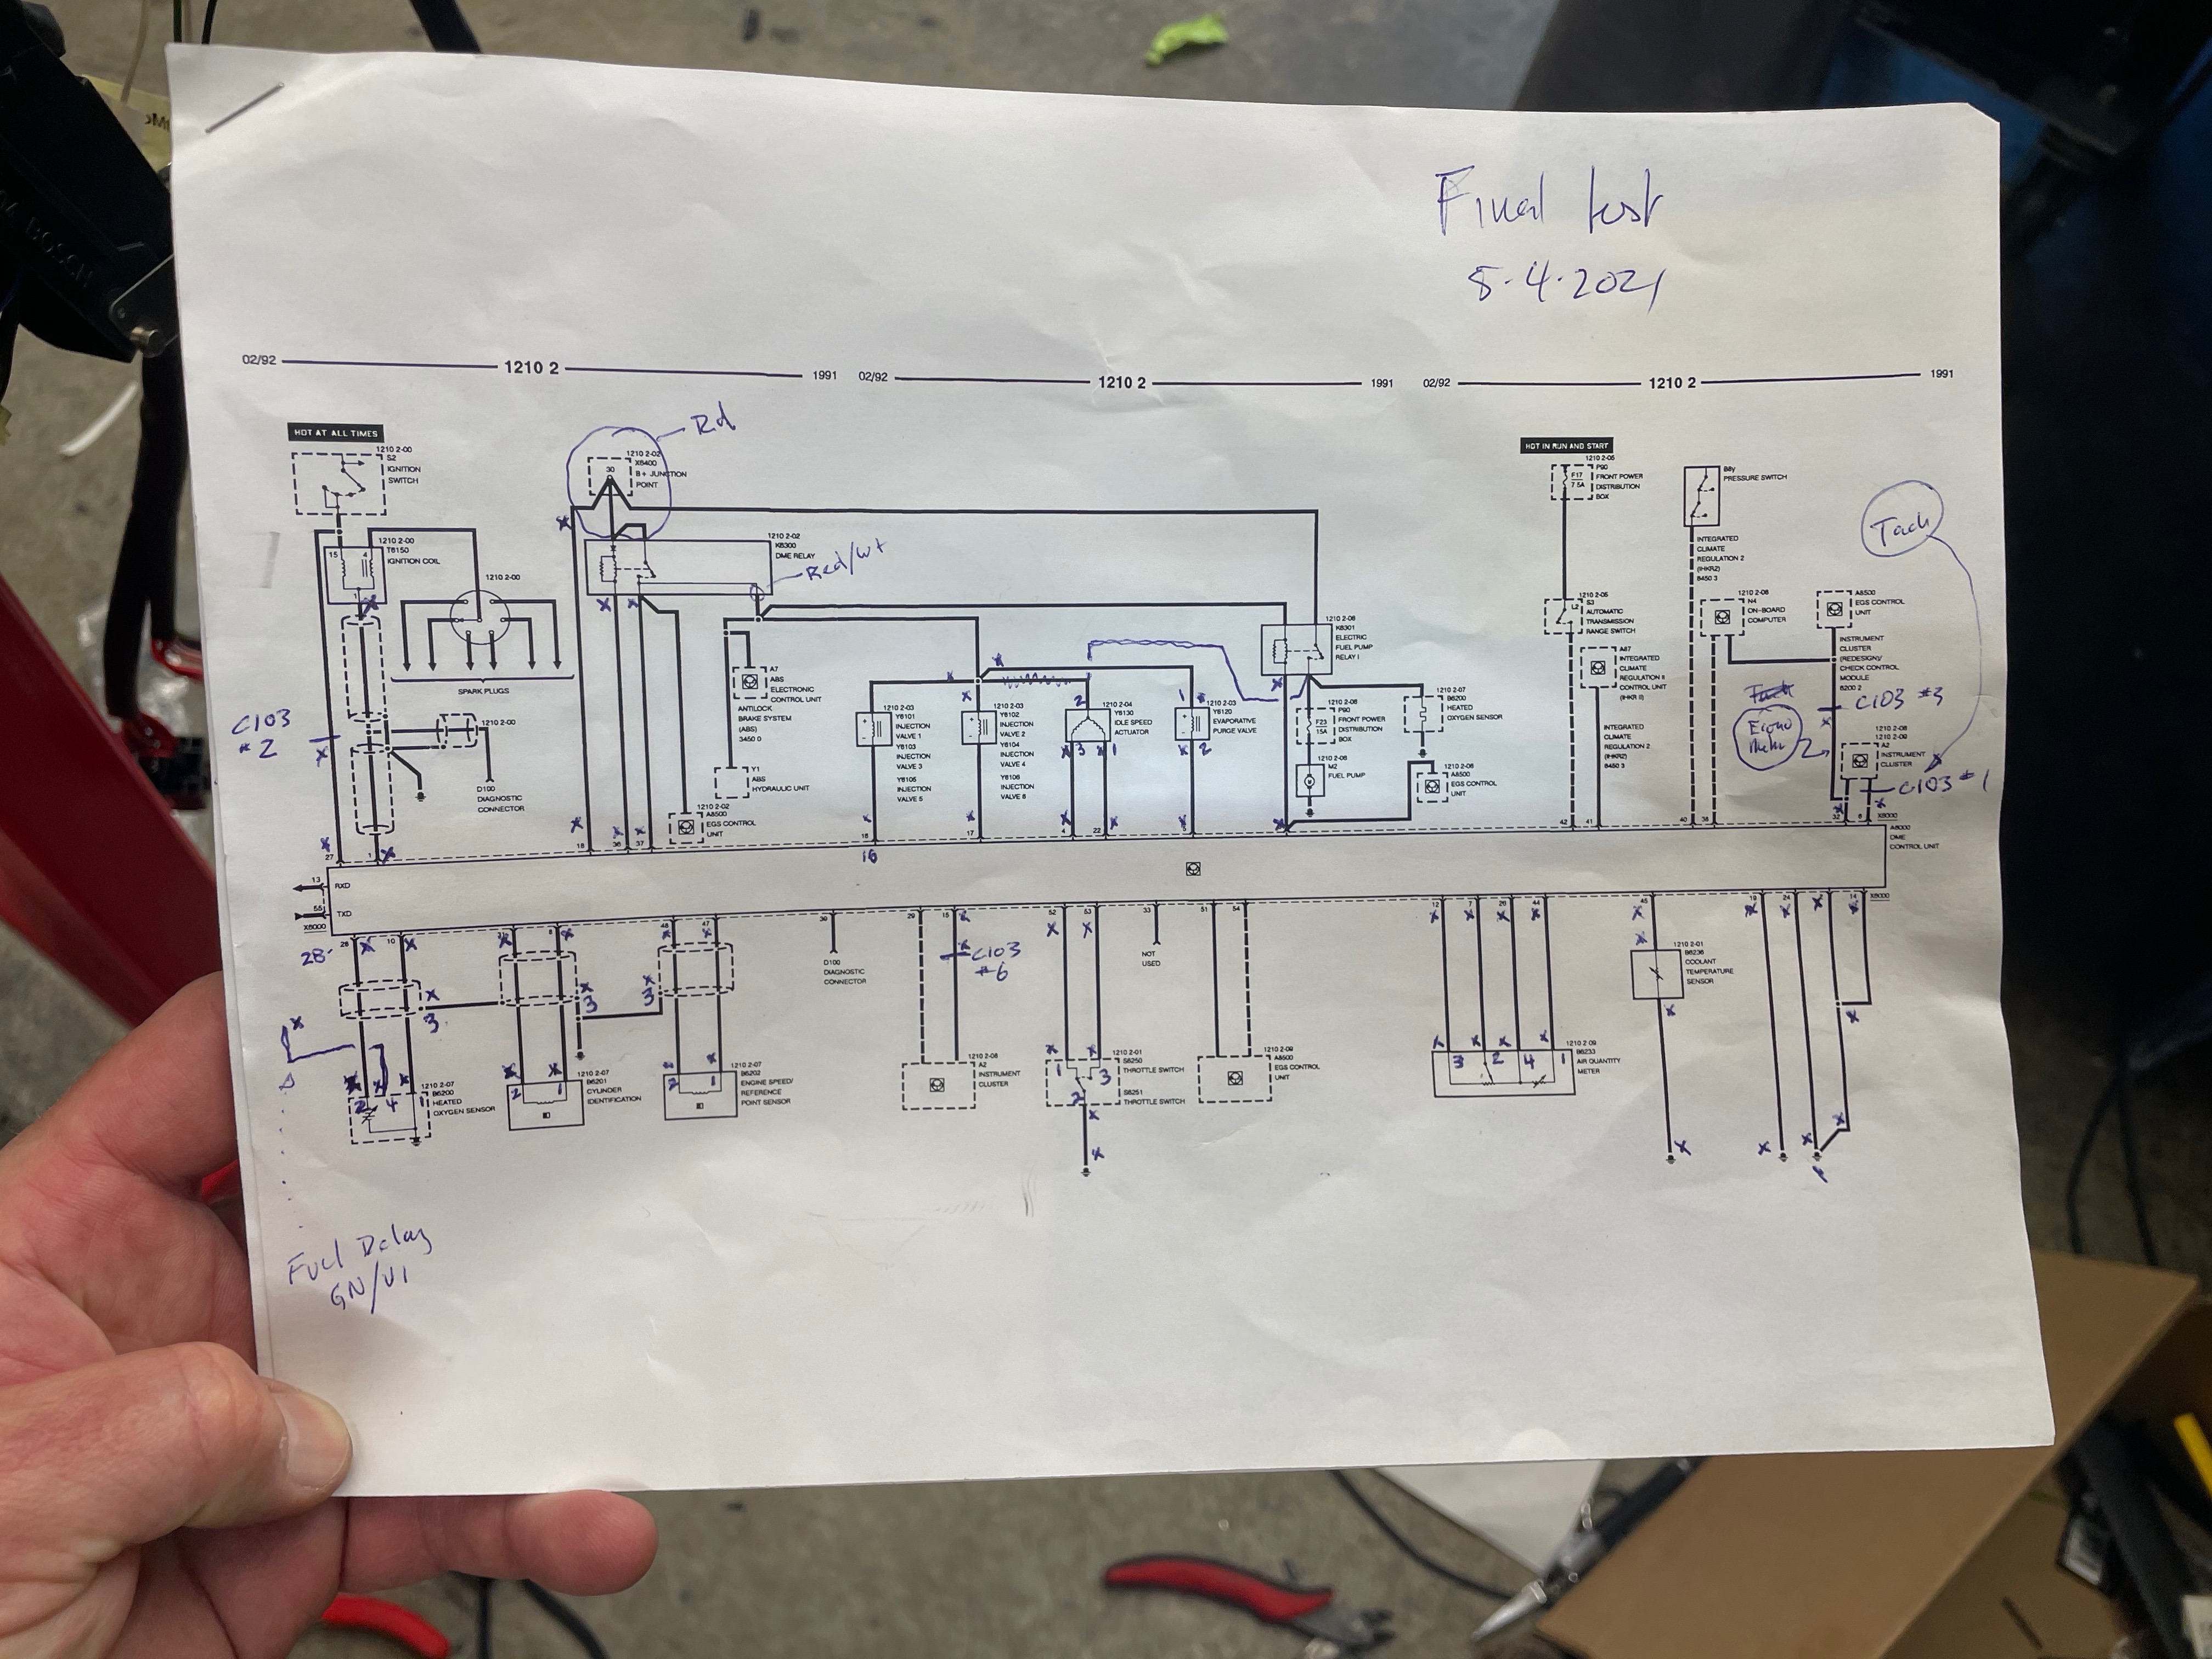
And the diagram I was using to test all the pin connections:

Image

I think I described some of this earlier. De-pinning the 35-pin connector was easy, and most of the components that hook up into the ECU just directly re-map from one set of pins on the 35-pin connector for Motronic 1.0, and get inserted into a new set of pins in the 55-pin connector for Motronic 1.3. There are three exceptions:
  • The logic & wiring for how you start the car is different, requiring rewiring for the ignition switch wires, main relay and the associated wires that go to the ECU. Put another way, I changed the ignition, main relay and associated wiring connections in my harness so that they now work the way they'd work in a Motronic 1.3 writing harness.
  • The old O2 sensor was 3-wire, the new one is 4-wire. There are probably multiple ways to do it, but I "orphaned" the wiring for the old 3-wire set up and installed a new shielded 4-conductor wire in parallel to the old signal wire. (That's the tan wire held in place temporarily by the blue masking tape & running along the side of the engine harness in the pics below.) That allowed me to use the new style 4-pin screw-in connector and the separate B35-style connector for the heater circuit.
  • The ever purge vale & barometric presser sensor in the M5 sit at the far front-right of the engine compartment at the end of a long section of the engine harness. The old set up (separate purge vale & purge vale relay + the barometric sensor) aren't needed, and all I wanted was a simple 2-wire set up to run to the new-style purge valve. Because that section of the harness is so long, I couldn't thread new wires inside, and I didn't want to run separate wires on the outside of the loom, so I repurposed a couple of the now unused wires in there and re-routed them so they'd work with the new purge valve. I then added a new Bosch 2-wire connector at the end of that section of the wiring harness.
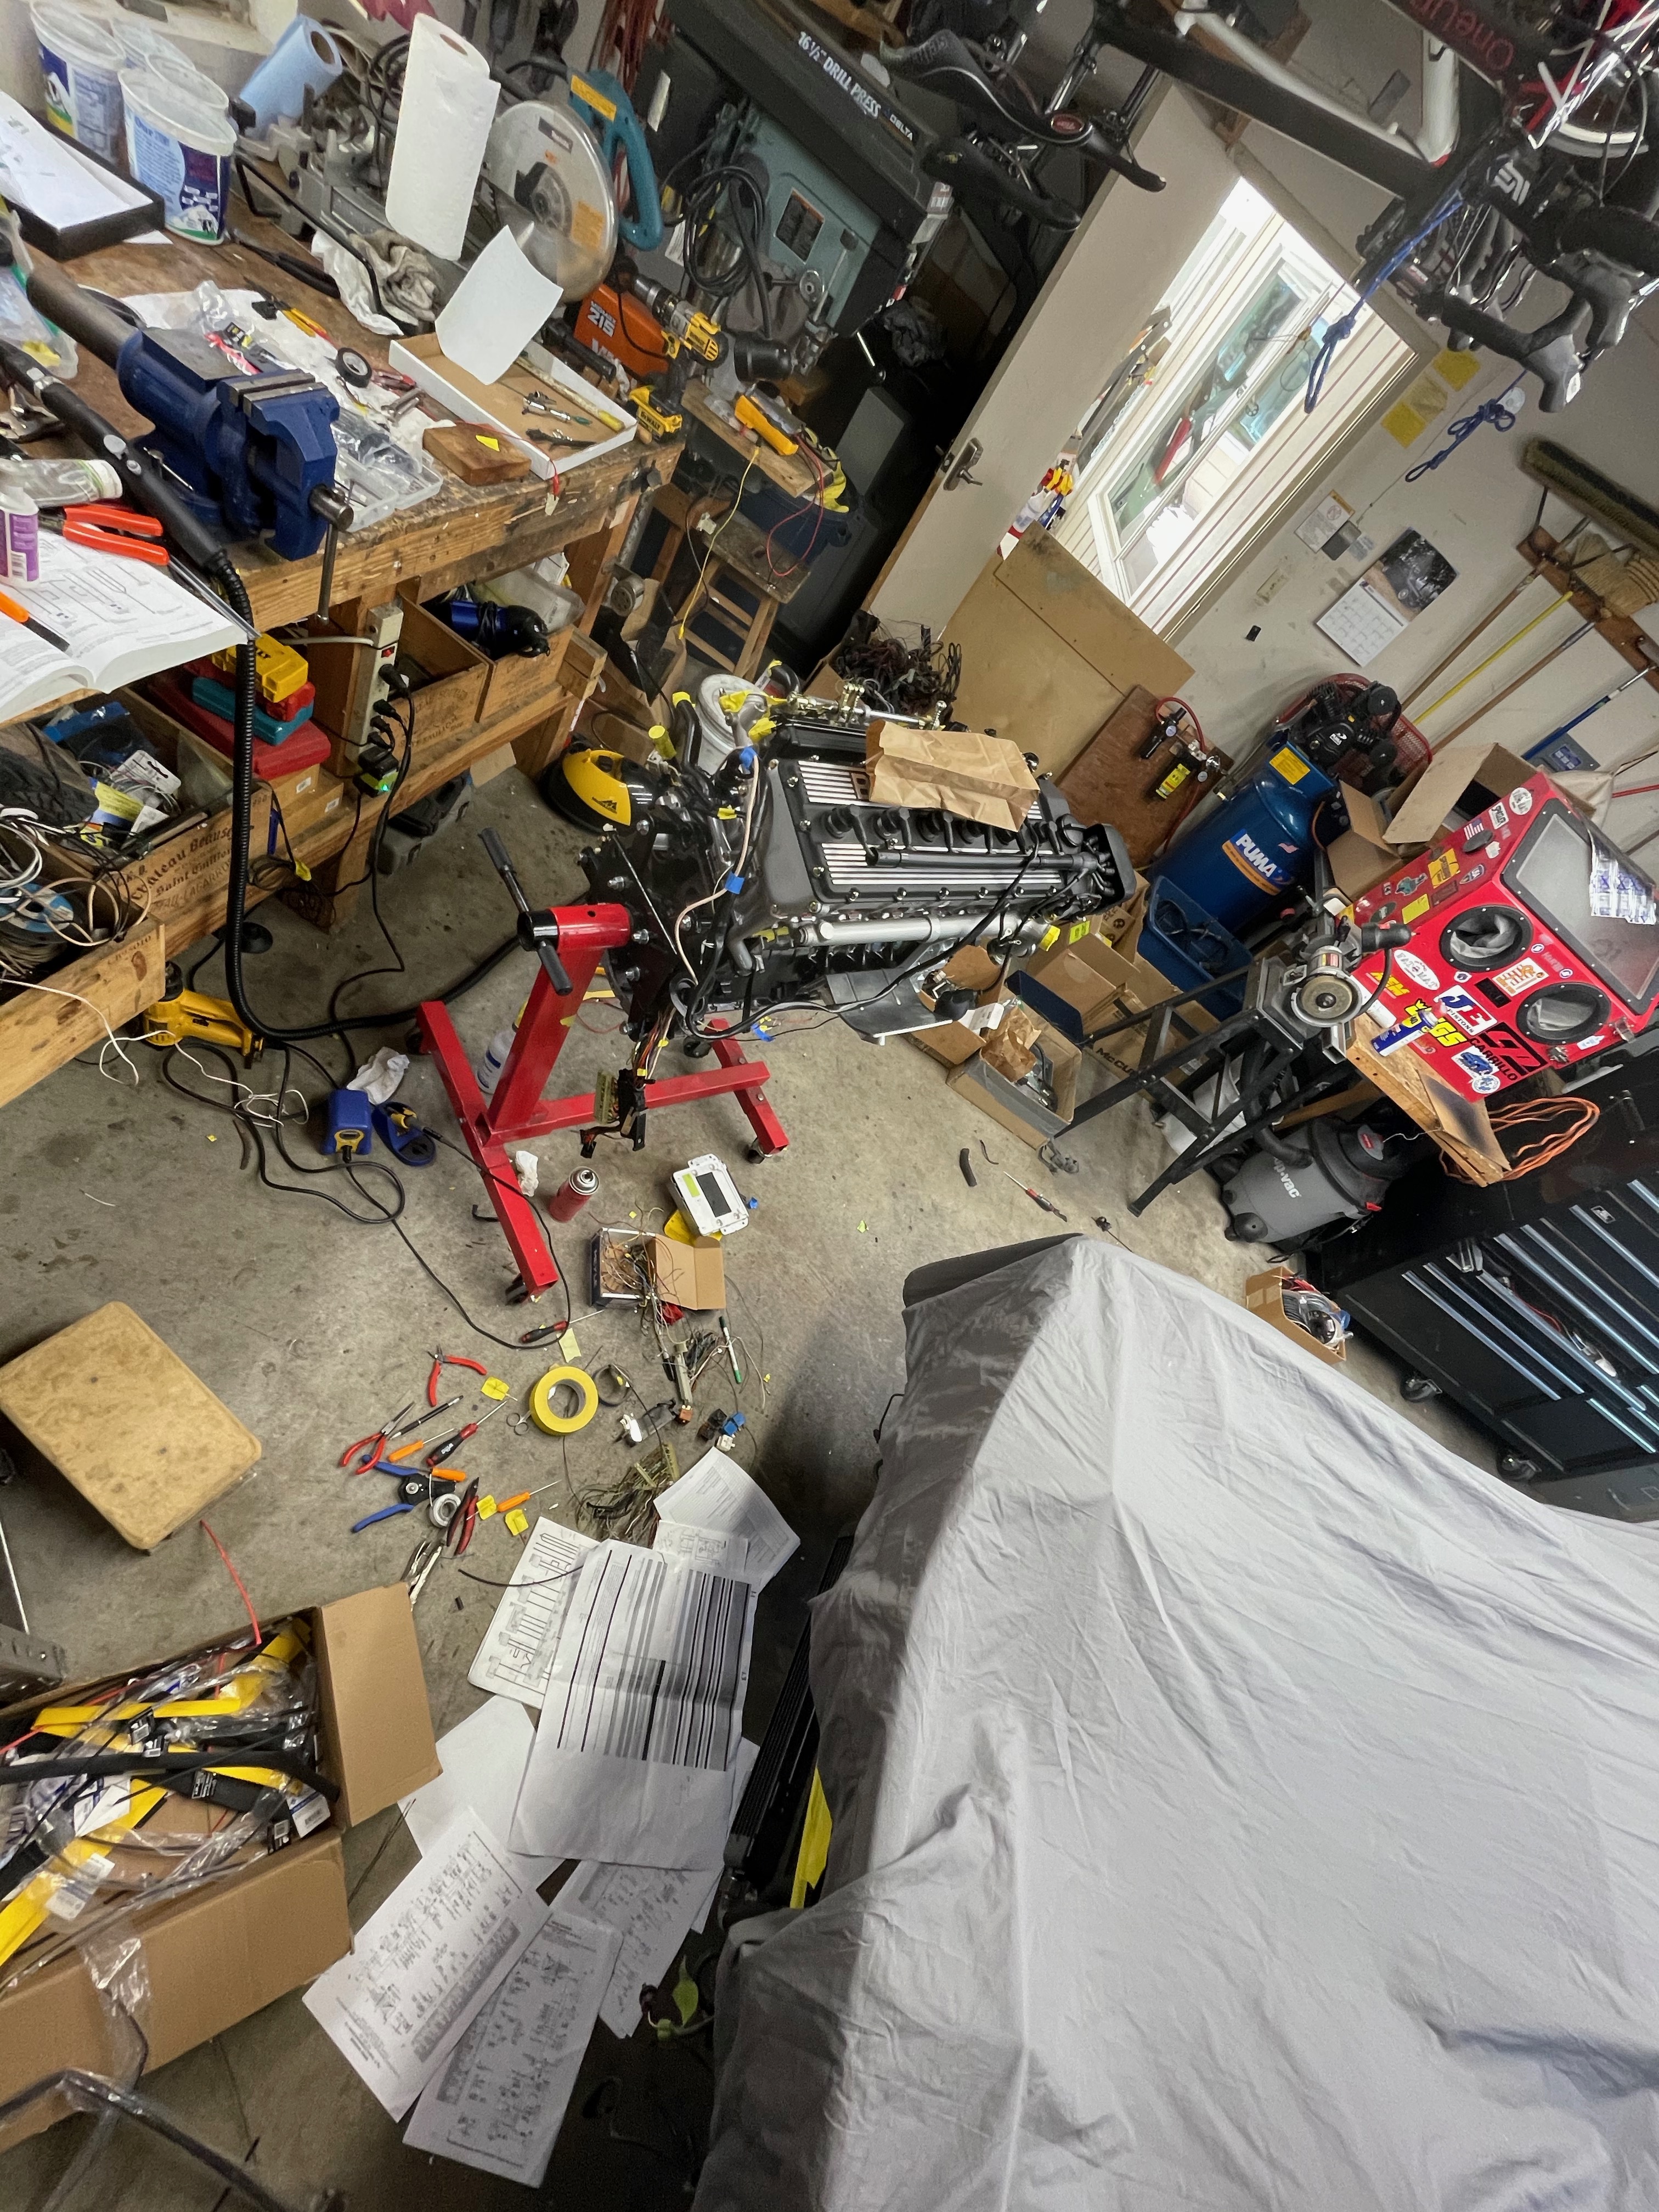
Other than that, it really was basically just moving pins from one connector to the other. In a couple cases, I found it was best to add an extension to the existing wire, but mostly this is a plug-n-play swap. Mostly. Not that I didn't sit there for a few long days shuffling between four different wiring diagrams.

It felt pretty chaotic while I was actually doing the work, but I think the end result came out pretty neat & clean.

Image

Image

One challenge that I'll figure out later is that the 35-pin connector comes out of the ECU with the wiring pigtail facing 180 degrees in the opposite direction from where the 55-pin connector will come out of the new ECU. I'll solve that either by mounting the ECU flipped upside down, or (more likely), by rotating the ECU a bit. We'll see.

Anyhow, the engine is ready to go in permanently! Which is exciting all by itself, but also means I'll get a bunch of room back in the garage.
jhh925
Posts: 917
Joined: Jul 11, 2015 12:23 AM
Location: Reno

Re: Rebuilding My 1988 US-spec M5

Post by jhh925 »

Making progress, getting closer to that first start. Here's what I've gotten done recently:

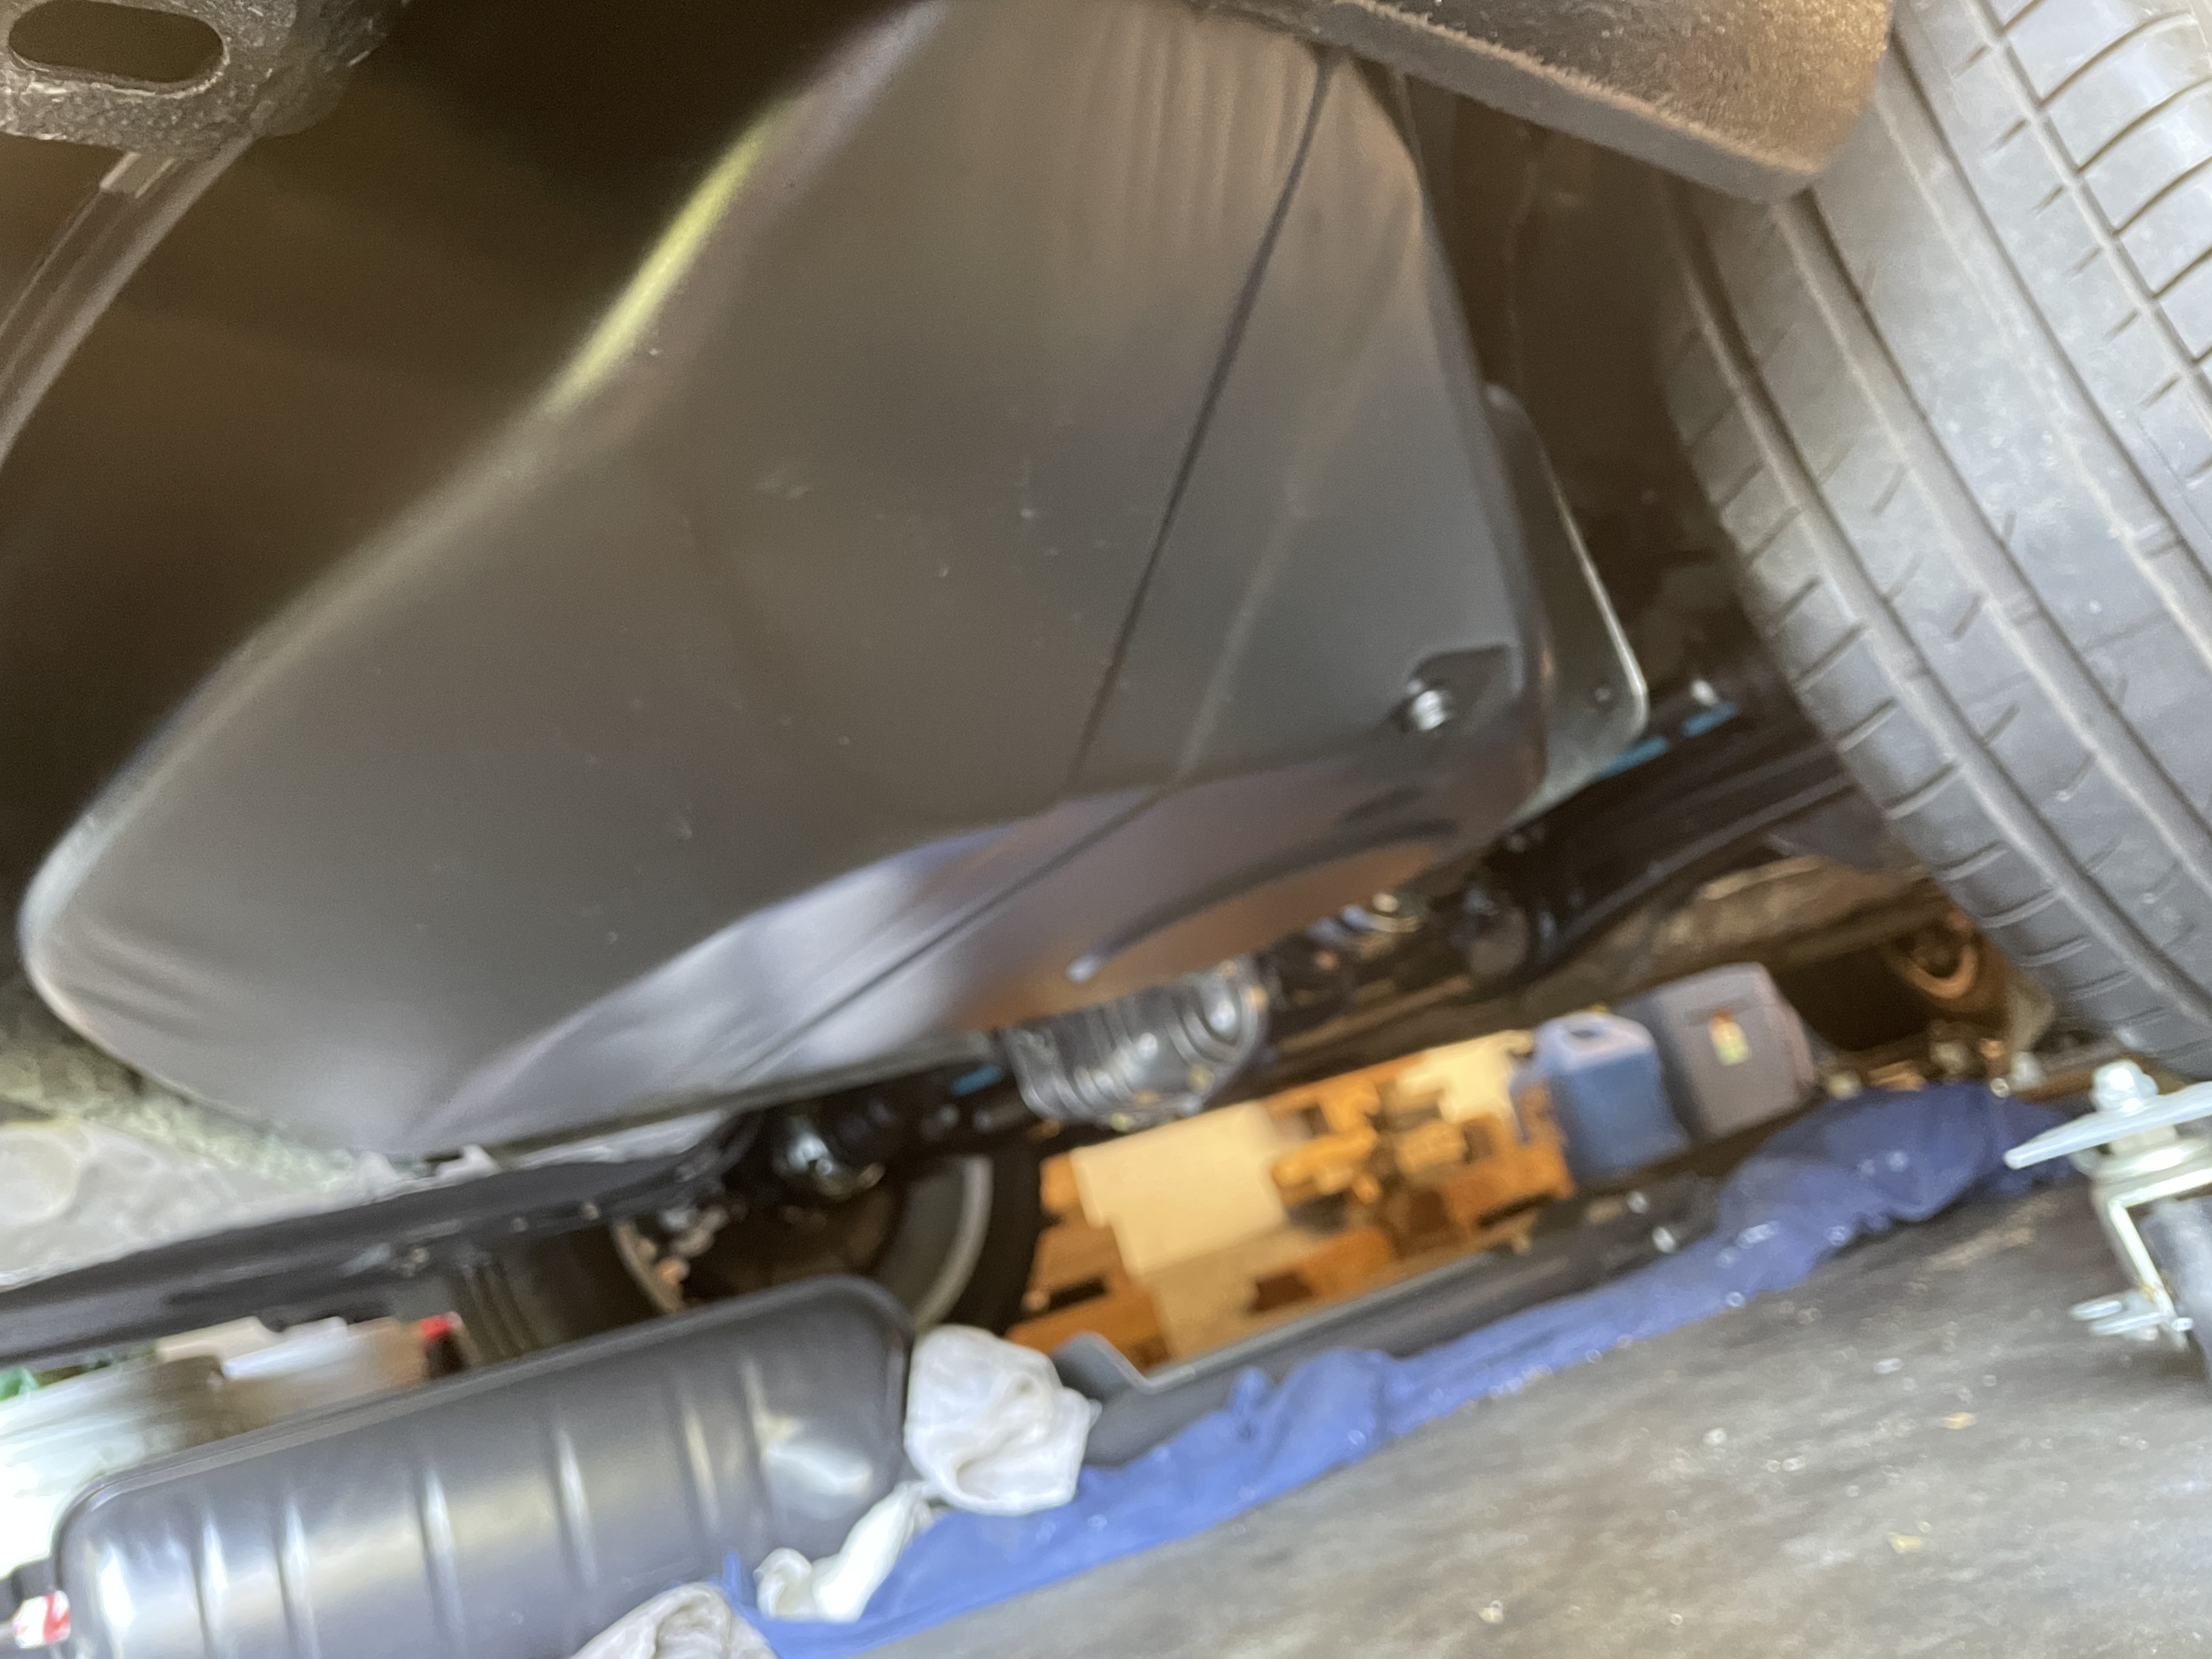
I painted the gas tank (SprayMax 2k "Hot Rod Black" paint - hoping it's a bit harder & tougher than the SEM trim black) and then installed it.

Gas tank installed:

Image

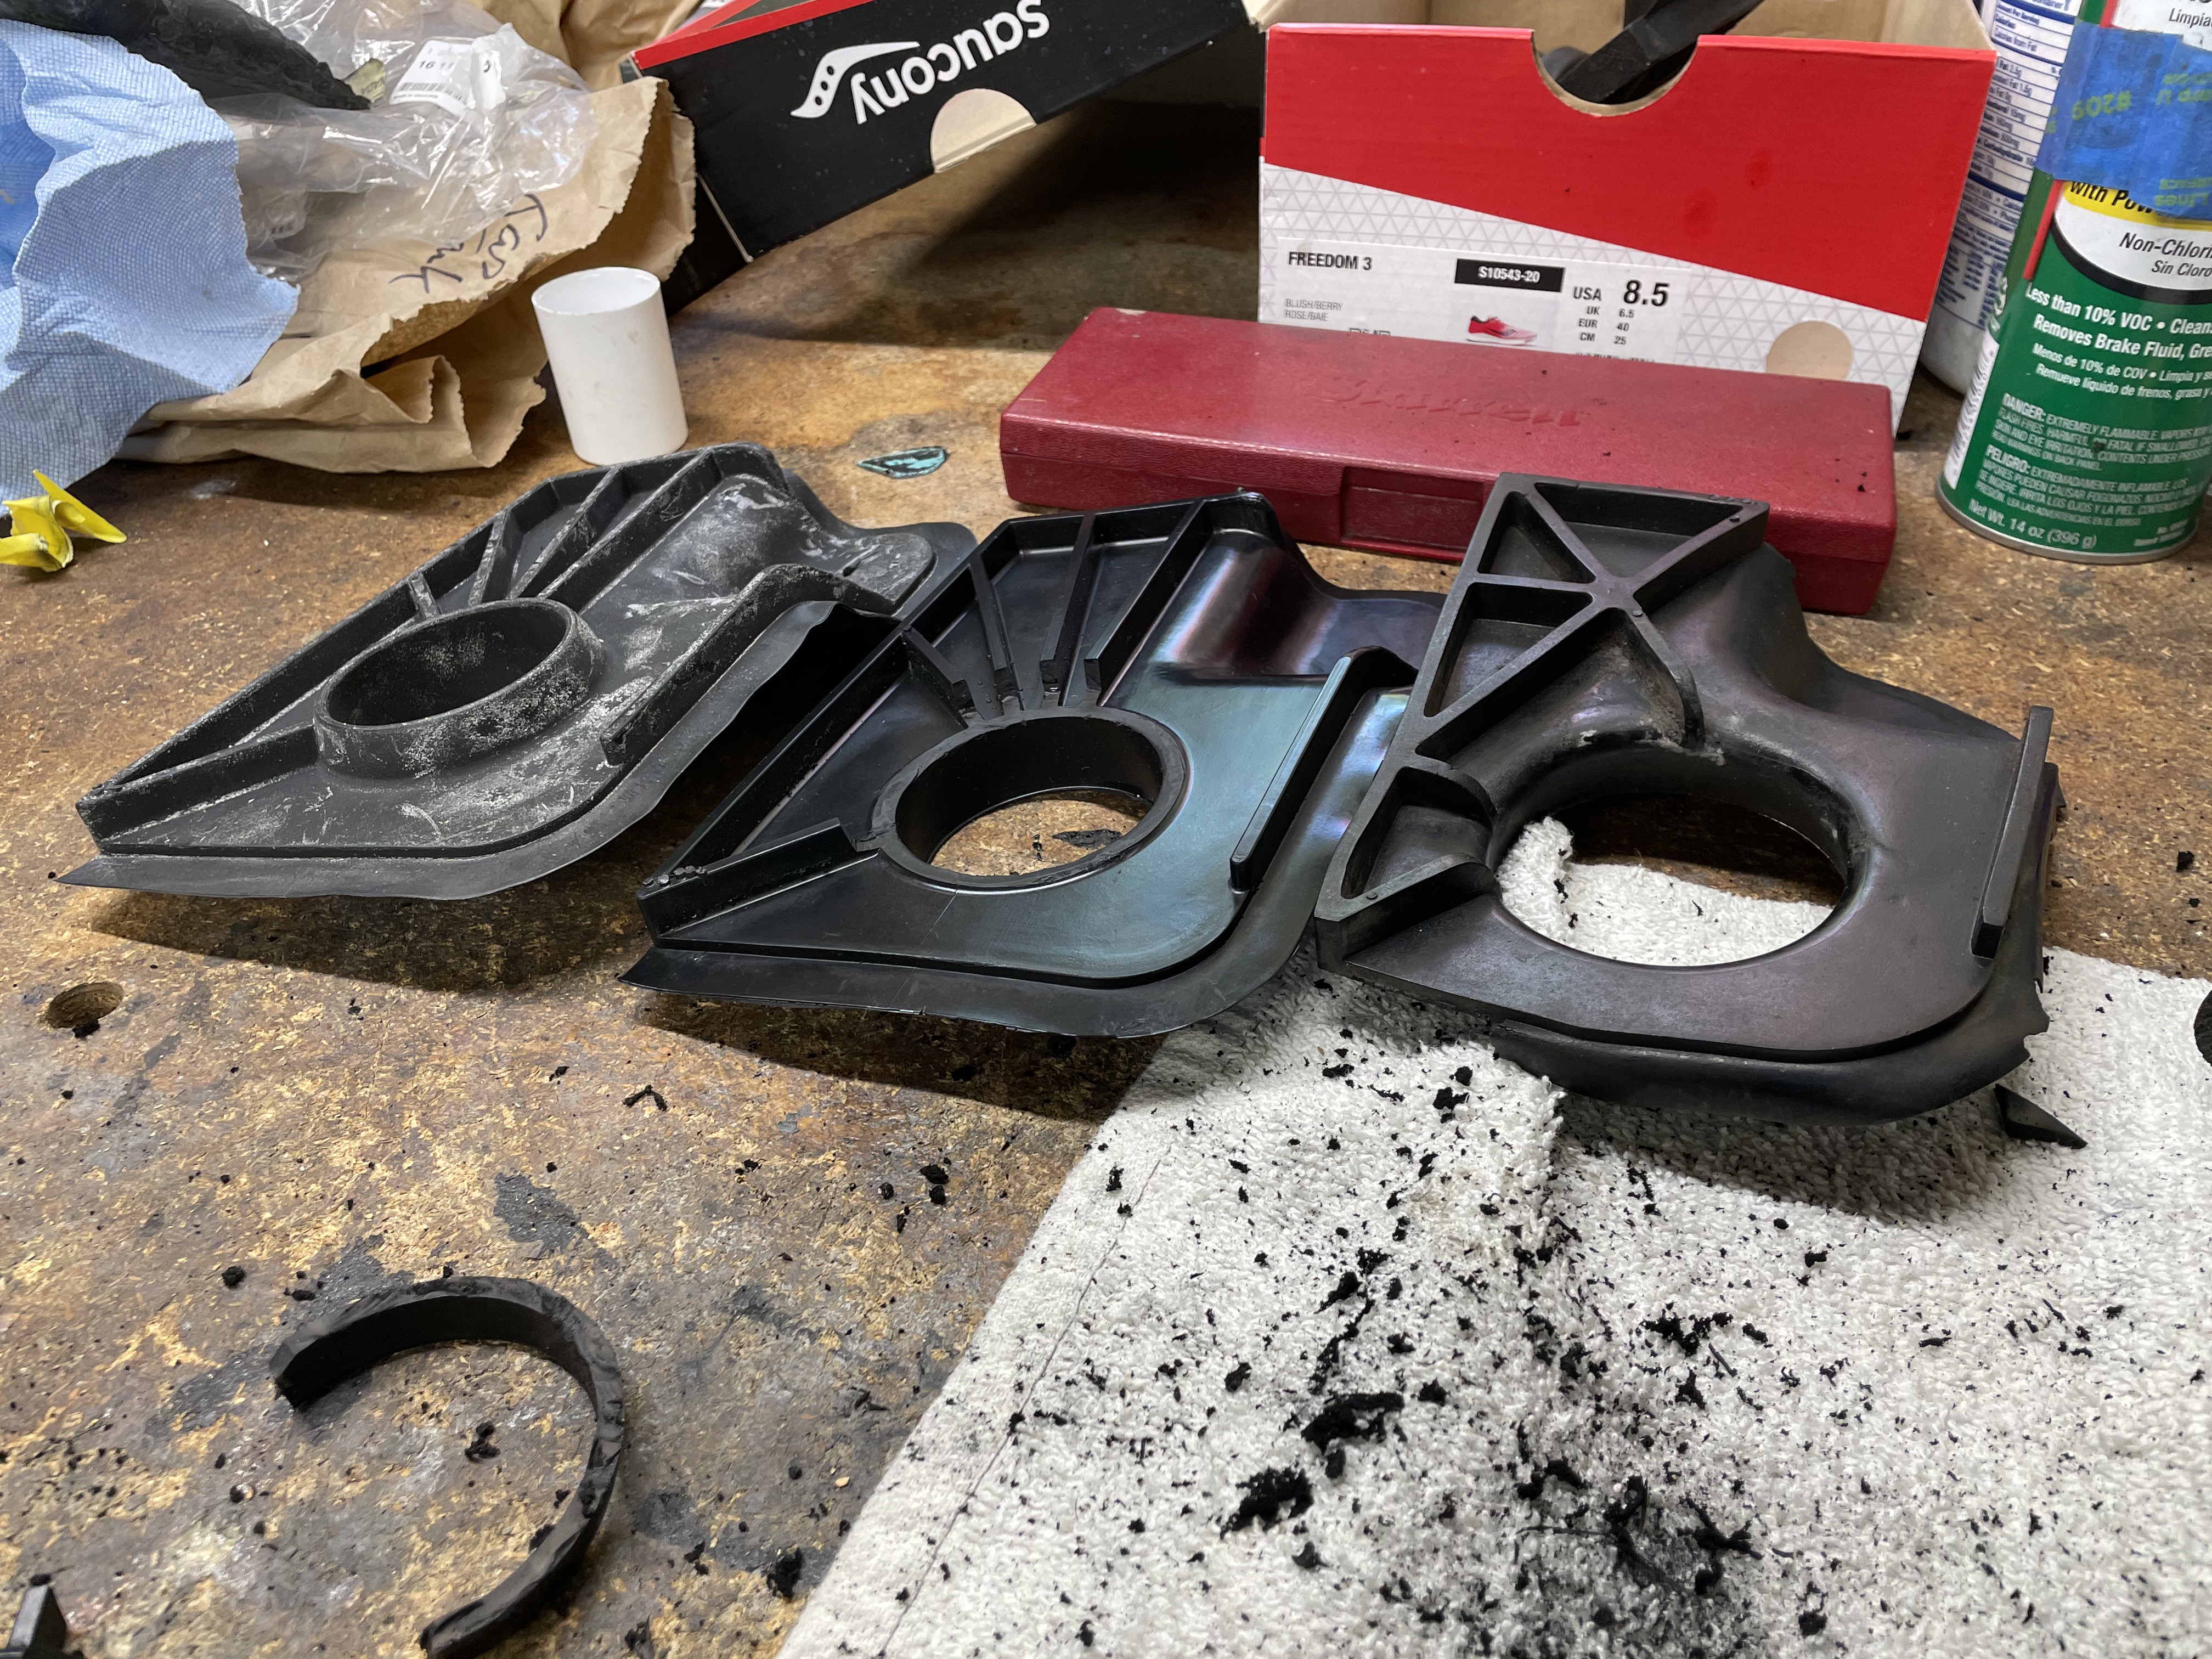
I also really wanted to replace that rubber "floor" by the gas cap, but the correct E28 part is long since NLA, so I modified the version for the E24 (which is still available). It's not perfect, but it's pretty close! Three rubber seals for the gas filler neck (from L to R): unmodified E24, modified E24, my original E28.

Image

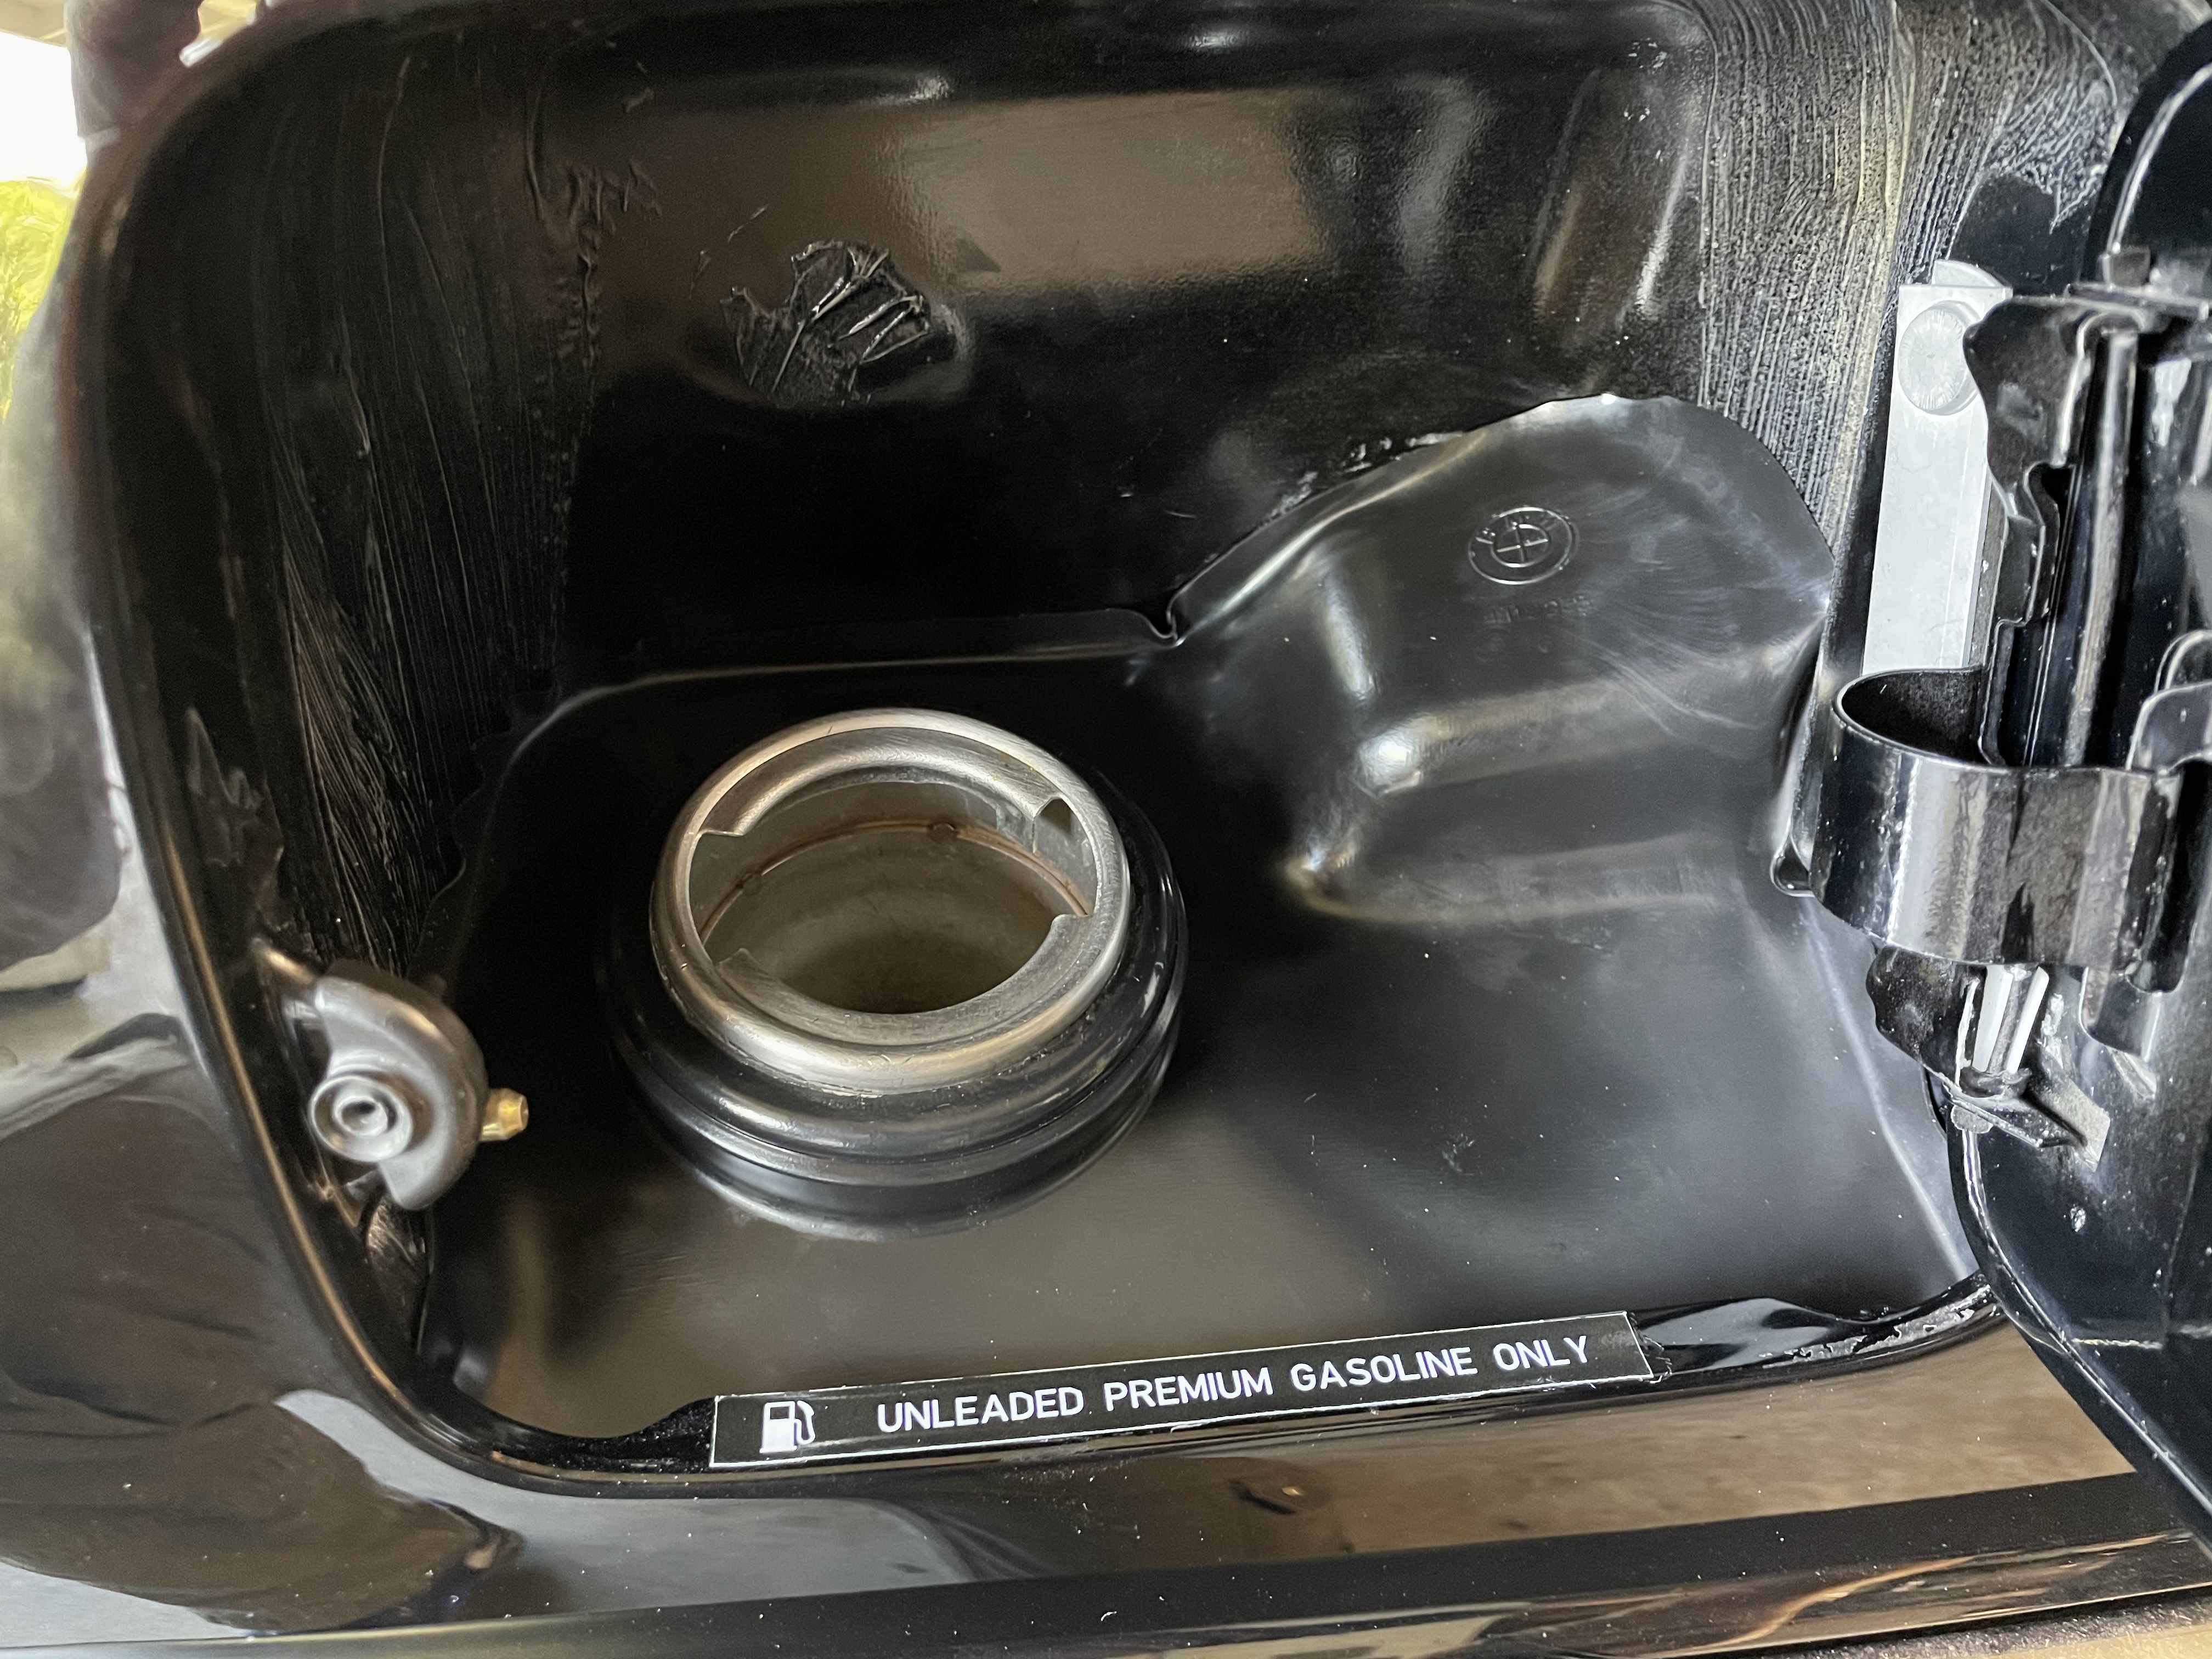
And here's the final fit in the car:

Image

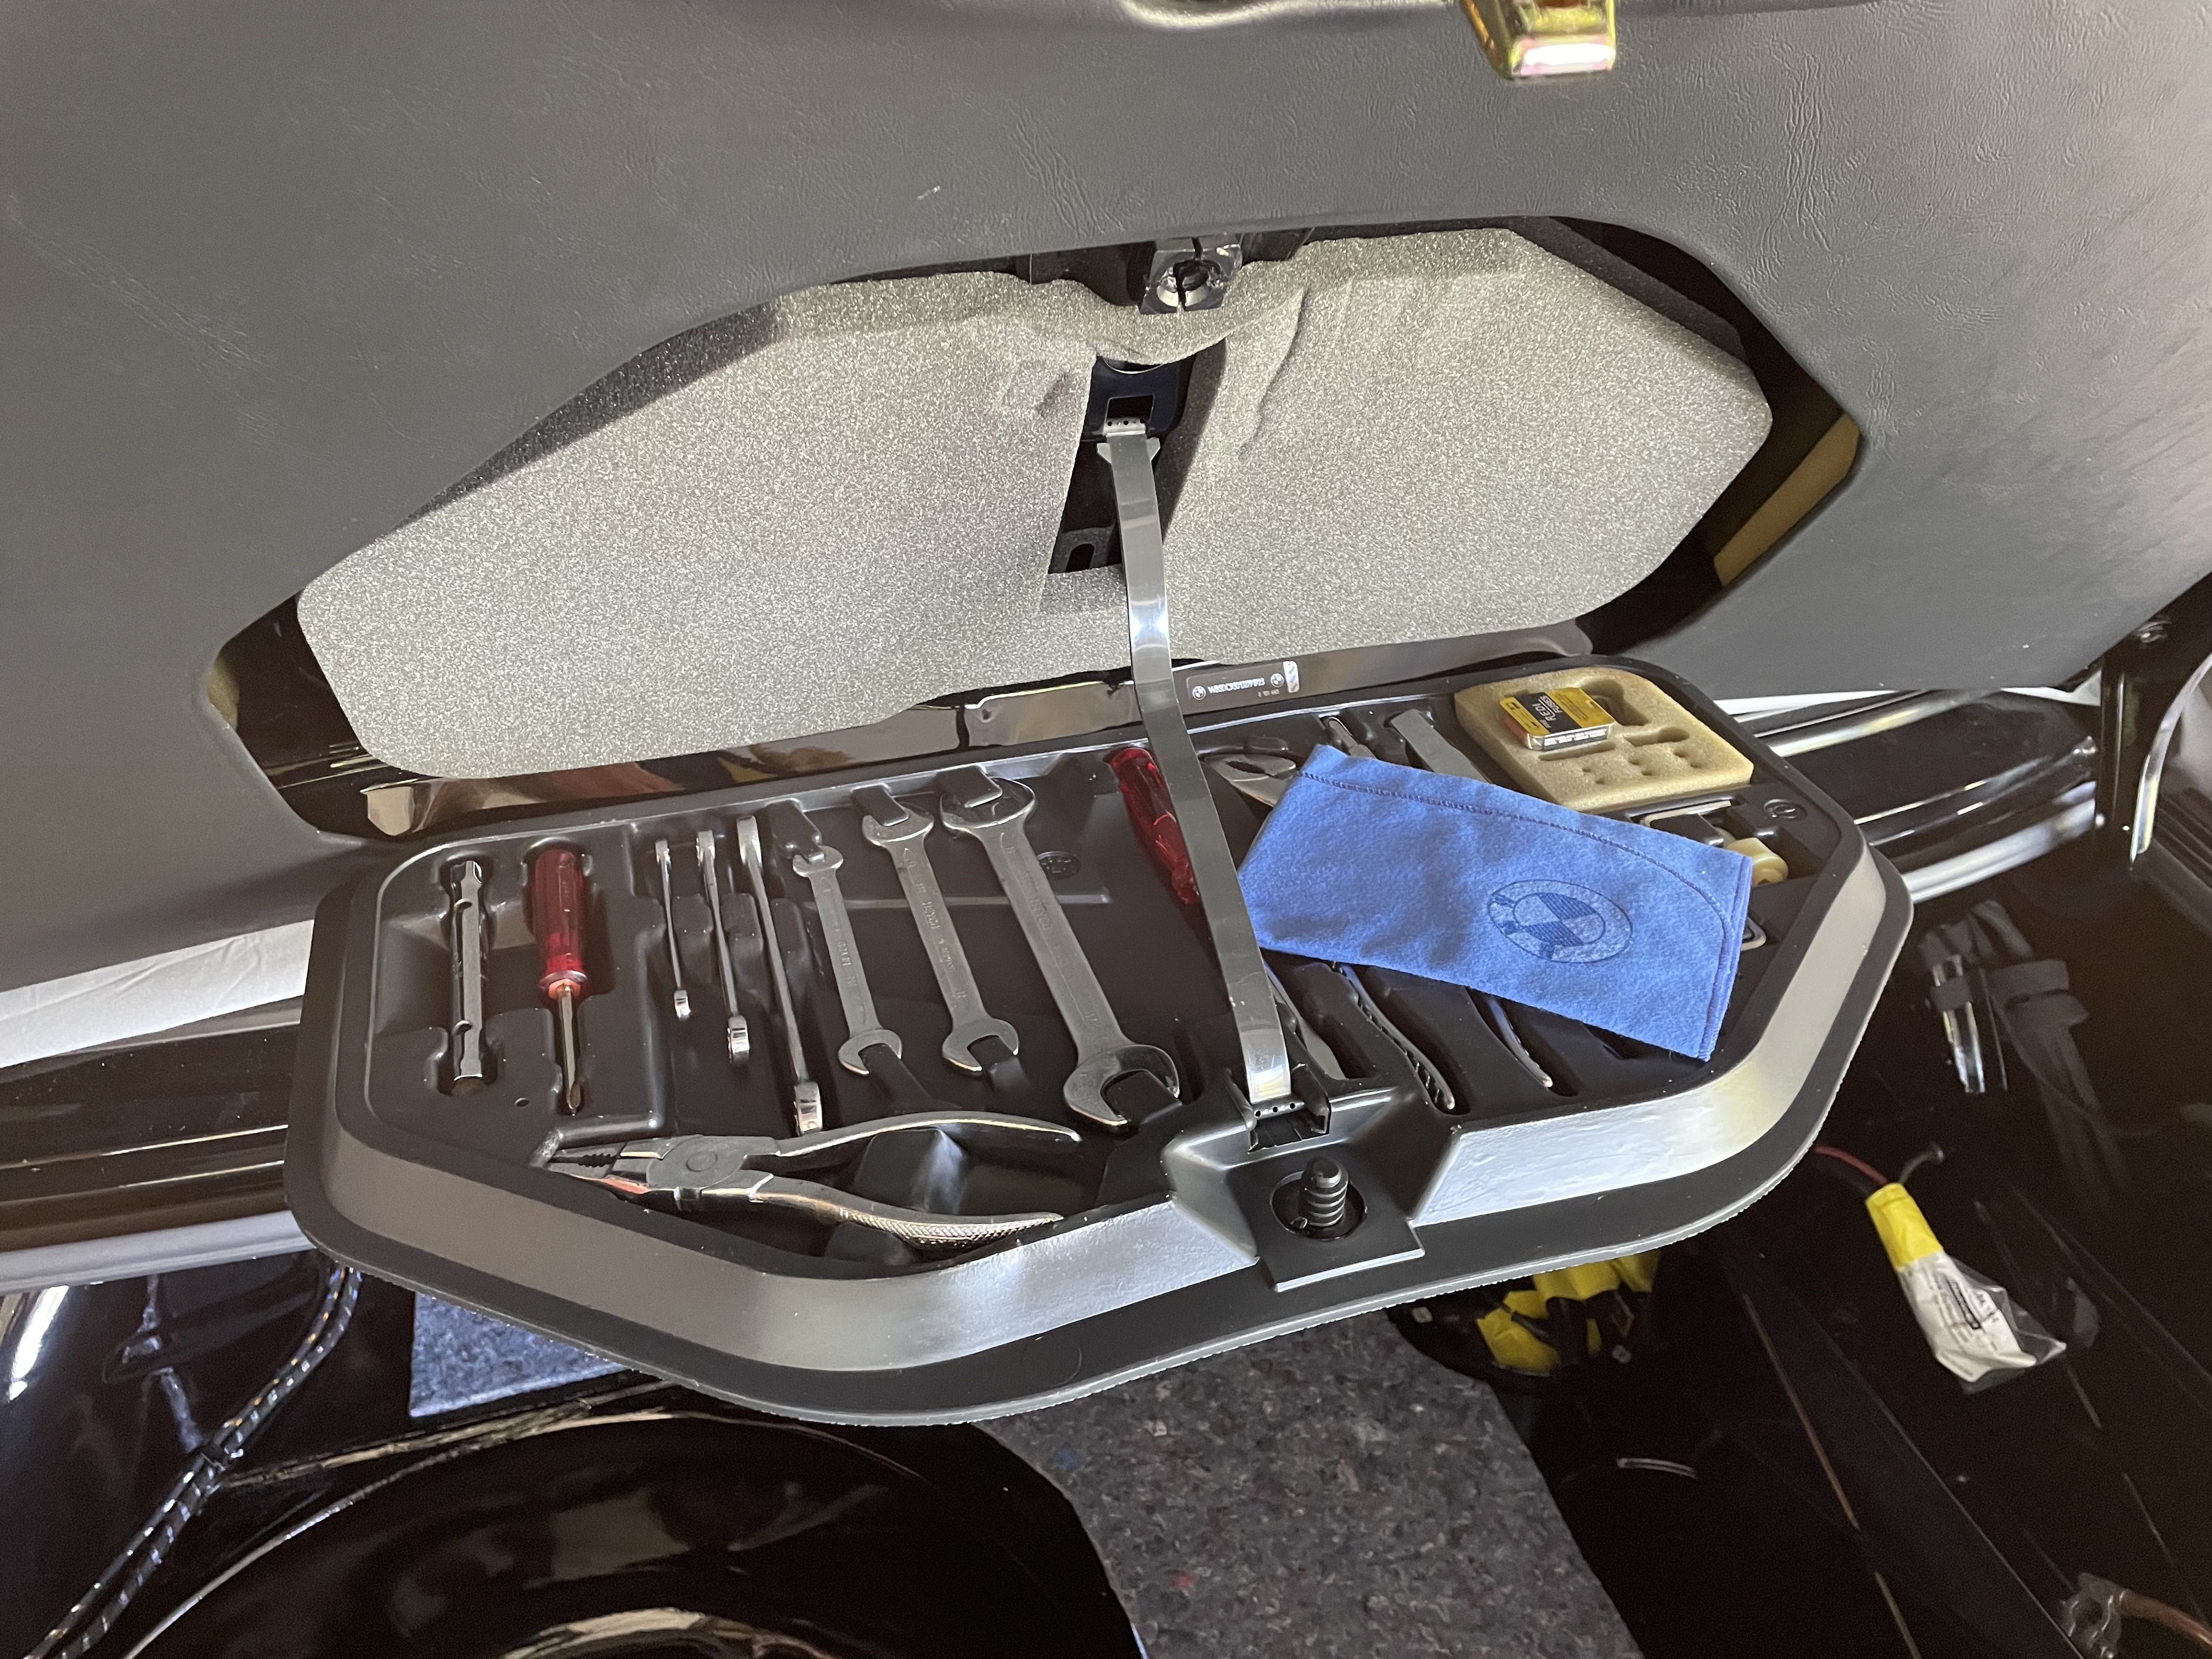
I also jumped ahead a bit and put my tools back - blue rag courtesy of Ivo:

Image

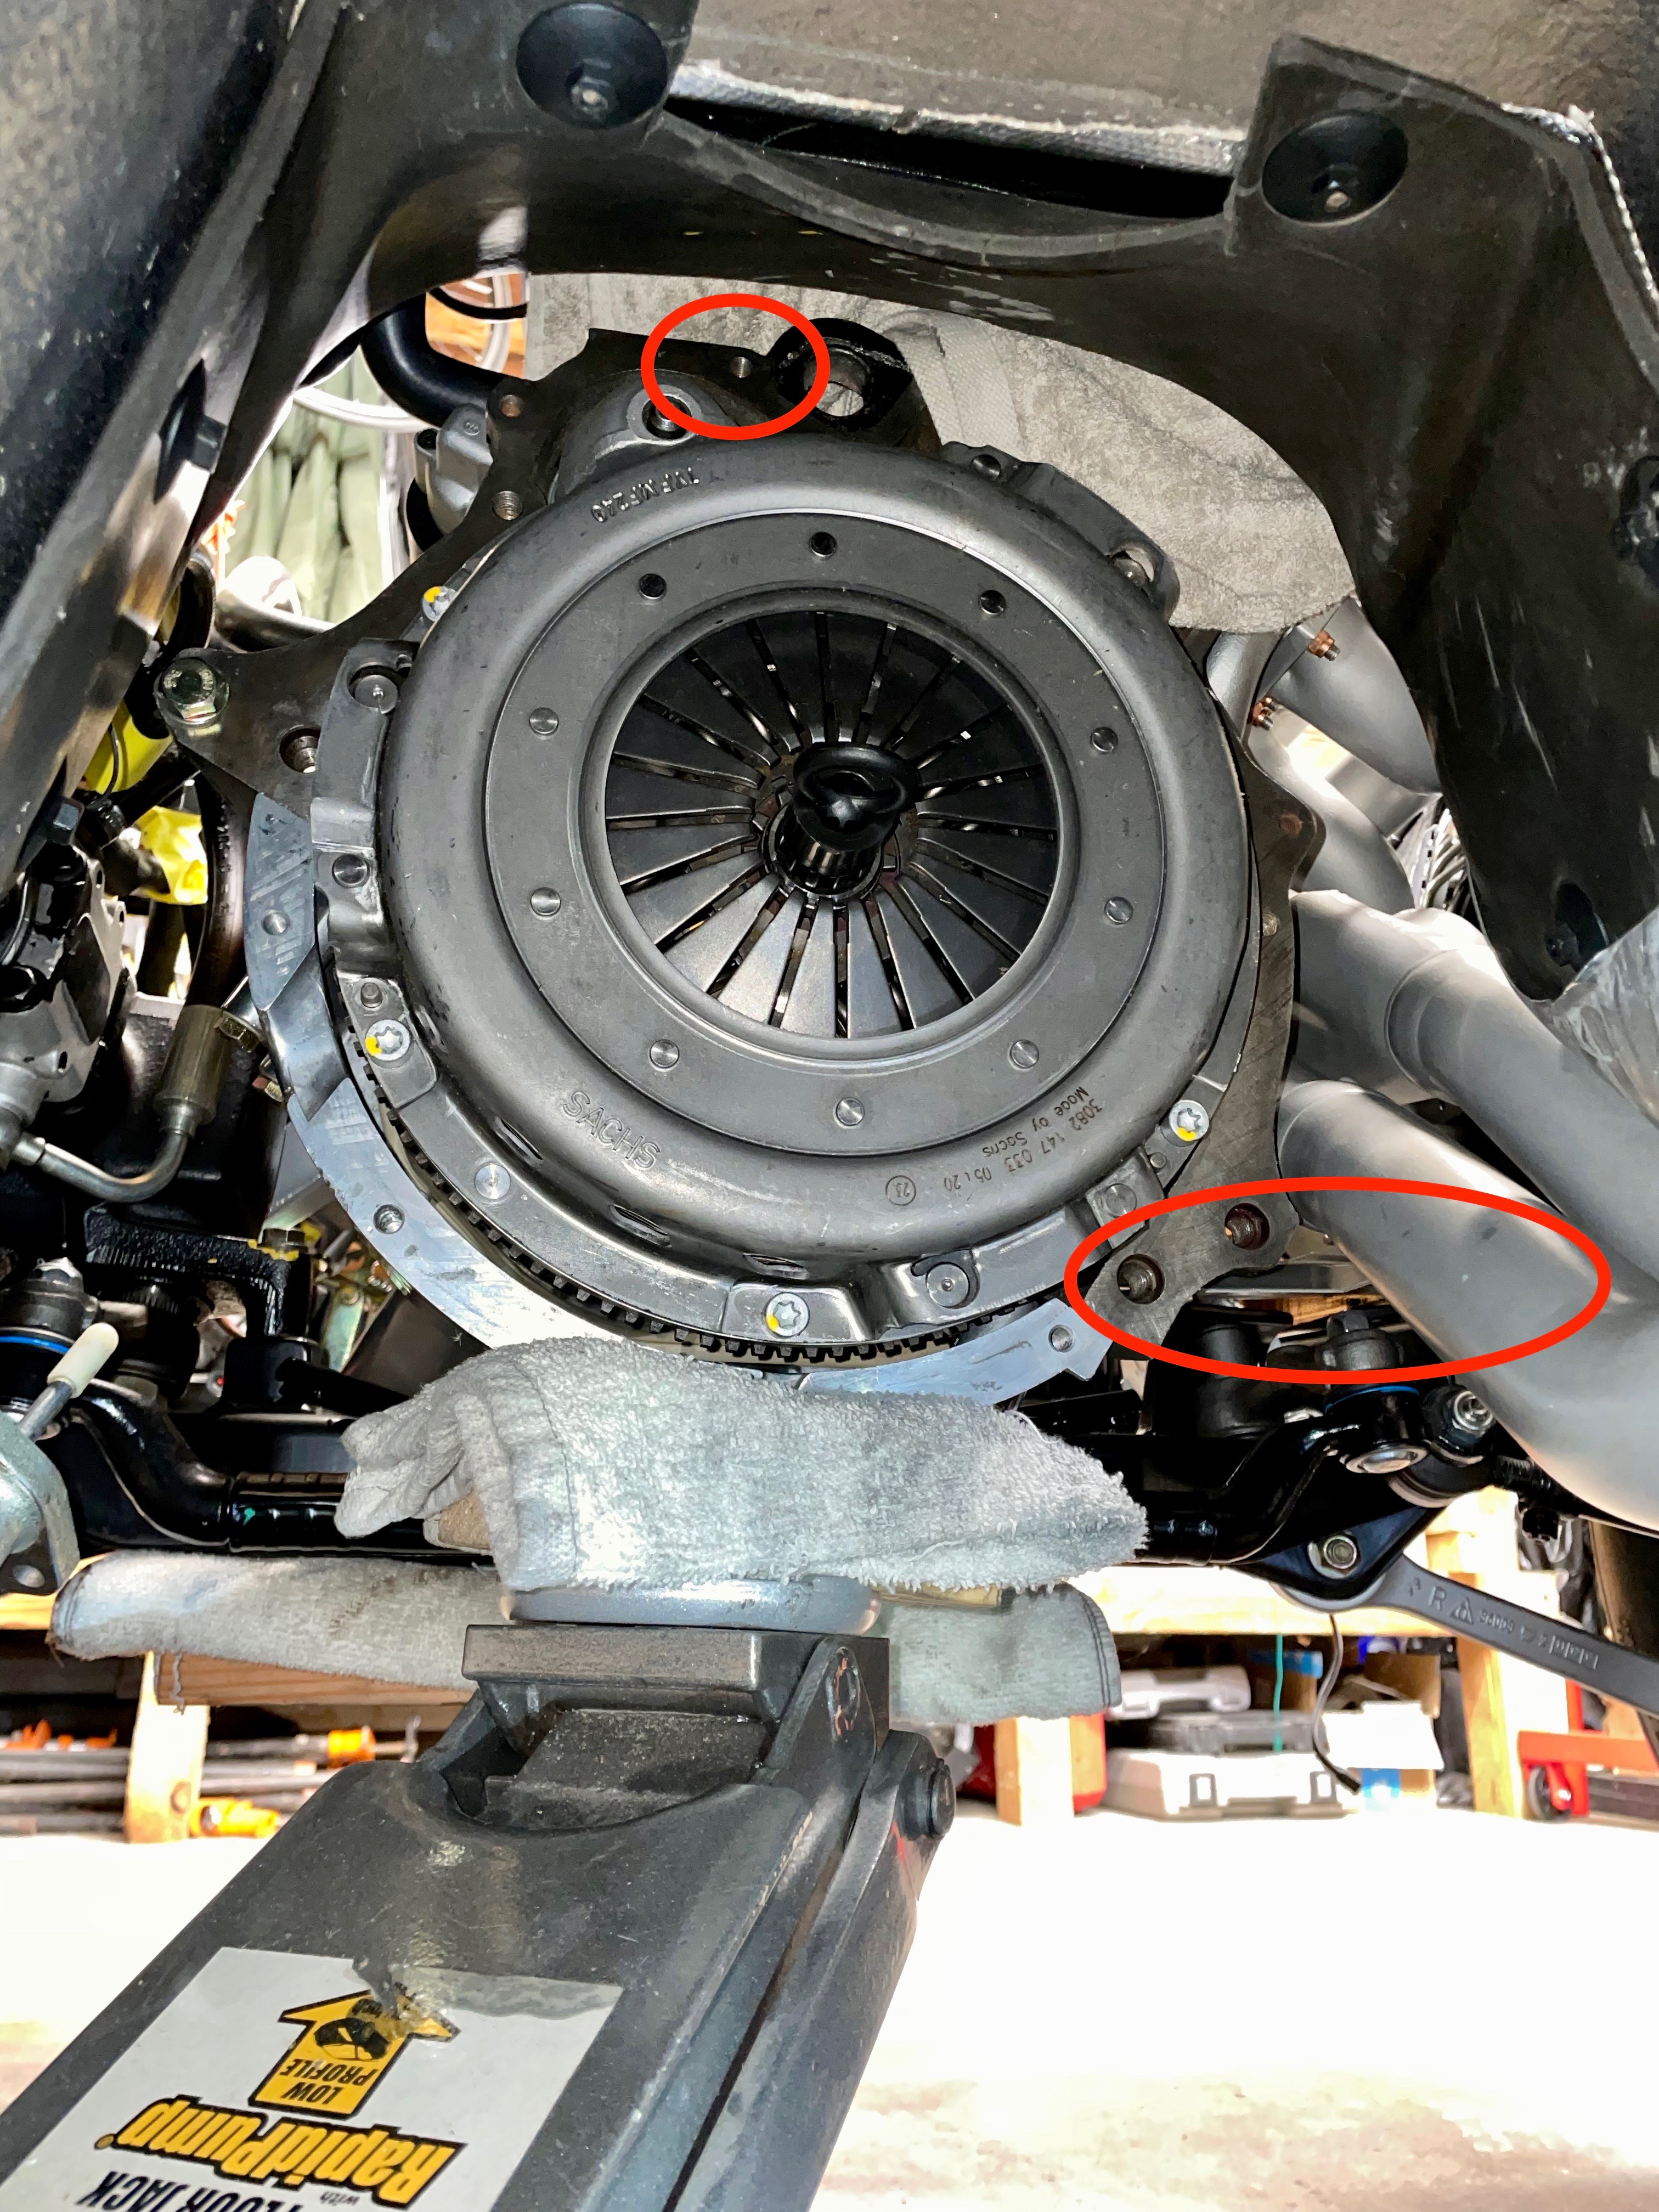
I dropped the engine in and mounted the re-finished flywheel & a new Sachs clutch assembly:

Image

Due to the wider S38 head, the M88 headers & the M5-specific aluminum shield (hard to see, but I'm talking about the red circle at lower right), after the engine was dropped onto the front mounts, it didn't tip back as far as a regular M30 motor would have, so getting the tranny bolts all back in & torqued was a royal pain. That bolt at the very top of the bell housing took me hours. That was in part my own damn fault ... once I pulled that aluminum shield off, the motor-tranny would tip down another few mm and I was able to snake my extensions up to get to the bolt.

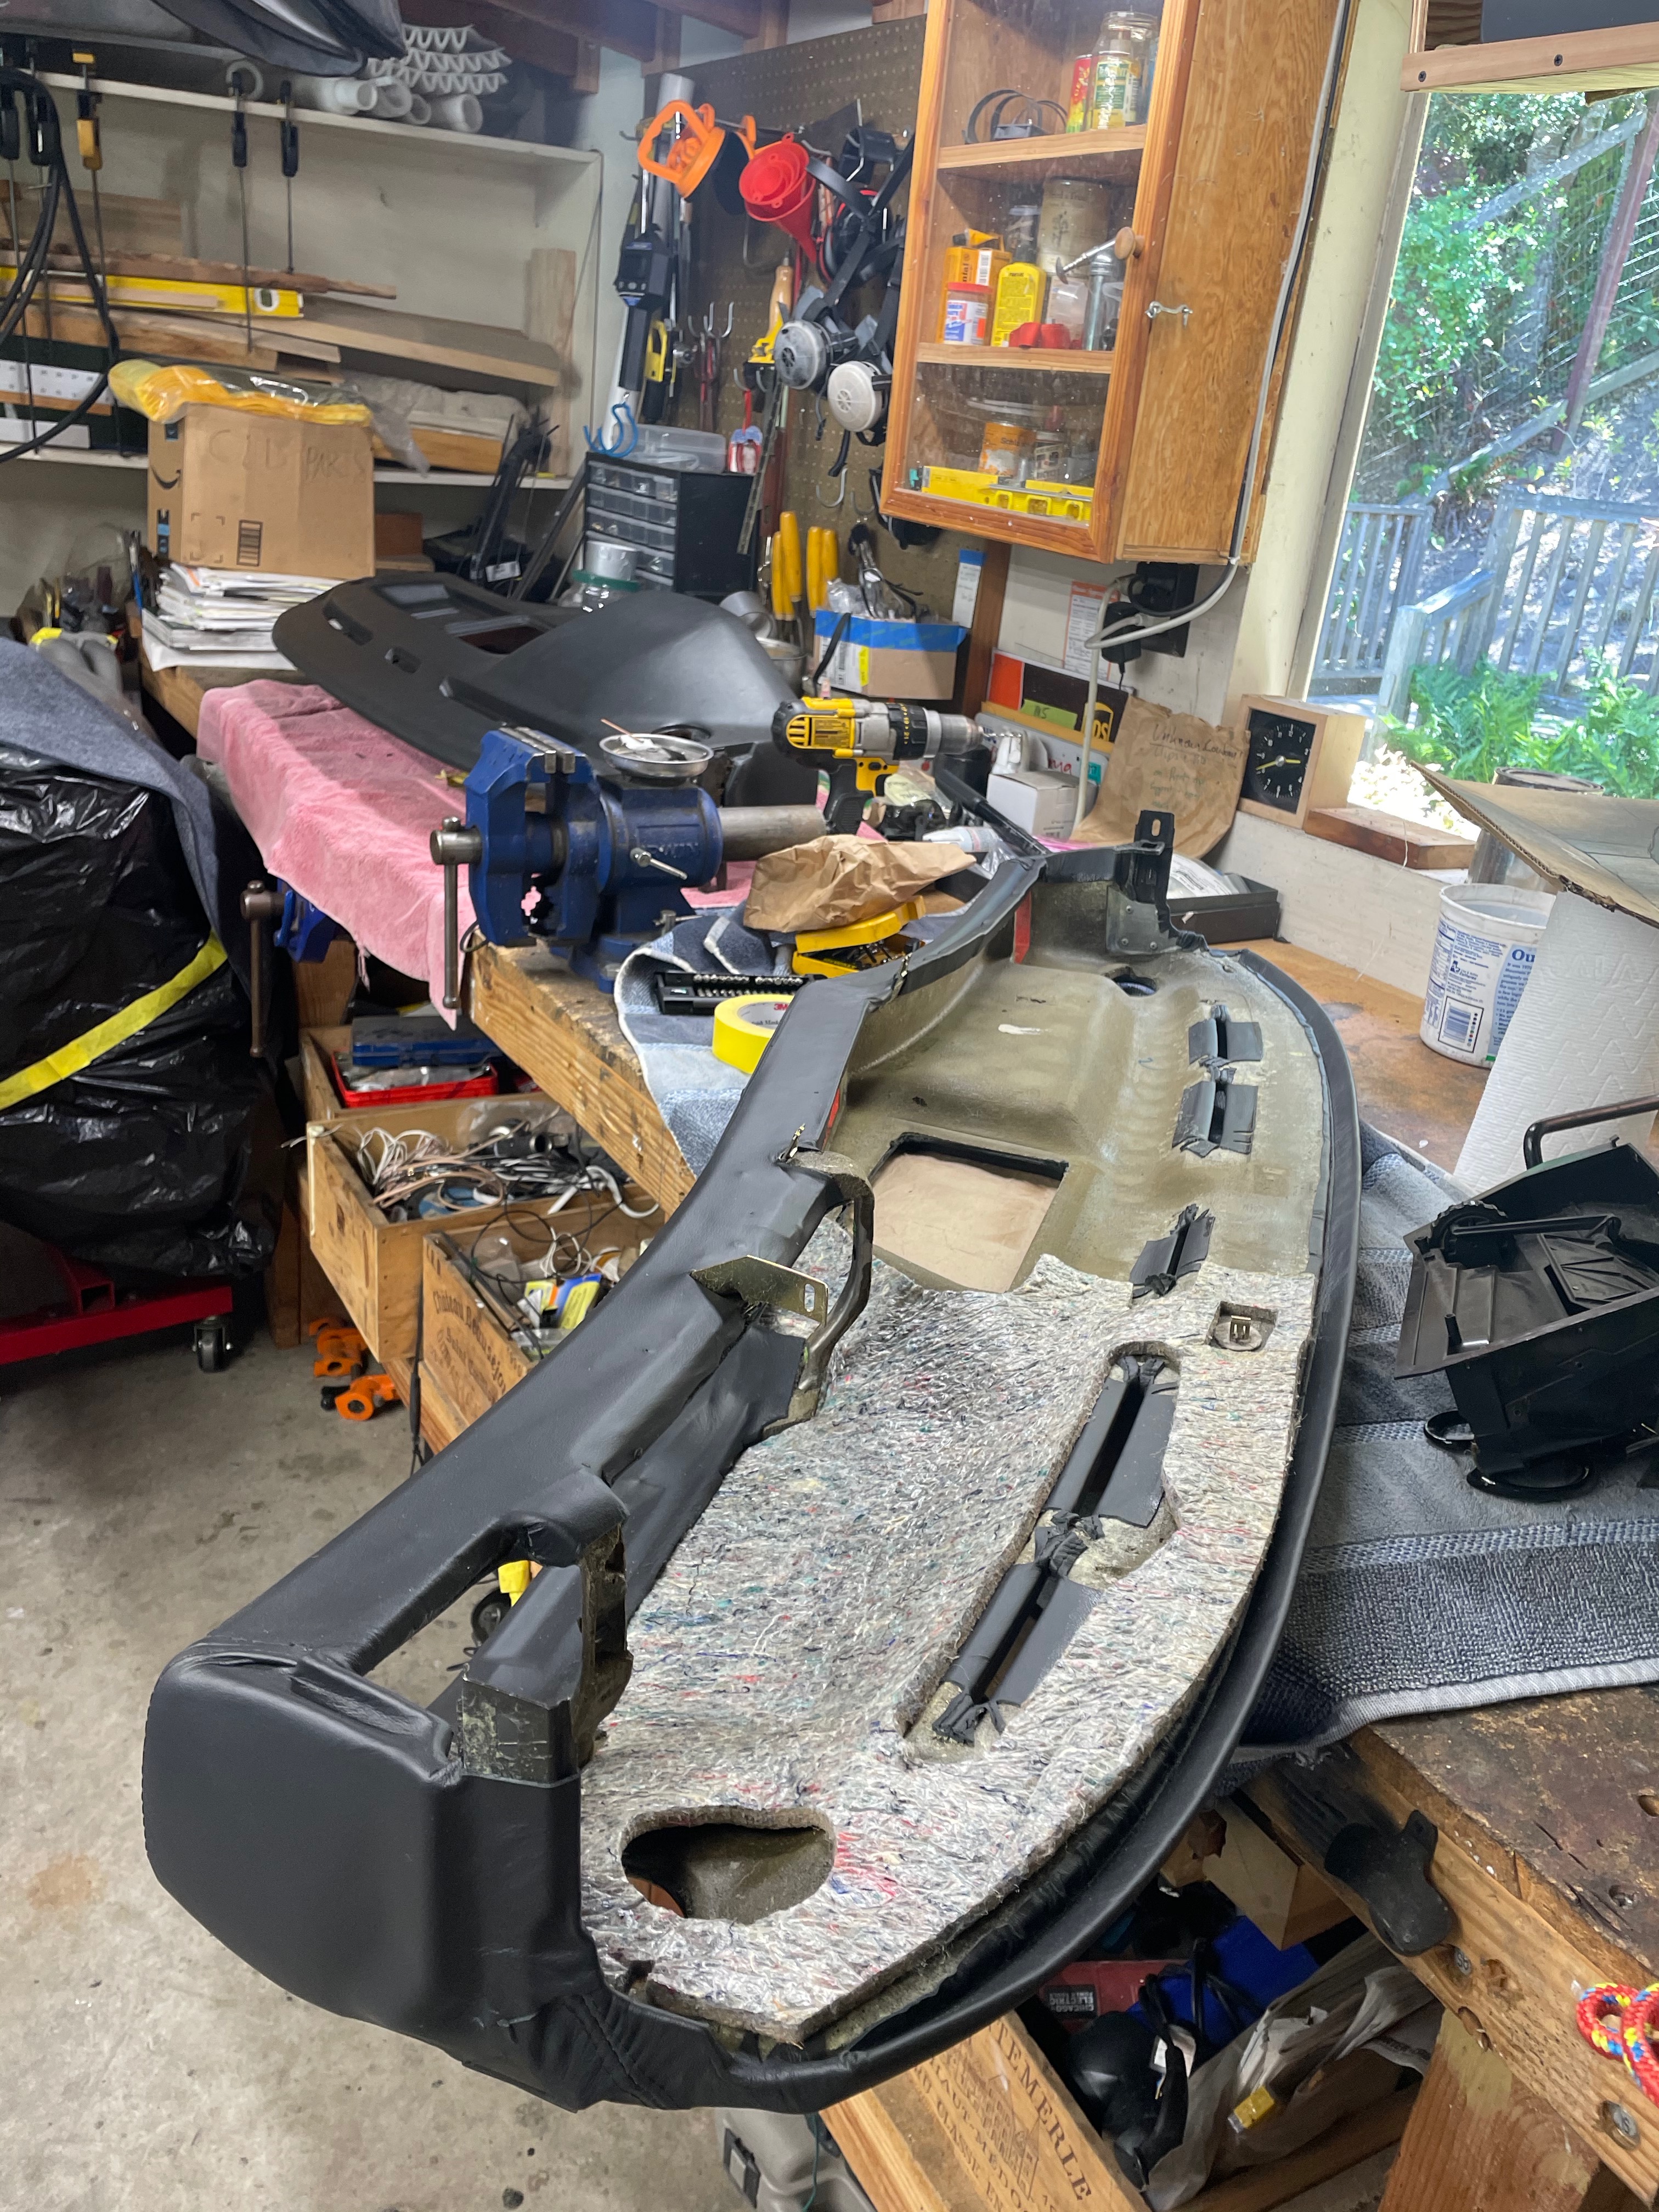
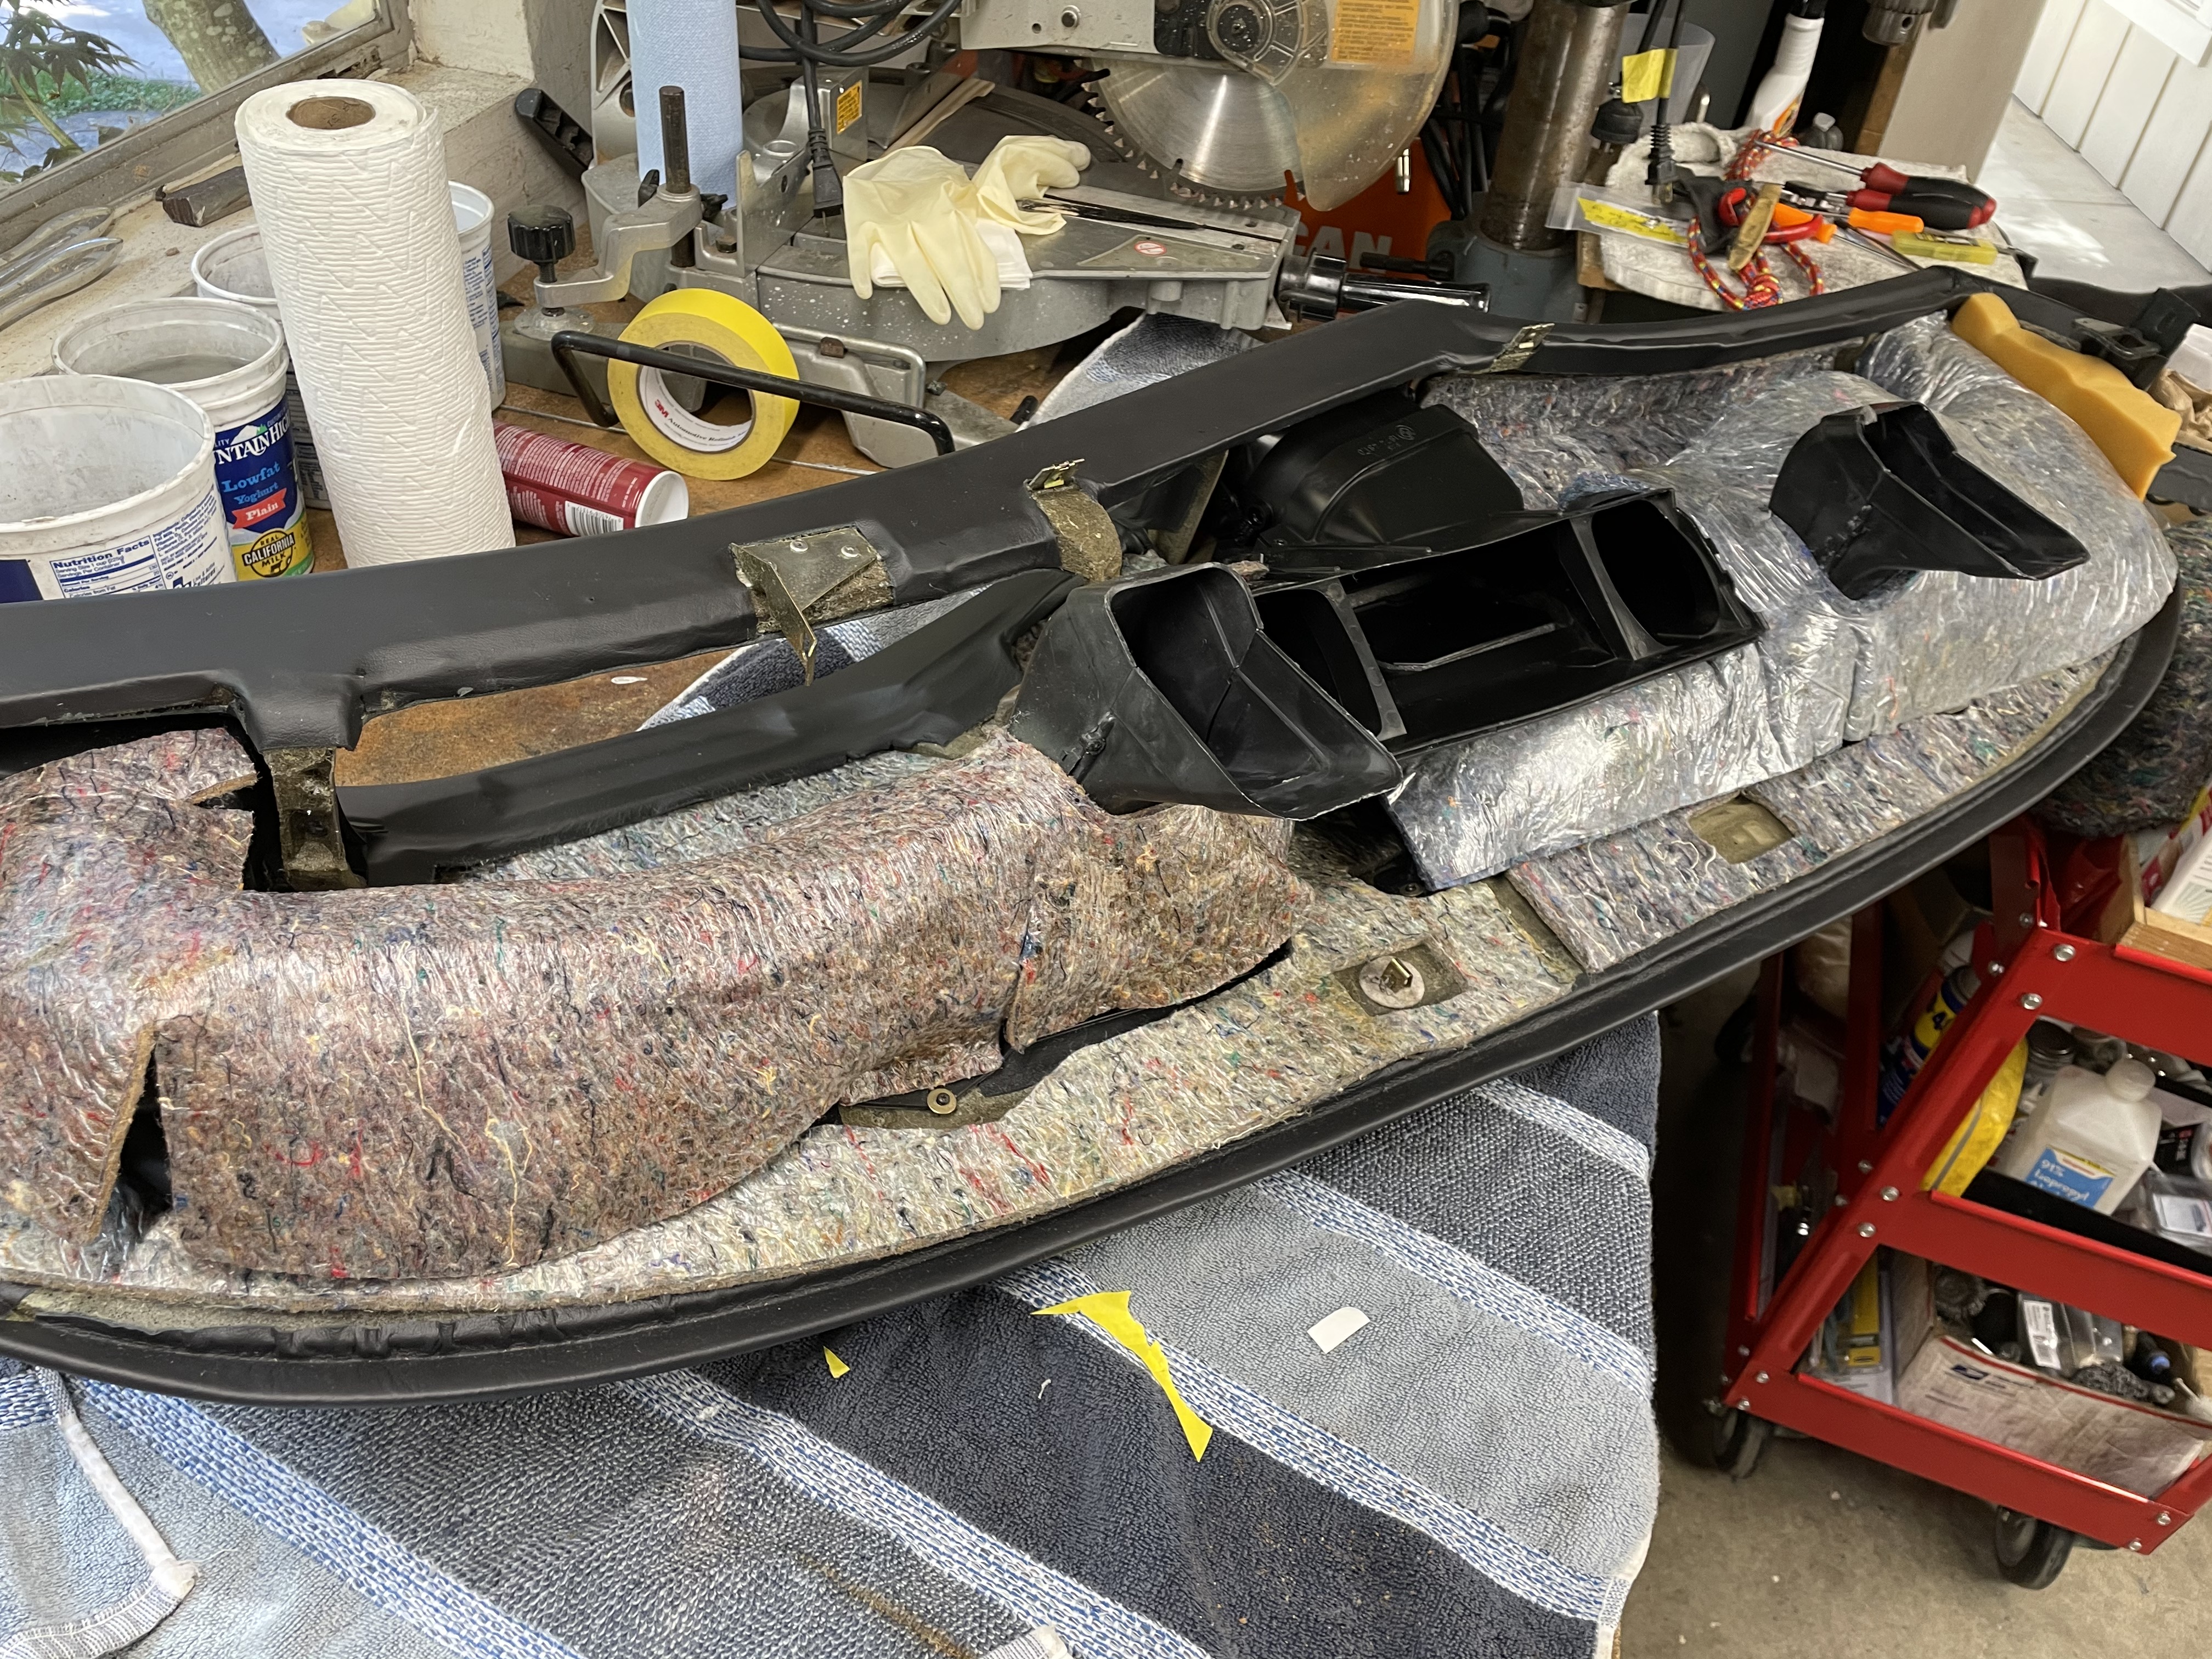
I also moved the vent parts from the original uncracked dash (which will stay in storage) to my newly recovered leather dash. I had to re-create one of the felt insulation pads - the original was ruined by a PO in a prior botched gluing job.

Image
Image

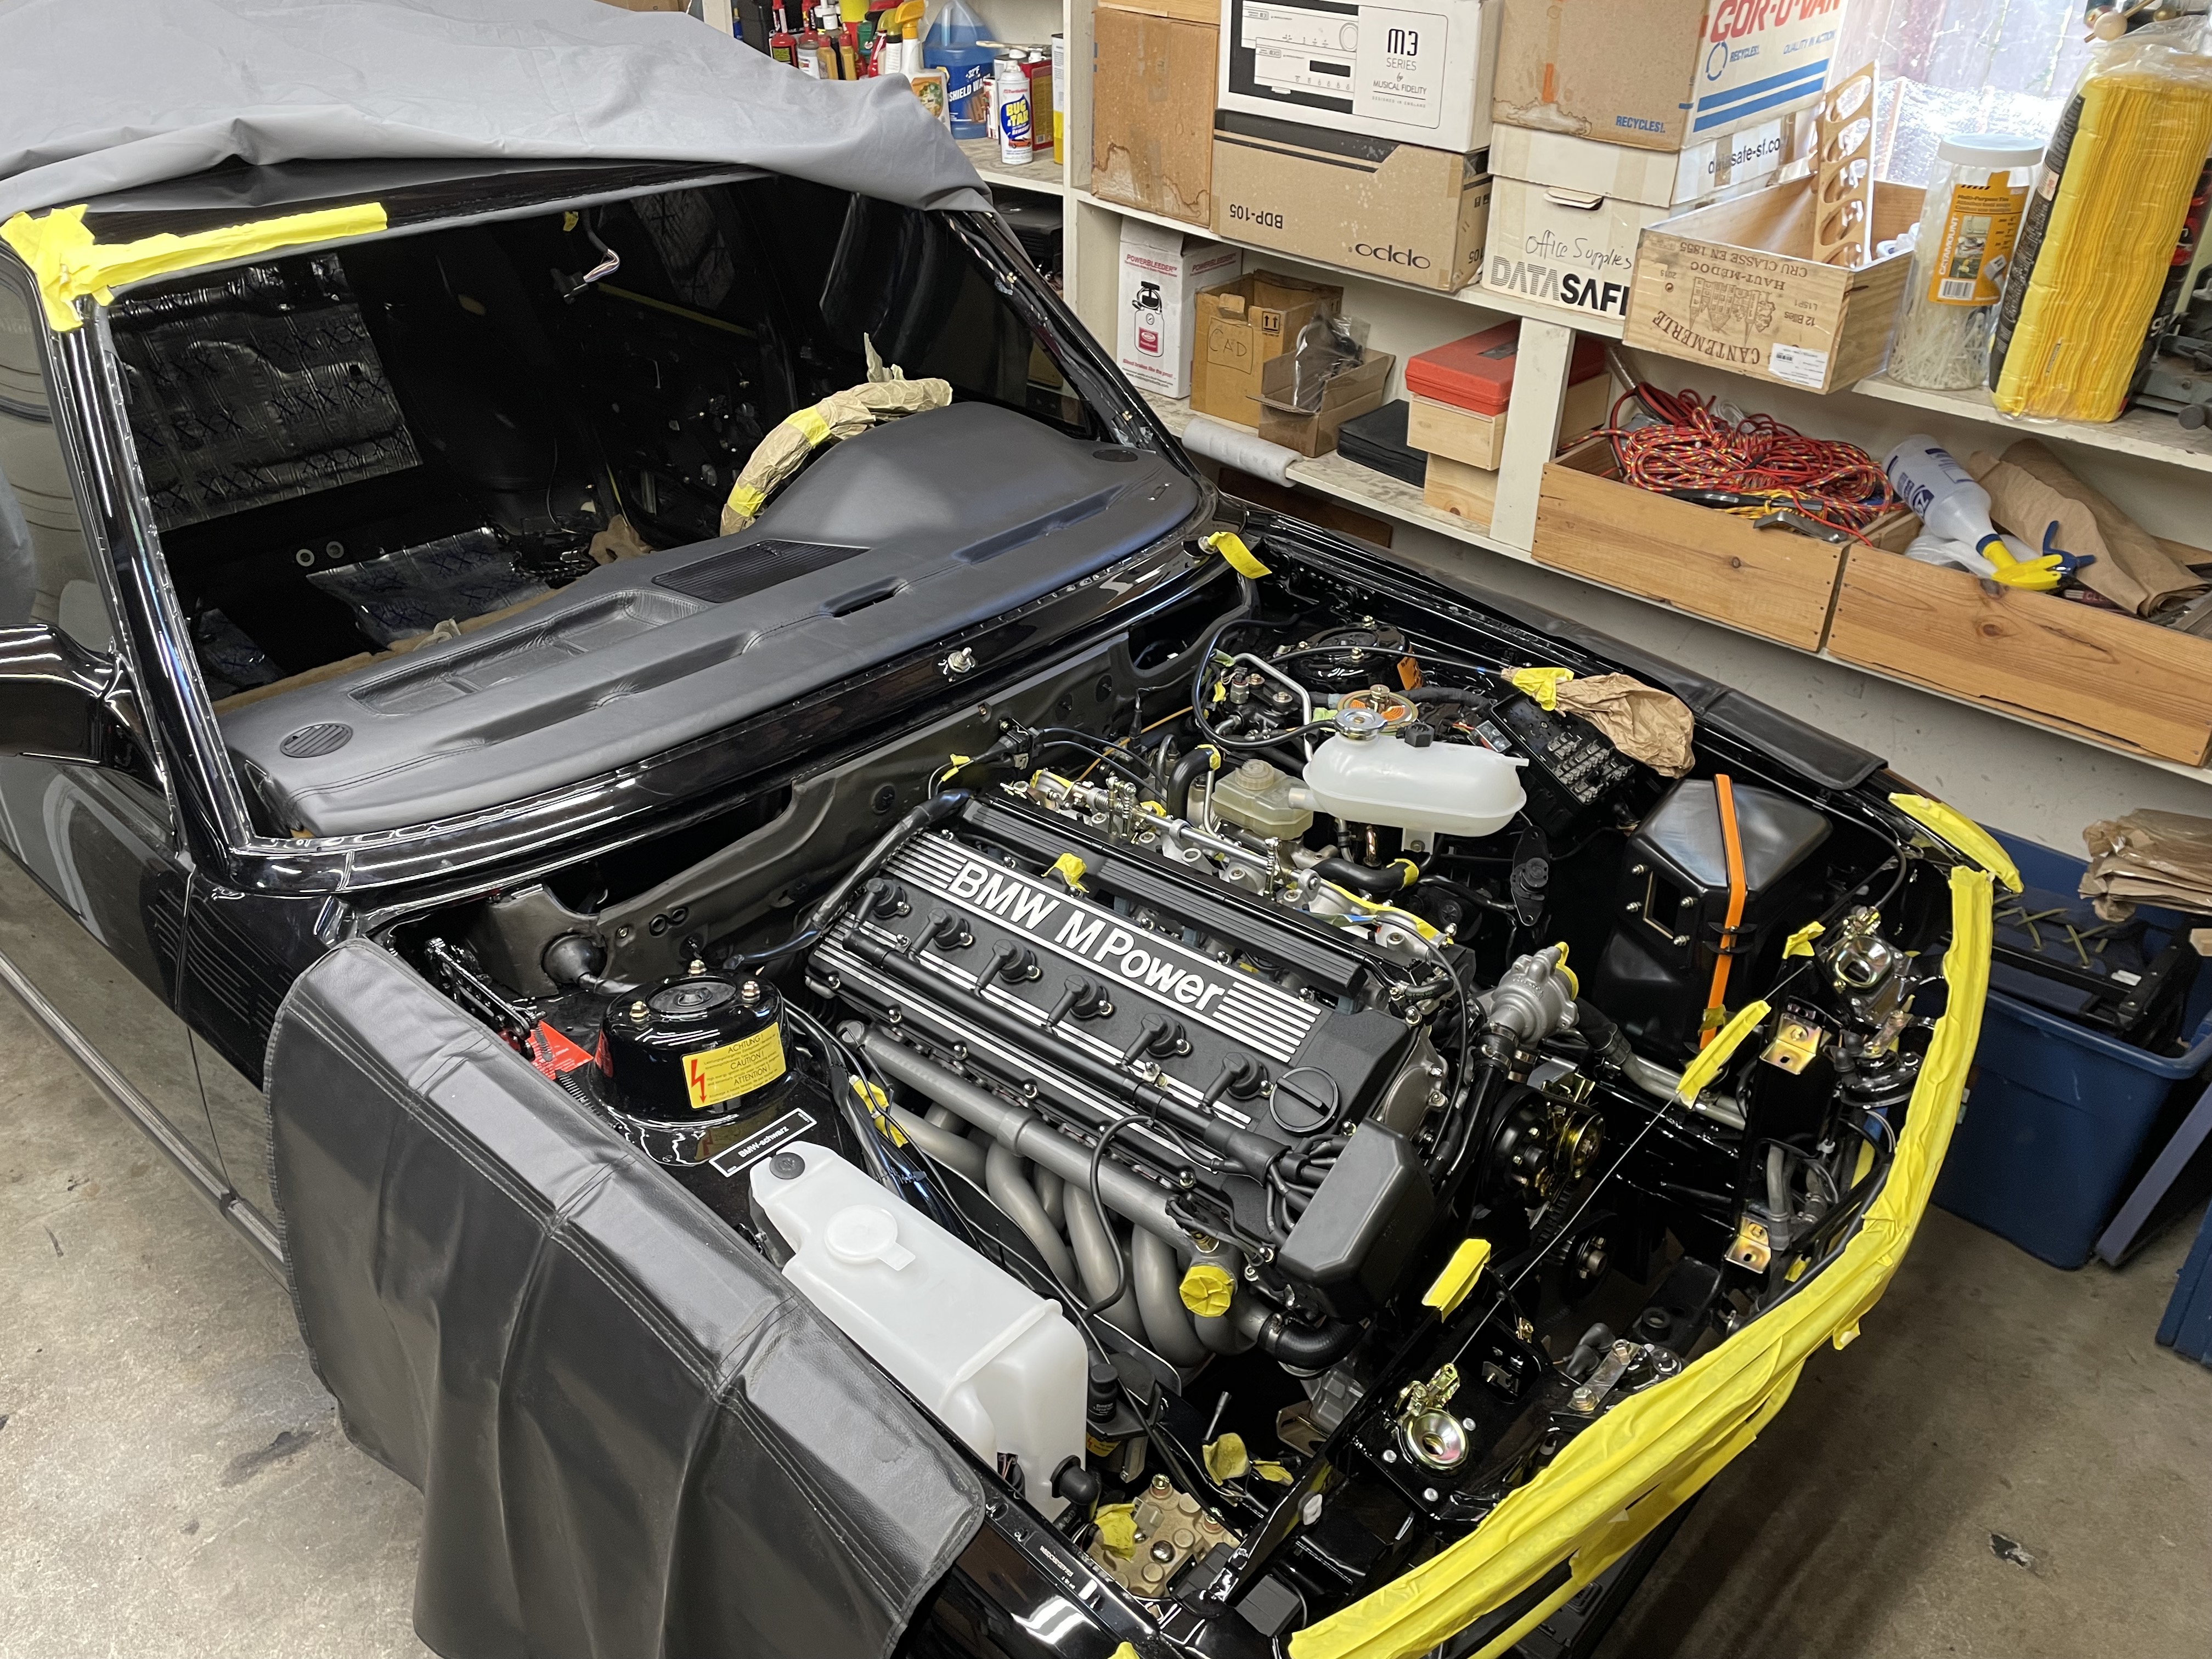
And here's the current state:

Image

I'm now working up a checklist of the things I need to get done to let me do a first crank on the motor. My goal there is to reattach / reinstall as few parts as possible so that if (or more likely when) I need to dig back into stuff I will be minimizing how much stuff will need to come back off.
Tiit
Posts: 290
Joined: Oct 06, 2017 6:27 AM
Location: Canberra

Re: Rebuilding My 1988 US-spec M5

Post by Tiit »

Thanks for sharing.
Adam W in MN
Posts: 5053
Joined: Feb 12, 2006 12:00 PM
Location: Don't waste my motherf***in' time!
Contact:

Re: Rebuilding My 1988 US-spec M5

Post by Adam W in MN »

Jeez this thread is so informative and inspiring.
Kapt
Posts: 213
Joined: Feb 12, 2006 12:00 PM

Re: Rebuilding My 1988 US-spec M5

Post by Kapt »

Your attention to detail is inspiring. Fantastic work.
Thanks for the tip on the e24 gas cap rubber.
jhh925
Posts: 917
Joined: Jul 11, 2015 12:23 AM
Location: Reno

Re: Rebuilding My 1988 US-spec M5

Post by jhh925 »

Kapt wrote: May 18, 2021 10:52 PM Your attention to detail is inspiring. Fantastic work.
Thanks for the tip on the e24 gas cap rubber.
Thanks ... also, in case it's helpful, I was reminded recently that there are probably a few different PNs for those gas cap rubber parts. The specific one I started with is PN 16111119235. RealOEM says that part will fit in an E28 up through a production date of 12/1987 ... but my experience is that it won't fit without modifying the "throat" so that it will fit onto the top of the E28 gas filler neck.
Ricky535
Posts: 1006
Joined: Feb 12, 2006 12:00 PM
Location: San Diego

Re: Rebuilding My 1988 US-spec M5

Post by Ricky535 »

Which pulse generator bracket are you going to use for the 179 ECU, B34 or B35?
Post Reply