And so it starts, Maeve
Re: And so it starts
That is a very generous gift, original cats if they're still working are gold. The rest of it isn't chump change either. Tip of the hat to generosity.
On the moulding clips, I've rarely if ever had a problem with them. Except the plastic ones that hold the door rub strip trim on, now they can get flaky with time. But the metal clips have always been reusable.
On the moulding clips, I've rarely if ever had a problem with them. Except the plastic ones that hold the door rub strip trim on, now they can get flaky with time. But the metal clips have always been reusable.
-
Blue Shadow
- Posts: 10306
- Joined: Feb 12, 2006 12:00 PM
- Location: SE PA
Re: And so it starts
Key to the clips is that you must move them/the trim piece the opposite way from what you would think will release them. I didn't figure out how they worked but did figure out that trick to removal.
Re: And so it starts
Yes there has to be a correct method as you say. I haven't figured it out on my own but no German engineer would design a clip that had to be destroyed for removal.
Re: And so it starts
Speaking of a correct method, what was your process for removing the upper aluminum trim on the door (the bit that goes around the upper perimeter of the window)? I've heard enough scary talk that I've been too afraid to even try, but it's getting close to time for me to send the car off for paint as well.
Re: And so it starts
The chrome trim is held on by the clips that I destroy when removing. If you look from the inside of the door window frame you can locate them. I pried up the three ears of all the clips with a thin flat blade screw driver before starting to remove the chrome trim.shallam wrote: Apr 02, 2022 11:05 PM Speaking of a correct method, what was your process for removing the upper aluminum trim on the door (the bit that goes around the upper perimeter of the window)? I've heard enough scary talk that I've been too afraid to even try, but it's getting close to time for me to send the car off for paint as well.
Start at the bottom of the trim and pry the clip up far enough so you can get it to slide over the window frame towards the outside of the car. Do the same for each clip, I think there are 5?. The trim will come off easily. The chrome trim also has an ear that located it next to the B pillar that you need to slide towards the B pillar to remove. BTW the black trim covering the B pillar comes off the same way.
It's not hard if you're willing to destroy the clips which are available new from BMW.
-
Blue Shadow
- Posts: 10306
- Joined: Feb 12, 2006 12:00 PM
- Location: SE PA
Re: And so it starts
These are the clips I mentioned. I removed the trim from a couple doors years ago without destroying the clips by pushing the wrong way to remove them and they released. Counter intuitive is the key to success in removal of the anodized aluminum trim without destroying the clip.
Re: And so it starts
[*]So could you elaborate on what you mean by “wrong way” please
-
Blue Shadow
- Posts: 10306
- Joined: Feb 12, 2006 12:00 PM
- Location: SE PA
Re: And so it starts
Been a long time but if you think you should pull the strip up to lift it off then you need to push it down to release the clip. Whatever you think is the way to remove the part it is the opposite. I had a number of these clips because I was able to remove the trip without damaging the clips.
Re: And so it starts
I typed out the whole process multiple times for this and no one ever paid attention to me. I have even walked people through it over the phone and it's all a waste of time. It gets aggravating. No need to ruin the clips!
When you buy those clips new, you'll need extras because even new some don't arrive in usable condition.
You have to completely disassemble the rear door (meaning all windows and everything come out) to remove the trim. If you try to remove the trim with the windows installed, you will ruin all the clips and the trim. It's very simple to release the trim from the clip. Just use a small screwdriver and push the tab up toward the top edge of the door frame and release the trim. Then move to the next clip. Obviously, you start at the a-pillar on the front door and the c-pillar on the rear door as the trim hooks over the edge of the door at the B-pillar.
-
Blue Shadow
- Posts: 10306
- Joined: Feb 12, 2006 12:00 PM
- Location: SE PA
Re: And so it starts
There are a pile of topics that should be in the faq section such as how to manage this clip. Back when the faq section was being populated it took a review and approval of the pope, the supreme crout and the bus boy at IHOP to get the thing added to the faqs.
I understand the desire for completeness of a faq but having most of the info and letting the person using the information choose his own screwdriver as required would have allowed a lot of buried information be available in the faq section.
I understand the desire for completeness of a faq but having most of the info and letting the person using the information choose his own screwdriver as required would have allowed a lot of buried information be available in the faq section.
Re: And so it starts
I tried this method and I was unable to get the clip to slide upwards towards the edge of the frame. Maybe just an old car with old clips, or I didn't pry hard enough.wkohler wrote: Apr 05, 2022 2:26 AM I typed out the whole process multiple times for this and no one ever paid attention to me. I have even walked people through it over the phone and it's all a waste of time. It gets aggravating. No need to ruin the clips!
When you buy those clips new, you'll need extras because even new some don't arrive in usable condition.
You have to completely disassemble the rear door (meaning all windows and everything come out) to remove the trim. If you try to remove the trim with the windows installed, you will ruin all the clips and the trim. It's very simple to release the trim from the clip. Just use a small screwdriver and push the tab up toward the top edge of the door frame and release the trim. Then move to the next clip. Obviously, you start at the a-pillar on the front door and the c-pillar on the rear door as the trim hooks over the edge of the door at the B-pillar.
Re: And so it starts
It takes very little effort. I have done it so many times I guess it’s easy for me.
As for the FAQs, half the stuff in there is total crap and I was pretty pissed off at the level of scrutiny I got for putting some really good stuff together that never made it so I gave up.
As for the FAQs, half the stuff in there is total crap and I was pretty pissed off at the level of scrutiny I got for putting some really good stuff together that never made it so I gave up.
Re: And so it starts
I like this board. Lot's of good info that helps me, at least. But.......wkohler wrote: Apr 05, 2022 10:08 PM It takes very little effort. I have done it so many times I guess it’s easy for me.
As for the FAQs, half the stuff in there is total crap and I was pretty pissed off at the level of scrutiny I got for putting some really good stuff together that never made it so I gave up.
Take a look at R3VLimited, the e30 board, and it will maybe show what can be done with stickies etc. I'm surprised there aren't more stickies for everyday things we all run into with 35 year old cars, like rebuilding the heater box or how to rebuild the front suspension etc. Yes you can search and find info, but it would help if there were more stickies for things that are common issues. and that the existing FAQ stickies aren't organized according to which part of the car they are for.
ok, ill sit back now. flame on.
Last edited by gwb72tii on Apr 05, 2022 10:41 PM, edited 1 time in total.
Re: And so it starts
Helpful insights from all on the trim/clips. Thanks for the insight.
Re: And so it starts
I'm going to go ahead and go on record saying that I am terrified of removing those damn clips!
For a complete amateur, what is the likelihood of causing permanent damage to the trim? Even after reading your descriptions, it all still sounds very confusing to me.
For a complete amateur, what is the likelihood of causing permanent damage to the trim? Even after reading your descriptions, it all still sounds very confusing to me.
Re: And so it starts
I've had them off on an assortment of 70s-80s BMWs, without issue. Seems like the book says something about using a wooden wedge, but a plastic putty knife sticks in my mind. I gradually pry the trim strip up vertically, a little bit at a time, keeping them vertical, then moving inwards some, then back out a little more, all gradual, and it just pops right off, with the clips entirely reusable. Yeah, it's a bit of a fight, but not that bad. I'm referring to the chrome anodized trim, with the window wiper/squeege attached, at the top of the sheetmetal of the door at the base of the window with the mirror at the leading edge, which of course must be removed.
Re: And so it starts
Thanks, Mike W. I'll let the group know how it goes once I take a crack at it!Mike W. wrote: Apr 22, 2022 12:16 AM I've had them off on an assortment of 70s-80s BMWs, without issue. Seems like the book says something about using a wooden wedge, but a plastic putty knife sticks in my mind. I gradually pry the trim strip up vertically, a little bit at a time, keeping them vertical, then moving inwards some, then back out a little more, all gradual, and it just pops right off, with the clips entirely reusable. Yeah, it's a bit of a fight, but not that bad. I'm referring to the chrome anodized trim, with the window wiper/squeege attached, at the top of the sheetmetal of the door at the base of the window with the mirror at the leading edge, which of course must be removed.
Re: And so it starts
A little good news. I bought several interior pieces from Ben from this board and at my suggestion had them shipped Greyhound Express. One of the boxes was misplaced and has now been found, 1.5 months late. But I get to pick up the lost box in Seattle tomorrow! The first box with door panels arrived on time, but this box contains center console and dash pieces.
And tomorrow I am headed to the body shop to see progress on the repaint of Maeve. I've been traveling for the last two weeks and haven't been able to see the car since I dropped it off about 4 weeks ago. I'll take pics and post this weekend.
Everything is taking longer than expected. I talked with Jim at Metric Mechanic a couple weeks ago and my motor is now slated for completion in mid/late July vs this month due to part shortages. In this case it was a lack worldwide of timing chain tensioners which Jim has now fabricated on his own.
But BMWNA has been very good at obtaining parts on time. I go pick up three separate orders today including a new M5 front spoiler and various parts for rebuilding the HVAC system. Super excited to be acquiring the pieces that are needed to get Maeve on the road.
Re: And so it starts
So today I went to the body shop to check on how Maeve is coming along. Brian, the shop owner, is a super nice guy and to my untrained eye looks like he knows his craft. The hood in particular was a wreck, various dents and a crease that looked like it would mean sourcing a new hood perhaps. Well the hood looks and feels flat and perfect.
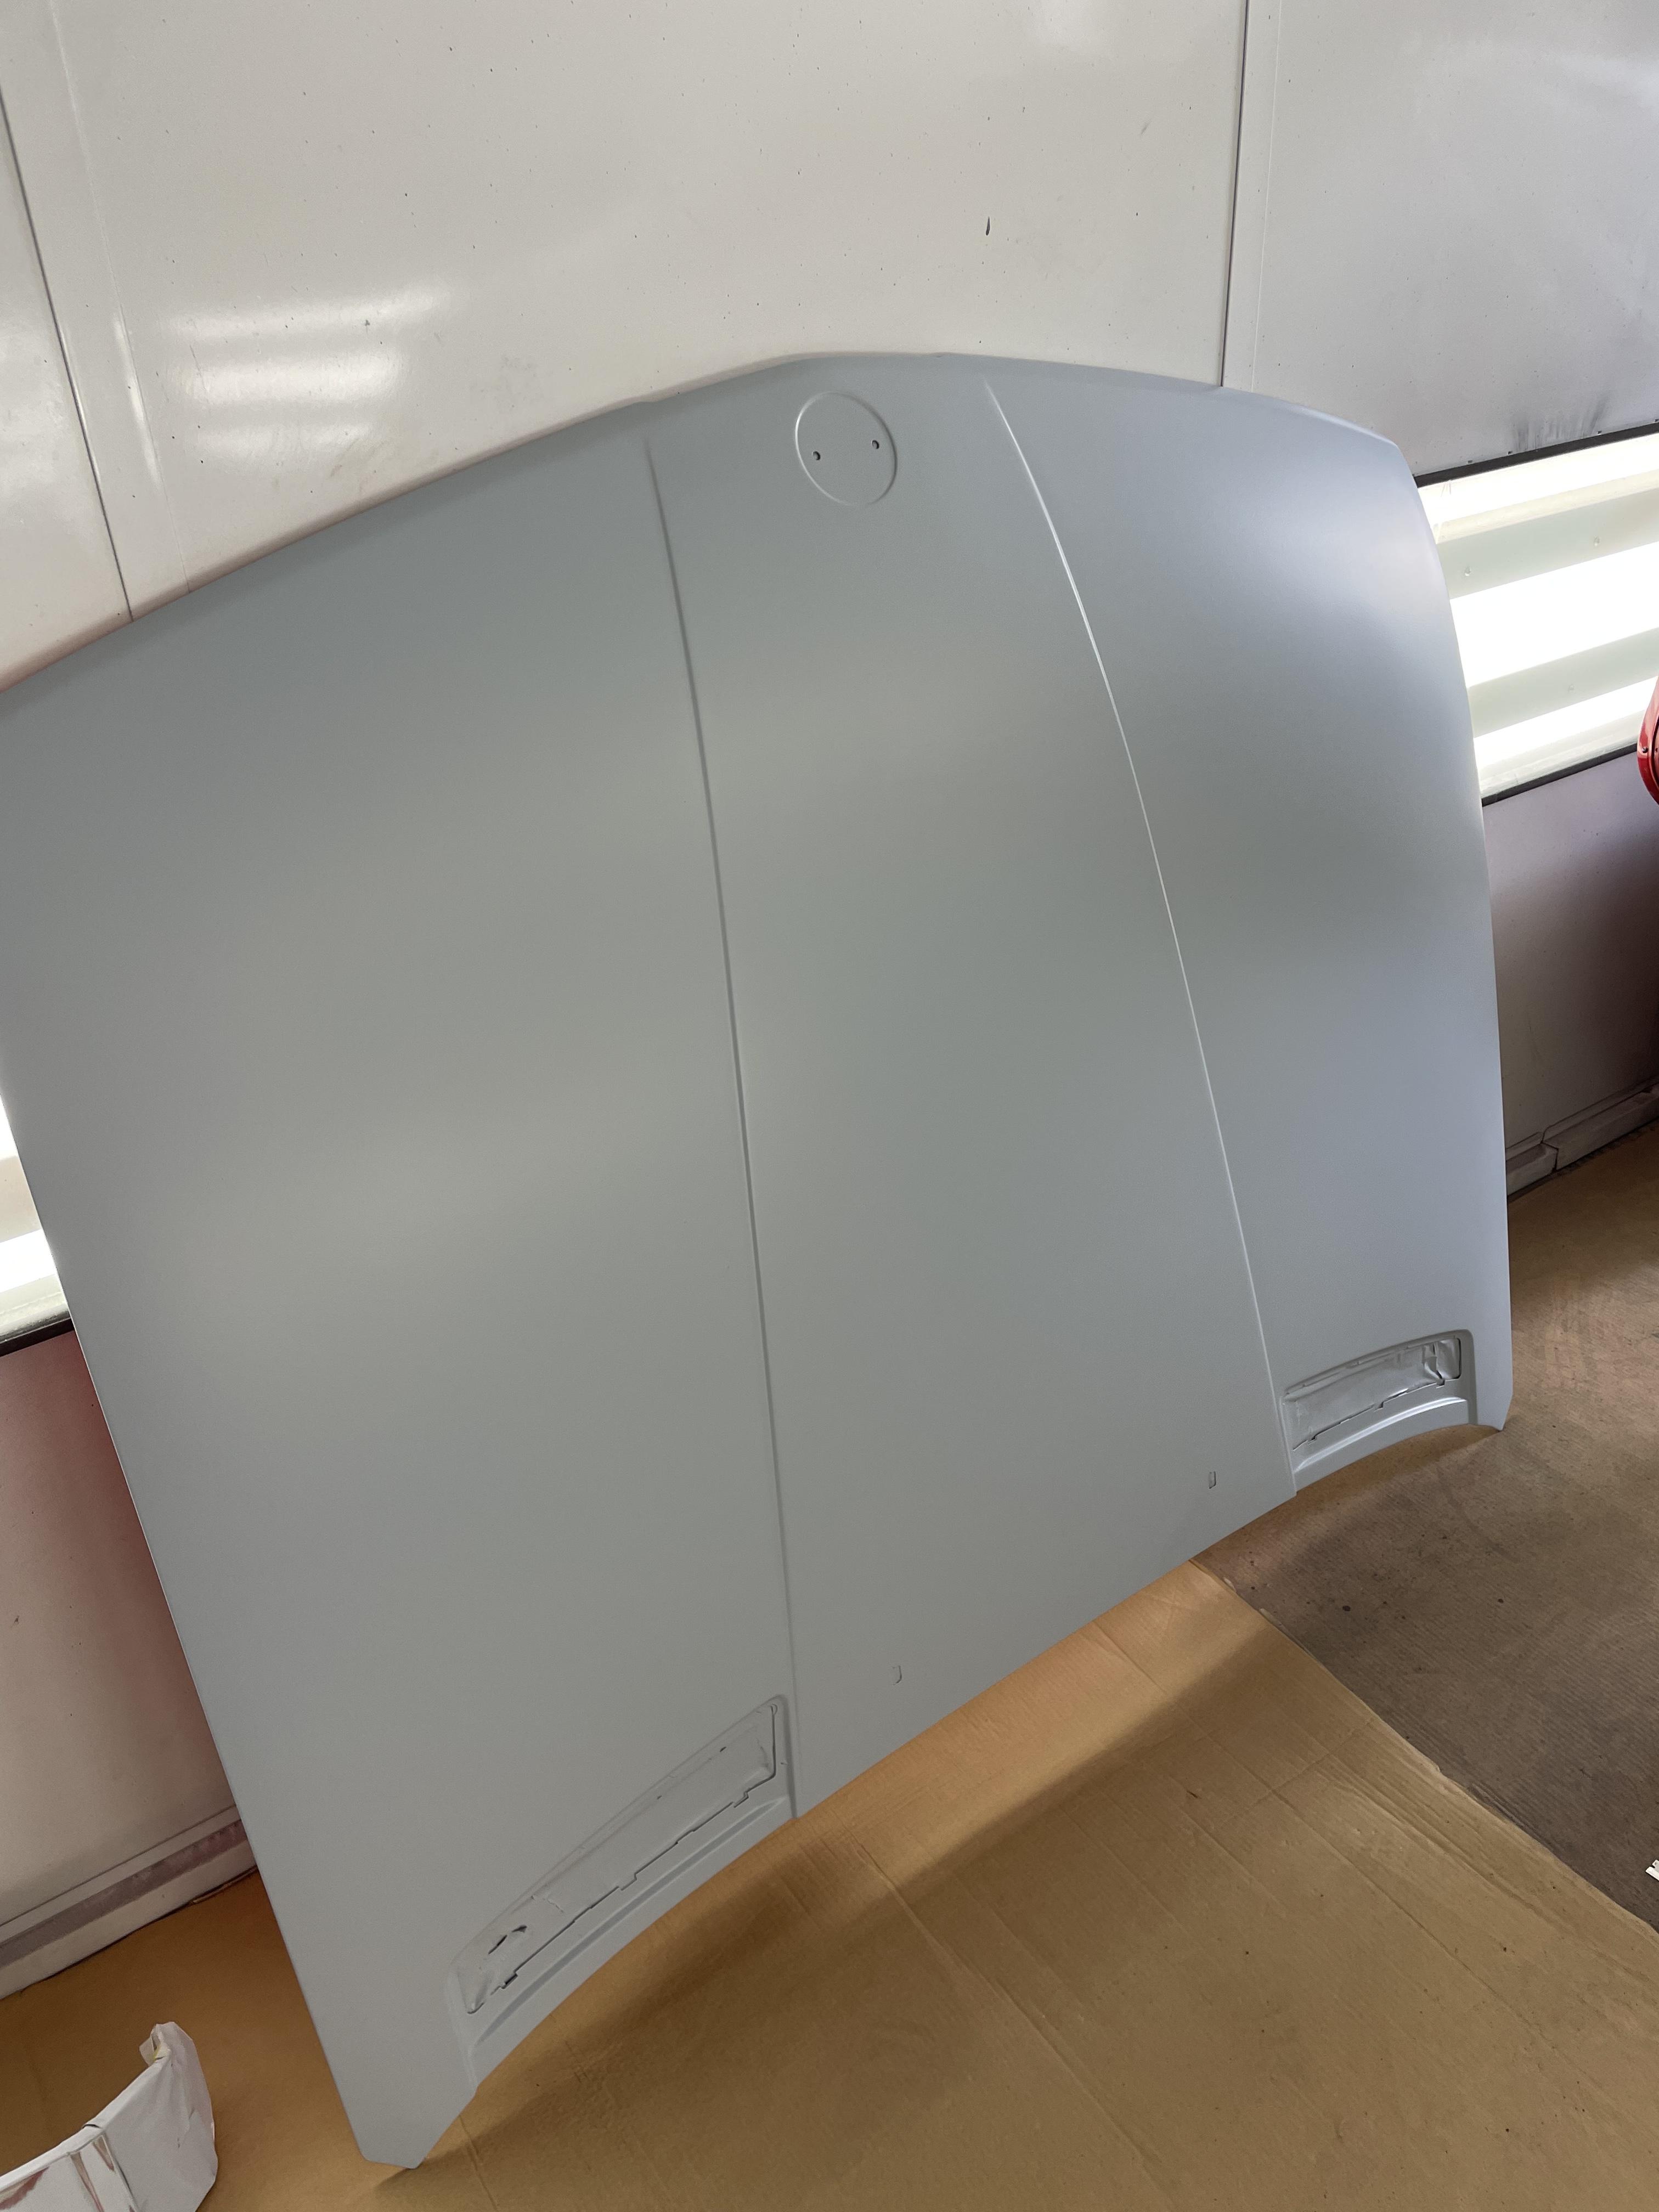
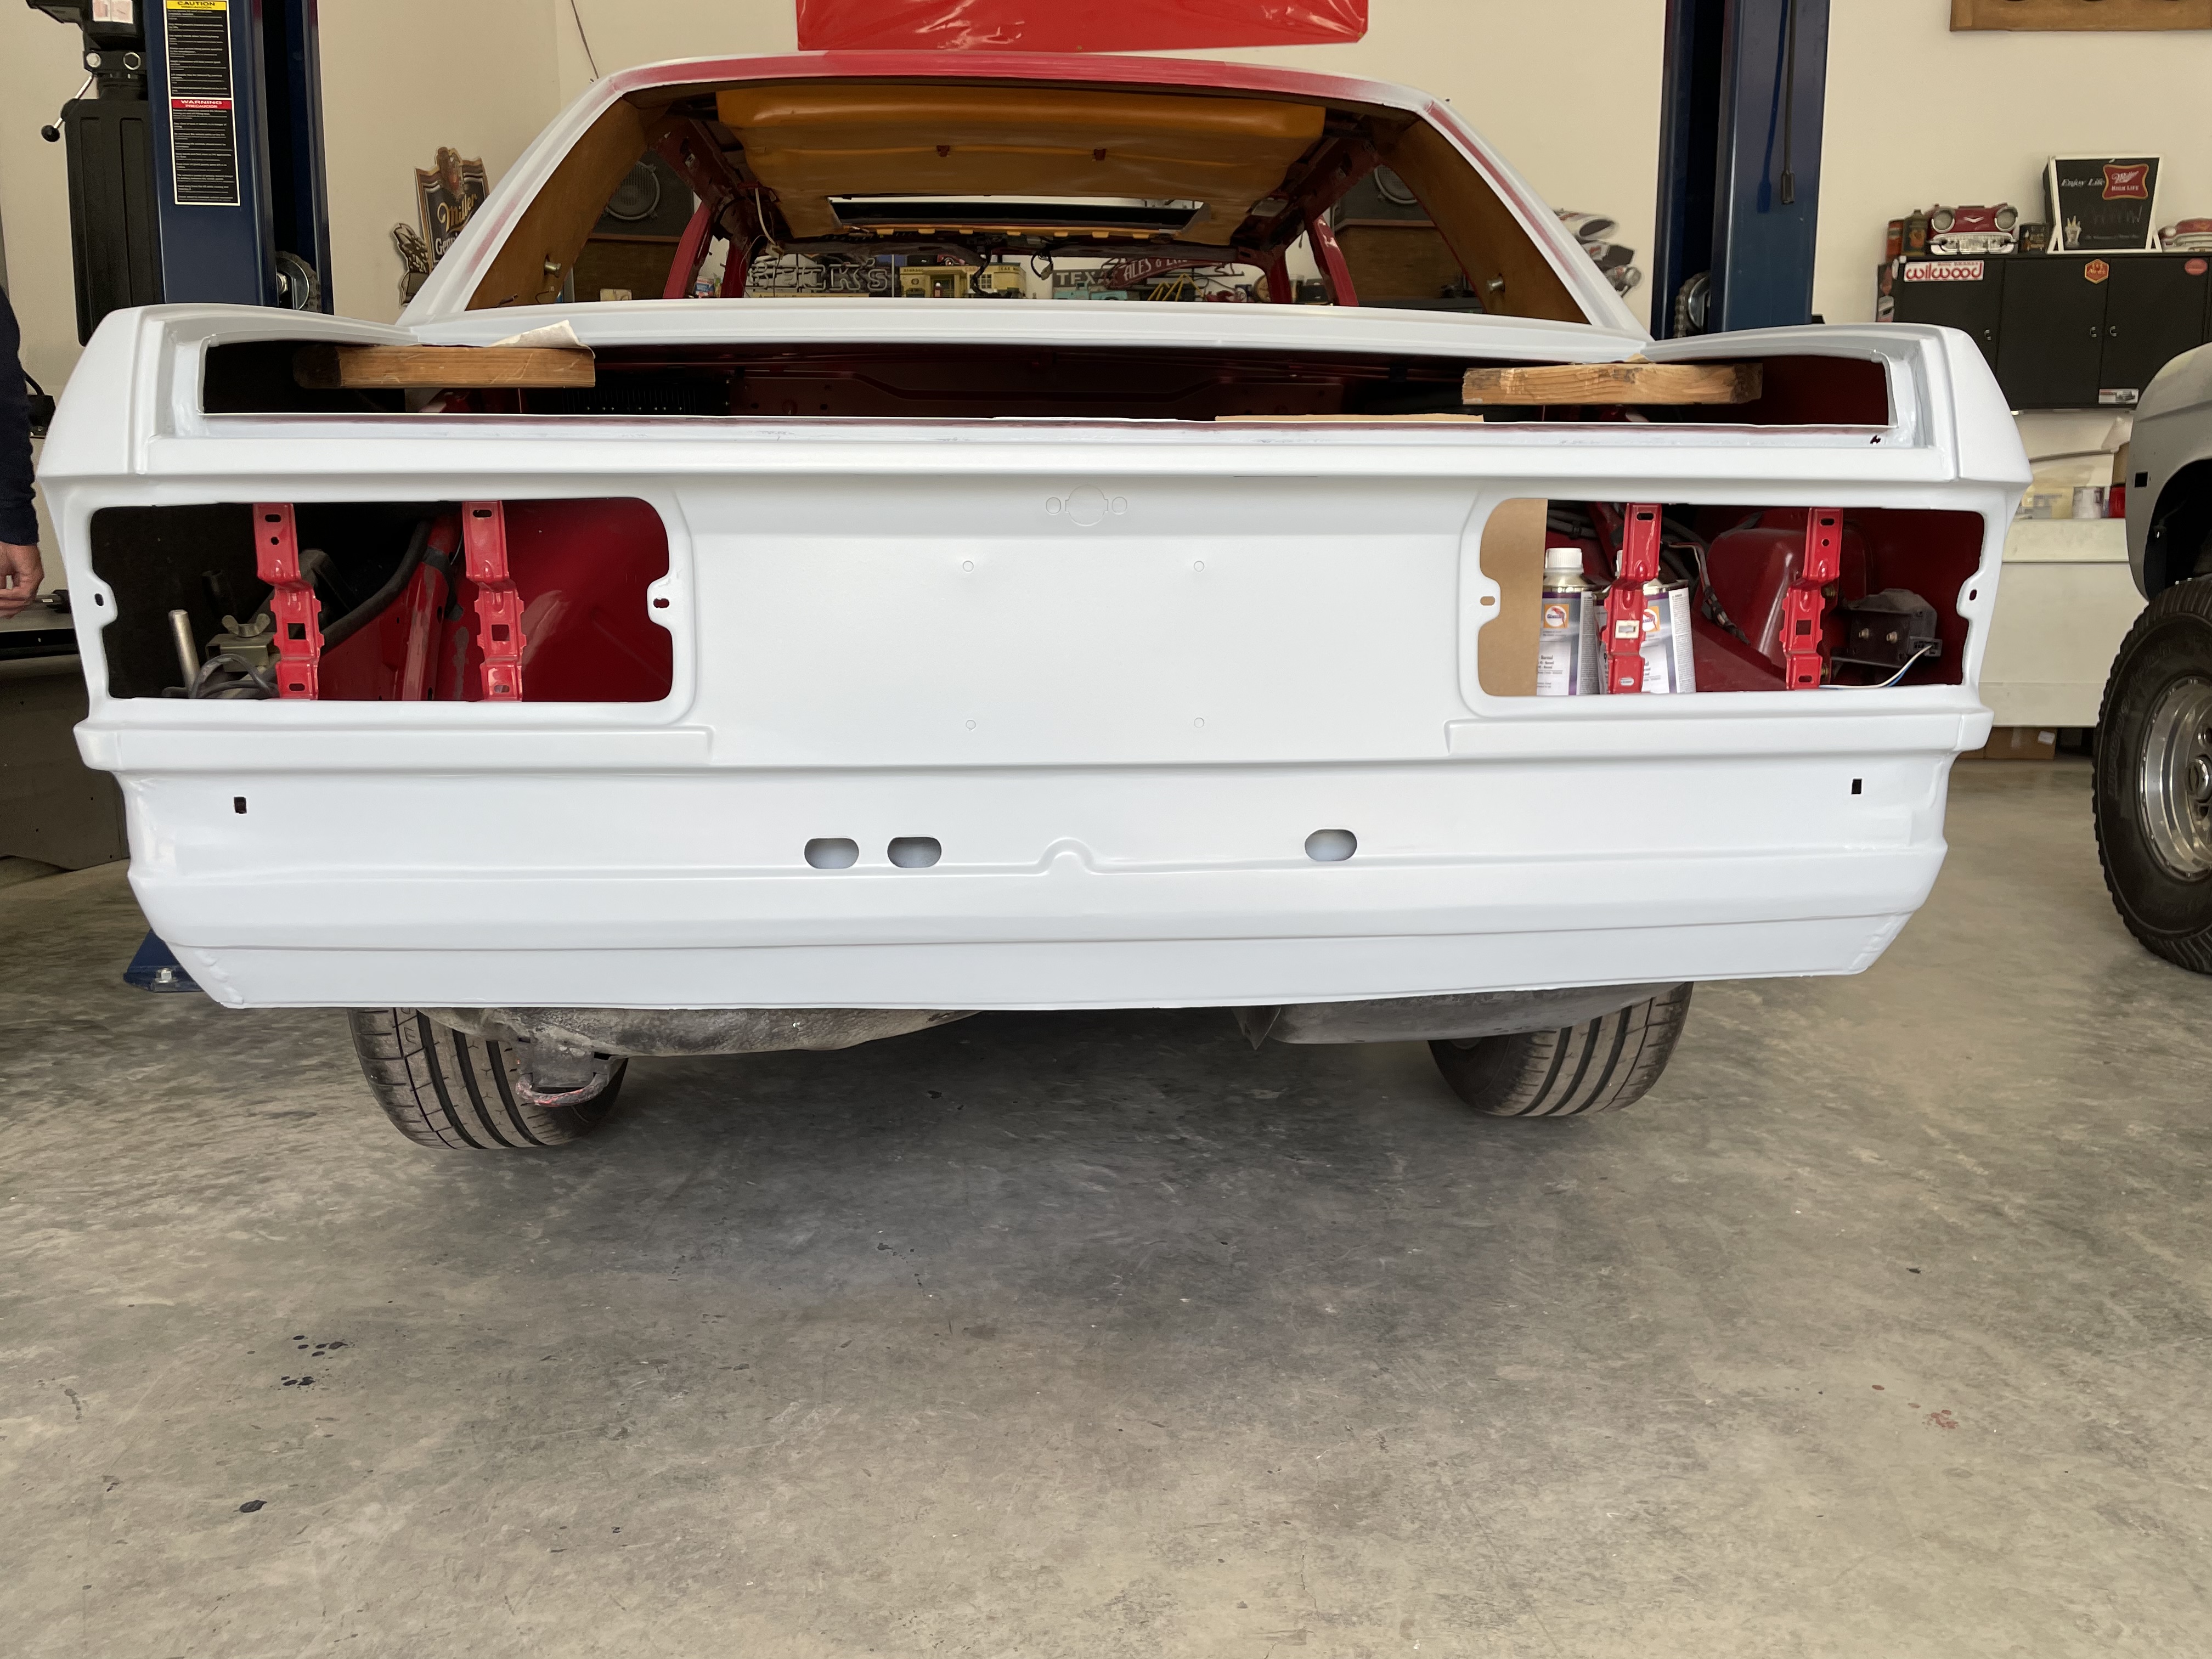
Various hole in the body work have been filled and sanded. The rear valance square holes have been filled except the outer two for the brackets that mount the rear bumper.
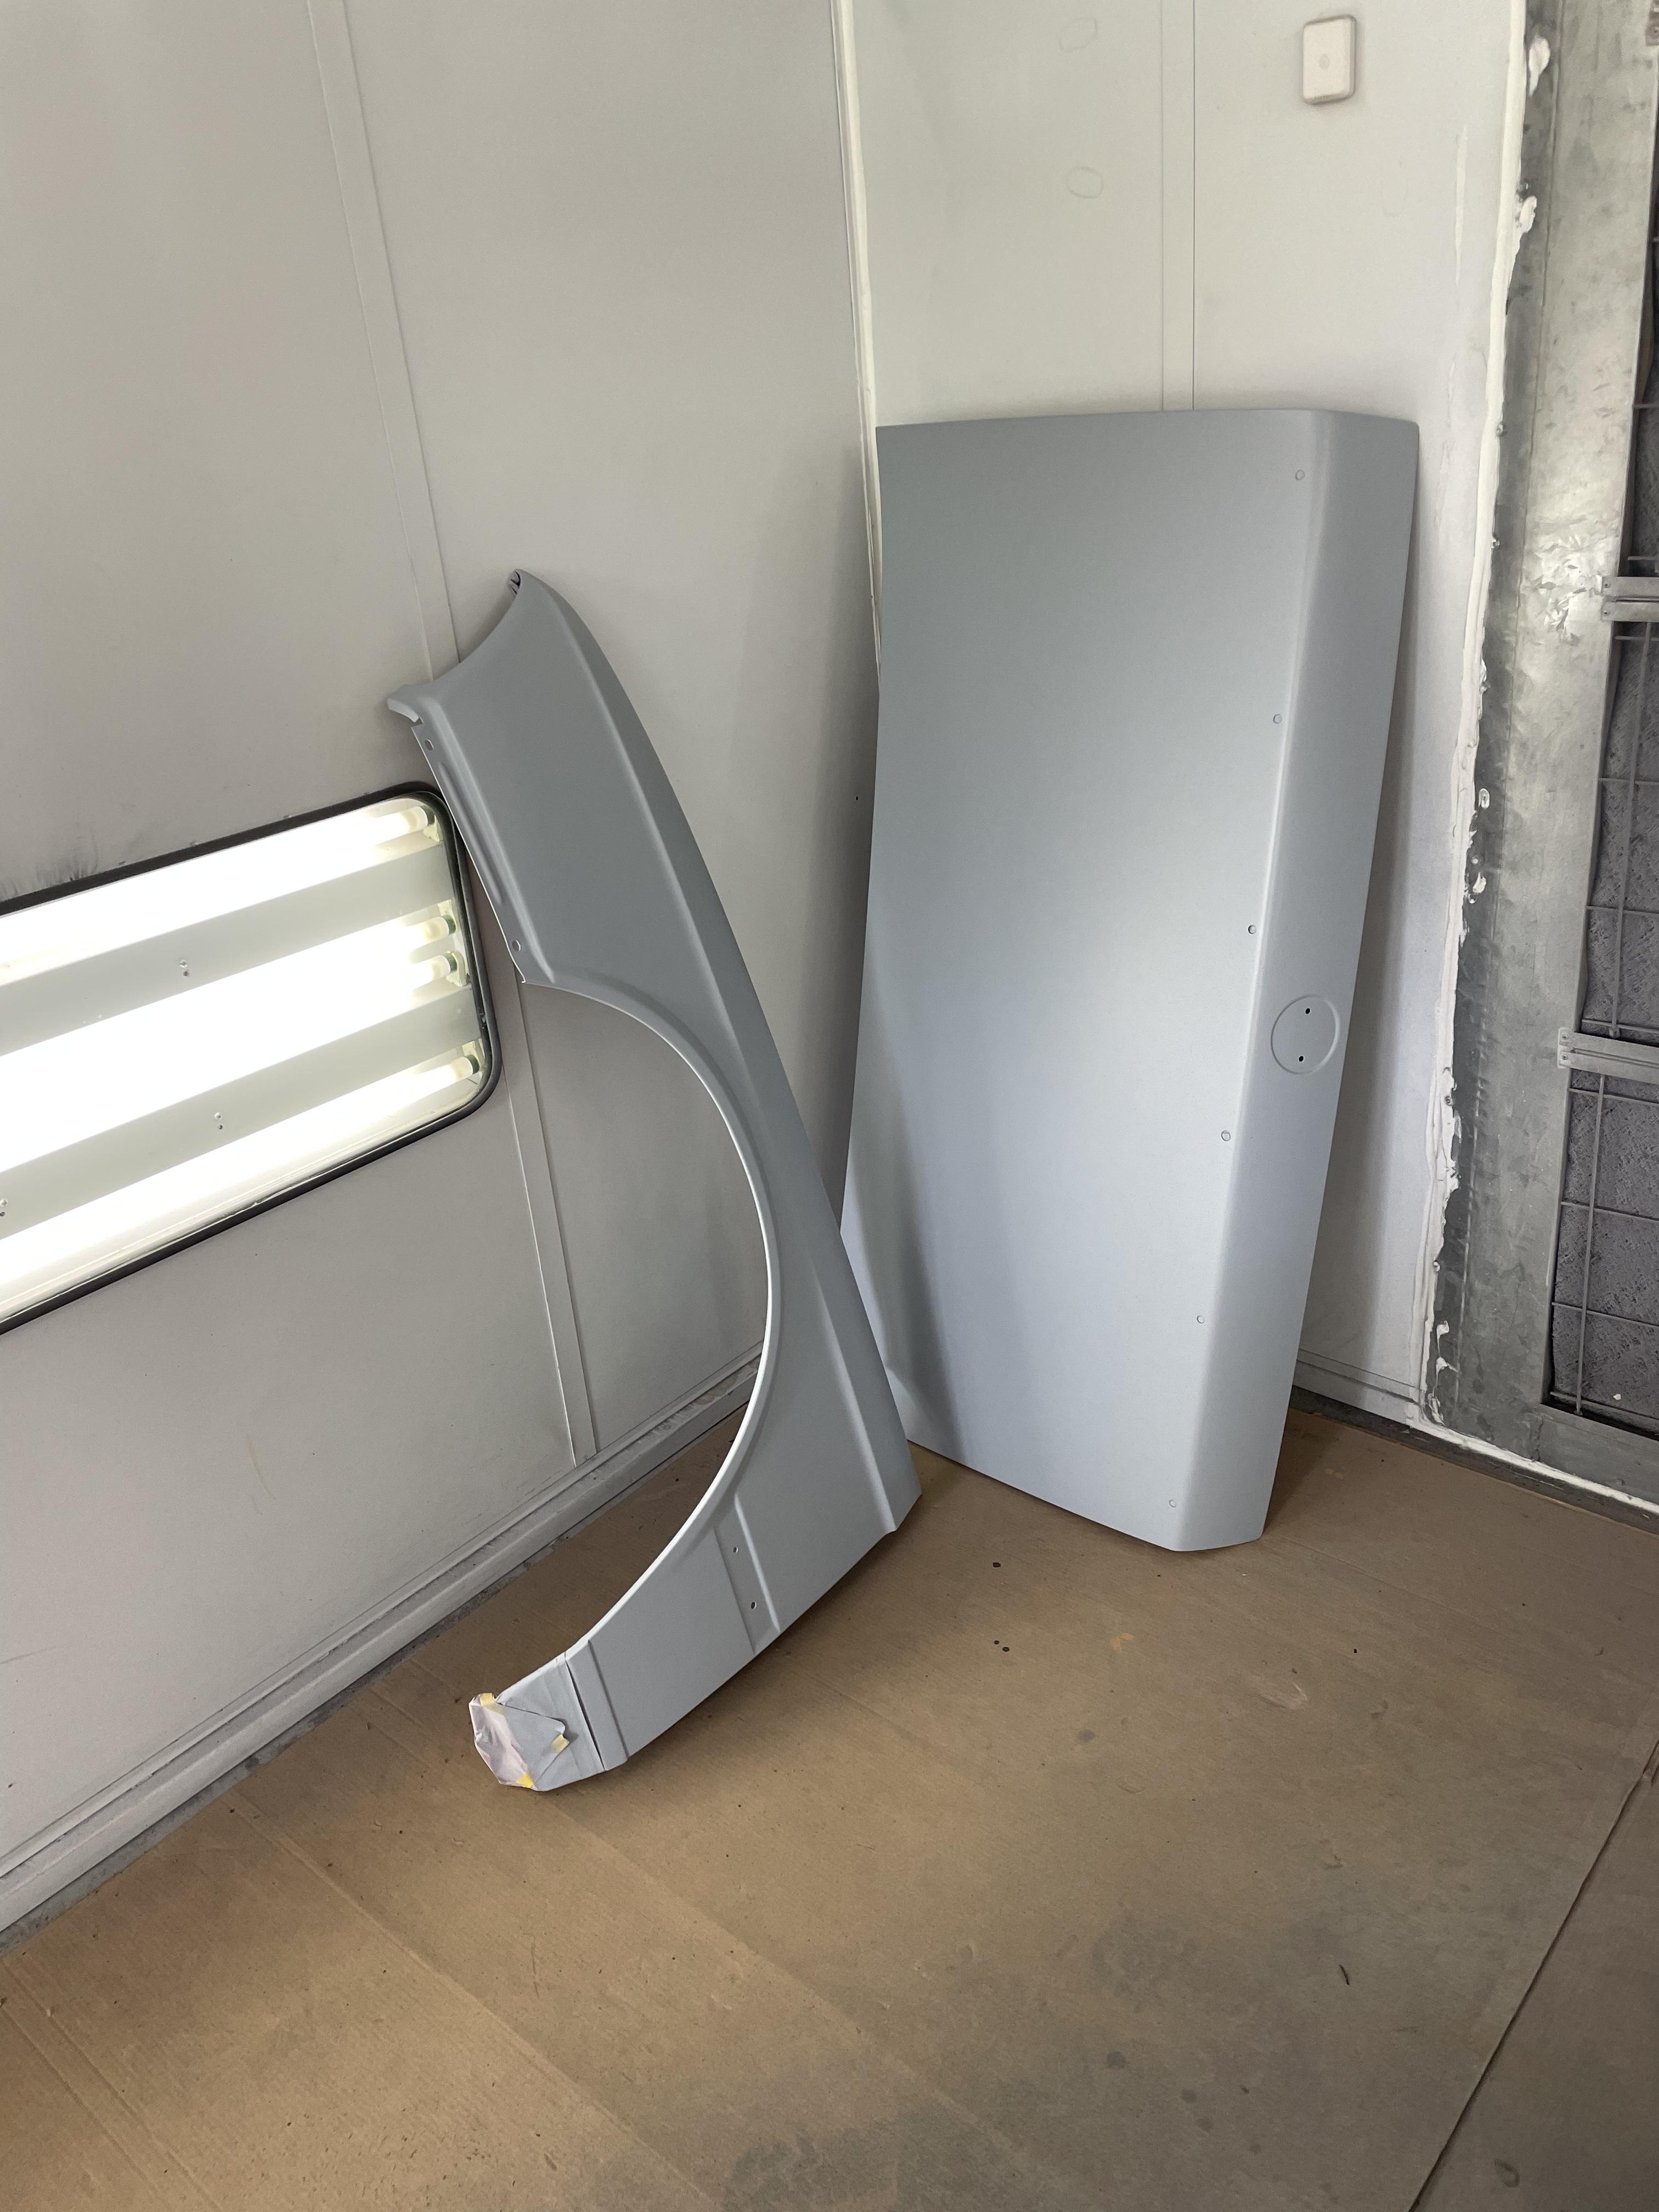
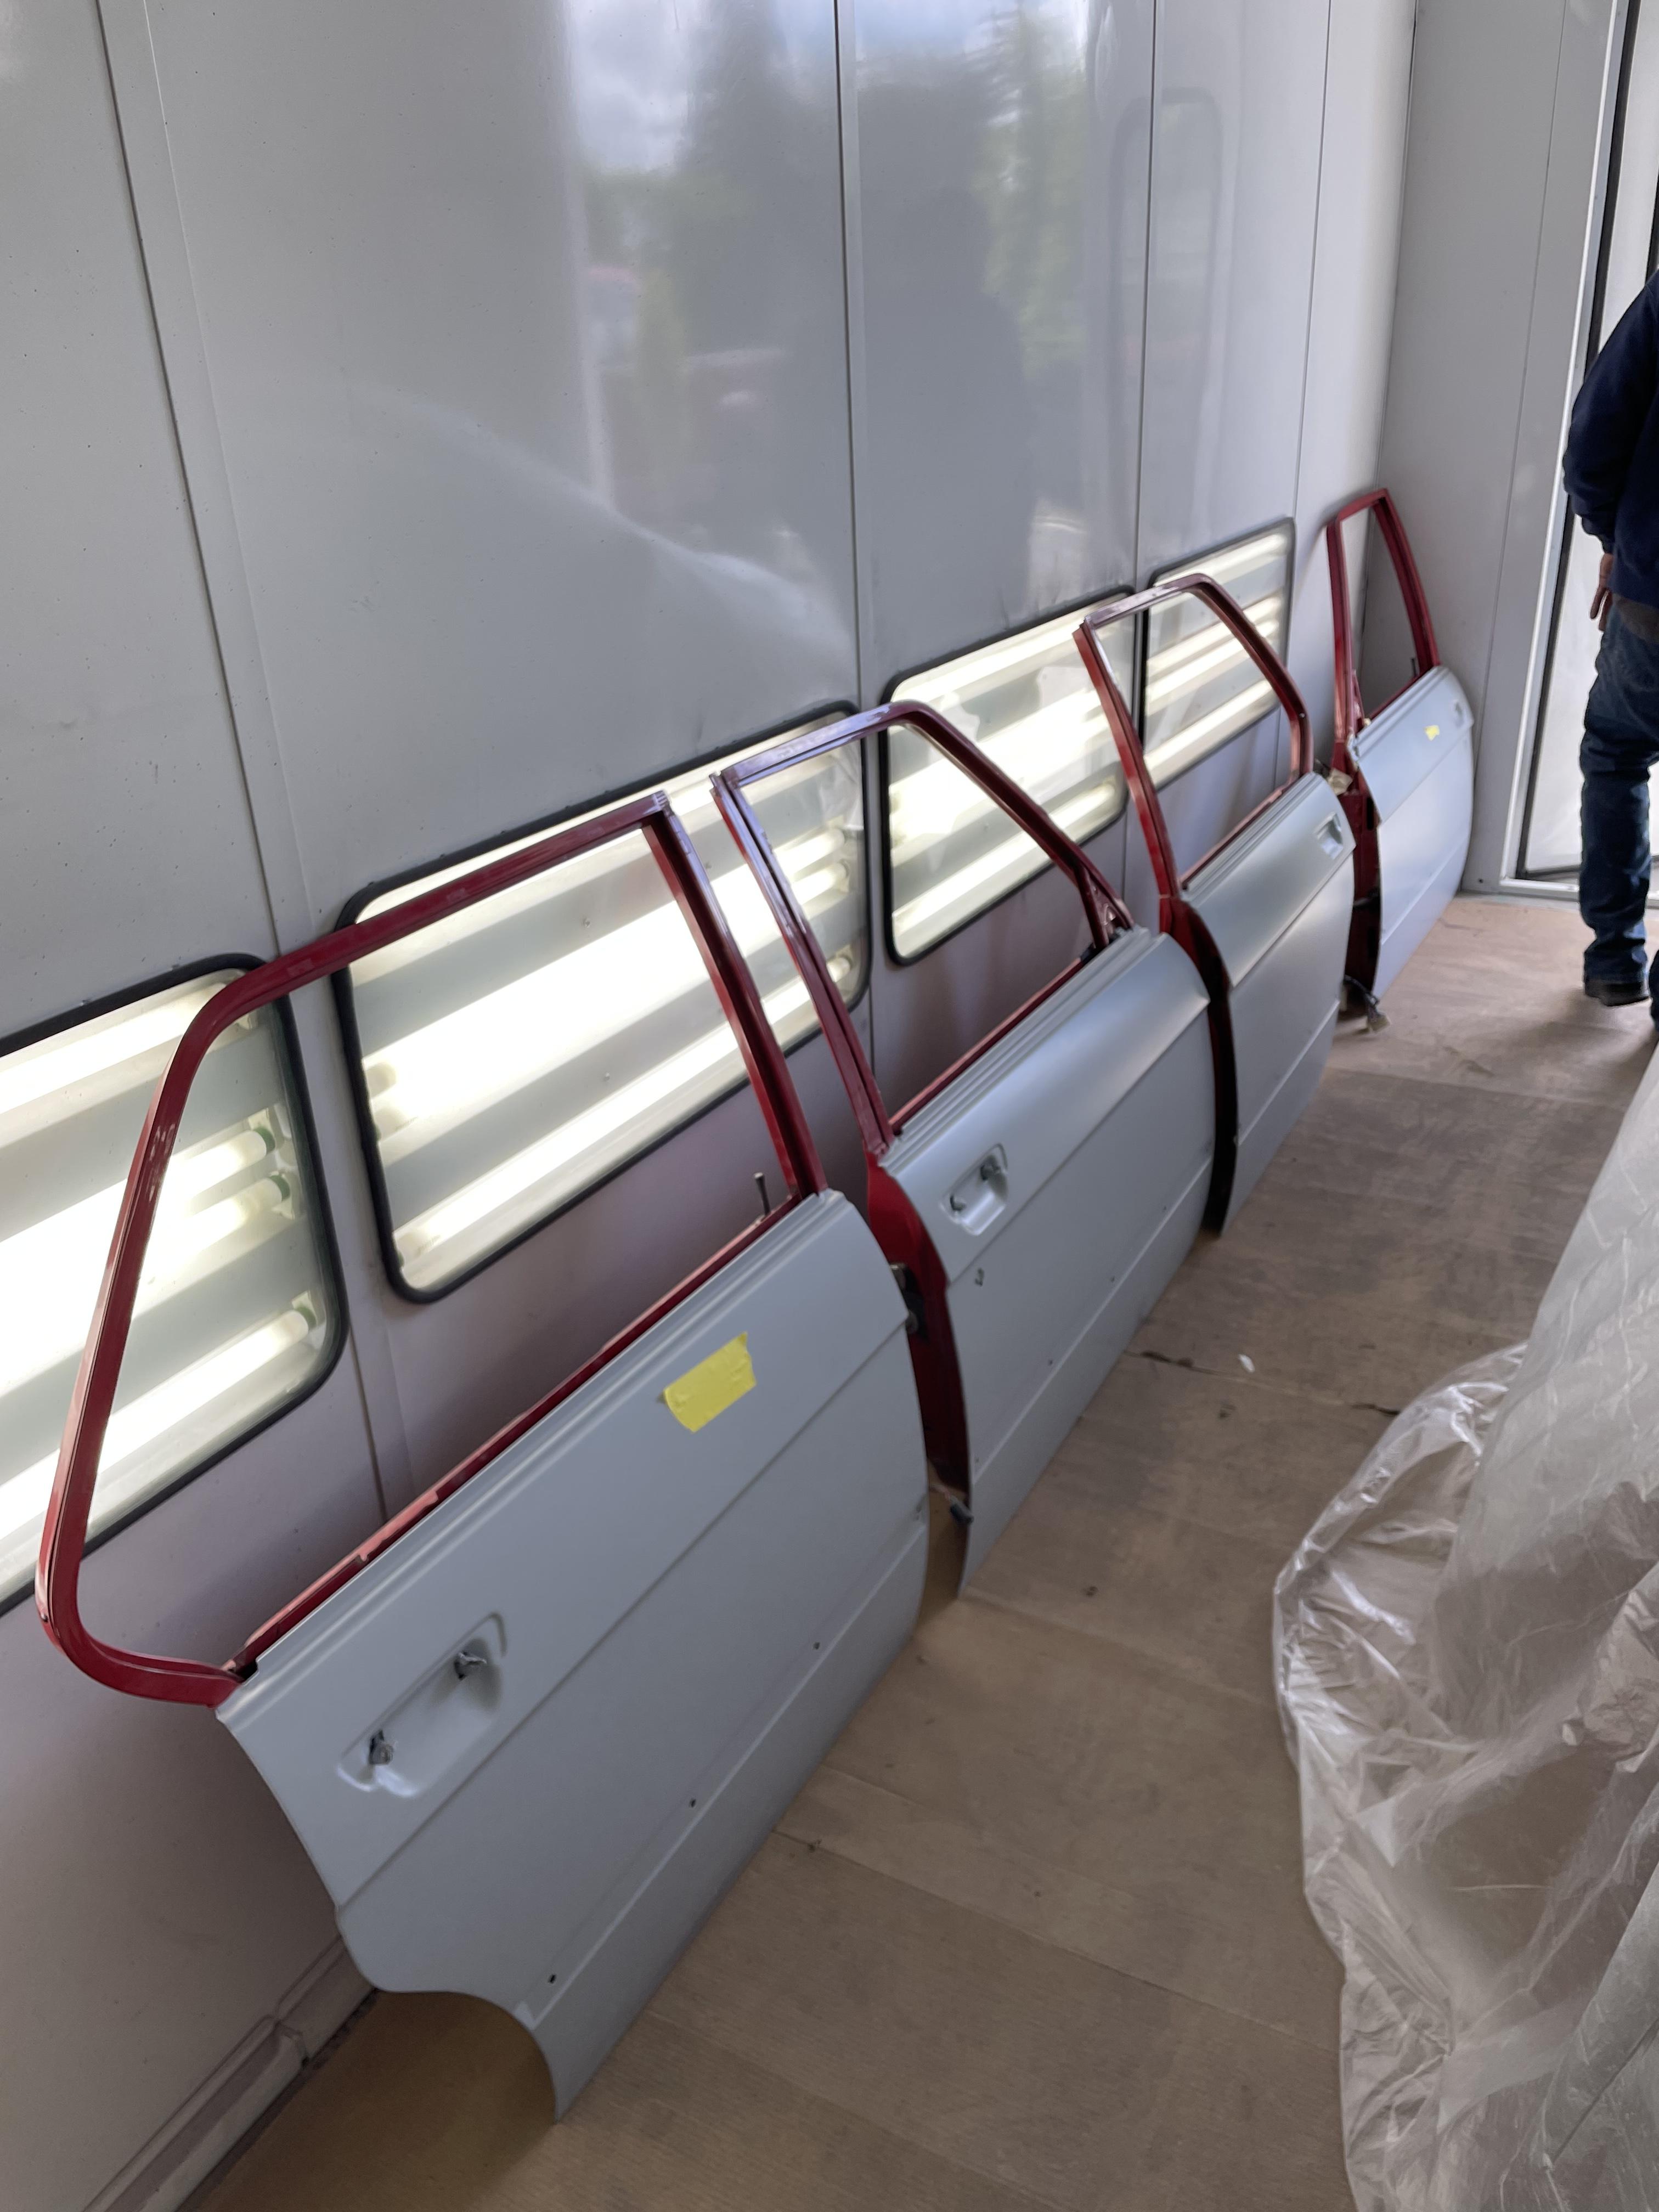
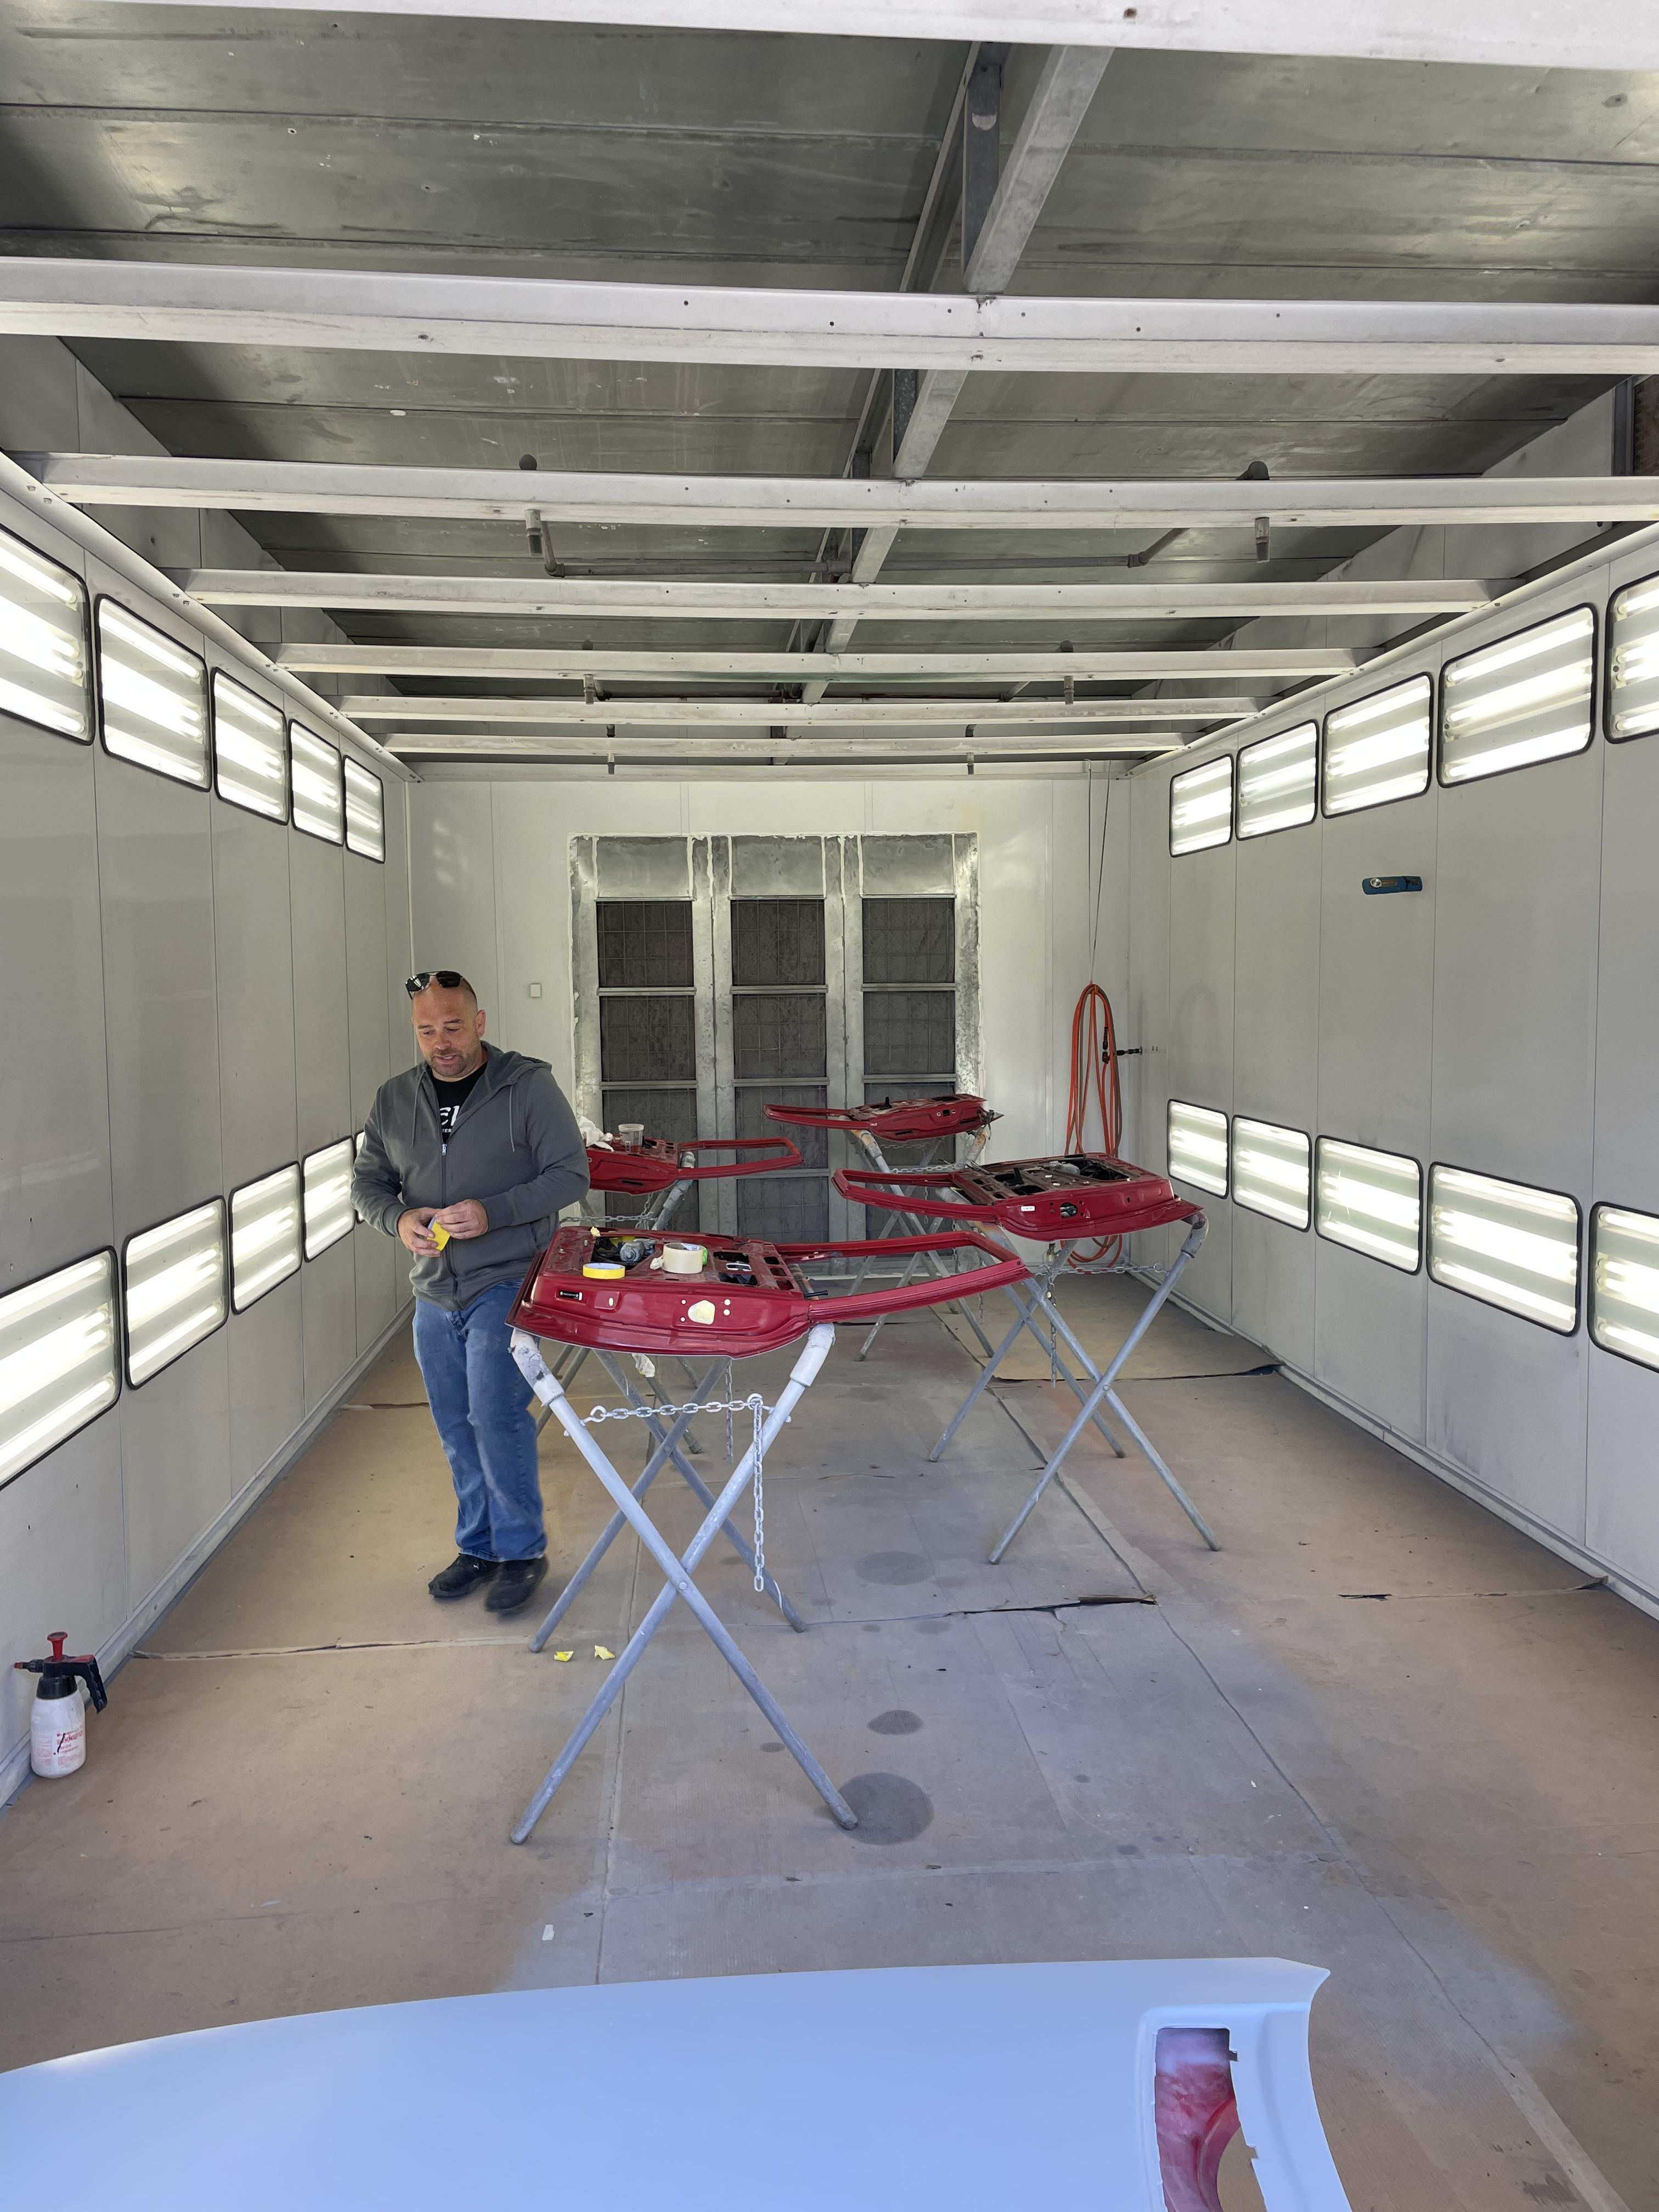
The doors, fenders, sunroof, and rear trunk hood are all ready to be final sanded prior to painting.
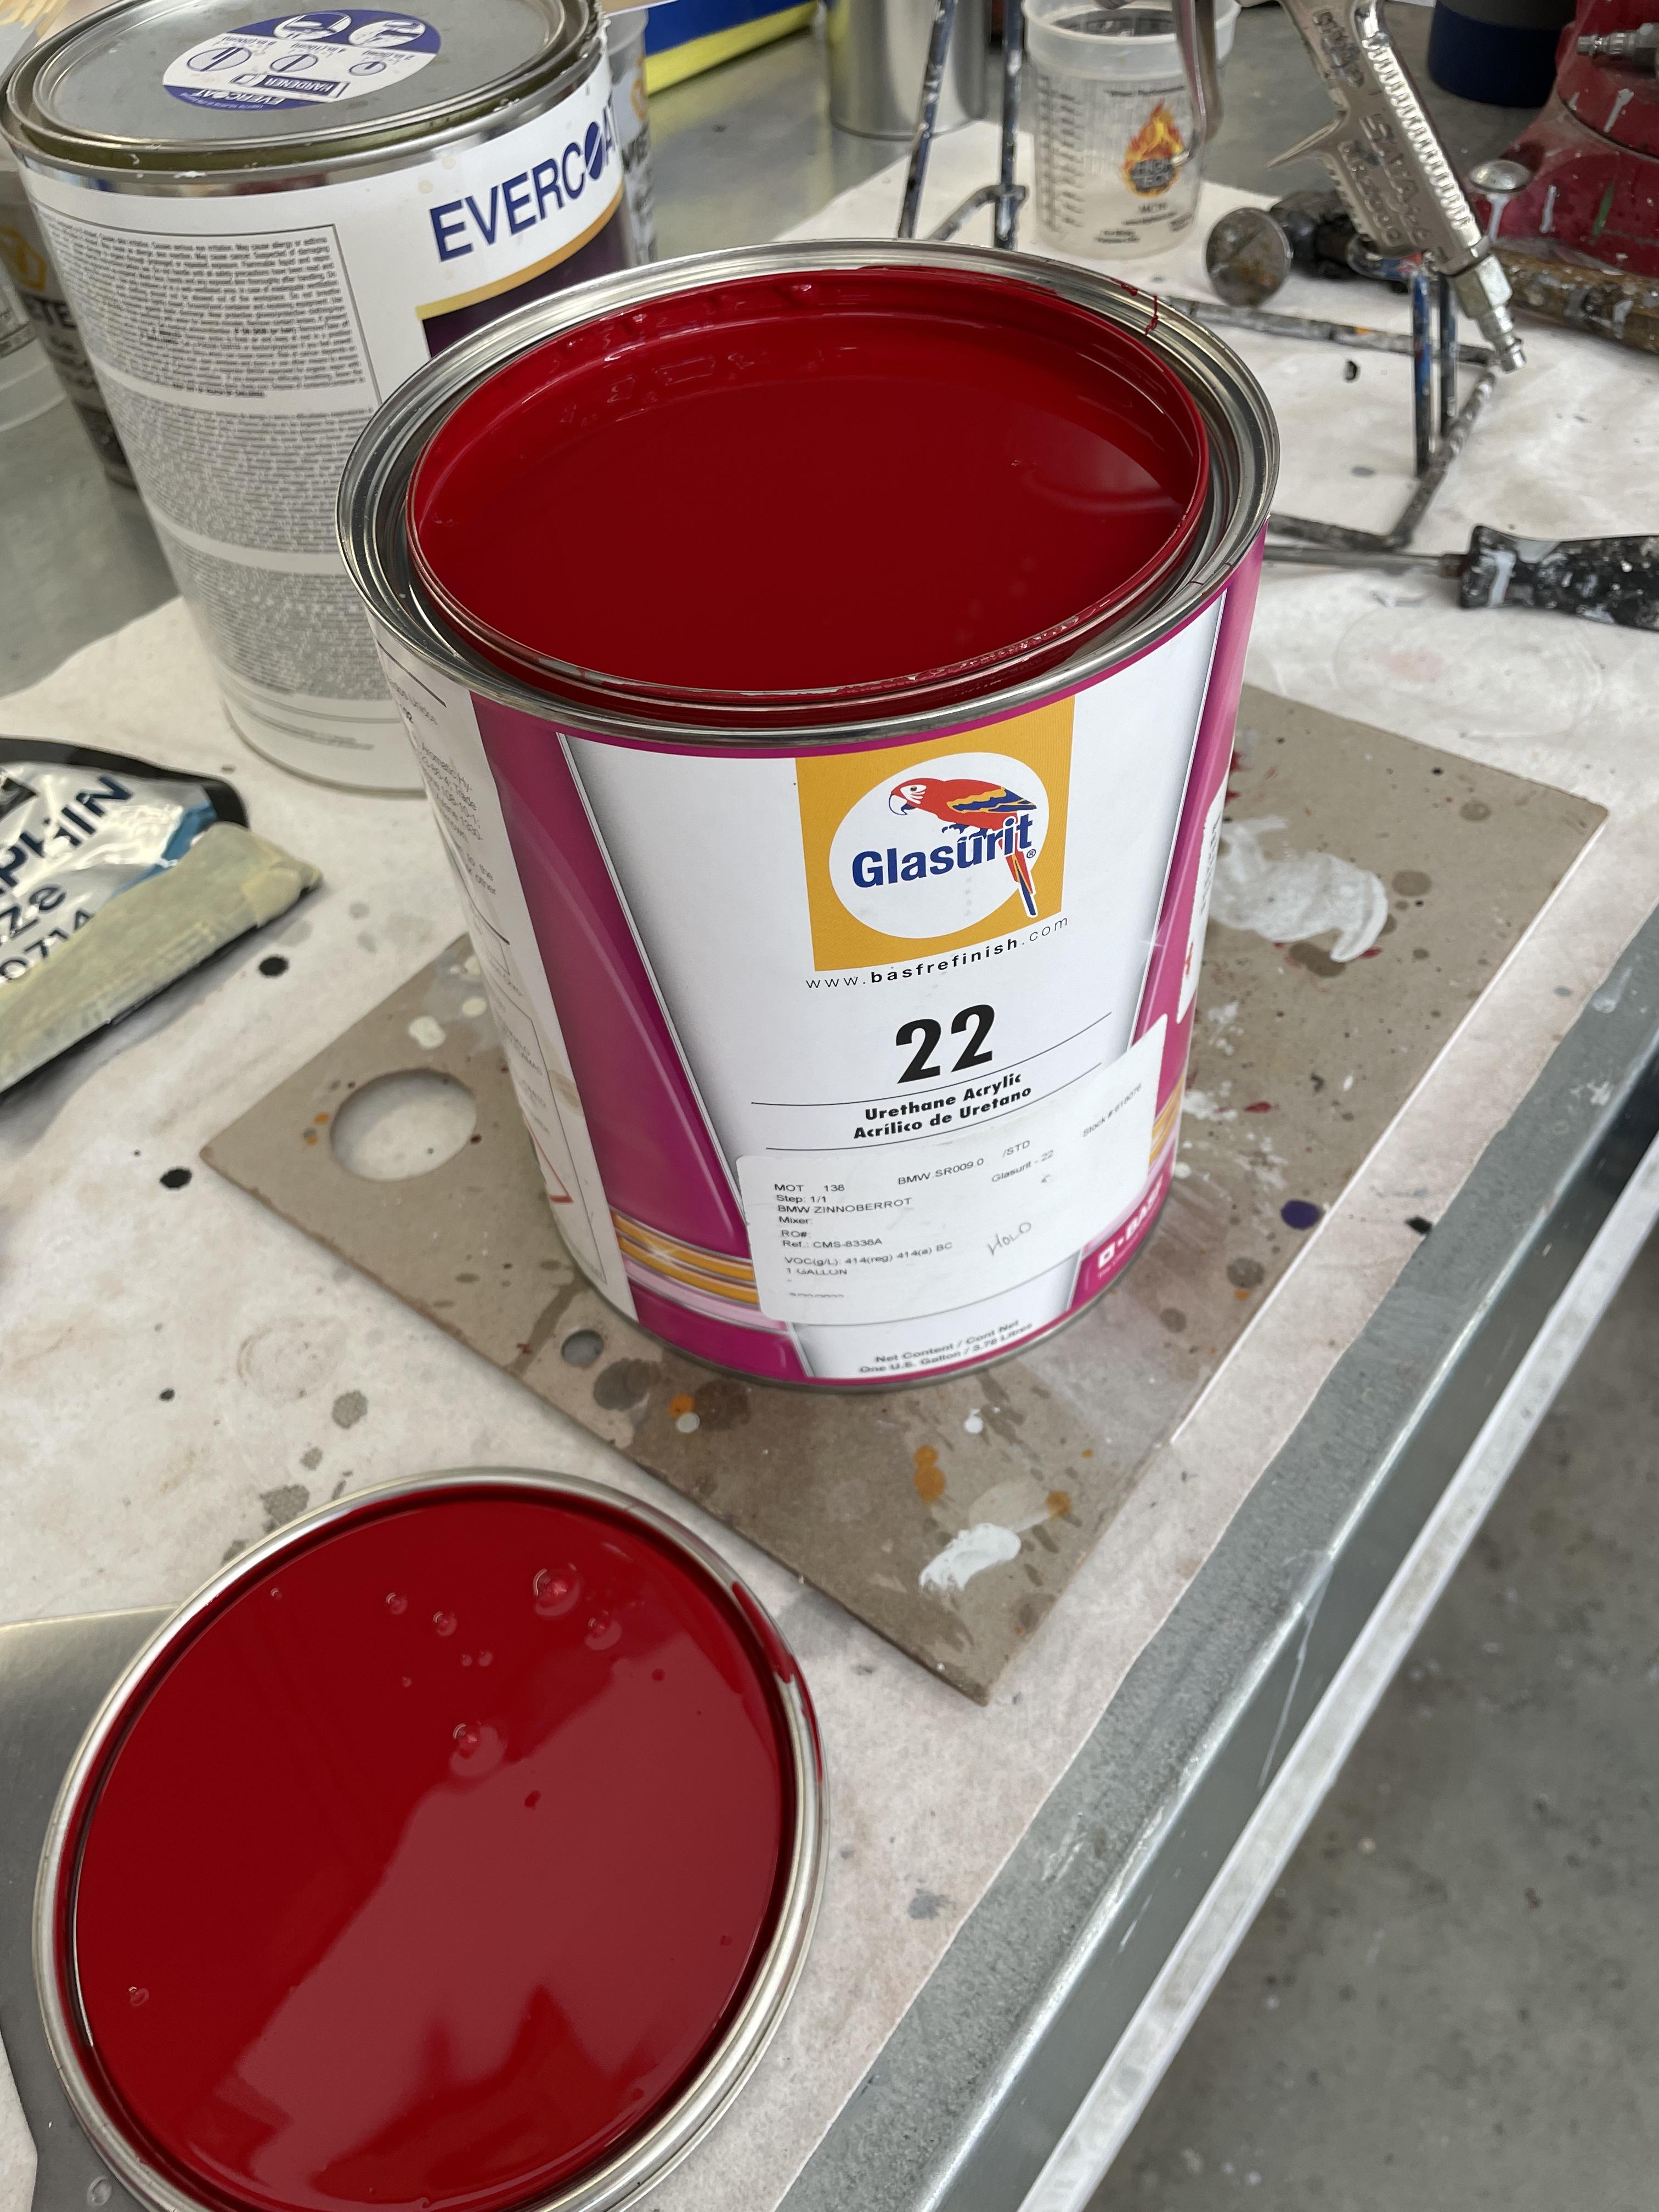
This is the paint. I stressed over whether to use modern paints or OEM Glasurit single stage. Glasurit won and is ridiculously expensive, $1900 a gallon. I am told Glasurit is phasing out their single stage paints. 18 years ago I restored our 1972 2002tii which is Colorado. I didn't know anything about paints and used a Dupont 2 stage that spec'd to Colorado. It's not Colorado. It's darker and is between Colorado and Inka. I am going to try to find a gallon of Glasurit to eventually repaint the tii. When we bought the car it's market value was about $7000. Today it's about $50,000, so having the correct paint is a big deal.
Sorry for the lack of postings recently but Cindy and I were traveling with her brother and wife. He's a retired pilot and she's an attendant, so we fly cheap. We went here, and bonus points to anyone who can name the country and place.


Various hole in the body work have been filled and sanded. The rear valance square holes have been filled except the outer two for the brackets that mount the rear bumper.

The doors, fenders, sunroof, and rear trunk hood are all ready to be final sanded prior to painting.


This is the paint. I stressed over whether to use modern paints or OEM Glasurit single stage. Glasurit won and is ridiculously expensive, $1900 a gallon. I am told Glasurit is phasing out their single stage paints. 18 years ago I restored our 1972 2002tii which is Colorado. I didn't know anything about paints and used a Dupont 2 stage that spec'd to Colorado. It's not Colorado. It's darker and is between Colorado and Inka. I am going to try to find a gallon of Glasurit to eventually repaint the tii. When we bought the car it's market value was about $7000. Today it's about $50,000, so having the correct paint is a big deal.

Sorry for the lack of postings recently but Cindy and I were traveling with her brother and wife. He's a retired pilot and she's an attendant, so we fly cheap. We went here, and bonus points to anyone who can name the country and place.

Re: And so it starts
Looking at the prep for your paint job, all I can say is "WOW!" Thank you for keeping us abreast of the progress you're making. Your advice about using Glasurit single stage is well received. That said, I am curious as to how many others have faced this decision? For those who have, which direction did you choose and why? Finally, were the results to your satisfaction?
If the above questions serve as a thread hi-jack, I apologize in advance. I'm willing to ask them in a separate post if that is prefereable by you, gwb72tii, or by the moderators.
Thanks!
If the above questions serve as a thread hi-jack, I apologize in advance. I'm willing to ask them in a separate post if that is prefereable by you, gwb72tii, or by the moderators.
Thanks!
Re: And so it starts
I traded pm's with several board members who had gone thru this decision before me. A big part of the decision was correct color, something that goes back to my tii. The Glasurit paint is OEM spec. If you go through the "Vlad" posts Charlie used this exact paint for his car, which is the same color as my car. His results were spot on for color.
Part of the decision was that these cars are rising in price. I wouldn't classify the 535is as a collector car, but 20 years ago the 2002tii wasn't a collector car either. And due to my ignorance of 2 stage vs single stage paint, I will have to re-paint my tii eventually to the correct Colorado color.
HTH
Re: And so it starts
1900 a gallon?
Re: And so it starts
all in with reducers and suck
haha spellcheck
and such
update: seems the auto paint supplier in the Great PNW that reps Glasurit is thinking of dropping the brand as they sell very little, not Glasurit dropping their product 22
haha spellcheck
and such
update: seems the auto paint supplier in the Great PNW that reps Glasurit is thinking of dropping the brand as they sell very little, not Glasurit dropping their product 22
Re: And so it starts
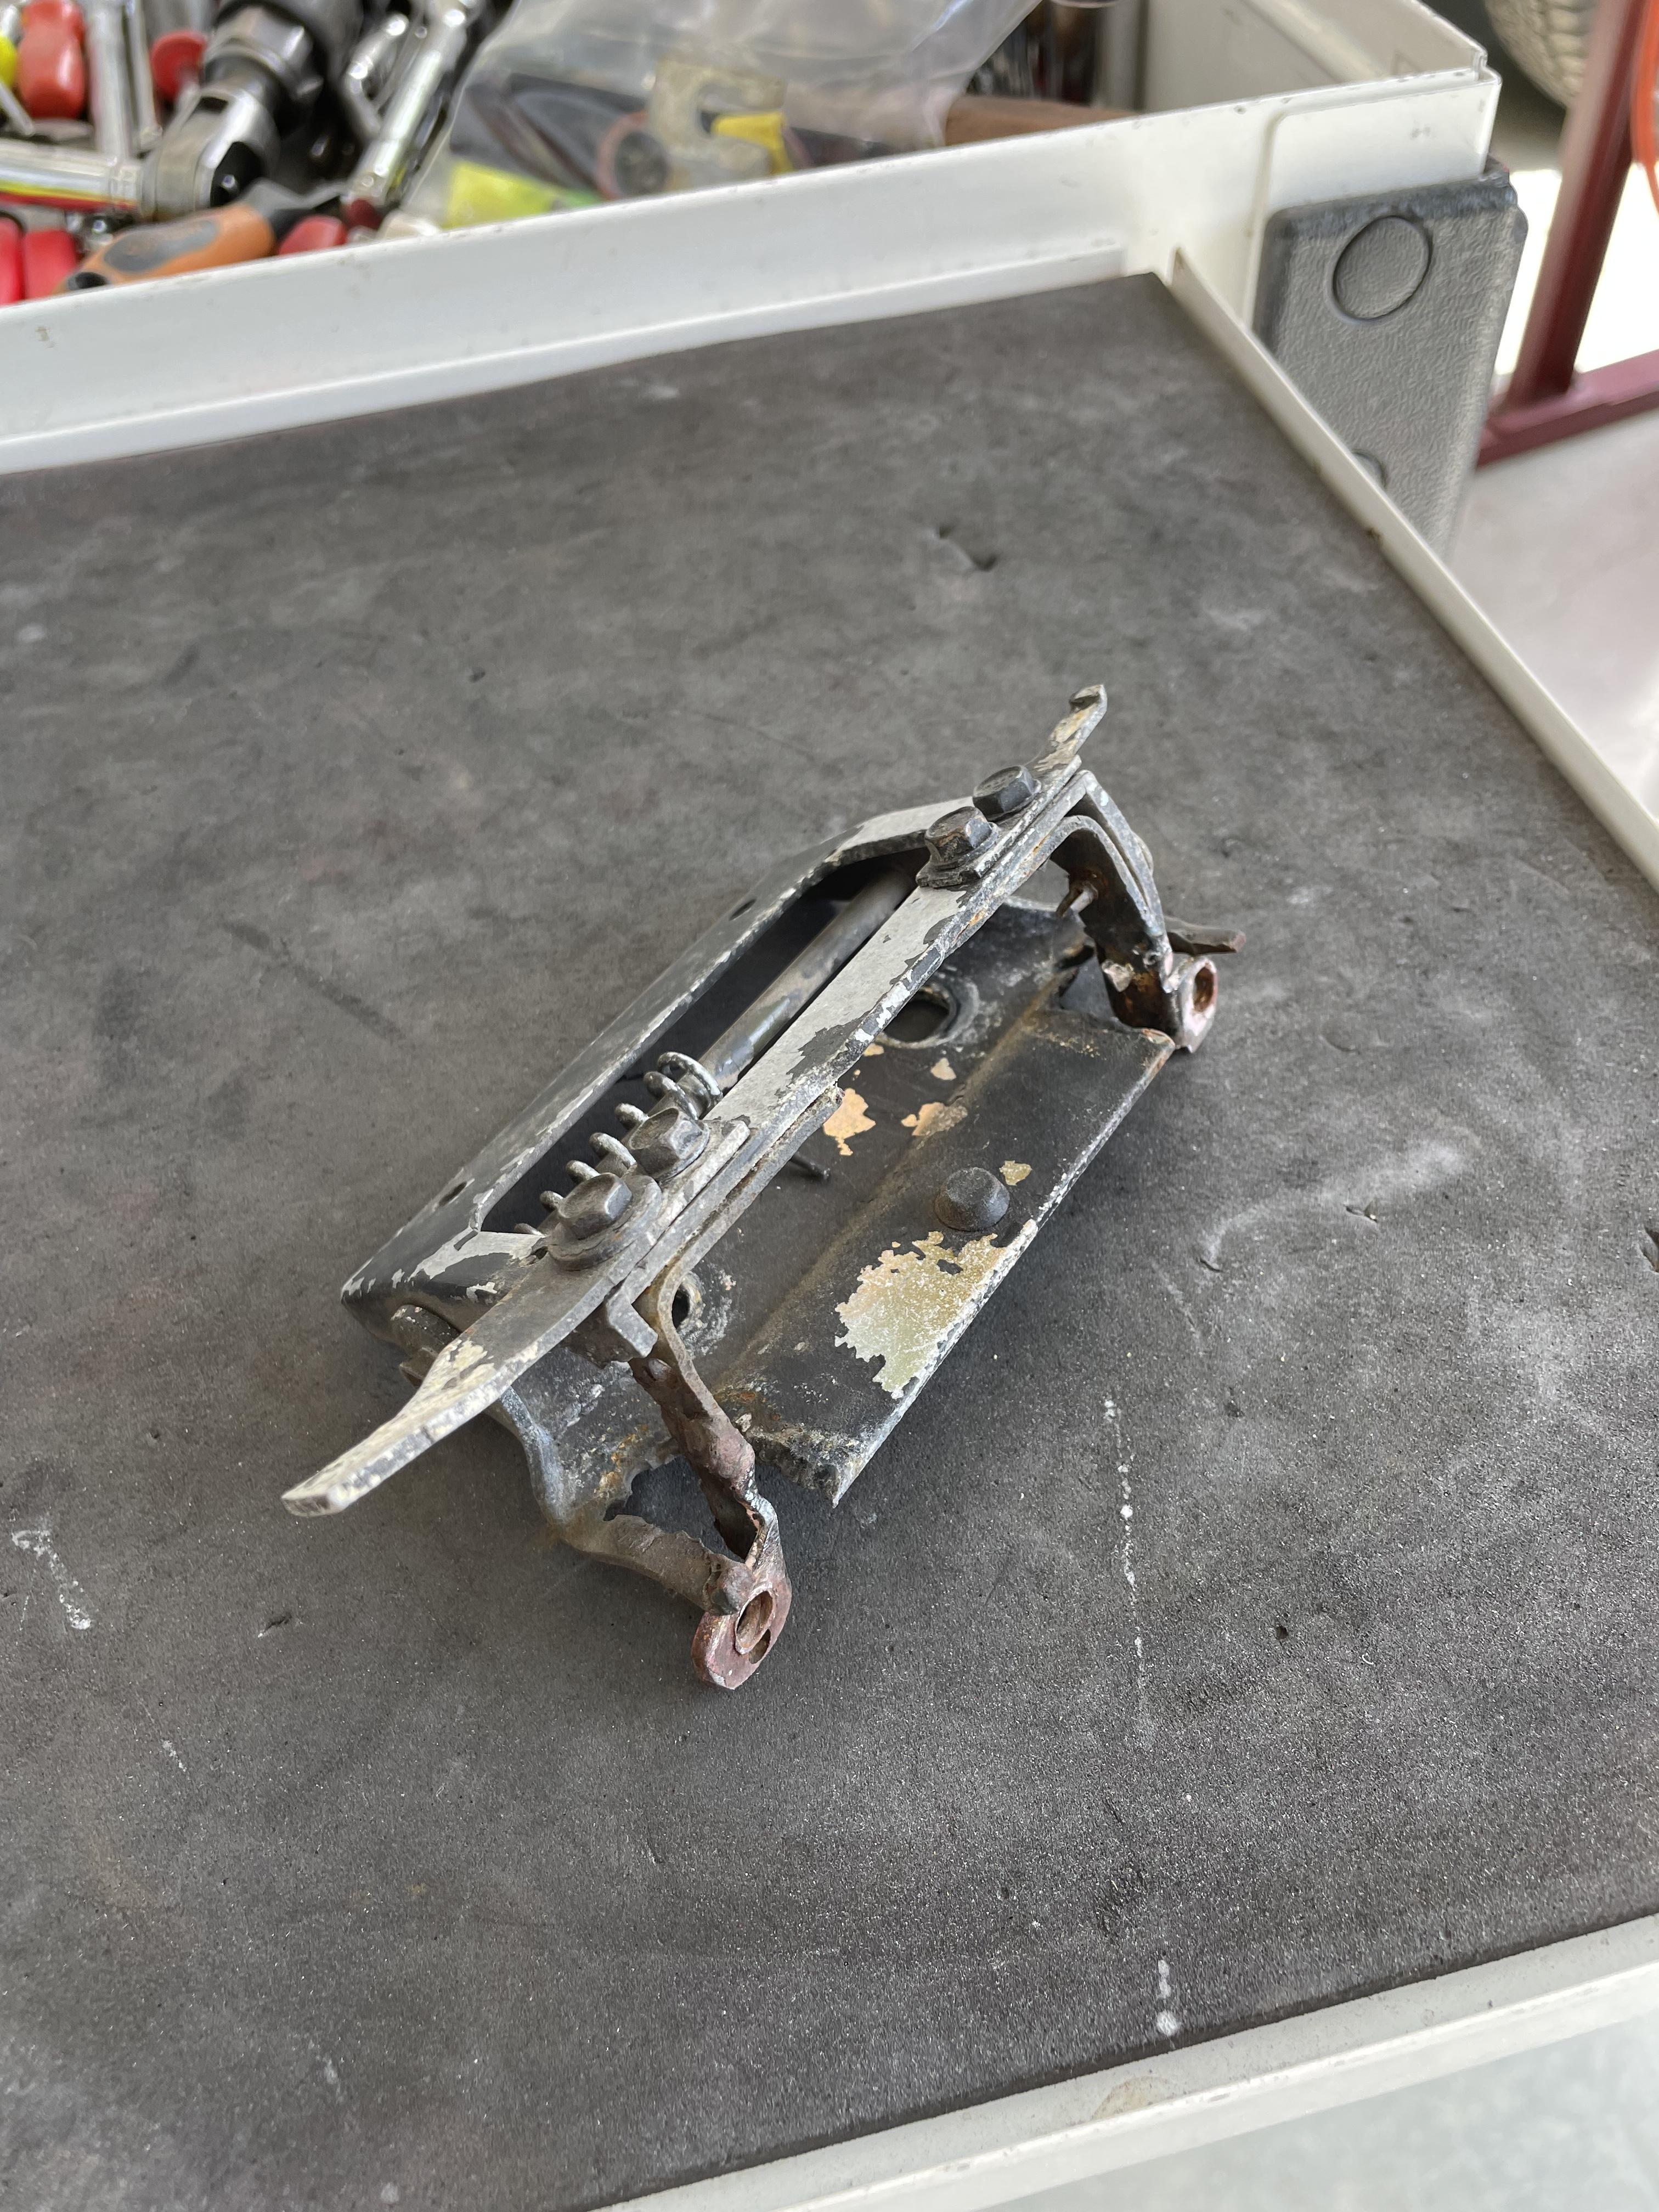
Look at this, it’s the driver’s door handle. Pieces are missing and it’s been welded together. Kohler correctly pointed out some time ago that the driver’s door on Maeve was a different shade of red, and indeed it’s the only panel on the car without a VIN tag. Luckily I found a like new replacement on eBay. If only the car could talk, I’d like to know the story behind a welded door handle!
Paint is coming soon.

Paint is coming soon.

Re: And so it starts
Sorry for the lack of postings recently but Cindy and I were traveling with her brother and wife. He's a retired pilot and she's an attendant, so we fly cheap. We went here, and bonus points to anyone who can name the country and place.

[/quote]
One of my favorite games - is it the south of France, west of Nice?

[/quote]
One of my favorite games - is it the south of France, west of Nice?
Re: And so it starts
I was thinking Mediterranean too but Spain. Maybe somewhere on the Costa Brava?alps wrote: May 23, 2022 7:13 PM One of my favorite games - is it the south of France, west of Nice?
Re: And so it starts
Bing!! We have a winner, Costa Brava it is! Wonderful place to visit, small towns, decent food, friendly people, and a hiking trail along the coast.
Re: And so it starts
Maybe I should have been less specific, it is west of Nice after all! lol. Looks gorgeous.gwb72tii wrote: May 24, 2022 10:33 AMBing!! We have a winner, Costa Brava it is! Wonderful place to visit, small towns, decent food, friendly people, and a hiking trail along the coast.
Re: And so it starts
What do I win?gwb72tii wrote: May 24, 2022 10:33 AMBing!! We have a winner, Costa Brava it is! Wonderful place to visit, small towns, decent food, friendly people, and a hiking trail along the coast.
I have to admit that I might have had an unfair advantage because I lived on the Costa Brava as a kid. It was a little town that no one has ever heard of called L'Ampolla https://www.google.com/maps/place/L'Amp ... d0.6867939
I'm on the catamaran and Mom is rocking the leopard bikini.

Re: And so it starts
We stayed in Sant Feliu de Guíxols as a home base.
I’d go back.
I’d go back.

