haha tetanus gets little to no esthetic love except the occasional vacuum and window cleaning. talking about my wrapped 'is
Rebuilding My 1988 US-spec M5
Re: Rebuilding My 1988 US-spec M5
Re: Rebuilding My 1988 US-spec M5
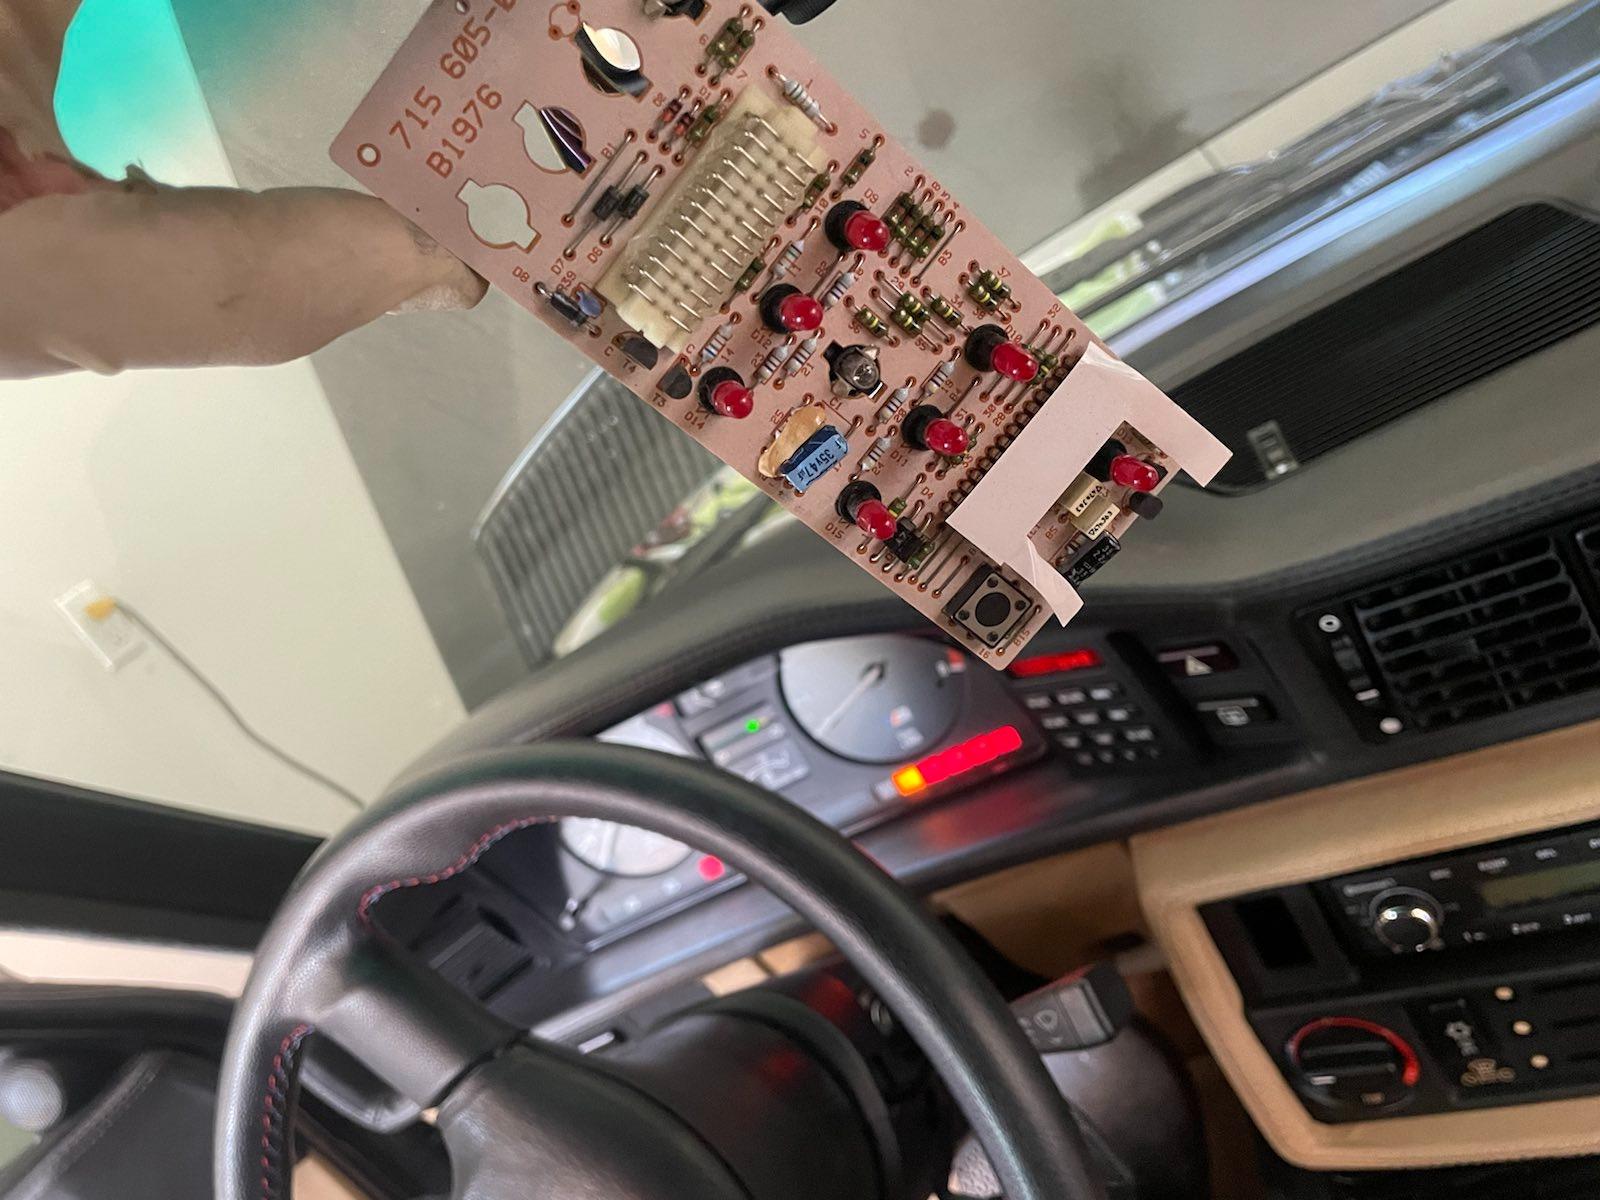
I set the day aside today to make progress. I can check the last bullet off the list! "Rear brake light" check light is cleared. Prior to the move to NV, I spent a few hours pouring over the wiring diagrams & learning how the "logic" of the check circuits worked for the brake light check. All the relays checked out (the box in the trunk + the separate relay embedded in the third brake light), all the wiring from front to back worked, and of course I also checked to make sure that the brake lights themselves were in fact working & had the correct bulbs. Check Check Check. The next obvious thing (based on all the related threads here) was to reflow the solder connections on the check panel itself. During the course of the move, the original circuit board got mixed up with my spares, so I picked out the cleanest one, re-flowed the solder & reinstalled everything. Success! Maybe it was the solder re-flow, maybe I picked a working circuit board. Who knows. But at least I get to check something off the damn list.jhh925 wrote: Jun 14, 2022 12:24 PMOther things that are still on the list:
- Get idle cleaned up. Likely need to readjust the butterflies.
- I'm not happy with the quality of the leather coverings on a bunch of the interior parts, especially the bunching on the dash. I'm collecting more parts to try to get a re-do on that stuff.
- I have the original basket weaves on the car. I have refinished BBS wheels that are ready to go on there as soon as the front end in properly aloigned ... but man, those original basket weaves look great. Need to reconsider the BBS wheels.
- I can't clear the "Rear Brake light" warning on the check panel. This one's a puzzle. Everything in the rear brake light check circuit is fine, and even shorting the pin on the check panel doesn't clear the light. I've tried to re-flow the solder on the board, but I haven't had a change to test my work yet.
Here's a super-dramatic picture of my check panel with no lights lit up. The panel did initially light up with the expected brake light "error," but it cleared as soon as I pressed the brake pedal, as it's supposed to.
Turning to the idle.
Re: Rebuilding My 1988 US-spec M5
Hi there! I read every bit of this amazing thread. Thank you! The one thing I wish you talked about because I’m trying to figure it out as we speak, is how you located the stud holes in the front European valance for the front air dam. I’d hate to drill holes in the wrong places. Any suggestions for me on this, please? Thank you!
-
CanadianMiniFan
- Posts: 145
- Joined: Oct 16, 2011 6:31 PM
Re: Rebuilding My 1988 US-spec M5
Also just read through this thread, excellent work and attention to detail, hope you get the Moyronic 1.3 working well and get the car out and enjoy it!
Re: Rebuilding My 1988 US-spec M5
So what’s the best source for the Natur leather for the interior? I think some of the original leather was really thin, like on the center console. GAHH makes some great seat covers. Thanks.
Re: Rebuilding My 1988 US-spec M5
I'd use Veterans Upholstery out of Los Angles (or somewhere in SoCal). I think the code is BM830? Memory is fuzzy. The thin leather used on, e.g., the ashtray & AC grill was manually thinned (or "skived" as I think they say in the industry). The Veterans leather is a very good match, though I'd probably have to admit it's not perfect. Others may disagree, but even if you pull a bvit of sample leather from an area that was well protected over the past 40ish years, that color is still likely to be a bvit faded. And even among survivor cars, it seems to me that the color varies.Syndrome wrote: Mar 23, 2023 7:41 PM So what’s the best source for the Natur leather for the interior? I think some of the original leather was really thin, like on the center console. GAHH makes some great seat covers. Thanks.
Also, don't cheap out on the leather. I'm currently doing another M5 for a board member here. He sourced his own leather. He shopped a lot and talked to a bunch of places that do custom dye work. He got a great color & texture match, but the shop he ended up using then used sub-par leather that is now turning out to be pretty easy to tear. The Veterans stuff is very strong.
Re: Rebuilding My 1988 US-spec M5
Long overdue post! I basically finished the car back in late 2021 / early 2022, and then took on a new M5 restoration project for a friend. That project kept me occupied for about a year and a half, by which time I'd bought another project car form myself. That new project mostly kept my M5 sitting in the corner on a lift collecting more dust that it should have.
And when I say I "basically finished the car back in late 2021 / early 2022," I mean that I could drive the car, though the list of things that still had to be worked out was annoyingly long. So long, in fact, that for Reno Fest 2022, I basically trailered the car from my house in south Reno to the event in north Reno. Not my proudest moment.
Among the reasons I trailered the car, top of the list was that I could never really get it to idle correctly, and even off idle it was never very smooth. I finally decided to ditch the Motronic 1.3 "upgrade" and go back to the original Motronic 1.1. That job mostly involved ripping the Motronic 1.3 engine harness out and putting in another E28 M5 Motronic 1.1 harness I'd gotten off of eBay. (I'd originally told myself that all my M1.3 changes were reversible, but by the time I decided to actually test that and reverse that mod, I had no appetite for completely redoing the old harness.) I also got the original injectors refurbished, and added all the old M1.1-specific items back (like the barometric pressure sensor and the old-style purge valve stuff).
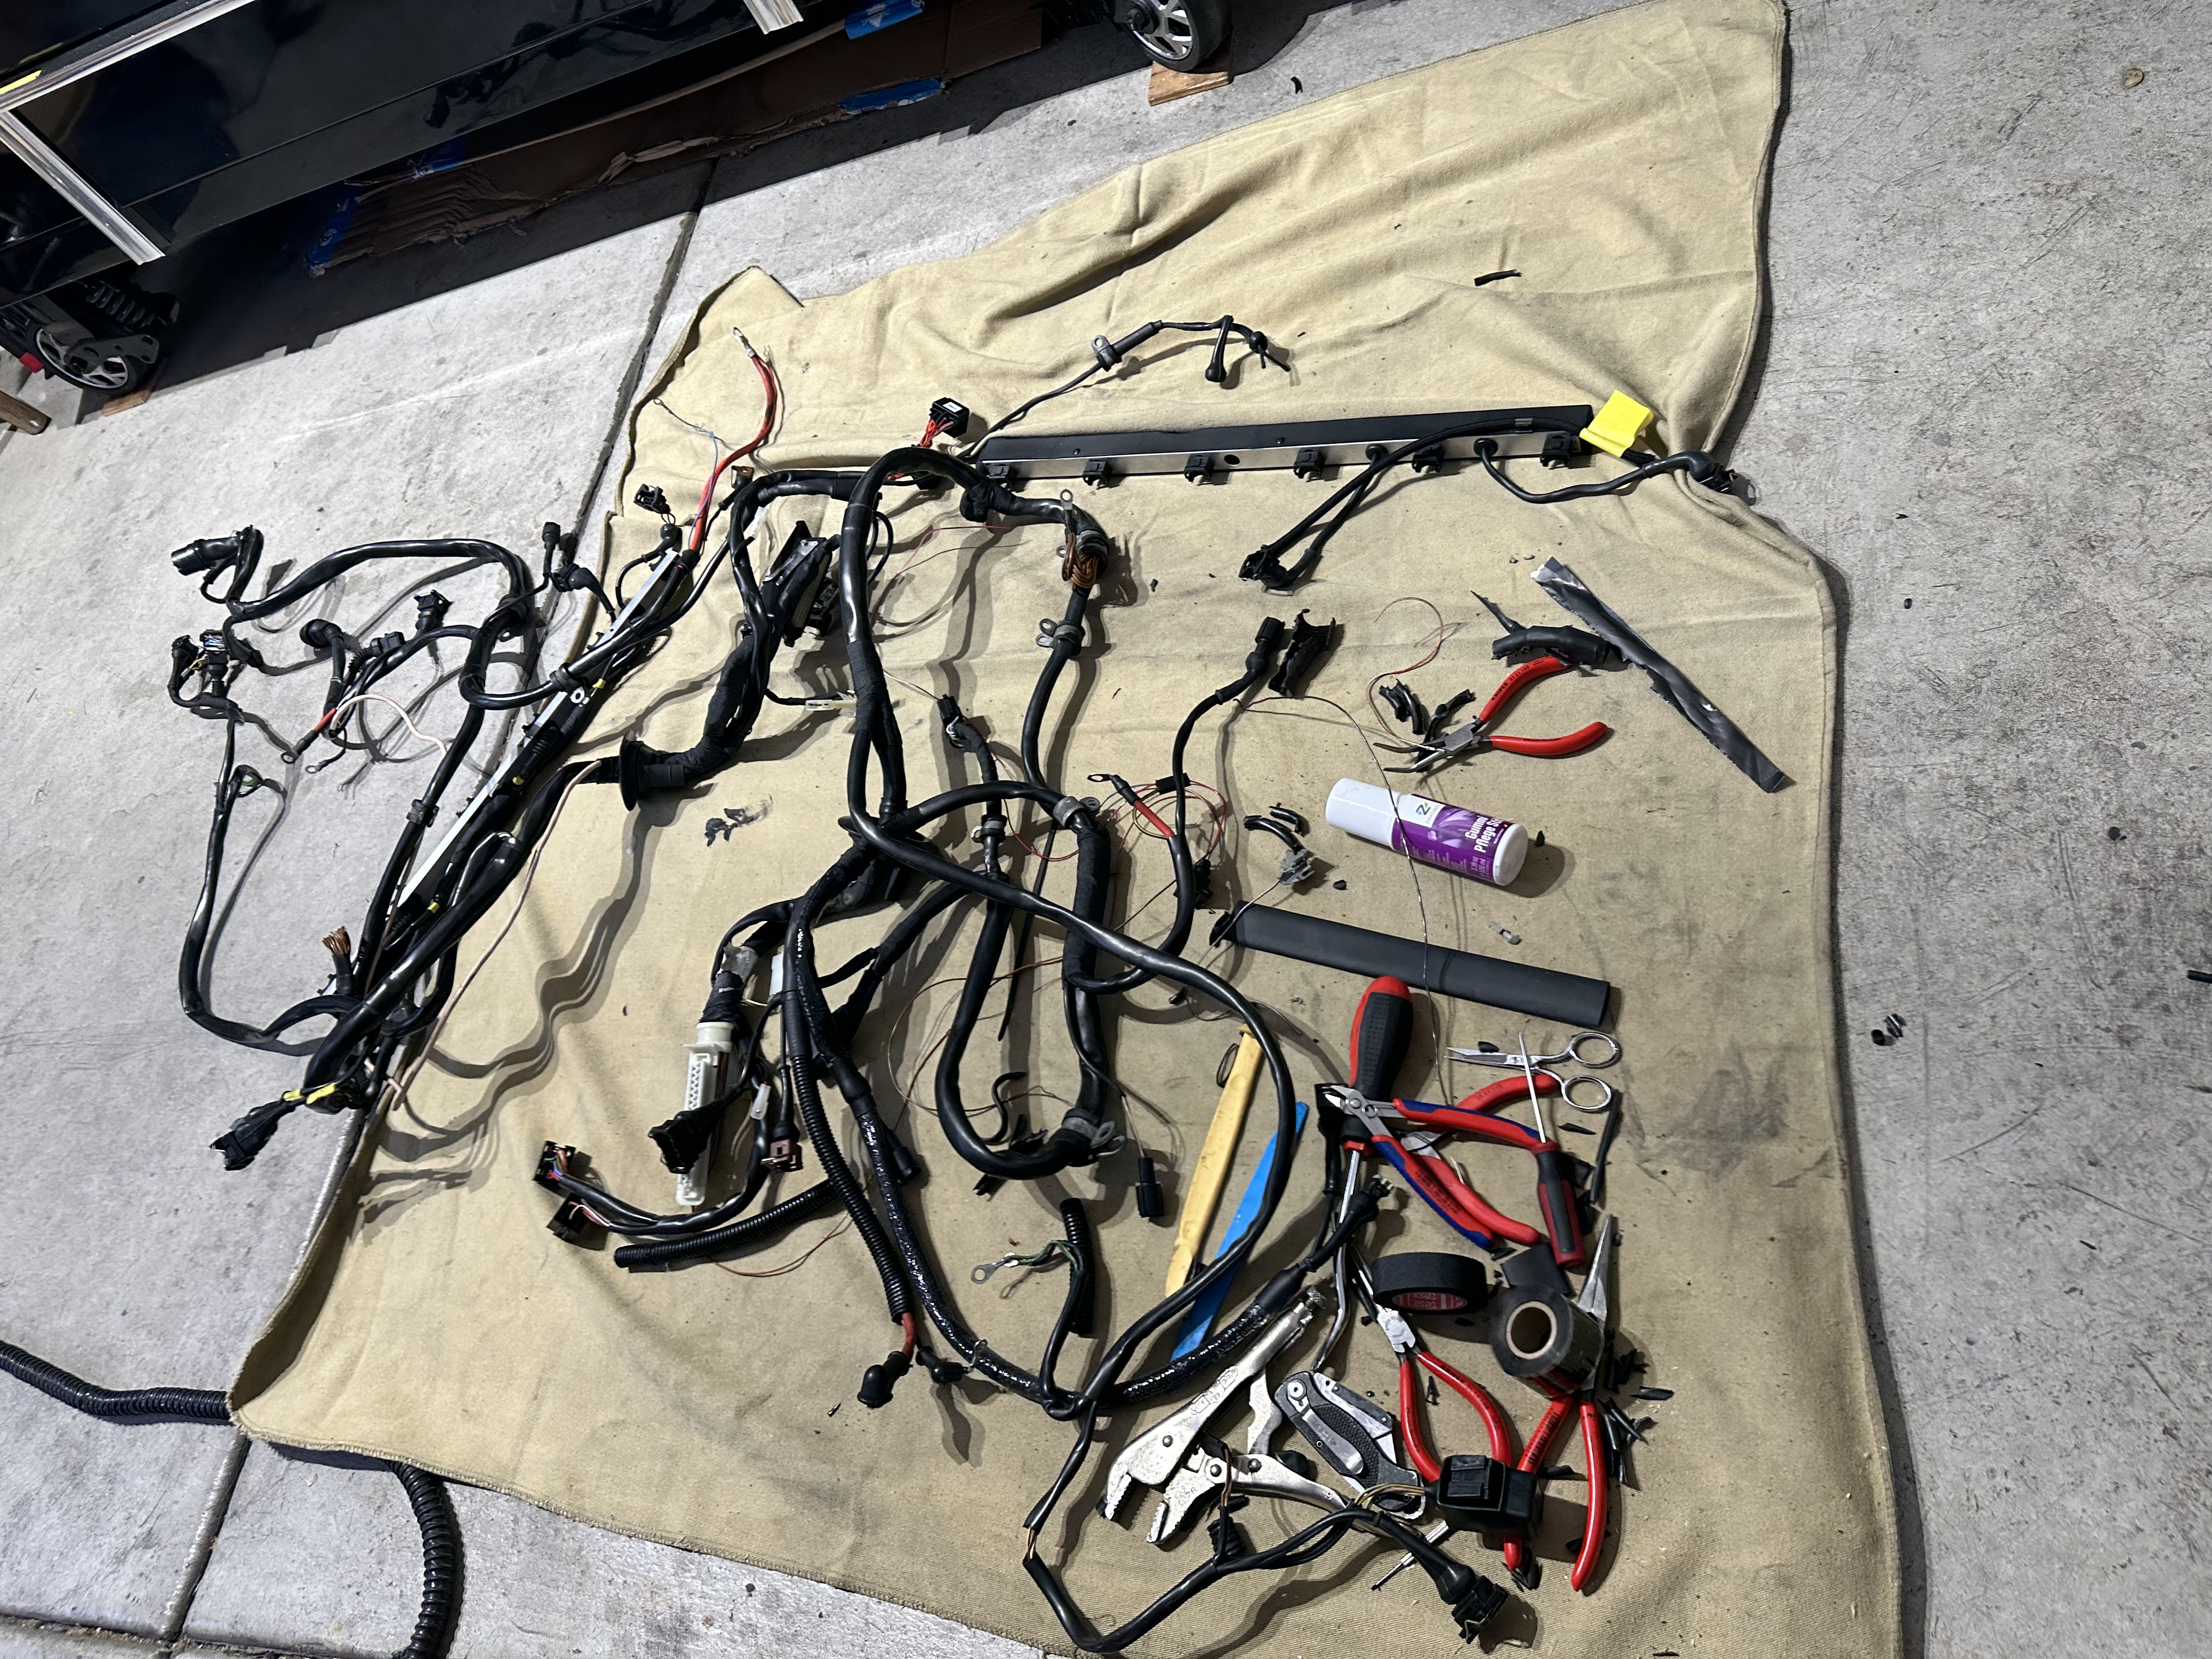
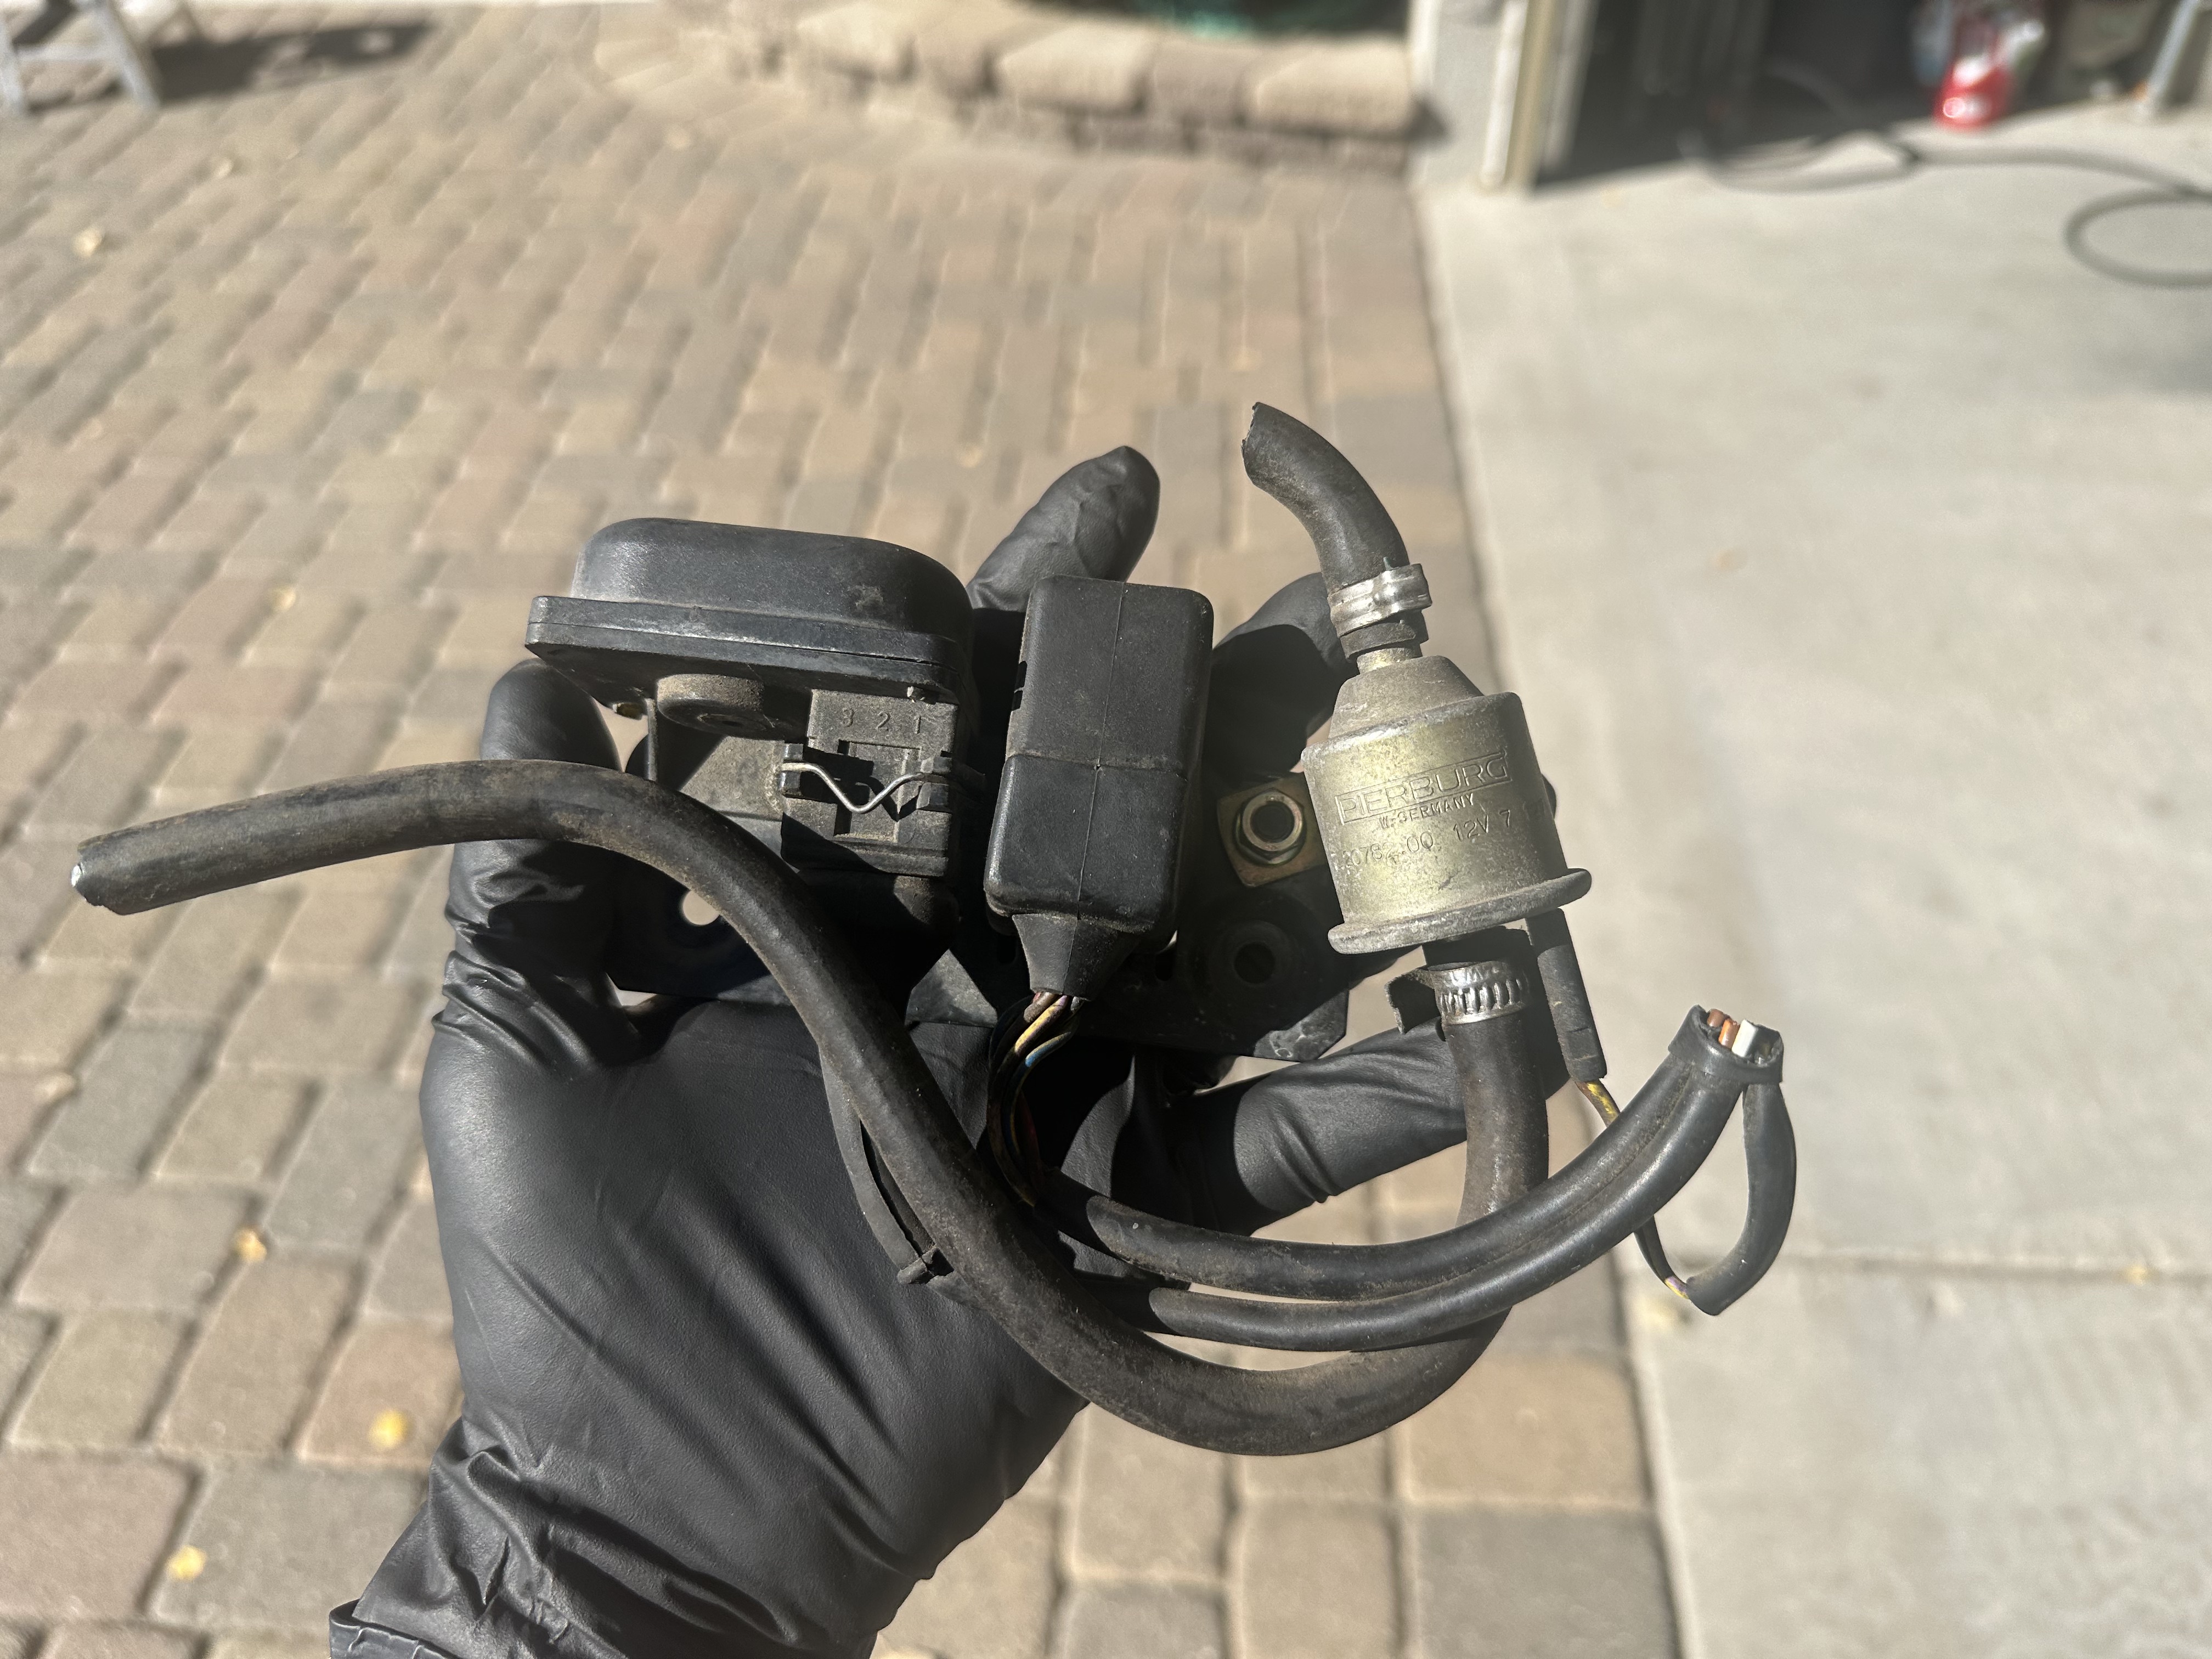
Holy cow - what a difference. Idled smoothly, ran up to 4000-5000 rpm smoothly (I haven't wound it out yet - as if this writing I'm still less than 300 miles past the engine re-build) - it's a whole different car. And this seems odd to me. M1.3 should work in theory, so I really don't know whether that theory is flawed or whether I just had some bad parts.
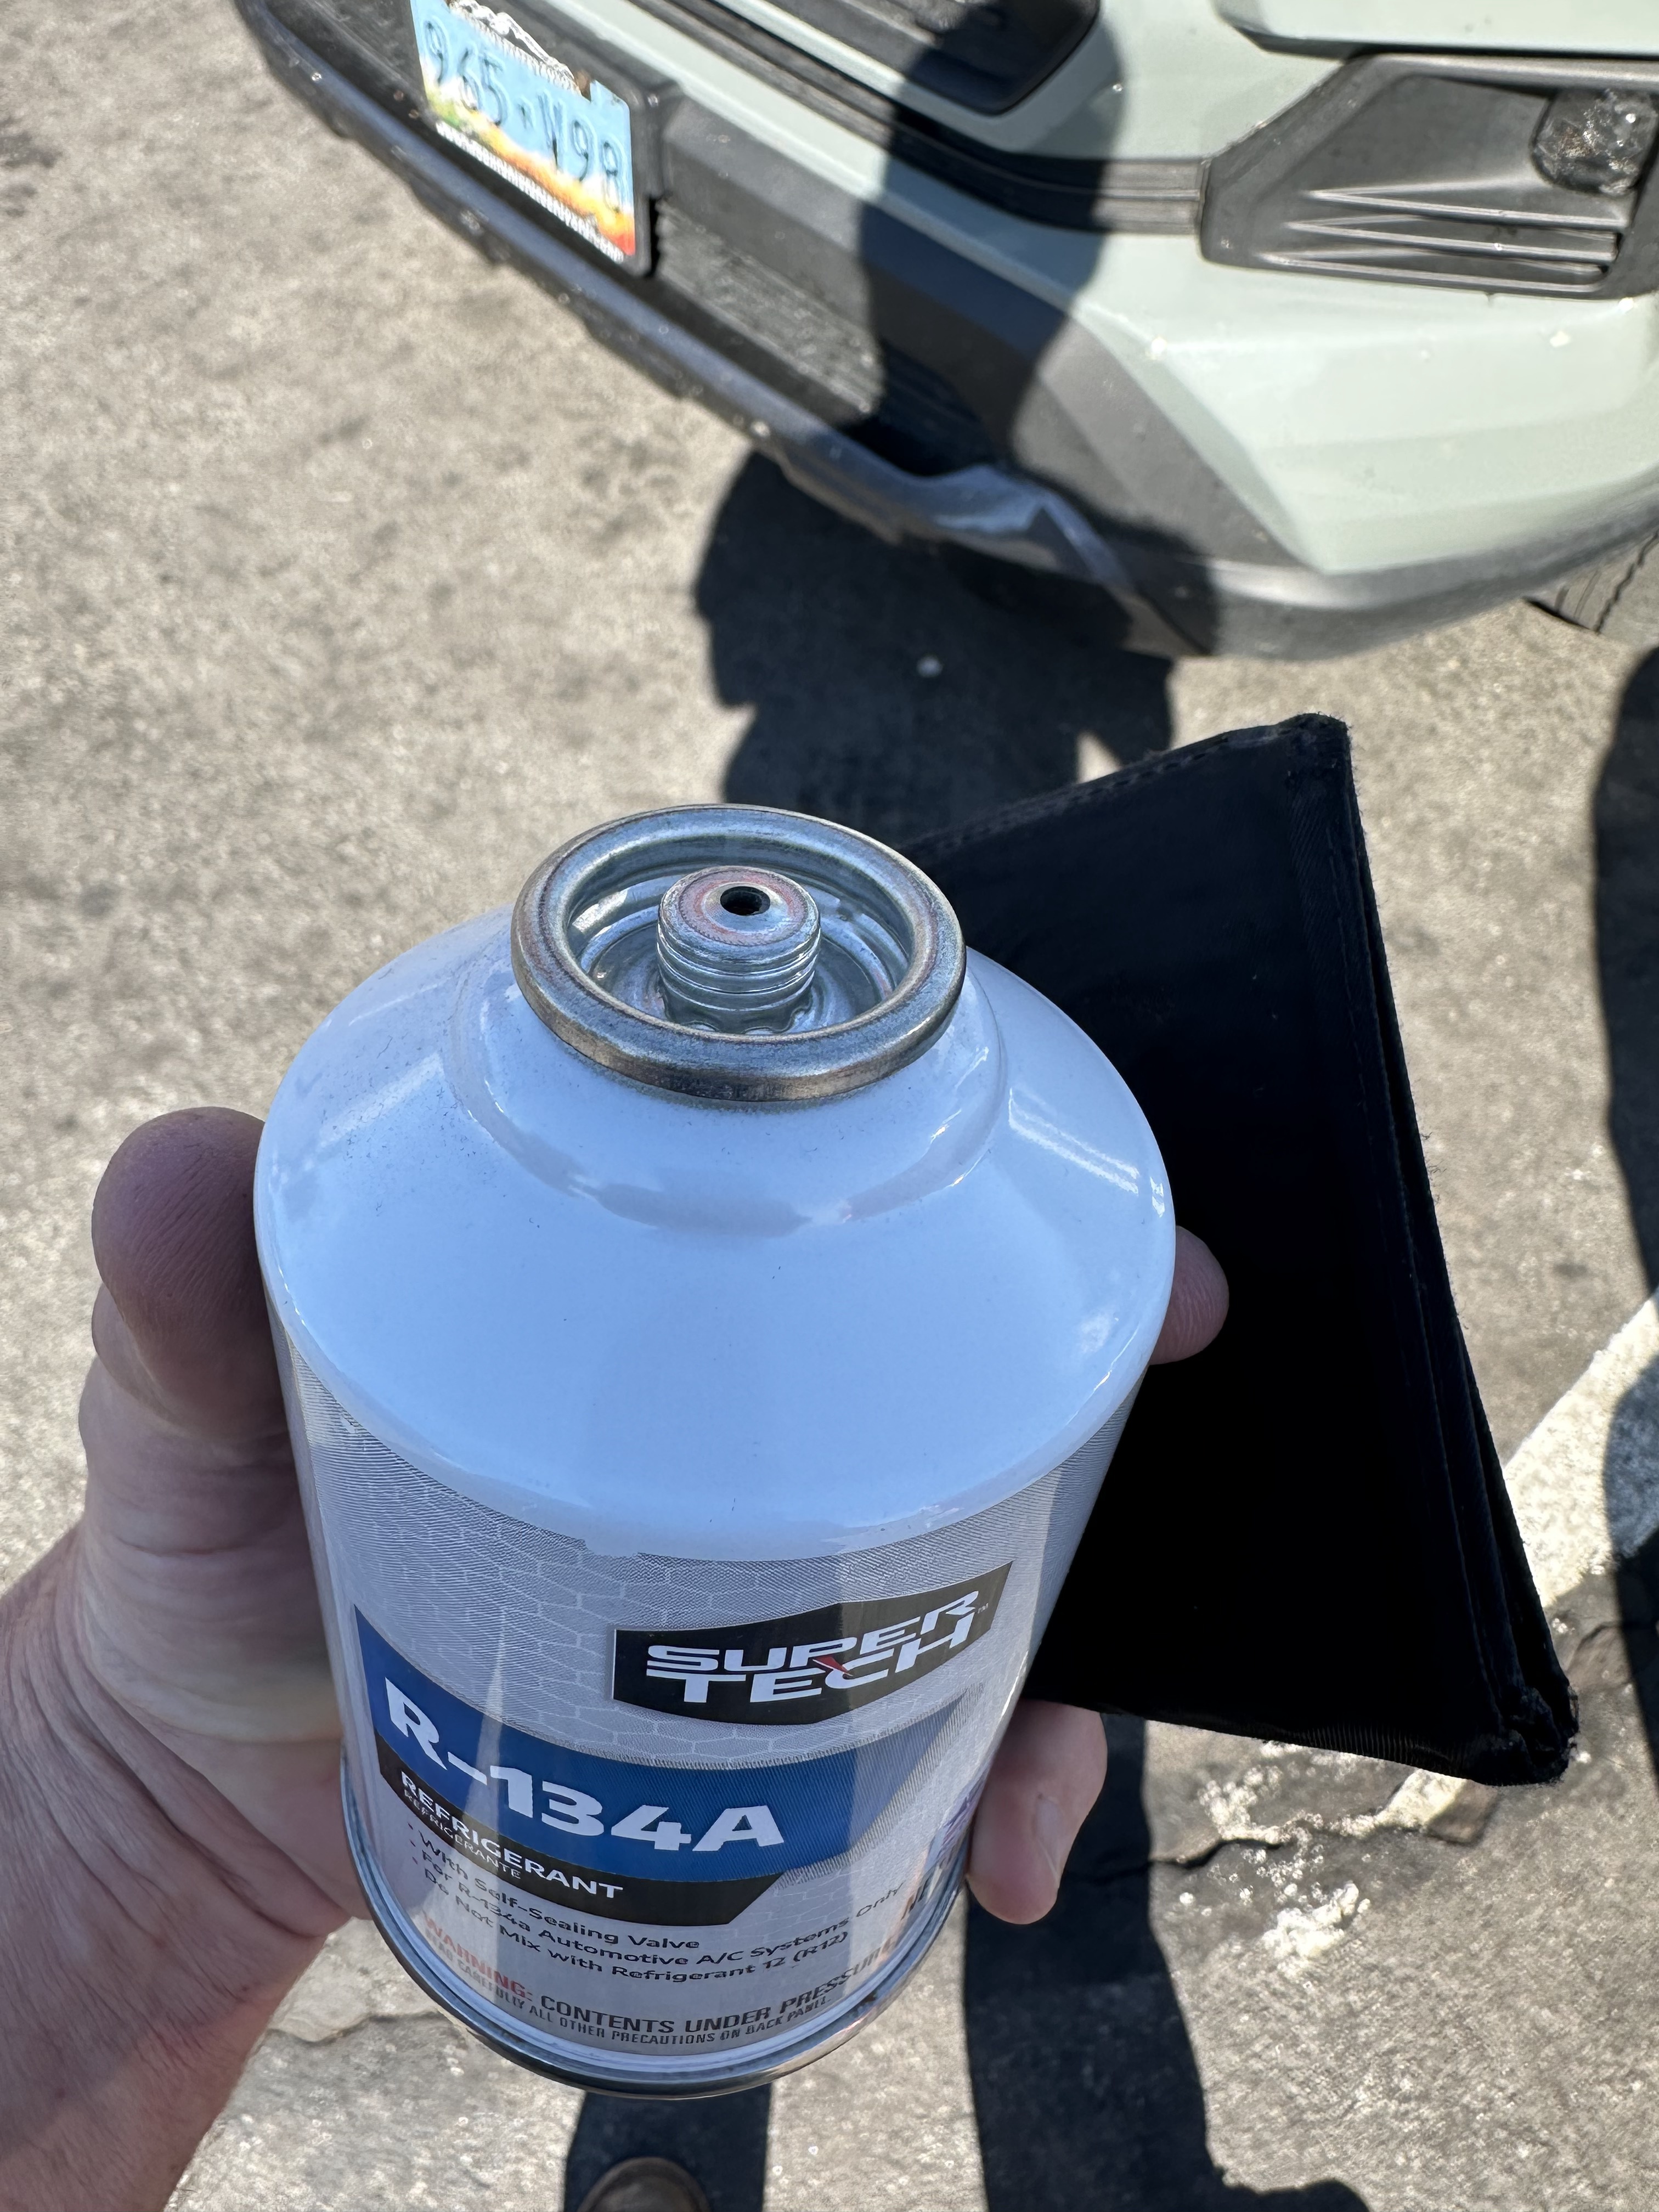
Right before Reno Fest 2023, I made another push to try to get stuff knocked off the to-do list, and an AC re-charge was top of the list. With a little help from Reno Fest guys, we got the AC working. The system pulled and held a great vacuum, so we put in three cans of this stuff to get to at least 975g of refrigerant (Fũllmenge!) ... and the results seemed to be as expected:
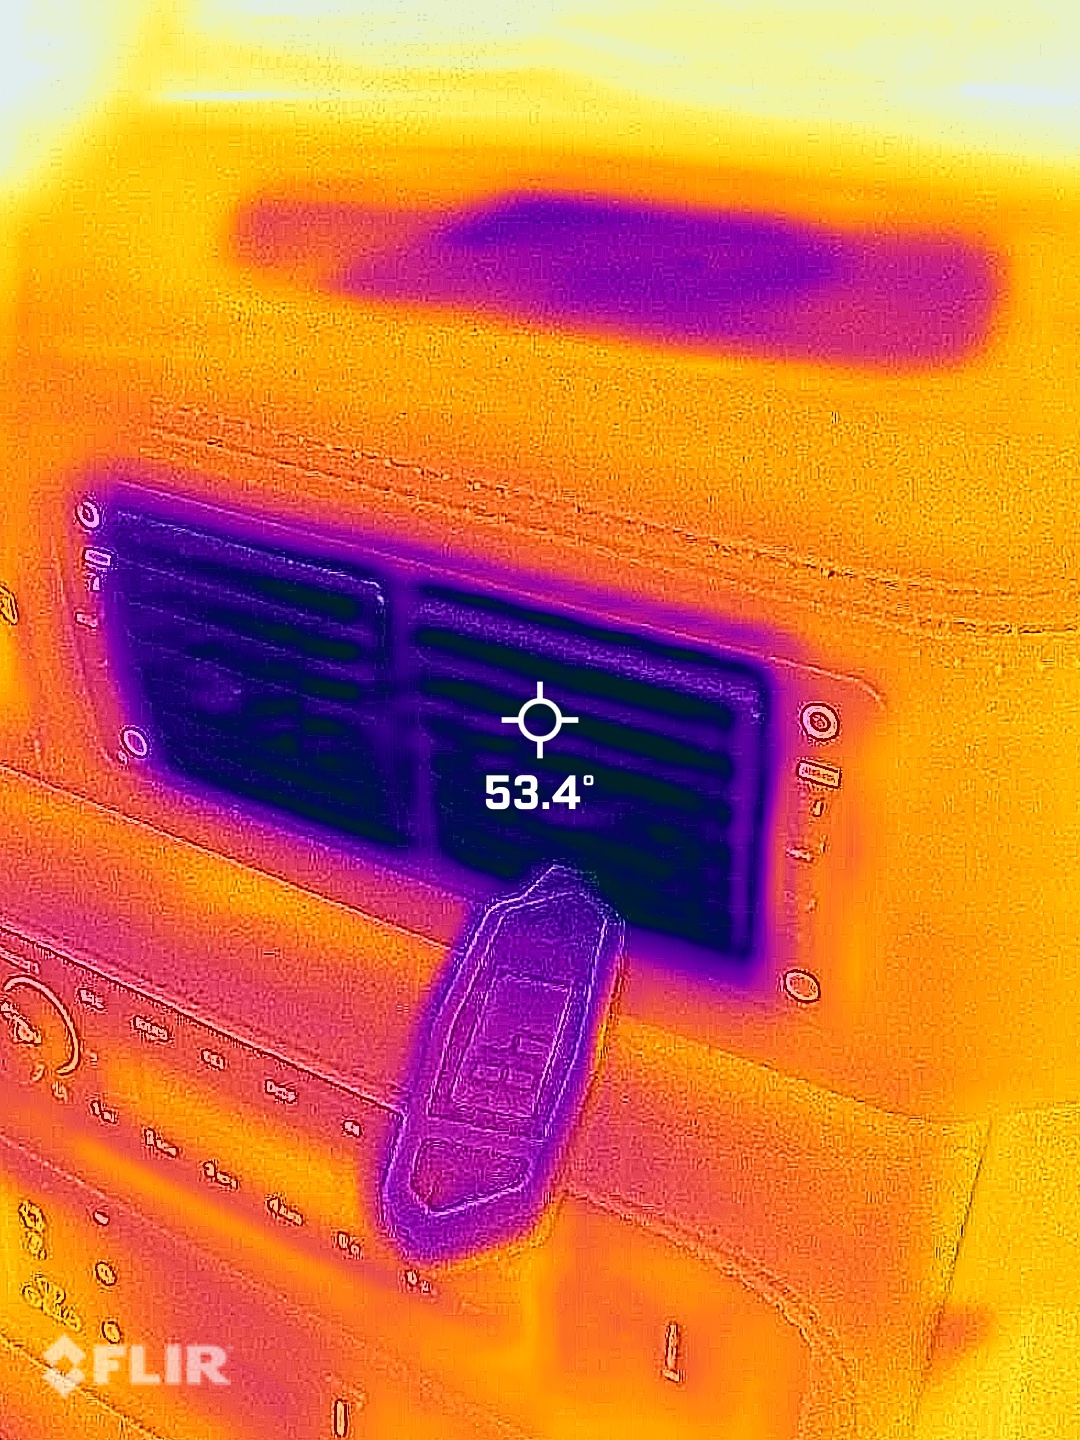
All seemed well, though the low-side Schrader valve had a slow leak - oh, well, add that to the list for later.
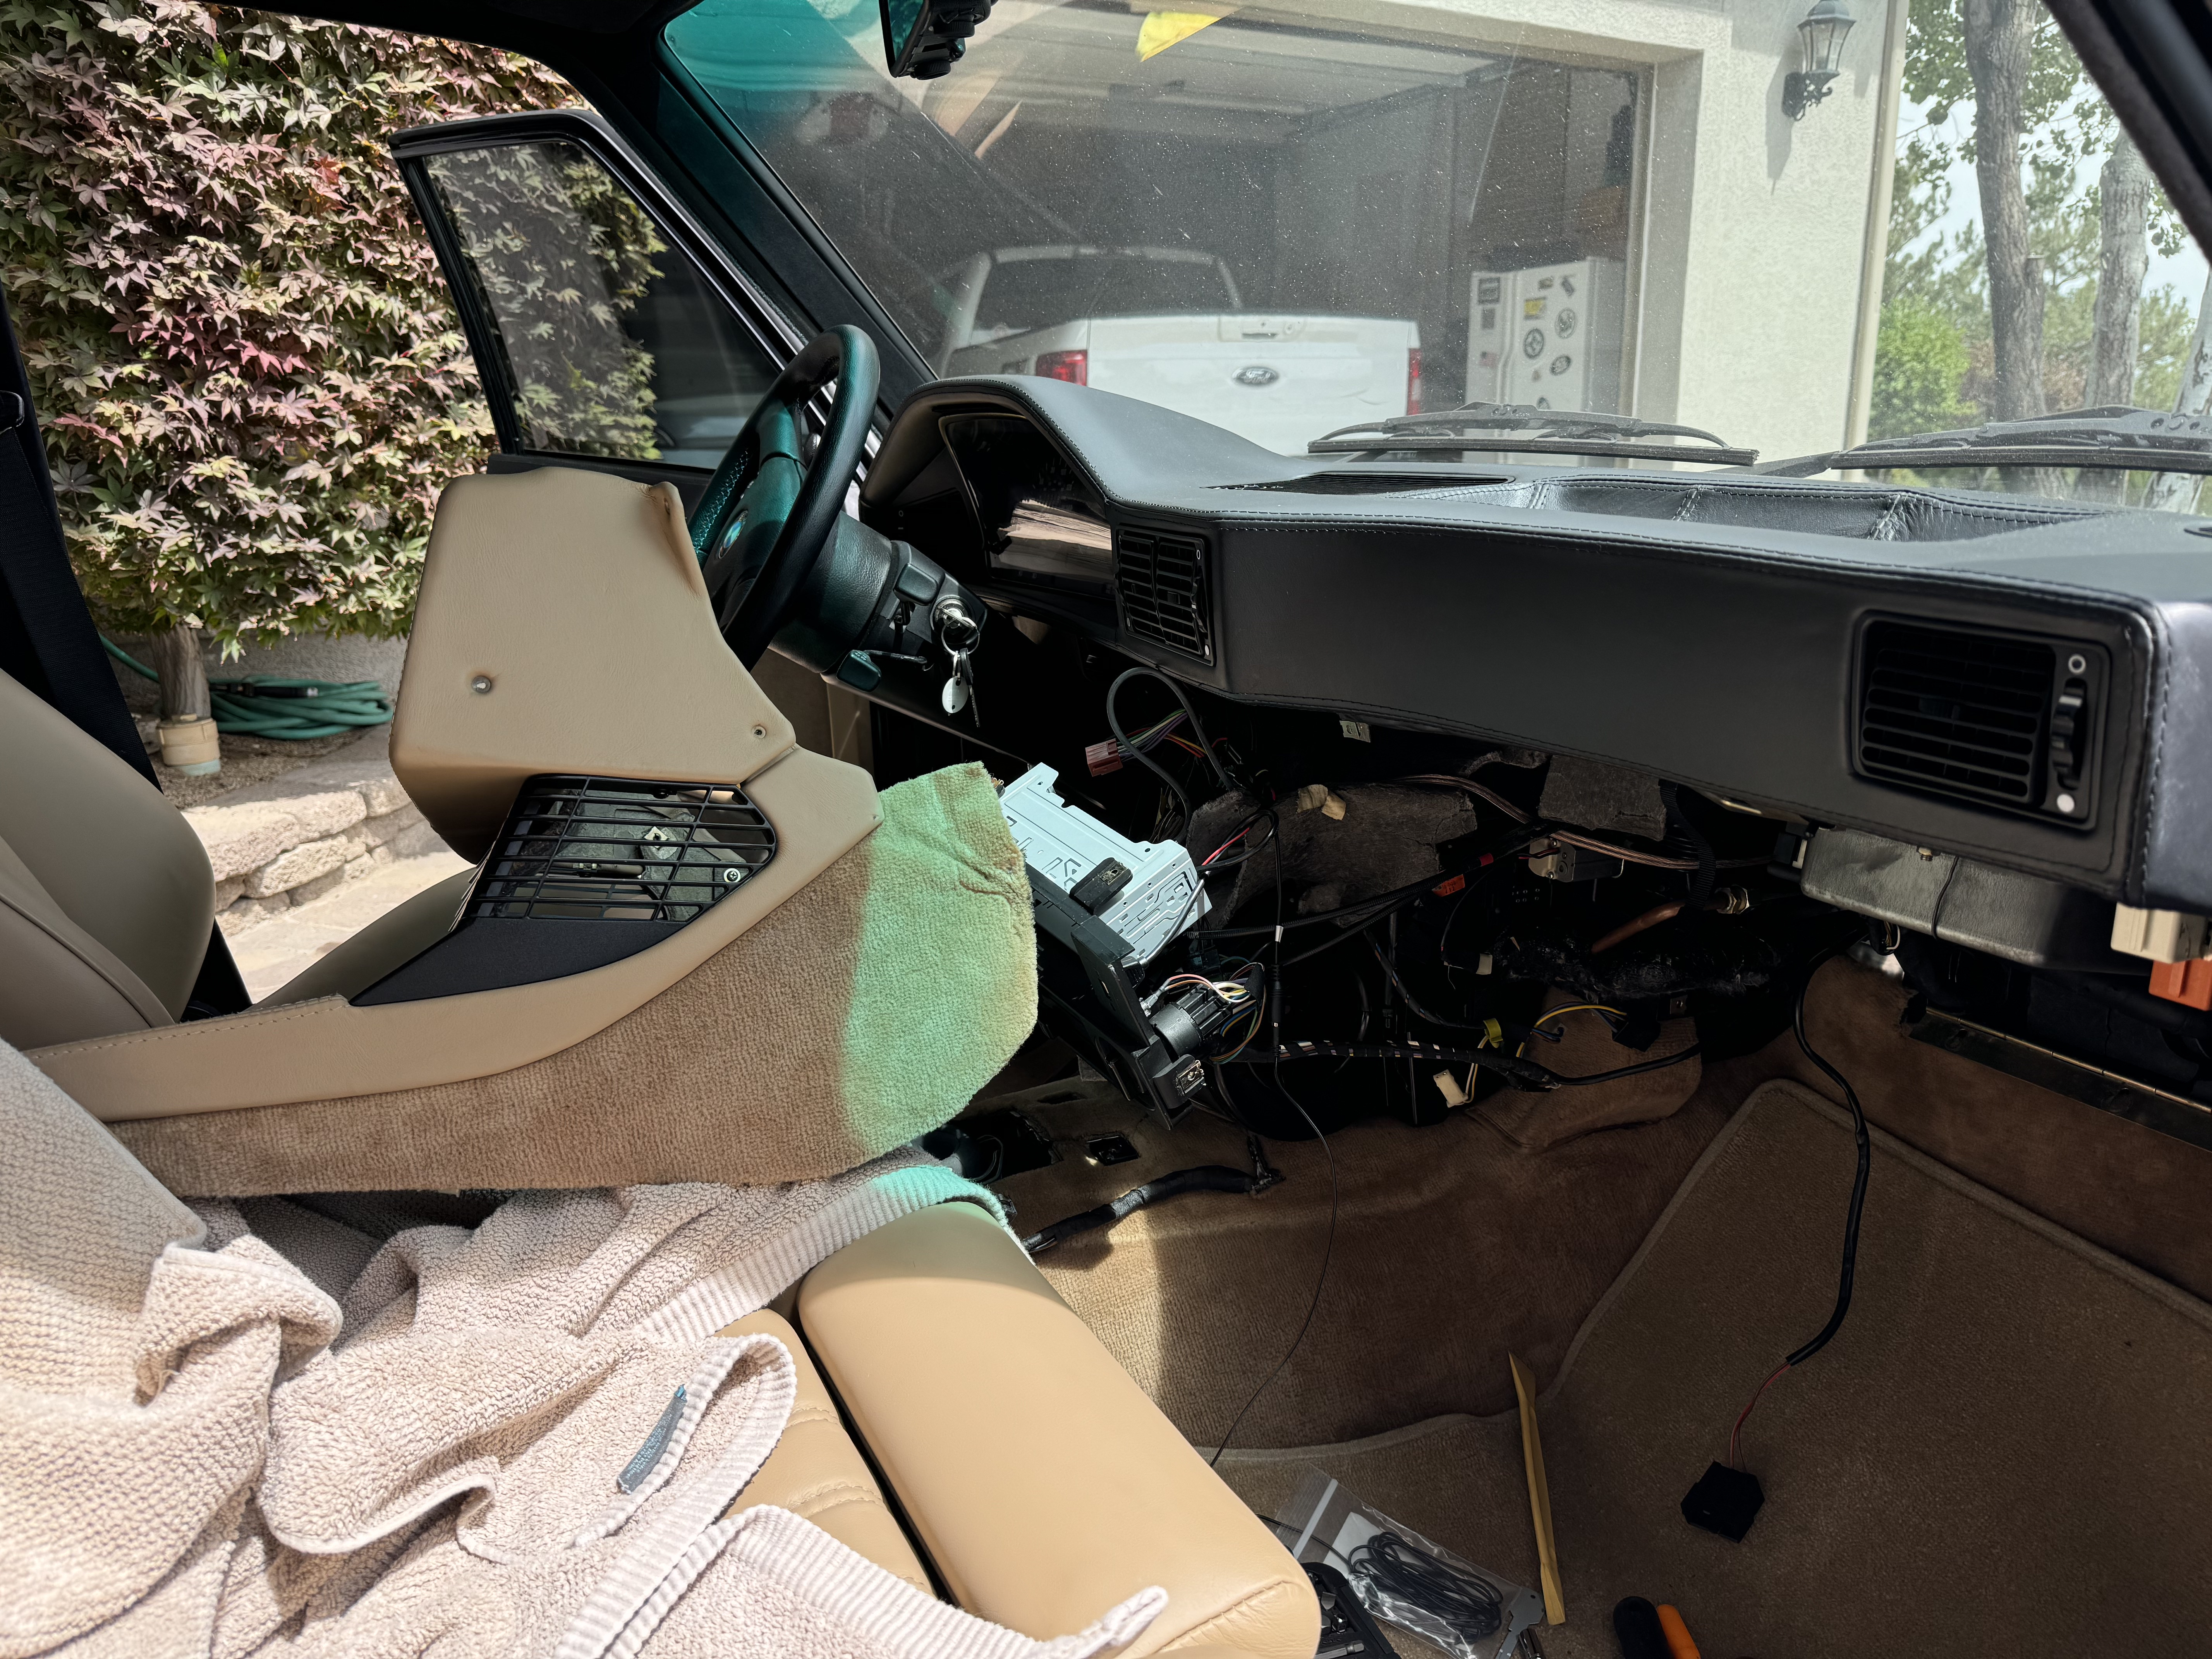
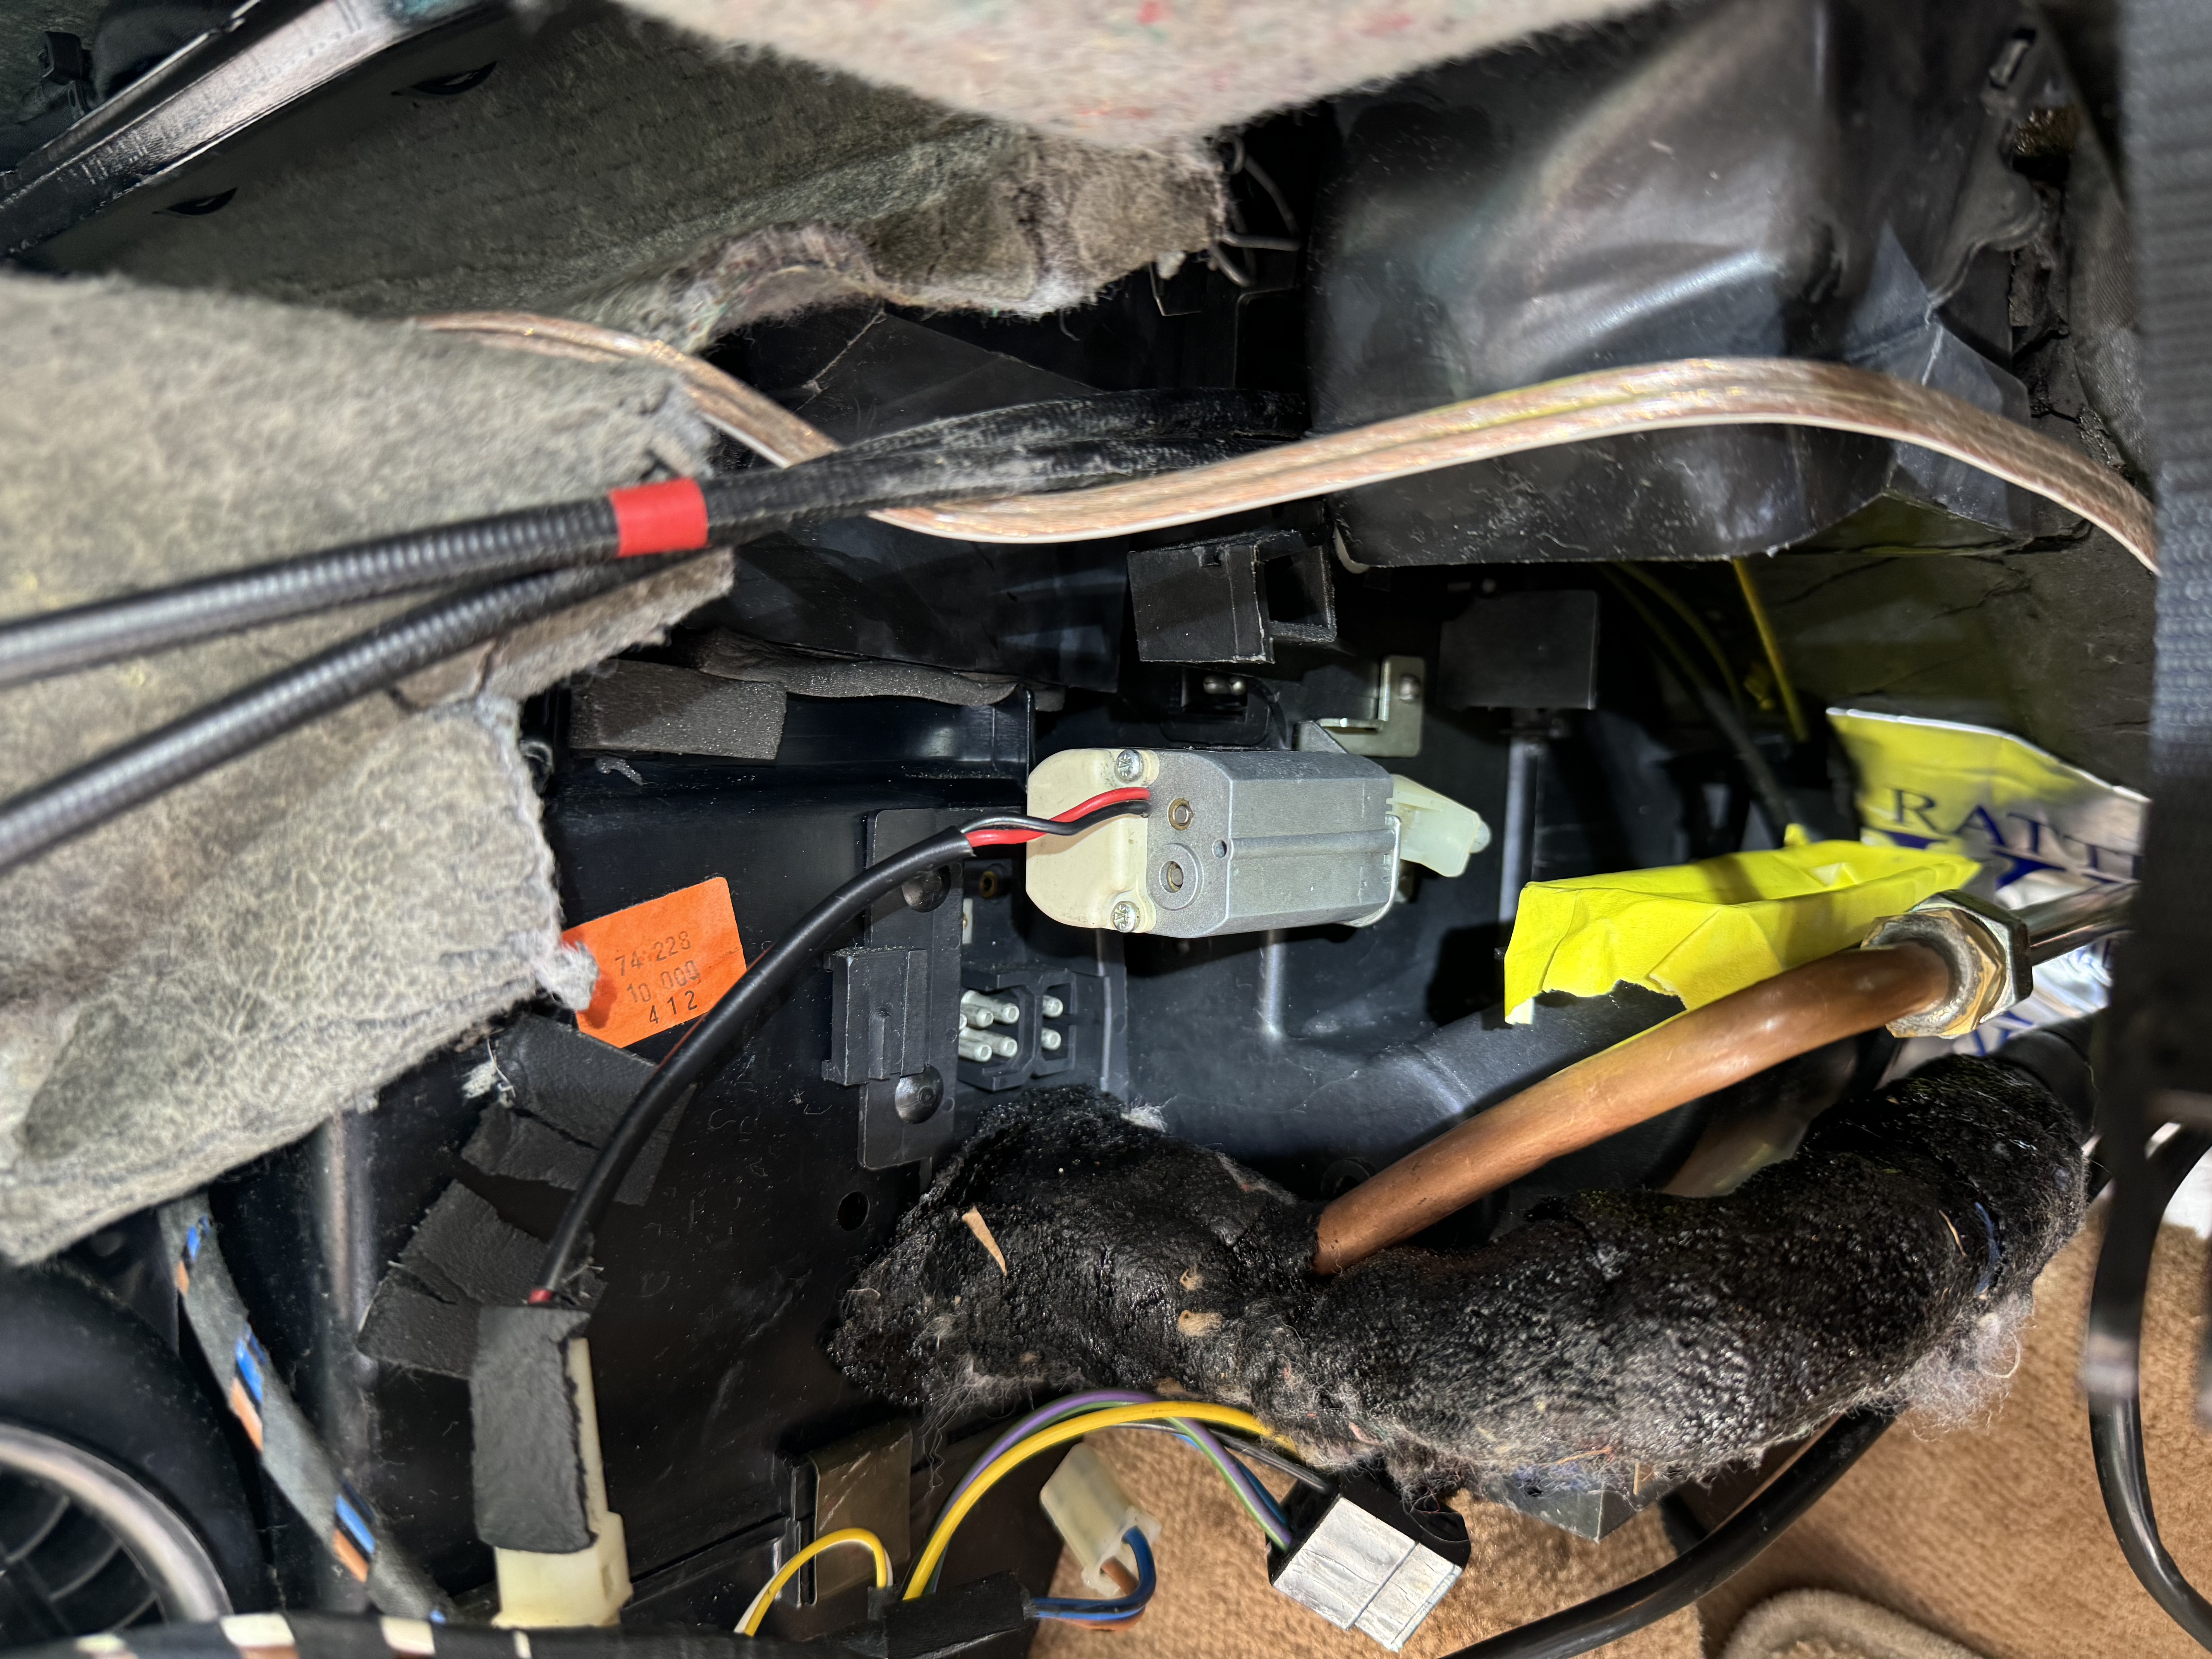
So, jump forward another year to prep for Reno Fest 2024. After the prior work on the AC, a couple of annoying problems were showing up. First, the little blue snow-flake button wasn't turning blue. Second, the AC would blow great, then suddenly go completely dead - no fan, no air, nothing. If I changed the fan speed switch, it would come back to life. My working theory was that the resistor back for the AC blower was bad and the connections in there would make/break, causing the AC to turn off temporarily. I ended up finding a good snow-flake button and also digging in to the evap box to get at the AC blower fan resistor pack (conveniently located behind the center vent stepper motor) and replace it.
There was still some refrigerant pressure in the AC system, so I also took this opportunity to swap out the Schrader valve core. This little bit of Chinese engineering ($19 off of Amazon!) did the trick to let me replace the valve core while the system remained under pressure.
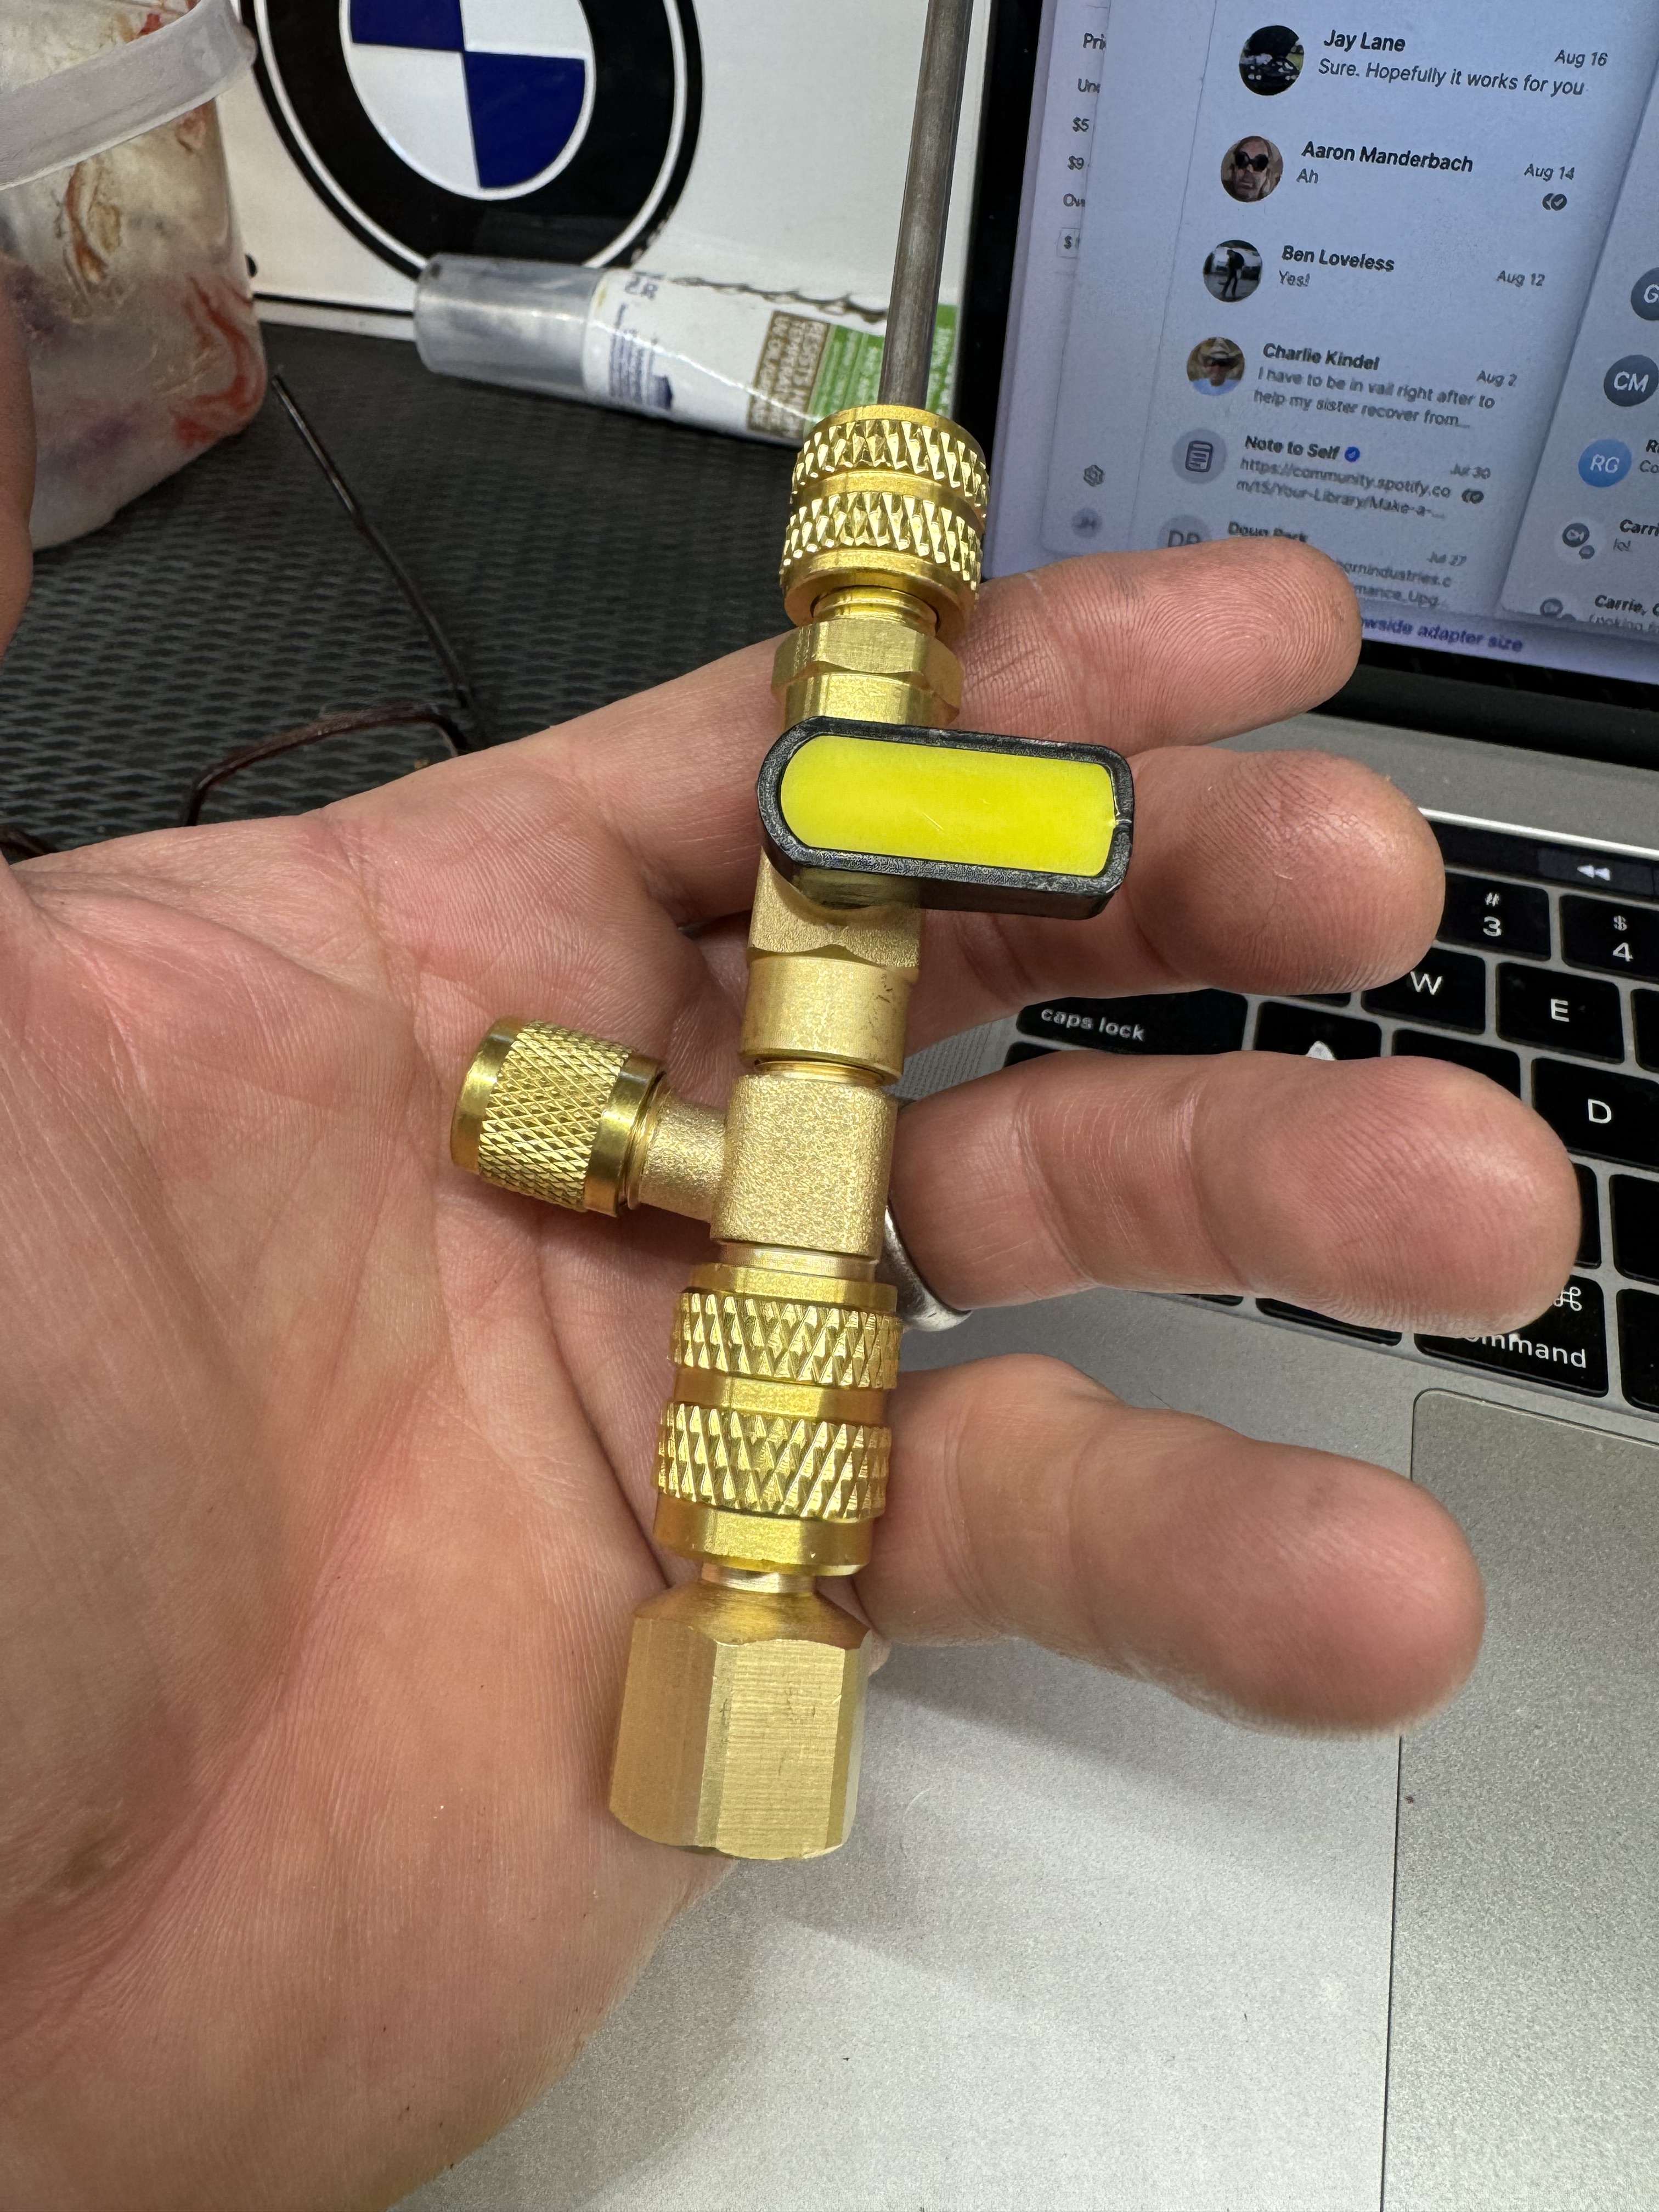
After all that work, I added another 500g or so of R134a. That leak was worse than I'd thought!
The AC works now, but with hindsight, I'm not actually sure whether it was the resistor pack or the snow-flake button that was causing the problem. Regardless, they're both PIAs to replace.
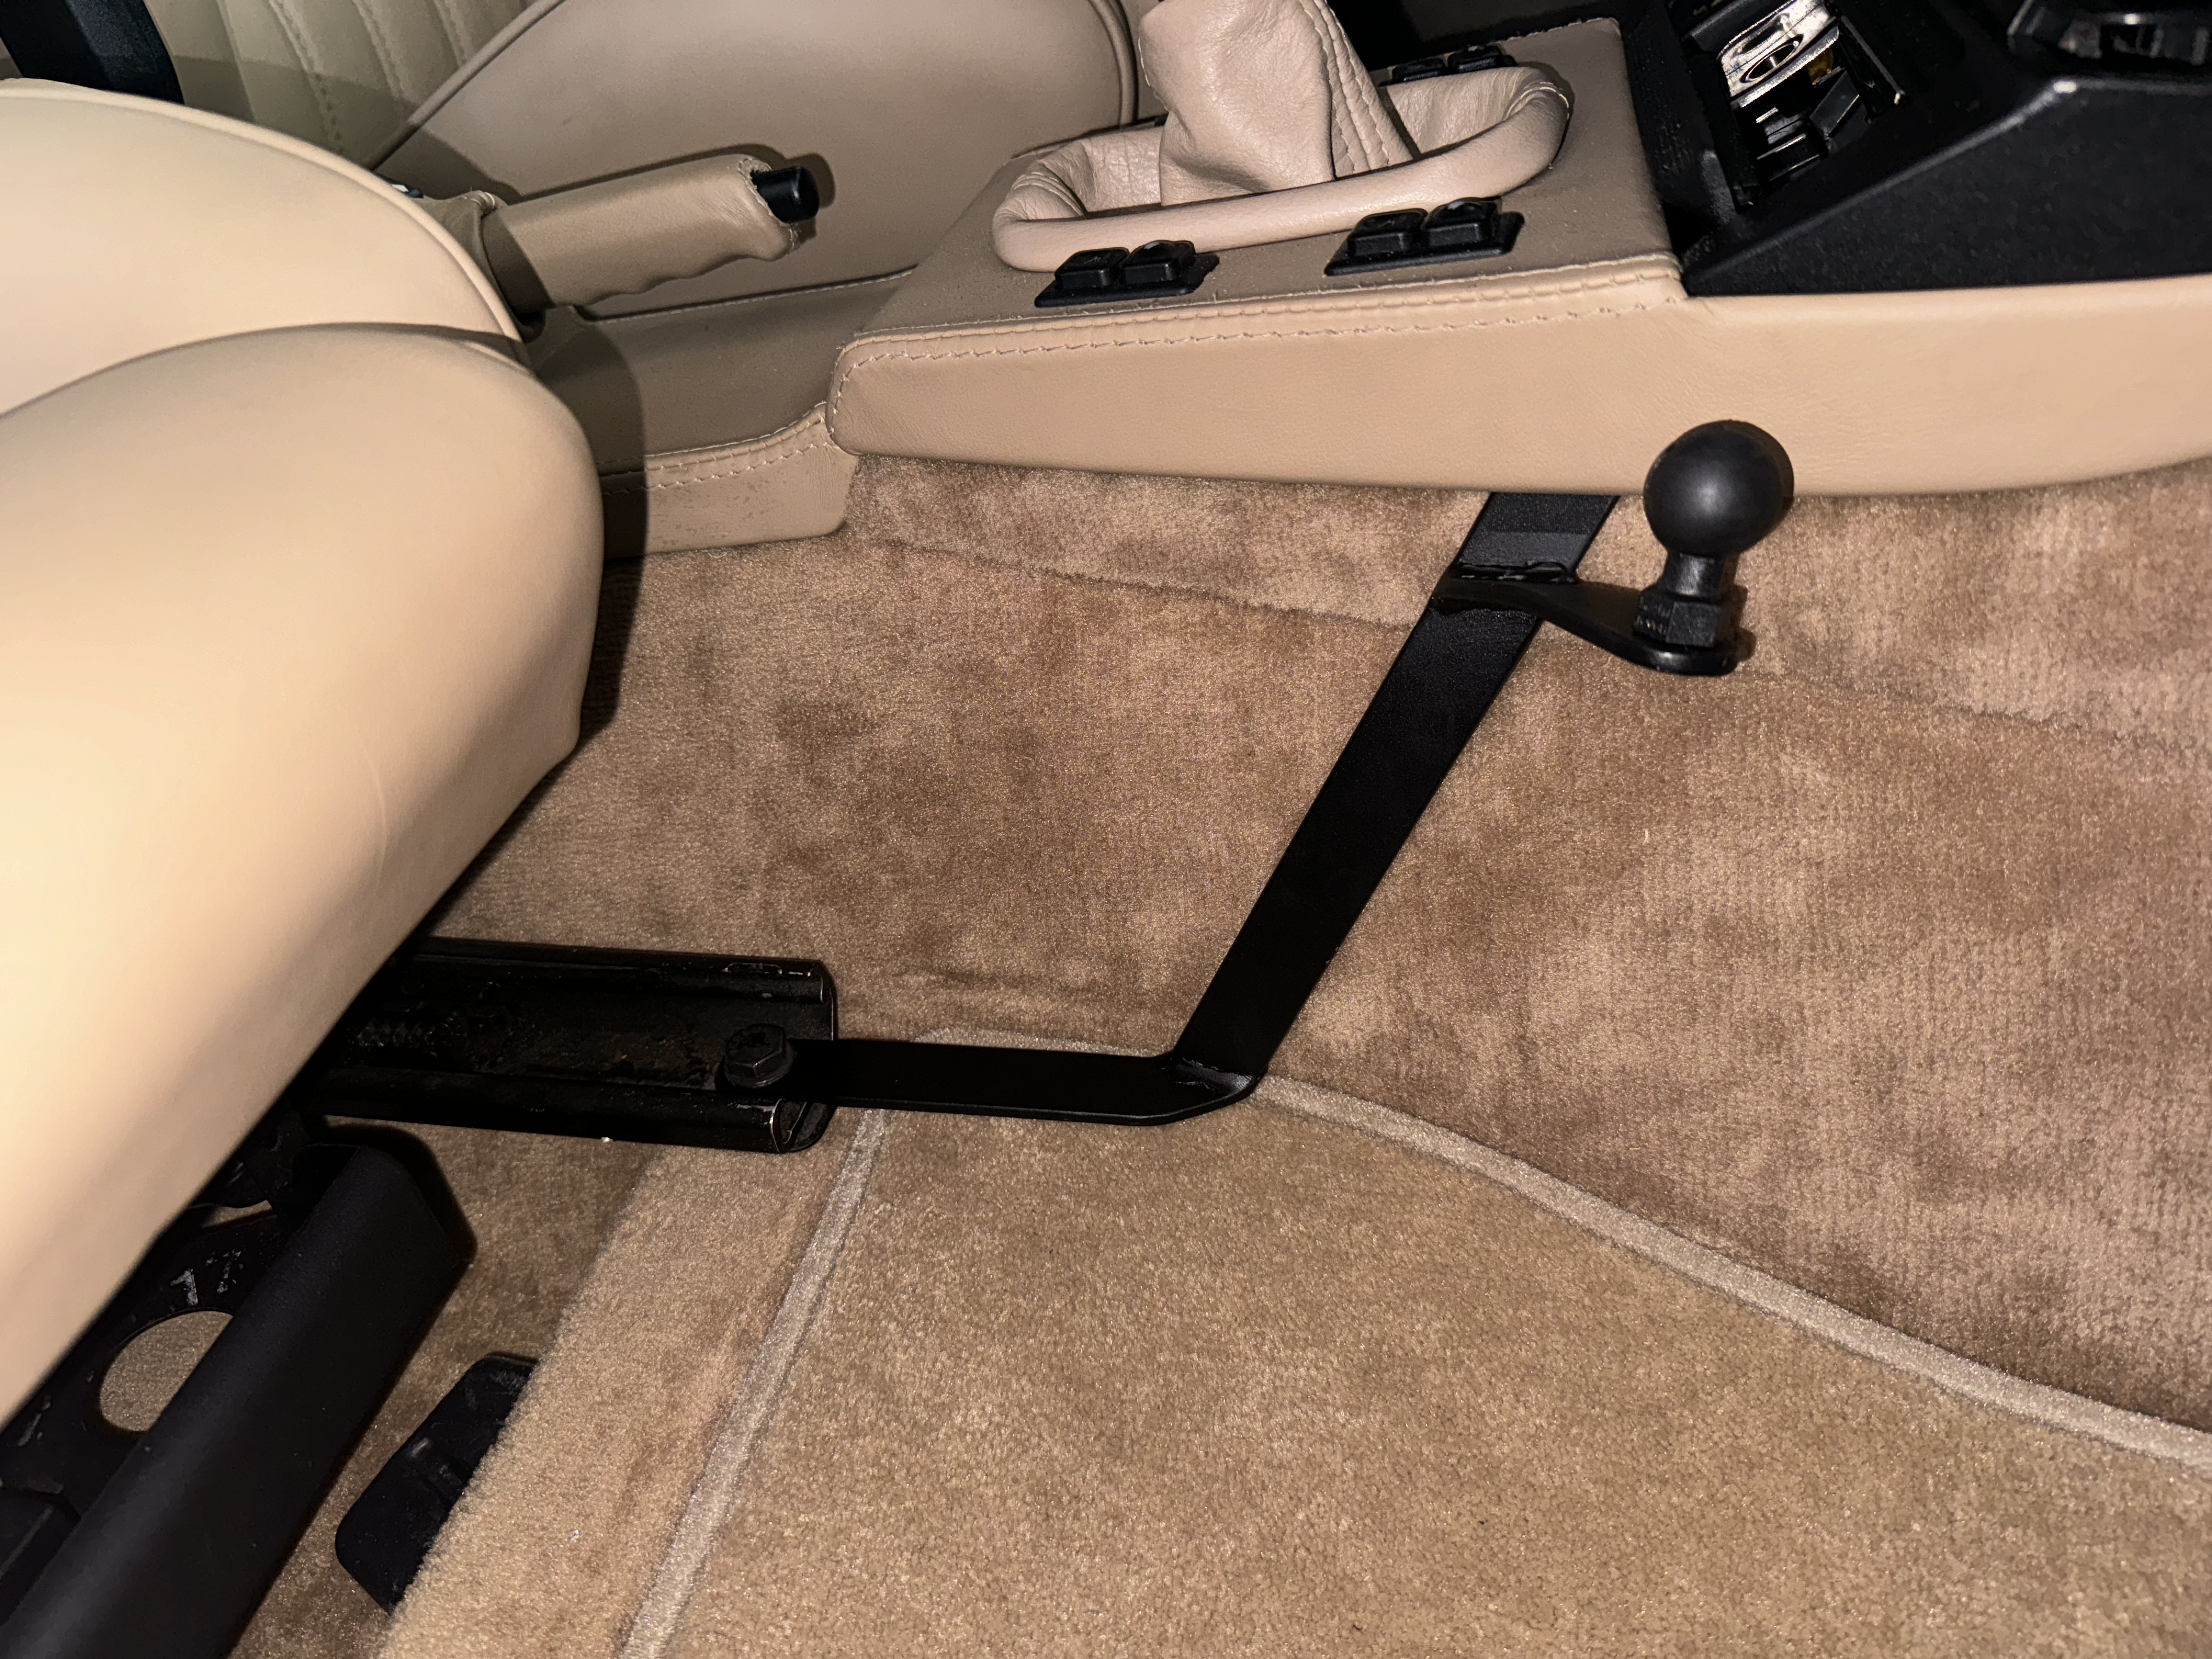
Next, I've been wanting to put in a decent phone mount. After seeing one a buddy had put in his E28, I built my own based on the same idea. This is made out of 1/8th x 1 inch mild steel. It is mounted using the M10 bolt inside the power seat track (front left bolt in the front passenger's seat). There's plenty of room to add this extra 1/8th inch of steel and still let the seat go forward & back with the full range of travel. The vertical arm then slips under the center dash console for stability, and the ball connects to an XRam phone holder. It works really well and I'm hoping that since the phone sits right by the AC blower fan inlet, that the phone will get some cooling ventilation.
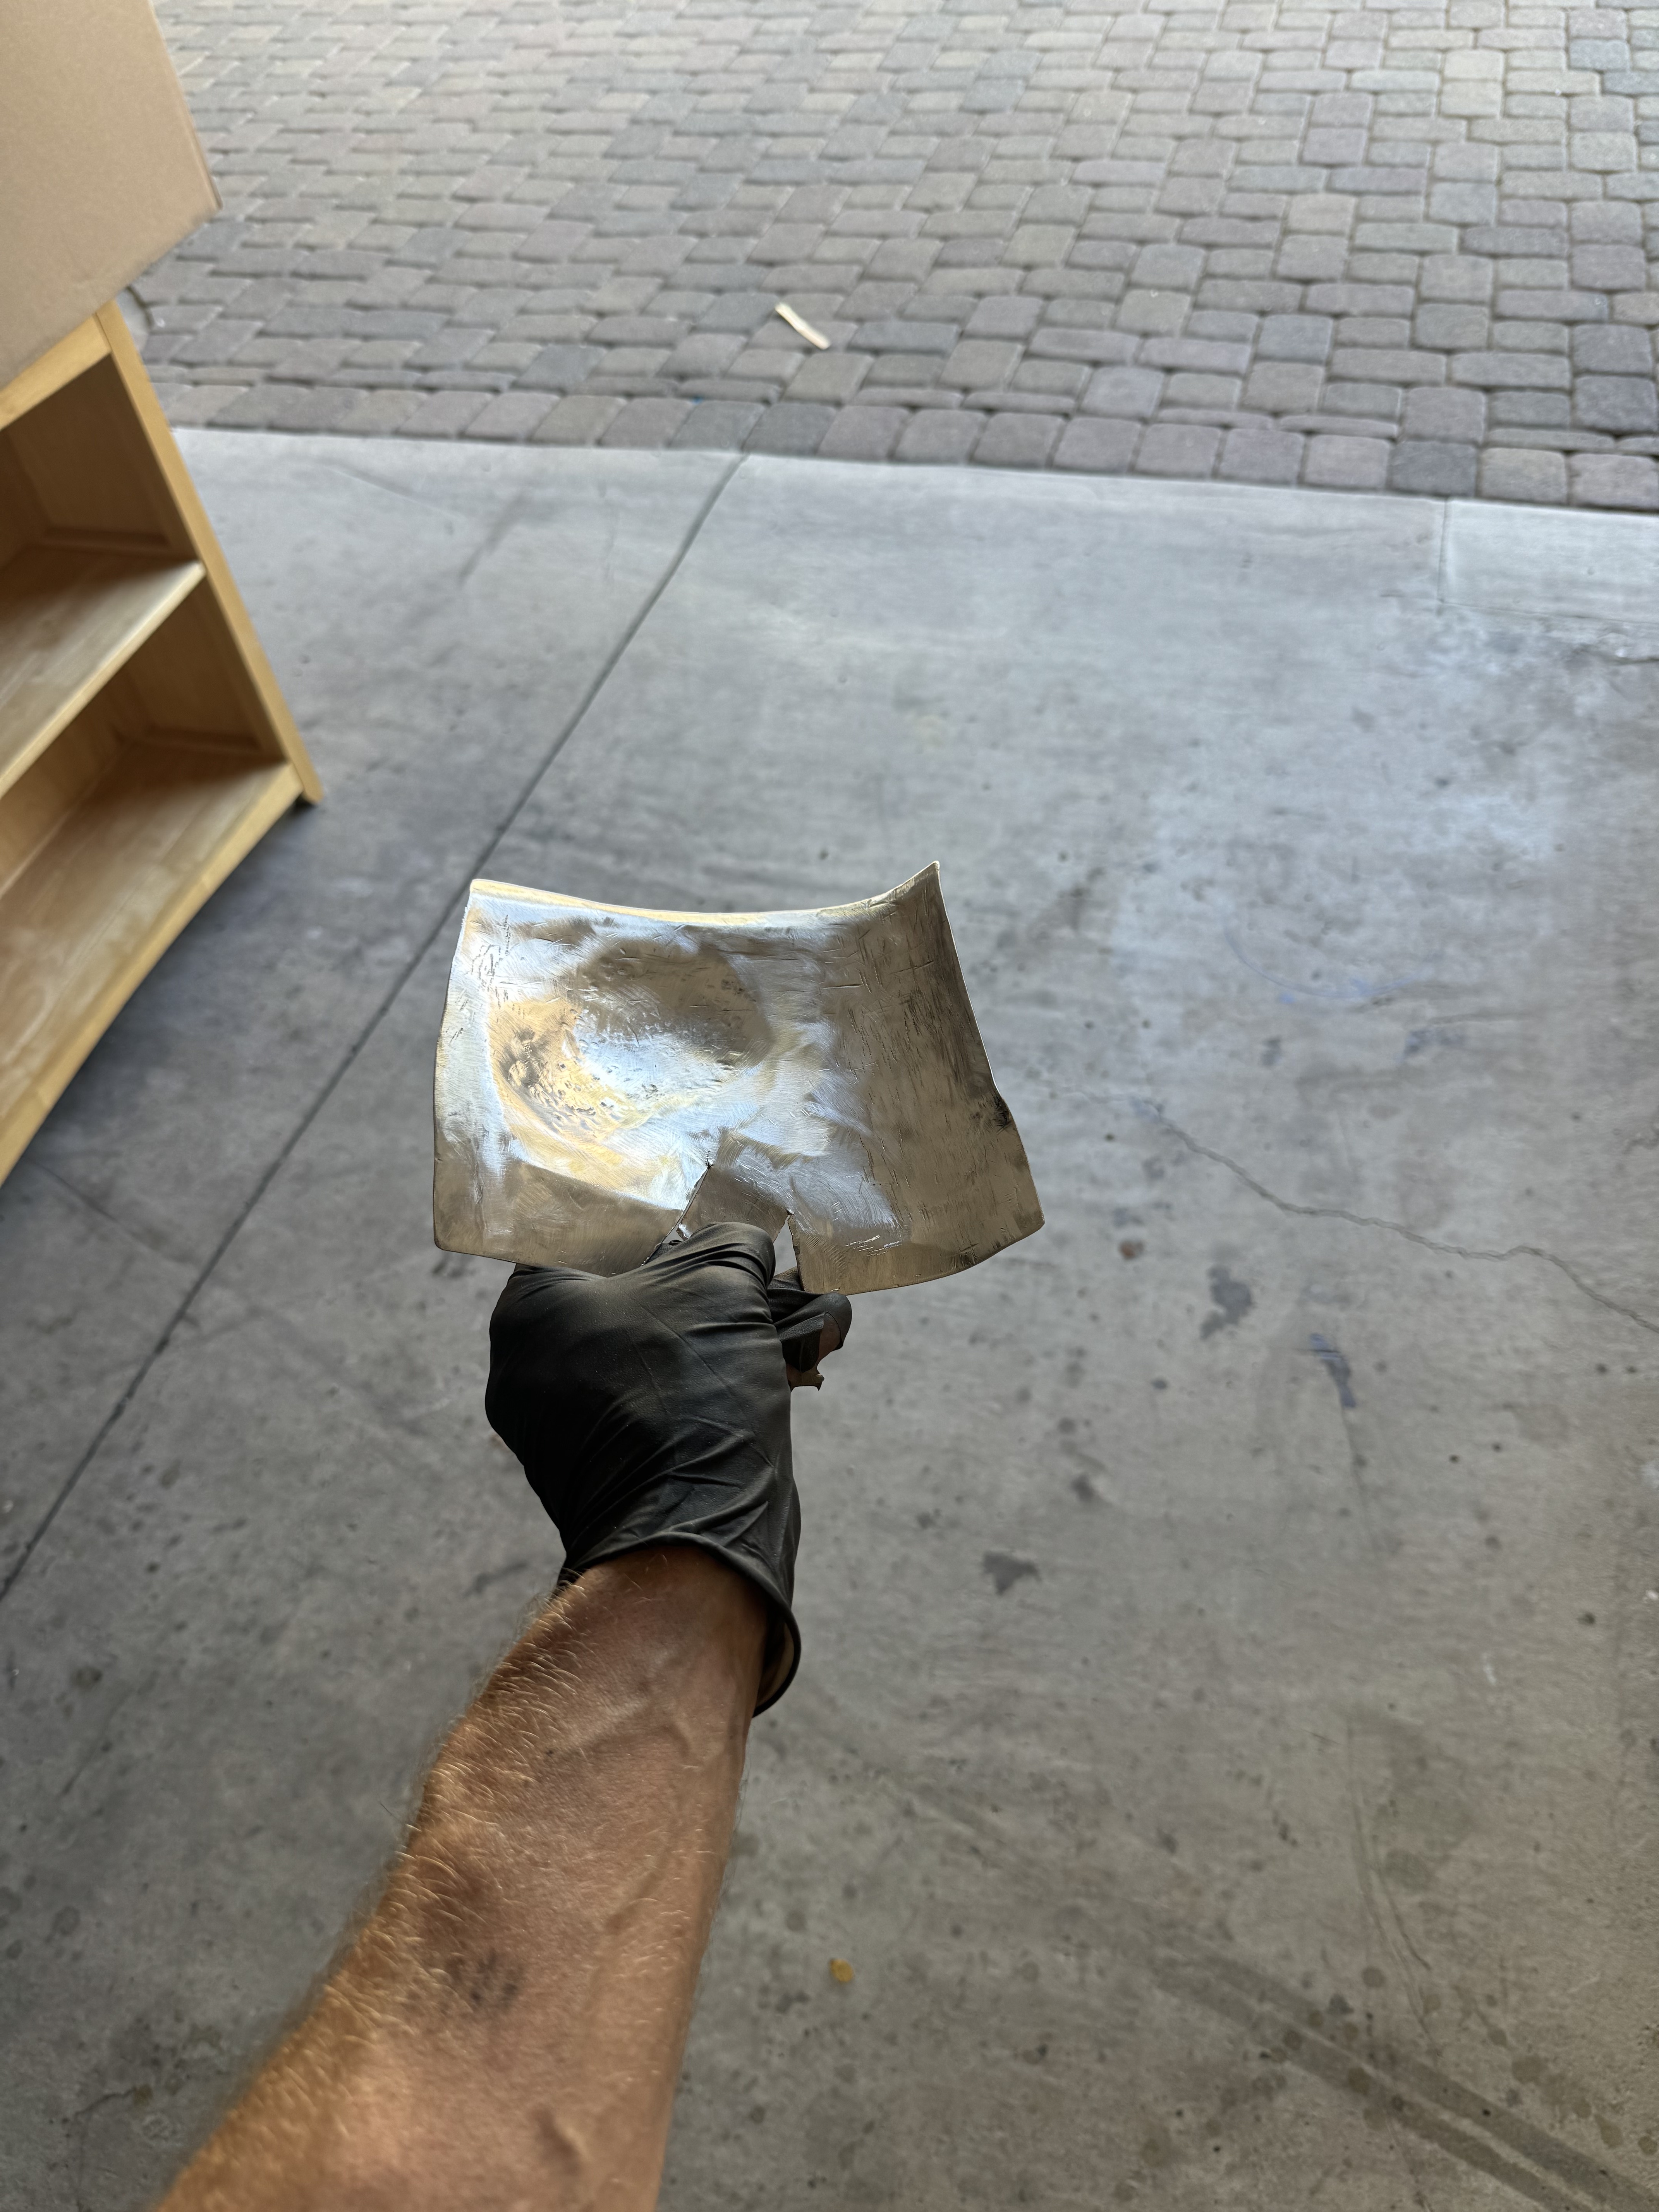
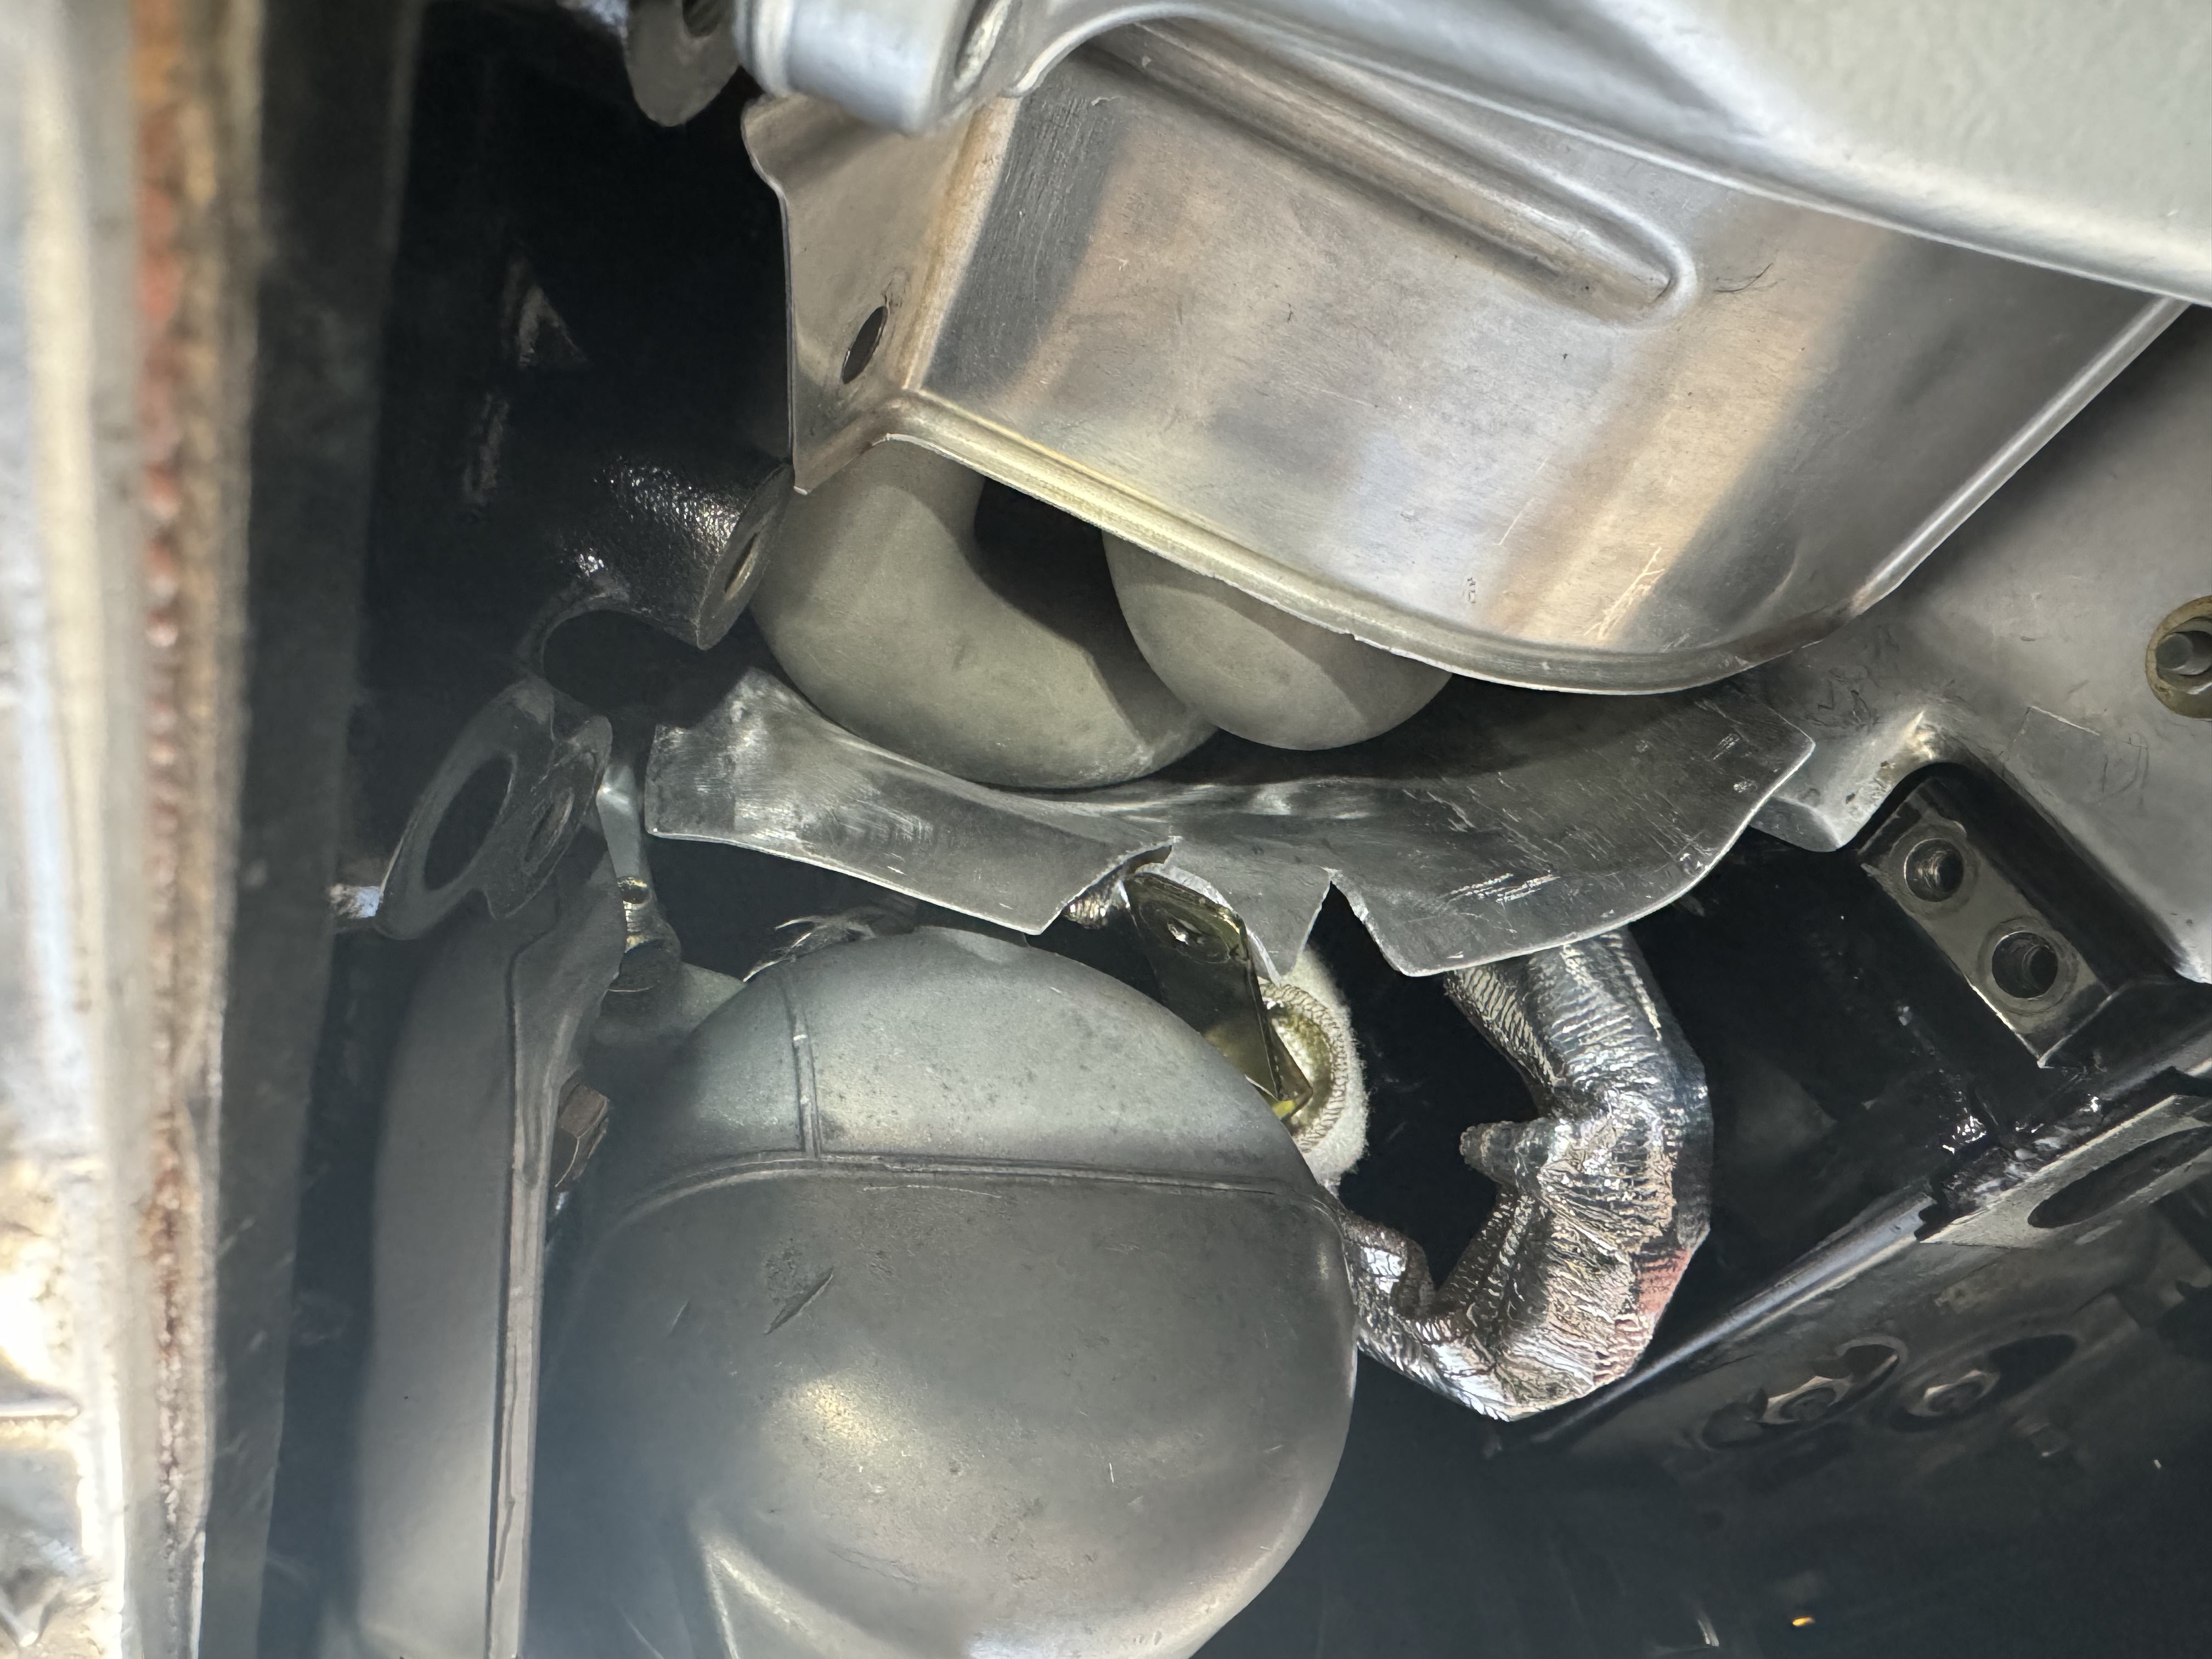
Lastly, this car has M88 headers. The exhaust tube for the #1 cylinder comes really, really close to the hard-lines that connect to the rear-top of the AC compressor. I'm not sure if this is going to make a huge difference, but I've also fashioned an additional heat shield to try to block a bit more of the high heat from the headers from cooking the AC lines.
Sorry for the shitty pics. And a fine metal worker I am not. Anyhow, we'll see if this works.
Edit: Oh, and I'm also playing around with a wildly inaccurate speedo.
And when I say I "basically finished the car back in late 2021 / early 2022," I mean that I could drive the car, though the list of things that still had to be worked out was annoyingly long. So long, in fact, that for Reno Fest 2022, I basically trailered the car from my house in south Reno to the event in north Reno. Not my proudest moment.
Among the reasons I trailered the car, top of the list was that I could never really get it to idle correctly, and even off idle it was never very smooth. I finally decided to ditch the Motronic 1.3 "upgrade" and go back to the original Motronic 1.1. That job mostly involved ripping the Motronic 1.3 engine harness out and putting in another E28 M5 Motronic 1.1 harness I'd gotten off of eBay. (I'd originally told myself that all my M1.3 changes were reversible, but by the time I decided to actually test that and reverse that mod, I had no appetite for completely redoing the old harness.) I also got the original injectors refurbished, and added all the old M1.1-specific items back (like the barometric pressure sensor and the old-style purge valve stuff).


Holy cow - what a difference. Idled smoothly, ran up to 4000-5000 rpm smoothly (I haven't wound it out yet - as if this writing I'm still less than 300 miles past the engine re-build) - it's a whole different car. And this seems odd to me. M1.3 should work in theory, so I really don't know whether that theory is flawed or whether I just had some bad parts.
Right before Reno Fest 2023, I made another push to try to get stuff knocked off the to-do list, and an AC re-charge was top of the list. With a little help from Reno Fest guys, we got the AC working. The system pulled and held a great vacuum, so we put in three cans of this stuff to get to at least 975g of refrigerant (Fũllmenge!) ... and the results seemed to be as expected:


All seemed well, though the low-side Schrader valve had a slow leak - oh, well, add that to the list for later.
So, jump forward another year to prep for Reno Fest 2024. After the prior work on the AC, a couple of annoying problems were showing up. First, the little blue snow-flake button wasn't turning blue. Second, the AC would blow great, then suddenly go completely dead - no fan, no air, nothing. If I changed the fan speed switch, it would come back to life. My working theory was that the resistor back for the AC blower was bad and the connections in there would make/break, causing the AC to turn off temporarily. I ended up finding a good snow-flake button and also digging in to the evap box to get at the AC blower fan resistor pack (conveniently located behind the center vent stepper motor) and replace it.


There was still some refrigerant pressure in the AC system, so I also took this opportunity to swap out the Schrader valve core. This little bit of Chinese engineering ($19 off of Amazon!) did the trick to let me replace the valve core while the system remained under pressure.

After all that work, I added another 500g or so of R134a. That leak was worse than I'd thought!
The AC works now, but with hindsight, I'm not actually sure whether it was the resistor pack or the snow-flake button that was causing the problem. Regardless, they're both PIAs to replace.
Next, I've been wanting to put in a decent phone mount. After seeing one a buddy had put in his E28, I built my own based on the same idea. This is made out of 1/8th x 1 inch mild steel. It is mounted using the M10 bolt inside the power seat track (front left bolt in the front passenger's seat). There's plenty of room to add this extra 1/8th inch of steel and still let the seat go forward & back with the full range of travel. The vertical arm then slips under the center dash console for stability, and the ball connects to an XRam phone holder. It works really well and I'm hoping that since the phone sits right by the AC blower fan inlet, that the phone will get some cooling ventilation.

Lastly, this car has M88 headers. The exhaust tube for the #1 cylinder comes really, really close to the hard-lines that connect to the rear-top of the AC compressor. I'm not sure if this is going to make a huge difference, but I've also fashioned an additional heat shield to try to block a bit more of the high heat from the headers from cooking the AC lines.


Sorry for the shitty pics. And a fine metal worker I am not. Anyhow, we'll see if this works.
Edit: Oh, and I'm also playing around with a wildly inaccurate speedo.
Re: Rebuilding My 1988 US-spec M5
Veteran is in Downtown LA (DTLA), a few blocks west of 7th & Alameda (no, Jake, not Chinatown). Right smack in the middle of Homeless Town, USA, so getting there takes a bit of steely nerves and combat awareness. I haven't been there in a while, so maybe it's gotten better but I doubt it (although recent Google street views show it pretty clear).jhh925 wrote: Mar 31, 2023 3:55 PMI'd use Veterans Upholstery out of Los Angles (or somewhere in SoCal). I think the code is BM830? Memory is fuzzy.Syndrome wrote: Mar 23, 2023 7:41 PM So what’s the best source for the Natur leather for the interior? I think some of the original leather was really thin, like on the center console. GAHH makes some great seat covers. Thanks.
Veteran Company
620 Gladys Ave.
LA, CA 90021
323-937-2233
Unfortunately their website is not working (and/or has been hijacked), so you will have to either call them or go in person.
Re: Rebuilding My 1988 US-spec M5
Can't wait to see that phone mount in person in a few weeks; curious to alternatives to what I've been using.jhh925 wrote: Aug 30, 2024 4:40 PMNext, I've been wanting to put in a decent phone mount. After seeing one a buddy had put in his E28, I built my own based on the same idea. This is made out of 1/8th x 1 inch mild steel. It is mounted using the M10 bolt inside the power seat track (front left bolt in the front passenger's seat). There's plenty of room to add this extra 1/8th inch of steel and still let the seat go forward & back with the full range of travel. The vertical arm then slips under the center dash console for stability, and the ball connects to an XRam phone holder. It works really well and I'm hoping that since the phone sits right by the AC blower fan inlet, that the phone will get some cooling ventilation.
Lastly, this car has M88 headers. The exhaust tube for the #1 cylinder comes really, really close to the hard-lines that connect to the rear-top of the AC compressor. I'm not sure if this is going to make a huge difference, but I've also fashioned an additional heat shield to try to block a bit more of the high heat from the headers from cooking the AC lines.
Sorry for the shitty pics. And a fine metal worker I am not. Anyhow, we'll see if this works.
Edit: Oh, and I'm also playing around with a wildly inaccurate speedo.
For the header shield, you could try adhering some of the Lava Shield from Heatshield Products on side facing the exhaust:
https://www.heatshieldproducts.com/lava-shield
I have some of this stuff in a roll, I can bring some with me to Reno if you're interested (or mail it to you sooner).
A fancier idea is to get the whole thing ceramic painted with heat resistant header coating paint. I did this to my headers before CA cracked down on the stuff. Or you can 'Rattle-Can-Ron' it with some Eastwood High Temp Coating paint (which might not look so bad):
https://www.eastwood.com/silver-hi-temp-coating.html
Re: Rebuilding My 1988 US-spec M5
LOL!!!!
Ha ha ha!!!
Poke poke poke…
Who DAT?
Re: Rebuilding My 1988 US-spec M5
Yes, please bring some to Reno!vinceg101 wrote: Aug 30, 2024 7:00 PM For the header shield, you could try adhering some of the Lava Shield from Heatshield Products on side facing the exhaust:
https://www.heatshieldproducts.com/lava-shield
I have some of this stuff in a roll, I can bring some with me to Reno if you're interested (or mail it to you sooner).
These guys also grabbed my attention: https://www.carbuildersusa.com
They seem to have a couple heat shield products, and also appear to have noise deadening materials that look an awful lot like some of the OE stuff in our cars.
Re: Rebuilding My 1988 US-spec M5
Will do. See you, and this car, soon.

