Page 2 of 4
Re: My "de-build" thread - 1987 535is
Posted: Feb 16, 2016 2:27 AM
by stoney
You mention you are going to use 24lb injectors, are you tuning the computer to suit them? or just hoping the 25% increase in injector size will be sorted by the computer?
When the time comes, the plug and play Megasquirt for the Motronic 1.3 is a great ECU upgrade, much better than any chip.
PPM in Melbourne, Australia make stroker kits for these motors, mainly for the S38, but same bottom end parts, and have a few options for pistons.
Love the attention to detail you are going to with this car!
Re: My "de-build" thread - 1987 535is
Posted: Feb 16, 2016 11:48 AM
by jhh925
Yes, forgot about that. The 24# injectors (eBay) actually arrived late last week, and I believe I also now have all the Motronic 1.3 parts in hand (wiring harness & the DME box). While I was down at Ron's shop, he had an e28 there that had a very similar set-up to what I'm building and he mentioned that he used (IIRC) a knock-off of the chip Alpina developed for the B10. I believe it's an EAT chip from Mark D'Sylva? That motor ran really smoothly, and he claimed 250-260 hp (I'm doing this from memory). I have noticed, though, that there's extended discussion of chip mapping in build threads for similar motors. I'm torn between wanting to have a proven (if inflexible?) solution vs. having way too many moving parts to deal with as the project nears completion.
Still doing my research ...
Re: My "de-build" thread - 1987 535is
Posted: Feb 17, 2016 12:09 PM
by Adam W in MN
What did you use for the interior sound deadening? Is that Dynamat or similar?
Re: My "de-build" thread - 1987 535is
Posted: Feb 21, 2016 5:46 AM
by jodystevens
Looks like FatMat, I was going to ask if it's any good?
Re: My "de-build" thread - 1987 535is
Posted: Feb 23, 2016 11:16 PM
by jhh925
The pads are all FatMats. They're in the trunk & the interior. Frankly, I'm not sure how well they work. The PO installed that stuff, and I only drove the car for a couple hundred miles before starting to take it all apart. I will say that the car didn't seem particularly quiet when I was driving it around, but I really have very little to compare it to. And, to make matters worse, the muffler shop that installed the CA-legal cat found plenty of small leaks in the prior welding work in the exhaust system (the car quieted down a bit after those were fixed), but I don't think they got them all. And when I dismantled the engine I discovered that only one of the exhaust manifold banks even had a gasket (the other bank was just metal on metal ... can't believe that wasn't caught in the PPI), and that 3 of the 12 exhaust manifold nuts weren't torqued down (one of them was 2 or 3 threads away from even contacting the manifold). So all that I'm certain contributed a bunch to getting extra noise in the passenger compartment.
I am planning on spraying the interior of the doors with sprayable seam sealer (just got the SEM gun), so I'm hoping that will also cause things to mellow out a bit.
If I was starting this car from scratch, I'd be seriously tempted to do what I think OcCoup did (is doing?) in his E9, namely spraying dampening material with a schutz gun in the interior.
Re: My "de-build" thread - 1987 535is
Posted: Feb 23, 2016 11:58 PM
by Shawn D.
Eastwood has spray-on ceramic-based sound/heat compound. It would probably be lighter than using sprayable seam sealer.
On the subject of different sound-damping products, years ago I did comparisons among brands which had published the technical specs (IIRC, it was Dynamat, Brown Bread, FatMat, and something else -- no published specs, not considered). At the time, in terms of damping per area applied, damping per weight, damping per cost, and damping per weight/area, Dynamat Extreme was the best. Dynamat is not heavy, despite its reputation. On the 535i, I applied it under the rear seat, on the support bulkhead at the front of the rear seat, the rear bulkhead, under the package shelf, between the taillights, on the inward-facing side of the rear valance, on the exhaust heat shield, and on the gas tank rock shield. The portions between the taillights and on the valance cut out about 1/3 of the exhaust noise.
Re: My "de-build" thread - 1987 535is
Posted: Feb 24, 2016 12:30 AM
by jhh925
Shawn: Good info. The main reason I was planning on using seam sealer (and you're right, it's comparatively heavy) in the doors is because I have it handy. I bought the SEM gun & SEM beige sprayable seam sealer to coat the underside of the fender I've replaced. From the factory, the undersides of the funders are sprayed with beige stone guard. That product is NLA in beige, and the Wurth reps tell me that Wurth recommends using their beige sprayable seam sealer to get as close as possible to the original. Well, I was having trouble finding a way to get the Wurth stuff (they only want to sell this stuff to body shops) and happened upon the SEM stuff, so I figure I'll give it a try in the fender, and maybe also in the doors.
However, the Eastwood site mentions
this stuff, which can be applied with brush or roller, so I may research that some more. Is that the stuff you were thinking of? Or were you thinking of this
Lizard Skin Ceramic Insulation?
Also, Shawn, since we're on the subject,
if I wanted to remove the FatMat, any advice on how to do that? I've tried just pulling it up at a few corners, but that stuff just holds on something fierce. And the idea of spending a few hours in there with a heat gun has been enough to make me thing the FatMat isn't all that bad looking.
Re: My "de-build" thread - 1987 535is
Posted: Feb 24, 2016 10:32 AM
by Shawn D.
I understand wanting to use something you already have on hand, but I'd do more research on alternatives.
Yes, the
Heat and Sound Barrier Coating 1.5 Gallon Kit Item #15632ZP was what I was thinking of, but I apparently conflated it with Lizard Skin to come up with the "ceramic" notion. If you're going to do more research on it and/or Lizard Skin, hot rodding/musclecar sites are a good resource (that's where I learned of these).
Since the FatMat is difficult to remove, I'd leave it in place unless necessary for rust repair or whatnot. No reason to go through a lot of effort and frustration simply in order to replace it with something else, even if it might be superior (it probably wouldn't be earth-shatteringly superior).
Re: My "de-build" thread - 1987 535is
Posted: Apr 01, 2016 8:41 PM
by jhh925
I'm way overdue to update this thread ... but work's been going crazy (in a good way), the boy and I have been getting our EMR certifications (Search & Rescue - just two more weeks to go!), one thing leads to another ... and, well, this thread takes last priority.
Anyhow, to update:
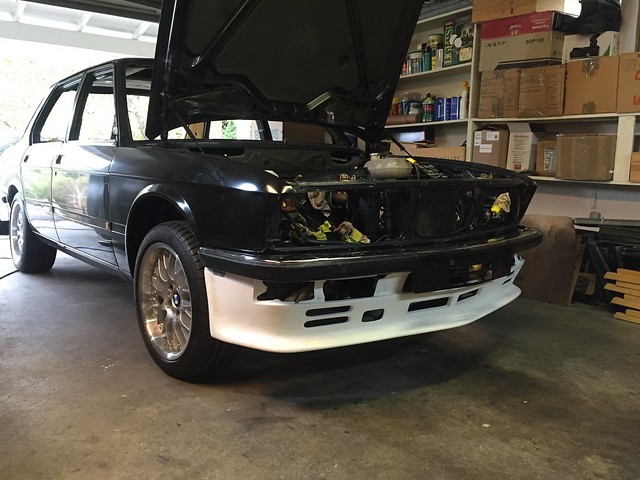
Car got picked up in SoCal from Ron's shop. Euro conversion is done and done properly. I decided to go with the Hartge reproduction front air dam, which I sourced through Ron, but I assume was made by Paul LaDue? (I'm guessing.) The air dam required some tweaking to get it to fit to the valance correctly (at least, I hope I got it done correctly).
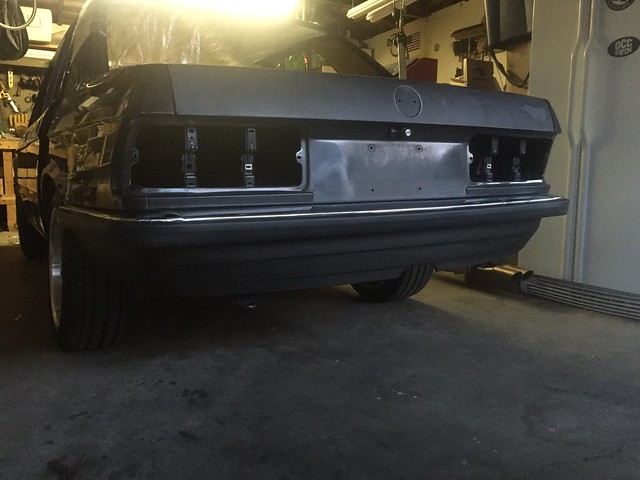
Other progress:
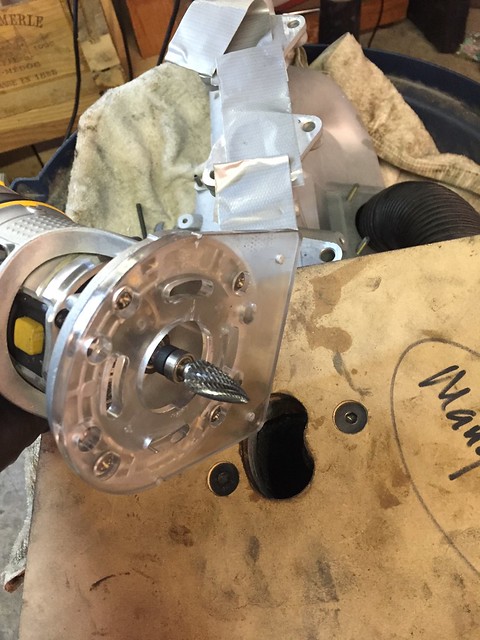
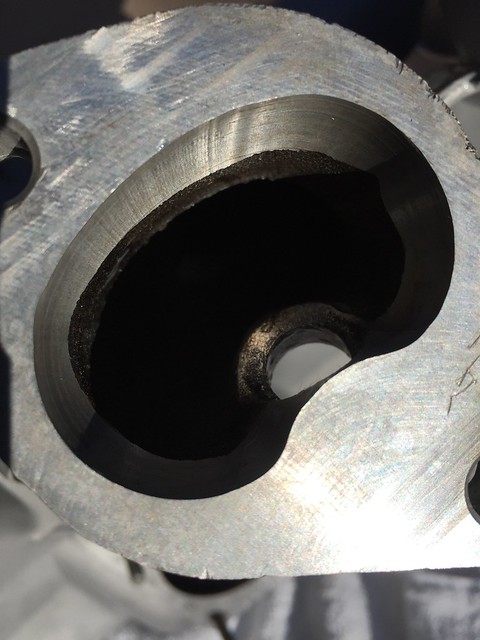
Got the B35 air intake port matched. Did this job myself, and I'm pretty happy with the result. I made a router template in half-inch MDF using a stack of new intake gaskets, then mounted the template to the manifold, then routed the excess aluminum out of the manifold using a tapered carbide bit. The router was turning at its minimum speed (around 6000 rpm IIRC?) and initially did a shitty job of cutting the aluminum at that speed. The main problem was that the teeth on the bit would get gummed up with aluminum within a few seconds, and it was taking me a few minutes to pick it all out. But then I figured out that the bit would cut a VERY clean, smooth path if I put cutting oil on the bit. Here's the jig set up and the result:
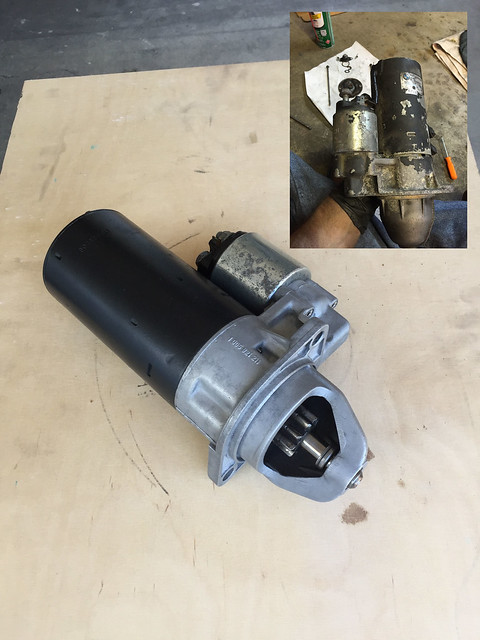
Cleaned and painted my new (to me) B35 starter:
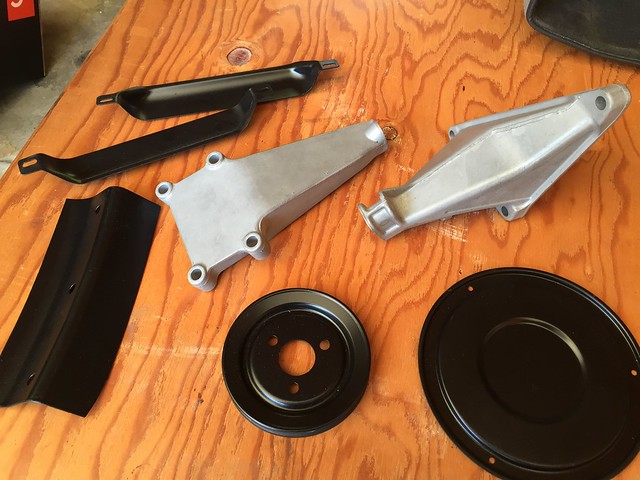
I decided not to do another trip to the powder coating shop, and instead I decided to polish the aluminum parts and paint the pulleys, air filter housing & various other parts myself. The aluminum cooling system manifolds that bolt to the head will get sand blasted & clear coated, as will the B35 intake manifold (after getting cleaned out at the machine shop). Some examples (including the motor mounts):
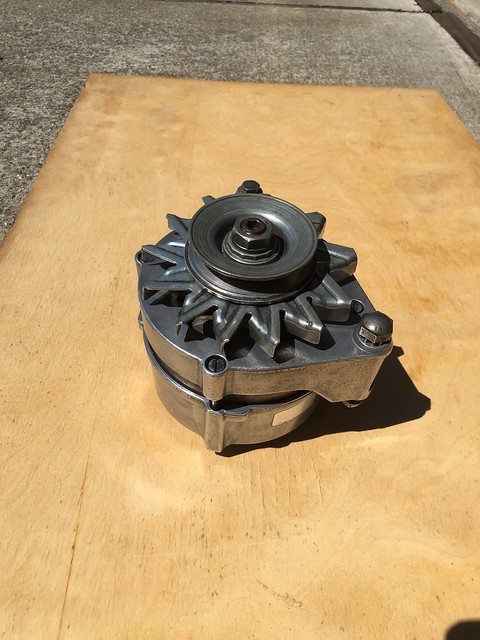
Polished up the alternator:
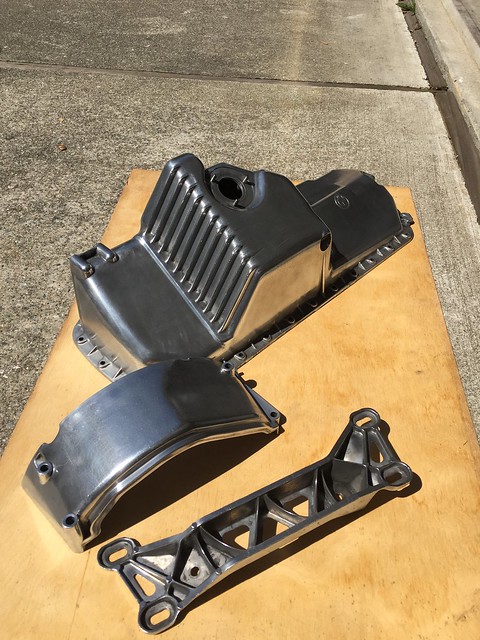
Polished the pan & bell housing mount:
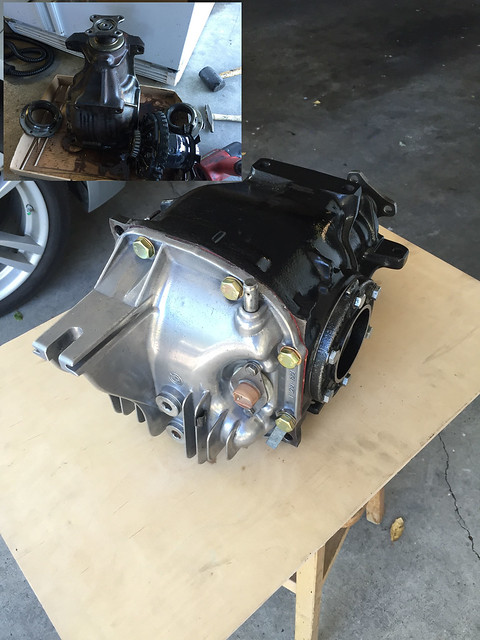
Cleaned up the diff:
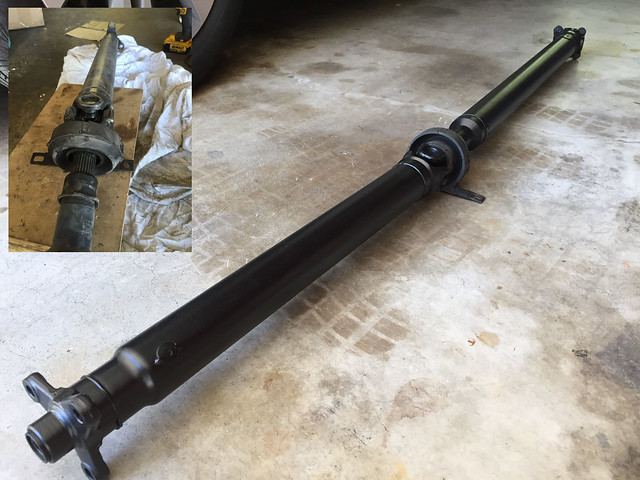
Cleaned & painted the drive shaft:
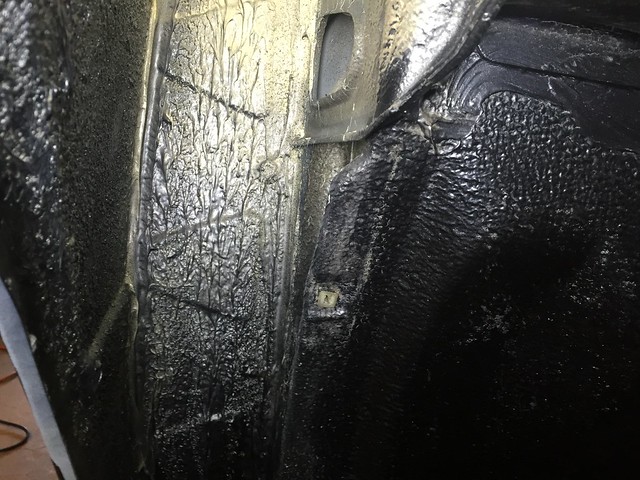
Got the new fender installed. I sealed up the seams with gray Wurth seam sealer, then sprayed the underside with SEM beige sprayable seam sealer. OEM was the beige Wurth stone guard, but that's NLA. Based on discussions with the local Würth rep, their guidance is to use the beige Würth sprayable seam sealer. Sounds great, but neither the product nor the spread gun are available at retail, so I gave it a shot with the SEM. The result was very good functionally (good coverage and sealing, good sound deadening compared to OEM), but the texture wasn't great. At the recommended spray pressure (55 psi), the gun sprayed in sort of a silly-string texture that I didn't like, so I ended up doing a second coat using a plain old paint roller, which ended up a lot better. Then I sprayed the sealed surfaces with some Diamond Schwartz Metallic to blend it all in. It's not as good a result as I'd hoped, but I'm happy with it. Did the same on the back of the new Euro front valance just to help ensure no future rust. Here's a shitty pic of the underside of the new fender:
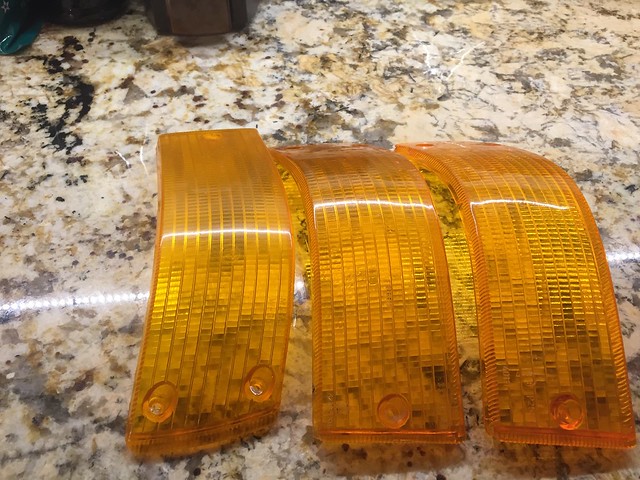
I've also been learning the versatility of the various polishing wheels & clays. I already have two new aftermarket front turn signal lenses, but for grins I figured I'd see how nice a polish I could do on the old lenses. Here's a pic showing (from left to right): (i) an untouched, used OEM lens; (ii) a polished OEM lens; and (iii) a new aftermarket lens. I had trouble getting a pic that showed how much of a difference there was between untouched vs polished or new .. the difference is more dramatic than shown here. Not perfect in any case, but certainly good enough that I'll be keeping a set of spares. For this I did toothpaste by hand, cleaned it up, the buffed with black, brown & white in order (using separate buffing wheels dedicated to each color wax).
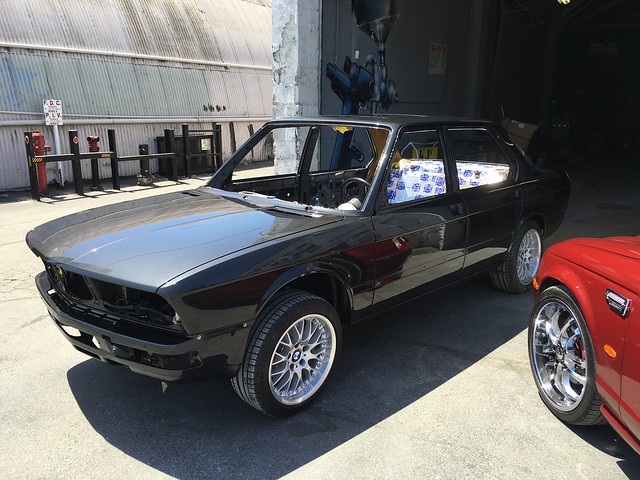
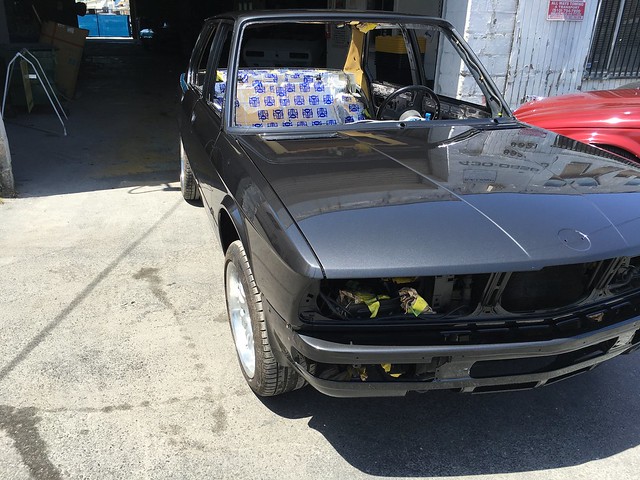
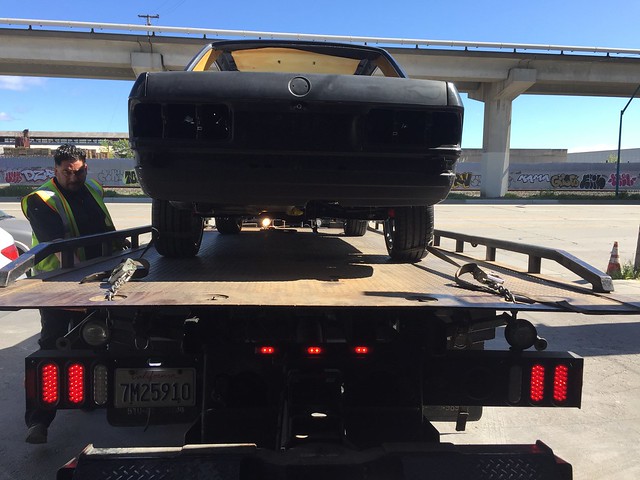
Car getting picked up for transport to the paint shop:
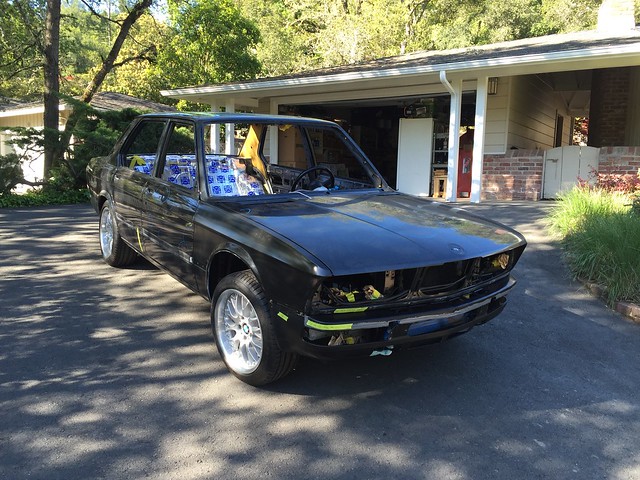
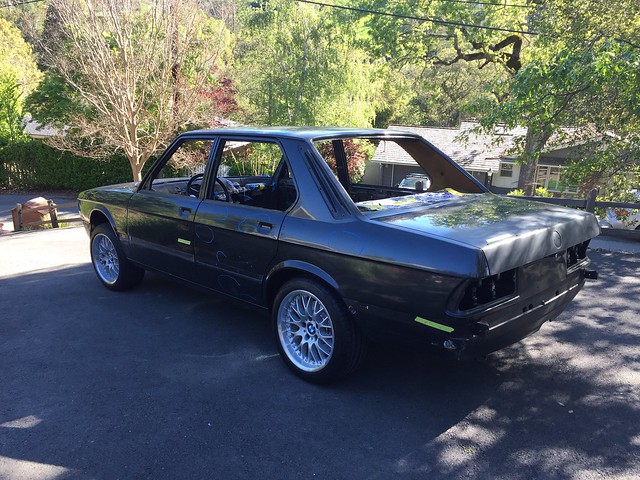
All the tape bits you see there have notes to the body shop. When he saw the gray seam sealer in front, the body shop guy guy asked "who the hell did that?" Um, me? He wasn't impressed. We worked it out.
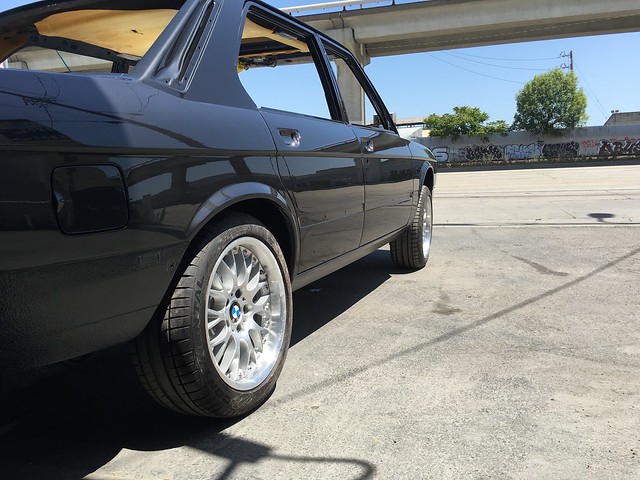
Here's a (crappy) shot from behind. Note the extreme toe-out on the rear wheels. As I think I posted earlier, we added camber adjustment brackets to the rear subframe before it was reinstalled. These wheels haven't been adjusted at all yet, but I'm hoping the adjustment range will be enough to get these back to spec.
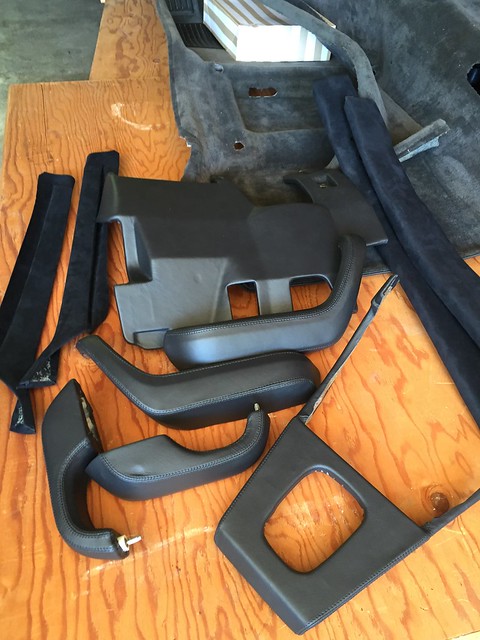
Head, block & crank should be getting picked up at the machine shop on Friday. Interior parts are coming in bit by bit from the upholstery shop:
Almost time to rename the thread ...
Re: My "de-build" thread - 1987 535is
Posted: Apr 01, 2016 10:02 PM
by tig
Really great work!
Re: My "de-build" thread - 1987 535is
Posted: May 06, 2016 6:50 PM
by jhh925
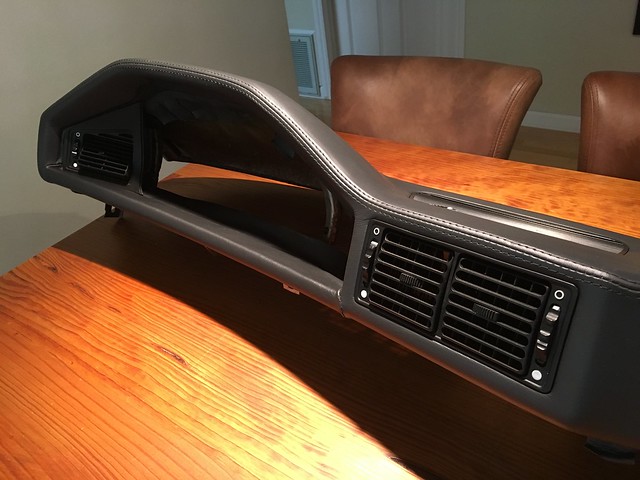
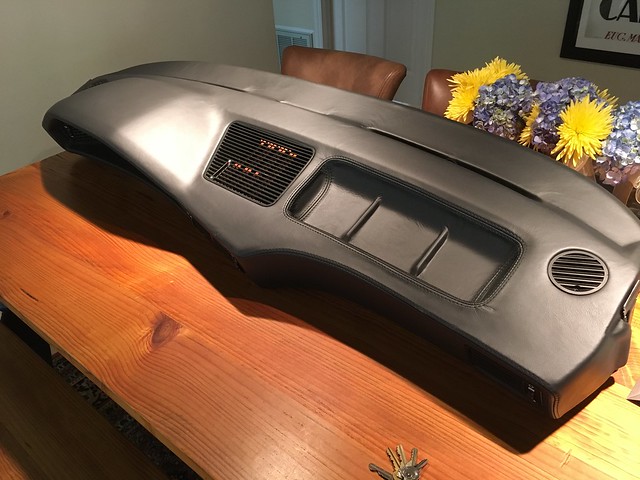
I got the last parts from the upholsterer today, including the dash. I'm super happy with the new dash, so I'll use that as my excuse to update this post.
At this point, I think I've turned the corner and this is really starting to feel like a "build" and less like just an expensive tear-down.
Dash, all leather:
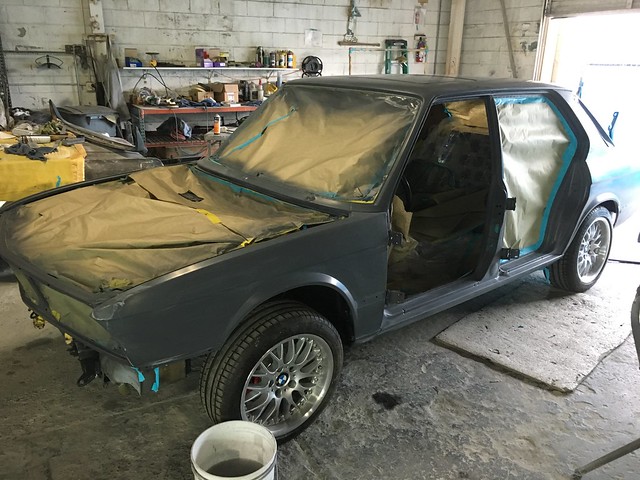
Progress at the paint shop. The gray coat in the pic is the sealer. They're going to redo the portions that have the stone guard on them. They used a type of stone guard that gives a texture that feels a lot like mid-grade sand paper, not the stucco / orange peel texture of the OEM stuff that came on these cars. They're going to redo those portions. Several coats of the base coat will be next.
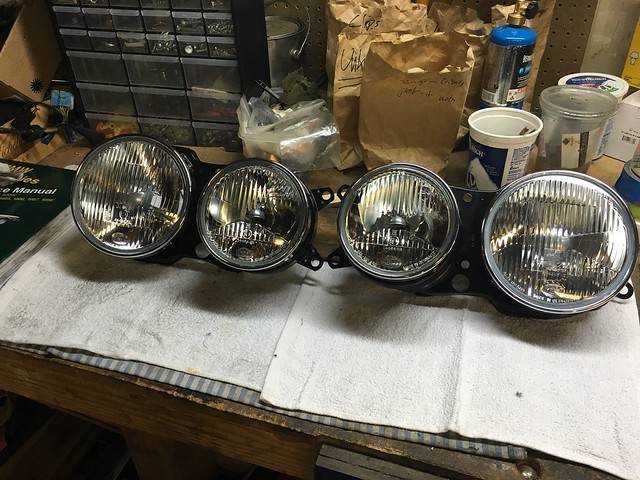
Reconditioned headlights. Buckets were powder coated. Lenses are new Hella. I deleted the wipers ... the units on the car didn't work and were missing some pieces. The blades also didn't seem capable of contacting much of the lens surface. And it seems cleaner w/o anyhow.
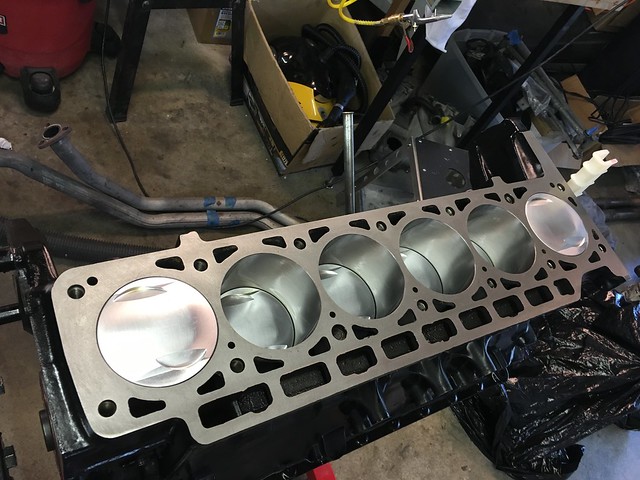
Engine progress. I was recently going back to CEK's engine build thread, and I think if I were to do this all over again, I'd lean towards powder-coating most of the unfinished aluminum pieces. Much cleaner look and much closer to the idealized look I had in my head. Oh, well, not unhappy with what I've got done here.
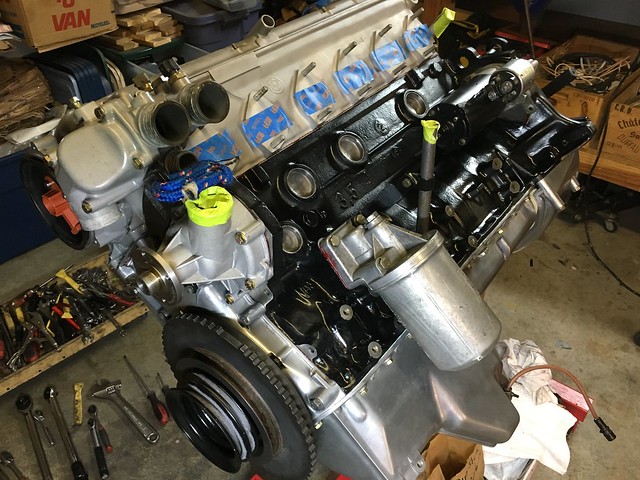
I probably have another month before I get the car back from paint. In the mean time I'll continue reconditioning various assemblies that have been removed from the car.
Re: My "de-build" thread - 1987 535is
Posted: May 06, 2016 8:40 PM
by ShineWorks1
bravo..... I will now change my shorts.

Re: My "de-build" thread - 1987 535is
Posted: May 07, 2016 10:31 AM
by white chocolate
Car is looking great, keep it up, and keep posting!
Re: My "de-build" thread - 1987 535is
Posted: May 09, 2016 4:33 PM
by jhh925
ShineWorks1 wrote:I will now change my shorts.

High praise indeed!
Re: My "de-build" thread - 1987 535is
Posted: May 17, 2016 4:28 PM
by Burnze
Great work! Very inspiring.
Re: My "de-build" thread - 1987 535is
Posted: May 27, 2016 7:30 PM
by jhh925
Re: My "de-build" thread - 1987 535is
Posted: May 27, 2016 8:57 PM
by Shawn D.
Wow, it's lookin' great!
Re: My "de-build" thread - 1987 535is
Posted: May 27, 2016 9:25 PM
by tig
Looks awesome!
Re: My "de-build" thread - 1987 535is
Posted: May 28, 2016 7:36 PM
by white chocolate
I can see my reflection int it from here

Awesome!
Re: My "de-build" thread - 1987 535is
Posted: May 28, 2016 11:08 PM
by Das_Prachtstrasse
Fantastic work, this is shaping to be areal beauty.
Re: My "de-build" thread - 1987 535is
Posted: May 29, 2016 1:02 PM
by jhh925
Yeah, I can't wait to pick it up on Friday (soonest I can get everything lined up, including getting out of work). I'm paranoid about scratching it as I rebuild it. I really like how dark the gray looks in person - a lot more "schwartz" than it was going in and a lot closer to what I remember some of these cars looking like when they were new on the lots.
In other news: Engine is all buttoned up except that the crankcase nut isn't torqued yet (I'll probably do that when the engine is back in the car) and the clutch/flywheel isn't attached yet (hard to do while the engine is on the stand).
Also, I gave up on finding Alpina chip and I've ordered the Miller + MAF + AFR sensor package. Looks like people have had a lot of success with that combo. My plan is to keep the original e28 air filter box (not go with an e34 unit) ... question: I have a line on a b35 valve cover. I think that I can mount all this intake-side plumbing (Miller MAF, air filter box, etc) solidly if I have the b35 valve cover, right?
Haven't started in on the wiring harness ... that one is making me break out in cold sweats. The tech threads on that conversion are great, and I've read them a handful of times, but still ...
Re: My "de-build" thread - 1987 535is
Posted: Jun 01, 2016 10:01 AM
by RonP
The car just looks stunning, Jens! Can't wait to see the finished product.
Re: My "de-build" thread - 1987 535is
Posted: Jun 12, 2016 11:32 PM
by jhh925
Making slow progress. All fuel hoses in the front are replaced. All hoses are crip-clamped. WAR chip installed, and 179 box installed. All assemblies in the cowl are back in place (blower, wiper motor & linkage, fuel lines & cover).
First some nice results. Got the diff & half-shafts in. The rear end is now done except: (i) I still need to adjust the parking brakes. For some unknown reason I decided to skip this step when I was putting all the parking brake parts back in. What the hell. (ii) I think I'll want to notch the coil-overs down ... not sure what to call it, but the circlip that positions the lower spring cup has three positions. It's currently in the "highest" position, and I think the car (without the M-Tech kit) will look better if it's a bit lower. (iii) The camber needs to be adjusted. I'll get that last item done when I get the front end aligned.
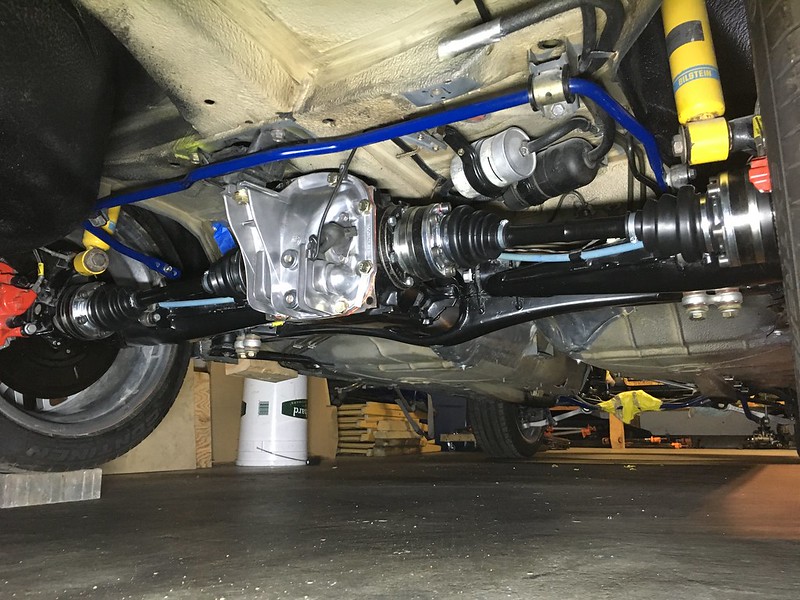
Now for the more frustrating parts:
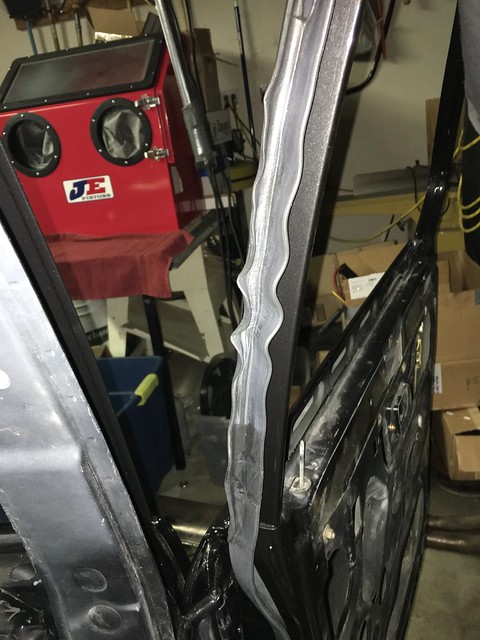
I have all new door rubber (both the rubber seals and the "edge protectors"). All of those parts are BMW original parts. Unfortunately, the two rear door seals are about 1" too long in the section between the 90 degree corner (at top leading edge) and the curved part that goes around the "door brake" (the strap that prevents the door from swinging too far open). Given that both the R and L sides are flawed in exactly the same way, I'm thinking the best approach will be to cut small sections out and re-glue them with good weatherstripping cement. Any better ideas? And if not, what's the best weatherstripping cement to glue two butt-ends like that?
Also, in the rear-end pic above note that the spare wheel well is repainted. I did that with Würth High-build under coating. It went on great. I held the spray can 18" to 20" away. I did only one single quick coat. Ventilation was great. Initially it looked great, but now 4 days later it's sticky! What the hell. And this is the second time I've gotten that same result. (I carefully cleaned my first attempt off.) Any ideas on what I'm doing wrong?
Oh, and the B35 wiring harness has me flummoxed ... Yes, I'm reading & rereading the many threads on this. Current plan is to compare my B35 harness to an E28 with the B35 conversion already done (the guys down at German Auto Sport have such a car). Fingers crossed.
Re: My "de-build" thread - 1987 535is
Posted: Jun 13, 2016 1:05 PM
by dsmith
I use 3M super weatherstrip adhesive. Get the black not the yellow.
http://m.autozone.com/sealants-glues-ad ... 34735_0_0/
Re: My "de-build" thread - 1987 535is
Posted: Jun 13, 2016 5:12 PM
by jhh925
Perfect. Thanks. And by the way, do you know what the difference is between the kind that you link to above
(number 8008) and the one that comes in the red tube
(number 8011)?
Re: My "de-build" thread - 1987 535is
Posted: Aug 26, 2016 8:30 PM
by jhh925
The actual rebuilding part is finally starting. I might have to rename the thread.
Our recent vacation (including a swing through Munich!) took me away from the project for about a month in total (no, vacation wasn't that long, but I lost the bookend weekends).
Prior to the vacation, I was focusing on the wiring - making the necessary mods to the B35 wiring harness, ripping out the old harness for the automatic tranny (this car was a 5sp conversion) plus cleaning up a bunch of the existing wiring and old wiring hacks. I did soldered "western union" connections all around, and sealed 'em up with shrink wrap. This pic shows the extension for the diagnostic plug (IIRC). I used BMW wiring from other harnesses and matched colors as best I could.
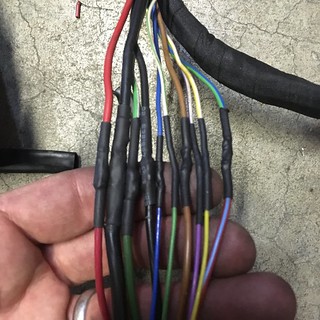
The wiring bundles & harnesses under the dash and running to the back were in sad shape. After 30 years, the stickum on the tape holding those bundles together had pretty much liquified, making working inside the cabin yucky. So as much as I could, I ripped off the old wrap and re-wrapped everything in new Tesa tape.
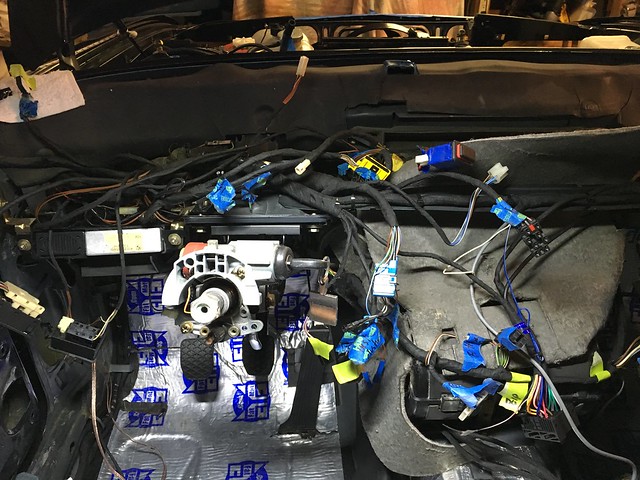
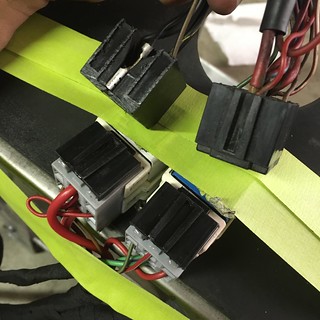
Since I was spending so much time on the b35 harness, I wanted to take the opportunity to make sure it would look right. I cut out the e34/b35 C101 plug and wired directly to e28 C101 plug. I also extended the leads for the diagnostic plug by about a foot so that it could be mounted under the coolant overflow tank, and modified the wiring for the relays so that they could slot into the original e28 relay mounts on the side of the fuse block (instead of in the glow box). In order to get the E34 relays to slot into the E28 dovetails, I cut off a portion of the plastic "female" relay holders and epoxied them onto the E34 relay holders. They fit perfectly, and now sit exactly where the old relays used to sit. The b35 coil is now mounted right under / next to the washer fluid tank. I had to extend those leads by about a foot also to make that work.
Relays:
Result:
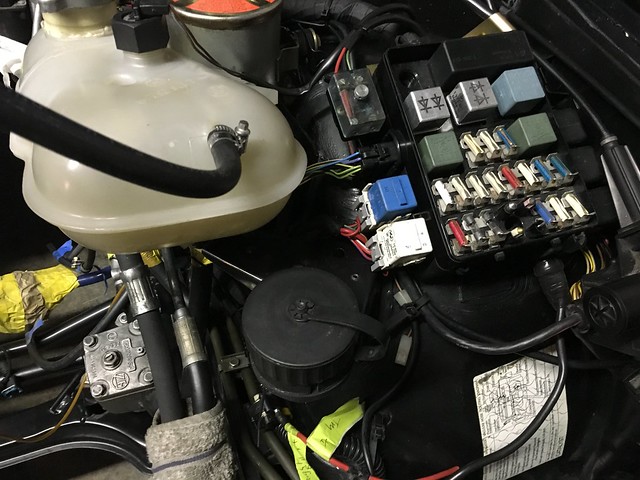
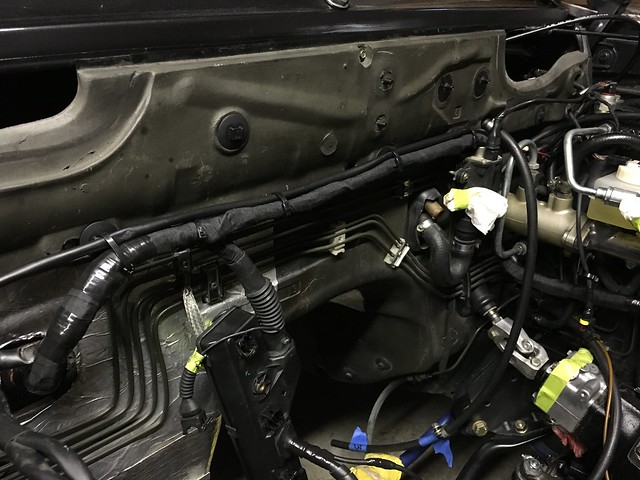
Everything then got wrapped in Tesa high-temp tape. Right now I'm pretty pleased with the outcome, but if I mis-wired something, I'll be fucked during the de-bugging process. And there will be bugs, so logic says I'm fucked.
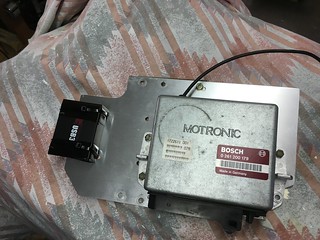
I also fabricated an aluminum plate to hold the 179 ECU in a 90 degree rotated position to accommodate the length & orientation of the b35 harness. I mounted an aftermarket in-line amp and the Grom Audio iPhone adapter on the same plate. Ideally, in this position all this will be neatly tucked out of the way when the dash & glove box get reinstalled.
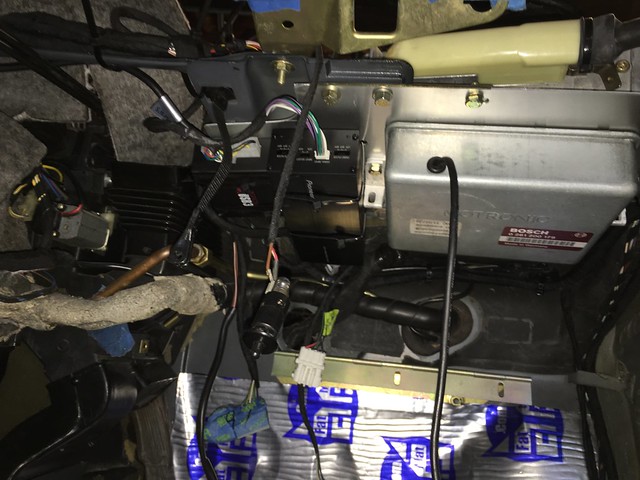
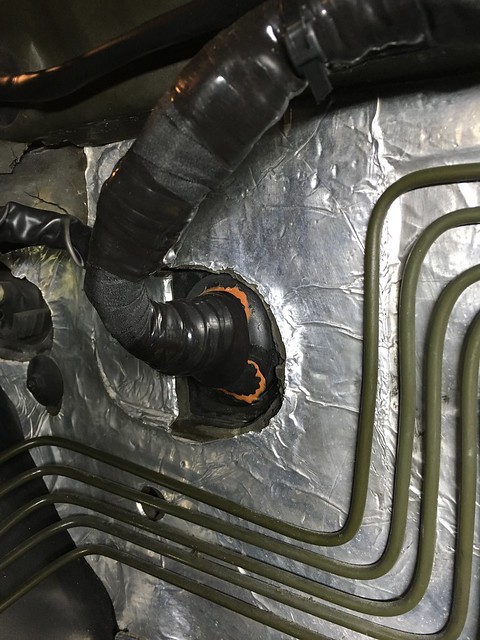
I then mounted the entire harness in the car before putting the engine & tranny back in. I'm figuring it will be easier to attach the installed harness to the motor than to try to thread the harness into all the nooks & crannies after the motor is back in. And yes, those are bicycle tube patches on the rubber firewall grommet. Couldn't quite get the F4 tape to cover all that, but the grommet is well sealed up and well seated in the firewall.
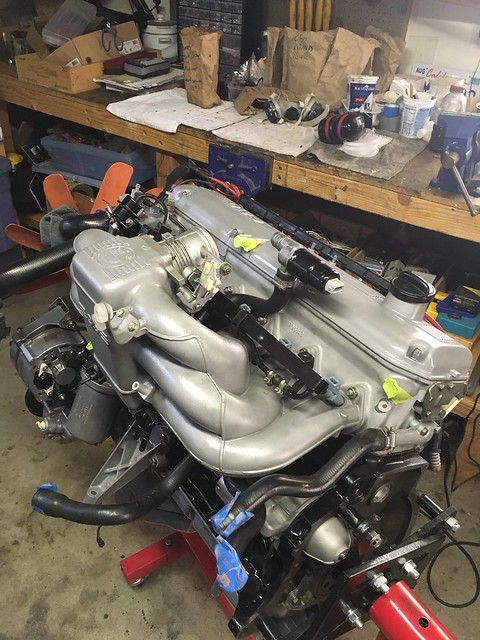
Engine is pretty close to being ready to put back in the car. Hoping to get that done within the next couple of weeks. Got a b35 fuel rail powder coated along with the two steel fuel lines that run under the intake. Clean look, though now I think I need to figure out where to route the fuel line that needs to run from under the intake (right side) to the charcoal canister (left side)?
Other less successful tasks: I've been frustrated at getting a good, clean, dry coat of black undercoating onto the underside of the spare wheel tub. The OEM undercoating is beige and appears to have caught diamond schwartz overspray in the original manufacturing process (a consistent overspray pattern is all over the bottom of the car). My first attempt to spray some Wurth product went so well that I figured a second coat would only improve it! Wrong. The second coat just turned everything to black stickum. A day and a can of WD-40 got all that off. I resprayed with a different Wurth product. That was sticky from the get-go, likely because I didn't get all the WD-40 and what not off from the cleaning project. So, that whole layer had to get removed. I'm now in the process of de-greasing with the POR-15 degreaser & a steam cleaner. Doing that 3 times. Then I think I'll shoot some black primer on there first to ensure the surface is clean & ready, then I'll reshoot with undercoating. What a mess.
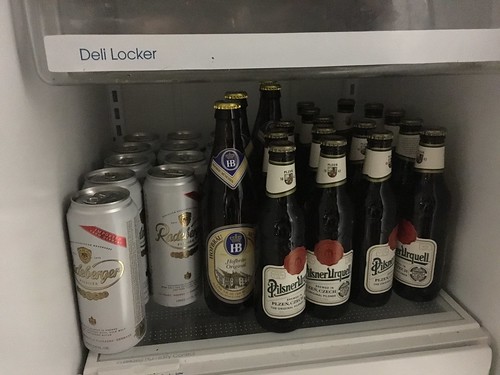
Yeah, sorry. Too many pics of incremental changes. Here, have a beer. On me ...
Re: My "de-build" thread - 1987 535is
Posted: Aug 26, 2016 10:17 PM
by Chimi-Changa
This thread rules!
Thanks for the brew. Oh and have you tried the Hoffbrau Octoberfest? yum, so smooth....
Re: My "de-build" thread - 1987 535is
Posted: Aug 29, 2016 3:05 PM
by jhh925
Chimi-Changa wrote:Oh and have you tried the Hoffbrau Octoberfest? yum, so smooth....
I have not ... I think I've seen it at the local BevMo, though. I'll try it!
Re: My "de-build" thread - 1987 535is
Posted: Aug 29, 2016 10:16 PM
by CBREEZ
Amazing, the amount patience and attention to detail you actually have. It's truly commendable!
Re: My "de-build" thread - 1987 535is
Posted: Sep 02, 2016 10:35 PM
by tig
Inspired by ecu mount plate... embarrassed to admit mine is held in place with zip ties.
Nice work.
I'm in Berlin right now and drinking my namesake...


