Page 21 of 89
Posted: Jan 15, 2013 11:58 AM
by davintosh
For the X5, I picked up 24 quarts of Castrol Edge 5w30 this morning; that's what the PO had been using in it, and Advance Auto has that oil on a buy-one-get-one free deal until the end of the month. It's due for a change (will probably do that tonight) and it takes 8 quarts (or so I hear), so this ought to last me a while.
I need to take my son's Miata over to my brother's storage unit and tuck it away tonight too. The weather's decent, so I'll get it washed up first.
Posted: Jan 15, 2013 12:26 PM
by cddallara
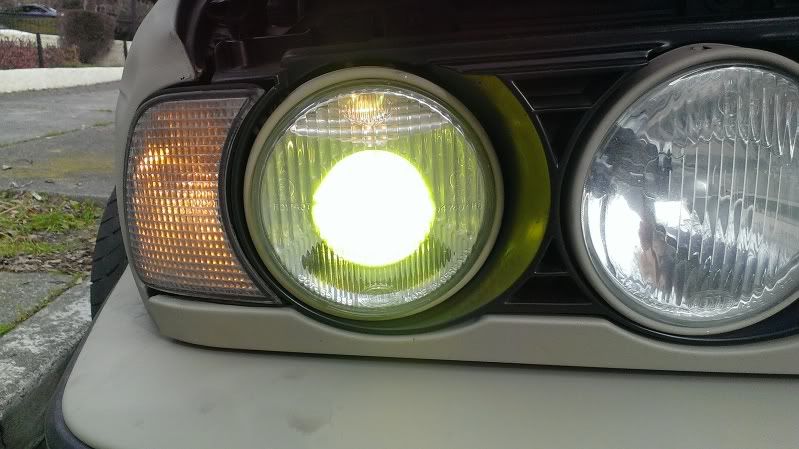
You've heard of pee beams?
That's old school, the new trend is frog lights:

Posted: Jan 20, 2013 3:10 PM
by RangerGress
RangerGress wrote:Last Fall I got a 2000 Ford diesel truck because the F150's gas engine turned out to be overwhelmed by the 24' enclosed trailer upgrade. Over all the diesel truck has worked out very well, but one thing that's been annoying me is the size of it's fuel tank.
It's supposed to hold 28-30gal depending on you who ask, but because of a poorly designed vent tube you can only get about 25-26 in it unless you are willing to spend 15min getting the last several gallons.
With the old trailer this wouldn't be a big deal because it was small enough to pull in anywhere and get some gas. But with the big trailer I not only need diesel, but I need a place big enough that I can get the rig in and out. Plus, the price of diesel varies significantly so it behooves me to ID the cheapest diesel on the route. Ideally, I'd only stop once for diesel and it'd be the place with the best price.
For my first couple events with the new trailer I brought along 15gal worth of gas cans to bring my diesel capacity up to 40gal, but that's a pretty inelegant solution. So I've been scheming on how to do an aux gas tank on the cheap.
On CL I found someone selling a Ford Expedition gas tank w/ fuel pump and got that for $100. Then I put eye-bolts into the bed of the cab and strapped the fuel tank down. Then I plumbed the fuel pump outlet into the primary tank's filler port, and then created a filler pipe/hose and filler vent for the aux tank. To create the actual filler port I used the gas port from an e30, one of two that were in the attic already modified for a big throated gas "dump jug" for fast fueling during endurance racing. So an e30 gas cap will fit right on. The big throat is significant because a diesel nozzle is large. The truck has a canopy on it. Once the back window of the canopy is opened, the filler port is in your face.
Nothing should leak in the event of a rollover because the tank's vents have checkvalves.
All I have to do now is wire a switch to the fuel pump and another switch that will choose with fuel level sensor is connected to the gauge. Once the primary tank gets low I just switch on the aux pump and the aux tank fills the primary tank. Should the aux tank go down to empty I have to be sure to turn the aux pump off because a pump running dry will overheat it. That's why it's necessary to wire in the aux tank's fuel level sensor.
I'd have taken some pics but it's not much to look at right now. Right now the focus is just getting it to work. Later I'll make it pretty. Or prettier, anyhow.
F-250 aux fuel tank is operational. It was surprisingly complex with vents for discharge and a vent for filling, the need for a filler system that went "downhill" and handled the flow rate, connecting the aux tank outlet to the OEM tank, the requirement that there be no leakage in the event of a rollover out of the 3 vents and tank inlet, and finally, wiring in the fuel gauge and fuel pump.
And it's done.
The tank is from a Ford Expedition. It's hard to see but there's a fiberglass shield that faces rearward and much of the top surface. That will protect it from anything in the bad giving it a whack.
To my surprising good fortune, I found that the truck apparently had an aux tank once before because there was already a tap into the OEM's tank's filler neck. Putting that in was going to be one of the more pita details of the whole effort and there was the port all ready to go. All I had to do was put a hose on the barb and diesel from the aux tank would go right into the OEM tank.

The filler pipe consists of the last 8" or so of an e30 filler inlet with vent pipe, and a plastic pipe I got from Home Depot.

The last part was the wiring. If you run a fuel tank dry the fuel pump will quickly overheat and die. Therefore I needed to not only be able to run the aux tank fuel pump, I also needed to know how much fuel was in the tank. I'd hoped that because aux tank came from a Ford, the fuel level sensor in the tank would be compatible with the gauge in the F-250. So what I needed was one switch to run the aux tank pump and another switch to click between the OEM tank and the aux tank sensors.
I did a lot of thinking about the kinds of switches I wanted to use. I have a whole drawer of switches from race car projects, and I also checked out Radio Shack, ebay and a couple autoparts store. I didn't really find what I wanted so I ordered switches from Mouser.
But I got impatient. So yesterday and today I drove on with the wiring using switches I had on hand, as a "temporary" solution. Because I've not yet decided on the final switch type, I went with an external box to house the switches instead of drilling holes in the dash.

Of course, nothing worked the first couple of times, but eventually I fought things into submission. The trickiest problems was switching between fuel gauges. The wiring scheme seemed ok, as best I understood how the gauge was connected to the sensors, the wiring itself and the switch seemed ok, but I just couldn't get it to work. Then finally I figured out what the problem was......The truck heavily buffers the fuel gauge except for when you first start the car.
So in either fuel gauge sensor position it reads correctly when you turn on the car. But if you flip the switch and change to the other sensor, the gauge doesn't respond.
For a while. If you're patient, the gauge will start changing to the new reading. It's so heavily buffered it takes probably >20min to move full sweep if one tank is empty and the other tank is full.
I filled the aux tank with diesel, tested everything, checked for leaks, and all is well. Cool.
Posted: Jan 20, 2013 4:57 PM
by Duke
Waxing the Tiger. It will be in the KC World Of Wheels show again. This time, in the "Snake Pit". The snake pit is reserved for Shelby Cars.
Posted: Jan 21, 2013 3:26 AM
by opposite
Bought my e28 back after selling it. The guy who bought it broke it, somehow. I'm working on my e24 now, but I did miss my e28, which was a lot more fun to drive, and had a much better designed interior.
Posted: Jan 21, 2013 12:15 PM
by unt0uchable
This weekend I finally managed to change the trans fluid in our 2003 Highlander. It was starting to hesitate between shifts and who knows if its ever been done before. 122,000 miles.
Since it's not recommended to flush these completely, I might do it again here in a couple weeks when I change the oil Anyway. It only replaced about 4 quarts of the fluid so it could use another drain/fill at least once more.
Posted: Jan 21, 2013 2:11 PM
by rmiddendorf
unt0uchable wrote:This weekend I finally managed to change the trans fluid in our 2003 Highlander. It was starting to hesitate between shifts and who knows if its ever been done before. 122,000 miles.
Since it's not recommended to flush these completely, I might do it again here in a couple weeks when I change the oil anyway. It only replaced about 4 quarts of the fluid so it could use another drain/fill at least once more.
I might research that further. I've been told that more damage can be done by over doing that but I only know enough to ask the question, not answer it.
Posted: Jan 25, 2013 2:05 PM
by unt0uchable
Last night I managed to replace an alternator on an H3 for a friend of mine. Took me just shy of 3 hours to do. I used this method found
here. It went really well considering it's a 5 hour job at the dealer and they go in from the inner fender well. Effff that. The truth about it is this: If they have shortened up the plateau that the battery tray sits on by LESS THAN 1 inch!!! This job would have been an hour and a half job. Either way, it went well.
Transrender
Posted: Feb 03, 2013 11:21 AM
by funfunfer
Got tired of shuffling the automatic transmission around the garage, so decided to rip it apart. Like a little kid dismantling a clock (pre electronic timekeeping). Net result: a tub of aluminum bits for recycle, enough shafts to seat any bushing I ever encounter, more nuts and bolts for the parts bins, scrap bits for welding practice.
Posted: Feb 03, 2013 2:24 PM
by oldskool
Was troubleshooting electrical gremlins on a 95 Windstar sporting 215k yesterday. I promptly diagnosed correctly that it was time to go new car shopping.
I haven't been paid yet

Posted: Feb 03, 2013 3:34 PM
by RangerGress
Switch porn. Update on the tow vehicle aux tank project.
As discussed earlier, the first iteration of switches to control the F-250's aux tank were switches that I had laying around. I'd ordered better ones, but I'd gotten impatient and pulled some matching switches out of the "switches and LEDs" drawer. I used a standard household switchplate as a box cover.....Not ideal, but that too would be improved upon.
I did a lot of hunting around for switches. I wanted the switches to look identical and I wanted the pump switch to be illuminated red when turned on. Turning something on just requires a standard single pole, single throw (SPST) illuminated switch, something you can get anywhere. "Single pole" means 1 circuit. "Single throw" means 2 positions...on and off. But the fuel gauge switch was harder. For that I need double throw (SPDT) which means the switch has 2 "hot" positions, you can make one circuit hot or you can make the other circuit hot. That would allow me to switch the dash fuel gauge between the normal tanks sensor and the aux tank sensor.
Altho there's lots of illuminated single throw switches, because if you're switching power it's easy to siphon some of that to run an LED, there's not too many illuminated double throw switches. The reason for this is that double-throw switches are not just turning power on, they're switching between 2 things...and maybe neither of which has 12v. For, example, if you using the switch to deliver a ground to two different circuits, you don't have squat for power. So what was needed was a switch that had separate power contacts for the illumination, and that made it a rare bird.
It took a while but finally I found some kick-butt switches at Mouser. They would illum amber/green in one position and red in the other position. They sounded awesome, but I worried that when they showed up I'd find that I misunderstood their spec sheets.
When the switches arrived I did some testing on them to make sure I understood what all the connections were. They turned out better than I'd hoped. They were more expensive than radio shack and autoparts store switches but the quality was so much higher that they made me realize that most of my switches in the "switch and LED drawer" were crap.
The next problem was to find a way to protect the switches from getting bumped. Both gear or the kids could easily bump the switches. My initial plan had been to use rocker switches on the dash in some out of the way position. Rocker switches don't stick out much so they're bump resistant. But the more I looked at places on the dash I could use and the kinds of rocker switches available, the less I like the rocker switch idea.
So if I was going to use toggle switches and an aux box, the switches needed some kind of cover to keep them from being bumped. The cover needed to be clear so if the switches were in the red position that would be immediately obvious. Finding a good cover solution took another several days, but I eventuallly I found the perfect solution at an aviation supply house. They sold clear toggle switch covers that you can fasten over any normal toggle switch. Awesome.
Even cooler, when the clear toggle switch cover is closed, it automatically flips the switch. So the result of any bump is the aux fuel pump being turned off. It's spring loaded so if it gets bumped, it flips down hard enough to pop the switch.
Finally, I ditched the household switch box faceplate for a smaller faceplate.
Aux tank switches Mod 0. Cheap non-illum switches, free to be bumped, and big off-white face plate.

Aux tank switches Mod 1. New face plate is smaller and looks better.

Aux tank switches Mod 1. Close up showing switch covers. Note that fuel pump is now on and therefore red. Should cover be closed it turns switch off.

Switches
http://www.mouser.com/Search/ProductDet ... 3-0006-EVX
Switch covers
http://www.skycraftsurplus.com/safetyco ... olors.aspx
Posted: Feb 17, 2013 7:25 PM
by 1st 5er
The wifey's Beast is off the jack stands with a new-to-it clutch slave flex hose.
She's happy again.
Posted: Mar 05, 2013 6:13 PM
by djazz
"Upgraded" the truck tires from LT275/55R20 to LT285/55R20. I had told Cindy she onl had maybe a half inch clearance as is with the old tires but Discount assured her the 285s would fit.
Guess who's problem it is, now that the new tires rub?

It looks like I could shim the bumper enough to clear.
Posted: Mar 05, 2013 6:57 PM
by cddallara
djazz wrote:"Upgraded" the truck tires from LT275/55R20 to LT285/55R20. I had told Cindy she onl had maybe a half inch clearance as is with the old tires but Discount assured her the 285s would fit.
Guess who's problem it is, now that the new tires rub?

It looks like I could shim the bumper enough to clear.
That's why the Good Lord invented sawzalls

Or, reciprocating saws if you prefer...
Posted: Mar 05, 2013 8:03 PM
by Mr.3-5-7
Posted: Mar 05, 2013 9:01 PM
by sQuirly
sheared a subframe stud off in the nissan Altima i picked up to flip

Posted: Mar 06, 2013 1:47 AM
by djazz
cddallara wrote:djazz wrote:"Upgraded" the truck tires from LT275/55R20 to LT285/55R20. I had told Cindy she onl had maybe a half inch clearance as is with the old tires but Discount assured her the 285s would fit.
Guess who's problem it is, now that the new tires rub?

It looks like I could shim the bumper enough to clear.
That's why the Good Lord invented sawzalls

Or, reciprocating saws if you prefer...
You read my mind.
I was told no ghetto hacking on her baby tho.

My understanding is that the offending bumper piece is a custom Regency piece made of fiberglass where stock is just plastic. If I have to cut the fiberglass I may silicone rubber tubing around the edge to keep it clean looking.
Posted: Mar 12, 2013 12:31 AM
by 1st 5er
Her DD got a
half a quart.
Posted: Mar 12, 2013 12:01 PM
by cddallara
No pics, but I wired in "euro" 2 wire sockets for the front corners. Now they're just turn indicators, the only marker lights up front are the fender lights and city lights.
Posted: Mar 12, 2013 12:38 PM
by Tammer in Philly
Sunday: oil change and front suspension inspection on the E34. Valve job and brake job soon, and strut/shock upper mounts, and a diff speed sensor, then I think this car goes on the FS block.
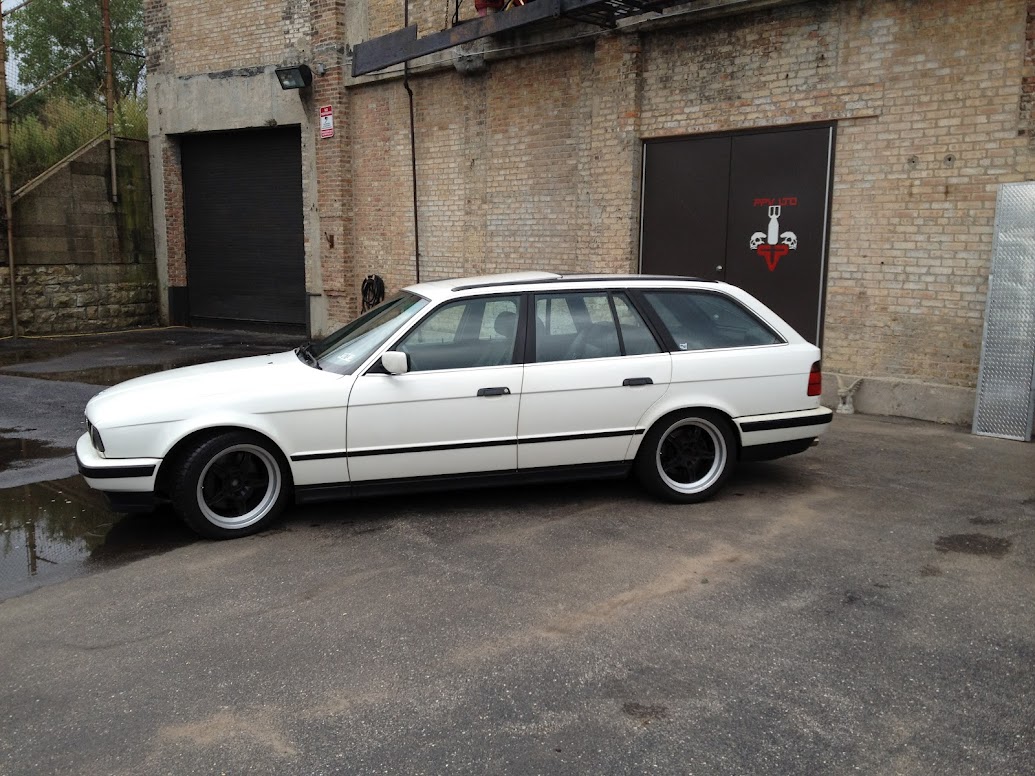
-T.
Posted: Mar 12, 2013 1:39 PM
by unt0uchable
Last night I finished a 2 part expedition on replacing the emergency brake guts on the 03 Highlander. It was a pain in the ass. I didn't even put the new parts on the passenger side once I realize that these parts weren't even the problem. The real problem was the caliper that was frozen on the passenger side. If I would have started on that side I could have saved myself a whole 'nother evenings work on it and about $50 bucks. But for some reason, I was drawn to the driver side first. Stupid stupid mistake. From now on, I will remove both rear wheels, inspect, and move forward. If that doesn't work, I'll leave the wheels off, turn the car on, put it in drive and place a fucking brick on the gas pedal.
Smoke 'em if ya got 'em.

Posted: Mar 30, 2013 11:00 AM
by rmiddendorf
A local friend graciously assisted me with a brake bleed on my E90. I can now say I would be comfortable doing that myself next time. And I put the summer tires on too.
I think I'm all caught-up on car maintenance now. Whew! I'm tired now...
Posted: Mar 30, 2013 11:17 AM
by ldsbeaker
Let the 6er out of the garage so I can organize...
Neighbors: "is that a new purchase?"

Guess I need to get her on the road and driving...
Posted: Mar 30, 2013 12:32 PM
by grahamular
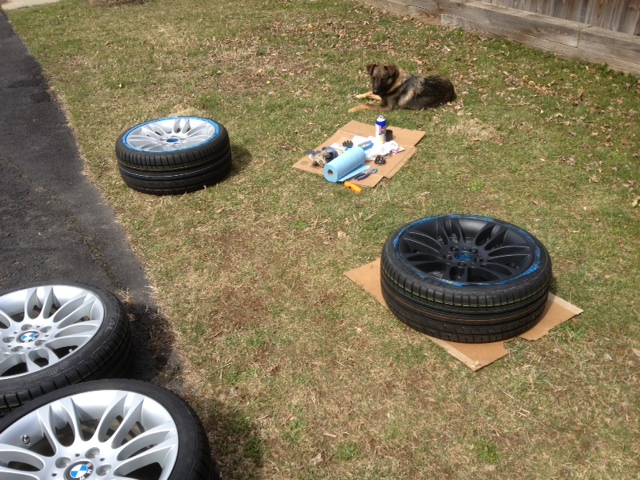
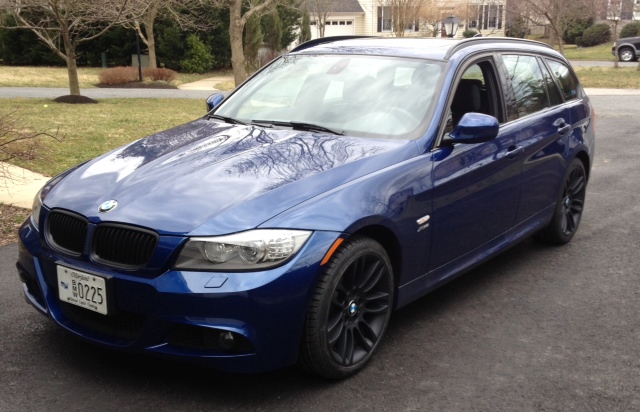
Took off the snow tires and then plasti dip'd my style 195 wheels on my E91. Color was supposedly dark gray, but sure looks like black to me. First time working with this stuff...had to re-do the first wheel due to runs.

-Graham
Posted: Mar 30, 2013 1:49 PM
by cddallara
Swapped the exhaust (cats), hoping to pass smog, no luck.
Giving it another try Monday. It's nice that the e34 sedan and wagons are the same in that respect. Opens up my options

.
Posted: Mar 30, 2013 7:33 PM
by jhall
Last weekend I did this:

So now this weekend I could start doing this:


Posted: Mar 30, 2013 7:58 PM
by tig
Posted: Mar 31, 2013 3:28 PM
by a
I just ordered 88$ worth of parts for my 1977 International Harvester Cadet 80 lawn mower. It will still look like a moving junk pile.

Posted: Mar 31, 2013 11:07 PM
by tig
Finished! Now all she needs is an alignment.

Posted: Apr 03, 2013 12:57 PM
by davintosh
Yesterday, drove ~40 miles to fetch my daughter's 318ti; it died on her as she was driving back home from school, and left her stranded on the freeway. Thankfully, a couple of her classmates were on their way to Sioux Falls as well, and were able to give her a lift. Getting the car home was a bear though; it sounded like a charging system issue, car wouldn't start sometimes, and this time stumbled and died after the instrument cluster & other electrical stuff went dead while driving. I checked the battery terminals -- one was loose (she and some friends had tried cleaning them up -- and started up fine with jumper cables. My son jumped in to drive it back and pfbtttt... died again. Jumped it again & let it charge a while; that got it to the next exit before it died again. We didn't want to have to stop & jump it ever five miles back, so we hooked up a tow rope, with the e32 in tug position. Got lousy fuel mileage on the way home.

Got it home & in the garage, and found the problem to be a dead alternator, so started tearing into it to get the thing out. Un-flippin-believable how much stuff has to come out before I could get access to the alternator! Air box, intake snorkel (the airbox is on the left side of the engine bay, but the snorkel goes over the radiator & pulls air from the right side of the grille; WTF???) MAF & power steering reservoir. And in the process of getting there I managed to break the neck off the radiator.

Whoever it was that thought plastic in the cooling system was a good idea ought to be shot. Good thing I have a replacement waiting in the wings. Maybe I'll just buckle down this week and do the cooling system rebuild that I've been putting off since last fall. I feel like I'm elbow deep into it anyway.


