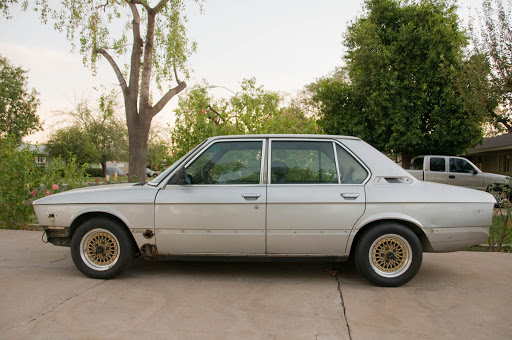
E12 M535i Project - 08-21-19 Update

Post your photos and videos here!
1st 5er
Posts: 21863
Joined: Jun 13, 2008 12:15 AM
Location: Cypress
Contact:

Post by 1st 5er »

A few hours well spent.
No rust makes me :D as well.

Thanks for the update.
Looking forward to more.
Adam W in MN
Posts: 5053
Joined: Feb 12, 2006 12:00 PM
Location: Don't waste my motherf***in' time!
Contact:

Post by Adam W in MN »

wkohler wrote: I went with the RSs for now. I don't like them on this car.
Ouch! :laugh: Well, I think they are a great 1980's correct look for these cars while maintaining the 16" (in my opinion) max size that looks right.
wkohler
Posts: 50924
Joined: Oct 05, 2006 11:04 PM
Location: Phönix, Arizona, USA
Contact:

Post by wkohler »

Adam W in MN wrote:
wkohler wrote: I went with the RSs for now. I don't like them on this car.
Ouch! :laugh: Well, I think they are a great 1980's correct look for these cars while maintaining the 16" (in my opinion) max size that looks right.
Don't get me wrong. They look great on your car, and I think they look good on this car. I'm just not a big fan of wheels that don't fit. 16x8 ET24 with 225/50/16 does not fit E12s. It's disconcerting. I'm having a set of RAs refinished right now and now I don't think I can use them.

As for the next step, I'm not sure. I guess I'll start removing all of the trim, though I think I'll wait for more stuff until I see what Brian has come up with.
skip535i
Posts: 5186
Joined: Oct 26, 2006 2:27 PM
Location: Lynchburg, VA

Post by skip535i »

Awesome news, Chris. Thanks for the creative writing, too....makes this a fun thread to follow. Good luck with the parts search and body work!
WilNJ
Posts: 4193
Joined: Aug 12, 2009 11:22 AM
Location: North Jersey

Post by WilNJ »

wkohler wrote: I also sold the Alpinas, so I had to figure out what to put on the car, which left me with the original wheels, TRX or RSs.

I went with the RSs for now. I don't like them on this car.
My $0.02
Mikede wrote: As for the RIAL's...here they are.

The 16x7's
Image

and the 16x9's
Image
wkohler
Posts: 50924
Joined: Oct 05, 2006 11:04 PM
Location: Phönix, Arizona, USA
Contact:

Post by wkohler »

Thanks for the thought, but I think Rials are kinda ugly.
Tucker
Posts: 961
Joined: Nov 07, 2007 9:37 PM
Location: Los Osos, CA

Post by Tucker »

FABEL
Posts: 146
Joined: Jun 10, 2010 4:07 PM

Post by FABEL »

Fox wrote:Sweet!!! I'm looking forward to seeing the restoration.
x 2
stoph99
Posts: 379
Joined: Feb 12, 2006 12:00 PM
Location: Chiang Mai, Thailand

Post by stoph99 »

Here's a useful page on L-Jet, written with Alfas in mind but applicable to old BMWs as well

http://www.hiperformancestore.com/Ljetronic.htm
wkohler
Posts: 50924
Joined: Oct 05, 2006 11:04 PM
Location: Phönix, Arizona, USA
Contact:

Post by wkohler »

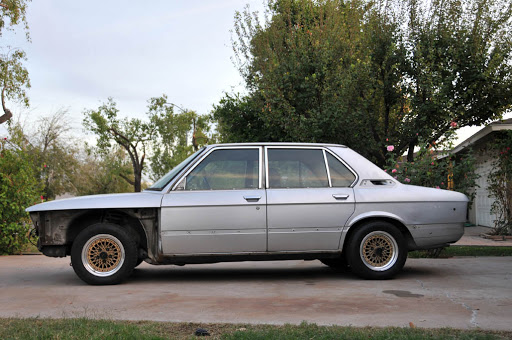
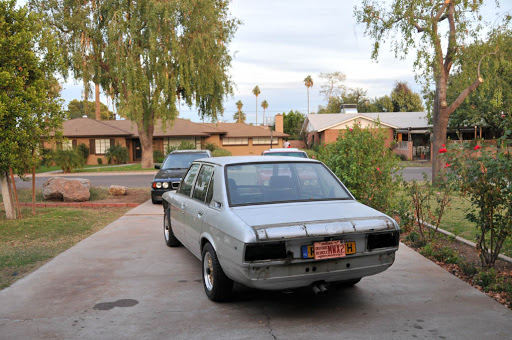
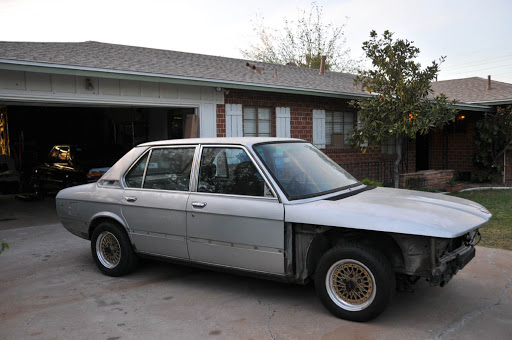
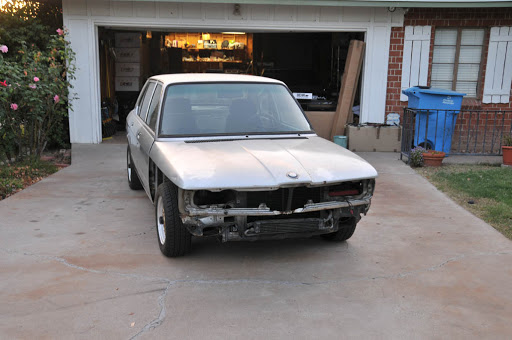
Been a while since I could say progress was being made. As just about everyone knows, the car was hit in my driveway on August 30. I was able to reach a proper settlement with State Farm, which deemed the damage repairable, allowing me to keep the clean title.

I did nothing to the car short of removing the airdam and grilles to show the extent of the damage. I wanted to keep the car in it's as-hit state just in case it was necessary to get another appraisal or something. The day the check arrived, I resumed working on getting the car ready for the bodywork stage.

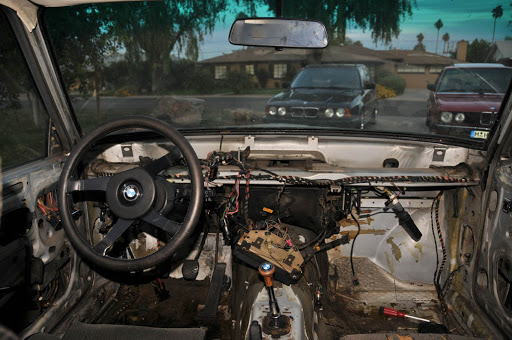
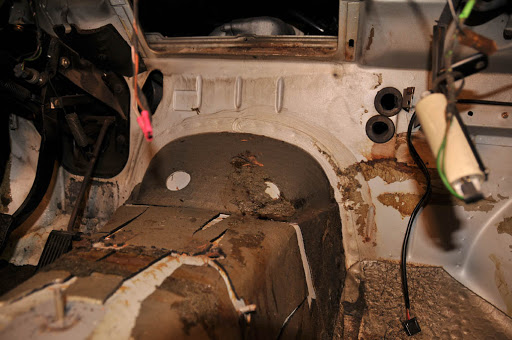
Shortly before the car was hit, I had removed the aftermarket AC components from the cabin, along with the carpet, and the soiled insulation. I was very concerned about what the driver's floor looked like, so it was a top priority. I hadn't removed anything from the firewall forward. So, I decided that was going to be my first project. I further developed my hatred for aftermarket parts. :evil:

The aux fan was easy enough. Standard mounting for that. The condenser on the other hand was a real pain. Held in place with 4 M6 bolts, with a nut on the backside of each. The two lower nuts were underneath the radiator. I couldn't remove the radiator since the core support wouldn't allow it to move, so I had to work around it. I had it out after about 45 minutes of trial and error. Ford tire iron for the win. Once the physical mounting was undone, then I could actually get to the hose connections (you couldn't actually turn a wrench for the top connection). Easy-peasy. I then figured I might as well take everything out. Washer bottle is in the way, so I pull it out. I got distracted and ended up removing the entire windscreen washer system - including the lines to the nozzles in the hood, despite the hood being slated for scrap. I followed the AC electrical from one side of the car to the other. I soon realized why nothing happened when I tried to run the AC. Someone cut the red wire to the battery. You're supposed to cut the blue wire! Damn kids fresh from the academy. Once all that was free, it was time to pull the lines. Ugh. Idiots. Just ran self-tappers into the inner fender, then decided to run a bolt - and a nut of course - for another. These people were so smart, they got the longest bolt they could to go 1/2". The end of the bolt was just a couple millimeters from the spring. So, after cranking the nut off of that for a couple minutes, I was able to pull all of the lines out for the Diavia AC system.

Next up, I removed the fender liners. They were perished, and I wanted to see what things looked like behind them - particularly on the left. I found a damn power antenna. I was 90% sure the car had a manual antenna. I was very confused about that. I then pulled all of the beltline and rocker trim. No issues there, except it's pretty hard to get all of the clips off without losing a couple of the expanding pieces inside the rocker. They'll come out sometime, I'm sure. I pulled the drip rail off each side as well. I'm glad I did, too. Everywhere there was a clip, there was a small bit of surface rust. I won't be able to get new pieces as they're NLA, but I'm going to try to get the cleanest E28 ones I can (they're the same) or have mine stripped, polished and re-anodized. I pulled all of the door seals as well. Each door has some minor rust behind the seal. I think it should be easy to treat that. No perforation.

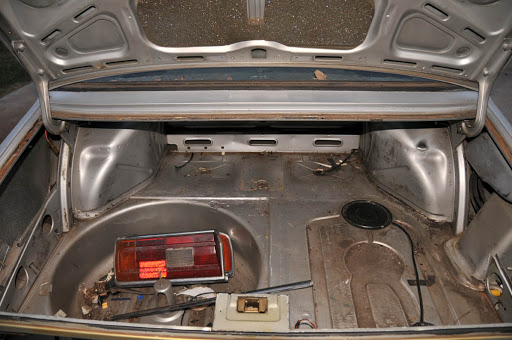
The following evening, I started in on the trunk. On E28s, there are carpet pieces for trim. E12s have the world's thinnest and most fragile plastic. Every piece in my trunk is broken, but there. Still, I pulled everything and set it aside, as you never know what you'll need. I pulled out the spare, tools, license plate lights, tail lights, trunklid trim, etc. I found some minor rust I hadn't seen. No big deal. I did some picking and wire brushed a couple of questionable areas as well. Pulling the rear spoiler off was a pain. You have to go really slowly and really be careful. I thought I did pretty good. Sure, my spoiler is in rather poor shape, but they are NLA and there is probably a way to restore mine to be presentable at least. I pulled the front and rear lockstrips as well.

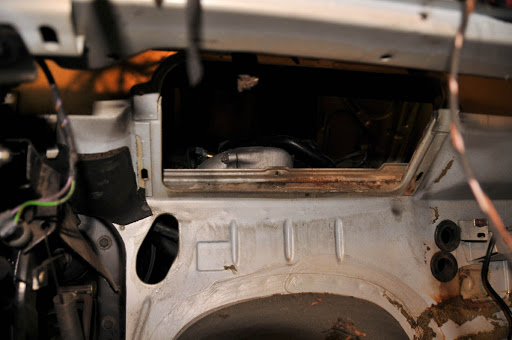
Next, I pulled off the front fenders. The right front had been replaced and pretty much fell off after undoing the bolts. The left was a bitch and a half. Not only did I have my favorite sealant to deal with, I also had a nice thick coat of undercoating, too. I ended up cutting through that with a knife. The funny thing is that the left side of the car is actually better than the right since whoever replaced the right fender just bolted it on. No sealant or anything. All that was there was residual from the old one. As a result, there's no rust along the left side, but, there is some on the right. Shouldn't be too hard to fix, though. I removed the rear speakers, rear parcel shelf and other pieces since I was a bit concerned about the condition of my left rear shock tower. I think I'll be replacing them, as I don't want to be done with the car and wonder what they're like. Not a great design.

I took a break from pulling things off since I had a few jobs last week. I decided to look at having the car chemically stripped. I did a lot of reading, I read probably 30 restoration threads in their entirety on several boards from muscle cars to Pelican Parts. People have differing opinions, but It seems the people that had it done by competent people and were careful to prime the car immediately. As opposed to acid stripping, the place here (formerly Redi-Strip, now Clean Metal Industries) uses a heated caustic dip (11.5pH) to remove the material, then an acid which neutralizes the base and removes the rust. Once it's out of there, it's pressure washed at 3000psi with water that has phosphoric acid added, and acts as a "conversion coating." They recommend priming it ASAP with an epoxy primer and doing the bodywork through that. They wouldn't quote a price until I gave them a test piece, so I brought them the left-front fender. They weren't sure if the undercoating would come off, so I was really happy to hear that. I haven't heard anything yet.

A couple days ago, I got back to work on the car. I was on the phone at about 11pm and decided to tinker a bit. I removed all of the aftermarket stereo wiring, then the lower left dash panel and next thing you know, I removed all of the remaining insulation on the floor, the rear seat heating ducts and then I had the dash out (cake). Then, I started looking at how wiring was run and where. I found some more rust, but it shouldn't be too bad to deal with.

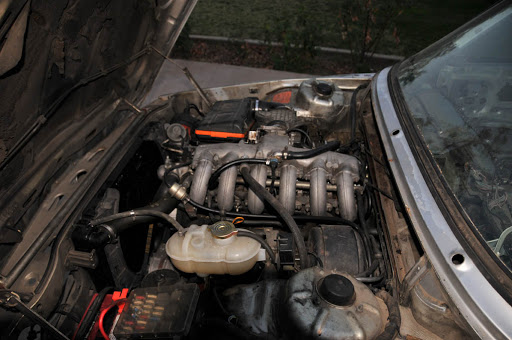
Thursday night, I pulled the heater fan, the wiper linkage and had the heater box ready to come out, but I didn't feel like undoing the hoses. Friday, I pulled the clutch fan, radiator and the heater. I removed the air intake as well. I photographed all of the wiring at the distribution panel under the dash.

The problem with taking a car apart is that it takes up a lot more space in pieces.

Next up is getting the harnesses from the trunk through the rear bulkhead. I hope to get most of the wiring out of the passenger compartment and trunk this weekend in addition to all of the other work I have to do.

Here's some pictures of the progress.

11-10-10 (still has the fenders):
Image

11-19-10:
Image

Image

Image

Image

Image

After removing the heater:
Image

Image

Image

Image

I'd take the hood off, but I don't know where to put it.
muleskinner
Posts: 1340
Joined: Sep 08, 2007 11:17 AM
Location: John Graham ATL

Post by muleskinner »

shee-it....that's a lot of work, but am sure it'll be rewarding once it's put back together.
mooseheadm5
Beamter
Beamter
Posts: 23035
Joined: Apr 08, 2009 10:30 PM
Location: Charlottesville, VA
Contact:

Post by mooseheadm5 »

Put bubble wrap or a heavy blanket on the roof and lay the hood there.
Sleeper21
Posts: 538
Joined: Nov 22, 2008 11:52 AM
Location: Winter Park, Fl

Post by Sleeper21 »

I was wondering what happened after the hit and run..glad to see you still are restoring it. Good luck !
Das_Prachtstrasse
Posts: 5616
Joined: Sep 10, 2006 7:06 AM
Location: Melbourne, Doooown Under

Post by Das_Prachtstrasse »

mooseheadm5 wrote:Put bubble wrap or a heavy blanket on the roof and lay the hood there.
This.

Or roof racks.


It's looking like it's coming along nicely, must be a relief after the StateFarm debacle.
wkohler
Posts: 50924
Joined: Oct 05, 2006 11:04 PM
Location: Phönix, Arizona, USA
Contact:

Post by wkohler »

mooseheadm5 wrote:Put bubble wrap or a heavy blanket on the roof and lay the hood there.
That would be more in the way than it is now. I need a second person to get it off the car anyway.
wkohler
Posts: 50924
Joined: Oct 05, 2006 11:04 PM
Location: Phönix, Arizona, USA
Contact:

Post by wkohler »

I hope no one has a heart-attack seeing this thread bumped. Don't fall over. Calm down.

Seeing when the last update was made me laugh. It's been nearly 3 years to the day since I've done anything substantial on this car. Actually, it's been three years since I've done really anything on this car. I've used it as a shelf. I used the B7 Turbo for a shelf while this car sat outside under four car covers since it has no weather stripping. Either way, I find the story kinda funny.

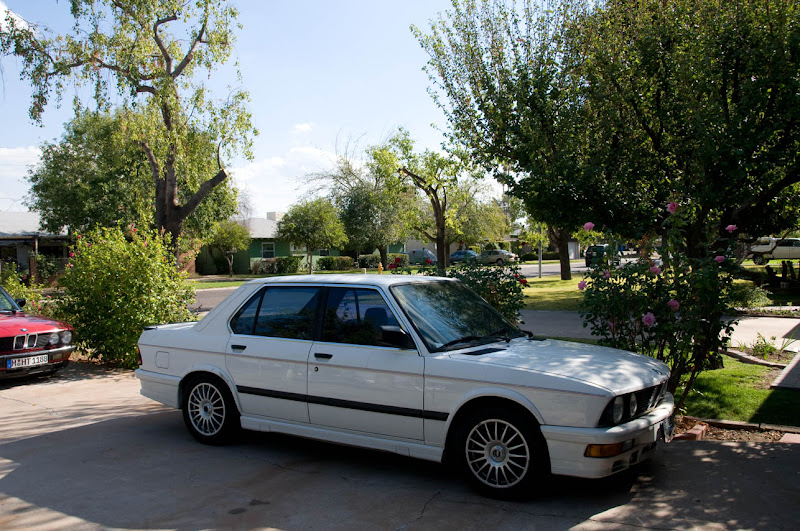
Basically, I was working on the car after the settlement from State Farm. Immersed in my world of ickiness, Polaris and rust that is this car, I was on a mission. I went to look at an E28 with a friend. An Alpinweiß M535i. Ended up being too much of a project for him. I looked at it and thought it was right up my alley and should be a quick project. I ended up getting the car (with my friend's blessing of course) the day before Thanksgiving and I quickly found out how incorrect I was about the quickness of the project. That said, it was still an easier project being mostly mechanical work.

Image

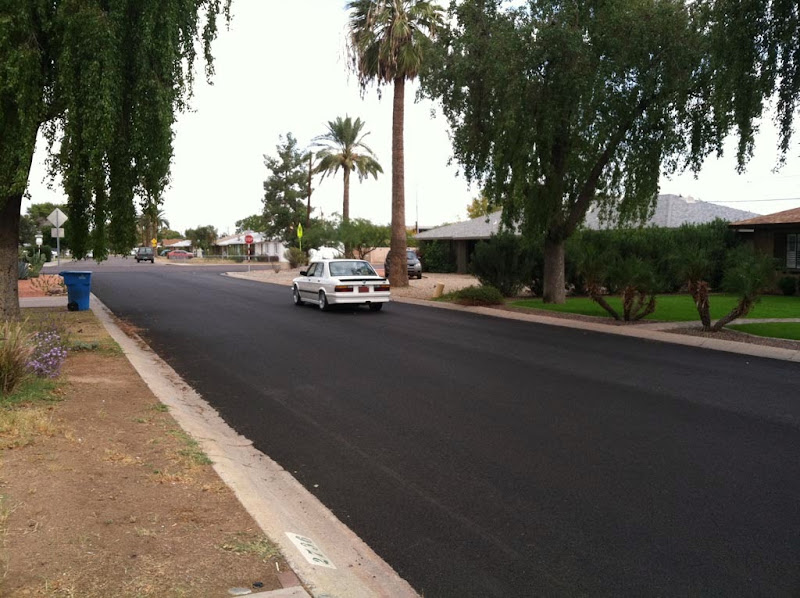
So the E12 M535i sat. I bought and sold a few other cars in that time. The B7 Turbo was a less-intensive project (so far), so it got the green light before this one. I ended up making the decision to sell the E28 M535i to who I feel is the right owner for it, so now that it is gone, I guess I can resume work on the E12 M535i.

Image

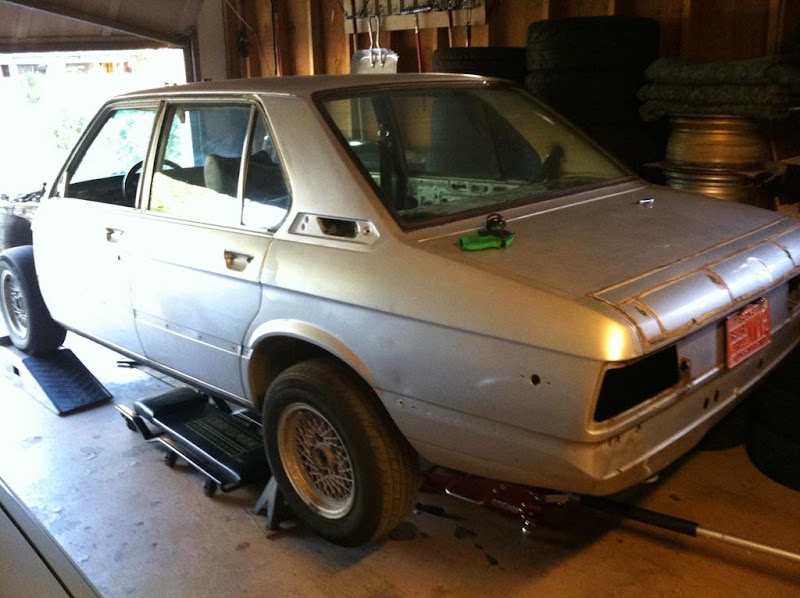
And resume work I did. I decided that it would be good to get it out of my garage and send it so bodywork could commence. He could keep it for two years for all I care. It's such an intense project needing everything that there's no way I could afford to do it quickly. I've accumulated a lot of parts but it's interesting going through what few parts are still left on the car and realizing what you don't have, what will need to be replaced and then have a nice long sigh about how many things are NLA.

Anyway, nothing could move ahead until a few key things were out of the way.

Image

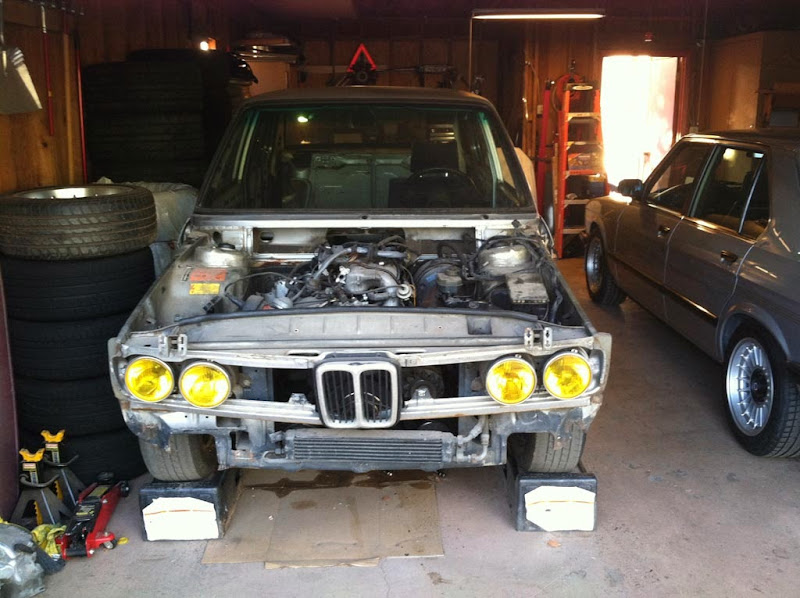
First, the hood and the front fenders. I forgot how heavy and unwieldy the hood was. Wow. Then I discovered my jack didn't work. I did some research trying to find seals and then found that my Craftsman Professional jack wasn't very professional since it was designed to be disposable. Only had it ten years. Made in China. So, I went to Costco and bought another Hecho en China jack and got back to work.

Image

Image

Putting the car up was a bit tricky since I have stacks of tires next to the wall. I didn't want to take the risk of having the B7 too close to the action, so I used some 2x4s to place the jackstand in front of the right rear wheel. My jack is new. It's also made in China and I'm not quite as dumb as I look.

I had sprayed the PB Blaster on the nuts on the downpipes a week or so ago. I was able to get the front manifold disconnected using just a ratcheting wrench, but access was a problem for the rear. Good thing I had that working jack.

Image

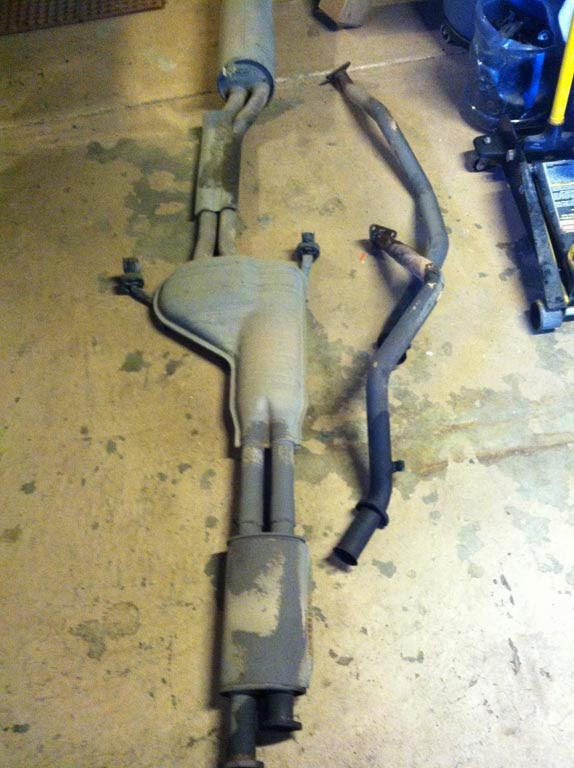
Fortunately, this car was imported in the late 1980s, and was at the time exempt from EPA regs, so it was never fitted with a cat (same went for the other E12 M535i I've owned). The exhaust looks very nice and very well might be reused as it sounded very good when I drove the car.

I moved on and with the exhaust out of the way, I pulled the driveshaft. Was happy to see that this car has the same flex disc as an E28, not the crappy one with the band. Driveshaft was original BMW, but the u-joints were nice. I've got a nice Beyer rebuild which will likely take it's place. Driveshaft came out with ease. Then came the transmission. I loosened three of the nuts on the bellhousing (I decided not to ask to borrow the key to success on the top left bolt on Friday, figuring I wouldn't get to it. Oops.) and pulled the slave and the shifter lever. It's ready to come out.

This morning, I borrowed the tool, loosened the bolt and pulled the transmission. On to the bellhousing. All of the bolts came out, but my opinion is that the e-torx bolts are a much better solution with the right tools. The hex heads are too tough to get sockets onto in blind places. Unfortunately, the drag link on the E12 prevents the motor from dropping enough to really see. With the transmission out, I removed the AC compressor, unbolted the power steering pump (stays on the car for now until I decide what to do). Then out came the fuel tank.

Image

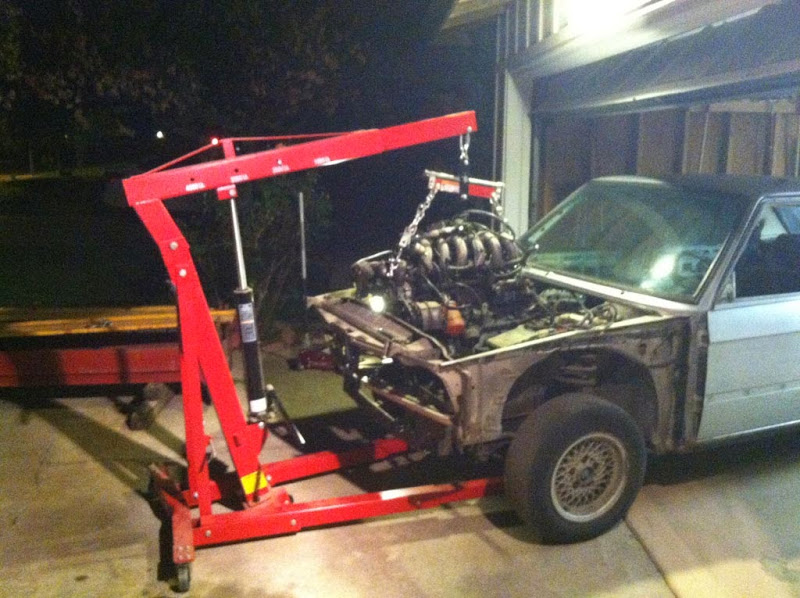
Oil drained, coolant drained (and saved to be reused as it's still blue and nice) and the oil cooler removed. Motor is ready to come out. I started the process of assembling my engine hoist (third time I've used it in 13 years) and realized that I didn't have the load leveler (probably unnecessary for just pulling an M30, but I use it to span the motor and not put unnecessary strain on any of the components). So, I called Ray and asked if he still had it and he did. I put the B7 back inside and retrieved the leveler.

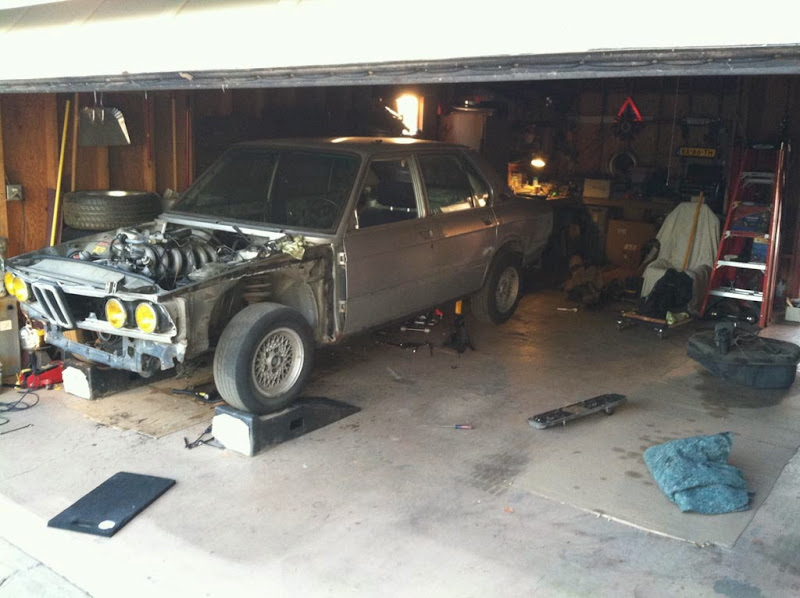
Back to work, I learned my lesson parting out my 535is. I had the car backed into the garage and on stands. I had already sold the suspension, so it was immobile. I had to engineer my way out of my garage door being in the way. Learning from that, this time, I moved the E12 outside the door, which was ideal since that's where the light was.

Image

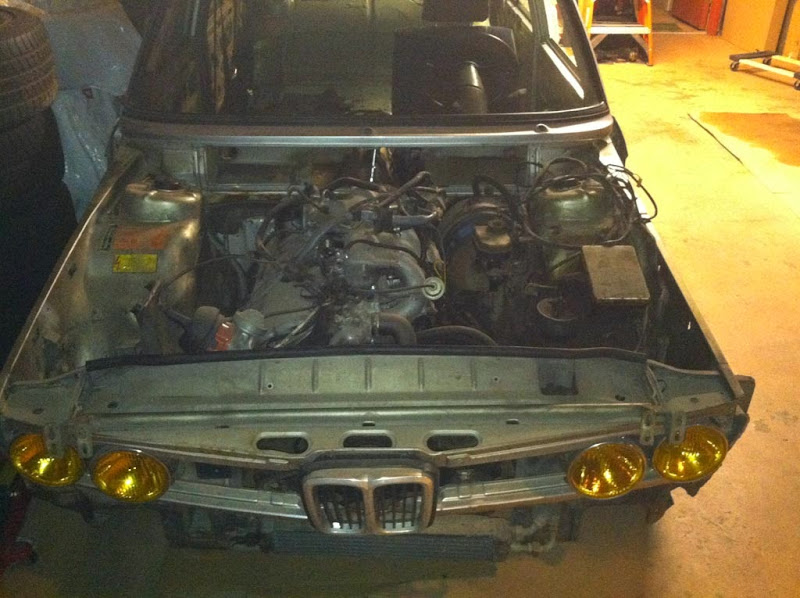
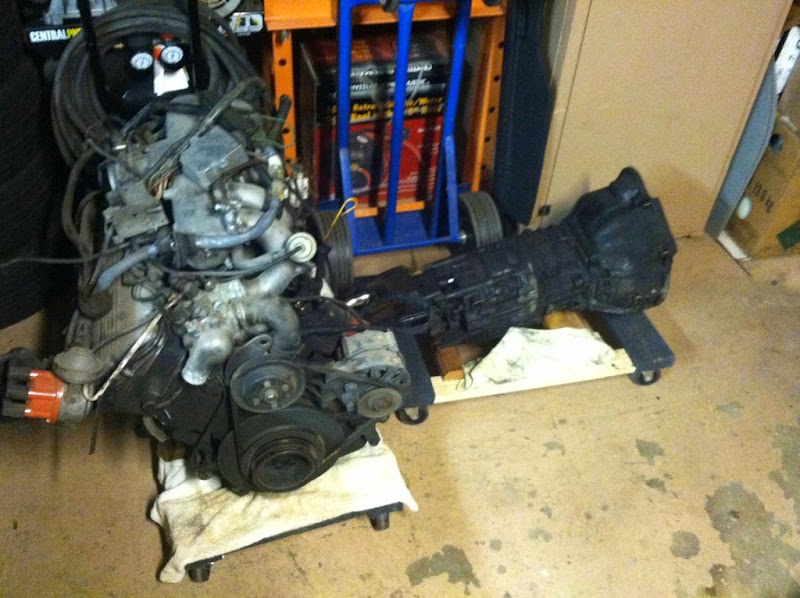
Motor came out okay. There isn't a lot of room fore and aft. I was investigating pulling the motor and transmission as one. It's been done, but that would have been ridiculous.

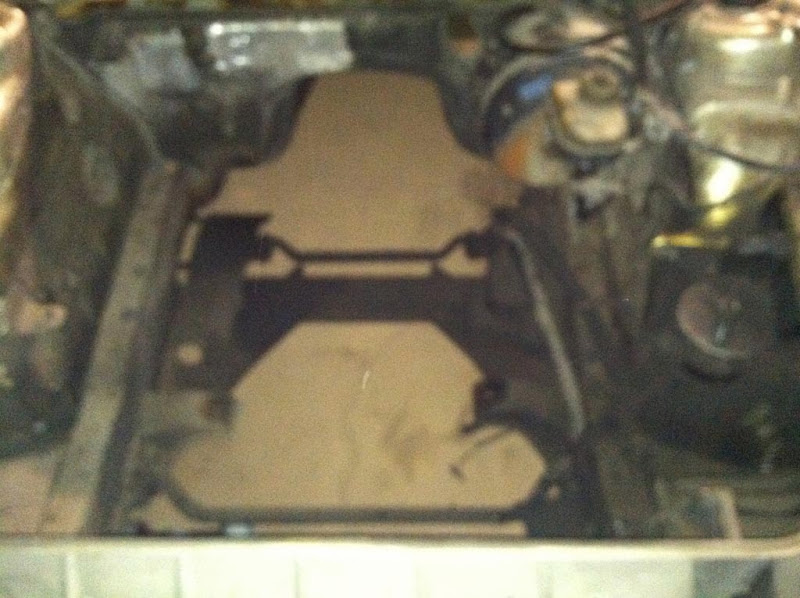
Image

I have no idea what the phone was focusing on, but you can see there is no motor in there and that it is very dirty.

Image

Tomorrow, I'm heading out of state for work, and won't be back until Friday, so we will see what I get done next. Brake system, power steering and fusebox are next.
cddallara
Posts: 3513
Joined: Apr 03, 2010 8:45 AM
Location: Lagunitas, Ca

Post by cddallara »

:up:
Drive safe, can't wait for more updates!
wkohler
Posts: 50924
Joined: Oct 05, 2006 11:04 PM
Location: Phönix, Arizona, USA
Contact:

Post by wkohler »

Thanks for the litany of comments. Not sure if I can find the time to respond to all of them, but I will try. Never thought such a meaningless update would garner such enthusiasm. It means a lot.

Will see what I can do on the updates.
Das_Prachtstrasse
Posts: 5616
Joined: Sep 10, 2006 7:06 AM
Location: Melbourne, Doooown Under

Post by Das_Prachtstrasse »

What's the reasoning behind separating the transmission before removal? Have never pulled an engine that way personally, I always found it lesser of a task to manipulate the engine and trans out and over complete as opposed to using 500km worth of extension bars to round transmission bolts with the car on jackstands.

Nice to see you finally getting stuck into this project, it'll make you appreciate the e28's more.
DMS
Posts: 107
Joined: Apr 29, 2007 6:19 AM
Location: The Netherlands

Post by DMS »

Das_Prachtstraße wrote:Nice to see you finally getting stuck into this project, it'll make you appreciate the e28's more.
Why is that?
pldlnr
Posts: 2221
Joined: Sep 18, 2007 5:45 PM
Location: Seattle
Contact:

Post by pldlnr »

It's great to see you back at work on this project. The timing is remarkable!

Great work pulling that drivetrain, too. Pulling a drivetrain by yourself is always "fun." I am really excited to see this car progress. I think the E12 M535i is a special car and it holds a unique position BMW history.
Matthias
Posts: 158
Joined: Jan 20, 2013 9:24 AM
Location: WI

Post by Matthias »

Hats off to you. Reminds me a lot of pulling the motor from my 85 Celica GTS by myself in my mom's barn 15 years ago. Hard work with hand tools and no lifts. Good luck putting her back together and getting her on the road again! :)
Adam W in MN
Posts: 5053
Joined: Feb 12, 2006 12:00 PM
Location: Don't waste my motherf***in' time!
Contact:

Post by Adam W in MN »

Great work and updates! You'll quickly pass me on your e12 m535i turnaround.
JonnyD3487
Posts: 48
Joined: May 22, 2012 9:24 AM
Location: fairmont, wv
Contact:

Post by JonnyD3487 »

Looks cool. Definitely gonna keep my eye on this thread
wkohler
Posts: 50924
Joined: Oct 05, 2006 11:04 PM
Location: Phönix, Arizona, USA
Contact:

Post by wkohler »

Das_Prachtstraße wrote:What's the reasoning behind separating the transmission before removal? Have never pulled an engine that way personally, I always found it lesser of a task to manipulate the engine and trans out and over complete as opposed to using 500km worth of extension bars to round transmission bolts with the car on jackstands.

Nice to see you finally getting stuck into this project, it'll make you appreciate the e28's more.
I did it this way because I needed the car to roll for now. Otherwise, I'd have just lifted the car off of the front subframe, pulling the motor out on a cart. Pulling the motor out the top with the transmission attached is not suited well for E12s. When the motor is bolted down without the radiator or fan on it, it looks like there is plenty of room, but even with just the clutch on the motor, it was really tight. I saw a photo of someone pulling both together and the motor was at a steeper than 45° angle and damage was still done to the firewalls insulation. Also, being a 265/5, I simply removed the gearbox, then the bellhousing. Extensions, wobbles and u-joints still necessary, but it wasn't bad. I'm still pretty sore though.
tig
Posts: 9311
Joined: Mar 18, 2013 6:25 PM
Location: Durango
Contact:

Post by tig »

Nice work Chris. I love watching you work and appreciate your attempts at humor. Please keep posting lots of status and MOAR pics.
hubble1953
Posts: 857
Joined: Dec 25, 2007 1:15 PM
Location: Boise, Idaho

Looks really good

Post by hubble1953 »

Chris: Looks like you are having fun with the m535:)
Glad to see it is going to be on the road!
jm
Jelmer538i
Posts: 1222
Joined: Feb 12, 2006 12:00 PM
Location: Netherlands
Contact:

Post by Jelmer538i »

I really like these kind of projects!

It looks a bit like our E12:

Image
Mab1957
Posts: 2252
Joined: May 14, 2010 1:33 PM
Location: Northern Virginia, USA

Post by Mab1957 »

Excellent, Chris. I enjoy following your builds. This one certainly has promise. Will you use the same contractors for paint and body, upholstery, etc. as the B7?
wkohler
Posts: 50924
Joined: Oct 05, 2006 11:04 PM
Location: Phönix, Arizona, USA
Contact:

Post by wkohler »

Thanks. Not sure. I didn't do any interior other than the headliner with the B7 since it was nice enough to leave alone. Jim's re-covered the seats for the E12 three years ago and screwed them up so they need to be redone again. I hope the cloth is reusable and I have the correct vinyl ready to go. As far as everything else, the car needs everything so I'm not sure yet. I'm going to have to have the dash redone as well as I'm tired of spending $$$$$$$$ on dashes which show up cracked. I'm not even sure on the bodywork yet. I wanted both Polaris cars painted by the same guy so they look the same but now I'm kinda stuck wondering what's going on and consequently don't have a place to put this thing.

I don't get why everything has to be so stressful and full of drama. If I could do this stuff myself I would.
Post Reply