LED License Plate & Check Bulb Relay Bypass Mod w/Pix
Posted: Sep 13, 2017 3:40 PM
Note: Car is a 1988 528e.
So I decided to upgrade my license plate, trunk and interior dome lights to LEDs. In this write-up, I will only cover the license plate LEDs mod, since it's the only one out of those three that triggers the check bulb relay. Swapping out the original bulbs with LEDs is straightforward, but bypassing the check bulb relay is a bit more complex. Bypassing the check bulb relay eliminates the need for load resistors. Well, here we go!
Tools you'll need:
A few screwdrivers, soldering gun, solder, flux, cutting pliers, tweezers and a paper clip.

Unscrew the four screws holding the two plate light covers...

Take out the covers by pulling and slightly wiggling them...

Disconnect the wires...

New LEDs. These are by Pilot, #6461. I got them at my local Walmart...

While you're at it, I recommend upgrading the license plate light covers to "Hella" ones. They are much clearer and look nicer! Plus, the new rubber gaskets/grommets that come with them are definitely worth it! I got mine off of autohausaz.com, part #10123813-63261354665. Note on autohausaz web page, "Please note, original left and right versions were superceded a number of years ago by one version to use for both. 2 per car."

LEDs in place...

Looks MUCH better and brighter than the stock bulbs! Easy part done, now the check bulb relay...


You can install the LEDs and be done with it, but the license plate check light will always be on as so. If this bothers you, continue reading...

Using a flat head screwdriver, remove the three retainers holding the center trunk cover panel...

Remove the panel. You will see the check bulb relay (circled white) on the left side...

Remove these two screws holding down the check bulb relay...

Once you remove the screws, unplug the two connectors. There is a dark brown cover on the back side of the relay (white square). You will have to use a small flat head screwdriver to pry it open...

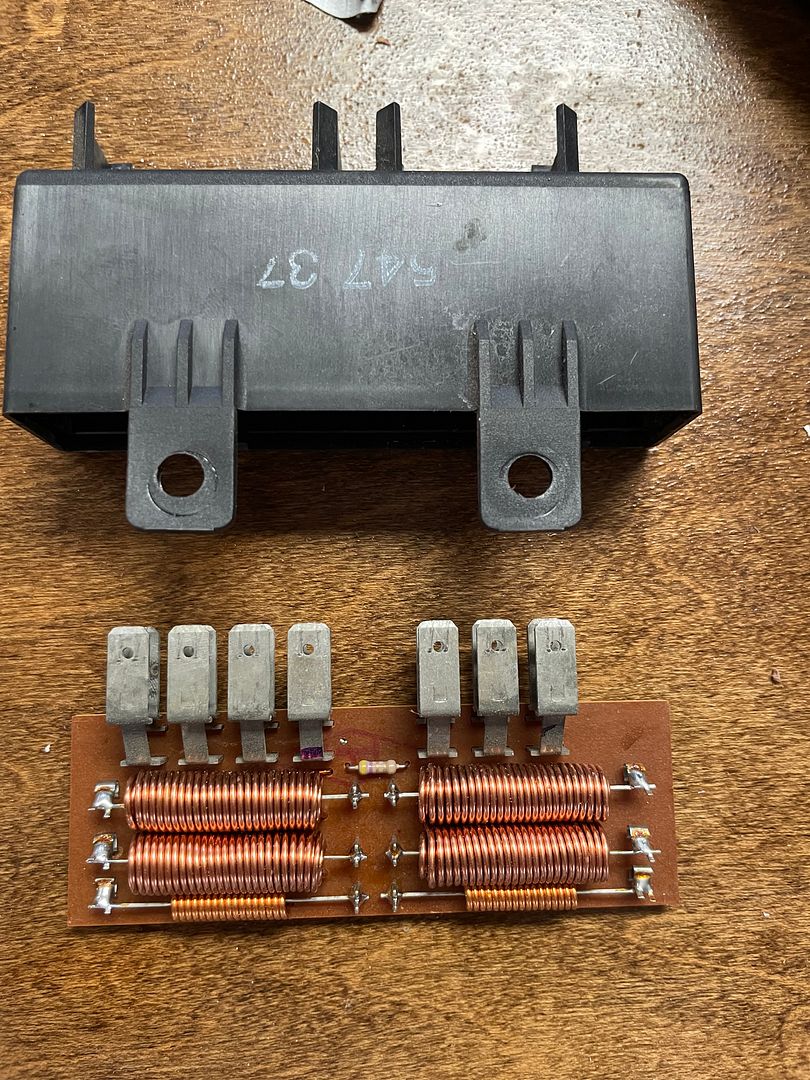
Once you remove the back cover, push on the pins with your fingers to remove the actual relay from the housing...

This is how the top of the relay looks like...

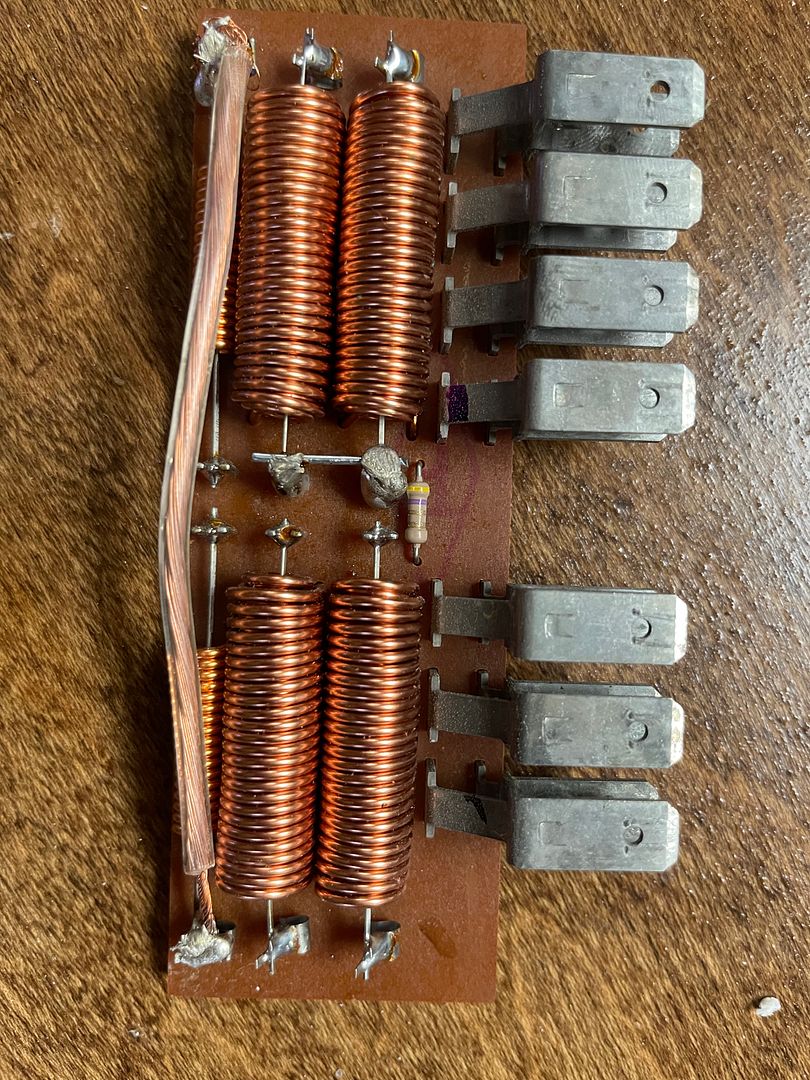
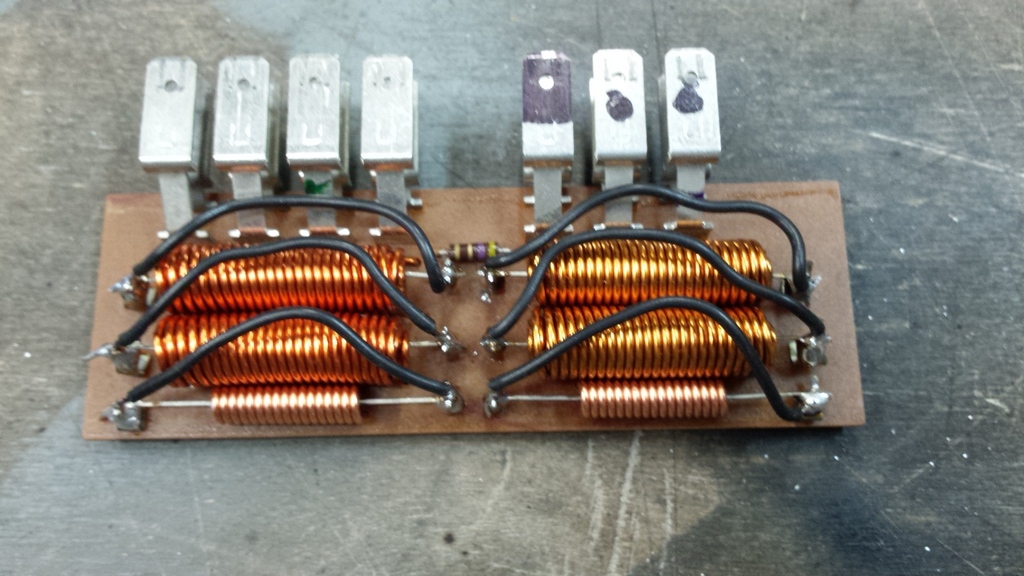
These are the two pins (red arrows) on the back side that you will jumper together using a paperclip. Take your cutting pliers and cut a short length of the paperclip, just enough to reach both of those pins. Using your tweezers, hold the small paperclip rod in place while soldering it to both pins...

This is how it should look like when done (circled white). Dip a spare toothbrush in some acetone and clean/brush off the excess flux. Install everything in reverse order using common sense...

No more license plate check light! Hope this was helpful, enjoy your day everyone!

So I decided to upgrade my license plate, trunk and interior dome lights to LEDs. In this write-up, I will only cover the license plate LEDs mod, since it's the only one out of those three that triggers the check bulb relay. Swapping out the original bulbs with LEDs is straightforward, but bypassing the check bulb relay is a bit more complex. Bypassing the check bulb relay eliminates the need for load resistors. Well, here we go!
Tools you'll need:
A few screwdrivers, soldering gun, solder, flux, cutting pliers, tweezers and a paper clip.

Unscrew the four screws holding the two plate light covers...

Take out the covers by pulling and slightly wiggling them...

Disconnect the wires...

New LEDs. These are by Pilot, #6461. I got them at my local Walmart...

While you're at it, I recommend upgrading the license plate light covers to "Hella" ones. They are much clearer and look nicer! Plus, the new rubber gaskets/grommets that come with them are definitely worth it! I got mine off of autohausaz.com, part #10123813-63261354665. Note on autohausaz web page, "Please note, original left and right versions were superceded a number of years ago by one version to use for both. 2 per car."

LEDs in place...

Looks MUCH better and brighter than the stock bulbs! Easy part done, now the check bulb relay...


You can install the LEDs and be done with it, but the license plate check light will always be on as so. If this bothers you, continue reading...

Using a flat head screwdriver, remove the three retainers holding the center trunk cover panel...

Remove the panel. You will see the check bulb relay (circled white) on the left side...

Remove these two screws holding down the check bulb relay...

Once you remove the screws, unplug the two connectors. There is a dark brown cover on the back side of the relay (white square). You will have to use a small flat head screwdriver to pry it open...

Once you remove the back cover, push on the pins with your fingers to remove the actual relay from the housing...

This is how the top of the relay looks like...

These are the two pins (red arrows) on the back side that you will jumper together using a paperclip. Take your cutting pliers and cut a short length of the paperclip, just enough to reach both of those pins. Using your tweezers, hold the small paperclip rod in place while soldering it to both pins...

This is how it should look like when done (circled white). Dip a spare toothbrush in some acetone and clean/brush off the excess flux. Install everything in reverse order using common sense...

No more license plate check light! Hope this was helpful, enjoy your day everyone!


